#help-with-3dprinting
1 messages · Page 42 of 1
 inner cedar
 elder oxide
🙂
inner cedar
I didn't think CLEAR printing was possible
 iron remnant
Of course, you need the right printer.
That being said, T-Glase PETT is astonishingly transparent for something you can run through a FDM printer and there's this: https://blog.prusaprinters.org/3d-printed-lens-and-other-transparent-objects_31231/

Prusa Printers
Lenses, crystals for lightsabers (not real ones, though), lampshades and many other useful things can be actually 3D printed using transparent filaments. However, it takes…
inner cedar
Guess I'm buying a 6th printer
 soft crypt
Anyone got any tips for printing with TPU? Trying to get my printer settings dialed in for TPU. I’m really only having problems with stringing, but since it’s pretty difficult to remove all stringing from TPU parts and i need these buttons to move smoothly in the case, some tips to reduce that would be appreciated
 inner cedar
Make sure you're printing really slow... It doesn't like speed. What are your temps? Might be a little low
Moisture can also cause stringing
soft crypt
inner cedar
Make sure you're printing *really* slow... It doesn't like speed. What are your ...
I had the temp at about 240 and the speed was pretty slow, like 20mm per second
It was probably moisture tbh
inner cedar
Yeah, do you have a way to dry it out?
soft crypt
The oven should work
inner cedar
Just don't use an oven you use for food!
inner cedar
I have a toaster oven I use for baking boards and stuff
soft crypt
I need to get a dehydrator and stuff but i’m always spending money on food and other junk so I don’t have any left for projects
 karmic brook
All you need is a box, light bulb (for heat), a thermostat of some sort, and probably a fan.
inner cedar
Watt's our aim for power consumption?
 carmine peak
does anybody have 3D models of the following:
USB Type A Female
HDMI Female
Ethernet female
I'm making a front-panel
carmine peak
...alright ill just get a ruler
inner cedar
carmine peak
does anybody have 3D models of the following:
Did you check Thingiverse? Lots of things on there, wouldn't surprise me if they had some
carmine peak
I've been looking. Nothing so far
inner cedar
Huh, surprised someone hasn't made those for prototyping/layout use
inner cedar
karmic brook
All you need is a box, light bulb (for heat), a thermostat of some sort, and pro...
Did you see my joke? Have you seen this done before? Never thought about a lightbulb for heat, but that makes sense. I have a lot of 60W bulbs from when we switched away that still work
karmic brook
I haven't done that myself, but that's how Easy Bake ovens work, and Ed Nisley described making a hot box that way on his blog, to destroy bedbugs

You might ask yourself “Wouldn’t It Be Nice If there was some way to be absolutely sure that does not happen to me?”
inner cedar
Lol, yeah, EZ-Bake indeed was a lightbulb... I should cook something up
Hmmm.... I've got these weird patterns


They're symmetrical front/back and side/side
Looks like related to the infill? Not sure what's going on -- printed a half dozen of these, same settings, same everything, no pattern
elder oxide
inner cedar
Looks like related to the infill? Not sure what's going on -- printed a half doz...
It seems to be infill layer shifting
inner cedar
I haven't seen this before -- any idea why it happened now and not before?
 empty sedge
inner cedar
Looks like related to the infill? Not sure what's going on -- printed a half doz...
empty sedge
inner cedar
Looks like related to the infill? Not sure what's going on -- printed a half doz...
same settings, or same gcode?
also cura's default of printing infill before perimiters seems wrong to me and has an effect like that, but you'll see it in a lot more places
inner cedar
empty sedge
same settings, or same gcode?
Same settings, different slice. Basically on two separate occasions I loaded up the model, set it to 99% scale, touched nothing else, and printed; the 8 other drawers didn't have the pattern. I changed the size to something else and back again to make it reslice, so we'll see if that made it go away
elder oxide
inner cedar
Same settings, different slice. Basically on two separate occasions I loaded up ...
It happens inconsistently for me. I think it’s just a slight over drag on the infill
 broken orbit
inner cedar
Watt's our aim for power consumption?
broken orbit
inner cedar
Watt's our aim for power consumption?
 inner cedar
broken orbit
https://tenor.com/view/punchline-badumtss-the-pirates-bandof-misfits-gif-5556409
inner cedar
broken orbit
https://tenor.com/view/punchline-badumtss-the-pirates-bandof-misfits-gif-5556409
Finally, acknowledgement of my genius
 tight cove
what causes hot steppers? specifically X/Y steppers
as far as i know, its caused by high current limit and lots of movements
also do the motors make more sounds/vibrate more as they get hotter?
is there a way to keep them cool?
 arctic dragon
It's not necessarily high current limit, it's just high current. The movements shouldn't contribute a significant amount to heat generation, but the current can get pretty high, depending on your stepper drivers.
The easiest way to reduce heat is to switch to a higher voltage supply, assuming your drivers allow it. Going from 12V to 24V should halve your current draw for the same amount of power, allowing you to reduce your current without sacrificing performance.
I don't think they should have significantly decreased performance unless they're getting so hot that they're a straight-up burn hazard. If you're observing such a trend, it could be the lubricant in your steppers are getting thinner as temperature increases, but I have no clue how to lubricate the inside of a motor with a different lube, let alone select one that handles temperatures better. Another possibility is that you just have a bad or low-quality stepper motor whose performance suffers due to an imbalance somewhere inside, and it's amplified by temperature.
Other cooling solutions are probably identical to that of keeping a PC cool, but I would be doubtful of their effectiveness considering the mass of a stepper versus a cpu or gpu.
empty sedge
changing your supply voltage won't change your stepper driver current setpoint and may require changing your heaters and control board out to support higher voltages
some stepper drivers have little potentiometers to set the current limit. Others can have it changed in software
 fluid plover
say i have an item that is 32mm in lenght, and i want that item to fit tightley into the thing i 3d print. do i scale the paer i am goig to 3d print up by 1mm on one side?
 toxic kite
I end up using lots of trial and error for tight margin stuff
 agile gorge
It depends on a lot of things, like is it a smallish hole in xy, small holes tend to shrink about 0.5mm
For things that are not holes, you'll generally want 0.2-0.3mm clearance added, depending on how dimensionally accurate your printer is
broken orbit
inner cedar
*Finally, acknowledgement of my genius*

 unique pendant
Just saw this. Polymaker is planting 1 tree for every spool of this PLA sold. https://polymaker.com/polyterra-pla-info/
inner cedar
Oh, that's cool
carmine peak
the carriage plate on my Ender 3 is broken; screw ports are stripped. Anywho, i'm looking to replace it
Should i upgrade to direct drive while i'm there replacing it?
inner cedar
Keep in mind you'll lose some speed and it might shake more at higher speeds
carmine peak
alright
well, how about using the Direct Drive carriage plate, but not actually installing the motor?
inner cedar
Hmm.... not sure
 half dew
I upgraded my ender 5 to direct drive - it made stringing a little easier to manage but yeah - vibration related artifacts are worse at the same speeds
On the plus side - I can print flexibles really easily now

 empty sedge
Is that an actual compile error or just the vscode autocomplete not working?
carmine peak
I have no idea
empty sedge
ignore it for now and see if you get errors when you compile with platformio
tight cove
What causes this?

My bed is levelled, I have a BLTouch that probes before a print and uses that mesh, the Z offset is fine, E steps is calibrated
empty sedge
your first layer is too close to the bed
 empty sedge
the plastic buckles like that when you're too close. I wonder if it's close enough it's from your bed or printer warping as it heats up
do you get the same results on a large print like your first picture if you heat your bed up and let it stay there for 15m before starting your print?
tight cove
Haven't tried that, I'll give it a go once this is done, what's weird is that the first layer prints fine but the middle layers buckle and the top layer prints fine
empty sedge
your e-steps could be too high then
tight cove
It could be that the bed only gets to temp ~15m into the print and the heat expanding causes it, I do still have the magnetic adhesive on
inner cedar
What material and bed temp? Sometimes high temps can cause bubbles and buckling
Ah, bed not being at temp can do it
tight cove
60c anycubic black PLA, 195c nozzle
inner cedar
Ok, those are good temp settings. But yeah, if the bed isn't at 60c when printing starts, that's probably it
tight cove
Yeah I'll try preheating it beforehand
inner cedar
What do you use to slice? I use Cura, and it always waits for the bed and extruder to hit Target temps beforehand
tight cove
Yeah I use Cura
tight cove
Ender 3 Pro, its been modified quite a bit
; Ender 3 Custom Start G-code
M104 S{material_print_temperature_layer_0} ; Set Extruder temperature
M140 S{material_bed_temperature_layer_0} ; Set Heat Bed temperature
G28 ; Home all axes
@BEDLEVELVISUALIZER
G29 T F10 ; Update bed level mesh
M190 S{material_bed_temperature_layer_0} ; Wait for Heat Bed temperature
M109 S{material_print_temperature_layer_0} ; Wait for Extruder temperature
M117 Purge extruder
G92 E0 ; Reset Extruder
G1 Z2.0 F3000 ; Move Z Axis up little to prevent scratching of Heat Bed
G1 X0.1 Y20 Z0.3 F5000.0 ; Move to start position
G1 X0.1 Y200.0 Z0.3 F1500.0 E15 ; Draw the first line
G1 X0.4 Y200.0 Z0.3 F5000.0 ; Move to side a little
G1 X0.4 Y20 Z0.3 F1500.0 E30 ; Draw the second line
G92 E0 ; Reset Extruder
G1 Z2.0 F3000 ; Move Z Axis up little to prevent scratching of Heat Bed
M117 By your command!
; End of custom start GCode
Lemme compare to mine
tight cove
i do probe while it heats up instead of when its at temp
inner cedar
... huh, I'm missing the temps entirely in mine?
tight cove
i think cura adds them by default if they are missing
inner cedar
Must be. Here's my V2's start code [they're similar enough] ; Ender 3 Custom Start G-code G92 E0 ; Reset Extruder G28 ; Home all axes G1 Z2.0 F3000 ; Move Z Axis up little to prevent scratching of Heat Bed G1 X0.1 Y20 Z0.3 F5000.0 ; Move to start position G1 X0.1 Y200.0 Z0.3 F1500.0 E15 ; Draw the first line G1 X0.4 Y200.0 Z0.3 F5000.0 ; Move to side a little G1 X0.4 Y20 Z0.3 F1500.0 E30 ; Draw the second line G92 E0 ; Reset Extruder G1 Z2.0 F3000 ; Move Z Axis up little to prevent scratching of Heat Bed G1 X5 Y20 Z0.3 F5000.0 ; Move over to prevent blob squish
tight cove
basically the same
im guessing it buckles/bubbles for 2 reasons in my case,
- probing the bed while heating, instead of after heating
- poor heat conducting to print bed, i still have the magnetic adhesive and a G10 sheet on top of that
inner cedar
Maybe try taking out the temp thing and see if it waits to start until it hits temp like mine?
unique pendant
It really looks like it’s just the nozzle is too close. Try again after probing a hot bed and if that doesn’t work, redo your Z-offset. I haven’t used the Ender3 much. Can you babystep with that?
inner cedar
Just don't try everything at once; if you change 5 things and it works, you have no way of telling which thing it was
broken orbit
inner cedar
Ok, those are good temp settings. But yeah, if the bed isn't at 60c when printin...
60c?? My settings are 55c/ 190c
inner cedar
broken orbit
60c?? My settings are 55c/ 190c
60c is pretty standard
inner cedar
JP has a guide for it https://learn.adafruit.com/overwatch-lucio-gun-pt1

Adafruit Learning System
Lights, music, and sound effects prop circuit design
Well, set of guides
 fast horizon
ive searched everywhere and i cant figure out what colors to print the parts
inner cedar
I'd just do white and paint it, unless you want to try to print each part in the color it would end up being
fast horizon
thats what im trying to do i guess, just having trouble telling eeything apart since the steps dont show every individual part
inner cedar
Ohhh, the white was a prototype, he lists the exact filaments he used in this page of part 3 https://learn.adafruit.com/overwatch-prop-gun-lucios-blaster-pt-3/overview

Adafruit Learning System
Part 3: Permanent circuit, 3D printing, and final assembly
fast horizon
yea i saw that but like you said its just the colors, im trying to figure out what color each part is
basically right now im just trying to find each part on the make and list its color with the name
inner cedar
Ahh.... doesn't seem to go into that much detail... I'd just load up each piece in your slicer, look at that exploded view for that part, and print in the color it shows
fast horizon
thats the plan and process atm
just cant quite tell them apart lol
projects are projects i suppose
 winged helm
Is there any reason the kirby fume extractor would work worse than an off the shelf one? I need one for work and I think it's cute. For light to moderate soldering
inner cedar
So long as it has the same sort of filter and fan as a COTS one, should perform "identically"
[y'know, as close as practically matters]
winged helm
Sweet thx
inner cedar
np :D
fast horizon
also thank you my good person Doc
inner cedar
You're welcome :D
broken orbit
inner cedar
60c is pretty standard
Hmm. OK. PrusaSlicer standard for PLA I'm pretty sure is 55c.
My nozzle temp is my own tested temp that's worked best for me
inner cedar
broken orbit
Hmm. OK. PrusaSlicer standard for PLA I'm pretty sure is 55c.
Weird
 raven coral
i noticed that my printer recently started going quickly around the printed part's perimeter when going up a layer
im using cura as a slicer
 shy kelp
“If you print too slow, the filament has too much time to melt (causing stringing), and the print head stays too long on the same spot and will melt the rest of that area too, causing visible deformation”
Could this be a reasonable explanation as to why there are patches of burnt material? And smooth everything else? I think it was on a pretty low speed.
 empty sedge
I doubt it
unique pendant
I'm a broken record. That looks like wet filament to me.
iron remnant
Sometimes it's a cut and dried issue tho.
raven coral
okay so i have noticed that there's ;MESH:NONMESH sections in the gcode file that cura produces, but im not sure how to remove that thing from cura
shy kelp
unique pendant
I'm a broken record. That looks like wet filament to me.
Sorry, I’m getting a dryer for that, but I just don’t wanna deal with any nonsense after it is dry
unique pendant
Most nonsense I have comes from wet filament.
You can't really run any meaningful tests if your filament isn't dry.
arctic dragon
True facts, fresh filament is a world of difference….
broken orbit
inner cedar
Weird
Yeah....
 shy kelp
arctic dragon
True facts, fresh filament is a world of difference….
shy kelp
arctic dragon
True facts, fresh filament is a world of difference….
I still got a tiny bit of burning even when it was just fresh, so it was prob wet before it went sent off then.
arctic dragon
Nah, if you tested with a new rol of filament, it’s probably something else at play. How long have you been using the nozzle on your hotend?
shy kelp
It’s a new printer
arctic dragon
Perhaps a different problem then? It looks like there are some inconsistencies that could also be a result of overextrusion and/or material getting caught on the nozzle tip during printing
Possibly overpressing the first layer?
elder oxide
is the bowden tube right up against extruder?
if there's a gap it could cause a buildup of extra material in the extruder the could get burnt and cause issues with flow
 lunar oar


What the heck is causing these dimples!!!
I've got good retraction settings, and printed it slow, WHAT GIVES!!!
Btw, It's printed vertically on a slant like this:
 empty sedge
lunar oar
empty sedge
lunar oar
That's the seam where the perimiter starts and ends. In prusa slicer, if you set the seam to "aligned" or "back" instead of the default "random" they will all line up and look a lot better than the random distribution that's set by default.
Cura has similar options too
I haven't spent the time to figure out how to make them less visible because just putting them all in a line has done enough of what I've needed. Supposedly the way Cura does that part of the outer extrusion should make them disappear but I haven't used Cura as my slicer since the UI and profile rewrite with Cura 2.0 in 2017 or so
lunar oar
empty sedge
That's the seam where the perimiter starts and ends. In prusa slicer, if you set...
Thats what I would like to think, but in my slicer i have made it to the back, thats why im so fustrated
the white here shows the seam


 lunar oar
I'll be editing just one post of what I do to keep things organize and not spam:
-10mms ❌
+10mms ❌
No retraction ✅
empty sedge
@lunar oar How are you sending the gcode to your printer? can you try the same gcode from an SD card?
That's really odd to see something with that randomness distribution. If it were mechanical it'd probably be more consistent
lunar oar
empty sedge
<@!407633527224532999> How are you sending the gcode to your printer? can you tr...
i use an sd card
lunar oar
empty sedge
That's really odd to see something with that randomness distribution. If it were...
the last 3 prints i did of this tube, they are all located in the same spot, so its not that random...
empty sedge
"same spot" so in a perfect line like the seam?
lunar oar
no, but all generaly in the same area
empty sedge
does something show up in that area if you turn on the other visibility things in prusa slicer? retracts/unretracts, travel, etc. (or gcode.ws)
lunar oar
I use cura, but nothing shows up, seems all good (the red is the affected area)

This is what I mean by it not being random, you can see the seam area at the top left, then this dimpled area at the bottomish area

I turned off retraction and the dimples are gone!!! now to fine tune it!
empty sedge
can you send me one of your problem gcode with retractions?
lunar oar
what do you mean?
empty sedge
I'd like to look through the gcode to see if I can see what's going weird
lunar oar
i got it mate! ill just be testing printing a few more things, if i dont know whats up ill let ya know!
i appriciate it!
agile gorge
If turning off retraction fixed it, definitely sounds like the seam
Because there's no.reason to retract in the middle of a perimeter
lunar oar
agile gorge
If turning off retraction fixed it, definitely sounds like the seam
what do you mean? i mean it retracts to go from the inner wall to outer wall, during this time air pockets or what not could have been built up, since i never changed that setting, thats why they all occur in the same spot
agile gorge
That's the seam location
empty sedge
From the cura screenshot the seam is where the two circles get bridged
lunar oar
agile gorge
That's the seam location
Look back at the other posts i made about how they are in two different places
empty sedge
it could be coast or wipe or perimiter order or something but I'd have to look at the gcode or say
agile gorge
Where the perimeter loop starts and stops is a de facto seam
empty sedge
agile gorge
Where the perimeter loop starts and stops is a de facto seam
You're missing the context. the dimples aren't where that seam is. There's pictures above that show both
agile gorge
Each perimeter will have a seam
inner cedar
But they're talking about spots that are not the seam
There's a clear line of marks where the seam is, and then dimples on another section scattered about
agile gorge
Haven't seen the actual seam on the outside, but ok
Anyway, something corresponding should show up in gcode preview
empty sedge
if you'd scroll up you'd see that it doesn't
raven coral
Okay so this is happening

It's like stringing but on the inside of the part
Nvm o think the whole nozzle was too low so it was chipping at the plastic
I used babystep z to rise it up a bit and now it prints mostly good
lunar oar
@agile gorge @empty sedge I think i found the issue! I'm currently printing an Benchy to see how it turns out
agile gorge
what setting is changing to support it?
lunar oar
Retraction distance: 10mm
Retraction speed: 15mm/s
 stuck trail
so, I am doing something likely overkill.... but I am putting a BTT SKR pro 1.2 in a ender 3 pro, I am planning on printing out a proper mount for it after I get it going, but wiring it up I have a few concerns.... well, mainly one concern.... the ender 3 pro only has one bed power ground line, the SKR has two options, bed power and bed heat, the only power hookup to the bed on the ender 3 pro is to heat it, should I plug it to the heat power or standard bed power? on the old board it just says bed
I am going to keep looking for the answer online just thought I would ask around X/
I went with the bigger board for the larger memory pool as the ability to use some extra features for a few extra dollars seemed better
agile gorge
@lunar oar what is that vs. your old settings?
lunar oar
agile gorge
<@!407633527224532999> what is that vs. your old settings?
I didn't work

It worked on the tube, the benchy came out like doo doo
lunar oar
agile gorge
<@!407633527224532999> what is that vs. your old settings?
it was
Retraction distance: 8mm
Retraction speed: 60mm/s
agile gorge
which slicer are you using again? what happens if you just paint the seam down a corner?
lunar oar
cura, right now im just testing no retraction and what that that looks like
empty sedge
stuck trail
so, I am doing something likely overkill.... but I am putting a BTT SKR pro 1.2 ...
I'm confused. Can you link me to wiring diagrams? I've got a SKR pro 1.3 in a delta printer here
empty sedge
stuck trail
so, I am doing something likely overkill.... but I am putting a BTT SKR pro 1.2 ...
The SKR 1.2 pro has a power input for the bed heater, and an output for the bed heater. "Bed power" connects to your power supply, "hot bed" connects to the bed heater
stuck trail
empty sedge
The SKR 1.2 pro has a power input for the bed heater, and an output for the bed ...
oh that is odd..... honestly I can't see a need. the ender 3 pro on its normal board has only bed, I would need to run a additional set of power from the psu to the board at that point and I think that would likely fry the board 😦 honestly this has become a minor issue as currently I can't even get marlin to compile properly
agile gorge
It allows you to use a stronger/different power supply for the bed heater
If you don't have a separate power supply for heater, jump Vin+ and Vin- to BedV+ and BedV-
stuck trail
umm, the ender 3 pro stock psu has some unused terminals tbh
I just didn't want to fry the board
currently I am fighting with dumb compiling issues but I think I will take your advice but also read up on it more before turning things on the first time
stuck trail
https://github.com/dylanpoll/Marlin if anyone has any input I would appreciate it, I forked the bugfix repo for marlin, and updated the readme to show the current errors I am getting upon attempt at building/compile, I also uninstalled and re installed platformIO with no change.
GitHub
Optimized firmware for RepRap 3D printers based on the Arduino platform. - GitHub - dylanpoll/Marlin: Optimized firmware for RepRap 3D printers based on the Arduino platform.
I also included all the files for the SKR pro 1.2 in a folder I added
empty sedge
There's another power input for the bed mostly because the bed current alone can be high enough to need it. Many control boards are this way, Einsy (prusa i3 mk3s), rambo, and ramps for example
agile gorge
Someone please talk me out of getting one!
https://a.aliexpress.com/_mMojdj4

aliexpress.com
Smarter Shopping, Better Living! Aliexpress.com
empty sedge
Very much not eye safe. Won't be great for cutting either.
inner cedar
Pop balloons
agile gorge
Cuts 5mm thick plywood at like 200mm/min, seems good enough at cutting
empty sedge
Assuming that's true, you would still have to build an enclosure and hook up a blower to get the smoke out
inner cedar
I'm sus that it says wood 200mm/s but also stainless steal 200mm/s
agile gorge
That's for etching
empty sedge
you can't cut stainless with that much power
inner cedar
Mmm yes I'm sleepy and can't read apparently
Also my experience with laser cutters is using DVD/CD-R/RW drive lasers
agile gorge
I don't even know what I'd laser cut, mostly acrylic, some metal etching, and maybe small wood bits
agile gorge
Mostly would print, but some things look so much better laser etching/cutting
inner cedar
Mmmm
agile gorge
I wouldn't bother with an enclosure
inner cedar
Printed case, laser cut/etched acrylic lids
agile gorge
Just goggles
agile gorge
Most I would do is design a fan mount to blow smoke away for "air assist"
And open the door/windows if cutting plywood or acrylic
Need to understand more about etching metals
But regular acrylic and wood doesn't have me concerned
agile gorge
And it turns out diode lasers suck for cutting acrylic
 torpid grove
agile gorge
Someone please talk me out of getting one!
https://a.aliexpress.com/_mMojdj4
torpid grove
agile gorge
Someone please talk me out of getting one!
https://a.aliexpress.com/_mMojdj4
If you know what your doing by all means buy it. But if you're feeling uncertain about your ability to build a laser cutter safely than my advice is buy an off the shelf cutter instead. As others have mentioned smoke is a real hazard
agile gorge
I'm turned off by not being able to cut acrylic well
torpid grove
Their are a lot of good off the shelf options for laser cutting. Also a mini router will cut plastics / wood very nicely and can do 3d structures.
Also no fumes to worry about
iron remnant
Yeah, I have to say that the primary reason why I covet a laser cutter is specifically cutting acrylic.
 static pumice
Does anyone know any good tutorials for designing to 3D print? I see lots of projects in the learning system, but most just include STL files and don't explain how to dimension the parts to make them fit together. I'm pretty competent at 3d modeling with fusion 360, but would like to know best practices for making sure my parts fit together.
empty sedge
not really. Maker's muse talks about some of that in his videos about puzzle box designs and stuff but I don't think he has videos dedicated to it
https://www.youtube.com/c/MakersMuse/videos

YouTube
On Maker's Muse we aim to Empower Creativity through Technology.
3D Design and Printing Tutorials, Reviews and Projects.
Got a question? Check out our FAQ - http://www.makersmuse.com/faq.html
Subscribe to get notifications through the YouTube app!
Support us on Patreon - https://www.patreon.com/makersmuse?ty=h
3D Printing models and more - ...
agile gorge
I remember seeing some tolerance and hole adjustment guidelines somewhere before, but can't find it
For parts that fit together, but aren't holes, I like to have 0.1-0.2mm clearance, for holes, I'll upsize about 0.3mm for pla, and 0.5 or more for petg and abs
Then again, if you're printing out both parts, I will very often go 0 clearance, except for stuff that is meant to fit along z, layer lines like to interfere with fit
static pumice
Thanks @agile gorge. I also found an example of what I was trying to do on the learning system.
shy kelp
the surface on top of supports looks really bad. help?
 unique pendant
shy kelp
the surface on top of supports looks really bad. help?
unique pendant
shy kelp
the surface on top of supports looks really bad. help?
You don’t have to use Simplify3D to take advantage of this guide. https://www.simplify3d.com/support/print-quality-troubleshooting/poor-surface-above-supports/
shy kelp
I got a SUNLU Filament Dryer Box and after a while of starting it the display reads off er3

 broken orbit
agile gorge
Gonna snort it all day long
broken orbit
agile gorge
Gonna snort it all day long

broken orbit
agile gorge
Someone please talk me out of getting one!
https://a.aliexpress.com/_mMojdj4
I need one once I'm rich
😹
 elder pagoda
Is there an established practice of 3d printing new enclosures for lithium battery packs to fit the battery shape of discontinued laptop models? If so, is there some place I could read more about this?
empty sedge
doubt it
inner cedar
Considering the large variety of shapes and sizes, I would guess most folks just design from scratch per battery. I know recycling 18650 cells is pretty common since using the whole laptop battery can be difficult due to a lack of data on the charging circuitry
torpid grove
elder pagoda
Is there an established practice of 3d printing new enclosures for lithium batte...
I've never came across anyone printing new enclosures for lithium battery packs its a really cool idea though. I would suggest checking out iFixit or similar sites first if you haven't to see if anyone has a repair guide for your specific model. Also this company seems to be selling some battery elimination / replacement tech. https://batteryeliminatorstore.com/
I don't know if it's open source but still worth checking out what they're doing for ideas / inspiration as it may be similar enough to what you're trying to achieve.

Battery Eliminator Store
NEVER Buy or REPLACE batteries again! Battery Eliminators are unique electronic devices to replace standard batteries (AA, AAA, 9 volt, C & D, CR123A) inside your device's battery compartment - power your battery device from AC wall power, DC auto power, or USB bus power. Battery replacement, AA to AC, AAA to AC
 knotty laurel
torpid grove
I've never came across anyone printing new enclosures for lithium battery packs ...
knotty laurel
torpid grove
I've never came across anyone printing new enclosures for lithium battery packs ...
Neat, thanks for the pointer!
torpid grove
knotty laurel
Neat, thanks for the pointer!
No problem, good luck with the battery!
inner cedar
torpid grove
I've never came across anyone printing new enclosures for lithium battery packs ...
Those Battery Eliminators probably are closed source, but super easy to make the same thing -- just need a battery shape with space for wires and contacts, and then connect a power brick of the appropriate voltage/current
And since batteries are mostly cylinders and boxes, ezpz to design
torpid grove
inner cedar
Those Battery Eliminators probably are closed source, but super easy to make the...
I was initially thinking of printing my own battery replacement for a desk toy. Decided to see if anyone else had already done the same thing and found that company. Only thing I'd change is switching the power cord to a ribbon cable, that way the desk toy can sit flat.
inner cedar
In some cases I've just soldered power brick wires right to the battery pads, if I had zero intention of ever using batteries again
Inline power switch good
winged helm
Does anyone know if it's possible to make big block letters in Fusion360? Like a part that is in the shape of text, just extruded
 weary lichen
It should be possible. I know how it's done in FreeCad, and if FreeCad has it, Fusion360 should have something comparable.
winged helm
I'm happy to use a different software, especially a free one
I got some rainbow filament and I want to make rainbow things
winged helm
sweeeet
I have experience with solidworks as well, will that help get up to speed in freecad?
weary lichen
I like FreeCad, but as far as I can tell, it's not quite a user-friendly as Fusion360. It is, however, open source and free.
weary lichen
winged helm
I have experience with solidworks as well, will that help get up to speed in fre...
Not a clue! I've never used Solidworks
winged helm
ok no worries, I'll tinker around with it. Really appreciate the super fast, specific answer
weary lichen
I'm no FreeCad expert, but that is one of the things I've used it for.
winged helm
noice, I'm looking to print something to hang on a wall for a friend who HATES signs on walls. I'm hoping I do well enough that she likes it
empty sedge
the 'part design' workbench in freecad is closest to the solidworks sketch-and-extrude workflow
I'd search youtube for how to do this in fusion if you'd like to use that. I'm sure solidworks can also if you're adding text to a sketch on a flat surface
winged helm
I unfortunately lost my license to SW when I left school, but I think free cad will be good enough
weary lichen
empty sedge
the 'part design' workbench in freecad is closest to the solidworks sketch-and-e...
I basically live in the "Part Design" workbench unless I'm dealing with multiple parts.
winged helm
how do I get to the part design workbench? I looked at the wiki and can't find the icon they describe
torpid grove
winged helm
Does anyone know if it's possible to make big block letters in Fusion360? Like a...
If you don't get block letters working with FreeCAD and have Fusion360 here's what I would do.
-In your design create a new 2D Sketch
-In the sketch create a text box you'll text box under the create panel with all the other geometric primitives in the sketching environment
-Size / position the text box, this will be helpful later if you want to go back and quickly make changes
-Add your text to the text box
-Exit the sketch environment
-Hit E or click the extrude command then select your text
-Extrude to your desired height (extruded text can do anything that normal extruded geometry can do btw)
winged helm
Oooh let me try that rather than mess more with FreeCAD
torpid grove
winged helm
Oooh let me try that rather than mess more with FreeCAD
Give it a go and let me know if it works for you. If you're still having trouble I don't mind making a quick example part and attaching it here for you to look at.
winged helm
that is very kind!
@torpid grove, do you know of a way to use a different font?
Oops there is, mybad
torpid grove
winged helm
<@!194286808161452032>, do you know of a way to use a different font?
Glad you found it, just a note not all fonts may work for extruding. They will have to have closed curvature, far as I know the only way to figure this out is trial and error.
torpid grove
winged helm
ah fun
Rule of thumb most standard MS fonts will work without issue. A few I've downloaded from the internet have not worked though. My solution for this is to add the font to the text box and then trace over it with the spline / line tool. I'd only recommend if you're very attached to a particular font.
winged helm
Yeah that sounds rough!
torpid grove
winged helm
Yeah that sounds rough!
It gave me added appreciation for the work that goes into designing a type face
weary lichen
winged helm
how do I get to the part design workbench? I looked at the wiki and can't find t...
This dropdown selects what workbench you're on.

 pallid fiber
Picked up a Neptune 2 over the weekend and have been having a blast with it. I’m using some Hatchbox PLA filament I got on Amazon so far and it seems to be working well. Looking to pick up a few more spools, any recommendations on brands/type specific to the Neptune 2 or in general?
Mostly printing parts and cases for ESP32 dev boards and modules at the moment
raven coral
so i would like to add octoprint to my 3d printer, so i have a question, could i power my raspberry pi 3b with the psu that came with my 3d printer(the printer is based off of an anet a8, using the am8 platform or something like that)
karmic brook
Heh, someone else was asking nearly the same question in #help-with-linux-sbcs with the idea of using a DC-DC converter to step down the power supply voltage to 5V to run the Pi.
iron remnant
There was a thread like a month or two ago and Snolabs and Atomic were mentioned. I've been using Atomic Filament and it seems to work nicely.
And Matter Hackers Build is quite reasonably priced.
broken orbit
winged helm
I got some rainbow filament and I want to make rainbow things
Use Tinkercad....
agile gorge
raven coral
so i would like to add octoprint to my 3d printer, so i have a question, could i...
no, not from the psu, but you can potentially take a 5v pin from your mainboard to power the Pi
but be aware the pi will take 0.6-0.8A running on its own, plus any peripherals you run on top of it
raven coral
i probably wont need any peripherals since i'll be running octopi
to be fair the mainboard seems cluttered
agile gorge
webcam, screens, etc. are a thing
raven coral
ah
ee i probably wont need any
and i dont think my mainboard has a 5v pin here lol
but the power supply is 12v
raven coral
karmic brook
Heh, someone else was asking nearly the same question in <#538149593246859313> w...
so i could probably try to use a dc-dc converted as stated here
to step down the voltage to 5v
wait actually
what's the J3 port on the anet a8 mainboard used for

next to the firewire port
arctic dragon
Looks like it's an SPI connector of some sort. Probably used for additional data line for certain addons, maybe some display?
knotty laurel
Yeah, from the schematic it seems to be a combination of UART, SPI, power, reset, etc.
 raven coral
if i were to get connector for that, i could connect the raspberry pi from the power and ground pins
winged helm
raven coral
if i were to get connector for that, i could connect the raspberry pi from the p...
the pi needs a good bit of power, 2.5A @ 5V at least or else it complains
winged helm
I'm no expert, but I have been advised by experts not to give less than 2.5 A to my pi
agile gorge
that's not entirely true, the pi complains when the voltage drops below 4.65v or something
the standard power supply to make sure there's enough headroom is specified to be like 2.5 or 3A
the pi actually uses 600-800mA while running and doesn't really go above that by itself (maybe under 100% cpu load)
the voltage is easy to drop on a cheap 1-2A power supply
and my PC usb ports will drop the voltage if you draw over 500mA on them
raven coral
how should i model a part cooling fan for a 3d printer, as to not have it cool down the nozzle itself too much, because when i had the part cooling fan enabled without a duct by accident it cooled down the nozzle too much and caused thermal runaway
should i keep the opening for the "exhaust" side smaller so it creates more pressure or leave it mroe wide open
empty sedge
I made a shield for the heater block part of my fan duct. I lined it with aluminum foil tape and poked a hole only big enough for the nozzle

Login / Signin to Onshape - the modern CAD system used by thousands of companies worldwide.
karmic brook
Are you going to have a part cooling fan too?
 lone trout
I am interested in getting a 3d printer and was wondering if anyone had any recommendations. I was looking specifically at the Ender 3 V2 and Anycubic Vyper. I'm leaning towards the Vyper but I've heard some horror stories about it that make me nervous. Figure my budget is < $400 at the moment, but < $300 would be better (to appease the wife unit)
empty sedge
prusa mini
to expand on that, the creality ender 3 and 2 are very popular but I wouldn't consider them a reliable well-supported machines. There's a ton of community upgrades and help but they're more of a project than "follow the instructions and go"
If you can spend more money on the prusa i3 mk3s+ it's a great workhorse of a machine. We have two at my hackerspace and using the default profile they've been running reliably with minimal trouble for years which I can't say for any other printer we've used
the prusa mini gets 95% of the way there. If you're printing PLA or PETG (get both smooth and textured sheets) and using the built-in profiles it should be a great machine
torpid grove
lone trout
I am interested in getting a 3d printer and was wondering if anyone had any reco...
other's might warn you away from the Enders but for your budget I would recommend at least checking it out. They can come in solidly under $300 even with mods. But as others have and will point out they can be a bit fiddly to setup.
However I would also add once Enders are dialed in they're good to just crank out prints as well as most other pricier printers in my experience. The only mods I added myself was a new filament feeder, and a glass bed, everything else I kept stock.
agile gorge
Artillery genius pro is probably a decent compromise, a little bit above the $300 mark
shy kelp
Hello, I am building that adafruit MIDI Solonoid rum Kit, but I cant find the stl files for the small stands (they look like small catoonish shoes), I think there are missing form the files you can download. Does anybody have the files? that would be great. Thanks a lot! Uhm... sorry if this is posted on the wrong channel...just desperately searching for this files... :/
toxic kite
cymbals-mount.stl?
https://www.prusaprinters.org/prints/37788-midi-solenoid-drum-kit/files
shy kelp
Hi, thanks, I thought that to, at first, so I ordered them, but they are different... 😦 The ones that are shown and missing are way smaller...
inner cedar
torpid grove
other's might warn you away from the Enders but for your budget I would recommen...
I have and Ender 3 Pro and V2, both have served me well. Slight Z sticking problem on the Pro after it sat for a while, but… I’ll fix it
torpid grove
inner cedar
I have and Ender 3 Pro and V2, both have served me well. Slight Z sticking probl...
Interesting that's one issue I haven't had. Biggest problems I've encountered was cheap filament clogged the nossle.
inner cedar
I haven’t had cheap filament XD
 humble pagoda
A filament dryer is a pretty cheap (~$30-40) and useful insurance policy. Just because something is vacuum sealed with a desiccant pack doesn't make it dry. Even cheap filament properly dried will generally work pretty well. I dry everything now and haven't had any filament related issues since then.
inner cedar
I'm going to build my own with insulation panels and incandescent light bulbs
 empty dock
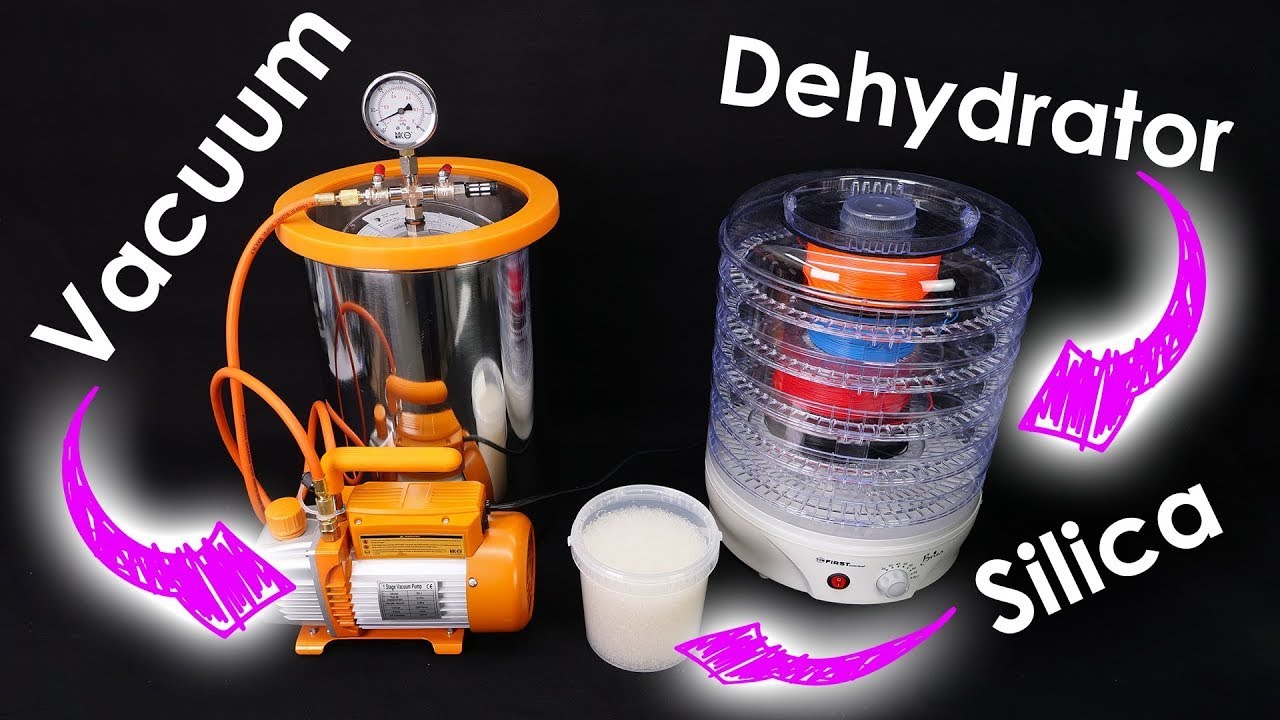
I would go with a little inline piston pump to pull a bit of vacuum inside a pelican case
iron remnant
Yeah, but @inner cedar has a really bright idea.
There was a YouTube video that showed that vacuum doesn't help that much.
inner cedar
I wonder if the vacuum intensity matters
iron remnant
Well, here's the video: https://www.youtube.com/watch?v=eqQRN9TUw08
Start listening with a 30-day Audible trial. Get 1 audiobook and unlimited Audible Original monthly downloads absolutely free. Visit http://www.audible.com/cnckitchen or text cnckitchen to 500 500.
I can highly recommend "Ready Player One" by Ernest Cline.
Website article with graphs: http://cnckitchen.com/blog/cyo43tzz88uqge65xgwz0wv8yvv3rs
...
Actually, I think I'm misspeaking.
raven coral
i dont understand why for some reason my prints wont stick to the surface anymore, i changed no settings or anything
it just stopped
nor did i change the surface, or the surface coating or anything
i tried setting the initial layer height lower to like 0.2mm or 0.1mm but it still wont stick
the plastic pretty much curls up around the nozzle
printing at 0.3mm had it kinda sticking to the surface but once the second layer started it didnt hold
arctic dragon
Most surfaces do have a lifespan. As you use it, it can become smoother and harder to adhere to?
If you touched the surface, it could also be a problem of oils on the surface.
What kind of surface are we talking about? And what material are we using?
raven coral
I have glass surface and i usually spray it with hairspray so bad things don't happen
And im trying to print with petg as usual
arctic dragon
Huh, glass is usually the opposite, thank goodness I asked. Do you clean your surface regularly? Residue from old hairspray could affect adhesion as well…
raven coral
I did clean the surface
It was a few days ago when I couldn't get the prints to stick
So i washed off pretty much all of the hairspray and then resprayed it
arctic dragon
Did you dry your surface before respraying?
I can't think of what else it could be tbh, my PETG experience is pretty limited...
raven coral
i mean im pretty sure i dried it, i used a paper towel for that
arctic dragon
No observable paper towel residue, I assume?
Idk I'm just trying to check off the obvious until I think of something...
raven coral
nope there oesnt seem any paper towel residue
raven coral
hmm
at first before washing off the buildplate i thought it could have been perhaps because i was printing my first layers too low, but since i washed off the buildplate there weren;t really any markings on the glass that would indicate that the surface got actually damaged
im gonna try printing an old gcode file to actually properly figure out if its the print settings that i have that are incorrect
arctic dragon
Have you leveled and reset your Z-offset?
raven coral
hmm i dont think i have a way to set up a z offset on the printer, but i have not tried leveling it yet, gonna check it actually rn
ok so the bed might have been a bit too high but it still seems weird considering i couldn't find a sweet spot even with babystepping z while trying to print
ok so the old gcode files taht i had do print well now
although i had to babystep the z axis down a bit
im looking at a sliced print in cura and im wondering
this means that the base gets printed fast while most of the other layers get printed slower

shouldn't that be the opposite?
inner cedar
iron remnant
Well, here's the video: https://www.youtube.com/watch?v=eqQRN9TUw08
Oh gosh, he shouldn’t be cooking his filament in his regular oven!
Even with PLA there is some risk of contamination with not nice stuff if it isn’t food safe… this is why I have a toaster oven for not food cooking
iron remnant
Oh yeah, I use my oven a lot to make yummy noms so I am not risking contamination.
empty sedge
raven coral
this means that the base gets printed fast while most of the other layers get pr...
I bet it's slowing down when doing just perimiters and infill to hit the minimum layer time
raven coral
Oh
raven coral
Quesiton is it a good idea to enable z hop in cura?
empty sedge
Depends on the printer. Might as well try it.
humble pagoda
iron remnant
Well, here's the video: https://www.youtube.com/watch?v=eqQRN9TUw08
Coincidentally, I also run a freeze dryer at work. Vacuum would theoretically help, but the function of the vacuum is to lower the boiling point of the water present so that it spontaneously vaporizes from the underlying material at or below whatever temperature the material is at. In freeze drying we are pulling it down below the triple point of water so that it goes directly from solid ice to water vapor, but the same principle applies with liquid water trapped in filament. Unless you can pull down to single digit Torr or less, I don't see it being capable of making a significant difference. Adding a little heat would be much more effective.
raven coral
i saw some bltouch/3dtouch install videos on the anet a8 and im wondering can i connect the bltouch to the J3 port instead of splicing the display cable stuff
winged helm
Instagram is trying to sell me the snap maker 2 modular printer/router/laser. Does anyone have experience with this device? It seems too good to be true
arctic dragon
winged helm
Instagram is trying to sell me the snap maker 2 modular printer/router/laser. Do...
Not personally, but I've read up a bunch on it. From what I've read while looking at reviews last year, the hardware is top-notch, but the software and firmware leaves a lot to be desired.

All3DP
The Snapmaker 2.0 3-In-1 3D printer, laser engraver/cutter, and CNC mill is our value pick for 3-In-1 machines. Check out our review to find out why.
It's a great entry-level multi-tool, but it's not necessarily the perfect pick for everyone.
winged helm
Ok I had a brief dream of my work buying me this. Sounds like I need to do some research
arctic dragon
Not sure how much improvement it's seen since the time of this review, but it's definitely a machine to consider.
iron remnant
The problem is that the things that make a good 3D printer are in opposition to the things that make a good CNC mill or laser cutter.
3D printers and laser cutters need a lightweight head that moves quickly which makes it hard to have a head that's sturdy enough to apply pressure, etc.
arctic dragon
Yeah, it's definitely not top of its class in anyone of the three. Pretty sure its 3d printer is a bit slower than newer single-function machines by a good amount...
As a prototype fabrication tool, though, it does have its niche.
winged helm
iron remnant
3D printers and laser cutters need a lightweight head that moves quickly which m...
Don't the heads swap out?
iron remnant
Err, not the head, the gantry.
winged helm
Ahhh
So probably better off buying a nice 3d printer and paying to use the CNC router and the laser at the makerspace
iron remnant
Yeah. Especially because there's "CNC good enough to cut acrylic and wood" and that's not "CNC good enough to cut ferrous metals"
winged helm
I think the one at the maker space is only rated for wood. I bet there's someone in town with a CNC capable of metal, I know there's a waterjet cutting guy
iron remnant
Yeah, like, while understanding that I have the sort of questionable judgement that netted me the "Master Punster" role, I am the target market for a combo printer thingie because I can afford one, make all kinds of strange things, and really none of them impressed me that much so I didn't even bother getting a Prusa and just got an Ender 3v2.
arctic dragon
Theoretically, you can build a small wood CNC for fairly cheap. Metal CNC tends to be a pretty specialized setup you're not likely to have any kind of desktop machine handle, so bonus points to your local makerspace if they have one...
Snapmaker is great for personal hobby use, but if you're imagining something for work, you're better off paying for separate machines. At the cost of a Snapmaker A350, you could get an Ender 7 with a Creality laser engraver module, and still have enough for a decent-sized desktop CNC machine.
half dew
+1 to looking for local maker spaces - they'll most likely have higher quality equipment and more importantly - the safety know how and training to use it properly
 blazing hornet
anyone have experience with an e3d v6 that tends to jam a lot the further you get into a print? "upgraded" my ender 3pro with a v6 hot end, petsfang mount, and 0.3mm nozzle (didn't have a .4mm in stock). stock hotend printed quite well with very few filament issues until it's thermistor started shorting, at which point I accelerated my plans to do the upgrade. it worked OK for a little while, but now after 15-30 minutes into a print, starts thinning out the filament and the extruder motor starts clicking more and more often. small prints that don't take that long finish just fine.
torpid grove
blazing hornet
anyone have experience with an e3d v6 that tends to jam a lot the further you ge...
I have lots experience with the ender 3 but none with the V6 hot end. What you're describing could be filament issues. If the filament you've been using is low quality, old or not dry that could be the problem. Have you had this same issue across a variety of filaments or just one?
blazing hornet
A couple different ones. But I've printed quite a bit of this one, only recent change being the hot end
Guess I'll see if the thrift store has a cheap toaster oven and try drying it...
torpid grove
blazing hornet
A couple different ones. But I've printed quite a bit of this one, only recent c...
Okay filament is always the place I like to start with these problems. Have you tried upping the temperature of your hot end? Doing that might get your filament flowing better. Could be the hot end can't melt your filament quick enough. But it could also be that your filament feeder is having problems as well so adjusting that may also help.
empty sedge
blazing hornet
anyone have experience with an e3d v6 that tends to jam a lot the further you ge...
Is your cold side fan working?
Can you upload a photo of how the nozzle looks against the block. There should be a gap between the nozzle hex and the heater block
unique pendant
👆 Agreed. The only time I've had issues with that was when my hotend fan wasn't working properly. Either due to me putting a weak fan on (static pressure is the important value so I use only e3d fans now), or the fan not running.
blazing hornet
Fan is running, not stock e3d but rather this one WINSINN 30mm Color LED Fan 24V... https://www.amazon.com/dp/B087TBB8YV?ref=ppx_pop_mob_ap_share

WINSINN 30mm RGB Fan 24V Color LED Hydraulic Bearing Brushless 3010 30x10mm - High Speed (Pack of 4Pcs)
Will get picture of gap when I get home.
The extruder has been fine with the stock ender nozzle, so I doubt that's the issue
Temp is pla at 210... Don't want to go much higher
And jam seems to be at nozzle, it's not backing up bad enough to block the heat break.
empty sedge
blazing hornet
And jam seems to be at nozzle, it's not backing up bad enough to block the heat ...
What retraction length and speed are you running?
Also where did you get your new e3d hotend from? I wonder if you got a bad clone
raven coral
After running this command it should store the pid settings automatically?
 empty sedge
no
it applies them but they don't get saved to eeprom
Marlin Firmware
This command initiates a process of heating and cooling to determine the proper PID values for the specified hotend or the heated bed.
blazing hornet
@empty sedge 3mm retract, 40mm/s. and it's a genuine e3d as far as I can tell (purchased from filastruder.com)
 empty sedge
blazing hornet
<@!459925076200914976> 3mm retract, 40mm/s. and it's a genuine e3d as far as I c...
empty sedge
blazing hornet
<@!459925076200914976> 3mm retract, 40mm/s. and it's a genuine e3d as far as I c...
Weird. 3mm retract is about double what I'd expect for direct drive but is not too long for bowden
I've always had good luck with filastruder's e3d parts
your nozzle looks about right, meaning that you should have a good seal between heat break and nozzle so retractions shouldn't have trouble with a gap between the two.
weird. I'm not sure what else to suggest at the moment
blazing hornet
ya, i heat-tightened the nozzle, so there shouldn't be a gap above it at all
i've got a new .4 nozzle coming "soon", will just wait until I can get that one installed and see if there's any difference. Will burn this one out with a torch too.
i have wondered about the part cooling ... those fangs look awful close to being blowing on the nozzle. can't move them down any further without being below the nozzle, it's only about .5mm space as it is.
and yes, it's a bowden at this point. going to a direct drive, dual extruder setup eventually. going to put a linear x rail in first so it'll support it, and want to put in a quick change (either whambam mutant or xchange) as well. plus, i think i'll wait for the next-gen e3d stuff to be available. 🙂
side question - what should I expect for print speed with a smaller nozzle? I was getting 80-100 with the stock stuff. Dropping to 60 with the .3 helped a little with the extrusion issues, but not sure if I should be dropping it even further?
unique pendant
blazing hornet
side question - what should I expect for print speed with a smaller nozzle? I wa...
That has to do with maximum flow rate. Try this: https://polygno.com/flow_rate_calculator
Polygno: putting you in control of your prints
blazing hornet
Hmm... That says I should be able to get at least what I'm trying to push, if not more. So it's not a feed rate issue.
unique pendant
This one is a little more practical: https://dyzedesign.com/3d-printing-speed-calculator/
Find the maximum 3d printing speed that you can achieve with your 3d printer. This calculator helps you find the optimal parameters for the desired speed.
Oh, wait. That’s for Dyze hotends only.
blazing hornet
It would make sense to me that the cooling fangs might be blowing on the nozzle... The longer the print runs, the thinner the extrusion gets. Like it's slowly building up inside the nozzle, kinda like lime scale building up in a water pipe.
I think I'll run a print without part cooling and see what it does.
lunar oar
lunar oar
This is what I mean by it not being random, you can see the seam area at the top...
Had a loose bowden tube, still wasn't it, replaced the nozzle, still wasn't is it
I've tried many different combinations of speed of the flow rate and temperatures, but I cant find a solution
before they were more in one area, but now they are completely random, and no they aren't the seam
I'd apricate any help!
empty sedge
Send me the gcode for your example cylinder
lunar oar
There it is @empty sedge
Ps: mention me ( @lunar oar ) or reply to my message so i get a notification on my phone to respond quicker to
blazing hornet
@empty sedge well, i think i found at least part of the problem. decided to go back to the beginning and do all the calibration checks and see if anything was out of line... was testing the extruder, and lo and behold I watch the motor turn, the gear turn, but the filament either not move or only move a couple mm (instead of the 15 i asked for). So the hob isn't doing it's job... which means it'll be down for a bit until I can either get a new stepper that has a socket to match the ender's plug, or bite the bullet and re-wire the stepper cable. thanks for the help!
was going to try to replace the gear with a spare hob-goblin, but Creality, in their INFINITE wisdom, used either some form of adhesive or a VERY tight press fit, instead of one of these modern contraptions known variously as set screws or grub screws. 🙂
 brittle hornet
Happy Indigenous Peoples’ Day [U.S.] Modeled in MAYA, Printed with Hatchbox Wood PLA, with baked FIMO clay insets.
 raven coral
actually question should i do pid autotune close to my bed when i want to tune it with the part cooling fan enabled?
unique pendant
I haven’t heard of having the part cooling fan on while PID tuning the bed, but I have been told to have it at about 50% while tuning the hotend. I suppose the problem would be it would be most accurate for small parts while the print head is close to the bed, but inaccurate as you go up. It’s probably only infinitesimal really. The bed is so large it is unlikely to be significantly perturbed by the part cooling fan really so I doubt it would really make a practical difference whether the cooling fan was on or off during PID tuning of the bed. Lots of speculation here, sorry. FWIW, I don’t have the part cooling fan on when I PID tune my bed and it works perfectly.
raven coral
ah you probably misunderstood me
i meant when pid tuning the hotend, not the bed
because i tried tuning it once at the fan going 100% when not close to the bed and it reached the target temps just fine, but when i tried to print and the fan kicked in when still close to bed the hotend started dropping temperature fast
unique pendant
Oh, sorry. Definitely PID tune with parts cooling fan on. As far as being close to the bed, you may as well try since it didn’t work before. Also, if your hotend has them, use a silicone sock.
raven coral
ah sadly i have no silicone sock for my hotend, although i was thinking of getting one
but before that ill probably get a new thermistor and mount it properly without using another small piece of metal to hold it in
it works but it was because i was stupid thinking thermistor was the problem and not the cooling fan cooling down the hotend
iron remnant
Thingiverse has leaked a bunch of passwords and accounts: https://haveibeenpwned.com/PwnedWebsites#Thingiverse

Have I Been Pwned allows you to search across multiple data breaches to see if your email address or phone number has been compromised.
inner cedar
Ah jeeze
broken orbit
iron remnant
Thingiverse has leaked a bunch of passwords and accounts: https://haveibeenpwned...
raven coral
Can i have my 3d printer wipe off this strand of plastic that oozes out while the hotend is heating up
arctic dragon
raven coral
Can i have my 3d printer wipe off this strand of plastic that oozes out while th...
Isn't that the main purpose of the skirt?
raven coral
i thought its to help with bed adhesion
Because i have set up a skirt, but the strand of plastic kinda gets shuffled around on the bed and stuff
inner cedar
Mine does a line back and forth on the edge before it actually starts, but I think that's a Cura default?
Skirt is just for adhesion
arctic dragon
Skirt is the one that doesn't connect to the print.
empty sedge
the prusa start gcode draws a bead on the front edge of the bed
arctic dragon
If that strand of plastic isn't adhering to the bed, your printer settings might not be dialed in properly. It should print an outline around your print if it's dialed in right.
Other possibility is the material has accumulated further up the nozzle due to a previously failed print or overextrusion. If it's not on the tip on the nozzle, you'll have to manually clean it off.
raven coral
i mean the skirt adheres to the bed
just not the strand that oozes out while the hotend is heaitng up
since it is very long
like
arctic dragon
It doesn't attach to the skirt as it prints?
raven coral
dunno how long but its certainly long
well no
im not sure if a cold plastic strand could attach to the skirt as it prints
arctic dragon
Well, if it's on the hotend, the end should be molten still.
raven coral
well yeah, that part attaches once it starts printing
arctic dragon
And if it's cold, it should be far enough away from said hotend that you should probably clear it off before the skirt finishes.
raven coral
but the long edge doesnt
arctic dragon
If you try to move it with the hotend in GCode, it'll just melt onto your mozzle and make all sorts of other problems.
I recommend just clearing excess plastic off manually.
raven coral
ah
would it help if i were to extrude some plastic and then retract before printing?
so i could have it done in a somewhat automatic way
arctic dragon
It would disconnect it from the rest of the print, but I personally wouldn't leave it on the buildplate if I can help it.
raven coral
well the nozzle before the print rests outside the buildplate, so if it were to disconnect from the nozzle then it should work fine
arctic dragon
Oh. In that case, you might as well just try it haha
raven coral
i suppose this has to be done with gcode
arctic dragon
Sounds like you might've come up with your own solution.
raven coral
adding stuff to prior to print
arctic dragon
Yeah. If you're using Cura, there should be a G-Code postprocessor that'll allow you to add custom movements before printing.
raven coral
ye but i gotta get it to do it rather in the "middle" of the gcode
or wait
does this code execute before the whole gcode stuff or is it somewhere in the middle
 empty sedge
before
if you want to add stuff to prime there you'll want to add back the heat-up gcodes.
mine for ancient cura is the following:
G90 ; use absolute positioning
M82 ; absolute extrusion mode
M104 S{print_bed_temperature} ;Uncomment to add your own bed temperature line
M140 S{print_temperature} ;Uncomment to add your own temperature line
M190 S{print_bed_temperature} ;Uncomment to add your own bed temperature line
M109 S{print_temperature} ;Uncomment to add your own temperature line
G28 W ; home all without mesh bed level
G80 ; mesh bed leveling
G92 E0.0 ; reset extruder distance position
G1 Y-3.0 F1000.0 ; go outside print area
G1 X60.0 E9.0 F1000.0 ; intro line
G1 X100.0 E21.5 F1000.0 ; intro line
G92 E0.0 ; reset extruder distance position```wait but i noticed that
G1 Z15.0 F2000 ;Move the platform```this code
;ZOFFSETPROCESSED
;Generated with Cura_SteamEngine 4.10.0
M140 S77
M105
M190 S77
M104 S225
M105
M109 S225
M82 ;absolute extrusion mode
G28 ;Home
G1 Z15.0 F2000 ;Move the platform
G92 E0
G92 E0
G1 F1800 E-9
;LAYER_COUNT:199
;LAYER:0```is after the heating up gcode
empty sedge
yeah, if you include the heat-up gcode in your start gcode cura won't automatically add it
... or shouldn't. I haven't spent enough time with new cura to be sure
 prime raptor
Hello all, I ma having an issue with my Ender3Pro and Octoprint. After I send gcode to the printer and it gets ready to print, heating etc, it auto homes then slowly raises upwards. It does not print and just moves upwards very slowly. I have to cancel the print. In the GCode viewer all I see is this: "Recv: echo:busy: processing". I have solved the back power issue from the rpi but it still fails every time.
raven coral
At what height should i enable the part cooling fan
blazing hornet
mine usually starts on the 3rd layer
@empty sedge - just an update... raising my extruder stepper current from 0.65A to 1A made it a little better, but still happening. new .4 nozzle, every filament i've tried (petg and pla) ... not sure what to try. 😦
it's not the cooling fan, as i've turned it off.
empty sedge
prime raptor
Hello all, I ma having an issue with my Ender3Pro and Octoprint. After I send g...
see if your homing switch is working. m119 and verify it turns both on and off when expected
arctic dragon
blazing hornet
<@!459925076200914976> - just an update... raising my extruder stepper current f...
What is your print speed set to? Are you pushing filament faster than it can melt?
blazing hornet
arctic dragon
What is your print speed set to? Are you pushing filament faster than it can mel...
have tried from 50mm to 100mm... .3 nozzle at .15 layer height, .4 nozzle at .2. Starts printing fine, the further it gets into the print the thinner the extrusion gets, until it starts clicking the motor.
arctic dragon
Have you verified your thermistor readings against an external measurement?
blazing hornet
used a volume calculator, 50mm with .3/.15 should only be just over 2mm^3/s
no. don't have a suitable thermometer.
is a brand new e3d cartridge thermistor
(not a guarantee that it works, but....)
and i wouldn't think the thermistor would get progressively worse during a print, then be fine at the start of the next one (once I've pushed enough filament through to get it unstuck)
doesn't seem to be getting into the heat break
blazing hornet
that said, will pull the heat break and clean it out thoroughly. that's the one thing that wasn't new yesterday.
raven coral
blazing hornet
mine usually starts on the 3rd layer
that would be somewhere around 1mm off the bed right?
ill probably set regular fan speed at height to 1.5mm
maybe even 2mm
becausse i tried running the pid test at 1mm height and it barely made to 200C
and im planning to print at 225C
prime raptor
prime raptor
Hello all, I ma having an issue with my Ender3Pro and Octoprint. After I send g...
SO I figured out that I had loaded the latest Marlin and it was not compatible with the 8bit board that I have.
blazing hornet
raven coral
becausse i tried running the pid test at 1mm height and it barely made to 200C
if you're running the PID test with the fan on, and it's not getting to temperature, it sounds like the fan is blowing at least on the nozzle, if not the block itself
i think the reasoning behind fan on layer 3 is that it'll help the first two layers stick together better if you're not cooling them. depending on your layer height, that could be ANY absolute height.
 prisma fjord
what are good/famous 3D printer companies out there?
empty sedge
that's a broad question. Do you mean something more specific?
prisma fjord
first time buying 3D printer. I am doing my research.
want to know from what I can choose
empty sedge
here we go again
prisma fjord
I can buy anything under 1000$
empty sedge
the prusa i3 mk3s is a great reliable workhorse printer
the creality machines are popular and have lots of community support but are more of a project to get dialed in and running well. So with an ender 3 or whatever you'll spend a lot more time futzing with it but you'll spend a lot less money
the end
[prusa mini is also pretty good and cheaper, but has a smaller build volume in a way that 95% of the time is not a problem]
resin printers are a different messy world I wouldn't recommend unless you're definitely going to be printing d&d miniatures every week or something. resin parts aren't as useful for mechanical projects and resin printers usually have smaller build volume. The material clean-up and post-curing and gloves and solvents required are too much a hassle for me
blazing hornet
stick with a printer with a rectangular bed if this is your first one... deltas are fun to watch, and have their strong points, but ease of use for beginners isn't one of them
@empty sedge i think i got my problem figured out... stray pressure advance setting in klipper. turned that off, and first print is beautiful. 🙂
prisma fjord
I see. Thanks for the input
iron remnant
I guess you managed to im-press yoruself then.
raven coral
blazing hornet
if you're running the PID test with the fan on, and it's not getting to temperat...
Well i tried to position the fan as low as possible so it wouldn't blow on the nozzle
But for sime weird reason it just cools down too much when the nozzle is close to the bed
empty sedge
yeah it bounces off the bed
makerbot replicators had ducts that split in two to point on either side of the nozzle instead of at it
raven coral
well i have modeled a similiar duct i think
https://www.thingiverse.com/thing:2133328 i used this duct but recreated it because it kept hitting the heating element cable

If you use this fan duct & think it makes your prints look better, don't forget to TIP! ;)
The story
I designed this fan duct as a 100% free & open source alternative to another one which was very good, but unfortunately it's license was preventing me from modifying it the way I see fit & share it freely.
So I started Blender, and made my own fr...
so it looks like this now

looking at the printer, the ducts are blowing right onto the tip of the needle, although since they are not that thin, some upper parts of it also get cooled down
i think ill just have to tune the cooling settings so it starts blowing when its high enough off the bed
although i havent compensated for the duct being not completely in line of the hotend
but i dont think that could cause much trouble considering when using the other fan duct i still had the same issue
unique pendant
Local/Regional Upstate New York, USA only. A friend of mine is selling is RailCore II 300ZL with Mosquito, magbed, multiple aluminum upgrades, panel due, etc. These do not ship well so that's why local/regional only. This was one of the ones built by Project R3D so it's been properly built. He bought a new printer and doesn't have room for the RailCore any more. He's asking US$1700 which is extremely reasonable if you are familiar with these printers (the unbuilt kit without many upgrades costs that). If you can drive to him he will sell for $1600. DM me if you are seriously interested and I'll put you in touch.

 inner cedar
Oh wow, wasn't that printer like $2500 or more new?
I kinda remember seeing that model before...
elder oxide
Fairly certain my buddy has a railcore
inner cedar
I want it, but I can't justify it right now DX
winged helm
I do too but I'm top far away to drive
broken orbit
I'm having a terrible time with print adhesion. Anyone have any tips?
raven coral
is bed cleean and properly leveled?
and do you have something like brim or skirt turned on in your slicer settings?
those can help with adhesion
 wooden girder
I usually use painters tape w glue stick on my bed
broken orbit
raven coral
is bed cleean and properly leveled?
Yes and yes
broken orbit
raven coral
and do you have something like brim or skirt turned on in your slicer settings?
I turned off skirt - but I'll try that
broken orbit
wooden girder
I usually use painters tape w glue stick on my bed
I've got painter's tape too
But no glue stick
raven coral
i print on glass with petg so i usually apply hairspray
broken orbit
I'm printing on a factory issue bed w/PLA
broken orbit
OK - I'll try skirt
iron remnant
Some things that have worked for me:
- Bed leveling. A lot of bed adhesion issues can actually be that the bed isn't trammed and leveled and where the z-axis height is configured properly, which I found out the hard way.
- Elmer's Glue Stick (apparently other brands don't work as well). Most of the tricky PLA prints are solved with glue stick
- Cut the first layer speed. I use that for intricate detailed stuff.
humble pagoda
@broken orbit , stupid question but...how are you leveling your printer? A point of confusion I've seen far too many times is that leveling does not mean making it level relative to the earth (though that's not a bad thing), but rather level relative to the XY plane of the machine (usually called tramming by machinists, and IMO a better term to use here). Assuming that you are actually tramming the printer, are you using something like a piece of paper to judge the gap between nozzle and bed? Cause I'd say you probably have too large a gap. You can also try finding a slicer setting to increase the amount of material extruded in the first layer (Cura 4.10 has Initial Layer Flow, which I set to 102% and Initial Layer Line Width, which I haven't needed to toy with but could help too).
I have not needed to use painters tape, glue stick, hairspray, or anything to print PLA before. There's enough slicer settings and machine adjustments that can be made to dial in the print performance instead.
carmine peak
i'm looking at default configurations for Marlin. Which one do i use?
 empty sedge
which marlin release are you running?
broken orbit
iron remnant
Some things that have worked for me:
* Bed leveling. A lot of bed adhesion iss...
OK, great. Thanks
broken orbit
humble pagoda
<@!746175873203437652> , stupid question but...*how* are you leveling your print...
I'm leveling it with paper
Thanks!
 fading wagon
I was recently having issues with adhesion too. First i homed the unit and then manually leveled at each corner with paper. Then i print one of the many available bed leveling prints with small squares at the corners. While it prints, you can work on dialing in the bed height. As it prints, adjust the wheels at each corner to get appropriate "squish".
Might need to print 2 or 3 times to get it perfect. Now i get excellent first layer adhesion with pla and glue stick.
elder oxide
Let me just say.. I started saving models in the 3MF file format and it is great
Highly recommend
torpid grove
fading wagon
I was recently having issues with adhesion too. First i homed the unit and then...
I would also recommend anyone with adhesion issues try aqua net hair spray. That stuff is basically glue in a can. Leveling issues can contribute to poor adhesion (among 200 other print factors) but Ive never had issues since I started using it.
raven coral
elder oxide
Let me just say.. I started saving models in the 3MF file format and it is great
i've tried saving them in 3mf but whenever i put them in cura i cant really place it on the buildplate, some features seem locked out
elder oxide
I use CURA and it works great
I can move individual objects in multi object files
Delete parts I don’t want to print
 pliant jasper
Hi guys! I'm designing an enclosure for housing an Adafruit Metro ESP32-S2. Does anyone have any examples?
Or drawings of the slide switch and neopixel position?
 loud silo
pliant jasper
Hi guys! I'm designing an enclosure for housing an Adafruit Metro ESP32-S2. Does...
loud silo
pliant jasper
Hi guys! I'm designing an enclosure for housing an Adafruit Metro ESP32-S2. Does...
it's arduino-shaped, so most arduino case would work with some tweaking
dimensional drawing here: https://learn.adafruit.com/adafruit-metro-esp32-s2/downloads
shy kelp
hi i have an flsun q5 and i just changed the extruder driver to a tmc2208 v1.2 and im getting dotted lines in my walls, infill and top layers and im not sure why
empty sedge
Did you wire it for uart communication and get that working in your firmware?
shy kelp
empty sedge
Did you wire it for uart communication and get that working in your firmware?
no i just plugged it in and reversed the direction, however i didnt change the vref or amps so im going to give that a go on monday i think
empty sedge
if the one you bought can be used that way, you probably need to check the microstepping jumpers
empty sedge
also you need to check the current setpoint with the tiny potentiometer on the driver. Trinamic uses RMS current not phase current so use half the current you would for A4988
shy kelp
empty sedge
also you need to check the current setpoint with the tiny potentiometer on the d...
im unsure what microstepping jumpers are but me and my brother looked at the max aps for my stepper motors and he worked out the rms current and 90% of that ofc so hoping that will be fine
raven coral
is there a way to use octoprint to edit my marlin firmware settings?
or have it edited, recompiled and uploaded to the printer from within my raspberry pi?
empty sedge
shy kelp
im unsure what microstepping jumpers are but me and my brother looked at the max...
there are 3 jumpers under the stepper driver board. The manual for your TMC2208 board should tell you how to connect them
empty sedge
raven coral
or have it edited, recompiled and uploaded to the printer from within my raspber...
I've done this by installing arduino and running it with x forwarding to xquarts on my mac
or I've use platformio from the command line
it'd be easier to do it over VNC but my octoprint pi aren't booting into a GUI
empty sedge
what OS are you running on your computer?
raven coral
windows
it isnt that easy hauling a whole printer or your comptuer to change some setting on your printer
but what i've noticed is that my printer for some reason wont reach the desired thempereature
by few degrees
empty sedge
openssh-client is included with windows 10 now, or otherwise easy to add
raven coral
so im planning to increase the heating timeout
empty sedge
I think that's a bad idea
raven coral
i dont even remember what the heating timeout is
empty sedge
you should fix whatever hardware issue is preventing you from heating up enough
raven coral
it sometiems seems to ehat up
somtimes doesnt
yesterday i printed just fine without no issues
today it just doesnt give it enough time

also i cant log into my raspberry pi
amazing
empty sedge
#define THERMAL_PROTECTION_PERIOD 40 // Seconds
but you've got something wrong if you can't get it hot quickly enough. just increasing the timeout isn't going to help when your fan turns on and cools your hotend off
you either have something assembled wrong pulling the heat away from the hot side, you need a better thermal break, your fans are too strong, or your heater isn't enough wattage
empty sedge
my mendel 90 is 12V with 40w heater and can get to 270 fine
raven coral
is there a way to print the current pid settings?
empty sedge
yes, look for "print settings" in marlinfw.org to print everything from the eeprom, or just running the g-code to set the pid settings with no other arguments should print them
raven coral
ah okay
ill try running just a normal pid tune
and then save settings
and then printing it
because if it will work after this then i have a feeling it just refuses to save the settings
raven coral
alright the pid test is done
will try printing again
if it'll succeed, i will see it as it not saving the pid settings properly
how do i set up platformio on the pi tho
raven coral
i dont get it why does it get a heating error when im trying to print but when im running the pid test it doesnt get any errors
also im looking at the gcode and its saying M109 S225*107
why is it 225*107
i know that 225 is the target temperature
but why the *107
also that type of code is shown by the terminal in octoprint
empty sedge
*107 is the line checksum
raven coral
Oh
I don't understand it heats up to 210X
210C
But not more
Like it is offset by 15 degrees
soft crypt
arctic dragon
Yeah, it's definitely not top of its class in anyone of the three. Pretty sure i...
It's much slower
It takes like double the time per print on the highest quality settings
That being said
it's an excellent printer and laser, though the CNC leaves a lot to be desired
I pre-ordered the A350 and enclosure and got it for like half the retail price, so far it's been good aside from excruciating print times for large projects with high detail
soft crypt
winged helm
Instagram is trying to sell me the snap maker 2 modular printer/router/laser. Do...
So personally if you ask me, it's good if you're willing to put up with print times and you have a lack of total work area for several machines, the Laser and Printer are great, but the CNC isn't the best, though they are constantly making upgrades like a dual nozzle attachment for printing and all that so you can upgrade it as you please.
The Laser is actually pretty fast
They've also been constantly updating firmware and software to make improvements
As long as you're fine with the Sub-par cnc and long print times for high quality projects, i'd say go for it
Oh and one thing i forgot to mention
it's loud
but seeing as they have upgraded it with the A350T model from now on, i don't think it's going to be an issue, the sound that is
humble pagoda
raven coral
40W heater, no fans are running
Can you unplug your heater connection and then measure the resistance of the heater? Just because the heater is rated at 40W doesn't mean it's 40W at 12V. If it's a heater designed for 24V, for instance, it would only put out 20W if run on a 12V system. The resistance should be 3.6 ohms if it's designed for 12V, it would be 14.4 ohms for 24V.
It shouldn't be wrong if it's an off the shelf system, but it's also an easy thing to check
raven coral
but it shouldn't change overnight from a 12v to a 24v or vice versa
15C feels like too much of a drop in temperature to just be within margin of error or something
humble pagoda
I don't mean that the actual voltage changes, I mean the heater itself might be mis-sized to begin with. There's no such thing as a 40W heater, there's a 40W@12V heater which is different from a 40W@24V heater (and there's even 120VAC cartridge heaters). They all have different internal resistances, which is the only way really to distinguish them. A 40W@24V heater will only output 20W if you run it at 12V. That would look an awful lot like a hot end that can't get up to temperature or do so very slowly.
shy kelp
empty sedge
there are 3 jumpers under the stepper driver board. The manual for your TMC2208 ...
I don’t think I ever got a manual for them. I brought a couple from amazon a month or so ago and kept them until now when I decided to use them. I assume there’s manuals or diagrams online?
raven coral
humble pagoda
I don't mean that the actual voltage changes, I mean the heater itself might be ...
Well to be fair it does barely reach 230C when I'm trying to heat it up(although if i slow down the heat break fan it does reach higher temperatures but that is a not a smart solution)
So the previous owner might have actually installed the wrong cartridge
I did order a 40W@12V one
I'll test them tomorrow since i dont have a multimeter with me atm
empty sedge
shy kelp
I don’t think I ever got a manual for them. I brought a couple from amazon a mon...
Hopefully the brand has a good manual. I doubt you bought the watterott ones from amazon
raven coral
how many times do i need to run the pid autotune for it to work properly
yesterday i ran the pid autotune and it left the printer capped at 210C when im trying to reach 225
today i ran it and now it reaches 219C
raven coral
alright running around 7 autotunes in total made it reach the 225C temperature mark
raven coral
nvm its still a bit struggling
empty sedge
a single time should be enough. I usually run it with c8 or whatever to do 8 iterations
raven coral
weird
alright so im about to flash marlin again, maybe the old config was messed up or somethign
but im not ure which one to use

i will assume that the first one should work
raven coral
i love how it just magically doesnt work
i printed something and it printed just fine, as it used to
now im printing again, and it is struggling to hold its temperature
this is how the temperature graph looks like

dropped to like 216C, and then went back up to 225C
empty sedge
this isn't going to be fixed by firmware
inner cedar
That sounds like your heater isn't capable of maintaining that temp
agile gorge
Do you have a heater block sock? It helps with heat consistency very much
inner cedar
Socks very good. A simple silicone sock might be all you need
karmic brook
I must disagree with "socks good"...
 agile gorge
@karmic brook that has nothing to do with having a sock
That is an incorrectly tightened nozzle
raven coral
Still how come my heater can't handle the temperature now, but like 3 days ago it was finee
empty sedge
maybe a wire or connection is loose? maybe you set bang_max?
maybe it's cooler now in the room with your printer
raven coral
no the temperature is quite the same
also what's bang_max?
the connections should be good
also i could not get my printer to not just cool down too much with a part cooling fan, it just alwaays seems to cool down too much
and somehow the heating element manages to hold the 225C temperature while it's doing pid tune
which still makes me think that its rather a firmware/software issue
shy kelp
I haven’t had time to sort my printer out yet but I just want to double check this is the cause/solution. So I changed the extruder stepper motor driver in my FLSUN Q5 to a tmc2208 and I believe the nozzle as well to one I’ve used before. It was printing perfectly fine before I done this but now I’ve got these lines of under extrusion. The only thing I haven’t done to my extruder driver is change it’s voltage which I’ll be doing tomorrow but yeah I’ll put a picture here as well of what I’m getting and I just wanna make sure it’s either the stepper driver voltage or possibly a blocked nozzle. I’ve printed many of these and even in different filament and it’s happening at exactly the same layers. Sorry for the wall of text!
 raven coral
Update to my situation : the heatbreak fan shroud had a gap that allowed air to flow backtowards the main heating block, thus cooling down the whole hotend
And giving me problems
inner cedar
karmic brook
I must disagree with "socks good"...
It can hold material that backs up from the nozzle not being secured directly, but I've also seen blocks enveloped without socks... But having a sock helps hold the heat in the block
 dusty granite
Hey guys,
I'm modeling a box which I intend to have 3D printed for an electronics project. I plan to stack a few components vertically inside the box (adafruit feather, myoware sensor, a lipo battery).
My problem is that I'm unsure how to add supports inside the box to place the boards on so they don't move around. Any configuration I can think of makes it close to impossible to assemble, as supports for higher components block the insertion of the lower components.
Can you suggest solutions, keywords or resources to look into for that task?
 old iris
Design it like a cabinet with shelves that are removable. Each shelf could print separate in any orientation to suit the mounting pegs/standoffs. Then have the main box use slots that each shelf slides into.
It could be similar to this, but instead each tray would have your boards and parts mounted on it. https://www.thingiverse.com/thing:398548

Super Simple to print trays and holder. 1,2,4 compartment trays. Can & SD card for scale.
Internal tray dimensions:
77mm x 55mm
38mm x 55mm x2
38mm x 27mm x4
Ideally the trays would not be drawers, but rather thin and flat. That way the I/O holes could be made on the box to plug stuff in.
Or you could make the box different, with stackable separate sections, similar to how sandwich style mechanical keyboards are assembled together. Each board has a separate layer and all of them have holes that align that you can put long screws through
Hopefully that gives you some ideas
dusty granite
old iris
Design it like a cabinet with shelves that are removable. Each shelf could print...
Ooh that's brilliant, it didn't even occur to me to make the box in multiple parts beside the cover. I'm gonna try that, thanks!
inner cedar
Could have a card edge connector on each and a mating connector inside the case, modular device!
old iris
A mini VME chassis haha
 bold yoke

i designed this L shaped bracket to hold my rayguns switch to activate zappy sound effects
is this sensible or am i being silly?
raven coral
okay so i printed this table clamp and a screw for it on my 3d printer aand i noticed that it is kinda squishy in the z axis
like
i can squeeze it a little bit
and im not sure why has that happened
i used superslicer as the slicer program for the models, and the infill was like the star/triangle pattern
arctic dragon
In the Z-axis?
raven coral
yeah

so if i were to press on the green marked area it would kinda squeeze a bit

so like in the z axis
raven coral
shy kelp
I haven’t had time to sort my printer out yet but I just want to double check th...
might be too late, but have you checked if the steps/mm setting for the extruder is properly defined
maybe the motor driver messed something up wih the steps/mm
shy kelp
raven coral
might be too late, but have you checked if the steps/mm setting for the extruder...
i changed the voltage, it was at 1.3 and i lowered it to 0.81 and i also changed my nozzle. it all seems fine now, skin has a lightly strange texture but its nothing bad so yeah it could've been a combination of those two things
raven coral
ah i see
shy kelp
thx tho
raven coral
np
raven coral
how can i override print settings in some area of the model with slic3r or superslicer?
 scenic shoal
well I don't know about overriding print settings but if you want it to stop printing and you can't cancel the print order you can just unplug it.
empty sedge
raven coral
how can i override print settings in some area of the model with slic3r or super...
In prusa slicer you can start/stop on particular layers and override settings inside there
Or add a modifier shape that overlaps part of your model and override the settings there
I did the latter once to print a part with half hexagon half cubic infill
raven coral
o okay, i'll try with the modifier shape
empty sedge

Learn more + links for model files:
https://blog.prusaprinters.org/model-with-prusaslicer-modifier-meshes-tutorial/
Download PrusaSlicer:
https://www.prusa3d.com/prusaslicer/
Music:
Midnight Stroll by Ghostrifter Official
inner cedar
Getting these random fills/layers... Thankfully this one is JUST a single layer, so I can clean it out, but I've had a few randomly fill half the thing. Any idea why this might be happening? If I reposition/reload it'll be fine


 empty sedge
your model is probably non-manifold
inner cedar
Any way to check that? It's a thing I got from Thingiverse
empty sedge
the x-ray view in cura or "select non manifold" in blender
inner cedar
Let me take a look
inner cedar
Ok, I pulled it up in Blender, but I don't see a non-manifold option under Select All by Type...
empty sedge
it selects the edges that are non-manifold. You're probably not seeing them because in solid display mode you can't see through the model
switch to wireframe, or switch x-ray on in the top right
oh, and you need to de-select everything first
inner cedar
I need to practice Blender more XD
elder oxide
inner cedar
I need to practice Blender more XD
turns on blender to make smoothie
So easy
inner cedar
Lol
iron remnant
hey
elder oxide
Is for horses
stuck trail
so, I am a bit certain now at this point that my issue has to do with the board declared for my marlin config.... I used meld to do file comparison 3 ways, 1 official release of marlin, 2 my config that wont compile, 3 a rework started from the original release of marlin..... and I pushed the found differences in the config files in my config that would not compile onto the rework slowly building between each change..... and there is literally only one thing that causes my build to fail.... and that is the board declared.
https://github.com/dylanpoll/Marlin is my repo for this...
this has the non compiling build
this, and the platform.io board declared are the only things different

this is how the site for the board and all the articles say it should be declared

this is how it comes out of the original fork

the failure codes I get are shown in the readme of my repo
if anyone knows the board declaration I should use please let me know..... I can't find it.... and editing the installed serial com functions ends in nothing but failure as well
empty sedge
stuck trail
this is how it comes out of the original fork
Sounds like you're using the wrong platform
let me see what I used for my delta
stuck trail
thanks, I am and have been stuck here for a while
I have found something interesting?
https://github.com/bigtreetech/Marlin this is the manufacturers fork for the bugfix branch and this is what I am using atm to attempt to build after the original and original bugfix branch failed..... and on this branch the listed boards don't seem to match up

GitHub
Optimized firmware for RepRap 3D printers based on the Arduino platform. - GitHub - bigtreetech/Marlin: Optimized firmware for RepRap 3D printers based on the Arduino platform.
but the actual instructions from their site clearly state what board declarations to use
empty sedge
ok, I'm running #define MOTHERBOARD BOARD_BTT_SKR_V1_3
and to compile, I don't use the default platform, I compile the LPC1768 platform
 empty sedge
skr pro is not lpc1768, but stm32f407
stuck trail
yeah and I have the v1.2
this is the only STM32F407* I have as a listed option

and it isn't loading oddly
I have STM32F10* folders but not the 407
empty sedge
maybe you need the BIGTREE_SKR_PRO platform below it
stuck trail
I tried that one but it also isn't loading.... I am going to attempt to do this on my laptop to make sure it isn't something with my desktop
it loaded actually but ends in the same result
 empty sedge
see if "teaching tech" or chris on youtube have a tutorial about configuring marlin on skr pro
stuck trail
thanks I will check them out X/. I honestly think there is something really wrong with the declared dependencies for the board itself in particular with the serial
lol looks like I have been here before XD
 empty sedge
stuck trail
lol looks like I have been here before XD
empty sedge
stuck trail
lol looks like I have been here before XD

We're back.......
We're back with Big Tree Tech's SKR 2 mainboard. Today we discuss some of the problems BTT had with the SKR 2, do a deep dive into past boards along with a step by step install and configuration.
00:00 Introduction
02:05 Good Board / Bad Board
03:51 SKR Comparison
08:06 SKR 2 Features
10:28 Driver Install
14:16 Board Install
...
stuck trail
but isn't that for the version 2 and not 1.2?
empty sedge
skr 2 is stm32f407 like your skr pro 1.2 so you're a lot closer
stuck trail
thank you, I will give this a shot X/
empty sedge
but also chris suggests a vscode plugin for this right after the timestamp in video above
raven coral
Alright how high the nozzle should be from my print bed, because whenever I'm printing it seems to be very low
And i cant consistently level it with paper, but I have some feeler gauges
So I'm thinking I could just level it with those and have it a bit more precisely leveled
unique pendant
If it’s too low while printing you need to adjust your z offset
inner cedar
I think 0.1mm? Not sure, I level by eye
 grand cove
raven coral
Alright how high the nozzle should be from my print bed, because whenever I'm pr...
grand cove
raven coral
Alright how high the nozzle should be from my print bed, because whenever I'm pr...
If both the bed and nozzle are at printing temperature, the nozzle should be exactly as high as the printer expects it to be. I.e. if the printer's display is saying Z=0.2mm then the nozzle should be 0.2mm high up. If the display is saying Z=0mm then the nozzle should be barely touching the bed, without pushing down on it.
raven coral
Ah
 empty sedge
you're over extruding or you're too low
raven coral
i have my fan settings set to this, will the fan speed up from the 3rd(or 4th, not sure) layer to the 10th layer or not?

im looking at behavior at the bottom of the page and it doesnt mention anything about speedup

im trying to have my fan gradually speed up so the pid process has enough time to compensate for the fan blowing cooler air towards it
empty sedge
Check the generated gcode
M106 or M106 S255 is full fan speed
M106 S127 is half
M107 or M106 S0 is off
(in practice, your fan probably doesn't actually start spinning below S64 or something)
raven coral
ye i noticed that at low speeds my fan makes a sound like its motors are trying to spin but it doesnt spin
o it does increase the speed
inner cedar
Ok, need help... I need to swap filament at a particular layer. Cura sending to OctoPrint for an Ender 3 V2. "Filament Change" does nothing at all. "Pause at height" doesn't stop at the right layer and makes a mess for some reason anyway... Any ideas? Can't do it manually as I'm not watching the printer directly
elder oxide
Yeah so weird


 elder oxide
For stopping?
inner cedar
Yeah
elder oxide
Huh weird
inner cedar
Ok, figured out the mess -- it wasn't retracting or extruding on pause, so I told it to retract to keep from leaking and then extrude [and I grab the string] before resume
 lament dove
inner cedar
It does give me this
lament dove
inner cedar
It does give me this
There's an octoprint configuration somewhere for commands that are disabled via octoprint. Just fyi
Its been like a year since I found it but it also caused an issue for me with something similar. Sorry I can't offer more context but you should be able to find that setting to unblock commands if you want to
inner cedar
... Pi Zero 2 W might be perfect for a tiny OctoPrint server since it's in the realm of Pi 3 performance
inner cedar
PLA + TPU fusion attempt in progress!
 brittle hornet
@inner cedar Did you change any settings? if so what? during the filament swap
inner cedar
Nope, no changes. Same temp range for both (215-230), set at 215, running at a low enough speed the TPU should be happy with
brittle hornet
Cool beans! best of luck!
inner cedar
Thanks :D very hopeful it works, I need this for work tomorrow...
inner cedar
Bleh, have some curling... But I think it'll be good enough

It's almost 1/3 of the way and I don't want to stop it
 graceful nest
Could we see the final product if it came out well?
shy kelp
So it seems my ender 3 model is too old to have the keyed stepper motor (42 - 40) fillament driver that allows my mod to attach to it, where can I find an exclusively keyed one?
Mine

one I need

 safe cave
hey....anyone here experienced in editing gcode? i have some generated from cura and i accidently stopped my print...i have the x y z it was at when i stopped it...
 robust grotto
You can pop it open in notepad and search for the specific layer you were at. So if you know it stopped at 10mm, search for Z10 and cut out everything before it.
safe cave
thanks...i tried and i think it worked out mostly okay except...prior to moving on as expected it decided to drag the hot extruder across my print in a diagonal line...
robust grotto
Ghaa, hate that!
safe cave
luckily my print is the top of a keyboard case (building a redox) and the side with the line will be facing the pcb 😅
robust grotto
I didn't even bother trying to keep printing on my last fail; just redesigned the computer case top to attach where the case itself failed. lol
unique pendant
safe cave
hey....anyone here experienced in editing gcode? i have some generated from cura...
best to use notepad++ if you're on Windows or TextEdit if you're on Mac. Regular notepad can add formatting data that will mess up your gcode.
If you have the Z data, you will know the layer and can go directly to that section
 vestal thicket
Anyone ever mount a NeoPixel Featherwing & Feather flush? I'm not having much luck finding any existing STLs, which surprised me. If anyone knows of a project that might have something, let me know. (I know, I need to learn FreeCAD!)
I am printing the one from the Ruiz Bros on Adafruit for Feathers to test it out, but I'm thinking I want to print a diffuser in transparent and either flush mount that in a speaker stand or just flush mound the Featherwing and the diffuser could stick out
carmine peak
my ender 3 makes a loud grinding noise coming from the motors (but nothing moves) if i try to do anything on it like home, manually control, print, etc. It also gives the HOMING FAILED error. Please help
empty sedge
carmine peak
my ender 3 makes a loud grinding noise coming from the motors (but nothing moves...
There's a lot to check
- do the axes move without a lot of force
- are the cables fully seated at both ends without any visible broken wires
- do you get the same behavior starting from the center of the bed as from the corner
- do the homing sensors work? M119 will print their status to console so try while holding the button on each switch and not and make sure you see a change
but I'm not sure how you'd get a grinding noise out of such small motors. When they bind up or otherwise can't move it's more of a buzzing/clicking sound
 bleak socket
so I have an odd question - does anyone know of a USB cable that has the power lines unconnected out of the box?
I've got an Ender 3 Pro and got a OctoPrint Raspberry Pi connected to it. And the Ender tries to power its entire everything through USB.
Which makes the Pi very upsetty spaghetti.
Or - has anyone tried to mod their Ender 3's USB port?
elder oxide
@bleak socket I modified my USB cable to cut the VUSB, leaving ground intact (need common ground to send messages)
I cut away enough of the VUSB line so they wouldn’t ever touch, then used electrical tape to cover the area up
bleak socket
that seems doable, probably cheapest and easiest too
also I totally would have killed the ground like an idiot
 void niche
I just put some electrical tape over the Power pin on the USB-A connector...
bleak socket
I'm not sure my hands are steady enough for that
iron remnant
You can get USB terminal block breakout..

This is the USB-A Male Plug to 5-pin Terminal Block. If you need to connect to a device with a USB Jack, maybe make your own USB stick or custom cable of sorts - this adapter will ...
iron remnant
So I used that, but then there's this: https://www.th3dstudio.com/product/power-blough-r-pi-usb-power-blocker/

Prevents the 5V from your Pi or EZPi from keeping the printer LCD on when AC power is off Works GREAT with Creality and BTT boards that do not have the 5V rail isolated properly.
old iris
I made one of those as well. Here's my KiCAD/gerbers for it
empty sedge
What are all the 3d model sharing sites these days besides thingiverse?
robust grotto
Prusa has one; just started exploring it last night:
https://www.prusaprinters.org/
iron remnant
PrusaPrinters is a lot more browsable and snappy than most of the other thingiverse alternatives.
Like, Cults and MyMiniFactory are interesting but the UI is unpleasant.
tight cove
why does cura slice like this?
line width = 0.4mm
the model has a 1.2mm wall thickness

nvm the model isnt actually a consistent 1.2mm
i fixed the model but it still slices with those yellow lines like that
half dew
You can try picking a different infill style - but thats just kind of how infil is
If you want it to be solid and have less infill you could increase the number of inner and outer walls until its enough to fill it
tight cove
it should have 3 walls
but instead it has 2 walls (both outer) and some weird top/bottom layers
empty sedge
It can’t fit 3 walls on both the inner and outer edge.
broken orbit
robust grotto
Prusa has one; just started exploring it last night:
https://www.prusaprinters.o...
I love PrusaPrinters
broken orbit
iron remnant
Like, Cults and MyMiniFactory are interesting but the UI is unpleasant.
And Yeggi's just 🤬
I mean, it's helpful, but man
iron remnant
Yeah.
 haughty thistle
does anyone have a cura profile for a 1mm volcano nozzle
empty sedge
Yes but I don’t think it would help much
lament dove
empty sedge
What are all the 3d model sharing sites these days besides thingiverse?
thangs3d is another newer one, like an aggregator.
way better than yeggi, but i feel like i need to really know what i'm looking for there--just browsing for models is overwhelming for me compared to thingiverse/prusaprinters
 bold totem

https://youtu.be/i-coZnJzuD4
Guide: https://learn.adafruit.com/pyportal-alarm-clock
Fusion 360 Share Link:https://a360.co/2TYCIyy
In this project we’re building an IoT Alarm Clock using Adafruit’s PyPortal.
This displays the time and weather using custom fonts and icons.
The device features a built-in snooze button and the alarm triggers sound e...
anyone have any clue what filament they used for these?
it's a perfect color
unique pendant
My guess is it was Ultimaker PLA since they were printing on an Ultimaker. At least it would have to be 2.85 mm. The video gives some hints as to the actual color of the PLA, especially when it is shown during printing. I wouldn't be surprised if that's just the regular Ultimaker white. If you look through the video you can see their white balance was incorrect every time, sometimes making it look like a buff color, sometimes giving it a magenta cast, etc. During the print, there's a few frames where the same light falls on the print and the Ultimaker white extruder housing and they're the same color.

I found a couple from Filamentum that look close to what the photos seem like. Kind of like that old buff plastic the computers in the '80s were made of. https://shop.fillamentum.com/products/pla-extrafill-light-ivory
https://shop.fillamentum.com/collections/pla-extrafill-filament/products/pla-extrafill-electric-grey

Fillamentum.com
Fillamentum PLA Extrafill is a material for the FFF (also known as FDM) 3D printing technology. High quality of printing even in tricky details with excellent lamination. Made of natural ingredients and can be biodegraded by industrial composting. Features: Good surface quality Easy to work with at high print speeds Us

Fillamentum.com
1.75 mm 750 g | Fella Watch - Get a notification after the product is back in the Shop Fillamentum PLA Extrafill is a material for the FFF (also known as FDM) 3D printing technology. Fillamentum PLA Extrafill is a material for the FFF (also known as FDM) 3D printingtechnology. High quality of printing even in trick

 rough cedar
https://www.thingiverse.com/thing:5087060/files Seems to be missing the plate that the Playground attaches to, anyone know where I could get that .STL

Learn Guide – Green Goblin Ornamenthttps://learn.adafruit.com/green-goblin-pumpkin-cpb-ornament
https://youtu.be/nAJu8YdBalw
Build an LED ornament inspired by Spiderman's Green goblin!
Use the built-in LEDs on the Circuit Playground Bluefruit and an additional NeoPixel ring on the back to illuminate on both sides of the ornament!
The 3D printe...
bold totem
@unique pendant thanks for all this input!!
unique pendant
@empty sedge I know this is old, but I use these sometimes:
My Mini Factory https://www.myminifactory.com
Youmagine https://www.youmagine.com

STL files for 3D designers and makers, share free and paid guaranteed 3D printable models. Download high-quality 3D print files for tabletop gaming, toys, gadgets and more for your 3D printers.

YouMagine
The best open source print files and designs available for you to build upon or simply download and 3D print!
There's also a paid one mentioned at the end of the 3D Printing Nerd project with Neil Patrick Harris: https://www.nikkoindustries.com/

Nikko Industries
Search the best 3d printed cosplay files at Nikko Industries. We offer 3D printer models, 3D printed statues, sculptures, and more! Order 3D printer models now!
unique pendant
15% off everything at filastruder.com for 2 days including RailCore kits @karmic brook
Code is ANNIVERSARY
unique pendant
Also, Proto-Pasta is having a 20% off sale on everything. Code = NOV21
 small heron
I have been wanting to try proto pasta for ages
but the makerspace is still sadly not open
rough cedar
Anyone have a clue what could be causing these big blobs on my prints?
 elder oxide
rough cedar
Anyone have a clue what could be causing these big blobs on my prints?
elder oxide
rough cedar
Anyone have a clue what could be causing these big blobs on my prints?
Alien infestation?
More than likely moisture
empty sedge
Looks like you’re over extruding and printing 100% fill with an unusually low layer height
That said the blobs might be from interruptions streaming gcode. Can you print from SD card?
unique pendant

Micro Center
New Customer Exclusive! Sign up to get your coupon via text. Limit one coupon per person. One time use in-store only coupon. While supplies last.
old iris
So it is already on sale for $199... I wonder if the coupon is applicable. That would make it $99
None of my phone numbers work for the coupon signup though.. lol.
They don't allow VOIP lines, and it says to try a different cell phone carrier for my normal cell phone (I'm using Google Fi)
"We’re having trouble registering this mobile number. For the security of your Micro Center account, please try another mobile number from a major US phone carrier."
empty sedge

Read more about the XL: https://blog.prusaprinters.org/original-prusa-xl-first-look_58312/
Pre-order by $200 / 200€ deposit: https://www.prusa3d.com/product/original-prusa-xl/
This is the first look at the Original Prusa XL - our upcoming large-scale CoreXY 3D printer with a 36×36×36 cm (14.17’’ cubed) build volume, next-generation extruder, ne...
@karmic brook ^ Probably late next gear .Get ready
old iris
$2k, lol no thanks
karmic brook
My next printer will likely be a Railcore. Very tempted by the sale.
bold totem
when i get a new apartment im gonna make a voron
@unique pendant couldn't find a in stock light ivory, so i grabbed inland bone white from microcenter and it's 'close enough' light ivory would definitely be a perfect match for my old mac pizzabox
 sharp thunder
What’s a good printer to get started with? By good, I mean one that gives precise prints without a need for a lot of tuning. I’d appreciate any recommendations.
knotty laurel
sharp thunder
What’s a good printer to get started with? By good, I mean one that gives precis...
The Prusa i3 is often recommended as a solid no-fiddling-needed printer, though that sort of reliability means it's more expensive than things like the Ender.
sharp thunder
I have the MK3S+ kit on my list of potential printers
Also looking at Crealty CR-6 SE
I’m a bit weary of the Ender 3 V2
I don’t want too many headaches. Also, is it worth it paying for Software such as Simplify 3D?
empty sedge
Prusa slicer has great profiles for the prusa. You don’t need simplify3d at all
sharp thunder
Thx for the feedback @empty sedge @knotty laurel
unique pendant
I’m going to move to Cura very soon as it has some great controls over supports.
winged helm
how do I tell what the units for an .stl are?
knotty laurel
winged helm
how do I tell what the units for an .stl are?
AFAIK they don't encode the units, so that's just a scale that has to be defined by the software reading the file. Usually they'll be millimeters or inches, though.
winged helm
interesting, shapeways is asking me the units
knotty laurel
I'd just try mm and see if it comes out to a reasonable size or is about 25 times smaller than you expect. 😁
winged helm
haha I'll see what happens
 cosmic star
Has anybody seen a small, minimally sized case that can hold a feather board with a wing and has holes for the USB port and for other wires like connecting LED strips?
knotty laurel
I don't know of anything specifically, but that sounds like the sort of thing people would have made 3D-printable designs for, so you might check sites like Thingiverse.
broken orbit
sharp thunder
What’s a good printer to get started with? By good, I mean one that gives precis...
Ender 3
arctic dragon
sharp thunder
I have the MK3S+ kit on my list of potential printers
Creality is a great brand with a nice tinker to print balance, but not exactly the top dog as far as unbox and go is concerned. If you really don't want to do the tuning, go for something like a makerbot or an ultimaker. It does come at a pretty hefty cost, though...
At which point you do have to weight the tradeoffs and consider HOW MUCH tuning you want to do.
elder oxide
arctic dragon
Creality is a great brand with a nice tinker to print balance, but not exactly t...
Is you print with only PLA, usually there’s very little fine tuning, just occasionally changing nozzles, and the occasional leveling. But printing with anything else does require a bit of effort. I’ve not really done any tuning with my Ender 3 pro since April or so