#help-with-3dprinting
1 messages · Page 37 of 1
 empty sedge
we've used hatchbox PLA, atomic PLA and PETG, dikole PLA (cheap 3kg garbage), and overture PETG and PLA
 lapis flame
sphereinabox, have you done any upgrades to either of your mk3s?
empty sedge
@lapis flame eh, not really. I have a different spool holder, a camera mount on the x-motor, and octoprint with ldap and cura in octoprint on a pi 4 for each
I have both textured and smooth pei sheets because printing PETG on the smooth sheet can tear chunks off
lapis flame
I will likely be using PLA exclusively to make parts for my electronic projects. So you have not had to do any heatbreak, extruder gear, etc. upgrades?
empty sedge
one of them was upgraded to the mk3s extruder from the mk3 extruder
@lapis flame nope, still the original drive gears. We've replaced the hot side once or twice after part came off bed and completely encapsulated nozzle because of printing PETG with PLA profile
lapis flame
Any significant downside that you can see with the mini vs. MK3? At half the price, there must be something missing from the forumla.
empty sedge
bowden makes printing flexible materials a lot more difficult and the mini doesn't have a good filament sensor by default
 karmic brook
Smaller build volume too
empty sedge
unfortunately the prusa lead time is pretty long also
lapis flame
Thankfully I am not in a rush so I am still researching. The mini has the option of adding a filament sensor for $20, wonder if that is necessary?
Thanks for the info so far. I will be back in an hour
empty sedge
if it's just you running the printer you can look at the spool and the amount of filament prusa slic3r says is needed to see if you have enough
at my hackerspace I can't make people submitting prints check the spools so the filament sensor is a must-have
 humble hull
what does the filament sensor sense?
unrelatedly, I think cooling is the remaining issue with my machine - there seem to be plenty of aftermarket designs for repositioning the fans or ducting the air to a more useful location, though
karmic brook
I think it simply senses whether there's a physical object in the place where the filament is supposed to be (it replaces an earlier optical sensor that didn't work well with clear filament)
empty sedge
yeah, it's largely acting the same way a micro switch does just with some different parts to get there
karmic brook
The current implementation is a simple lever with a flag that passes through an opto-interrupter sensor.
empty sedge
yeah, with a ball bearing riding on the filament and a pair of magnets as the spring
lapis flame
I suppose that the sensor would be helpful for an overnight print
Thanks for all your input so far. I will likely op for the mini for a faster out of the box experience
 violet needleBOT
Adafruit Industries posted Black Panther Helmet #3DPrinting #adafruit

Every week we'll 3D print designs from the community and showcase slicer settings, use cases and of course, Time-lapses!
Black Panther Helmet
Tom Lacey
https://www.thingiverse.com/thing:3152123
CR10S Pro
Silk Black PLA
49hr 23mins
X:286 Y:285 Z:189mm
.2mm layer / .4mm nozzle...
 gusty sorrel
is there a list of printers that you all would suggest? Considering it's my first printer, budget friendly with good enough print quality is what I'm looking for
karmic brook
Scroll back, it's a common topic of discussion here
gusty sorrel
@karmic brook cool, I go back further lol
 blazing barn
Could anyone recommend a decent 3d printer for me?
in the sub $1k range
is the Prusa i3 still the one to get?
oh god, that was literally just asked a few posts ago
goes and hides in a corner, ashamed of himself
 full sand
whats the deal with printers that have 2x Z-axis motors anyways?
karmic brook
It's one way to have separate drive on each end of the Z axis gantry to maintain parallelism while in motion, without using gears/chains/belts.
full sand
is it somehow superior to belt systems?
you would think its more costly to have two motors and screws instead of a belt and pulley
violet needleBOT
Adafruit Industries posted 3D Hangouts – Synths, Fairy Wings and Helmets
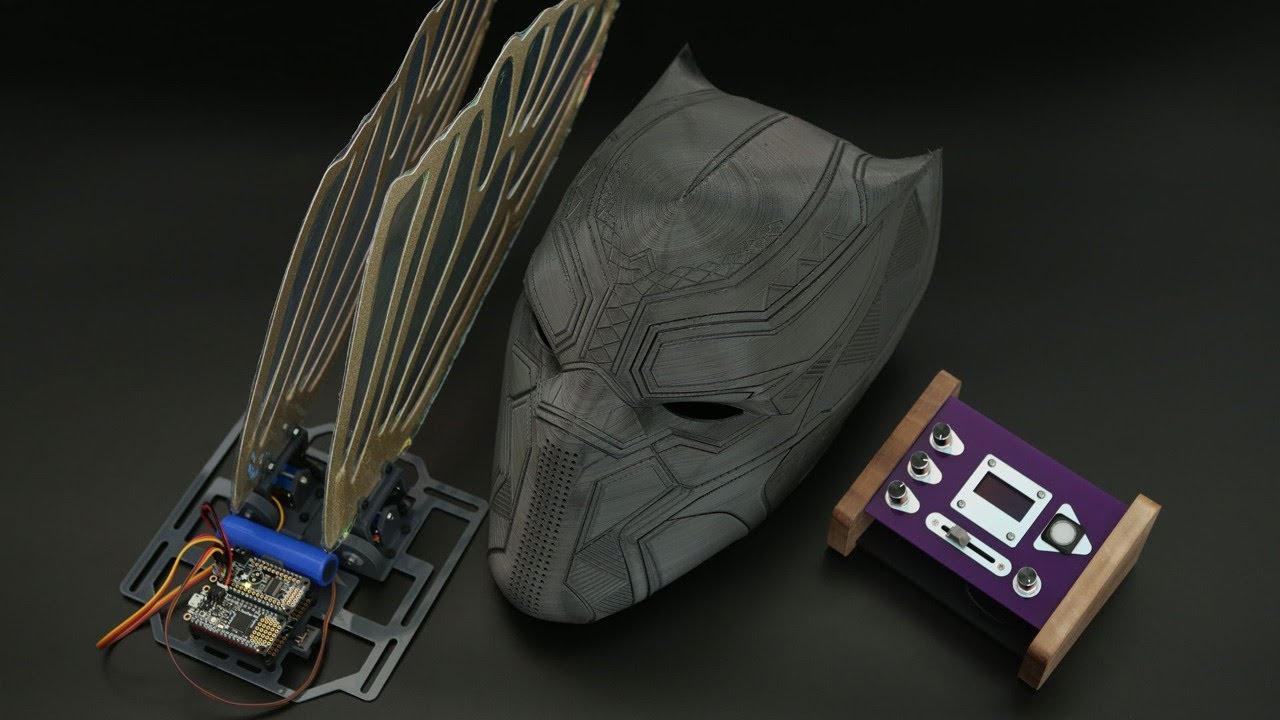
This week we'll take a look at the LEGO compatible parts for STEMMA boards. Demos this week include fairy wings and MIDI melody maker.
Learn Guide
https://learn.adafruit.com/stemma-lego-base-plates
YouTube Project Video -
https://youtu.be/7s8bPaKm-BY
Servo FeatherWing
ht...
karmic brook
I'm no expert, but offhand I can think of two advantages for separate Z motors. One is the unit can align the Z axis for you by adjusting the motors independently. Another is that two motors have more torque than just one.
empty sedge
Eh, my hackerspace had an old mendel with a single z motor a belt driving two leadscrews. Nowdays it's probably cheaper and easier to build a z axis with two leadscrew motors. A second motor isn't really more expensive than an additional leadscrew, bearings, closed loop belt, and pulleys.
humble hull
pffffft it's not that often that you get to SEE the moment of disastrous failure 90% into a multi-hour print
and here I thought I'd never use up this giant spool of PLA
definitely need to enable z hop
usually I just come back to a spagetti mess and helplessly wonder what happened
Basic plausibility test succeeded
now to refine the shape nad size of the links, and then see about pulleys and muscle wire
 iron remnant
I mean, you knew this was going to be a real tale.
humble hull
8/10 classic
I'm getting some stringies despite reducing the retraction - I might have to do a temp tower to see if it's retraction or temperature
iron remnant
So.... heated debate later?
humble hull

iron remnant
I really really want to know how the puppers react to you being able to wag your tail back.
humble hull
aww that would be so adorable
 edgy steeple

On October 1st, 2020 - Fusion 360 for personal use will be defining clearer lines between what is available in Fusion 360 for personal use versus other offerings in order to align with intended usage, scale for the future, and stay true to Autodesk’s guiding principles of demo...
humble hull
Whoa.
Tempted.
I'd assume it was garbage for that price, but a professional maker friend of mine adores his
And that's a heck of a sale
karmic brook
The wash and cure companion unit is $129 now too, so you could get both for $300.
 elder oxide
I’d get a resin printer but I have small kids and no safe place to put the printer
karmic brook
I'm somewhat tempted too, but have a windowless basement so no easy way to vent the fumes.
elder oxide
Yeah, and you need a place to recycle the rinse water
Since it’s illegal to dump it
Well, it’s illegal in a lot of places
I suppose you could by a denaturing agent but I think you need a hazmat license for those kinds of chemicals
It’s been a while since I took a hazmat course
humble hull
They sell a nontoxic plant based resin too, which presumably wouldn't have those concerns
Not sure if the wash and cure would be worth it, but I'll have to check it out
elder oxide
They sell a nontoxic plant based resin too, which presumably wouldn't have those concerns
@humble hull the SDS’s still suggests proper recycling channels even for plant based resin
elder oxide
Safety Data Sheets
A lot of times you just cure left over resin (even that in rinse water) before disposal
humble hull
makes sense
not sure I'm going to make neough things for a wash and cure unit to be worthwhile, but I'll pick up a UV nail curing thingy
iron remnant
I guess it's really reisn-ating with you then
humble hull
humble hull
Funky loops on the corner. What do?
empty sedge
if that's the only object you're printing and you have z-hop turned on you have a retraction problem
humble hull
I printed another small cube at the same time, a few inches away
I should lower the retraction, I assume?
Let me check if I had z hop for this one
empty sedge
you may need longer retraction or have another issue
what is your printer? what extruder and hotend? what retraction are you using now? what kind of filament? what temps are you printing at?
humble hull
ender 5 pro, metal hotend, standard extruder. 4mm retraction, and I've gotten the same problem regardless of filament
printing at 210, which might be excessive, but the metal hotend docs claim that it needs the temp increased by 5-10C
humble hull
yes
empty sedge
I've never needed that long on bowden but I guess my machines have been built better
what is your retraction speed?
oh, that's a long bowden tube
humble hull
2400 mm/min
waitaminute
that's sliced for a .4 nozzle
I'm using a .5 nozzle
that can't possibly be helping
facepalm
empty sedge
that wouldn't cause those string/blobs but would cause the beads to not be the correct shape when they stack up
the top surface texture should be better when the nozzle diameter is correct
does the teflon go all the way to the hot zone?
humble hull
not with this hotend design
 obtuse quail
Hello. I'm making a LACK enclosure, and I want to add a camera to it for timelapses and streaming. For whatever reason, I want the lighting of this enclosure to be addressable for the purposes of white balance and for adding colored effects to make the timelapse or streaming video a bit more interesting.
Which would work better for lighting up an enclosure? Dotstar LEDs or Neopixel LEDs? I've read the Dotstar page and while the differences between them make sense, the topic of "how bright can these things get" is glossed over. Is there a difference in how bright NeoPixel LEDs vs Dotstar LEDs can get?
empty sedge
@obtuse quail looks like they're both 18W for 60 LEDs
obtuse quail
So it wouldn't make that much of a difference?
empty sedge
if you want it brighter, add more LEDs
obtuse quail
OK. That helps. Thank you!
empty sedge
that's for the 5050 package
obtuse quail
There's other packages? I was looking at this one: https://www.adafruit.com/product/2837?length=2
What is better than smart RGB LEDs? Smart RGB+White LEDs! These NeoPixels now have 4 LEDs in them (red, green, blue and white) for excellent lighting effects. These LED strips are fun ...
karmic brook
There are other packages (a few sizes, as well as side-emitting ones). The RGBW ones are somewhat brighter than the RGB ones (4 LEDs instead of 3).
empty sedge
@obtuse quail it sounds like the dotstar (apa102) are able to control their intensity more finely when dim and also have a higher PWM frequency which might be a better option taking photos with
obtuse quail
I was leaning in that direction to begin with. The fact that I wouldn't need to use special pins on the Raspberry Pi with the Octoprint server (used for taking photos + keeping track of statistics) would be a plus to using Dotstar LEDs.
karmic brook
The timing insensitivity is handy too on platforms like the Pi where the CPU is multitasking.
iron remnant
I really really wish they made Dotstar LEDs with RGBW. :/
empty sedge
hue uses 3 different LED packages for RGBW to get RGB, cold white, and warm white
obtuse quail
Since the one controlling the lighting is a Raspberry Pi (OctoPrint ftw), the fact that I can just connect the strip to whichever GPIO pins it needs is a plus. I was planning on using the approach used in the Roll-up Video Light (https://learn.adafruit.com/roll-up-video-light), where I have alternating strips right next to each other to provide light.
My current issue is that Adafruit is the only one that sells Dotstar LEDs... and they're sold out unless I buy way, way, WAY more than what I'll ever need.
empty sedge
@obtuse quail adafruit is the only one that calls them "dotstar". Sparkfun does sell APA102 boards and strips too. Looks like you'll need a 5v arduino or level shifter
your linked guide uses a 5v pro trinket
obtuse quail
Yeah, I'm going to get a level shifter to transfer from 3.3v --> 5v logic. I'd like the Pi to be the one giving instructions, because then Octoprint can do anything it wants (adjust lighting, trigger effects, etc) between layers.
Will that require higher current draw, however?
empty sedge
the current draw is going to depend on how many lights you have
obtuse quail
I was talking about the CLK and DATA lines requiring 5V. The 5V and GND lines are going to be receiving power from an external jack that's not connected to the Pi at all.
empty sedge
the signals won't be enough power to worry about. power the 5v side of your level shifter from the same 5v you're using on the LED strips
obtuse quail
Nice.
I know this is more of an electronics question instead of a "how 2 3D print" question, but I really appreciate y'all offering advice!
 cunning oyster
Has anyone created 3D models for any of the Adafruit boards? I have an idea for a project that would fuse leather working and electronics. I need a plastic model of some boards for the leather forming.
A PyPoetal model would be fantastic
empty sedge
@cunning oyster if just the PCB is fine yes
cunning oyster
...with components
empty sedge
the connectors and components aren't always modeled

GitHub
CAD files for various boards, components and parts - adafruit/Adafruit_CAD_Parts
cunning oyster
Thanks !
 serene quest
I'm getting warping on a 20mm calibration cube, when I have a bl touch that I just finished tuning perfectly, and the warping only happens in one corner. What makes it worse is I just bought a ultrastik pei coated steel bed which I'm using so I'm pretty sure its not the bed, I'm printing PLA at 200-50C
Just finished drying my PLA in the oven overnight too
It was very wet before and was popping
It's fine now
Anyone know what could be the issue?
empty sedge
does the fan blow on that one corner?
serene quest
fan is off until 3rd layer but I ended up fixing it
humble hull
what was the problem?
violet needleBOT
Adafruit Industries posted Samus Aran Helmet - Metroid #adafruit #timelapse #3dprinting

Every week we'll 3D print designs from the community and showcase slicer settings, use cases and of course, Time-lapses!
Samus Aran Helmet - Metroid
Jacob
https://www.thingiverse.com/thing:1461378
CR10S Pro
Red PLA
55hr 34mins
X:286 Y:286 Z:177mm
.2mm layer / .4mm nozzle
6% ...
violet needleBOT
Adafruit Industries posted RGB Matrix Pixel Sand #adafruit #3dprinting

In this project we’re making 3D printed handles for the Adafruit Matrix Portal Pixel Sand!
Guide: https://learn.adafruit.com/matrix-portal-sand
The Adafruit Matrix Portal is a plug-n-play dev board that makes it easier to do internet connected projects using RGB matrices.
I...
 lethal relic
Good Morning Everyone,
Just found out Autodesk products can be free for a year with a valid University email. You can get some free CAD software or even 3D animation tools. Sign up here to get a variety of software packages.
Go to the following link and click get products and there will be a second link for educators and students.

Autodesk supports the student community by providing students, educators and institutions free access to 3D design software, learning tools, programs and competitions.
violet needleBOT
Adafruit Industries posted 3D Hangouts – Matrix Portal, MIDI Feather and Metroid Helmet
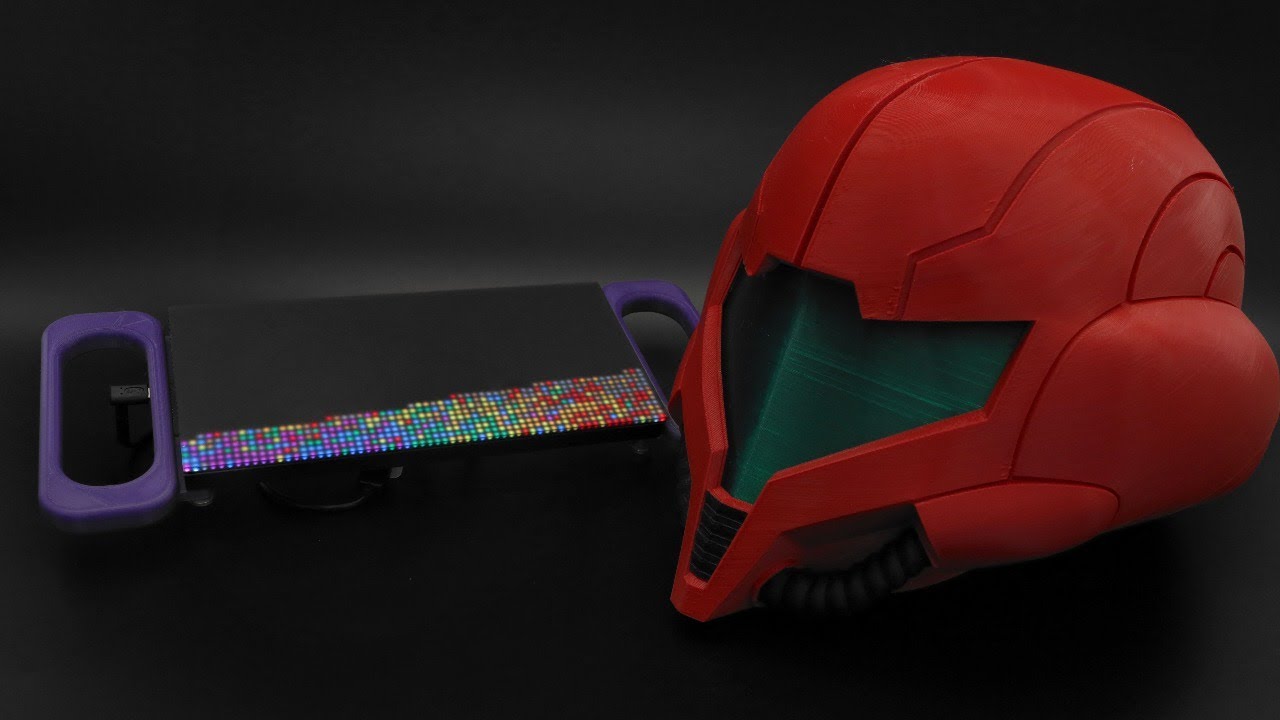
Learn Guide
https://learn.adafruit.com/matrix-portal-sand
YouTube Project Video -
https://youtu.be/b9q4FsCiNwc
32x64 Matrix Display
https://www.adafruit.com/product/2278
Matrix Portal
https://www.adafruit.com/product/4745
Black LED Acrylic
https://www.adafruit.com/pro...
 kind coral
HI, im new to 3d printing. I recentli got an ender 3d. What software is recommended to make gcodr files for the printer?
empty sedge
@kind coral prusa slicer probably
Lots of people use Cura also but I stopped when they broke all my configurations
kind coral
Ive heard about fusion 360, is that good for gcode files?
empty sedge
Eh sorta. Gcode is the path the printer follows. Normally you’d make a model in fusion or blender or openscad or tinkercad, export stl, then load the stl in prusa slicer or Cura to convert to the movements for your specific machine
Fusion also has a gcode converter built in as of this year but it doesn’t have profiles built in well tuned for Ender 3
kind coral
Ohh so i make the model in lets say tinkercad, then what do i do to get it into gcode?
empty sedge
Export stl, load the stl into cura or prusa slicer, and set the part orientation, and print options, then export gcode to print
kind coral
Pretty simple, thanks
empty sedge
I'm sure you can find instructions online for how to do that
here's one I found on youtube. 3mf is another 3d model format that's newer and facier than STL
https://www.youtube.com/watch?v=fez6fpEFMR4

Buy Me a Beer: https://www.buymeacoffee.com/blove
Support me via Patreon: https://www.patreon.com/blovett How to print a Coronavirus mask from a 3MF file using Prusa Slicer to export an STL file or GCODE for a Creality Ender 3. This video is for those just getting started that...
kind coral
Yeah definantly, thanks for all the help man
 undone nymph
I feel so oldschool. I have still a e3d v5 hotend.
which btw doesn't hold temperature after exchanging heating. Loose screws?
I did not find my allen key to check
empty sedge
@undone nymph I also have a machine with ed3v5. There's an allen screw holding the cartridge in place but that'd have to be quite visibly falling out to cause the temps to drop
undone nymph
Well, I found some instructions which say I should tighten the scrrwd when it is warm
serene quest
Does anyone know why there is these blobs at the bottom of cylinders? Printing pla at 210-50C on a heavily modded ender 3
empty sedge
@serene quest it could be a lot of things. temperature, retraction, extruder slipping, or part cooling. Small towers
with a lot of retracts are a common problem for bowden machines to get tuned well
 stuck cargo
Getting pretty intense strings on these types of areas.
Current settings:
Wipe distance: 0.4mm
Retraction: 8mm @ 55mm/s
Z hop: 0.4mm @ 5mm/s
(Ender 3)
Any advice?
empty sedge
@stuck cargo try with 25mm/sec retraction speed and also try without z hop. To test faster, try with the #12 part on https://www.thingiverse.com/thing:2755063/files
- current settings 55mm/sec retraction speed, .04 @5 z-hop
- 55mm/sec retraction speed, no z-hop
- 25mm/sec retraction speed, 0.4 @5 z-hop
- 25mm/sec retraction speed, no z-hop

These are the files used during the 2017 Make: Digital Fabrication Shootout to test 3D printers. We have added a few new models to this year's testing and some modifications to some of our older probes.
To find out more about our testing visit:https://makezine.com/comparison/...
stuck cargo
wipe distance & reducing z hop fixed it!

 tight flower
Hello! I'm designing/remixing a new X carriage of my own. I'm trying to put the fan duct but I don't really know how low it should be positioned. I drew line from the fan duct exhaust walls. Should I make it lower?
empty sedge
that's probably fine but I'd make it so the bottom end of the duct is at least 1mm, maybe 2mm above the nozzle
you might also find the duct ends up cooling the nozzle too much
that said, that's either a giant heater block or a tiny part cooling fan or the fan isn't pictured above
this duct has a shield below the nozzle so the 5015 blower doesn't cool the nozzle too much. https://cad.onshape.com/documents/41c3b12e742c4d2f9961aa9b/w/31453eda78b442e38c3c81aa/e/5aa8b5f7616e46e3a144d8ac
Login / Signin to Onshape - the modern CAD system used by thousands of companies worldwide.
this one copies the 3 holes in the i3 mk3s duct
tight flower
that's probably fine but I'd make it so the bottom end of the duct is at least 1mm, maybe 2mm above the nozzle
@empty sedge Oops, I totally forgot about clearance for printed parts. I was quite concerned about the fan cooling down the tip of the nozzle and causing the filament to come out a bit solidified. But now I that I think about it, brass conducts heat pretty well and should be fine I guess. So a little bit of air on the nozzle should be okay right?
empty sedge
try it
karmic brook
I had some "thermal runaway" issues with too much cooling air on the nozzle. This can be addressed by modulating the fan speed, a silicone "sock" on the nozzle for heat retention, or adjusting the fan duct geometry to direct the airflow as needed.
tight flower
So errors from too much cooling air on the nozzle is a thing. Learned something new. I do have a silicone sock on but it covers only the heatblock and not the nozzle.
I'm gonna go ahead and do some experiment with different positions of the fan duct. Thanks.
empty sedge
yeah, I've had the nozzle temp drop over 20C because of the part cooling fan overpowering it before
violet needleBOT
Adafruit Industries posted Dr. Doom #adafruit #Timelapse #3DPrinting
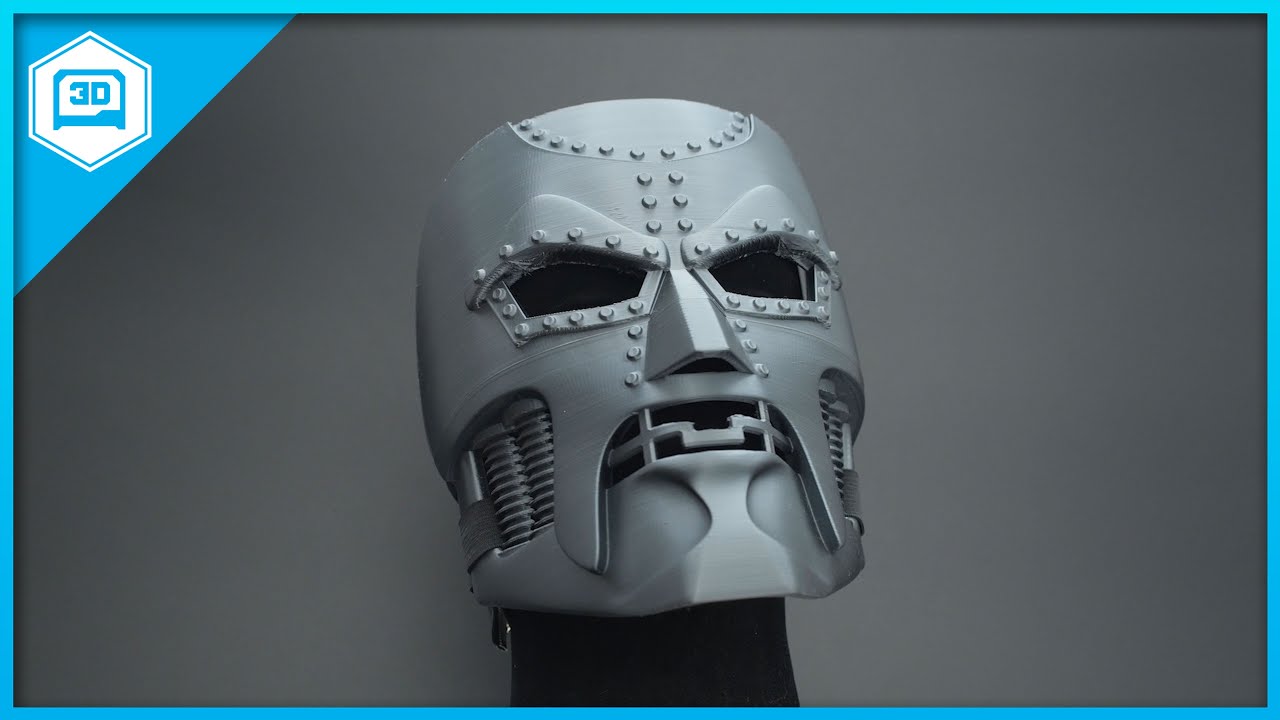
Doctor Doom Mask
4MULE8
https://www.thingiverse.com/thing:886812
CR10S Pro
Black Silk PLA
19hr 15mins
X:236 Y:189 Z:219mm
.2mm layer / .4mm nozzle
6% Infill / 6mm retract
235C / 60C
320g
90mm/s
Visit the Adafruit shop online - http://www.adafruit.com
-----------------------...
violet needleBOT
Adafruit Industries posted 3D Hangouts – MIDI Melodies, Matrix Parrots and Doom Helmet

Learn Guide
https://learn.adafruit.com/midi-melody-maker
YouTube Project Video -
https://youtu.be/lCqD803gtOQ
MIDI FeatherWing
https://www.adafruit.com/product/4740
Feather M4
https://www.adafruit.com/product/3857
Doubler FeatherWing
https://www.adafruit.com/product/...
violet needleBOT
Adafruit Industries posted MIDI Melody Maker #CircuitPython

Control synths with MIDI using CircuitPython!
Guide: https://learn.adafruit.com/midi-melody-maker
Use the MIDI FeatherWing and Feather M4 to power your musical projects using the classical 5-PIN DIN jacks. The 128x64 OLED with STEMMA QT makes it easy to add a screen with cus...
tight flower
Could somebody who has some experience with fusion 360 and 3d modeling please help me out on this design I'm doing?
I'm trying fill up this gap highlighted in green in the screenshot but don't know which tool to use or which face to extrude. basically I need to extrude that empty chamber but not the red air vent.
Here's a photo without the green fill on the empty chamber
If i just extrude the right inner wall, it goes through the red air vent body. I just want the extrude tool to exclude that body. Is there a way to do this?
karmic brook
I'm not entirely clear on which parts you want to fill and which parts you don't, but you might be able to extrude the bottom of the air vent.
tight flower
It extrudes through the air vent even if I extrude from the bottom, because the airvent bends outwards at the top. I tried using the combine tool to cut the air vent body out of the extrude but no luck
humble hull
does it have a boolean difference tool?
or can you build a solid by copying the surfaces of the vent and the chamber and capping the ends?
I don't use Fusion 360 but those are the approaches I'd take in the software I use
tight flower
I ended up extruding it through the air vent, drawing 2 profiles at ends of the airvent and loft-cutting them. It's not the most efficient way but it worked
karmic brook
Cool, I was curious what approach might work there
violet needleBOT
Adafruit Industries posted Fusion 360 Tutorial – Draft for Support Free 3D Prints

Visit the Adafruit shop online - http://www.adafruit.com
LIVE CHAT IS HERE! http://adafru.it/discord
Adafruit on Instagram: https://www.instagram.com/adafruit
Subscribe to Adafruit on YouTube: http://adafru.it/subscribe
New tutoria...
violet needleBOT
Adafruit Industries posted Demon Horn Skull with Hallowing eyes #adafruit #timelapse #3dprinting

Every week we'll 3D print designs from the community and showcase slicer settings, use cases and of course, Time-lapses!
Demon Horn Skull
Arkleseizure
https://www.thingiverse.com/thing:3150998
CR10S Pro
Black Silk PLA
18hr 25mins
X:234 Y:246 Z:93mm
.2mm layer / .4mm nozzle
6%...
violet needleBOT
Adafruit Industries posted QT Py Lego Mount #adafruit
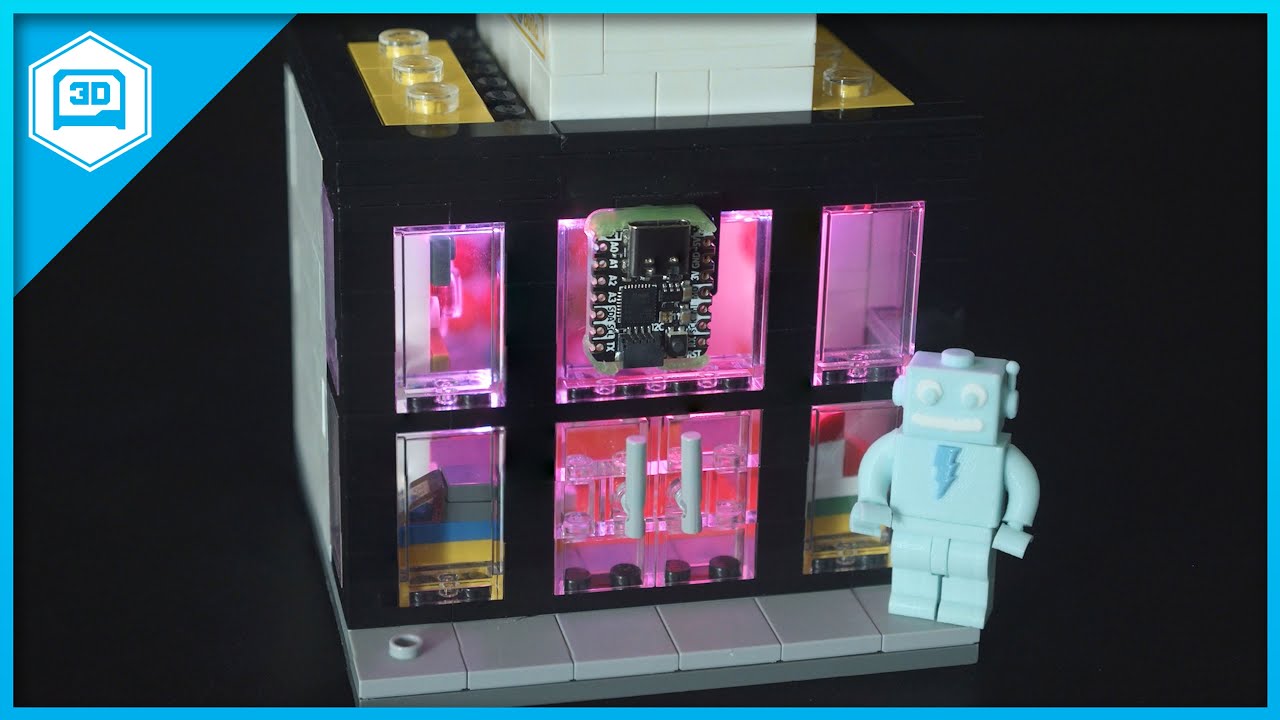
The QT Py is perfect for embedding into small spaces, like Lego buildings!
Guide: https://learn.adafruit.com/qt-py-lego
We used small PicoBlade 3 pin cables to wire our even smaller Ultra skinny Neopixel strips. These strip have a 4mm width, yet surprisingly flexible and can ...
violet needleBOT
Adafruit Industries posted 3D Hangouts – QTPy, Eyes and Skulls

Visit the Adafruit shop online - http://www.adafruit.com
LIVE CHAT IS HERE! http://adafru.it/discord
Adafruit on Instagram: https://www.instagram.com/adafruit
Subscribe to Adafruit on YouTube: http://adafru.it/subscribe
New tutoria...
 silent veldt
I'm going to start asking for help here again soon.
Because the Anycubic Photon I got on crazy sale finally appeared.
humble hull
mine just got here too!
iron remnant
One might say that the both of you have a solution in search of a problem.
empty sedge
"elephants foot" is because your first layer was too low @tight cove https://support.3dverkstan.se/article/23-a-visual-ultimaker-troubleshooting-guide#elephant
On this page you'll be able to visually try to match the problems you are having with your print and hopefully find enough information so that you can eliminate
empty sedge
does that line up with your solid top fill layers? Your extruder is probably putting out too much plastic causing it to buldge also out the side
 tight cove
i think so
empty sedge
or otherwise, it could be that your z axis didn't move enough on those layers
 smoky summit
Anyone use a viki2 lcd with marlin 2.0? Trying to get it working with a Re-ARM board. I can get it to display but it causes a kill command and I can't communicate it over USB when the LCD is enabled. When it's disabled printer works fine over USB.
empty sedge
my only viki 2 is dead
 finite verge
Anyone here use Atomic Filament PETG? I’ve been using it for years, but this latest spool of white PETG is wayyyy different than the other 5-6 spools of white I’ve been through. Can’t get it to print well at all. This batch is from around August/September 2020
empty sedge
I'm using gray atomic petg from maybe june and not having trouble. Does your new spool have any smell?
finite verge
Yeah, new spool smells, my other 20+ rolls of AF PETG across 12 different colors don’t smell
The raw filament is also not glossy anymore, more matte color.
Going to ping their support, but wanted to also ping the community to see if it’s widespread or just my bad luck
empty sedge
did you buy petg pro instead of petg? though neither should smell
finite verge
PETG Pro is what I always get, looks like.
empty sedge
yeah I got it wrong. they have another blend of some plastics with a higher printing temp but I'm not finding it right now
I think contacting their support is the right idea though
finite verge
You can see the difference in gloss, hot pink AF PETG in the back. No specular sheen on white at all
Also new stuff has different temp range listed, old stuff was 230-245, new is 235-245, though that could be just adjusted guidance
Anyway...thanks for the chat and data point 👍
empty sedge
petg shouldn't smell either. if it smells like burning plastic it's probably ABS
finite verge
Yeah it smells more like PLA, kind of that sickly sweet antifreeze smell
Not heavy but detectable. Never smelled anything with previous spools
empty sedge
petg shouldn't smell sweet either. maybe that's high temp PLA
finite verge
Could be
 unique pendant
Did you dry it? Atomic is my go to. I’ve had plenty of wet filament right out of the package from basically every brand. Less often from Atomic, but they’re not immune. @finite verge
I have noticed a faint sweet smell from Atomic and Snolabs PETG lately. Not from the extruder tho’ just pretty much from the spool. I wonder if they have to put a little of that corn-derived resin in the mix for some colors?
Anyone looking for a super precise 3d printer, Project R3D just introduced their latest printer at VERRF and are selling it $400 off regular price. https://www.projectr3d.com/shop/daedalus

PROJECT R3D (Copy)
I primarily use a RailCore2 300ZL which this printer used as its design starting point. The prints are superb. I’m in no way connected to the designers/company by the way. Just throwing this out there in case anyone is in need of an awesome printer like I was last year.
 tall flame
any suggestions on alternatives to Fusion 360 for Linux? I used to use Fusion but I can't get it to install anymore.
 knotty laurel
Not a ton of options on Linux... FreeCAD? I didn't think Fusion had ever worked on Linux, though...
tall flame
I vaguely remember running it under Wine
knotty laurel
Oh, Wine, gotcha...
karmic brook
I use OpenSCAD, but it's not the same thing. It's similar in that it's a parametric modeler, but you have to explain to it in code how to build the model from the parameters. For some people, that's fine, for others, it's not. I ended up using both Fusion and OpenSCAD, each where its particular mode of working fits my current project.
knotty laurel
I'd love to have something in the middle... like OpenSCAD but with a real-time interactive visualization engine, or like Fusion but with first-class editable scripting for the models it creates...
tall flame
I'm checking freeCad but seems likes it's going to take a while to go through the learning curve :/
I like the more visual approach of Fusion. I usually don't have a clear mental image when designing things so the visual, iterative approach works best for me.
It's a shame Autocad seems to actively prevent people from running it on VM/Linux
empty sedge
after using onshape, freecad seems like quite a hassle.
unique pendant
Yeah, I have a friend who's going all in with freecad right now after the F360 update. He says it's not so bad after going through these tutorials. https://www.youtube.com/playlist?list=PLxa9m2nC6N924jFUOYRECQUMm9xl4_jUI

YouTube
Learn how to use FreeCAD a remarkable program available on Windows, Mac, and Linux machines with tools for modeling 3d Prints, Architectural Drawings, and Me...
empty sedge
the restrictions on only having one "face" to a sketch, the lack of sketch trim tool (so I can turn a rectangle overlapping a circle into lines and arc), and the way that constraints are needlessly more complicated is just the stuff I ran into today
violet needleBOT
Adafruit Industries posted 3D Hangouts – Tombstones, Eyes and LEDs

This week we’ll take a look at the Matrix Tombstone halloween project. Demo of an updated 3D printed tombstone for HalloWing M4. This week’s timelapse Tuesday is an AirPods case in the shape of characters from the video game Among Us.
Learn Guide
https://learn.adafruit.com/t...
 crude kettle
 sullen zinc
On the compostability of PLA: https://www.youtube.com/watch?v=X_Gh-3PQhiE

2 years ago, I've burried and drowned a few 3D printed Benchies to see just how biodegradable PLA really is. It's actually much more complicated than you might think.
Special thank you to Stefan from CNC Kitchen for guest appearance! He'll also perform all the tests next year...
violet needleBOT
Adafruit Industries posted Among Us AirPod Case #adafruit

Every week we'll 3D print designs from the community and showcase slicer settings, use cases and of course, Time-lapses!
Among Us Airpod Case
modellerhouse
https://cults3d.com/en/3d-model/game/among-us-case-for-airpods
CR10S Pro
Red PLA
53hr 15mins
X:167 Y:180 Z:60mm
.2mm lay...
violet needleBOT
Adafruit Industries posted Fusion 360 Tutorial – Sketching with Constraints
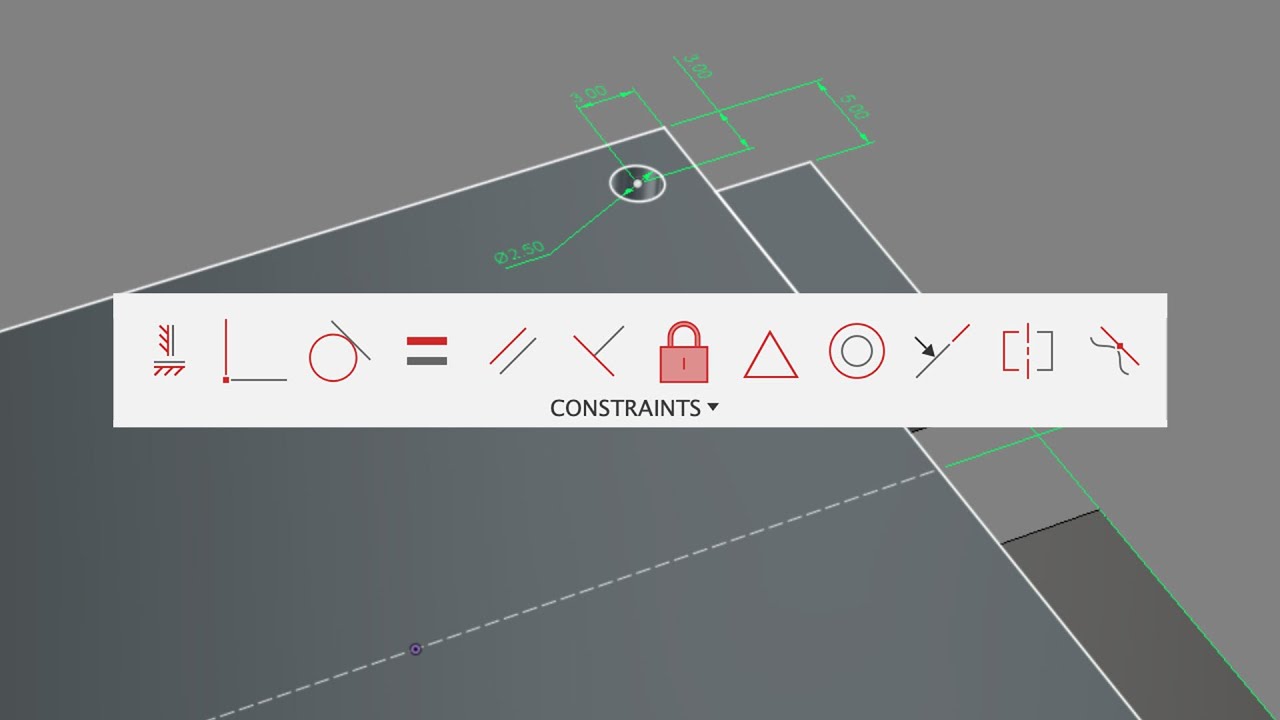
In this tutorial we'll take a look at some of the basics of using a 2-point rectangle. Using collinear, coincident and midpoint constraints to make sketches that are centered with the grid. These are the fundamentals of making parametric designs.
Layer by Layer CAD Tutorials ...
violet needleBOT
Adafruit Industries posted Tombstone Matrix Portal #adafruit #3dprinting

In this project we’re making a tombstone with Adafruit’s Matrix Portal! Guide: https://learn.adafruit.com/tombstone-matrix-portal
We upgraded this foam tombstone with an RGB matrix so we can display animated graphics.
The Matrix Portal is a plug-n-play dev board that makes ...
serene quest
when I'm loading filament into my Bowden, there is a huge amount of resistance when pushing it though the hotend, is this a bad sign?
I'm also have a ton of stringing issues
empty sedge
@serene quest https://www.youtube.com/watch?v=7tCxO17XZtw

Chuck shows you a simple hotend fix for your Creality Ender 3, CR-10 or just about any Creality Printer. He uses a technique created by Luke Hatfield to create a higher temp insert for the Hotend. But Chuck adds his own twist to the design to give you a higher temperature solu...
serene quest
just did that
it's better
I have an ultistik pei steel sheet and I'm getting really bad warping with pla at 60c and I just cleaned it with hot water and soap
it sticks really well in the middle but the edges peel up
every single thing I do seems to cause a different problem
its leveled
empty sedge
some heated beds are warmer in the center vs at the edges
but also you might try another brand of filament
serene quest
the whole part is in the center I was talking about the edges of the part
I'm using stronghero3d which is recommended by a lot of people and I've seen great results with it on the same bed I have at 205c and 60c, but at 205 I get layer separation so I have to raise to 210 and before 60 worked for me but now its lifting
violet needleBOT
Adafruit Industries posted 3D Hangouts – Glowing Faces, LEDs and Claws#adafruit
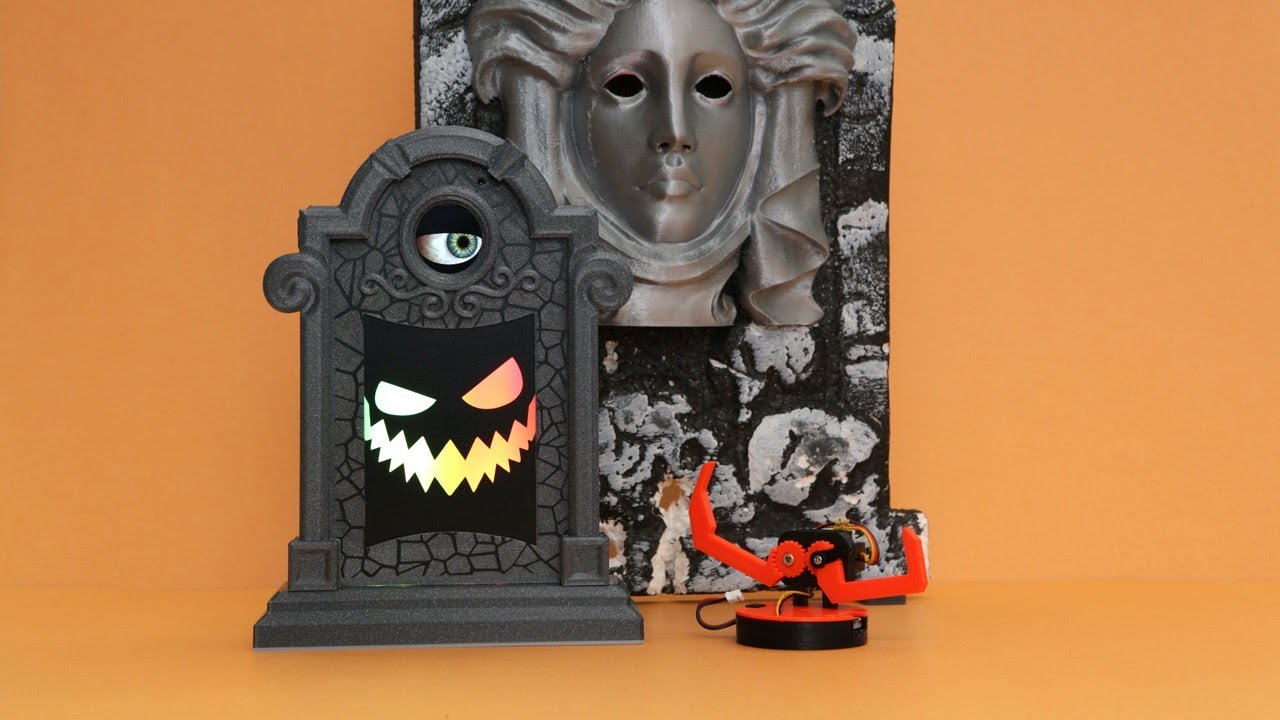
This week we take a look at the HalloWing M4 Tombstone. Discussions on getting good light diffusion from black LED acrylic. Demoes include easy plug-n-play neopixel strips and tips on applying vinyl to 3d prints. Prototype this week features a new claw mechanism for potential ...
empty sedge
I hope new z screws make my layers more consistent
or else I will rebuild the entire z axis to be more rigid
 inland sage
Anyone care to share slicing tips for printing something like this horn here in Semiflex/Flexfil 98A? I"m currently honing in on better settings but still having some blobbing and curling on the more hanging parts of it.
karmic brook
I might print it in two halves
violet needleBOT
Adafruit Industries posted Madame Leota #3DPrinting #Timelaspe #adafruit

Every week we'll 3D print designs from the community and showcase slicer settings, use cases and of course, Time-lapses!
Madame Leota
prototypes_and_pixie_dust
https://www.thingiverse.com/thing:3848250
CR10S Pro
Grey PLA
29hr 32mins
X:233 Y:180 Z:211mm
.2mm layer / .4mm nozzl...
violet needleBOT
Adafruit Industries posted HalloWing M4 Tombstone

Build a 3D printed light up tombstone with an animated eye! Use the HalloWing M4 and NeoPixels to make a backlit sign with a custom message or spooky face!
3D Hangout YouTube Link
https://youtu.be/GMeAWtW84No
Learn Guide
https://learn.adafruit.com/hallowing-tombstone/
Dow...
 livid tangle
Can someone tell me how I might clear up a constant issue. I have an e3d v6 hotend that keeps clogging. It's hard to get past the fiest layer without a clog. Any thoughts?
empty sedge
@livid tangle there's a few things it could be
- no fan on the heatsink, or broken fan
- some thermal connection between heater block and heatsink (like a big blob of plastic, or the heater block is assembled touching the heatsink)
- a gap between the nozzle and the heat break inside the heater block threads. the nozzle shouldn't bottom out on the heater block, there should be about a 0.5-1mm gap. it should bottom out on the threads inside so the heat break and nozzle seal against each other
livid tangle
@empty sedge thanks for this. I checked the PTFE, it was not flush to the heat break. I have noticed, too, that the heat block will turn ever so slightly. Is there a way to tighten it to the heatsink so it doesn’t move?
empty sedge
@livid tangle after assembling the nozzle/heat break and getting them finger tight when cold, you're supposed to heat up the block to the max temp and then tighten like 1 inch pound the nozzle again
if it's loose at the heatsink you should just need to thread that in more
if it's loose where the heatsink mounts in your printer, you can shim that interface with tape. I've used kapton tape for that but electrical tape works too
karmic brook
Note that the nozzle should abut the heatbreak within the heat block, it can take some fiddling to get the heatbreak to the right position for this to happen when the nozzle is tightened.
livid tangle
The nozzle is secure against the heatbreak with about a 1mm gap between nozzle and heat block. The heat break has about a 2mm gape between the heat block and heat sink. The heat sink will come loose where the heat break enters the heat sink. Do I need to tighten the heat sink while everything is hot?
empty sedge
no, the heatsink shouldn't get warm enough to need to be tightened again when hot
livid tangle
That's what I thought.
 brave mica
Howdy folks! I'm looking for a direct drive upgrade for my CR-10 V2 that won't break the bank since I may only need it for so long.
I finally got my Hemera installed and have discovered that it's...troublesome. It seemingly randomly starts skipping and not feeding filament. I think it's skipping steps but I'm unsure. If I look into the extruder section while it's happening, I can see the large gear moving back and forth in place, just a few mm. It's inconsistent; Sometimes I can squirt out filament at ludicrous speed, and others I can't.
So, I'm going to deal with E3D to get it fixed because I'm not alone in having similar issues. With that in mind I would really like to get my printer operational again ASAP so I can work on Halloween projects, so any advice would be helpful. I'm probably going to put the stock extruder/hot end on for now, but any help or suggestions would be appreciated
livid tangle
I am having thermal runaway on e1. What is e1 referencing? I am using Ramps 1.4, so I assume e1 is either related to the T0 or T1 connection. Or it's related to the D8, D9, or D10 connectors. D9 is my print cooling fan, I think D10 is my Bed and the extruder is on D8. I might have D8 and D10 mixed up right now since I can't look to verify at the moment,I know the connections are correct, though.
I did change the extruder thermister, the results are the same. Could the heater cartridge be messed up?
I plan to run a PID auto tune tonight. Is there anything else I can check. Oh and I did check the resistance in the old thermister, it seems to be fine as it reads at 100k ohms.
I wonder though, could I need to make am edit in the firmware to use the e3d hotend and thermister (upgrading from a stock anet a8 build.)
empty sedge
@livid tangle weird, you should be getting min temp error on E1 if you don't have a second hotend thermistor plugged in, not thermal runaway
@livid tangle if you have only one extruder your configuration.h #define extruders line should say 1
if you're really getting thermal runaway that means that it's trying to heat something, but the temp isn't going up
livid tangle
I just look in Octoprint, the error reference E0
And I noticed the graph for E0 dropped about 15 degrees pretty quickly.
So, I am wondering if E1 is incorrectly set in the configurations.h
empty sedge
so you could have no power (say your 12V supply shut off and your pi is powering the arduino), your cooling fan could be cooling the hotend too much, you tripped the PTC, the thermistor or heater fell out of the hotend
livid tangle
#define extruders is set to 1
empty sedge
ok, read what else I wrote above
livid tangle
I wonder if it's the cooling fan. I think the duct is blowing more on the heat block than around the nozzle.
what is the ptc?
Heater and thermistor are secure
empty sedge
it's the big rectangular orange things on the RAMPS that get hot
next to the power connectors
livid tangle
Oh the polyfuse?
livid tangle
ok.
empty sedge
I've never tripped one with a hotend before though, just with a heated bed
empty sedge
yeah, I needed a fan blowing on my ramps board on one printer for it to work reliably
my other printer with ramps doesn't have that problem
livid tangle
Yeah, I've read that it just depends.
Is there any way to be notified of the fuse tripping?
like can I wire an LED On = tripped off = all is good?
empty sedge
yes but it will be the other way around
livid tangle
ok
empty sedge
the two + inputs go through the polyfuse, then directly to the positive terminals. the 5A input at the corner of the board goes to D8+
the 11A one goes to both D9+ and D10+
so if you had an LED with the correct series resistor for your voltage between D8+ and your 0V
and another between D9+ and your 0V
and if either LED turns off when the power is on then you've tripped the polyfuse
or if stuff stops going and you touch the polyfuse and it's burning hot that's what happened
livid tangle
Both good to know, I will crunch the math for the resister and solder up a test LED. And, well, in the meantime I will test with fingers.
inland sage
I have this model sliced in simplify and for some reason it doesn't want to fill in. Those thin gaps are supposed to be solid and I can't seem to get them to fill in using Simplify slicr. It fills in fine for some reason on the Prusa Slicr and Cura, but simplify is making it open on the top and hollow between outer perimeters. Any thoughts?
empty sedge
@inland sage what version of s3d?
@inland sage on the advanced tab, under thin wall behavior set to "allow single extrusion walls" and "allow single extrusion fill"
inland sage
Ok I’ll try that👌🏽 thanks
livid tangle
Thank you for all the help. I checked thermistor connections and it looked like one to the bed was breaking off from the crimp. So I repaired that wire and did not have any thermal runaway errors. I successfully completed a print.
Thanks again for the advice.
 orchid fable
Hello .. I'm trying to figure out why the first layer is so bad .. is it a temperature issue or the bed level issue? I have done mesh bed-leveling multiple times 😕
empty sedge
looks like wanhao. what kind of plastic?
orchid fable
@empty sedge It is a Wanhao Duplicator i3 v2 😀 .. it's the overture black 1.75mm PLA
empty sedge
huh, I've had good results with overture petg
orchid fable
I've never tried petg .. want to get pla working reliably before trying other materials 🙂
empty sedge
what temp is your bed? what's your first layer height and print speed? I'm assumig you're on a 0.4 nozzle still
orchid fable
I kept the bed temp to 50C (I have an enclosure around the printer).. Nozzle temp at 205C..Primary Layer Height is 0.200mm with first layer height to 90% and speed at 25% (default printing speed 60.0mm/s)
these are settings from Simplify3D
empty sedge
weird
I tend to do thicker layers for first layer if possible (keeping it under 75% of nozzle diameter). So 0.3mm first layer even if normal layer height is 0.2
so 90% of normal layer height sounds like a recipie for pain especially when printing 0.1mm layers
15mm/sec is about right
50C hasn't been warm enough for PLA bed for me. I do 60 or 65. That's not your problem here
I also sometimes cheat by turning up the first layer extrusion width. like 2x or 2.5x if the extruder can keep up
I think 205c nozzle might be low for wanhao. Give 215C a try
also clean the print surface with isopropyl alcohol when cold. fingerprints will make your parts stick less
of those I think the nozzle temp will make the biggest difference. PLA beads should look glossy compared to the matte yours look
orchid fable
Thanks @empty sedge .. I've always kept the default first layer height .. didn't realize I should try higher value .. I'll up the temps on the nozzle and bed .. increasing the width might make it difficult to fit parts together so I will do that last
orchid fable
@empty sedge thank you so much for your recommendations. The bottom layer came out amazing and everything remained stuck on the bed 🙂
violet needleBOT
Adafruit Industries posted Fusion 360 Tutorial – Diffusion with Black LED Acrylic

In this tutorial I take a look at how I got nice light diffusion in my recent halloween project.
Tombstone Learn Guide
https://learn.adafruit.com/hallowing-tombstone
Black LED Acrylic from Adafruit
https://www.adafruit.com/product/4594
Black LED Acrylic from Tap plastics
ht...
 rough marlin
I dowloaded this app on my phone that let me scan my head and i wanted to print it but i'm new to fusion360 and i don't know how to make this a full head, how do i make this work?
also, a lot of videos on youtube are telling me to go to the mesh menu, but i dont seem to have one
undone nymph
hi, just in case one remembers me: I told ya, my printer was unable to hold the heat
I realized, that my heating was a 24V variant instead of a 12V one. That really explains, why it took ages to heat up and why it was unable to maintain the heat
I had about 13W instead of 40W
 ornate raven
Printing some PLA Wood Filament. Changed nozzle to 0.5 and upped temp on nozzle to 205 on Ender 3 Pro with glass bed. Top of a barrel printed quite well at 60mm/s. Printing the barrel now.
I was very encouraged with my nozzle. When I removed the 0.3 one there was no filament on the seating face. Previously when changing nozzles, the seating surface had some filament on it.
ornate raven
Well, that was a bust. three quarters through the barrel the nozzle clogged. I had left it going so well...
unique pendant
@rough marlin Meshmixer might be a better choice than Fusion360 for that application.
@ornate raven The smallest nozzle I've ever had success with for wood filament was 0.6 mm. Is there a particular reason you want to use wood filament? There might be a better material choice for your application.
ornate raven
@unique pendant I'm doing a whiskey barrel and the texture is perfect as well as the stainability. The screw on top went perfect. The barrel itself clogged about 65% complete. That's when I realized I hadn't changed the nozzle size in my cura settings. Since I plugged nozzle and bordon tube, I changed to a .6 nozzle and new tube. Next barrel went very well. Odd though that the lid went so well. Ah well, live and learn. Thanks for the feedback.
unique pendant
The fibers in the woodfill PLA are of variable size and sometimes a big one gets stuck. The first time I printed with it I had a 0.4 nozzle and it got all the way through an 8 hour print until 1/2 of the last layer when in finally clogged! 😄
rough marlin
thanks @unique pendant
 deft raven
Does anyone have a Gorilla Maker 3D printer that could help me get some settings working on it?
empty sedge
@deft raven I doubt it but I expect the settings would be pretty similar to a prusa i3
well, with a larger nozzle it looks like
deft raven
Well my issue is it only accepts one file system type for the flash drive and we lost the one that had the information on it so I can’t remember how the flash drive has to be formatted.
empty sedge
I don't see any usb drive on the youtube videos yet, but the one I see with a viki mini LCD uses a micro SD card that you'd format fat32
deft raven
@empty sedge I figured it out through trial and error. It has to be formatted as FAT and MBR
violet needleBOT
Adafruit Industries posted Layer by Layer – PMS Air Quality Sensors

Taking a look at the PMSA003i air quality sensor from Plantower.
Adafruit on GrabCAD
https://grabcad.com/noe.ruiz-1
Download PMSA003i on GrabCAD
https://grabcad.com/library/plantower-pmsa003i-1
Learn Guide: Adafruit PMSA003i Breakout
https://learn.adafruit.com/pmsa003i/over...
orchid fable
Hi, is it normal to apply a lot of force to take parts off a Buildtak like surface (I have the Overture build surface)? I had a PrintBrite surface before and that released part so easily. I just had to pick it up 🙂 It feels like have to apply a lot of force relatively speaking. No harm on the build surface, I'm just worried about messing up the bedleveling
empty sedge
@orchid fable yes. that's part of why builtak and others recommend you find the first layer height by starting too high because that also helps you get it stuck down reasonably well
I have a frosting spreader I use. Usually I can lift a corner then I slide it between the part and the print surface to try to un-stick a little at a time. Don't do this towards your other hand with a knife or putty scraper or you can slip and get some terrible cutts
orchid fable
@empty sedge Should I start the z height in Marlin firmware to a higher value and then tune it towards 0 as the first layer is printing?
empty sedge
I don't know what your firmware uses as a z offset
orchid fable
I've just flashed Marlin to my Wanhao i3 so still learning all the terminology there .. I'll experiment with that and see what happens
 acoustic spire
Silly question perhaps: are filament dust filters worth using? I just pondered this after cold pulling all sorts of yackage out of my nozzle
acoustic spire
Welp I have some issue to tackle... Currently using a somewhat suspicious all-metal hotend from eBay on an ender 3. It seems like it goofs up on longer prints. I've ordered some other parts to try switching it out later, but anything I should try for now? The nozzle isn't clogged, but it just jams up, haven't caught it in the act to tell if the extruder skips or grinds when it gets constipated
unique pendant
@acoustic spire Best filament cleaner ever. Binder clip with 100% cotton blue towel.
@acoustic spire re: your print above. Yeah, if it's not clogged, then it's not pushing the filament properly. I've learned that getting off-label printer parts (especially critical parts like extruders) just ends up being a waste of money in the long run, tho ymmv.
acoustic spire
Extruder is a really nice one, it's an improvement over the plastic stock ender3 extruder, I'm just suspicious of the hotend parts. I did order the stuff needed to restore the stock configuration
I bought the printer used and it had..... strangeness
unique pendant
Friends with Ender3's and others swear by the Micro Swiss upgrade. One of the best extruder/hotends made. https://tiny-machines-3d.myshopify.com/products/micro-swiss-direct-drive-extruder-for-creality-cr-10-ender-printers

Tiny Machines 3D
Micro Swiss Direct Drive Extruder is a drop in system for CR10 / Ender Printers No modification required, simple plug and play No printed brackets or sandwiches Features: Dual-drive train Hardened tool steel, CNC precision cut gears Adjustable filament grip Easy filament loadi...
acoustic spire
Ha I have those same clips lying around thanks to a Monoprice Mini Delta (hence the delta effector w/ e3d v6 mount I was trying to print...)
unique pendant
I found them in our junk drawer 😄
acoustic spire
Oh that looks nice! I have a direct kit on it now but it's an earlier take on it and uses the stock hotend
And that weird metal fan shroud
karmic brook
Heh, I also have the same clips, also for a Mini Delta
acoustic spire
That poor mini delta is a drool demon. Bad temperature regulation issues... I suspect it's something with the heat block or thermistor
I'm working on getting that up to where it's reliable
unique pendant
@acoustic spire can you post a pic of your current extruder/hotend? Maybe I'll have an idea... it does occasionally happen 😆
acoustic spire
I'll probably take it apart this evening, but it's one of these clones
No idea if the heat break is titanium but it certainly doesn't mesh with the sink like the Micro Swiss does
unique pendant
Do you have PTFE tube going down into your hotend?
If so, that has to be very precisely cut without any play or you can get erratic results that could look like what you got if bad enough.
acoustic spire
No. I know what you mean though-- if you get a gap in that setup it tends to get jammed up.
unique pendant
FYI, I use Micro Swiss pretty much exclusively for all my heat breaks. They have never given me any trouble (unlike stuff I've gotten on Amazon). Tho' I've been very interested in trying out the new Copperhead reprap heatbreak in my V6 machines. I didn't understand them at first, but you don't have to get all the Copperhead parts, you can just get the heatbreak (which is the best part) and drop it in your standard V6 as it is already.
Expensive tho'. But I haven't had to replace a Micro Swiss heatbreak after 1000s of printing hours, not once, so definitely worth it.
acoustic spire
Neat. Yeah, that should work fine on any e3d v6 block and heatsink from the looks of it.... though I like the looks of their heat block
I learned the hard way a couple years ago that the heat block makes a big difference lol

The stock heat block on the Malyan (200?) / Monoprice Select Mini v2 3d printer is a special sort of awful. Out of the box I had weird issues. PID autotune would fail with a “Temperature too …
unique pendant
It's copper. I've been using the V6 copper blocks and I really can't tell if it makes a difference during printing, but it does take longer to cool off so it's likely to be more stable in temp during printing. A lot heavier, that's for sure.
acoustic spire
Yeah. That should avoid the weird little ringing you get as it comes up to temp and stabilizes there too
Which really isn't a big deal as it's usually done ringing about as you're still priming the nozzle
What is that craziness on the Mosquito Magnum I wonder... Looks like their take on the Volcano hotend
unique pendant
Yeah, it's their take on the Volcano. Advantages of it, tho', are it's no bigger than the regular Mosquito (similar in length to V6, a little shorter) and you can do cold nozzle changes. I know several people with the Mosquito, and a few with the Magnums and they love them. I have a standard Mosquito, but I was one of the people who could never get PLA to work right in it. I just upgraded it with the second generation redesigned heatbreak and heatsink, but nowhere to put it right now. It's supposed to handle PLA as well as the higher temp stuff nicely.
One friend of mine has been using the liquid mosquito for several weeks now and he absolutely loves it.
All those Mosquitos, tho', are so crazy expensive. I really like my V6s so no real reason to go that way. If I was printing more exotic materials I might look more into it.
I guess that's why I'm interested in that Copperhead heatbreak for V6 😁
acoustic spire
Neat. Thanks :3
violet needleBOT
Adafruit Industries posted Batman Cowl #3dprinting #adafruit #timelapse

Every week we'll 3D print designs from the community and showcase slicer settings, use cases and of course, Time-lapses!
Batman Cowl
jack tim
https://www.thingiverse.com/thing:4614291
CR10S Pro
Black PLA
18hr 19mins
X:228 Y:253 Z:200mm
.2mm layer / .4mm nozzle
6% Infill / 6mm...
livid tangle
Thinking about getting or making a filament dryer. What are your thoughts and experiences?
karmic brook
Made one, seems to work fine
violet needleBOT
Adafruit Industries posted BLE Servo Claw #halloween #adafruit #3DPrinting
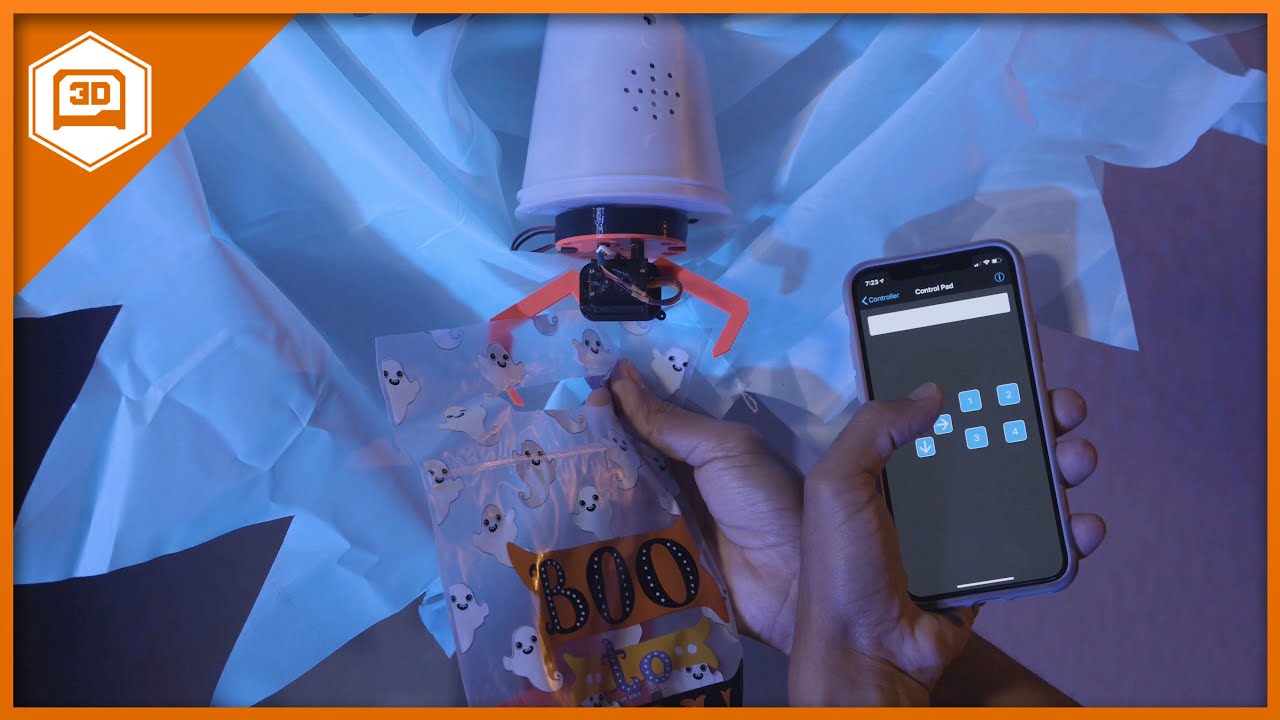
Guide: https://learn.adafruit.com/ble-claw
For social distant trick or treating, we thought we’d make a BLE controlled servo claw using the Circuit Playground Bluefruit.
LIVE CHAT IS HERE! http://adafru.it/discord
Adafruit on Instagr...
violet needleBOT
Adafruit Industries posted 3D Hangouts – Servo Claw, Air Sensing and MagSafe

YouTube Project Video
https://youtu.be/SwCxFk3fIb4
Learn Guide
https://learn.adafruit.com/ble-claw
Code on GitHub
https://github.com/adafruit/Adafruit_Learning_System_Guides/tree/master/BLE_Candy_Claw
Circuit Playground Bluefruit
https://www.adafruit.com/product/4333
...
ornate raven
Yep, built one.
 rancid canopy
hi all, i am trying to design a valve to auto regulate the outside air coming into my campervan based on the co2 level in my van. I am thinking of making a wedge style gate valve (or if anyone has any better ideas), and also not sure what motor to use, servo or stepper (it needs to be quiet since it will turn on and off while im sleeping) any suggestions?
karmic brook
Most actuators are somewhat noisy, and may be ineffective in still air. Perhaps a blower instead? The ones from CPAP machines are quiet, as they're designed to by used by sleeping people.
rancid canopy
a blower? not sure what you mean by that
karmic brook
A device for moving air.
rancid canopy
ohh, im just trying to make a valve
not move air 🙂
i have a fan assembly that will be doing the moving
sorry my initial description probably was a bit convoluted in that sense
karmic brook
I understood your original description, just didn't know a fan was already present. You may be able to accomplish your goal by modulating the fan instead of moving a valve/cover.
unique pendant

If you found this helpful, please consider supporting me on Patreon:
https://www.patreon.com/BillieRuben
Or buying something I've designed:
https://www.billieruben.info/shop
And if you have any questions, or you just want to hang out, you can find me here:
- Twitter: ht...
humble hull
oh neat
 serene dome
@rancid canopy What would win on cool factor is a version of a Tesla valve. You'd need an actuator similar to a butterfly valve to move a dimension though, assuming by valve you need one-way air flow.
https://www.youtube.com/watch?v=suIAo0EYwOE
Or better yet, a regulated fan placed at 90 degrees to the exit would produce a Bournuli effect and pull a varying amount of air. On the practical side, controlling a variable speed fan extractor would work the same.

Nikola Tesla had invented a very interesting one-way value. Let's understand the complete physics of this valve in this video.
Be our supporter or contributor: https://www.youtube.com/channel/UCqZQJ4600a9wIfMPbYc60OQ/join
instagram : https://www.instagram.com/sabinzmathew/
Tw...
rancid canopy
@serene dome thats pretty neat, like a fluid diode
serene dome
Yep. Yet like I say, if using circuits a variable speed fan extractor would be less moving parts and hassle.
https://www.thingiverse.com/thing:2668591

Was planning to experiment with this design on a valveless pulse jet design, the part has been sized to give similar inlet area to that of typical valveless pulsejet.
Diameter 55.43mm
531.86mm2 inlet area
protolabs priced it ~£1300 so have changed design to something that can ...
acoustic spire
Ok so apparently the result of a heat block sock falling off is... too hilarious to even be mad about it
humble hull
Oh? I once forgot to put the sock back on and nothing failed hilariously... I want to hear the story!
karmic brook
It can sometimes be worse if the sock stays on...
iron remnant
Either way, it can really sock to have it happen to you.
acoustic spire
Haha so I figured it out, the nozzle had gotten loose and plastic drooled into it from on top of the block
GLOOP
karmic brook
Ouch.
acoustic spire
Heehee. All happy now
brave mica
I'm just dropping in to say that after beating my face against Marlin for neigh on two aeons, I started looking into Klipper by way of the Voron folks and let me say, klipper does a lot of stuff right.
I'd highly recommend checking it out if you haven't. It's well documented, mainly via the docs dir on their github repo, well designed, easy to configure and reconfigure, and it comes with a free pony too
unique pendant
Combined 3D printing, magnets, and a submarine! https://www.kjmagnetics.com/blog.asp?p=red-october
K&J Magnetics - Incredibly strong neodymium magnets at affordable prices. Large variety of stock rare earth magnets available.
ornate raven
3D Cad on the Raspberry Pi 4, any suggestions?
empty sedge
onshape?
except you probably want free.I haven't tried solvespace or freeCAD on pi 4
violet needleBOT
Adafruit Industries posted Kobayashi Cube #adafruit #Timelapse #3dprinting
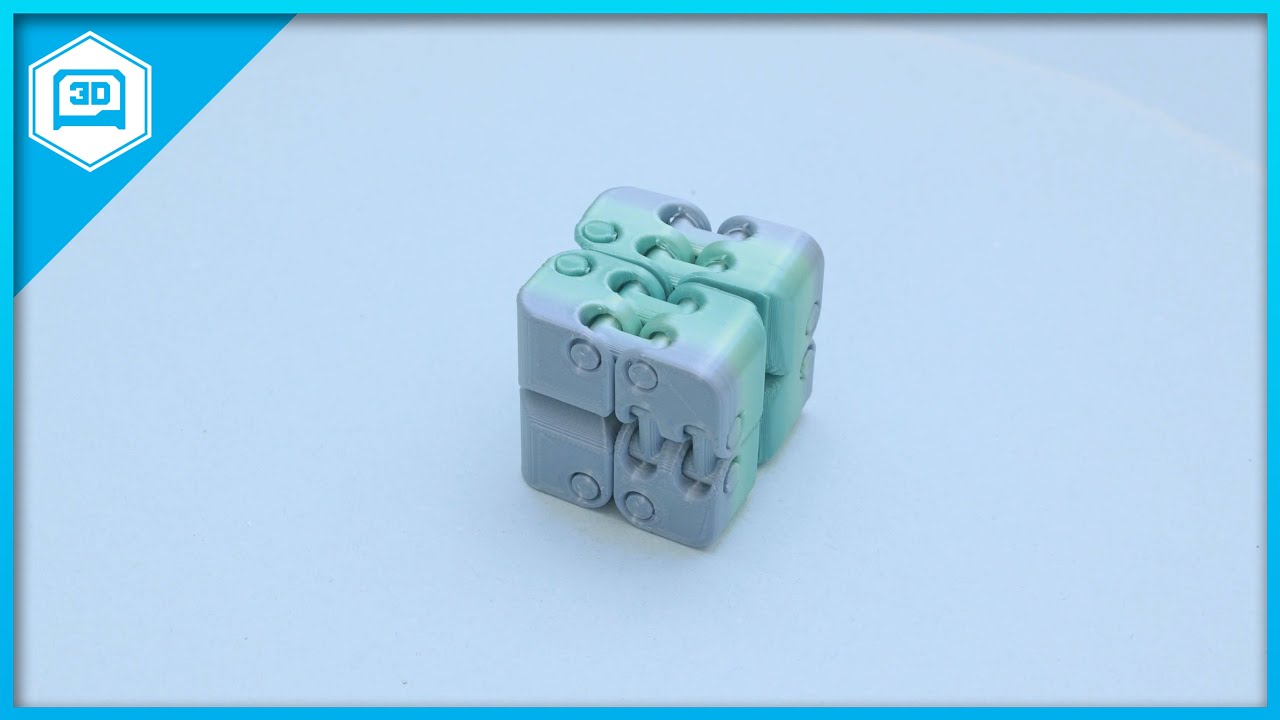
Every week we'll 3D print designs from the community and showcase slicer settings, use cases and of course, Time-lapses!
Kobayashi Fidget Cube
Ty Silva
https://www.thingiverse.com/thing:4555201
CR10S Pro
Rainbow PLA
2hr 30mins
X:160 Y:180 Z:19mm
.2mm layer / .4mm nozzle
6% In...
 pearl prairie
How do I figure out what screw size is appropriate for a module? The datasheet says the hole has a diam of 0.1, but I don't know what unit that is, or what that translates to in a 3d design for using with inserts
karmic brook
0.1mm sounds unlikely, so I'm guessing it's 0.1 inches. There are plenty of references (Machinery's Handbook and others) that give clearance hole sizes for various screws.
 sage flame
i have a problem that drive me crazy my printer extrude when i load filament but no mather what file i use or if the print has just start or is finishing no filament comme out
when printing
the motor use to move the filament move like in normal but weirdly the filament goes slowly in the opposite
direction
karmic brook
Hard to tell what's going on in that dizzying video. Almost looks like the axis and extruder motor leads are swapped.
sage flame
when i load the filament everything normal
sage flame
after 6hours of trying to repair it it rework with no reason
violet needleBOT
Adafruit Industries posted IOT Air Quality Monitor

Build a 3D printed enclosure for your IOT Air Quality Sensor. This project uses sensors to measure PM2.5 (particles that are 2.5 microns or smaller in diameter) dust concentrations, temperature and humidity.
This weatherproof enclosure is modeled after a silo-home. We've inc...
 dawn terrace
My Fusion360 trial has expired and right now I am thinking of alternatives to it.
My son is using Solidworks at school so i'd like him to practice also at home. Is it worth it to purchase a student license?
Are there any free alternatives?
empty sedge
@dawn terrace FreeCAD can do the same kind of things but really doesn't have the same polish
There's also Solvespace which I haven't tried
student solidworks is meant for non-commercial use
dawn terrace
I don't plan to use my 3d prints or cad drawings in any comercial way.... The only problem I have is that they don't allow the same license on multiple pcs. Like my pc and my son pc
Or at least we will have to go through the license transfer process form one pc to another whenever one of use wants to use it
unique pendant
Students can also get a Fusion360 educational license.
 lilac patio
@dawn terrace you could get the hobbyist license for free
 shy kelp
Hi
Which 3D printer should I get for better value? Creative Ender 3, V2 or Pro?
I plan to buy one of this and I would like to hear some advise
 lucid fiber
I have the pro
From what I've heard the differences are very little
The only reason I got the pro was because it was on sale at microcenter but I don't think theres a difference in quality
If it means anything I love this thing
shy kelp
I see
 torn salmon
I'd recommend the Ender3 base model to anyone.
There's tons of mods you can do to it.
And it's cheap. About $150.
It's also extendable with the Ender Extender kit (though you overpay for the kit; it's way cheaper to buy the aluminum extrusions and the z screw yourself)
My ender 3 setup is a base ender 3 with a micro swiss direct drive all metal hot end to do flexible filaments, and the other mod I have is the SKR mini with silent drivers.
violet needleBOT
Adafruit Industries posted Layer by Layer – Arrange Woodworking Projects

In this tutorial we'll take a look at using multiple sketches and the Arrange feature to sort out pieces for a woodworking project.
Download my Fireplace
https://a360.co/35bFPb5
3D Printing Projects Playlist:
https://www.youtube.com/playlist?list=PLjF7R1fz_OOWD2dJNRIN46uhMCW...
unique pendant
@shy kelp Depends on what you mean by value. Can you define what you’re looking for in terms of how large you want to print and how high you want your print quality to be?
Oh wait, I just saw you’ve already narrowed it down. nvm.
empty sedge
I'm going to continue saying the prusa i3 mk3s is a reliable workhorse. auto bed leveling and spring steel sheet are seriously life changing
I have two at my hackerspace and if we were running stock creality machines I'd have to fix the print surface or nozzle every week in ways I don't have to with the prusa
shy kelp
@shy kelp Depends on what you mean by value. Can you define what you’re looking for in terms of how large you want to print and how high you want your print quality to be?
@unique pendant I am looking reliable and upgradeable printer without spending too much.
This is the one that I plan to buy. After doing some research, I think Ender 3 fit my requirement
What about this brand, is this 3D printer reliable?
 plucky depot
@shy kelp I have the Ender 3 and it is amazing!
Amazing value, easily upgradable and the quality of the prints for the price of the printer is great
shy kelp
I see
 austere temple
does anyone know where and how I can hire a designer to design a 3d print for a project of mine?
unique pendant
Well @shy kelp, reliable, then, is the key. In my experience, based on 3 Enders, one Prusa, one Raptor, one Xinkebot, and two RailCores, Enders are at the bottom of reliability, and Railcores are at the top. Prusas are near, though, and for the money, are a great value. Railcores have the best prints than any of them, but Prusa is not far behind, and the Prusa is great to learn on as well. Enders are great to start on, but if you’re like most, you’ll soon be wanting upgrades to the point where you should have just bought a Prusa in the first place. Up to you, though, it’s more of how you want to spread spending over time.
shy kelp
I see
Thanks for your advice
I will take note and make better decision
What about cloned Prusa i3?
Should I buy it or avoid it?
knotty laurel
@austere temple I used Upwork to find a freelancer for that sort of job, and had pretty good results. There's also Fiverr on the less-professional end.
unique pendant
@shy kelp There are pluses and minuses. 3D printing is not that different than other industries in that the saying "you get what you pay for" applies. That being said, if your goal is to learn how 3D printers work, and you have the time to take things apart and fix them, a clone will suffice. However, you will end up replacing failed parts and will eventually spend about as much or more than the genuine article costs. You will also learn that it's just not worth replacing the same parts over and over again with cloned parts. It took me about 2 years of futzing around with clones until I swore them off completely. But I may be a special case... I'd rather be printing than repairing, adjusting, and tuning, so there's that. I enjoy a good capable 3D printer that will do it what I tell it when I tell it. But I also enjoy taking clones apart and fixing/upgrading them. Maybe it would be ideal to get the genuine Prusa AND a clone for the most fun! 😂
karmic brook
What hotends do you have in the Railcores? E3D, Mosquito, or something else?
austere temple
@knotty laurel thanks mate
unique pendant
@karmic brook I have E3D V6's on my RailCores, but I have a Mosquito waiting for the RailCore Mini when the kit comes out.
empty sedge
@shy kelp I think you're better off with a creality than a prusa clone. If you have any questions about the creality someone will have answered them already, where with a prusa clone you're more on your own
unique pendant
That's a great point ^^^
karmic brook
Thanks for the info!
empty sedge
also prusa i3 clones have a huge variety. the super cheap ones are garbage
elder oxide
Creality is a great entry machine
And honestly, I like them better than prusa
and much more so than Fusion printers
makerbots are okay
shy kelp
Can anyone confirm this is a room temp related fail?
the layers that seem shifted were printed over night
(2 day print)
it was half way done when this happened
unique pendant
kind of out of focus. can you be specific about what the fail is?
unique pendant
Are they actually shifted? I actually haven't seen a fail like that before. 🤷♂️
shy kelp
on the other side it appears they aren't shifted
its sooo weird
oh wait the support is covering it
yeah its just shifted somehow
maybe something is slipping??
lots of odd spaggehti and gloobs
unique pendant
Possibly. Check all your nuts/bolts and tighten them. Also possible the nozzle could have caught on a glob and caused the shifts.
They look like gradual shifts tho', which is the weird part. Usually a shift will happen all at once.
Was it stuck to the build plate OK?
shy kelp
yeah i had it at 75 C and it was real stuck on there even after i turned it off
unique pendant
You don't happen to have a cat that likes to lay down close to the printer do you?
empty sedge
I think it's not an XY problem because they wouldn't stay as aligned if it was losing steps in x or y
shy kelp
it was kinda chilly in there so thats what lead me to think it was temp related
then its gotta be my Z axis right?
unique pendant
More likely a pulley (loose set screw) problem than a belt problem, but could be loose belts.
empty sedge
it could be the Z axis binding, the spool pulling up on the extruder then jumping, or something temperature related if your bed moves that much as the temperature fluctuates
shy kelp
yeah that sounds like the cause tbh
empty sedge
if it's bed temp related then I'd expect to see big like 5-10C swings because only 1C shouldn't move things that much
shy kelp
its weird cause the base of the print showed no signs of fluctuation
it was on there solid
so thats why i thought it may have been the extruder
the gloobs and spagehti the Z axis slipping possibility more possible i think
unique pendant
What's the material?
unique pendant
That's far enough away from the bed that it will be near room temp. 75 is really too hot for PLA.
(bed temp)
shy kelp
so 60 would be fine then?
unique pendant
Yeah, 60 is good. You're only trying to get it to stick. Bed temps should be near the glass transition temperature for your material. Tho' PLA can stick to room temp beds, I've never tried it 🐔
I doubt the bed temp was the problem with your fail tho'.
unique pendant
Usually the cold ambient temp fail is lifting off the bed.🤷♂️
shy kelp
ah ok
whats also interesting is that i noticed the same layers seemed to have failed on another print i did a few days ago
so its definetly gotta be the Z axis
thanks all for helping me troubleshoot
unique pendant
Sure. Looks like there's a lot of youtubes on how to fix Z-axis binding on the Ender3. That's some seriously big artifact for Z-axis binding alone tho.
unique pendant
@shy kelp if you are in the USA, Tiny Machines assembles all their Enders and makes sure they’re working correctly before sending to you. No extra charge.
violet needleBOT
Adafruit Industries posted Flexible iPhone 12 Pro Max Case #3DPrinting #Timelapse #adafruit
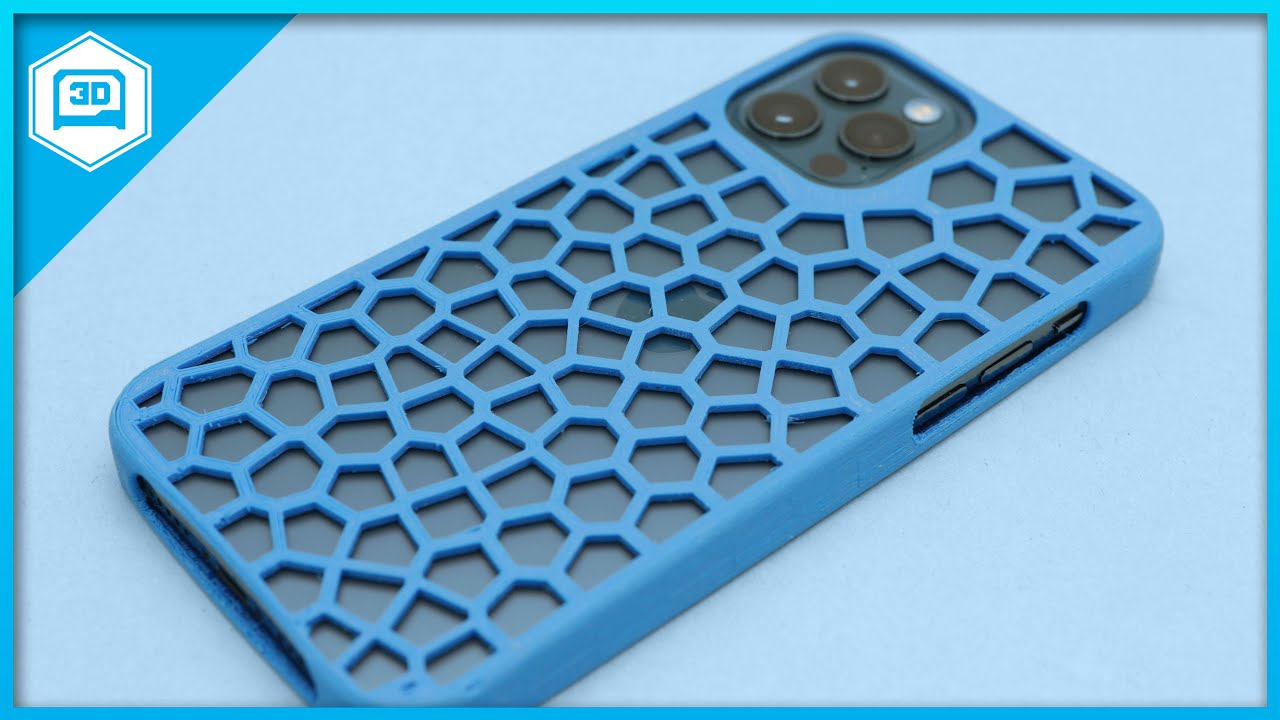
Every week we'll 3D print designs from the community and showcase slicer settings, use cases and of course, Time-lapses!
iPhone 12 Case
Pedro Ruiz
https://www.thingiverse.com/thing:4648523
CR10S Pro
Rainbow PLA
1hr 45mins
X:215 Y:180 Z:10mm
.2mm layer / .4mm nozzle
10% Infill...
 shadow dagger
That's a theft prevention feature, not a bug
no one will steal it because they will be too grossed out
THAT is a bug
shy kelp
@unique pendant Sure, I will take note with your advise. Thank you
unique pendant
If that's a first layer, your extruding too much and you're not close enough to the bed.
empty sedge
@signal finch I can’t tell. Usually I look at the bottom. When you’re too low the lines on the bottom will alternate in width being wide/narrow/wide/narrow or too far and they’re all wide. When they’re all the same width but touching everywhere you are there
From the photo that looks too low to me but it’s hard to tell
unique pendant
So, edges not sticking = not close enough. But, extrusion lines are touching, therefore extruding too much. This assumes you properly cleaned your PEI. So, there’s many factors here. Maybe share your settings?
empty sedge
I'm not sure that's the case. I found that the corners can curl during that test when my nozzle is too low. Unfortunately I can't test easily today to be sure
empty sedge
still looks too low to me
empty sedge
@signal finch check out the image below "have a look at the nozzle"
https://help.prusa3d.com/en/article/first-layer-calibration_112364

Prusa Knowledgebase
All information you need to know about Original Prusa 3D printers. Assembly manuals, print quality troubleshooting, calibration, PrusaSlicer and much more.
 signal finch
Maybe I didn't install the nozzle correctly
empty sedge
@signal finch why do you think that?
violet needleBOT
Adafruit Industries posted Raspberry Pi Machine Learning Camera #adafruit #3DPrinting #RaspberryPi

https://learn.adafruit.com/braincraft-camera-case
Adafruit BrainCraft has everything you need to get started with machine learning on the RaspberryPi. TensorFlow Lite Object Recognition + 3D Printed enclosure keep everything together so you can take your machine learning pro...
empty sedge
@signal finch I'm trying that on my printer now, but with petg. It has taken me a while because I don't have a proper prusa machine that can use the stock firmware at home
Here's my current z calibration about right, as viewed from the bottom with macro lens
this one is 0.050mm lower and the beads are so squished together you can't see them. It's still not sticking probably because my petg is wet
this is 100 microns lower than the first picture and the buckling is even worse. you can't see the individual beads either
perfect! This is 0.025mm higher (less negative offset) than the first photo. again this is a photo of the bottom of the first layer calibration
good luck @signal finch you're pretty close
signal finch
I know. I had the printer working previously but I think the nozzle is in the wrong spot - or there's a flow issue. It's hard to tell.
My room is extremely cold so that might be the issue too
Not using a fan for most of my petg
I got my aqi sensor working tonight instead of doing more on this.
unique pendant
@signal finch have you calibrated your e-steps?
unique pendant
This morning’s first layer. Try to get something like this. Good squish, lines together, no blobs. I’ve never heard of looking at the underside to determine correct squish. Does that work better?
If you look at the far left of the image, you'll see there's a little too much squish. The edges of the lines curl up just a little. I babystepped the nozzle up by 0.02 mm and then it was about right. Still maybe just a little too much squish, but OK.
violet needleBOT
Adafruit Industries posted 3D Hangouts – Air Quality, BrainCraft and iPhone12 Cases

IOT Air Quality Monitor
https://youtu.be/6KpKyPQaUaE
BrainCraft HAT case
https://youtu.be/zNfgfn1_dyA
IOT Air Quality Monitor Learn Guide
https://learn.adafruit.com/air-quality-sensor-silo-house
BrainCraft HAT Case Learn Guide
https://learn.adafruit.com/braincraft-camera...
signal finch
No I haven't , XYZ
Belt test was off a bit
Just did another layer calibration
What a mess.. ambient temp is 10 c
Just took off the nozzle to clean
I probably have the nozzle touching the heating block
I3 mk3s fwiw
empty sedge
having the nozzle bottom out on the heater block can leave a gap between the heat break and nozzle which would cause retraction trouble and if your block can wiggle than it might cause more issues. the prusa and e3d build instructions suggest about 1mm between nozzle hex and heater block, then once assembled heat up to 280C and tighten it again, but don't torque down on it too hard. I think they say something like 3 inch pounds
but you should be able to clean the PEI with isopropyl alcohol when cold and get the first layer test to print well
that said, I haven't tried petg when in a 50f room
on the first layer it shouldn't matter: the whole bed will be the same temp
unique pendant
^^^ agreed. Here's one of my favorite tutorials on nozzle/heatbreak relationship -- Step 5 shows it well. https://e3d-online.dozuki.com/Guide/V6+Assembly/6
 sullen zinc
Hi all. Recent mk3s acquisition. What improvements should I print? Already have or working on: octoprint/pi mount, camera mount, lower profile spool holder. seems like a filament guide would not be a bad addition. Looking at this one: https://www.thingiverse.com/thing:3512031

A filament guide made to be used with a tube that goes to the extruder of the Prusa. This will avoid pulling directly to the spool moving the stress from the extruder to the frame.
For optimal result, the tube must go through the hole. A spot of superglu will then keep it in p...
empty sedge
that's probably ok for a filament guide
I have a ps3 eyetoy mounted to the x motor. I should probably put that on thingiverse
i3 mk3s spool holder, guide, camera mount
sullen zinc
IPA in the nalgene, or what?
empty sedge
no, just water in that one. that was printing face shields at home
I moved the spool to the side so it's in frame for the top down camera we have so hackerspace members can see the remaining filament
probably easier to just take the current picture from there
sullen zinc
oh nice idea
 balmy cradle
Hi! Does anyone know the name of this style of enclosure?
I can’t find it on any of the box generator websites
blazing barn
I should be getting my i3 MK3S kit this week.
empty sedge
@balmy cradle looks laser cut, slot and tab. It wouldn't take very long to draw up yourself
balmy cradle
@empty sedge thanks so much! Seems like there’s infinite resources for t-slot, flat and fingered but nothing for this slot and tab! Maybe I’ll have better luck now that I have the actual term to search for 🙂
balmy cradle
Hrmm still not finding any matches - anyone know of a good tutorial for designing one of these enclosures?
empty sedge
@balmy cradle https://www.instructables.com/How-to-Build-your-Everything-Really-Really-Fast/#step2
also https://fab.cba.mit.edu/content/tools/omax_waterjet/tnuts.html

Instructables
How to Build Your Everything Really Really Fast: A few years ago, I wrote a short document on methods for rapidly fabricating elements of mechanical systems entitled How to Build Your Robot Really Really Fast. It was catered towards students in MIT's 2.007 introductory design ...
here's a 3d printer I designed with lasercut t-nut slots and tabs https://cad.onshape.com/documents/41c3b12e742c4d2f9961aa9b/w/31453eda78b442e38c3c81aa/e/978accfb881f477f9a1b51fc
Login / Signin to Onshape - the modern CAD system used by thousands of companies worldwide.
because the tabs are modeled the same size as the slots the only clearance comes from the laser kerf
balmy cradle
Thanks so much!! Really appreciate that
 real gyro
Having some problems with warping on a PLA print and need a little help. I'm fairly new to 3D printing and have an Ender 5 Pro, pretty much stock. I do have a TH3D EZFlex Textured plate on it. I do have my printer working pretty well and fairly well dialed in (used Teaching Techs Calibration github site (https://teachingtechyt.github.io/calibration.html) & video on YouTube).
I'm working on a project using an Adafruit RGB Matrix Display 4mm (with an Adafruit Matrix Portal M4) and found these mounts on Thingiverse (https://www.thingiverse.com/thing:4462509) that were posted by Adafruit and part of a Fruit Slot Machine. I grabbed the left & right foot holders and modified the STL files in TinkerCAD to add some parts that I needed for my project.
I'm using CURA 4.6.2 and have been using Yousu PLA+ filament from Amazon and it's been printing pretty well at 210C with the bed at 60C. This model is long & narrow, so I figured I was going to have some issues. My first print warped pretty badly (#1-3). I researched warping with PLA and saw that slowing printing speed, reducing printing temp, and printing with a brim can help. So I went from 80 mm/s to 60 mm/s, dropped to 205C and added a brim. Second run was a bit better but still got had some warping.
What else can I try?
lilac patio
@real gyro your part fan should be off for the first couple layers and make sure there's no drafts on the print
empty sedge
@real gyro you can also try different bed temperatures. I've found for some PLA spools I need to bump to 65C from my normal of 60.
but yes, brim or raft also help a lot. brim will print faster and looks like it'd be easier to clean off that part
 serene fractal
@real gyro If your Ender 5 pro is like my Ender 5 plus, the "energy saving" mode is on by default. Turn that off. It turns off the bed heater too soon. Also, use a Brim or a Raft under build plate adhesion.
real gyro
Part fan is off for first 3 layers.
 low cairn
@real gyro can also try a skirt instead of brim. Not too much more waste, but it helped me quite a bit. Of course, the first step I would take would be bed leveling. I don't know about the ender 5, but the ender 3 has a common problem with warped beds. If that is the case, you can't really level it ever. Mesh bed leveling would be the next step here if you do have a warped bed. But, try everything else first. I got too excited when I got mine and upgraded a lot at once then could not get it to print and there were so many variables to eliminate. Take it slow!
unique pendant
If none of that works, try vision miner nano adhesive. It’s expensive, but just works. I use a foam brush to spread it on the build plate.
ornate raven
@real gyro I have similar issues, 60 print speed is probably too fast. That's as fast as I have ever printed anything but I find 40 - 50 works best. MY rule of thumb - larger the surface area lower the speed.
sullen zinc
prusa i3 mk3s, prusament pla, using recommended temperatures and cooling. I'm getting layer separation like this. Ambient is about 19-20C. On my prior printer I was not used to seeing printing problems like this except in ABS.... any advice?
my (limited) ABS experience makes me think it's TOO MUCH cooling (fan speed is 100% in prusaslicer for prusament pla) but I haven't had this with PLA before. But usually I'm more like 25°C ambient PLUS my old printer had an enclosed build volume so it was probably more like 28-30 in there.
mmm layer height is .3mm which is pretty aggressive, some website suggests it can cause this problem too
empty sedge
.3mm layers are fine. I haven't seen that happen with PLA before
unique pendant
You can increase the temperature. It seems there's no shine to the print, suggesting your temp is too low. Just because you tell it to heat up to 220 C, doesn't mean it actually does. You may need to PID tune if the temperatures seem way off.
sullen zinc
nozzle temperature +10 degrees didn't cure the problem but the next print (same part) came out somewhat better, 2 smaller delaminated areas instead of 4+ larger ones. Still no shine/gloss on this prusament pla at 225°C, finish is indistinguishable from 215°C.
lilac patio
My personal experience with Prusament is that you have to print it hotter then other PLA but 225C should be fine
unique pendant
Delamination can also be caused by too much cooling fan. However, given that you're still not shiny at 225 I'm a little suspicious that you need to do another PID tune. PLA should be pretty shiny at 225.
karmic brook
PID won't help if the thermistor calibration is off
unique pendant
True, there are many variables. @sullen zinc Did you replace your heater or thermistor with one different from the stock model? If so, you may need to load the correct values in your firmware.
sullen zinc
No, this is a new prusa mk3s preassembled, stock everything
unique pendant
And what did you say the temp was in the room where it is?
Still, It's weird that the PLA isn't shiny.
sullen zinc
about 19°C according to various thermometers
so not insanely cold but a bit cooler than what I find comfortable
unique pendant
That should be OK. The S3D troubleshooting guide only suggests 2 solutions: https://www.simplify3d.com/support/print-quality-troubleshooting/layer-separation-and-splitting/
Either layer height is too high or the extruder temperature is too low.
sullen zinc
Printed this (random brand petg) and happy with the result 🙂
I also printed one more of the trouble print in the same PLA but reduced fan to 60% and increased temperature another 5°C and changed the orientation (so at least 3 things different 🤬 great for narrowing down a problem) ... and no splits.
prusaslicer seemed to use 250C for PETG which seems high to me (compared to my previous printer) but what do I know 🙉
(and I really appreciate all the helpful remarks here; sometimes I start with a chat instead of a search because it feels like the sheer volume of contradictory info is too big to navigate .. and also I'm just lazy)
karmic brook
Sometimes you'll get contradictory info in a chat too, but have the opportunity to ask why
shy kelp
Is there any guide website about type of filament besides all3dp in specific way?
unique pendant

MatterHackers
Filament Comparison Guide: Everything you need to know about 3D printing materials from the professionals at MatterHackers.
shy kelp
Ok. Thanks
 turbid falcon
I’m new to 3D printing I just got a Creality CR10 V3 and was just wondering why sometimes I hear a pop in the extruded like maybe an air pocket in the filament?
karmic brook
Could be the filament has absorbed water and it's boiling, or it could be the extruder skipping
 fading viper
are there any existing 3D files for some bracket pieces that can be used two connect 2 of the 64x32 RGB matrices together to make a double sized one?
 dull gulch
@real gyro I saw your posting above about first layer adhesion/warping issues printing PLA on a textured PEI build plate. I had similar issues after finally getting a textured build plate for my Prusa Mk3. Reading the Prusa forums, I found others having similar issues. A Prusa employee pointed out that the textured plate does really well for filaments like PETG and flex, but he recommended smooth PEI for PLA filament. I've followed that advice and have had much better luck with PLA adhesion. Others in the Prusa forums say that PLA sticks fine on their textured plates, the plate just needs to be cleaned well. They suggest Dawn dish soap and water for cleaning. Also, making sure your Z (first layer) calibration is good helps.
empty sedge
yes PLA sticks better to the "smooth" PEI than textured
signal finch
hello - i am soliciting feedback from others on the print quality of my benchy. i am vision impared, so it can be tricky for me to tell sometimes
Using petg on i3 mk3s
empty sedge
@signal finch do you have a filament dryer?
signal finch
yessir
used on the filament during printing at 50
in addition to drying it the night before
empty sedge
weird, that's not the results I would expect. it's not as bad as some wet petg I've received that bubbled but still the outer perimiters should be more consistent than that
signal finch
i've been having problems, not sure what the issue has been. before this print it was too much sticking to the nozzle. i can do a 1st layer if you want to see that
empty sedge
your first layer wouldn't tell me much
signal finch
temp towers?
i've been having problems for a while and trying to figure out what to do
XYZ calibration, temp calibration
empty sedge
it's probably not a software or slicer change
do you have another spool to try?
otherwise: check for binding in the axes, check your belt tension (belts should remain flat, but make a low note when plucked), see if the hotend is mounted rigidly or if it can wiggle
starts printing benchy with 0.2mm quality PETG preset
also check that the smooth rods don't wiggle in their mounts and their mounts don't move
signal finch
Thank you I'll try to go over those
signal finch
I tightened stuff, should I do xyz calibration again?
Trying with a sock on the hotend
empty sedge
it shouldn't change anything if you do the xyz calibration again
I've found a hotend sock causes the fan duct to melt
signal finch
the sock didn't help, it came off mid run
i'm trying to do a small print now, and then will try with another material
i think the x axis is too tight, it's making a noise going left to right
empty sedge
you should be getting results at least this good
unique pendant
@signal finch I agree with @empty sedge totally. That benchy you posted is classic for wet filament (put it in a filament dryer for a good 12 hours), and on top of that, you have a cooling issue (e.g. your nozzle temp is too high and/or your cooling is inadequate). Look how shiny and droopy the lines are, which is a dead giveaway for that.
signal finch
Hrm. I had it in a dryer for 12 hours. I'll try another today
Thank you for the feedback
unique pendant
Well, just because it's classic, doesn't mean that's actually the problem. Check on those temps and cooling fan then.
Good luck and keep us updated! 😉
 drowsy hawk
currently building a heater mod for my elegoo mars pro with the help from someone on here, if i can get it perfected ill probably make more and sale some
it will have almost no EMI
and wont interfere with motor/print
drowsy hawk
here is the board
it will have heating coils going across at the top
and a fan attached to it
the whole thing fits inside a mint can
and runs off a 5v phone charger
it will be connected to a feather board, that you can program and tell it to stay at a certain temp
and its connected to a thermistor
also almost no EMI will be emitted
everything is grounded really well and the can helps too
thanks @magic bone for helping me with this project
🙂
 magic bone
You're welcome. To clarify "almost no emi" its just in a metal case (Adafruit Gum container) and the switching power is a lot less compared to the other setup I was shown. Will be curious to hear how well it works
I can also see a few more issues we need to iron out
inland sage
Printing these funny t-rex chicken arms. Curious How I might be able to get this overhanging portion to interact with the support material in a way that would end with a smoother finish. Printing in PLA. I'm thinking there could be more contact between the support & the object. I was looking at this XY separation %. Wondering if More (50%) or less (25%) might give me more contact between the two?
signal finch
unique pendant
<@!271150672253157376> I agree with <@!459925076200914976> totally. That benchy ...
Was using a 0.8 mm nozzle with 0.4 settings 🤦♂️
turbid falcon
I just got my first 3D printer can someone take a look at my test print? Seems good to me but maybe could be better with a better eye
drowsy hawk
more on the printer heat mod
the blue print for the casing
made a cavity under the heat part to keep plastic away from the hot tin can, and we can even add some kind of insulation , maybe thermal paste or etc inside the cavity
drowsy hawk
sorry if im posting in wrong channel
karmic brook
Not the wrong channel, heater mods are relevant here
lilac patio
turbid falcon
looks like a pretty standard z-seam
drowsy hawk
thanks
re consideing having/making the printed casing cover the whole tin can
not sure tho
magic bone
@drowsy hawk I think I might test it first 😉 melted plastic all over the place isnt very fun
drowsy hawk
Good idea lol
 cloud halo
Question for the upcoming holiday shopping season -- any expected sales on good quality 1.75mm PLA? I'm getting into 3D printing more, and I've just about exhausted the spools I've gotten so far.
empty sedge
turbid falcon
The "tree ring" pattern on the side?
turbid falcon
I’m not sure. It’s the line going up the side of the hull about 3/4 of the way
empty sedge
that line is the seam where the outer perimiter starts or ends. in prusa slicer the seam can be random, nearest (default), aligned, or rear. sometimes the default of "aligned" puts the seam in a big line like that. If you're going to sand the part I find the rear option better so your extra sanding effort is focused somewhere you can choose not whatever the slicer decides with the other options.
turbid falcon
Ah okay thanks
I’m having a really rough time with the bed leveling here. I’m convinced that my bed isn’t level. I have the bed heated to 45c and nozzle to 205c. Every corner has clearance but it scrapes in the middle....
empty sedge
turbid falcon
I’m having a really rough time with the bed leveling here. I’m convinced that my...
What printer? Maybe your bed isn't flat, your rails aren't straight, or you're on a delta that's calibrated wrong
turbid falcon
Creality CR10 V3
Should I be leveling my bed while hot or cool? I had it working the first night but now I can’t even get a single layer to print!
empty sedge
if it moves a lot when hot then level it while hot and heat it up maybe 10-20m before starting your prints
karmic brook
I first wondered if you were asking about the seam, or the text on the bottom
empty sedge
see if there's something pressing up on the center bottom of the bed
turbid falcon
The first successful print I did leveled the bed when cold
sullen zinc
I wonder why prusaslicer does multiple layers of "skirt". Perhaps I don't understand the purpose of adding a skirt. Formerly, I used ultimaker cura by default and I never saw it build the skirt more than one layer tall.
karmic brook
I've used "brim" and "raft", "skirt" is a new one on me
sullen zinc
It's some extra material laid out at a short distance from the model, not touching
On my older printer it seemed to help ensure the plastic was flowing by the time it started on the main part (though the prime blob of prusaslicer takes care of that) but other than that I'm not actually sure what it's good for
When you enable skirts in Cura, your printer will initiate your prints with a line around the main part. This initial line has a few benefits. It acts as a sort of material purge, ensuring that the filament is flowing well and that no stray extrusions stick to the first layer. Additionally, it helps you to check that the bed is leveled properly and the Z-offset is well adjusted.
karmic brook
Ah, Prusaslicer seems to do a single strand surrounding the print automatically, hadn't seen multiple passes or layers
sullen zinc
this one's about 3 layers tall, looks like
aha the prusa docs tell all:
One layer tall skirts can be difficult to remove from the print bed. Prusa profiles typically use 3 layers tall skirt for this reason.
karmic brook
Ah, interesting. I wonder if this is a new feature or a different config than mine
sullen zinc
I'm using 2.3.0-alpha3 but that snippet is from the stable-version docs
unique pendant
@cloud halo What country are you in?
cloud halo
United states @unique pendant
unique pendant
@cloud halo Best quality filament in the USA is typically Atomic, Snolabs, and Protopasta. Atomic and Protopasta are made in USA, Snolabs in China, but for a USA company, shipping from USA warehouse. They do occasionally have sales, but not too often. Protopasta is puttiing a different class of filament on 20% off sale each week this season. This week is Carbon Fiber HTPLA and the code is 2020week4. Might periodically check their websites to see. I have heard good things about Filamentone and about Greengate3D (Billie Ruben works with them), but I have not tried those filaments from the USA. Perhaps others can chime in on their quality.
turbid falcon
Hi. Is it possible my issue could be coming from moisture in my PLA?
I am totally totally noob 3D printer... did basic setup and hit print... got this beautiful print
Except now a few days later I can’t even print a single line before everything gums up, nothing sticks, nothing comes out, it’s a stringy mess. Horrible.
Maybe issue is from moisture? I left the PLA out
unique pendant
Yes, moisture is the number 1 cause of printing problems. Do you have a filament dryer/
?
empty sedge
I doubt it's moisture messing up your PLA
@turbid falcon could it be a blob of plastic between the end of the bowden tube and the nozzle? https://www.youtube.com/watch?v=7tCxO17XZtw
Chuck shows you a simple hotend fix for your Creality Ender 3, CR-10 or just about any Creality Printer. He uses a technique created by Luke Hatfield to create a higher temp insert for the Hotend. But Chuck adds his own twist to the design to give you a higher temperature solution. He explains all the reasons behind the design so you will fully ...
empty sedge
I don't know, I haven't seen one of those taken apart
you can check your filament gears aren't clogged and nozzle tip is clean though
turbid falcon
If I can manually extrude, is that a good sign?
empty sedge
sure, it means your hotend isn't clogged
turbid falcon
Also my base plate is clearly not flat. I can level it with paper on each corner just fine. But as I move from one end to the other or anywhere in the middle, it scrapes.
unique pendant
If the only difference between today and a few days ago, and if you live in a humid environment... https://www.thingiverse.com/thing:2669646

3-4-19 There is now a single piece version for 330mm/13"+ print beds: https://www.thingiverse.com/thing:3468826
3-4-19 Glue up version prototype:https://www.thingiverse.com/thing:3470025
Original:
This is a riser for the common Rosewill/Best/Flexzion/Yobo food dehydrators. It holds 2 1KG spools. With this mod, you don't need to destroy your fo...
turbid falcon
The little plastic wheel that retracts the filament is also making this horrendous grinding sound every time it retracts the filament
unique pendant
As far as you plate not being flat, sometimes the clips cause the plate to bend. You can bend the clips more open by forcing them to open on the edge of a counter or table so they don't clip so hard, and then check the flatness again. I only print on FR4 on all of my printers, and I use double-sided Kapton tape to hold them in place. Much flatter solution than any glass I've ever used.
Regarding the retraction/grinding sound, your extruder tension may be too high. That can deform the filament and simulate a clog as well since the filament needs to be round to go all the way through to the nozzle.
of course, these are only a few ideas and I could be wrong. If you haven't done that Creality extruder mod, better do it sooner than later. I spent over an hour unclogging one of our maker space Enders because it didn't get the mod yet (I put the mod in yesterday afterwards of course) 😄
 chrome badger
Thanks for the extruder mod. I had my first partial clog yesterday and couldn't figure out why my prints were all goofy.
turbid falcon
I just cleaned out all the extruder gears and the main feed line tube thing
Looked pretty clean
I'm starting g to think the filament has gone bad
Also, undoing the clamps seems to make my bed more level
Still nothing coming out and what does come out doesnt stick and is spaghetti
unique pendant
So, nothing coming out when running a print, but it comes out when you manually push it through? Double check that extruder gear tension. If it's too tight, it could act that way.
turbid falcon
I mean some comes out but it's super thin, instantly curls, and doesnt stick to anything
But I know everything is clear
turbid falcon
I tried some filament that the printer came with. It's much better
I think I'm dealing with moisture issues then
unique pendant
Looks pretty good to me, as long as you're printing 1 layer of 2 lines, 3 perimeters each! 😄
turbid falcon
Sweet. Between taking those clamps off a little bit and using some of the PLA that the printer came with, it’s doing good prints again. I tried with my black PLA and everything broke again. I think that is the issue
cloud halo
Thanks @unique pendant, I'll check them out
sullen zinc
Let's do this .. the ~1/8 size test print turned out well
https://www.thingiverse.com/thing:1356547/files remains one of my favorite models

No supports. No bridging. No retractions.
It has the astonishing property that the horizontal cross sections are simply connected and change continuously with height, so can be printed perfectly with spiral mode (or single-walled without infill).
This fractal is half of the octahedron flake (or Sierpinski octahedron). Every triangular face is a...
acoustic spire
Wow.
You can vase mode that thing? Excuse me while I pour tea on my brain to extinguish the fire
 mellow snow
Hey folks! do you know if exists a 3D print material with a density of 0.19 gr/cm^3 ???
👍 thank you
empty sedge
mellow snow
Hey folks! do you know if exists a 3D print material with a density of 0.19 gr/c...

Start listening with a 30-day Audible trial. Choose 1 audiobook and 2 Audible Originals absolutely free. Visit http://www.audible.com/cnckitchen or text cnckitchen to 500 500.
I can highly recommend "Failure is not an Option" by Gene Kranz!
ColorFabb released 2 new light weight materials based on TPU and PLA. These materials use a blowing agent...
empty sedge

Start listening with a 30-day Audible trial. Get 1 audiobook and full access to the Plus Catalog absolutely free. Visit http://www.audible.com/cnckitchen or text cnckitchen to 500 500.
My recommendation: Thunder Below! by Eugene B. Fluckey
VarioShore TPU contains a blowing agent that will foam up this 3D printing material during printing. This ...
lilac patio
That foaming tpu looks really cool
I'd probably get a spool if it wasn't nearly $80 per kg just to experiment with it
turbid falcon
Well I’m packaging up this CR10 and sending it back to Amazon.
Unbelievable I spend 550$ on a printer only for the bed to be warped. Ridiculous.
Can anyone point me to a company that doesn’t ship defective products?
unique pendant
Tiny Machines in the USA unpacks, examines, tunes, upgrades, and tests all the printers they sell before packing them back up and sending to you, and it’s the same price as from the factory. I won’t buy a Chinese printer from anywhere else.
unique pendant
Just got this Cyber Monday big sale in my email, speaking of Tiny Machines: https://www.tinymachines3d.com/pages/bfcm
 ember narwhal
Looking into getting my first 3d printer and I'm torn between FDM or SLA. I love tinkering and such so I'm looking at an Ender 5 Pro so far, but I'm wondering if an SLA printer would be better for getting started. I'm mostly going to be building custom cases for various microcontrollers but also plan to make simple toys and D&D minis. Have barely looked into SLA printers yet so I'm not sure what's comparable to the Ender 5 Pro for features etc.
magic bone
@ember narwhal FDM is the usual starting technology, its much easier, SLA is great for high quality prints, or if you want to do something like make speakers
empty sedge
SLA needs a lot more cleaning and safety equipment (gloves, ventilation sometimes, special treatment of uncured resin) but is definitely a better option for d&d minis
for larger parts, like raspberry pi or arduino cases FDM is fine. I think if you keep designing parts you might end up with both
ember narwhal
Yeah it's looking like I'll start with the Ender 5 Pro and eventually add an SLA printer once I'm more comfortable with things.
Appreciate the guidance!
acoustic spire
Anyone familiar with the Ubis ceramic hotend? I just ran into a nice heat creep clog and can't figure out how to get it out.
This thing is. Uh. Different. I'm not sure how to get the heat break out of it or anything and searching it just reveals people having issues with the tubular heater breaking
magic bone
That is probably the sort of thing I would ask the maker of the nozzle, but since its ceramic I would have high hopes of recovery
empty sedge
printrbot isn't around any more and I don't think you can disassemble the ubis and put it back together again
well, checking it seems old printrbot is dead and brook is working on a new printrbot but there isn't anything new yet
 high prairie
hey guys I recently got an ender 3 pro and finished building it but I tried out the dog test print but it started printing strangely and ended up printing on the edge. If anyone could help with this I would greatly appreciate it.
acoustic spire
I'm tempted since that thing's ceramic to just clamp it upside down and cook it with the heat gun until offending PLA just drops out the top
I've had no luck trying to unscrew the heat break from it
empty sedge
high prairie
hey guys I recently got an ender 3 pro and finished building it but I tried out ...
Check your belt isn't too lose and that the pulley setscrews are secure
 turbid dawn
Hi All, I'm looking for a model I saw posted a couple years ago...somewhere. Thought I'd see if anyone remembers this. Someone on Thingiverse or maybe Hackaday posted a giant 3D printed Mk7(ish) extruder model they used for teaching/instruction. Does anyone remember this? Thought I'd see if it's still out there before I try to re-invent the wheel.
shy kelp
I have a da Vinci Jr. 1.0 pro, and it has recently clogged up REALLY BAD. The filament went up into the interior of the nozzle. This is the second time this has happened to me. Can anyone help me out?
magic bone
high prairie
hey guys I recently got an ender 3 pro and finished building it but I tried out ...
+1 sphereinabox, you are having a belt issue
magic bone
shy kelp
I have a da Vinci Jr. 1.0 pro, and it has recently clogged up REALLY BAD. The fi...
With which part?
shy kelp
The nozzle
magic bone
Like, help unclogging it, or help not clogging it again?
sullen zinc
sullen zinc
A few weeks ago I asked for help with my 3D prints that were delaminating. I was printing with PLA settings. Eventually I set that spool of material aside in disgust, and went back to some rolls of PETG I knew were working for me. Last night, while lying awake, I said to myself: what if I was mistaken and that was PETG. Well, this morning I looked. It's a spool of PETG. So no surprise it wasn't printing well with PLA temperatures. I feel very silly for all my anguish and frustration.
🤦
 blissful marlin
Does anyone here have experience with 'waterproofing' SLS prints?
 river cipher
Ive never done it, but I would think a dip in lacquer, or a vacuum impregnating resin like cactus juice would work
the latter requiring your part to withstand curing temperatures
magic bone
Has anyone used ceramic SLA resin before? I was warching a video with someone making rocket nozzles and might be a good reason to get into sla
unique pendant
@turbid dawn Here's a hotend, haven't seen an extruder tho'. https://www.thingiverse.com/thing:3691405

Deutsch:
Kennt ihr das auch?
Freunde, Bekannte, Verwandte und Kollegen fragen euch, wie eigentlich das mit dem 3D-Druck funktioniert!?
Mit diesem Model fällt es mir leichter ein Hotend zu erklären!
Ich habe das tolle Model von HobbyHoarder (https://www.thingiverse.com/thing:2762634) etwas für meine Zwecke modifiziert und um ein paar Teile ergänz...
turbid dawn
@unique pendant you know there a good chance I was remembering wrong. That looks like what I was remembering. Thanks!
 unkempt hare
Hey folks! Has anyone used hypercube or hypercube evolution? I’m wondering what should I choose between these two.
I want to make a single z-axis one
But can’t choose between these two
unkempt hare
Also 214x214mm bed
empty sedge
@unkempt hare Voron seems to be getting more enthusiasm than those two
empty sedge
no, it's more expensive
Get started with VORON 3D printer, the best little CoreXY 'space shuttle' you can build in your garden shed, or your kitchen.
unkempt hare
I have anycubic kossel, which doesn’t print for some reason, so I want to rebuild it into something simpler
So that’s why I’m choosing between hypercube and HEVO
Like, rebuild as cheap as possible
empty sedge
what problems are you having with your kossel?
 unkempt siren
Hi All. I got ender 3 v2 and there is no material coming out of nozzle at all. Temp and other settings are fine. Really annoying me for few days. Sometimes a blob might come out but mostly none.
 pearl tendon
I would make sure it isn't clogged. If its not clogged I would check the extruder to make sure its actually pushing the filament forward. The Ender 3's come with a cheap feeder assembly arm that cracks easily. A year ago I got an Ender 3 Pro and it cracked within a week of use. I upgraded that to a metal version of the same extruder.
So far after a few days with my Ender 3V2 it has held up, but I am going to upgrade it to a MicroSwiss Direct Drive soon, and hope it will hold on until I get that.
 lean reef
Hello everyone :) newb question. I've never printed more than 1 object at once. What are the benefits (aside from time) of printing multiples? Any tips? I have an ultimaker 3. Thanks !
empty sedge
it's actually slower to print more than one object at a time
that said, if you're printing something small (say 1x2 inches or smaller) makes sense to print more than one just to slow down enough to get enough cooling
unkempt siren
pearl tendon
I would make sure it isn't clogged. If its not clogged I would check the extrude...
Thanks. I strongly believe I need to update the extruder. I have absolutely zero clogging as I totally opened and disassembled the whole hot end assembly and all things are fine but extruder is terrible sometimes and starts to CHEW on the filament. So disappointing to see brand new machine having such an issue.
ember narwhal
How much tinkering is really needed for something like the Ender 5 Pro? Am I looking at days of fiddling before being able to print something solid? Weeks?
Trying to decide on pulling the trigger on that one now or wait 2-3 months for a Prusa mini
I don't mind tinkering but I'm hoping it's not quite weeks of work
elder oxide
@ember narwhal aside from assembly, ender 5 pro basically prints right out of the box
A buddy of mine has one and said it’s super straight forward
ember narwhal
Ooh, good to know
Any recommended guides or books for getting started on modeling stuff? I'm planning to primarily print things like custom cases for Feathers etc but have zero experience with 3D modeling software and am expecting to need to learn a ton.
 alpine stag
I would recommend downloading fusion 360 and looking tutorials up on YouTube
@ember narwhal
knotty laurel
"Fusion 360 for Makers" is a decent book for getting started if you prefer printed resources.
karmic brook
I wish I had known about that. I've had a time searching for written information.
brave mica
@ember narwhal I previously chose a CR10 over a Mk3 and I regret not waiting. My experience might not be representative, but I've had lots of issues with my CR10. Between the original price and upgrades I've made, I've spent well over the price of a Prusa. Not all of the upgrades may have been strictly necessary but I'm only now feeling like I trust it with 10+ hour prints
ember narwhal
Most of my prints should be pretty small and simple for a good while so I'm not super worried about longer ones
 arctic inlet
ember narwhal
Any recommended guides or books for getting started on modeling stuff? I'm plann...
arctic inlet
ember narwhal
Any recommended guides or books for getting started on modeling stuff? I'm plann...
https://www.youtube.com/c/TylerBeckofTECHESPRESSO/videos and https://www.youtube.com/c/ProductDesignOnline/videos

YouTube
I focus on helping engineers, designers, makers and hobbyists create custom designs and 3D prints in Fusion 360. If you are hoping to learn the very best practices for CAD modeling, create custom 3d prints and save time creating designs then I can definitely help you. Subscribe so don't miss out on any tips or free tutorials ⚡ https://bit.ly/S...

YouTube
Hey there!
I'm on a mission to make CAD education accessible to anyone that wants to learn. Here you'll find concise Fusion 360 tutorials on best practices, 3D printing, woodworking, common workflows, and more!
Be sure to Subscribe to the channel - I release new content (almost) EVERY FRIDAY!
Just getting started with Fusion 360?
Head over to...
real gyro
Any advice on printing & post processing metal filaments like Proto-Pasta Iron, Steel, Copper and Brass infused filaments? I understand the basics, looking for more detailed info. I print with an Ender 5 Pro with 4.2.2 board and 2208s using TH3D UFW 2 (V.2.12b). I'm a stained glass artist and an EE, so have a lot of the bases covered. Have done lots of work with Sculpt-Nouveau products for patina work.
Reviewed the Ruiz Brothers article on 'How to Polish copperFill & bronzeFill Filament' posted several years back (https://learn.adafruit.com/copperfill-filament) which has some decent info but it's pretty dated. Also have a lot of questions about what they presented. Wondering if anyone has any updated info.
Also reviewed a bunch of YT videos, like Joel Tellings (3D Printing Nerd) "3D Printing with Metal Composites and adding a Patina and Oxidation!" at https://www.youtube.com/watch?v=iD7ZDh9Xfs8&t=551s and Matterhackers "How To: Post Process Metal PLA // Filament Guide" at https://www.youtube.com/watch?v=nsMMEzDFfjY. But, again, these are a couple years old and at least Joel's approach is pretty sporadic. You can see my recent comment on Joel's video at the top.
As usual, everyone was all over this filament when it first came out but coverage has really dropped to close to nothing. Really looking for anyone who is still working with it and can share any ideas and tips. Thanks.
There are some good ways to get 3d printed models the way you want them. You can print with multiple types of filament and/or multiple colors, and you can sand, prime, and paint. HOWEVER, have you thought about adding a patina?
#3dprinting #patina #oxidation
Proto Pasta filaments:
Iron: http://3d.pn/ppiron
Brass: http://3d.pn/ppbrass
Bronze: h...
From bronze to copper, to steel and brass, there are a lot of different metallic PLA filaments out there, and many ways to post process them. MatterHacker Pro, Alec is here to show you some awesome post-processing methods to get the most out of your metal-infused PLA filaments!
To see all our awesome metal-infused PLA filament choices, follow t...
turbid falcon
what first layer height do u guys print at?
empty sedge
0.2 or 0.3
turbid falcon
do you carry that through the rest of the print?
empty sedge
not intentionally, but only because it's not worth the time to print 0.15 or 0.1mm layers
oh, on my printer with the larger 0.6mm nozzle I print 0.4 first layer and 0.3 the rest
turbid falcon
i am pretty new to 3d printing, been dealing with a lot of problems and solving them
basically i finally got my bed level, extruder calibrated, and bltouch working right
found that i was able to print, after a lot of fine Z-adjustment, 0.12mm first layer
but is this unrealistic? it was really finnicky to get it working, and prints are taking hours
 thin breach
is what realistic?
what tolerance are you aiming for?
empty sedge
having a thicker first layer means your bed leveling doesn't have to be as perfect
turbid falcon
well i guess im just trying to see what the limits of the machine even are
and i think im quite close, i was wondering how standard printing at 0.12mm initial height is
i should also mention my printer is creality cr10 v3 and printing PLA 210c 60c bed
 hasty nest
I have an ender 3 and am looking to make some upgrades. online Im seeing some conflicting opinions and info, is the glass bed or magnetic bed better for adhesion? Also can they be used together? or only only by themselves, im not really clear. plz ping me with any answers. thanks
thin breach
i prefer glass
the less that can move the better, imo
the magnetic bed has to stick to something. that something is going to prevent you from printing directly on the glass.
empty sedge
printing directly on the glass is a good way to pull shards out of it
thin breach
?!!
hasty nest
so whats the point of the glass if you cant print on it?
empty sedge
if you print something large, directly on glass (without hairspray, glue, pet tape, kapton, etc) the plastic can pull chips out
thin breach
should say what u r printing, maybe it matters
unique pendant
FR4
empty sedge
I've pulled shards out of glass with PLA. it tends to happen when your first layer is too low, which on a shared hackerspace printer like I've worked on is going to happen
now the space printers are i3 mk3s with spring steel sheets and I don't have that problem as much, but petg on the smooth PEI sheet did pull chunks of the PEI off
hasty nest
so then theres no point of getting a glass bed? go with the magnetic?
unique pendant
I use FR4 exclusively now. With nano adhesive. Glass is not flat enough, and it’s messy.
hasty nest
FR4?
empty sedge
I haven't used the creality magnetic bed but the prusa one works well
hasty nest
thanks, ill look into it
thin breach
bed flatness can be measured, heat it up and probe around so you have a point of comparison and know how close you are to level
then you will have something to base your "is it flat enough" comparisons
with a glass bed i found differential thermal expansion made a big difference (ender 3)
as i recall the magnetic bed was worse in that regard, but maybe i didn't know what i was doing at that time
unique pendant
@hasty nest If you'd like to go the FR4 route, I stick it to the bed with double-sided Kapton tape. Works well. Filament sticks like crazy when hot, and you could blow the parts off with a burst of compressed air when cool. Though PLA will stick without any help, I use Nano Adhesive for "insurance" which has never let me down. Magigoo works pretty well, but I have had corner lift on very large parts with Magigoo, never with Nano Adhesive. It's really expensive, but I've saved the extra cost many times over by not having failed prints and lost time, and a little goes a long way.
 slow patio
I am a beginner to 3D printing , i wanted to ask whether i can go with new version WOL 3D ender 3 V2 ? Is it worth the price ?
 brave maple
How does this happen? I’ve been working on my first layer because it was under extruding and my print isn’t sticking to the raft anymore. I have been changing the z offset for the under extruding problem
 vast talon
guys can I feed 12V to a RAMPS 1.4 and at the same time plug the atmega to the USB for serial debuging or sketch upload?
seems trivial but I got problems by doing so
unique pendant
@brave maple You are correct that your print isn't sticking to the raft, of course. Take a look at your gcode preview in your slicer and see if it's leaving a gap between your raft and your model. I think you may need to start at the beginning for your first layer underextrusion problem. Proper extrusion has nothing to do with changing Z-offset, as you may know, but it has everything to do with proper e-steps (extruder steps). Changing probe Z-offset has everything to do with good squish on your first layer.
First thing: Did you calibrate your e-steps?
Next thing: Did you set probe offset by sliding a piece of paper under your (clean) nozzle with a hot bed and hot nozzle?
You may find this guide helpful since there is no one solution for every problem, but rather a bunch of possibilities. https://www.simplify3d.com/support/print-quality-troubleshooting/
As an aside: You really shouldn't need to print a raft for a model like that. Rafts are very rarely used for situations in which you have a model that only has a few points of contact to the bed, and/or has a particularly difficult cooling problem (e.g. sphere).
brave maple
unique pendant
<@!338042534217646091> You are correct that your print isn't sticking to the raf...
Thanks! I'm going to check out the guide and take a look at the estep setting. I don't think I've measured how much it's extruding before so that could be an issue
empty sedge
vast talon
guys can I feed 12V to a RAMPS 1.4 and at the same time plug the atmega to the U...
It should work. Some knockoff arduino mega 2560 boards have the wrong reset circuits and are troubesome to upload a sketch to
vast talon
now, I have some boards that wont powerup the RAMPs LCD when they're not connected to the computer at the same time
just like the arduino mega board regulator went bad
this way only powering up via usb
makes any sense?
mine are knockoff.....
empty sedge
weird, I never had trouble with the arduino linear regulator going bad
(with 12V in)
vast talon
yeah... it only happened a couple times
but im pretty sure it was after It was on 12V and then I plugged in the USB for debugging
I could smell something burn, really subtle
subtle (is that a word?)
empty sedge
there's supposed to be a diode so that the 5V in your computer doesn't fight with the 5V from the regulator on board
vast talon
Dear all, I have build my own 3d printer and it works. But it wont work when it is unplugged from pc. It has voltage output still but the lcd screen wont power up. I have changed the arduino mega into another one. This time, it powers up the lcd without needing to connect to usb but the lcd shows n
vast talon
empty sedge
there's supposed to be a diode so that the 5V in your computer doesn't fight wit...
I was worried about it
maybe the display consumed more current than the regulator could deliver?
probably with a wrong backlight trimmer position?
empty sedge
a couple LEDs for the backlight shouldn't make much of a difference
empty sedge
yeah pretty much
vast talon
right, ty!
empty sedge
anyway, if you want to keep using that hardware you can keep it powered over USB from your computer or pi and probably just bend the VIN pin so it doesn't plug in to the arduino
silent veldt
Have people here tried 3D printing keycaps?
CherryMX compatible or otherwise.
The problem I'm considering is, how to get hexagonal keycaps to make a hexagonal keyboard.
A keyboard with hexagonal keys.
iron remnant
@silent veldt I have this bookmarked: https://github.com/rsheldiii/KeyV2

GitHub
KeyV2: A Parametric Mechanical Keycap Library. Contribute to rsheldiii/KeyV2 development by creating an account on GitHub.
I haven't tried it, but it sounds like a fun project to try for the hex of it.
silent veldt
@iron remnant yeah I would definitely want to print the hex out of that. Thank you!
 hasty torrent
Hello, I'm trying to connect my printer using pronterface and that is what I get. It's stuck to that line. My baudrate is set to the highest, I already tried changing the com number and changing the speed on device manager. I also tried using a different usb port
hasty torrent
I have no idea, honestly. I'm new to 3d printing. I want it connected because I'm trying to calibrate my esteps and this video I'm following uses pronterface to do that
empty sedge
@hasty torrent you were successfully connected it looks like from that screenshot
unique pendant
@hasty torrent Can you change E-steps through the LCD panel?

The correct Extruder Steps (e-steps) are a must for good 3D Prints, but the Ender-3, Ender-5 and CR-10 are almost set wrong. We look at the steps to fix it.
hasty torrent
unique pendant
<@335074176337575936> Can you change E-steps through the LCD panel?
I was able to resolve it by using repetier instead of pronterface :)
shy kelp
Hi, which one should I choose as my first 3D printer to buy? Anycubic i3 Mega or Creavity Ender 3 V2?
empty sedge
@shy kelp the ender is very popular, but I think the prusa i3 mk3s+ is worth the extra money for the included auto bed leveling, spring steel print sheet, reliable dual-drive extruder, lost step detection and recovery that make it MUCH more of a reliable workhorse printer
elder oxide
Idk, auto bed leveling isn’t all that great. Lost step detection can be compensated for with Octoprint, and recovery as well.
Prusa is a bit overpriced IMO
 forest wyvern
I would second @empty sedge opinion, and if the MK3S+ is too expensive go with the Mini+ (the plus is the new and improved one from just about a month ago). I have had my MK3S for a little over 2 years and have run ~80 kgs of filament through it with almost 0 problem besides user oversight. I owned two other printers and the Prusa wins hands down. Your millage may vary, but if I had to by another printer, it would be a Prusa.
empty sedge
@shy kelp on the creality machines I see a lot of people needing this easy fix: https://www.youtube.com/watch?v=7tCxO17XZtw
Chuck shows you a simple hotend fix for your Creality Ender 3, CR-10 or just about any Creality Printer. He uses a technique created by Luke Hatfield to create a higher temp insert for the Hotend. But Chuck adds his own twist to the design to give you a higher temperature solution. He explains all the reasons behind the design so you will fully ...
unique pendant
@shy kelp In addition to my own printers, I'm in charge of a bunch of printers at our maker space including Ender 3s, Prusa, Gmax clones, and Railcores. I have learned that it really depends on what "relationship" you want with your first printer. For a first printer, choosing between Ender and Prusa is probably a good starting point. Save larger and coreXY printers for later. If you want to learn all the different parts of the printer and how they function together, you can learn a lot with an Ender 3 because you will find that you need to do a bunch of upgrading. You will have lots of downtime while you're trying to figure out why you're not getting results as nice as others you see online. If you'd rather spend more time learning how to print, the Prusa is a better choice. It already comes with excellent parts and shouldn't need any upgrading. Your downtime will be a lot less, but you may not get a lot of hands-on teardowns and rebuilds like you would with the Ender. When you weigh in downtime and money spent together after a year or so, they're both pretty equal in cost. The Prusa Mini, as mentioned above, is a really great choice in those terms because it's cheap, and has quality parts. (also you'll find that 90-95% of prints most people make will fit in its build volume). If you decide to go with Ender, Tiny Machines is hands-down the best source for Chinese printers in the USA since they assemble, inspect, and upgrade every printer, then box it back up to send to you, and there's no extra cost. They also have top-notch unlimited support afterwards.
This is just my opinion, of course. What's the best first printer is an age-old question. Most important is to avoid junk and get a printer that has a lot of users so you can ask questions. 😁
shy kelp
I see.
I think I will get Ender V2 first, I will choose Prusa i3 as my new printer if I need it.
What about Anycubic i3, is it a good printer?
karmic brook
I went a similar route and started with an inexpensive printer (Monoprice Mini Delta) but quickly got frustrated with its limitations and bought a Prusa. Other than the stepped heatbreak (now replaced with a smooth bore titanium one), I've been happy with the Prusa.
unique pendant
I am not familiar with the Anycubic personally, but I am always worried about fire hazards when it comes to the cheap printers. They often have very dangerous wiring on the power and control boards. Unless you are always going to be sitting next to the printer while it's printing (nobody does) it's just not worth putting the safety of you and your family at risk.
brave mica
elder oxide
Prusa is a bit overpriced IMO
I'm inclined to believe that if you factor in the irreplaceable time spent debugging and futzing with less reliable printers and you actually put a reasonable price on that time (how much/hr do you make at work?) that the Prusa printers are somewhere between a fair price and a bargin.
elder oxide
Honestly, ender 3 pro has been great
Auto level Has been more of a pain for me in my experience with printers that have had it, including Prusa
Overall, given the printers I’ve used... prusa is overpriced. Others have different experiences which is fine. It works for some
brave mica
fair enough
elder oxide
Most importantly people have to use what’s the best use of their time and interest
I admit that the Ender 3/3 pro are not for the faint of heart. But they really open a lot of doors into understanding printers, get you acquainted with it on a more hands on level. Plus the customizable nature of them really makes them the hackers 3d printer.
thin breach
Agree. If you see the time you spend as a way to learn something interesting, the Ender 3 sure gives inspiration. If you’ve got something else you want to make, then think about it longer.
 short crag
Can the ender 3 pro print with petg
elder oxide
@short crag yes, but you need a different nozzle than is stock
short crag
Which one plz
elder oxide
👍🏻
short crag
How do you set the. Pramiters on the printer and in cura of petg
elder oxide
You probably need to build or download a profile for it
short crag
What temps
 vital mica
I use 220extruder and 75 bed for petg here.
Most mfg's print recommended on the spool.
pearl tendon
I print PETG with my two of my Ender printers. One has the stock hotend with the Capricorn PFTE. THe other has the MicroSwiss all-metal hotend. Both print PETG quite well.
If you do have the stock hotend I would make sure to swap out the white PFTE tubing for some of the blue Capricorn tubing before doing high temp prints. The stock PFTE tube will burn when it gets to higher temps (I think around 250C if I remember right).
As for PETG temp. Lately most of what I've been printing seems to like temps of 235C-240C. But I have also printed some other brands that are best at 225C and other best at 245C. I usually use print a temp tower, but try to set my final temp to the manufacturers recommended temp if possible.
For a profile I think I just copied the PLA profile and started changing things as needed. Or maybe I just started using the generic PETG profile in CURA. I can't remember I've had bad luck with downloaded profiles so I've been wary of them.
ember narwhal
What's the best way to remove a print from the bed? I printed a Feather case and it warped a bit when I was pulling it off the bed.
ember narwhal
I guess I should probably print those things with a raft or something
 limpid trail
It should not be a struggle, I have a bed that I can bend so it pops off
If you are using smth like ABS that actually sits on the bed, it will be hard to take off, so a knife or smth might be needed
empty sedge
@ember narwhal let the bed cool down before removing your parts. For PLA, remove them around 40C or cooler. At 60C or so the part may still be soft on the bed and will remain bent when you peel it off