#help-with-3dprinting
1 messages · Page 25 of 1
 prime heart
Right now, I don't know how to electrically command the matrix itself. Some transistors give me some pain as the Li-Po voltage is not constant
It will be REALLY awesome 😍. I can't wait building it
 violet flame
I always think it's exciting to send off for a PCB.
It's even more fun when it actually works.
Not that the PCB comes back bad, I just forget some pin was supposed to be grounded 😉
 versed wren
ah the joys of somewhat having an idea of what you think you're doing
 cobalt quarry
@prime heart It was painless to build, there were a couple points where I had to look at the online instructions with bigger images. It worked perfectly the first time I powered it up. It's quiet. I've recorded build videos less than 1m away from it while it was printing. Just a quiet murmur in the background. Bed adhesion is generally great. On cool days I bump the temperature up a couple degrees and it's fine.
 flat shale

Just when it seems like we’ve juiced all the creative potential out of our 3D printers, a bold new feature lands on the table. Enter Velocity Painting, a concept brought to life by [Mark Whea…
 snow ether
Anyone know of any decent tutorials on fusion360 for 3dprinting?
 boreal lava
@snow ether I think there are a few on the learn.adafruit site. I'm no expert, but will probably do one soon when I remodel my hot end mount. What are you looking to learn?
 hidden sable
@snow ether I am really enjoying the Adafruit tutorials on fusion360 https://www.youtube.com/watch?v=iF_P5ie_b8o

Let's see how we add snap fit features to a cylindrical enclosures! I'm using a handful of sketches, sweeps and mirrors to make the case and cover combo. Mor...
 silent veldt
I need to learn some of the modeling.
Because I want to get back to printing things, and it seems a lot more useful if I print things that I want to exist.
snow ether
@silent veldt @boreal lava thanks! Brad I’m just curious where to start. I have a background in design so adobe products are a breeze but once you add 3D and CAD my brain explodes haha! Especially from fusion to print would be awesome!
 opaque gust
I used to know 3D Studio Max, fusion 360 seems to make much more sense. If you have access to fusion 360 I would recommend trying to follow along. It helps you remember what you see. I watched a few on adafruit’s channel and they are great. Even the ones offered by autodesk are very good. They take you step by step and if you take longer you can pause the video
versed wren
it's still possible to get the free hobbiest license for fusion 360, but the way to do it is non-obvious
this looks reputable https://knowledge.autodesk.com/support/fusion-360/learn-explore/caas/sfdcarticles/sfdcarticles/How-to-activate-start-up-or-educational-licensing-for-Fusion-360.html

When you start Fusion 360, a countdown clock is displayed for a trial. You want to know how to select the free Start-up/Enthusiast or free Educational licensing option. Important License Information: All trials are for Fusion 360 Ultimate. To activate Start-Up or Ed...
weird question, anybody know if fusion will run on a very bad dell microtower from maybe 2008 with an integrated intel GPU from before their HD series, that doesn't support openGL 2?
boreal lava
@versed wren They have made renewing the license much easier now. I don't recall if it was within fusion itself, or if I was redirected to the site, but it was basically just clicking the license that applied.
@snow ether like others have said, there's loads of resources on youtube. Just start small with things like vases and boxes, you'll catch on pretty quickly I am sure. One thing I wish I had paid better attention to at the start is parameters. They can make sizing/resizing a model MUCH simpler; especially if you just need minor tweaks that will affect placement and dimensions on various features.
versed wren
parametric modellers are all about relationships , it can be tough for people to grasp "the square is as big as you tell it to be"
boreal lava
yeah, it is confusing lol. It comes in handy when you need to tweak all the m3 holes by .1mm, or resize a part while keeping everything else in place.
versed wren
one of my favorite things is making a huge complicated thing almost entirely using relational parameters and geometry, and then like one thing with a diameter on it
boreal lava
lol @versed wren sounds like how I did my LED ring. everything is done in parameters except the internal diameter of the ring.
versed wren
things tend to get a little explody when it gets too circular
opaque gust
Explody ? Is that the technical term?
versed wren
yep
it's the general mode of operation where doing a thing results in unpredictable consequences because the software has an intense mind fart trying to figure out what's supposed to happen, and usually this ends up by throwing all your sketch bits in random directions and turning everything purple
not exactly 3D printing, but I developed a model to do triangulation in subnautica with a plan to distribute bases around the map for optimal can coverage; the software got a little crashy because it doesn't like embedded images, and I had a lot of trouble wrapping my head around 3 axis polar solving
and then RSI destroyed my hands for two months
if/when I get back into the game I'll be building the base at the top-left by the squidcrab, which will be critical to moving forward with the story
versed wren
have any of you used a 3D printing service with a transparent plastic material?
I'd like to try out making a pendant about the size of a silver dollar and two quarters thick with a logo embedded, but shapeways doesn't have transparent materials as far as I can remember/tell
materialise seems to have some but the pricing section mostly explains that there is a price and things influence it
 violet needleBOT
Adafruit Industries posted Rotisserie Marshmallow Roaster - Timelapse Tuesday

Every week we'll 3D print designs from the community and showcase slicer settings, use cases and of course, Time-lapses! Rotisserie Marshmallow Roaster Kasey...
 idle crest
#help-with-3dprinting Live in 10 mins! https://www.youtube.com/adafruit/live

YouTube
3D Printed Mount for CRICKIT https://learn.adafruit.com/mount-for-crickit/ Adafruit Fusion 360 Parts on GitHub https://github.com/adafruit/Adafruit_CAD_Part...
violet needleBOT
Adafruit Industries posted 3D Hangouts – Mounts, Marshmallows and Dinos

3D Printed Mount for CRICKIT https://learn.adafruit.com/mount-for-crickit/ Adafruit Fusion 360 Parts on GitHub https://github.com/adafruit/Adafruit_CAD_Parts...
opaque gust
I was wondering if anyone could recommend a good printer for light professional use. Friend has a business making packaging equipment and want to explore using a 3D printer to augment more traditional machining
 signal lotus
@opaque gust what kind of parts, materials and sizes would be needed?
opaque gust
I have to ask him what he's making now. They are using someone's home printer. Good questions I should have already asked him
opaque gust
it sounds like he is currently printing up to 10 inch diameter parts, and I am still reading on material. Probably ABS (for wear and tear) so it would need a heated bed
signal lotus
@opaque gust for ABS you'll want a heated build plate and an enclosure unless ambient is pretty toasty
ABS, ASA, Nylon, PC, PETG, or Carbon Fiber based filaments would be good choices depending on needed rigidity, UV and temp resistances
any printer that can print ABS will handle most of the aforementioned filaments with minimal effort
cobalt quarry
One item off my TODO list: Octoprint/Pi0w installed in my i3mk3. First print using it running now!
boreal lava
Oooooh!!! @cobalt quarry I have been thinking of doing Octoprint with my Pi3, but if a Pi0w works well, that would be way better. Please let us know how it goes.
cobalt quarry
@boreal lava The i3mk3 has buildin support for a Pi0w. 6 long header pins, a printed mounting bracket, and a refab image of raspbian. It's quite nice
I'd like to eventually add the camera. (which I have).
Then I can do time-lapses & such.
And remote monitoring, which woudl be cool.
boreal lava
Awesome! Thanks for the update. I've been sort of toying with an idea for time lapse that involves installing an IR switch on the Y axis so all of the shots have the part in the same position so I don't have to put the camera on the bed
 crude kettle
Hey does anyone know how octoprint IP address setup works?
What I'm going behind is that after I set up octopi on my raspberry 3 model b it does work. I create a login and it's awesome. However, after a extended period of time with I power up the pi later the IP address changes and the login I created it invalid. What do I do?
I can find the new IP address fine but after that nothing
opaque gust
you can find the new ip, but can't connect? From what I have read the suggested method is to set the octoprint server as a static ip in your router's settings
 clear vector
Assembling the RepRapGuru Prusa I3 today
 grim juniper
it is also possible to setup your pi3b to have a name address. I have my pizero setup so I can remotely log in on my LAN via a browser or putty with the address url "pizero.local" (name chosen by myself)
@crude kettle ^^
this way if/when the IP changes, I don't have to scan my LAN to find the new address
crude kettle
Okay, I'll give these suggestions a try thanks @grim juniper @opaque gust
grim juniper
BTW .local is what you put in instead of .com or .net when you use names on your LAN
signal lotus
@crude kettle there is also a plugin for octopi to display the ip address of octoprint on your 3d printer screen
crude kettle
@grim juniper I understand that part. Chrome or maybe Windows 10 doesn't like that unless it's through Putty. The only thing that does work is typing the actual IP address to get to octoprint.
@signal lotus Thank you, that does sound better than using an external app. The only issue is that the login, username and password, is invalid after the IP changes for me or some reason.
cobalt quarry
@crude kettle My install puts the IP on the printer's screen, but I ended up just assigning a static IP to it. I've done that with the majority of my things here. desktops, Hue bridge, laptop, & Pis at least.
crude kettle
@cobalt quarry what is best, assigning the IP through the octoprint code or locking it through the wifi router setting? I feel like I should adjust the code to have something permanent.
cobalt quarry
I do it with DHCP reservation in my router.
opaque gust
Which seems to be the way to do it, otherwise you might get conflicts with assignments
 molten steeple
Should be able to do it straight forward on your router settings.
(reserve a ip that is)
crude kettle
Okay, I'm going to reflash it and lock a IP for my pi through the router setting, a quick google should tell me what to do, as well as a few plugins. Thank you all for the help.
opaque gust
good luck
cobalt quarry
@crude kettle How'd it go?
crude kettle
Good, this time the login stayed the same. At first when I set the static ip I forgot to save changes.😋
But it's good now. NIce and secured.
molten steeple
Anyone score a good deal on prime day? I saw a few 3d printers on sale. Wish I had the space and the money lol
signal lotus
I just bought two new printers so I didn't even look for printer deals on prime day
which printers did you see go on sale @molten steeple ?
molten steeple
@signal lotus I don't remember off hand the brand or specs sorry 😣
idle crest

YouTube
Multistreaming with https://restream.io/ ----------------------------------------- Visit the Adafruit shop online - http://www.adafruit.com Subscribe to Ad...
violet needleBOT
Adafruit Industries posted 3D Hangouts – LEGO Crickit Rovers and Ultimaker S5
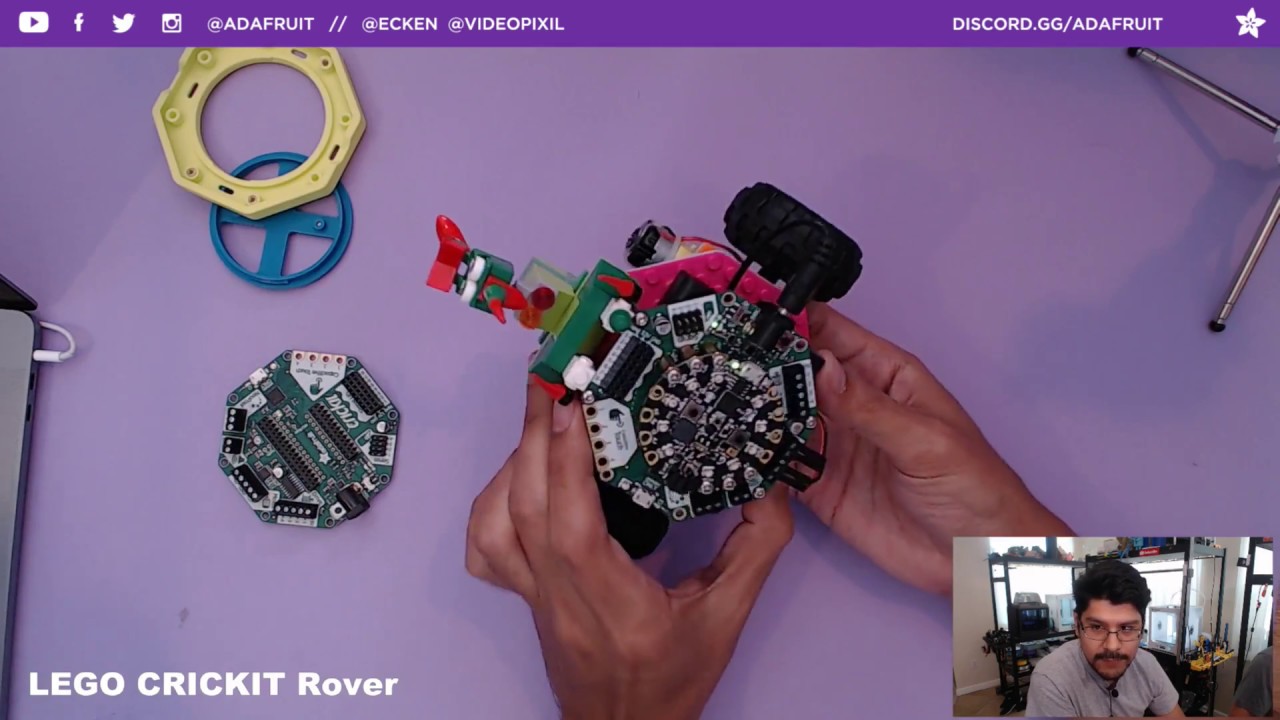
Multistreaming with https://restream.io/ ----------------------------------------- Visit the Adafruit shop online - http://www.adafruit.com Subscribe to Adaf...
cobalt quarry
Missed the live show this morning... catching up now. The rover looks cool.
cobalt quarry
I am printing a tank into which I shall place a Crickit.
versed wren
oooo, how functional?
cobalt quarry
Not a replica, just a treaded robot. But completely 3d printed.
Though putting a mechanized nerf gun on it could be fun.
I'll be able to have 4 servos and some solenoids... it could be done.
 weary lichen
@cobalt quarry https://www.thingiverse.com/thing:2687174

A gear designed to work with this slip ring, along with a mount and gear to use with a 28BYJ-48 Stepper Motor such as this one
The slipring gear is a 1mm pitch, 54-tooth gear. The grommets and washers allow for use of M3 screws without nuts. The gear for the stepper motor is ...
That was part of my own tankbot project, for the turret.
Haven't worked on it in ages so never really got past that
cobalt quarry
Cool. I've only gotten as far as seeing it on thiniverse and thinking "that's cool". It takes TT motors with room for a crickit (I'm thinking with a Feather M4 and a load of sensors). https://www.thingiverse.com/thing:652851
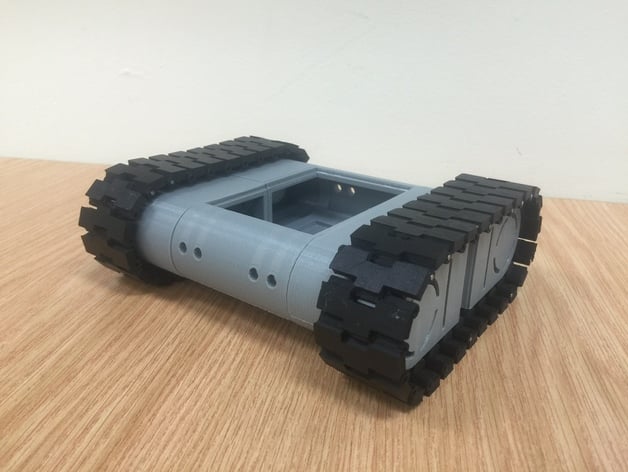
The second prototype out of the jRobot project, this little tank bot makes use of a number of simple parts to do a whole lot.
I have updated it to make it more versatile. The tracks are a little more grippy as well!
https://www.youtube.com/watch?v=MJIx0cyOL3s&feature=yout...
weary lichen
Oooh, I like that one
I've got some rubber treads that I'll be using, but that drive system is pretty nice.
I'd also like to, at some point in time, do a "Tank" just using strandebeast legs.
cobalt quarry
I'm wondering about rubberizing the tread surface somehow to give it more grip. Most of our floors are laminante, so it won't have much traction.
That's be awesome.
weary lichen
@cobalt quarry I can't remember, but are there MicroCenters in Canada near you?
http://www.microcenter.com/product/486541/Track_With_Track_Axle_-_40_Pack These are the ones I have. Not expensive, and shouldn't be terribly hard to make work decently.

Micro Center
cobalt quarry
I think they're only in the US. None around here that I know of, anyway. Never heard of them before living in Chicago.
I got a lot of stuff from the one in N Chicago. My first round of tools, component assortment packs to get bootstrapped, breadboard, etc etc. And several Pis, and Arduino clones. So many Arduino clones. (and on-brand 101s)
weary lichen
Soooo many Arduino clones!
cobalt quarry
8 UNOs, 7 Megas, 18 Pro Minis, 1 DUE.
I think that's it.
Now they all seem so big, yet so small. And oh, so very slow (well, the DUE is not too bad)
And my smarthome nodes are basically custom pro-minis with an UNO footprint and a pile of onboard sensors and an nRF24L01+ mesh modem.
cobalt quarry
That said, a promini is just an ATMEGA328P with a bare minumum of support circuitry.
weary lichen
So a pro mini with an uno print is... Well, just a stripped down Uno?
cobalt quarry
The only real difference is the USB. Mine have sensors and support circuitry on them, as well as a connector for the wireless modem. The design started life as an UNO shield. Moved to a prototype using a promini, then a custom PCB. Fun SMT soldering on that.
 karmic brook
My Arduino knockoffs are generally through-hole, so less fun to solder.
 heady python
signal lotus
heady python
signal lotus
nice @heady python , love that color scheme
cobalt quarry
Tankbot is printed. Now I need to find steel pins to assemble the tracks.
Tankbot is printed. Now I need to find steel pins to assemble the tracks.
weary lichen
What size pins?
@cobalt quarry I would also recommend a drill bit the same size as the pins, to clean/clear any print leftovers.
cobalt quarry
@weary lichen Good call. Although the hole that has to move freely is slightly oversize. The two that shouldn't are smaller. A dab of superglue is probably a good idea for those. Trip to the hardware store next week. Worst case some small finish nails should do the trick.
weary lichen
The cases for my DigiBadges are designed for a 1mm hinge rod. Much of the time they don't fit without cleaning first. Larger rods might be better, though.
 dusty mural
I was wondering if I could have some help with issues in a print. I am using a Chinese clone of an i3 and I recently got a new control board for it (MKS Gen 1.4). The print has consistent lines and at some points holes and gaps between layers. I don’t think it’s z wobble because this never happened with the old board.
 wise estuary
Is there a way of adjusting the drive current for the Z axis steppers?
dusty mural
Yes, I’ll try that
dusty mural
My z axis wasn’t getting enough current, so I increased it but to no avail.
I’ll try the old board again
 polar bluff
It looks like your E motor is skipping steps, or the filament is slipping on the hobbed bolt
dusty mural
I don’t remember hearing a clicking noise from the extruder
polar bluff
Hmmm. The only difference between your old prints that worked well, and your current prints, is a new board?
polar bluff
So, I have a 3d printer issue of my own. I'm rigging up a dual extruder, and I use Repetier-Firmware. Both extruder motors move, doesn't matter if I'm commanding E0 or E1 to move, they both move, according to their own steps per mm.
Does anyone know what'd cause that?
AHA I figured it out
Forgot to set my weights
dusty mural
I’ve switched to the old board and this happens
Note: the z is swapped with the y axis
Could this be a blown driver?
Also, I’ve tried adjusting the current but nothing happened
polar bluff
Oof that doesn't sound good. Is the current set correctly? Could be too high
dusty mural
I’ve tried playing around with it but it either stopped from undercurrent or acted like that
If I apply force it moves correctly but still makes that noise
dusty mural
Yes, I ran into that problem earlier
polar bluff
Hmm. I guess it'd have to be a blown driver
karmic brook
Look for a bad connection first (this happens surprisingly often in things that move, especially when you're changing boards).
dusty mural
I did check and the cable was in place
I’ll try using the driver on a different axis
crude kettle
Hey does anyone knows if a bad SD card could cause under extrusion? I have a Ender 3, don't know what version, and after an hour of printing it have under extrusion problems in certain layers. I'm trying a different SD to check.
dusty mural
I would doubt it
Try checking extruder current and make sure the tension is correct on the filament.
crude kettle

the print would go good for the bottom okay, but when it gets to the layers for the walls.........well that happens
violet needleBOT
Adafruit Industries posted Fab Lab Tulsa 1 - #3DPrinting #Timelapse @adafruit #adafruit

Every week we'll 3D print designs from the community and showcase slicer settings, use cases and of course, Time-lapses! Fab Lab Tulsa 1 Greg Zumwalt https:/...
idle crest
3D Printing LIVE in 5 mins https://www.youtube.com/adafruit/live
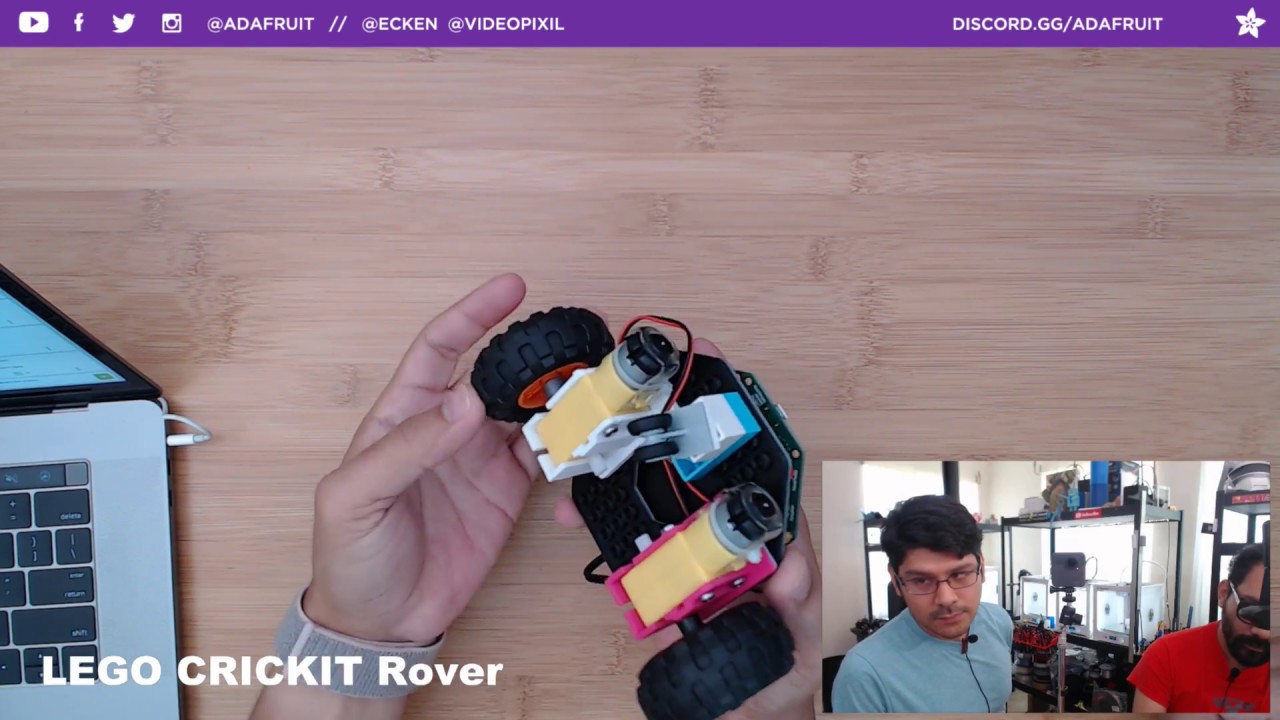
YouTube
CRICKIT Lego Rover https://learn.adafruit.com/lego-crickit-rover/ Adafruit Fusion 360 Parts on GitHub https://github.com/adafruit/Adafruit_CAD_Parts LED P...
heady python
Open rc car fully printed and assembled 😃 electronics next month 😃
Thanks @signal lotus !!!
Car is completely PETG. So shiny 😃
violet needleBOT
Adafruit Industries posted 3D Hangouts – LEGO Robotics and 3D Printing a Boat

CRICKIT Lego Rover https://learn.adafruit.com/lego-crickit-rover/ Adafruit Fusion 360 Parts on GitHub https://github.com/adafruit/Adafruit_CAD_Parts Adafruit...
crude kettle
Hey, after some experimenting I found out that the G-code output to my micro SD card was bad. I have a theory that the adaptor driver is bad. Now I'm using a USB Micro-SD adaptor and so far my infill looks beautiful again.
 bold jetty
Hi! Does anyone know where I could get some wood PLA filiment? Hatchbox is sold out.
crude kettle
@ @bold jetty
Apparently Homedepo has it
https://www.homedepot.com/p/AFINIA-Specialty-1-75-mm-Wood-Infused-PLA-Plastic-3D-Printer-Filament-AF-PLA-1-75-250-WOOD/206653654?cm_mmc=Shopping|G|Base|D25T|25-9_PORTABLE+POWER|NA|PLA|71700000034127218|58700003933021540|92700031755124706&gclid=CjwKCAjw4uXaBRAcEiwAuAUz8CwlfKoOs484yKfFvi4zRQSq_G8Dvb5BYVUApbV-wYFhI-rIDEQF6RoCjkwQAvD_BwE&dclid=CKP9u6vKvdwCFVg9Twod5KsG5Q

The Home Depot
Create things of beauty at a touch of a button by selecting this AFINIA Specialty Wood Infused PLA Plastic Printer Filament.
16 bucks and free pick up
bold jetty
Thanks! I didnt even think to check them.
crude kettle
You're welcome. I'm courious about their spools now hopefully I can get some soon.
heady python
https://www.matterhackers.com/store/3d-printer-filament/colorfabb-woodfill-1.75mm
Free shipping and usually arrives in 2 days

MatterHackers
If you're a fan of the smell of fresh cut lumber, but fear the sound of saws and drills, then ColorFabb Woodfill filament is perfect for you! 70% PLA and 30% recycled wood fibers, this specialty filament has a finish that rivals finely carved and sanded natural wood pieces.
 shy kelp
Today I learned 0% infill prints really good
Clear blue, pla filled-in on left, hollow on right
crude kettle
I'll remember that when I print a lamp shade, and don't worry I plan to use a led bulb.
shy kelp
@crude kettle I printed a hollow rocket and created a night light type lamp thing
What was a failed print is now a mini night light
hidden sable
would the hollow effect also be achievable by designing a hole in the bottom?
signal lotus
I think so @hidden sable, you could use a program like meshmixer and run through the "make hollow" process that people use for SLA printing
that being said, some models might then require supports on the inside to compensate for lack of infill/body
hidden sable
it seems like a cool way to speed up the printing process as well 😃
signal lotus
there is the slicer Simplify3d that can use multiple processes to change infill percentage through certain parts of a print so save time - it's not a free slicer though
crude kettle
I must get this sign. I can put it everywhere.
shy kelp
It’s on thingiverse

Just a little gimmick.
You can use it to protect your printer from curious fingers.
English or German
Print in 1, 2 or 3 Colors:
First 2mm for Background
Next 1mm for Warning Background
Last 1mm for Font
@crude kettle ^
crude kettle
Ah, now I can put a warning sigh everywhere in my room.............I have one printer though
 buoyant temple
https://www.monoprice.com/product?p_id=21666 found this printer for less then $200, seems okay, max print size only 110mm x 110mm x 120mm
think i could use it to print stuff for feather???

Monoprice.com
Empower your children's creativity, or your own, with the lowest-priced professional quality 3D Printer in the world. With a steel frame wrapped in black anodized aluminum shell and 50 micron layer resolution, you can see and feel right away that this is no toy. The delta des...
karmic brook
I bought one of these, but haven't fired it up yet. There is some information online on how to fairly easily tweak it for better performance, I'm planning on doing that first.
 boreal wyvern
I have had my mp mini delta for a while and have fired it up a couple times. I have found that the facebook group around it is The Best resource, definitely check it out to see what you are in for. Low cost in this case means the community replaces company tech support.
violet needleBOT
Adafruit Industries posted Flexi Stego - Timelapse #3DPrinting #Adafruit

Every week we'll 3D print designs from the community and showcase slicer settings, use cases and of course, Time-lapses! John Showalter https://www.thingiver...
 forest scroll
If you're looking for a cheap printer M3D sells a really consumer friendly one built for desktop. I can't remember the print bed size off the top of my head but I think it would be enough to contain a feather
shy kelp
@heady python that looks really cool, what does it do?
idle crest
#help-with-3dprinting Live in 5 mins! https://www.youtube.com/adafruit/live #3DHangouts

YouTube
CRICKIT Powered Paddle Wheel Boat https://learn.adafruit.com/crickit-boat/ Get CRICKIT from DigiKey https://www.digikey.com/short/jrzr03 3xAA Battery Holde...
violet needleBOT
Adafruit Industries posted 3D Hangouts – Paddle Wheel Rover

CRICKIT Powered Paddle Wheel Boat https://learn.adafruit.com/crickit-boat/ Get CRICKIT from DigiKey https://www.digikey.com/short/jrzr03 3xAA Battery Holder ...
buoyant temple
I'm modeling a feather case slowly, taking my time making sure dimensions are correct. I had to use https://github.com/adafruit/Adafruit-Feather-M4-Express-PCB
to get everything right in mm scale.
I haven't done any 3d modeling in years, not since like 3ds max 6 for Halo mods. Currently I'm using MS 3D builder but I would like to use blender eventually, a lot of my old friends use it for Halo mods now days and have great tutorials using it.
If your new to modeling MS 3D builder is easy to use.

GitHub
Adafruit-Feather-M4-Express-PCB - PCB files for the Adafruit Feather M4 Expess
buoyant temple
okay dont use that one... it seems off???
this one seems correct https://github.com/adafruit/Adafruit-Feather-M0-Adalogger-PCB
GitHub
Adafruit-Feather-M0-Adalogger-PCB - PCB files for the Adafruit Feather M0 Adalogger
opaque gust
great to use whatever modeler you feel most comfortable with. I have found a lot of great material for Fusion 360 modeling and seems to offer some really powerful parametric modeling capabilities
buoyant temple
i just like vertex editing, almost everything has it, nothing like xyz editing lol...
shy kelp
Oh I see, It’s looking good so far👍🏻👍🏻
violet needleBOT
Adafruit Industries posted Crickit Paddle Wheel Boat #3DPrinting @adafruit #adafruit

Guide: https://learn.adafruit.com/crickit-boat/ In this project we’re building a cricket powered paddle wheel rover! This simple water bot is 3d printed and ...
buoyant temple
Something to hold feather in, anyone want to try printing it?🙃
weary lichen
@buoyant temple Sure, put up the STL somewhere.
buoyant temple
how about .obj?
weary lichen
I don't have any software to do the converting.
And... Honestly, I'm feeling a bit lazy today.
weary lichen
I'm assuming binary.
Also, let me check to see if slic3r can load obj
Oh, so it can
weary lichen
What's the difference between "feather thing" and "feather fit"?
buoyant temple
one has symbol on it that when you put a feather in the case would be covering up... so was pointless kinda sad about that
weary lichen
Aha, I see that now
buoyant temple
feather base has the symbol
i tried my best to get everything mm scale, so if you have import option for that, thats what it would be
weary lichen
ooof. MM scale on a feather... Been there, not easiest
weary lichen
@buoyant temple It's printing now
buoyant temple
you think it will work?
weary lichen
Hard to tell without pulling it up. I've got my feather ready though
@buoyant temple It's SO CLOSE
Trying to find a feather that hasn't had pins soldered to it...
So, good news, bad news.
Good news: IT FITS.
Bad news: Removing the feather wing broke the nubs.
buoyant temple
dargh
weary lichen
Further bad news: the holes in the bottom are good for the pins, but not the plastic headers that connect pins.
buoyant temple
great feed back, i need this info
weary lichen
So, a hole in the bottom to let you press up and push out the feather without akwardly bending it
And enlarging the pin holes
buoyant temple
great idea
weary lichen
Would also recommend widening the USB hole, as a lot of connectors have a fat base
buoyant temple
ill work on all this and maybe ruduce the overall mass
weary lichen
Oh, also bear in mind that things like the joystick feather with through-hole components might not sit evenly, so making a "step" on each nub for the feather to sit on would work.
Otherwise, great work!
weary lichen
@buoyant temple Also, might want to add a little more room around the feather, it's pretty tight. To give allowance for 3D printing accuracy.
buoyant temple
okay
weary lichen
@buoyant temple Let me know when you have an updated version and I'll print it. (But I'm going to bed now so maybe not immediately)
buoyant temple
sweet okay, thanks alot, have a good night
weary lichen
@buoyant temple I've started the print.
buoyant temple
i hope it works, can you get a pic after done with a feather in it, so i can see if i gave too much room around it
weary lichen
@buoyant temple Bad news. The plastic bits of the headers are still catching - At their ends, and on the outside. They extend out to the edge of the board, while you have a small lip there still.
Good news! The boards otherwise fit nicely.
buoyant temple
oh dang, i shouldnt have put that lip there...
weary lichen
Just a little longer in either end, and removal of the lip and it should sit nicely.
buoyant temple
will your spacer you have work with this version?
weary lichen
Hmm? The one I posted was a mount, not a spacer.
buoyant temple
oh
weary lichen
It was to illustrate what I meant by a step on the nubs
The pegs that go in the hole are sized for those holes. Below them is a slightly wider peg, which the board actually sits on
Which allows space for through-hole components and the like.
buoyant temple
okay i see what your saying, like dont have it settle on it?
for if someone has like proto and stuff...???
buoyant temple
thank you very much for this feed back, ill start working on V3
weary lichen
Happy to help!
buoyant temple
i wanted a bit more support then just the nubs, so i added flat spots for board to sit on under USB and JST
weary lichen
A good call.
Those parts are going to get more flex, and you can count on that end not having much in the way of through-hole connections.
buoyant temple
yeah, the proto area/ SD card slot should have large enough area for cords to come out, if that is needed
weary lichen
Alright, it's printing. should be done before I head out.
buoyant temple
Dude thank you so much, i greatly appreciate all the help you have been
weary lichen
It's not a problem. Lets me use my 3D printer for more than just the occasional random thing.
weary lichen
@buoyant temple So, good news! It fits!
The pegs are a little tight (Maybe shave them down a hair?) and the long header on the USB side is a little tight.
Only one problem, and I'll post a picture for that
JST is not quite aligned.
Also, the pins stick out the bottom if they're oriented in that way, but I'm not sure if you intended it that way or not.
Anyway, I'm off. Feel free to send another file whenever, and I'll print it when I can.
shy kelp
Can anyone tell me what a good 3D printer would be for a beginner, I will probably put it in my bedroom
weary lichen
@shy kelp I have had good results with a Wanhao Duplicator i3 Mini (Rebranded for MicroCenter). It's working great so far.
@buoyant temple I'll print it when I get home. Hard to tell the minor differences from the pictures, but looks good!
 supple stratus
@buoyant temple @weary lichen nice Feather mount, reminds me of a joywing case I made but never published.
opaque gust
can i use say that section analysis capability, even on the web viewer is even better than sliced bread... it's sliced models
buoyant temple
the pics are from http://masc.cs.gmu.edu/wiki/ObjViewer you just drag and drop an .obj from PC into web browser so yeah, super basic
buoyant temple
im working on another one, that one has 12.5mm space, this one will have 13mm space for headers
 willow sedge
@buoyant temple @weary lichen The JoyWing case was designed to hold an ItsyBitsy with a Featherwing on top. I needed it because I'm running DotStars which need the levelshifted pin on the Itsy to work properly, so a feather wouldn't work, but I wanted to control it with the Joy Featherwing. So tah dah, case 😃
buoyant temple
at this point i wouldnt call this a case... lol huge chunk of plastic for keeping the feather safer??? idk i always touch pins when moving the feather and my skin has like no resistance, i short stuff very easy by touching...
willow sedge
I totally get it, I'm a lightning wizard during the winter when it's dry. Less so during the summer. Makes a lot of sense! And it's looking great, @buoyant temple, you're doing a great job!
forest scroll
So Ive been trying to print a Ukulele Chassis I designed in OnShape with a local printing shop, but every time I export the aspect ratio gets all mucked up. Anyone have an idea of how to fix that?
 sour hawk
What units are you exporting it in?
buoyant temple
sour hawk
And you're opening it in what to view it?
supple stratus
@forest scroll I haven't used Onshape but my guess it's a inches to mm thing? could try reaching out to their support on the socials.
sour hawk
That's what I'm guessing too. Loads just fine into Cura with no scaling issues.
@forest scroll is it too big or too small when you load it?
buoyant temple
i noticed an import error in "3D Print" mm is far too small, have to use "in"
weary lichen
@buoyant temple I'm home now. What's the difference between 4 and 5?
buoyant temple
4 is 12.5mm space, 5 is 13mm space... um 5 is just latest, i went back and re-measured everything should fit nicely
buoyant temple
i dont actually know how far the extra long headers poke out...
but it should be noticeable difference from the last one you printed
buoyant temple
taking more plastic now, If it has to go taller, ill start cutting holes or something to reduce overall mass....
weary lichen
It's really not a HUGE amount of plastic
@buoyant temple What would be really cool would be a way to have them stack nicely. A little lip around the top edge with a matching groove around the bottom edge?
If you could make them sized for the stacking headers, that'd be awesome
buoyant temple
i was originally thinking that, but... size of headers when attached is unknown for me. Only thing good about current version is ability for pretty much all feather to use one build
weary lichen
...Oh, look. I've got some stacking headers. Looks like about 10mm between the top of the PCB and the bottom of the next. And Feather PCBs are 1.6mm thick
buoyant temple
i think i could make it into 3 parts with the middle part different sizes
3 parts that stack
weary lichen
I'm not sure I follow?
buoyant temple
like base and top would be a feather without any headers
then middle section could be space of header
weary lichen
Ah! I was thinking something like what you have now, but with space underneath calculated to be correct for a male header to connect to a female header of a feather on a case below it
buoyant temple
currently when i design i dont use any overhang or anything like that, i try to keep everything pyramid like where larger stuff on bottom then smaller stuff on top.... this helps 3D printers greatly...
weary lichen
Indeed
buoyant temple
ill mess around a bunch to see if i can come up with something but, i dont think i can get 2 parts to connect without some kind of over hang... umm i could make it so you will have to glue flat part to flat part???
weary lichen
I've literally never glued a part.
In my experience, small overhangs supported on both sides tend to print well.
Smaller overhangs, even only supported on one side, seem to work OK
And! Overhangs on the bottom side can be supported really easily, especially 90-degree flat ones
buoyant temple
alright ill try with 2 lips, just a small 1mm round lip on both parts that has to slide past eachother
weary lichen
As always, I'll be happy to print.
I'd recommend a 1.2mm lip, though. Multiples of nozzle diameter are best, and common nozzles are 0.4mm, 0.3mm, and 0.2mm - of which all fit nicely into 1.2mm
@buoyant temple Printed! Grabbing pictures.
The header pins have a decent amount of space above the bottom of the case, which can be useful. The excess area around the JST connector is useful for being able to grab and remove the connector nicely. And the area around the USB socket is good for the big and hefty USB cables.
The V3 version is nice for when someone wants to use it for the bottom part - Headers on top.
The V5 version is nice for protoing underneath, etc
buoyant temple
@weary lichen your printer must have liked the v5 it looks amazing
weary lichen
It printed REALLY well.
buoyant temple
thanks for info on nozzles
weary lichen
IT's super useful!
I also didn't realize that 1.2mm was such a good number until just then, either
I knew it was a multiple of 0.4, which is a super common nozzle
but also being a multiple of 0.3 and 0.2 is super awesome.
Worth noting is that there's still some wall separation going on with my prints, but that's all settings, and isn't super visible in the print.
buoyant temple
does the v5 feel like it will last?
i think nubs at 0.8, half of board would be best??? then could make something that fits on top of it
weary lichen
...Honestly, I think it could support my weight.
It'll easily support my weight in the correct orientation
If I put a decent amount of pressure on the long side I can feel it starting to give. Short side, it falls over first but I'm pretty sure it'd support me in that direction.
So, super solid.
And this is only 20% infill
buoyant temple
everyone will one one...
anyone may tweek v5 with the .3mf i posted if it needs something changed slightly
idle crest
#help-with-3dprinting Live in 10 mins! https://www.youtube.com/adafruit/live #3DHangouts

YouTube
CRICKIT Rack and Pinion https://learn.adafruit.com/rack-and-pinion-bot/ MakeCode with WebUSB https://learn.adafruit.com/makecode/webusb Mount for CRICKIT h...
opaque gust
i was looking in the adafruit shop and they offer the ultimaker 2+ and 3, but not the s5... think it's coming? or maybe it's more prosumer? 🤔
violet needleBOT
Adafruit Industries posted Reciprocating Rack and Pinion Motorized #3DPrinting #Crickit #Adafruit

Full tutorial: https://learn.adafruit.com/rack-and-pinion-bot/ Reciprocating Rack and Pinion Learn how to create an automated geared mechanism with hypnotic ...
 vast salmon
guys any good recycling options for 3D printing waste? like making own 3D filament
karmic brook
There's this writeup on DIY filament extruding: https://www.3dhubs.com/talk/t/how-to-make-your-own-filament-by-recycling-old-3d-prints-part-1/2090

Talk Manufacturing | 3D Hubs
Hi there! After my previous series of 3 Talk posts, that were an introduction to local recycling: Part 1: Introduction to 3D printing recycling Part 2: How does local recycling work Part 3: Which shredding and extruding machines are available I would like to take that ...
For less DIY, there's the Filastruder kit (US$300): https://www.filastruder.com/products/filastruder-kit

Filastruder
In stock, ready to ship. Free domestic shipping, $60 internationally. Includes 1lb of ABS plastic for free! Are you frustrated with the high cost of filament for your 3D printer? Do you desire the ability to produce filament on demand, as it is needed, in the color and size ...
For ready-made, there's the ProtoCycler (US$1000): https://redetec.com/
ReDeTec
3D Printer filament recycling systems allow you to recycle and create PLA and ABS filament for use with 3D Printing - Safely, Affordably, and Sustainably.
weary lichen
Realistically speaking, the Filastruder should also be paired with a winder, which is another... $250ish if I remember correctly?

Filastruder
In stock, ready to ship. Created and supported by IanJohnson. Extruding filament to the floor works, but it can be finicky. You need a clear, clean space for it to coil, and the positions of the guide, fan, and extruder need to be just right. Then when the job is done y...
And for recycling your prints, at least with PLA, you'll need to add "fresh" PLA for best results.
 plucky moat
Anyone here printed connectors for fiber optic bundles to neopixels?
In particular I'm looking for something to connect bundles to the Jewel w/ 7x lights.

Be the belle of the ball with the NeoPixel Jewel! We fit seven of our tiny 5050 (5mm x 5mm) smart RGB LEDs onto a beautiful, round PCB with mounting holes and a chainable ...
I've played around with printing with PLA and PVC and having difficulty with tolerances trying to make snap fit style connectors. I'm wondering about something flexible like ninjaflex that will grab the jewel better, and also grab the fiber better
Or, even casting in silicone???
Any and all ideas welcome. I've done a lot of searching on instructables, youtube, adafruit, coming up lacking
or... maybe a two-piece screw together design ?
shy kelp
Hey everyone that 3d prints zyletech is having a sale in there filament, nema17 steppers and extrusions
Here’s the coupon codes
plucky moat
So I ended up designing a parameric model for 3d printed fiber optic to neopixel connections if anyone wanders across this 😄
Explained here with model images: https://forums.adafruit.com/viewtopic.php?f=47&t=139889&p=691811#p691811
Enjoy!
Also thanks to the @idle crest @supple stratus team for putting up the Fusion 360 CAD designs for the Jewel.
supple stratus
@plucky moat nice, looks great!
 tired fjord
I know 3D printing is all the hotness, but what about 3D scanning? I work a museum and currently document objects and artifacts w/ photography, but would like to start scanning stuff, I have yet to find any good documentation on the diff tech out there and how to start. Anyone have any pointers? Or the right channel/website to ask on?
 austere sedge
This Old House covered it in their recent Detroit season to replace some molding. They 3D scanned then printed large batches to replace broken plaster sections.
tired fjord
Interesting. I’m looking to start with smaller pieces. Pottery shards & pipes to start maybe.
 small beacon
@tired fjord You might find something suitable on these projects
I know that there have been pop-up stores and services that do 3-d scans to make lifelike 3-d prints.
tired fjord
Thanks @small beacon I’ll check them out.
small beacon
@tired fjord The DIY proposition to make your own 3D scanner system seems to be pretty feasible with the relatively inexpensive tech of raspberry pi and ordinary webcams. I think if you were to get into actually creating 3D object models from ground up instead of starting with a scan, the learning curve is pretty steep with the various CAD(computer aided design) and modeling software available but there are some that are a bit easier to use like Tinkercad. Good luck.
tired fjord
Yea I’m looking to scan objects specifically. I have used CAD software before (I’ve modeled our whole house and various pieces of furniture in sketchup).
And it would be more something I’d prefer to build/run/maintain myself as our museum has tens (possibly hundreds) of thousands of artifacts that would need to eventually need to be scanned. 🤪
boreal wyvern
@tired fjord we have had success with smaller models using the matter and form tabletop scanner (<6" models mostly). For larger models and arms we have a structure scanner attached to our ipad air that works really well for less detail.
tired fjord
@boreal wyvern so no real one solution fitting everything, I mean I guess makes sense I have to use different cameras and def different lenses depending on what I’m documenting, shouldn’t be different when going into the 3D realm I guess.
boreal wyvern
@tired fjord yeah! It is very much like photography in that sense. Macro lens for tiny things and strobe for shiny things lol. The biggest challenge after resolution is dusting the objects just enough to remove the shine to avoid reflections and get proper laser readings. Many people get frustrated with the limits of the scanners and move to photogrammetry solutions instead - sometimes faster and just as accurate.
tired fjord
Yea mostly what I’m seeing from museums are going photogrammetry, probably why they’re going that way.
 stuck inlet
@tired fjord kinects are readily available at goodwills here in seattle and probably where you are. they do depth sensing which is helpful
 night kraken
Does anyone if this (white filament)
will diffuse light
or would i get 'neutral' filament
heady python
In general white filaments do a great job diffusing light. You just need to experiment with how many layers thick you want it to be.
night kraken
well, i bought the neutral one now i hope it succeeds :<
plucky moat
What light? How many? What colors? How thick PLA? Is your design flexible?
There's an adafruit tutorial that uses 3d printed flowers over neopixels for diffusion. I've gotten nice results up to 5mm thick when running neopixels at 100% brightness.
idle crest
@night kraken @heady python we were tasked to tested white and Natural (off white) for learn.adafruit.com/neopixel-bracelet . the white's pigment actually blocks some light. Natural diffuses beautify. neutral will have a hard light spot if placed too close. here the show where we take a look at it https://youtu.be/xvVXBXBThO0?t=28m29s

Hang out with Noe & Pedro Ruiz and discover 3D printing! Get your 3D news, projects, design tutorials and more each week on Google+ Hangouts On Air. Subscrib...
night kraken
Yeah! glad i bought the neutral one haha
i held it in the light and i saw it diffuse nicely
I am just figuring out how to get blender to work with cura 😦
night kraken
I need this,
but then for the anet A8
this one is for the A6
its a filament guide, because my filament never goes into the extruder hole
drew a sketch haha
as you can see, thats how it goes, because the filament is on a reel, it doesnt go into the hole of the extruder
idle crest
#help-with-3dprinting Live now https://www.youtube.com/adafruit/live #3DHangouts

YouTube
This week's projects and Links 3D Printed IoT Gmailbox https://learn.adafruit.com/gmailbox Adafruit IO https://adafruit.io/ Adafruit Feather Huzzah ESP826...
plucky moat
@night kraken as a former blender person who did a lot of organic modeling, mesh stuff, if you're not using fusion 360 for 3d modeled engineer parts, you should really consider learning it.
engineer = measured dimensions, angles, sizes, offsets, etc
violet needleBOT
Adafruit Industries posted 3D Hangouts– IOT Mailbox

This week's projects and Links 3D Printed IoT Gmailbox https://learn.adafruit.com/gmailbox Adafruit IO https://adafruit.io/ Adafruit Feather Huzzah ESP8266 h...
night kraken
Yeah... I know how to use fusion for cubes, but i want to know, how to model battery holders with a lip (closing cover) etc
plucky moat
@night kraken everything i know about fusion 360 i learned from watching 200 between the layers youtube videos
Can i have that in a tshirt please
 night kraken
@plucky moat From watching what? haha
plucky moat
@night kraken doh! Layer by Layer. Where was my head at? #facepalm
night kraken
Ooh haha 😄
Well i tend to use blender because i know the program
but it makes more sense making it in fusion 360
Also, i got new filament, but i dont know the right settings 😦
 ruby hearth
@molten saffron which one did you get?
...can you put enough current through to get it to reflow itself? 😂
 molten saffron
@ruby hearth TriGorilla Round GMK3 Aluminum Round Heatbed Dual Power for Delta Rostock Mini with LED + Resistor + Cable + 100K ohm Thermistor https://www.amazon.com/dp/B01J3OAXNC/ref=cm_sw_r_cp_api_NuRFBb0W8V4DJ
ruby hearth
geez - even the stock picture for it isn't a great joint

at least it was accurately described
vast salmon
seems like Blackmarket-3D printer now support colorfabs
you can even build your own rockets with it
weary lichen
@ruby hearth That is an amazingly bad solder job. I'm impressed with how bad it is, honestly.
ruby hearth
pretty sure it wasn't heated up - just hammered on
vast salmon
I meant blackbelt 3d printer

Space Launch System (SLS) Block 1 Design by NASA :https://nasa3d.arc.nasa.gov/detail/sls-block1-2017 Material: nGen BLUE by colorFabb Music: frametraxx
molten saffron
@ruby hearth the picture says 24v too, the actual one not so much
is it safe to preheat that to 200C for soldering?
I mean the 450C iron didn't hurt the soldermask so I assume I can take it to 200C to help
violet needleBOT
Adafruit Industries posted IOT Gmailbox #adafruit #IoT #3DPrinting #IFTTT

Build a physical mailbox for your emails using Adafruit IO and IFTTT! This is a fun, easy, introductory project to the Internet-of-Things by making things mo...
violet needleBOT
Adafruit Industries posted Fusion 360 Tutorial – Exporting Projects

In this tutorial we'll take a look at how to export projects with linked components. Adafruit CAD Models on GitHub https://github.com/adafruit/Adafruit_CAD_P...
shy kelp
I'm looking at creating an enclosure for a project. It'd have a small button that would need to be pressed from an angle. https://www.adafruit.com/product/3347 seems to be the type of button to use for that. What I'm trying to find out is how to create the little actuator/push-rod/thing (and make part of the enclosure). I tried googling, but seem to not have the right terminology to find much of use. Any suggestions for projects to peak at, or howto guides to read?

Add some steely elegance to your project with these Metal Ball Tactile Buttons. They've got a nice industrial shine to them along with a light blue underbelly. Not only do they look ...
wise estuary
Here is an example of a face plate that presses similar buttons on an arduino shield:

Designed to be used with Adafruit's LCD shield kit with buttons (one example: http://www.adafruit.com/products/772) and Carlon electrical box (P/N E989NNJ). I purchased my Carlon 4" x 4" x 2" box from Home Depot for about $7.00. The box does not have any holes in it (for se...
shy kelp
Thanks
 normal dirge
hey all.....so im not very good at knowing what settings of my printer to change when things aren't working....i've got this STL file, and it's basically a switchplate for a lightswitch. but instead of having sharp corners, it has these slightly rounded corners. for whatever reason, the printer just keeps taking the "turns" too fast, and the filament gets dragged away from its position, and the build is messed up
i just did it using a raft, and it seems to be working fine so far, but i hate using a raft
other builds seem to work just fine
is it possible there's something in the way the print is designed that its causing these print problems?
i did it like 10 times in a row and every time im getting globs of filament, and its sticking and dragging with the print head
i took out the hot end, cleaned it, got some cleaning filament, ran that through, printed the makergear demo print (the bracelet), and it was perfect.
but this print....i dunno....something's not right
 brazen anchor
What surface are you printing on?
normal dirge
heated bed
with kapton tape
@brazen anchor
maybe i should slow down the speed of the first layer?
or change the first layer height?
brazen anchor
Perhaps. Have you tried brim print adhesion?
brazen anchor
It essentially adds a large "skirt" (but it's not a skirt) around the perimeter so the edges of your print lift up less. And it gives you some time to adjust and fix on-the-fly before the actual print portion is done.

That's the best picture I can get
Either that or it sounds like you have an uneven surface
I've had that issue too before, where the filament wouldn't stick and just roll across the surface, and if adjusting my Z axis while it was printing didn't work, I used steel wool to clean my glass surface. But with tape you shouldn't have any contamination issues
normal dirge
but other prints work just fine
i think its these rounded corners
that's why i thought slowing down the first layer might help
brazen anchor
I can see how sharp corners can improve adhesion, but really any shape should be printable. Try slowing down the first layer, or play with the first layer height and see
 junior osprey
make sure the tape is clean when you applied it. i have problems when using my printer. if i touch the tape i lay ontop of my glass, it prevents anything from sticking. the oils from our hands. i finally realized that after 100000 tries. also maybe a little glue on the tape will help. i sometimes use elmers school glue stick ontop of the painters tape i lay on my glass bed. crude solution but atleast the prints come out nice
@normal dirge
normal dirge
@junior osprey @brazen anchor just tried again. It’s weird. It’s hard to describe, but for whatever reason with this file, when it prints, the filament is coming out like a pearl necklace: every few mm there’s a glob
And that’s how it’s coming out of the hot end
junior osprey
what slicer are you using
brazen anchor
I believe it's Simplify3D
junior osprey
oh yes i rad that from the above comments
brazen anchor
But now it sounds like something's knocked out of calibration. Like filament extrusion rate
junior osprey
have you leveled the bed. and again. and once more lol
how many layers are you using and size? and hotend size?
normal dirge
Leveled again
This demo file worked perfectly
But look at that edge now, and that circle
Very messy
brazen anchor
ABS or PLA?
normal dirge
PLA
brazen anchor
Ooo that's quite hot. I would try 200 or 190.
And maybe try turning your bed up to 65 or even 70
normal dirge
Ah. Ok. So that could cause this intermittent globbing that I’m seeing?
brazen anchor
Potentially. It could be so hot that it just turns into a liquid and globs everywhere rather than smoothly extruding out a line
The melting point of PLA is 150-160 so you wanna find that happy zone where it's hot enough so it doesn't clog and extrudes smooth, but cool enough so it re-solidifies shortly after coming out of the hot end
normal dirge
@brazen anchor lower temp did not work
im either going to throw my printer in the trash, or, i guess try leveling again
so strange
brazen anchor
Hmm, yeah. How old is the filament?
normal dirge
not that old
brazen anchor
There are a ton of factors that can affect print quality, and it can be frustrating trying to isolate the cause
normal dirge
ive just never seen this behavior before
the thing it's doing..... 0.2mm flat, 0.1mm glob...0.2mm flat...0.1mm glob
how about this: is it possible this is happening because the extruder is too close to the bed?
brazen anchor
Honestly to me and my experience it sounds like a slow extrusion rate or contaminated bed.
And if anything the extruder might be too high. You want it close enough to basically "squish" the filament on. Too high and it won't press down and stick
normal dirge
ok....do u happen to know if there's a setting that slicers have that allow u to override the z offset?
as opposed to leveling again and relying on that to do the trick?
brazen anchor
I can't say for sure. I know in Marlin firmware you can set your Z probe/switch offset, but I don't know how to in slicers. Might not even be able to do it because the firmware will prevent movement outside of the defined boundries
versed wren
what's the best way to make two peices snap together
brazen anchor
It can vary based on the shape, how much load it's going to bear, etc... What are you planning to attach together?
versed wren
I'm making a giant pen clicker mechanism, and I need to retain the button on the shaft
brazen anchor
You could probably make something with a lip. Let me sketch something...
versed wren
the button will go over the beige part and down into the space between the green and beige, it pushes the green down and ramped rfaces cause the green part to rotate
I'm thinking maybe a finger that latches over the alignment tab?
brazen anchor
And it needs to affix loosely to the beige part?
versed wren
right, it needs to slide up and down
brazen anchor
Yeah my initial thought would be a lip around the top of the beige part and the bottom of the cap, but you might have to change some of the geometry to allow a little bit of flex for it to fit over
violet needleBOT
Adafruit Industries posted 3D Hangouts – PVA Supports & Halloween Projects

Multistreaming with https://restream.io/ Crickit Lab Shaker https://learn.adafruit.com/crickit-lab-shaker Adafruit Crickit https://www.adafruit.com/product/3...
violet needleBOT
Adafruit Industries posted Immortan Joe Mask Timelapse #3dprinting @adafruit #adafruit

Every week we'll 3D print designs from the community and showcase slicer settings, use cases and of course, Time-lapses! Immortan Joe Mask Remix By: Filip Tu...
 keen sundial
bit of a long shot, but i dont suppose anyone here would have any idea where to start for research about how to print for things larger than the print bed? I'm trying to print something that's larger than my print bed and I'm thinking I'll print a few components that will fit together to make a larger whole, but i need it to be fairly structurally sound and i dont know what sorts of shapes are best for that
 stuck nexus
This Immortan Joe Mask video keeps appearing in the streams I follow. But the thing that I wonder about it is, what is the material that the mask is printed with? It seems much more flexible than the 3d printed items I usually see. More rubber than plastic. What's is printed from?
 proven musk
@keen sundial I found this article interesting, though I have not tried their advice:
https://formlabs.com/blog/how-to-create-models-larger-than-your-3d-printers-build-volume/

When determining what's possible with a 3D printer, think beyond the build volume. Find out how to create objects larger than what fits on a build platform.
Their advice on chemical bonding is a bit specific to SLA, for FDM it is going to depend on the filament.
vast salmon
new droids you are building?
proven musk
No no, I'm not in that skill class, @keen sundial was just asking about big prints and that seemed to be a good article
 fleet spindle
@stuck nexus I believe that it was printed with Ninjatek Cheetah, a TPU (Thermoplastic Polyurethane) filament.
vast salmon
any temp limits with TPU?
fleet spindle
Well, if you heat it up to it's print temp it's going to fail, but I haven't tested temp limits on it yet. And I have a spool sitting here on my desk...might have to find out 😃
So I used a heat gun to heat up a rectangular strip I had printed of TPU95A (Ninjatek Cheetah). I measured the temperature with a Fluke IR Thermometer and pulled on it every 20 degrees of increase in the surface temperature. It failed somewhere between 120C and 140C. The failure mode was fascinating though.
vast salmon
i was thinking what is good in sauna
brazen anchor
That's quite the stringy tear it did!
fleet spindle
It wasn't printed solid, so the infill ripped out a bit.
@vast salmon What do you want to do with it in a sauna? I would think most FDM filaments would ok alright from heat. I'd be more worried about moisture + heat.
fleet spindle
Wearables, thinking of something like a watchband?
vast salmon
possible but other as well
fleet spindle
I've seen a number or TPU printed watch bands and they seem to work well, never made one myself though.
stuck nexus
@fleet spindle Thanks.
 spice estuary
@proven musk Seeing the image reminds me of James Bruton’s http://www.xrobots.co.uk/category/r6-droid/
violet needleBOT
Adafruit Industries posted Crickit Lab Shaker #3DPrinting #PVASupport #DualExtrusion

Full tutorial: https://learn.adafruit.com/crickit-lab-shaker/ Build a lab shaker to agitate parts with PVA supports! This DIY shaker uses an Adafruit Crickit...
 wet socket
Hey I know this might be a pretty basic question but I am a coder trying to make a robotic prosthetic arm and to keep the costs down I am gonna try to 3D print the pieces I was wondering if anyone has recommendations on user friendly cad software because I haven't 3D printed anything to this scale before.
fleet spindle
I personally like to start people new to CAD on Tinkercad. Free, easy to learn, no installation required. I think it's a good place to get your feet wet, so to speak. I've seen some people create some truly complex models in Tinkercad. Another option, and my personal favorite is Autodesk Fusion 360. Tons of great features, tutorials and guides all over the web, program CNC machines, send to 3D Printers, the whole gambit. Adafruit has a great series of videos called Layer by Layer that helps me find new tricks in Fusion that I never knew existed.
wet socket
Thanks @fleet spindle I will check both of those out
shy kelp
@normal dirge if you were going to throw your printer in the trash, I would feel very bad because of the amount of room it will take up in your trash can... you can send it to me, and I can get it out of your way without taking up all the room 😄
shy kelp
heady python
 night frigate
i finished assembling my new "anet a4" 3d printer and when i try the "home all" function in the settings menu the limit switches dont seems to be working the stepper motor just continue moving i checkel all cennections tho and i can see anythi8ng wrong with them anybody help?
versed wren
have you done a continuity check?
versed wren
have you checked continuity at the pins
night frigate
no how would i check them?
i don´t have access to the other side of them with this printer
versed wren
https://ae01.alicdn.com/kf/HTB1nGpJi25TBuNjSspmq6yDRVXaS/Anet-New-Upgrade-Main-Board-MotherBoard-Control-Board-Mainboard-for-Anet-A8-A6-RepRap-Prusa-i3.jpg
there should be exposed metal on on the side or back of the plug
 versed wren
well, it's either that the switches aren't connected, or it's misconfigured
sometimes to replace a headgasket you have to remove the transmission
 split cradle
Has anyone out there printed the Lego Cricket rover parts?
cobalt quarry
So... I had a catestrophic print failure last night. A few layers in the piece got loose and pushed right off the bed. For some reason it didn't register as a crash (which would stop the print) and by the time I saw what was going on the nozzle & block was encased in a blob of molten PLA. In vcleaning it off,, I managed to rip out one ot the thermister wires. 😦 New thermistor on order. I feel like this is a milestore as a 3d printer owner.... my first repair.
small beacon
and now for the rest of the story... https://www.thissmarthouse.net/dont-burn-your-house-down-3d-printing-a-cautionary-tale/

My ANet A8 caught fire and I nearly burned my house down. Read about what happened and the steps you can take to make sure it doesn't happen to you! Don't assume you've heard this all before -- you haven't.
brazen anchor
Ooof, yeah I remember one time a print detached from the bed and it was starting to form a blob. Luckily I was around and caught it before it got too out of control
cobalt quarry
Wow... ordered from Prusa half an hour ago. Got the "it shipped" email 20 minutes later. Scheduled for delivery Friday.
brazen anchor
i3 Mk3?
fleet spindle
Wow indeed! That's crazy fast!
cobalt quarry
@brazen anchor yes
brazen anchor
Nice, that's been on my wishlist for a while now.
cobalt quarry
@fleet spindle I've been really impressed with Prusa.
brazen anchor
Still pushing my cheap-o Amazon i3 but once it's time for an upgrade..
cobalt quarry
@brazen anchor It surprised me that it didn't register a crash and stop the print
brazen anchor
Ooooh okay, thought you were ordering a whole new printer. Sorry I'm up to speed now 😅
fleet spindle
I've been impressed with them as well. I help manage a set of 5 Mk2S printers, and have been pushing to upgrade them to 2.5S, or at ideally Mk3
brazen anchor
But yeah that's weird.....
Maybe because there was no actual resistance on the axis?
cobalt quarry
Serves me right to take a shower right after starting it 😦
Earlier prints came out perfectly...
brazen anchor
Are you using those special powder coated metal sheets that are in such high demand?
fleet spindle
3D Printers, consistently inconsistent, unless you want to pay $40k
brazen anchor
When you least expect it
fleet spindle
Murphy's Law strikes again!
cobalt quarry
No. I got mine before they were shipping those. I'll get one when they are in stock. They shipped with a plain one and $10 off the textured, powder coated one.
idle crest
#help-with-3dprinting Live Episode #199 – Running Marbles https://www.youtube.com/adafruit/live
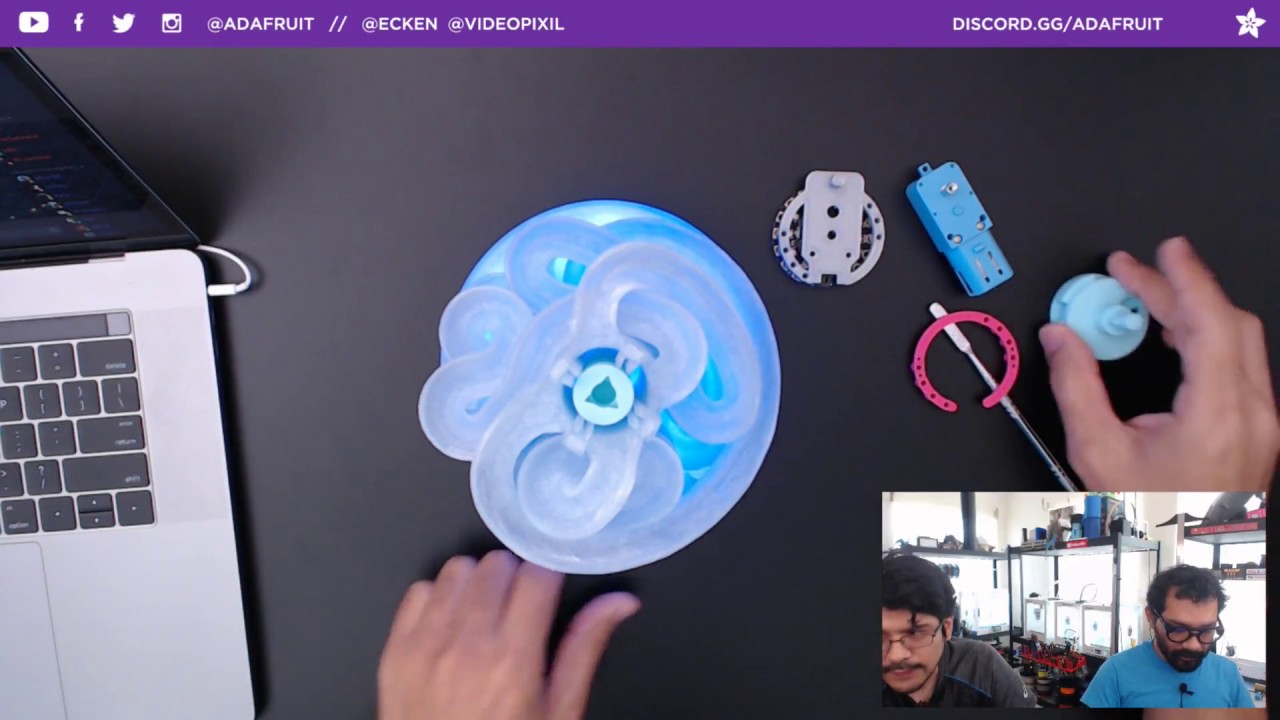
YouTube
This week's 3D Printing Project: Crickit Marble Run (original design by Tulio Laanon) https://learn.adafruit.com/marble-run/ Adafruit Crickit https://www.ad...
idle crest
Today's coupon code “kitbash” gets you 10% off your order! #help-with-3dprinting
https://www.youtube.com/adafruit/live
YouTube
This week's 3D Printing Project: Crickit Marble Run (original design by Tulio Laanon) https://learn.adafruit.com/marble-run/ Adafruit Crickit https://www.ad...
fleet spindle
Guess so
violet needleBOT
Adafruit Industries posted 3D Hangouts – Running Marbles #3DPrinting
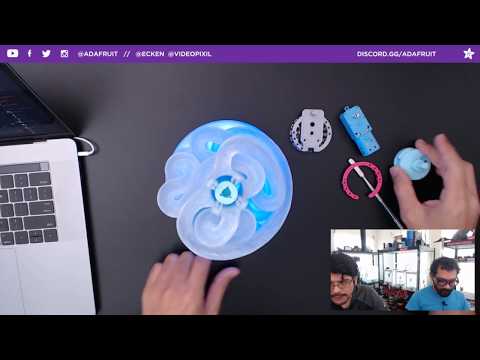
This week's 3D Printing Project: Crickit Marble Run (original design by Tulio Laanon) https://learn.adafruit.com/marble-run/ Adafruit Crickit https://www.ada...
 slate adder
I am looking for a good entry level 3d printer. Does anyone have experience with printers from M3D? Amy recommendations?
small beacon
@supple stratus @idle crest If you are looking for a way to attach tubes like the tube from the lightup part of a lightsaber to the hilt, look at pipe slip joint connectors. Go to the plumbing section for bathroom pipes and you will see there is a ring nut that threads on to the end of a threaded pipe but it clamps down on a beveled washer that gets compressed in the fitting. Bathroom drain pipes are 1 1/4 inch in diameter so you may have to ninjaflex a custom reducer washer for your light pipe. And btw, I wrap my neopixel strips in sheet fiberfill batting (bulk pack stuffing is uneven) and stuff that inside the tube for light sabers. It diffuses as well as center and supports the strip in the tube.
karmic brook
Gives a little compliance/padding as well, I'm guessing.
idle crest
ah sweet thanx @small beacon !!
supple stratus
@small beacon Think fiberfill stuffing works too or are sheets better? Can't seem to find fiberfill sheets online.
i'd imagine stuffing could be troublesome but ill search around the local craft shop for batting sheets
small beacon
@supple stratus Get thee to a fabric store. The sheet fiberfill batting comes in rolls used to line a quilt or garment. The big poly bag is all clumpy and not even when you try to flatten it out or make a sheet to roll. Regular foam or even those foam packing sheets are too dense and will dim your noepixels.
supple stratus
@small beacon I won't let you down!
small beacon
May the Flora be with you!
@supple stratus and tip#2 stuff the lights in the tube with scrunched up saran wrap for that cracked ice look on a Kylo Ren lightsaber. There should be an old Adafruit blog post on someone who used that.
violet needleBOT
Adafruit Industries posted Fusion 360 Tutorial – Using Library IO & Eagle
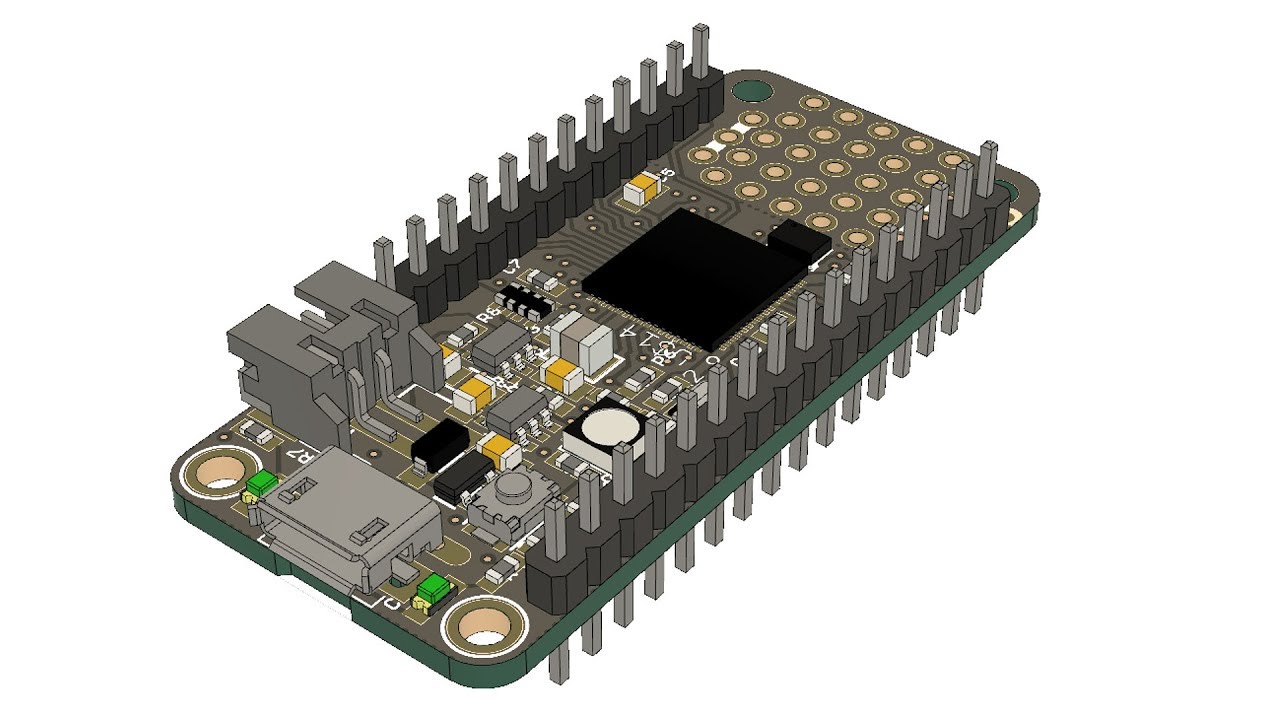
In this video I walk through the workflow of turning an adafruit board into a detailed 3D model. I use Autodesk Library IO to generate custom components to p...
karmic brook
The article has some good recommendations, like replace the default firmware (which ignores temperature errors). A smoke detector and an extinguisher are good ideas in general (but don't use the links in the article), if you want to get fancy, there are some UV flame detectors that are quite nice.
versed wren
put it on a flame resistant surface like stone tiles, don't store flamable materials near by
normal dirge
What does it mean if your filament is curling up around the hot end as it’s being extruded?
I tried using filament cleaner, but it didn’t help.
Does it mean I need a new hot end?
fleet spindle
Is it doing this on the first layer?
normal dirge
@fleet spindle yes
Here’s a picture. I slowed the speed wayyyyyy done, which helped a little bit
See how “blotchy” it is?
fleet spindle
Wow, definitely underextruding. What material are you using? What temperature are you printing at?
normal dirge
PLA 200
fleet spindle
Hmm, could be a little cold. I run my lab's Ultimakers closer to 215-220. Maybe try slowly increasing the print temp by 5 degree increments? New PLA?
Slowing the print speed down could indicate you're printing too cold because by slowing down the printing speed you're increasing the amount of time the filament spends in the hotend. This in turn increases the amount of heat being transferred into the filament in order to melt it.
brazen anchor
He was having a similar problem before at 220, and I suggested running it at 200. I print my PLA at 190 with a speed of 50mm/s no issues, so I reckoned it was too hot 🤣
fleet spindle
Really? wow lol.
brazen anchor
If it's STILL globbing up like that, it could very well be an extrusion speed issue, or something gunking up the tip.
fleet spindle
@normal dirge Have you only ever printed PLA on this printer? Any other higher temp materials like ABS or PETG?
versed wren
is the filament fresh and new?
versed wren
was it stored in a sealed container with a dessicant in the dark?
normal dirge
and when it just does a straight extruding (like when loading, just, extrude 50mm at a time), its curling up like crazy around the hot end
no
stored in the open
versed wren
humidity has probably messed with the filament, that can change what parameters work right
normal dirge
i bought some filament cleaner, and when that extruded, it was also curling up
brand new in the box
and the cleaning didn't help
versed wren
curling could be caused by asymmetric geometry on the nozzle, might help to do a thorough manual cleaning and inspection
there was nothing in that message....
fleet spindle
That was weird...
versed wren
the bot has a lot of false positives
fleet spindle
seems like it
Curling when extruding into thin air sounds like there's a problem with the nozzle, I concur with a manual clean
versed wren
and inspection, nozzles are typically brass which is a soft metal, if there were a ding sticking out into the extrusion path it would cause curling
normal dirge
how do u do a manual clean

Shared with CloudApp
this is as "isolated" as i can get the nozzle
i can't get the end separated from that whole..package...
fleet spindle
Ultimaker calls it the atmoic method: https://ultimaker.com/en/resources/19510-how-to-apply-atomic-method

Ultimaker.com
The Atomic Method can be used to unclog the nozzle of your Ultimaker. It will clear the blockage by pulling dirt or carbonized material out of the nozzle from the top side. To apply the Atom...
versed wren
you should be able to, so that's not good
fleet spindle
I would advise not trying to remove the nozzle while the hotend is cold, I've lost two nozzles and hotends from the tight tolerances, snaps half of the nozzle off in the hotend.
boreal wyvern
Our nozzles can get a partial blockage and that will cause a curly extrusion. For our manual cleaning, we use the bristle from a brass brush to wriggle around in our nozzle at full temperature to break things loose. I hold the bristle with needlenose pliers.
normal dirge
which one should i try first?
not understanding the atomic method exactly
or if there's a change to the procedure with my specific printer
fleet spindle
Basically you heat up the nozzle to 200ish. insert PLA manually by hand until it extrudes out of the nozzle. Then lower temp to 90. Then, making sure that the hotend/nozzle is secure, pull out the PLA in a swift, smooth, jerk. You should get a roughly conical end pulled out. If there's derbies in your nozzle, you'll see it stuck to the gummy PLA you just pulled out. Trim the gummy end and repeat until no more junk on the end of the PLA
normal dirge
yikes
ok
ill try that
my print is actually looking nicer now
after that first "rough" layer
but im guessing what would have taken about 3 hours will now take 14 hours 🤣
fleet spindle
get the end to come out clean?
versed wren
nah, they mean because it's running so slow
normal dirge
yea....continuing on with my print (the one i sent the picture for earlier)
gonna see how it plays out
i tried to print this file a dozen times, and after an hour, it was a giant ball of filament
this is the first time it seems to be working well
the speed is 2000
(vs normal 8000)
cobalt quarry
Thermistor arrived today. Alas when I went to replace it I found that the molten plastic had gotten into every possibly place it could have gotten into opn the heat block. Everythign caked up and seized. The heatsink is fine, but the rest of the hot end needs replacing. Block, nozzle, and heater cartidge ordered.
 restive nymph
Does anyone have any files for 3d printers for the CPX while using an external alkaline battery pack?
The ones on the learn guide seem to only allow for lipo batteries installed inside the case.
Also which material should I be using when ordering a snapfit case for the CPX and Crickit
cobalt quarry
@restive nymph I've used PLA (it's all I've used for anything so far) though something less rigid/brittle might work better. Dunno.
 carmine peak
What's the best method to print something that's bigger than my printer
versed wren
cut it into sections as best as you can, and key them so they're self-aligning. Basically have little teeth & grooves
carmine peak
wouldn't i need some kind of epoxy for that?
versed wren
you will have to attach them somehow but there's a lot of options
carmine peak
(if there's a tool for making screw ports i could see myself doing it that way
versed wren
you could use a solvent to make the mating surfaces sticky then jam them together, put in some form of glue, sonic welder, latching mechanical tabs, bolt holes
you still want the alignment keys, when you put two peices together they should'nt be able to slide around
carmine peak
there's a lot of bolts leftover from my printer, i could use those
is there a tutorial to make alignment keys?
versed wren
probably, I don't know of one though
they just need to be features that stick in or out on the mating surface, where the other side has the opposite feature
this is excessive, for a relatively small planar mating you'd want one key in each direction, and you wouldn't want to make them square teeth like this because they're unlikely to align cleanly straight out of the printer. If you use hemispherical or triangular keys it'll fit together better. Having a void at the tip of the extending side of the feature will make it fit together easier
carmine peak
ok
now if i DID have epoxy, would it make a bond strong enough to negate the need of the keys?
versed wren
unrelated
brazen anchor
The keys aren't for strength. They're for aligning the pieces
carmine peak
Right so the epoxy will do the work, thanks
brazen anchor
Otherwise if you have two flat surfaces you'll be holding them together with your hands while it sets if using glue, and still probably won't align well
carmine peak
yeah probably. Is there a bolt hole tool?
brazen anchor
What do you mean by that?
carmine peak
oof
brazen anchor
If you just model a straight hole, most screws will self-tap
carmine peak
aight
versed wren
so I'd recommend doing your keys like this
carmine peak
alrighty then
carmine peak
Alright, i sliced the peices
The two sides of the sliced part screw together, so it's really a matter of applying the epoxy. I would still like to know how to put the keys in though
 formal relic
is there any cnc people here?
proven musk
I do a little
shy kelp
0.1mm layers
carmine peak
Im trying to 3D print a mask and i had to decrease the scale of the model to fit it onto my print bed. How do I measure it to confirm if it'll still fit on my face?
It's an irregular shape so that's why im asking
also how do i add a camera hole
night kraken
Can anyone tell me the best PLA settings for a screw hole?
molten saffron
Clearance hole or are you threading into it?
brazen anchor
Looks about right already
molten saffron
What size?
molten saffron
I dont think that is going to print
night kraken
too small?
brazen anchor
Ooo yeah M3 is way to small
night kraken
oh!
brazen anchor
Unless you're self-tapping
brazen anchor
I would just get a self-tapping screw and model a straight hole
brazen anchor
Yup, and they can work a treat
molten saffron
I would just model it at the tap drill and screw it in
night kraken
(making cases for arduino etc)
brazen anchor
What exactly are you trying to screw together?
molten saffron
even with a machine screw
molten saffron
if you wanted to do it "right", heatset inserts are nice
brazen anchor
Use what you have at your disposal ¯_(ツ)_/¯
night kraken
I have screws
brazen anchor
Tapping your own hole is one additional step, so there's that.
night kraken
I have blunt m3 screws
molten saffron
m3x.5?
molten saffron
just model a straight hole at 2.5mm diameter and screw them in
molten saffron
at 2.5?
night kraken
brazen anchor
Yeah the threads might be too small to try and dial in the right tolerance
night kraken
i mean
molten saffron
try 2.75 then and add a chamfer at entrance to hole
night kraken
2.75 as hole diameter?
molten saffron
yes
versed wren
if you have trouble you can cut the end of the screw with a file to make a tap
night kraken
True, im just having a bit of trouble with the thread function in Autodesk
if i should have to use it
if if can tap it in with a diam of 2.75
versed wren
night kraken
Yeah i dont have a tap my sir
versed wren
that's a bolt
molten saffron
thread functions in cad are just visual
night kraken
Oh
versed wren
they filed the cutout to make it a tap
works for soft materials like plastic and wood
night kraken
So what yall saying is, make a hole 2.75mm in diameter
and then just
put the screw in
and tap it
versed wren
yes but
I'm imagining there's situations where just putting a normal bolt in could cause splitting, you can turn one of your bolts into a tap using only a file (easier with a dremil), then use it to tap the holes
versed wren
you cut it like in the image
night kraken
oooh
versed wren
you're turning it's threading into teeth to cut the thread
night kraken
Alright!
i might try that haha
thanks for the info guys, will report back asap when i tried this all 😄
versed wren
https://youtu.be/EJpgT2VCB_w there are some bonus steps to make it easier, like tapering the threads at the bottom

A simple way to make thread taps from bolts of screws using an angle grinder. http://woodgears.ca/thread_taps To address some hostile comments: Don't have th...
versed wren
You can't handle duet!
molten saffron
bah humbug
molten saffron
woo, got a v1.04
night kraken
what is it 😮
molten saffron
@night kraken its a precision piezo orion on a tevo blackwidow extruder
night frigate
how can i get filament into the extruder of my anet a4 i dont get it
idle crest
#help-with-3dprinting Live Episode #200 – Making the BladeSaw from ZELDA BOTW https://www.youtube.com/adafruit/live #3DHangouts

YouTube
Ancient Bladesaw from Zelda BOTW https://learn.adafruit.com/bladesaw Adafruit Crickit for Circuit Playground Express - https://www.adafruit.com/product/3093...
violet needleBOT
Adafruit Industries posted 3D Hangouts – 200th Episode!! Bladesaw
Multistreaming with https://restream.io/ Ancient Bladesaw from Zelda BOTW https://learn.adafruit.com/bladesaw Adafruit Crickit for Circuit Playground Express...
violet needleBOT
Adafruit Industries posted Ancient Bladesaw @adafruit #3DPrinting #ZeldaBOTW

3D Printed BladeSaw from Zelda BOTW with motorized chain and NeoPixels! Build your own BladeSaw from Zelda BOTW with 3D Printing and Electronics from Adafrui...
molten saffron
cobalt quarry
New hotend bits & pieces arrived tonight. Looks liek I'll be rebuilding it tomorrow.
(need better light than I have in the evening)
molten saffron
@cobalt quarry what did you get?
cobalt quarry
@molten saffron Just replacement for the stock M3mk3 hotend.
molten saffron
You like it?
I've had Mendel i2, Kossel Legacy, i3, Kossel Mini, E1x, DaVinci Duo, and now Tevo BlackWidow. Kossel Mini and Tevo BlackWidow are the only ones I run now
cobalt quarry
@molten saffron Ah.. the printer. Yes.. Prusa I3mk3. It’s great. I’ve had the usual minor glitches before but this was the first serious problem, and was partly my fault. I’m very happy with it.
cobalt quarry
Hotend replaced, printer rebuilt, self-test passed, calibrated, ready to print!
small beacon
Fire extinguisher charged and ready, smoke detector tested, escape routes planned, escape routes cleared...
 glass cairn
Once a design is drawn in Fusion 360 with the vertical axis set as Y, can it be corrected so the vertical is Z? Without completely redrawing the entire project over again after changing Fusion 360's preferences that is.
glass cairn
That'd just move the piece not correct the problem. Love the handle @molten saffron
molten saffron
Well that would fix your current model yes?
or do you want to know how to change default axis up?
glass cairn
Lol, nope. correct, get the default axis corrected.
molten saffron
Click your name in upper right > preferences > https://i.imgur.com/HnLiwEA.png
 glass cairn
Yup did that, but I want to correct the default axis in files that I made before learning about this.
glass cairn
ya as a jerry rig, but I want to learn how to do it correctly
molten saffron
Right click your sketch and select redefine
But its likely to break nearly every feature that is dependent
Especially if you're projecting geometry
glass cairn
Doesn't give me an option to 'redefine' if I right click anyways.
molten saffron
@glass cairn https://i.imgur.com/Aw7aW1Q.png
 molten saffron
Im not sure then
glass cairn
@supple stratus or @idle crest would either of you guys know how to correct the default axis in Fusion 360 on a file that was drawn when the default vertical axis was set to Y instead of X? I've already changed the setting in prefrences, but I don't know how to correct it in a file that was already drawn that way.
supple stratus
@glass cairn sure can! you can use the navigation cube to switch it. Goto where you want the top or front to be (click on the top face for example) and then right-click, select "set current view as"
@glass cairn
also, Garret of chaoscoretech had it as a tip https://youtu.be/ezKZIvzVGRM?t=9m30s

Garrett from Chaos Coretech models incredible things in Fusion 360. He is self taught, and has learned a great deal over the last few years. He has 5 tips fo...
glass cairn
Na, it's because of Joel's new vid that I learned about this issue. I'm referring to fixing the default modeling orientation to Vertical being Z even though it was mistakenly set to Y when the CAD was originally made.
@supple stratus If you notice even though I corrected to setting (making vertical Z), the default for that particular file (and all of the other files I've created previously) is set to vertical Y.
glass cairn
Lol, wow you weren't kidding @molten saffron I finally found & got to work the 'change the sketch plane' & man did it mess stuff up!
molten saffron
Is there a reason you need to change all the old files or a reason you care about it?
Just so it imports into the slicer as you model it?
glass cairn
Yup that's exactly the reason. Been looking at it as a mistake & was trying to learn to correct the mistake.
molten saffron
I think it's a lot more trouble than its worth to fix the previous ones
I dont model anything to a specific plane/axis up when I do it for work
If I have to upload anything to Thingiverse I'll open the STL in like Repetier Host, rotate/position it how it should be printed, and then export a new STL in the correct orientation for upload
If it's just for me I just use the slicers command to place surface on bed
If you export a file as f3d and create new from design it will follow the exported files coordinate system so it looks like your only options are redefine sketch planes or use the move command to reposition the model (the sketches will still be on the wrong planes but the model should export correctly)
glass cairn
Cool. Thanks @molten saffron
violet needleBOT
Adafruit Industries posted 3D Hangouts – Hallowing

Adafruit HalloWing M0 Express https://learn.adafruit.com/adafruit-hallowing Hallowing Case Files https://github.com/adafruit/Adafruit_Learning_System_Guides/...
 quasi trail
Has anyone attempted 3d printing eye glasses with a semi rimless design? I have yet to see one pop up on YouTube.
violet needleBOT
Adafruit Industries posted 3D Hangouts – Hallowing

Multistreaming with https://restream.io/ Adafruit HalloWing M0 Express https://learn.adafruit.com/adafruit-hallowing Hallowing Case Files https://github.com/...
violet needleBOT
Adafruit Industries posted Adafruit HalloWing M0 Express @adafruit #adafruit
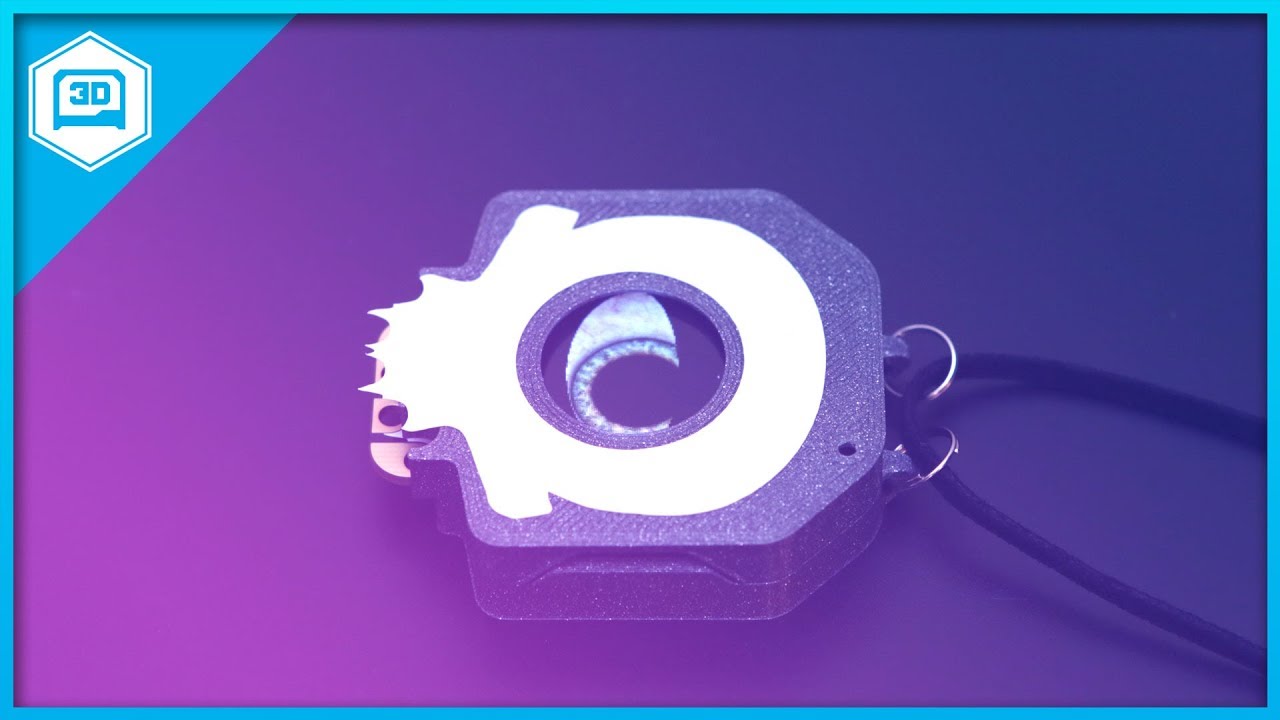
3D print a wearable case for the Adafruit Hallowing M0 Express. https://www.adafruit.com/product/3900 The Adafruit HalloWing is a skull-shaped ATSAMD21 board...
shy kelp
Watdya guys think of this? https://github.com/MrAlvin/RAMPS_1.7 I'm also making a shield for it here: https://easyeda.com/npgoalkeeper/ramps1-7

GitHub
An Arduino Shield for 3D printers. Contribute to MrAlvin/RAMPS_1.7 development by creating an account on GitHub.
I'm too broke to afford eagle, so I'm making the BOM in this program. Cheers, Mr Alvin. This will feature a 5v regulator as well as 5x TMC4361A-TA's with TMC2130's, and a standard Reprap LCD connector. It will also feature ESD protection, closed loop stepping, and even a coup...
 merry arrow
Is tronxy X1 a good 3d printer?
 spare ferry
I'm going to buy the Monoprice Inventor II that was featured on the main page yesterday. The content section says it comes with 1 roll of filament. Does anyone know what color it is?
idle crest
our was white pla @spare ferry
spare ferry
@idle crest Thank you!
shy kelp
@merry arrow get an ender 3
shy kelp
Anyone know where to get a ceramic heater for a 3d printer (M7)
shy kelp
versed wren
if that was light brown filament and you had some darker brown paint, it would look a lot like woodgrain
 leaden slate
I'm working on a forearm mount for
https://www.adafruit.com/product/3601

Sure, you have a keyboard. Maybe it's wireless. Maybe it's even Bluetooth. But do you have a mini Bluetooth keyboard? Like Halloween candy, this keyboard is fun-size! If ...
I based it on this $600 tactical keyboard
versed wren
nice, although if you're going to wear it as pictured you'll want to have some shape on the back to make it remotely interested in staying on the side of your arm
if your usecase allows, wearing it like a womens' watch would be pretty stable and comfortable
karmic brook
That could be useful. Since I really want a physical keyboard for my phone, I'm pretty restricted in the models I can consider.
leaden slate
I am making it because I'm bringing back my airsoft HUD scope and a keyboard will add a lot more functionality
versed wren
I do feel the need to be doubtful of any application that would need a full keyboard....
leaden slate
Sending messages
versed wren
I mean in a 'combat' situation like this
if you need to facilitate communications there's a lot of ways to do that without needing a whole keyboard, even if you can't talk for reasons
putting a keyboard on your wrist is attractive in a lot of ways and perfectly viable, outside of combat
leaden slate
I'm building a web app to go with it, if I use the laser range finder I can mark targets that get shared.
https://airsoftbattlenet.com
Anyone on their phone can add targets/clear areas and objectives and well as share geolocation information
versed wren
keep building your cool thing but here's another idea to go with, maybe at the same time. There's a few games I know that have a basic replacement for actual VOIP where you push a button, and it gives you a bunch of themes, you push the button for the theme you want, and it gives you a bunch of specifics, you select the one of those you want, and it sends a prebuilt message to your team conveying the information you want. What if you had a little 8 way hat that clicks and a basic tree to construct basic messages
push a direction, click, push a direction, click, push a direction, click, then all your buddies get a message about a sniper to the northwest of your position
leaden slate
Interesting
versed wren
in Team Fortress 2 they're called Voice Commands and they're pretty basic, in Planet Side 2 they're called VGS and I've never tried to use them
leaden slate
I already have a rotary encoder to turn on and off features I could add it in there maybe
karmic brook
Sort of like pie menus.
versed wren
then imagine instead of an 8 way hat you use a slider joystick, install a compass module under the joystick, and now you can have commands where you just point the stick towards the thing you want to spot and it figures out the direction, or for other commands you push it to the edge and swing it around to select a distance
leaden slate
I'll be displaying it on the screen using the pi camera annotate function
versed wren
ohh and it'd be extra cool if your buddies had a module that receives these things as data and then constructs it based on their position and orientation, even if they don't have your whole terminator HUD
voice synthesis doesn't need a lot of computing power, if anything making good sentences is tough
leaden slate
I could use a mumble server with a pi but I think my poor pi zero doesn't have room for anything else gpio wise. I could add an extra pi zero for the communication just a button/speaker/mic
versed wren
I remember mumble being really intense; but what I'm thinkiing is something more along the lines of sending structured IRC messages back and forth with absolute coordinates and then each team member hears a synthetic message in relative terms
so your system knows where it is, and can detect where other things are using range finding and orientation sensors, you send that coordinate and an identifier like sniper, machinegun, etc, their module knows where they are and what way's north, and tells them sniper 2 oclock 70 yards
leaden slate
So I take a pi zero, GPS, compass and a screen and just display an arrow to the closest target a well as the text
versed wren
I think you could replace the display with an ear peice and voice synthesis; but it would be fun to build a little fake watch with an E-ink display and maybe that radioactive nightlight stuff, that displays an arrow and a number
but where to get a circular eink display with pixels instead of segments....
leaden slate
So I'm gonna get that forearm mount printed in flexible plastic I think it will do better that way vs pla/abs
And then some double sided tape to hold it in
 worn mason
Today the SmartExtruder+ of my robotics team's MakerBot 5 kicked the bucket.
Anyone ever fixed these?
glass cairn
If my slicer is thinking that the printer is going to be using 2.85mm but actually prints 1.75mm. The printer would be seriously under extruding wouldn't it? The piece that your seeing the light through is a 4mm think printed piece which 2.4mm of that is solid, 3 walls - 1.2mm each side with 30% infill.
@supple stratus
glass cairn
Of which, if my guess is correct. How would I change that in Cura 3.3.1, of which I just opened it saw that there is an update. So it'll be 3.4.1 soon.
molten saffron
@glass cairn Settings > Configure Setting Visibility > Type "Diameter" in the search box" > Check the box for "Diameter" under the "Material" tab > Setting should now be visible to change filament diameter
I'm not really fond of how Cura hides everything
shy kelp
Its hidden so idiots don't go around messing up their settings. You can enable them ALL if you want.
heady python
Just finished designing, printing, and painting my homage to the Its a Small World Clock for my daughter’s nursery. I think it turned out well.
glass cairn
@heady python that is really awesome! and very well done, great job dad!
@molten saffron Thanks. 😃 @shy kelp ya but that's what a return to factory default settings is for. I personally prefer to have access, perhaps with a warning (like what windows does before you go into some areas) but it is much better to have access. Like in this case, I have been having this print issue for months, just because the setting was buried deep in the settings.
Hmm, may have spoken to soon in thinking it was fixed. @molten saffron that setting was already set to 1.75. You wouldn't have any other thoughts of something that I could try would you?
These are the settings that I presently have.
shy kelp
@glass cairn you do. It's in the EULA saying that cura wont compensate you if your printer breaks.
glass cairn
Well ya @shy kelp , that's given anytime that you mess with something. Opening, editing, changing etc. Whenever I change something about some thing I assume that it will void any kind of warranty or guarantee.
molten saffron
@shy kelp yeah and they hide settings that override other settings so you change it but nothing changes because of another hidden setting
glass cairn
OK, @molten saffron Do you know if there are any settings that could over ride the setting that you had me check?
molten saffron
I'll check when I'm off work
Have you calibrated your extruder?
Have you tried using Slic3r? I think its a little easier to configure...same with S3D.
glass cairn
OK, thanks. Short of cleaning it out, which I have done, I have no clue how to calibrate the extruder. & no haven't tried Slic3r or S3D. @molten saffron
molten saffron
Look up triffid hunters guide
glass cairn
I can not thank you enough @molten saffron ! I downloaded & sliced with Slic3r & I'm getting print quality that I haven't seen in months!
molten saffron
@glass cairn you might want to try prusa edition, it has some other stuff
Im sure Cura can make nice prints but it has a lot of settings
glass cairn
It was Cura that was giving me all the problems. I actually tried downloading S3D first (that's the Prusa one isn't it?) but I couldn't find the free download version & went & found Slic3r instead. I'm done with Cura.


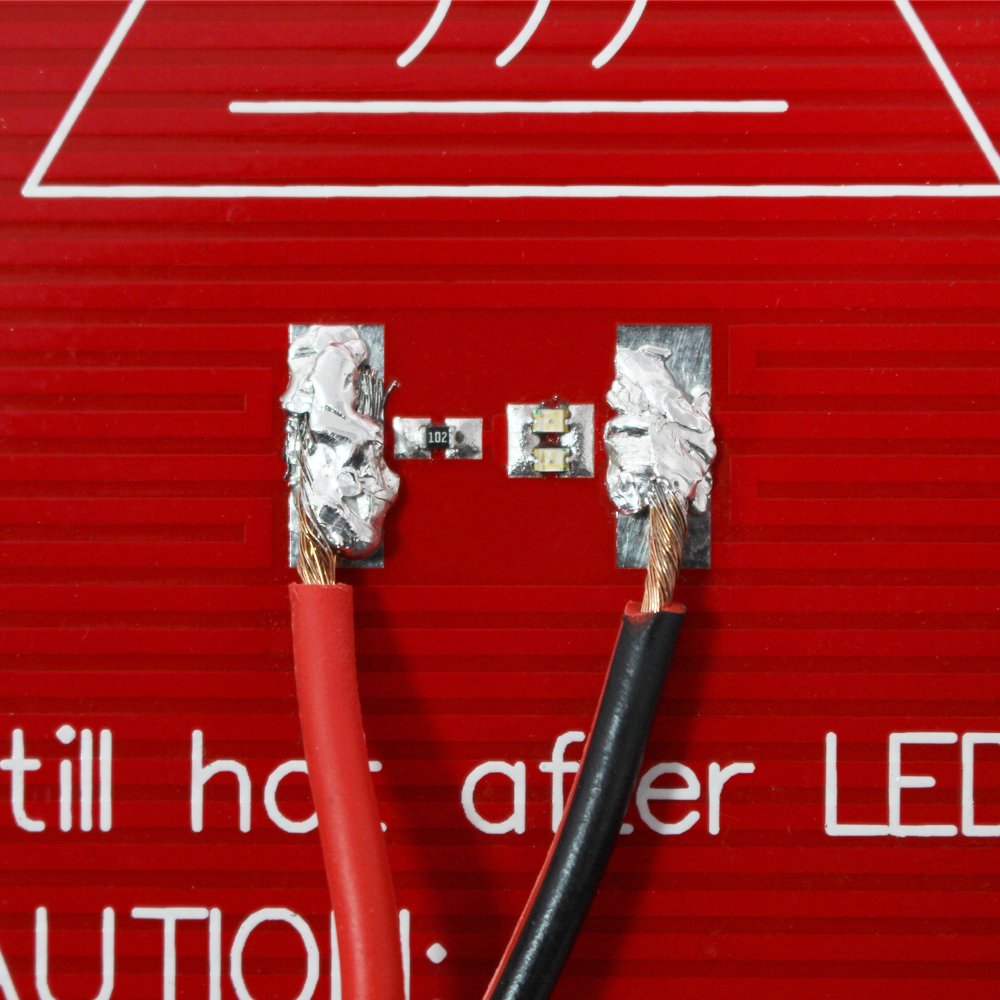

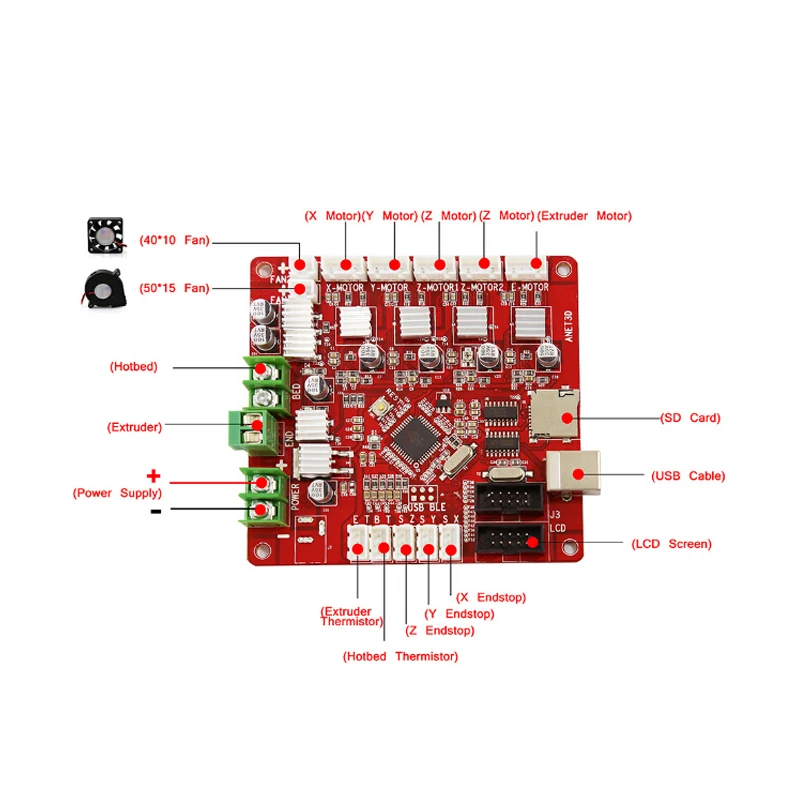


 coarse ruin
Cura does work with the i3 MK3... but the setting they give are... less than ideal
glass cairn
Ok cool, that's a much newer ver then what I found. Mine was only 1.3.1, that is 2.2.0 😃
I have the Maker select V2 @coarse ruin & it hasn't worked right & enabled my printer to print quality parts in months.
molten saffron
prusa edition is maintained separately
glass cairn
Ah, so it's even that much better? triply cool. 😄
coarse ruin
it's all about the settings. If you have a PRUSA machine... use PRUSA slic3r mostly... if you have other machines cura gives you the ablity / requires you to build the settings yourself.
slic3r has similar ability... but at the moment cura is a bit ahead in this game.
if you don't want to deal with it... pay for simplify3D
violet needleBOT
Adafruit Industries posted 3D Hangouts – Hallowing Book

Multistreaming with https://restream.io/ LIVE CHAT IS HERE - http://adafru.it/discord ----------------------------------------- Visit the Adafruit shop onlin...
idle crest
#help-with-3dprinting Live in 10 mins! Episode #202 – Hallowing Book https://www.youtube.com/adafruit/live #3DHangouts
YouTube
This week’s #3DPrinting project on Adafruit Learning System Hocus Pocus Book Eye https://learn.adafruit.com/adafruit-hallowing New Parts Every Week! Adafr...
night kraken
@coarse ruin I use the Anet A8 so 😮
violet needleBOT
Adafruit Industries posted 3D Hangouts – Hallowing Book

Multistreaming with https://restream.io/ This week’s #3DPrinting project on Adafruit Learning System Hocus Pocus Book Eye https://learn.adafruit.com/adafruit...
coarse ruin
@night kraken this guy seems to produce reasonable results and give you setting (clearly not the best but functional) https://www.youtube.com/watch?v=9HkZHXK5n4I

Hi Guys! In this video I wanted to show how to set up a profile in Cura for the Geeetech A10. If you are new to 3D Printing, I hope this helps. If you are in...
cobalt quarry
I have an STL file I want to work with in Fusion360. Importing so far results in a mesh made from all triangles which won't convert to an object. It's fairly simple: solid triangle slab with a hole through each corner. I want to build on it. I could recreate it I suppose.
 zinc nebula
Is anyone on that has printed the Cults Surtur-Crown that Noe and Pedro showed on their program yesterday?
molten saffron
@cobalt quarry would an iges or step help you?
cobalt quarry
No idea. These words mean little to me in this context.
I think it'll be easier just to redesign it.
molten saffron
Can you share the file?
cobalt quarry
I've gotten past it now. Deep in Fusion now 😃 I need practice with Fusion anyway.
versed wren
if you have Blender installed you could try importing it, then delete duplicates
where did the STL come from?
coarse ruin
@cobalt quarry there are some tutorials on how to import stl files into fusion360. I did it once a long time ago. The method has since changed and i don't remember all the steps.
coarse ruin
step files are the easiest to import into most CAD.
coarse ruin
@cobalt quarry i think is this the new way (patch mode)? https://www.youtube.com/watch?v=m5v8JO7pEAk

How to Convert .STL to a Solid Model in Fusion 360 // In this quick tip, I'll show you how to convert an .STL model into a Solid model using the Mesh to bRep...
cobalt quarry
Next question... @supple stratus @idle crest Are there fusion360 files around for https://www.thingiverse.com/thing:3018417

https://youtu.be/NvkouG-F75k
Build a CRICKIT powered rover robot using LEGO pieces and 3D printed mounts! Learn how to use the Circuit Playground Express and the LEGO brick system to build and assemble a two wheeled moving robot. Use Microsoft MakeCode to program movements wi...
Specifically the TT motor box/mount.
idle crest
of course! https://a360.co/2LkIk2t for the motor mount and https://a360.co/2uLYuH9 for the plate
files are always listed in the 3d printing section of guides like https://learn.adafruit.com/lego-crickit-rover?view=all#3d-printing

Make a two wheeled robot
cobalt quarry
@idle crest Awesome! Thanks.
cobalt quarry
And I figured out how to pull it into my design. I'm actually going to take the TT Motor model and try using it to carve out a pocket in my piece.
coarse ruin
was it the mesh to brep / patch method or one of the other methods?
there a lot of projects i have that a easy accurate STL -> fusion workflow would help. But i just don't have to time for because it so slow / manual.
signal lotus
Does anyone here have any advice on custom printer building? I want to build a rigid frame with at least two extruders, support for flexible/pva, and also a large bed. Dimensional accuracy is important for anything coming out of this machine.
cobalt quarry
Almost perfect... ex@coarse ruin The final approach was using a fusion project, extracting what I needed from it, and bringin that into my project.
Printing the first prototype now.
coarse ruin
3Dprinting hundreds of snowflakes as hand outs for events.
small beacon
@coarse ruin Are each of the snowflakes unique in design as are real snowflakes?
coarse ruin
not unique.... that would require generative design... but some are clear and some are white... similar to this design https://www.thingiverse.com/thing:38992

Just a simple snowflake for the holiday. Hang 'em on your tree or around the house for some holiday cheer.
p.s. My wife likes them in white PLA, but I prefer the clear.
small beacon
I guess you had better queue up netflix for a couple of days while they print. Good luck.
coarse ruin
batch of 9 every hour... just press the button every once in while doing other things. But yes holiday stroll (nashua, nh) is more than a month from now so... just getting started early.
 fiery pecan
Is this the right channel to ask about cnc milling?
coarse ruin
depends... if its about speeds and feeds... unlikley.... if it's about how to get slic3r to work with something likely
fiery pecan
Ok my question starts out simple, and grows to more complex possibly.. I’m thinking of diy cnc options for cutting thin tin sheets, like bear can of the sort.
The more accurate result the better, I have some stepper motors lating arround scrapped from scanners..
fiery pecan
0.3 ?