#help-with-3dprinting
1 messages · Page 20 of 1
 pale python
 modern nacelle
PETG is definitely really good for snap parts, it is a bit springier than PLA
 golden mica
Ey,
Im taking a class in school called Manufacturing. Its really fun and we are getting into stuff like CNC machining and other methods of prototyping. We have several 3d printers too, and we will be getting into those later. Im really interested in 3d printing because of its ability to take 3d models on a computer and make a physical model of that computer model surprisingly fast, something that would prove very useful for me as I have gotten into 3d modeling using blender and Autodesk CAD. I was hoping someone with a lot more experience in 3d prining could make some suggestions on what printers are cheapest yet still relaiable and at least decent quality
pale python
@modern nacelle thanks, i'll order some and try it!
modern nacelle
@golden mica how much are you willing to work to keep the machine running?
We have some machines that never need service, but start at 30k
If you are willing to put in the effort, a good starter would be a Monoprice Mini, or a Makerfarm Pegasus if you want a bit bigger.
 cloud halo
The prusa i3 mk2/mk3 are highly reviewed and positively regarded consumer printers that are sub $1000 usd.
 boreal lava
@viscid kelp I have a two-up that I am in the process of upgrading, but is getting pretty solid prints. I'm happy to help where I can.
@golden mica @cloud halo yes. it's really hard to go wrong with the prusa design. There are so many mods and adaptations, that you almost have to fall on something that works for you.
golden mica
Hmmm, Ok, ill take a look around and ask some of my neibors and friends that have them, thanks for the advice tho!
cloud halo
@boreal lava That's what I love, the large userbase. Just like the old saying "No one ever got fired for going with Microsoft/IBM/EMC...", it's hard to go wrong with choosing a popular development/prototyping platform. So many people use Arduino/RaspberryPi/Prusa/etc that you have security in numbers.
modern nacelle
I'm not a huge fan of the Mk2/3 personally.
They can be finicky at times, and many parts are hard to come by spares.
The MMU is fantastic though
 uncut ledge
mk2 outclasses practically every machine sub 1500
mk3 is.. personally a bit more than i want from a printer to the point of it being a burden
and PETG is my go-to plastic these days for anything that isn't a show piece
there's no reason to not use it over ABS unless you want to acetone smooth or it needs to survive above 75c
 covert ferry
I ❤ my Mk2. Haven't done the S upgrade nor the multi-color (yet?) Was finnicky until I got the Y-axis perfectly aligned. Hasn't had an issue since February. I love my Proto-Pasta, their matte filaments are amazing
 vital cipher
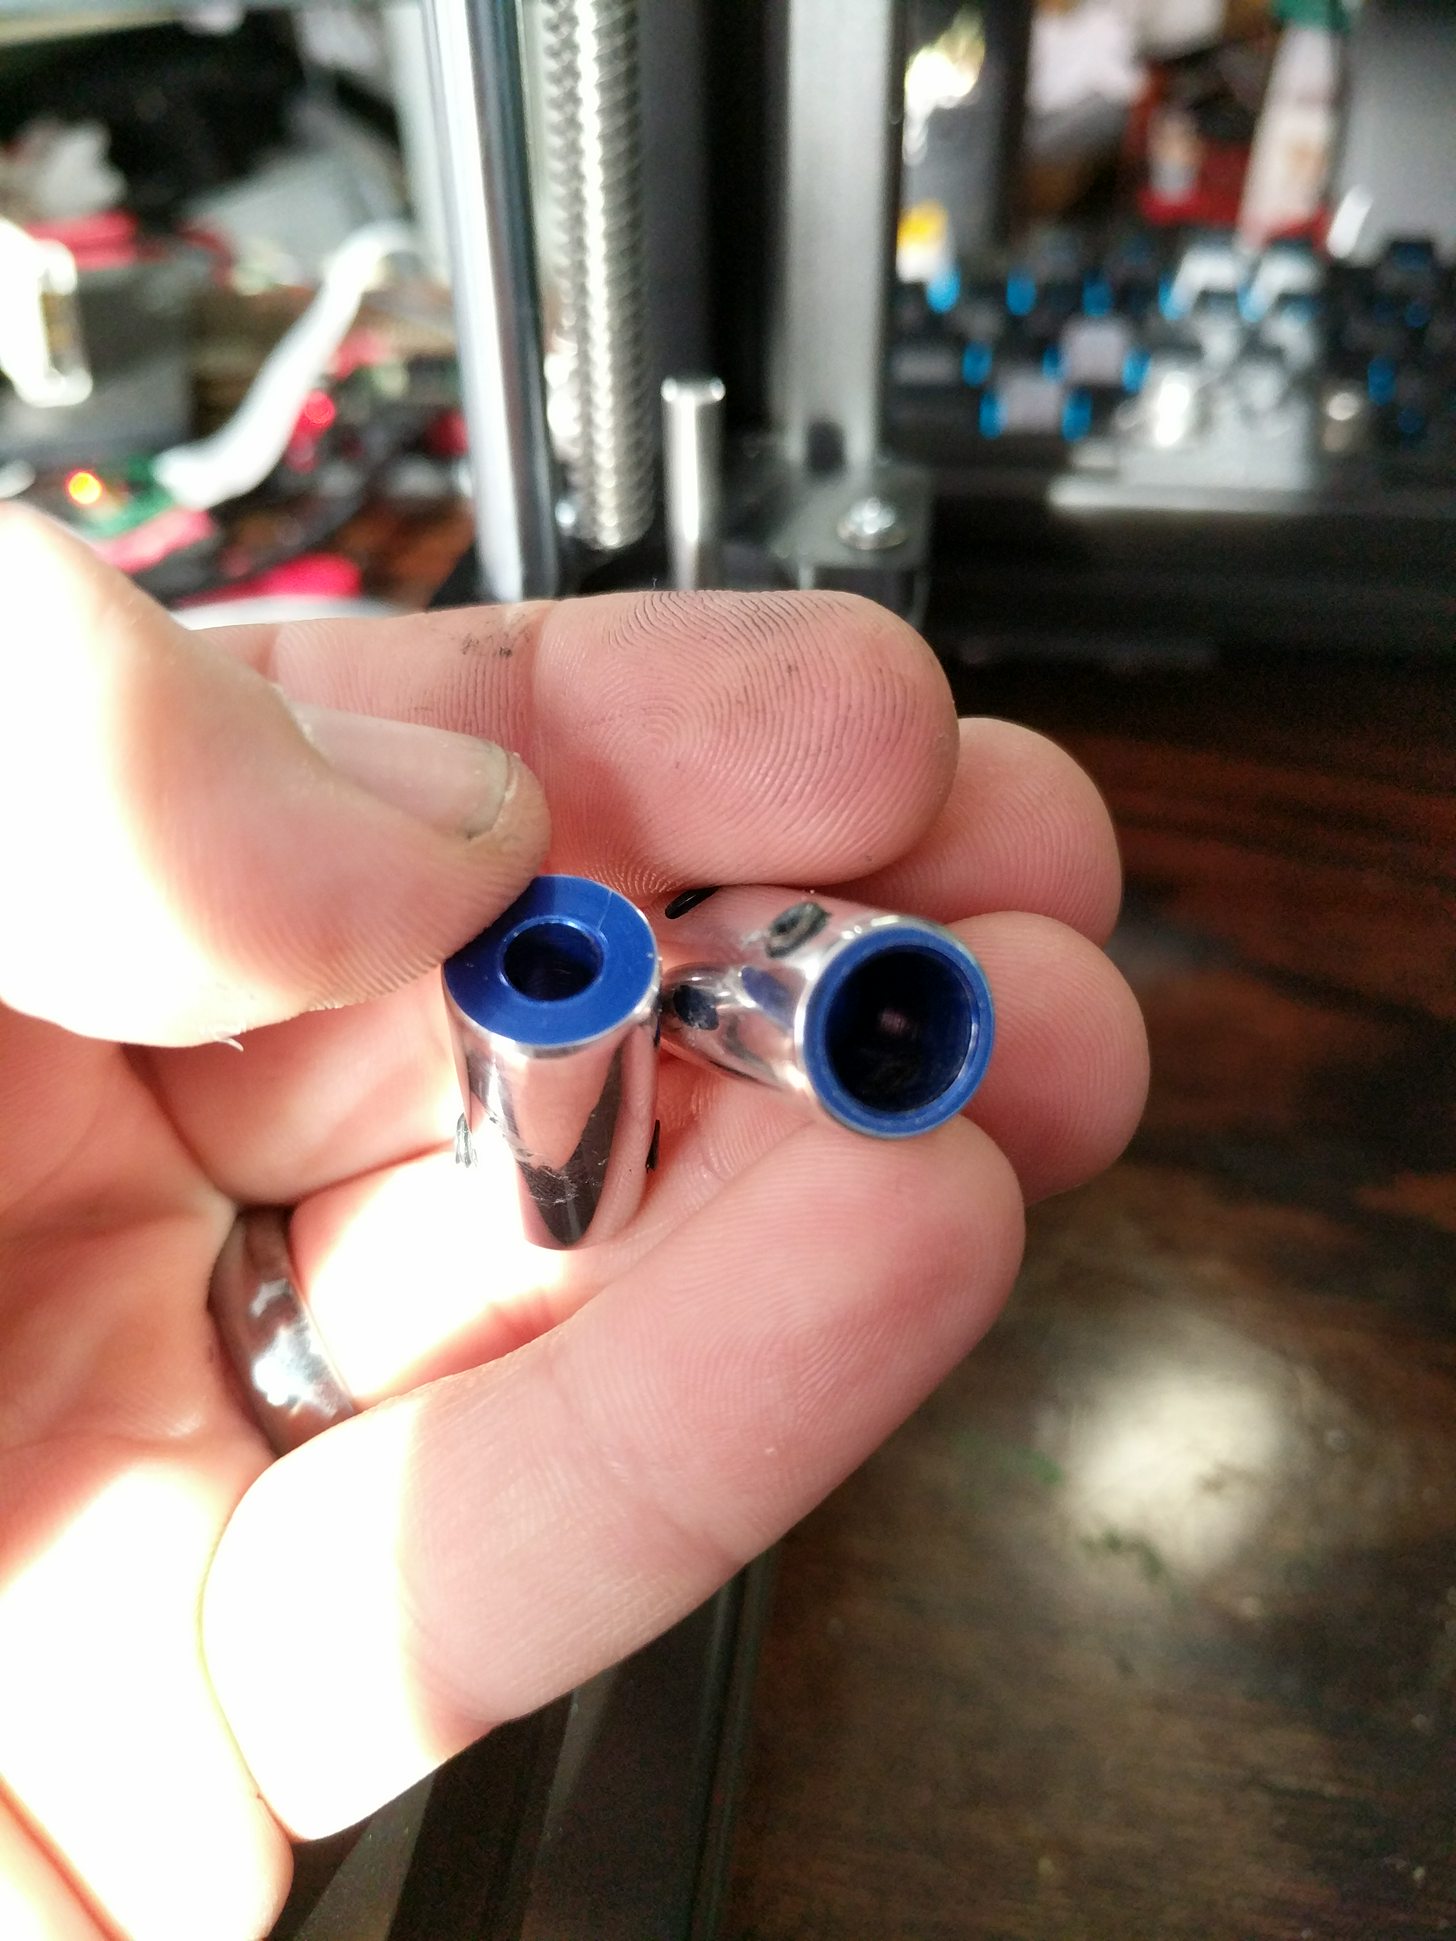
had to turn down my z couplers https://photos.app.goo.gl/ns63gff9hu5aYaEu2

Google Photos
 karmic brook
I looked at the Prusa but it looked like the frame wouldn't be as rigid as a box frame design.
boreal lava
@karmic brook The box ones do seem stronger, which is why I am going for that design on my next build. Honestly though, the standing frame design is plenty rigid. It just becomes an issue at higher speeds if it is not reinforced well. As long as you go at a moderate pace, they are great.
 devout sable
I run my mk2s at 120mm/s and it’s perfectly fine, no issues with ringing or the frame flexing. The mk42 head bed is incredibly light so there’s way less stress on the frame than some of the heavier glass beds. The only issue with the frame is the initial setup and getting everything square but that’s just a bit of patience and measuring stuff a few extra times to double check
uncut ledge
extruder is trying to take off with 0.8mm nozzle at 60 mm/s 😂 https://streamable.com/o1o4m

 sacred oyster
@uncut ledge look where i found you...
currently my printer is broken, its just turning off midprint, and going to its loading screen.
modern nacelle
sounds like you're drawing too hard on the power supply. happened on one of my printers
modern nacelle
@harsh laurel I own 3 of them, really good starter printer
sacred oyster
@modern nacelle
other people have had the same problem on the same printer
hwo would i fix it?
modern nacelle
Hm. What printer is it?
sacred oyster
The Microcenter rebrand of the duplicator i3 plus
the Powerspec Duplicator i3 Plus
@modern nacelle
modern nacelle
Hm, I'll do some digging and see if I can find a fix. I'm guessing you're in the US, so 110v power input?
sacred oyster
Pretty sure, idk 😛
@modern nacelle
It started right as i was gonna start building a nice robot arm
Rip
modern nacelle
Hm, what material were you printing at the time?
sacred oyster
Pla.
modern nacelle
Alright. My best guess is that the power supply can't provide the power needed, which is unlikely. Could also be a firmware bug. Try running the print again, keep an eye on the temperatures. That'll tell you the issue.
 bright olive
Venting: I'm doing a model and it's incredibly detailed considering my lack of inexperience, and fixing all the geometry whoopsie-daisies in Sketchup is nine kinds of a chore.
That instantly went better by exporting a different format and letting Shapeways handle the conversion and slicing.
 weary lichen
I did end up buying that 3D printer. And some filament. It will fuel all sorts of shenanigans, I am sure.
uncut ledge
You should probably steer away from sketchup as well
weary lichen
I've personally used FreeCad in the past
bright olive
Noted, thanks
sacred oyster
@modern nacelle
boreal lava
For designing mechanical/functional items, Fusion 360 is hard to beat. It is a bit more fidgety when it comes to organic shapes, but is still workable.
sacred oyster
@modern nacelle
i still havent got it working, i opened up the back and nothing look burnt, hm
 vast salmon
@supple stratus @idle crest now task to 3D print your face and test iphone x with it https://www.macrumors.com/2017/11/27/face-id-iphone-x-fooled-by-mask/

Since the iPhone X launched earlier this month, people have been attempting to fool Face ID, the new biometric facial recognition feature built into...
 idle crest
oh yea didn't even need a mask. it thinks noe and i are the same person so it unlocks for us both, lol
 jovial wedge
Not sure if velocity painting is a new technique for this crowd, but I haven't seen it before.
Here's an example with Repetier Host, video in spanish but should be pretty clear even in mute 😃

Técnica de Velocity Paing con Repetier Host os animo a que la probéis y así dar un toque especial a vuestras piezas impresas. Link de Repetier Host: https://...
Demo of the object at the end.
 violet needleBOT
Adafruit Industries posted Circuit Python DotStar LED POV Wand

In this project we’ll show you how to build a POV LED wand. Adafruit DotStar’s deliver high speed PWM making them great for Persistence Of Vision. Full Tutor...
weary lichen
Sweet. My printer arrived a day early
Buuuut I don't have much in the way of filament until tomorrow
boreal lava
@weary lichen I have nothing but good things to say about Hatchbox filament. I've never bought $30 a kilo spools, so maybe my view is biased, but at around $20 a kilo I have had good results.
weary lichen
The filament that's arriving tomorrow is Hatchbox
boreal lava
Awesome
weary lichen
And now, for a super small tiny test print with the included "sample" filament
It moves! This is all so exciting.
 willow sedge
@weary lichen Nice!
weary lichen
It's tiny and, uh... stuck.
Scraper is not working. Seems to be super thick plastic so not surprised. Best idea?
Got it! Pair of pointy tweezers
I love that I can just drop things on a SD card and not have to worry about location.
Hmm, that'll have to be addressed. Started printing but only came out with a glob at first. Nozzle seemed too high?
I'll have to fiddle with it tomorrow. I'll finish this print but then it's sleep time.
 tribal egret
@weary lichen did you level your bed?
boreal lava
@weary lichen There's a lot that goes into setting up a new printer. Don't get discouraged.
weary lichen
@tribal egret I leveled the bed firsr thing but that's also the first thing that came to mind. Print quality otherwise seems grand though
And @boreal lava given the great super simple prints I have had so far, I am anything but discouraged.
tribal egret
that's great @weary lichen 😄
weary lichen
Indeed! I'm excited to get home and start fiddlig with it
 unkempt remnant
Hey, group mind--any suggestions for 3D printers <$200?
Looking for a starter to see if it's something I'd want to invest more into.
bright olive
The Monoprice Select Mini at $230. Maybe you can find an open box for less if you want. But I wouldn't go lower
unkempt remnant
Yeah, it was a relatively arbitrary pricepoint
weary lichen
@unkempt remnant I just got the V2 mini on Cyber Monday for 165ish
Seems solid and well built
unkempt remnant
Looks like they've got a promo code all week
weary lichen
Mine was from Amazon, so it arrived next day. Which was awesome
unkempt remnant
Lemme know how you like it!
sacred oyster
@modern nacelle
violet needleBOT
Adafruit Industries posted Fusion 360 Tutorial – Parametric LED Strips

Ever need to model an LED strip? Here's how to make a parametrically driven strip. The length of the strip grows (or shrinks) when the amount of pixels chang...
weary lichen
Well, it looks like (so far), the web uploading is working.
Waiting for it to heat up before I will hit print, though.
Well, it's been printing for a bit now
I love the sounds it makes
 supple helm
weary lichen
supple helm
weary lichen


Whirr whirrr whirrrrr.
In other news, I now own a 3D printer. https://t.co/c8UYt9mo43
 Twitter
tribal egret
Twitter
tribal egret
@weary lichen are you aware of the heated bed fix you might (should) do eventually?

Many users have this timing belt grinding problem with this Monoprice Select Mini 3D Printer. The wires for the bed heating are routed underneath the print b...
@weary lichen thankfully its an easy fix, and you can skip drilling a hole through the body by printing a side plate or other workarounds on thingiverse
weary lichen
@tribal egret I had not seen that
Printer in the vid isn't exactly the one I have. At the very least the plate attachment is different.
tribal egret
@weary lichen doesn’t matter if it’s v1 or v2, — the video shows a v1 before the v2 came in white. v2 has the design slightly adjusted but the mod will still need to happen eventually.
weary lichen
I'll have to look in to what's the easiest method for doing so. Definitely don't want my printer breaking from an "easy" fix
 halcyon hedge
How much of an issue are fumes assuming you stay away from ABS?
weary lichen
Doesn't seem to be an issue to me so far.
tribal egret
@weary lichen I have the same V2 printer, had it for ~ oh less than a month, then the heated bed stopped heating up. If anything just be mindful of the bed temperature, if its not "Heating up" then you need to consider looking at the wiring. Mine frayed (check the facebook group for the printer for similar threads) -- learned how to properly splice wires because of it xD
weary lichen
Spaghetti was from filament being a little too far forward.
Also, I'll take a look at the wiring
tribal egret
@weary lichen just lookin' out fer yah !
weary lichen
Sensible!
weary lichen
So, the "Underside" of my prints (With support) are looking like hot garbage. Is this normal?
tribal egret
@weary lichen hot garbage? Like?
weary lichen
So, I printed a gear out. The top looks nice and smooth. The bottom has lots of lines going everywhere, they're not regular, and it's very rough.
tribal egret
@weary lichen my workflow for good first layer is rubbing the bed with isopropyl alcohol then preheating the bed and hot end to 200 (PLA) and 60 on the bed. After it’s “warmed up” the first layers tend to adhere better
@weary lichen ah, may need to get a glass pane to make it smooth
weary lichen
No, not for touching build plate
That ends nice and smooth
It's stuff above supports
One on right HAD a peg, but it was too small and broke off. The back of the one on the left looks just like that, too
tribal egret
Using which slicer?
Use a different support pattern
What’s your temperature settings?
weary lichen
Support is "Everywhere"
190/60
I had previously been using 210/60 with the included filament but the recommendation for the Hatchbox stuff was 190
tribal egret
Everywhere in the setting but the pattern
weary lichen
I didn't see a pattern setting in the program.
tribal egret
Would say something like “zig zag” etc
tribal egret
Which version?
weary lichen
15.04.6
The newest version yelled at me and wouldn't start, so I installed the one that came with the printer
I just wanted to get the printer working first.
Strucutre Type is "Lines" with overhang angle of 60, 15% fill amount, 0.7mm X/Y distance, and 0.15 Z distance
 weary lichen
It only has "Lines" and "Grid" available
tribal egret
Latest one should work. The quirk there is you have to select the printer on the menu before you can slice it
weary lichen
Oh, it was an OpenGL issue.
Said something about not being able to find something and just wouldn't start at all
tribal egret
Hm! Not familiar with that
weary lichen
I did a google search and found absolutely nothing, so I gave up and tried the older version.
tribal egret
Yeah, can’t help with that atm sorry
tribal egret
Also how fast are you printing?
weary lichen
30mm/s
tribal egret
Hmmmmm
weary lichen
Infill at 50mm/s
tribal egret
Should be aight. Only thing I can’t think of is the pattern
Maybe lower the travel speed to like 30mm
The z axis only has one arm support
weary lichen
The gears I printed with the included filament look fine. I'm going to print one of those with the same settings as the old filament.
weary lichen
I know I have printed with higher layer height, which is the first thing on the list.
tribal egret
Yeah leveling the bed 🛏 is a crucial step
tribal egret
weary lichen
@tribal egret New prints look next to identical to the older ones. Definitely going to call it a layer height issue
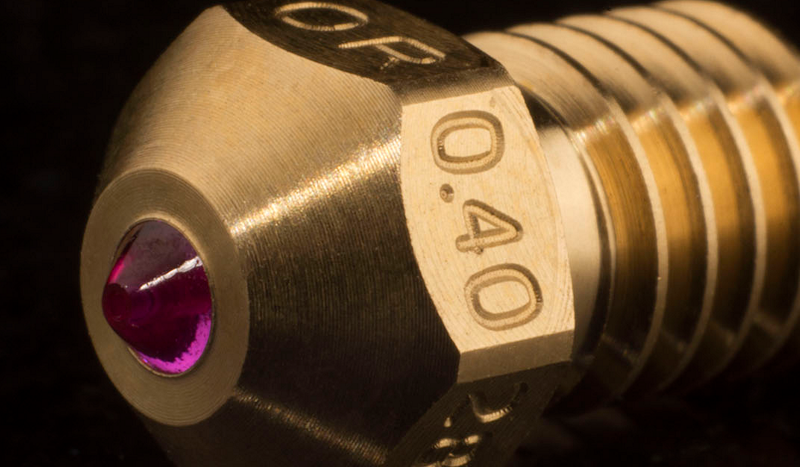
Watching a 3D printer work always reminds us of watching a baker decorate a cake. Gooey icing squeezes out of a nozzle and makes interesting shapes and designs. While hot plastic doesn’t tast…
Huh. Neat.
Not going to need that anytime soon, but still neat
vast salmon

I’m teaching a high school astronomy class this year (which I thoroughly enjoy, by the way!), and one of my students lives a couple hours away and uses Skype to attend the class sessions. Th…
tribal egret
@weary lichen :3 definitely something to consider if you wanna try filaments with additives 😄
weary lichen
Yeah, which isn't something I'm going to be doing soon.
 still panther
@vast salmon , very cool. Next step, let it turn itself based on who is talking.
vast salmon
it's cool that it even use adafruit tutorial diagram
weary lichen
Had my first print failure today. The bed was never set to heat (oops), and somewhere after the first few layers the whole thing got knocked off the build plate. Cue a bunch of spaghetti.
On the plus side, what did print was plenty enough to check my measurements and verify that mount hole placement and the like was correct, so that was great.
The re-print of the part is almost done, according to the web interface. I should probably go check it.
uncut ledge
many people dont seem to like the ruby https://www.reddit.com/r/3Dprinting/comments/7152r8/psa_avoid_the_olsson_ruby_nozzle_i_was_shocked_by/

reddit
Lets just hit the major points: -E3D hot ends specify 3Nm torque for nozzle installation, this is typically no problem. (I do this a lot) The...
 slim escarp
Much like @weary lichen I also jumped on a monoprice 3d printer sale last weekend, only I got the mini delta. Had some issues with the auto bed leveling where it would aim off the build plate, but removing that line in the gcode & doing a manual homing before starting a print seemed to fix the issue but I have a question about it in the facebook group for the printer
And here is the 1st print!
weary lichen
Nice! I was wary of the Delta printers. They look cool but as far as mechanical complexity goes, there's a significantly large amount of things to break.
slim escarp
@weary lichen yeah it was definitely a calculated risk but I liked the form factor & the review from Hackaday was very positive
weary lichen
The Mini V2 has an issue which I plan on addressing, in that the wires for heating the bed are poorly placed and will eventually kink and fray.
slim escarp
That's one thing that I think is so cool about 3d printing, that you can upgrade or fix basically any issue yourself so then you don't have to go crazy for an expensive machine if you don't want to
uncut ledge
until your bearings die and you're waiting over a week for new ones 😞
 opal shale
hey all, I'm thinking of making a Zelda chest as a secret santa preset (complete with chest opening jingle and lights inside)
I'm thinking of making using popsicle sticks and a 3 print
So print a a sorround and stick popsicle sticks to the inside
As shown here
So I would cut and stick popsicle sticks to the inside to hopefully give a nice effect
Does anyone have good recomendations for the hinge part?
weary lichen
@opal shale For the hinge, you can usually go to craft and/or hardware stores (And/or walmart maybe?) and get tiny hinges.
tribal egret
@opal shale maybe something like this? https://www.thingiverse.com/thing:82533

I searched the Thingiverse for a simple hinged box that was parametric and printed all in one piece. I couldn't find one. I did find some really neat parametric boxes and lids though. I used none of their OpenSCAD code for this.
I've printed probably a dozen one piece boxes with hinge during my testing. I wanted a tight hinge that would reliably print and NOT fuse together. During my testing I experimented with different speeds, temps, and tolerance values in my SCAD files. The attached OpenSCAD files prints reliably on my printer. The resulting hinge is a bit loose but it reliably does not fuse. Changing the tolerance by .1 does make a much tighter hinge, but sometimes I could not break it free. YMMV.
just the hinge part - maybe you could build it into the frame?
tribal egret
@opal shale have you seen this? https://www.youtube.com/watch?v=G-k8U9gvZXM - uses tinkercad but easy to adapt for fusion

In this mini-series we're going to create a Battlefield game in TinkerCAD and make it ready to be 3D printed. You're welcome to suggest me more ideas for fut...
opal shale
I use thinker cad 😋
Terrible quality, but I was playing around with the circuitry for this
I need to get a normally closed reed switch though
weary lichen
Anyone care to guess at what this is?
opal shale
I dont know @weary lichen but i am curious!
I have the same slip ring adapter that i got for a project and curious to see what you do with it
would you mind linking to the STL?
weary lichen
Sure, I can put it up
It's the gear for a turret ring for an RC tankbot I'm working on
Agh. Time to type all of that up again
AGH
Thingiverse is NOT liking me

A gear designed to work with this slip ring.
It's a 1mm pitch, 54-tooth gear. The grommets and washers allow for use of M3 screws without nuts.
The holes don't line up perfectly, but you can convince the grommets to go through with only a little effort.
I didn't think about the difficulty of holding the grommets still while inserting the screw, so they'll have to be gripped with a pair of pliers or something similar.
@opal shale It's up on Thingiverse, despite the website trying to fight me the whole way
 serene basin
Does anyone know where I can find a sled to hold my Adafruit Metro that I can 3d print?
tribal egret
@serene basin isn't that the same formfactor as an UNO?
serene basin
Yeah I think it is the same shape
OK, realizing now that its the same formfactor as the UNO, I was able to find a 3d model of the UNO on autodesk (https://gallery.autodesk.com/fusion360/projects/arduino-uno-rev3) and I'll be able to design my own sled now.
 tribal egret
that's great @serene basin 😃
 shy kelp
Just measure it first.
shy kelp
How much do the wires twist, if at all?
weary lichen
It's a slip ring.
They don't.
The top part (Connected to the gear) can spin to its heart's desire.
Except it doesn't have a heart.
opal shale
Do you have a link @weary lichen that looks exactly what I was after for my project!
weary lichen
@opal shale Thingiverse link for the gear is above
I'm still working on "perfecting" the mount.
opal shale
oh sorry!
weary lichen
No worries!
opal shale
i scrolled up til i saw the pictures and i thought they were the ones you posted earlier!
weary lichen
Heh, it happens.
opal shale
My idea was a clock
weary lichen
What project are you working on?
opal shale
I was going to use UV leds and glow in the dark paint
weary lichen
Oh, neat!
I'm building a LoRa TankBot.
now that I have the 3D printer, I'm actually able to build the tank from the ground up instead of modifying something that already exists. Gives a bit more possibility.
I totally intend on putting the largest laser I can afford as the main gun. It probably won't be much, but it might be able to pop baloons or light matches.
opal shale
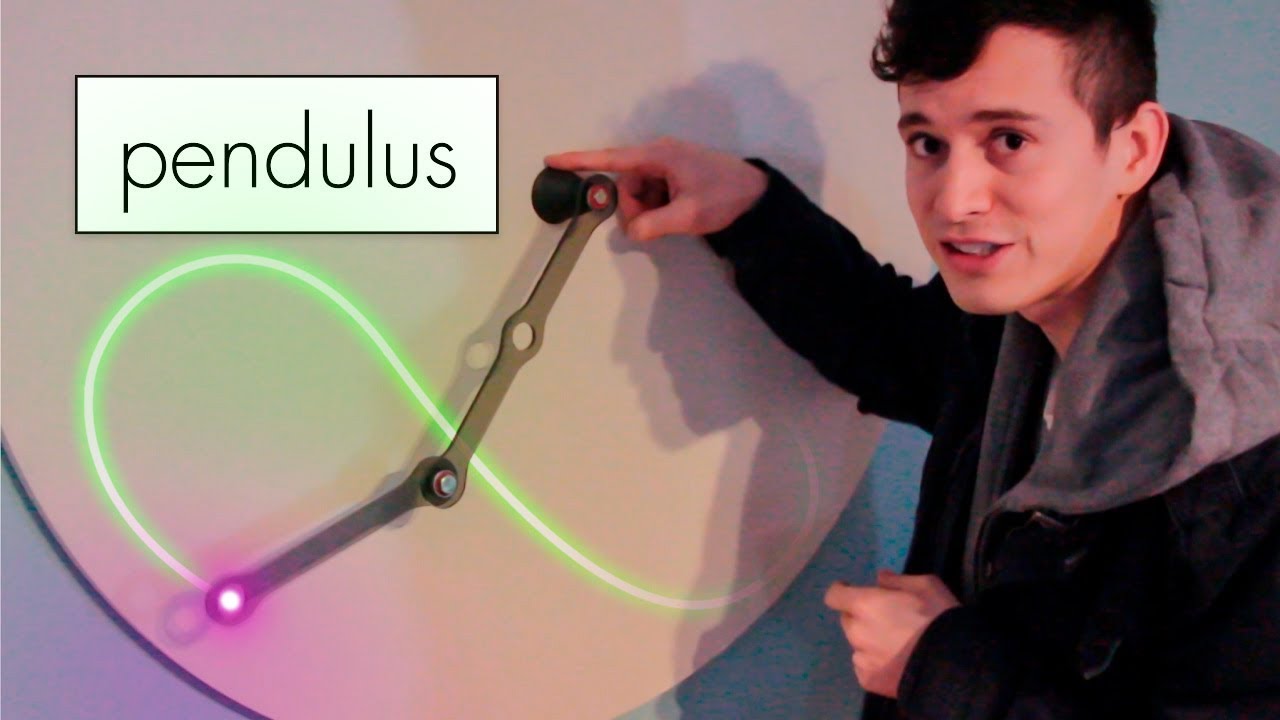
https://www.devinmontes.com/pendulus pendulus is one of my favorite projects, a stunning visualization of the beauty in chaos. The paint used was Rustoleum G...
If you skip about two minutes into this video it shows the effect i was looking for
weary lichen
Oh, that is COOL
opal shale
The UV light leaves behind a "mark" on the glow in the dark paint
So I was thinking, one single hand continously rotating
would light up the appropriate places for the minute and the hour hand
weary lichen
I wonder if that Glow-in-the-dark paint would glow if painted on a translucent/transparent surface and illuminated from behind
opal shale
Thats interesting, I was going to face the LEDS back towards the surface
weary lichen
It might not work at all, but might be worth a try
 weary lichen
Man. It's amazing how much difference half a millimeter makes when it comes to gear meshing
opal shale
Probably need to reprint on its side as the support is tough to take off
But pretty happy with it
weary lichen
That is cool
opal shale
weary lichen
I want to get a Filastruder to recycle my random crap
violet needleBOT
Adafruit Industries posted Multi-Color Ferrari 246 F1- Timelapse Tuesday
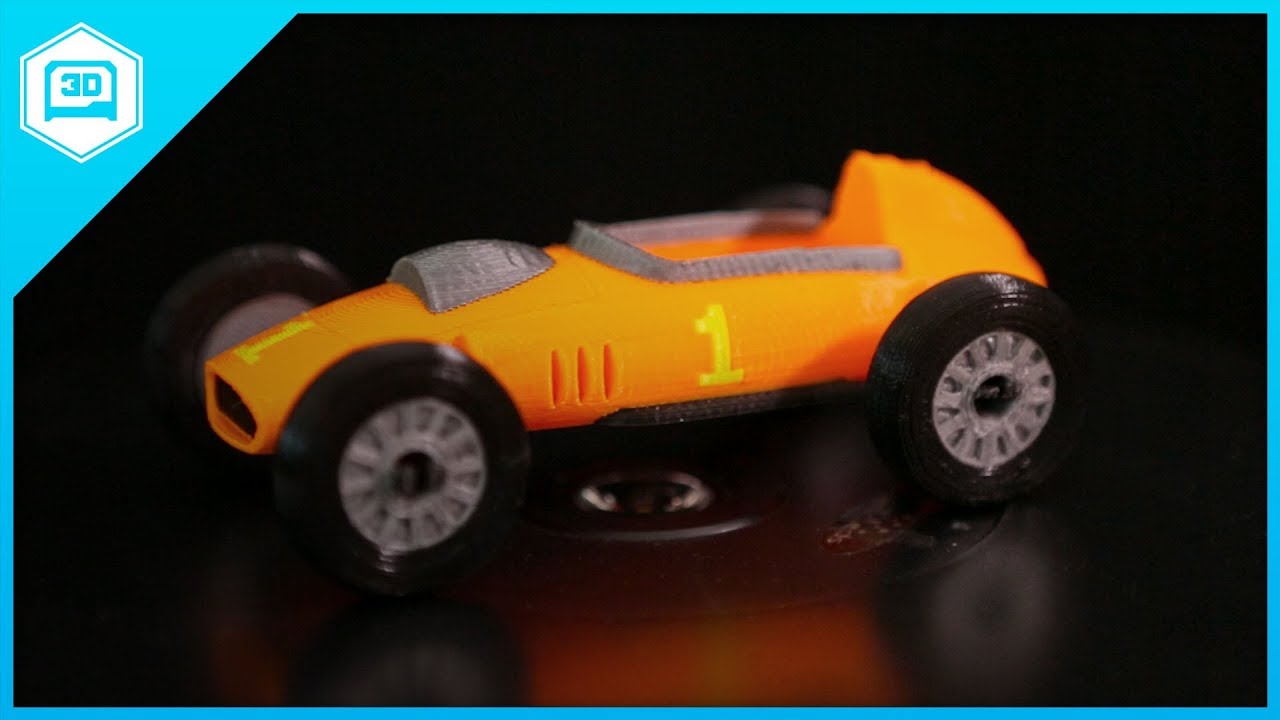
Every week we'll 3D print designs from the community and showcase slicer settings, use cases and of course, Time-lapses! Ferrari 246 F1 (multi-color) By: htt...
opal shale
Thanks @tribal egret !
I think I'll print the hinges tonight and see does that work out
weary lichen
Have to say, designing parts that need things in both millimeters and in inches... is very annoying.
Especially because FreeCAD does NOT like inches
weary lichen
5 iterations to get a mount for a feather right where I want it. Not terrible, but if FreeCAD had worked better in inches it wouldn't have taken that many
 karmic tapir
🎉 at least it didn't eat up to much plastic. How come you didnt want to try fusion?
weary lichen
BEcause FreeCAD works very well for the stuff I'm doing and is, well, free.
Also, almost everything I work in is metric, so FreeCAD is fine. IT's just converting the measurements that's annoying.
And yes, Fusion360 is "Free" for hobbyist use. I do have a company and would like to be able to sell the stuff I work on.
karmic tapir
Gotcha, makes sense!
weary lichen
So far, I'm absolutely loving FreeCad's "build-a-gear"
I designed and printed a gear that's a replacement for a metal one I had bought. First print, works perfectly.
 honest haven
First print, works perfectly? Impossible.
weary lichen
I took many measurements!
honest haven
Ah, you are that Measure 50 times, print once kind of guy
honest haven
True, for longer prints you want to measure a lot.
weary lichen
This was "only" about half an hour, but it's also right before bed.
honest haven
For my first acrylic box I got it right but a little too right
weary lichen
Haha, I've done that
honest haven
It slid apart just as easily (actually hard) as it was put together
No friction, and it was laser cut.
weary lichen
Mmm lasers.
honest haven
Also, my college is really cool. It got a Aluminum Laser Sintering printer
weary lichen
Ooooh shiny
honest haven
I'm waiting for it to get setup so I can get someone to print me something on it
I know the guys in that shop
weary lichen
Always a plus.
Well, the gear worked, and the nighttime cold meds are starting to kick in. Going to sleep some.
I'll take/post pictures and post up files on Thingiverse tomorrow
honest haven
Night'
vast salmon
@supple stratus @idle crest for dock video think Microbit and aka.ms/devkit dock with edgeconnector bottom base
weary lichen

A gear designed to work with this slip ring, along with a mount and gear to use with a 28BYJ-48 Stepper Motor such as this one
The slipring gear is a 1mm pitch, 54-tooth gear. The grommets and washers allow for use of M3 screws without nuts. The gear for the stepper motor is a 1mm pitch, 15-tooth gear. Depending on print accuracy, you may require a M3 screw to keep it in place. Mine fit snugly over the stepper motor's output shaft with a small amount of force. The bracket also takes two M3 screws to mount to the stepper motor.
The holes for the slip ring don't line up perfectly, but you can convince the grommets to go through with only a little effort.
I didn't think about the difficulty of holding the grommets still while inserting the screw, so they'll have to be gripped with a pair of pliers or something similar until I update them.
vast salmon
@supple stratus from the USB dock i was thinking if you have USB-C booster and then modular dock to it like Usb breakout so it charge your device depend device charging like lightning connection or Qi charger or miniusb or usbc
one time i got this multicharger puck what have multiple charging modules so why not hack it and modernize it
shy kelp
@supple stratus @Pedro The slider needs to withstand outdoor use, is it possible or too late to review/comment/augment the design before publishing?
 supple stratus
@shy kelp sure i'm open to the discussion. I've been testing it quite a bit inside and once outdoors (i posted a test shot on instagram). The latest CAD model is public here ehttp://a360.co/2AMIomg
shy kelp
@supple stratus Whoah, very nice! My main concern is dirt and water/snow, but at first glance, I don't see much problems. My hobby is nature timelapses, so yes, I take pictures when it rains 😉 What are you planning on using for the electronics and power? Edited: OK, I found out -> Metro 328
supple stratus
@shy kelp Ah thats very cool hobby! Most of the electronics are housed in the case but some things are exposed like the belt, pulley and bearing. Not sure what type of metal the support rail is made out of but the aluminum extrusions (hopefully) don't rust. To power the boards + stepper motor i just have it plugged into the wall with a 12v adapter but could also use a 8x AAA battery pack.
opal shale
Got some hinges for my Zelda chest, these are just temporarily double sided sticky taped on but the seem to be working well
2mm hole in the hinges and I'm using some filament as the bar
I melted one end with my soldering iron to keep it in place, once its in its final resting spot I'll melt the other side
shy kelp
@supple stratus No one needs legs on the bar mounts? Having 2 2-inches stubs on each end would allow us to put the slider on a surface and be stable rather than resting it on the tripod pad?
opal shale
Bottom part of the chest printed out so I now hopefully have everything printed
It's going to be a tight enough squeeze though so hopefully its big enough!
opal shale
weary lichen
@opal shale That looks great
opal shale
Thanks @weary lichen , I'm thinking of staining/varnishing the wood to make it darker
weary lichen
That will look grand
 rough marlin
@opal shale What did you use to hold the popsicle sticks together? In the back of the box I see a thick grey line, Is that clay or something like that? Or did you just use super glue.
opal shale
Hey @rough marlin my plan is to use super glue, but what you see there is called blu-tack , that's just a temporary thing to see what it looks like
rough marlin
oh, cool
rough marlin
yeah, it kind of looks like clay
opal shale
Thanks!
rough marlin
yw
opal shale
I'll add all to thingiverese in the next couple of weeks , just need to finish the lid
And hope all the circuitry fits in!
rough marlin
it should
opal shale
Well the circuitry should OK,but I also need to fit a GBA game in 😂
rough marlin
is that what the present is?
opal shale
Yeah, my secret Santa described the best present he ever got as Zelda minish cap,but said he has since lost it
rough marlin
noice present
opal shale
He also mentioned he still plays his gba
rough marlin
its gonna be a great present!
opal shale
Thanks! Just posted another thing they are getting in #show-and-tell too
Also going to make them a guitar pedal (if I get time)
rough marlin
cool
opal shale
Just trying out some wood stain, probably needs another coat but pretty happy with it (its not dry in that photo either)
rough marlin
👌
opal shale
whoops
uncut ledge
get a light coat of sealant on there
rough marlin
wow that looks great 👍 👌
@opal shale you see the side on this chest, there isn't a metal part. On yours the side is all 3d printed, maybe you could make the frame 3d printed and everything else wood
weary lichen
@rough marlin Brian's grey frame is 3D printed. Then he put popsicle sticks in for the wood
rough marlin
ik im saying the side where there is a big chunk of 3d printed material
i think it would look better if it were just wood
vast salmon
looks like @glossy light mystery Chest
weary lichen
Ah, I see what you mean. But the chest is very small so I'm not sure how structurally sound that would be
opal shale
That was my original plan @rough marlin , I might try another print where I take out a piece in the center, I'd probably only fit one stick in there though
I might not have time though 😂
opal shale
I have to solder up the electronics yet, I think they will
I can change to a coin cell battery instead of the Nintendo D's battery if I need to save space too
rough marlin
okay
opal shale
Attinys are crazy flexible with what voltages they accept!
rough marlin
thats perfect for the box then
opal shale

Instructables.com
Hey everyone! My name is Brian and thanks for checking my Instructables. I'm a software developer by trade but I've recently gotten into Arduino development after discovering the esp8266 chip, a WiFi enabled Arduino chip for $5 delivered blew my mind! I started looking at Arduino stuff late 2016 and I'm really enjoying it. I did Electronic and Computer Engineering in college so I had some base knowledge of electronics but I'm having fun learning it again. With my YouTube channel and instructables I'm hoping to try share some of what I've learned. I live in Ireland with my Fiance, Daughter and two dogs
Is probably the best way to share it
Probably my best project is the Google maps one
rough marlin
ok ill check it out
opal shale
If you have any questions on anything let me know!
rough marlin
ok i will 😃
 vast salmon
@supple stratus @idle crest how you guys would 3D Print mailbox? as I was thinking to include the MXChip IoT Devkit what i put #show-and-tell as it have magnetometer so when the mail is delivered it notify house
idle crest
hmm, maybe with the back end of it on the bed and then have nubs on the sides for the door hinge?
supple stratus
@vast salmon depends on the shape but maybe best to print in pieces. could do all-in-one tho
vast salmon
as this project sample are in the aka.ms/iot-devkit projects so https://microsoft.github.io/azure-iot-developer-kit/docs/projects/door-monitor/
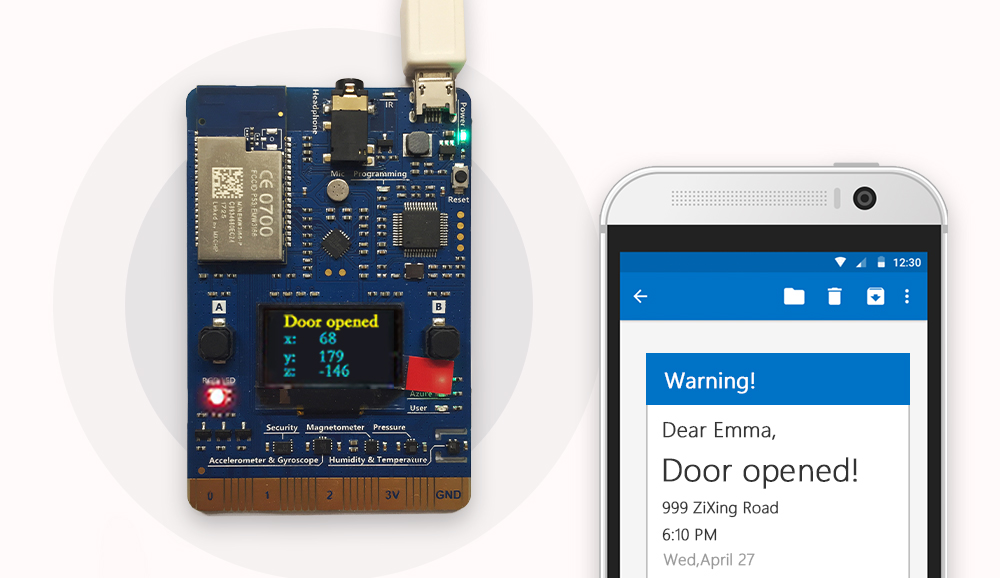
IoT Developer Kits
Use magnetic sensor to detect the change of magnetic field, and send notifications.
supple stratus
oh thats a neat kit. would be easier to stuff the board into a waterproof project case and mount it to the mailbox
vast salmon
@supple stratus it comes with adafruit driver
that would be awesome to test and actually even evolve it like when mail is delivered as mailboxes now here are grouped near by houses so do that when car go near mailboxes and mailbox open send notification to that house
that project guide show old design as new design IR sensor is SMD component
slim escarp
Has anyone else been watching the Hangprinter build on Tom Sanladerer's channel? https://toms3d.org/2017/12/11/building-a-hangprinter/

Building a Hangprinter! If you want to 3D print really large parts, you have two options - either build a really large 3D printer with its own rigid frame or use the frame you alr
uncut ledge
yes
i've been following it since v1, have yet to try and build one because i have no idea where i'd put it
 trim sail
Hi, NOOB to 3D printing, so this may be obvious to someone else, but not to me... or it may be a design flaw (ouch).
I downloaded the 3D printable cases for circuit playground. Then I built the round one with PLA filament. I was easily able to affix the circuit board to the new case with number 4 sheet metal screws. Next I built the HEX case, also from PLA (different color). When I went to install the circuit board, a problem arose. The holes in the case were too large of diameter for the M3 screws specified, and they are also too large for the #4 sheet metal screws. Any larger screw will not clear the holes in the circuit board. . . Now my question - Has any one else had this issue? Could it be slight diferenced in the two different PLA filiments (other than one's gray, the other is orange)? The only other soltion I can come up is fill the hole with epoxy, let it dry, and then drill to a more reasonable diameter. Comments, please.
😩
weary lichen
@trim sail There's going to be some minor inaccuracies for 3D printing, so screw holes may not be perfect. Do you have a link to the case?
trim sail
Printer is MonoPrice Select Mini V2. Tutorial on the cases is at https://learn.adafruit.com/case-for-circuit-playground/3d-printing?view=all Parts files came from clicking a big green box in the tutorial (there are 3, not sure which one I chose... probably the first one). As for fit and finish, everything appears to be to scale (i.e. correct size), the parts snap together wett. Only the diameter og the holes is wrong.

Two piece snap fit case for Circuit Playground
 rapid steppe
Ooh, that looks nice.
weary lichen
@trim sail It was @supple stratus and @idle crest who designed that case. They may have made the holes a little larger than normal, so you may need to asjust things.
The Fusion360 files are in the article, and Fusion360 is free for hobbyists
 verbal bronze
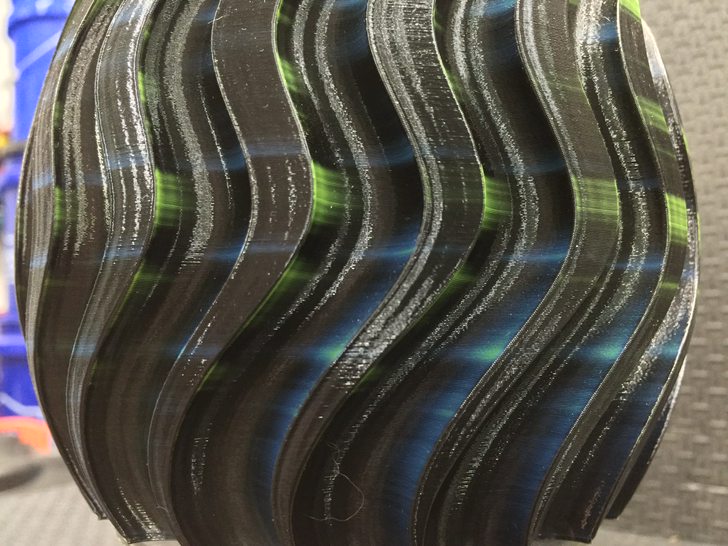
Hello, everyone! For the holidays, I made this Christmas bell ornament with a hidden compartment (for candy, chocolate or even small presents!) https://www.thingiverse.com/thing:2712776

At first sight, this might look like any other ornament. However, this Christmas bell has a secret compartment that you can use to store candy, chocolate or small gifts to surprise your loved ones during these holidays!
 echo flare
 supple stratus
@trim sail Yes, @weary lichen stated exactly what I would suggest 😃 Let us know if you'd like a custom tweak, it's fairly easy to adjust the mounting holes and the snap-fitted cover.
cloud halo
@echo flare That is awesome. Your creation?
trim sail
Cool, Thanks
trim sail
And the CP case saga continues... Today I printed the third case (of the three). It works magnificently. So now, for those of you keeping score: Square & Round are tied with 1 each (they both worked) and Hexagonal has 0 (as in FUBAR). Thanks for playing along, and generating some informative comments. - Jim
 silent veldt
@trim sail I also got myself a MonoPrice Select Mini V2! In the Black Friday sale.
So far it's been painless for me, but I haven't tried printing any enclosures yet
I say typing on my laptop right next to the printer that's trying to run off one of the Micro USB cases from this week's 3D hangouts.
Not cases, docs.
docks.
Sorry, too much blood in my caffeine system.
And, my first print nozzle jam, I think.
help, how does one clear a jammed up nozzle?
Or am I just going to have to wrench out the nozzle and replace it?
weary lichen
@silent veldt Are you sure it's jammed? Have you tried heating the nozzle and pushing filament through by hand?
I haven't had a jam/clog on mine yet.
So my recommendation is to look it up via google. There's also a Facebook group for mini V2 owners that has been super helpful
trim sail
@pcurryinahurry @weary lichen No nozzle issues here. Just make sure you preheat it then run some filament through it (I usually use the Move-Extrude menu).
OBTW, I have not had any luck with USB printing. Are there some magical incantations I need to know. My setup is PC - USB hub - 3D Printer. out of a dozen or more prints I have been able to get USB printing to work only once.
silent veldt
I haven't tried USB. I haven't cracked the case open to enable WiFi.
I think I have a nozzle jam, because it stopped passing filiment in the middle of a print run. I thought I had preheated it enough, but apparently it cooled too much.
Won't extrude at 220C with manual control on the extruder motor. I couldn't get it to move forward by hand.
Then I left for 4 hours.
So I can reheat the block and see if that makes a difference.
slim escarp
I'm using the low poly Pokémon models by Flowalistik to fine tune my printer & also get a little bit more used to 3d printing in general. Also I just love Pokémon haha. But I wanted to share some mistakes I made because I think that's important for learning. The left Bulbasaur is crooked as a result of improper leveling. The middle is a result of not wiping down the print bed & having temps a little too low. The right is a successful print 🙌
 vagrant ridge
Has this already been mentioned here? https://www.thingiverse.com/thing:2676324

The Measuring Cube | Original:
1 cup, 1/2 cup, 1/3 cup, 1/4 cup, 1/5 cup, 1/4 teaspoon, 1/2 teaspoon, 1 teaspoon, and 1 tablespoon containers. Size: 90 mm (3.5") cube.
The Measuring Cube | Version 2:
1 cup, 1/2 cup, 1/3 cup, 1/4 cup, 1/8 cup, 1/4 teaspoon, 1/2 teaspoon, 1 teaspoon, 1 tablespoon and 1/2 tablespoon containers. Size: 89 mm (3.5") cube.
The Measuring Cube | Metric:
250 mL, 125 mL, 100 mL, 75 mL, 50 mL, 1/4 teaspoon, 1/2 teaspoon, 1 teaspoon, and 1 tablespoon containers. Size: 93 mm cube.
All containers share (within reason) common walls for the most compact shape and the minimum filament use.
How to use: fill all the way up for the correct volume for each container.
We printed at 0.1 mm layer, 12% fill, 0.2 mm layer should also be fine. Supports: NONE.
Please see our popular binary titanium key carabiners made from pure titanium, with the safety cage to keep your keys secure, and the built-in bottle opener.
Our other thingiverse projects.
Enjoy
Printing one out right now. It's only 90mm, so it should print on just about any printer.
silent veldt
So, after re-heating and manually pushing filament, extruder is working again! Printed the lid of the project.
 hidden sable
@verbal bronze looks cool - it would be nifty to put something with an accelerometer in there to make a sound when shaken!
trim sail
@silent veldt WIFI on the MonoPrice Select Mini V2 is easy. Follow the directions on pg 11 of the manual . It requires you to install an IOS or Android app on your phone/tablet. But after that its a snap. What the manual doesen't tell you is how to send files. With a uSD card installed that has room for the gcode file, point your PC or Mac's browser to the IP address shown on the printer's display (10.10.10.106 in my network). No need for http... or port numbers, etc. A web page should pop up that's so easy to use (albeit slooow). Drag and drop your gcode file, set your temps, then click print. Should work!
weary lichen
@trim sail has it right. It's super easy to set up with the android app.
Printing is weird. Sometimes you'll upload and it'll auto start. Sometimes it won't.
Also, if you set the temps to preheat it, then upload, the preheat is turned off at the conclusion of the upload.
As with normal prints, gcode will set the temps for the print just fine, but you can override it
vagrant ridge
I really recommend just setting up Octoprint rather than using the built-in wifi on the MPSM. Heck, the newer versions of Cura even allow you to skip the drag and drop phase of uploading gcode.
weary lichen
I'll be upgrading to OctoPrint eventually, since it lets me have cameras and such
But the onboard WiFi is perfectly functional and works great
weary lichen
Hmm. I want to talk design of a 3D printer. Anyone have any Facebook groups/forums/etc dedicated to that sort of thing?
uncut ledge
@weary lichen step into the light https://discord.gg/7Sjt4d
weary lichen
You monster.
uncut ledge
😂
weary lichen
I'll have to check it out later. Sleep time now
violet needleBOT
Adafruit Industries posted Multi-Color Small Car - Timelapse Tuesday

Every week we'll 3D print designs from the community and showcase slicer settings, use cases and of course, Time-lapses! Multi-Color Car Model By: LeFabShop ...
vagrant ridge
Achievement Unlocked: After a year of 3D printing, I just had my first print failure due to loss of bed adhesion.
I've had to stop prints from time to time due to a curled corner or a failed first layer. I've also had them fail halfway through due to bad supports. But never had the model actually tip off the platform till today.
And the crazy thing is it's something I'm mass printing for Xmas gifts and I've printed a dozen "good" ones.
 lunar crane
My First atempt at making a watch with a 3D printed Bracelet (Flexible)
violet needleBOT
Adafruit Industries posted 3D Hangouts – Sliders, Cars and Pixel Sand

Hang out with Noe & Pedro Ruiz and discover 3D printing! Get your 3D news, projects, design tutorials and more each week on Google+ Hangouts On Air. Subscrib...
shy kelp
Thinking of buying a monoprice select v1. Good idea?
weary lichen
@shy kelp I'd recommend the V2
The mini V2, at least, over the Mini V1
Be aware, though, that both versions have an issue with the wiring for the heated bed - Two, actually. One is a location on the wires where they bend a lot more than they should, which can cause them to break. And two is a location where the wires can rub up against the bed's belt, which can cause the wiring and/or belt to go bad.
It's a fairly easy fix, although I have yet to do it
shy kelp
Can't afford a v2
Yes the one I found bed does t heat
Doesnt
But seems like an easy fix
weary lichen
Oh, getting it used?
shy kelp
Yep, can't afford it new
weary lichen
Replacing wires should be fairly easy (Especially if you're in this Discord server), and you can easily run the wires in a better location while you're at it.
weary lichen
With PLA? Not really.
The larger concern is the belt for the bed. I'd at least make sure the wires aren't chafing on that.
shy kelp
Any big errors with the v1?
weary lichen
None that I know of
shy kelp
Last question
weary lichen
I only got my V2 a month or so ago, so I'm fairly new to it
shy kelp
Is a computer connection required or can it rely on sd
weary lichen
If I remember correctly, the V1 doesn't have Wifi, but both the V1 and V2 can print directly from a SD card
shy kelp
You just move the stl to the card?
weary lichen
You have to run the stl through a slicer (Such as Cura or Slic3r) first to generate the gcode file
But then you put the gcode on the sd card and put the sd card in the machine
shy kelp
Alright, I use slic3r with my laser so I'm good with that
Alright
Is it mostly plug and play?
Or does it require tons of setup?
It comes calibrated
weary lichen
You'll want to level the bed
shy kelp
Is that hard to do?
weary lichen
nope
shy kelp
Is there a way to accidently ruin a 3d printer?
weary lichen
Many, but none that I'd be worried about.
weary lichen
Always useful.
I would recommend joining the Facebook group for the MP Select Minis - https://www.facebook.com/groups/1717306548519045
They're a HUGE trove of information
weary lichen
There's a few of us on here that have the V2. so we should be able to answer most questions you have about the printer
shy kelp
I see the most complained thing about is speed
Everyone says it price ts slower than others
I don't care for speed so won't be a problem
Think you can help me fix the bed heating issue when it gets here?
shy kelp
I still wonder how the company missed the issue where the zip tie causes the cables to be damaged
weary lichen
the Monoprice printer is a rebrand of... Malayan?
Which in itself is a cheap-ish Chinese manufacturer.
uncut ledge
no, both are rebrands of wanhao
which by itself isn't the worst machinr you can be stuck with
$100 in mods and it's a very good machine
weary lichen
They seem to be a pretty solid design, minus the bed issue
shy kelp
So I was wondering
uncut ledge
that's factored into the $100 😂
there's a $25 plate on amazon that's much thicker and about 100g lighter
shy kelp
Someone mentioned something about how the spool was perpendicular to the head and how it's better to have it lined up so there's less tension on the plastic and motor
Is that something to worry about?
weary lichen
@shy kelp I haven't had any issues with it so far.
Would it be better to have it rotated? Sure. Seems to work just fine as is though
shy kelp
Ok
What would count as "extended use" for a 3D printer? Since I've seen things that take like 26 hours to print
uncut ledge
add a mosfet for the bed and it should be fine indefnitely
well, usually you run out of filament first
shy kelp
Alright
shy kelp
@weary lichen whats the best slicing software for this printer? Can I use slic3r?
weary lichen
@shy kelp I started using slic3r yesterday. I can give you my settings when I get home
shy kelp
Thanks
I've got most things set up
The biggest drawback with this printer is the direct upload from computer is broken
weary lichen
Well. Maybe "The other day" is more accurate. It's all running together
trim sail
About the comment on printing from an sd card... I generally use the WIFI on my V2... with occasional transfer failures. Its convenient, but SLOW!!!. Sneakernetting a uSD card is actually faster, but far less convenient. The web interface is clunky (or is that Klunky?), but it works.
shy kelp
The v1 appears to have wifi. Am I right?
All the video I've seen the LCD at the top says "No connection" and has wifi bars next to it
At least I hope so, I'm not a fan of having to move files onto an micro SD card adapter then to the printer then back each time
@weary lichen
shy kelp
So you upload the gcode Trough that?
weary lichen
Yes. And @trim sail is VERY right about the slowness of it.
And it occasionally likes to be stubborn and I'll have to go over and turn it off and back on.
shy kelp
How slow we talking? Like super unreliable?
Wonder if the wifi chip can be replaced with a Esp8266
weary lichen
Oh, no. Just... far longer than it really should take for a file transfer.
Unlikely.
However.
People HAVE replaced the entire driver board
shy kelp
Is it like an app or program to upload gcode or an online interface?
Yeah not looking forward to replacing a whole board just for uploading speeds lol
weary lichen
Web page. You type in its IP address and it brings you to a super simple page.
weary lichen
A lot of people use Octoprint for the wireless + other bonuses, but I've heard octoprint can have issues connecting to the printer's USB port sometimes.
That is the app that you use to set up the wifi
That's all it does, though.
shy kelp
Wow
I was thinking about using my Pi for octoprint
For now I just want it to print lol
Wireless upload is going my main mode
weary lichen
Yeah, my printer's upstairs. Not far - It's at the top of the stairs and my room's at the bottom, but it's still annoying to have to drag the SD card back and forth.
Also, the SD card slot is set in a little bit too far and is annoying to take in and out.
shy kelp
I'm really bad when it comes to inserting micro SD cards
I broke 3 in half trying to get it in the Pi with a case lol
weary lichen
Wow. I've never once broken one.
I HAVE launched them across the room, never to be seen again, though
shy kelp
Lol
I was looking a videos and almost everyone mentioned how bad the thermometers were
How the temperature reading fluctuates from 1 sec to another
Is that a hard thing to fix?
weary lichen
Not sure.
shy kelp
So I would go to the little web interface, upload the file and hit print?
shy kelp
So since the bed on the one I'm getting won't heat until I fix it, should I set the bed temperature to 0 in slic3r?
weary lichen
Yeah
shy kelp
Oh, last question
I was reading that it's better to have this printer in a room without direct sunlight and lots of drafts
Something about plastic warping
Should I follow that advice?
shy kelp
Oh speaking of filament, does PLA smell a lot when being melted? If so does it smell bad?
weary lichen
No, it doesn't smell a lot
shy kelp
Thanks for all the help Andon
shy kelp
Lol I hope all it needs is bed leveling when it gets here
 viscid kelp

 weary lichen
Adafruit also carries coffee-scented filament.
shy kelp
Mmmm. Coffee...
vast salmon

Have you ever wished that your 3D printing filament smelled like freshly brewed coffee? If the answer is yes, then boy howdy are you in luck! Go ahead and scratch your computer screen to ...
but those are out of stock
shy kelp
Coffee mug printed from filament that smells like coffee when you pour coffee in it. Yo dawg... 😉
shy kelp
Don't the filaments that are infused with other things damage the nozzle?
weary lichen
For brass nozzles, yes
cloud halo
Adamantium nozzles are wolverine-strong.
weary lichen
Wolverine nozzles are adamantium-strong?
Generally speaking, stainless nozzles are grand if you're printing fancy things
shy kelp
So @weary lichen
What should the gcode for the MP mini look like?
I put it into a gcode visualizer online but it cant recognize the parts that have "Gxx"
weary lichen
@shy kelp I've never actually looked at the GCode.
http://gcode.ws/# is the gcode viewer I use

Online GCode Viewer
shy kelp
I will take a look
Thanks
Lol I'm just scared it gonna be all broke when it arrives P:
uncut ledge
i would be more in favor of nickel plated nozzles instead of A2 unless you print metal filament or glow in the dark
 south elbow
Quick question: Is this bad?
Theres weird powder (i assume from the filament) on the side wall there and filament shards next to the tube
shy kelp
What filament you using?
shy kelp
Could it be from retraction?
south elbow
I honestly have no idea, the fan covers it all when printing
I was actually trying to print a mount for the fan so it can be installed above when it started stuffing up
shy kelp
What printer is this?
south elbow
Anet a8
south elbow
Ok the powder on the side is actually just dust blown in by the fan
shy kelp
Oh lol
south elbow
Cos its all in the fan heatsink for some reason
south elbow
So reading a thingo online, these little shard things are from the extruder grinding on the filament and they might have gotten into the tube blocking it
shy kelp
Makes sense
south elbow
Yeah its just dust, but an absurd amount of it
shy kelp
Wow
How do you plan on. Among it so that doesn't happen again?
Just a dust cover when not in use?
south elbow
Idk cos the room is fairly dust free. But i guess i could get some paper or something and stuff it in the gap
shy kelp
That's kinda strange
south elbow
I think all my problems come down to the bowden tube. Ill clean that and see how it goes
And find out why its grinding
And find out why an absurd amount of dust is being blown in
shy kelp
What is the bowden tube? I don't even have my own 3d printer yet lol
shy kelp
O
south elbow
There is also some wierd black crud coming out of the top of the heat block, probably burnt filament but why tf did it come out
shy kelp
Yeah that's real weird
uncut ledge
can't even print above 30mm/s with the wonky af setup I have now, need to find a more appropriate extruder motor 😔
weary lichen
@south elbow weird black crud on the top of the heat block? That sounds like heat creep to me.
As for the dust, I've heard that some people put a small amount of oil on their filament/in their bowden tube to prevent dryness/chafing.
south elbow
After pulling it apart, theres black crud all through the threaded parts that go in the heat block and i dont have anything (i dont think) that can clean it.
A few weeks ago i pulled it apart because i thought the nozzel was blocked (which i blow torch cleaned) and after puting it back together it leaked everywhere (cos i didnt know it had to be tight n stuff) SO i cleaned the plastic off the threads to the best of my ability by heating it up and trying to scrape the plastic out. but i guess its all charred in there and stuffed it.
So i think ive just done a few too many things wrong and am gonna buy a new heating assembly so i dont have to clean it all to fix the blockage.
another thing wrong is that the 'atomic' method of cleaning doesnt work, and i can not get filament out of the tube. it always gets stuck right at the opening for some reason
but i dont even know that the thing was blocked in the first place, filament comes out when you manually push it through. Just the machine cant get it out when its running for some reason
god ive rambled
TL:DR black crud all up tube from botch clean job prior, filament wont come out tube (but goes in fine), guessing its a blockage making it not print properly, dont have cleaning equipment, buying new assembly to hopefully fix
weary lichen
Definitely sounds like heat creep. The filament gets heated further up than the nozzle and expands to larger than normal size, so it can't be pulled up. Heat creep can be caused by incorrect assembly and is a giant pain to clean
shy kelp
@weary lichen you at home?
shy kelp
You think you could provide me with your MP mini slic3r settings?
weary lichen
MP Mini V2 Slic3r Config Bundle
You should be able to just import the config bundle via Slic3r
shy kelp
Thanks, think utll work well for the v1?
weary lichen
They're largely the same in the ways that matter for Slic3r
shy kelp
Thanks Andon for all the help, probably wouldn't have gotten anywhere in 3d printing if it wasn't for you lol
weary lichen
I'm sure someone on here would have guided you
I just like helping people with things like this, and happen to have an absurd amount of monitors so it's easy to, well, monitor Discord
shy kelp
Lol
Usps is taking forever to ship
I even paid for 2 day shipping and it's been like 4 days
weary lichen
Where'd you get it from?
weary lichen
Ebay? Someone's web store?
shy kelp
Ebay
weary lichen
Random person on Craigslist?
Ah, my bet is the person hasn't shipped it out yet.
Busy time of year and all that.
shy kelp

eBay
Works great aside from the build plate not heating, which is a common issue with this printer. It's a wiring issue that can be easily fixed by replacing the wiring surrounding the build plate. It sometimes heats but usually doesn't, just displaying the temp as 0. | eBay!
That one
It is shippes
Tracking says it's on route to SA
So I was looking at maybe doing external wiring for the heated bed. Good idea?
weary lichen
Absolutely
I like the look of the drilled methods better, but.... Then you have to drill through sheet metal
shy kelp
So 1 question n about the wifi thing
weary lichen
Oh, hey. West Chester's not that far from me.
shy kelp
Oh
For the wifi file upload, I just need a SD card in the printer?
Or some extra thing?
weary lichen
Yep
Just keep the SD card in the printer
And it downloads the file onto it as cache.gc
shy kelp
Does it have to be blank? I only have 1 which I use for my Raspberry OS
weary lichen
I would not recommend using the one you use for your Pi
Would it work? Probably.
Would it screw over your Pi's files? MAybe, who knows.
The V1s and V2s have, IMO, a dodgy repuation for SD cards. A lot of people say it's the SD card that has the issue, but having fiddled with a few hundred SD cards for various things, I'm more inclined to say the printer doesn't treat them as well as it should.
But people have come across issues to which the solution is to reformat the SD card.
shy kelp
Rip
weary lichen
You don't want to have to reformat the SD card you use for your pi
shy kelp
Well guess I'm not using my Pi anymore
weary lichen
That said, the SD card that came with my V2 has worked just fine so far.
shy kelp
Does the printer destroy SD cards? Or just glitches while reading them?
weary lichen
And it doesn't need a large one, so you can probably get a <1gig one for dirt cheap somewhere.
Glitches while reading.
It'll stop mid-print, from what I've seen
shy kelp
Is there a fix?
weary lichen
Formatting the SD card is the go-to fix for it from what I've seen
shy kelp
I mean for the printer
weary lichen
Not that I've seen. Pretty much everyone blames it on the SD card, which could well be true.
I'm just skeptical of that claim.
shy kelp
I have a 32gb perfect SD card so if something goes wrong I'm blaming the printer
weary lichen
Seems perfectly fair to me
shy kelp
I'm tired of waiting, I want my printer yesterday
weary lichen
That is totally understandable
shy kelp
So besides the 20mm calibration cube what are some good things to print first
I heard people say to print a copy of the spring loaded thing since they say it breaks easily
weary lichen
Calibration cube is a good one
shy kelp
Platform Jack [Fully Assembled, No Supports] found on #Thingiverse https://www.thingiverse.com/thing:925556

This functional platform jack prints fully assembled without supports.
UPDATE [7/21/2015]: We have uploaded an updated platform jack with stronger scissor arms, improved axles to stop the arms from separating, and a larger gap between the screw and crossbeam to fix the fusing issue. We printed the updated version with a 0.3mm layer height and 15% infill in 4 hours.
UPDATE [7/22/2015]: For anyone having problems with the scissor arms fusing together we have uploaded a modified file with the tolerance increased from 0.5 to 0.65 mm (The axle tolerance is unchanged).
I want to print this lol
shy kelp
Raspberry pi zero?
shy kelp
That's a cool case
weary lichen
It's part of the Christmas gift for family.
Yeah, I've been tweaking the design for the past few days
shy kelp
Nice
weary lichen
Now to design the top piece, the bit that'll hold the APA102 LEDs
weary lichen
Watertight will require a gasket of some sort.
Can PLA be printed to be watertight? I believe so, although it might require some heat treatment.
It's not something I've looked into much
weary lichen
LED holder mostly done
This print ended up looking like crap on the outside, so I'm testing printing the other way
I also need to add buttons to the top as well.
shy kelp
What is this going to be?
And why does the Pi zero w have 2 micro USB ports?
One is power, one is data
The one closer to the middle os used to power the device only
The other one can be used to connect usb devices
weary lichen
@shy kelp You've got them flipped. Interior one is USB, exterior is power. But aside from that, spot on
As for what it is, each of those holes will have an LED
There will be four devices
shy kelp
My bad, thanks for correcting that.
weary lichen
And each will have its corresponding LED. Buttons will allow each individual unit to change its color
shy kelp
They should be labeled on the PCB anyways
weary lichen
This will go via the InterTubes so that each unit will display all units' colors.
I'm giving one to my parents and one to each sibling/family group.
 timber niche
@shy kelp @weary lichen PLA is hygroscopic, by the way, so I would avoid water. That's why PLA should be stored in an airtight container with dessicant.
uncut ledge
this is true but most PLA is pretty water tolerant
if you dont live in anywhere particularly damp or tropical its fine to leave out
i get more issues from leaving it unwound and snapping under stress, lol
weary lichen
@uncut ledge I think @timber niche was more referring to the question of "Can you print waterproof things"
uncut ledge
ahh, yes, i can't read too well
weary lichen
There was a bit of conversation between then and now!
weary lichen
If PLA absorbs water.... you shouldn't attempt to print water-things with it.
uncut ledge
lacquer or polyurethane 👌
shy kelp
So since pla absorbs moisture, how should spools be stored?
weary lichen
As dryly as you should.
You're in Texas, right? You shouldn't have much of an issue
 cobalt quarry
@weary lichen Nice Pi0 case. I wouldn’t mind printing a few of those as an early printing project.
weary lichen
I'll upload them eventually
timber niche
@shy kelp @weary lichen
Yeah, I should have clarified that I was refering to the earlier conversation about whether a water tight enclosure could be made from PLA. PLA can absorb water. Of course, feel free to do your own tests to see to what extent that affects a printed part. It may well be possible to coat PLA in something to make it waterproof. One thing about PLA is that it doesn't react much to common solvents. Ethyl acetate has a little bit of an effect on it, but to much, much less of an extent than the effect of acetone on ABS. So there probably wouldn't be too much risk of a sealant disolving the PLA.
trim sail
I saw the discussion on Slic3r for the MP Mini V2. Then I spent way too long on the Slic3r website. Totally unsaid, but I gather it only runs on Intel/AMD architectures under Win, MacOS, or older Linuxes (e.g., Debian Wheezy or Jessie... not Stretch). No ARM (RPi) support???
Another topic... does anyone know if there are recommended preventative maintenance procedures for my MP Mini V2, and if so where do I find them?
weary lichen
@trim sail Look up the bed rewire.
That's the most important and significant thing that'll need to be done eventually
shy kelp
Bed wiring is also an issue on the v2?
@weary lichen whag exactly is fixed or new on the v2?
weary lichen
I believe it's mostly driver board updates
The control knob on the V2 is apparently much, much better than the one on the V1
Ah, the V2 has a better bed surface, a (better? Existing? Not sure) cooling fan, and an improved hot end.
Those are all things that can be improved/replaced/upgraded as you go, and a lot of people have done so
uncut ledge
it needs a mosfet for the bed
the board is an example of wishful design
its not really cut out to push 200w of power
weary lichen
200W... eesh
uncut ledge
mosfet, real belt tensioners, z braces, and microswiss hotend and it's a very good printer
weary lichen
I have to say, the V2 is a solid printer from what I've done with it
shy kelp
Why does PLA smell like pancake syrup lol
trim sail
PLA is made from corn (or so I've been told). Last Friday I did a lot of 3D printing. Saturday morning my MP Mini V2 just wouldn't fire up. It took several power cycles over an hour or so before it was back to normal. Maybe the corn fermented, and the poor thing was hung over.
shy kelp
Lol
weary lichen
An only-slightly-late christmas gift!
weary lichen
Absolutely
It should be to the point where you feel some resistance from a sheet of paper between the bed and the nozzle, but not where you need to use force
shy kelp
Lol the seller just messaged me an he said he forgot the spool holder and sent it today
Alright
Can I print without a spool holder?
shy kelp
I'll try to
Let me get the bed leveled 1 sec
Bed is leveled
How do I set up the wifi for uploading files?
Needed up luxky
Found the holder in the box
Also came with an SD to micro SD card adaptet
weary lichen
timber niche
@trim sail There's an old joke about a preacher that was interviewing for the pastorate of a church. While having dinner at the home of one of the deacons, he was asked if he would like some corn and absentmindedly passed his glass instead of his plate. He didn't get the job.
shy kelp
Should I pre heat extruder for loading filament?
weary lichen
Yep
shy kelp
220 good?
shy kelp
I'll heat to 200
timber niche
If your filament gives a range of temperatures, start near the bottom of that range. The filament I buy from Microcenter has a sticker on the reel with the temperature range on it.
weary lichen
I tend to feed it manually until it comes out the nozzle, then use the controls to pull it back a step or so.
shy kelp
Now the y axis won't move up, is it supposed to when pre heating?
weary lichen
Preheating only heats the nozzle.
The Z-axis (Up/Down) can't be force-moved. There should be a thing somewhere in the controls for moving it.
weary lichen
Sounds like it
shy kelp
I'll print the 20mm cube
So once is slic3r, do I quick slice and save to SD card?
I mean
Exposición gcode?
Export**
weary lichen
I've never used quick slice. Export G-code is where I go to.
weary lichen
That's part of the gcode normally
shy kelp
Forgot to level one of the corners lol
timber niche
You can search thingiverse for "bed level calibration" and find lots of flat items that can help you see if it is printing evenly across the bed.
shy kelp
I just noticed
Wow lol this is the dumbest mistake ever
I never leveled the bed
None of my screwdriver bits fit
timber niche
Look under the bed, there are probably finger tightenable knobs for leveling.
timber niche
And, if all else fails, read the manual. 😛
weary lichen
If the bed is like the V2s, you'll need a hex bit for the four corners.
shy kelp
Found a bit lol
Lol the knob is so unc
Uncomfortable
Why are controls so delayed lol
Alright should be leveled now
@weary lichen why is this happening?
weary lichen
I'm not sure.
timber niche
Maybe lack of bed adhesion.
shy kelp
Lol having so much trouble leveling bed
timber niche
It's probably a good idea to go around twice when you're first getting the hang of bed leveling.
shy kelp
How much force should it take for the paper to move
It doesn't want to stick to the bed
timber niche
It's a bit of a judgement call. I'd say when you can feel a difference in sliding the paper, you're there.
Does it have a heated bed?
shy kelp
Yeah but it doesn't work
I have to fix wiring
I'm going to put it super close to the bed to test
timber niche
Here Joe Prusa is demonstrating the setup of his i3 mk3 printer. At 9min 12s a graphic appears across the top of the video showing how the filament should be on the bed. https://youtu.be/GE-lrRbU124?t=9m12s

Handbook, Drivers and FW: https://www.prusa3d.com/drivers/ Subscribe: http://www.youtube.com/user/prusajr?sub_confirmation=1 Web: http://www.prusa3d.com/ Fac...
timber niche
If your slicer has an option for a skirt, use that. It will print a box arounnd the outside of where the object will be printed that will help make sure the filament is extruding properly before attempting to print the object.
timber niche
I'd try it with those settings. That's probably good.
timber niche
Probably not on the printer itself. Your slicer might make some guesses as to time frame.
timber niche
Not sure. I can't see to clearly exactly what is happening there.
shy kelp
I fixed it
Changed infill to 40% instead of 15%
And the settings I was using had the filament size wrong
timber niche
Cool. Yeah I was wondering if it could be an underextrusion thing. If it was set for larger filament it could have been underextruding.
shy kelp
So is PLA supposed to avoid contacting water at all times?
I was thinking of printing this but and bolt I need but the nut is going to be underwater
weary lichen
@shy kelp PLA is not the best for water

3ders.org
It is generally advised to store your PLA 3D printer filament in a moisture free environment to keep it reliable. But how much care do you really need to take to keep your plastic dry?
It works, sometimes
But I wouldn't rely on it because it's only "Sometimes"
timber niche
There may be a way to waterproof it.
weary lichen
@shy kelp What sort of "Underwater" is it going to be?
shy kelp
What do you mean?
weary lichen
Where do you need to use it?
weary lichen
Hmm.
weary lichen
The water itself isn't the problem, according to that link. PLA will absorb water, but it's the other things that cause issues.
shy kelp
What about maybe coating the 3D prints with the clear nail polish protector?
weary lichen
Which in a pool shouldn't be an issue, but a pond probably wouldn't fly.
That could work.
I've never tried it though.
weary lichen
That's exactly it
At the end of the above link, there's this:
PLA will absorb water, meaning water molecules diffuse between polymer chains causing volumetric swelling. PLA will NOT be affected otherwise by pure water. When in the presence of certain compounds that are in soil, the polymer chains actually degrade into smaller and smaller pieces until they are (approximately) tetramers (4 monomers). At this size, the PLA can begin to be eaten by microorganisms in the environment causing it to compost. So unless these chemicals are present in the environment that the PLA is in, it will not be affected other than swelling, which can be remedied by drying it with desiccant in a box or through heating to a low temperature (<50C) and letting the water evaporate out naturally.
shy kelp
Oh
Thanks, I'm going to try the nail polish protector thing
So far the printer is working perfectly, no problems
weary lichen
You mentioned the knob was terrible, right?
There's many designes for knob improvements on Thingiverse. Might want to print out one of them for a good functional print
shy kelp
Yeah saw, them
Oh also, comment on your slic3r settings @weary lichen , you had the filament size to 3mm that's why my test cube came out all squishy, I s hanged it to 1.75 and it came out great
weary lichen
My filament is set to 1.75 locally, I'm guessing it didn't copy that over.
You'll probably have to tweak certain settings for your printer anyway. I usually run at 30% infill. Except for things like gears, then I go up to 75% or so
shy kelp
Word you recommend printing spare parts for this printer just in case?
weary lichen
It's not a bad idea
Especially as you can use it to check printing accuracy and see if things need tweaking
shy kelp
Why does everyone always 3d print a boat as a test? I think it's called bench y? What's the big deal about it?
weary lichen
It's a known quantity.
Everyone knows how it should look
It also incorporates certain design things into it.
IE, overhangs, bridges, etc.
shy kelp
Oh ok
weary lichen
Putting up pictures of said boat can allow for easy guidance on how to adjust settings for your machine.
That said, I've not done it.
shy kelp
Neither have i
weary lichen
But hey. Whatever floats your boat.
shy kelp
Lol
Currently trying to print the nut and bolt I was talking about
Really wish the printer had an ETA time thingy
shy kelp
Is there some way that I can make the LCD display show time instead of percantage?
Or have slic3r give an ETA?
weary lichen
Not that I'm aware of.
Slic3r doesn't do times, AFAIK
I use the linked gcode tool to figure out roughly how long it'll take
shy kelp
Is it very accurate?
weary lichen
Ish.
It says one of my prints should take about 1 hr, 40min
It took slightly over 2 hours.
shy kelp
Good enough for me
weary lichen
When I used Cura, I knew to add about 50% more time with what Cura said it would take.
For Slic3r and the Gcode viewer, it seems to be about 20-25%
shy kelp
Oh ok thanks
trim sail
I just installed Slic3r this afternoon. It defaulter tp 3mm filament. Probably a software feature (bug).
OBTW the slicer time estimates are like asking your programmers how long it'll take to do X. After a while you come up with a constant (finagle factor) for each engineer that you multiply their answer by to get close to real.
shy kelp
Lol I see what you mean by wifi upload is slow
I was playing around and it took 10 minutes for a 500kb file lol
shy kelp
weary lichen
@shy kelp What sort of location do you have the WiFi in? Mine's slow, but not THAT slow
shy kelp
Web interface is really user unfriendly lol
shy kelp

Music messed up half way trough, too lazy to fix. Comment with any questions. Happy Holidays.
Made a Timelapse of the cat print
weary lichen
Oh, cool!
shy kelp
Rip
I was printing this puzzle box but set them o to 190 instead of 200
Only printed like .25 of an inch
 covert warren
@Tech2025#8459 Cool video!
weary lichen
I'm heading out for the night. Have to be awake in about five hours, so I can't do much. Wha'ts up?
shy kelp
For some reason all of a sudden prints are starting to stick to the tape
It's gotten to the point where I have to change the tape each tike
weary lichen
Blue tape is, if I remember correctly, only good for a few prints. That said, I've never used it.
shy kelp
Is having a glass bed good enough to never need tape?
weary lichen
From what I've seen, it's typically glass with some hairspray or a glue stick.