#help-with-3dprinting
1 messages · Page 18 of 1
 tender sparrow
 steep umbra
I think I'm going to look for a glue stick
 faint sky
we call that spaghetti 🍝
happens to everyone. check your z-offset.
you want the first layer to have good squish like a flat blade of grass kind of.
but not too much squish or you'll run into over extrusion issues later and it's possible to grind your bed surface if you're too close. like everything with 3d printing there's a goldilocks zone for everything.
steep umbra
I wasn't sure if it was spaghetti or stringing
 faint pier
stringing would be little wisps of plastic around the model. Sort of like a spider web
 ashen moat
eh, the two spools of PETG I spot-checked are labeled for 255C and 265C at the top end. YMMV.
 vivid helm
ashen moat
eh, the two spools of PETG I spot-checked are labeled for 255C and 265C at the t...
vivid helm
ashen moat
eh, the two spools of PETG I spot-checked are labeled for 255C and 265C at the t...
You're sure it isn't HTPET?
ashen moat
vivid helm
You're sure it isn't HTPET?
yes. Printed Solid Jessie PETG says 230-255, Atomic PETG-CF says 240-265, and I'm pretty sure I've used a cheapo roll that topped out at 265. I'd try the middle of those ranges first, I only mean to demonstrate that some manufacturers range above 250C for their PETG.
vivid helm
Ok PETG-CF needing to be hotter makes sense. Jessie/Prusa also runs in the 240-250 range.
 arctic dragon
For most printers, 240 is a pretty good temp to stop at. Don’t push past 250 unless you know your printer doesn’t have a plastic heatbreak.
vivid helm
Yeah this is a good point.

Deadly neurotoxin.
Joking aside, PTFE (teflon) does break down if you heat it above 240°C, and this process releases a neurotoxin.
If your printer has an all-metal hotend, it's fine as long as you're able to dissipate enough to prevent heat creep. Otherwise you should put a hard stop at 240°C.
steep umbra
aww, it's OK, we can handle a little neurotoxin. Birds on the other hand, not so much. I've known bird owners who refuse to get teflon pans because of this.
arctic dragon
steep umbra
aww, it's OK, we can handle a little neurotoxin. Birds on the other hand, not so...
While it’s true birds are especially sensitive to this, I’d avoid downplaying the potential harm of overheating teflon, even as a joke.
steep umbra
I think the risks of overheating teflon are significantly higher in the kitchen, where people do so regularly
vivid helm
That doesn't make it safe to do intentionally.
Also your 3d printer will be spewing it for several hours at a time.
steep umbra
Is that accurate? I mean at some point the part of the tube involved closest to the hotend will have broken down the PTFE to the point where it doesn't release any more toxins.
I have no idea how much ptfe gets applied to those little tubes, or how well it gets bonded. Dupont has made varying claims about stability at varying temps over the years, but I imagine that's also variable based on the process of how it's bonded to the substrate
vivid helm
- In PTFE-lined hotends, it goes right up to the nozzle. Assuming you are feeding material, that means there's a chance it will get fed along with your filament.
- Bold of you to assume everyone sources PTFE exclusively from DuPont.
steep umbra
right, but other manufacturers claim higher numbers. Here's some random plastics company that claims 300C: https://www.theplasticshop.co.uk/plastic_safety_data_sheets/ptfe-safety-data-sheet.pdf
I'm not trying to say this is a no-risk proposition, I'm trying to say it's hard to understand what the risk really is, and how much should that risk be a concern when you're knowingly introducing a device that introduces VOCs and microplastics into their environment? Ideally I'd be running this in a room with excellent filtration and air evacuation, but instead I'm running it in my asbestos-tiled, radon-filled basement
(just kidding, I paid many thousands of dollars to have both those things addressed before I moved in)
I run a HEPA/activated carbon filter in the room, and hope that's enough
steep umbra
Sorry, I'm just frustrated with the general proliferation of toxic stuff entering daily life, whether it's BPA in plastics or ptfe/pfoa in clothing or formaldehyde in furniture or lead and cadmium in chocolate or antibacterial products that promote antibiotic resistance or pesticides or whatever else. As an individual, I can't possibly assess the risks of all these things, so I do my best and hope I won't die of the next big "guess we shouldn't have done that" thing.
faint sky
Volkswagon said they exceeded emissions standards in 2015 but science determined that was a lie. Always take any marketing claims with a grain of salt.
PTFE tubes that go into a hotend eventually degrade and can cause issues like jamming the extruder or causing a clog. You won't notice until months/years later when you pull out the tube and it looks like it came out of a campfire.
 shy kelp
I'm looking for collaborator.
I'm web developer.
so please send me DM.
faint pier
PTFE lined hotend is not a concern for Bambulab printers
Bambulab hotends are pretty good, and they are all-metal
shy kelp
about stuff burning, I've noticed that the silicone socket in the p1s does also smoke as in the creality k1
faint sky
if the silicone sock is smoking then something is wrong. i've never used a bambu or k1 though.
vivid helm
Probably has some old plastic stuck underneath.
But yes, smoke = bad. You shouldn't use it until you figure out what is going on.
shy kelp
vivid helm
Probably has some old plastic stuck underneath.
Maybe likely, I just remembered that I was never able to properly clean the head on the p1s, after some plastic blob forming on it; as far on the k1 I long got rid of it, expensive mistake buying it
faint sky
Just want to ensure that filament getting stuck under the sock isn't a continual issue otherwise a blob might form under the sock and one day you'll find your sock embedded in a print. 😛
 balmy pulsar
faint sky
Volkswagon said they exceeded emissions standards in 2015 but science determined...
balmy pulsar
faint sky
Volkswagon said they exceeded emissions standards in 2015 but science determined...
wait... people say things that arent true about their products?!
noooooooooooooooooooo
vivid helm
faint sky
Volkswagon said they exceeded emissions standards in 2015 but science determined...
They did exceed them. By a lot.
shy kelp
soo now I am forced to use their slicers to download files? who cares gotta get in another sauce

 alpine dagger
shy kelp
soo now I am forced to use their slicers to download files? who cares gotta get ...
alpine dagger
shy kelp
soo now I am forced to use their slicers to download files? who cares gotta get ...
It's not bread, you can afford it.
faint sky
Normally I might intervene but currently I feel no pity.
shy kelp
fineee
yet I have 2 5090 😛 (JK)
although if within 14 days I can't resell them, gotta return em
 vocal flax
Most of their modern printers are not open source and not branded as such anymore. They never were truly open source and some of their practices were worse than being close source. I'd prefer Bambulab before authentication things, after authentication stuff I honestly can't recommend any printer.
Just filing the bad surface finish is easiest. Probably takes less time than you spend thinking how to eliminate that process.
shy kelp
vocal flax
Most of their modern printers are not open source and not branded as such anymor...
the more you learn... online nowdays is filled with shillers
anyhow about makerword they seem to have gone back
 grim sandal
I'm gonna ask my question here:
I've got a prusa i3mk3 but have wanted to get started with laser cutting/engraving and CNC milling at home too. Currently interested in a snap maker with an enclosure to save space(and money?). Does anyone have experience with a snap maker or something similar? Or recommendations for intro level CNC mills or laser cutters.?
I use a tormach 1100m at school, but don't have experience with lasers.
I'm fairly confident in my ability to get stuff working, so ease of use is not important to me.
Hoping to do PCB milling among other things
btw if you do respond pls ping me since I don't check this server often
 iron remnant
grim sandal
I'm gonna ask my question here:
I've got a prusa i3mk3 but have wanted to get s...
iron remnant
grim sandal
I'm gonna ask my question here:
I've got a prusa i3mk3 but have wanted to get s...
So.... the problem is that the needs of a CNC mill, a laser cutter, and a 3D printer are all very very different. Laser cutter and 3D printer needs a fast moving gantry, CNC needs to be able to handle some force and doesn't need to move fast. Laser cutter doesn't need Z. Et al.
But, yah, I get peeved at people who were all like "Nice Guy Open Source Josef Prusa" forgetting that he's now the head of a large company and all of the newest printers aren't open source. Just because he made a great open source printer a long while ago doesn't mean that he is, today, a great open source guy.
And, dono, the Ender 3v2 wasn't "actually" open source in that it diverged fairly far from the repo that Naomi Wu talked them into putting up... but it was still nicely moddable and well-understood, so it's clearly not the open source part that makes a 3D printer something that we can use, repurpose, and prevent from being just another blob of expensive e-waste. So it's important for there to be a blowback over the locking of Bambu printers and it creates opportunities for other companies to re-create the Bambu-ish experience of a printer that does not suck and works out of the box now that people can have the palatable fear that their Bambu printer, while nice out of the box, has a high risk of turning into experience of a HP inkjet.
 keen raft
grim sandal
I'm gonna ask my question here:
I've got a prusa i3mk3 but have wanted to get s...
keen raft
grim sandal
I'm gonna ask my question here:
I've got a prusa i3mk3 but have wanted to get s...
From what I hear, milling PCBs sounds a lot better than it actually is. It's dirty, potentially dangerous, getting the necessary precision requires a fairly expensive machine and even if you manage to mill out your tracks, you still don't have any solder mask, vias or silkscreen on there, let alone parts. So compared to more traditional at-home methods of making PCBs, you will at best avoid the most dangerous chemicals, shift your work towards the CNC a little and get your result faster, but the total amount of work is probably about the same. And compared to a PCB service, you'd only save money if you really make a lot of PCBs, because even an entry level CNC equals dozens or even hundreds of PCBs. And the quality you get is far, far superior to what can be made at home.
faint sky
Well that depends on the goal. If you're interested in learning how these things work then the learning makes it worth it.
keen raft
And laser cutting is a different thing altogether. Some people experiment with it to make PCBs, but it's not really suited for that.
shy kelp
iron remnant
So.... the problem is that the needs of a CNC mill, a laser cutter, and a 3D pri...
cheap lasers often don't autofocus, you need like to manually adjust them...
funny enough, you need to spend thousands more to get anything that autofocus
faint sky
Some people don't just want to drive a car they want to know how it works, how to fix it, etc... some kids might want to grow up to be 3D printer mechanics even if it's only for their own printers. Not everyone has the same use case scenarios.
iron remnant
Making your own microwave PCBs seems like a case for milling tho, given that that's full on black magic.
I dono, one of my friends does mill her own PCBs and loves it.
keen raft
faint sky
Well that depends on the goal. If you're interested in learning how these thing...
That is true. But getting a mill with PCBs in mind is like getting an FDM to make 1cm-miniatures with 0.05mm layer height. It's possible, but you need great equipment (i.e. expensive, high end stuff, not a beginner device for 200 bucks), otherwise frustration will hit you pretty soon and pretty hard. Generally, whenever anyone tests out these cheap CNCs on Youtube, they all come out saying they're great, probably because they're all sponsored. But most of them don't take long to tell you that they put heir own spindle motor on, use their own cutting tools, did their own adjustments, have years of experience and still found the machine lacking. I had looked into the same thing and this was a huge put-off for me.
I think when someone mentions that they hope to make PCBs, then that is what they want and if it doesn't work, they'll be disappointed 😉
I totally support the idea of getting such a device and to learn using it. CNCing complements 3D printing very well sometimes, especially if you can do acrylics or even metals.
faint sky
Being able to CNC your own custom acrylic enclosures sounds nice. Manufacturing stuff out of billet aluminum is also very tempting.
That's why I got a 3D printer, mainly for project enclosures. It's the most utilitarian aspect of a 3D printer and far cheaper than a 6-axis CNC. 😉
vocal flax
Chemical process is way to go for PCBs. If you don't care about the potential harms, you can just spray paint PCB and remove paint with cheapish fiber laser (the ones used for branding things) then use ferric chloride or h2o2 + HCl to etch.
If you care about smoke then you use photoresist and 400nm (or whatever photoresist sensitive to) laser then develop and etch
faint pier
you can mill your own PCBs, but if you're doing something more complex than a 2 layer PCB, the way to go nowadays is to just order them. The PCB manufacturing companies are very competitively priced and very fast. If you are doing simple PCB milling in the garage, you do not need a fancy CNC, even a classic 3018 style CNC will be sufficient for that. As far as CNC machines, If you really want to get fancy, and since this is the 3D printing channel, you do have the option of building your own Millennium Milo (of which they are now launching a new update) or Voron's own design. This not even considering out of the box options with toolchangers, like the Makera Carvera etc.
It really depends on what capability you want. Same with lasers. If you just want to engrave, a simple 5W laser would work (but I would caution against the really cheap open frame lasers unless you know what you're doing). If you want to cut clear acrylic, things get more complex/expensive fast and you would probably need a CO2 laser
grim sandal
okay, I think I'll try out toner transfer+etching for now
in terms of non-pcb milling and laser etching/cutting, does a snap maker make any sense or is it better to get something else?
id be milling small wood projects
and etching paper and wood
vocal flax
faint pier
you can mill your own PCBs, but if you're doing something more complex than a 2 ...
That's a cute tiny tiny Bridgeport. I love it🤩 😍
I NEEEED IT 🤤
grim sandal
thanks everyone for your help
 regal charm
There was some talk about using generative AI to help with modeling, just saw this from a coworker. https://zoo.dev/text-to-cad

Zoo
Text-to-CAD is an open-source prompt interface for generating CAD files through text prompts. Generate models that you can import into the CAD program of your choice.
vivid helm
Good luck modifying models from that.
keen raft
I just found this: https://www.youtube.com/watch?v=SBJX8NE19sI
It cuts off the end of the filament if it's tangled, bent or stuck to the spool. Might be interesting to some of you.
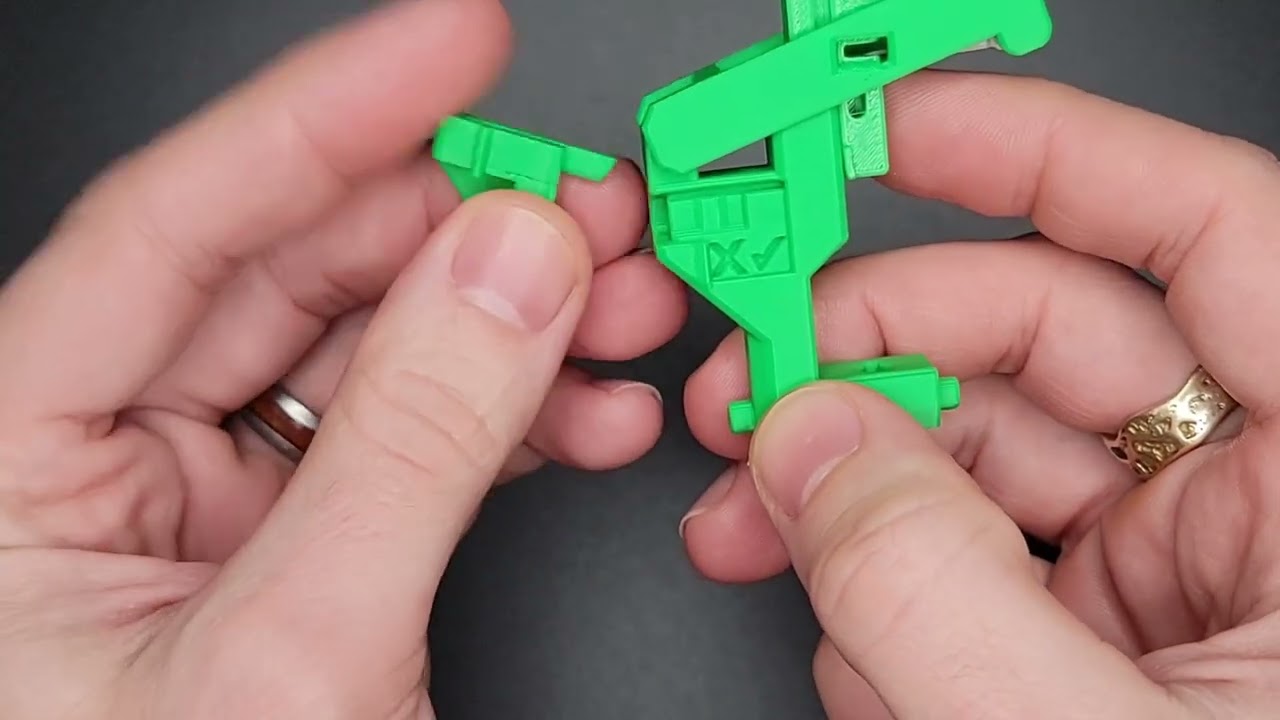
This video provides instructions for assembling and installing the AMS Saver Snag Cutter. For more information and related files, please visit https://makerworld.com/en/models/957400#profileId-926562
 latent breach
is there an easy way to have a standard git enabled repo local to my dev machine
and automatically rsync (or similar) the python files to the circutpython drive?
or, would it just be easier to write a simple shell build script that does that
ashen moat
nothing built-in. you could make one of the repos on disk the origin and clone the other from it (no network necessary), but pushing to a repo only updates its index, it doesn't automatically update any checked-out files there.
you could probably add a post-commit hook script to your local repo on your PC that would copy the files to the circuitpython drive after you git commit.
and there are programs like nodemon that watch a file tree and run a script if anything changes
latent breach
i've used inotify before, i might just do that
ashen moat
yeah, nodemon listens for inotify events
latent breach
i just realized this is in the wrong chat 
i got something up and running with python inotify
it doesn't do file deletes, but it works pretty well
 gloomy anchor
Will 3D printed PCBs become mainstream in a few years?
faint pier
No, it's still early days in the "extremely convenient mail order PCBs" phase
vivid helm
Also there are material limitations. It's hard to get good electrical performance from 3d printable materials.
Temperature tolerance is also likely to be an issue.
steep umbra
 green reef
does anyone have any simple projects with electronics in them
green reef
does anyone have any simple projects with electronics in them
Can you be a little more specific?
ashen moat
green reef
does anyone have any simple projects with electronics in them
if you're talking bolt-ins, Bambu has a few, like a cheap module for making a printed wireless mouse:
https://us.store.bambulab.com/products/wireless-mouse-components-kit-002
 blissful marlin
Is there a fast way I could sand/polish a cylinder and a hole? Around 160 mm in diameter. I need to do it like 20+ times or so. Trying to find a way to automate it if possible
arctic dragon
If the hole is centered in the cylinder, you can affix the whole thing onto some kind of spinning fixture like a lathe, then apply a sander as it spins.
blissful marlin
hmm I guess the problem would be how I keep pressure on the walls then
 versed cloak
Maybe oddly specific but my ender3 v2 neo started having issue.
It stop in the middle of a print saying both nozzle and bed temperature are too low.
I can’t think of anything else than changing the temperature probe but which one ?
iron remnant
That sounds more like an overall PSU or controller board issue?
 torpid grove
blissful marlin
hmm I guess the problem would be how I keep pressure on the walls then
torpid grove
blissful marlin
hmm I guess the problem would be how I keep pressure on the walls then
Do you have a picture of the part(s) you could share? The lathe idea is good if you have access to one, you could use that to drill out the holes as well
blissful marlin
torpid grove
Do you have a picture of the part(s) you could share? The lathe idea is good if ...
It's like a bucket/vase

Ignore the top edge
I just need to smooth out the inner diameter
faint pier
versed cloak
Maybe oddly specific but my ender3 v2 neo started having issue.
It stop in the m...
Are you getting a thermal runaway error? Seems unlikely that both thermistors would fail at the same time.... does the Neo's firmware show a general error or actually both thermistors having an issue? I would check the obvious things first- verify that the thermistors are intact and wiring and connections looks ok (including having the printer on, wiggling wires and checking the temperature readout on the screen to see if temps jumps around randomly). I would also check around your environment- for example are you printing in a drafty area, maybe a cold garage, etc.
versed cloak
faint pier
Are you getting a thermal runaway error? Seems unlikely that both thermistors wo...
the message axtually mention both but it could be a generic message. During the first 50% of the print all the temperature readout look normal and its printing correctly.
But you might be right it could be the board 😦
versed cloak
faint pier
Are you getting a thermal runaway error? Seems unlikely that both thermistors wo...
I actually moved my printer to a more drafty area recently but did not expect this to be a problem.
I will try closing the ceiling vent (directly above my desk) and try again.
thanks so much for those suggestion
faint pier
Just as a random aside- I have no issues with POM wheels for Z-movement, but I don't think they are optimal for X and Y movement on bedslingers. They do wear out especially as printer speeds increase. I saw this pattern when doing a bedmesh on one of my printers that my SO called a "sunchip" shape and realized that the peaks corresponded to the diameter of the POM wheels on the X-carriage. After replacing 2/3 wheels the sunchip shape is almost gone. I have an order of new wheels coming in so hopefully the bedmesh will just go back to being slightly bent 😂 Granted they did last over 300 hours of printing.

 torpid grove
blissful marlin
I just need to smooth out the inner diameter
torpid grove
blissful marlin
I just need to smooth out the inner diameter
So if you just need the interior walls smooth I'd try sand-able filler primer. You spray it inside it fills the gaps in the layers and can then be sanded smooth. That won't be a quick process though. A quicker way might be to redesign so that the interior wall is a non 3d printed part (like a pipe or tube) that is already smooth.
faint sky
Might sound silly but a lathe type of adapter for a drill chuck and a piece of sandpaper would make quick work of it. Put the drill in a vise and voila a cheapy lathe for sanding round objects.
They sell lathe chucks for about $20 up to 3" on amazon, after 3" they start getting expensive. If you're really careful and gentle with it.. you might be able to 3D print your own lathe chuck drill adapter.
faint pier
One Adafruit product that is pretty popular in the DIY 3D printer space are... LED Sequins. It's kind of funny because they were meant for wearables but they actually work out pretty well for folks building the popular Dragonburner toolhead. I bring this up because they are popular enough that some 3DP supply companies offer a Neopixel variant... but Adafruit doesn't https://www.fysetc.com/products/fysetc-neopixel-sequins-with-rgb-ws2812-3535-glow-rgb-led-and-1m-26awg-teflon-cable-for-voron-mini-sb-extruder. Perhaps this is something that Adafruit can consider adding to the product lineup? I think it would be a cool option for wearables even if the LEDs are a bit bulkier than sequins.
faint sky
faint pier
One Adafruit product that is pretty popular in the DIY 3D printer space are... L...
You can request products to stock via the adafruit website feedback form. They do listen and if enough people request something good chance they'll add it.
No one from Adafruit in an official capacity hangs out in this channel (3D Printing) so even expressing the idea of stocking something here will likely never be seen.
 loud silo
faint pier
One Adafruit product that is pretty popular in the DIY 3D printer space are... L...
loud silo
faint pier
One Adafruit product that is pretty popular in the DIY 3D printer space are... L...
how about:
https://www.adafruit.com/product/1312
https://www.adafruit.com/product/1559
https://www.adafruit.com/product/1558

This is the easiest way possible to add small, bright RGB pixels to your project. We took the same technology from our Flora NeoPixels and made them breadboard friendly, with two rows of 3 x ...

So, you want lots and lots of NeoPixels? And you want them for less? Not a problem! Here's a sheet of Flora NeoPixels fresh from the (reflow) oven. Cut them off as you need 'em and ...

So, you want lots and lots of NeoPixels? And you want them for less? Not a problem! Here's a sheet of Breadboard-Friendly NeoPixel breakouts fresh from the (reflow) oven. Snap them off ...
faint pier
loud silo
how about:
https://www.adafruit.com/product/1312
https://www.adafruit.com/produc...
It's really about the form factor, the regular neopixel format works for things like the Stealthburner but not for the compact Dragonburner. I'll use the website form
loud silo

These are the smallest NeoPixel breakouts around! Tiny, bright RGB pixels to your project. These little PCBs are only 8mm x 10mm and have two sets of three pads on the back for soldering ...
so not 5050 size but smaller?
faint pier
loud silo
so not 5050 size but smaller?
Yeah, the Dragonburner by default uses sequin PCBs rather than the normal sized neopixel pcbs. I don't really know if it HAS to (can be modded) but that is the default configuration
loud silo
faint pier
Yeah, the Dragonburner by default uses sequin PCBs rather than the normal sized ...
I think the formfactor of the individual sequin boards is more important than the size of the LEDs.
unless there is some worry about max current
faint pier
Scratch- Neopixel support is part of official release: https://github.com/chirpy2605/voron/tree/main/V0/Dragon_Burner#leds

GitHub
Voron mods. Contribute to chirpy2605/voron development by creating an account on GitHub.
I think it might still be a fun product so I'll go ahead and suggest it
shy kelp
https://www.youtube.com/watch?v=B9sdrezl6AU
I like when youtube suggest me few minutes of video, and not a 10+ " of sponsorship

Another test print of a new 5-axis 3D printer with all 5 axes in use.
The printed model has approximately 70 deg overhang in all directions.
Music by https://www.bensound.com/free-music-for-videos
Artist: TURNIQUE
License code: NIYKILYVDUNOMFTQ
blissful marlin
Is there some kind of tool I can buy or maybe print that helps with sanding holes to a correct diameter?
For example I have some parts that need holes with a diameter of 60 mm and another with 120 mm
But when printing there might be some small bumps like leftover support structure or seams
It would be great if I can just put it on a drill and sand it somehow
arctic dragon
blissful marlin
It would be great if I can just put it on a drill and sand it somehow
A rotary tool like a Dremel should work well for this.
May need a finer grit sandpaper afterwards though.
faint pier
If you need to clean up the edges of holes, a deburring tool is perfect as well. Otherwise yeah, dremel and a sanding drum, or a drill bit of the exact size you need.
arctic dragon
60-120mm diameter might be tough for a drill bit haha
ashen moat
for some increasingly-worse ideas, you might be able to chuck up a round "rat tail" rasp in a drill, too, in a pinch. or mount the part somehow and use a bottle brush cylinder hone, if they exist for very small engines.
shy kelp
So, in the end for o rings, I ended up ordering a really expensive foamable tpu (I always wanted to try it out).
Now, I need like an array of o-rings
How could I easily set those o-rings in place, without cursing myself with the assembly
or doing the costly solution, which is printing everything in place with the same material, but under different temps, to have diferent hardness?
PS: I don't have ams/multiple nozzles
faint sky
shy kelp
So, in the end for o rings, I ended up ordering a really expensive foamable tpu ...
Make a fillet U channel for the o-ring around the circumference of the rod. This ensures its installed in the correct position and stays in place.
You will have to customize the depth of the channel for the diameter of the o-ring.
faint sky
blissful marlin
It would be great if I can just put it on a drill and sand it somehow
The problem with using sandpaper is over time it will lose the grit and your hole will no longer get sanded to the exacting specification you want. A large drill bit or something metal will last much longer.
shy kelp
faint sky
Make a fillet U channel for the o-ring around the circumference of the rod. Thi...
fast sketch, something like this?
But by doing so I should stretch and put by hand each oring, while hoping it won't permamently deform

I though something like a giant screw, with nuts, but it's also painfull
faint sky
Correct o-rings are typically rolled on from the end. In this case from the right side of your object. O-rings will stretch a little for a multi-o-ring object like yours but will retain their memory after allowing it to settle for a while.
To make installation a little easier install them from right to left. So the 2nd o-ring in the middle is rolled over the first on the right.
If your o-rings are round and your channels are rounded like a U the install should be pretty simple. Getting the depth correct will be the hardest part to ensure the outer diameter of the o-rings are flush to whatever you're installing the object into.
shy kelp
thanks for the suggestions ^^
faint sky
also never use petroleum based lubricant on petroleum based o-rings. it will melt them like acid. use silicone based lubricant for petroleum based o-rings.
spraying wd40 on o-rings for example will melt them over time.
by "over time" i mean a matter of days, your o-rings will turn into black goo.
it's why most automotive o-rings are made of hard durometer nitrile.
one of the first things you should know about your o-ring is what it is made of so you can use the correct lubricant (if you need to use lubricant).
shy kelp
By chance do you know what are those made from? https://us.store.bambulab.com/products/lubricant-grease?id=43083133550728&skr=yes&com_cvv=8fb3d522dc163aeadb66e08cd7450cbbdddc64c6cf2e8891f6d48747c6d56d2c
Just cause I have them hanging around

Bambu Lab USA Store
faint sky
That would be something to ask Bambu. They have a linked page that points towards WD-40. https://wiki.bambulab.com/en/a1-mini/maintenance/lubricate-y-axis-with-wd-40-multi-use-product
That is for guide rails only. A different type of lubricant might be used on different parts. Anything that might come into contact with a petroleum based rubber would be prone to deterioration such as rubber belts.
So never spray WD40 on your printer directly. spray it on a cloth and wipe it on, the same goes for grease packets, use a cloth (or soft paper towel) to apply it. I would avoid using regular paper towels as they are designed to be somewhat abrasive and over time can wear down the part you're lubricating simply from application... but that is splitting hairs as maintenance happens so infrequently that it's not a big deal anyway. If for whatever reason you frequently maintain your printer on a weekly basis then yes it could have an affect on your rails over a very long period of time.
iron remnant
That's..... weird?
Like, OK, I'm obsessive and have a bunch of rando lubes hanging around the geekroom and all but my impression is that WD-40 is the worst choice for all kinds of situations other than unsticking things and keeping Atlas rockets from corroding.
I'm guessing that the lubricant grease is probbably some sort of NGL2 grease thingie?
shy kelp
I didn't mind, pretty good to know. Likely the advice aganist wd40 is that's common, although I personally never bought it, but it's common to find it at the workplace. That remembers me, that spraying it in some fan at work, may not have been a great idea
iron remnant
Yeah, there's a giant vocal anti-WD40 brigade where some people will not have anything from WD-40 soiling their doorstep.
So, yah, dono, oiling the rails feels weird compared to other printers, but I would presume that they have some sense of not giving people instructions that would destroy the printer?
And I guess today's high-speed printers are asking more out of the linear rails than days past, because some folks are saying that yeah you really need to re-lube once a month or so.
But I'm not sure, if looking at the Hiwin guide, if that means that high speed grease is required?
But I got a nice syringe of Mobilux EP2 grease for my linear rails.
faint pier
WD-40 is pretty good in certain situations for cleaning, but I don't really use it for lubrication because it leaves such a thin and low viscosity film.
If you look at Voron and Hiwin's guides, they have specifics about what grease to use. There are two things happening there. Hiwin's guides are meant for rated loads in industrial applications, which are far and beyond what most 3D printers exert on their rails, so viscous industrial greases are often recommended. The other thing is specific to Voron and other enclosed chamber builds, where higher temperatures and high speed repetitive movement tend to cause certain oils and greases to become a mess and leave the areas they're supposed to be lubricating. I have to imagine that Bambu is comfortable with WD-40 in the A1 to keep the motion system lubricated enough but are more concerned about keeping components clean.
ashen moat
I've used hydraulic assembly lubricant on things like PITA rubber auto exhaust hangers with great success. I'd expect it to to be widely compatible with things like o-rings (though I haven't verified). engine assembly lube might be something to check into, too.
faint pier
oh, for rubber exhaust hangers you can just juice them up with soapy water... that plus exhaust hanger pliers or even channelocks and they slide right off. In fact you can get O-rings on with that too.
ashen moat
interesting! I've used channellocks dry with some elbow grease, but never learned the soapy water trick.
shy kelp
Expensive plastic has come
 faint pier
ashen moat
interesting! I've used channellocks dry with some elbow grease, but never learne...
faint pier
ashen moat
interesting! I've used channellocks dry with some elbow grease, but never learne...
Yep, just put dawn and water in a spray bottle and go to town, the soppier the better and they just slide. Best part is no mess afterwards. Boeing might have gotten in trouble leak testing with snoop but it's perfectly fine to use on your own rubber components XD
 wheat rivet
What is your go to software for designing and engineering the 3D printing, and why ?
From design to actual setting up the print.
I ask out of general curiosity and interest as I want to learn some of the software first and then potentially deliver the results to be printed by others (professional businesses/hobbyists)
shy kelp
wheat rivet
What is your go to software for designing and engineering the 3D printing, and w...
They are all the same. Pick whatever you like most.
I use rhino cause I like it.
On a business stand point, you're forced to use whatever the top ladder likes most
faint pier
As far as parametric design software, I use and like Fusion 360. It's quite streamlined with a good featureset and is relatively easy to use. The big downside is that it's cloud based. The personal edition is free but it does have some limitations - nothing crippling that you can't work around. There are a number of true "free" software out there that works with varying degrees of success and difficulty in use as well.
Once .STL is exported, I quite like Orcaslicer for 3D printing slicing software. It comes from a hilariously long open-source lineage (Bambuslicer, which is derived from Prusaslicer, which is derived from Sli3er) and has a very active development community. Really nice featureset and being able to swap between various types and brands of printers with ease.
shy kelp
F360 gained marketshare by being free, now it isn't quite anymore. Autodesk in the 201x did had the free pass on piracy on their software to gain userbase, lots of fake student licenses
Mcneel kind of did the same with endless 3 month trials, now they have integrated sone anti piracy software which works pretty badly if I have to say
faint sky
I've noticed Orca has been gaining steam lately.
shy kelp
Some truly free are: freecad/openscad, ondsel (no support deprecated project), salome (not quite a cad tho)
Some less truly free but free for the time being: altair cad
iron remnant
Yeah see my gut feel is that a lot of people are eventually going to regret ever using Fusion 360 once Autodesk is finished ... Autodesking.
That being said, people want a cool well designed 3D printable object where the open source part is not actually an explicit requirement.
ashen moat
I use OpenSCAD for modelling because I really like boolean operations (CSG), I like making parametric designs that anyone could modify (or customize on thingiverse), I'm into coding, and I mostly make functional models. and I use Linux, which eliminates most popular packages. OpenSCAD can be slow to use, though. and you have to think of names for every conceivable measurement.
I use PrusaSlicer because it worked better than Cura a couple years ago when I leaned into it.
I haven't tried Orca yet because setting up a new slicer from scratch sounds worse than it actually is, and I've been putting it off.
 vestal thicket
I second OrcaSlicer. Been using it pretty much since I bought my Bambu.
 random urchin
OpenSCAD for most of my 3D design. Occasionally import STLs into Blender to do a bit of sculpting on them.
GIMP and Inkscape for creating 2D profiles (svg) to import into OpenSCAD.
Prusaslicer for slicing. OctoPrint for printing.
One thing about OpenSCAD: The current release version is 4 years old. However, there are daily development snapshots with much better performance if you enable the new renderer (Edit->Preferences->Advanced->Backend->Manifold). Not sure when they're going to do a new release but the development snapshots seem to be reasonably stable: https://openscad.org/downloads.html
shy kelp
As far for slicers I don't see that much of a difference between all. Orca has more or less the same features as the others but with different naming. If you go around the gui, it just crashes
random urchin
As far as I know, most popular slicers (e.g. PrusaSlicer, Orca, Bambu, SuperSlicer) are derived from Slic3r (primary or secondary forks). The one exception I know of is Cura. There are probably a few others floating around that I'm not aware of, though.
faint pier
I started off with Cura
and then I stopped when someone submitted a PR on their github to add a volumetric flowrate feature (which is basically standard now for all Sli3er derived software), only for a Cura dev to reject it as they said they were going "in a different" direction
faint pier
Speaking of getting Autodesk-ed, this is actually my main concern with a cloud based service (happening right this moment). It doesn't really matter too much if you only have it on one computer (since presumably all your projects were opened and updated locally and you never have to log in), but if you use the software across a few computers, problems like this will get you.

At my work place, such an outage would be absolutely unacceptable. But then we have other problems, because most software have license managers and if all licenses are being used by coworkers or you simply aren't subscribed to the right featureset... you're still left sitting there twiddling your thumbs explaining to your boss why you aren't doing anything XD
 velvet radish
i was working on a fusion project and it happened to be 12am or whenever they do maintenance so i had to leave fusion open for 2+ hours to let my work sync back up
i wonder if inventor is any better
tender sparrow
Where does that name at the top come from? I’ve looked everywhere in orcaslicer and I can’t find anything that changes or would otherwise give this name
 steep umbra
tender sparrow
Where does that name at the top come from? I’ve looked everywhere in orcaslicer ...
steep umbra
tender sparrow
Where does that name at the top come from? I’ve looked everywhere in orcaslicer ...
mind sharing the file?
tender sparrow
The one i slice?
The sliced result gets sent over with the bambu network plugin thing so i have no idea where it goes
steep umbra
yeah, the one you slice
tender sparrow
I don’t have this exact one but i can send over another with the same issue in a bit
tender sparrow
steep umbra
tender sparrow
and what name does it have on your printer?
"Toothpick Dispenser - all parts printed"?
tender sparrow
"Toothpick Dispenser - all parts printed.3mf"
steep umbra
tender sparrow
"Toothpick Dispenser - all parts printed.3mf"
Sorry for the delay. In Orcaslicer (at least 2.3) go to the Project tab in the top row, then in the left toolbar, click "edit project info"
tender sparrow
My sliced files won’t overwrite each other now, thanks
 placid anvil
Does anyone have recommendations for good silk metallic gold PLA filament?
I bought Geeetech Giantarm last year and it was THE BEST gold I had ever used. However, I bought more from Geeetech and the filament is just so dull and not as metallic looking. I bought some of their "Giantarm" filament too thinking maybe it's different? But it's not. I also tried Teqstone gold but it looks dull also.
Their Amazon listing also has a photo comparing the old and new, seems like last year I got the new style but now I got the old style? Please help 😭


 steep umbra
Not an answer, but someone like Zack Freedman on youtube probably has some thoughts
shy kelp
on bambus why do I need to keep inserting the auth code every f time on the slicer?

same on orca, old and newer versions
 tidal stone
shy kelp
on bambus why do I need to keep inserting the auth code every f time on the slic...
tidal stone
shy kelp
on bambus why do I need to keep inserting the auth code every f time on the slic...
Bambu has been doing things to their printers to make it harder to use LAN mode. They want everyone to use their cloud service. I haven't been able to get my A1 to connect to the slicer for months.
I've been on sneaker net with microSD cards.
steep umbra
same
shy kelp
So annoying filament that in the past didn't give me any problems, now it has been a nightmare, doesn't stick to the bed, doesn't properly extrude, it's inconsitent, I wonder why
steep umbra
the only thing I know of that changes without apparent cause is humidity, but I'm far from an expert
arctic dragon
shy kelp
So annoying filament that in the past didn't give me any problems, now it has be...
Beds also wear over time, it's very possible for any number of variables on the bed surface to affect first layer adhesion at least.
Similarly. extrusion issues can occur as a result of nozzle wear or any number of variables there...
shy kelp
It's the filament... i heard that's prone to get humidity, but I didn't though that letting it a day out would kill it
steep umbra
at least you were able to figure it out
iron remnant
I was in a makerspace that had spools out in the open and thought "oh, how quaint!" because ... I keep even PLA in the sealed desiccant bins.
shy kelp
Currently it doesn't print too well but at least it prints... At 300C/100C.
Going soon to sleep, I hope it doesn't turn into expensive spaghettos
steep umbra
what filament??!?!
arctic dragon
What printer…?
vocal flax
300C?
tender sparrow
steep umbra
Sorry for the delay. In Orcaslicer (at least 2.3) go to the Project tab in the t...
that edits the title but not the filename which is what the printer and everything else displays...


i'm trying the dig through source code route but i'm not finding anything
steep umbra
can't you just rename the file?
tender sparrow
I never get the file
It gets sent over to the printer where it ends up who knows where on the SD card
steep umbra
you have it in orcaslicer, no?
tender sparrow
Wdym
steep umbra
you get a file from somewhere then open it in Orcaslicer, right? Just click File->Save Project as, save it with a new name, then make sure that's the one that's open when you print
tender sparrow
better than nothing ig
shy kelp
arctic dragon
What printer…?
P1s using pva, pretty sure it has become soaked with humidity,as it was printing fine not long ago
Anyway here's my problem, how do I electroplate pva without making it fail as it doesn't like liquids while using human safe (and cheap) stuff? I thought epoxy but it's bad to work with, and also I would have a layer of epoxy which I don't like.
I was hoping that it would just survive electroplating, but it doesn't
 shy kelp
This stuff is nasty
ashen moat
isn't PVA a water-soluble support filament? like PVA glue (Elmer's white glue, glue sticks, hairspray) is used for bed adhesion because it binds to other plastics and washes off. I would think you wouldn't print actual models with it unless you wanted water solubility.
faint pier
that is correct, you often use it for supports
It is quite expensive so you usually just use it at the interface between the support and the part. For example, print most of the support in the same PLA as your main part, except at the main interface. Then you can dunk in water and separate the parts.
Alternatively, if you have an AMS and take care when purging (or better, an IDEX or multi-toolhead system), you can also use a dissimilar plastic as a support material. PLA and PETG do not mix, so often when printing one, you can use the other as the support material. This is often cheaper.
shy kelp
ashen moat
isn't PVA a water-soluble support filament? like PVA glue (Elmer's white glue, g...
That's exactly the point. You electroplate it, and then remove it by rinsing on water, so you're left out only by a thin metal part
That's in theory cause it doesn't survive the electroplating process. Hardening through epoxy not an option, cause it's insulating
 lavish needle
faint pier
It is quite expensive so you usually just use it at the interface between the su...
lavish needle
faint pier
It is quite expensive so you usually just use it at the interface between the su...
i just spent half an hour with pliers, snips, a metal spatula thing, and an x-acto knife to remove the supports from helmet parts i had printed.. i recently switched to an 0.6 ratehr than 0.4 nozzle and my adjustments to the support settings clearly didn't work quite right so some of those supports were fused real good. The idea of just dunking in water and the supports simply falling off is ... tantalizing
shy kelp
lavish needle
i just spent half an hour with pliers, snips, a metal spatula thing, and an x-ac...
They don't fall off, it dissolves in water with enough time
iron remnant
It's a very appealing ... solution to a problem.
vocal flax
In practice it's not as straight forward
shy kelp
Although nobody has quite followed my question... i'l guess I'll have to try with random soluble stuff to get it right
Like idk coating with caramel
ashen moat
I thought electroplating deposited a very, very thin layer of metal. like, even if it worked the way you want, wouldn't the result be akin to tin foil?
you could maybe try alcohol-soluble filaments like PVB or HIPS (fumes require ventilaton).
shy kelp
ashen moat
I thought electroplating deposited a very, very thin layer of metal. like, even ...
If you let long enough you may get a decent thick layer or so I've heard...
The problem with hips is that it's toxic, I haven't heard of PVB...
arctic dragon
Anything that can stand up to a liquid bath for electroplating and still be chemically soluble is likely to have some degree of toxicity involved.
Another alternative is to use a specialty material that burns away cleanly, though their applications are typically limited to SLA or other specialty printers.
 coarse ruin
PVB is desolves in alcohols, ABS desolves in acetone, HIPS desolves in actone or d limonene(green paint thinner). All produce some level of toxic by product.
PLA breaks down slowly with NaOH (lye) in water + ultrasonic.
all of these methods are used by commercial 3D printing systems. What works best for you depends on your print types and other processes.
you can find PVB from : Prusament, Polymakers, and many others.
shy kelp
I guess I'm going to drop down this project... Tooo expensive
 placid grail
Hi I want to make a standard iot box Id uses for all my projects as a starting point, it would have cut-up space to fit a particular LCD snugly, a plastic pocket for an esp32 qt py, cut out space for the battery pack and an hole for a motion sensor (to turn off the lcd to prevent burn in when Im not near it). I dont really know where to start any open-source stl I could adjust for my purpose ?
When I want to make another iot project I just have to spend 35$ + filament price as the basic parts for any project so I see a lot of benefits in it
faint pier
Well, that and in addition to the price of the printer
You can find 'parametric' adjustable boxes and enclosures on printables and thingiverse. For Adafruit boards, LCDs and sensors specifically, their Learn section often has pretty good base designs that you can use as a starting point. Often, you can mishmash mounts for different objects into a box design of your choice
Here is an example for Adafruit Feather enclosures: https://learn.adafruit.com/3d-printed-case-for-adafruit-feather/cad

A Multipurpose Enclosure for Adafruit Feather
(they have a channel on printables if you want a general repository as well: https://www.printables.com/@Adafruit/models)
random urchin
placid grail
Hi I want to make a standard iot box Id uses for all my projects as a starting p...
Here's a few models for QTPY projects: https://www.printables.com/search/models?q=qtpy
ashen moat
I like this parametric box design. not sure if it'll handle multiple PCBs out of the box (ha), but it's OpenSCAD so you can always dig deeper than the easy Customizer options (on thingiverse or in OpenSCAD's own Customizer UI).
https://www.thingiverse.com/thing:1264391

Thingiverse
The file include now the Panel Maker. this project...My first try with OpenScad,the box is fully customizable.I hope you will enjoy with it, and will show us many boxes made with.If you play with the Fillet value you will go from the sharp to the round sides boxIf you want a chanfered box, set Resolution to 1.To export each single piece, just se...
if it's cumbersome to design the holes you need, PLA drills pretty easy.
placid grail
thanks Ill look at that much easier to modify than create from scratch 🙂
shy kelp
pardon for the drawing.
I want to join two thin sheets of few mm (2-3mm) of thickness, without using glues
snap in stuff won't ever work, so I though something like this, anyone has any other idea?
I saw this type of fit, on some older 3d printers which were mostly cnc cutted
 keen raft
shy kelp
pardon for the drawing.
I want to join two thin sheets of few mm (2-3mm) of thi...
keen raft
shy kelp
pardon for the drawing.
I want to join two thin sheets of few mm (2-3mm) of thi...
If both parts are only 2-3mm thick, then where is the nut supposed to go? 😉
You could try screwing directly into the print, but at that thickness it won't be very strong. The thinnest thread inserts I know of are also 3mm, but that's only for a tiny M2 screw and the recommended hole depth is 4mm.
shy kelp
keen raft
If both parts are only 2-3mm thick, then where is the nut supposed to go? 😉
something like this; I ended up adding a little bit of thickness as the channel for the scew was hitting walls
 steep umbra
is it normal for PETG to have problems with sticking to the nozzle? I keep seeing an issue where a few bits will stick the to the nozzle, and then it will rip up whatever layer it's working on. Sometimes it will recover, usually it will end up as spaghetti. Any thoughts on how to address that?
keen raft
steep umbra
is it normal for PETG to have problems with sticking to the nozzle? I keep seein...
My nozzle is always covered in a layer of gunk, but it's never an issue. Where do these "bits" come from? It has to pick them up somewhere. Is the nozzle colliding with anything? Grid infill maybe?
steep umbra
keen raft
My nozzle is always covered in a layer of gunk, but it's never an issue. Where d...
Not sure, I think it's just the general layer of gunk, but for some reason, it sticks to PETG where it doesn't stick to PLA
ashen moat
you can try slowing down. I used to have that problem with t-glase and I don't remember how I fixed it except to slow down and maybe live-trim the sticking-up bits with flush cutters while the print was going, but that takes a lot of babysitting. maybe you could also experiment with retraction settings, or z-hop?
or calibrate extrusion, on the chance you're slightly overextruding.
green reef
anyone know any 3d prints for a bracket/case for this https://www.adafruit.com/product/2279

Bring a little bit of Times Square into your home with this sweet 64 x 32 square RGB LED matrix panel. These panels are normally used to make video walls, here in New York we see them on the ...
random urchin
green reef
anyone know any 3d prints for a bracket/case for this https://www.adafruit.com/p...
Only one I could find: https://www.thingiverse.com/thing:4680669

Thingiverse
Hi all!I bought a really cool 64x32 RGB LED Matrix from Adafruit, and wanted to put it ina nice enclosure. After some searching, I could not find exaclty what I was after, soI designed my own! It is completely modular, so I can mix and match parts for whatever projectcomes along. The bezel comes in three versions. Simple bezel, bezel with diffus...
shy kelp
I guess this project is going to be a nightmare to assemble
I tried previously one go print, but it didn't quite work, lots of filament wasted
 faint sky
PETG temps are higher than PLA. It takes longer to cool. That's why printing PETG slower works better because you give the rest of the part more time to cool before going over it again on the next layer. Because it's a higher temp and the material stays molten for longer it's much easier for the side of the nozzle to pick up molten material on a neighboring pass. Adjusting flow rate % to be slightly less can help but at the risk of under extrusion and stringing. Everything is a delicate balance for higher temp material.
speed and fan cooling % has a bigger impact for PETG than PLA.
 vivid bay
green reef
anyone know any 3d prints for a bracket/case for this https://www.adafruit.com/p...
vivid bay
green reef
anyone know any 3d prints for a bracket/case for this https://www.adafruit.com/p...
I recently built a 2 panel display using the same matrix. I started with the files from: https://learn.adafruit.com/matrixportal-circuitpython-animated-message-board/3d-printing and modified them to the hole positions of the 2279. I also mounted the matrixportal on the end. Bought the diffuser from TAP Plastics (link in Adafruit build).

LED matrix animation using bitmaptools and the MatrixPortal S3
vivid bay
green reef
anyone know any 3d prints for a bracket/case for this https://www.adafruit.com/p...
Here are a couple shots. Not a "piano finish" but it was my first 3d print project.


 subtle prawn
just wondering if anyone has run into a similar problem, i have an ender five plus and I'm getting "thermal runaway" / "heating failure" errors, originally i assumed it was a faulty thermistor or loose wire# but it seems to only happen on certain prints. could this an issue with the gcode, slicing or would it be something completely different?
other then it reoccurring with certain prints it appears to be kind of rare and completely random.
shy kelp
subtle prawn
just wondering if anyone has run into a similar problem, i have an ender five pl...
Within marlin you should be able to disable the protection.
But check if the thermistors is correctly placed and doesn't move & if in your marlin config you have selected the correct resistor.
Although it may as well ne the heating cardridge or fans
arctic dragon
subtle prawn
just wondering if anyone has run into a similar problem, i have an ender five pl...
Is it possible that certain printer positions are applying tension to the cabling somewhere? Thermal runaway and heating failure errors are typical of the system not being able to read the temperature sensor somewhere, so try to reproduce the error and trace the cable path from the printhead temperature sensor back to the main board.
vocal flax
shy kelp
Within marlin you should be able to disable the protection.
But check if the the...
Don't do this. This is not a solution. You are disabling safety measures. Find the real problem. A real problem or not, that setting can be what keeps you from burning down your house.
Remember anet incident!
random urchin
subtle prawn
just wondering if anyone has run into a similar problem, i have an ender five pl...
Any chance there was a strong air current blowing across the print bed? I've had an incidents where a fan was blowing across my print bed — I'd inadvertently pointed it at the printer — and the air flow was enough to cool off the print bed nearly as fast as the heater could heat it. That was enough to trigger a false thermal runaway alarm. Turning the fan away from the printer was sufficient to remedy the problem.
shy kelp
vocal flax
Remember anet incident!
I like how the rest of the comment is ignored.
arctic dragon
shy kelp
I like how the rest of the comment is ignored.
The rest of the comment doesn’t address the risk the disabling of protection in marlin brings. It’s not that the rest of the comment is ignored, it’s more that the dangers of that part of the suggestion outweighs the validity of the rest of your response due to it being the first sentence and making everything else feel like an afterthought.
 hard patrol
Heyo! So uh.
I’m trying to update the firmware on my Kobra 3 Max but it’s taking.. ages.
The inage attached was taken at 9:12
Its now 9:59 as of sending this and it’s still at that point

I’m not sure if it’s stuck or what
I don’t wanna turn it off and on again incase it bricks
It’s now 10:09
still nothin
hard patrol
10:24
hard patrol
Update: rebooted it and it was fine.
 sullen zinc
3d printing project idea, "the good air canary" @idle crest @supple stratus
 arctic dragon
Reminds me of something like https://www.amazon.com/Birdie-Design-Indoor-CO2-Monitor/dp/B0DGQB1C1Q, but that price is crazy
 pearl turret
Hi, I need help flashing my 3D printer — stuck on "booting" after trying to flash Klipper.
Printer: Wanhao Duplicator D12-230
Screen: Stock touchscreen (not flashed separately)
Firmware: Klipper .bin compiled for Wanhao v5.2 using make menuconfig and another version found on github who made the same result
SD card: 8GB, FAT32 formatted, only the .bin file on it (with a unique name)
What happened:
I inserted the SD card with the Klipper firmware and turned the printer on.
The screen showed "100%" for a long time.
I turned it off and on again — now it's stuck on "booting" forever.
What I want to know:
Is this normal when flashing Klipper?
Should I try another SD card?
Is the screen causing this?
How can I recover or retry the flash?
Any advice would be great, thanks a lot!
arctic dragon
pearl turret
**Hi, I need help flashing my 3D printer — stuck on "booting" after trying to fl...
Do you have a host pi connected?
pearl turret
arctic dragon
Do you have a host pi connected?
no, the tutorial i followed told me to not connect my pi
arctic dragon
Which tutorial are you following?
pearl turret
a random tutorial on YT i dont remember
oh
i just understand
maybe the firmware work but i didnt know since i didnt connected my pi
arctic dragon
I cannot confirm that is the case, but with my experience with a different printer, that may be the case.
pearl turret
but my printer was stuck at 100% when i installed and was stuck to booting when i restarted (brutally) the printer
arctic dragon
I don’t believe klipper inherently supports stock displays, it’s meant to use a display on the Pi.
I would not use the stock displays as a reference to whether the firmware install was successful
pearl turret
ok ill try that with the pi thx
pearl turret
arctic dragon
I would not use the stock displays as a reference to whether the firmware instal...
I tried with the Pi connected, and it showed me this.

it made the same with every firmware i tested, and one i made myself with the printer specifications
vocal flax
You have to create printer config for klipper. Are you following any tutorial to install and use klipper?
faint pier
This definitely requires following a tutorial. Copy and Paste configs will work but you still need to enter some information. For example, to connect the Pi to the MCU over USB, you need the address ID of the MCU once it's been connected to the Pi's USB port (i.e. with the lsusb command).
balmy pulsar
finally back to fixing up my cnc... https://youtu.be/0q-ipbeLYBg

Finally got these things running under linuxcnc. Still some fine tuning to do, but... um... yeahhhh....
Technically it can go even faster, but its not worth while.
Acceleration is 0.8G, and the maximum speed in the video is 40m/m, or 1575ipm over 200mm of motion.
 fallen dirge
Does anyone have 3d-printer recommendations?
arctic dragon
For what purpose and budget?
fallen dirge
arctic dragon
For what purpose and budget?
$300 and for general printing nothing to insane but enough to get the job done.
Like creating projects or builds. Also what’s a good 3dpriter designing application.
arctic dragon
fallen dirge
Like creating projects or builds. Also what’s a good 3dpriter designing applicat...
If you’re willing to wait, elegoo’s new centauri carbon is a great value for the money. If you prefer something more available and open source, there are a fair number of bedslinger printers like sovol sv07 or elegoo neptune 3 which work great once dialed in.
As for making 3d models, fusion360 is the go to for more technical models, while many artists tend to prefer blender. If these tools are a bit daunting, there are also online tools like tinkercad which are designed to be kid friendly, too.
shy kelp
fallen dirge
$300 and for general printing nothing to insane but enough to get the job done.
Bambu's usually just work. Although their hw/sw is closed. But parts that do mostly fail, are avaible for cheap, their wikis/troubleshooting steps are pretty great
As far for cads, they're kind of all the same, that's down to personal preference. I like Rhino.
iron remnant
Yah, I guess my problem with the Bambu printers is that they seem to be speedrunning the journey to the HP inkjet printer experience?
shy kelp
iron remnant
Yah, I guess my problem with the Bambu printers is that they seem to be speedrun...
Bah other brands do not seem to contribute much at the foss comunities either way, other than ripping off, use the open source sticker, while having parts that are not so open in the first place and reskinning slicers
So long bambu's are still working, unlike hps, and many other brands. If they ever get in that route, there's still the horde of foss stuff/modifications
fallen dirge
arctic dragon
If you’re willing to wait, elegoo’s new centauri carbon is a great value for the...
For Elegoo’s new Centauri Carbon how do I upload prints/designs?
arctic dragon
fallen dirge
For Elegoo’s new Centauri Carbon how do I upload prints/designs?
You can load up print files over WiFi or USB drive.
fallen dirge
Ok
faint pier
You use a slicer program that allows you to make settings to how you want to print it, and then it'll upload the design over wifi. Elegoo slicer is the default. If you get deeper into the hobby you can try out more generic programs like Orcaslicer (which Elegoo slicer is based on iirc)
fallen dirge
I tested out tinkercad just for fun and couldn't figure how to use real measurements?
shy kelp
fallen dirge
I tested out tinkercad just for fun and couldn't figure how to use real measurem...
You should be able to use a ruler, from a google search https://www.tinkercad.com/blog/tinkertip-r-is-for-ruler

Tinkercad
Learn how to use the ruler tool in Tinkercad to see all of a design's dimensions displayed, as well as its relative position to the ruler.
Anyway I wonder if by getting a fiber laser, I could fuse together atomized metals, or fuse soder
I don't wanna spend cause I want to buy home, but a 3k machine is somewhat too attractive
 zinc dawn
Hi all! I am just getting into 3D printing, and learning some CAD using FreeCAD. I just made the "Mother of all Demos" USB Keyset from the Adafruit learn guide, it was awesome! I would like to make some modifications to the 3D models, but since I'm already quite overwhelmed by all the new concepts, tool and programs, I'm a bit hesitant to switch tools like CAD programs too much (I barely start to find my way around FreeCAD). Since the CAD files are provided in Fusion 360 and STEP file formats, I believe i could either:
- Import the STEP file in FreeCAD, and recreate/trace the imported geometry into FreeCAD bodies and then make modifications
- Bite the bullet and start to learn Fusion as well
Am I missing another option? What would be your recommendations?
 nocturne pond
Greetings, I want to start 3d printing things but I'm on a tight budget, does anyone know any good 3d printers that are more on the quality side that are cheap?
steep umbra
nocturne pond
Greetings, I want to start 3d printing things but I'm on a tight budget, does an...
You didn't specify your budget. I have an A1 mini, and I think it's an excellent value, though perhaps far from the perfect printer. A lot of it depends on what "quality" means to you, what you're going to do with it, and what "a tight budget" means to you. Oh, and some printers are popular for their customizability, and so if your budget or needs grow, your printer can grow with you.
nocturne pond
steep umbra
You didn't specify your budget. I have an A1 mini, and I think it's an excellent...
I was going to use them for cosplay props, I apologize for not specifing my budget
steep umbra
Oh, and there are different styles of printers, for example FDM vs resin (aka SLA), which have fairly different properties
I know almost nothing about resin printing, though I'm sure there are people here who do
nocturne pond
It doesnt need to be "the most perfect" but I would hope for them to be able to withstand some damage
steep umbra
are you talking helmet size props? Are you willing to make up for the shortcomings of a cheap printer with more labor?
steep umbra
you're going to have to do things like figure out how to break apart models across multiple prints and then fasten them together
nocturne pond
hmm
dont worry, I will start with a beginner cosplay prop
they have multiple pieces across a lot of prints
steep umbra
you might also be able to find a makerspace near you, they'll often have 3D printers that you can use to try something out, and get a better sense of what you can do, what you might expect at different price points
nocturne pond
yeah, good idea
I'm gonna have to wait a bit before that happens, I dont think there is a makerspace where I currently am right now
But I should be heading to the west in a few
shy kelp
how do I stop supports from going on top of other objects? The checkbox of using only the plate is enabled, but they still go on top of objects, using right click and add a support blocker, they're both ignored, and I get support on top of other objects, which don't fully remove, so I cant just ignore it. this happens on both orca and bambustudio

 magic wing
would @ionic heath be willing to release the source (SVG?) files for Acrylic + Hardware Kit for Adafruit MagTag. It appears MagTag is EOL but would love to use the SVGs as a template for future cover designs
ashen moat
shy kelp
how do I stop supports from going on top of other objects? The checkbox of using...
I don't think the support is on top of your model, I think it's touching the build plate and intersecting your model. I don't use those slicers, but look for an option for support distance from the model in X/Y, you should be able to force those roots farther away.
subtle prawn
has anyone here had trouble connecting a printer to the bambu labs slicer/studio?
 golden peak
So I made a model, but the issue is I need it spliced down the middle and able to be taken apart and put back together

I'd use screw holes but there's no room inside to put the through holes except for one at the top
Any ideas on what outer joints I could use to hold the two pieces together securely that isn't permanent?
arctic dragon
I can’t say I fully understand the geometry here, but if you have one end with place for a screw, you can secure the opposite end with locking tabs. Think the battery door behind a tv remote or something.
golden peak
arctic dragon
I can’t say I fully understand the geometry here, but if you have one end with p...
Do you know of any methods on how I could design said locking tab? This is in blender but tbh I'm using it as bootleg CAD software with just cylinders and cubes
arctic dragon
golden peak
Do you know of any methods on how I could design said locking tab? This is in bl...
Janky way to do this would be some offset rectangular prism joined to the panel, slotting into a rectangular hole. Not sure how that would work in blender as I've never tried it before.
 willow wasp
this just blew my mind, makerworld allow altering the parameters of fusion files after import.
 ashen moat
makerworld's like a thingiverse or printables?
they built a version of customizer, but for fusion? that's pretty great.
iron remnant
I'm assuming they had to do some kind of deal with Autodesk?
Either way, Josef Prusa was making a big deal about how Makerworld was just Printables but green, but they've not done anything with customizer at all on their site.
ashen moat
yeah I sort of assumed customizer would find its way into every model repository and somehow it... hasn't.
iron remnant
I mean, speaking as someone who manages infrastructure teams professionally, properly containing OpenSCAD in such a way that it does not provide an attack or denial of service vector while also preserving the necessary functionality is not a trivial problem?
Especially considering BOSL2 and the lack of an OpenSCAD package manager.
random urchin
Yeah, there are a lot of issues with setting up an OpenSCAD customizer on a server. One of the big ones is that the last release version is over 4 years old. There are fairly regular development snapshots that have lots of improvements over the 2021 release but there's always a risk of a bug or two. I'm currently using the 2025.07.01 at home without any problems, but I'm not sure I'd feel comfortable deploying that to a public server.
vocal flax
Genuine question, if you sanitize input values, what could go wrong?
iron remnant
More or less, the halting problem?
So, halting problem in CS states that you cannot determine by inspection if a program will actually terminate.
OpenSCAD is a complete programming language with a lot of potential things it could be convinced to do.
So, infinite loops being the obvious thing but you can always cut off the CPU, but you can extend the mental concept of that to understand that with a programming language you have a very hard time actually ensuring that it is not trying to do something nefarious.
So, for example, JavaScript is designed to be sandboxed carefully in ways that OpenSCAD is not and there have still been class breaks and bugs and novel new attack vectors including things like Spectre and Meltdown.
So I kinda wonder if Makerworld has attack vectors ready to be exploited that nobody really cares to poke at?
If I had the time to poke at it, I'd probably play with applying Emscripten to the OpenSCAD and FreeCAD engines to create a browser-side customizer but that's the sort of thing that's easy to demonstrate and hard to turn into bulletproof production code.
Likewise, I understand that Prusa very deliberately did not add the OpenSCAD customizer to Printables because of how cruddy the interface for Thingiverse was and I feel like there's a computer-human-interaction study to be done on the best way to make that truly functional.
Because ... parametric models using whatever platform you choose are a power tool for enabling normal humans to customize their world with 3D printers without needing to be good at CAD.
(Why yes, I did have a booth on exactly this last year at the Bay Area Maker Faire, how can you tell?)
ashen moat
I also imagined running OpenSCAD in the end user's browser to offload the compute work and sandbox it. though as someone who also works on cloud infra, it seems like one or more levels of containerization would address potential compromise. or even the same WASM transpile you'd use in the browser, but running in node. it's an interesting problem.
what part of this was your booth about?
iron remnant
Parametric models being how we enable normal humans to customize their world with 3D printers, with HSW and Gridfinity being the big examples.
And OpenSCAD's ability to make a library being a power tool that most other CAD tools lack.
I guess the other reason to run it in the browser is that you don't pay for a bunch of cloud servers running endless Minkowskis because that'll probably add up?
 gloomy wharf
hi all
i'm trying to get my 3d printer up and running after it sitting for a little while, i've blown out all the dust and ive spent most of today systematically testing everything and so far it's going fine
i was having trouble with my z-axis limit switch (the printer just blows past it and will crash) but i have a bltouch, so i'm trying to use that, but im having trouble trying to set up the firmware properly
i'm using marlin 2.1.x bugfix for both the configuartion and marlin versions, just going off the biqu b1 example
now here's where i'm tripped up
in the readme with the configuration it says this
## BLTouch Probe Support
Uncomment `B1_USE_BLTOUCH` for probe customization.
This configuration retains the use of homing with a Z limit switch. If you want to home with the BLTouch probe, remove your Z limit switch & bracket and enable (uncomment) `USE_PROBE_FOR_Z_HOMING` and `Z_SAFE_HOMING`. Change `Z_MIN_ENDSTOP_HIT_STATE` from `LOW` to `HIGH`.```
i do all of that but the Z_MIN_ENDSTOP_HIT_STATE is not set in a way i can understand with how much i currently know
if anyone's got suggestions let me know
i think i've got it
i dont code c++ so im not sure where the best place to find documentation is, but from what im seeing, since i uncommented b1_use_bltouch, it should default to high, which means i dont need to change anything, right? 😅

 lilac sparrow
Hello chat
Any guides on getting your first 3d printer?
I’m seeing one that’s super cheap second hand but idk what to look for
Never used a 3d printer but want to get into it
steep umbra
try stuff. All the research in the world won't prepare you for what you will encounter
lilac sparrow
O I meant like anything in particular to look for ?
steep umbra
There are so many things to look for - speed, accuracy, ease of use, ease of maintenance, integration with other services, many more things besides. It's really hard for me to say "this is the thing that is important to you".
but if you try one out and have some feedback, then it's easier to have a conversation
For example, I'm on my first printer and I'm starting to learn that a bigger print bed would be nice for some things, and a heated enclosure might help with some of the warping I get with some materials. Now, I don't think I'm interested in spending the money on fixing those problems, but I still learned some things to look for
shy kelp
lilac sparrow
O I meant like anything in particular to look for ?
bambu's are the most consumer like things.
the other brands are not bad, but they all like release stuff on a yearly if not less basis,
and never end up to properly set their machines up, letting the user dealing with that
And tbh, if they were around the 201x I would had gladly avoided all of that, annoying experience
they're all based on the same projects, with all you can get somewhat hacky if you're into that
 lethal oar
(Apologies if it's there and I've missed it) is there a place where I can download the exact dimensions of this board and mounting holes https://www.adafruit.com/product/5477 - e.g. the height of the qwiic connector, usb connector etc? ( Context: trying to print a simple case around it for someone remote who has the board, so I can't conveniently measure it. I tried to use the feather specifications for the mounting holes but the first attempt ended up not quite fitting. I also think I got the outer board dimensions wrong)

The ESP32-S3 has arrived in Feather format - and what a great way to get started with this powerful new chip from Espressif! With dual 240 MHz cores, WiFi and BLE support, and native USB, ...
vestal thicket
lethal oar
(Apologies if it's there and I've missed it) is there a place where I can downlo...
If they've shared them, they'd be at https://github.com/adafruit/Adafruit_CAD_Parts but I don't see 5477 unfortunately
lethal oar
Ah, cool - thanks for the pointer to the repo.
vestal thicket
I think you can file an issue to request a part
lethal oar
Looks like there's 5323 (version without flash) but should be sufficient for my needs - thanks again!
 spark cosmos
Does anyone know if there are 3d models to replace this product? https://www.adafruit.com/product/5073

For all the DIY keebfans in the house here is a super sleek and sturdy 4-Key Aluminum Keypad Shell in Silver, the perfect base to begin your custom keypad project. ...
 bronze iron
Would someone make me some 3-D Printer designs for TMNT Stamp pads?
 unreal marsh
Hello. I am building a weather station display using the square 4-inch RGB-666 TTL TFT display run by the Aualia ESP32-S3. I would like to house it all in a 3D printed case. I see designs for the round 4-inch and square 3.4-inch RGB-666 displays (https://learn.adafruit.com/qualia-3d-printed-cases). Any chance the STL files for the square 4-inch case are available (and not yet posted)?
 gusty sorrel
Has anyone had a print do this?
I think it's a corrupted gcode file because I tried printing it twice and it freaked out at the exact same point.
Naturally it's not supposed to be printing way outside the float in mid air like that.
The sliced file looked fine in the Cura preview. It got weird when saving it to the SD card so I'm thinking the gcode file was corrupted.
I'm running it a third time with a formatted SD and resliced model so hopefully the gcode will work correctly.
vocal flax
I've filled the ram of Arduino uno but that was like instant reboot
random urchin
spark cosmos
Does anyone know if there are 3d models to replace this product? https://www.ada...
I've got something like this. The keys snap into the tray and the tray slides into the top of the enclosure. Now screws; just friction fit. I did a 2×3 for a keypad, for example.


 gusty sorrel
Naturally it's not supposed to be printing way outside the float in mid air like...
gusty sorrel
gusty sorrel
Naturally it's not supposed to be printing way outside the float in mid air like...
It was bad gcode... That was a fun new learning experience 😂
gusty sorrel
vocal flax
I've filled the ram of Arduino uno but that was like instant reboot
It ended up being the gcode. The new file printed correctly 😅
spark cosmos
random urchin
I've got something like this. The keys snap into the tray and the tray slides in...
That looks great! Have you posted the STLs on any shops where I could purchase them (Cults3d, Bambu labs, etc.)?
random urchin
spark cosmos
That looks great! Have you posted the STLs on any shops where I could purchase t...
I don't have that specific one uploaded anywhere, but here's a copy.
spark cosmos
random urchin
I don't have that specific one uploaded anywhere, but here's a copy.
Wow, thanks for the STL file
 royal sable
Hope everyone is doing well. I need some help from anyone who can see if I am making a wise choice in purchasing a 3D printer. Strictly a hobby for just myself. I am looking at a FlashForge AD5M Pro. My reasons are I want it self inclosed so it doesn't smell up the house. Any messes it creates in my office space wil lbe kept inside the box. No fuss in adjustments, Easy to use and has a 200mmx200mmx200 build space that will build most if not all of Adafruits learn projects. I have been watching tons of YT videos on every kine of make and model for days and all have good and bad. This model seems to cover all my check boxes but want to make sure i didn't miss one that someone really loves and is close to what I want. Thanks for anyone who has any good suggestions.
arctic dragon
royal sable
Hope everyone is doing well. I need some help from anyone who can see if I am m...
If you read the reviews and it checks all your boxes, I’d say go for it. While I can think of a bunch of alternatives each with their own tradeoffs, sometimes it’s better to not fall too deep into the rabbit hole before you even start…
 rich axle
@royal sable Not sure what your budget is but I see this particular printer mentioned often. https://us.elegoo.com/products/centauri-carbon

ELEGOO US
Enjoy CoreXY high speed and advanced materials with Elegoo Centauri Carbon. Get ultra-detailed prints with easy Plug-N-Play, built for both beginners & pros.
arctic dragon
rich axle
<@579810877864411136> Not sure what your budget is but I see this particular pr...
While I do agree that the centauri carbon is a great deal in terms of performance to price, I do think the flashforge printer is going to offer better air filtration and lower noise relative to elegoo’s cc. I own a cc myself and I’m fairly confident it’s significantly louder than 55db…
rich axle
Never occurred to me that it would be that loud. Good point.
arctic dragon
Some say the later units are quieter, but I don’t know by how much.
Their air filters are basically nonexistent, compared to the AD5M pro and its HEPA/activated carbon filters and particulate sensors. Educational printers take safety pretty seriously.
It’s not a priority for me since mine is in the garage, but if I ever move my CC inside I’m upgrading the air filter first.
royal sable
rich axle
<@579810877864411136> Not sure what your budget is but I see this particular pr...
Hey EeBbHh , I was looking at this one and have work with Elegoo folks before. But I decided on the FlashForge 5M Pro. It was so easy to set up. After unpacking it turned it on and it went thru its calibration and test print. Printed a 1x1 cube in 3 minutes. It was so fast it shook the card table. I guess I will be looking for a more studier table for it.
rich axle
Was looking over a the .stl for the QTpy Snap-on Mount and noticed something is missing. So I double checked the one I recently ordered to see if it was pushed to production and it was.


Is this a known issue? If not who would I contact to let them know?
rich axle
yes
vestal thicket
Click on the Feedback? Corrections? link in the left hand sidebar
rich axle
my bad there is no learn guide for that product
but the same section as the learn guides
vestal thicket
I'm not sure then
rich axle
Posted on forums just in case.
 dull gazelle
rich axle
Posted on forums just in case.
dull gazelle
rich axle
Posted on forums just in case.
Just to close the loop here, it was answered in the forums and that piece was meant to be that way in order for the mount to accommodate ALL Qt Py form factor boards where one has a component at that location. Or in short, it was the design intent.
rich axle
Correct. I was able to get clarification on both the forums and Github. Thank you for the follow up.
royal sable
Is it possible to take a Adafruit CAD file and make modification to the .stl or 3mf file using FreeCAD. I tried getting CoPilot AI to walk me thru it but nothing happens when I switch to Sketch mode. I built up the Learn guide for "16x16 NeoPixel Matrix Square Pixel Display" and I wanted to modify the Sparkle holder for the mini Sparkle .
rich axle
@royal sable It looks like you can but I think it takes a conversion to edit. I use blender and it won't open a .stl directly but it will import and allow me to edit. FreeCAD probably does something similar in it's conversion of the file type.
coarse ruin
blender has import and export tool add-ons for STL.
however, STLs are mesh files so will be using mesh type tools for modifications. not very CAD friendly / an entirely differenty type of work flow.
if your going to use blender in that way... you might also look at the CAD addons also.
the STEP files is a better starting point to import into CAD type programs
 distant quiver
royal sable
Is it possible to take a Adafruit CAD file and make modification to the .stl or ...
distant quiver
royal sable
Is it possible to take a Adafruit CAD file and make modification to the .stl or ...
Use the Fusion free account. Or solid works has a real cheap version. Personally I love using the apple pen on iPad with Shapr3D. I think that's the fastest way. I bounce back and forth between fusion and shapr3D.
Could tell me what you need done and I can do it.
DM me if anyone is interested.
dull gazelle
royal sable
Is it possible to take a Adafruit CAD file and make modification to the .stl or ...
Late seeing this post, but if it is still any help, I use Tinkercad for simple designs. It imports .stl files directly which you can then modify with Tinkercad tools. Granted it isn't like a traditional CAD program where you can easily change some stuff and you kind of have figure out the Tinkercad ways to change things. But I often will start with a .stl file from elsewhere (Thingiverse for example) and then modify it for my use in Tinkercad.

Thingiverse
Download millions of 3D models and files for your 3D printer, laser cutter, or CNC. From custom parts to unique designs, you can find them on Thingive
balmy pulsar
I been busy makin cnc thingamawhatsits... https://youtu.be/_fJCKJ6Oq9A first one should be made in october. wooooo. can i sleep now?

miniMonster is a high performance machining center with 430mm x 280mm x 130mm travel based around affordable zero point tooling
Preorders for base frame kits*, rotary tables, and accessories will start soon, with auto tool changers for HSK25E and ISO20 to follow
*frame kits include mechanical components only and fit a wide range of value consc...
steep umbra
why is PHA so hard to print without warping
 uneven adder
steep umbra
why is PHA so hard to print without warping
uneven adder
steep umbra
why is PHA so hard to print without warping
Is there some special property of PHA that you need for your project? :p
steep umbra
uneven adder
Is there some special property of PHA that you need for your project? :p
No, I thought it would be eco-friendly to prototype with a maximally environmentally friendly material. Instead I've done nothing but produce trash.
coarse ruin
my personal exp with PLA is it definitely breaks down in direct sunlight (turns into a powder in a few years )... not as eco frenly as PHA... not as limited break down as some people suggest. Shades of grey on eco. less waste = just better over all.
coarse ruin
I've printed with PHA blend. Needed to use a higher bed temp to keep it flat. Might be able to use other other bed adhesion methods (brim, glue, reduced fan cooling, geometry, etc.) to resolve it on a non heated bed.
steep umbra
coarse ruin
I've printed with PHA blend. Needed to use a higher bed temp to keep it flat. Mi...
Interesting. I came across some recommendation on reddit to turn OFF the bed heating, and instead use brim, glue, and fan off for the first few layers. What temp do you like for the bed? Unfortunately, the filament I have is from beyond plastics, and they went out of business, so a more authoritative source than "some guy on reddit" is not available
coarse ruin
not sure why you would turn off bed heating... that does not make sense. Each printer will be unique on tuning so you should do your own tests. My main brinter right now is s prusa mk3 i3. I presently use 70c and a PVA coating on a textured PEI plate (thus the heating) . rarely fails. no brim (usualy).
but have done something similar with Replicator 2 lower temp heated, PEI non-texture plate
note warping in overhang and dimenetioned parts are related topics but have different solutions
steep umbra
Like I said, some guy on the internet told me to. So now I'll try listening to some other guy on the internet ^^
faint pier
I would always recommend starting with the OEM print setting recommendations and going from there. For example, the technical data sheet from Colorfabb https://colorfabb.us/allpha-natural


AllPHA is 100% biobased and 100% biodegradable in any biotope, without leaving microplastics.
Read more about our sustanaible materials : here
Our allPHA 3D printing filament (pronounced as Alpha) is the ultimate bioplastic. PolyHydroxyAlkanoates abbreviated PHA, is created by a naturally occurring process called fermentation. By feeding bacte...
Depending on the nature of the warp, you might need to consider other solutions. If you post an example of the issues you are seeing, we can probably help diagnose.
coarse ruin
PEI build plate adhesion is very dependant on bed temperature. It has very little impact on the print otherwise (for the most part). if other build plate are used... no heat or more heating might be required.
 blazing glade
This is sort of a vague question but, how do you plan out stuff like enclosures? Like, what's the mental workflow? Would you first try to put all of the breakout boards together on one PCB then plan around that, mount things separately, consider airflow, consider exterior access (for batteries or things like that), ...?
and like, do you find it useful to arrange things physically and try to figure that out first in a tactile way, or just grab all the CAD models and go in software and trust it will work out?
vestal thicket
blazing glade
and like, do you find it useful to arrange things physically and try to figure t...
I'm no expert, but maybe checkout Noe Ruiz's Layer by Layer tutorials where he walks through his design process: https://www.youtube.com/playlist?list=PLjF7R1fz_OOVsMp6nKnpjsXSQ45nxfORb
There are a few videos on enclosures
blazing glade
thanks
 sick horizon
What's the preferred Linux alternative to Fusion 360? Seems like FreeCAD?
vestal thicket
sick horizon
What's the preferred Linux alternative to Fusion 360? Seems like FreeCAD?
Yes, FreeCad or OpenSCAD
 buoyant lagoon
sick horizon
What's the preferred Linux alternative to Fusion 360? Seems like FreeCAD?
buoyant lagoon
sick horizon
What's the preferred Linux alternative to Fusion 360? Seems like FreeCAD?
OnShape is also quite nice. Super easy to sign up if you're a student.
loud silo
sick horizon
What's the preferred Linux alternative to Fusion 360? Seems like FreeCAD?
I have used online free TinkerCAD for some projects and OpenSCAD for others. TinkerCAD was not hard to learn. I have tried SketchUp in the past but didn't find it intuitive.
placid anvil
man does anyone know why the heck the first layer of my support here is seeping out? its preventing me from slicing because the gcode goes over the buildplate boundaries
 dull gazelle
loud silo
I have used online free TinkerCAD for some projects and OpenSCAD for others. Tin...
dull gazelle
loud silo
I have used online free TinkerCAD for some projects and OpenSCAD for others. Tin...
Second the TinkerCAD suggestion. Also because it is web based and online so all the heavy lifting is done by the Adobe computers, it works about the same speed regardless of what platform you are running it so I have been able to do stuff using a slow Chromebook where on the Chromebook it was no slower than on my home Mac or work PC.
keen raft
placid anvil
If the printer physically allows it, you could just define the plate as 1mm larger in that dimension as a workaround
 astral sun
placid anvil
astral sun
placid anvil
if using bambu slicer, go to the Support tab, and scroll down to Advanced. Set "Initial layer expansion" to 0
 placid anvil
astral sun
if using bambu slicer, go to the Support tab, and scroll down to Advanced. Set ...
placid anvil
astral sun
if using bambu slicer, go to the Support tab, and scroll down to Advanced. Set ...
i tried this and it affected everything BUT that pesky gcode path
blazing glade
I'm trying to think about how to redesign this lid. Right now the screws protrude and interfere with the buttons. But if I want to sink hex bolts here, it kind of is a bit big for the buttons as well and they're hard to press if the display is recessed even one extra mm. Wondering if I can print flexible buttons directly into the case top with compliant connectors, so I can afford +1 or +2mm here. Also, I need to figure out a good way to fasten the far side. There are holes in the PCB but they don't seem to fit M2.5 screws. Maybe a ledge or groove the PCB can slide into?

(also, I did notice that when I print pockets to fit the hex nuts, the overhangs seem to cause some problems; any good tricks people know for designing tiny supports that can easily detach from an M2.5 hole?)
loud silo
blazing glade
I'm trying to think about how to redesign this lid. Right now the screws protrud...
could you use flat-head screws and countersink the screw holes?
you could print a flexible flap that goes above the button, and even have a protrusion on it (though hard to print then). But I don't think the flap would last that many flexes.
you can get button caps for tactile buttons. We don't have any for that size, but you might be able to find some. Or 3d print some with a collar, so that they fit into the top of the case from the cap but can't fall through.
blazing glade
I've been iterating on this and getting closer, but it's definitely fiddly. Lost the front reset button on my esp32-rev-TFT when I got the tolerances too tight - the flex button survived, the solder on the tactile switch didn't...
The good news is that the screws seem to be able to be used to pretension the flex buttons so they can trigger the tactile switch with minimum flex
Making a hole for the screw head does work, getting the tolerances right has been a little trial and error. I had thought just one 0.4mm margin would have worked, but I needed more than that (I guess it's printing double walled and with other cut features near there that all goes into the hole, which I should have known from settings)
loud silo
blazing glade
Making a hole for the screw head does work, getting the tolerances right has bee...
You may want to use external buttons that are larger and less fragile, and just hide the on-board buttons
blazing glade

this is what it looks like now
Kind of hard to see, but it's loaded in a way that the buttons protrude very slightly. So when you press it barely moves.
 loud silo
blazing glade
Kind of hard to see, but it's loaded in a way that the buttons protrude very sli...
loud silo
blazing glade
Kind of hard to see, but it's loaded in a way that the buttons protrude very sli...
that looks good, though repeated flexing may still be an issue
good for resetting sometimes, but not for gaming
blazing glade
the two buttons that are in use are a power button and a kind of screen toggle thing
so probably pretty infrequent usage
 nocturne canyon
Update on my free 3d printer
I ordered a new belt tensioner, motor mount and switch holder for the y axis, alongside a new extruder and extruder knob


Parts cost me $23 dollars, lets hope when they arrive i can get it working so i can test the nozzle
Oh yeah i also wanted to ask if there are any other ender 3 v2 owners for advice
Also
Do i need a control panel or can i run it headless with just a pi and octoprint?
vestal thicket
nocturne canyon
Also
Do i need a control panel or can i run it headless with just a pi and octop...
I had an Ender 3 v2, but sold it a couple years ago. You can run it without the screen with just a pi, that's what I did
nocturne canyon
Nice
nocturne canyon
Does anyone know what kind of screw this is
I think its an M5X25 but im not sure

Yeah it is a M5X25
Might be able to get one of these here where i study
unreal marsh
Hi Folks. I have one of the nice Adafruit RGB-666 4-inch square TTL TFT displays connected to a Qualia ESP32-S3. I would like to mount it in a 3D-printed enclosure like the ones described at https://learn.adafruit.com/qualia-3d-printed-cases/overview, but only the 3.4-inch square and 4-inch round RGB-666 displays have posted STLs (https://www.thingiverse.com/thing:6314263). Any suggestions for where I can find the 4-inch square enclosure design? I looked at modifying the 3.4-inch square design but did not see an easy way to do that (freeCAD novice-level user). Thank you for any pointers.

Thingiverse
https://youtu.be/qjxQFNZtgz0Build an enclosure for displays powered by the Qualia ESP32-S3Guide: https://learn.adafruit.com/qualia-3d-printed-casesThe 3D Printed mounts hold the Qualia board in place with access to the USB port and built in buttons!Designs for additional displays will be included as they are completed, stay tuned for more!
lethal oar
I've been intrigued by the Sovol zero - I know it's small, but I think that works for my small desk space. Any direct experience or opinions/ pro/cons from people familiar with it? (YT reviews are getting harder to parse with sponsored printers)
loud silo
lethal oar
I've been intrigued by the Sovol zero - I know it's small, but I think that work...
https://www.trustpilot.com/review/sovol3d.com a bunch of reviews say customer service is poor
lethal oar
loud silo
<https://www.trustpilot.com/review/sovol3d.com> a bunch of reviews say customer ...
Definitely lots of red flags there. Thank you for the heads-up.
(Open to other suggestions too in case you or others have thoughts. Small, enclosed printer, open source preferable, ok with software tinkering, prefer limiting hardware tinkering, are roughly the constraints)
faint pier
If you are looking for small open source, then the Voron V0 (which the Sovol Zero is inspired by), is another option. Right now for Black Friday on Aliex, you can find kits for around $250 or so shipped once used with coupons
At least unlike the Sovol SV08, Sovol's Zero is more an inspiration than straight copy of a Voron designs. Perhaps better to say that it is a bigger V0 with some choice mods. It is substantially beefier than the V0, and is therefore probably the absolute quickest accelerating printer you can possibly buy on the market today. Sovol having poor customer service doesn't surprise me, but I'd take a risk on it if you already know your way around a printer. It runs Klipper and CAD is available on their hithub I believe, so it's prebuilt but you can expand if you need.
That being said, the Voron V0 is a very well documented, completely open source printer with an extensive BOM and many kits out there. I have one myself and I can recommend it. The 120X120mm bed does limit what you can print. But the size also means that it is really quick to chamber heat (for printing ABS/ASA), has a lot of nice supporting quality of life mods, and is still wicked fast with great print quality.
lethal oar
faint pier
That being said, the Voron V0 is a very well documented, completely open source ...
Thank you for the suggestions! This will be my first 3d printer - are there "good" pre built versions of the voron 0? (Or is that essentially what the sovol zero would be, with the expectation of no hardware support?)
faint pier
There are no prebuilt versions of Voron, sadly. So yeah, that would be Sovol.
hmm, I just double checked and Sovol doesn't seem to have open sourced the Zero yet. https://wiki.sovol3d.com/en/sovol-zero. So perhaps buyer beware
unusual, since they came out with the SV08 files very quickly
lethal oar
Thank you, very helpful information!
 zealous oyster
So uh, I have a bit of a problem. I'm really not sure where to start.
 vestal thicket
zealous oyster
So uh, I have a bit of a problem. I'm really not sure where to start.
vestal thicket
zealous oyster
So uh, I have a bit of a problem. I'm really not sure where to start.
It happens to all of eventually. Heat up your extruder and it should come off
nocturne canyon
Ok so
Here is the benchy i printed yesterday
Its alright for the most part but it has this vertical line on the left side.
Does anyone know what could have caused this?

I feel like its a slicer thing
blazing glade
yeah, you can maybe set a random seam or paint the seam somewhere that won't be visible
Btw, anyone here print LED diffusers? What's a good material for that? I tried Bambu transparent PETG and it sort of makes the LEDs streaky but doesn't smear them together much

 faint pier
if you want nice diffused lighting I would actually consider printing in white
like a milky white if possible, or a thin white layer. If you take a look at Adafruit's famous Lightsaber project, the blade is a milky white and further diffusion for the LEDs is done by placing them in corrugated plastic (itself semi-translucent). You can try a similar method for very well diffused lighting.
arctic dragon
If you just want a very uniform blending, printing in white is best. You may have to play with material thickness and/or divider design to get the look you want with the LEDs you have.
blazing glade
ok, I'll give that a try, thanks!
blazing glade
so the white filament is definitely better at uniform diffusing; I do feel like I have to make it paper thin or I lose too much light, but after a couple failed prints I think I found a reasonable balance maybe
A couple of segments installed

 opal loom
Hi all does anyone that prints with a Bambu Lab A1 know how to properly ventilate it because it can’t be in an enclosure.
I have asthma so I really don’t want to run it without venting the fumes out. I could run it outside but I’m worried about water or the sun damaging it. I considered a shed too (expensive to buy) or using the garage (bugs might get in if it’s vented).
Does anyone have something that worked?
Thank you.
blazing glade
Do you have a room you could put it in where you can close the door, open a window, and run a fan? Also for what it's worth, I've put an air quality monitor next to my printer (P1S though) printing PLA or PETG and there's zero change in PM1, PM2.5, and PM10 concentrations when its printing - basically below detection levels. So you might not need anything more aggressive than, say, the ventilation system on a stove. Haven't checked VOCs though, and haven't printed ABS or ASA which are more known for producing fumes (but you can't print them without an enclosure anyhow).
faint pier
You can print it in an enclosure, it's just that over time without venting said enclosure, ambient air temp will rise. You will see poor print quality in PLA prints first long before reaching a threshold where you'll damage your machine. So you can buy one of those tent-like enclosures, monitor temps for short prints and run ventilation outside for longer prints. In my case, the one bedslinger I'm still using I simply run in a closet, that has a HEPA filter going as well for particulates only. This is assuming you are never going to print ABS/ASA, which has actual VOCs concerns with styrene fumes, in which case you would have to run ventilation outside, or include a carbon filtration element.
 dense bear
Is anyone solid with CAD I rlly need some guidance real quick! thx
 signal yarrow
What's your question
 carmine geyser
Pleaseee what is wrong with my printer

For some reason it skews everything
Well
Not everything
A few things
coarse ruin
rail alignment due to belt slipage? if your talking about the end slant? look up a procedure to align your rails for your printer and then use something like a cube calibration test.
carmine geyser
Wdym alighn the rails
The vertical ones?
Thats def not the issue, if they were at that angle itd be obvious
I tightened the y acis screws and am re printing it
faint pier
what kind of printer do you have? Has this printer only had issues recently? Can you take a picture of your machine?
coarse ruin
the issue i mentioned happens on printer that have a axis driven by 2 belts... a possiblity when you didn't say which printer.
carmine geyser
faint pier
what kind of printer do you have? Has this printer only had issues recently? Can...
It seems to have been fixed by tightening the set screws on the y axis pulley
Its an anet et4
I thought i had tightened them before, but i guess not
coarse ruin
printers vibrate a lot. A once in a while check/clean/lube (how often depends on how much you print) keeps working best.
opal loom
blazing glade
Do you have a room you could put it in where you can close the door, open a wind...
Sorry forgot to reply here. Was thinking of just running it in a garage and then using an air purifier. That should probably be ample?
opal loom
faint pier
You can print it in an enclosure, it's just that over time without venting said ...
I would 100% use an enclosure if I was printing inside the house. Thanks for the advice! Currently using a garage so for now I think just an air purifier and maybe opening the gate after printing is done should be sufficient.
Also @blazing glade I will only be printing PLA for now. Just getting started. Anything like ABA will require a more complex venting system
blazing glade
I was considering my garage, but I'd worry about insects getting into the machine; also humidity isn't great for filament
opal loom
For insects, I’d cover it up when not in use, but yes I suppose that’s a risk. I may ultimately get an enclosure, I just worry about it overheating.
I do want to avoid running it indoors if I can avoid it because my lungs are quite bad these days so don’t really want to risk it
 solid delta
Is it okay to request 3D CAd files of Adafruit projects that currently do not have any uploaded?
vestal thicket
solid delta
Is it okay to request 3D CAd files of Adafruit projects that currently do not ha...
Yes, you can open an issue to request a file in their CAD parts repo at https://github.com/adafruit/Adafruit_CAD_Parts
solid delta
vestal thicket
Yes, you can open an issue to request a file in their CAD parts repo at <https:/...
Thank you
solid delta
@vestal thicket Hi Paul,
I was about to make the issue for the parts but I notice that there are several open issues dating as early as 3 weeks to 2020 and even earlier.
So I wanted to ask you what is the reality that the issue would be fulfilled given the current workload that already exists. I am just trying to be practical with expectations.
vestal thicket
solid delta
<@273162248615100417> Hi Paul,
I was about to make the issue for the parts but...
I don't know, sorry. It's hard to guess, looking at the GitHub Repo's closed issues it looks like Noe did some a few weeks ago, but to your point, I don't know how he prioritizes the requests
solid delta
vestal thicket
I don't know, sorry. It's hard to guess, looking at the GitHub Repo's closed is...
Thank you for letting me know.
solid delta
vestal thicket
I don't know, sorry. It's hard to guess, looking at the GitHub Repo's closed is...
If Noe is on this Discord, do you mind sharing his account name so I can ask his workload? I would have to make a Github accoutn to create the issue and I want to avoid adding a workload if it is not reasonable for him. It is only a few sensors, but if it is not practical, I'd rather not create an issue and try to do it on my own (though I am no expert and I am learning how to do this at the time of writing).
I hope that you understand. Thank you in advance.
vestal thicket
solid delta
If Noe is on this Discord, do you mind sharing his account name so I can ask his...
He's not really active outside of his one hour show a week and it's considered poor etiquette to ping someone whose not a part of a conversation.
loud silo
solid delta
If Noe is on this Discord, do you mind sharing his account name so I can ask his...
I thought there was a guide about how to make a model, but I can't find it
loud silo
solid delta
If Noe is on this Discord, do you mind sharing his account name so I can ask his...
 abstract jetty
Hello there. I just wanted to share that I finally flashed Klipper on my old Anycubic i3 Mega and did some input shaping tuning today.
These test prints are at 100 mm/s (twice what i used to print at). The left print is with input shaping off, and the right is with it on at the values I calculated based on the left.


The Y input shaping completely cancels out the ringing effect. The X axis also has a big improvement, but doesn't completely eliminate it. I did a bit more tuning for X, but didn't have any major improvements past what is in the picture. Still a huge upgrade for my ancient printer.
Next up is pressure advance to try and eliminate the ridges around the corners
If anyone knows any tips that would help further improve the X axis input shaping I would really appreciate it!
Otherwise I feel like I'm starting to make perfect the enemy of good enough
faint pier
If you are happy with your print quality, you can basically stop. To me your results look pretty good! If you're more serious about causes of ringing and how to eliminate them, using an ADXL accelerometer can help point out what your printer's natural frequencies are at, and therefore what might be causing it. The cause can be anything from a structurally weak frame, to loose (or too tight) belts, loose bolts, motion system play, non-rigid hotend and toolhead mounting, or even poor toolhead center of gravity. Voron community member Reth has a couple of videos on the subject: https://www.youtube.com/@The_original_Reth

YouTube
Dealing with interpreting input shaper, resonance, ghosting, ringing, and how to fix your machine when you have issues with the above.
Machines are Voron's however, some of the principals apply to all Core XY, and some bedslingers (core XZ)
Need help - generally in Voron Discord talking about resonance - Reth
https://discord.com/invite/voron
...
abstract jetty
faint pier
If you are happy with your print quality, you can basically stop. To me your res...
Thank you for the great channel recommendation! This is exactly what I'm looking for.
abstract jetty
I picked up an ADXL345 to help tune my x axis. I'm planning to eventually swap out the hotend for an all metal e3d v6 and will probably build a new x carriage for that, so it will be nice to have the accelerometer to make recalibration easier.
 glad orchid
Guys, I have some stepper motors left over, and I found a way to use them. I want to make a plotter(or whatever they're called). Any idea where to start? I'm kinda stuck on: which board would do. And which software to use. Would any g-code reading cnc board work? Do you guys have any recommendations. I'd love to hear them
faint pier
I built one a few years ago out of leftover 3D printer parts and using this guide as a reference: https://www.printables.com/model/94363-easy-3d-printable-cnc-drawing-machine-draw-on-cake
Essentially, electronics consist of a Arduino + CNC board (something like this: https://www.amazon.com/dp/B01D2HL9T8) and a motion system. The guide is a bit outdated as far as software, but the basics should be mostly the same.
And the software is basically an old version of inkscape with a GRBLplugin and the Arduino IDE. I'm not certain if there's newer/better methods to drive this, but essential basics of converting a drawing to G-code and sending it to the Arduino is the same.
glad orchid
I was thinking of forking a little more modern software like Marlin or Klipper. Movements on the x and y axis. Those can read and execute g-code. I also need to find a way to build a slicer(?) type of thing that can configure g-code for my machine using 2d vector image
iron remnant
So ... g-code is pretty universal?
signal yarrow
@glad orchid I converted my 3D Printer to a 2D plotter and wrote my own library to use Python to generate gcode from images and from various geometry primatives (rectangles, paths, circles, etc.). Maybe you can find some inspiration in it: https://github.com/travisBumgarner/gcode2dplotterart
Also, you've got quite the journey ahead of you. Try not to reinvent the wheel throughout the entire process. Unless, you're specific goal is to learn how the wheel works.
(I too tried to build my own hardware, circuitry, and software and failed spectacularly)

 blazing glade
I've been printing large, flat things on a Bambu P1S (skadis boards) and I've noticed that in the back-left corner in particular, and only on the final layers of the print, there's some roughness. I dried the filament overnight and printed this morning and it's just a Sunlu PLA+, so I'm trying to figure out what might be going on here. Belt tensioning or calibration issues maybe?
it feels rough, not necessarily rippled
(image is rotated here)

 north rune
blazing glade
(image is rotated here)
north rune
blazing glade
(image is rotated here)
Heatsoak the bed, do a mesh at temp, turn off leveling before print, let the bed soak before print and if needed, bump z height up .05 at a time
That’s a high spot in your bed
blazing glade
huh! good to know
since its PLA I've been printing with the top open, maybe closed top would help with more uniform temp?
north rune
Nah man temp isn’t an issue with PLA
blazing glade
well the point of a heat soak is to avoid hot spots and cold spots right?
faint pier
the heat soak is in reference to the bed. You want the bed temperature to remain consistent as this allows the PLA to stick to it. If the bed is not heatsoaked evenly, there could be some cold spots that would cause printing in those zones to lift/detach. For everything beyond the first layer, you want to cool PLA as much as possible, because high chamber temperatures will cause print quality issues such as deformation on overhangs. That said, if you're printing PLA, bed temps are typically only between 55-65 deg C and should not be a problem for most heater beds to be properly up to temp. However.... for your Skadis print, I notice that 3 corners don't look great. Did you check to make sure that the print isn't curling and lifting off the bed plate during the print?
blazing glade
it seems to be on there pretty well; I printed another one using: 1. heat soak for 15 minutes, 2. flip the plate, 3. close the enclosure, 4. half speed and acceleration on the top layer; now its pretty smooth
one thing that I am noticing is that the areas between the holes (which print more slowly due to direction changes) have a different texture than the long diagonals (which print much faster); but its pretty much visual only now
e.g. you can see it only if you shine a light at 30 degrees to the surface
faint pier
glad orchid
I was thinking of forking a little more modern software like Marlin or Klipper. ...
You can use Klipper for the 2D kinematics and set Z-distance. The big modification would be to modify g-code to activate a servo for the plotter. I think most people would typically just use a laser cutter workflow. Most common nowadays appears to be using Lightburn to turn your vector graphics into G-code, and then using GRBL based fork to send commands to the plotter.
glad orchid
faint pier
You can use Klipper for the 2D kinematics and set Z-distance. The big modificati...
I'm familiar with lightburn. Its ancient though
Watch me build a new software. I'll be back in a month. I hope I have it ready by then
abstract jetty
Small update from my messages earlier about tuning my old Anycubic i3 Mega. Here is a 47 minute benchy. These used to take around 1hr 40min when I was running Marlin with basic settings. So klipper input shaping and pressure advance have allowed me to cut that time in half.
I've heard Marlin has input shaping now, but Marlin runs entirely on the printer's microcontroller, while Klipper runs on both the microcontroller and an SBC. So klipper can leverage the much more capable resources of the SBC for these advanced control features, while letting the microcontroller side just respond to inputs and drive the hardware, which is great for my 8bit Trigorilla v1. And my Raspberry Pi Zero 2 W is handling it very well.
I can probably tune for a little more speed and accuracy. I haven't used the accelerometer yet, and there are some more adjustments to make with pressure advance and retraction. It's never going to get close to something like a Bambu Lab P1S, but the upgrade has breathed new life into my old printer.
 ashen moat
just being able to update the printer config without rebuilding/reflashing firmware is a night & day advantage for klipper. getting a full web control panel is a huge bonus. I was able to to do so much more tuning on an ancient marlin delta after upgrading to klipper running on a pi 3. the extra tuning let me get to a level of speed and quality that I never achieved on marlin.
that's a handsome benchy!
faint pier
Pretty nice upgrade for $15 and some time! Yeah, the 8bit boards are basically already at their limit when you ask them to draw a circle too fast 😂 never mind Marlin's more advanced features, so Klipper is definitely the way to go.
abstract jetty
Definitely the single best bang for your buck upgrade for an old printer.
abstract jetty
ashen moat
just being able to update the printer config without rebuilding/reflashing firmw...
Easily updating the config is something I've immediately saved a lot of time on. My print bed has a... unique shape, and being able to just go in and do small bed mesh profile tweaks between prints to zero in the first layer has been super valuable.
I was also able to quickly correct my hotend thermistor setting after I discovered it was wrong which was nice.
shy kelp
in orca how can I ignore this warning? I can't find anything about the warning
 lethal oar
shy kelp
in orca how can I ignore this warning? I can't find anything about the warning
lethal oar
shy kelp
in orca how can I ignore this warning? I can't find anything about the warning
(not an expert) I could be wrong, but I get this when the print is too big for my printer. Something you've already eliminated as a reason?
faint pier
One or more of your items is over the boundaries of your bed size. Either it's too big and you need to rotate it (or it can't be printed as one piece), or you have a random item sitting outside the plate that you forgot to move or delete
 median nymph
I don’t know where else to put this but I got 4 NeoPixel Stick - 8 how would I set that up with my board that has only one neopixel pin on my board how would I make that work without having them take up 4 pins? (I have an SKR MINI E3 V3)
faint pier
They are addressable, meaning you can chain them together as if they're one long neopixel string (so connected end to end, and to only one pin). Then, you can command individual (or groups/sticks) to do something within that string.
median nymph
faint pier
They are addressable, meaning you can chain them together as if they're one long...
How would you address them in gcode though?
faint pier
You do it via firmware. Are you using Marlin, Klipper or other?
faint pier
Follow this configuration reference to add your neopixel chain to printer.cfg: https://www.klipper3d.org/Config_Reference.html?h=neopixel#neopixel Your chain count should include the total number of LEDs in all 4 sticks.
Once that is done, you can configure how you want your LEDs to show up in your print macros. For example, if you want them to actually indicate status (meshing, heating, cooling, print progress, etc). Klipper has its own native, built-in LED controls but I would probably recommend a plug-in as the configuration might be a bit easier to understand for beginners (and you have access to more fun effects): https://github.com/julianschill/klipper-led_effect Be sure to go through the example Voron Stealthburner folder to get an idea of how LEDs are configured and macros are made and added.
Note that you can treat all 4 sticks as one continuous chain , or define behavior specific to each stick or even a singular LED. For example, if each stick has 4 LEDs, then Stick2 contains LEDS 5, 6, 7, 8. If you put this stick under the bed as a sort of status bar, you can use this to define whether the printer is heating or cooling. You can further change the colors of LEDs 6, 7 (in the middle of the stick) with a slightly lighter color for fun. And at the same time, have the 3 other sticks doing some other color scheme.
median nymph
Thank you so much!!!
 stoic echo

I just opened up the Apple IIe Fruit Jam enclosure in Fusion 360.
I am an OpenSCAD kind of guy when it comes to enclosures and I have yet to bring myself to learn Fusion 360.
The reason why I opened this project up in Fusion was to see if there was a possibility of tweaking the keyboard mount and the keyboard cover to fit a smaller keyboard, a Planck v7. Because ortho-linear is fun (and I have like 3 Planck v7s just sitting around doing nothing).
Where do I even start?
 simple agate
Does anyone know if there are 3D prints for the eInk / ePaper displays? Especially the 7.5"?
https://www.adafruit.com/product/6415
I thought about trying to edit this one:
https://www.printables.com/model/1260595-3d-enclosure-for-seeed-studio-xiao-75-epaper-panel
stoic echo
Have you checked on https://learn.adafruit.com to see if there are any?
simple agate
stoic echo
Have you checked on https://learn.adafruit.com to see if there are any?
Yes and I searched printables
stoic echo
There's this one: https://learn.adafruit.com/eink-slow-movie-player

Enjoy Steamboat Willie one frame at a time
Which is for the monochrome version, but I think they're the same dimensions?
I like that one better than the one on Printables.
simple agate
stoic echo
There's this one: https://learn.adafruit.com/eink-slow-movie-player
Thanks! I just need to figure out how to edit it for a feather
iron remnant
stoic echo
I am an OpenSCAD kind of guy when it comes to enclosures and I have yet to bring...
I mean ... the wrong answer is "Write a general-purpose OpenSCAD library to parametrically generate any arbitrary Apple II-styled case using the industrial design language of the time"
(On the lower-end of my project list is writing a Snow White Design Language OpenSCAD library)
Practically, I've usually found it easier to just grab the model and mesh-edit it forcefully in Blender instead of learning other people's CAD software but I'm also A Difficult And Obsessive Person and I've intentionally never learned Fusion 360 because I do not want to, in the words of Immortan Joe, become too used to water.
stoic echo
Yeah, Fusion 360 is not easy to transition into. I really appreciate that people provide Fusion 360 versions of enclosures on the Adafruit Learn site, because that's just awesome. Maybe I just need to find a Fusion 360 video course or something?
iron remnant
Yah, I did have to resort to youtube tutorials before I got comfy with Blender and FreeCAD which is actually pretty unusual for me.
 drifting badge
I'm waiting for LLMs to work better with OpenSCAD, they will get there someday
hopefully
iron remnant
Not wanting to train LLMs so other people can try to make money is discouraging me from posting as much OpenSCAD.
I have a set of OpenSCAD problems that I use as a litmus test for LLMs just because there's way enough information out there for something with a glimmer of actual intelligence to work things out already, just not quite enough to do enough using spicy autocomplete.
stoic echo
I was able to find a KiCad footprint mod for the Planck v7, and from there extract the exact dimensions along with the drill holes, and then basically paste that into a fresh project's PCB. I then exported that as an STL. So I should be good to import that into Fusion 360 and try to make some changes.
https://github.com/olkb/olkb_parts/tree/master/planck
stoic echo
drifting badge
I'm waiting for LLMs to work better with OpenSCAD, they will get there someday
I have tried using Claude 4.5 with limited success for OpenSCAD. It's pretty accurate if I provide good dimensions and instructions, but can be a bit dumb when it comes to union/difference and those types of operations. It always helps using the BOSL2 lib as well.
My modus operandi with LLMs is: keep the scope narrow, and provide succinct and accurate instructions.
If that means I have to stitch together a bunch of shapes and things myself after the fact, that's still way better than doing some of these things manually.
My OpenSCAD sources are admittedly not that great. 😄
I haven't actually committed any of this code to my repo yet, but if you want to take a peek at what I'm working on, I can either upload the files here, or perhaps use code blocks if Discord supports OpenSCAD.
It's a variation of a cyberdeck that was created by @abetoday on YouTube. I am creating the enclosure from scratch, though. Haven't done a whole lot with it in a week or so, but the main parts are there. Now I just need to design the innards like compartments for batteries and mount-points for components and things.
drifting badge
Thanks for the head's up @stoic echo , I will give it a try again. I haven't since GPT 4o days but the models have gotten substantially better since then
faint pier
For those of us who come from the (mechanical) engineering side, openscad is very strange compared to traditional parametric modelling packages like CATIA, solidworks and Fusion
Those packages all have their pros and cons for specific tools, but Fusion360 is pretty nice for individuals. Particularly for CAM and sheet metal design integration. But once you use one, you can use all of them. openscad is just completely different animal.
shy kelp
stoic echo
Yeah, Fusion 360 is not easy to transition into. I really appreciate that people...
There are other cad too... Rhino has the classic cad things, and openscad like thing by either using graphical blocks or python/other languages
It's also pretty dumb to run forcefully, just block the firewall and change the system clock/app clock to run indefinitely
But honestly they are more or less the same, use whatever you like most
Just the interfaces changes, based on the same things. Call much of multithreading/gpus and whatever pr crap, and most of the functions run single threaded anyway
random urchin
faint pier
Those packages all have their pros and cons for specific tools, but Fusion360 is...
I'm a big fan of OpenSCAD, probably because I'm a coder at heart. It's basically a 3D modeling programming language. Takes a while to get the hang of the syntax, but really handy if you happen to have a programming / math mindset.
 hidden hull
I use OpenSCAD to make things for my 3D printer, but recently found it probably won't play well for CNC stuff alas, as it can't output .step files. It can output .csg, which you can import into FreeCAD to convert to step, but i found that only works for simple models
which seems a shame to me
(so i might try learning build123d more)
stoic echo
I hear y'all. However, it does not get me closer to modding the Apple IIe enclosure for the Planck v7, because that stuff is all in Fusion 360 which I am very new with.
stoic echo
hidden hull
I use OpenSCAD to make things for my 3D printer, but recently found it probably ...
I think there are plugins for OpenSCAD that can export STEP files.
hidden hull
oh? Would be curious about that, as I found this issue from 2014- https://github.com/openscad/openscad/issues/893

GitHub
Right now you have to go from OpenSCAD -> CSG Export -> Free Cad -> Export as STEP -> HeeksCad -> Gcode for CNC machine http://en.wikipedia.org/wiki/ISO_10303 It'd be sweet if we...
stoic echo
Oh, wait. I mixed it up with KiCad, because I was messing around with both yesterday night.
You're right, there's no STEP support for OpenSCAD.
hidden hull
ah heh, gotcha
iron remnant
The fundamental working model is too far apart for it to really work.
OpenSCAD is CSG with meshes, STEP presumes CSG with NURBS.
 white crane
Hi folks. I wonder if you could help me understand why acessing the link
Vertical Stand Fusion Share Link https://a360.co/3l9V9d8
is giving me "Unauthorized page". I got that link from the description of the video recorded here: https://youtu.be/8Pe2b1AIdaw?si=OAWhLeX5qWc-fXb4
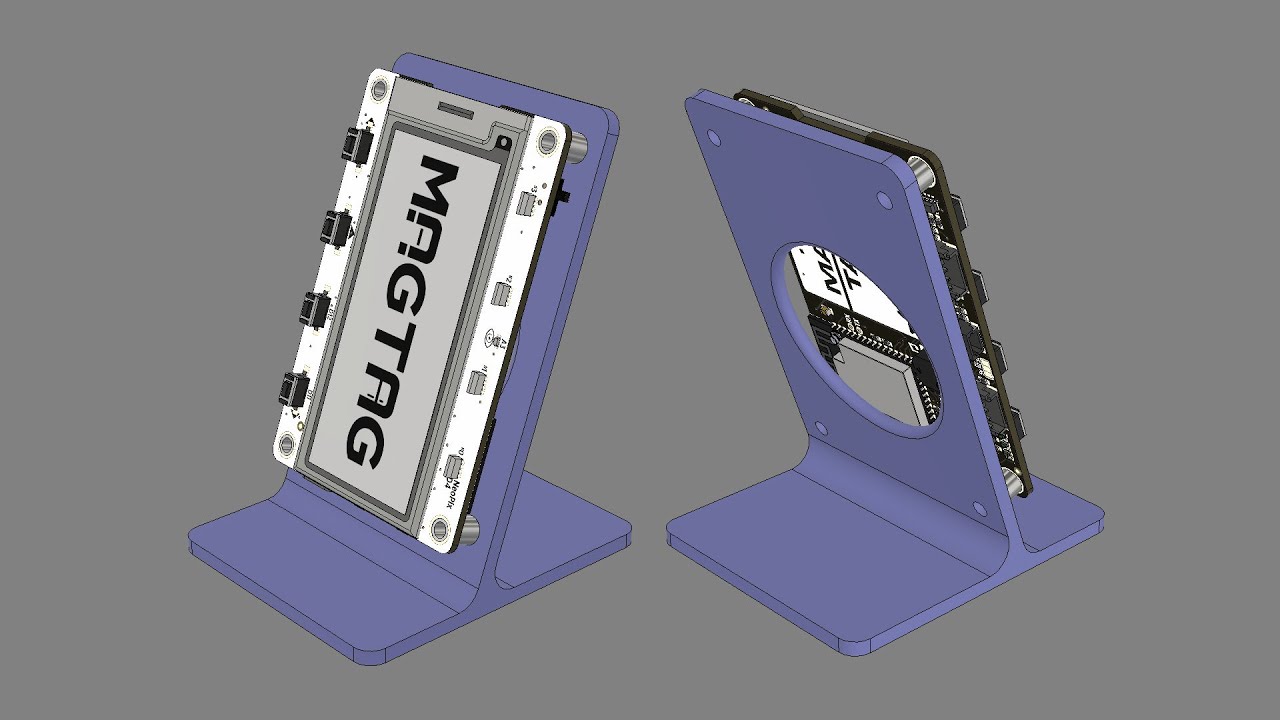
In this video we'll design a simple 3D printed stand for the Adafruit MagTaga. We'll create user parameters to make a sketch driven design that can easily be modified. Also take a look at orientations for slicing for fast / stronger prints.
Get Adafruit MagTag
https://adafru.it/4800
MagTag Learn Guide
https://learn.adafruit.com/adafruit-magtag...
loud silo
white crane
Hi folks. I wonder if you could help me understand why acessing the link
Vertic...
i made an inquiry about this.
loud silo
white crane
Hi folks. I wonder if you could help me understand why acessing the link
Vertic...
link fixed, now it's https://a360.co/4kcyKfq. YouTube description link also fixed. Thanks!
white crane
Yes, @loud silo I can open it now! TYSM. One more link, if you don't mind:
https://learn.adafruit.com/3d-printed-glowing-mace-prop/3d-printing ---> http://a360.co/2daJ8ni
loud silo
white crane
Yes, <@329766224093249548> I can open it now! TYSM. One more link, if you don't ...
Is it the same as the "Edit Design" at the top?If so I think we will just remove the link at the bottom.
The Download link at that I think will get what you want.
white crane
loud silo
The Download link at that I think will get what you want.
hmm... not sure I follow. That link is for a different fusion project.
https://learn.adafruit.com/3d-printed-glowing-mace-prop/3d-printing ---> then try clicking on "Download Fusion 360 Source" to see.

 loud silo
I am looking at the "Edit Design" button near the top of that same page. That points to https://a360.co/3UB6TKL, which looks like a mace to me, and has a Download menu in the upper right.
The fixed link in the previous guide also goes to that kind of page.
white crane
ah. ok, maybe my browser cache is messing me up. I can indeed open https://a360.co/3UB6TKL just fine.
loud silo
It's true that "Download" link at the bottom of the page doesn't work, but now the info is combined in the other link. I just deleted the bottom link.
white crane
yup, refresh was all I needed to see and finally understand. Thanks again!
shy kelp
I printed some files off the internet, the tolerances are bad. is there a way to shrink/expand pla once the prints are done?
faint pier
no, you should perform some basic dimensional calibrations with your printer for each material type profile. Although PLA should be dimensionally pretty accurate out of the box, is it just the design that didn't allow for good tolerancing?
iron remnant
You can frequently use sandpaper or a plastic file (available at McMaster Carr) to enlarge PLA.
shy kelp
iron remnant
You can frequently use sandpaper or a plastic file (available at McMaster Carr) ...
A plastic file?
iron remnant
shy kelp
A plastic file?

McMaster-Carr is the complete source for your plant with over 700,000 products. 98% of products ordered ship from stock and deliver same or next day.
 analog sage
i dont know if this is the right channel to ask this, but im currently building my own 3d printer and have been finding issues sourcing a hot plate with the right dimensions. an approximate range for this hot plate dimension would be 250x250 to 280x300. if anyone has a good place to find a large selection of hot plates, and ideally more on the cheaper side, please reach out!
shy kelp
analog sage
i dont know if this is the right channel to ask this, but im currently building ...
AliExpress, or you can build one, there are lots of guides online
faint pier
do you mean heater bed? Common bare MIC6 aluminum plates for Core XY usage includes 250X250 and 300X300. A large number of companies that sell Voron and other DIY printer components would have these. My question is, for the 280X300mm bed, can you physically fit a 300X300 (and just lose 20mm access), because going to 300 would allow you a lot of off the shelf options. Alternatively, if you have a method of machining your own mounting holes, you can just buy MIC6 aluminum plates off industrial websites (i.e. McMaster Carr). There are also several companies that sell universal heaters- these do not necessarily have to go edge to edge to work well.
analog sage
faint pier
do you mean heater bed? Common bare MIC6 aluminum plates for Core XY usage inclu...
anything bigger than 280x300 would need modification of the plate. I'm a bit worried about damaging the heating pad if i do buy a heater bed rather than building DIY.
faint pier
if you have the means, you can buy a 12"X12" or 300mmX300mm MIC6 plate and trim it down to your requirements. If a local machine shop or makerspace can't cut a MIC6 plate down for you, I think maybe oshcut and some other online services could also work. You could then pair this with a 250X250mm silicone bed heater (it will not be edge to edge but will work). The other challenge will be the print surface, as you will be unlikely to be able to use off the shelf PEI sheets (though you can cut your own glass and use painter's tape). I would ask myself if you really need the 280X300mm space or if 250mm is sufficient, since 250mm really opens up a lot of aftermarket support.
simple agate
Does anyone know if there is a version of this for V2?
https://learn.adafruit.com/3d-printed-case-for-adafruit-feather/tft-feather-wing
A Multipurpose Enclosure for Adafruit Feather
loud silo
simple agate
Does anyone know if there is a version of this for V2?
https://learn.adafruit.c...
Do you mean Feather ESP32 V2? It is the same form factor as other feathers. The "V2" refers to it being the second version of an ESP32 Feather (HUZZAH32 was the first).
ashen moat
re: bed size, also remember that even if your motion system allows you to cover a 300mm bed, you could mount a 250mm bed and constrain your software to use it, then use the extra non-bed area in the printer for something cool like a silicone nozzle wiping brush or a docking probe.
shy kelp
iron remnant
https://www.mcmaster.com/8189A11/
In the end I just reheated the part and exponded it manually
simple agate
loud silo
Do you mean Feather ESP32 V2? It is the same form factor as other feathers. The ...
So that design will work with "Adafruit TFT FeatherWing - 3.5" 480x320 Touchscreen for Feathers - V2 with TSC2007" ?
 burnt tiger
Looking to upgrade from my secondhand SOVOL SV-06 (don't worry no one has heard of my printer). It's got a 235mm x 235mm build plate which I like as it's seemingly bigger than average. If I stick with that size my options are pretty limited. 220mm x 220mm seems to be more the norm. Are those of you out there with a 220mm build plate happy with that? Or are you wishing you had something bigger?
(also in the market for multicolor, I don't care about it being enclosed)
My first choice would be:
- ELEGOO Centauri Carbon 2 Combo Multi Color 3D Printer, CoreXY 500mm/s High Speed Multicolor Printing with Canvas, 1-Click Full Auto Leveling and 350°C High-Temp Nozzle, 256x256x256mm Build Volume
If I were to "settle" for 220mm, I'd probably go:
- FLASHFORGE AD5X Multi-Color 3D Printer, CoreXY 600mm/s High-Speed, 1-Click Auto Leveling, 300°C Direct Drive Extruder, 220x220x220mm Build Volume
blazing glade
I've been glad to have 256mm when doing any kind of furniture-adjacent thing (shelving supports, spice racks, skadis boards, etc)
stoic echo
Learning AutoDesk Fusion to edit Ruiz Bros stuff
If there are any AutoDesk Fusion peeps in here, I would greatly appreciate an assist on tweaking a Fusion design from the Ruiz brothers (the Apple IIe Fruit Jam enclosure). I started a thread so it doesn't pollute the main channel.
iron remnant
burnt tiger
Looking to upgrade from my secondhand SOVOL SV-06 (don't worry no one has heard ...
I had a 235 x 235 Ender 3v2 and it didn't really feel that much different in size in terms of what I could print vs the 220 x 220 Prusa i3 that was the competition.
iron remnant
burnt tiger
Looking to upgrade from my secondhand SOVOL SV-06 (don't worry no one has heard ...
As someone who has a 300mm bed on my current printer, it's really nice to have the larger build plate just because not only is it nice to have the size in general, it's also nice to be able to print a bunch of something as a batch (especially now that you can cancel the one that popped off the bed).
Although 300mm beds start to get into the realm where prints can be very troublesome? For example, I was printing a long skinny print diagonal, something like 380mm long, and it really really really wanted to pop off the bed, so much so that it started to pull the flexplate off the bed.
stoic echo
iron remnant
Although 300mm beds start to get into the realm where prints can be very trouble...
What material were you printing, and onto what plate?
iron remnant
stoic echo
What material were you printing, and onto what plate?
PETG onto PEI with some gluestick. Long thin pieces are the bed adhesion test case.
stoic echo
Not sure if BQ makes any CryoGrip plates that big, but I recommend them!
iron remnant
Yah, in this case I'm working with fundamental material shrinkage.
stoic echo
PETG is also a lot more heat sensitive when it comes to these things. Ambient air is going to matter much more on a print like that.
iron remnant
I mean ... [gestures vaguely in the direction of ABS and ASA]
stoic echo
Do you have an enclosure?
Yes, ABS and ASA are way more demanding, but, PETG is surprisingly annoying compared to PLA.
iron remnant
I need to put the enclosure on. Right now I'm in the middle of printer maintenance.
stoic echo
Yeah, that's definitely what's messing up those long prints. Did you use brims?
iron remnant
And otherwise make sure that I'm getting the chamber at an appropriate PETG temp that doesn't cause the heatbreak to get clogged and all.
I hate using brims. I had a friend help me out and she was printing at a makerspace that's very particular (of course I can't fault them for being particular with a zillion people going through and inadvertantly finding new ways to break the printer and/or make a mess) and so it was their specified build plate and no adhesive and so she printed some of my stuff with a brim and it was just annoooyyyiiiing to remove.
But, yah, my geodesics / space frame / strut-wall projects all use a strut length of 250mm because that length is a lot less fiddly than 300mm or longer struts, even though the bed can accomodate.
stoic echo
For a long piece like that, a brim could be the thing that saves the day.
But, brims are annoying to cut off, for sure.
iron remnant
Yah, I have the right tool, but it's still annoying.
stoic echo
Yeah, I am not a fan. If I can print without brims, that is my preferred method.
Unless they are internal parts, then I don't really care because I don't have to look at it.
faint pier
burnt tiger
Looking to upgrade from my secondhand SOVOL SV-06 (don't worry no one has heard ...
235X235 is actually the ender 3 physical plate size, so it is extremely common. Nowadays 256X256 is also very common thanks to Bambu. The Elegoo CC is also advertised as a 256X256 bed, but it's actually a mm or two larger in both dimensions, still mostly plate compatible albeit you need to center it manually or update the guides on the rear. To be honest, between these two sizes I don't really think I saw much useability difference. About 70% of what I print can fit on a Voron V0 sized bed (125X125), 90% can fit on a 235 or 256 bed, and then just about 100% can fit on a 300mm bed. I have had one or two occasions (work related) where I wanted to go more than 300mm, but typically just printing diagonal and at an angle on tree supports gets me there since those parts aren't usually "3D print" optimized in the first place.
burnt tiger
faint pier
235X235 is actually the ender 3 physical plate size, so it is extremely common. ...
Oh gotcha. I've only been looking on Amazon so I'm probably missing a good deal of models. I still see mostly 220mm Ender 3 on there. I'll try the manufacturers sites and see if the selection is better. Thanks
burnt tiger
iron remnant
I had a 235 x 235 Ender 3v2 and it didn't really feel that much different in siz...
Yah I probably shouldn't quibble over 15mm. It's only the occasional cosplay piece that I ever hit the max.
faint pier
Just to clarify- the "physical" plate size on an ender is 235X235, but the "printable area" is usually advertised as 220X220
iron remnant
burnt tiger
Yah I probably shouldn't quibble over 15mm. It's only the occasional cosplay pie...
Yah, cosplays are really where lorge printers really start to shine. Especially if you want to do helmets or armor pieces.
white crane
loud silo
It's true that "Download" link at the bottom of the page doesn't work, but now t...
hi, it is me again. 😉 Could you please authorize access to https://a360.co/3fwzKbm ? I am trying to download the objects that Noe created, from the video https://youtu.be/aAjhTFxi2_w?si=fzV7dvdGViVeLKh1
Happy new (lunar) year! 🥳 🐴

Taking a look at the new emboss feature recently added to Fusion 360. It's pretty boss! I made some examples of applying circular and rectangular patterns to embosses. Can we apply an emboss to a surface that has been embossed? Some limitations with self-intersecting and how to do tapered knurling.
Download the examples
https://a360.co/3fwzKbm
...
loud silo
white crane
hi, it is me again. 😉 Could you please authorize access to https://a360.co/3fwz...
creators notified
 idle crest
hi hi, is this the same one https://a360.co/4tE3VEz ?
Share 2D and 3D design files and project files with anyone.
or is it https://a360.co/4ayU627
Share 2D and 3D design files and project files with anyone.
loud silo
@white crane 👆
 supple stratus
white crane
hi, it is me again. 😉 Could you please authorize access to https://a360.co/3fwz...
supple stratus
white crane
hi, it is me again. 😉 Could you please authorize access to https://a360.co/3fwz...
Hi there! Yep, here's the link https://a360.co/4ayU627 I also updated the link in the video description
Share 2D and 3D design files and project files with anyone.
white crane
loud silo
<@379823758007074817> 👆
hi @idle crest ! Yes, it is https://a360.co/4ayU627 .TYSM
Share 2D and 3D design files and project files with anyone.
 glacial oxide
Hi @pedro I'm making the Stained Glass Lamp, super cool. Is the bottom platform frame supposed to be in the 3mf that's on the learn guide?
loud silo
@idle crest 👆
idle crest
glacial oxide
Hi @pedro I'm making the Stained Glass Lamp, super cool. Is the bottom platform...
ah yes sorry i’ll tag when its uploaded
idle crest
glacial oxide
Hi @pedro I'm making the Stained Glass Lamp, super cool. Is the bottom platform...
ok updated the file on the guide, link is: https://cdn-learn.adafruit.com/assets/assets/000/142/505/original/stained-lamp.3mf?1771600485
glacial oxide
idle crest
ok updated the file on the guide, link is: https://cdn-learn.adafruit.com/assets...
Oh wow thank you! I like Lamp.
 drifting ridge
Hi everyone! 👋
I wanted to personally invite you to the HP Robots Otto Remix Challenge that we're launching next week in collaboration with Prusa on Printables.com. I'd love to see what you come up with!
It's about remixing Otto with mods, expansions, or fun 3D printable character designs.
You don't need to buy any kits (but we will have discount coupons 😉 ); the prizes include a Prusa printer, HP Robots kits, and more.
We hope you'll join us!
 misty ibex
Hey all! I'm looking for a new 3d printer and looking for suggestions. I had a Ender 3, that I replaced with a Qidi Q2, but I'm returning it because of bad build quality (the actual machine, not the printing)...
Any recommendations? Looking for a build volume of around 250, and although I don't do multi color prints, something that has support would be nice (mostly just so I can easily switch colors. I pretty much only print PLA, but am curious to try ABS at some point...
 fickle seal
misty ibex
Hey all! I'm looking for a new 3d printer and looking for suggestions. I had a E...
fickle seal
misty ibex
Hey all! I'm looking for a new 3d printer and looking for suggestions. I had a E...
perhaps you should look into the Bambu Lab P1S? multi-color prints are possible with the AMS
 twin geyser
Hi! I'm wanting to make a 3D printed enclosure for the Adafruit Macropad.
Goal 1: Protect the display. I had a hallowing that I loved, but sadly didn't store safely and the screen was damaged, so I want to keep the screen protected. For this, I plan on using the enclosure to hold it down a bit better, and using an acrylic window to keep dust off the display
Goal 2: Keep access for the Reset button and QWIIC port, so I can connect sensors and play around with things easily
Goal 3: Adjustable angle. I would like to use it primarily horizontally at a 45 degree angle, but being able to collapse it flat is ideal. Currently, my best bet is just repurposing a phone stand or pop socket and 3D printing a base plate that accomodates that. I was wondering if the community might have other ideas?
Alternative: I could also cut some acrylic using the laser and make an acrylic enclosure. If I particularly like the design, I may try using the CNC to cut the enclosure out of wood
Software: FreeCAD
Printer: Snapmaker (Laser, CNC, 3D Printer).

 vestal thicket
twin geyser
Hi! I'm wanting to make a 3D printed enclosure for the Adafruit Macropad.
Goal...
vestal thicket
twin geyser
Hi! I'm wanting to make a 3D printed enclosure for the Adafruit Macropad.
Goal...
The only one I've seen with an adjustable angle is this one: <https://learn.adafruit.com/3d-printed-stand-for-macropad-rp2040, but it doesn't meet goal #1. If you're looking for inspiration, I maintain an awesome list, here is the link to the 3d printed cases: https://github.com/prcutler/awesome-macropad#3d-printed-cases
 white salmon
What would cause my flashforge adventurer 5m to print a over the screw holes here? I've printed six nearly identical pieces on the same settings without issue.


 pale ore
Maybe a slicer issue?
But if you’ve done the same print six times, that’s not it.
white salmon
That's my guess, but what's the issue?
pale ore
The slicer didn’t understand that there was a hole.
If you pull it up in your slicer, does it show the hole covered?
Either way, it’s worth a bug report
Much trickier if the slicer displays it incorrectly though
Oh. That is a picture from your slicer
ashen moat
check the slice preview to see if it's commanding the printer to print that way. seems like it is. the model may have something like an infinitely thin plane there that gets visually hidden but rendered by the slicing routine.
 strong magnet
anyone have a blueprint for printing a shield for feather rp 2040 with usb a host? Would love some help ive never 3d printed before.
loud silo
strong magnet
anyone have a blueprint for printing a shield for feather rp 2040 with usb a hos...
Is this what you want? https://learn.adafruit.com/case-for-feather-rp2040-usb-host
strong magnet
yeah thats perfect thanks a lot danh 🙂
steep umbra
This seems like a common enough problem, but I haven't come across many solutions. For 3D printers that only support SD cards, is there a good way to connect the SD card slot to a computer and have the computer emulate or otherwise present something on its disk to the SD card slot?
So far the best solution I've come across seems to be an SD card muxer like this one: https://badgerd.nl/sdwire3/ but that's more expensive than I was hoping for, and it's a little clunkier than I was hoping for.
New generation of SDWireC with SDR104 speeds and faster host interaction with USB3
There were some SD form factor boards with an ESP running a file server over wifi, which is a cool solution, and the price is very reasonable, but the software looks like it started off as junk and never improved
pale ore
I’ve used Octoprint to run a printer over USB. I’m not sure what you would gain by remotely copying files to an SD card though, unless you’re really attached to your printer’s UI and don’t want monitoring
abstract jetty
Does anyone have any tips for mitigating microplastics released by a Bambu Labs P1S when running it in a home office?
 ocean orbit
Ideally? vent it out of a windowe
abstract jetty
ocean orbit
Ideally? vent it out of a windowe
I'm considering doing this and a vento box in the enclosure. I still want to avoid blowing lots of microplastics out the back of my house. I'll also set up a hepa air purifier in my office as an added precaution
ocean orbit
Through a filter and out the window would probably be a solid choice, you would need to look up how effective filters are for airborne microplastics but i imagine a HEPA filter would be a solid choice
this is very much a do as i suggest not as i do because my own printer is unenclosured or filtered...
abstract jetty
ocean orbit
this is very much a do as i suggest not as i do because my own printer is unencl...
I get that. I have big ambitions for how I want to do things but the reality isn't always the same. Hopefully I at least implement part of this.
steep umbra
abstract jetty
Does anyone have any tips for mitigating microplastics released by a Bambu Labs ...
When I last looked into this, there had been a little bit of research, but more was in progress, so I expect there's new information available, but quick summary of what I remember:
- Print when you're out of the room as much as possible (overnight is good), most small particulates will settle.
- Room filtration is helpful at reducing particulates in the air, but keep in mind the CADR rating
- Enclosure + filtration was disappointing at reducing particulates, but YMMV depending on the details.
coarse ruin
Toshiba FlashAir might be an option (wifi flash card).
steep umbra
coarse ruin
Toshiba FlashAir might be an option (wifi flash card).
those have been discontinued and what's left on the market is wildly expensive
 nova wolf
Not exactly help with printing, more with getting started. Looking into getting a 3D printer, but don't entirely know which one to choose.
I'm kind of shying away from bambu due to their closed always-online ecosystem from what I understand
My friend recommends Anycubic, they have the Kobra 3
I see on Reddit a lot of people have had a ton of issues with anycubic printers, but those posts were around a year ago so it's possible things have changed?
What else do you suggest I look into?
-# please ping me when you reply to help me see it
pale ore
I bought a used prusa mini and I love it
But it depends on your needs. I can do PLA just fine, but I’m size-limited on ABS unless I get an enclosure. PETG is possible but would take a different build sheet. TPU is unreliable on any bowden printer.
At the very least, get a printer with automatic bed leveling and a detachable build sheet. Anything less will quickly waste your time.
If you have money, the most significant upgrade you can get is multi-material printing. This used to be done through a single hot end but had issues with contamination. The new way is with a tool changer. Bambu, Prusa, and Snapmaker all have their own way of doing this.
As for build area, I’m not a fan of jumbo printers. For most large designs you can make it in multiple pieces or with a different method entirely. I hate printing overnight only to find that your part doesn’t fit. Get a size that accommodates most of what you’ll be doing.
random urchin
nova wolf
Not exactly help with printing, more with getting started. Looking into getting ...
I bought a Prusa Mk3S+ a few years ago. Solid, dependable printer. They've got a bunch of newer models now, though.
steep umbra
nova wolf
Not exactly help with printing, more with getting started. Looking into getting ...
In my opinion/experience: start with something inexpensive. I didn't really know what a 3D printer would do for me until I had one. I still haven't moved on to a second one yet, but I have some ideas about what I'm looking for next time around. I think it's pretty difficult to nail the right printer for you the first time.
and a bambu can be run offline, https://wiki.bambulab.com/en/knowledge-sharing/enable-developer-mode
Bambu Lab Wiki
Guide on how to enable Developer Mode on Bambu Lab printers
you lose out on some features that way, but that's life
coarse ruin
don't start to cheap... 99$ are not worth having most of the time.
steep umbra
that's why I said "inexpensive" not "cheap". There are some creality and elegoo printers at around the $200-300 price point that are said to be pretty decent
pale ore
My wife set a budget of $200 and I had my heart set on a Prusa. So we found a used Mini on ebay for $180
My coworker wanted to sell his MK3 for $300
So the used market can be pretty good
nova wolf
Hmmm, alright, thank you all. Are there any brands or printers I should shy away from?
iron remnant
So ... I guess one thing to note is that people see the "3D printer" part and fixate on the "3D" part when they should be fixating on the "printer" part. As in, that thing that really loves to get under your skin when you just need it to print out your tax return but it doesn't want you to.
(And, of course, Bambu is trying to speedrun their way into the enviable position of HP inkjet printer hatred, LOL)
nova wolf
yeahhh, I did see the bambu AGPL debacle which is another thing kinda of shying me away from them haha
iron remnant
We're kinda reaching the point where it's probably better to get one of the enclosed CoreXY printers instead of a cantilever unless you really want an inexpensive one.
nova wolf
What's considered inexpensive these days? It's been years since ive really looked into printers and entry level were sitting at close to $300
iron remnant
Yah, there's a lot of bambu-ish corexy printers with in the $300-400 range?
Like, I've got a Voron so I don't have personal experience with the modern crop of printers.
nova wolf
also, what's a cantilever?
I assume by enclosed you mean the "box" printers like the anycubic s1
iron remnant
The cheapest Bambu, the Prusa mini, et al
Yah, box printers tend to be faster and give you more ability to print exciting filaments.
So, like not so much the Anycubic Kobra
And multi-material printing is getting to be a thing lately. Allegedly Bambu's AMS system isn't half bad except for the part where you have this endless sea of "droppings" every time there's a filament change. I'm not impressed with the Prusa MMU. But Prusa is about to ship INDX for the Prusa printers and there's the Snapmaker U1 and the Flashforge Creator 5
So the Anycubic ACE, for example, might not be as nice as you'd like to think.
nova wolf
Hmm, alright
Is multimaterial printing worth it? I don't know if it's something I would need. I plan on getting multicolor at least, to save me a bunch of hassle
iron remnant
Well, as I said, multicolor is kinda OK except if you try to do a multi-color print and realize how much of your filament goes to waste.
nova wolf
You can have it infill with the second/mixed color when possible or however that works, right?
iron remnant
Multimaterial adds complexity ... but there's no waste, and as far as I'm concerned a lot of the interesting stuff really works better with a multimaterial printer....
nova wolf
Not sure how much that reduces filament waste
iron remnant
So, you can't just swap out the filaments in the hot-end, it's a melty blobby plastic thing. So, to change color, the printer has to retract the filament that's in the hot-end, make sure the tip is a reasonable shape, and then purge enough of the filament to get a clean start from the new color.
Multimaterial just has to draw a tiny tower to draw a small line to prime the hot-end for a clean start.
nova wolf
I thought I read that when possible, it tries to dump as much of that inside of a print as additional filler but I may have misread
Looked briefly at prusa's page, it's out of budget unfortunately
iron remnant
Yah, so I guess it kinda behoves you to get a regular cube because the Prusa printer able to take the not-yet-released-INDX system is a bit pricey and the other multi-material printers are the same way.
And most of my friends with the Bambu printer have done some multi-color stuff but they got tired at how much filament they were wasting so they mostly just use it to avoid needing to manually change filament.
ocean orbit
I always just painted my prints honestly
nova wolf
Unfortunately I have hand tremors so painting the prints ive had done for me has been a struggle lmao, though I may resort to it if filament waste is too much for me
iron remnant
Yah, big thing is that we're just seeing everybody glom on to the multi-material units, so presumably either people will decide they are too much trouble or they'll get a lot cheaper.
The cubes used to be more like $1k.
nova wolf
I don't really think I'll have a need for multimaterial for my use cases
iron remnant
More that it'll end up being less trouble for the multi-color case than anything else.
Okay, so my problems are better solved with multi-material tho, LOL.
nova wolf
Do you know if the anycubic s1 is any good? So far it's what I'm leaning towards
Unless there's any major issues with it
iron remnant
So ... like, there's this: https://github.com/jbatonnet/Rinkhals
GitHub
Custom firmware for the Anycubic Kobra series of 3D printers (Kobra 2 Pro, Kobra 3, Kobra 3 V2, Kobra S1, Kobra 3 Max and Kobra S1 Max) - jbatonnet/Rinkhals
I'm not sure about the relative brand quality, it may be a bit of a luck-of-the-draw, honestly, but what you do kinda want is enough folks who have it such that there are mods [giggles in Ender] and self-help guides and general knowledge to be shared.
nova wolf
Hmm, alright
loud silo
there is a whole reddit group on anycubic
iron remnant
Yah, like the Ender 3 was always a bit questionable but at least you could find out what to check before you tried to use it.
loud silo
in the past I looked at https://all3dp.com for reviews.
ocean orbit
my ender 3v2 has always been a star but they are like, WILDLY variable in finish and some peoples just...barely work so i dont recommend them
loud silo
I felt in the past that 3d printers were like automobiles in the early 1900's. Everybody had to be a shade-tree mechanic. It's gotten somewhat better, maybe we are up to the 1920's now
ocean orbit
Dont buy an anet a8
thats the advice ill give
idk if they still sell them but theres cheaper ways to burn your house down
loud silo
i have an ancient Flashforge Finder which I got on local craigslist from someone who bought amazon returns and refurbished them
iron remnant
That but also 3d printers have the vibes of a 90s Civic owner telling you about how much horsepower they got from bolt-on accessories of questionable virtue.
nova wolf
I may also seriously look at bambu after all, it seems like they're generally highly recommended with little issues
iron remnant
I mean, except for The Big Issue, LOL.
Like, probably you could do a survey and have people dump the total number of printer hours vs number of issues they've experienced but it's all vibes otherwise, outside of the firestarters and clearly bad printers.
nova wolf
iron remnant
I mean, except for The Big Issue, LOL.
I assume you mean the recent orcaslicer thing?
iron remnant
nova wolf
I assume you mean the recent orcaslicer thing?
The chain of events most recently elicited by the orcaslicer thing.
nova wolf
ahh, what all happened? I'm super ootl, I read like one article on it yesterday
iron remnant
So ... OK, Bambu's first patent diagram uses CAD drawings of the Voron (an open source community-driven printer) which kinda got everybody off on the wrong foot.
Bambu's printers as released have nothing to do with a Voron as best I can tell other than both of them being CoreXY cube printers.
But, the overall goal, as I said, is that Bambu wants to be the HP inkjet printer of the 3D printer world. So they have very deliberately and strategically tied their printers towards a working model such that your printer must phone home and parts of the printer farm infrastructure run in their cloud.
They tried to brick a bunch of 3rd party accessories because they claim that it was impacting their service reliability.
Also, there was the time where there was a SRE incident on the Bambu side where they triggered a bunch of print jobs on people's printers in the middle of the night.
And so there's been this endless cycle of shenanigans, rap star styled feuds, etc.
Now, conversely, my experience in the past doing IoT devices suggests to me that we're collectively in for a world of hurt with 3D printers in 5-10 years because they are all pretty much little Linux boxes running a software stack that's usually some amount of open source software installed on them, creating the wonderful opportunity for a whole bunch of people to wake up one morning with their printers on fire, hopefully metaphorically.
And, likewise, there does seem to be some very secret special sauce in the Bambu infrastructure -- most everyone else just uses relatively standard boards with stepper driver chips whereas they have their own stepper drivers, which is part of how they manage to make them so darn cheap.
So ... I don't actually have an answer, tho? There are a lot of fairly happy Bambu owners out there who are potentially in for frustration when Bambu suddenly says "Hey, your printer has reached end of support and we're turning it off" or "Hey, we've decided to only let you print Bambu filaments" because it generally does work fairly well for people.
nova wolf
Ahh, yeah, that's fair
iron remnant
And, because they are huge, they can work at scale so therefore everybody else often times either has to make it a bit more expensive than Bambu or they make it crappier than Bambu but at the same price.
nova wolf
I don't know if I'm leaning anycubic anymore, ive read online that customer service can be a bit hard to deal with, and they'd rather send you a bunch of parts over the span of six months than a new printer when it breaks
iron remnant
And Prusa has a golden opportunity to position themselves in this new market place but largely have failed to do so, even though the new Core printer seems pretty good.
nova wolf
And they just seem to be inconsistent, some work great and some have issues after a few hundred hours
iron remnant
I've heard horror stories about Bambu support too?
It's just they are less inconsistent?
nova wolf
yeah I didn't know bambu was that bad lmao
iron remnant
Yah but at the same time you do get that I have a bit of old-man-yelling-at-cloud about it.
nova wolf
I mean, I run arch and only touch a closed source OS on my laptop when absolutely required lmao
so I get it lmfao
iron remnant
I guess the big thing is that it is a mechanical thing built in the same genre as a CNC mill or lathe or laser cutter so it's going to have problems eventually.
There's a reason why CNC Operator is a job people have.
nova wolf
Yeahhh
My budget is ~700-800 for the printer and ideally filament and any other "get started" materials I'd need that I don't know about
Given that, what do you recommend I look into?
iron remnant
I mean, one avenue you could take is find one where it's easiest to get to the Linux on the inside?
nova wolf
huh, didn't know that was a thing lmao
iron remnant
Oh, yeah, so basically, a lot of printers use the Klipper software which is written in Python and runs on Linux.
(not Bambu)
Were, in order to deal with the hard-real-time requirements, Klipper puts a special firmware on an actual microcontroller and then focuses on the high-level logic like 6 levels of derivative and integral for the motion planning and stuff.
So, All3DP's latest roundup has some Elegoo and Qidi printers on it?
I poked around the Elegoo Centauri 1 at OpenSauce last year and it seemed solid at least as far as I was able to go without being unsociable and dismantling the demo model at the booth.
nova wolf
lmao
iron remnant
("but I can get it back together! I know what I'm doing!")
But yah there's a lot of stuf that it helps to have like some way to dry filament, spare parts, a variety of different materials, a lot of M3 screw hardware, a good set of hex drivers, etc.
Extra nozzles, both as spares but also in different sizes.
nova wolf
Mhm
iron remnant
If you look at the stuff that's up on the 3D printable sites, there's a lot of projects that just assume you've got the M3 screw assortments.
Filament likes to be dry, PLA lets you get away with stuff but most everything else is going to want to be dried. And even PLA lasts better in a drybox.
You want to at least play with TPU and/or PEBA.
nova wolf
Hmm, alright
I know bambu has a combo that has a filament dryer combined with the AMS system, do you know if anything else has that?
nova wolf
iron remnant
So, All3DP's latest roundup has some Elegoo and Qidi printers on it?
https://all3dp.com/1/best-3d-printer-reviews-top-3d-printers-home-3-d-printer-3d/ i assume that's the link you were talking about?

All3DP Pro
Our updated buyer's guide to the best 3D printers in 25 categories, incl. home, pro, budget, & beginner's picks, backed by testing & reviews.
iron remnant
yah
nova wolf
tyty
I don't suppose you're familiar with https://bambuddy.cool/ at all?
Bambuddy
Self-hosted command center for Bambu Lab 3D printers. No cloud, no lock-in. From one A1 to a 40-printer farm.
iron remnant
Yah, it's cool, but it doesn't replace the firmware on the printer motherboard, just (presumably) the Bambu cloud stuff.
nova wolf
hmm, alright
iron remnant
Yah.
If it got popular, Bambu would presumably find a way to try and make it go away.
nova wolf
If I can't find anything else at the pricepoint and features, I might go with the p2s and run bambuddy
iron remnant
Yah, like what some people are doing is firewalling off their Bambu printers just in case.
iron remnant
Also depends on how much you really end up using it? My 3D printer is integrated into my artform so I really want it to be mine.
nova wolf
Yeah that's totally fair
Mine, at least for the foreseeable future, would most likely be primarily display pieces and the occasional project part that's easy enough for me to model
And as much as I dislike the closed-source nature, I do also like the tightly integrated parts (that it seems like bambuddy does its best to replace)
steep umbra
iron remnant
Yah, like what some people are doing is firewalling off their Bambu printers jus...
this is what I'm doing, and I'm not happy about it, but I'm OK with it.
 winged geyser
Hi all I just got a creality k2 pro and wanted to ask if anyone could recommend anything better then this for a upgraded filter
https://www.amazon.com/Filter-Creality-Printer-Activated-Eliminates/dp/B0GVHRVCMD

HEPA 13 + Activated Carbon Filter (3-Pack) for Creality K2/K2 Pro/K2 Plus/K1 Max Your Creality 3D printer creates amazing objects, but it also releases unpleasant odors and harmful particles. The stock creality k2 filter uses activated carbon only – it helps with smells but ignores ultrafine part...
steep umbra
well hey, my 3D printer self-destructed. ~40g of filament is now inside the tool head.
iron remnant
winged geyser
Hi all I just got a creality k2 pro and wanted to ask if anyone could recommend ...
So I'd look less for a filter that goes on the vent and more for something like the Bento Box or Nevermore to work insider of the printer and recirculate the air
iron remnant
steep umbra
well hey, my 3D printer self-destructed. ~40g of filament is now inside the tool...
These days I just heat the tip of a NoClogger with a torch and shove it in
(may destroy a toolhead)
steep umbra
iron remnant
These days I just heat the tip of a NoClogger with a torch and shove it in
 iron remnant
Ah, yah it's going to take more than a hot poker to bring that back.
nova wolf
how did that happen 😭
ocean orbit
Nozzle jammed and the filament fed back, you can fix it but it sucls
nova wolf
I can't wait for the day when my printer inevitably does that /s
iron remnant
Apparently Bambu poked a bear this time: https://sfconservancy.org/news/2026/may/18/bambu-studio-3d-printer-agpl-violation-response/

Software Freedom Conservancy
Software Freedom Conservancy (“SFC”) announces a new
initiative regarding the software right to repair for users and consumers
of 3D printers manufactured by Bambu Lab. After recent news of violations of the Affero General Public License,
version 3 (“AGPLv3”), SFC staff began a
comprehensive AGPLv3 compliance investigati...
nova wolf
holy based
iron remnant
So, there's not really any mention of the closed-source firmware on the board with an intentionally obstructive bootloader.
pale ore
Seems to be focused on the slicer
nova wolf
iron remnant
So, there's not really any mention of the closed-source firmware on the board wi...
is the firmware breaking agpl?
iron remnant
nova wolf
is the firmware breaking agpl?
No, I think their firmware is largely their own work?
The firmware is part of how they want to keep the whole infrastructure locked down.
nova wolf
Probably why it wasn't mentioned too much then, afaik they're just focused on the agpl violations
iron remnant
Well, there's enough drama for a fully fleshed out drama timeline and the firmware has also been part of the drama at various times.
nova wolf
yeahhh
iron remnant
But, yeah, like ... pick your battles. Right now, pretty much any pile of 3D printer-esque hardware can be made into a perfectly functional 3D printer with Klipper and an easily procured control board.
So some folks have taken antique Strata Systems very expensive retired 3D printers and klipper-ified them.
 dry pine
If you wanna help them chase down the license ties in the binary firmware, they would welcome that, but it means having a full commit audit log for the courts
pale ore
Wait. Can I use klipper to get input shaping on my laser engraver???
 stuck inlet
fyi @supple stratus there is a deleted video on the 3d hangouts playlist. https://www.youtube.com/playlist?list=PLjF7R1fz_OOVgpmWevin2slopw_A3-A8Y

YouTube
Hang out with Noe & Pedro Ruiz every week and discover 3D printing! Get your 3D news, projects, design tutorials, shop talk and more each week.. We'll also s...
supple stratus
Ah nice catch, ill remove it.
stuck inlet
I'm setting up IFTTT to post to the individual channels about relevant things
 fluid ridge
Nice!
stuck inlet
for example, I'll have that playlist post here on new ones (hopefully)
supple stratus
yes, automation FTW!
stuck inlet
what other playlists should I include?
supple stratus
yes, layer by layer https://www.youtube.com/playlist?list=PLjF7R1fz_OOVsMp6nKnpjsXSQ45nxfORb

YouTube
Learn how to use CAD for 3D printing and DIY electronics! In this series, we'll walk through some projects and learn how to use features in CAD software to b...
stuck inlet
anything you are posting today to test with?
supple stratus
and 3d project videos https://www.youtube.com/playlist?list=PLjF7R1fz_OOWD2dJNRIN46uhMCWvNOlbG

YouTube
Every Thursday is #3DThursday at Adafruit! Tune in for a new project using 3D printing and DIY electronics. Get inspired to use 3D printing in your projects ...
next vid will be on tuesday for timelapse tuesday

YouTube
Every Tuesday we'll 3D Print things and show timelapse and slice settings
stuck inlet
kk
stuck inlet
testing incoming
fluid ridge
^^^ ducks
 violet needleBOT
Adafruit Industries posted 3D Hangouts – Buttons, Servos, Drones and LEDs
Adafruit Industries posted 3D Hangouts – Buttons, Servos, Drones and LEDs
stuck inlet
no video 😕

Hang out with Noe & Pedro Ruiz and discover 3D printing! Get your 3D news, projects, design tutorials and more each week on Google+ Hangouts On Air. Subscrib...
violet needleBOT
Adafruit Industries posted 3D Hangouts – Buttons, Servos, Drones and LEDs
Hang out with Noe & Pedro Ruiz and discover 3D printing! Get your 3D news, projects, design tutorials and more each week on Google+ Hangouts On Air. Subscrib...
stuck inlet
ok, that looks good
violet needleBOT
Adafruit Industries posted 3D Printed Fingerboard for Feather Boards

Learning Gudie: https://learn.adafruit.com/feather-fingerboard/overview ----------------------------------------- Visit the Adafruit shop online - http://www...
violet needleBOT
Adafruit Industries posted 3D Hangouts – Decks, Lanterns and Glowing Eyes

Hang out with Noe & Pedro Ruiz and discover 3D printing! Get your 3D news, projects, design tutorials and more each week on Google+ Hangouts On Air. Subscrib...
violet needleBOT
Adafruit Industries posted 3D Hangouts – Decks, Lanterns and Glowing Eyes

Hang out with Noe & Pedro Ruiz and discover 3D printing! Get your 3D news, projects, design tutorials and more each week on Google+ Hangouts On Air. Subscrib...
fluid ridge
@supple stratus I love the gothic lantern project! Getting ready to start printing components. Question, though. Can I use nylon M3 screws to attach the Circuit Playground to the base, or do I need to get metal?
fluid ridge
Printing hazard avoidance sensor brackets for my CircuitPython robot tutorial!
supple stratus
@fluid ridge Cool! I have some nylon m3 screws here on hand. I'll give them a try and let you know.
supple stratus
@fluid ridge Fits just fine, they actually just press fits and stay in place 👍
ops, not M3 but the M2.5 's
fluid ridge
@supple stratus Thank you! I'll use 2.5s. The base printed beautifully!
violet needleBOT
Adafruit Industries posted Fusion 360 Tutorial – Circuit Playground Lantern
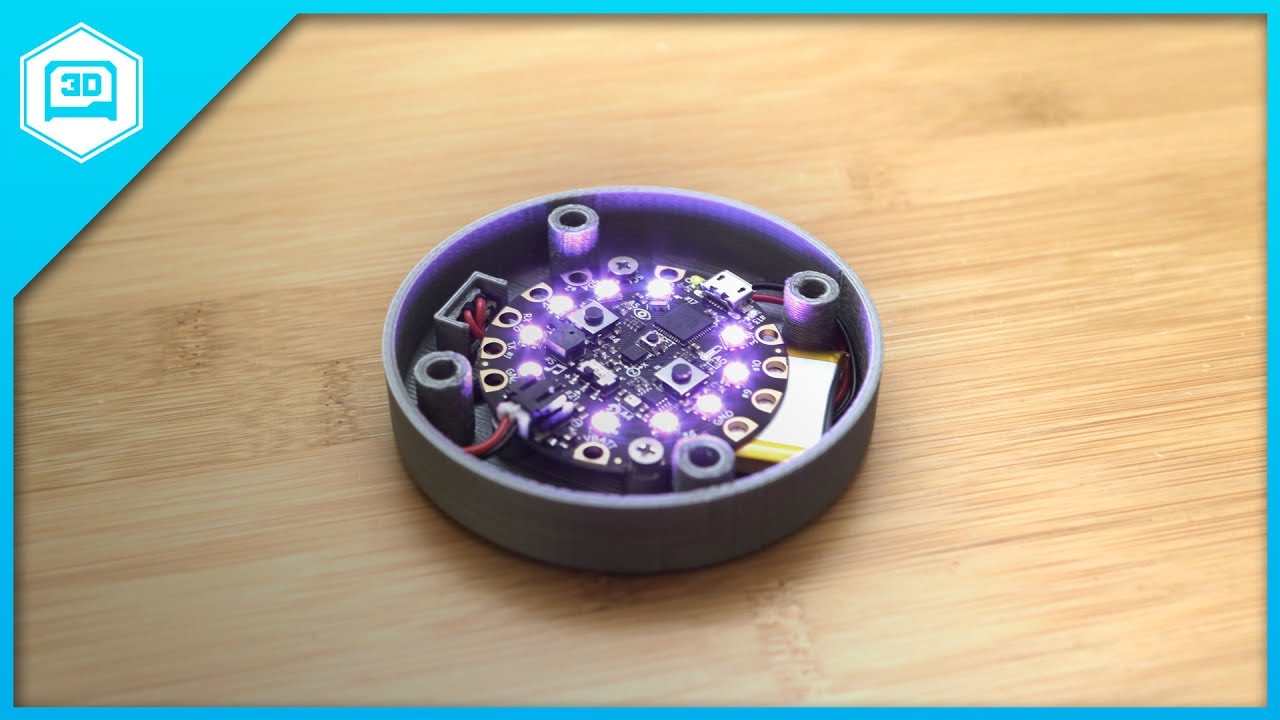
In this tutorial, I'll show you how I designed a simple enclosure for the Adafruit Circuit Playground Classic. Adaruit Circuit Playground Classic https://www...
 tulip wing
Hey, I'm printing that thing right now!
But I scaled it down 50% to fit my baby printers. So far, the lamp part looks great, the top is still printing, and I had to recreate the inside piece in Fusion 360 to make the walls thicker. Hopefully have this hanging from my ceiling before the next show and tell!
 opal shale
What are you going to use as the light source if it's scaled down?
Assuming the circuit playground is the current source
tulip wing
I'm putting in a trinket and a NeoPixel Jewel
The holes almost line up with the scaled down mounting cup.
opal shale
Oh cool
tulip wing
I'll have to figure out power, of course...
opal shale
Would be interested in seeing it when done
tulip wing
As long as I don't hit any snags, you'll be able to see it on Show and Tell next week. 😃
But that statement probably jinxed it
opal shale
👍
tulip wing
Here's a preview. Top is printed with copper infused PLA (going to do the whole thing that way) middle is black and bottom is blue, just for fitting purposes. Whole thing will be copper. Trinket inside with a NeoPixel Jewel!! 😃
 rapid steppe
3D printing is the best.
opal shale
Hey, I'm looking for advice on a print I'm looking to design. It is a mount for controlling a switch with a servo motor. My switch is not really the same as the US switches (and not really like european ones eihter! It's pretty old) so the existing switch mounts on Thingiverse do not work for me
My first attempt at the problem is here

Here are the parts I printed for my Telegram controlled immersion switch using a Wemos d1 mini and a servo motor
Full details and code of the project can be found on the project's github page
The Faceplate is probably pretty specific to my switch the parts I designed are available on thinkercad
Faceplate
Button Extender
Thanks to carjo3000 for their original project that I remixed from. The servo arm is from their project.
I remixed an existing solution , where the motor was facing inwards and the black arm was controlling the switch directly, but my switch was too stiff (or the motor wasnt strong enough) so i needed to get some law of the lever going
but eventually the extender part got loose and it was unreliable when being switched
So I am looking to redo it, I have a bigger motor now (MG 966R) and still have the small servos
fluid ridge
Silly thought, but could you pull the wires out of the switch itself and then use a relay breakout to control the power flow?
opal shale
but I am looking for advice on how to approach it
It is my water heater, which is a full 13A at 220V device
so I don't really want to use a relay (I dont know do I trust them at those currents)
fluid ridge
Ok, so, yeah, I wouldn't do that either.
tulip wing
I use a solid state relay to power on/power off things of this nature
opal shale
Well maybe its not 13A, but its high current anyways
It is a rented house too 😃
So im not sure if my landlord would appreciate me rewiring anything
how big of a heatsink do you need for the solid state @tulip wing (Just out of curiousity)
tulip wing
This one handles 40 Amps --> https://www.amazon.com/Lerway-Solid-State-SSR-40DA-24-380V/dp/B00HV974KC
Nice thing is, the optoisolator is buiilt in, so you just send it a 5v signal to turn on/off
so its "safe"
opal shale
thanks for the links but I would like to avoid the rewiring
In Ireland I would legally need to get an electrician to do it, and sign off on it
or at least sign off on it anyways
tulip wing
Thats true in the US as well, but it still happens. 😃
opal shale
😃
It is a relatively new law in Ireland, brought in in maybe 2014, but there is nothing to say when something was done so its very hard to enforce
tulip wing
I like your switch flipper, however. Great way to add a digital interface to an analog device!!
opal shale
it was great when it worked!
it worked well for maybe 6 months
but the extender was held on with super glue and Sugru
tulip wing
Maybe you need a stronger servo
opal shale
and i guess eventually came loose
I bought a bigger one
The switch is pretty stiff though and just from manually testing it really does need to be pushed primarily in the y direction (if looking face on)
Well obviously 😂
But if the force is applied at an angle it doesn't really work
fluid ridge
So you primarily need a cam mechanism so the forces act along the switch axis....