#help-with-3dprinting
1 messages · Page 17 of 1
 vast salmon
 shy kelp
Quite honestly I don't get it. How am I getting shocks touching the printer (p1s)? Using a multimiter it doesn't detect anything, yet I am getting shocked, that's the only piece of electronics that's there, except well wires
 vivid helm
A multimeter cannot measure static charge. You'd need a either an electrometer or an electrostatic charge meter for that. And yes, 3d printers can build up a significant charge when they move.
shy kelp
vivid helm
A multimeter cannot measure static charge. You'd need a either an electrometer o...
It's not static charge, as I don't feel little sparks when touching the printer, but I feel shocks inside the arms with sometimes involuntarly contraction
Unless static could cause even that
vivid helm
That's... concerning. Probably still won't be able to use a regular multimeter to measure it though.
shy kelp
Like if I was hitting directly the nerve type of sensation
vivid helm
Is your power supply mounted to the printer?
shy kelp
vivid helm
Is your power supply mounted to the printer?
It's inside, I dunno how's the bambulab p1s built honestly, but likely they follow safety standards unlike some other cny manufacturers...
Fyi: it doesn't happens always, but quite commonly, I dunno if it somehow builds up or what
vivid helm
First of all, unplug it. It's possible that the ground connection is broken.
Until you can figure out what's going on, I don't recommend using it.
Second, it may be related to the fact that bambulabs likes to use carbon fiber rods rather than stainless steel.
shy kelp
vivid helm
Second, it *may* be related to the fact that bambulabs likes to use carbon fiber...
Wdym?
I mean I don't see how is it related?
vivid helm
Most 3d printers use linear rods made of stainless steel. This provides a path to dissipate static charge accumulated from moving the bed/toolhead to ground via the frame. Carbon fiber rods would make no such connection, which means that a significant potential could accumulate on either the bed or toolhead.
-# This is a guess. I think a broken ground connection is more likely.
shy kelp
I guess I can exclude outside outlets/switches, as if they were at fault the circuit breaker should had been triggered...
In theory warranty exist, there has to be seen if they will take a look at it or not
 loud silo
is the power plug 3-prong, and are you plugging it into a grounded outlet? I would suspect some leakage from the power supply perhaps due to a fault. Do you get these shocks over and over immediately, or once and then you have to wait a while? The later suggests static build-up. The former suggests a power-supply fault.
shy kelp
loud silo
is the power plug 3-prong, and are you plugging it into a grounded outlet? I wou...
3 prong and grounded outlet. When it happens you may be shocked multiples times, but then it "cools down" and you need to wait some time till you'll get shocked again.
I never heard that static electricity could cause this tbh
loud silo
does it have to be actively printing for you to be shocked after the "cool down"
https://forum.bambulab.com/t/shocked-when-touching-x1c/10148/10 sounds like it!
what are you touching when you get the shocks?
if you have an outlet tester, test to make sure the outlet is really grounded
shy kelp
loud silo
does it have to be actively printing for you to be shocked after the "cool down"
I did not take note of that tbh, as for parts hard to say, both plastic and metal parts, since as each time I came without thinking about it and getting shocked
I guess I'll check the outlet and then see how to disassemble this thing for gnds, thanks
loud silo
that long thread: not sure if some people have static, but some people also have poor grounding. which model do you have
shy kelp
loud silo
that long thread: not sure if some people have static, but some people also have...
P1s, I see it mentions the a1
vivid helm
I wouldn't discount the possibility of shoddy wiring on other printers.
 faint pier
Yes please check the ground wire connecting the printer and the power supply. There should be one attached to the chassis of the printer
 fervent lagoon
any suggestions for ventilating a small space with only 1 window on the opposite side of the room from the printer? note that this is an apartment, so knocking holes in walls isn't practical
 arctic dragon
fervent lagoon
any suggestions for ventilating a small space with only 1 window on the opposite...
arctic dragon
fervent lagoon
any suggestions for ventilating a small space with only 1 window on the opposite...
The best way would be to setup some ducts from the printer enclosure directly to the window, but it’s not always feasible.
If ducting isn’t possible, a HEPA filter and activated carbon filter is a possible alternative.
Do keep in mind that if you do vent directly to the outside, you’ll want to ensure the weather conditions outside don’t come in. Some active fans and maybe a dryer vent will help with that.
faint pier
if the printer is enclosed, there is option to minimize emissions by using a recirculating HEPA filtration system (nevermore Mini, Bentobox), and then you can ventilate any remaining air in the room through other means. If you are just printing PLA or PETG, I think a normal fan to encourage room air circulation should be sufficient. If you are printing ABS you need to be much more serious about ventilation due to particulates and styrene gas.
 ashen moat
note that filtration/carbon only cleans up particulates and smell, not noxious chemical vapors released by stuff like ABS, nylon
there are systems for cleaning VOCs, but they're thousands of dollars
arctic dragon
faint pier
if the printer is enclosed, there is option to minimize emissions by using a rec...
While PLA and PETG are comparatively much safer in enclosed spaces compared to ABS, there is still a general recommendation to ventilate where possible. A recirculating HEPA filtration system is also great for this, as it will capture the bulk of the nanoparticles released from the melting of thermoplastics.
ABS, on the other hand, has an extra risk factor of VOCs (volatile organic compounds) which are responsible for the "fumes" released from ABS/ASA. These particles are even finer than the particulates from general thermoplastics, and the results of filtering these with a HEPA filter are not great. The best way to filter VOCs are to use activated carbon filters in conjunction with your HEPA filtration system.
I have to emphasize the relative nature of these safety statements, as the overall long-term effects of exposure to 3D printers are still being studied to this day. Overall, though, the general consensus is that exposure to this air is not bringing any health benefits, so err on the side of caution where possible.
faint pier
Yes, you will want a system that has both HEPA and activated carbon, with room ventilation elsewhere. Nevermore (the Mini, not the micro) and Bentobox (again, the regular, not the mini) have both
and even so, fumes will still escape the printer at times, so I would seriously consider ventilation. Either that or just leave the room while things are printing
ashen moat
it'd be cool to see a nevermore/bentobox type recirculating filter that used like organic compound respirator filters so it could extract toxic gases
fervent lagoon
thanks, folks -- sticking to PLA definitely for the foreseeable future
 vocal flax
fervent lagoon
any suggestions for ventilating a small space with only 1 window on the opposite...
vocal flax
fervent lagoon
any suggestions for ventilating a small space with only 1 window on the opposite...
If I were you, I'd move the printer. But more jank one would be, duct from enclosure that have fan (to create negative pressure so air fills in enclosure from gaps not escapes with bad stuff) .Then a ventilator pointed to the window with some space. In front of the window fan duct pointed up.
The idea about pointed up fan duct is Bernoulli. If you speed up air it'll pull air while it moves. So it'll suck up from went as it leaves the room
fervent lagoon
thanks, but due to other factors, moving the printer is impractical -- however, not only do i have a room filter on it's way, but i found this little gem: https://www.printables.com/model/832054-creality-k1-k1c-hepa-active-carbon-filter-housing (why i didn't think of searching for this in the first place, i will never know...)

Printables.com
Screw-less version of the original design. | Download free 3D printable STL models
faint pier
I imagine that's probably sufficient for PLA. Since PLA likes as much cooling as possible, the exhaust fan is probably going to be running nearly maxed out to keep chamber temps low, but that's fine.
fervent lagoon
that is my current target -- more "exotic" materials aren't in any future plans 😇
 iron remnant
Yah I guess the Nevermore version of things is to use a lot more activated carbon than the lightweight mesh sort of filters that one uses.
shy kelp
faint pier
I imagine that's probably sufficient for PLA. Since PLA likes as much cooling as...
It makes no difference... Although if it's closed, keeping the temp down may be necessary to avoid clogs
iron remnant
OTOH, yeah PLA and PETG have me vaguely concerned after what my VOC and PM sensor shows me except I can't really quantify if there's an added risk, but they are also not especially unsafe in the ways that ABS/ASA does.
shy kelp
Ah it's the k1c, I dunno how much difference there's with the k1, but my experience with the latter wasn't fun
iron remnant
So... yeah, there's a VOC and particulate spike. Is it hazardous? Dono. Prusa was hawking that their filament + printer has passed a UL labs safety test for printing indoors.... but Prusament spikes my meter.
A lot of the printers suggest that you print PLA with the doors open which kinda defeats the point, but then again PLA likes a lot of cooling and I'm not entirely sure if my Voron Zero's setup is cool enough to print PLA with the doors closed. The same might be true for that filter.
fervent lagoon
shy kelp
Ah it's the k1c, I dunno how much difference there's with the k1, but my experie...
the k1c is what the k1 was "supposed" to be -- aside from my ventilation issues, the printer itself is quite a step up from a Tina2 -- running the "full speed" test print was insane
i do have to print small things with a brim for adhesion to avoid using glue
faint pier
do you use textured PEI? I find if you just keep those clean, PLA typically has no problem sticking (with 60 deg C bed)
fervent lagoon
yep -- operating straight out of the box (i did do one print with glue, but washed the plate after)
well, almost -- the printer comes with files for printing a side mount to get the spool off of the back 🙄
iron remnant
Oh yeah also do try yourself some PETG. It's in the same safety category as PLA.
Honeycomb storage wall assumes PETG flexyiness, the transparents are better, and it's less brittle.
shy kelp
Also more resistent to temps
But it will be painfull with adesives, it doesn't even bound with itself using a 3d pen
faint pier
You will want to use glue stick with petg on PEI... It sticks too well without a barrier lol
fervent lagoon
hmm - the printables page for HSW doesn't seem to mention PETG anywhere, but i can see from the clicky stuff that it would probably work better, indeed
arctic dragon
There simply isn’t enough data to evaluate the hazards of the PM. My recommendation is simply not to print in the same space you sleep in, unless you have ample ventilation and/or filtration.
 ancient folio
How would I go about picking a 3D printer if I'm going to be printing some higher temp and some more abrasive filaments?
I don't really want to buy one just to replace the hot end, but I can't find any printers with v6 or volcano hotends, and I can't find any nice nozzles for other hotends that can handle around 300°C. Of course I could ignore the nozzle and go with plain brass replacements, thus settling for a printer with a proprietary nozzle size, but I'm worried that all the wear on the nozzle will be a huge hassle down the like.
Am I overlooking something or so I actually have to make that choice? And if so, does anyone here have experience printing abrasive filaments (carbon fiber,etc.) and know how annoying and frequent nozzles wearing out actually is?
ashen moat
I've printed abrasive glow in the dark filaments, but only with a hardened steel nozzle on a V6. unless I'm out of date, steel nozzles ought to be relatively cheap and fairly easy to install no matter what hot end you have?
I didn't want to cut corners and try it with a brass nozzle, because knowing me, I'd ream it out pushing abrasive plastic and then spend the next year being disappointed by mysteriously poor print quality, not suspecting a worn nozzle.
faint pier
hardened steel nozzles are available for most popular printers and nozzle types
I like printing PETG-CF (the only PETG variant I really use) and I did do a few prints in brass without noticeable degradation. But for a whole roll I would just buy a nozzle. V6 and MK8 nozzles are cheap, but I find even if you go Bambulabs for example, a hardened steel hotend for the P1 is "only" $15 and is a relatively easy swap. There are also adapters you can use for V6 nozzles or E3D Revo as well. Lots of options.
ashen moat
I've got a spool of PETG-CF on the way to try
vivid helm
faint pier
I like printing PETG-CF (the only PETG variant I really use) and I did do a few ...
The issue is that as you print the nozzle diameter will expand, changing the flow.
Also there have been some questions regarding the safety of CF filaments lately.
 tidal stone
Where are folks learning about the safety of filaments? I had no idea about the ventilation of PLA until I read it here.
arctic dragon
I read up on this stuff so long ago I have no idea. Probably on All3DP some years ago?
I'm sure there are youtubers running their own experiments...
iron remnant
The Nevermore folks have done a pile of amateur-science level stuff.
I feel like nobody in the industry side of it really wants to be told that they were selling something that's unsafe and there's just not enough interest from other quarters to I dono do things right?
The glass fiber filaments are fun stuff although I guess there's your real demonstration of why you need to be CAREFUL, LOL.
The plus side is that you can get them in colors other than black.
The minus side is that glass fiber is inherently itchy so you can kinda feel around the problem, so to speak.
The other minus side is that they are more abrasive than carbon fiber so you generally want to have both a nozzle and a heat-break that's up to the task.
Folks are getting cheap bambu hotend clones and putting them on their Vorons because it's a reasonably-good-quality reasonably-high-flow cheap setup. There's also the Dragon SF, Dragon Ace, and Revo hotends that folks are generally OK with.
And you can now get tungsten carbide nozzles instead of hardened steel nozzles.
And then also, PETG-CF doesn't require any higher temperatures than regular PETG.
faint pier
There have been studies on 3D printing fumes, particulates, VoCs, but it's also going to vary from roll to roll because presumably the additives (coloring, matte and silk effects, and other modifiers) have a significant effect on what's actually coming out. General advice is to ventilate as much as you can. No real conclusion on the effects of PLA and PETG emissions (other than 'they exist' so use that info as you will), but in the case of ABS/ASA you need to take additional steps. The bigger filament suppliers provide safety data sheets on their website (like Prusament) which also carries warnings.
tidal stone
I’m interested in thoughts on my setup RE ventilation. My printer is set up in a closet below the stairs. I keep the door closed with a dehumidifier running to keep the spools on the AMS in good condition. There is literally no ventilation in there when the door is shut, but I don’t hang out in there or keep the door open. The door is a bit over 5 feet tall.

 fervent lagoon
even with the door closed, fumes will have to go somewhere, unless it's completely air-tight, and then all that would come out when you opened the door
the first thing i'd do is make sure it was isolated from any air-conditioning return, which i know are typically located near/under stairs
tidal stone
fervent lagoon
the first thing i'd do is make sure it was isolated from any air-conditioning re...
Yup, no AC intakes anywhere nearby. I'm in the process of building an exhaust fan into the window because there is bad ventilation in general in the basement when the AC isn't running.
faint pier
You can just use a recirculating filter in there, that should help clean the air before you open the door.
vivid helm
Only if you leave the door closed for awhile after the print finishes, and even then those can put out additional particulates.
shy kelp
Hm not so much 3d printing, but any laser that can at least mark metals and cut a couple of materials? As cheap as it can get
vivid helm
shy kelp
Hm not so much 3d printing, but any laser that can at least mark metals and cut ...
None that you want to look at with your remaining eye.
I wouldn't trust the pathetic little glasses, and you can't put them on cats, dogs, small children, or unsuspecting adults.
shy kelp
vivid helm
I wouldn't trust the pathetic little glasses, and you can't put them on cats, do...
Luckily I don't have nor pets (excepts for rats in the dropped ceiling..) nor kids. As for safety just some shielding down to the laser, and a dedicated "room"
 faint sky
foam soap dispenser top. fit perfect first try.


Here's what it looked like new. Worked great until it didn't. Going to use the existing shell to DIY a new one. Black top is just an initial fitment. Now I can design the part with the PIR sensor and dispenser tube.
 fervent lagoon
noice!
faint sky
Not bad for a 0.8 nozzle, took 1.2 hours to print. If I did that with a .4 nozzle it would have taken 2-3 hours. 🙂
iron remnant
phat nozzles are the greatest.
ashen moat
I get why 0.4mm are the most common, but even moving 0.2mm in either direction from there really improves speed or detail.
vocal flax
iron remnant
phat nozzles are the greatest.
Aren't they just V6 nozzles?
faint sky
ashen moat
I get why 0.4mm are the most common, but even moving 0.2mm in either direction f...
Yep, I print mostly industrial types of parts and rarely need great detail. The tradeoff is worth it even for printing small parts and super worth it for very large parts.
I struggle with supports though often they fuse to the part and I have to use snips on every contact point. Support structures need greater detail to cleanly break off.
ashen moat
yeah, I have to position support contact surfaces 0.3mm away from the print to detach cleanly, but then sometimes the supported surface droops more than I'd like.
I'm in the same boat, 90% of the time I'd rather have speed than detail since I'm printing functional parts.
shy kelp
Btw, is hips that toxic? I can't just like get one of those alluninium like tunnel to attach to the printer to the window?
Although the printer is not actually that much sealed either...

Likely I shouldn't but pva is expensive...
faint pier
ABS and other styrene filaments are the one thing you don't really want to mess with, because in some people they can cause headaches and nausea, you can feel sick off them. Styrene gas is bad, and so are the particulates that often come off these materials (particulates from smoke, which sometimes you can actually see coming off the nozzle). Hard to say what the long term effects are, but I would hard recommend ventilation and/or filtration. But if you're only printing with these materials sometimes, you can also just move the printer to the garage or something.
iron remnant
I move my Zero to the back patio to print stuff all the time.
 steep umbra
I think there are a lot of variables and it hasn't been well studied (edit: in home settings), but generally speaking, less exposure to the air around 3D printers is better, and more ventilation/filtration is generally a good thing.
fervent lagoon
iron remnant
I move my Zero to the back patio to print stuff all the time.
putting the printer on a cart might be a good idea, but i don't even have room for that
iron remnant
I just printed a pair of handles and pick the printer up to move it
fervent lagoon
yeah, mine's not that light 😏
shy kelp
Also, does anyone know an official name of this material?
https://colorfabb.us/varioshore-tpu-natural
Or do they have really an exclusive of it, and it's actually named like that?

We have taken TPU… and made it special by using the same foaming technology we debuted with LW-PLA. Our varioShore TPU has a few main distinctive features: its variable shore hardness, reduced weight and density and soft touch. varioShore TPU allows users to vary the density of the material by adjusting temperature and material throughput (speed...
faint pier
it's exclusive so if you say "varioshore TPU" people will know it's the foaming/density changing stuff from colorfabb. Some of their other foaming materials you can find variants of elsewhere (eSun LW-PLA) but as far as I know, foaming TPU is a colorfabb thing only.
fervent lagoon
6m of failed print and i find out that the vaunted "AI print failure detection" is not on by default -- you would bleeping think that one of the biggest advertised features would be out of the box, but noooo 🙄
ashen moat
I designed some line tensioners for the crossbracing lines I'm adding to stiffen my delta. they do the same thing as turnbuckles, but I've always found turnbuckles kinda fiddly to use. these are also fiddly, but different fiddly. =)

ultimately I'd like to add tensioning knobs to the line tie-off points on the towers, but I don't have it in me to design right now.
iron remnant
Turnbuckles would be great for a printer that doubles as a wrestling ring tho.

Just about going.
ashen moat

 uneven garnet
Hey all. I've had my Bambu A1 for about a month and I'm having lots of fun. I've started using the AMS Lite for multicolor printing, but I've had a lot of trouble with it.
First issue was that the PTFE tube was somehow getting eaten, pulled down into the extruder. I ended up replacing the "filament hub" part and replacing the PTFE tubes. This seems to have worked.
However, I still get a lot of "Unable to feed filament into extruder" issues during prints. I've been dealing with this by removing the filament from the tube, making sure nothing is tangled, and feeding it back in. Not the end of the world, but it's annoying to have to babysit the AMS and intervene every 30 to 90 minutes. I haven't had a single print "just work" -- maybe my expectations are too high?
Curious to know if any of y'all are familiar with this system. Are these issues typical? Is there any way to make the system more reliable?
 vestal thicket
No, that doesn't sound typical. I don't know if anyone has an A1 in the channel, I haven't seen it come up yet (I have a P1P). You may want to ask in the Bambu Lab Discord for advice on that one
ashen moat
yeah, no personal experience with a Bambu, but their whole deal is supposed to be "it just works". I agree their discord or even their support are probably good bets, since that's so specific to their hardware.
vocal flax
uneven garnet
Hey all. I've had my Bambu A1 for about a month and I'm having lots of fun. I've...
Idk what bambu uses but usually if PTFE doesn't fit well enough filament can catch space in the middle. So making sure PTFE tube is cut straight and perpendicular would be my first action. Then I'd check with PTFE tube fittings if they have play maybe replace them. Also printing some retainers could be a nice upgrade. Also try not to keep PTFE tubes stretched. The metal inside push fit connector could chew away PTFE tube overtime tube get loose and create aforementioned gap
ashen moat
does that wear/chewing still happen on reverse bowden setups? I figured that was limited to bowden extruders, where the tube is constantly pushed/pulled in the push-fit connectors. push-fit retainer clips are a good idea.
vocal flax
Reverse bowden generally don't face this issue.
I assumed ams acts like bowden while loading and unloading
ashen moat
I guess it would, though hopefully there isn't resistance/backpressure while feeding the next filament down to the direct-drive extruder. maybe there is, though? maybe that's how the system detects the "unable to feed filament" condition? filament pressure or binding up before it can reach a runout sensor? 🤷♂️
vocal flax
Afaik ams exactly same principle as mmu but executed better
So I assume it checks 2 switches (maybe monitors spool rolling) one on tool head one on ams, if triggers are not as expected it gives error.
faint pier
if this machine is under warranty I would let Bambu CS deal with it. After all, the "out of box working" is basically their schtick
shy kelp
Just know that their support is slow
fervent lagoon
well, well -- i just had my first extruder jam and i have to give some props to creality: i'm a bit of a mechanical klutz and thus literally afraid to take anything remotely complicated mechanically apart, so it was with major trepidation that i approached taking the head apart, following the video guide; my fear was unfounded: the video was clear precise, the mechanism easy to access and remove and I was done in under 15 minutes, even with feline assistance (no screws missing thankfully)
 lucid nest
Can someone recommend some PLA that's easy to print and shines reflectivity with a colour shift that isn't silk?
I am getting decent with learning problem solving with my X1C but idk how the community did it without all the creature comforts of modern printers, mad respect for the people doing this for years
Pls ping in reply
fervent lagoon
lucid nest
I am getting decent with learning problem solving with my X1C but idk how the co...
@lucid nest polymaker has a line that's called "Starlight" that might be the thing
quickie survey time: HSW or Multiboard?
lucid nest
fervent lagoon
<@119479724304105474> polymaker has a line that's called "Starlight" that might ...
Thank you!!!
lucid nest
fervent lagoon
<@119479724304105474> polymaker has a line that's called "Starlight" that might ...
It's exactly what I was looking for!!!!
vocal flax
fervent lagoon
--------------------------------------------------
quickie survey time: HSW or M...
How about neither? A wood panel and screws. More robust and eco friendly
Make custom mounts from the 3d printer
fervent lagoon
i live in an apartment, so i use a lot of 3m command strips; but #1 cutting any wood products is problematic #2 it has to be easily removable in about (looks at non-existent watch) 9 months
iron remnant
Multiboard is newer, I guess?
At this point, I've invested a lot of energy in getting HSW to where I want it.
Like, I've got some nice Command Strip OpenSCAD mounts that you'd probably want that I need to wrap up and post?
Multiboard looks more pegboard and less futuristic.
fervent lagoon
there's 3m mounts on printables and yeah, HSW looks more wowza and definitely less "heavy"
fervent lagoon
well, in that case i would likely be interested in your mounts -- at your leisure, i haven't even printed my first grid yet (still printing all the little 💩 you do when you get a printer: today is a soundbar stand and a robot gripper)
vocal flax
fervent lagoon
i live in an apartment, so i use a lot of 3m command strips; but #1 cutting **an...
Mounting wood is just 4 screws but you do you
IMO it's much easier to get a wood with desired length and screw it to whatever (wall desk etc.) and make mounts that gets screwed to the wall
Than countless hours of printing
fervent lagoon
vocal flax
IMO it's much easier to get a wood with desired length and screw it to _whatever...
i did that once and paid over $50 for 3' of 1x12 because they charged for the whole board
iron remnant
What I really want is someone who will deliver me some useful subset of dimensional wood much in the same way I get extrusions from Misumi USA.
Yah, basically a lot of projects I haven't been progressing on because I haven't had a working 3D printer or a working 3D printer that's large enough, so it's quite a relief to see things printing on my Trident.
For example, I have a looooooorge piece of HSW for the entryway that was one piece away from being done.
fervent lagoon
owowowowow!
akir did get me thinking a bit, so i did some rough calculations just for grins:
3 panels @ ~25m filament per panel == 75m
filament 330m @ ~ $20 == $.06/m
75 * .06 == $4.50
note i'm leaving the "time" element out because i got plenty of that
vocal flax
Electricity
ashen moat
the problem with a board isn't the screws, it's the holes.
fervent lagoon
dude -- rough for grins -- if you're so bleh on 3d printing, why are you in this channel (just asking)?
iron remnant
Okay, I just used the accelerometer to do klipper things and now it's doing the freaky fast-moving printhead thing.
Very nice.
Printer go brrrrrr
ashen moat
input shaping based on those accelerometer readings really does help with ringing, it's pretty great. the graphs from the klippain shake & tune plugin are even nicer and it automatically keeps a graph history and moves them so you can view them from the files/logs viewer in your web front end.
�...re: earlier talk of command strips, I haven't had great luck with them sticking well to prints. any particular filament or surface finish that helps?
fervent lagoon
i've got a couple of smallish "display shelves" in "cheapie" PLA that have been up for several months, but there's not a lot of load on them
i would also recommend roughing the print surface a little -- if it's too slick, there aren't any molecular binding sites for the stickum to work
ashen moat
interesting. wasn't sure if rougher or smoother would help, since the official hook surfaces are pretty smooth.
fervent lagoon
from my observation, if the tape surface is on the print bed, it's "too smooth", but if it's printed vertically, there's enough variation in the surface (at .2mm with a 4mm nozzle) that the foam and glue have more surface area, much like the wall behind it -- my apartment, for example, has low-textured walls and they work really well, at least until the paint de-laminates from the 5 layers of paint underneath it
iron remnant
I suspect that the official hook surfaces are smooth because of injection molding.
I should actually probably use some sandpaper or something on the surfaces.
fervent lagoon
i suspect your suspection is correct 😏
well, i will be finding out for myself in approximately an hour and a half -- printing the mounts and inserts even as i type
i have to admit that watching an XY printer is fascinating -- and plastic spools are noisy a.f.
faint sky
Redesigning my TFT enclosure. Made a custom PCB for the top buttons, should arrive this week. About 17 hours of print time total.


Was getting gradually worse quality so releveled the bed manually and ran another bed mesh. Results are night and day better. It's amazing what kind of difference a good bed leveling can make. It's a .8 nozzle so not going for perfect aesthetics, as long as it can function as a TFT display then it serves its purpose.
 karmic rover
Hey all, I was wondering if anybody has suggestions for 3D CAD programs, other than fusion? I'm looking for something ideally free and open-source, but I'll settle for just free if there are no better options. I've used FreeCAD, and while it's decent, I would like to try out more options, but I'm having trouble finding good recommendations on google. Another preference is that it's local, I'm not sure why all these free cad software run in a browser now and require a login.
iron remnant
I mean, they aren't really "free" they are "free at our pleasure and not free at the moment where it seems like it'll make us the most money"
I guess the big thing is that FreeCAD is the most Fusion-like CAD app.
Blender is not at all a CAD app but it's often useful for making 3D printables.
OpenSCAD is not at all like FreeCAD or Fusion but if you are a software-oriented person, it's quite handy.
ashen moat
I love OpenSCAD, though I've heard CadQuery (and cq-editor) is a python-based alternative.
Ondsel is a company-backed fork/superproject of FreeCAD focused on UI/workflow improvements. it has some cloud storage and collab features if you log in and/or pay, but also works standalone offline for free (LGPL).
iron remnant
Yeah, like Ondsel is all like "Yay! We're going to make this open source project better!" and I'm kinda skeptical because I've Heard This All Before.
ashen moat
I mean, if it's better, it's better, and if it's not, it's not. it has interop with FreeCAD so you can't get stranded and their FAQ says they submit improvements back upstream. I intend to start with Ondsel over FreeCAD when I finally learn a visual CAD package.
iron remnant
Sure, but some of the the open source communities I've been part of have gone in all kinds of weird directions because some company shows up with money and an agenda.
Heck, I've been on the showing-up-with-money-and-agenda side as a representative for a past employer and pushed an agenda. I'd like to think that I was pushing them kicking and screaming towards awesomesauce but I'm not really the person who gets to decide that.
ashen moat
I guess that doesn't seem like a risk to me in this particular case, when considering investing time into learning it. or, this seems like the best possible way to do it: company started by a FreeCAD contributor, book author, current module maintainer, promising forward interoperability and contribution back to upstream (if accepted, to your point).
fervent lagoon
on a different question -- do those anti-tangling "tags" actually work?
ashen moat
and if it dies, I might have to learn another package, but my files won't be locked away in a dead format.
fervent lagoon
fervent lagoon
on a different question -- do those anti-tangling "tags" actually work?

Once upon a time there was a man…who never had tangled filament spools !!! The reason for this is no miracle or rocket science… It's just very simple !!! Just use these little Anti-Tangling-Cards: Super Fast and Easy Print ! Just 2 Layers thick ! I've been using these every day, on every spool for over 2 years without any issues !!! After pr...
regarding editors/modellers -- i'm still awkward enough that tinkercad is about my level and, tbh, even though it's a browser/hosted thing, it works pretty well
just as a note: i've been using Linux as my primary OS since the last century (fun saying that!) and there is one thing i have learned from many painful bruises: sometimes you just have to hold your nose and go with "x", otherwise you go nowhere or spend more time working around it or finding the "perfect" thing
ashen moat
is the tag something you add before storing the filament? I guess it's intended to help keep you from accidentally losing the tip into the roll and creating a tangle when you dig it back out again?
huh. seems like filament would be ornery enough to snake itself out of the card's hole, too, but maybe not? seems worth trying.
fervent lagoon
i think you're correct -- not exactly what i'm looking for tho -- i've got some older, not-quite-so-good filament i'm running through and it's not wound all that well, so constantly listening for cranky spools
karmic rover
Thanks @iron remnant @ashen moat , I'll check out those suggestions
ashen moat
yeah, I think those tags are to prevent tangles, not solve them.
faint sky
My printer has a runout sensor with backlash protection. It works better than that kind of card setup. If there are tangles already wound in the spool from the factory there's no good way to combat that If you're talking about tangles that happen due to retraction backlash (which can definitely happen) then a runout sensor with backlash preventer is a better way to go... even if you don't actually use it electronically the physical mechanism inside the run out sensor works very well.
faint sky
One common misconception is thinking that your setup will perform better if you add bearings to the filament holder. The opposite is true. You want friction on the spool holder so it doesn't continue rolling. Continued rolling plus large retraction is how filament comes off the spool and creates a tangle.
fervent lagoon
it's probably happening in the manual part of retraction 😀 - let me guess, y'all usually just cut the stuff off and not worry about it going back onto the spool?
ashen moat
trim the end, remove spool from dry box, carefully unthread filament from hole in drybox, clip or thread filament into spool edge. it's a little awkward with the box, but I've gotten good at keeping the free end in hand and untangling the spool if I mess up.
the box acts as backlash protection too, in case the filament snaps off at the extruder or otherwise gets loose
fervent lagoon
"dry box" 🤣 -- yeah, no, i've got vacuum bags which is about it due to space limitations, but i will take note of the clip (checking... yeah, on the printlist)
ashen moat
most of the time I either thread it thru holes in the spool or use a small binder clip. should probably try the printable clips sometime, though.
yeah, I use ziploc bags for most storage and the box for feeding the active spool.
faint sky
fervent lagoon
it's _probably_ happening in the manual part of retraction 😀 - let me guess, y'...
That's another scenario when it happens yeah. Always keep tension on the filament during a spool change. Most tangles are self inflicted and not a tangle from the manufacturer.
vocal flax
fervent lagoon
it's _probably_ happening in the manual part of retraction 😀 - let me guess, y'...
I always remove filament manually never had a tangle using reverse bowden and tush with 608 bearing never had an issue. Just make sure you secure the filament to one of those holes on the spool.
Additionally never had an issue with ball bearing tush in my experience even better to slide easily for reverse bowden it even winds itself to the spool.
fervent lagoon
danke, folks!
faint sky
There is another scenario where this can happen with a direct drive extruder with no bowden tube and no run out sensor. This literally just happened to me an hour ago during a print. If the filament is too dry it can snap/break and all that tension then unwinds the entire spool in horrific fashion. Thankfully I have a runout sensor holding it tight or that would have been a nightmare scenario.
It printed air for a couple of seconds while I reinserted it into the extruder. Luckily it happened while I was standing there watching it print the brim. That's the kind of scenario where you'll check on it in an hour and it's been printing air for an hour and your print is ruined. Filament breakages mid-print rarely happens but when it does, say goodbye to your print job.
That's one of the risks of over drying your filament, it can become brittle.
ashen moat
I've had that happen with very old, cheap filaments, too, though I assumed it was moisture since they seemed to get less brittle while drying. but maybe it was just the heat making them more pliable?
 balmy pulsar
I found some cheap aluminum. anyone got something i could make 1000 of that would be hot for xmas? my nes controller i would sell 10, max. so thats a no go. pi cases are pennies, so thats a no. 3d printer part? i am drawing a blank.
ashen moat
portable handbag/backpack hooks for tables?
ashen moat
they can be pretty handy, though at least on the handbag/purse side, market's crowded and CNC may not look nice enough. they're for hanging your accessories under the table at like a bar/restaurant/library.
balmy pulsar
yeah
 dapper carbon
i'm updating this case https://learn.adafruit.com/pi-5-case?view=all to support no only active cooling but the raspberry m2 hat... Who would I talk to if adafruit wants to provide it...
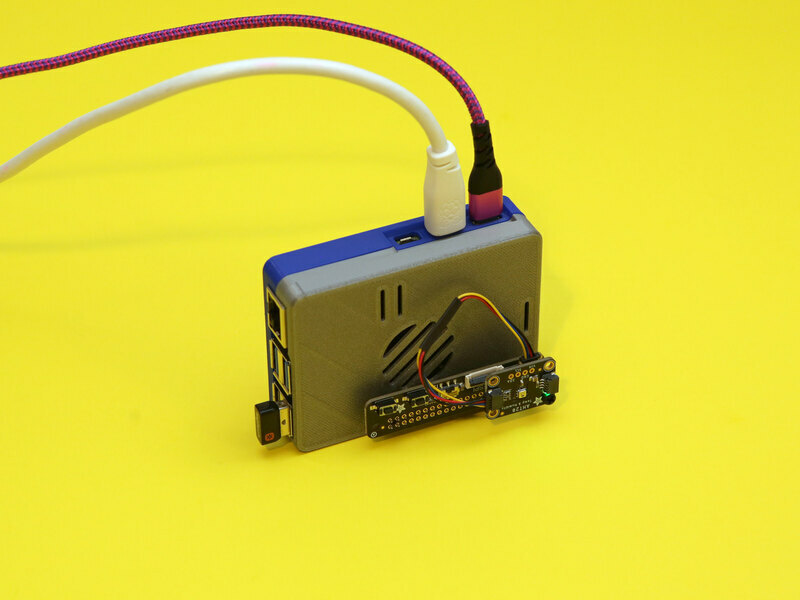
Print a 3D snap fit case for the Raspberry Pi 5
the board posts are now pocket holes and the top will be extended to fit the m2 hat added height, an extended height 2x20 will extend the gpio pins so they are still accessible, the hat connector is pass thru but the stock pins end flush with the top of the hat
steep umbra
I see that the Bambu Labs A1 mini is very reasonably priced right now. Does anyone have experience with it, and would it be appropriate for a first-time 3d printer user?
vivid helm
Well, the full size A1 had... issues.
https://www.cpsc.gov/Recalls/2024/Bambu-Lab-Recalls-A1-3D-Printers-Due-to-Electric-Shock-and-Fire-Hazards

U.S. Consumer Product Safety Commission
Consumers should immediately stop using the recalled 3D printers, and contact Bambu Lab to arrange either (1) return of their A1 3D printers for a full refund, or (2) for free replacement of the heatbed and cable by a local electronics repair facility. Consumers requesting a full refund will be sent a prepaid shipping label to return the printer...
 gloomy anchor
oof
 buoyant citrus
That has been corrected and replacement parts have been shipped out if the end-user didn't want to just return it.
faint sky
dapper carbon
i'm updating this case https://learn.adafruit.com/pi-5-case?view=all to support ...
Adafruit doesn't host files for enclosures unless it's something they've paid for designing in house. The best avenues to get your design noticed is uploading it to a thingiverse or printables account then linking to it with an Adafruit Blog submission or Playground note. If it's a remix of an existing design then you can submit it as a remix (or make) on those sites and it will likely be covered by Noe & Pedro during 3D Printing livestream (every Wednesday morning eastern time).
Only 3D models they directly accept are of PCB's for their CAD Parts github repo.
gloomy anchor
how to make sure supports make the supported surfaces smooth?
ashen moat
I don't think that's possible unless you use a different material for the supports, like something that dissolves. I've never been able to get supports to detach well unless I put them far enough from the model that the supported layer doesn't smoosh together.
though I did see a post about using a sharpie as a release agent for supports. you'd need to pause the print after the support's topmost layer, then color the support surface with sharpie, then resume the print. maybe that would allow for closer support that still detaches?
alternately, you may be able to find a print orientation that doesn't need (as much) support, like printing a cube on one of its points.
or you could design your own supports into the printed object, or as a separate support object you could have on hand to place on the build plate just before the supported layer, rather than using the slicer's supports.
fervent lagoon
there are some things sandpaper and patience can solve...
iron remnant
You don't have to be so abrasive with your answers, you know. 🙂
fervent lagoon
no, but it does take a certain amount of grit
gloomy anchor
ashen moat
I don't think that's possible unless you use a different material for the suppor...
Ive heard of a bunch of things like bridge settings and modified flow + adaptive height, but it doesnt seem to change much significantly
fervent lagoon
son. of. a. beach. filament snapped off during retraction, so now there's an unknown amount in my bowden tube... 👿
so my great task tomorrow is pushing it out ... such fun
iron remnant
Sounds like you'll get it done.... in a snap
fervent lagoon
🙄
fervent lagoon
breathes sigh of relief
i had managed to get it all out as it was breaking, so no clogs -- umpteenth memo to self: no more cheap filaments...
ashen moat
if it breaks off at the extruder and you catch it in time, you can chase another piece of filament into the extruder after it. retractions won't work as well until the extruder pushes the break down to the hot end, but it can save the print.
fervent lagoon
fortunately, it was during retraction and i had just pulled the last piece out
 velvet radish
balmy pulsar
velvet radish
balmy pulsar
printable cable chain. whee.
 ashen moat
yes! I added one to my delta a while back and it helped keep the cables from splaying all over and catching on things. though cable chains are really only meant to roll along one axis and I'm asking it to handle two...
vocal flax
I've seen some spline designs. Maybe better for your application
Wonder how good they work
ashen moat
whoa, that sounds trippy
ashen moat
I'm seeing "spine" designs, though it seems like "spline" would work just as well for what they are. could work for me.
balmy pulsar
ashen moat
yes! I added one to my delta a while back and it helped keep the cables from spl...
igus makes multi axis tube and rectangle ones for robots. was looking at them before i decided making my own would be more fun (and cost almost the same)
these are an ideal candidate for nylon sls printing
cause its strong, flexible for snap fits, and not that expensive to get printed

on machine
i need to make the end mounting parts
and then a variety of cable clips and guieds
ashen moat
you're very good at industrial design renders.
 vocal flax
If anything i do costs just about as same as genuine igus part I'd assume I'm losing money.
My things don't usually home up as well as genuine igus
balmy pulsar
vocal flax
If anything i do costs just about as same as genuine igus part I'd assume I'm lo...
You are in the wrong hobby. igus is cheap. 🙂
the benifit of the printed one is i can size them exactly as needed with specific bend radii and make custom end connections. mine cost about 2.60 per link. a similar igus is about $2. one from misumi is $5+.
so its an acceptable middle ground for the advantages.
(also remember this is a $10000+ machine, not $299 so what is "cheap" changes)
vocal flax
Time it takes to design and stuff. For me, time is a scarce resource these days and I am not a speedy designer.
Also, it's a hobby for me. I'm not a ME nor planning on doing this professionally.
I designed this enclosure for my Arduino mega and ramps. I will print it with PLA in this orientation. I wonder if these slots will make the box feel flimsy. Does anyone have guesses?
 balmy pulsar
will be fragile inthat area yes.
vocal flax
balmy pulsar
will be fragile inthat area yes.
Do you think half slots will be good enough? Also considering making 45 degree slots (they look better.)
Additionally it has a cap will be bolted from top do you think it helps?
balmy pulsar
problem is layers. you have tiny lengths of filament. they will be prone to snapping.
balmy pulsar
think of a piece of wood. if you had the grain running that direction it would just break
vocal flax
Scared to print 45 degree but it might be only solution
balmy pulsar
if you had the slots horizontale, it would help more
but that has printing issue, support, etc
vocal flax
Well pin needles it is
ashen moat
it would take more effort to design, but the sides, or just the areas with slots, could be separate panels that slide/snap/screw in, so you could print them flat for strength.
ashen moat
vocal flax
Well pin needles it is
tiny rebar!
it might not be unique to klipper, but I really like being able to cancel individual parts from a build plate during a long print. if I catch a part detaching, I can tell it to stop air-printing that part and dragging spaghetti into the remaining parts.
I had a 6-hour print of about 30 small parts and 6 or 7 detached. the rest came out well because I disabled the detached parts.
I certainly couldn't do anything like that in the Marlin years
shy kelp
Some kind of joint that works well with flat thin parts? Puzzle like things don't hold. Glue and 3d pen soldering don't work with petg.
Easier solution may be making the part thicker and insertion joints inside, but it's more material
ashen moat
maybe LEGO-style print-in-place hinges?

 vocal flax
ashen moat
it would take more effort to design, but the sides, or just the areas with slots...
vocal flax
ashen moat
it would take more effort to design, but the sides, or just the areas with slots...
One of my design goals was to not do that
vocal flax
shy kelp
Some kind of joint that works well with flat thin parts? Puzzle like things don'...
Do conical hinges work well for you? Also are you willing to put some vitamins to build?
ashen moat
thin/narrow verticals are a really tough thing to make durable in PLA.
vocal flax
If vitamins allowed depending on friction needed, a pin needle, pieces of PTFE tube etc could work nicely
shy kelp
vocal flax
If vitamins allowed depending on friction needed, a pin needle, pieces of PTFE t...
Vitamins? What are you talking about? I'm thinking about supplements type of thing .-.
Hinges may work thanks, although I wished the parts to remain flat, but I guess I should compromise in some way, as the part is too big to be printed in one go
ashen moat
in some parts of the 3D printing world, especially the original RepRap project, "vitamins" are "things you can't print". like, when printing parts for a 3D printer, the rods, belts, control board, motors, wires, switches, hot end would all be "vitamins".
how flat are we talking? I would've called those hinges relatively "flat"
shy kelp
Ah now I see
vocal flax
Pin needles for shaft of hinge
You print the hinge (or part with hinge) add vitamin needle
Quite low profile
Conical hinge is bulky but print in place and fully printable
ashen moat
in PETG, depending on the application, a living hinge could be an option too
vocal flax
PTFE tube if done correctly low friction
ashen moat
PTFE tube is a good idea for a hinge pin; I always wonder if my scraps could be used for anything.
vocal flax
Single angled slit and wrap around the post
fervent lagoon
possibly "dumb" question -- if i have a filament that has a tendency to get a little stuck in the head on retraction, would running a second retraction with/without the filament lock set clear the head a little better? (i had to take it apart once already, but that was a lot less painful than i though it would be)
vocal flax
fervent lagoon
_possibly_ "dumb" question -- if i have a filament that has a tendency to get a ...
I am not sure if I understand the issue correctly but I used to use huge retractions (3 mm, 4 mm) on direct drive it jammed, because filament got retracted and solidified. When I decrease retractions (to 1.2 mm, 0.8 mm) it worked fine.
fervent lagoon
i don't have that kind of control over it (i don't think... yet 😈 ), but it's a bowden feed -- ironically, the filament that came with the printer which is supposedly the "niftier PLA" has a tendency to get a bit stuck in the head during retraction (e.g. won't pull out easily), so i was wondering if running retraction a second time would aid in clearing the head
vocal flax
Maybe slowing down retraction can help.
Is it k1? I expect creality to put accel and speed unreasonably high and get messy like this.
fervent lagoon
k1c 😏
ashen moat
your slicer should have a retraction setting. PrusaSlicer has it in printer settings, and allows you to override it in each filament's settings. there is such thing as firmware retraction, but I don't think it's common?
I usually run 3mm retraction on a ~500mm bowden, dropping to 2mm for filaments that gulp some air during retraction and later pop in the middle of a print line.
it could be like akir said, retracting too much and pulling molten filament up into the cold end where it cools and causes a jam. depending on the hot end design, there could also be a gap where the bowden tube meets the hot end opening, allowing molten filament to form a sticky donut disc at the bottom of the tube.
if you do a cold pull and pull out a chunk/disc, it could be the latter. make sure the bottom of the tube is sliced square with a knife (there's a handy bowden tube cutter tool for this, or you can probably print one), and make sure it's fully inserted, holding it in while you pull up the push-fit collar to lock it in place.
this used to happen a lot in old PEEK hot ends that used a captive piece of PTFE tube inside the cold end
fervent lagoon


sorry -- i'm talking about retraction during filament removal not post print, which is what i think you're talking about?
vocal flax
I do that step manually. Release extruder tension push it in before pulling out. Generally mushroom tip gets stretched out.
ashen moat
ah, I was talking about adjusting retraction used during a print. I think you're talking about unloading filament. I also do that manually. either while hot or after cooling to cold-pull temps. I have one stubborn filament that mushrooms and won't pull back thru the tube, so I usually have to disconnect the tube at the hot end and snip the mushroom off before unloading it.
fervent lagoon
same, just one filament type (ironically, the creality "higher quality" pla that came with the printer 😀 )
gloomy anchor
vocal flax
I designed this enclosure for my Arduino mega and ramps. I will print it with PL...
looks pretty cool, I feel like it would work
(with 50%+ infill and the right print settings)
loud silo
microcenter is blowing out the Creality Ender 3 V2 for $50 and Creality Ender 3 S1 for $70, in-store only. I don't own any Creality printers and don't know the value of this.
fervent lagoon
they're now discontinued, but that's like 1/4 of what you might pay like at amazon -- i've had really good results with my K1C "out of the box" so if you want another one or want to jump in, that's a REALLY good deal (c'mon -- $50 for a printer?)
faint pier
That's a pretty good value. If you are DIY-er, the Ender 3V2 is a great base to use for your robotics or other 3DP projects since you can utilize the motherboard, power supply, motors, and many of the extrusions in other projects. Even if you use it just by itself, it's $50 for a 3D printer! Though If you're looking at a printer to actually use, the S1 has auto bed levelling, direct extruder and PEI sheet so it'll be easier to start with.
vocal flax
The components worth more than 50$ to repurpose
steep umbra
if you're up for a bit of light arbitrage, refurbished ones are selling for more than that on ebay
balmy pulsar
i put my keycap files up if anyone wants a resin printing adventure. ha

 fervent lagoon
and this is the other reason i need a printer with an enclosure .... 😏
 iron remnant
Can't a void an enclosed printer.
Or, as far as the void's concerned "warmy boxy seat"
fervent lagoon
got a little too "bumpy" for Princess Void, but she did appreciate the floor show at the start
iron remnant
I guess she doesn't need the massage chair
 topaz viper
Are you sure that cat did not Void your warranty
 coarse ruin
if it fits it sits... even more so if it's warm
faint pier
@vivid helm I could not find Fabian's OG DIN rail brackets, but I saw that you had very nice remixes posted. Thank you for putting these up, the heatset remix works great! https://www.printables.com/model/472505-din-rail-bracket-redux

Printables.com
Parametric redesign of Fabian's DIN rail bracket model including selftap, heatset, and print in place variants. | Download free 3D printable STL models
vivid helm
faint pier
<@578805364019953715> I could not find Fabian's OG DIN rail brackets, but I saw ...
Glad you like it!
That reminds me I have more designs to upload at some point.
vocal flax
Upload them to git
iron remnant
If I had a bunch of time and didn't need to ... you know, work for a living... I'd totally build a thingiverse/printables-like site that was actually a git hosting service under the covers.
ashen moat
I use a couple of cloud services that automatically publish new revisions of code libraries you've written when they detect a new release tag in a connected git repo. no reaaon 3D models couldn't work the same way.
I have a big folder with all my source models, STLs, and 3MFs. a separate folder for each with its own git repo seems like a lot of overhead for small projects, but would be nice for larger ones.
iron remnant
Yah, like a lot of this goes back to my year at the 3D printed car company and looking at CAD/CAE/CAM and PLM systems from an outsider perspective and then doing various things ... and OK, so I'm not a mechanical engineer and definitely understand that "I could disrupt this, bro" is a counterproductive techbro thing... but ... still, it feels like there's some room for real improvement.
Overall, free idea, worth the cost you paid for it, but imagine if you were to take the way that Printables works... nothing changes, really... but under the covers it's just storing things in git repos.
Still have the interface optimized towards browsing a lot of parts, getting to the models, et al but now if you update a file, people can retrieve prior versions.
Okay, but then also now you can fork and that's a stronger link than just marking it as a remix.
Like, you could provide at least a decent amount of utility without even bothering to expose any sort of actual git interface... and, actually, you probably don't even want to expose a git interface most of the time because of the infra cost.
(Besides, it basically requires either Git LFS or potentially actual special-purpose magic)
 woeful carbon
I feel like forks are a bit weird be cause you would need to be able to cherry-pick/merge changes if you want to keep those forks up to date
And merging like that only really works well with text based files. I don't know how well you could merge changes made to a STL file if there have already been changes made to the file in the fork
fervent lagoon
i don't think you'd be able to do that, unless maybe gcode, but then i would consider it iffy
the thing about printables is that it's really a storage and indexing system, so something like git is (imnsho) a bit overkill -- the trick is the interface and how the file storage (images, models) is integrated with the indexing and presentation system
oh, and the money to run it
😀
ashen moat
STL can be either text format or binary, though I think most apps emit binary. I wouldn't expect a lot of merging STLs, though; they're output artifacts. that'd be like merging .zip or .exe files. GitHub can do visual diffs between STL revisions, though.
cloud git hosts provide some metadata to track forks, I think. there's nothing inherent to git that knows about relationships between repos, really. a fork's really a full copy with history. rev history can be great if your undo buffer runs out, or you want to roll back several files to a previous point where they all made sense together. or especially if your CAD files are actually source code.
I wonder if anyone's written command line tools for publishing models to thingiverse or printables
I designed stiffer carriages for my delta to reduce play in the motion system and expose the backs of the 15mm tower extrusions so I can mount things to them. wheel pressure is set with a screw that squeezes one wheel mount inward. it also lets me use drive lines with loops on the ends that can be unhooked rather than cutting and remaking/rethreading them if I want to remove a carriage.


I'm trying PETG-CF for the first time here, with some Atomic filament. prints really well.
I'm not happy with the metal rod ends I got to replace the original plastic traxxas joints, but it's about $90 USD whether I replace them with high-quality Igus KBRM-03 rod ends or get a full carbon fiber rod + magnetic ball attachment conversion, which seems better than pairing good joints with acrylic arms.
faint pier
folks use github repo for their documentation but printables for STLs and STPs
iron remnant
So I'm wrapping up the project that a nice lady convinced me to do by leaving it in my living room until I got it working and I have to say that it's quite satisfying to have all of the spare bits she'll need in a 3D printed gridfinity organizer that didn't really require any design effort because other folks wrote nice parametric OpenSCAD models.
ashen moat
I figured out that the wheels that ride on aluminum extrusions on my printer set rolling friction by tightening their axle screws, which works because it applies thrust pressure on the inner bearing race, trying to push it out of alignment with the outer race. that cannot be good for the bearings. probably time to look for new wheels anyway.
(each delrin wheel has two bearings loosely fitted into either side, held apart at the outer edge. the inner races are not constrained, so tightening axle nuts squeezes the bearings' inner races toward each other. tighten enough and the bearings won't move.)
ashen moat
though it seems like wheels for 15mm extrusion no longer exist, so maybe I'll stick with what I have and add spacers between the bearings instead. 😝
ashen moat
or maybe the thrust pressure is meant to take up end play in the bearings.
shy kelp
Lol when you drop a project because you can't find a way to do something, then randomly years later on a reddit feed, you see a stone that does exactly that
ashen moat
stone?
 merry blade
i got this weird axis shift on a cr-10 smart pro, not sure why? the lid on the floor printed just fine so not sure what happened


https://www.printables.com/model/944318-desiccant-container-for-creality-space-pi-plus/files#preview.file.tYpcZ
link to model

Printables.com
Desiccant container for Creality Space Pi Plus.
~ 300-350g. silica gel | Download free 3D printable STL models
vocal flax
@merry blade looks like overhang curled up and nozzle catched it and lost steps
merry blade
vocal flax
<@730588024924274758> looks like overhang curled up and nozzle catched it and lo...
i heard the nozzle dragging along the print, would that be a cause?
only started about halfway up
vocal flax
When you cool down the plastic it shrinks which will make it curl up
Then curled part is higher than nozzle
Nozzle catches that and loses steps
It is not a problem with non overhangs because plastic holds onto previous layer
merry blade
vocal flax
It is not a problem with non overhangs because plastic holds onto previous layer
how do i prevent it then? print on side with supports on?
vocal flax
But on overhangs it hangs onto the surrounding so they can go up nothing pulls them down
vocal flax
merry blade
how do i prevent it then? print on side with supports on?
Both probably would work
Just be careful about support distance to object
merry blade
vocal flax
Just be careful about support distance to object
what about the nozzle getting closer to the printer as the height increases? how can i fix that
vocal flax
Nozzle probably not getting closer to the bed that'd be more catastrophic I assume
 misty gyro
vocal flax
When you cool down the plastic it shrinks which will make it curl up
misty gyro
vocal flax
When you cool down the plastic it shrinks which will make it curl up
Regarding the model curling up, I just did a print today that suffered this problem really badly. Enough that the final model, which is in two pieces has a noticeable bulge in the middle.
Previous prints haven't done this, but the one thing that occurs to me that could be a cause is that I'm using some old filament that's getting quite brittle.
AFAIK, PLA gets brittle because it absorbs water, could that somehow make the shrinkage problem worse, leading to the curling?
fervent lagoon
what you might try is using a modeling program to split the upright part from the base and print them separately, with the upright flipped over so that the wider part is on the plate and you're not necessarily trying to print against gravity?
faint pier
printing overhangs slower and with more cooling would be ideal, along with tree supports
 raven hearth
anyone good with stepper motor drivers? I am trying to control a nema 17 with a tmc 2209 and a metro m7 airlift. ive got it working in step/dir mode but it spins really slow
any ideas?
balmy pulsar
speed is a factor of pulses per revolution. "full step" is usually 200. most drivers will have a setting to change this form 200 all the way up to 52000 or more.
so, you need to see what they drive is set to, then command it at the speed you want with pulses.
ashen moat
yeah, the datasheet should explain how the MS1 and MS2 pins are jumpered to configure microstepping. alternately, I think TMC chips can be controlled in UART serial mode, giving you more control over parameters like current and microstepping in software.
shy kelp
Besides bambu printers, what else is out there with an out of the box experience, that's enclosed? ~500, Like a core xy, no cartesian, as they overall require more space, and living in an apartment smells go all around
I already have two bed slingers but I never use them as they always require manutention, whereas the bamboo that I got a while ago, it just works.
vestal thicket
The Creality K1 comes to mind. Haven’t used it as I have a Bambu too
faint pier
Qidi has a line of enclosed printers, that also come with chamber heaters
honestly, none of them offer "out of box" that just works like Bambulab printers. They all have weird quirks or incomplete/very basic setups so some require fiddling around to get best results.
fervent lagoon
shy kelp
Besides bambu printers, what else is out there with an out of the box experience...
i recently got a k1c (which seems to always be on sale at the Creality site 😀 ) -- they say from box to printing in 3 minutes, so my experience of 5 minutes wasn't far off; i've had really good experience with it, except for one instance with the sample filament that got stuck and required some small disassembly, but the instruction video made it a snap -- printing at 200mm/s beats the pants off of other FDM types
my biggest "gripe" is the lid -- in order to keep the feedtube chain from banging against it, you have to print a riser to get it up off the frame by about 1"
iron remnant
Definitely something to flip your lid over.
fervent lagoon
whir, bonk,whir, whir, bonk, whir, bonk, whir, whir, whir, whir, bonk ... 😀
iron remnant
So fun thing about the Maker Faire is that I met the guy who designed my Voron.
 blissful marlin
Need some advice.
I am building a type of valve for water to flow through.
Basically it's a cylinder inside another cylinder and some holes.
The inner cylinder needs to rotate.
Got all that working so far.
My main problem is the gaskets/o-rings/seals etc.
I can't use standard sized ones because the diameter is too large. So I got some O-Ring cord and manually cut them and glue them - which seems to work fine too.
The problem I have is the "assembly" once I push the cylinders together with the O-rings there is a lot of friction and some of the O-rings seem to twist/get squished between the walls.
This makes it impossible to rotate and taking the parts apart again is also quite difficult.
Any ideas/suggestions on how I can improve it?
Rough sketch on how it looks
 faint pier
Does your design have O-ring grooves? Skipping the tolerance stackup review, I think you would need to calculate, or at least tweak through trial/error, the o-ring groove width and depth so that the O-rings sit in a good compression state (not too tight, but also not too lose): https://ceetak.com/o-ring-calculator/. If you enter the O-ring size into this calculator using ISO quick search, it will give you the parameters needed for the O-ring groove for a specific O-ring cross section width. there are other calculators available on the internet. You can ease assembly by using a lubricant such as a dielectric grease.
 blissful marlin
Yep got grooves
I think my main problem is that I have some "holes" in the cylinder and the o-ring gets kind of caught on it when getting pushed in
 loud silo
blissful marlin
I think my main problem is that I have some "holes" in the cylinder and the o-ri...
loud silo
blissful marlin
I think my main problem is that I have some "holes" in the cylinder and the o-ri...
could you install the O-rings on the piston instead of the surrounding column? I would also think you might want to re-size the whole thing so you can use standard-size O-rings. What is the current diameter of the piston?
blissful marlin
Actually I am putting the O-rings on the piston already
The piston diameter is around 117 mm
faint pier
So there are holes in the outside cylinder as well that the O-rings are getting caught on? Are the edges of the holes chamfered or have filets?
blissful marlin
Yes the outside cylinder has some holes.
In the current 3D print I don't have any fillets - but I am printing another one with fillets to test
blissful marlin
hmm still not working right. I tried a different model now


The O-ring gets kind of squeezed between the walls and then pushed to the next section and twisted around
loud silo
blissful marlin
The O-ring gets kind of squeezed between the walls and then pushed to the next s...
is the o-ring moving at the splice, or is it anywhere? The splice you described sounds like a weak point
blissful marlin
O-ring would be at any of these grooves here

Right now when I push it in it kind of looks like this
 faint pier
this is with a calculated groove width and depth according to O-ring cross section and diameter? A lubricant was used for assembly? The tolerances on the print are accounted for?
And to understand, there are 4 O-rings because they are intended to be used with holes in the inner cylinder to direct flow out?
The other suggestion I would have if the steps taken above don't remedy the situation, is to use a bigger cross sectional O-ring. This would necessitate a deeper and wider O-ring groove but those types of O-rings are less prone to slip out of their grooves.
balmy pulsar
A print is coarse with lots of friction. Needs lube. Also an install trick is to twist the part as you install, like a screw. That will help keep the rings seated. This is a pretty universal issue with o rings in general. They are not the ideal type of seal for this. Usually you use cup or wiper type seals for this kind of thing.
blissful marlin
problem with the cup/wider type seals is that it's difficult to "make" as a prototype
for the o-ring I can just buy some cord, cut it to size and glue
balmy pulsar
mcmaster sells all the cup seals you can want.
but yeah. protos are hard
what holds this part on as well?
a typical hose fitting (it looks like one?) will have the or ring seated at the bottom, held in by screw pressure.
blissful marlin
I will add a screw from the bottom later
 latent silo
Any ideas on how I would go about connecting this smoothly (loft doesn't work, it says something about self-intersecting geometry)?

 minor urchin
anyone have an idea for how to mount these into shapes? Was thinking about printing the screw in zip tie holders and changing the shape to match the ridge near the base. But thoughts are welcomehttps://www.adafruit.com/product/3869
No joke, we have been looking for this exact product for over 5 years, and we've finally got the perfect one in stock! You love NeoPixels, and you love silicone diffusion? Peep this ...
latent silo
vocal flax
easy answer is surface modelling
Thank you
balmy pulsar

In episode 39 of Project Binky - the one that nearly killed us - we encounter some problems with the quick and easy way of fitting a suitable dashboard. We therefore had to take matters into our own hands and learn a whole new set of skills while developing a novel way to make printed circuit boards.
Thanks for watching, apologies for the long...
does not compute
iron remnant
Huh.
So, yah, the melting temperature of solder alloys and filament is fairly close so presumably you might even be able to 3d print pewter.
I guess then it will be "does not com-pewter"
fervent lagoon
that is so metal
balmy pulsar
it is an interesting idea to print metal. an insane idea to make a pcb haha
iron remnant
One more step along the way of a house full of killbots if your printer gets remotely rooted.
ashen moat
that is a terrifying amount of scope creep, but I absolutely understand surveying off-the-shelf options and not only finding them all insufficient, but not even properly advertised, with crucial specs left undocumented.
blissful marlin
I am a step further now with my O-ring seal and 3D printed enlosure.
I increased the gaps a bit more, added some fillets and added grease. Now it slides in and does not twist the o-rings.
The problem is now that I have another part which is a bit more complicated. It is a cylinder with around 5 O-rings. (Basically separating different chambers)
I need the cylinder to rotate though which makes things more complicated.
When I try to assemble it and slide in the cylinder the first 3 O-rings go in fine and I am able to rotate it. O-ring 4 and 5 however seem to add too much friction and I am no longer able to rotate it
I was also thinking about printing the whole thing out of TPU instead so that I don't need the O-rings at all. But I am not sure if that would help the situation
blissful marlin
Was also looking at these type of seals - which might be a better solution?

But difficult to prototpye - they don't sell these as cords it seems
ashen moat
that looks a bit like an automotive axle seal. those will retain liquids while a rotating shaft passes through its opening, but probably aren't designed to handle liquid under pressure. though maybe other variants do? hydraulic and pneumatic cylinders do it somehow.
faint pier
Rotating seals under high-ish pressures use face seals. For example, in water pumps, the shaft sealing mechanism that separates the bearing from the fluid is a carbon to carbon face seal.
faint pier
You can be a bit mad and print your own face seals out of TPU, but i would peruse the McMaster-Carr catalog to see the various seals they have in stock
iron remnant
There was a guy at the Bay Area Maker Faire with a McMaster-Carr t-shirt. Apparently it wasn't part of their reward system, after you've reached the "you get the McMaster-Carr paper catalog" level, he had to make it himself for the lols.
ashen moat
I didn't know they had a reward system, heh
iron remnant
So, basically, if you are a big enough customer, eventually you get the paper catalog.
And then you know you've made it.
"made it"
And I've been offered someone else's paper catalog, but I don't really need it so I might as well hold off until earn it. Which may never happen, but a person can dream.
balmy pulsar
ashen moat
that looks a bit like an automotive axle seal. those will retain liquids while a...
Cup seal or U seal. they expand under internal pressure and seal tight, This is the type of seal in hydraulic cylinder systems.
blissful marlin
Looking into those cup seals at the moment. At the large diameters they get quite thick though
If I have a diameter of 100 mm or so they are 13 mm thick
balmy pulsar
100mm! thats crazy. i assumed the thing you had was 5 or 10mm
shy kelp
Hey everyone I’m new here! My wife and I are looking to build a wall lamp and I was wondering if I could get some advice.
The lamp is similar to this but I’m not sure what type of LED would be best here or how to plug it into a wall.
 ashen moat
I can't tell what part of it is light-emitting, but generally, starting with an off-the-shelf product that already plugs into the wall takes a lot of the guesswork out of the project. like an LED lamp, or under-counter LED lighting strips that can be cut to length.
for more traditional bulb/socket, search up pendant light sockets. long cord with a screw socket at the end that can make a good basis for a custom lamp.
blissful marlin
blissful marlin
O-ring would be at any of these grooves here
Going back to this "simple" gasket problem.
I now printed several versions and tried different kinds of o-ring seals.
It got a bit better. However even if I put 4 O-rings on it and fill the container with water it will slowly leak tiny droplets.
The best result I had was with EPDM seals (they are softer and squish better)
But I wonder if I can do anything else to improve the sealing. (Already using some grease)
ashen moat
as I understand it, it's pretty hard to make watertight FDM prints, much less when pressure is involved, besides water getting inside your prints, the mating surfaces for the gaskets are probably imperfect.
you might be able to use paint or epoxy to smooth and seal? though it may affect your clearances. there are also some products specifically for 3D prints, like Smooth-On's XTC-3D, but I don't know if they're any better.
the one time I tried XTC-3D, I either got the hardener proportion wrong or put it on too thick, and it was tacky forever, heh. 😔
blissful marlin
ashen moat
you might be able to use paint or epoxy to smooth and seal? though it may affect...
Yep coatings will affect the clearances unfortunately.
I did print a sort of cup earlier for testing and it was pretty much watertight with 3+ perimiters
 tulip crest
How do y'all generally weatherproof projects? My current plan is to 3D print an enclosure, coat the outside in PlastiDip, and put a TPU gasket in the lid seam.
What I'm less sure about is keeping the USB on the board port accessible, and whether or not I should fully enclose the radio antenna. It's short enough that I could, but I'm not sure if that's the best option
tulip crest
I'm not expecting to handle complete submersion, but it does need to weather potentially torrential rain
tulip crest
I will add that whatever I do does need to be reversible, since I'm likely going to be taking these apart eventually to repurpose the hardware for other projects
arctic dragon
tulip crest
How do y'all generally weatherproof projects? My current plan is to 3D print an ...
Something akin to https://www.adafruit.com/product/4218 would make it easier to seal the project while still having an available usb C port. I can't speak for the degree of waterproofing on this specific item, but it should be sufficient for splash resistance.

If you need to add a panel-mount connection but don't have the time or ability to cut a custom oval or square hole, this USB C Round Panel Mount Extension Cable is the ...
faint pier
You can also just use a PVC pipe with screw caps, which is a popular quick and dirty enclosure for weatherproofing small electronics projects. If it has to be specific then yeah, I'd probably use something UV resistant like ASA or PETG. Multiple layers, and a gasket
tulip crest
faint pier
You can also just use a PVC pipe with screw caps, which is a popular quick and d...
PVC pipe hadn't occurred to me but it's actually kinda perfect for what I need. I could definitely design mounting holes on a little sled designed to slot into PVC with a big enough ID, and put the USB port behind one of the screw caps
steep umbra
tulip crest
How do y'all generally weatherproof projects? My current plan is to 3D print an ...
You can get IP rated enclosures from digikey/amazon/other places for reasonable prices which include appropriate gaskets/o-rings. I would rather use that than try to engineer something myself. In terms of antennas, if it's small enough, and if the enclosure is all plastic, you can usually keep the antenna inside, but it's pretty common to drill a hole, mount the antenna, then slop on some marine adhesive or wrap it in weatherproof tape. If you're concerned about long term maintenance, humidity build-up, that sort of thing, you might also drill another hole in the bottom and add a vent with a water-resistant membrane over it.
the PVC pipe solution is also pretty reasonable, and a good starting point
oh, and for keeping the USB port available, you again do a hole in the bottom, bulkhead mount, marine adhesive around the edges, and a cap over the port. Check https://www.mcmaster.com/products/usb-bulkheads/ for some ideas about the port

Choose from our selection of USB bulkheads, including panel-mount USB adapters, panel-mount USB cords, and more. In stock and ready to ship.
ashen moat
yeah, if I needed actual water resistance I'd go for a premade enclosure with cable organs as necessary to run wires outside without compromising the seal.
 wraith oyster
Dont suppose someone has a solution for this, bought the parts to make my Prusa wireless (Pi Zero 2 W) and a camera so I can watch it (Pi Cam 3), and so I could attach it to the moving bed I needed a cable longer then 30cm, so I bought the CSI or DSI Cable Extender Thingy, and that seems to be an issue stopping the Pi from seeing the camera
I tested the connection without the extender, and with a different cable, its just the extender
Found a forum post where someone had the same issue, but there was no solution https://forums.adafruit.com/viewtopic.php?t=208093
 heavy ether
Does anyone have material suggestions for fdm printing what is essentially a lens hood? Trying to figure out a material for reducing glares and reflections.
 regal charm
I'd imagine dark, matte filament would work best. Maybe fuzzy skin slicing to further break up reflection?
balmy pulsar
heavy ether
Does anyone have material suggestions for fdm printing what is essentially a len...
i have a matte black pla. but probable best to flock it like a real lens hood if glare is important
iron remnant
Yeah that's an idea I too am flocking to.
faint pier
filaments with carbon fiber bits in it tend to have a matte sheen. That could be enough. PETG-CF is very nice.
balmy pulsar
to me thats overcomplicating things. flocking is easy and better anyway
heavy ether
balmy pulsar
i have a matte black pla. but probable best to flock it like a real lens hood if...
I am terribly unfamiliar with the construction process
It's for imaging petri dishes and it's going to be a controlled env
balmy pulsar
a shade has 2 ways of limiting glare. one is a matte black surface, and one is to trap light in colvolutions. A bellows shape does this, as done flocking, which is basically black fluff glued on the surface.
iron remnant
Vantablack paint would be the funs.
balmy pulsar
iron remnant
Vantablack paint would be the funs.
ha. is that really expensive?
iron remnant
balmy pulsar
ha. is that really expensive?
Stuart Semple sells Black 2.0 through 4.0. Never tried them but they claim to be quite black and are also reasonably priced…
heavy ether
balmy pulsar
a shade has 2 ways of limiting glare. one is a matte black surface, and one is t...
ah I see
I might just flock some cheap pla
 halcyon quail
moisture would be a culprit for PETG delaminating?
faint pier
I usually get blobs and stringing. I suppose it can cause delamination but unless you see the other symptoms of moisture, I would check extruder temp and fan speeds. What do you have both set at?
 amber basin
Moisture in PETG is an issue for many. It can reduce strength/interlayer adhesion and causes surface issues.
There’s an easy test if you have a battery powered hygrometer. Seal the spool in a ziplock bag with the hygrometer and let it sit for 12 or so hours. It works best with fuller spools. The hygrometer will give you an idea of the moisture content because the filament will either absorb or give off water to where the humidity in the bag becomes an indirect measure of filament moisture.
I don’t have extensive experience testing like this but have done some before/after drying printing tests. With PETG HF from Bambu, filament straight from the shipping bag (RH test in high 30s) gives doughy-looking surfaces, ridges along layer lines, and I see lifting at corners. After drying, I get smooth surfaces (besides the layer lines) and no corner lifting. I haven’t tested for strength. The RH test bottoms at 10% because that’s as low as my hygrometers I use with filament storage can read, but <10% after drying.
My experience is with PETG HF, though. YMMV. I need to say too that my filament drying is a little different than most. I purge my filament dryer with dry air using an aquarium pump flowing ambient air through a desiccant column. Different hygrometer and might not be super accurate but it reads 2% RH on the air purging the filament dryer with a fairly well used column. The flow sweeps moist air out of the filament dryer and removes the limitation most filament dryers have with ambient humidity. It has made a big difference in the quality of my prints too.
Also, the ziplock bag test is subject to error. Ziplock bags aren’t much of a barrier to moisture. Easy test is to fill one with dry air with a hygrometer in it and watch the humidity climb over days to near ambient. A second ziplock can make it more water resistant and the test more indicative of actual filament moisture.
Polyethylene cereal storage boxes hold moisture out much longer and are what I actually use. They already have hygrometers and without desiccant (which many add but breaks this test), I see if filament starts getting too wet.
halcyon quail
blobs, stringing, low bed adhesion, layer delamination…
220c hotend, 70c plate.
got annoyed and tried PLA on a fresh install of cura, and plate level… amazing results.
might have to give CF PETG a try
faint pier
You may want to try to print a temp tower to confirm, but for PETG I usually start at 240 deg C with very low fan (except on overhangs). 220 C I can see delamination being a possibility, especially if you are running that with 100% fan. I would try 240 deg with < 30% cooling fan and see if that helps. If it doesn't, it's probably moisture. If it does but you still get blobs and stringing, that's still due to moisture but probably isn't as severe.
For bed adhesion I also run at a 80 deg plate, but depending on your plate material I actually often have issues releasing PETG unless I use gluestick or something.
topaz viper
I do PETG at 250/80 with a slow speed first layer before speeding up.
Prusa MK3s+ with a smooth plate for a bed.
shy kelp
My jayo petg is all time 255/70C
With the side fan blasting air in it, as with smaller objects for some reason it doesn't print well without the fan
It's a real pain to glue/post process though
balmy pulsar
220 is way too low for petg. 240-250 is more the range as others say. (careful not to go too hot, its a narrow window before it scorches)
 spring grove
Ok, question...
if I want to get into soldering and FDM 3D printing, will I need two separate air purifiers specialized for each, or is there no need for specialization with air purifiers at that level?
faint pier
for soldering you will want a HEPA filter (smoke particulates), carbon (fumes), and a fan strong enough to move air away from your face. For 3D printing in an enclosure with something nasty/requires a heated chamber like ABS/ASA, it's best to have a recirculating system with again HEPA, carbon and fan. For unenclosed 3D printing with PLA/PETG... Honestly I have my printers in a closet so I just close the door and leave a small room sized filter on in there, but you can also do a more complex setup that moves air outside. So similar concept, similar materials, different form factor.
topaz viper
For Soldering you do not need to go overkill, Hepa filters and such, simply make sure that a basic fume extractor is used so that the fumes (Which are from the rosin/flux in solder) are drawn away from what you are soldering. Any basic fume extractor will have a basic filter in them.
iron remnant
There's a giant Nevermore filter intended for that use case because the filtration medium is the same either way.
faint pier
If you only have a few joints to solder it's probably ok to just move the fumes away from your face. But it's still smoke (particulates), so if it's not HEPA, it's not filtering. Probably more of an issue if you intend to solder for hours, but with filters being readily available for cheap I don't see any reason not to just get or build something with one included.
halcyon quail
alrighty -- i'll give those a try. however i still somewhat feel it could be saturated with moisture
halcyon quail
thank yall btw -- 235 temp, good extrusion so far, tiny bit of stringing, lets see
faint pier
you can (carefully) microwave silica beads, the type that comes in with packaging, to dry them out. Then shove them in a tight-ish fitting plastic box with the filament to get the moisture levels down. Or you can find an old food dehydrator that can carefully control temps to ~45 C and leave it in there for a few hours. Or, if you have an enclosed printer, you can heat the bed, leave the filament in there for a few hours with the doors closed. Or, you can find a consumer filament dryer solution.
regal charm
Cnc kitchen did a good video of silica a few weeks ago on YouTube. https://youtu.be/6tHInlFfMcM?si=qZpIFNDBvGSN5VXR
Check out https://www.pcbway.com for your high-quality 3D prints, PCBs, CNC'd, and sheet metal parts! Check out their material guide: https://www.pcbway.com/rapid-prototyping/3d-printing/
Over the years, I've collected a lot of silica gel packages and regularly put them into my stuff, hoping that they will keep it dry. These tests showed me tha...
halcyon quail
dang, this is somewhat a very particular material
halcyon quail
what a wonderful community
what a difference 3 to 4mm retraction makes, along with 70c plate and 235 hot end -- great adhesion, tiny amount of stringing, overall solid print
balmy pulsar
halcyon quail
what a wonderful community
what a difference 3 to 4mm retraction makes, along w...
Is there a reason you dont got the recommended 245? does the printer not like it? 235 is still much too low.
halcyon quail
better to increment by 5 and test than immediately jump -- Polymaker suggests 230-240, so i tried in the middle
halcyon quail
halcyon quail
better to increment by 5 and test than immediately jump -- Polymaker suggests 23...
same with many settings
arctic dragon
balmy pulsar
Is there a reason you dont got the recommended 245? does the printer not like it...
On most printers, it’s generally not safe to exceed 240 anyways. If there isn’t an all metal heatbreak, the PTFE heatbreak can deteriorate at temperatures above 240.
If it works, lower temperatures are generally safer for emissions in general as well. That’s also the main reason PLA is considered safer to print, because it generally prints at lower temperatures.
All things considered, it’s generally recommended to start at the lower end of the temperature range and test upwards in increments until print quality is satisfactory.
If you print a temperature tower, the opposite is usually applied because you want to start printing from a temperature where extrusion is guaranteed in case extrusion fails at a certain temperature, but generally manufacturers’ recommended range will always be in the “guaranteed to extrude” range anyway.
balmy pulsar
arctic dragon
On most printers, it’s generally not safe to exceed 240 anyways. If there isn’t ...
250 usually. but yeah. above 240 you need to be careful. make sure you got no birds.
255 it burns. but it starts off gassing before then
(i do bridge nylon at 250)
vocal flax
with mks one ill be adding full package (ts35 screen wifi module and tmc2209)
with btt ill be only adding tmc2209
current setup is atmega2260 + ramps 1.4 with a4688 and 1604 display
mks has fork fo rrf idk about btt (mcu supports but idk about fork)
faint pier
Are you switching out from RAMPs because you don't have enough IO
I've been using a RAMPs board with a Pi Zero loaded with Klipper and it's been pretty fast... for a Bedslinger.
vocal flax
faint pier
Are you switching out from RAMPs because you don't have enough IO
mainly swaping for the tmc2209. I know ramps but quality of life. I have this other printer with skr 1.3 card, and UI feels really responsive. Also in the past had some memory issues with the marlin. I don't plan on using klipper quite a while. never had any luck with SBCs. they always got corrupted within 4 boot. I'll stick to marlin or rrf.
ashen moat
I'd go with BTT because IMO Makerbase's documentation isn't very good. BTT is only slightly better, but you said you already have one SKR, so seems like it could make setup easier.
it does seem like a good candidate for klipper. if you have trouble corrupting SD cards, you could go for a board with onboard eMMC storage instead, like a BTT Pi 2 or a raspi CM4 with a carrier board.
shy kelp
Consider hackerboards website for comparison. The site has an old database, but it's still pretty usefull
vocal flax
vocal flax
poll_question_text
Which would you prefer?
victor_answer_votes
1
total_votes
1
victor_answer_id
2
victor_answer_text
BTT SKR PRO
 nova minnow
i have a humid room, my printer used to print great but now it's not sticking to the bed, stringing and i don't have any filament storage (PLA), do you think it'd be that which is causing these issues and if so, would throwing my rolls of filament into the oven for an hour at like 50C or something to try and dry it out?
i do have a roll of filament that's still vacuum sealed and i might open it to see if it works but if it doesn't i don't want to spoil the roll
nova minnow
Update: I cleaned the bed with isopropyl alcohol and it started sticking but the prints wouldn't stick to itself very well and was very brittle so i inevitably opened up my sealed filament and it seems to be printing well
so im going to see if i can throw my other stuff in the oven or borrow a dehydrator
regal charm
Yeah, high humidity can have a big effect in print outcomes. Even sealed bags of filament can get "wet" over time (unless it is sealed in a nonpourous medium like mylar); most plastic packaging is not completely impermeable.
Drying guide for different filament. https://wiki.bambulab.com/en/filament-acc/filament/dry-filament
Bambu Lab Wiki
You could dry your filament and drop them in some cereal boxes for longer term storage. Most 4L cereal storage boxes you find online should fit spools. I use some from Skroam - they all seem the same design though.
faint pier
an oven might not be able to maintain the 55-70 deg ish temps needed (depending on filament- I assume you're having issues with PETG?). If you don't have access to a filament dryer or dehydrator, you can turn up the heat on your printer bed to a target temp and put the roll of filament on it. Then cover it with a cardboard box or something heat reflective if you want to get slightly fancy. Leave it there for 6 hours or so.
nova minnow
faint pier
an oven might not be able to maintain the 55-70 deg ish temps needed (depending ...
PLA
nova minnow
regal charm
Yeah, high humidity can have a big effect in print outcomes. Even sealed bags of...
the filament that should be dry looked like it was printing okay, once i took it off the layers didn't stick together
now im pretty sure it's dry, it had never been opened, vacuum sealed, had silica gel in it
and i only got it 3 months ago
so i think it's now tuning the printer to make it work
faint pier
the layers are delaminating?
nova minnow
i did print at 200, im on 210 rn cause i usually do 210, that typically works; it's annoying though cause it worked great and now it's being annoying
nova minnow
faint pier
the layers are delaminating?
yeah
and the infill was deplorable
when it broke off, it didn't look like what it should've
nova minnow
regal charm
Drying guide for different filament. https://wiki.bambulab.com/en/filament-acc/f...
thanks, i'll check this out
faint pier
temp is correct (for modest print speed/volumetric flow rate). I'm just wondering if your printer is underextruding for some reason. How does the first layer look?
nova minnow
i was about to just throw it in the air fryer for 4 hours 
throw a roll in, 50C
hahaha
multipurpose, eating foods coated in plastic fumes always sounds yummy
nova minnow
faint pier
temp is correct (for modest print speed/volumetric flow rate). I'm just wonderin...
well im using a raft but the raft looks good from what i can tell
all my old prints came out great; not touched the printer settings, slicer settings are all the same
i mean maybe the stepper motor for the extrusion is gone bad but i don't think so, the printers only a year old
i haven't replaced the nozzle since i got it so it may be in need of a new one
faint pier
extruder isn't slipping or doing anything crazy?
nova minnow
it doesn't seem like it is
looks pretty typical to me
made a couple adjustments and now imma print a benchy
see if that works well
nova minnow

that's more like it
25mm from bow to stern
no issues on overhangs
absolutely amazing print
thank you for your suggestions, i will use them to dry my filament
nova minnow
faint pier
extruder isn't slipping or doing anything crazy?
you were right, it was the ESteps, i measured it and it was extruding 94.4 mm when told to extrude 100mm
adjusted the E-Steps and it prints like a beauty
thank you for your suggestion
nova minnow
been baking all day (i've had my filament spools in the oven for the last 3 hours )
regal charm
Probably a little late now, but some people weigh their spools before drying to know how much water weight they baked off and have a rough idea of when the spool is done giving off water by measuring weight along the way.
vocal flax
ashen moat
I'd go with BTT because ~~IMO Makerbase's documentation isn't very good. BTT is ...
I don't get the point about documentation. Seems like makerbase's documentation is more complete. Their GitHub has all the details you need and uses it quite effectively. Unlike BTT which is kinda painful to navigate.
ashen moat
vocal flax
I don't get the point about documentation. Seems like makerbase's documentation ...
you're right; when I wrote that, I was already struggling with another under-documented board of theirs (esp32 dual foc), and I didn't immediately see a pinout for the Robin Nano when I went looking. but it looks like there's a pinout diagram on their product page and in the github repo for the board (which they don't link from their product page 🤦♂️). if your firmware has community support for it, setup may be equivalent to the BTT mainboard.
I'd be interested to know if anyone's tried getting support from Makerbase before, and what it was like
vocal flax
Oh I don't think anyone getting 1st hand support from them. Also their website seems like it's just there in case anyone tries to take it. Their AliExpress page does link it so I didn't really think much of it. Additionally, I will be buying from a reseller so probably not eligible for support anyway. (Makerbase unfortunately doesn't ship to my country.)
I'm banking on "I'm an embedded systems engineer, I can solve my problems." (It'll end badly for sure.)
ashen moat
their website seems like it's just there in case anyone tries to take it.
this is the best and most accurate description of a website I've heard in weeks. 😂
vocal flax
Are these all bad? Seems like anchoring positions have lines between "perimeters"

 ashen moat
I can't remember, this is a pressure advance test, right? I think you're supposed to look for the best corner, then redo the test with a smaller range centered on that value?
faint pier
are you using a bowden extruder? I would say I don't remember blobs around the perimeter. I don't really remember if I had underextrusion between the lines like that. Why does it seem so stringy around the perimeter?
PA improves by 0.055, but it doesn't change much afterwards
vocal flax
Yeap Ellie's pressure advance
vocal flax
faint pier
are you using a bowden extruder? I would say I don't remember blobs around the p...
Retraction is %70 there not exactly calibrated
vocal flax
faint pier
PA improves by 0.055, but it doesn't change much afterwards
Default marlin is 0.22 which is huge compared to thos
vocal flax
faint pier
are you using a bowden extruder? I would say I don't remember blobs around the p...
It's titan aero clone
 vivid swift
Anyone have experience with Bambulab basic PLA?
How is it compared to Prusament?
shy kelp
vivid swift
Anyone have experience with Bambulab basic PLA?
How is it compared to Prusament?
Get whatever is cheaper, differences between brands are inconsistent
 coarse coral
Anyone else used esun filament? I had pla and would not stick to anything, anytime, anytemp I had to to return it
coarse coral
vivid swift
Anyone have experience with Bambulab basic PLA?
How is it compared to Prusament?
I quite like eryone and creality. I haven't spent much more money on filament but the eryone Matt colours are pretty sweet
I had success with eryone tpu also in but couldn't get good detail quality on a .4 nozzle and tpu. Too gloopy
Even with a .1 nozzle and tpu there's still a bit of seepage for detailed parts of a print
I'm eating ham hem. What a time
arctic dragon
I've used eSun in the past. I don't think they are the absolute best in my opinion, but also never had any major issues with it either. I generally had more of a bias towards Overture and MH Build back when I still used my printer, but eSun was just fine for the price.
Never tried TPU so your mileage may vary.
coarse coral
Oo can agree overture works out well. Actually has that as a follow up to the esun, I didn't recognise that it worked well until using the last of the spool to confirm my calibration and recalibration wasn't borked. So yeh I generally consider eryone, overture, creality as safe choices. Nice and sticky and good colours
My online buddy got a creality k2 I'm pretty jealous. 30,000ms print speed. Not slow at all
faint pier
Generally I don't think that PLA is a very difficult material to print, unless you are looking at matte or 'silk' variants that have lots of additives. They're all pretty similar
vivid swift
Thanks for your inputs, guys 🙂
ashen moat
I like all the Sainsmart TPU I've printed. it helps to slow down. on a bowden, it also helps to make all speeds equal and disable retraction. I used to have to print at about 10mm/s at 0.3mm layers, but I think I can do 30mm/s now with a good extruder and the right temp.
coarse coral
@arctic dragon having now got a fresh role of eryone pla. I was more impressed with overture. Was way more sticky
Funny how I was able to converge and agree with you on that. Overture is now my better priced pla choice
 coarse thistle
I have a Prusa i3 MK3S+ that keeps giving me the "THERMAL ANOMALY" error any time the hotend is past about 130C. I keep trying to do PID and thermal calibrations but it always aborts with the same thermal anomaly error. The nozzle has about a 0.5mm gap like the Prusa website says, the heat block is straight, I just updated the firmware, and there doesn't appear to be any filament blobs anywhere. At this point I don't know what else to do, maybe I have to replace the entire hotend assembly?

 faint pier
do you have a silicone sock?
coarse thistle
Yes, I took it off for the photos
I did a full factory reset and recalibrated everything and it seems to be working fine now
vocal flax


Sorry for the spam but I have this "slightly" moist filament does these seem good first layer? (First 3 pictures are bottom side)
regal charm
I guess it depends on how you are going to use it and how "finished" it needs to look. If I were just prototyping something and did not care about strength or appearance I'd say it is fine, but I would not use that for a finished product.
blissful marlin
I am back at my wateproofing problem from a few weeks ago.
I am working on a bit complex waterpump/valve system.
There are multiple pipes going into a valve which has multiple "floors".
Each floor needs to be sealed from the other one.
Basically there are 3 cylinders that sit inside eachother with holes on the sides.
Printing them was fine. I used 3-4 walls which seems to be waterproof for now ( will add some coating later to make it properly waterproof).
The problem I have is that the gaskets/o-rings make it difficult to insert.

Very rough sketch

I sanded every surface to be smooth already
and the gasket compression is around 10%
any ideas/ suggestions?
I was thinking of making the middle one just out of a soft silicone that compresses a bit? to avoid the gaskets
blissful marlin
the seal is 2.4 mm diameter - the gap is 2.3 mm
loud silo
@blissful marlin ok, I am thinking about this in a different way. Suppose you just wanted to make one rotating valve, and you didn't want to use internal O-rings. Imagine the actual inner rotating valve part is a solid cylinder with a hole drilled through it. It fits in the outer cylinder, as you have. The outer cylinder is threaded on each end, and matching threaded caps with short inner vertical walls fit over both ends. The caps have holes that the inner cylinder fits through. There is a rubber washer (like a hose washer) that goes over the cylinder at each end. Optionally there could be a groove that the inner part of the rubber washer fits in. So instead of having to push an O-ring through a cylinder, the threaded ends and caps get tightened to compress the washer to make a seal.
Another way to think about this is that you're widening your O-rings to fit on a little shelf.
Now this is only one. Each valve would be its own sealed unit.
Another wacko idea is to use three ball valves and just link them together mechanically, outside, not inside.
e.g. link the handles of three of these together:

could be done in your own design by making the handle part come out both sides. In other words, isolate each valve and make the mechanical linking external
https://www.andersonbrass.com/multi-port-stack-valves is kind of what you are doing, but they are ball valves
ashen moat
vocal flax
First layer height
layer height seems uniform. no space between lines or over-squishing to form peaks. the wet filament might be causing some quality problems, but it doesn't seem like layer height is one of them.
blissful marlin
loud silo
<@284159082800218114> ok, I am thinking about this in a different way. Suppose y...
Thanks - yes I thought about having the 'vertical' compressed o-rings like the hose washer.
My concerns for that one are:
-
I still need like 4 gaskets for the different levels. Meaning they all need to work by compression and are kind of linked? It might leak?
-
I still need the dark blue part to rotate and I am not sure if those type of seals are good for that? I usually see rotary seals installed on the cylinder axis and not at the ends.
- Another problem is that the dark blue part has some internal paths that go to different end points so the ball valve method probably also does not work (unless I am misunderstanding that part)
blissful marlin
I guess the closest thing to what I am trying to prototype is a "multi port rotary joint" (sort of)

 faint pier
The best you can prob do with this sort of design is to make the middle cylinder a compressible/soft component, yeah. I'm thinking of rotary valve designs and they usually have much smaller sealing surfaces.
In the aforementioned ball valve design, the rotating ball in the middle is sealed with two simple O-rings that sit on the face of the ball and seals the small hole through its center, rather than having large circumferential O-rings that also have to float and locate it within the assembly. So the smaller sealing surfaces present less friction and smaller overall surface required to properly seal the assembly. In your case, rather than a single cylinder it might be better to present two separate individual assemblies (an upper and lower) with a shaft that keys them together. And rather than large circumferential O-rings it might be better to integrate something that simple seals each end of the through-hole. I think the key is to minimize the amount of surface area that needs to be sealed, and if those seals also don't have to locate or float it would really increase the chances of actually sealing and also significantly lower friction and wear.
You also have rotary valves that are kind of like Tesla's Octovalve design, and these are much simpler as they resemble 'paddles' and a small internal leakage is deemed acceptable.
loud silo
blissful marlin
Thanks - yes I thought about having the 'vertical' compressed o-rings like the h...
Can you say what the use case is here? What are the fluids,why do they need to be separated, why do they need to be controlled simultaneously, and where are they going and coming from?
blissful marlin
loud silo
Can you say what the use case is here? What are the fluids,why do they need to b...
- It will all be water but at different temperatures going to different places or mixing in a chamber depending on the rotation of the middle cylinder (which can rotate with a single motor)
- the goal is to later have a single "assembly" that can be moved to different locations and easily connected while also not taking up too much space.
blissful marlin
faint pier
The best you can prob do with this sort of design is to make the middle cylinder...
I wonder if there is some product that does this kind of "soft" inner component. I don't have anything in mind right now that could fit
Except maybe some sponge in a tube
faint pier
TPU95 probably closest bet
blissful marlin
faint pier
TPU95 probably closest bet
Yep - I meant a product reference that uses this approach
I guess this is the closest thing I could think of
 faint pier
many ball valves use a teflon or delrin inner and a brass or stainless steel outer casing
it's more extreme but that's an example of soft/hard
blissful marlin
hm but teflon is usually quite hard/rigid, right?
arctic dragon
It can be if it’s thick enough, but it’s soft enough to make flexible tubes like the Bowden tubes on 3d printers.
 dusk tangle
Hey all, I was printing all day yesterday with this filament (Overture Transparent PETG) and the parts came out great. I then switched over to some PLA for a few hours and kept the spool of PETG out on my desk. When I went to switch back to the PETG the filament was getting all clumpy as it was printing. When I tried again this morning it’s still doing the same thing. The settings were the same as the earlier prints (default PETG in Cura).
Is it possible the PETG didn’t stay “dry” enough sitting on my desk for a few hours? It’s 37% humidity in my room. Is there something else that would cause this clumping issue?
Filament: Overture PETG Printer: ELEGOO Neptune 3 Pro Parameters: 0.4mm nozzle, 0.2mm layer height, nozzle 235C, bed 80C, print speed 60mm/sec

 faint pier
it doesn't look like it's extruding properly. Did you purge the PLA from the hotend before loading the PETG?
dusk tangle
yeah i always do a purge in between of like 100mm @ 150mm/s. i just printed a cal cube in PLA and it came out perfectly. so i dont think its a nozzle issue?
I'm trying PETG again now, and it's actually looking promising. Maybe it was a pesky bit of PLA that was stuck in there. Just seems weird since PLA is a lower temp material so one would think it would clear itself out with a higher temp when i ran the PETG.
regal charm
tfw you weigh your filament (with spool) at 1232g and after 7 hours later in the dryer you weigh again at 1232g... 🙃
shy kelp
Some crap-posting: a plastic substitute may be wax/sugar-caremel, not as resistant, but maybe some composite may work better...
Neither cheaper, as, as far as I understand plastic is a byproduct of oil, which is also subsidized
But we all know that the real solution is famine/pests removal /s
faint pier
I guess this is the "crap-posting" part of what you wrote, but PLA is biomass and not petroleum based
shy kelp
faint pier
I guess this is the "crap-posting" part of what you wrote, but PLA is biomass an...
Yeah but it's not really compostable/biodegradable
steep umbra
it's not? It's sold as biodegradable
https://www.reddit.com/r/3Dprinting/comments/cij8a6/can_we_stop_saying_pla_is_biodegradable_or/ Some fairly reputable sources linked in there, but indeed, PLA is only compostable in very limited conditions, and it is more biodegradable than most plastics, but still not like... all the way, in a reasonable timeframe. Good to know.

Reddit
Explore this post and more from the 3Dprinting community
faint pier
Didn't know that was a criteria. If you're looking for something that doesn't require industrial compostable properties, maybe look into PHA.
steep umbra
I don't know if it is one, but I definitely see "biodegradable" and "recyclable" listed in product descriptions for PLA filaments
and it seems like while that's technically true, it's also somewhat misleading
faint pier
Specifically colorfabb PHA, I believe there are a few compost tests floating around. The material is quite soft and can warp so adjust accordingly.
arctic dragon
It is technically compostable and biodegradable, but it’s never going to become compost in your bin at home. While it is considerably more eco friendly than its petroleum-derived counterparts, everything is relative.
PLA requires some industrial level process to decompose IIRC
iron remnant
I got a set of peanut gallery people with my 3D printed booth at the Maker Faire about waste of plastic and ... ugh, I dono, the dialogue sucks?
Like, recycling aluminum is a clear win. Almost everything else is like ... are we coming out ahead?
shy kelp
arctic dragon
PLA requires some industrial level process to decompose IIRC
Which aren't even that common. Ie stuff gets filled in landfills/burned anyway
Taking a glance to pha, it isn't as cheap
faint pier
iron remnant
I got a set of peanut gallery people with my 3D printed booth at the Maker Faire...
Quite an interesting take to have at a Maker Faire. It's in the name- you come to a gathering where people "make" things and then criticize about "wasting plastic"?
Some people must feel really important that they can just go up to random people who invested time and money into setting up their hobbies at a Maker Faire only to tell them that what they're doing is wrong. Posers in any case, if they really wanted to be part of the solution they can set up a booth with inexpensive home plastic recycling solutions (a field that can genuinely use some innovative ideas for PLA and PETG). But chirping at people is much easier and lazier I guess.
iron remnant
So.... yeah, Bay Area Maker Faire 2024 where my friend and I both spent the weekend before the due date writing proposals ... and then we both got in, so we had our booths right next to each other. Cosplay with LEDs on her side, Gridfinity, HSW, and mass customization on my side, and we kinda traded off on booth duties.
So, I guess one of the points I was trying to make was that if we're all printing the exact same thing on our 3D printers, that's actually really wasteful because we might as well get it injection-molded, so we need to instead focus on the mass customized, which therefore also requires the community to get better at providing people with tools to make their own 3D prints without being CAD experts. Where HSW and Gridfinity are actually really good examples of this where it's a system with which you can just make the custom bit.
Also note that I was the least "fluffy" of the three people who were there all weekend, yet I spent some time talking to the person about recycling, the inability of plastic recycling, HSW vs pegboard, laser-cut gridfinity, et al. because I dono I'm fairly patient if you ask good-faith questions.
The two not-male people agreed that if the person had gone to them, they would have trolled hard.
And ... like, the answers suck? Generally my answer is "don't make stuff you are going to throw away"
But, for example, glass recycling seems sensible and actually kinda easy until you look at the energy cost of melting it vs getting fresh silica so a vague interesting unsolved problem is figuring out how to recycle glass without actually melting it. There was a fascianting talk I dropped in on from a guy who was mixing recycled glass particles with ceramics and a sintering process that fired it at a much lower temperature than actually melting.
And plastic recycling is easy until you get to the melting thing, where at the very least pulltrusion recycling of PET plastic bottles manages to offer a potential but not great answer.
My free pet idea is using shredded recycled plastics as a substitute for infill material ... some how.
Hence, "don't make a thing you don't need" and "don't make stuff you are going to throw away" and "figure out how to re-purpose things so you don't have to throw them away" are all great concepts that actually HSW and Gridfinity and other such systems do promote and that's the best answer other than "convince wealthy people to stop flying private jets"
So I guess I have the patience for it because I'd love to see someone look at particle board or wood and one of the several really neat accessible CNC projects that were also on display and come up with some awesome stuff... it's just that yeah probably the person just wanted to chirp at all of the people displaying 3D printables.

Printables.com
Lightweight Gridfinity compatible bins mostly made out of cardboard. | Download free 3D printable STL models
steep umbra
I'd still like to see some more alternatives that are more recyclable and/or more compostable. I personally want to limit my environmental impact while still enjoying the benefits of new technology.
I bought some beyond plastics PHA, I'll see how that goes.
ashen moat
I've been meaning to try PHA, too. it'd be nice to have a more-degradable replacement for PLA to use for prototyping, when you're printing a lot of revisions that are probably trash-bound.
faint pier
For PETG and PLA recycling the process of cleaning, grinding, drying, and re-extruding is possible to do at home, but it's either super expensive or very tedious. From what I've seen it might be better as a makerspace project since the material investment into the tools is pretty extreme for home hobbyists. I've also seen people recycling PET bottles into filament, but honestly I'm not sure if that's a good use of it since that material is probably the only plastic that is actually recycled (into new bottles or into clothing).
ashen moat
yeah, I like the bottle spiralizers used by the DIY filament extruders.
wraith oyster
My printer keeps having solid infill issues which are getting really annoying


 wraith oyster
Ok, I think its a mix of speed, and humidity
Lowered the solid infill speed from 200 to 75
And it seems to be printing pretty well now
ashen moat
depending on your layer height, you could be outstripping your hotend's maximum flow rate. there are flow rate calibration models you can print to check. once you know your max flow rate, you can usually add that as a slicer setting and it'll cap your speed to stay under that max. you might request a 200mm/s feed rate, but the flow rate cap can limit the slicer's output speeds below that.
shy kelp
within cads is there anything like rhino grasshopper, but faster? Each time that it recompute the geometry it takes an ethernity! sure you can workaround using faster blocks, but not quite an experience, and when things get big it doesnt quite work anymore;
Blender is not a cad, and I'm not quite familiar with their nodes, I dont know if it would be the same as with grasshopper.
Openscad looks annoying to use
arctic dragon
shy kelp
within cads is there anything like rhino grasshopper, but faster? Each time that...
I’ve never used rhino grasshopper, but any full recomputation of geometry tends to take a long time for more complex models. For generative algorithms, openscad may be your best alternative despite the learning curve, but for parametric modeling pretty much any mainstream cad software should work. Is there a specific feature you’re looking for?
shy kelp
arctic dragon
I’ve never used rhino grasshopper, but any full recomputation of geometry tends ...
Not really, anything that cuts on computing time ideally, because in the end they sort are all the same, just the naming of things changes
I don't know, many software houses, or maybe it's more down to hardware manufacturers, like to sponsor about multithreading, or gpu computing. Yet most of the software seems to be single threaded except for few functions within the program like rendering
What I also find particularly annoying, is that grasshopper doesn't give you en estimate, but just the whole program freezes for like an hour, and then you don't know if it has crashed, or you should wait extra time or what
steep umbra
Is anyone aware of any generative AI tools that can generate printable 3d models?
shy kelp
steep umbra
Is anyone aware of any generative AI tools that can generate printable 3d models...
If you want a stable diffusion for 3d, stuff is not quite there.
Although I've seen some using stable diffusion to generate a 360 view of a subject, and then using photogrammetry to get a 3d view. I dunno though how usable is the mesh generated in such way.
There are other libraries/toolsets to get basic characters, such metahuman, treegenerators and so on
steep umbra
shy kelp
If you want a stable diffusion for 3d, stuff is not quite there.
Although I've ...
I'm looking for something much more simple. Something like, "I have an object of this size and shape, with these ports. Design an enclosure that leaves access to said ports"
arctic dragon
shy kelp
Not really, anything that cuts on computing time ideally, because in the end the...
The nature of the math behind most of the computation behind these other processes is unfortunately quite sequential, so the integration of true parallel threads only provides a limited benefit. Rendering happens to be the drawing of a very large number of triangles, so that has almost no dependencies on anything other than perhaps the adjacent triangles.
The freezing aspect is poor management of displaying computational progress, but despite the poor UI it could have some benefits in speed and efficiency.
My advice would be to keep a resource monitor open, and get comfortable with reading cpu and disk usage to identify whether a program is actually stuck or just unresponsive due to blocking tasks running.
 toxic kite
I dunno how good it is, but I recall more recent SD having depthmap support?
shy kelp
arctic dragon
The nature of the math behind most of the computation behind these other process...
yeah I read the same answer in the rhino forums. Multithreading computation, across suites is usually limited to some function, as with rendering, or simulations, and implemented in a few hand of suites.
I don't actually know how those things work under the hood, so I leave at that. Yet I wish there was something faster or that at least gave me an estimate
Definitely not going under the rat nest of trying to program those, multithreading is already a pain by itself, add that cads use all proprietary stuff and if not it's an absolute nightmare, but I can at least complain lol
 lethal oar
steep umbra
Is anyone aware of any generative AI tools that can generate printable 3d models...
lethal oar
steep umbra
Is anyone aware of any generative AI tools that can generate printable 3d models...
I haven't done much more than a cursory test, but Gemini will generate some python openscad code that could be a start
iron remnant
https://zoo.dev/ is doing things

Zoo
Zoo creates infrastructure for hardware design. We're laying the foundation for a modern hardware design toolkit, so that you can create new design tools never before possible.
I'd gotten to the middle round of interviewing there before the whole GPT thing hit and .. I dono, I guess I'm glad I didn't end up there because while they might be on to something interesting, I really can't get over my immense dislike of spicy autocomplete.
shy kelp
iron remnant
I'd gotten to the middle round of interviewing there before the whole GPT thing ...
I dunno, I feel like describing something (and getting it right), would be more complex than just drawing the thing. It's neither fancy as with sculptures, but bare primitive with bools.
Although that may be closer to what @steep umbra was maybe looking
Personally I wouldn't mind if autocomplete did actually work, but most of the time it doesn't! In the end gpt is just like Google but with extra steps
iron remnant
Yeah, I think the problem is that GPT's can't "learn"? If you had a random kid doing some 3D design for you, they'd give you bad results at the start and then eventually figure out what you really meant. GPT's have a training process but they don't "learn" from past answers really.
But, overall, an intermediate language like OpenSCAD or Zoo's language is more autocomplete-ish than actual geometry.
But, of course, that still exposes the lie of GPT's. It only works because it's got an absurdly massive training set of other people's existing code written to solve similar problems.
Presumably if we ever actually get real AI's that aren't spicy autocomplete, the real-world Turing test is if it can generate novel 2D drawings and 3D sculptures without having to firehose the entire Internet to get things only somewhat right.
toxic kite
Creative abilities are usually a result of experience. Minimizing the required firehose is an interesting problem.
arctic dragon
iron remnant
Presumably if we ever actually get real AI's that aren't spicy autocomplete, the...
Is that an accurate Turing test, though? The problem with using that as a basis is application-specific AI tools for that already exist somewhere. The point of GPT is a large enough model that can have a natural response to a wider range of conversation topics. Drawings and models are only one of many aspects a large language model like GPT is expected to be able to provide.
iron remnant
I mean ... okay, philosophy?
The way that GPT's are assuredly confident at outputting really nice looking human-sounding text suggests that the pedestrian version of a Turing test is maybe flawed.
And, OK, part of the problem is that GPT's are still actually in the uncanny valley.
But a general purpose language model is still basically a predictive thing as opposed to an innovative thing?
Part of the value of human beings is that you can produce them in a very simple factory with unskilled labor and, as it turns out, not that much resource drain per human. And they can apply themselves to a wide variety of problems from philosophy to poetry to model creation to manual labor to engineering.
So, yeah, a "AGI" whatever that means version of an AI would be human like to the same degree, with adjustments for appendages not present and stuff.
Obv if we spend a significant chunk of the world's energy resources to make an AGI tool that's about as smart as a monkey, we've just invented a stunningly awful way to destroy the world. Which, if you compare the rate at which AI tools are burning energy to build GPTs that are presumably easier than actual AGIs against the rate at which computers have stopped getting better, seems uncomfortably high probability.
A painter in the days of the great masters was exposed to the world around them and probably not actually that many actual paintings yet they were able to produce beautiful paintings. A painter in the modern day has access to many orders of magnitude more reference paintings, but no human has been exposed to even a drop in the bucket compared to the firehose of your average training dataset that's necessary to produce a passable picture.
But, like, I could model things very causally in Blender's mesh editor or sculpt them out of materials at hand and they'd look ... roughly the same intention as what would happen if I wrote a slick little OpenSCAD script, except that I'd get it done a lot faster because OpenSCAD is able to automate things and the libraries available have snaps and joiners and stuff so I don't need to make a joiner from scratch every time.
So yeah dono, OpenSCAD or Zoo make it easy to apply a GPT to a problem to get interesting-looking results. Presumably a more AGI-ish tool might still get better results working with primitives and tools like OpenSCAD and arguably make the whole thing work better regardless.
I'm assuming the better results you get with a smaller training set, you'd potentially begin to approach the point where philosophically the thing is "creating" more and "autocompleting" less.
arctic dragon
I personally just don’t have a lot of faith in pushing AGI to do everything a human can. If it’s powerful enough to direct people to the proper, more specialized tools for particular applications, I think it’s in a great spot.
iron remnant
I mean .. the only faith I have in the AGIs is that because philosophy is actually hard and we have essentially zero understanding of how our own brains work it's probably more likely that we'll generate AGI via the current approach of trying to provoke a giant cosmic screwup than actually trying to write one from base principles?
arctic dragon
GPT is giving people the impression AI will eventually be able to do everything, but the function set is outpacing functional accuracy by a gross margin
If only expectations were realistic, and not the hyperinflated image of ai replacing anything and everything, I think the potential is enormous. I guess my bigger issue here is people took to GPT as a direct replacement for background knowledge and technical understanding.
iron remnant
Yeah, one of my business teachers had a catch phrase which was that the wrong answer to the right question was a lot better than the right answer to the wrong question.
I think the problem is that the field of AI has bequeathed the industry an endless variety of useful side quests that end up turning into something specific, while never actually making AI.
And, dono, that's the way for a lot of basic research? Smashing atoms together to figure out what they are made of is silly and the corners of physics with dark energy and quantum physics and stuff is a mess but the side quests there have been epic too.
Except that people are a lot more excited about AI actually generating AI than physics generating a grand unified field theory.
faint pier
Slightly related, I'm a bit surprised that Adafruit hasn't released more Tensorflow library related kits when AI first became a buzzword, since it is python-related and is "baby's first neural network". I was doing a data science related course and while I did not use it to create a LLM, I did end up creating a CNN to sort out cats and dogs with surprising accuracy (at least until you present with pictures of hotdogs) 😂
Anyways, all I can say for GPTs is that they have been incredibly useful when working with python scripts for the like of pandas and other well-known libraries. Given a proper description of what you want to achieve, I've often gotten a script that passes the sniff test, or otherwise just needs a bit of polish or definition. Where it falls apart is when you're dealing with APIs (where GPT just doesn't know anything about the API's structure) or when using incredibly niche libraries in Linux. It beats looking through all the nerd arguments on stack exchange, even though I'm pretty sure that’s where most of the answers came from 😂
The more low-level statistical machine learning processes (scikit-learn, PCA, k-means, supervised and unsupervised learning) are actually things I use every time I cut large data sets. LLMs not so much other than for help with coding help
As far as 3D printing goes, I think it would be nice to get a tool where if you give it basic dimensions, it can spit out an object with some parameters that you can further tweak. But we already have models like that for basic items like containers I guess. I do recall that one of the 3D printer manufacturers released a web interface where you can upload a picture, it will try to create a cartoon model out of that image, and spits out a .STL. It was not very good.
regal charm
Re: LLM to create 3d models, I saw this video the other day and could be a good starting point for experimentation https://youtu.be/ytomieYqUCQ?si=FcUzuFPzZJ4Lc8YO

Experimenting with Googles' new Gemini 2.0 Flash Experimental to control Blender with my voice!
Tools used:
Blender - https://www.blender.org/
Tinytask - https://tinytask.net/
Gemini 2.0 Flash (Experimental) - https://deepmind.google/technologies/gemini/flash/
 wind glade
I’m looking for a convenient way to store my filament but also keep it ready to print. I like some of the MMS systems out there, but I’m wondering if anyone has a favorite that they’ve printed multiple times. In other words, show me your super organized massive filament storage that still connects all filaments to your printer! (Or convince me why this would be a nightmare to take on)
iron remnant
So... yeah, that's a tricky one.
It feels like the latest open source MMS systems (ERCF v2 / TradRack / BoxTurtle) when installed with the extra bits and whatnot are OK?
Likewise, the Bambu system seems fairly solid as well?
And, yeah, if you are using them to change filaments between prints, that's probably a lot less likely to get hung-up mid print?
ERCF v2 and TradRack are designed so you can have a lot of lanes in ways that Bambu AMS and BoxTurtle aren't.
I guess there's a chart of nightmare and it was nightmare nightmare a few years ago and now it's just somewhat nightmare.
faint pier
If you mean to just hold your spools, the repracks out there seem to be pretty nice and basically ready to print
If you mean to actually store and dry filament, there's a couple of models out there that also allow you to print direct, such as from Sunlu and Polymaker. Sunlu has a 4 spool dryer and storage device, for example.
 keen raft
wind glade
I’m looking for a convenient way to store my filament but also keep it ready to ...
keen raft
wind glade
I’m looking for a convenient way to store my filament but also keep it ready to ...
I've been using individual cereal boxes, thinking I would handle them like cartridges than keep spools dry and allow printing from. But it turns out that storage isn't actually the problem, the problem is that the loaded spools aren't sealed. The better way would have been bigger storage boxes that hold more spools more efficiently long-term and some sort of active drybox for the ones that are actually loaded to keep them dry. But most commercial filament driers aren't good. They turn off after a while, can't dry with the lid closed, are not available for five spools, etc. And they're way overpriced.
I think if the space is available, the best solution would be a closed cabinet with a powerful dehumidifer for the printer and loaded filaments. Storage and drying can happen somewhere else.
wind glade
@keen raft @faint pier @iron remnant I hadn’t thought to mention that I’m not particularly worried about a sealed dry box. I’m using a smallish closet to house the printers and filament, and it’s usually a good 5-15% less humid in there. I mainly print pla, but do have some abs/petg/tpu I need to use. For that, I have a two spool sunlu dryer, which I have been using as a feed point for the last year.
My main goal is to simplify the filament swapping process, and basically make it super easy to choose what filament I use. When I’m feeling lazy, I sometimes will choose what to print based on what colors, or even sometimes just not print. So simplifying the filament swap will I think help me get back to printing. (So will selling my Ender 5 pro and buying another BL printer lol)
wind glade
iron remnant
It feels like the latest open source MMS systems (ERCF v2 / TradRack / BoxTurtle...
I haven’t paid too much attention to what version I’ve used or what it’s been called. One was really slick and had built in storage for build plates and tools. Another one was a little more bulky but I think handled the filament channeling better. I’ll need to look at these
Oh. @iron remnant I was talking bout manual systems, or maybe passive systems with no electronics
keen raft
For me, if I didn't have to worry about moisture, then just keeping a pile of spools and just loading whichever I want would be the most streamlined process. Everything I've tried to add something to this process makes it more complicated. I might also add an unload command to the end Gcode, because loading can begin with a cold nozzle on my printer, while unloading can't. That would give be the ability to immediately load something at the start of a print, without waiting for the nozzle to heat up.
faint pier
I just keep my spools on a shelf (similar to Reprack). Pull the one I want down. You can also make a variant that simply lets you print from the shelf, and then you keep your printer nearby to feed the spools in. Though rarely is "picking out a spool and setting it" the longest part about loading filament in a printer
People like to say that they like the ERCF and AMS-like systems for multimaterial printing, but honestly if I built such a sytem it would only be to facilitate my own laziness, so that I wouldn't have to manually swap filaments.
 half dew
faint pier
People like to say that they like the ERCF and AMS-like systems for multimateria...
half dew
faint pier
People like to say that they like the ERCF and AMS-like systems for multimateria...
This is the main thing I use my AMS for. You can't really print multimaterial unless they're all the same temperature and tpu doesn't really work well in the AMS so its more multi-color than multimaterial. The one exception is using a support interface.
iron remnant
So... there's gotta be some super-awesome 3d printable breadboards to be made using https://www.adafruit.com/product/6107 ...

Have you ever peeled the back of a solderless breakout board off and gazed at those smooth metal strips that are lodged into the plastic? Maybe you want to repair a loved breadboard, or ...
 frosty cobalt
Are there mail-order places that will do a one-off 3D print for an enclosure I need? For less than the cost of buying a 3D printer plus supplies that is.
keen raft
frosty cobalt
Are there mail-order places that will do a one-off 3D print for an enclosure I n...
I think if you place a small ad and offer some chocolate you probably have a good chance of finding someone willing to help out
loud silo
frosty cobalt
Are there mail-order places that will do a one-off 3D print for an enclosure I n...
There are many, many such places, in most countries. You can do a websearch for 3d printing service.
shy kelp
Maybe it's best fitted there. I pretty much wanted to use a Fea as a shape finder, by either testing multiple geometries at once in parallel then selecting the best, or use it as a node to do actions when x thing happens.
But what I am finding around for free like prepromax seems to be limited to launch simulations by an object at a time, and no way to automate it, unless maybe doing dorky things
 late ember
frosty cobalt
Are there mail-order places that will do a one-off 3D print for an enclosure I n...
late ember
frosty cobalt
Are there mail-order places that will do a one-off 3D print for an enclosure I n...
Do you have the design already?
frosty cobalt
late ember
Do you have the design already?
No. But it is for an Adafruit MacroPad, combined with an IR emitter so a little taller than the basic MacroPad. So about 2.5 by 4.5 inches.
late ember
frosty cobalt
No. But it is for an Adafruit MacroPad, combined with an IR emitter so a little...
I could print you a case, are you in the u.s.?
faint sky
PCBWay and JLCPBC offer 3D printing services (from China) at very reasonable prices with good quality. Adafruit has used them for some projects and the Ruiz brothers were impressed with the quality. One downside is it usually takes about a month to receive (slowboat from China). All you have to do is give them an STL file.
If all you need is to modify an already existing 3D model to be a little taller that can accomplished quite easily. If someone like Omri is willing to print and ship a single print to you that would be nice.
faint pier
Certain 3D printing Discords also have a buy/sell for printed components. The Voron Discord is active with buyers and sellers of printed components. Unsure about Bambu social media but I assume it's similar over there.
steep umbra
Context: new to 3D printing. If I find a PLA filament I like and want to buy a bunch, is it better to buy smaller amounts and keep it sealed until needed? Or is it going to absorb some humidity either way, and I just need to learn about drying? Or is that concern overblown?
keen raft
steep umbra
Context: new to 3D printing. If I find a PLA filament I like and want to buy a b...
PLA stays usable for a long time, especially if stored well. However: The sealed packaging it comes in isn't always perfect. And whenever it does pick up moisture, that's not just "in there", waiting to boil away during printing, but it also damages the filament chemically.
Personally, I think drying and dry storage are absolutely essential, even for PLA. Unless you live in the desert, you'll definitely see a difference in print quality.
steep umbra
Thanks for the feedback. Any favorites for dry storage besides a sealed box with desiccant?
keen raft
I think that depends a lot on your workflow. If you're new to 3D printing, my suggestion would be to wait a little and see how it goes. Dryers are ridiculously overpriced and storage solutions can quickly accumulate cost as well, so it'd be nice to start out in the right direction instead of starting over at some point.
faint sky
Can also get a dehumidifier that will help dehumidify the entire room. Also comes in handy if the hose on the end of the washer pops up and floods the entire house and you don't notice until water starts seeping under your bedroom door... That's how I got my dehumidifier.
Those things will remove about a gallon an hour of water vapor from the air.
ashen moat
moisture farmer
I've got a single-spool heated dryer, and it works fine for drying problem filaments. I feed all my filaments from that dryer box, even if I'm not drying them. I keep all my spools in ziploc bags with the desiccant pouches they came with. optimal? absolutely not. cheap & effective? IME, sure.
shy kelp
steep umbra
Context: new to 3D printing. If I find a PLA filament I like and want to buy a b...
Even if you buy them in bigger amount, they come in the same sized sealed spools.
Buying in "bulk" gives you discounts. Sunlu/jayo usually sells stuf for spool aroun 20ish each, if you buy 10, they cost around 8-10 each for petg/pla
faint sky
yeah depends on how much you print. one spool might last you a few days, weeks, or months. if you're going through spools every couple of days then buying in bulk makes more sense.
it's always nice to have a lot of different colors on hand but not absolutely necessary. i only buy different colors if i really want something not in black or white, per project.
ashen moat
I hadn't seen activated alumina desiccant before. its grain size is large enough that you can make or buy little canisters of it to toss in a spool or in an oven to renew, and it's apparently more absorbent than silica.
https://www.sliceengineering.com/products/filament-drying-desiccant
faint sky
toss in a spool. intentionally moving the water vapor to a sacrificial spool? sounds counter-productive.
hmm i wonder if a dehumidifier will work on desiccant. double the efficiency? 😛
faint pier
if you're careful you can just microwave silica beads
faint sky
I would rather not chance putting stuff in the microwave that doesn't belong there. I could see them exploding all over the inside of the microwave quite easily. It might be fun but the cleanup afterward wouldn't be.
keen raft
faint pier
if you're careful you can just microwave silica beads
That does work, but it also makes the beads fracture, even if you take it slow. Putting it in the oven is actually faster if you spread them out on a tray. It doesn't make a mess inside the microwave, because (at least at sensible power levels) they don't really explode, they mostly just shatter "internally". Similar to what an ice cube does when put into water. But you do end up with lots of tiny particles, which are very inconvenient to use.
ashen moat
when I wrote "toss in a spool" I meant the canisters fit inside the center of the spool for filament storage or during printing if you feed filament from a dry box with an edge-rolling spool holder where the center is left open.
 willow wasp
Just tried to find the "purge into infill" option when using multi material in prusa slicer. Had to turn to Reddit, but it's the cog by model in models list, then wipe options per model are there. https://www.reddit.com/r/prusa3d/comments/bqj6mk/how_to_purge_to_infill_in_prusaslicer/
@glossy light saves on the wasted filament.
Not sure on the Bambu slicer software, but maybe someone here knows or the interwebs can help
vocal flax
ashen moat
I hadn't seen activated alumina desiccant before. its grain size is large enough...
Still unclear that it can be renewed in kitchen oven safely, but if you have a garage and disposable oven I'm sure it'll be mostly fine.
 tender sparrow
Why does the filament twist like that over time

It starts out perfect then slowly twists to the point it comes off the spool like this
keen raft
One possibility is uneven grabbing force in the extruder
tender sparrow
How would i check and/or fix that
keen raft
No idea. I've only heard of this because Prusa's Nextruder has two screws side by side to adjust tension and apparently if you tighten these unevenly, it twists the filament. Maybe your printer has a similar setup?
tender sparrow
Doesn’t look like it
It’s a bambu lab A1 mini i got a week ago and i haven’t touched any calibration things anyway
faint pier
Did it slip off the spool one rotation? Maybe the filament just naturally has that twist in it? Hard to believe the extruder would be doing that- it's a single sided extruder with a single tensioner arm and straight cut teeth. Unless it's severely misaligned.
tender sparrow
It’s jumped off 3 times
The twist slowly builds until it’s able to jump over the side
It also happened with a different printer and a different filament
faint sky
Filament is twisted on the spool naturally as it's rolled into the spool. The trick is allowing your extruder to let the tension slip occasionally. Your extruder tensioner is too tight.
Another possibility is your extruder gears are not parallel. Inspect your extruder closely. You might have to experiment with it to get it just right. I've never had this issue so I can't give better advice. :/
What kind of filament spool that? Are you winding your own spools? I've never seen that one before.
tender sparrow
faint sky
Another possibility is your extruder gears are not parallel. Inspect your extrud...
If you’re talking about the toothed wheel and the free spinning disc with a groove in it they’re perfectly aligned
tender sparrow
faint sky
What kind of filament spool that? Are you winding your own spools? I've never ...
Bambu lab, no, it’s black PETG HF
tender sparrow
faint sky
Filament is twisted on the spool naturally as it's rolled into the spool. The ...
So lower the force the grooved disc is squeezing into the toothed wheel
i just realized i pinged you 3 times in a row, sorry
faint sky
tender sparrow
So lower the force the grooved disc is squeezing into the toothed wheel
Yes, that thing. Don't worry about pinging me. There are some people that dislike being pinged, I am not one of them. Anyone here can ping me any time 24/7, especially in the 3D printing channel.
tender sparrow
Is trial and error how I figure out the right setting or is there a better way
faint sky
yup, there isn't a way to calibrate for that kind of thing to help prevent twisting to my knowledge.
like with most things in 3D printer land trial and error is the way.
tender sparrow
That does explain why the problem mysteriously appeared and disappeared on my old printer
I messed with it a lot
Anyway, thanks
faint sky
When tension builds up in the extruder gear it should release the tension itself. When that happens you'll hear a clicking noise as the gear teeth skip.
tender sparrow
I haven’t noticed that sound with the twisting filament
faint sky
That's my point.
tender sparrow
I realized that after i said that…
faint sky
There is a goldilocks zone for the tension. Too much and it can't release tension for these types of things. Too loose and it might fail to grasp the filament enough leading to printing air. Trial and error will help you find the right balance.
Let's say you get a knot in your spool which can happen to anyone. With too tight of an extruder it could rip your spool holder right off. That would be an extreme example.
tender sparrow
Sounds fun
faint sky
You would hope the filament would break before that but I've seen it happen where someone's extruder was so tight it bent the spool holder and stretched the filament.
If you keep your filament dry using desiccant or drier then it will break first. Dry filament is more brittle.
keen raft
tender sparrow
It’s a bambu lab A1 mini i got a week ago and i haven’t touched any calibration ...
Isn't there some sort of warranty if it's only a week old? I'd ask the seller or manufacturer to fix it if I were you.
I don't think it's very likely that the filament comes pre-twisted on the spool. Filament is extruded, very similar to what happens in your printer nozzle. Imagine you keep extruding and wind the extrudate onto a little spool. How would you introduce a continuous twist into that process?
faint pier
To adjust the tensioner arm, there is a screw that sits on the side. If you haven't taken the assembly apart, start heating up the hotend and loosen the tensioner all the way. Then, grip the filament with your hands and start extruding a small amount while retightening the tensioner until it no longer slips in the gears (i.e. when it pulls the filament away from your hand when you're trying to hold/pull it- no need to overdo it, just need a 'reasonable' amount of gripping force to pull the filament through). You can also do it with the extruder off the machine- loosen the tensioner all the way, put in a piece of filament, "lock" the gear assembly using your fingers while pulling the filament with the other hand and adjust the tensioner in increments until it no longer slips.

but that aside, did you verify the filament is twisting? Observing and using either a marker or a tape flag on the filament to track the twist? I can't say I've ever seen this issue either. Usually when I get a jump off the spool it's because my filament holder spins too freely and the roll is relatively new.
tender sparrow
It is actually twisting
ashen moat
I can't say I've ever noticed that either, but my filament goes thru maybe 500mm of free air between the spool and the extruder, so it would take a ton of twisting for it to become a problem.
I've thought about adding a reverse bowden tube, but it seemed like it would make it harder to load/unload filament by hand (into a bowden extruder), and apparently twisting could also be a problem.
vocal flax
tender sparrow
Why does the filament twist like that over time
Because the filament goes counter clockwise rotation but reverse Bowden tube goes clockwise so the bending forces equalize at that position. also don't force it to not do a loop it would increase stress on the filament which can result in breaks
I'd advise not changing anything if prints don't fail.
It's more common with more rigid materials due to filament wanting to not bend 180 degree other way so it rotates and twists to align the constrained path with integral bend.
If filament catches the rim and gets stuck then print a wedge that creates a smooth path to not get stuck.
tender sparrow
vocal flax
Because the filament goes counter clockwise rotation but reverse Bowden tube goe...
Wouldn’t the loop slowly getting smaller put stress on it too?
vocal flax
filament would adjust itself as long as its not over constrained
like unspooling
if its constrained then stress rises and filament breaks
my spool holder moves around on the granite plate and the reverse bowden tube flaps around
iron remnant
Sometimes your filament is just too cool for spool.
balmy pulsar
CNC toys. that is all. 😛
 ashen moat
3D printed soft jaws for some kinda work holding clamp?
balmy pulsar
those are aluminium soft jaws
these are some super cheap vises. $73 each. plus $8 for the soft jaws.
:x
 spare garnet
hey, does anyone know a good 3d printer to help get me started at this? i dont know nothing about this, but i want to make my own parts for my arduino projects
keen raft
spare garnet
hey, does anyone know a good 3d printer to help get me started at this? i dont k...
If you're serious about it, get a Prusa. If you aren't or don't know, consider something cheap but expect less support and more frustration. Don't get anything without some sort of automatic leveling. Either way, spend some time learning about it first. It is an insanely broad topic and buying something with zero knowledge is never a good idea.
spare garnet
keen raft
If you're serious about it, get a Prusa. If you aren't or don't know, consider s...
thanks
keen raft
But I'm sure somebody else would recommend a Bambu or some other brand. There's a war going on for those willing to participate 😉
arctic dragon
Prusa is a nice premium brand that you can’t go wrong with 99% of the time. They’re far from the cheapest in its category, but they are extremely reliable and well-supported machines.
BambuLab is probably not AS reliable as Prusa, but you get a lot more features for your money. I’ve heard a lot more good things than bad for BambuLab printers, but they’re not perfect.
There are far cheaper printers too, if those are outside your budget. Some of those printers will require additional time investments, though. Sovol is one of the better budget brands from what I see and hear. Creality quality isn’t great, but they’re quite popular so the community is pretty sizable.
faint pier
Controversies with Bambulabs aside, I think the A1 and A1 mini are good low cost options to get into 3D printing. They work, they take a lot of frustration and guess work out of things.
steep umbra
I just got an A1 mini, and I'm pretty pleased. I'm learning a lot about 3D printing in a very practical, hands-on way. It's got a lot of stuff that makes it easy to just print, but there's plenty of advanced options to tinker with if that's what I want to do.
 carmine dune
Got some printers looking to get. Looking for reliability, and overall just want it to work and give really good quality with minimal work on it. I mainly print TPU and PLA. Let me know your thoughts and recommendations:
K1 SE: $329.00 (Is apparently a stripped down K1C not stripped K1)
A1: $339.00 (With all the stuff happening with 3rd party idk if its a good option anymore)
FLSUN T1: $399.00 (Is there actually a difference other than noise to the T1 Pro?)
K1: $439 (The K1C is too expensive rn)
FLSUN T1 Pro: $499.99 (Better than T1?)
I want to get back to a brand name. I currentl have a SovolSV07 Plus, and it has been riddled with errors where it stops mid print, random hardware failures and breakdowns, but still prints good. But want to get another printer that is more modern and has a name brand backing it with support.
Any recommendations other than those printers is greatly appreciated.
keen raft
carmine dune
Got some printers looking to get. Looking for reliability, and overall just want...
In my experience, "support" from Chinese companies (which includes everything on your list) is just a marketing show without any real intention of solving your issues. It always follows the same pattern: Superficial diagnostics in friendly tone but bad English, requests for a ridiculous and unnecessary amount of "proof" that something is wrong, then the cheapest possible part that might solve the issue gets sent out to arrive in two weeks. At every step, they hope that you give up and go away. If nothing works and you insist on a solution after repeating this cycle two or three times, they ignore you.
This doesn't say anything about the build quality or print quality of these machines, of course. Just be aware that a big brand name has nothing to do with big support.
shy kelp
carmine dune
Got some printers looking to get. Looking for reliability, and overall just want...
I'd plain avoid the standard creality k1, you can see my previous posts. as far for warranty, they gave me plenty of replacement parts, which never end up solving the issues, shipping was quite fast though. can't tell the others. As far for Bambu's if you get it sooner you'll likely get the old version, I can't really tell from now if it's really a drm, docs are like barebones.
carmine dune
shy kelp
I'd plain avoid the standard creality k1, you can see my previous posts. as far ...
Would the K1SE be a good fit then for the price?
I probably should have left the a1 off, at this point I don't want to deal with a company that treats their stuff like apple.
Kinda shows their intentions now.
shy kelp
carmine dune
Would the K1SE be a good fit then for the price?
I dunno, I don't have first hand experience with it, nor I know it (there's so many new releases, that I can't keep up with them), if you're looking for reviews... just see the negative ones, the internet is full with shillers nowdays
carmine dune
shy kelp
I dunno, I don't have first hand experience with it, nor I know it (there's so m...
I'll look more into it. Just hard to compare them all. I have had all bedslingers and want to get something that focuses on quality
And reliability
I've gone feom ender 3, to neptune 4 plus (horrible) now to sv07 plus. It had firmware issues and has had quality degrading. I want something that's more plug and play and not worry about when I press print it's not going to break and have firmware that stops half way through.
 gusty sorrel
Does anyone have a scale model stl file for headers?
I'm new to 3D modeling...
arctic dragon
carmine dune
I've gone feom ender 3, to neptune 4 plus (horrible) now to sv07 plus. It had fi...
Before you really get super into the nitty gritty details of things, 3d printing is still very much a fairly technical hobby. The less you pay for the features on the printer, the less likely you’re going to be well supported when issues almost inevitably arise. Juggling cost and reliability is always going to be a difficult question, and if you can’t afford the time diagnosing your own printers, I’d stay far away from 90% of the Chinese printer brands.
BambuLabs, despite their own controversies, are one of the better companies when it comes to supporting their hardware, at least relative to the others on that side of the world. If you want to take zero risks with quality, Prusa is the top choice, but you do pay a premium for it. The A1 printers are probably the best compromise you’re going to get if the Prusa mini isn’t large enough for your purposes.
carmine dune
arctic dragon
Before you really get super into the nitty gritty details of things, 3d printing...
I've been in the 3d printing world for 6 years, just have not followed the updates in a year ow two. I don't want a bambo because I hate what they are standing for. Like I said forget I even mentioned it. I really am looking for a recommendation or comments on what I have there. Support isn't that big of a thing. Biggest thing is if it works. I can diagnose and things like that, but I run a side buisnes while in university so I don't have time to fix issues all the time and have the printer down for that long. I understand there is a level of hobby involved that I'm still here foe, but I want something that has more advanced features that make it much simpler to get a first layer, reduce random issues, etc. A Prussia would be perfect but they are overpriced for me. I don't have the funds for that.
shy kelp
carmine dune
I've been in the 3d printing world for 6 years, just have not followed the updat...
prusa has gone less open than what they claim to be
By fair the p1s that I got a while ago, just works, most of the time. the support is also pretty great.
the most recent controversy, it's all smoke imo, nothing concrete yet
also side note, with the whole openess that those companies claim to have, I'd say like half of their hardware can't be found at sale, nor they do give you docs, pretty much open huh?
keen raft
carmine dune
I've been in the 3d printing world for 6 years, just have not followed the updat...
The most hassle-free way to ensure first layer quality is a load cell that senses bed contact with the nozzle tip. This not only detects an uneven bed, but also eliminates the need to set Z offset, even after a nozzle change. It's a game changer. Not sure who uses something like this though. I once tried the Anycubic Vyper and it was a complete dud, but that may have been bad luck.
faint pier
The recent eddy current probes with contact touch auto-Z offset seems to be end game
faint pier
carmine dune
I've been in the 3d printing world for 6 years, just have not followed the updat...
6 years I would say you either build your own (Voron) or bite the bullet and get a Bambulab printer. It really depends on what you're after. If you cannot tolerate downtime and fiddling and need things that print out of the box, then Bambulabs (and Prusa, for extra cost) is the way to go. If you have the time to build and set up a printer to be as or more dependable, many folks have thousands of hours on their Voron machines but it takes time and effort to get it set up- and perhaps more willpower to bite the urge to add upgrades.
ashen moat
the latest FLSUN deltas use load cells for bed levelling, I believe. the present crop of eddy current sensors don't work on deltas.
blissful marlin
Question:
I have this model here with these kind of ribs that form an overhang. I later need to add some O-rings here
What would be the best way to print this?
-
I guess I can do PETG + PLA supports but then I have to set purge to like 500-600? Lot's of wasted filament and increases the print times a lot.
-
I also tried to add 45° angles to the ribs - but this is a problem for the O-ring => it gets pushed up which is not ideal.
-
I could change the Z-distance to make supports easier to remove (with same material supports) but then I probably don't get a good surface finish? And trouble removing supports in general.
Something else I can try?
 ashen moat
you may be able to tip the model 30-45 degrees to one side so only the tips of the ribs need support on one side?
blissful marlin
That makes it a bit problematic later because it needs to go into a circular hole
and it doubles the print time
ashen moat
your printer is dimensionally accurate in X/Y but not Z?
you may also be able to pre-print physical support objects and slide them onto the build plate at the appropriate layer, like a cylinder cut in half with the object negative subtracted from each half. a release agent like some sharpie on the top of the support face could help separate them. you might need to add/remove several of these objects during the print to support each of the ribs sequentially.
or, you could slice the object into parts and assemble them after printing like a layer cake, so the widest parts at the ribs are always printed on the bed.
faint sky
overhangs are doable

🔥My Favorite Starter 3D Printer: https://amzn.to/3hMi2r2
Favorite Mid-sized 3D Printer: https://amzn.to/3Eq9KNa
🌈BEST PLA Filament: https://www.printbed.com/home?tap_a=119803-9b31ae&tap_s=3212393-8f9491
Patreon Support: https://www.patreon.com/jjshankles
Support me on YouTube: https://www.youtube.com/channel/UCHH_3lX8QShJnhHVA422OCQ/join
Chall...
blissful marlin
faint sky
https://www.youtube.com/watch?v=sR2sz3sQjsg
Yes I guess that is what I need
keen raft
blissful marlin
Question:
I have this model here with these kind of ribs that form an overhang. ...
If you can do PETG+PLA, you can also do either of them with BVOH supports and dissolve them in water later. That would probably give you the nicest finish and the longest life for the O-rings.
blissful marlin
I am doing PETG+PLA already - but it wastes a lot of time/filament - which I was hoping to avoid
keen raft
And if you do end up using PETG+PLA through a single extruder, then yes, you'll have to purge a lot to maintain adhesion. But more importantly, the support will not stick to the model on either side, so you'll have to use tree supports and put the supports onto the plate as well.
keen raft
blissful marlin
I am doing PETG+PLA already - but it wastes a lot of time/filament - which I was...
That's why I suggested PETG+BVOH
tender sparrow
Why is the infill like that? It looks normal at the top but gets worse and worse near the bottom
 ashen moat
did you have an even first layer? problems like that can be cumulative. you could also try an infill pattern that doesn't cross itself, like hex infill. IME, some filaments (like PETT) don't like crossing themselves.
steep umbra
I'm having problems printing petg on a bambu a1 mini. Controversies with Bambu aside, what are some troubleshooting techniques to try to get it to print?
I started out trying it naively, relying on the handy app to print a benchy. After a few layers, I think adhesion failed and it started wiggling the bottom of the boat all over, and then just spraying filament every which way.
I tried increasing nozzle temperature, and the quality of the filament extruded looked better (it was a little cloudy @ 230C) but had the exact same problem.
Now, I was trying to print a temperature tower, but the nozzle clogged.
After cleaning up the nozzle, here are some things I'm considering: attempting to dry the filament, trying a bed adhesive, trying a hardened nozzle
tender sparrow
ashen moat
did you have an even first layer? problems like that can be cumulative. you coul...
It’s perfect, this is several hundred layers up
It is over an overhang tho
tender sparrow
steep umbra
I'm having problems printing petg on a bambu a1 mini. Controversies with Bambu a...
Have you tried cleaning the bed
Touching it with your oily fingers a lot can make adhesion worse
ashen moat
on Bambu bed adhesion: a hardened nozzle won't change anything. cleaning the bed, drying the filament, and using a bed adhesive could all help. you don't say what kind of plastic you're pushing, but 230C is kind of hot for PLA and kind of cold for PETG.
you could also try slowing down the first layer while you're dialing things in.
arctic dragon
ashen moat
on Bambu bed adhesion: a hardened nozzle won't change anything. cleaning the bed...
If this is to funkymark, he did mention petg.
tender sparrow
i’m having problems printing petg
ashen moat
arctic dragon
If this is to funkymark, he did mention petg.
ope, you're right, I missed that
 slate lance
steep umbra
I'm having problems printing petg on a bambu a1 mini. Controversies with Bambu a...
slate lance
steep umbra
I'm having problems printing petg on a bambu a1 mini. Controversies with Bambu a...
The things I have done to make the biggest impact on petg were nickle plated or teflon nozzles, nickle worked better for me, adjusting the first layer height to not over squish it and printing on painters tape.
ashen moat
in that case, check the filament manufacturer's instructions, but I'd expect PETG to print at 240-260C
slate lance
honestly, the nickle plating was the biggest impact. PETG won't stick to it so it goes straight to the board instead of sticking to the nozzle.
tender sparrow
The A1 mini ships with a stainless steel nozzle and i don’t think they changed it
slate lance
I was coming from a standard brass nozzle so it may not apply to you.
arctic dragon
tender sparrow
It is over an overhang tho
One possibility is that the stringing caused by the filament is touching the nozzle, causing plastic to clump up on the tip and drop in random locations. Have you tried playing with retraction distance at all?
tender sparrow
I did notice stuff very slowly building up on the sides of the nozzle but couldn’t figure out where it came from
slate lance
tender sparrow
I did notice stuff very slowly building up on the sides of the nozzle but couldn...
I was able to reduce that effect by using teflon coated nozzles but the teflon doesn't last long
vivid helm
tender sparrow
Why is the infill like that? It looks normal at the top but gets worse and worse...
What infill is that? PETG doesn't like infills that cross themselves on the same layer, so grid infill will tend to act that way. I suggest switching to gyroid.
tender sparrow
vivid helm
What infill is that? PETG doesn't like infills that cross themselves on the same...
That explains a bunch
I assume the PETG sticks up instead of staying part of the infill?
ashen moat
yeah, that's why I suggested hex infill
vivid helm
Basically PETG is very sticky, so when you cross a line you've put down on the same layer, some of the material sticks to the nozzle, which ends up dragging a lot of junk around.
Hex is ok but extremely slow.
tender sparrow
Honeycomb?
vivid helm
Yeah
ashen moat
I haven't tried gyroid
vivid helm
Gyroid is faster to print and it's isotropic (same strength in all directions).
ashen moat
sounds good to me
vivid helm
ashen moat
in that case, check the filament manufacturer's instructions, but I'd expect PET...
PETG is generally 230-250. 260 will definitely be too hot.
Oh, another thing about PETG: it doesn't like being printed fast. If you see edges starting to fold in, slow down.
tender sparrow
Oh and should i be seeing steam(?) when the printer is pushing a lot of filament at once in the purge chute for example
It’s not smoke because it disappears
vivid helm
A small amount is ok, but generally you should only see it in new nozzles as leftover mineral oil from the machining process is purged. If you're seeing it any other time, it means your filament needs to be dried.
vast salmon
filament have it own label what is printing speed
tender sparrow
?
vast salmon
like that Green PETG filament from creality have
 steep umbra
So to summarize things to try: nickel plated nozzle, try 250C, dry filament, print on tape, bed adhesive, clean the bed (I've done it regularly, but again can't hurt), change retraction distance settings
tender sparrow
The retraction thing was for me
tender sparrow
steep umbra
So to summarize things to try: nickel plated nozzle, try 250C, dry filament, pri...
I don’t know if they even make nickel plated bambu nozzles
I assume you’re using a textured PEI plate?
slate lance
steep umbra
So to summarize things to try: nickel plated nozzle, try 250C, dry filament, pri...
If you go from pla to petg you'll have a nightmare trying to get it to stick if you don't clean the bed very well first.
steep umbra
yeah, the default one. I'm pretty new to this
tender sparrow
Simple things first, have you tried re-leveling the bed with the auto level?
(Make sure the nozzle is clean when it’s doing that)
slate lance
I am not familiar with bambu printers but there is a hotend replacement that comes with a nickle plated nozzle

- APPLICABLE MODEL: This nozzle hot end kit adopt upgraded threaded nozzle structure, removable and separately replaced. Available for Bambu lab or mini 3D printer
- EASY TO REPLACE: This is an upgraded version, upgraded from the original, the original hot end extrusion head does not have repla...
I'm not suggesting buying it but it may indicate they exist.
tender sparrow
Btw https://wiki.bambulab.com/en/a1-mini the wiki is a pretty good resource for stuff
Bambu Lab Wiki
The main Wiki page of the A1 mini, containing all the links for various guides and information related to it.
faint pier
PETG tends to stick too well to PEI sheets (from what I've experienced). You can try using gluestick or hairspray if you don't have something else handy. I also print it with an 70-80 deg bed, and 250 deg nozzle temp. You want the fan speed to be low, I have mine set to 40% most of the time (single 5010 blower). The other thing to note is to start slow- I think this is an option in Bambuslicer but see if you can set the volumetric flow rate limit for PETG (in the PETG materials settings) to a low number. Talking about 8 mm/s^3. If this prints successfully, then you can do further tuning for volumetric flow rate as well as retraction.
Though I'm a bit surprised- does the default Bambuslicer profile for PETG not work? This is what I see when I select the profile in Orcaslicer for an A1 Mini, and this seems to be a pretty solid starting point under "generic PETG" (you might not want to select the "PETG HF" version)

 faint sky
tender sparrow
Why is the infill like that? It looks normal at the top but gets worse and worse...
faint sky
tender sparrow
Why is the infill like that? It looks normal at the top but gets worse and worse...
Is that image of your first layer on the bottom?
Can see separation between lines where there definitely shouldn't be any if it's your first layer. That means a simple bed leveling and z-offset issue, especially if the print starts leveling out and looking better at higher layers.
With PETG if your bed is too cool you'll have adhesion issues. If it's too hot you'll get elephants foot. Then there's the warping vs ambient temperature. PETG is tempermental compared to PLA. PLA is much more forgiving.
tender sparrow
faint sky
Is that image of your first layer on the bottom?
This is the top of a print i stopped several hundred layers up
keen raft
faint pier
PETG tends to stick too well to PEI sheets (from what I've experienced). You can...
Rubbing the plate on your (not make-upped) forehead and then spreading the deposited skin oils evenly across the plate also works, but getting the amount right requires some experience. Getting that experience may destroy a plate or two. Glue is definitely easier.
faint sky
Is the bottom warped at all that might cause a tilt to the entire structure?
tender sparrow
No
faint sky
Have you ever printed something that tall before with success?
tender sparrow
Yes
I’ve printed this exact model a few days ago
This is just 15% bigger
But it didn’t make it to the height of the original before i stopped it
faint sky
It looks like either the model shifted or your bed isn't level anymore. There's obvious signs the top of the image is printing ok but the bottom isn't on the same level.
faint sky
Is the overhang level?
tender sparrow
Wdym
faint sky
can you share a picture of the full model from a side profile?
tender sparrow
Not currently
I think i figured out the issue tho, i’m using a different filament for this one
Maybe the filament is just behaving differently which is causing print issues
faint sky
 steep umbra
So to summarize things to try: nickel plated nozzle, try 250C, dry filament, pri...
steep umbra
steep umbra
So to summarize things to try: nickel plated nozzle, try 250C, dry filament, pri...
I tried to clean the nozzle, check for clogs, clean the bed, 250C, order a dryer, and slow way down. Turns out the filament recommends 30-50mm/s, I think it was running at 150. Now printing a benchy at 250C, wish me luck
faint sky
If you can see circular shaped filament it means there isn't enough squish or adhesion.
Yes, classic mistake with PETG trying to print too fast. You can tailor your settings to print fast but you have to print slow before you can understand what PETG wants to be happy before you can go fast.
Other than that I'd say you're results are extremely impressive. You got that far at that speed, most people will fail at less than layer 10 with that speed. 😉
I can't print PETG faster than 30mms or my Ender 3 will throw a fit.
Your infill looks amazing btw. Struggling a little with walls at that speed but the infill is still better looking than most of my infills. Doing fine, just print slower.
tender sparrow
Me or funkymark?