#help-with-3dprinting
1 messages · Page 11 of 1
 faint sky
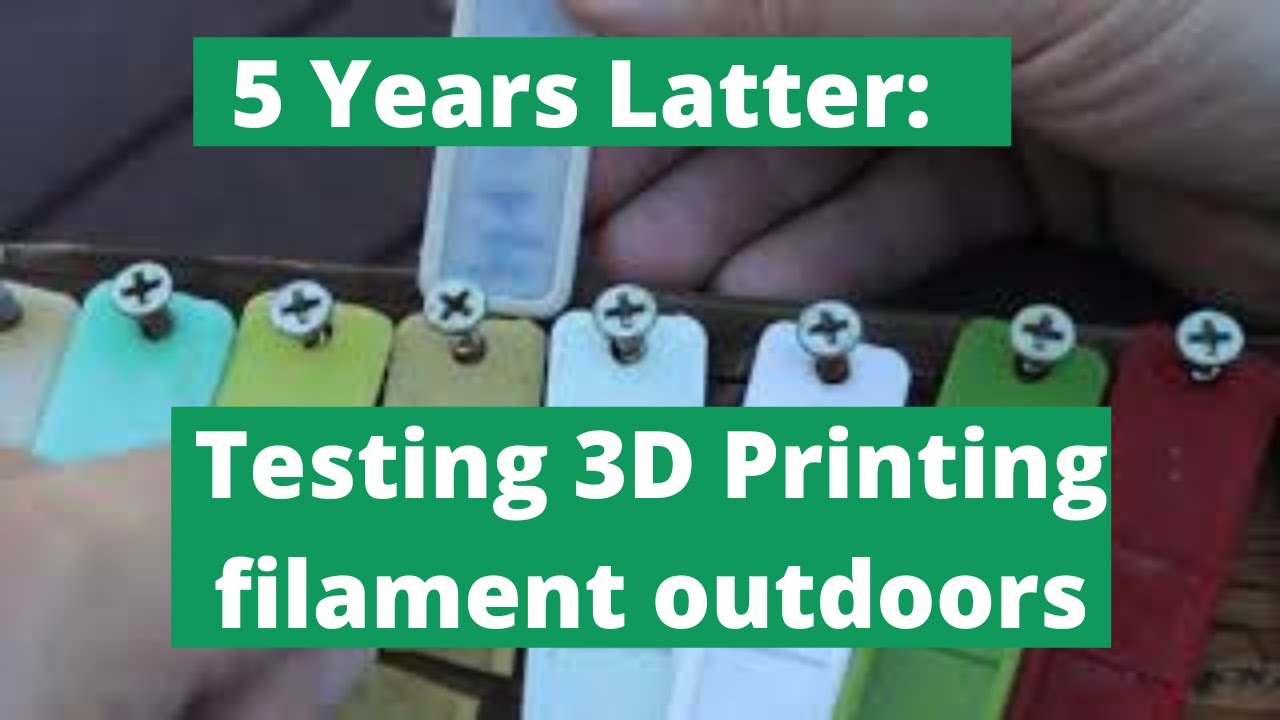
Starting in 2016 I put samples of the 3D printing filaments I had on hand outdoors. This board has been on a west-facing fence in Colorado. The last couple years the weather has been hot, dry and smokey.
The old blog on this can be found at https://3dprinterchat.com/filament-exposure-testing-results-after-3-years-outdoors/
**** Chapters ****
...
 coarse coral
Any tips to alleviate stringing? I've done a retraction test and adjusted slicer to the distance that looked best with the towers but in real world printing I'm still getting so much.
faint sky
calibrate e-steps yet? if it's pushing a little more out than expected could result in stringing or over extruding. if you're compensating for it in software that's a work around but still always good idea to calibrate e-step and PID tune.
coarse coral
@faint sky thanks. this will be a new addition to calibrate with. thanks, will check things online 🙂
 keen raft
coarse coral
Any tips to alleviate stringing? I've done a retraction test and adjusted slicer...
keen raft
coarse coral
Any tips to alleviate stringing? I've done a retraction test and adjusted slicer...
I've gotten rid of what stringing I had left by disabling Z hop, but (at least in PrusaSlicer) this often creates paths where the nozzle crashes into printed extrusions, so it doesn't work for many prints.
coarse coral
yeh z hop hasn't been enabled for me for some time
 winged helm
Are bed slinger designs really a lot worse than core Cy?
Xy? *
I'm considering a new printer. It's not currently possible to upgrade my mk3s to a Mk4 but I could get a kit. I or I could get a Bambu x1c
As far as philosophy of printing goes, those are about as far as you go, but I've already got the mk3s, now I want to try something new design wise
 arctic dragon
winged helm
Are bed slinger designs really a lot worse than core Cy?
arctic dragon
winged helm
Are bed slinger designs really a lot worse than core Cy?
Worse is defined by a number of different metrics. The bed-slingers are a proven way to get great quality for low cost, while the corexy machines can achieve higher accelerations with less impact to print quality. At the point you’re at, you’re basically paying more for what you want than what you need.
Comparatively, the x1c is a much better value right now, given the difference in features and performance. However, the upgrade is a matter of what makes you happier, and many metrics in that comparison are highly subjective.
winged helm
arctic dragon
Worse is defined by a number of different metrics. The bed-slingers are a proven...
My main concerns with the bamboo are with regards to repairability given that it is closed source, long-term reliability given the prior statement, and the cloud nature of it see above again. I don't like always online things unless I can't avoid them reasonably. That said it does look slick, and I can have one in about a week as opposed to a month for prusa. I have read that for mm prints with lots of different materials, prusa's solution outperforms Bambu. I would like to get into multi-material printing, but fast accurate prints are my most high need at the moment. All of that points to not prusa in this case, but my above concerns remain
I'm quite torn between the two, it's not like crochet is the greatest company to ever be involved with open source, but the waters around Bambu are Mighty murky
 iron remnant
I mean, I definitely wouldn't trust a Bamboo cloud product.
But, yeah, I'd really like that the 3D printer (and larger CNC/lasercutter/et al marketplace) doesn't end up like 2D printers ended up.
 vestal thicket
winged helm
I'm quite torn between the two, it's not like crochet is the greatest company to...
vestal thicket
winged helm
I'm quite torn between the two, it's not like crochet is the greatest company to...
If you have any questions on the Bambu, let me know. I have a P1P and my best friend has both the Prusa Mk3 and an X1C. I totally get the concerns about the cloud service and not being open source.
winged helm
vestal thicket
If you have any questions on the Bambu, let me know. I have a P1P and my best f...
Thanks for responding, I am primarily after bed size, speed, reliability, and multi-material capabilities, roughly in that order although you could swap speed and bed size. I really like Open Source Products and so I'm also considering a boron build would be very expensive but possibly great. I use Fusion so I'm familiar with many of the drawbacks of the cloud model and I don't know that I want to add more of that to my life unless I'm getting a lot for it. My printer will sit one foot from my computer so I don't really need to Cloud deploy anything. Losing firmware upgrades by going into private mode is almost a deal-breaker in and of itself. Unless the bamboo can knock the mark IV for the voron completely out of the water in terms of capabilities it seems like my choice has been made. Curious about your thoughts. Thank you again
vestal thicket
I had an Ender3v2 and the Bambu just blows it away in both quality and speed. Compared to the Prusa, the Bambu gets just a slight edge in quality, but way faster. My P1P is a foot behind me and it's kind of loud because it prints so fast, that's the only downside to it being close. But if you want something that just works out of the box, no fiddling with it, no leveling or any of that nonsense, I do recommend Bambu, open source ethos aside
winged helm
vestal thicket
I had an Ender3v2 and the Bambu just blows it away in both quality and speed. C...
Thank you again, those are attractive qualities also the fact that I can get one in less than a week as opposed to north of a month from other sources. I have a lot to think about I may end up with the bamboo just because I am a stinker for convenience. I guess I can always just connected to the network when I need firmware upgrades
coarse coral
Returning the neo. Not happy with the assembly of the hot end making maintenance hard and also the strining ranging from 190 to 220 pla print temperatures with retraction and z hop disabled. Parts are terrible if there is inner travel. I will say it's the truest in terns of levelling but after 2 weeks of owning it I've not had one print I'm particularly happy with
So I now have 325 again for a new printer.
 balmy pulsar
O-o
arctic dragon
coarse coral
So I now have 325 again for a new printer.
IIRC you had a cr6se? 325 is not going to get you an impressive printer compared to what you have haha
At that price range, the best I’ve heard are the anycubic Kobra
And the kingroon kp3s pro
Go a bit higher and you’re already in Voron 0 range hehe
coarse coral
Yeh I think I'll go a wee bit higher and do research this time
coarse coral
Anycubic kobra plus seems to be good so far with people saying it can reliably print at 180mms
Also similar price point and has the no knobs for levelling which is right up my street
balmy pulsar
these are old style printers. 50-70mms is where they work best. if you are expecting more, you will be very disappointed
ohread wrong. kobra they claim 180? interesting
coarse coral
Picked up an elegoo neptune 3 plus. 320mm build volume. People reporting 180mms plus a few other pluses on there. Direct drive for one.
Yeh I think the Kobra is more of a tuned profile whereas people are more stable with Neptune. Idk. I'm glad to try something not creality, I've had a horrid experience with them tbf
Also the Neptune 3 plus is less than the neo max in cost and comes with all the extras.
Got the Neptune for 289 and free shipping. Neo is about 380 without discounts
balmy pulsar
so are you returning the creality?
coarse coral
The Amazon seller, yes it's getting returned.
coarse coral
I've returned stepper motors, fans, thermistors, build plates, silicon socks.... So far.... All creality
Well you usually get 31 days with Amazon. I've only ever really returned creality stuff. Can you believe this though, I ordered a budget 4k monitor from Amazon a few years ago. About 300. They mistakenly sent me a 2019 4k iMac. Worth 1500 lol. They told me "are u happy with alternative"
balmy pulsar
i dont know the others are any better, they are all near identical. but good luck.
coarse coral
Well on the 3 printers I've had two of them very much did not have stringing problems to the point it was oozing on the stock setup. That's a bad start, I tuned it somewhat, I think it's fair to return that experience.
balmy pulsar
the stringing is settings, and nothing to do with the printer itself.
also some filament is just bad
coarse coral
Oh I don't know I feel there was something happening in terms of heating the plastic too much. No matter if I bumped retraction up to 7mm it still dropped everywhere.
balmy pulsar
but you literally have a nozzle, a heater, and a pusher... they really are all the same.
was it a new filament. one that came with the printer?
coarse coral
You're probably right, but if creality can't tune their products inline with previous releases then it's not ideal. Either way, round 2
It did it with two types of filament. Always oozing
balmy pulsar
hm
coarse coral
Both eryone brand but really bad
balmy pulsar
and you tried that filament in a different printer and it was fine?
coarse coral
Also very unhappy that the "progress" on neo max was actually regressions on the cr6 so felt disappointed when looking at the assemblies
Yeh 100% I had no issues with that filament over many prints before
balmy pulsar
ok
keen raft
coarse coral
Oh I don't know I feel there was something happening in terms of heating the pla...
You probably tried lowering the temperature, right? Even if it goes below the recommended value?
coarse coral
Example stringing - neo max. various temps and retractions

Yeh I was printing as low as 190
coarse coral
coarse coral
Example stringing - neo max. various temps and retractions
i mean this is not good. coupled with the fact the hot end is a horrid assembly so i don't even want to touch it
keen raft
Looks more like spaghetti than stringing actually 😉
coarse coral
keen raft
Looks more like spaghetti than stringing actually 😉
yes it's really bad. all travel build up
on faces the travels are so thick
neptune 3 plus on the right

 balmy pulsar
coarse coral
Yeh I was printing as low as 190
balmy pulsar
coarse coral
Yeh I was printing as low as 190
err, that aint right.
coarse coral

Amazon Links
Neptune-3 Plus: https://geni.us/BuAQ2h
Neptune-3 Pro: https://geni.us/vzwO
Recommended: http://geni.us/JustVlads
https://www.elegoo.com/collections/neptune-series-fdm-printers
ELEGOO Neptune 3 Plus FDM 3D Printer with Larger Build Volume of 320x320x400mm³
Dual-Gear Direct Extruder
The new dual-gear direct extruder with a better...
 shy kelp
coarse coral
https://youtu.be/7mIuj_btevU?t=3139
shy kelp
coarse coral
https://youtu.be/7mIuj_btevU?t=3139
A little bit smaller but it's enclosed
https://m.tomtop.com/it/p-rtoqd-xsmt3-eu.html?Warehouse=DE&cr=19151109&aid=jalos
shy kelp
For more or less the same price there were bigger corexy if I don't remember wrongly
Oh nvm then
coarse coral
yeh it's all good. feel this has a few improvements, probably flaws but seems like a reasonable way to spend the cash
300 all in. 50 cheaper than neo, with direct drive, bigger build volume, faster speeds, less stupid cable management, more sensible filament alignment, all the basic screen functions
faint sky
coarse coral
just don't know. whacky thermistor?
A PID tune would allow you to tune the temperature of the hotend vs the thermistor readings. 190 is pretty low but not unheard of.
that's uhh not stringing that's a spiderweb. when you said you have stringing that is not the amount i assumed you were talking about. that's... a lot.
coarse coral
yeh i can't deal with it. like @keen raft said it's basically spaghetti
but it is very much from travel
faint sky
over extruding at 190 is hard to imagine.
coarse coral
yeh i agree here, my gut just tells me to send it back before it's too late
so that's that
faint sky
and now we wait
coarse coral
part 2. elegoo neptune explodes leaving @worn solstice with 3 fingers and half a printer
faint sky
let us know when you get the new one in and setup.
i've never seen one actually explode... that would be your luck though.
coarse coral
absolutely will, really keen to see if it can print at 150mms
haha it's been rough @faint sky the first ender 3 was probably the worst with actual visible electrical arcing outside the psu
faint sky
you've been through a lot, yes.
 keen raft
When the software says it's at 190°C, this is based on the assumption that the thermistor is the correct one, working correctly and mounted correctly. Any of these might not be true.
Always trust what you're seeing on the build plate - if it looks too hot, try going lower. Your extruder will give an audible warning once you've reached the lower end of what's possible 😉
balmy pulsar
for it to melt out that bad i think temps wont be the issue. Cause pla will just burn first if it was too hot.
something else is going on
99% it will be a setitng, but who knows what
coarse coral
i dialled retraction at 200c temp, which remained for a handful of adjustments with the prints which all had travels that were visible. Over the 2 weeks or so the temperate ranged from 190 to 220 with the retraction at a high 5mm and speed 50mms so yeh i can't say on that range the stringing ever actually improved
i replaced the bowden tube because prior to that the filament snapped for some reason multiple times yet after the bowden change it never snapped
w.e i'm so over creality for a while
k1 looks nice
plus whilst i can absolutely say the build plate was very flat and true for neo (a bit of calibration) the neptune in far as reviews seems to focus that area even more. so my main good takeaway from neo is enhanced by neptune so that's a win
arctic dragon
K1 has a lot of issues with their firmware still, definitely not something I’d recommend until it’s had more time to mature.
Top printer to beat in the current market is basically the P1P/P1S, anything cheaper is either a bedslinger or not worth the money right now.
coarse coral
yeh just a bit out my price range either way
 vivid helm
arctic dragon
K1 has a lot of issues with their firmware still, definitely not something I’d r...
vivid helm
arctic dragon
K1 has a lot of issues with their firmware still, definitely not something I’d r...
This is creality you are talking about. Their firmware has been a joke in the 3d printing community for years.
coarse coral
not exactly sure how elegoo are doing this but their profiles are way faster and the print speed as a setting doesn't seem to change
their profiles have halved the default neo print time and reduced plastic with identical layer heights, maybe it's all acceleration
like we are talking about 171g of plastic instead of about 250 +> and those print time saving are much
also using a .4mm nozzle vs .5
what is this profile magic
vivid helm
Sounds like underextrusion to me.
coarse coral
make that another 2g saving since brims aren't needed
ah
infill 15%
even still big savings. impressed with the profiles at least, will post results in the future
coarse coral
p1p would have been awesome
coarse coral
if it helps anyone .5mm tabs running along overhangs to the build plate in cad are better than actual supports imo for parts that can take that type of addition. understandably a model like a mini fig would be way too complex but if you're dealing with a simple overhang, just add a .5mm tab to the build plate and it will act as a great bridge, if the overhang is large, add multiple tabs spaced along the underside of your overhang. similarly if the layer lines are drawn to a corner you'll need to square off that end with a tab also
Makers Muse on YT for that one
they snap off really easy
hence the .5mm
 vocal flax
@winged helm if you're looking for just a new build, maybe you can try prusa bear upgrade. From what I've seen in 602 wasteland discord server, the creator is very friendly and enthusiastic. I have a couple friends tried it and they told me that they are satisfied with it.
winged helm
vocal flax
<@887510739462537236> if you're looking for just a new build, maybe you can try ...
I was just reading about that thank you for sending it. Did they find speed improvements? What I saw said that the quality improvements were debatable. I'm open to it though because it's much cheaper than a new machine
vocal flax
I don't really know they weren't close friends
Some people I've met at a convention
I assume you'd get some speed increase if you klipperize it. Otherwise probably better off slow printing than fast
vivid helm
winged helm
I was just reading about that thank you for sending it. Did they find speed impr...
I'm running BearExxa. The full bear frame can go faster, but it is also constrained by the bed movement.
winged helm
That was my concern
vivid helm
I think the real question here is whether you actually need to print faster.
winged helm
I do. I I have lots of prints per week
vocal flax
winged helm
I do. I I have lots of prints per week
Best way to increase throughput is to get a secondary or tertiary printer rather than increasing speed.
arctic dragon
If you’re iterations through multiple designs, definitely +1 on more printers. If you just need many of a single print, you could consider ordering them from a vendor?
iron remnant
IDEX can also be fun.
(I can also provide bad ideas as well as bad puns)
I guess the reason why I got an Ender instead of a Prusa is that if I got a Prusa, I'd feel compelled to keep it super-stock because I might break the spell that Josef casts upon each one that leaves the factory from his dungeon in Prauge whereas I'm more content to do strange things to my Ender. Because, yeah.
vocal flax
Idex is good as an idea
In practice I don't think there is a good open source area for it
 half dew
vocal flax
Best way to increase throughput is to get a secondary or tertiary printer rather...
half dew
vocal flax
Best way to increase throughput is to get a secondary or tertiary printer rather...
I think this is true if you get multiple printers that print at similar speeds - and may continue to be true with all the new fast printers coming out. On the other side - when I got my x1c I kept my Ender-5 around thinking I'd use it to print in parallel but the x1c is so much faster that it was less time to print parts in serial on it - or fill the build plate with multiples that it was never worth using the ender 5
vocal flax
That could be true for printing finished parts
But for prototypes you can iterate 2 parts at once
half dew
I mostly use it for prototyping - the 2nd part would be done on the x1c before the ender 5 finished since its several times faster. (The Ender 5 is on the slower side of printers though). I think if I needed to print 3 or 4 at once the equation would change but these days I make use of things like paper prototypes and such for fit
The Ender 5 would probably be more useful to keep around when I need to print final parts since many of my parts are structural and strength suffers from high printing speeds
coarse coral
I wouldn't recommend a neo over the alternatives it seemed to fit but should be overlooked. Creality definitely heavy marketed the neo
So I've got a new bed slinger arriving soon with direct drive, and manual / auto level. What should be my first check list for calibration?
I'm thinking
- update firmware if available
- e steps
- make sure lead screws match height (soup can style calibration)
- gantry v rollers tighten so no wobble
- X and y belt tension
- manual and then auto level bed
- bed level calibration test (print) (adjustments if needed)
- stringing test (filament specific)
- temp test (filament specific)
- benchy at 50mms and benchy at 120mms
half dew
Not everyone may agree with this - but I'd move step 0 to the end and only do it if there is a compelling reason.
Though - I guess if you're going to manually calibrate everything and make your own filament profiles then it probably doesn't matter.
coarse coral
There's one thing which may have been fixed in a firmware update (if it exists) for this it's Neptune 3 and they have weird fan quirks out the gate which all community have raised as an issue and it seems that elegoo have either fixed this for future printers or it's maybe a fix in firmware for that alone I feel it's worth doing
And yes it looks like they have a firmware release after the printer
half dew
Sounds like its probably worth it then. My experience with firmware updates is that they often break filament presets and unfortunately the printer companies rarely release updated presets with firmware updates :(.
coarse coral
Wise words I'll proceed with caution
Thanks
Doesn't help the firmware update is on GitHub with the readme only in Chinese
Just downloaded elegoo cura which is 4.8 cura immediately said cura is 5.4 so just download this
Pointless exercise why didn't they just say use whatever slicer you want
And they don't have any changelog for the firmware I can see
half dew
yeah - I ran in to that a lot with my ender 5. firmware updates that weren't clear about which mainboard they were for, the bltouch firmware was completely broken, etc. I ended up having to compile Marlin myself. If you end up having to go that route, teachingtech on youtube has some good videos
coarse coral
thanks @half dew it looks like there is a firmware out there, and an english version of installation exists. i'll go through it before installing. i do like recent firmware updates in general but the only reason i installed a creality firmware update was a last ditch effort to save my printer from crazy layer shifts. it actually worked, and then with this the fan issue has been mentioned enough for me to say it would be good if they fixed that... that said, the fan thing is basically the elegoo shuts off fans after a print which is a good cost saver but it forgets to shut off the psu after shutting everything else. community was asking for them to shut the psu fan also.... so the firmware is a real world cost saver in this case. of the 3 creality printers i had, none of them did this
coarse coral

Affiliate links:
Buy $199 Ender-3 V3 SE:
https://bit.ly/ender3v3se
Buy SUNLU filaments from official website:
https://bit.ly/sunlu-filaments
00:00 Intro
04:02 Setup
05:39 First print using Creality Print, 3D Benchy with different filaments at 180mm/s and 250mm/s
09:24 Robo Alpaka test print and compare with Prusa MK3S+, AnkerMake M5C, Creality...
faint sky
Take Aurora's videos with a grain of salt. She's a pro and knows exactly what settings to tweak out of the box if something isn't right and she doesn't always cover every tiny detail. While she might know exactly what to tweak, measure, and calibrate, a beginner likely will not. She's an excellent source though... one of the better ones on youtube in my opinion.
vocal flax
It's probably not perfect either but why not get a sovol sv06. It's only 20$ more (for us) and basically prusa mk3 (all linear rods, inductive probe, dual z drive) and direct drive and stuff.
shy kelp
I see many versions on AliExpress about the creality k1 extruder/hotend section, which one should I get?
Buy they all seem to have the awful stock joint, or am I wrong?
balmy pulsar
the heat break is part of the design. what you need to find is one made of stronger materials
creality claim it is titanium already. ha
shy kelp
balmy pulsar
creality claim it is titanium already. ha
"Titanium alloy"
So do they have all that fragile joint?
So what's even the point of release an upgrade kit with the hotend if the issue isn't fixed, unless that was the issue to begin with
balmy pulsar
this is a design feature in most printers now. the issue with yours is the overhang is so massive it becomes a hazzard. if you just buy a new one, 99% chance it will be fine. you just had some sort of accident where the nozzle got hit hard
coarse coral
faint sky
Take Aurora's videos with a grain of salt. She's a pro and knows exactly what s...
Agree with you there, she's quite methodical. This being an ender 3 v3 video was just a continuation of the ender printers for me. They claim progress with regressions. I don't get creality at all now
shy kelp
balmy pulsar
this is a design feature in most printers now. the issue with yours is the overh...
So I just get the cheapest from AliExpress?
I did order the upgrade thing but it's 2 weeks that they haven't yet shipped huh
balmy pulsar
i have no adivice. i would just buy the same one it came with (official brand) from wherever they sell it fastest. (amazon prime here)
 alpine pivot
What are everyone's thought on the Anycubic Kobra 2? I had a couple FDM printers several years ago and sold them. Currently I still have a small resin printer, but have several electronics/robotics projects I want to tackle and need an FDM printer for.
 sand mountain
alpine pivot
What are everyone's thought on the Anycubic Kobra 2? I had a couple FDM printer...
sand mountain
alpine pivot
What are everyone's thought on the Anycubic Kobra 2? I had a couple FDM printer...
I worked with Anycubic printers at work for a while, although not that exact one. The print quality was fine,when it worked, but the firmware was unreliable and buggy. Their firmware isn't open source IIRC, so don't expect Marlin or Klipper support. If all of that sounds OK to you, the build quality was alright, and despite those issues, prints mostly worked as expected. For that printer's current price, and if you're not looking for a seamless experience, it'd probably be fine. Personally, I'm a big fan of firmware tinkering and it'd be the wrong choice for me. Creality printers (especially the old ones like the Ender 3 (pro) are very well supported by the community, and are a great value these days.
balmy pulsar
My anycubic printers work very well. the only issues I've had is one had a flakey SD reader. i think it was a bad contact that would move when the machine heated up
alpine pivot
I like the idea of the faster print speeds for larger/multiple pieces.
One project I would like to tackle is an ROV, so multiple versions and refinement are going to be a thing for some decent sized parts (not huge, but reasonable size, some at 100% infill)
Open source/support is good, and back when I had my printers I was tinkering with them all the time and swapping/making parts, running Octoprint, etc.
With this one, at least at the beginning, I want something that will be good to go with minimal set-up out of the box, and some convenience features. I don't want the printer to be the project in the beginning.
coarse coral
So long civilised eating, hello TV dinners. It's pretty huge by my standards

Assembly wasn't too bad but of course I took much longer than the less than 20 mins guide
Out the box there was some wobble on the gantry and also build plate tighteners were all loose, that said cable management seems sensible and assembly is not that different to an ender
coarse coral
we're gna need a bigger boat
coarse coral
levelling vs creality ender 3, cr6, or max. much nicer
screen ui more intuitive and access to the tightening nuts more easier
similar noise levels to neo max and a bit noisier than cr6. og ender 3 with non silent motors.... i think u kno
micro sd provided doesn't read with windows and my card reader but will read with the usb adapter it came with
eccentric nuts on gantry are accessible, not awkward - really. i've yet to change a nozzle
auto level has 49 points so my first print is going to be a sheet over the max dimensions and a single layer. hoping for it to be glorious
1 hour 45 mins for that print
but ofc u know i'm gna try double the print speed here 🫠
So promising

I've never seen such a smooth first layer
balmy pulsar
nice
coarse coral
So that's about 15g of test filament supplied since this is a 25g print
 coarse coral
320
Filament changes mid print are a bit weird to me since you'll need to a cut the length from the filament sensor to the hot end in order to do the swap since there is still plastic between the gap. Not ideal

It is much more accessible than Bowden changes
That is such a good sheet
4 printers a charm for me 😂
this video is part of series, so maybe go back to beginning if you didn't see https://www.youtube.com/watch?v=eb5ocD1uycE

Learn more about Starfield at http://www.starfieldgame.com This video is part of a sponsored series with Bethesda Game Studios.
Our Starfield models are complete! Adam and the Tested build team put the finishing touches of weathering, decals, and vinyl application onto the Frontier ship and dress the interior of the cockpit diorama. We're so pr...
3 filament changes here and messed up mid print but I'd call this a great test print.

3d printed napkin

3d printed boat sail
 balmy pulsar
ha
 coarse coral
https://tenor.com/view/3d-printing-pen-sculpting-art-pixel-heroes-gif-16605306
coarse coral
coarse coral
https://tenor.com/view/3d-printing-pen-sculpting-art-pixel-heroes-gif-16605306
creality
 coarse coral
https://tenor.com/view/sml-brooklyn-guy-to-the-printer-printer-printing-gif-2436...
coarse coral
coarse coral
https://tenor.com/view/sml-brooklyn-guy-to-the-printer-printer-printing-gif-2436...
other stuff
coarse coral
flying through a 15 hour print at .4mm with these default profiles at 120mms. on the neo and cr6 it was taking 2 days
with absolutely everything firmly stuck
faint sky
awesome. now do a tall print to check for anything that might go awry like layer shifts at high z-axis
coarse coral
yep i've only been able to come up 2mm so far but the finished print comes up quite high which will let me see if there's ringing and shifts. it looks really accurate by my standards so far, totally stoked
coarse coral
yep very little stringing, bridging is great and thin support walls are working out. this is like the first time i've felt that the printer / thing i bought is working at a level
faint sky

bed level test with 0.8mm nozzle. have to setup whole new profiles and start from scratch. bed level looks good.
.8 is so thick, hoping it will cut my large volume print times down.
was adjusting z-offset on the fly. think i found a good distance to start with. next is temp and retraction towers because i'm using pla+ right now.
updated cura to 5.4.0 and calibration shapes has a lot more in there now too including this bed level test. i love calibration shapes plugin.
weather is starting to cool off... printing season is almost here. 🙂
put together my spare sprite extruder and bl touch. now i have a .4 hotend and a .8 hotend. can swap them out with 4 screws pretty quick.
coarse coral
i like ur plate i see now why you say no to glue etc altho on glass i think glue is fine and with the pei i think glue might be useful for filaments that warp more. also don't u think it's wiser to do a full sheet print rather than points?
faint sky
 coarse coral
very clean on this point, very clean
faint sky
You know z offset is good when you replicate the surface texture. That never gets old.
coarse coral
yeh very well trained visual inspections, that's a nice point. absolutely
did you see my test sheet above, my jaw dropped. i guess i only ever had a partial calibration on previous printers
faint sky
Temp tower is messy. So thick can’t even read the numbers on it.
coarse coral
but also printing on smooth glass probably caused me lots of problems i didn't know i have masked with glue
well u r using .8
makers muse has a calibration castle for $2.99 i think i'll pick that up going forward
faint sky
That’s a lot of material for a calibration test. That kind of thing is more for a final tweak.
coarse coral
it's a fun print and nice to keep, i threw the temp and string tower tests in the bin
a full sheet print .2mm thick on a 320mm bed used like 25g plastic
faint sky
I keep mine for a while but yes after a certain amount of tweaking they become no longer relevant. Benchys are always nice to look at.
faint sky
coarse coral
did you see my test sheet above, my jaw dropped. i guess i only ever had a parti...
Yes, that was pretty amazing. I've seen a lot of your results though and doesn't surprise me. You've always managed to get far better prints than me. ;P
I'm currently at 200 on my PLA+ temp tower and expecting it to turn into spaghetti at any moment. I usually print at 220 for PLA+ but this latest test is showing 215 definitely better so far.
coarse coral
faint sky
Yes, that was pretty amazing. I've seen a lot of your results though and doesn't...
not entirely sure but appreciate that vote of confidence. i'm doing more custom supports on prints so that can start working with different orientations to place layer lines in optimal positions, unfortunately you can't get plate texture when layer line sides are more front facing it's a trade off there.
i've never tried pla+ hearing good things about these days, i think the thing with me is i'm so slow to stop the insanity..... like i've been using eryone pla matte for most of the time when really i should be changing to something else now because it has problems, sort of same line with creality printers and nozzles. i don't know it's sorta creative / learning even now
faint sky
 faint sky
starts at 230 in -5 increments
no that's a standard base for a temp tower from calibration shapes
faint sky
there are tiny gaps in the bridges that i never got with a .4 nozzle
and seems like it might be overextruding a little
coarse coral
yeh it may depend your nozzle size you're gna print. if printing with .8 nozzle and bridging important i'd go with 220
it also seems to serve as an indicator of bridging distance u would have with this nozzle / temp
even on the right (side) post at 220 u've got less sag on the layer lines that are built on each other
faint sky
because the lines are so thick i could probably run farther bridges. it was kind of neat watching the lower temp bridges tighten up like around 210 to 205.
coarse coral
and the bridge looks decent
faint sky
yeah i guess for .8, i'm used to .4 being really neat and clean
no stringing though so that's a plus
coarse coral
yeh 100% no one wants that
faint sky
38 minutes at 60mms
coarse coral
i would show my prints but i've sorta decided to hold most of it back because some times i just don't like sharing projects it's an annoying personality flaw
faint sky
would have likely taken well over an hour with a .4 nozzle.
coarse coral
get urself a neptune 3 plus 😂 120mms 🔥
faint sky
i mean i cannn do 120mms technically
coarse coral
but can u do 180mms?
faint sky
sure
coarse coral
but can u do one trillion mms
faint sky
just don't ask about the quality of bowl of spaghetti it'll make
coarse coral
thinking of ur mailbox project tho i feel a bigger build volume would be good for u
faint sky
yes, need more space. i used almost every mm with that mailbox.
coarse coral
yeh u did that
well don't be adverse to buy out of creality, they just saturate the market
faint sky
i was eyeing the CR10 max but they stopped selling it for some reason
coarse coral
highly recommend buy new brand, i feel it's definitely worth the change / risk
creality are definitely example of a company who struggle to care
faint sky
it was like 480mm or something. i'm still thinking about modifying the s1 pro with a longer y-axis but i need a custom cut carriage.
coarse coral
just depends how much time u want to invest into supplementing core functionality which tbh is a complicated thing
and mods can soon add up
faint sky
i'm planning on making some custom brackets for the 5mm pitch matrix panels. with the temp tower out of the way at least i know i can go that tall without a lot of overextrusion.
coarse coral
there's also that pin test
faint sky
good point, i need to do a tolerance test.
coarse coral

Printables.com
Test your 3D printing skills with this very difficult 3D print | Download free 3D printable STL models
faint sky
oh that lol not with a .8 nozzle there's no way
faint sky
straight up lol
coarse coral
would it even try to make a circle?
hahaha
floooop
and done
i don't even know if the sphere would be a sphere it would probably be a cylinder from top to bottom
faint sky
i think void star's flow test is a bunch of 💩 emoji's
that's for super high flow nozzles. i doubt my printer would be able to flow that much to go really fast. flow tests are really helpful for speed printers.
coarse coral
can you adjust flow during print? this neptune screen ui allows for adjusting speed, flow and z-offset
faint sky
my s1 pro can't. it's part of the slicer settings.
maybe people running klipper or other slicers that are directly connected with a web ui might be able to.
i'm still using sdcard method because i don't want a LAN or internet connected printer. octopi looked really appealing but decided against it. i'll stick with the sdcard.
coarse coral
why does voidstar wear his glasses like that, do they serve any purpose or is it just his YT spiel?
faint sky
maybe you should ask him i have no clue
coarse coral
my printer is close so sd card doesn't matter to me, maybe if i had distance to walk for each print it would become a thing. neptune can be connected over usb
half dew
coarse coral
why does voidstar wear his glasses like that, do they serve any purpose or is it...
He uses them as a teleprompter. He has a video going over building and updating the newer version.
coarse coral
half dew
He uses them as a teleprompter. He has a video going over building and updatin...
Oh that's cool, Dave Plumber uses a teleprompter it's good to see some scripted channels
faint sky


very rough prototype. 2 hours with the .8 nozzle. would have taken me 6+ hours with the .4 nozzle.
iron remnant
Fat nozzles are the greatest.
faint sky
bottom warped a little bit but doesn't affect the utility of it. actually fit great first try.
faint sky
 iron remnant
Clearly you were board.
faint sky
brackets for matrix panels
if i want to hang it on the wall have to attach them all together somehow. will still need a wooden frame around it to house the external psu, power switch, and reset switch.
 balmy pulsar
oh. so thats a display on the other side?
faint sky
can improve the fitment later, was just excited to start printing again.
yes this is the back intersection of 4 matrix panels
balmy pulsar
im cncing some ABS keycaps for my control panel keyboard. they are turning out nice.
so how big is the panel/what res?
in total
faint sky
128x96 with 6x 5mm pitch panels, about 2'x1.5'
faint sky
will make a nice display piece running weather data from local sensors and online api (unless i'm in a hurricane).
faint sky
i don't want to jump the gun on making a frame for it until i figure out the maximum amount of panels it can drive. i thought it would be 4... added 2 more for 6 total no problem.
yeah i wish i'd gone with the 2mm pitch. the 5mm pitch is huge when you tile them together.
you can do a whole wall with these but you have to drive it from a PC with a special PCIE card and a lot of specialized hardware. hub75 is a standard.
driving 6 with a matrix portal s3 that fits in the palm of my hand is pretty neat in comparison.
balmy pulsar
 faint sky
i did go searching the internet for 5mm pitch hub75 brackets but came up empty. these brackets i'll likely put up on printables once i get the design honed in.
balmy pulsar
the one closest to camera is botched cause i had the offset wrong. but its still usable since you wont see the mistake and the stem will still hold
abs it turns out machines pretty clean, but it is super staticy
faint sky
those almost look like rubber
balmy pulsar
ha
faint sky
that is so clean compared to a 3d printer. maybe an SLA printer might be able to match it but not with ABS to my knowledge.
balmy pulsar
ha. no 3d printer could do that clean.
faint sky
is static a concern with cnc?
faint sky
why abs thought you were doing wood?
balmy pulsar
this is for the cnc panel. cant do wood really, it would get ruined so fast

gonna see if i can make the knob from abs. it shouldnt be too big a deal. the back peice ive not decided yet. aluminium or a block of uhmw.
just materials i have lying around
faint sky
ah. that is going to be so cool when you finish it.
balmy pulsar
i am making the encoder which should be fun. there nbo real reason to do this, even a really fancy expensive one of these is $150. so this is purely for fun and to show off keycaps.
these caps are for low profile switches
faint sky
first time i saw your renders of it was about a year ago. you've been planning the big panel for a while. really neat to see you starting to make the caps and everything for it.
this one is new, haven't seen the rotary thing before.
balmy pulsar
ha yeah. the panel kinda leads me to learn things.
this is called a manual pulse generator.
you can hold it in your hand while being up close in the macghine cabinet. each "pulse" on the encoder moves the machine a set distance
faint sky
is that one of those dials from adafruit? that's a really cool implementation.
faint sky
holy 🐮
balmy pulsar

photo sensor encoder. like a mouse.
100 lines.
and then a ball detent wheel from metal
all rides on a big bearing
you can buy these wheels, but they are all very large. i wanted something small
shy kelp
A nice portfolio
Definitely overkill "ha"
faint sky
that is meticulous and beautiful.
balmy pulsar

overkill is all i know how to do 😛
this is not really sellable, BUT, i can definitely sell/give the cad out later on and people could make their own. materials are only a few bucks, its just tons of work.
you could of course print it too
the alternative for the encoder is induction. but ive not seen one small enough. each tooth is only a mm or so
and it would need to be steel. which is more annoying to cut
coarse coral

This Mingda Magician X2 was provided free of charge.
Affiliate Links (I Earn a commission on Qualifying Sales):
Anker Make:
https://shareasale.com/r.cfm?b=2182107&u=3447554&m=133002&urllink=www.ankermake.com%2F&afftrack=
Anker:
https://shareasale.com/r.cfm?b=2060371&u=3447554&m=126562&urllink=&afftrack=
Elegoo Neptune 4 $259.99:
https://...
faint sky
Looks like thermal runaway. Poking the thermistor with a piece of metal is a good way to get shocked too.
balmy pulsar
something smells fake about that.
the aluminium being all melty (meaning it is 700+c) despite no longer being in contact. yet all the plastic around it is fine.
faint sky
good point, almost looks like someone tried to make a heatblock out of gallium. the silicone sock doesn't even look deformed.
could be cheap chinese pot metal made from aluminum dross to cut down on cost? chinese cast aluminum can be very impure.
balmy pulsar
unlikely
iron remnant

Welp, printing Nylon on my Ender like the Ender owner I am. To the left side is regular ol' Elmer's purple glue stick. To the right side is fancy Magigoo PA adhesive... but the glue stick seems to have worked better.
faint sky
I've certainly seen worse. Is it functional like you want? If it works then it works.
balmy pulsar
i use liquid white glue, but you 100% need an enclosure. ive never had a nylon print stay on the plate without being enclosed
faint sky
now i need to get some nylon as a challenge. if you really do need an enclosure then i'm out a roll of nylon because i don't have an enclosure. risky.
vivid helm
I wouldn't expect one to. Also if I understand correctly you want to be continuously drying it even while printing.
faint sky
that sounds like super temperamental filament, i've changed my mind.
vivid helm
I haven't used it for that reason. Probably could with my setup, but I have PC and ASA.
balmy pulsar
vivid helm
I wouldn't expect one to. Also if I understand correctly you want to be continuo...
the drying is a bit overblown. i do dry the filament in an oven but then it is fine for weeks
depends on the specific filament though i think. i use taulman bridge
balmy pulsar
jumbotron!
iron remnant
Dono, with Garolite and the purple stick, not everything prints right but at least a reasonable set of things prints just right. I printed this version with a draft shield.
I figure stuff that's mounted on my hot-end ought to be nylon for heat resistance.
Mostly Nylon really needs a filament dryer and a drybox, drying it as you print seems like extra-credit.
Then again, I just store everything in dryboxes and the filament dryer is handy regardless as well. The worst filament is actually the doesn't-seem-like-they-make-it-anymore HTPET+ from Fusion FIlaments.
balmy pulsar
ive had more issues with petg being wet than nylon
iron remnant
tl;dr: which filaments are the most troublesome is not a cut-and-dried sort of thing.
Like, I see people with a rack of spools of filament in the open air and I'm like "Wat?"
coarse coral
man really happy with this new bed slinger, when slicing with ironing it actually makes a difference. going to try monotonic now
Monotonic right ironing left

photo doesn't really show how pristine both finishes are, both prints had 90 degree infill direction... so not drawing diagnol and fyi monotonic is overlapping layer lines which does what you can imagine it does and ironing smooshes. at this point i would be happy using either
applied to top layers only
shy kelp
How much does take creality to ship upgrade kits?
Ordered the 26th august and still no updates on shipping
Emailed them, I have received nothing
faint sky
Can take about 3 weeks depending on where you live. I believe they ship from China.
balmy pulsar
add 9 weeks for italian customs
shy kelp
i have a really strange 3d printing problem
i have a creality ender 3 s1 plus and it's extruder isn't moving.
it's not making sounds like it's trying extrude either

the little gear on it which indicates if the extruder motor is turning
isn't moving
(older picture)
i have taken a volt meter to power pins of the motor and confirmed it is recieving power
i've replaced the motherboard and replaced the firmware to see if it was a software / hardware issue
i've also replaced the entire sprite extruder
still nothing
any ideas on how i could diagnose this issue
faint sky
When attempting a print does the x-axis move back and forth or does is stay at the home position and never moves?
possible pinched data cable in the main braid going to the hotend. just because it has power doesn't mean the extruder is getting data necessarily.
Also on the new sprite extruder did you ensure you plugged in the thermistor? A new sprite extruder comes with the thick red thermistor wire unplugged and stuffed between the fan & nozzle and could be easy to miss.
The red thermistor wire is barely able to reach the plug and can be a pain to plug in. You'd definitely know if you plugged it in because it can be a struggle to do.
From the look of your image it appears as if you do have the thermistor plugged in but worth double checking to ensure it has a good connection.
shy kelp
faint sky
When attempting a print does the x-axis move back and forth or does is stay at t...
only the extruder motor doesn't work, every thing else is completely fine
i'm able to print just fine -- when i push the filament through manually
shy kelp
faint sky
possible pinched data cable in the main braid going to the hotend. just because...
yeah. i might ereplace the data cable
i wish it was like the older style where i could just swap out one cable
faint sky
yeah there is something else going on everything looks good. the odds of a brand new sprite extruder not working is really really low. check your wiring.
Here's a report about the main cable coming loose on the motherboard. Just needed to be reseated. https://www.reddit.com/r/Ender3S1/comments/vdgo3k/brand_new_sprite_extruder_not_working/
There is another report about a pinched cable too. Unplug the ribbon cable from the extruder and do a continuity test on every pin in the cable.
resistance test might be helpful too and wiggle the cable while testing each pin as a pinched cable might work when elongated but be broken when pinched. Try to keep the cable in the same orientation as it currently is because that's the physical state of the cable when it's failing.
a pinched/fractured data wire or unseated connector makes the most sense here.
 coarse coral
@faint sky https://youtube.com/shorts/H-ap4UKlAFg?si=WmXGt72qzXjlXS3T someone made the ice cream cone
🔥Favorite Printer on Sale: https://www.shareasale.com/u.cfm?d=1042556&m=124834&u=3295970
$50 OFF Coupon: TIER50
🔥Best Cheap 3D Printer: https://www.shareasale.com/u.cfm?d=1050642&m=124834&u=3295970
$10 OFF Coupon: ESE10
💰Patreon Support: https://www.patreon.com/jjshankles
Support me on YouTube: https://www.youtube.com/channel/UCHH_3lX8QShJnhHVA...
faint sky
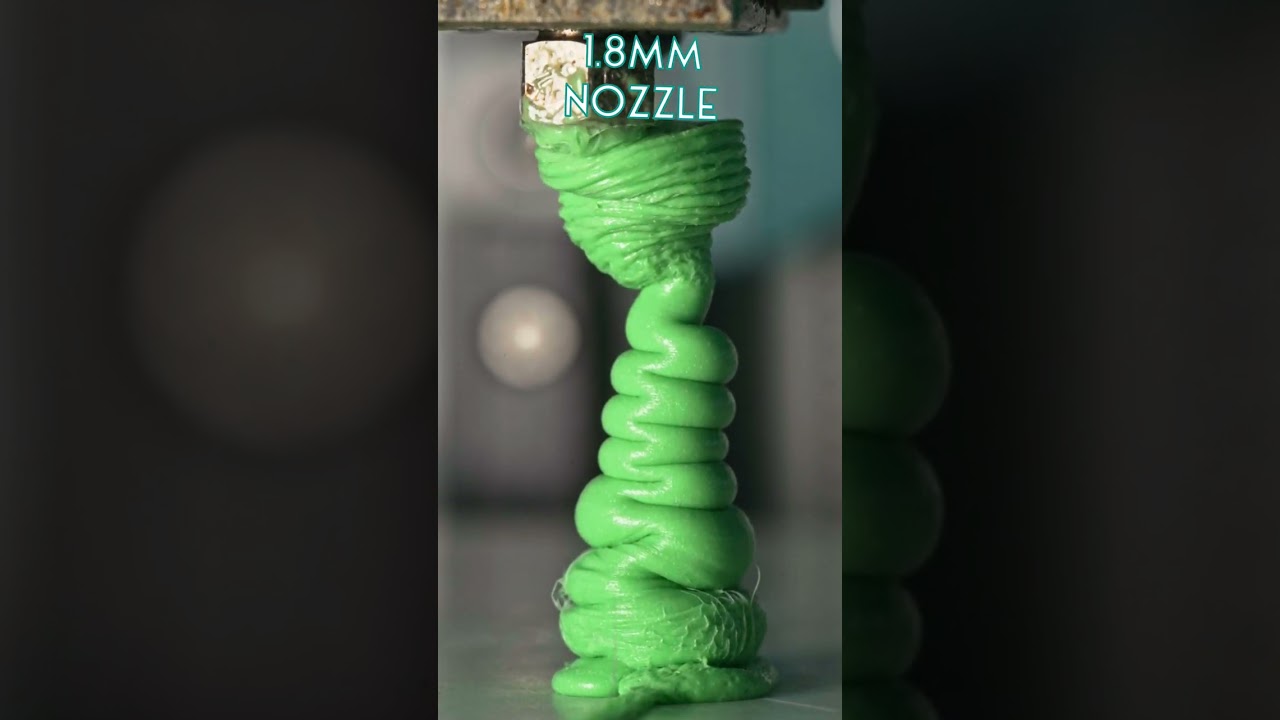
1.8mm nozzle, i guess going straight up wouldn’t work. There has to be some layer cooling time.
coarse coral
Yeh its a funny one that print. I'm sure it would work at scale but no longer really becomes a pin print
I don't know why he did the challenge at original scale. A lot of these videos are to please the algorithm
vocal flax
Does anyone know how to lubricate for pom nut? I just bought anti backlash ones, used to use brass with light machine oil. (gimmicky and probably not needed but one side of my x gantry falls off and I'm expecting to fix it)
arctic dragon
vocal flax
Does anyone know how to lubricate for pom nut? I just bought anti backlash ones...
While generally not needed, POM can benefit from dry lubricants like graphite, or a Teflon based grease like super lube.
vocal flax
I don't think I can obtain teflon grease easily around here
So, I'm just going to clean up light oil
faint sky
I would go with a dry lubricant if possible and use the minimal amount possible. Wet lubricants will accumulate dust and debris created by the 3D printer over time and create gunk. Definitely avoid petroleum based lubricants like WD-40. Dry PTFE lubricant is a good choice. Bowden tubes are made with PTFE for good reason.
coarse coral
going to try elegoo s filament since i feel overly happy with the neptune 3 plus
sadly no matte options tho
winged helm
What's a good way to adhere this led strip to my enclosure (painted aluminum). I tried command strips and super glue.
 faint sky

This week's EYE on NPI is going to stick around for a long time: it's 3M's RP+ VHB™ Tapes (https://www.digikey.com/en/product-highlight/3/3m/rp-vhb-tapes) the latest version of the 3M VHB family that has been solving 'how to stick this to that' for over 40 years.
Digi-Key stocks all sorts of shapes from strips, rolls and sheets - and all the d...
coarse coral
winged helm
What's a good way to adhere this led strip to my enclosure (painted aluminum). I...
did you really clean the area you were sticking to? a gentle sand then clean might work
faint sky
Depends on the paint finish. I wouldn’t recommended sanding a nice glossy surface for example. Use a slightly damp rag and let it air dry for 24 hours. VHB bond can actually be better with a slight amount of moisture added, I think its in the spec sheet. I’ve used it to attach a window to a case side panel. Once adhered its not coming off so you have to be precise with the application and make sure you want it there, forever.
arctic dragon
Is there anything to ziptie it to?
faint sky
Those type of case lights are typically held by magnetic brackets. I have some in my case and they came with the strip. Unfortunately with an aluminum case magnets won’t work.
arctic dragon
They can if you have strong magnets on the other side.
Have you considered duct tape, perhaps?
Or duct tape some magnets and then use a magnetic clamp…
faint sky
Some type of double sided tape is the only real option.
If you want a clean install anyway.
vocal flax
Unconventional opinion use a bracket to hold it on top and bottom (anywhere in between if it doesn't stay nice.) Generally that works better because back of led strip gets hot and double sided tape just gives up
faint sky
VHB isn't normal double sided tape. It held up a case window for like 10 years. 3D printing brackets to hold the strip is a good idea.
balmy pulsar
vhb is what im using to hold me ceiling wood panelling on. ha.
that stuff once applied with pressure will last longer than the thing it is attached to
led strips should stick to everything. but you need to apply some pressure on them, and make the the surface is clean. if its not sticking to paint, something gone weird.
coarse coral
coarse coral
going to try elegoo s filament since i feel overly happy with the neptune 3 plus
no issues with this so far... cheap, basic colours, spool - no tangling and finish is just fine. retractions also good
 tardy juniper
I'm planning to resin print an ambient-temperature compressed air thruster. I've already done the calcs and it'll easily be strong enough to hold back the pressure (10 bar), however I was wondering if anybody has experience with tapping holes in a resin print? I have a 0.25" NPT fitting that I'd need to tap so I was just wondering the feasibility of that. Also would it make sense to throw some epoxy on that hole when I screw in the fitting, or is the resin strong enough for that to not be needed?
vivid helm
Trying to tap a resin part will almost certainly result in cracking.
vivid helm
Epoxy wouldn't be a bad idea.
With a resin printer you might also be able to just print the threads.
tardy juniper
Yeah was thinking that too. Prob will just give that a try then
balmy pulsar
npt 1/4 is huge, you can easily print them.
to seal them normally you use teflon tape, but epoxy may be a better idea as long as you are ok with that fitting being permanently part of that print
there are special fluids just for air fittings as well, but they may cost more than can be justified
how are you modelling the thread form. if memory serves fusion for example does not create a correct tapered thread.
tardy juniper
@balmy pulsar Making this in onshape, but I'd just manually model the threads. Heres how the part looks

 faint sky
vivid helm
Trying to tap a resin part will almost certainly result in cracking.
faint sky
vivid helm
Trying to tap a resin part will almost certainly result in cracking.
if you make the hole to be tapped close to the diameter of the tap i think it'll work. a tap just cuts and scrapes away material it doesn't exert much lateral force during tapping.
resin is far more brittle than fdm though. the key is to get the hole close to the diamter of the tap shaft minus threads.
also depends if they're fine or course threads. course threads could crack the resin i'll agree with that. fine threads shouldn't be a problem like M2 or M3 fine pitch.
oh it's 1/4" npt missed that part, yeah you're likely to crack the resin with such a course tap.
you could probably do it with PETG and a little heat with good results though.
tardy juniper
Hmm
Not sure about using petg tho bc I doubt it'll be able to hold pressure
I'll try resin printing it with the hole already tapped
faint sky
PETG is pretty tough stuff especially with close to 0 infill.
arctic dragon
I’d second modeling the threads with SLA printer. Most CAD suites include tools to do that, so it shouldn’t be that bad. If you’re worried bout sealing, a liquid thread sealant or Teflon tape is usually used for real pipes, and can help compensate for a bit of extra clearance.
iron remnant
You just have to... thread carefully
tardy juniper
arctic dragon
I’d second modeling the threads with SLA printer. Most CAD suites include tools ...
Its an NPT tap which is tapered, so that adds a bit of complexity 😅 . Giving it a shot tho
faint sky
I attempted to make 1/4" 20 threads once (standard camera mount threads), even used a really low .16 layer height with a .4 nozzle and it couldn't get it done. Still had to tap the threads. Tapping threads with any FMD 3D print is really easy though. Taps are designed to chew through aluminum, makes quick work out of anything plastic.
faint sky
tardy juniper
Its an NPT tap which is tapered, so that adds a bit of complexity 😅 . Giving it...
tapered threads though, might be a different story especially with resin. i would heat up the end of the tap with a butane torch and just melt them in, wait for it to fully cool around the threads, then unscrew it. might take longer but might be a worthwhile approach if you do crack the resin on your first attempt.
tardy juniper
faint sky
tapered threads though, might be a different story especially with resin. i wou...
I think I'm just gonna try printing with the threads in place and if that doesn't work I'll just machine it out of billet aluminum
faint sky
why do i feel like you should have lead off with that idea...
tardy juniper
faint sky
why do i feel like you should have lead off with that idea...
I really really dont want to machine this out of aluminum bc a 2-3hr resin print turns into a full 2 day activity
And I'm gonna have to make 8-16 of these depending on the configuration
faint sky
oh yeah that's different then. good luck with with SLA!
faint sky
Went through an entire spool of PLA just printing matrix panel brackets.
tardy juniper
hahaha
balmy pulsar
tardy juniper
I really really *dont* want to machine this out of aluminum bc a 2-3hr resin pri...
id machine it out of aluminium
:x
shy kelp
From creality
Ordered in August, 1 month of processing
Bah

 alpine pivot
shy kelp
From creality
Ordered in August, 1 month of processing
Bah
alpine pivot
shy kelp
From creality
Ordered in August, 1 month of processing
Bah
Is this for the V3 SE?
shy kelp
alpine pivot
Is this for the V3 SE?
K1 bonus bundle or whatever it's called
 alpine pivot
I see. I ordered a V3 SE the other day and it shows late September, but I’ve seen that some are starting to ship.
coarse coral
@alpine pivot neptune 3 plus is superior to cr6se, ender 3 and neo max imo
alpine pivot
coarse coral
<@984808909632073751> neptune 3 plus is superior to cr6se, ender 3 and neo max i...
Maybe, but I got it for $177 so I’m not mad.
shy kelp
I end up paying the k1 around 360€, I got 56€ refund from the seller due to the broken part, dunno if it's worth the wait though
coarse coral
bargain
k1 looks good
u will be banging out prints
however my ender 3 was catastrophic failure after 4 weeks of running
vivid helm
The K1 is a disaster.
coarse coral
i doubt you'll get electrical arcs
shy kelp
But in the other hand when I shipped my pc to lenovo for rma, it "somehow" become glued so they refuse to fix it, while trying to bill a new pc
Yay sorry for telling disadventures here
coarse coral
which became "glued"
u need to smash these manufacturers some times
lenovo used to be manufactured here in scotland i was actually working next door when ibm also had a plant
shy kelp
coarse coral
u need to smash these manufacturers some times
This is the bill
They need to change everything because to open it, they would destroy it, and that's why everything is included, they can't change individual faulty parts
Then they sent me photos of my laptop with a ton of glue
Yay damaging even more stuff to not abide to warranties, thanks lescam
 coarse coral
so u sent them a non glued machine and now it has glue everywhere?
did you not take a photo before you shipped it?
sorry - like when i returned neo, i put everything in the box and right when i was sealing it i videos what was in the box
shy kelp
coarse coral
did you not take a photo before you shipped it?
Eh no, I didn't though of any of that
coarse coral
i also added a hand note to say "this has fault, temperature causing plastic to be too hot"
ahh man / woman
have u got any proof of what it was like before u shipped?
like 'last-known-good-config'
'evidence-of-sudden-faults'
shy kelp
Buh maybe, let me check my gallery
vivid helm
Creality is infamous for having zero QA.
coarse coral
@vivid helm i think creality is down to send a huge quantity of replacement parts to the seller
e.g. sain smart had no issue with customer care and giving me parts on cr6
vivid helm
Doesn't fix the fact that their printers are poorly designed.
coarse coral
yeh im not a fan of creality
3 times not fun but i like the look of k1 and i enjoyed cr6 after some tlc
shy kelp
coarse coral
who is the seller?
Nah, no photos
Amazon.de, they use some third party service to repair stuff, in my understanding some lenovo undercompany
The thing broke like a week before that the warranty expire, so I think it's like an excuse to not abide to it
coarse coral
have you got anything that would have proof you were using it before shipping it
maybe you send something to someone which had your specs in it
maybe a cpuz id
something like this
shy kelp
Unfortunately nothing
coarse coral
and why would you return an item with glue? ask them to describe the glue
did you send it with insurance via courier? maybe it does have glue for some random reason (although i doubt it)
shy kelp
coarse coral
did you send it with insurance via courier? maybe it does have glue for some ran...
I used insurance
I already asked them if they can provide me photo of the box, and they provide me the proto of the laptop box, but not the box that contained the laptop's box, when I asked for that they ghosted me
coarse coral
ok good. claim insurance is your last bet but let's get these fools to provide you with more info about "what-they-received"
that's bad joojoo how they behave
you also have the writing to say it's covered in glue (although we don't know what's covered in glue, is it pva? is it super glue? is it like a box of pva exploded?) what do we really know
and what do u know is key
shy kelp
All useless photos huh...
 coarse coral
and why would you lie
that's not a laptop. that's networking infrastructure in a building
what an odd situation!
people never surprise me
shy kelp
coarse coral
that's not a laptop. that's networking infrastructure in a building
Indeed, all my gallery is filled with that and alike
coarse coral
what a load of rubbish. well it's actually a good thing because they never verified their claims - i see no glue
so you can easily contest that and since that's their critical evidence supporting their rogue claims you can easily sort this out
shy kelp
coarse coral
what a load of rubbish. well it's actually a good thing because they never verif...
They did send some photos, hold on:
coarse coral
so it's not manufacturers warranty, but it does fall into electronics consumer rights. in the UK we have a minimum 2 years when some manufacturers implement only 1 year.... but when it's 18 months we can get covered under UK law. i imagine where you are and most places is similar
shy kelp


 coarse coral
i still see nothing of merit. big deal there is one screw marked. what about all the other screws?
did you remove one screw but give up after 1?
yeh these guys
explain this to them that they have created new problems from your original issue.
you may want to ask them to return the item to you however since they've photod what they say the issue is but their photos are half baked
i think you already have room to go to small claims court
and you would say they have refused this, they have my item, they added defects, and the defects are not conjusive to the fact they wont repair, therefor implying they are looking to avoid the repair when it is will within the remit under the relationship lenovo have with you as a consumer and your consumer rights.
tell the small claism court, all you want is a repair, but since the repair company have been so awkward, you'd like to compensated for repair value with a company who handles with care and integrity or a replacement laptop
small claims (in scotland we call it simple procedure) you just write a one page a4 and apply to the court, a judge will look at it. invite both parties to attend for 45 minutes. it's usually over by then.
coarse coral
coarse coral
you may want to ask them to return the item to you however since they've photod ...
i don't think this company is a good company, they wont repair it if that's what they do on day 1
you prolly want your device back asap or let them keep it and present to small claims court
sorry for your issues
or just go to the courier and say abc maybe you'll get the insurance for it - not ideal but that's what it's there for
nice looking laptop btw

Chuck shows you the basic steps to re-use older Ender 3 boards to build electronic projects. He shows you the steps to setup Arduino IDE and then how to determine the connections on a Creality V1.1.5 board with bootloader installed.
Video Sponsored by:
https://www.pcbway.com
Schematic shown in video:
https://github.com/RudolphRiedel/CR-10_wiri...
 lean flower
is there any reason for a hotend to clog up on its very first print? had it happen yesterday on my CR6 max while printing a 200% benchy, stopped extruding at 90% completion. had to take the entire hot end apart to clear the blockages
faint sky
too low of a z-axis offset or too high flow rate causing over extrusion which will eventually clog the nozzle due to backpressure.
recalibrate z-offset. reducing flow rate is considered a cheap work around for over extrusion. can set flow rate to 98% instead of 100%, and/or keep reducing flow rate until it no longer over extrudes.
calibrating e-steps is also a calibration step that should be done if you know you're over extruding & you know your z-offset is good.
calibrating e-steps is generally the same principle on all printers even if the method to do it might vary slightly from printer to printer https://www.youtube.com/watch?v=qOj8L0IXcfA Calibrating on a bowden setup.
In this video i'm going to show you how to calibrate the E-steps on your Ender 3 v2 3d printer. This is a very simple quick process that you can do completely on the printer and should take no more than 10 minutes from start to finish.
Why do you need to calibrate your e steps?
In basic terms, calibrating your e steps ensures that the right am...
Calibrating on a direct drive setup. https://www.youtube.com/watch?v=VZScw30B4KA

In this video we're going to check, and if needed, quickly adjust our E-Steps on an Ender 3 S1 Pro 3d printer. This whole process can be done without a separate computer by using only the printers screen, a small amount of light coloured filament and a ruler or vernier.
Direct Drive Printer E-Steps: https://youtu.be/zVOx1Ys0IHA
Affiliate links...
coarse coral
lean flower
is there any reason for a hotend to clog up on its very first print? had it happ...
i had some spontaneous clogs on cr6se.... i did the same as you, disassemble the area and new nozzle. you can try to deal with it by pushing some filament through whilst hot to increase flow. this worked some times
i also notice a huge difference in flow between my creality printers vs elegoo.... far more consistent on elegoo. not that i'm an expert but randomly had 3 creality in the last year. cr6se, ender and neo max. they all just simply didnt have same experience as elegoo. i'm sure there are upgrades to make it all sing but yeh stock always had issues for me
faint sky
finished printing out all the brackets for the matrix panel. 1.5 spools of PLA. Required 4 different bracket types.
 coarse coral
it's epic
faint sky
the .8 nozzle made everything go sooo much faster. the .8 will now be my go to for big prints.
faint sky
3mm
coarse coral
and they got dialled in? i take it you didn't add threads
.6mm nozzle and 2mm holes some times i couldn't get that to work, so you've done well at 3mm
but was usually adhesion issues
faint sky
dialed in really well. the threads tap as I'm screwing them in. Using long M3x10mm. There are threaded inserts in the back of the panel already where each bolt goes. Everything lined up perfectly. Took a lot of prototypes but eventually got everything just right.
faint sky
thank you, was a big project 🤗
coarse coral
out of curiosity is that a controller on the lower right? may i ask why it is off at an angle?
faint sky
You can plug the matrix portal s3 directly into the hub75 connector but i used a ribbon cable instead so it dangles off. easier access while i'm prototyping to get to the reset button.
Also that end bracket where it sits is too long to plug directly in, so had to be done anyway, otherwise I'd have to specially design that specific end bracket.
coarse coral
nice
faint sky

Also the power supplies are just hanging in mid air right now. I need to make a bracket to hold them. If one of the spade connectors pulls out that could be a big problem. 🔥
coarse coral
well i discovered the answer to everything earlier, so just short everything. that will make it work (expert opinion) (please do not accept this advice, ever)
faint sky
yeah and with about 5V 24A of juice running between the two the results wouldn't be pretty.
coarse coral
hehe
that's a lot of amperage compared my world atm
but i trust it's in good hands
faint sky
my world too, that's an obscene amount of amperage for 5V
coarse coral
im just hoping the boost converter i get can hit the efficiency it promises because i'm going to power an sbc which has PD so it's quite strict
that's if i ever get it, i may end up receiving some exotic animals.
 faint sky
I was thinking about getting a 9v or 12v PSU and bucking it down to 5V but then you'd be relying on the efficiency and quality of the buck converter.
coarse coral
yeh
i don't have any experience with converters so can't make any recommendations atm
or circuits
faint sky
I have some that have been quite reliable but only up to about 2 amps.
This is my first project over 2A and it does make me really uncomfortable especially with them hanging in mid air right now. The PSU's put off a good amount of heat too which makes me worry if it'll actually deform the PLA brackets I'm going to design for it.
Maybe I'll switch to PETG for those brackets.
coarse coral
i'm sure there's standard tests you can run through upon completion or in leading up to
here we have a scheme called PAT testing (Portable Appliance Testing)
faint sky
i have a test methodology too. if it catches on fire it was too hot.
coarse coral
like all homes need to be PAT tested if an agency is renting. so ur kettle, microwave etc all has a safety label applied proving a test was carried out
 faint sky
i want to make one for halloween. that's awesome.
coarse coral
totally haha. u could just get a boring company flame thrower and use a mechanism to pull the switch at the right time
faint sky
oh i actually have one! one of those portable weed killer flame throwers.
eh halloween, flame throwers, kids, probably not a good mix.
coarse coral
i wonder if there's a propane and propane accessories discord somewhere
balmy pulsar
how many panels is that now?
iron remnant
My wife has a bit of ommetaphobia but she decided that if I used white filament against a white wall, I could put honeycomb storage walls up in the entryway for storing useful things.
I've got some nice sparkly purple filament for the geekroom and that was a Nope Not Going To Happen.
faint sky
balmy pulsar
how many panels is that now?
12
I really liked garys recent honeycomb wall he showed on show and tell. It was nicely done.
iron remnant
I mean, I dono what I'll think in a few decades, but it looks cool in ways that pegboards don't.
faint sky
This is true, and likely will always be true. I mean you can't really argue with bees.
iron remnant
Yeah, it's always going to have all kinds of buzz.
Both of my popular models on printables are part of the HSW system.

 alpine pivot
balmy pulsar
what it looked like yesterday....
alpine pivot
balmy pulsar
what it looked like yesterday....
One day I will have one
balmy pulsar
you can have this one, im selling it off. no room for it and i barely use it.
faint sky
Looks like two different lathes. Nice cleaning
balmy pulsar
i did cheat and replace the chuck. but vinegar really eats rust well
now i need to do some electronics for it. hmmm
a tiny mechanical keyboard with 12-16 buttons could be fun and a 3"-4" display.
using the pi zero?
i dunno
i want to spens no money. trying to use what i have on hand
lean flower
coarse coral
i had some spontaneous clogs on cr6se.... i did the same as you, disassemble the...
i have raised my z offset to 0.35 and nozzle temp to 210 Celsius and my machines been going strong since doing that. hopefully i can finish printing my fixed wing drone without issue. https://a360.co/45Ue2Jk the link contains the drone in it current form still need to finish the main wing and tail feathers
Share 2D and 3D design files and project files with anyone.
faint sky
z-offset will be different for almost every printer even of identical models especially if it has adjusting screws, it's pointless to mention the setting unless it's for yourself to later reference. nozzle temp, bed temp, filament, nozzle size, and layer height are always critical settings to share with any successful print. i detail printer settings in every printables model i upload as a reference.
vocal flax
balmy pulsar
what it looked like yesterday....
Oof. Can it cut straight now, or just tapers?
balmy pulsar
ha. it was always fine. just cosmetic rust.
for my next trick

although the more i lay this one out, the more i want to just keep it. (trying to clear out old stuff i dont use)
lean flower
11 hour print with no problems. I pretty much nuked my roll of transperant filament on this part
 coarse coral
lean flower
11 hour print with no problems. I pretty much nuked my roll of transperant filam...
coarse coral
lean flower
11 hour print with no problems. I pretty much nuked my roll of transperant filam...
That's goal. Nothing worse than threads left on a reel
lean flower
i wonder if i could squeeze out the nose or tail parts with what's left on the spool. would probably runout out during the print. nothing like hot swapping a spool in the middle of a print
coarse coral
lean flower
i wonder if i could squeeze out the nose or tail parts with what's left on the s...
have you got scales? you could weigh your spool
or you can unwind it and measure
lean flower
i'll just keep a hawks eye on the spool and pause the print when there is almost nothing left
coarse coral
good stuff
lean flower
my current slice. its the nose cone of the plane
 coarse coral
oh that looks cool. how are u joining the parts?
also can i let u know you are a major version behind with cura
i think current version is 5.2
lean flower
i'm going to use bbq skewers and hot glue. i'm using creality slicer which isn't updated as often as ultimaker cura
lean flower
i use cura with my wanhao duplicator. so i have 2 different slicers installed on my pc
i use my wanhao only for tpu at the moment. any other filament just end up as a giant tangled mess that doesn't stick to the crappy build tack. thinking of getting a glass plate for it as well
Is there a way to clean the glass plate so that the residue from the previous print is no longer there? The photo is our ender 5 max. A proper work horse
 coarse coral
razer edge and be gentle then isopropyl alcohol is how i did it
coarse coral
yeh you've actually looked after it pretty well.
lean flower
my dad has a ender 3 v2 that's been converted to direct geared extrusion. the nozzle kept clogging no matter what we tried and we ended up buying the most overpowered extruder setup we could fit on the head
coarse coral
i heard sprite extruders are a good mod for enders
coarse coral
lean flower
Is there a way to clean the glass plate so that the residue from the previous pr...
you can also flip this plate and start new. the other side is a much smoother surface and produces a glassy like finish on your prints
faint sky
you can actually install multiple versions of cura on the same PC too. the new version will attempt to take all your preferences, profiles, and settings. in the past it was a cluster**** during profile imports. Seems like they've managed to fix that in 5.3 when they completely changed to how your preferences and profiles were stored. Importing 5.4 from 5.3.1 worked flawlessly. I still keep it around just in case but I'm just about ready to delete 5.3.1 and use only 5.4.0

Creality Slicer is just a downstream clone of Cura and always lags a few versions behind. That can be a GOOD thing if a new version of Cura introduces bugs but you also don't get the latest feature enhancements by running creality slicer. If those new features turn out to be riddled with bugs you win by not running Cura. If those new features are actually awesome features you end up waiting months until they're merged into creality slicer.
You'd think that creality slicer would be a highly stable form of cura then right, ensuring everything works as intended? Nope, they port the bugs in there too and can be less stable than Cura. So I don't even bother running creality slicer anymore and just stick with Cura.
The machine profiles with custom start/end gcode is definitely better tailored in creality slicer. Cura doesn't have the right profiles for most creality printers and I think they do that intentionally. So you open creality slicer, take the machine profile gcode, and import it into a printer/machine setting in Cura. You get all the benefits of the correct start/end gcode for your printer plus the updates of Cura.
The start/end gcode in creality slicer includes the correct settings for probing, using a bed mesh, creating a purge line, homing, etc...
If you create a custom profile for your creality printer in cura none of those start/end gcode settings are in there by default. You must manually copy/paste them from creality slicer.
It was more than a year before the Ender 3 S1 Pro showed up in Cura as a printer to select (and the start/end gcode was wrong). If you have a new printer odds are it will not have a profile in Cura yet.
If you run Cura double check that your start/end gcode in machine settings is the correct gcode supplied by your manufacturer for your printer.
coarse coral
faint sky
Creality Slicer is just a downstream clone of Cura and always lags a few version...
yeh i'm getting to that time when bleeding edge doesn't always do it for me either but that said 5 introduced a few better things, supports (if you use them) got updates, ironing and probably tons more. that said the core feature set even last year was more than what i ever looked at
i just feel newer versions will lead to quicker prints and better resulting prints (just a hunch)
i was thinking about switching to prusa but don't like the ui at all
faint sky
same, i tried prusa slicer and thought the same thing. the UI is scattered and unrefined. Cura is much more beginner friendly. i went from using beginner settings in cura to expert settings within a month. think it would have taken much longer to figure out prusa slicer.
vivid helm
I went straight to expert when I first opened PS. Didn't find it difficult.
coarse coral
vivid helm
I went straight to expert when I first opened PS. Didn't find it difficult.
have you used cura?
coarse coral

Check this 3D Printer here:
https://www.amazon.com/dp/B094ZC5GDK?ref=myi_title_dp
https://creality3d.shop/collections/cr-series/products/creality3d-cr-30-3dprintmill-3d-printer
https://www.creality.com/goods-detail/creality-3dprintmill-3d-printer
A heartfelt thanks to all my Subscribers! It’s you guys that make this channel possible. If you enjo...
faint sky
vivid helm
I went straight to expert when I first opened PS. Didn't find it difficult.
Correct me if I'm wrong but didn't you write your own slicing software? I think you're level of experience vastly differs from that of a beginner taking a 3D printer out of the box for the first time.
yeah instead of modifying my printer to have a longer bed that one does look like a better solution.
however it won't do hotter temp materials with a 240C limit. wonder if it's possible to swap in a full metal sprite extruder. at that price it's not worth it as I do a lot of PETG prints typically at 250-260C, it simply won't do infinite PETG with my preferred filament.
lean flower
https://www.youtube.com/watch?v=ym0fM9bSpzsi could think of a much better way for making a bigger machine. i have thought about a machine with a 1m x 1m x 1m volume and i think there is no roll of filament big enough to feed such a machine. the only real problem for me is the amount of space needed for such a printer
would also need to be a scratch built printer
vivid helm
coarse coral
have you used cura?
I used it a little, and found it extremely sluggish.
vocal flax
faint sky
Correct me if I'm wrong but didn't you write your own slicing software? I think...
If you build your own printer instead of buying and taking out of the box, it makes a big difference
I jumped into both cura and ps as advanced. Cura never worked well for me, and ps advanced wasn't satisfactory
But I was building the machine, rather than using the machine to build things
faint sky
I set a 3V DC motor on fire. I know enough just to be dangerous. I'll leave the 3D printer building to the people who are good at electro-mechanical design.
winged helm
How would folks say the experience is with the voron community compared to the prusa community?
For example I haven't been able to get advice about my prusa basically anywhere that there is a concentration of 3D printing enthusiasts, if I build an ldo voron 2.4, will that be true?
arctic dragon
winged helm
How would folks say the experience is with the voron community compared to the p...
I would say the Voron community itself is much smaller, but because everyone is spending the time they do building their printers, they have more experience troubleshooting their builds and are overall much more knowledgeable compared to members of similar communities built around off-the-shelf printers.
winged helm
Okay makes sense thanks I am leaning towards a 2.4 because I don't love the concept of going further from open source than prusa for my printing needs by going with a bambu
I am just wondering what about a fully specked out 2.4 build makes it worth $1,600 as a kit? It seems nice based on the specs but is it really that good?
arctic dragon
It’s just the traditional no-compromise build with a reputation. It’s designed to handle engineering-grade materials like abs and nylon, though as a side effect of that it’s not ideal for printing pla.
winged helm
Hmm ok
iron remnant
I've been eyeing a Voron.
Actually, eyeing a Voron 0.2 to "replace" my Ender 3v2 and a Trident as a new large printer.
So, dono, I guess one failure mode of the 3D printer marketplace at large is that a large number of printers are delivered as crappy not-necessarily-properly-assembled quirky monsters and then they were able to rely on the community of users (frowns in Ender) to create an environment where people were able to actually use the printer they'd purchased.
Whereas at least with the Voron or other fully-open-source printer projects, you don't have the pretense of someone who is lying at you about your printer working straight out of the box with no mods.
Also, the presence of the BOM spreadsheet means that you can keep companies like LDO honest by figuring out what the purchased-not-in-bulk price would look like and deciding if the markups are worth it.
I would suggest that getting a kit where the wire harness is pre-assembled such that you don't need to worry if your 110/220v crimp job is good enough would be hellllpful.


 balmy pulsar
you seem to print much more things now.
hehe
my "print" for the day:

spindle housing for my little mill
i think ive decided to keep the mill and sell the router. (i can only keep one).
faint sky
coarse coral
that's some .8mm layer lines?
yes, .8mm there's a huge difference in line thickness and layer height it's noticeable to me. .32 layer height squishes out a thicc line compared to a normal .20 layer height
faint sky
balmy pulsar
you seem to print much more things now.
it's too humid during the middle of summer to print here. nothing but problems. so yes i'm printing more, it's printing season and i'm off to a bangin start.
balmy pulsar
i was meaning that with the 0.8 you CAN print more cause they go faster
hehe
a spindle housing is what you put bearings in for the spindle on the cnc (the part that holds the cutter). i needed to make a special one to fit a custom shaft i found on ebay for $100
faint sky
oh yes haha. it definitely goes faster. the spool reel is continuously turning while printing, that doesn't happen on a .4 nozzle. i also go through filament faster.
oh spindle duh i was thinking lathe for some reason instead of cnc
balmy pulsar
i made it on the lathe 😛
faint sky
i know nothing about lathes, milling, or cnc. 😅
iron remnant
I feel like the layer lines from progressively fatter nozzles are fun.
Spool go zoom
I am a few pieces away from a new organizer but I had to stop because I like to have the window open while printing and there's fires blowing smoke in.
vivid helm

 tender sparrow
hears belt skipping
coarse coral
faint sky
yes, .8mm there's a huge difference in line thickness and layer height it's not...
Beautiful way to get it done
coarse coral
faint sky
oh yes haha. it definitely goes faster. the spool reel is continuously turning...
.3 is my fav nozzle
faint sky
clicking noises and nozzle grinding from over extrusion wakes me up in an instant
vivid helm
coarse coral
.3 is my fav nozzle
Everyone: I use a .4mm nozzle, maybe 0.25 for detail
stej: .3 is my fav
Me: You absolute mad<person>
faint sky
when the nozzle catches an overhang just right it can make a clicking noise too and then i'm like
 coarse coral
Hahaha @vivid helm .3 allows me to do .5mm lettering on flat surfaces. Yes the typeface can change and .4 will work but .3 just guarantees that the outline is drawn without blob overlaps
I always sand a surface finish now with lettering anyway but sanding won't help letters that aren't drawn correctly
vivid helm
coarse coral
Hahaha <@578805364019953715> .3 allows me to do .5mm lettering on flat surfaces....
Yeah in the rare instances I care about lettering I use either 0.25 or turn on ironing.
coarse coral
i never had good letting with ironing on parts that have various travel areas
infact never had good ironing with any parts that can't complete the ironing in linear passes over the whole part
you always get some areas that are ironed just a teeny bit more than others and it remains just as inconsistent as it was before ironing. that's just me tho, my tests and calibrations let's just say have personal tolerances
and elegoo neptune 4 plus is bein released in 3 days. 7 days ago i bought the 3 plus. for same price. fml
iron remnant
It's an issue that you have to iron out, that's for sure.
 balmy pulsar
0.3 is the nozzle you use when you think 3d printing is fun.
0.8 is the nozzle you use when you actualyl want to accomplish something
😛
vivid helm
coarse coral
how dare you

 faint sky
I'm loving the faster print times for big objects with the .8 nozzle
coarse coral
no doubt @faint sky some parts you can happily print a .2mm with times but it's basically right tool for the right job with aesthetics / function considered
vivid helm
I usually go 0.6 for large objects unless I really need lots of filament and don't care about xy resolution. For many parts they end up printing in about the same amount of time because I hit my hotend flow limit.
coarse coral
just depends what you are willing to throw at it. increased print speed is a nice luxury standard emerging
vivid helm
Yeah, it really comes down to what you're trying to accomplish. You can easily print 1.2mm walls with a 0.8mm nozzle, which means you can do in two perimeters what requires 4 to 8 for most other nozzles.
faint sky
I haven't tried petg with the .8 nozzle yet. Usually print that at 30mms. Maybe I can print it a little faster now? I haven't changed from my normal speed settings vs .4 but the volume it produces naturally makes it about twice as fast.
vivid helm
PETG likes to fold in on itself if you print it too fast.
coarse coral
don't know about other filament types. even when i'm printing at 120mms on pla there's still a few vibrations visible. input shaper i feel is really what we need to get higher print speeds consistent
plus a truly well made printer
faint sky
yeah and warp. it'll be an experiment when i cross that bridge for sure.
vivid helm
Accelerations matter more than speed.
coarse coral
@faint sky i'm really sure you'd benefit from some glue
 coarse coral
just a wee bit

 coarse coral
i love glue but will never use it on this build plate, it's pei and i tried a tiny smidge of soluble and it was horrible to remove and will probably ruin it fast. also i now have a printer that seems to be easier to level so with pla and pei adhesion is so not an issue any more
that said if i went to filaments that are known to warp and couldn't get it to stick even with the recommended plates, i would absolutely use glue again
 coarse coral
 faint sky
brims, rafts, supports only. if you need more than that your settings are wrong or your printer needs recalibrating.
coarse coral
or what if your build plate has a tiny scratch in a place. what will u do then, buy a new plate?
faint sky
with a pei metal sheet i think a scratch wouldn't be a game ender
with a smooth bed, perhaps
coarse coral
yeh i'm talking glass really with my previous comment
either way, i think it's good glue is applicable in certain times. it does alleviate things
faint sky
welp time to get ready for show & tell
coarse coral
but i do appreciate your stance
very cool, i'm cleaning my appartment 4/6 rooms complete
faint sky
it's tough, absolutely, but i believe in my methods
coarse coral
what's a typical downpricing on a second hand 3d printer? i bought cr6se 10 months ago for £280, it's selling for £285 in outlets today (new)... i was thinking about selling for £170 am i too high or too low? the glass plate is used (not damaged), the spatula is missing (it broke), there's no box now. there has been no upgrades really just a software update and bowden replacement
 balmy pulsar
i really have no idea. often depends on how easy to make things for the buyer. think amazon. press a button, arrives next day. if its $20 more, that's fine.
coarse coral
yeh i figure it's still not for everyone so i just listed it as a new hobby project, there's school programs here so i'm sure there will be parents looking to give something to their kids
balmy pulsar
 coarse coral
sold!
balmy pulsar
i sold a spare anycubic printer to a friend and ha paid basically what i paid.
minus taxes
(13%)
coarse coral
yeh i think £200 is reasonable start price
balmy pulsar
if its too high, youll find out fast. people like to email you and tell you
:x
haha
coarse coral
let's see how it goes
thanks
i think the cr6se is on the edge of being ahead of other manufacturers with the screwless levelling system
creality really got it right
so you really are buying into a bigger brand name of household printing

i was actually going to give it to a friend overseas but the shipping is too high to justify it. we were quoted between £70 and £100 and he'd rather use that money on a printer he chose
balmy pulsar
shipping is the worst. kills many deals. cause creality probably ships free. so suddently you are down $100
a local person is a better target
coarse coral
agree
vocal flax
coarse coral
i think the cr6se is on the edge of being ahead of other manufacturers with the ...
How does that work tho? 🤔
coarse coral
it's clever algorithmic mesh matching
vocal flax
So it's not actually leveling/tramming
coarse coral
creality ensures that you have a true build area
nah i just think it's the point calibration and adjusts the nozzle as it prints
i had a lot of success with the printer but my new fav is elegoo neptune 3 plus
vocal flax
I think my fave is still p3steel or sovol sv06 or sth like that
balmy pulsar
coarse coral
nah i just think it's the point calibration and adjusts the nozzle as it prints
my old anycubic has that. but it is relatively coars, only 5x5 points.
ive seen some new machines do a pretty fine scan of the plate
vocal flax
Anyone recognize this x axis mod?


I have browsed thingiverse for a while and couldn't find it.
arctic dragon
vocal flax
Anyone recognize this x axis mod?
Are you looking for this specific mod or a functional equivalent? What printer is this for?
vocal flax
Little bit both
vocal flax
arctic dragon
Are you looking for this specific mod or a functional equivalent? What printer i...
It's p3steel
And I have another grabber (acrylic frame i3 style) whose motor shafts are short so I can't invert the pulleys
Like this

Most mods meant to be inverted pulleys which I have to shim with washers. It creates unevenness and either bend the shaft of the motor or skip steps while printing.
I've very recently acquired that p3steel, and the seller said he doesn't know what he had used back when he built it.
It can support my unconventional pulleys
Also have to note unlike most printers grabber (acrylic one) uses 9mm belts (more like 8.3 at this point) so not all x axis mods have space for it either
If you have any other suggestions I'm down to try them.@arctic dragon
arctic dragon
vocal flax
If you have any other suggestions I'm down to try them.<@98211350907490304>
While I don’t have any mods in mind offhand, I’m not sure if your current issues with the noninverted pulleys have much to do with the shims or the motor mount. Inverted pulleys keep the belt closer to the base of the shaft, meaning it will be less likely for the proper belt tension to apply too much unwanted torque to the motor.
If you want to test the theory behind your motor mounting, you could try printing a solid spacer to replace the washer shims?
vocal flax
Today I did that at work
Not really installed it yet
But the pla bushings were crushed to pieces when motor got hot
balmy pulsar
they kinda match.....

 faint sky
started working on project i put off for months because my printer was failing every print due to the humidity. now i'm a printing machine. feels good to get back to design and printing.
 coarse coral
 coarse coral
Picked up an elegoo neptune 3 plus. 320mm build volume. People reporting 180mms ...
coarse coral
coarse coral
Picked up an elegoo neptune 3 plus. 320mm build volume. People reporting 180mms ...
hi there stej. it's 2023
faint sky
My brother got an eElegoo Nepture 4 Plus... will be visiting him soon and helping him set it up.
faint sky
Build quality is comparable to an S1 Pro but comes default with Klipper which makes it a far better deal than an S1 Pro. To get Klipper on the S1 Pro you have to buy a $200 Sonic Pad accessory.
coarse coral
faint sky
My brother got an eElegoo Nepture 4 Plus... will be visiting him soon and helpin...
wonder how good it is at 250mms. forget the 250mms on parts taller than a cm. i printed at 120mms and it really did well but the vibrations were visible. doesn't matter too much on a functional print tho
I LOVE my neptune
altho i tried most creality printers i never did try an s1 pro 🤣 only joking, i only tried 3 now
coarse coral
faint sky
Build quality is comparable to an S1 Pro but comes default with Klipper which ma...
yeh i think i'd buy into sonic pad for input shaping now i've truly got a printer i feel solid about
faint sky
Neptune 4 Pro has a linear rod with u shaped roller wheels instead of traditional POM v-rollers. An interesting design change.
 coarse coral
isn't that also an array of blowers on that rail?
faint sky
yes
coarse coral
neat
i think i'll try klipper on this broken rpi i have and get some fan mods, i've noticed a huge difference the more cooling i throw at part during print
faint sky
my guess is that only really needed for high temp nylon material, seems overkill for PLA/PETG
coarse coral
aw extra cooling on pla is totally welcome
the quicker we cool anything the better imo
faint sky
depends if your printer has adequate cooling which my s1 does fine with, many other clones go with undersized fans and cooling schemes though.
this is not always true, sometimes you want slow cooling, too much cooling can contribute to warping.
and stringing
coarse coral
if u think about it the printer produces exact coordinates. smoosh happens, some times there's just a teeny bit too much or too little flow. i think cooling mitigates the elephanting effect - whichever layer you are at
faint sky
elephant foot happens due to differences on initial layer vs full layer settings in most cases
going too hot on the print bed with too fast of a speed will do it
coarse coral
yeh i couldn't quite think of the word. the equivalent of elephants foot on the nth layer. that's what i'm seeing on a print that's about 220mm tall. at various points there's a fraction of mm bulges in or out. the cooling i think minimises this effect
faint sky
ah yeah that one is a pain to track down i know what you mean
coarse coral
it's like it freezes the plastic in time before it can get chunky
but i'm applying an inexact science there to something that is ultimately a printer that's not 100% dialled
vibration is hard to fight on a bed slinger
i'm going to maybe design a system for texturing prints on various faces to mitigate these imperfections by working with the medium rather than blaming it when it fails due to limitations
faint sky
yep these are the little perils of 3D printing that no manufacturer will ever add a footnote about.
coarse coral
it often comes down to what you're printing. i see some amazing looking parts but these prints benefit from the ability to be rotated and printed on ideal cross angles. my situation is very limited to orientation because circles never come out perfect circules if printed on diagnol / vertical or fully vertical even with supports. i just haven't ever got that. perfect circles only happen when flat for me
and then the other part i'm working with is a box type thing and that again needs to be built up from flat
meh
ultimately if you're doing a bespoke part with nuances you'll work with it and find what works
faint sky
at least the K1 has a footnote that 600mms is unrealistic even though they advertise it can do it.

in reality most people with the K1 print at 150mms... which is still 3x faster than what I can do with marlin on an s1 pro.
I actually tried 150mms last night just to try with the .8 nozzle. it wouldn't stick to the bed.
coarse coral
yeh definitely, i'm happy at 80mms / 100mms - it is what it is
coarse coral
i've been doing initial layer at 60mms literally no issues on about 6 prints now
but always pla
just stock
haven't tried higher but the adhesion is so good i'd imagine it can go higher, either way don't mind a slow first layer
faint sky
same, using basic polylite pla. ended up reverting back to my known good setup of 25mms/50mms
coarse coral
you are doing mostly advanced filaments tho.... i only know about those from chat here, i did try tpu on cr6se and got it to print after a few tries but didn't do what i wanted it to so still have a reel of moist tpu here
don't think neptune will have a problem with any filaments tho, i feel that confident about it
faint sky
filaments i'm using are very cheap basic pla. the petg is where there things get tougher and i haven't tried on the .8 with petg yet.
the neptune 3 and 4 as well as the sovols are good clones of enders. the nepture 4 plus & 4 pro are where they're starting to branch out with their own designs.
coarse coral
yeh i'd say cr6se, neomax, ender 3. neptune 3 is just everything they did, done more robustly and elegantly
the crealitys always needed after care. i can't be bothered with that
but whatever. if it takes a day to mod stuff that's fine, i'm just not mentally equipped atm to deal with it
sounds crazy
i used to love modding stuff. must be getting old lol
creality prices are always pretty amazing
faint sky
creality cloud getting a backlash as well as the bambu cloud. creality starting to roll back the advertising on it making sure people know klipper can be used without the creality cloud.
coarse coral
all the cloud stuff can walk off a cliff. they're trying to setup marketplaces for objects
no doubt they'll do it as the manufacters are all trying it
the more the community speaks against the better it is
iron remnant
I mean, I spent a lot of time talking myself out of chucking the broken HP inkjet 2D printer over the fence of an HP facility with a nasty note attached, I'd hate to see 3D printers end up like 2D printers.
balmy pulsar
ha
eventually they might
an objet is kinda like an inkjet printer. one day they will be cheap and basic enough to be made for $99. with $5000 resin tanks.
:x
I managed to cram everything inside this casting. ha.
 faint sky
6 hour print and wasn’t even close. Got 204mm mixed up with 214mm. 😖


backside of a mirror holding bracket that will get screwed into the side of the box
intend on adding a display, sdcard, feather, battery, behind the mirror so i need the depth. lid is only 20mm deep and the bracket/mirror take up half of it. tight squeeze.
was going to attempt an infinity mirror but there's just not enough depth for it with everything else i need to add in it.
faint sky
the rectangles on the sides still has the support material. didn't bother removing it as it's obviously not the right size bracket. an attempt at making enough space for a neopixel strip.
balmy pulsar
doh
 misty gyro
For extra bed plate adhesion how effective are either a glue stick or blue painters tape? Reason being I have a model that prints perfectly with a 0.2mm layer height, but when I try with 0.1mm there's one section, a support, that routinely detaches when printing the second or third layer.
The other possibility is bed temperature. I have it set to 55C for the first layer, and 50C for subsequent layers. Is it worth trying leaving it at 55C the whole way? I'm printing PLA.
misty gyro
Found a solution. A combination of two things: 1) keeping the bed temperature at 55C the whole way, and 2) "enlarging" the support base.
A quirk of Cura is that it tries to avoid placing support on the model itself, and instead, at least with tree support, it'll start on clear bed space, and "bend" the support as needed to get it where it has to be. So by putting a very thin (0.2mm) cylinder that's 15mm diameter right under the center of the model where the support is needed, it caused Cura to print a much larger base for the support, which in turn stayed attached to the bed.
faint sky
not always if you have the tree support set as everywhere it will place supports on your object. it will only start on clear bed space if you choose the "touching buildplate" option
if you print in lower layer heights make sure your support options adjust accordingly. it might work for .2 but not .1, you can make supports closer for .1 so it's touching. recommend doing small experiments first to dial in your support options.
faint sky
Fits like a glove now. 🙌

Printed it vertically too. With a .8 pretty happy.

not sure if the recess will work out for neopixels as vanity lights. an attempt was made.
 misty gyro
faint sky
not always if you have the tree support set as everywhere it will place supports...
misty gyro
faint sky
not always if you have the tree support set as everywhere it will place supports...
In that case Cura has a bug. I have support placement set to everywhere, and it's still not printing on the model. It has printed on the model when there's no clear area on the bed to work from, but at a SWAG I'd say it will try and avoid printing support on the model when it can. Not a bad choice in isolation, since where the suoport is built invariably has a slightly roughened surface.
Not that it's a worry, that particular problem is solved anyway by the disk, since the support is much larger, and now adheres.
Next problem is deformation during the print. The web tells me to increase the fan speed, but it's at 100% already. Will slowing down the print speed have the same effect, effectively giving the model longer to cool between layers?
faint sky
Depends on the part. If you have ironing on it might choose to skip finished surfaces. The only downside to printing from build surface is the additional filament. If it’s a full volume print the difference can be substantial.
Define deformation? Warping where the part bends upward? Have a picture?
misty gyro
Let me get a picture ...
faint sky
I have encountered issues with support tree mode in particular being very choosy where it wants to start from. In those cases i’ll go with normal supports everywhere. Normal support mode is less finicky but can also be a pain to clean up vs tree. Better to have normal support than unreliable tree support if tree is giving you issues.
Also include your filament type, nozzle temp, bed temp, print speed, and initial/full cooling settings please.

 faint sky
Slowing down the print speed will in most situations result in better quality. However if your bed temp and nozzle temp are not adjusted to your speed it won’t make a difference.
Is that iron? Drill bit go brrrr.
balmy pulsar
iron yeah
faint sky
For a mold of some kind or a part?
faint sky
Vacuum with magnetic filter sounds like a good idea, in theory.
balmy pulsar
?
faint sky
Suck up all the ferrous shaving instead of blowing them away.
balmy pulsar
oh. ha. no, its grey iron so its graphite and conductive. eeeevil.
makes a big mess
misty gyro
Material: Sunlu PLA - silver silk.
Bed Temp: 55C for the whole model
Nozzle Temp 200C
Fan speed 0% for the first 0.4mm (4 layers) 100% thereafter
Print speed 50 mm/sec
Nozzle size 0.4mm
These two pictures show an example of the deformation. You can see how the "three pronged fork" has bent out. The middle prong is supposed to grow up and curve in, but it simply didn't have anything to print on, so it failed. The remainder of the model recovered due to careful engineering to keep overhang angle under 45 %, at least in this area. It curves in to form a dome, thus the need for support in the center.

 faint sky
Do you have any fans on in your room or a cold draft? Set bed temp to 60C and nozzle temp to 210C. Deformation happens when a part cools and contracts. By raising bed temp you can slow that process. Using a brim in bed adhesion settings can help.
Not even sure what I’m looking at. Can we get a zoomed out pic for reference?
Looks like a delicate dome structure?
misty gyro
Good call on the delicate dome - it's a half sphere hair cage for my wife. Prints just fine at 0.2 mm but doesn't look so great, you can see the layering
faint sky
Looks like it snagged on that part and snapped it off.
For thin delicate part’s definitely go slow as possible. Ill go as low as 15mms but thats with petg. For pla ill go as low as 25mms. Printing delicate parts fast is asking for issues.
misty gyro
It shouldn't snag if the printer and slicer are each doing their respective jobs. I have to wonder if the filament is "stringing" causing the print head to pull the model. That was the root cause of the acdhesion problem for support - the first layer printed fine, but then the second or third layer would have the print head dragging the proto-support off to the edge of the model
faint sky
Also most of the time im watching it like a hawk with my snips in hand ready to correct any weird extrusions or strings.
misty gyro
Ahh OK. I can drip print speed as low as I want. IIRC, the first (and olny) time I printed at this thickness I was at either 30mm/s or 25mm/s. Let me give it a shot at 25mm/sec. I'm not in a hurry for this.
faint sky
If its knocking prints off regularly then your extrusion isnt calibrated with esteps. You can work around it temporarily by dropping flow rate to 97 or 98%
Can also help with over extruding layer heights if attempting to print finer heights.
misty gyro
This is not a regular occurance. 99.9% of the time everything sticks just fine. It's only been that small (smaller than a dime) support disk that gets pulled away, and then only when printing at 0.1mm layer height.
faint sky
Also if it knocking prints off on layer 3 that suggests an adhesion issue.
Ahh yes initial layer circles can be a problem even with a perfect z-offset.
Have z-hop enabled? That can help with the circles.


 faint sky
Best thing for adhesion issues is raising the bed and nozzle temp… provided you have a perfect bed tram, bed mesh, and z-offset.
misty gyro
In between times, theres a full picture of the fail;ure, and a pic of what it should look like. The green one was printed with 0.2mm layers, you can see why I'm trying to get 0.1 to work, the layering is noticably visible.
faint sky
Yeah that’s complex with a lot of tiny intersecting towers basically. Not an easy print by any standard.
Instead of .1 try .12?
.1 is as fine as you can get and everything needs to be perfect with flow, temp, retraction, etc…
misty gyro
Weird thing is it's a no-brainer at 0.2mm. To give some sense of scale outer diameter of the cage is 75mm, height is (obviously 🙂 ) 37.5mm
I found Z hop speed, that name suggests to me there ought to be a Z hop enable somewhere
faint sky
Can use search bar at the top of settings