#help-with-3dprinting
1 messages · Page 7 of 1
 vestal thicket
 neat lynx
vestal thicket
You've got a good printer - make sure you review the Bambu wiki for the maintena...
neat lynx
vestal thicket
You've got a good printer - make sure you review the Bambu wiki for the maintena...
Glad to hear I made a decent choice on the printer. Heavily considered a prusa, but X1s enclosure, and slightly increased simplicity of use outweighed the open source aspect for our purpose. Putting a manual together on maintenance for whoever comes after me for exactly that :)
 faint sky
The X1 is an excellent printer with all the goodies. 3D printers are really only limited by budget. If in a corporate or educational use settings I'd have a way to send STL files to print but not allow people to change any settings without an admin present. or perhaps they could make their own profiles and have an admin double check that a profile will work. no physical access to the PC (or network page) for the slicer and only physical access for removing prints after they're finished and/or an emergency (stop) button.
I think Makers Muse has commented in some past videos he was responsible for something like that and it was a personal nightmare to administrate. He eventually stopped providing support as issues became too frequent from people accessing the printers without authorization and completely hosing his custom profiles.
Profiles in particular can take a ridiculous amount of time to dial in per filament, per nozzle size. To have an entire swath of dialed in profiles for every filament type (PLA/PETG/ABS) and nozzle sizes can take hundreds of hours with calibration prints for almost every possible setting. Printers generally work great out of the box, as they age and parts wear down they must be re-calibrated again, and again. Maintenance is required just like a car. They're not brand new forever.
Anything mechanical wears down over time, that's a fact. It's practically a law of physical mechanics. Expect anything mechanical to require maintenance over time.
 raven coral
ok can someone help me dial in some slicer parameters
mainly for support structures
because it seems like several supported parts arent "supported" so they jsut warp for me
im not sure which setting would help to prevent that
im printing at a 0.1mm layer height and the support Z distance is 0.4
i'd assume thats too high?
 whole onyx
Hello
My ender 3 v2 prints x,z measurments correctly, but y measurment is always a little smaller
How can I callibrate it?????
I am using cura
 elder oxide
whole onyx
My ender 3 v2 prints x,z measurments correctly, but y measurment is always a lit...
elder oxide
whole onyx
My ender 3 v2 prints x,z measurments correctly, but y measurment is always a lit...
How much smaller is the y lengths than they should be?
Like a millimeter?
You can scale the y axis by unchecking the uniform scaling box, and adjust the y scaling
 arctic yew
whole onyx
How can I callibrate it?????
arctic yew
whole onyx
How can I callibrate it?????
Are you using a calibration cube to test this?
 arctic dragon
whole onyx
My ender 3 v2 prints x,z measurments correctly, but y measurment is always a lit...
arctic dragon
whole onyx
My ender 3 v2 prints x,z measurments correctly, but y measurment is always a lit...
If y is off by 0.2 mm regardless of model height, check your first layer height. If it’s proportional to your model height, adjust steps per mm?
whole onyx
arctic yew
Are you using a calibration cube to test this?
I made a simple rectangular piece with a hole
whole onyx
arctic dragon
If y is off by 0.2 mm regardless of model height, check your first layer height....
Ill check it thanks
arctic yew
whole onyx
I made a simple rectangular piece with a hole
Did you measure in multiple areas along the y face?
whole onyx
Yes I did
arctic yew
Ok
Make sure that your Y belt is tight and that your Y axis doesn't have too much play
arctic dragon
Wait, just checking, is your Y axis parallel or perpendicular to your bed? I’ve seen both interpretations before…
arctic yew
It's an ender 3
arctic dragon
Is Y the vertical height, or the front / back motion of the bed?
arctic yew
Y is front back
 vocal flax
You shouldn't willy nilly change steps per mm. Set them to theorical value. If you "calibrate" for given length you will get exactly {calibrated_length} when printing {calibrated_length} but any other print will be smaller or bigger
this was one of the first pitfall of reprap project
arctic yew
I agree
 short crag
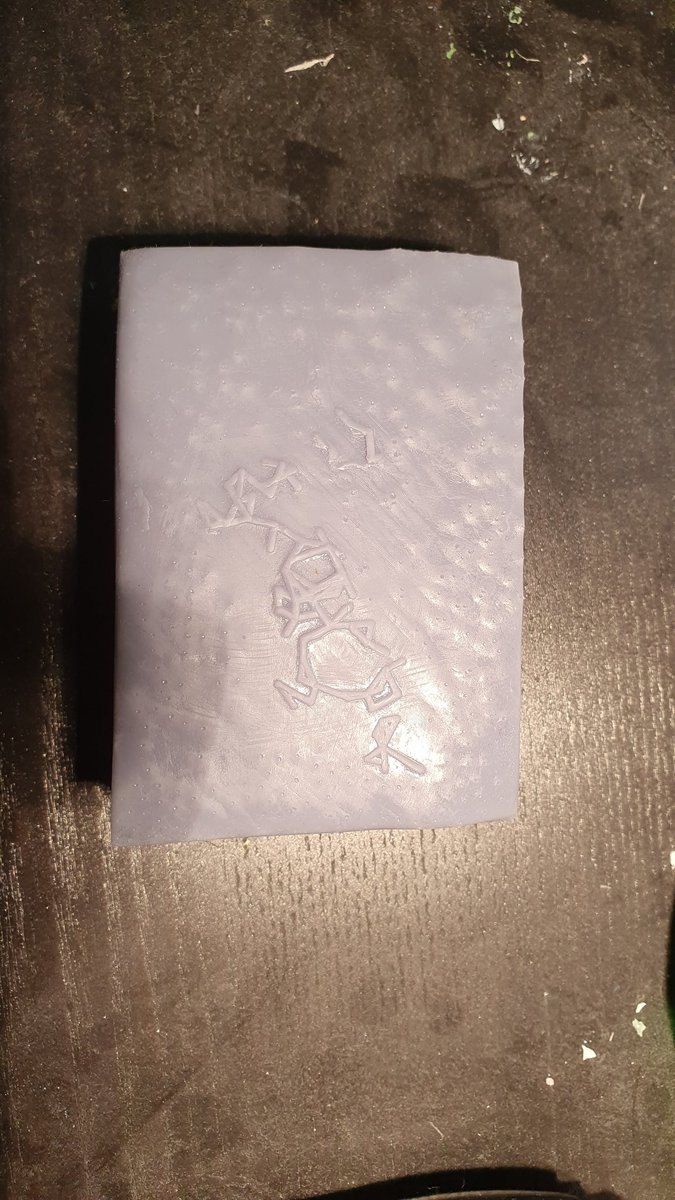
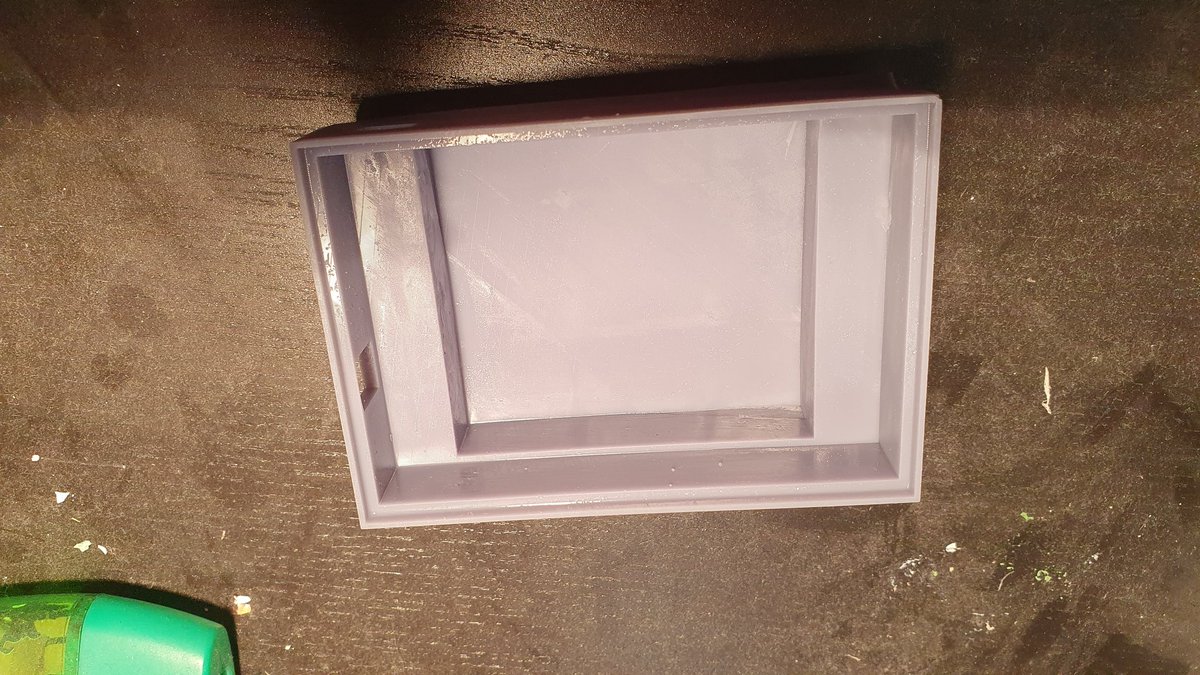
Why would this happen there was nothing on the vat or the screen

 balmy pulsar
i dont know what im looking at
short crag
the holes
balmy pulsar
ok, but what is it, what is the orientation on the plate, etc
short crag
oh its a box , and the bottom is facing the camera
balmy pulsar
and the sides were meant to be smooth and flat?
short crag
yes
vocal flax
short crag
oh its a box , and the bottom is facing the camera
By bottom you mean screen side or plate side?
Lazy answer changing orientation probably would fix it
faint sky
print holes with support material?
when you get globs like that it's from extra filament slowly building up on the nozzle, turns into a blob, then attaches itself somewhere.. and most times knocks the print off and its spaghetti time.
i'm dealing with that right now actually after changing my nozzle didn't tighten it enough and there's a slow leak coming out from the side of the heat block.
for holes i always use supports because if something goes wrong it'll end up with a bad roof/ceiling or overhang which eventually will at the very least make the print uneven in one spot.
but most times it'll just fail or have a result as pictured
multiple pictures to show different angles also helps when asking for help. specifying settings, printer, filament type, etc.. does too.
short crag
vocal flax
By bottom you mean screen side or plate side?
plate side
vocal flax
I think it might be because it doesn't have support
short crag
faint sky
print holes with support material?
its sla
short crag
vocal flax
I think it might be because it doesn't have support
no it did have support
faint sky
oops sorry missed that part
short crag
ur fine
faint sky
I don't have SLA or any of the helpers here. If anyone has experience with SLA and can help please do.
balmy pulsar
it does look more like an adhesion / curing weirdness than a geometry one
 weary lichen
short crag
Why would this happen there was nothing on the vat or the screen
weary lichen
short crag
Why would this happen there was nothing on the vat or the screen
Are the holes straight through the printed object, or are they more like craters?
If they're all the way through, your screen might have some dead spots. Depending on printer, there's quite a few ways to test this but most often it's to put it in some type of clean mode with a piece of paper over the screen (because UV is not good for your eyes)
short crag
weary lichen
Are the holes straight through the printed object, or are they more like craters...
they are through holes and now its not printing at all
weary lichen
Sounds like a screen issue. I'd recommend looking up how to test the screen in your type of printer
short crag
alr thx
weary lichen
Unfortunately, UV light is also terrible for the screens that go into these printers, so they are consumables.
Fortunately, printer companies know this and replacing screens is generally not difficult
short crag
This is with paper and without

 weary lichen
Does it feel like there's any texture on the screen's glass?
I've had some super thin residue caked on mine in the past. Had to really carefully use a scraper blade to get it off.
short crag
no its under the screen i took it off and found that out so im gunna buy a new screen
balmy pulsar
actualy lcd screen or fep?
short crag
lcd
faint sky
You can learn a lot from the 3D printing reddit. Weird issues that come out of left field. Filled with tons of issues and solutions.

After about 400 comments OP finally figured out the cause.
 elder oxide
Oof
 strange ledge
trollololololol
balmy pulsar
haha
elder oxide
My first thought was someone was playing with a lighter and low and behold lol
strange ledge
I'd kick him in the grapes... Seriously.
elder oxide
Maybe let’s not condone physical retaliation.
vocal flax
Does anyone know if unparallel y axis belts introduce cosine error?
I added bearing holders to y axis and now my belt is not level with motor or idler 😕
PSA. Unless you have to try not to modify bed/y axis structure for prusa style printers
faint sky
technically it shouldn't as long as the carriage is centered. 2 belts should only provide more torque for the additional weight of the bed (larger beds) compared to smaller lighter beds.
your y axis motion should be dictated by the center rollers and extrusion. with dual belts something would have to be really off, noticeably off to cause issues.
i'd look more into your v-rollers, check for play, snug them up
vocal flax
It doesn't have dual belts
Single belt loop but the bed mount is little higher than where motor sits
Also don't have v rollers either
faint sky
oh you said unparallel y axis belts, i thought you meant plural as in 2 belts.
i don't have any experience with linear rails sorry. :/
vocal flax
It's rods
Anyway my issue was belt on motor is lower than where it connects to y axis so it is angled, and it does introduce some cosine error but since angle is real tiny it's fine
 vivid helm
I have linear rails and a custom y axis idler/tensioner on my Prusa. Haven't noticed any issues with it.
(I can link to it if you want, but I don't want to spam too much shameless self-promotion)
 green reef
POV: I'm trying to go to bed and I hear a strange sound coming from my printer and now I gotta get up to check on it
vivid helm
If you really want to get suspicious of any noise that might come from your printer, try listening to the Portal soundtrack :p
 bleak flare
my hunch/brain is telling me that it shouldn't be a simple "pull the file from Printables, ignore the fact the model is designed for PET, and slice it"...
but I tried it anyways and it immediately printed poorly but in a way that could also be my own spool of PLA being wonky
so... to make this into a question instead of a bunch of data lacking statements...
do I have to follow some "do this to make this work" steps when trying to print on my Ender (using PLA) something that is labelled (on Printables) as a Prusa thing-a-ma-bob that has PET in the data?
hmm, the notes in the item from the author says it should print fine using any filament
I wonder if my bed is not allowing for a good layer 0 adhesion
wanders off to go read up on bed cleaning
vocal flax
bleak flare
_wanders off to go read up on bed cleaning_
I use dish soap and sometimes %70 ethyl alcohol. Usually dish soap works better among two. Fyi my build surface is pp (polypropylene), dish soap should be fine with both glass and pei but do your own research.
Also, my filament supplier says they also use dish soap.
bleak flare
that's one of the things I'm looking into - what exactly the surface is that I'm using
vocal flax
About the model, it should work, i can't think of anything being easier with pet than pla.
Anything I can think of printed better with pla than pet (except speed, we don't have capable enough printer for speed test)
But out filament was pet without additives (aka petg)
bleak flare
ok, so I should definitely look at cleaning the bed as the first thing to test/adjust before blaming the universe as to why it's not working :)
vocal flax
7 out of 10 that's the cause
bleak flare
sweet, thanks for the confirmation
vocal flax
Oh I don't exactly remember but, pet might be sticking to bed harder than pla
bleak flare
it's ok, i'm learning so much so i'm glad that this could be it and how to fix/verify
vocal flax
I mean pet sticks better than pla
bleak flare
I wonder if this really should be "solved" by me just getting a spool of PET
vocal flax
My experience with pet is limited to only 1 spool (Basf brand)
bleak flare
I am only 1/3 into my first spool of PLA and printing in general
vocal flax
Quite high end spool (glad I wasn't paying 😁)
bleak flare
so I'm loving all the new learning
arctic dragon
Generally changing the material won’t magically fix printing issues. Recommendations for material are usually for functional purposes.
vivid helm
vocal flax
But out filament was pet without additives (aka petg)
PETG has an additive: glycol.
PET without additives is usually labeled HTPET, and it's nothing like PETG.
vocal flax
bleak flare
so I'm loving all the new learning
It's fun until you start to modify and realize how many people design and never share the solid files 😫
vivid helm
vocal flax
It's fun until you start to modify and realize how many people design and never ...
I make it a point to always share those when I am capable.
bleak flare
I am ignoring for now even the thought of modifying a design
vocal flax
vivid helm
PET without additives is usually labeled HTPET, and it's nothing like PETG.
Good to know. What should I expect if I decide to try petg in future?
arctic dragon
Switching materials often involves calibration of a new profile to print the material properly. Temperature, speed, fan settings…
bleak flare
tho, I do want to print a hex wall grid thingy and the article lists parametric this and parametric that... so I'm in for a fun weekend
bleak flare
arctic dragon
Switching materials often involves calibration of a new profile to print the mat...
this alone is making me not want to switch until I get more prints done
vivid helm
vocal flax
Good to know. What should I expect if I decide to try petg in future?
In comparison to PLA it usually likes to print slower and may curl a bit more on overhangs. Run the part cooling fan at 30-50% (75-100% on bridges). 230-250°C hotend temp, 85°C bed. It's very good for functional parts and soft enough to self tap screws up to M4.
Printed parts can usually handle temperatures up to 50°C before deforming under load. It's also more chemical resistant than most other filaments.
Downsides are that it's very sticky, so good luck removing a blob of death. You'll definitely want to regularly clean your nozzle with a brass brush. It's also more hygroscopic than PLA.
bleak flare
welp, off to get some isopropyl alchohol ... thanks all for the chance to rubber duck this with you all
vivid helm
vocal flax
My experience with pet is limited to only 1 spool (Basf brand)
If you're looking for good filament brands, I recommend Polymaker, Printed Solid, and Prusament.
vocal flax
vivid helm
In comparison to PLA it usually likes to print slower and may curl a bit more on...
Can it printed without heating bed? I generally don't bother with heating bed with pla.
vocal flax
vivid helm
If you're looking for good filament brands, I recommend Polymaker, Printed Solid...
Not really. In office we use Basf (we have agreement or something) and at home I'm using local brand because it's cheap
vivid helm
No, you need to heat the bed.
vocal flax
Aww maan
vivid helm
Pretty much everything made in the last decade has a heated bed at this point.
vocal flax
My printer has it, i just don't like using it
vivid helm
Why not?
vocal flax
It's one of the older style printer.
Mk2a PCB with glass and magnetic pp bed
So it takes a while to heat up
Also, psu noise
And in general I feel safer because those old beds are quite sensitive to pid calibration
arctic dragon
Pla might be the only material that prints decently without a heated bed…
vivid helm
Oh, another thing to keep in mind about PETG: when I said it is sticky I meant it. It will permanently fuse to glass and PEI if you don't put in a separation layer of glue stick or Windex.
vocal flax
At this point abs or pla plus sounds better choice than petg
vivid helm
You'll need an enclosure for ABS.
vocal flax
I have cardboard box 😁
vivid helm
ABS also puts out some toxic fumes.
Nothing life threatening in the short term, but definitely not something you want to be breathing constantly.
vocal flax
vivid helm
ABS also puts out some toxic fumes.
That idk if I can solve
At work we use abs and it do be smelling nasty
vivid helm
ASA is very similar to ABS, but has better UV resistance and smells less. It still has styrene though so you don't want to be breathing it constantly either.
 iron remnant
I mean, it probably behooves you to ventilate the heck out of your printer area regardless because there's plenty of toxic stuff that you can't smell, whereas at least styrene has the decency to be simultaneously stinky and toxic.
I dono, I actually like PETG a heck of a lot more than PLA, but for reasons. PETG is much easier to do compliant designs with and it can handle higher temperatures, even if PLA tends to be a bit easier to print precisely and is stiffer.
vivid helm
iron remnant
I dono, I actually like PETG a heck of a lot more than PLA, but for reasons. PE...
This is the exact reason I use PETG as my 'all purpose' material.
vocal flax
Have anyone experienced hotend clogging with too little retraction?
vivid helm
vocal flax
Have anyone experienced hotend clogging with too little retraction?
Heat creep?
What printer do you have?
green reef
Anyone have any ideas for 3d printed projects
vivid helm

That's pretty broad
The general rule is that if you have a 3d printer projects will find you.
bleak flare
I have found that my first set of projects to print are all the things needed to organize the tools that i'm gathering for this
allen wrench handles, parts bins, deburring tool case
faint sky
there are a lot of tool case designs on printables you can base your designs from. deciding on a hinge design is honestly the hardest part.
vocal flax
vivid helm
What printer do you have?
Custom bed slinger. E3d V6 with 90mm length between creality single gear extruder (aluminum mk8). Tried 3mm speed 40mm/s too much and clogs, 0.85 35mm/s too little both clogged. Acceleration is quite low 1000 or lower can't remember.
vivid helm
How much cooling do you have on the heatsink?
vocal flax
12v 40mm fan but it's not quality one
vocal flax
Does anyone know how to do retraction speed and length calibration? Kinda similar to temperature tower
vivid helm
elder oxide

Hmm 🤔 I don’t think that’s supposed to happen lol
I wonder if the power bumped last night
The printer has never done this which is funny
faint sky
@vocal flax a retraction tower can be setup just like a temp tower
elder oxide
I don’t need advice, just though this was funny lol
faint sky
😦 it happens
elder oxide
Unlike Kanye, imma let this finish so it can go on the shelf of beautiful disasters
faint sky
looks like your tool head is trying to eat the print. that's an interesting looking one.
 faint sky
it's only stuck at a small point on the nozzle? that's kind of amazing
elder oxide
It’s not stuck, it’s printing
faint sky
wait what lol
elder oxide
vocal flax
faint sky
<@316890839026761728> a retraction tower can be setup just like a temp tower
I copy pasted a layer change script for temp tower idk how it works
faint sky
what slicer are you using? cura has calibration shapes plugin built in.
vocal flax
Prusa slicer
faint sky
sorry i don't know anything about prusa slicer yet 😦
vocal flax
I could use cura but last I tried it was worse/behind prusa
faint sky
if you have the gcode for doing a temp tower then you should be able to replace temp changes with retraction changes.
vocal flax
Right now probably in front of prusa but i kinda value prusa as company so will try to use/help them when I can
faint sky
that is a benefit of going with prusa, can always ask them for support directly
vocal flax
faint sky
if you have the gcode for doing a temp tower then you should be able to replace ...
Retraction is a slicer setting (in prusa slicer machine setting). retraction is just extruder moves unlike temperature it's very hard to distinguish between normal moves. Also I don't really want to change lines one by one
vocal flax
faint sky
that is a benefit of going with prusa, can always ask them for support directly
Yeah. I don't own a prusa tho 😔
vocal flax
I think i figured out my problem
the 0.8 retraction was probably fine. My nozzle clogged again today
I pulled out and cleaned while heating with lighter and I am pretty sure there is some metal pieces stuck at the end
makes sense because I recently changed nozzle
bleak flare
hmmm, I printed some handles for allen wrenches and the two pieces are so very tight, is there a known good way to scrape away some material on a thread ?
vivid helm
You can just use a tap.
Or a screw if it's something soft like PETG.
Also a deburring tool may be useful.
bleak flare
I used the deburring tool to get the initial thread lead clean, currently using a small file to slowly work my way down the thread
and ... just (re)learned to look to see if the tool holder your printing can actually hold the tool you have
the deburring tool handle holder is a tad too small for the tool I have :(
green reef
elder oxide
K but how did it stay in the air?
vocal flax
bleak flare
hmmm, I printed some handles for allen wrenches and the two pieces are so very t...
Sandpaper is generally my preferred method, and sometimes metal brush, metal wool to get into the details.
Steel wool and brush doesn't leave a nice finish but good texture
balmy pulsar
elder oxide
you exceeded the maximum recommended overhang.
looks like it lost position twice. lost steps. most likely model warped up a little and the nozzle hit it hard. very good bed adhesion, when that happens to me the model usually gets dragged with it
elder oxide
I’m honestly impressed that it didn’t spaghettify
elder oxide
Same haha
balmy pulsar
ive been drooling over the new high speed 12k resin printer.
balmy pulsar
4" an hour
elder oxide
I just have a Halot One
Current resin I’m using prints like.. an inch an hour
Not very fast
balmy pulsar
yeah.
elder oxide
But it was $160 so I can’t really complain too much
balmy pulsar
the 12k one seems idea. its large, its high res, and its fast.
ah yes
cheap is good
haha
i saw one for $99 even
was tempted
but it was too small
elder oxide
The resolution is definitely much better than my Ender 3 pro
balmy pulsar
resin is for printing miniatures and selling them on etsy. hahahaha
elder oxide
Things that need high detail and will receive much less mechanical shock
Hilariously, my little brother loves games that have miniatures as has been getting pretty decent at painting them. He’s going to try and print/paint/sell them
balmy pulsar
i need a printer that can print me a guitar. then i will be a multi hundredaire
elder oxide
Hehe
balmy pulsar
yeah the miniature thing is doing well. if you know how to sculpt good models, you can make a real full time job of it
balmy pulsar
and thn the mortgage is due
ha
i wonder if you can resin print a miniature with built in light guides and a space for an mcu board with rgb leds
elder oxide
Anyway, my brother is planning to start out licensing other people’s models
You might be able to with the right design and resolution
balmy pulsar
license and print them to sell all painted up? thats cool.
balmy pulsar
keyboard keycaps is another one thats big. bascally a miniature built onto a key.
no idea how you type on those, but...
elder oxide
I could see doing that to the esc key or even the function key row
balmy pulsar
i want to do some of my halo models. not or sale, just for me in a reasonable size
elder oxide
Print off life size versions?
balmy pulsar
haha
green reef
Hi
elder oxide
Some dude printed a life size master chief
balmy pulsar
the drone is 2m wide. i would probably do 1/4 size
elder oxide
And an Arbiter
balmy pulsar
longsword is. um. 34m long. soo, 1/48?
balmy pulsar
corvette model is bad. background res only.
elder oxide
Ah, that stinks
balmy pulsar
yeah ha
balmy pulsar
haha
elder oxide
Take over another planet
elder oxide
Hey, if musk can do it we should all be able to be deranged billionaire lunatics fantasizing about colonizing other planets.
balmy pulsar
haha
elder oxide
CSO-Class Super Carrier
balmy pulsar
7km that one. there was one bigger
 balmy pulsar
there was a guy at 343 who's job is basically resident nerd. he would find all the specs and decide what sizes things are.
most of the ships were actually consistent, but a lot of the big background ones were random fudged
elder oxide
The forerunners vessel was 142.7km long
elder oxide
The actual size was 142.7km long, 136km wide, and 371km high
elder oxide
Mantel’s Approach?
elder oxide

Halopedia
Mantle's Approach was an unordered command vessel built specifically to serve as the personal flagship of the Didact. The only vessel of its kind, the Mantle's Approach played a pivotal roles in the final years of the Forerunner-Flood war executing the Didact's will by launching an army of machine-warriors that were effectively impervious to the...
balmy pulsar
haha
elder oxide
Last day and then a 4 day weekend
 shy kelp
Did all decent 30€ pre mounted bowden 12v nozzles disappear?
Everything is 24V
I don't want to assemble it myself because I never managed to, and it's a pain
balmy pulsar
O_o
define pre mounted
the ones for my anycubic are a single unit with heater, sensor, etc. they are 12v i think
v5 i think they are called
 vivid helm
You should probably just replace it. It'd likely just break again at the joint.
shy kelp
balmy pulsar
the ones for my anycubic are a single unit with heater, sensor, etc. they are 12...
Indeed but they suck
Or at least they keep failing in my experience
That's what I mean premounted anyway
vocal flax
 trail turtle
Can I just solder the bottom wire back?
trail turtle
Can I just solder the bottom wire back?
Technically, yes. Solder melts at 370 ish degree, which your hotend shouldn't reach but i suggest go get a new one. If you manage your cables well, cables shouldn't move relative to carriage which eliminates cable fatigue. Next time consider leaving some slack and fixing it to carriage well. You can make 3 (4 would be better) plate use 2 holes for cable pass through (so you can't yank the cable) and secure it to the carriage with 3rd (and 4th) hole. In my experience this worked real good.
trail turtle
vivid helm
You should probably just replace it. It'd likely just break again at the joint.
I plan to I just want to keep printing for now
trail turtle
vocal flax
Technically, yes. Solder melts at 370 ish degree, which your hotend shouldn't re...
Its an older printer and the wires are corroded as well, it lives in the same room as a very large tank so its definitely a bad environment. Hasnt been used in a year and the break happened within about 20 minutes of the first print. I like to think im pretty good about my cable management but ill definitely look into a plate to secure it.
Thanks both of yall!
vocal flax
I'm not a big 3d printers are delicate machines but they need some care and maintenance
trail turtle
Yeah, it definitely needs a tune up
old mk3s, left it at my parents house when I went to college and just got to pick it up
balmy pulsar
shy kelp
Indeed but they suck
Or at least they keep failing in my experience
I've never had one fail. 3 machines, i have extras of them for different materials to make it easier. I mean, its just a tube a nozzle and a heater...
arctic yew
I've have had both thermistors and heaters fail. I would not recommend resoldering them since they are cheap to buy. Make sure you have good strain relief on your wiring too so it doesn't mechanically overstress the wire.
faint sky
I see them fail like that on reddit every day. Usually it's due to a huge blob solidifying around the hot end. With enough pressure a blob can snap the wire too. It's always best to replace the thermistor if you can.
arctic yew
That's why you avoid getting blobs in the first place by ensuring your prints stick properly
faint sky
and checking on it regularly, if you're going to be out of the house you need to find some way of shutting off the printer remotely.
arctic yew
I never walk away from a print without seeing that the first couple of layers print properly
 half dew
arctic yew
I never walk away from a print without seeing that the first couple of layers pr...
half dew
arctic yew
I never walk away from a print without seeing that the first couple of layers pr...
I got one of a certain brands printers that does all the fancy first layer inspection and such - its been good enough that I no longer check and haven't had any failures for almost 1 year. Hoping that the tech just gets better and better
 simple hedge

which one of these am I supposed to use?
ender 3 pro with v4.2.2 board
dont tell me i have to take apart my printer for the 3rd time 😭
simple hedge
remind me to buy the $200 printer next time
faint sky
Yes remove cover, take pic, put cover back, never lose pic.
vocal flax
Print it out put it next to the printer
Or build custom and this is what you have to deal with😄
 arctic yew
Is that an acrylic prusa i3?
vivid helm
Prusa never made them with acrylic, for good reason. I believe the most acrylic clone was the anet a8.
balmy pulsar
acrylic is for painting walls. not 3d printers
arctic yew
They did exist, they were not originals though but they were still prusas
I had a folgertech i3 acrylic a very long time ago, anet and I believe geetech made them too
balmy pulsar
ive seen acrylic panels on lots of printers. but not structure. as soon as it gets warm it starts to warp/sag/bend
i assume yo umean something like a laser cut acrylic structure?
sounds bad
ha
aha. i found the anet
ew
vivid helm
balmy pulsar
i assume yo umean something like a laser cut acrylic structure?
It's also flammable.
balmy pulsar
not at 100c
but it will crack from rapid heat cycling
its also really exepensive. kinda ticks all th e"dont use" boxes
vivid helm
balmy pulsar
not at 100c
At 100C no, but those printers have a reputation for thermal runaway, and 300+C is definitely enough.
arctic yew
None of them had any heated parts that would contact the acrylic
The thermal runaway issues were firmware related since they would ship with the setting off
vivid helm
They are still famous for catching fire, regardless of the exact failure mechanism.
balmy pulsar
sure, but lets not conflate all the different issues. dont learn nothing that way 🙂
vivid helm
Indeed, though I wouldn't encourage buying one.
balmy pulsar
no. terrible looking machine
although, its good in a way that people did, cause what we have today is a direct result of people buying all those terrible printers 10-15 years ago
iron remnant
When they said the 3D printer market was on fire, tho, they didn't mean that literally.
vocal flax
arctic yew
Is that an acrylic prusa i3?
Yeah. Not exactly prusa but has a lot of similarities and some common parts
Also, it's not acrylic it's plexiglass (slightly better plastic iirc)
vocal flax
balmy pulsar
but it will crack from rapid heat cycling
Nothing has cracked for 10 years other than user error, and no real bents to speak off
It's not as rigid as I'd like but that's because it's laser cut construction. 2d planes flex, who would have guessed 😄
The piece was offcut i bought from raw materials source. I was a kid so they made it cheaper.
balmy pulsar
vocal flax
Also, it's not acrylic it's plexiglass (slightly better plastic iirc)
plexiglas is acrylic. nothing more, nothing less
vocal flax
I thought there were some additives 🤷♂️
balmy pulsar
its the original "brand name" for acrylic cast sheet
arctic dragon
Plexiglas is a brand of acrylic, so it would not be wrong to consider them the same.
Strictly speaking, plexiglass is used as either acrylic sheet or a specific subset of acrylic sheet, depending on context.
The main distinction Plexiglas claims is that they cast their acrylic sheets between glass, which tends to result in a more durable sheet compared to extrusion.
balmy pulsar
extruded acrylic is prone to crazing, and other issues. also not suitable for machining
vocal flax
I'm glad I go with acrylic, if it was MDF or plywood, it would be already warped and stuff
And in that case idk if I would fix it
vocal flax
It's been 10 years
balmy pulsar
ah
vocal flax
And 5 of them were in pretty humid environment
vocal flax
balmy pulsar
time for a new one 😛
Naah man I love this one
balmy pulsar
ha
vocal flax
It brings me joy to see imperfections on it
Tho I probably should fix the mains switch it's dangerous for people other than me
vocal flax
balmy pulsar
get a resin printer. than you can print new acrylic parts
I can't deal with resin, seems like too messy process and the gains I'd get doesn't seem worth it
vocal flax
But i want another printer soon. This time less experimentive more for functional/aesthetic parts
balmy pulsar
eos m280
balmy pulsar
haha
vocal flax
I really like the hevort build but it seems pricey
Might just get a voron kit from fytech and call it a day
But im also curious about prusa xl
balmy pulsar
i want one of the crazy fast printers. that do 500+mm/s with a 0.8 nozzle
vocal flax
Maybe I build xl clone or miniature xl
balmy pulsar
but i think those are still experimental
vocal flax
I'm not into fast printers but
Even simple printer with Klipper is quite fast
Fast enough for me
balmy pulsar
I need large structual parts made fast. cover panels and ducts etc
vocal flax
10x10x5 is most common part size for me and with Klipper that would take 30 mins maybe less
balmy pulsar
last one i did was 0.8 nozzle in petg. was ok ish, but it took over a day. i need more like 10 a day.
i know
vocal flax
My print quality is bad tho
vocal flax
balmy pulsar
last one i did was 0.8 nozzle in petg. was ok ish, but it took over a day. i nee...
Are you selling parts?
balmy pulsar
not directly. they are for a device that would be sold
vocal flax
Commercial use
balmy pulsar
yes
ideally i would use an sls printer, but $$
ha
aint got no $500k lying around
vocal flax
Sls texture is so nice
I've heard of sls builds with CNC lasers but CNC laser isn't cheap either
balmy pulsar
the laster is the easiest part as well
vocal flax
Explosive powder and diy machine is questionable combo
balmy pulsar
yeah
you need an argon purge or a low vacuum, something that lays out the powder reliably at 0.05mm thickness..
its obvious why they are expensive
but, maybe one day they will be like 5k 🙂
ha
 pliant iron
what beginner-friendly foss creation software is recommended for designing a 3d object and exporting a standard file format that various printers can read?
vestal thicket
pliant iron
what beginner-friendly foss creation software is recommended for designing a 3d ...
FreeCAD is the first FOSS app I can think of
But then again, I wouldn't call that beginner friendly.
pliant iron
there's nothing geared to printable objects and not full-blown CAD All The Things?
pliant iron
maybe the better question is... what do people use to design their 3d objects, and which ones are the most beginner-friendly?
iron remnant
I mean, the FOSS community tends to have a harder time delivering beginner-friendly things without a corporate overlord to deliver it to the community for free.
Also, 3D is kinda always going to be tricky.
So... yeah, I guess TinkerCAD or Sketchup would be beginner-friendly in general.
A lot of people end up using Fusion360 because there's lots of tutorials and stuff for it.
If you want FOSS stuff, there's FreeCAD, Blender, and OpenSCAD.
One of the things that's been nice lately is that people have started making FreeCAD tutorials on YouTube, which really fills in that gap.
I think that the current model of CAD All The Things is all kinds of broken. I'm not actually the right kind of engineer to know for sure, but I do know that the people who are the right kind of engineer are really resistant to change, probably to a fault.
But, at the very least, what's actually interesting for me in the 3D printing space is things like OpenSCAD because the true advantage is in mass customization.
pliant iron
thanks all, plenty of things to research now. I just need one relatively simple part that has been printed before (not by me) but the file is lost
faint sky
I started using Fusion 360 because that's what the Ruiz Brothers use, most of their files are drag & drop compatible. If they moved to something else I probably would too. It's helps to learn on the same software as the people you're getting guidance and learning from.
I like that there's a wide variety of tools people are using. So if you have a question about a new piece of software you're using chances are someone might have the answer.
vocal flax
iron remnant
If you want FOSS stuff, there's FreeCAD, Blender, and OpenSCAD.
Blender is Foss?
Didn't know thay
 toxic kite

Blender (stylised as blender) is a free and open-source 3D computer graphics software tool set used for creating animated films, visual effects, art, 3D-printed models, motion graphics, interactive 3D applications, virtual reality, and, formerly, video games. Blender's features include 3D modelling, UV mapping, texturing, digital drawing, raster...
 hidden sable
When you realise that you forgot to bring across the m420 s1 in another cura install to retrieve the mesh, haha
 hoary wind
So this isn't 3d printing related directly, but does anyone have a recommendation for turning an SVG from Inkscape into Gcode? I can't seem to figure out Gcodetools
Specifically for a CNC router
 keen raft
This seems a bit unreasonable, doesn't it?
 vocal flax
Have you done repeatability test before?
Depending on printer mechanics it could be belt tension or bent/unaligned something
keen raft
Yeah, it looks pretty much the same every time. Some of it is bad tramming (right side is a little low, front a little high), but there's still a pretty big dent in the middle and lots of ripple. I'm just wondering if that's normal? I did this after heating up, so it might be the heating wire in the bed.
vocal flax
The ripple sounds like a problem
Which can be caused by belt tension. I had similar artifacts with loose and uneven belts
keen raft
Guess I'll play with the belt tension a bit then after the current print is done 😉
arctic yew
keen raft
This seems a bit unreasonable, doesn't it?
I'd say it's not unreasonable to have that amount of deviation but for sure the pattern looks very odd. How many points did you take?
vivid helm
Your bed should be flat to within a single layer height. Ideally less than 20% of a layer height.
keen raft
arctic yew
I'd say it's not unreasonable to have that amount of deviation but for sure the ...
It's a 20x20 grid
Here's a 50x50 after tensioning the belts a little more. I'd say they feel too tight, but the result does look a little better. And I did overcompensate the bad tramming 😉
 keen raft
vivid helm
Your bed should be flat to within a single layer height. Ideally less than 20% o...
keen raft
vivid helm
Your bed should be flat to within a single layer height. Ideally less than 20% o...
20% of a layer would be no more than 0.02mm, maybe even less. I doubt that's achievable on this printer. Even with a flatter print bed, the tramming probably won't get there.
vivid helm
Hmm that's about what mine is.
keen raft
Could also be pilot error 😛
vivid helm
Oh sorry .08
https://media.discordapp.net/attachments/712207796120322118/1096926747615830076/image.png

Still less than half a layer though.
keen raft
I put on a 0.2 mm nozzle today. If it works well, I might try a 0.1 next, but that would reduce layer height to at most 0.05mm. I think that would really push this printer to the limit. The stock bed certainly won't get to this level of precision, apparently. Maybe I can replace the metal sheet with a glass plate to make it more even.
vivid helm
What are you trying to print that would need that much detail?
Because .05mm is getting into the realm of SLA.
keen raft
Need... nothing actually. I just think it looks nicer 🙂
vivid helm
Print time loosely scales with volume, so it will take a very long time to print most parts.
keen raft
Yeah, but I'm not doing this commercially, so print times don't matter that much
vivid helm
Oh I'm just impatient and like to iterate my designs
keen raft
These are 20 point meshes, one on a cold bed and the other on a hot bed


(With different tramming)
vivid helm
Yeah you always want to probe hot.
keen raft
I'd say the large ripples in Y direction are somewhat permanent, but the smaller ones in X direction are worse when hot
Maybe that's just the way it is. I don't want to tighten the belts any further, they already give a tone when plucked.
vivid helm
Yeah, your bed will tend to warp when it heats up. You can try loosening the screws while hot, letting it settle, and then retightening it.
vivid helm
keen raft
Maybe that's just the way it is. I don't want to tighten the belts any further, ...
What frequency?
keen raft
155 Hz
vivid helm
That's very high. 90Hz would be more typical (although it can depend on the printer).
keen raft
It's an Ender 3 S1, probably won't require anything unusual
vivid helm
Does the E3S1 have a dual z drive?
keen raft
Yep
There might actually be a slight problem with the Z axis. The prints have very slight banding and the grease on the Z screws has a noticeable pattern. But it's not enough of an issue to troubleshoot and probably has nothing to do with the mesh
vivid helm
I wouldn't dismiss it that quickly.
keen raft
But a wobbly Z screw would most likely create a regular pattern across several layers and I'm not seeing that
vivid helm
Yeah, but I'm not convinced it's fully unrelated.
keen raft
This is the benchy I printed immediately after installing the new nozzle

You can see on the lower part that the banding really isn't that noticeable. The more interesting thing are these huge ridges 😉
But they all correspond with a feature on the model, so this is probably not a hardware issue
vivid helm
The giant ridges in the hull that look like layer shifts? None of those are in the model.
vivid helm
Could be related to cooling.
keen raft
Not really sure what to even search for. I'd guess it might be a slicer issue.
vivid helm
It's definitely not a slicer issue. If it were you'd see it.
keen raft
But the correlation between the features and the ridges is too strong to dismiss. That can't be coincidence, there must be some connection.
 vivid helm
There is a connection, but it's not an issue with the slicer.
Benchy is a (light) stress test. It's meant to show issues.
keen raft
Well not as in "the slicer wants to print that", of course. But settings like printing the outside perimiters first or last can have an impact on such things
vocal flax
vivid helm
Your bed should be flat to within a single layer height. Ideally less than 20% o...
You have some high standards dude
I am not sure if most probes that repeatable
vocal flax
keen raft
Need... nothing actually. I just think it looks nicer 🙂
Sandpaper exists 😶
vivid helm
vocal flax
I am not sure if most probes that repeatable
Whatever probe Prusa uses is pretty good.
keen raft
Pressure Advance is miscalibrated and there may be some slight overextrusion. The rest is... ok, I guess. Quite possible that the Z screws are a major contributor to the remaining wobble.

 keen raft
vocal flax
Sandpaper exists 😶
keen raft
vocal flax
Sandpaper exists 😶
Yeah, but I'd prefer not to use any 😛

 sand mountain
Is blender worth learning for designing and printing ergonomic enclosures for projects? If not, what are some FOSS alternatives?
iron remnant
So, your three options are Blender, FreeCAD and OpenSCAD.
Blender is mostly about just editing meshes and it's not really intended for 3D printing but it works just fine for the purposes.
FreeCAD is mostly oriented towards duplicating the functionality of a "serious" CAD tool so it's actually pretty good for designing things you'd fab with traditional methods but it can work for 3D printing just fine.
OpenSCAD is a programming language for generating 3D models which can drive you up the wall or be just fine, but it also has a lot of higher functionality that make it easy to make chassis designs if you look at NopSCADLib
If you want it curvaceous, it'll probably be easier to get started in Blender.
 random urchin
sand mountain
Is blender worth learning for designing and printing ergonomic enclosures for pr...
random urchin
sand mountain
Is blender worth learning for designing and printing ergonomic enclosures for pr...
I use OpenSCAD for roughing out designs, and Blender for turning them into more organic shapes when required. I learned enough about Blender from a tutorial that had me create a glazed doughnut that I could at least manage the basics.
shy kelp
That said both freecad and openscad vs commercial alternatives are an eyesore
Rhino/grasshopper are cheap and have plenty of functions
vocal flax
Fusion 360 is free for hobbyist use
iron remnant
Oh, yah, like, I've spent a lot of time with Blender and FreeCAD and OpenSCAD for different projects and probably I'm just proving that Naomi Wu is right and we should all just get over ourselves and use TinkerCAD, LOL.
And one of my friends learned the heck out of Rhino and she loves it.
At least that doesn't have that weird "you are the product and AutoDesk will screw with you to wringle money out of your hide as they see fit" thing that free Fusion 360 has.
shy kelp
Small scale imperialism, lets all learn rhino
Anyhow that's mostly personal preference at the End of the day
iron remnant
Yeah, pretty much the open source model has not been very successful in any particular set of markets at making that which is not an eyesore with a coherent design.
shy kelp
Where I work they use bricscad which I personally hate, because it's like autocad but cheaper
Autocad itself is junk imao
I can't use rhino with it, because stuff gets broken
iron remnant
I used to work at a place with some Seimens NX obsessives.
shy kelp
So you end up taking measurements by hand of like 200 access points and wasting hours
While in grasshopper you could just make it in few minutes
Ah there's a grasshopper plugin, but it's broken
iron remnant
I dono, I feel like the CAD/CAM marketplace is due for a shakeup but I feel like all of the actual engineers are all like "WHO MOVED MY CHEESE" any time anyone tries to do something even vaguely cool.
Maybe KittyCAD.
shy kelp
iron remnant
Oh, yah, like, I've spent a lot of time with Blender and FreeCAD and OpenSCAD fo...
i wish there was something similar to tinker cad but with more options
i like building something up with basic shapes
instead of draw a outline and extrude
iron remnant
I mean, you can kinda get the same sort of constructive geometry out of OpenSCAD, just with programming
balmy pulsar
iron remnant
I dono, I feel like the CAD/CAM marketplace is due for a shakeup but I feel like...
Fusion was the shake up. It has done well to serve the people that would never (be able to) pay for mastercam, gibbs, catia etc... but it sorta has not made any dents in their sales either.
Youd have imagined it would have wiped them all out, but nope
shy kelp
balmy pulsar
Fusion was the shake up. It has done well to serve the people that would never (...
Bah as I see they exploited the 3d printing hype to gain userbase, then limited the program
They're pretty known for it, like let everyone use their junk for a while then place gateways, like the endless fake student program
balmy pulsar
err
fusion isnt limited, its pretty full featured. not 100% on part wioth some others yet, but at only $450 or so a year, there is nothing else close.
The presonal version yes, they restrict and its annoying, but its free so, you cant whine too much
shy kelp
balmy pulsar
The presonal version yes, they restrict and its annoying, but its free so, you c...
Once it was fully free, if my memory doesn't lie to me
Although I never liked it, so I didn't end up using it
balmy pulsar
solidworks with cam is still insanely prices
balmy pulsar
shy kelp
Once it was fully free, if my memory doesn't lie to me
Although I never liked it...
your mewmory lies to you.
it started as the "123" suite of software, which i guess was free, but largely useless
then adek rebuilt it into fusion for $300 a year for basic, and $1500 for ultimate, plus a personal edition which was mostly the same as the basic one. the CAM came from HSMworks which they bought and integrated. PReviously HSMworks was $7000
over time the ultimate went away, merged into the basic, with some optional add ons. the personal got more limited
not liking it is a different topic, which it probably which it didnt walk all over the existing expensive packages. people get adapted to software and do not want to change.
arctic dragon
shy kelp
Bah as I see they exploited the 3d printing hype to gain userbase, then limited ...
Did something happen with the student program? I used it to great success back in the day and I think it still works with my .edu emails.
balmy pulsar
i dont know if its changes much recently.
the personal license evolved from the start up license, but they found people were abusing it (large companies using free version) so they basically separated out the free personal version.
vivid helm
Short version: engineers want to design things, not to muck with corporate bureaucracy and try to figure out how to get their software to launch.
keen raft
Just to follow up on my two issues from the other day: The Benchy looks fine when I slice ith with PrusaSlicer 2.5.0 instead of 2.6.0a6, so the rdges it must be related to that.
I've also installed a glass bed, thinking that maybe the metal bed was warped and my mesh now looks like this, which leads me to believe that this doesn't actually have anything to do with the bed itself. The wheels in X direction make exactly three revolutions to cover the distance, which corresponds with the 3 grooves in the mesh. Not sure why the one in the middle is deeper though. Also not sure what I could do about this.
 toxic kite
iron remnant
OpenSCAD is a programming language for generating 3D models which can drive you ...
toxic kite
iron remnant
OpenSCAD is a programming language for generating 3D models which can drive you ...
if you want to ease yourself into OpenSCAD, blockscad3d.com uses a very similar engine and offers SCAD export
vocal flax
keen raft
I've also installed a glass bed, thinking that maybe the metal bed was warped an...
Get better wheels or install a linear rail. I remember seeing people installing mgn9 rails onto enders should be possible for yours too
keen raft
vocal flax
Get better wheels or install a linear rail. I remember seeing people installing ...
I've been looking into that for the last hour or so. My expectation was that if the wheels were flat or elliptic, the grooves would be in a different location if I rotate the wheels. That isn't the case though.
vocal flax
Good thinking, that's true
 small bay
hey everyone. im gonna get some magnetic beds for me ender 3v2 from the creality store to replace the glass one. and there's a option for 3 or just 1. would it be better to buy the 3 pack and have backups or just the 1
small bay
i know thats why im asking
from the printer we have at school i can tell i dont need to change em like every month
but then again 3 for 30 bucks also seems like a good deal
keen raft
Only if you end up liking them! 😉
small bay
true true
vocal flax
does anyone know how to download fusion 360 shared design?
because i couldnt find any download icon
balmy pulsar
O_o
the free personal version does not allow sharing
you need the paid version to share projects with other peopel
 placid grail
is a creality cr-x a decent choice along with solidworks indie ?
The filament for it seems to costs a lot though
vocal flax
balmy pulsar
the free personal version does not allow sharing
I have education license
Almost the paid version
vivid helm
placid grail
is a creality cr-x a decent choice along with solidworks indie ?
Like I said in the other channel, Creality doesn't make good printers. They are popular because they are cheap. If you want something reliable, I recommend a Prusa, LDO Voron kit, or RatRig.
 hushed turret
I got an ender 3 at the beginning of 2022, and after about 100 hours of futzing with it and not being able to get even a single good print, I sold it heavily discounted to a friend (who was aware of its issues and was okay with messing with it) and bought a Prusa (which worked out of the box, and has been amazing ever since). The time wasted on the Creality was a bigger loss to me than the higher cost of the Prusa.
half dew
My creality (Ender 5) printed amazing for a year or 2...then once things started going wrong it was an endless loop of fixing and replacing. My friend has a Prusa mk3 thats super consistent. I'm printing with a Bambu x1c these days and I don't even bother watching the first layer anymore. Its important to keep in mind that there are users of all these printers that have issues, though.
placid grail
I feel like something like that will costs over 1000$ especially if I have to import it to Canada
Id rather not have one that I have to solder either
but assembly is fine
weary lichen
At work we have a farm of Prusa Mk3S printers. They're solid. We do maintenance on a rotating 12-week schedule (each printer gets maintenance every 12 weeks) and they rarely need anything other than a good cleaning. Maybe a nozzle. Thermistor wires have broken, but Prusa knows how to make things easy to service.
If you can afford one, I would definitely recommend one.
placid grail
well for me the price is basically how many enclosures can I print before it costs less than having bought industrial high-grade enclosures at like 20$ each
Like so far that number is 65 (1000 eur ~ 1300 cad + taxes = 1500) (even more actually because of filament costs)
vocal flax
Creality is good modification printer. It's not a tool.
placid grail
yeah that's the thing to. It seems that some 3d printers like the elegoo mars are not classical 3d printer but are modeling printer and dont use normal filaments like other 3d printers
alledgedly they are more intended for printing modeling/sculpting renders than for says printing small parts to make a contraption
It's just that 2 years ago this same channel keep giving me coupons code for creality and telling me they were just 399$ etc 🤣 so Im kinda surprised
Id mostly use it to make custom enclosures with holders in them so I can hold sensors/mcu without needing to glue them/screw them / include space to glue a battery compartment make lego technic sized though plastic beams / gears etc (hopefully a base plate could carry 4-5 pounds) / panel-mount space thing by sliding them in etween two notchs / brackets / motor adapters. Im willing to forego a small level of detail as Im willing to hammer in an M2.5/M3 if needed . I have a makerspace with makerbots 3d printers and one with a huge 3 cubic feet industrial 3d printer so it would mostly be for says 15cm long things maximum otherwise Ill make a reservation for them.
I have limited space and this will go a counter when it uses near a smoke alarm
arctic dragon
placid grail
yeah that's the thing to. It seems that some 3d printers like the elegoo mars ar...
Elegoo Mars is what is more commonly referred to as a resin printer. Instead of extruding filament the way a CR-6 or Prusa would, it cures a resin layer by layer using UV light and an LCD. These types of printers are great for high-detail models, and can definitely print pretty clean looking enclosures, but they come at the cost of having to safely handle uncured resin in setup and post processing. In case you’re not aware, all UV curable resins are quite toxic and release some nasty fumes you don’t want to be exposed to.
I really don’t think the creality printers are nearly as bad as everyone else says, but my background comes from the days of Anet and their actual fire hazards, not the golden child Prusa was, so my opinion is somewhat biased.
Creality printers are pretty capable printers, as long as some maintenance and learning is within your expectations. There are solid machines at almost every price point from as low as 200, so don’t let non-perfection make your decision too difficult.
placid grail
atm I have eyes on an elegoo neptune 3 pro
elder oxide
I have a Creality Halot One that has been pretty easy to work with
placid grail
I have the huge constraint of living in canada and bought several things from elegoo a find it to be a good value brand
arctic dragon
With any resin printer, be aware of the need for a decent wash and cure station, and plenty of ventilation.
They’re fine printers with their own intricacies, but I want to make sure you’re not surprised by the hidden costs.
placid grail
sounds like resin isnt for me. Is resin some kind of P*** something ? Or PTFE / Petc is all filament ?
arctic dragon
Resin is its own thing, and doesn’t have a filament equivalent. Filaments are extruded from a hotend, so PLA, ABS, and PETG at all thermoplastics. Resin is cured, so they’re closer to some kind of epoxy than any of your traditional thermoplastics.
@placid grail If you know your price range and what you want to make, I’m sure we can suggest some decent options.
placid grail
The specific problem Im trying to solve is lack of access to something like mcmaston-carr in Canada and having to spend several hundreds on lego technic clones/construction system + all the time I spend wasting time on it . Also all the minimum order that make me add unnecessary stuff to orders. Also I'll probably only uses solidworks indie
arctic dragon
So you basically just want a lot of building blocks, but can’t afford to buy them in large enough quantities to justify a bulk order?
placid grail
well it's always the shipping and customs and dhl fee that kill me. That add like 50 to 200$ before I even add anything to the cart
let me grab a pic
This is what I wanted to get for the last 6 months. It's aluminum but being able to assemble things together allows for a lot of projects. But it went back in stock recently, costs 95$ shipping + customs fee + shipped from lithuania even if I order from robotshop canada since it is a marketplace item
 arctic dragon
Some Lego technic parts are indeed printable, but relying on a 3d printer to mass produce pieces will likely drive you up a wall haha
placid grail
But that would be the type of things Id like to print
Also custom enclosures where I can snap in sensors in holders/plastic latch to easily slide them/out and make holes for the usb "debug port" and a sub-latch to hold panel mountings
arctic dragon
Printing custom enclosures is a fairly common use case for a 3d printer. For the construction sets, maybe not ideal, but it could work.
placid grail
Just having a decently though L-shaped printed brackets and generic stuff like this to affix things with m2/m3 standoffs would already help a lot
arctic dragon
It’ll be very time consuming to print a meaningful number of pieces, which at that point you’re more likely to simply print larger custom pieces instead
placid grail
Is it actually easier to say combine different parts using says the solidworks assembly tool and 3d print it at once vs printing separating parts and putting them together like a puzzle ?
arctic dragon
I think the budget printer of choice these days is the Kobra from Anycubic.
placid grail
Oh also very important
arctic dragon
I can’t speak for solidworks, but for most modeling software it should be fairly easy to join bodies.
placid grail
Im a newbie, not very confident with my electronics knowledge dont want to solder anything or assemblre a lot of small parts to be able oot use the printer
that's why I didn't get in the creality ender 3 pro wave a couple of years ago
Would like to avoid modding too but open-source software / lot of config would be nice
price range would be the neptune 3 pro to plus max I guess and available on amazon canada / digikey canada / manufacturer site shipping from canada. Very important I avoid customs fees
arctic dragon
Honestly, most printers don’t require assembling the small pieces anymore. Printers like the Ender 3 S1 should come with the electronics and frames somewhat preassembled.
Mostly plugging cables into connectors and tightening screws.
placid grail
been looking at this https://www.reddit.com/user/richie225/comments/rx4lyi/generic_fdm_recommendations/ so far and a couple of reviews from other sites for a couple of these.
Resuming printing / not having to wait 16 hours for a small enclosure would be great too
arctic dragon
I’ve heard pretty good things about the sv06. Most of the printers in the range you’re thinking are probably going to be pretty close to each other: autoleveling, magnetic PEI…
placid grail
Also like I said if I have something big / require lot of filament I can make a reservation for a sorta free commercial 3d printer. Just gotta wait and pay the 5$ fee
arctic dragon
I’d worry less about which one you want and consider which one is easier to get haha
placid grail
definitively elegoo always have stuff in stock had issues and they are great by email. But amazon.ca has a lot of them like the kobra and the kingroon and the sovol
but the elegoo doesnt have the plus in stock would have prefered it to the biggest plate that is on the max (otherwise they are all the same)
arctic dragon
If you’re really not into troubleshooting, Prusa’s reliability and support might be worth the extra 200 dollars, but otherwise you shouldn’t be too unhappy with anything in the kobra-sv06 range.
placid grail
225x225x240mm might be something I might regret later
so I would have prefer plus with about a 30% upgrade to the size of the plate for around 350x350x400mm
arctic dragon
If you’re okay with letting prints run overnight, sure, get a larder volume. Just be aware that bigger printers are actually harder to print fast with, due to the larger bed.
placid grail
seems that larger bed also means less print quality
the plus would have been between the max size bed and the highest print quality so good compromise
arctic dragon
Not necessarily, if you print slow enough you’ll get the same quality across the board.
placid grail
prusa arent easy to get in canada btw or Id have considered it
arctic dragon
It only makes a difference if you’re impatient
placid grail
saw one sus site selling it and that's it
basically they says This Product is ETL certified and in compliance with Canada Electrical Authority. which clearly shows they arent from Canada (it's called the CSA or Industry Canada). Also ETL is a self-certification
so sounds like a aliexpress clone reseller to me
arctic dragon
Digitmakers.ca? They do have a retail location, so I can’t imagine it to be aliexpress-level quality.
That being said, that’s not cheap haha
placid grail
You mentionned hidden costs earlier ?
arctic dragon
Oh that was for resin printers mainly
Filament printers mainly just need a printer and filament
Cheap nozzles will wear down over time, print beds may need replacing after significant wear, but the overall cost is mostly in material.
After the initial investment anyways
Cheaper printers may break and cost time and money to fix, but overall machines are fairly reliable these days
balmy pulsar
placid grail
sounds like resin isnt for me. Is resin some kind of P*** something ? Or PTFE / ...
resins are usually some form of acrylate
vivid helm
arctic dragon
Resin is its own thing, and doesn’t have a filament equivalent. Filaments are ex...
More accurately, UV resin is a photopolymer. Liquid resin consists of the photopolymer "activator" suspended in a concoction of different monomers and a few other organic cells. When hit with UV light, the photopolymers bind with the other components and form a solid object.
elder oxide
Resin is good fun when you get the settings right
I, in a way, wish I would have got one sooner
vivid helm
I'm wanting to get rid of mine.
It's too much of a pain and I print mostly functional parts.
balmy pulsar
My friend ordered a 12k resin printer. Should be fun.
vivid helm
Well that's good.
vocal flax
placid grail
atm I have eyes on an elegoo neptune 3 pro
That looks like same class as creality printers. No real linear guides (linear rails or smooth rods) to speak of. It relies on v sigma extrusions and rollers which is inferior.
vocal flax
arctic dragon
I think the budget printer of choice these days is the Kobra from Anycubic.
Sovol sv06 is pretty good. linear rails all along decent performance
vocal flax
placid grail
Resuming printing / not having to wait 16 hours for a small enclosure would be g...
Resuming generally doesn't really work in practice because when power goes out print most likely unstick from bed and loose it's position. In that case print remaining half and super glue it together. Which most printers should be able to do
faint sky
Get a beefy UPS for your 3D printers.
It can definitely help if you’re in an area prone to brown outs or short black outs.
 dense garnet
What's a good fdm 3d printer for a classroom maker space environment?
arctic dragon
dense garnet
What's a good fdm 3d printer for a classroom maker space environment?
How old of kids are we talking here? Do you have your own projects planned for it or just want to provide another tool in an open design space?
This list of printers might be a bit dated, but it provides a pretty comprehensive overview of what printers are available for your classroom needs. I’d probably recommend you stay away from the Creality Ender 3 V2, as that price point has since been saturated by a large variety of better printers since.

All3DP Pro
A 3D printer in a classroom is a powerful tool for enhancing STEAM education. Here are the best 3D printers for schools from all-around performers to those backed with an arsenal of classroom resources.
Also worth consideration off my own knowledge are the Flashforge Creator Pro 2 and the BambuLab X1 carbon. Both are great, fully enclosed printers with solid performance for all ages.
shy kelp
Usually with 1k you can get printers that don't need costant troubleshooting
Under that, especially with those 200ish printer or less, it's always about that
In my experience
dense garnet
High School. I started with a couple Creality Ender 5's but have had nothing but trouble with them.
arctic dragon
The old Ender 5s? Yeah those guys can be questionable haha.
@dense garnet if you have the funds, consider https://www.matterhackers.com/store/c/education-bundles as well. Some of these come with curriculum materials, others are just a really good deal haha

MatterHackers
Find the right educational 3D printer, CNC or laser engraver package to bring digital fabrication and technology to your classroom.
 winged helm
What causes bowing like this? Prusa Mk3S, prusament PLA from my dry cabinet, 0.3mm height, standard settings
This was the plate side down portio
 winged helm
Yes peeling up
arctic dragon
Usually an issue of not enough bed adhesion. Typically the cooling fans are off for the first few layers, and turn on after the base is established. However, it’s pretty common for the first layer with cooling to shrink too much and pull the base away from the bed, causing a slight deformation.
random urchin
winged helm
What causes bowing like this? Prusa Mk3S, prusament PLA from my dry cabinet, 0.3...
I usually get that with long, thin prints. The combination of low surface area on the sheet, plus the length tends to make curlung more likely. The factors involved are: 1) poor adhesion and 2) the printed plastic shrinking as it cools. You can try a few things to remedy this. A heated enclosure helps a lot, The plastic doesn't shrink as much. Products like BedWeld help to hold difficult parts in place while they're printing. You can also add "helper discs" to the ends of the print (using the slicer app), that will help hold down the part.
arctic dragon
If it’s an adhesion issue, make sure your bed is clean and your temperature is as you expect. If you’re not printing a part with significant overhang, you could also turn your part cooling down a bit.
And if you really don’t feel like troubleshooting the printer, brims and rafts are always valid workarounds.
balmy pulsar
bed adhesion but also just uneven cooling. normally not a big issue with pla on a heated bed, but if the print is solid and weird shaped it can peel. best solution is always to enclose the machine. but thats not always possible
faint sky
Uneven bed heating can cause it too. On my Ender 3 I noticed it’ll warp in the same spot on the bed regardless of what print i was throwing at it if the bed temp is barely too low. Easiest fix its to turn up the bed heat by 5-10C and turn down cooling. Temp ranges for both nozzle and bed also depend on filament type to help prevent warping.
Brims and rafts can help depending on the base area but are ultimately band aids for too low bed temp or too much cooling.
I’m just reiterating what Hem said though.
 hollow furnace
Anyone know what's causing the crazy resin warping? Internals dimensions are okay.
https://twitter.com/JoshuaBeck7088/status/1667640100023566337?t=ZS61_1xFQ2K2a6OKdYXbBQ&s=19




 keen raft
I'm trying to print these caps. Left one with my usual settings looks ok, but breaks between layers when the slightest force is applied. Right one is with +10°C and no cooling at all, looks impractically bad and still just barely holds together when bent. Thickness of the broken segments is 1.2mm. Both of these are Extrudr NX-2 PLA. Would this work better with another type of filament?
 vocal flax
keen raft
I'm trying to print these caps. Left one with my usual settings looks ok, but br...
vocal flax
keen raft
I'm trying to print these caps. Left one with my usual settings looks ok, but br...
Here is a list of things I think that could make difference
Try lower temp (high temps sometimes make filament more brittle)
Increase flow if tolerances allow. (Squish layers so that they bind together better.)
Try faster minimum layer time if extruder can keep up (same idea as first point filament spends less time with heat)
keen raft
Mh, didn't think of heat as the problem, I'll try that! Thanks 🙂
faint sky
That type of design would break more easily than something injection molded yes. You might not need the cuts to go that far down. Might be able to get away with no cuts at all if it's a snap fit design.
If it's FDM printed the part will only be as strong as your layer adhesion, might still snap off anyway. Depends on the use case and how much torque is applied to a layer.
PETG can be more durable yet more brittle, it really depends on layer adhesion even with PETG.
overall PLA is the best material for most applications
vivid helm
PETG is less brittle than most other filaments, with the exception of TPU.
faint sky
PETG is an advantage only if your layer adhesion is very good and your speed is very slow to remelt a previous layer. PLA can have similar results, again strength with any material depends on layer adhesion.
For SLA.. I have no experience so if you're doing SLA that's out of my ballpark.
keen raft
Yep, they're FDM printed. These are plugs for connector sockets that have a groove at the bottom on the inside, which the cap is supposed to snap into, to keep a not-yet-implemented seal on the socket. Currently the design is an exact copy of the manufacturer's stock plugs. My thinking was that keeping the deep cuts would stretch the stresses over a larger area, because one major concern is that no part may break off under any circumstance while inside the socket. But you can literally put no pressure on them whatsoever, which was a bit of a surprise. And they're equally brittle all the way to the top, so reducing the cut would just make them break further up.
I've only ever used PLA, so not sure where the limits are with any of the materials. The dimensions are fairly small, after all.
It's definitely a layer adhesion issue though.
faint sky
Sounds like you might need to slightly adjust the design to compensate for a more brittle material than the OEM part.
vivid helm
faint sky
For SLA.. I have no experience so if you're doing SLA that's out of my ballpark.
SLA parts are very rarely more durable than FDM.
faint sky
Where each section is make a T junction to provide more lateral strength. That might help.
each tooth would end up looking like a T in a way.
keen raft
There may not be room for that, the connector looks like this: https://commons.wikimedia.org/wiki/File:6-pin_Lemo_connectors.jpg
 vivid helm
Those parts though look to be sort of at the edge of what you can practically print. They might hold up with PCCF. Otherwise you may want to take a different design approach.
faint sky
ah if there's a center core yeah that's a tough one
keen raft
Yep
vivid helm
Another thing you can try is putting little slots or holes in the base between the vertical pieces.
faint sky
yeah you don't want it to be a ring to get stuck in there. make the cuts between them as small as possible. or maybe even reduce the amount of cuts to make each tooth bigger? not sure if that's possible inside that thing. the more surface area you can provide to the teeth the stronger the layer should be.
it's a mechanical part that will see some stresses. that's not an easy problem. not even sure if FDM would be a good answer for it.
keen raft
Continuous rings seem to work, I've seen other people use them. I just don't see them making everything watertight, which would be the only benefit of a new design, really
faint sky
and you need it water tight? yeah cast it in resin with a rubber o-ring.
keen raft
But then again, if a ring breaks off down in there, that's going to be pretty much impossible to get out
faint sky
use the OEM part, get some silicone for mold making. mold the part in silicone, remove it, cast it in resin.
vivid helm
Yeah or just get the OEM part.
faint sky
because FDM will absolutely not be water tight. solid resin is a better way to keep moisture or water out.
vivid helm
faint sky
because FDM will absolutely not be water tight. solid resin is a better way to k...
Well... unless you dip it in epoxy.
faint sky
that's a good idea, will add thickness to each part and might make each tooth bind together. it's something.
keen raft
Well, the device manufacturer claims water is not a problem with out without the cap, but I know from experience that sand and dust will be a problem, so that's what I'm aiming for.
faint sky
liquid electrical tape on the outside., slather it on.
keen raft
It's also a great learning experience to see what's possible, what isn't and to maybe buy my first spool of TPU to print the seal as well 😉
faint sky
TPU is a good idea, yup, didn't even think about that.
but TPU won't be water proof will still need a coating
keen raft
TPU might actually be the solution, doesn't that have great layer adhesion?
faint sky
depends on your printer 😉
vivid helm
I recommend Polymaker TPU95-HF. The stuff prints like a combination of PETG and PLA, but has the properties of TPU.
faint sky
your layer adhesion is a personal thing between you and your printer 😛
vivid helm
TPU has very strong adhesion yes.
faint sky
depends on the TPU too there are many different varieties and I've tried none of them.
vivid helm
As a general rule though TPU has strong adhesion.
keen raft
vivid helm
I recommend Polymaker TPU95-HF. The stuff prints like a combination of PETG and ...
I'll have a look at that. 95A, I'm assuming from the name? Is that soft enough to make a seal?
keen raft
faint sky
your layer adhesion is a personal thing between you and your printer 😛
Currently not adhering to standards, I'd say 😄
vivid helm
Should be
vivid helm
faint sky
depends on the TPU too there are many different varieties and I've tried none of...
It also has strong adhesion to the nozzle and print bed. Make sure you use a textured sheet and have a brass brush on hand.
keen raft
I've just fallen in love with my new glass bed, is that ok?
Has some fancy extra special nondescript surface treatment on it
faint sky
as long as a printer isn't on fire everything is fine.
keen raft
I've got PEI sheets as well as an alternative
faint sky
good luck 🫡
vivid helm
keen raft
I've just fallen in love with my new glass bed, is that ok?
It's fine if you want the bed to be permanently attached to the part.
vivid helm
keen raft
I've got PEI sheets as well as an alternative
You'll need a decent layer of glue stick at minimum unless the sheet is textured.
faint sky
don't rip it off with petg. tpu should be fine. if it sticks and won't come loose can always put the bed in the freezer (after it fully cools down), to get it unstuck.
people do the same thing to remove candle wax from glass. stick it in the fridge or freezer for a little bit it'll come right off.
keen raft
Maybe I'll throw an old PEI sheet on to try it out then, just to be safe 😛
vivid helm
Yeah that's a good idea
placid grail
so I went and got a 3d printer... supposed to get it today but i hasn't shipped yet so I dunno so I can still cancel it if you guys are convincing 🤣
faint sky
Congrats 🎉 I recommend you watch as many youtube videos about how to use your specific model of printer as possible.
placid grail
I cant have ABS in my small room(toxic fumes apparently and I lack ventilation) but Im so confused if PLA can do if it has a bigger fill rate etc
Like I mostly want to do lego technic like beams/L-brackets/screw sizes converters etc
vivid helm
I recommend PETG. It's soft enough to self-tap screws and it has better temperature resistance than PLA.
placid grail
how dioI know if a random petg filament roll will fit the 3d printer ? printer maker dont sell petg or anything else than pla filament
vivid helm
What printer is it?
vocal flax
@keen raft try printing your part horizontal than vertical with supports. it sounds counter intuitive but if it makes it manageable than doesn't work that's a progress.
vivid helm
placid grail
how dioI know if a random petg filament roll will fit the 3d printer ? printer m...
As a general rule most machines take standard spools of 1.75mm filament. Personally I recommend Polymaker.
placid grail
vivid helm
As a general rule most machines take standard spools of 1.75mm filament. Persona...
An elegoo neptune 3 pro
I can still cancel like I said 🤣
vivid helm
Honestly I don't know much about it, but I think elegoo might be one of the better cheap brands.
placid grail
yeah that is usually my experience with them that is why I took a risk on a east asian brand
the was also a socol at close price range and a kingroon but the kingroon is too small. prusa costs too much and dont seem to ship from canada without customs costs
keen raft
vocal flax
<@205572952597594113> try printing your part horizontal than vertical with suppo...
Also a good idea!
vocal flax
placid grail
the was also a socol at close price range and a kingroon but the kingroon is to...
Depending on the model I'd prefer kingroon but elegoo is a totally fine choice.
Ps. Not implying you to change. It's debatable if the cantilever printer with linear rails is better than fully warping around the frame.
placid grail
vivid helm
I recommend PETG. It's soft enough to self-tap screws and it has better temperat...
I had self-tapping screws in mind as it seems making screws with 3d printing is bad. Also I prefer to have a smaller circle on the print and force a screw in rather than having a circle that is too big. Im gonna need a bunch of 2-56 adapters too..
placid grail
vocal flax
Depending on the model I'd prefer kingroon but elegoo is a totally fine choice.
...
the kingroon is too small it can print like 60mmx60mm
vocal flax
And recently sv06 intrigues me because it's basically a cheap version of prusa with limited community and support
placid grail
And I want to make 200mm ish enclosures
also Im really bad at assembly dont want anything requiring hardware modding/soldering
Like last time I had a drone to assemble it ended up looking like a battlemech with fans as weapons on the arms
vocal flax
Yeah size is a big constraint for some people. I think everything I do can be done with voron 0 or similar sized bed. 😄
placid grail
yeah a shame voron and prusa cant ship from canada
it has shipped 16 minutes ago so Im stuck with it
vocal flax
placid grail
also Im really bad at assembly dont want anything requiring hardware modding/sol...
You might have benefited from something a little more expensive but it'll be fine if you are willing to practice some maintenance.
placid grail
can I put it on a wood desk or that need some mat for the heat ?
vocal flax
You don't need anything, but some isolation layer is beneficial for acoustics
I put 2 slices of big cork and fairly heavy marble piece then printer on top
Reduces echoes from coupled noise
keen raft
placid grail
can I put it on a wood desk or that need some mat for the heat ?
I actually put mine on the floor to reduce noise and vibrations.
Not the most space efficient solution though 😉
placid grail
was planning to put it on a counter but someone borowed my tape and I think it wont fit under a cabinet. Also the fans are there so probably too close to wood anyway
vivid helm
placid grail
I had self-tapping screws in mind as it seems making screws with 3d printing is ...
Yes, that's why you want to be using PETG. PLA will crack.
vivid helm
Heatset inserts are nice, but can be overkill. If you're not going to be repeatedly screwing and unscrewing self-tapped threads are fine.
half dew
I mostly use heatset inserts aesthetically. They look cool
placid grail
vivid helm
Yes, that's why you want to be using PETG. PLA will crack.
Polymaker PETG Filament 1.75mm, 1kg Strong PETG 3D Printer Filament Black - PolyLite PETG Black 3D Printing Filament 1.75mm, Dimensional Accuracy +/- 0.03mm, Print with Most 3D Printers looks fine ?
vivid helm
Yeah I buy that stuff like 4kg at a time.
placid grail
does 3d printing transparent/clear filament works ? google speaks about PLA and PMMA (not sure my printer can use these). Reddit says it looks bad and to use resin or epoxy
like for LCDs/leds in the weather
vivid helm
It can work for some parts with enough post processing. My experience has been that it's a pain.
Using a printed part to make a silicone mold and then pouring epoxy will likely work better.
iron remnant
So, there are certain filaments that work... well, better?
vivid helm
Yes, but your parts will not come off of the printer transparent.
iron remnant
Clearly.
There's kind of an axis. On one side, acrylic or glass. On the other, white. For LEDs in the weather, you might reach a happy point where it's clear enough to look cool. For LCDs in the weather, probably not.
vivid helm
PETG has decent UV resistance and can be fairly clear.
PVB is similar to PLA but can be smoothed with alcohol.
iron remnant
Ugh, OK, I was trying to post links but I hit the spam filter.
placid grail
yeah that was weird lol I was tryuing to read and the text kept moving up and down 🤣
iron remnant
Basically, for LED stuff, I tend to treat clear PETG (or PETT or PCTG) as a semi-diffusion material to make the LED look less LED-ish.
And I had to spend a lot of time making it look more diffuser-ish and less clear for the clip-on bits I've got on my bookshelves because part of the goal was to not look at the bookshelves and have my retina fried by looking at the COB strips.
Here's two links:
https://blog.prusaprinters.org/3d-printed-lens-and-other-transparent-objects_31231/
https://www.prusaprinters.org/prints/15310-how-to-print-glass

Original Prusa 3D Printers
Lenses, crystals for lightsabers (not real ones, though), lampshades and many other useful things can be actually 3D printed using transparent filaments. However, it takes more than just using the correct filament. We’ll show you how to use your Original Prusa...
placid grail
can you 3d print some kind of nooks/crannies/pockets to put/slides in sensors and MCUs in instead of using screws in an enclosure or that wont work as well as I imagine ?
what about long hollowed cylinder to pass a wire to avoid a wires spider ?
iron remnant
So, making nooks and crannies to slide sensors in requires that you actually model the part to enough fidelity that you can slide it in? Calipers help!
Basically, a loose fit that you use a screw or two to keep it stationary is much more quickly achievable than a friction fit.
Oh, also, while it's in my head, as per the past discussion, I've been doing a lot with nut-holders such that I can slide a nut in and it'll hold it mostly stationary while I screw in a screw. That has much of the advantages of heat-set inserts without requiring the heat set inserter thingie.
placid grail
solidworks annoy me a bit cant pay for a yearly sub for some reason
arctic dragon
balmy pulsar
screws in most plastics, printed or otherwise are poor
This is actually not totally true, tapped screws actually have slightly more if not comparable strength to that of heat set inserts. Threaded inserts are ideal for screws with intent to unscrew and rescrew multiple times, but the remelting of the thermoplastic actually reduces its strength by a significant amount.
Depending on geometry, there’s also the option of slotting or embedding metal nuts in prints. If you can pause your prints at the right layer, you can press fit nuts mid print.
balmy pulsar
remelting a print will usually increase its strength by a large margin as it will make layer cohesion better.
im not sure how you figure a tiny threaded screw in plastic is as strong as a melted in large diam insert (which takes the same tiny screw in it)
arctic dragon
Hm, I guess the polymer chains don’t degrade that fast. I remember someone doing a stress test and showing pretty similar results, but I guess the type of screw and the filament itself matter too.
Never mind me…
balmy pulsar
petg does degrade on remelting, but not enough to be relevant in this case.
vivid helm

I've tested the strength of brass threaded inserts and will compare it to cut threads and 3D printed threads. Let's find out if it's worth adding these metal parts to your designs!
Buy our own CNC Kitchen inserts: https://geni.us/CNCKInsertsChoice
💚 Support me 💚
Patreon: https://www.patreon.com/cnckitchen
Join as a YouTube member!
Original CNC...
Stefan tested it. Strengths are comparable IIRC. Each approach has its own set of benefits and drawbacks.
placid grail
eh never thought of using an iron to heat up a screwdriver to make holes for screws 🤣
I wonder if it would work for my mean zumo 32u4 and its 2-56 holes 🤣
vivid helm
balmy pulsar
remelting a print will usually increase its strength by a large margin as it wil...
What you're referring to is called annealing, and it usually consists of heating the print up just beyond the Tg of whatever material you are using and baking it at that temperature for awhile. With heatset inserts you usually run your soldering iron at the hotend temperature. Done repeatedly that can probably degrade the material.
placid grail
Im mostly interested in lego technic like parts and tamiya like universal carrier plate so they would be like 2-3mm thin max
so too thin to do this or to uses a power drill to make holes
Im just going to have to use a screw and hammer it in to make the hole then force screw it in
finding the correct screw pattern in a hole to pre-print the correct threads seems difficult/unnecessary
vivid helm
For small screws there's no need to bother modeling the threads. You just need to put in a slightly undersized hole (for example I use 2.8mm hole to self-tap M3 screws).
placid grail
not bad for the thickness Im planning

13 pounds weight on PLA/PETG/"strong resin"
Seems like PETG hard to print, adheres to bed, stringify etc seems you need to tune up on most printers for it to work
vivid helm
PETG isn't too difficult.
"Tough resin" would be printed from an SLA machine, which is totally different.
placid grail
what's with that little mship everybody seems to print anyway 🤣
vivid helm
mship?
placid grail
Like on most 3d printing tuts I check online or videos there is a little ship like this somewhere in the suggested videos / test for the 3d printer etc. Is it like a 3d printing meme or something ?

Ive seen it like 10 times so far in 20 websites/videos since yesterday. Most common it is gray
vestal thicket
It's a Benchy and used to test how accurate your printer is
vivid helm
 placid grail
does it serve as some kind of communication device when talking about 3d printers in a maker space or something ? Like instead of saying your issue / printer specs you show your best benchy and it tells the other person everything they need to know ?
vivid helm
The website covers it.
But if you really want to do meme prints...
https://www.printables.com/search/models?q=rock

Printables.com
Printables.com is an ever-expanding 3D model database for all 3D printer users around the world. Download free 3D printable models, take part in regular design contest, discuss 3D printing with other users, and collect physical and digital rewards for your activities.
placid grail
been reading about g-codes today as well like changing the filament to have more than one layer of color
vivid helm
For the most part your slicer will handle that.
placid grail
what do you mean? My 3d printer dont support 2 filaments installed at the same time so it would have to pause and I would have to switch it manually. firmware that come with it dont support pause either
vivid helm
Ok that's kinda weird. You may want to see if there's a community Marlin build.
placid grail
are cardboard petg filament that bad ?
vivid helm
Cardboard spools from decent manufacturers aren't bad. I recommend Polymaker and PrintedSolid.
placid grail
I did look at a polymaker one but one reviewer said to pick plastic ones: "My only problem with this PETG is that it comes on cardboard spools. I only purchase this product when I cannot find the color I want from another brand wound onto a plastic spool. I have to rewind every spool of this to a plastic spool in order to use it in my Bambu Labs Carbon X1 or the AMS gets filled with cardboard dust. This would be my go to brand for all my PETG needs if it came on plastic spools as it prints so nice." .
vivid helm
Everybody has been moving to cardboard spools because it's much less wasteful (you can't really recycle the plastic spools). Polymaker has some of the better ones.
placid grail
what about the filaments and misprint ? will they get reused / recycled / made into filament when sent back ?
vivid helm
A few places do it. Not sure if there's one in Canada.
balmy pulsar
vivid helm
What you're referring to is called annealing, and it usually consists of heating...
not it is not what i am referring to.
balmy pulsar
vestal thicket
It's a Benchy and used to test how accurate your printer is
Not so much accuracy, but a part that tests many abilities of the printer and slicer at once. bridging, overhangs, etc. And it looks cooler than a box 😛
iron remnant
Understanding all of the different properties of plastics will bring anyone to their knees.
Hence.. annealing.
balmy pulsar
go stand in the corner
vocal flax
vivid helm
But if you *really* want to do meme prints...
https://www.printables.com/search/...
I like the rock duck
arctic dragon
placid grail
I did look at a polymaker one but one reviewer said to pick plastic ones: "My on...
Sounds like something specific to BambuLab. If you use an external spool holder I wouldn’t worry about this.
faint sky
Benchy is a good first print but you have to know how to interpret the results. A calibration cube is also a good first print testing for dimensional accuracy. There are more advanced dimensional accuracy tests you can do.
This one looks pretty good for testing your axis accuracy after initial build. https://www.printables.com/model/164018-xyz-dimensional-accuracy-calibration

Printables.com
This is a print in place object aimed at tackling the XYZ dimensional accuracy calibration | Download free 3D printable STL models
You'll want a set of good accurate calipers for dimensional accuracy tests. You measure everything and compare it to what the model should be. Can help you account for thermal expansion offsets too.
and if you're running Cura there's an excellent built-in plugin called "Calibration Shapes".
calibration shapes includes things like flow test, tolerance test, temp tower, fan tower, retraction tower. all things you'll need to fine tune your printer.
vocal flax
faint sky
This one looks pretty good for testing your axis accuracy after initial build. h...
looks pretty wasteful 😶
placid grail
Im just gonna print lego technic like things till they comes out fine 😄
Dont really care if a miniature comes out ok or not
got the test filament before the 3d printer 🤣
placid grail
and obtained it but I cant really install it at the moment
faint sky
proceeds to print a large model and ends up with spaghetti... but the lego was fine.
placid grail
My new kitty
 faint sky
a bed leveling print is also handy. it's never wasteful if it's for calibration.
Here's a bed leveling print by Prusa. You might need to scale it to fit your printer. https://www.printables.com/model/36706-bed-level-test
Now let's see a pic after it's setup. One step at a time.
building is actually the easy part. calibration can take longer and more effort in some ways.
placid grail
oh cant I check with a spirit level/bubble level ?
faint sky
no, leveling really means tramming so the bed surface is perfectly perpendicular to the gantry.
has nothing to do with actual spirit leveling
you can print on a 45 degree angle if you want as long as the bed is perpendicular... and there are actually 3D printers out there which do that.
i think the creality print mill is best known for that
some people actually mount them to the wall
 placid grail
I have to learn a 3d cad now too 😦
thats the hidden cost of all this
I say 😦 because solidworks/pro-creo/autocad was one of the last class before I failed in engineering due to the maths
|- Manual says "In case of emergency, please cut off the power directly" - OK 🤣 But more seriouslyhow many amps are these things ? says 24V in the manual but not the amps

and need to know to install it on counter
vocal flax
placid grail
|- Manual says "In case of emergency, please cut off the power directly" - OK �...
For 24v models should be around 10 a at full load but generally speaking you only have full load for a 3 to 5 minutes
vivid helm
Yeah generally speaking unless you're running at high speeds peak power will be while both the hotend and bed are initially warming up.
placid grail
10 amps / 240W is ok for a counter socket
Just didnt want a 3k W thing on my counter landlord told me several types that counter sockets arent full amps like the wall ones (but it doesnt sounds right but anyway...)
vivid helm
Might have smaller breakers, but generally speaking 3d printers won't draw too much.
Granted, they'll still draw several hundred watts at least while running.
placid grail
I have 3 sockets and 2 are wired together so I use the 3rd one for higher load
I feel comfortable arguing they should follow the code and not blame me for their shoddy work in front of tenants court if they throw a fit about the 3rd one on such a small load
but on the 1st and 2nd one especially that it is wired to neon lights I can understand a lot of amp capacity is taken
balmy pulsar
code right now is silly for sockets. almost everything needs independant breakers and afci
blah
(im wiring a bedroom this week)
😛
also your 15A breaker is not actually rated for 15A continuous. only 12
(fuses are actually 15)
placid grail
code basically says that if there is a socket it should have a minimum capacity
balmy pulsar
and at 15A the wire, plugs, etc can heat up to 90c. so that's a bad idea as well for long duration.
placid grail
As the tenants or house owners shouldnt be expected to be electrician to understand their sockets
balmy pulsar
no
placid grail
So they tell me the counter sockets are different and I shouldnt use them even if Im very far from the minimum 30A@120V
balmy pulsar
but the point is, 15A is the trip limit, but in most cases, if you have a device that runs for a long time (hours or days) you want to stay well under that limit
counter sockets?
like in a kitchen?
those are 20A usually. with a special shape.
and required to all be independant of each other
(they never are though cause people do silly things)
mine are cause they are new.
ive seen 30A 110 fuses, but im not sure what they are used for except direct wired things (radiators etc)
electricity is fun! :x
placid grail
they connected two of them together on the left side along with neon lights
balmy pulsar
ooh. thats not allowed. oh well
placid grail
and neon lights are usually very high voltage and a lot of amps initially for the starter in the ballast
vivid helm
I would report it.
placid grail
I tried to explain to them that if a socket cant handle 15A because something is wired to it in the walls that's against the code
balmy pulsar
not worth it. old wiring is grandfathere din unless its actually unsafe
placid grail
and they cant threaten to kick out a tenant because they didnt know their landlord isnt following the code
nah building was built in 2019
balmy pulsar
O_o
ok, thats needs to be redone by their original contractor under warranty
unelss some idiot did it on their own in between
anyhow
my condo was full of electrical mistakes
washer and dryer on same circuit etc
most of the plugs were half wired as some sort of cheat (only one socket on the outlet worked, the second was dead)
placid grail
it seems they dont actually have much electrical knowledge
balmy pulsar
they dont need to. they just need to get the person who did it to fix it
placid grail
like less time they didnt like I had my computer speakers/screen/computer/external hard disk on the same outlet so I did the calculations and Im way down vs 1800W
balmy pulsar
code changed in 2020 as well. so some new things dont apply
placid grail
And I was like huh, that is how a normal person plugs a computer...
balmy pulsar
like afci
placid grail
canadian code in my case but still
balmy pulsar
in any case. your printer does not use much power.
placid grail
very similar to the american one since we are stuck with your electrical stuff/standards 🤣
balmy pulsar
placid grail
canadian code in my case but still
im in canada. dont accuse me of being american. thats rude.
😛
but the code is mostly the same. 2020 revision kinda unified them
which is why i am annoyed. giant electrical panels and $100 outlets.
grrr
placid grail
who should I report it to anyway? tenants court ? provincial engineering association ?
balmy pulsar
err
vivid helm
Whoever enforces the electrical codes.


 placid grail
oh there is a trick with that - I learned with age it's better if someone else pick the fight
like if I have an issue with a shop it's better if my credit card company handles it
and if I think something is unsafe in my apartment better to let my huge insurance company with an army of lawyers handle it
balmy pulsar
yes, but worst case you are frowned at by the owner of the shop
messing with landlords can be quite bad
suddenly they will tell you they need the unit for personal use
placid grail
yeah mine dislike me already and Ive been here since the building been built
every time there is an issue in my apartment (like their aliexpress range hood blows up) they try to imply I messed with the electricity because they know I do electronics or I dont connect things correctly to the sockets etc
but that is their management, when their handyman comes he is quite happy I have almost everything he needs and he dont have to constantly go back to his truck
balmy pulsar
is this a large corporate building?
placid grail
not sure what you mean exactly but it is owned by shell company for a REIT on the toronto stock exchange
Like I have to open a ticket with a third party to get repairs and they uses a costly middleware to send/receive emails
balmy pulsar
yes. i mean not owned by an individual condo unit owner. a "real" apartmentr
placid grail
yeah it's condos for rent/apartment
balmy pulsar
its one or the other. not both
placid grail
Well not sure what it the correct word, but they basically built condos and rent them. So condos-style apartment for rent . I have marble counter in the bathroom/granite in the kitchen/italian shower and bathroom etc. that's why I tolerate it pretty much what I always dreamed off
balmy pulsar
in condos each unit is owned by a different person, and they are the ones responsible for everything
placid grail
Anyway we are getting a bit offtopic but at least Ill disconnect my laptop on my inside exterior wall socket when using the 3d printer
so they dont whine about it
balmy pulsar
ha
placid grail
I can explain more about what I live in in #general-chat if you want 😄