#help-with-3dprinting
1 messages · Page 5 of 1
 elder oxide
 potent thunder
Oh heck yea! It would be awesome! This is the adapter I designed...
 elder oxide
oh that's pretty detailed. very nicely done.
potent thunder
The bottom opening is for coolant and we are terrified to put a PLA part on the car and let it war up to operating temperature. We're upgrading the Ender 3 to print ABS so we can attempt to avoid disaster!
elder oxide
ah neat, the ender 3 pro should be able to print ABS with little modification outside of an enclosure
 coarse coral
Delicious print
elder oxide
coarse coral
Delicious print
Right? I looked at it and was in love
coarse coral
Yeh I can see actual reflections. We have peaked with that
Layer lines all spaced nicely plus that finish oh that finish I couldn't imagine ever getting a reflection in plastic but here we stand
 faint sky
Added the 7" TFT touchscreen to adafruit's CAD Parts repo tonight.

As long as the measurements are accurate super high detail of the ribbon cable isn't as important. The curve of the ribbon gave me issues.

With the iMX and larger displays about to become more prevalent it seemed like a good one to contribute. I'll be working on a display project with it. Will probably start out as a weather station display.
Having access to CAD parts especially for displays makes enclosures much easier to design and 3D print. 😉

GitHub
CAD files for various boards, components and parts - GitHub - adafruit/Adafruit_CAD_Parts: CAD files for various boards, components and parts
coarse coral
It's a real pain modelling for parts you have no guides for. Often not even measurements and I've only just started with electronics .
elder oxide
4 of the same blocks done, printing two mirrored ones for doing narrower panels

 bleak flare
Looking to buy my first 3D printer, or rescue one that is unused and needs a good home :)
Is there a good series of articles on what to look for, or avoid more likely, in consumer models? My goals are to build enclosures and small items for the workshop and house. I want to think that material flexibility is my main point, but that's me speaking from a point of raw lack of knowledge.
Thanks in advance for any assistance, and apologies if i've accidentally contributed to the noise :/
 arctic dragon
bleak flare
Looking to buy my first 3D printer, or rescue one that is unused and needs a goo...
arctic dragon
bleak flare
Looking to buy my first 3D printer, or rescue one that is unused and needs a goo...
Most of the popular printers today lack significant gotchas that would otherwise be a complete dealbreaker, but picking the best printer for your purpose can be a journey still. Some good questions to ask before exploring the sea of consumer 3d printers would include:
How large are your prints going to be?
What kind of materials would you want to print? What factors are important to your applications? eg tensile strength, flexibility, temperature resistance, etc
What kind of budget do you have for this?
How much space do you have for this? Does your space have enough temperature fluctuation to need an enclosure?
How much technical capability or time do you have to fine-tune your printers to run the way you want it to run?
elder oxide
Those last questions are going to determine how much you’re going to spend too
bleak flare
arctic dragon
Most of the popular printers today lack significant gotchas that would otherwise...
Thanks for the reply!
- I want to start with enclosures or things to help with the electronics workspace I'm starting
- flexibility primarily, the occassional outside enclosure sure, but mostly in house (not afraid to upgrade to something more)
- not too worried about budget, as long as it doesn't break out of the high 100's ;)
- I have an entire basement that is aching to be put to use
- my day job is computers, i've been a hobbiest in the electronics world for a long time, ham radio - so highly technical
arctic dragon
The second question was referencing the physical characteristics of the plastic itself haha
High 100's, or High 1000's? Big difference there...
bleak flare
I don't want to spend more than 800 or so at the start, once I get more confident in what I'm doing, then I will invest
oh! not flexible in material - I get it! hard items that will not flex mostly - enclosures that could be mounted outside in the elements also
elder oxide
Some materials are temperature sensitive like ABS so your printer might need an enclosure
faint sky
I think one of the most important considerations is build volume. Specifically bed size. If you eventually want to print large items then you're looking at hundreds of dollars to enlarge a printer frame. You can always upgrade the motherboard, steppers, belts, hotend, or extruder. The one thing that is hardest to upgrade is the size of the print area itself as it might require a custom made carriage, platform, bed heater, wiring, and build plate.
bleak flare
my basement has a propane heater - so I should be able to maintain a stable temp range
arctic dragon
Okay, that's definitely workable. Sounds like you're in the market for something that handles more than just PLA, but you don't need an enormous build volume off the bat. With that budget, definitely a lot of options to be considered.
elder oxide
If you’re planning to do outside durable prints, you’ll want to use ABS or PETG
bleak flare
the outside stuff I would consider secondary, I realize that I may create something that will not survive a few seasons as I am on top of a mountain and it can get rather cold
elder oxide
Most higher end Ender printers can print ABS out of the box, a few of the Prusa are pretty capable across multiple filament types
Prusa mini might be a decent option
faint sky
If I would have known now what I didn't then I would have gone for the biggest volume I could, like an Ender CR10 Max or something like that.
bleak flare
I'm not adverse to starting with a good bed size and upgrading once I learn more - the starting printer I am sure I can donate or give to someone
elder oxide
Enders tend to be great for learning a lot
bleak flare
so your suggesting that bed size is the primary, because you can swap out heads for changes in materials?
elder oxide
Prusa are great for printing mostly out of the box
I wouldn’t buy anything under 150x150mm build plate size
faint sky
To do ABS or PETG, basically anything hotter than PLA you'll want a full hot end (made of all metal parts and not a bowden setup)
arctic dragon
If you are working with a single machine and prefer upgrades to replacement, then picking a solid base to start with is a good idea.
elder oxide
faint sky
To do ABS or PETG, basically anything hotter than PLA you'll want a full hot end...
My friend printed ABS fine on a stock Ender 3 lol
For years until he decided to get a full metal end for doing Nylon prints
bleak flare
the discussion is reminding me of what I go thru when talking to ham radio folk about gear
arctic dragon
But to me it sounds like you're okay with dropping a learning printer for a nicer premium printer once you gain some experience.
bleak flare
oh totally willing to swap out gear after I get that critical base knowledge
faint sky
PTFE does start to break down at higher temps. It's possible yes but it's a slow degredation process that will eventually cause a clog or feed issues when the PTFE tube end gets too messed up.
arctic dragon
With the budget you have, there's plenty of room to get a nice Creality Ender 3 or 5 S1
Those are great starter printers from what I hear, from both a price point and a learning experience.
 vestal thicket
I have an Ender 3v2 and just bought a Bambu P!P ($699) - it's known for just working out of the box with fast prints. Otherwise Prusa is good in that price range
arctic dragon
For a similar price, Prusa Mini+ offers less of the premium features in exchange for a better quality-controlled printer that performs super well and would be easy to pass off to someone else.
bleak flare
Ender 3 Max Neo on sale for $399
arctic dragon
BambuLab P1P is probably going to teach you a lot less about printing as it's not something you'd tune or modify, but it's got all the features you'd want from a premium printer and ready to go out of the box.
elder oxide
I have an Ender 3 Pro that’s basically just worked. I occasionally need to trim the bowden tube. I did just buy a Capricorn bowden kit though which is better than the stock tube
faint sky
Looks like the CR10 Max has been replaced with he CR-10S. 500x500 build volume. No full hotend and is missing a lot of features that I'd want from the S1 Pro, no touch screen, etc..
elder oxide
Occasionally I get a bad batch of filament and need to replace the nozzle. Bed stays mostly level. I print on shiny glass so my prints just come off nicely as the plate cools.
faint sky
Bambu's are honestly some of the best out there right now. They're really good but also expensive. The 3D printer space is competitive. You usually get what you pay for.
bleak flare
this is a lot of good starting information - now to read more about some of the lingo you all are using so I can start to make accurate comparisons :)
elder oxide
Some materials need like kapton tape as they will destroy the magnetic bed or slowly pull chunks out of your glass bed
faint sky
Paul Cutler just got a Bambu and I'm super psych'd for him.
vestal thicket
faint sky
Paul Cutler just got a Bambu and I'm super psych'd for him.
It's a beast so far. 🙂
arctic dragon
My recommendation for Creality right now would probably be an Ender 3 S1 Pro. The biggest difference would be its ability to print higher temp materials like Nylon, which is expensive and difficult but ideal for outdoor-use.
bleak flare
nothing like a fresh n00b to trigger conversation
arctic dragon
I'm actually trying to load up Klipper on my Ender 6, and it's not really doing a great job...
elder oxide
PCTG is also a great outdoor filament. It’s a newer material to print will. It’s like printing with PETG from what I understand
But it’s very durable
faint sky
Once you get any 3d printer dialed in and calibrated it will work for your uses. the trick is finding the right one for you because the market is super saturated with options.
arctic dragon
The cons of picking up a less-popular model is less community support to reference.
vestal thicket
I fixed my boss's Ender6 and you're right about that
faint sky
One really helpful place is reddit's 3d printing subreddits. Tons of people post their issues, mistakes, and successes. You get to learn really really fast over there what works, what doesn't, etc..
bleak flare
do I need to start thinking about what to do with the failed prints before I start making many of them?
faint sky
like every day someone posts a picture of a print that's not quite right and people can tell just from looking at a print what needs to be adjusted. it's really helped accelerate my learning curve.
start small, a lot of small prints, then work your way up to medium, then large. don't try to run before you walk.
elder oxide
I started out my printing journey printing ear savers
faint sky
3d printing is a lot like circuit python coding. a lot of iterations in small changes. see what works, what doesn't.
bleak flare
the small before large is something I am fully supporting, it's the best way to learn
my day job is computer security and operations - so incremental is in my blood
and python is my main language
faint sky
yup, it's the same concept.
arctic dragon
bleak flare
do I need to start thinking about what to do with the failed prints before I sta...
Unfortunately, there isn't that much one can feasibly do with failed prints. Re-extrusion costs quite a bit, and plastics degrade with each heating cycle so sustainability is limited.
My advice is to not worry about the waste from your inevitable failed prints, as long as you learn something with every failure.
bleak flare
I was just reading about re-extruding
faint sky
i have a little trash can for excess material, even purge lines go into it.
there's a company that will buy your excess filament when you get more than a kg of it. they recycle it into rainbow filaments. 😉
faint sky
keep it in a separate trash container just for filament
bleak flare
yes, I was reading about what plastic types filament most commonly are and none of them are household waste applicable
faint sky
and keep it separated by color if possible. that does help them avoid having to separate some of it. kind of like recycling bottles and cans in different bins. it does help.
bleak flare
being mostly color blind, I am so not worried about that aspect
faint sky
then throwing it all into 1 bag is fine, they'll accept it anyway.
bleak flare
$10k plus for most of the filament recycling gear I'm seeing
that may be a longer term project, always looking for a niche side-job :)
elder oxide
Use a blender to pelletize your waste, save money in that part of it
bleak flare
that may be a great use for some thrift store blender purchases
faint sky
yeah i can't find the company that i heard accepts it
bleak flare
hmm, I will have to look for maker spaces in my area - there may be something like that already in play
faint sky
We recycle PLA Filament at a 3:1 Ratio. You send us 3kg of used PLA filament (scraps, failed prints, supports, etc) and we will send you a 1kg spool of usable PLA in return. Please e-mail us at info@creativeheartwarrior.com with a tracking number so that we know to expect your shipment.
bleak flare
but that Crealty Ender-3S1 is looking might good as it's on sale
that is an option, I was also thinking about getting a laser cutter so I could make things out of wood just for the composting option but need to research that area more
faint sky
Are you sure the S1 is compatible with the laser cutter?
I thought that was only the S1 Pro?
faint sky
The laser module is compatible with Ender 3 S1, Ender 3 S1 Pro and Ender 3 S1 Plus
That'll work.
elder oxide
Neat
faint sky
Pretty sure it requires a firmware upgrade.
My S1 Pro won't do it until I upgrade the firmware and it's a real PITA to do on the S1 Pro due to the plastic shell. Have to flip it over and disassemble the bottom to get at some of the stuff for the firmware upgrade.
The S1 and S1 Plus don't have that issue only the S1 Pro.
bleak flare
oh cool, so another reason to use the Ender series
(other than it being named "Ender" which is a great reference (even if not on purpose) to my favorite SciFi book)
faint sky
There's also the Sonic Pad... which is an additional like $170
or you could run Klipper on a Raspberry Pi instead. I'm not sure if you can use the laser module with Klipper though.
The Ender 3 S1 or S1 pro are excellent entry level printers. So is the Sovol SV06. 😉
bleak flare
spare computing power is not something I need to worry about - the number of older laptops I have is ... well, embarrassing
faint sky
The Sovol SV06 is comparable to the S1 Pro at a much better price. It actually uses Creality components too.
How can another company get away with ganking parts from another company and selling them as their own? Umm China.
I'm pretty sure that Sovol is just a fork of Creality though. Pretty sure it's all run by the same people.
They produce videos in an almost identical looking room, in the same fashion, with similar graphics, same extrusions, and parts. Probably someone's cousin or something.
 shy kelp
is there any free slicer for fdm that can print supportless? like by displacing tiny parts out air so they can bridge them? like in the image
 elder oxide
Cura maybe?
shy kelp
elder oxide
Cura maybe?
Which option? I'm currently using it, but I have not seen anything alike
elder oxide
shy kelp
Which option? I'm currently using it, but I have not seen anything alike
I’m not certain
 iron remnant
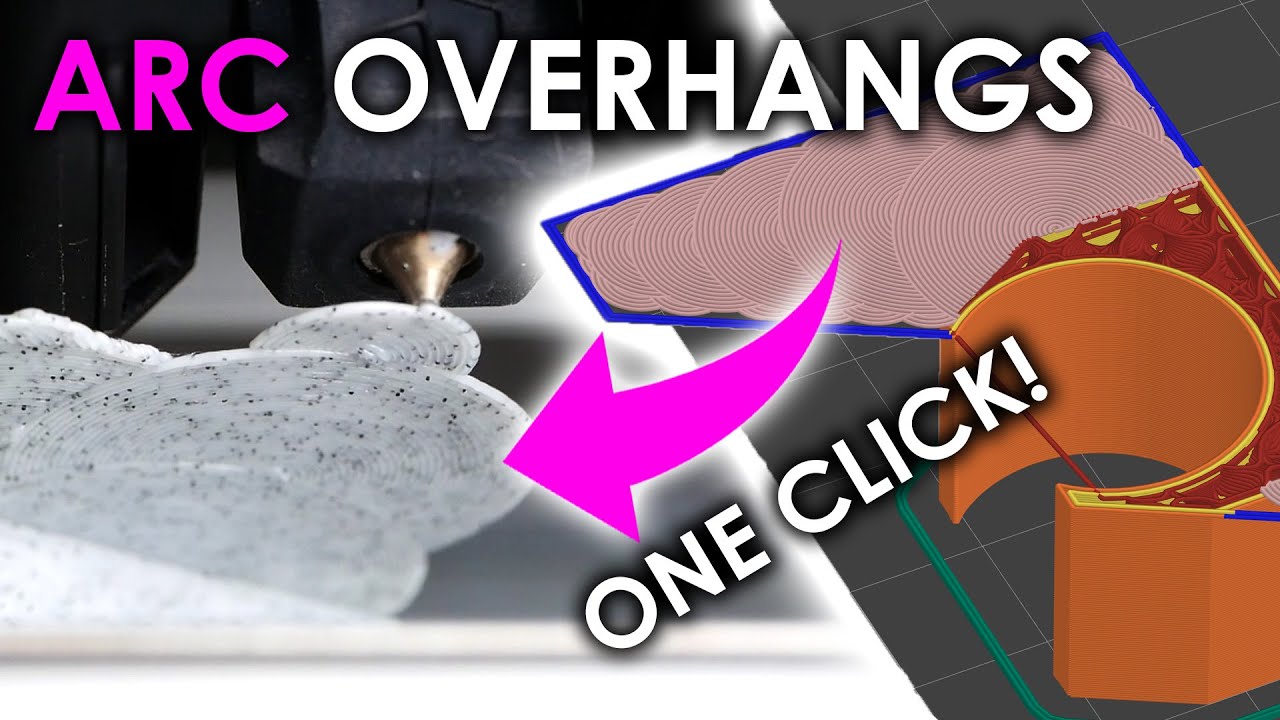
Head to http://squarespace.com/CNCKITCHEN to save 10% off your first purchase of a website or domain using code CNCKITCHEN.
Only 2 months after Arc Overhangs were first released do we have the first implementations in PrusaSlicer! Pleccer added a one-click solution in their SuperSlicer fork, whereas Nicolai Wachenschwan programmed a feature-ric...
shy kelp
iron remnant
https://www.youtube.com/watch?v=TGa_KvKLDR8
seems to work, I'll try it thanks
coarse coral
shy kelp
is there any free slicer for fdm that can print supportless? like by displacing ...
cura does this no worries. i printed close to 45 degree slope and it handled it just fine without support
 void niche
faint sky
`We recycle PLA Filament at a 3:1 Ratio. You send us 3kg of used PLA filament (s...
void niche
faint sky
`We recycle PLA Filament at a 3:1 Ratio. You send us 3kg of used PLA filament (s...
I may have missed it, but do you have a link to this company?
Doh -- nevermind -- it is right in the message I replied to!
https://creativeheartwarrior.com/pages/filament-recyclingl looks like they have paused on the exchange, but still accept "donations"!
faint sky
There are a few company's out there who accept it. Basically they re-extrude their own filaments. I mean you can go that route if you want but it's another hassle I personally don't want to mess with it so would rather send my excess to someone that I know will use it.
 inner cedar
3:1 trade sounds fair, I need to find somewhere to do that
arctic dragon
I'm trying to install klipper on my Ender 6 (V4.3.1 mainboard) and I can't seem to get any data over USB serial. Does anyone have any experience with this?
vestal thicket
arctic dragon
I'm trying to install klipper on my Ender 6 (V4.3.1 mainboard) and I can't seem ...
I wish I could help - when I upgraded an Ender 6 to Klipper last year it went pretty smoothly
elder oxide
Let’s see if this works
 vestal thicket
good luck!
elder oxide
vestal thicket
good luck!
I’ve never done SLA before so here’s to hoping I put enough in for it 😬
faint sky
didn't know creality made resin printers. tha's neat. let us know how it turns out!
elder oxide
It kind of worked but a bit of a fail, likely on my part. Releveled the bed and trying again 🙂
 arctic dragon
They’re not as well-known as Elegoo in the resin space, but they occasionally have really good deals on their resin printers haha
elder oxide
$159 for mine
arctic dragon
Missed the 99USD resin printer over the winter
elder oxide
Which is interesting to me because it retails on the creality shop for $289
It appears most every prime shipping Halot One on Amazon is selling for under what creality sells for
faint sky
I got the ender 3 s1 pro for 260 on black friday. normally about 500 so definitely keep an eye out for deals when they come around.
elder oxide
Anyway, if you’re curious: Creality Halot-One Resin 3D Printer, 6" Monochrome LCD Screen UV Resin Printers with High-Precision Integral Light Source Fast Printing WiFi Control Dual Cooling & Filtering System Easy Slicing https://a.co/d/5ahUyaJ

Creality Halot-One Resin 3D Printer, 6" Monochrome LCD Screen UV Resin Printers with High-Precision Integral Light Source Fast Printing WiFi Control Dual Cooling & Filtering System Easy Slicing
 novel aspen
ok I should not have listened to you 🙂 because it doesn't stick, and I only saved a few dollars
though maybe I didn't calibrate it probably... I'll see
arctic dragon
If you don’t have a glue stick or blue tape around at home, they’re pretty easy to get at any nearby store haha
But it honestly does take some time to get it cleaned off and tuned properly
faint sky
a perfectly properly calibrated printer needs no gluestick, hairspray, or tape.
people generally add them out of laziness or desperation. it treats a symptom not a cause. they're band aids.
especially when you're first beginning you'll be inundated with recommendations to use them and when things start breaking down or going out of alignment and you don't know why, you'll get desperate and reach for them. depending on your build plate surface and which band aid fix you choose... you might irrevocably contaminate your build surface forever.
faint sky
if you have adhesion issues it's simply a z-offset issue where the nozzle is too far from the bed combined with too low of a bed and/or nozzle temperature. you'll find 99% of the time your adhesion issue will cease when you fix one of those 3 things.
 elder oxide
 dapper tree
There could be a few things that caused this.
- Temperature of the extrude being too hot.
- Bed level issues
- Feed rate being too slow on the first layers
And a number of other things
coarse coral
Possibly a bad slice and you have broken walls in your model but also possible your bed is out of alignment and all it takes is one bad pass to start scratching and breaking the part and other things.
coarse coral
elder oxide
There could be a few things that caused this.
1. Temperature of the extrude bei...
And these
Have you done the bed calibration tests?
coarse coral

test to check first layer print after 9 point calibration on the adventurer 3
dapper tree
first layer feed rate is 20mm/s, and then afterwards its 50mm/s
coarse coral
Yes auto level is only part of it. What printer do you have ?
dapper tree
cr10
coarse coral
Oh nice I have cr6 let me check
elder oxide
dapper tree
first layer feed rate is 20mm/s, and then afterwards its 50mm/s
What’s your first layer travel speed?
dapper tree
elder oxide
What’s your first layer travel speed?
100mm/s
elder oxide
Pla?
dapper tree
yep
elder oxide
Maybe try a slower first layer travel, lower your temp to 195
Bed temp should be fine
Maybe do 90mm/s
coarse coral
Calibrate as much as possible every 3 months that's my best tip, I can't tell you exact calibration for cr10 since it's belts on the z axis and different to mine.
But also re slice your part and check for errors in the slicer also
dapper tree
elder oxide
Maybe try a slower first layer travel, lower your temp to 195
yeah i was just about to try with 195 and maybe 25mm/s print speed
coarse coral
@elder oxide what's the pluses of resin based printing over plastics?
elder oxide
coarse coral
<@728676724522352733> what's the pluses of resin based printing over plastics?
Generally you can print finer detailed objects, and other similar benefits
coarse coral
that's cool
 torpid grove
coarse coral
<@728676724522352733> what's the pluses of resin based printing over plastics?
torpid grove
coarse coral
<@728676724522352733> what's the pluses of resin based printing over plastics?
Not only do you get much better detail but also layer lines will disappear in many cases because you're forming parts with a much smaller layer height from liquid resin rather than a hot plastic noodle
arctic dragon
coarse coral
<@728676724522352733> what's the pluses of resin based printing over plastics?
Another major advantage is their thermal resistance. Because they’re not thermoplastic, they won’t melt or deform at the temperatures petg or pla would.
Usually they just kinda start to burn somewhere above 175C?
 craggy sandal
Anyone in here built a Voron based printer? Worth the investment?
vestal thicket
I have not, haven't noticed anyone mention they have
faint sky
@dapper tree The higher your print gets the worse it becomes if the starting point isn't a perfect trammed bed.

Recommend you retram if possible (some 3D printers no longer have tramming springs) and print some calibration shapes.
If the problem is z-axis height related, calibration shapes should help show evidence of that.
Prior to doing any large prints you should first run a bed calibration print.

Generally looks something like that. It should be perfectly even and symmetrical in every aspect. That's only to test the bed tram. If you have other issues at play like an x-axis or z-axis offset due to framing issues that's a different issue entirely, one step at a time though.
dapper tree
faint sky
<@563170995725402122> The higher your print gets the worse it becomes if the sta...
appreciate the in depth, I'll check it again when I'm home
faint sky
Then print a tall object like a temp tower to see if it's z-related.
never underestimate the amazing help that calibration towers offer. they're a window into your accuracy, temp, retraction, and flow rate settings.
novel aspen
I think I got my printer to work mostly, but the default firmware is absolutely frustrating. Are there any "universally accepted" upgrades in that regard?
(I'm using Anycubic Kobra Neo)
absolutely frustrating
u: Hey by the way, I want the nozzle temperature to be 225C, the bed to be 80C and the print speed to be 25%.
p: Oh yes. Sure.
u: Print me this file then.
p: Alright, I'll set the nozzle temperature to 190C, the bed temperature to 60C and the print speed to 100%
u: What?! I just told you... Anyway, abort the print.
p: Good. Now I'm going to set the target temperature to 0 degrees Celsius! We're printing with ice next time!
(excuse my mini-rant, I'm just starting out and I get confused)
shy kelp
novel aspen
I think I got my printer to work mostly, but the default firmware is absolutely ...
Nothing is wrong with your printer
You just need to setup the temperatures within the slicing software
Then export the file and print it
novel aspen
shy kelp
Nothing is wrong with your printer
You just need to setup the temperatures withi...
Huh, the temperature is set in the gcode thing? 🤔
that sounds strange, what if I want to print the same model with two different materials
shy kelp
novel aspen
Huh, the temperature is set in the gcode thing? 🤔
Exactly, and so is homing
Your printer just executes what's in the gcode
shy kelp
novel aspen
that sounds strange, what if I want to print the same model with two different m...
You need to set it up on the slicing software
novel aspen
novel aspen
that sounds strange, what if I want to print the same model with two different m...
ah well I guess I'll have to do that anyway, because of the different physical properties
Yeah I'm a dummy, sorry
Well, it did kinda work. It printed the lower half of the owl
dapper tree
faint sky
Then print a tall object like a temp tower to see if it's z-related.
temp tower came out alright up until 185 where it got clogged somewhere
basicalyl the top rung
arctic dragon
dapper tree
temp tower came out alright up until 185 where it got clogged somewhere
Lower limit for most PLA is 190, don’t go lower than the manufacturer recommended temps haha
elder oxide
arctic dragon
Lower limit for most PLA is 190, don’t go lower than the manufacturer recommende...
it's really weird. I think quality and mix play a lot into it. I've seen some PLA that has 180-220, some that's 190-220, and some that's 200-220
but yeah, 190 is a good floor
dapper tree
arctic dragon
Lower limit for most PLA is 190, don’t go lower than the manufacturer recommende...
yeah that's just what the tower printed tho
coarse coral
arctic dragon
Usually they just kinda start to burn somewhere above 175C?
Yeh higher temps useful, resin seems so messy tho.
coarse coral
dapper tree
I did one of these last night and it came out okay
Adding to this it's worth doing a leveller like that with more points which gives you a greater sense of where the differences are. Some firmware (creality community firmware for one) will show you exact numbers of areas in . mm so you can tighten the bolts on your hot plate and use paper tape if you want it to be super level, the more level your base is the less your hot end has to move which leads to better prints
dapper tree
coarse coral
Adding to this it's worth doing a leveller like that with more points which give...
oh yeah, I've got a custom marlin firmware that lets me do that
very useful indeed
faint sky
PLA bezel for 7” display. Printed at 190/60. This is why i designed the display for CAD Parts. Making a little tripod display. One step at a time. First make a bezel that fits then enlarge the design into a tripod or triangle enclosure.

 vestal thicket
very cool! looks good
faint sky
Thinking about using it with the iMX for a graphical project and spin the tires on the new board.
faint sky
notice the top of the bezel face has no layer lines, replicates the bed texture surface with no lines visible. that's a good tram, good z-offset, flow rate, and line width.
which also translates to maximum adhesion without band aids like glue, tape, hair spray, etc... i couldn't pull the part off the bed if i tried. have to wait for the bed to cool down below 20C before it will release from the bed.
coarse coral
yeh that is a very nice print
faint sky
For those wondering why the bezel isn't symmetrical well it's just a test and the actual display isn't symmetrical either. Most aren't, it's just at 7" the asymmetry becomes much more obvious.
 coarse coral
love how my 3d printing always interferes with bluetooth headset
coarse coral
coarse coral
love how my 3d printing always interferes with bluetooth headset
also interferes with FM
elder oxide
coarse coral
also interferes with FM
That seems odd
It shouldn’t get close to having harmonics that would interfere
Makes me wonder what else is going on
coarse coral
would anyone want access to a model for RPI 4 Model B, Elecrow 5" HDMI screen with speakers and a Pi Sugar S Plus for a handheld system in a form factor that works. Assembly is dupont and solder to push switches, a 2mm cut protype board for triggers and powered by retropie with a python script used from GitHub with some mods to support MCP3008 and Adafruit analog thumb, also a fan connected to screen so it gets power out when pi sugar is turned off. it doesn't have safe shutdown or anything else. for overall compatibility i followed a tut to add the gamepad to the linux gamepad db to avoid intermittent mappings in PPSSPP etc
elder oxide
coarse coral
would anyone want access to a model for RPI 4 Model B, Elecrow 5" HDMI screen wi...
I’m sure if you pushed it to a GitHub repo and shared it someone would find it useful
coarse coral
prints at 230mm
 onyx willow
Am I just doing something ridiculously wrong? With an Ender 3 Pro.
I have a CR Touch, I've manually leveled my bed, I have purchased a glass plate - and still I get these results during printing -- the left side of the bed always seems to be getting squished and looks like this -- the first layer, it's transparent the closer to the left that it gets and at times has dug into the build plate, scraping it. And the right side prints off the build plate.
I kinda thought the CR Touch was supposed to help with this, too, but now it's worse than it's ever been.
I've updated my GCode start to include
G28
G29
And it does run the bed leveling before printing.. still does this.
 novel aspen
What options do I have if I want to use a general-purpose programming language for making 3D models?
coarse coral
onyx willow
Am I just doing something ridiculously wrong? With an Ender 3 Pro.
I have a CR...
Might want to tighten the bolts on the right side of your hot plate and loosen to the left. There is firmware that will give you particulars but you can use your hand and move the hot end and visually inspect for these dips. That will give a good clue about which areas to tighten on your hot plate.
Further to this you may need to adjust the lead screws if your printer has two, you may have sag at one end.
Also worth tightening your hot end roller assembly as this can wobble
onyx willow
Seems I have the 303 chip and the firmware creality provides maybe doesn't support that with the cr touch. 🙀 It takes the readings but the z offsets from it are ignored or something. I don't fully understand how that can happen having used the firmware they linked me to after emailing them.
So now I'm at the point of returning the ender 3 pro, I'll buy a Bambu instead and not deal with it ETCHING a path into the build plate after spending 2 weeks and over a hundred dollars trying to level the bed (which came warped, hence trying to use the cr touch/glass build plate/new springs/etc to mitigate that...)
Including getting someone ELSE who has an ender 3 pro to try to help and giving up after many hours. 😓
I'm optimistic with the Bambu p1p, though! A number of folks have said good things about it.
coarse coral
I had an ender 3 and had problems with how it arrived. The psu had arcing and it thermal throttled sporadically and also couldn't get it level out the box. I would recommend a cr6 se to you, I've been running this for 6 months and with a little bit of maintenance (it's all stock) it's running like a champ. I've seen deals on this printer. It also has a 235mm build plate
novel aspen
Any general tips on printing lego pieces? I'm having a lot of trouble removing the supports for the pins
Victims:

I'll finish my latest iteration in ~4 minutes and see if any of my random tweaks worked
LEGO print failure
coarse coral
novel aspen
Victims:
try printing without supports upside down but those prints look really bad
.4mm nozzle should be fine but better with .2mm imo
novel aspen
coarse coral
try printing without supports upside down but those prints look really bad
without supports? how will that work?
yeah, I'm printing with the pins down
coarse coral
as long as there is a bridge, depending on your printer it can make the passes
novel aspen
a bridge?
coarse coral

How far can the Creality Ender 3 or CR10 Bridge? In this video we will find out. Bridging is possible because of the tensile strength of the filament. As long as the extruder is "pulling" the filament the 3d printer can print horizontally in mid-air.
Learn how to design your own things for 3D Printing using Blender:
https://www.udemy.com/course...
novel aspen
alright, i'll watch that 👍
coarse coral
i think your hot end temp might be too hot. just guessing but that plastic looks really melted
what temp did u print at?
novel aspen
coarse coral
i think your hot end temp might be too hot. just guessing but that plastic looks...
yeah that might be a factor...
(nozzle=205, bed=75) on the first layer and (nozzle=200, bed=65) on the rest
coarse coral
what filament is it?
novel aspen
PLA
coarse coral
if pla 205 is usually ok
i print 210 with pla and it works fine but can go a little higher and lower also
novel aspen
I started at 225 and it was a bit of a disaster
coarse coral
did u check manufacturer recommended range for this pla?
u can do a temp calibration print also for best results
novel aspen
coarse coral
did u check manufacturer recommended range for this pla?
190 - 230 °С
coarse coral

Download files and build them with your 3D printer, laser cutter, or CNC. Thingiverse is a universe of things.
u could do a temp tower, find the best looking temperature to you then write it down in your pc for future reference if you buy that brand again
coarse coral
yeh
novel aspen
Oh another question unrelated to LEGO:
What kind of connectors can I use to stick two parts together? Are 3d-printed screws a thing? (6mm radius or something like that)
coarse coral
yeh i can't really advise i haven't had much success with snap fit but you will need to figure it out for lego to make sure the grips work. it's basically finding a tolerance for one part to go to the next and the right join system. u have dove tails, pegs, hinges etc etc - many ways if you are designing a model yourself you need to find what works. i have just used screws so far
novel aspen
I could also consider a spring-retained pin or whatever they're called
coarse coral
yep you could identify the various systems and do smaller prints to figure out your dimensions from one part to the next and store it for future use
then anytime you need a joint just re-use your system
novel aspen
yep
I'm also using OpenSCAD which should make it easier, supposedly
But the lack of namespaces is probably going to irritate me
faint sky
In order to do high precision stuff like lego you really need to do tolerance tests. Your overall print quality is too poor to attempt lego... which is one of the most high precision parts you can do.
The orientation you print can make a difference too. I haven't attempted lego's yet because I know my tolerances are too poor to do it. In general my tolerance ranges from .2 to .3 and to do lego's you really need precision that's closer to .1 or .05. You have to dial in your tolerances to that kind of level to get super precision.
faint sky
Made 2 more models for a project I'm working on.
Pyle PFA330BT 100W amplifier


Dayton TCP115-4 4" speakers

 shy kelp
I don't remember, nor I can't find stuff, what should I place here, to make so it uses the bed leveling? using marlin firmware
 novel aspen
Oh dear, I think I found a way to print legos without supports... Not at home so can't check, but sounds interesting
Wait no, I don't think I can orient it correctly
Basically, print the piece at a 45° angle
That could mean reducing the number of supports though
coarse coral
there's a cool video by prusa about making lego
i don't know why they are printing with rafts tho, probably to minimise elephant feet
https://www.youtube.com/watch?v=XwPLn7XWOw4 take a look

Read our article to find out more: https://blog.prusaprinters.org/how-to-make-3d-printed-lego-and-lego-duplo-parts/
Have you ever wondered how to print LEGO-like bricks? It requires some tweaking but with our Original Prusa 3D printers it can be done and the results are amazing!
Download our LEGO-like pieces set: https://www.prusaprinters.org/...
faint sky
Here are my Cura printer settings for the Ender 3 S1 Pro with CR-Touch.
 coarse coral
is 220 the max print size on s1 pro? or can you print with no build plate adhesion and get extra space?
faint sky
You need to ensure your printer is actually using the bed mesh by saving it in memory first. Possible it's not even using your bed mesh.
I don't think anyone can print with no bed adhesion...
coarse coral
ha i mean instead of using brim or raft
faint sky
Do you mean with band aids like glue stick, tape, hair spray?
Yes, I regularly print without a brim or raft.
coarse coral
does that remove the grey border in slicer giving you more space?
faint sky
Depends on the size of the piece. If it's top heavy or taller I might use a brim.
coarse coral
like i get 220 with something like that but without it goes to 235 and full size of plate essentially
ender 3 it advertised as 220 but only really 210, there were ways to remove it
with brim
 faint sky
That's the safety margin.
coarse coral
without brim
 faint sky
for printing purge line at the beginning basically
coarse coral
i was probably too noobie 8 months back to figure out this was easily removed with build plate adhesion type set to none
faint sky
oh you mean using the full build volume, yes you would set that up in the printer settings if you want that little additional room. you have to adjust your gcode if you print a purge line everytime (which i do).
 rough trout
Oh yeah, sometimes I've had to turn off the purge line and outlines to fit a part on the plate
faint sky
I didn't know about that. What slicer are you using?
I don't think I have that option. I would just enlarge my printer settings build volume.
coarse coral
there is some gcode that adds the purge line afaik, cura writes it on every gcode generated
so one way is to manually remove it from that file with a text editor
altho not ideal
maybe there's a setting in the gui
faint sky

Slicer: https://ultimaker.com/software/ultimaker-cura
.
.
.
234x234 Model: https://www.thingiverse.com/thing:5423428
.
.
.
Start GCode is also in the Thingiverse description
.
.
.
START GCODE:
M211S0 ;Removes 220x220 Soft Endstops
G28 ;Home
G92 E0 ;Reset Extruder
G1 Z2.0 F3000 ;Move Z Axis up
G1 X-3.6 Y-5.0 Z0.28 F5000.0 ;Move to start po...
faint sky
; Ender 3 S1 Pro Start G-code
G92 E0 ; Reset Extruder
G28 ; Home all axes
M420 S1 Z10; Use Bed Mesh with Z-Fade
G1 Z10.0 F3000 ; Move Z Axis up little to prevent scratching of Heat Bed
G1 X0 Y0

M104 S{material_print_temperature_layer_0}
M190 S{material_bed_temperature_layer_0}
M109 S{material_print_temperature_layer_0}

G1 X0.1 Y20 Z0.3 F5000.0 ; Move to start position
G1 X0.1 Y200.0 Z0.3 F1500.0 E15 ; Draw the first line
G1 X0.4 Y200.0 Z0.3 F5000.0 ; Move to side a little
G1 X0.4 Y20 Z0.3 F1500.0 E30 ; Draw the second line
G92 E0 ; Reset Extruder
G1 Z2.0 F3000 ; Move Z Axis up little to prevent scratching of Heat Bed
G1 X5 Y20 Z0.3 F5000.0 ; Move over to prevent blob squish
G91 ;Relative positioning
G1 E-2 F2700 ;Retract a bit
G1 E-2 Z0.2 F2400 ;Retract and raise Z
G1 X5 Y5 F3000 ;Wipe out
G1 Z10 ;Raise Z more
G90 ;Absolute positioning

G1 X0 Y{machine_depth} ;Present print
M106 S0 ;Turn-off fan
M104 S0 ;Turn-off hotend
M140 S0 ;Turn-off bed

M84 X Y E ;Disable all steppers but Z
yeh i think you can remove some of that to get rid of the purge line
faint sky
i like the purge line, it's extremely informative about bed adhesion before it even starts printing.
as soon as it prints the purge line i rip it off and inspect it, like the millisecond it's finished printing the purge line.
really good indicator for bed adhesion being able to see the underside of the purge line immediately.
coarse coral
same haha some times it's just for fun, others essential. like my last print went over that area so i need to remove it the second the nozzles goes to print first point on layer 1
or i have a purge line on that side of my print
faint sky
I haven't edited the gcode much. that's actually the gcode from Creality's Cura profile for the S1 Pro. 😉
which I just copy and pasted into a custom printer profile within Ultimaker's Cura.
coarse coral
yeh im just using stock cr6 cura profile. it changes on nozzle size to suit
hasn't failed me yet
the app gets updates so maybe i see some changes they add with a bonus
faint sky
Pasting that here should help someone in the future maybe since those are the default settings for the CR-Touch to use the ABL.
specifically M420 S1 Z10; Use Bed Mesh with Z-Fade
Z10 fades out the bed mesh calibration over 10 vertical layers. as long as your gantry and z-axis are good it should fade upwards properly.
ABL can only correct for about a 1mm deviation from side to side of the entire bed. if you're off by 2mm on your bed tram, a bed mesh with CR-Touch won't save you.
a good bed tram + UBL is honestly the key.
auto bed leveling is more of a marketing term, it only does very minor corrections for the bed surface but it still expects a relatively near perfect tram and a good z-offset.
there are core x/y printers out there which have stepper motors under the bed instead of springs... those can actually do true auto bed leveling.
if your bed slinger has springs or solid silicone spacers there's no such thing as auto bed leveling.
the CR-Touch can only make minor corrections in the z-offset (nozzle height from bed), that's all it does with the bed mesh and it's very limited.
the better your bed tram and z-offset the better your CR-Touch system will work.
shy kelp
faint sky
Here are my Cura printer settings for the Ender 3 S1 Pro with CR-Touch.
thanks to both, I'm going to clone that though
faint sky
Yes, it's honestly best to clone the profile from Creality Cura to Ultimaker Cura. If you're adding a CR-Touch that your printer didn't come with but does support then you'll also likely need to visit Creality's website and update the board firmware (specifically listed as "with CR-Touch") as part of the modding process.
arctic dragon
@short owl re: 3d print services - if you’re looking to try a print service for the first time, craftcloud is a pretty good marketplace to get quotes on print jobs online. I also know of some low-cost pcb manufacturers like jlcpcb that recently started offering 3d print services, if you’re familiar with them and want to check that out.
 balmy pulsar
be wary of low pricing offers though. the shipping is usually 5x the price of the print. 🙂
coarse coral
i think @short owl has left the server can't find his op
 short owl
arctic dragon
<@419097447134920704> re: 3d print services - if you’re looking to try a print s...
short owl
arctic dragon
<@419097447134920704> re: 3d print services - if you’re looking to try a print s...
Thank you
coarse coral
🥳
coarse coral
anyone got tips about best quality and speed for .6mm nozzles?
coarse coral
I wish all top layer lines looked as they do in my test face plate but sadly with a larger piece there is wider variation
arctic dragon
coarse coral
anyone got tips about best quality and speed for .6mm nozzles?
Generally, you would take the 0.4mm values and scale up wall thickness and layer height accordingly?
coarse coral
yeh i'm going to use the stock .28mm layer height on the low profile for a .6mm nozzle in cura and see how it goes. 100% infill for this, i'll stick to what i know and adjust from there after results if they're not good enough. at this point my printer is running very well
faint sky
Ive never used anything other than the stock .4mm nozzle. I’d be interested in hearing about your experience.
coarse coral
Will post results there are two smallish details that come out well at .4mm so those really are the tolerances
Fyi .4mm I'm getting 39 hours on the print, .6mm gives me just under 19
faint sky
For bigger prints where fine detail isn't as necessary maybe I'll look into switching. I have some .2-.3 tolerances for small snap fit pieces otherwise I'd have to redesign the model. I usually don't make small things so maybe a bigger nozzle makes more sense. Please keep us updated.
faint sky
Some of the internal components are bigger than expected and didn't quite fit right. This is a first attempt at 3 snap-fit pieces. Not perfect but not too bad either.
The hole is standard 1/4"-20 camera mount tapped for a tripod or other camera accessory. Not sure how they want to display them, the camera mount hole provides a lot of options.
Stuffed inside are 2 14-segment backpacks, 8 channel multiplexer, 1200mah lipo, and esp32-s2 feather.
Haven't run a test yet to see how long the battery life will last driving all of it. Guess we'll see. Unplugging it at 9:20pm 4/2/2023 now.
faint sky
Getting tolerances just right in order to snap-fit stuff has been one of the biggest challenges I've faced so far. It has to be exact.
Too far away and the top slides in and out. Too tight and you have to use a mallet to get them together (which I have done) and it ends up breaking something.
There's a goldilocks tolerance for snap-fit parts. They have to be just right.
coarse coral
faint sky
Some of the internal components are bigger than expected and didn't quite fit ri...
instead of snap fit you may want to consider sliding dove tails with a stop, they're quite easy to work with
coarse coral
faint sky
Getting tolerances just right in order to snap-fit stuff has been one of the big...
highly desirable but very snappable and not always in a good way
i'm printing a test with those smaller cut outs now, it looks like it's doing really well with the bonus being that with thicker layer height no supports needed in that area!
speed of .6mm is blowing my mind
arctic dragon
I mean, it’s a volumetric difference of more than 2x haha
arctic dragon
I’ve been meaning to swap the nozzles to try to print some big boys, but I have a couple of higher resolution prints I want to finish first
coarse coral
well my test is about to finish from a distance so far it looks great
arctic dragon
My wife could use a yarn bowl, but I would use a 0.8mm nozzle for that…
coarse coral
I think I'll do a solid block to verify later lines but those smaller vent holes look just fine
 arctic dragon
Hmm, just a bit of stringing. I could see that as an issue for larger nozzles…
coarse coral
yes definitely stringing
running a .2mm layer height test now
previous was .28
i'll actually run this part on .28 and .2mm .6mm nozzle to show results since it's a small print. back in an hour
coarse coral

I have no issue with .28mm for my part at this point. Layer lines difference isn't really noticeable , both have a similar feel and can handle the arc. Stringing more present in both @ .6mm instead of .4mm. I can see why .6mm is a popular choice.

 faint sky
Stringing can be managed with recalibrating using tower tests. Might take a while to dial in the bigger nozzle. your results thus far are definitely acceptable.
coarse coral
that's one calibration method i have yet to implement, this is related to flow and retraction inline with z hops i imagine (and maybe filament specific). for now, i'm happy to run a heat gun over the part to zap those strings!
faint sky
Cura’s calibration shapes plugin is amazing. Can highly recommend it. Any time you change hardware you should run some tests first. Like retraction towers, temp towers, cooling towers. They’ll help you dial in the best settings for your printer faster than any other method.
Thats chasing perfection in your case though, your results are already looking really good.
coarse coral
i'm changing nozzles frequently for this build, the buttons are all in .2mm, the face is .4mm and now the back is .6mm since it took 2 days to print and i had too many failures to enjoy that wait time, plus it seems like a good blend of nozzle sizes for this to be put together.
fyi i'd be careful with hotends on creality printers, my end block came loose and almost ripped the thermister out
heater block came loose
which houses the thermister
faint sky
Is that from wear on nozzle changes putting stress on it? Ive not encountered that one yet.
coarse coral
yeh very much so, there's always a little rotation that i didn't account for until the firmware threw up an thermistor error (twice). i panicked and replaced my nozzle using a wrench to hold the heat block. powered down and back on, thankfully i didn't break anything
always heat nozzle before replacing
i don't see any play until about 180 degrees so i pre heat to 210 always when changing but this time i must have over tightened a smidge
found this online
 faint sky
Yes now that i have heard of before. Also if you dont get the nozzle tight it can squirt out filament from the side and you end up with a blowout and blob around the entire hotend.
coarse coral
another issue i had yesterday, was doing a filament change mid print so it was sliced to pause at a specific layer and park the nozzle. well, it was parked for a couple hours since i couldn't get to it. swapped filament ok, and did a manual purge which i normally do. what i didn't know is the filament had gunked up inside whilst parked, so even tho the new filament was loaded and purging there were inner artifacts left which when the print resumed really constricted the flow....
so a new nozzle or a nozzle clean was required, i chose new nozzle to save time
coarse coral
faint sky
Yes now that i have heard of before. Also if you dont get the nozzle tight it ca...
sounds like what happened earlier
faint sky
Possibly, I’ve also seen images of nozzles that worked their way loose and fell off.
You see a lot of weird issues like that on reddit pretty much every day. It’s a great place to learn, extremely active community.
coarse coral
yeh i seem to be hitting a few snags ha (thanks again for helping with stepper motor)
faint sky
Breaking something in every possible way first is invaluable towards making it work the right way eventually.
Not many people would know the signs to watch out for before a shaft breaks. You now have more experience than most precisely because you’ve endured through those lessons.
coarse coral
absolutely
i almost gave up with the printer, since owning this it's basically been calibrated eventually
really enjoy the cr6, i'll probably upgrade the hotend in the future
however i am going to use glue now
coarse coral
when switching nozzle absolutely adjust your z-offset to what works with new layer settings
coarse coral

looks like my thermistor came loose
Yes another bent screw .

Not so much a broken thermistor but likely temperature fluctuations because the heat block isn't snug

Snapped thermistor

Thankfully a cheapish part that's if I can remove the cartridge as it feels welded in there
coarse coral
replaced screws and new thermistor arriving wednesday
i'll be your tour guide - this is how a 3d printer was once destroyed
need to tidy my home anyway, there's dishes and things that need cleaned
got some nice walks to go on, that type of thing
 gloomy anchor
anyone have a kingroon kps3 with bltouch? I cant get mine working with klipper mainsail, did it work for you guys?
vestal thicket
gloomy anchor
anyone have a kingroon kps3 with bltouch? I cant get mine working with klipper m...
I'm running Klipper & Mainsail on my Ender3 v2. If no one has a Kingroon, you might try the Klipper Discord too: https://www.klipper3d.org/Contact.html
shy kelp
anyone have recommendations on a multi material 3d printer. A few requirements, must either be a bed slinger in a upside down T shape or skinnier than 17 inches. And must be currently on the market. (I have closet that i must be able to wiggle the printer into, upside downT shapes I can flip the printer on it's side and twist it in there)
faint sky
coarse coral
replaced screws and new thermistor arriving wednesday
Everything was going so well too! What happened? During a nozzle change?
coarse coral
yeh it was that one pull i recognised, which did damage the thermistor
hopefully the new part is a simple swapout and we are working again. the thermistor warnings were intermittent over short period of time, i got 20 seconds of print then error, i got 20 minutes of print then error.
can't really bypass thermistor errors, that wouldn't be a good idea
good time to clear up my desk
and solder wires and microcontroller
coarse coral
Heater cartridge and thermistor arrived
 vestal thicket
yay! Those look much easier to install than on an Ender where you have to run the cable all the way to the board
coarse coral
Oh that is a long cable run, there's a board on my hot end area
It all connects here
 vestal thicket
Nice
coarse coral
Just warming up to temperature now so far so good. I'll setup a small test part but really seems fine .
coarse coral
Holding it's temperature and now a test over 50 minutes. Feels fine and was also good to replace the bolts on the heat block. Looked like the hot end came up to temperature quicker
thermistors are so cool
coarse coral
printing again
 vocal flax
coarse coral
Thankfully a cheapish part that's if I can remove the cartridge as it feels weld...
vocal flax
coarse coral
Thankfully a cheapish part that's if I can remove the cartridge as it feels weld...
Heating up the block might loosen it. But you need thermistor for that 😅
coarse coral
haha i see what you did
i think they put a little bit of adhesive in as it looked chalky
it did take some force using an allan to come out
putting down some thick layers now with a .6mm nozzle
faint sky
Unplugging it at 9:20pm 4/2/2023 now. 1200mah battery in the 14 segment display lasted about 36 hours
vocal flax
coarse coral
i think they put a little bit of adhesive in as it looked chalky
That might be thermal paste.
faint sky
The white paste typically is ceramic based.
Now that I cut the multiplexer out of the equation in the segment display project. I can make a much more compact enclosure with less parts.

Everything gets mounted in a single enclosure. No more 3 piece design. It's a normal 2 piece snap fit design now.

The snap-fit lid has a slot for a small Lipo battery which will sit in the unused space next to the ESP32-S2. Will be downsizing the 1200mah for a 500mah. There's no reason for this thing to run on battery power for more than 24 hours... Actually there's no reason for it to need a battery at all since it's not using wifi. Meh.

Just started the 5 hour print for the enclosure.
and I just thought, I have plenty of room to add the lid on the build plate but I'm used to printing things one piece at a time. 🤦♂️

Anyone print one piece at a time or do you load your build plate with as much stuff as you can?
vestal thicket
I usually lean more to one at a time, unless it's a bunch of little stuff. I'm always afraid something is going to go wrong, heh
arctic dragon
faint sky
Anyone print one piece at a time or do you load your build plate with as much st...
Seeing as my printer is in my bedroom, I tend to keep job timers shorter when I can.
rough trout
faint sky
Anyone print one piece at a time or do you load your build plate with as much st...
For initial testing, almost always one at a time. For something like this if I was making a bunch, then I'd load the plate up a bit, but if parts sit on mine for too long they'll warp (even PLA)
Also if I'm printing it face-down, I often chamfer the edge on the face or else that edge can be rather sharp
elder oxide
Finally got the settings right for the resin I’m using

Turns out I was curing too long on the base layers, not long enough on the normal layers.
The details are very nice
Just goes to show that resins are far more particular for settings than FDM
rough trout
Oooooh, looking good!
iron remnant
Yeah, I can see how it would only resin-ate with some people.
elder oxide
iron remnant
Yeah, I can see how it would only resin-ate with some people.
Just don’t eat it
faint sky

This is why it helps to use the Adafruit PCB meshes for accuracy. Barely slides under the crossbar. 🙂


All dressed up and ready to go. 🙂
elder oxide
Very classy
faint sky
Thank you. 🙂
elder oxide
 faint sky
That's going to be a big watch.
 faint sky
Very nice. I want to make one too. Mountable enclosures are hard to find for them.
I mean as a product.
Are you doing the PCB yourself or is this an enclosure to modify a commercial product?
elder oxide
It’s just to hold plug to socket extender cables
I’ve thought about making a custom under the desk hub though
faint sky
ah i see, i could actually use that too. when you play around with electronics you tend to slowly get enveloped by wires
coarse coral
vocal flax
That might be thermal paste.
good call, it's possible
coarse coral
faint sky
Anyone print one piece at a time or do you load your build plate with as much st...
I try to print items at the same time if they are same height but will make an exception, plus special mode is set to one at a time always for multiple items unless it's a two filament print then it's required to print at same time.
i don't think it really matters though, if there's space there's space
faint sky
That’s awesome. Your print quality is amazing too.
coarse coral
yep very impressed, and feels very similar
definitely not as defined though, things like .5mm counter sink not so good.
coarse coral
coarse coral
yep very impressed, and feels very similar
Prefer .4mm. it's worth the wait. Even for my quite bulky part
faint sky
Well you printed with a bigger layer height. You’d lose detail doing that with the same nozzle anyway.
coarse coral
of course - it is what it is
my workflow has been totally screwy but all things learned now


 elder oxide
Lol no
coarse coral
what are you printing?
elder oxide
I’m printing a legend of zelda Link figurine to test out fine details
 elder oxide
I was watching some videos on this high transparency resin and apparently a lot of people have issues with fused supports, overhangs, and hollow objects
coarse coral
i always wondered how water soluble supports work in resin printing
elder oxide
Same
coarse coral
the world is very grey if we only print in 1 filament
but then again there's always paint but yeh i'd imagine water soluble supports somehow need the main part to not be that
i printed a doom guy with tree supports at a small size. it was instant trash
long time ago tho
elder oxide
Tree supports are much better these days from what I understand
coarse coral
yeh i heard same also haven't worked with them more than that model but will get there, i'm just deciding between orangepi and rock5 for next sbc project or whether to go for a radxa cm and do a custom pcb (learning from scratch with pcb design)
i think i'll do a sbc tho and get myself a handheld before going further because pcb design seems like it will take a long time
has anyone tried fusion360 in a vm on linux? how's the performance?
faint sky
reminds me of fraggle rock doozers.

fraggles used to make them mad destroying their engineering projects because their building materials were basically delicious rock candy.
why would you want to run fusion 360 in a vm? it's a cloud based program so going through a vm would definitely make it a little slower.
i imagine you can but fusion 360 likes to crash on me as it is. going through the vm would probably crash more. i've never tried though.
elder oxide

Aside from the fact that I broke the top of the bow off while removing supports, it looks fabulous
 tender sparrow
Link doesn’t need a bowstring to fire an arrow anyway
elder oxide
tender sparrow
Link doesn’t need a bowstring to fire an arrow anyway
I don’t think the model had a bow string. 🤔
I’ll have to look again
coarse coral
faint sky
why would you want to run fusion 360 in a vm? it's a cloud based program so goi...
Oh I did not know it was based in a browser! I thought that was only education licensed software. I will look !
faint sky
Im not sure if its browser based. Its kinda like adobe’s creative cloud. Program runs locally but everything you do goes out to a cloud server as your timeline history. You can save and export locally too. Try it out, the free version has some feature limitations on advanced stuff, but totally useable as your main 3d design program for beginners.
The paid version allows for plug-in support which is necessary if you want to use it with an electrical 3D component library to replicate adafruit boards (for contributing to Adafruits CAD parts).
elder oxide
This will be an interesting failure to see finish lol
 faint sky
aww it was doing so well
elder oxide
It should still work though
coarse coral
elder oxide
This will be an interesting failure to see finish lol
Literally printed the same dragon for my friend, the dragon name is now George ^^
Issue:
Is there any way to install Fusion 360 on Linux?
Solution:
Fusion 360 cannot be directly installed on Linux. It is only available on Windows and macOS.
fusion 360 also £408 a year. can't justify it, they don't support linux. it's not that good that it may be, i'm still not able to access this software for the prices they want. I have now found this
Compare features and functionality between Fusion 360 for personal use and Fusion 360 and learn which CAD, CAM, CAE and PCB software is the right solution for you.
vestal thicket
OnShape is free for hobbyists (browser based), but all your designs are "open" - anyone can browse them
coarse coral
onshape have a nice looking web page
however i'm a student rn
it disapears when i'm no longer in education
browsing files is cool in an open way that's like github
vestal thicket
What do you mean it disappears?
coarse coral
well if you are not in education you don't get access
but they literally ask you only if you are in education nothing more, no student id - just that question
vestal thicket
It says free for hobbyist and maker community on their pricing page: https://www.onshape.com/en/pricing
coarse coral
yes that's the installable mac or windows client
their browser access appears to be limited to the education realm
it's literally a vm they provide
what an ugly experience for linux / personal users by autodesk
think i'll stick to sketchup and kicad
coarse coral
vestal thicket
It says free for hobbyist and maker community on their pricing page: <https://w...
Sorry i was referring to autodesk stuff, didn't fully check out onshape
faint sky
Fusion 360 is basically an advanced form of sketchup. I didn't realize you were a Linux user.
I'm sorry I didn't realize it wasn't available for Linux.
FreeCAD is a popular alternative and is available on Linux.
coarse coral
that's alrite
sketchup is cool i'm pretty familiar with it, it's just not parameter based
i have a feeling there are extensions for it which may help that, and it does have the ability to add functions to parts of the model which effect others e.g. if component < x set this component to n
shy kelp
I don't get it, can't you use wine? 🤨
 sleek crag
onshape is browser based. Will that work?
coarse coral
had real flow issues tonight and the problem was a small residual build up right at the tip of the bowden tube at the hot end assembly, a trim fixed it... direct drive i don't think has this problem
that said i've had about 8 weeks of regular printing with this bowden
 loud silo
coarse coral
yeh anything browser is good
loud silo
coarse coral
yeh anything browser is good
I like tinkercad for simple designs. I find it easier than sketchup
 high junco
I wonder if this is the best place to ask for files from one of Adafruit's designs? I left a comment here, but no reply: https://www.thingiverse.com/thing:4089500/comments

These cases are designed for the new line of PyPortals. The PyPortal original, PyPortal Titano and PyPortal Pynt. It’s like a mini desktop PC that you can have on your desk and display all sorts of data. The ports are accessible on the side and there’s even a spot to hold a speaker. The 3D printed enclosure is designed to snap fit so it’s easy t...
vestal thicket
high junco
I wonder if this is the best place to ask for files from one of Adafruit's desig...
I might suggest leaving feedback on the Learn page, too. I don't know if anyone will see it here
faint sky
@high junco Looks like they've updated the files on Printables. Most have stopped associating with thingiverse since people are stealing designs without attribution and attempting to upload them as their own original designs. It's a big problem on thingiverse. So the Pyportal enclosure file being 1 piece there might actually be intentional. Printables is a much better moderated community for sharing 3D printing files.

Printables.com
These cases are designed for the new line of PyPortals. The PyPortal original, PyPortal Titano and PyPortal Pynt. | Download free 3D printable STL models
If you make an Adafruit designed 3D print you can share it as a "make" and they might highlight that in 3D Hangouts live show (with Noe & Pedro on Wednesday's).
Printables makes sharing makes and remixes much easier. It's just a better place to be if you're into 3D printing.
Printables by the way, in case anyone was unaware... is directly run by Prusa and they do a fantastic job.
 short crag
dose anyone have any recommendations to stop the resin leaking on the display and ruining the print
coarse coral
loud silo
I like tinkercad for simple designs. I find it easier than sketchup
Thanks I think I'll focus my efforts on SketchUp and continue there
faint sky


Redesigned the lid with a tiny momentary toggle button for a power button.
The concentric pattern created an eye around the center hole. Would be great for a webcam, just one of those accidental discoveries.
Also redesigned the battery holder. Infill likes to fuse so it was a pain to remove. One of the sides broke but it actually worked out for the best as the battery wouldn't fit in there due to the new center switch anyway.
high junco
faint sky
https://www.printables.com/model/16583-retro-cases-for-pyportal/files
Thank you. Guess I'm behind the times! I'll go get my designs uploaded to printables too!
faint sky
That's not an infill pattern. That's a top/bottom layer pattern (concentric).
I've started to prefer concentric because of the pretty patterns and the printer makes more continuous lines without travel moves which means finishing just a tad faster.
It depends on the geometry of your design though. Since I mostly do enclosures lately it makes the most sense to set top/bottom layers to that pattern.
With Cura expert settings you can setup the top/bottom layers to be of a different pattern than infill. The basic Cura setting yes it's probably all the same.
 halcyon apex
Does anyone know where to get the STL for the EPCOT build that was in this video?
https://www.youtube.com/live/KxbhVBEuip0?feature=share&t=2222

This week @adafruit we’re checking out John Park’s Hexpad MIDI controller. Taking a look at the EPCOT spaceship earth work in progress. Checking out more res...
vestal thicket
halcyon apex
Does anyone know where to get the STL for the EPCOT build that was in this video...
it's not out yet, it's a work in progress
faint sky
When it is released you'll find it on Adafruit's Printables page here: https://www.printables.com/@Adafruit

Printables.com
Open source projects using micro-controllers, NeoPixels and creativity! Profile managed and moderated by Noe Ruiz – 3D models
If you're on Printables it's recommended to follow them or bookmark it. Most of the 3D printing learn guide projects host the files on Printables. 😉
 coarse coral
cool switch. maybe a future design u can make the toggle switch hole bigger and make a button cap for it
and after the inserts you make a lip to stop it falling through
inserts to stop rotation and lip to keep in place
you could also put a standby glyph on the button cap
faint sky
space constraints might not allow for that but it's a great idea.
i'd have to lower the switch more to fit that in there and it's already pretty low and close to the stemma plug below it.
coarse coral
yeh you'd need some sort of space to mount the button on a platform or a piece of board to ensure stability
faint sky
i think it could fit but it works as it is. the power button was just an extra feature. i doubt they'll actually ever turn the thing off.
coarse coral
yeh it's a nice switch all the same
faint sky
i was scouring my workshop for a tiny power button and that's all i could find.
i've never seen someone do a snapfit thing like that before with that kind of button, actually quite proud it worked.
will be sharing that one with the Ruiz Brothers, not sure if they've seen something like that either. i just came up with it.
coarse coral
you've done well putting it together
faint sky
Thank you 🤗 It's all really squished in there. Not much unused space.
coarse coral
i wish i'd built space for my adc inside this project but unfortunately it's just super glued to an inner wall lol
faint sky
if it works it works
coarse coral
that's it on this occasion, next versions will improve i'm sure
now i need to verify that retroarch handles a uinput c and z button broadcast event
 coarse coral
oh wow that's a really nice button enclosure
that's what mine looks like LOL

specifcially my toggle housing
super glue from 3 sides 😆
faint sky
right but you have something below it to press on
coarse coral
with the legs pointing horizontal. yes that was the main consideration but it could have been SOOoo much better akin to your implementation
i really should have grabbed it somehow
faint sky
it's not in the public file on printables and probably won't update it with it
because the buttons are unique and someone would have to have the same exact one for it to be of any use
coarse coral
for push button projects i'm trying to stick with .6mm but there are many out there at .8mm and toggle switches are many variants i think my current one is .7
i need to try the soft feel buttons but they're quite expensive in limited quantities
faint sky

mxuteuk 50pcs Black Latching Mini ON/Off Switch Self-Lock Micro Push Button Switch DC 30V 1A for Light Lamp Wall Outlet DIY SMD Flashlight Type BK-1208
coarse coral
they are nice looking
faint sky
it's a latching switch not momentary, which is why i wanted them.
coarse coral
the toggle i use has 3 pins
faint sky
I could have used a mountable slide switch but i like the clicky latching button switch for some things. right tool for the right job. everyone loves pressing buttons. 🙂
coarse coral
 faint sky
i don't even need to add instructions, people will see a button, wonder what it does, and press it and figure it out. buttons are intuitive.
coarse coral

Aussel Tactile Push Button Switch Micro Momentary Tact Assortment Kit (180pcs)
faint sky
those look big
coarse coral
they are actually i never purposely bought them but in the end i needed it
faint sky
oh they're actually like the 6mm button size
coarse coral
they click and stick in the high or low position essentially
the blue cap button is actually .7mm
faint sky
i could see them being useful for something easily
i kinda lucked out having the latching switch on hand, they're really low profile which is exactly what i needed.
coarse coral
they are a good assortment but the high capped tactiles i havent found much use for them 6 x 6 x5mm is really all i ever needed
plus with the press being closer to the base you can get some extra tolerance if your button cap is outside the diameter of the actual button
faint sky
the nice thing about the 6mm breadboard form factor is you can plug them into just about any pcb that accepts 6mm buttons like that
coarse coral
high capped buttons would lead to pressure going side to side rather than up and down
indeed, they do melt very fast if the iron gets too close
but through hole soldering you wont have that problem at all
faint sky
actually most don't need soldering if you get the footprint just right, they'll friction fit
coarse coral
for breadboarding yeh they hold snug but they wont hold in proto board
faint sky
not the blue ones you have though, the pins are straight. the 6mm ones have curved feet for friction fit.
coarse coral
yeh but i wouldn't rely on friction in a final assembly
they pop out of breadboard often
faint sky
they're loose in a breadboard but in a pcb with just the right footprint they'll snap fit in
like on my TR-Cowbell, no soldering necessary
coarse coral
u could try for sure
faint sky
but i do solder them anyway
coarse coral
yeh and to be fair the pins are very thin metal, even in a friction fit the movement may lead to leg snap
faint sky
i like that they can be used in breadboards or pcb's. make it a versatile part to prototype with and for final install.
coarse coral
well after today im about to find out just how good these buttons are for every day interactions
i will be pressing these ALL the time
well my cousin will 😂
faint sky
the ones with the soft coating i think only come with a very small pad and for a handheld you'd still want to use them with a button cover anyway
i used a couple of them and they do feel really nice
JP ended up getting that one with the soft buttons, was trying out different buttons.
coarse coral
yeh with the handheld and the button cap as it is today they are really really clicky, it's more the sound that's the issue than the feeling so if the soft cap dampen or nullify the click that's the ideal
i treid tpu button caps which did very little
faint sky
also the problem with the soft ones for handheld is they won't hold up to the abuse, they should be used for main buttons
might as well use a dab of hot glue, the pressure is similar
coarse coral
there are probably buttons out there that are silent clicks
https://www.amazon.co.uk/gp/product/B01N59MK0U/ref=ppx_yo_dt_b_asin_title_o01_s00?ie=UTF8&psc=1 i found these to give very accurate reads and a consistent centre

WMYCONGCONG 10 PCS Joystick Breakout Module Game Controller for PS2 Arduino
faint sky
getting just the right buttons for a handheld is a pretty important thing. i'm sure you'll get it just the way you want eventually.
coarse coral
they accept 3.3v and the reading max and min is literally 10 bit (if i've got that right) i see 1024 as the max and 0 as the min with the adc reads
i tried two others and the centre was so variable and the max and min range was whacky
faint sky
i think adafruit has something like that

This mini-kit makes it easy to mount a PSP/Xbox-like thumb joystick to your project. The thumbstick is an analog joystick - more accurate and sensitive than just 'directional' ...
coarse coral
i used that before also i'm sure the reads were fine with it also
i've trashed a few buttons and sticks in this project 😆
the thing about the adafruit one s the headers need added
so just depends what you are looking for
faint sky
you could rip it out of an existing controller. i think JP's shown some code to work with that stuff.
i mean he turned a fischer price controller into a working one for games so i'm sure it's possible.
coarse coral
oh yeh i seen that in the show and tell
there's some amazing kits out there for handheld projects such cm4lite by stonededge
faint sky
oh he did a full teardown of it this week on JP's workshop.
he also said the latency is better than regular PS and Xbox controllers... so it might be worth your time to look into for lower latency stuff.
though that was a wireless controller not a handheld so that might not apply for your project.
coarse coral
it just depends on the approach and goals, i think there's a whole area for handhelds repurposing existing gamepads, then there's the road of making a new hud compliant device e.g. your own gamepad recipe. for the latter i heard using an arduino teensy and making it essentially a stand alone usb device is the way forward. my project is just a beginner project to use the GPIO on w/e SBC
yeh being hard wired to the GPIO altho i've yet to test i can imagine my latency is essentially the time it takes to loop and check button states
i'm going with .1ms as a test but if it can't handle that i'd go up to .2ms
faint sky
alright i'm getting tired, time to get going. i'll ttyl. keep the updates on your handheld project coming. please post them here so everyone else can see your progress too.
coarse coral
have a good one
bleak flare
popping in to thank you all again for the conversation about 3D printers! I ordered the Ender-3 S1 3D with a nozzle set and also the laser engraver - a combo that was on sale.
I am so looking forward to making many things (and mistakes!) :)
coarse coral
@bleak flare be patient with your learning and consume as much YT videos as you can. will make it a lot easier !
8 months since i got my first printer and i'm starting to feel more comfortable with it
personally i find cura easier to use than prusa slicer but there's a choice of slicers out there
bleak flare
coarse coral
personally i find cura easier to use than prusa slicer but there's a choice of s...
Indeed, it will take time... Considering I have no clue what a slicer is 😏
faint sky
Generally you'll work with STL files and import those into a slicer program. The slicer (Creality Slicer which is based on Ultimaker Cura Slicer) will import the STL file and output a .gcode file which your 3D printer will use to actually print something.
A slicer translates a .stl (3D Model) to .gcode (3D printer file)
bleak flare
so basically it takes the 3D model and generates the layers to print ... in slices
gotcha
arctic dragon
Has anyone ever printed a nerf blaster before? I’m thinking about making one for a friend and wanted to know if people had any experience with it.
coarse coral
mistakes were made
coarse coral
coarse coral
that's what mine looks like LOL
literally my biggest mistake
the rest quite happy about
faint sky
gorgeous!
You gotta take that onto show & tell. That looks amazing. What a project!
the multicolor printing is flawless.
coarse coral
the two tone is cool a bit of an accidental discovery
but it really does work out so nice in this format
trying to rescue a power button but hey it works !
the rest is config in retroarch
faint sky
the tolerances for the buttons must have been really hard to figure out. you nailed it.
coarse coral
i just knocked it down a mill or two , tbh the measurements are garbage
the tricky part was getting a system for the push buttons to interface with the printed caps. that is what i'm proud of however it does involve super glue
 faint sky
sorta-kinda-alot-of-awesome
coarse coral
aw thanks that means a lot
i worked on this goal for about 8 months now and it's as far as i can take it without refining the prints and finding patience i don't have
faint sky
if you don't have patience you won't get far with 3D printing, it's practically mandatory.
coarse coral
too true too true, i've shown a lot of patience but throwing the .6mm at this was the end of my tether
rough trout
Hey, that looks amazing. The button design is great, how do they feel?
coarse coral
they actually feel ok and you kinda forget about them, i only played tony hawks for a moment a full race of f zero
the triggers click over the full range
rough trout
Clicky buttons rule!
coarse coral
everything clicks basically and the thumb has a slightly smaller range than it can read but that's handled and scaled in code
faint sky
arctic dragon
Has anyone ever printed a nerf blaster before? I’m thinking about making one for...
The most I've seen is someone modifying a nerf blaster with lights. The enclosures can get quite large so you'll need a pretty large bed to pull off a full nerf blaster.
sleek crag

If you have a 3D printer, you can build blasters that crush Nerf guns to dust.
Buy my awesome Nerf tactical gear! Visit https://etsy.com/shop/VoidstarCombatSports and use code 'ZACKISASELLOUT' for $5 off!
That wimpy revolver hits twice as hard as the best brand-name blaster toy, and that's just the start. You'll discover laser-sharp Nerf snipe...
faint sky
Of course people do cosplay weapons all the time and sometimes they're functional with nerf darts. There are a lot of internal mechanics involved so you have to be good with mechanical engineering or replicate an existing design.
Oh I thought he was specifically asking if anyone here in this discord has.
Though, I think Zack Freedman does hang out here occasionally.
sleek crag
I don't know what the specific ask was, but this is a good primer if you're considering it.
arctic dragon
I was thinking of taking an existing design and customizing the exterior a bit to make it unique, and found a couple of different designs.
sleek crag
That's closer to this:
https://www.youtube.com/watch?v=_DJLRGIoK_U

Find out who might be the World's Greatest Con: https://youtu.be/cNh1W2ZuB5g
Start your free trial today at http://squarespace.com/rogue and enter offer code "ROGUE" to get 10% off your first purchase.
🡇 ⸺⸺ extra material & accreditation ⸺⸺ 🡇
Jason called Brian a "nerf herder," but Brian heard "nerf hoarder." After so long he just got tired...
faint sky
Had no idea he was such an authority on nerf blasters lol. I don't watch his channel too often. His non-stop alliterations melt my brain sometimes.
arctic dragon
I don’t think it needs to be overpowered, but I also don’t know what kind of nerf fights he’s into…
sleek crag
Skip the overpowered part. Bill Doran from Punished Props drops some sweet techniques on prettying up whatever you have or make.
coarse coral
*fixing power switch using self aligning glue 🫤
and a proper button cap, there was no excuse for that previously
 minor shore
faint sky
if you don't have patience you won't get far with 3D printing, it's practically ...
minor shore
faint sky
if you don't have patience you won't get far with 3D printing, it's practically ...
Truer words have never been spoken
Try building a Klipper config from scratch
coarse coral
faint sky
https://www.amazon.com/mxuteuk-Self-Lock-Flashlight-Latching-BK-1208/dp/B086L2GP...
think i'll need to make use of this
minor shore
Has anyone ever installed a bimetal/non PTFE lined heatbreak? I bought a slice engineering one, installed it, and actually had to increase my retraction. I thought it was supposed to cut it in half.
rough trout
minor shore
Has anyone ever installed a bimetal/non PTFE lined heatbreak? I bought a slice e...
I just installed two from Micro Swiss and had to decrease retraction, though not quite as much as they said. Did you increase temperature for PLA?
minor shore
No. I had to lower it. I was getting horrible stringing.
rough trout
What are you at now? I was at 210 before and pretty much left it there
rough trout
Oh wait, are you on a bowden setup or direct drive?
minor shore
Yer
rough trout
Ahh, I'm on direct drive, I wonder how much of a difference that makes
minor shore
I mean it's working now. My stock heatbreak was a hot mess. The PTFE was missing and I had pla gunked all inside my heat sink
You like the Microswiss? I've been looking at them
rough trout
minor shore
I mean it's working now. My stock heatbreak was a hot mess. The PTFE was missing...
Oh yeah, mine kept breaking down and then the filament would fuse to it
rough trout
minor shore
You like the Microswiss? I've been looking at them
It's great so far! The only downside I found was that my already-heavy print head is slightly heavier. It's nice to be able to print PETG reliably now, and no jams yet (knock on wood)
I bought mine direct from Micro Swiss because I was leery of knock-offs being poorly machined. Installation went exactly as they described
minor shore
Did you see more ringing?
rough trout
Yeah, but my dual-extruder head already had a fair bit. I'm still using the stock closed-source firmware on my machine, but might try to port Klipper to it one of these days
minor shore
Klipper made all the difference for me. Being able to quickly adjust any parameter is nice. The UI is top notch too.
I run mine off a pi zero w so save money there if you want.
rough trout
Oh nice, I have a few Pis hanging around that should work. Did you have linear advance on it before you went to Klipper?
minor shore
I printed a stand alone housing for my LCD screen the holds my SKR mini e3 and then pi zero w... minimal footprint
rough trout
Oh sweet, I have an older Monoprice Maker Select that has an SKR 2 in it- that would be perfect for trying Klipper
minor shore
Nah I tried messing with it but the only things I tune in Klipper really is pressure advance and PID
I do everything else in prusa
rough trout
Hmmmm, I've used Simplify for years now, but Prusa might be worth a shot for the new tree supports
rough trout
No, Monoprice Maker Select is the junk boi, and my main one is a Flashforge Dreamer
rough trout
Yeah, should be pretty easy with the SKR 2 board
minor shore
No doubt
rough trout
I'd have to port it to the Flashforge but someone already figured out how to compile Marlin for it, so it shouldn't be too bad
minor shore
Good luck. Thanks for the help
rough trout
You ever think of going direct drive with the E3? A friend of mine did it with his E5s and liked it better
faint sky
Direct drive with all metal hotend has much smaller retraction than a bowden. Usually only about 1mm-3mm and bowdens can be around 6mm-8mm, or more depending on the hotend and nozzle design.
It's why you can't just blindly tell someone to set their retraction (or other settings) at a specific distance. Things like that are also why sharing "profiles" is a fools errand. Every printer is different and even with two identical printers they'll require slightly different settings. 3D Printers can be as unique as a fingerprint. Just have to calibrate, test, and retest.
coarse coral
@rough trout the handheld is pretty cool, way better with headphones. improvements for next version will be to make a better dpad, make it feel less squished, better print quality and reduce weight.
i'm hoping to get a radxa 5 or an orange pi with the new chips for more platforms
possibly an odroid instead. will wait and see
also retropie has a few 'bugs'
coarse coral
coarse coral
Heater cartridge and thermistor arrived
I have encountered a new error occasionally about ambient temperature with this new combination installed. Unsure what it may be but it could be from a layman's point of view that the firmware and sensitivity of new thermistor is a bit out of sync
faint sky
Overheating?
coarse coral
can't quite say what it was, it read in broken english
it said something along the lines of "ambient temperature around the nozzle variable". it's a critical error and the print stops. that said, i encountered it twice in total and have printed successfully for hours long prints
faint sky
some kind of thermistor issue? that's the only thing i know of that reads the temp anywhere around the nozzle area.
The thermistor is also responsible for preventing thermal runaway. That error is pretty vague but any temperature warnings should be taken seriously.
Were you the one that replaced the thermistor and used white ceramic thermal paste on it or was that someone else?
Might be worth looking into calibrating the PID tune for the thermistor. https://www.youtube.com/watch?v=VEESeVRUIOM

something like that.
Here's a good article on what PID tuning is and why it's important though most of the examples won't be compatible with your specific marlin it's a good article overall. https://all3dp.com/2/3d-printer-pid-tuning/

All3DP
Looking to auto-tune the PID settings on your printer to improve print quality? Learn how 3D printer PID tuning works!
coarse coral
faint sky
Were you the one that replaced the thermistor and used white ceramic thermal pas...
i used no paste just the lug nuts to hold it in place
 heavy ether
Hello, I need some 3d printer suggestions. I'm looking for something that's self leveling and reasonably accurate. under 350$. It's been a while since i've known what's good in the 3d printer market.
coarse coral
cr6se
every day
self levelling, large build size, filament run out detection, dual lead screws, accepts various types of build plate, comes with tool box, good price
parts easy to find
firmware easy to upgrade
nice touch screen
easy belt tensioners
mod friendly
i've printed from .2mm to .8mm nozzle and all turns out nice, it will inevitably need maintenance but it's worth it
arctic dragon
heavy ether
Hello, I need some 3d printer suggestions. I'm looking for something that's self...
Ender 3 S1 and Anycubic Kobra both tick the boxes within your budget. Not sure if those beds are large enough for your purposes?
heavy ether
arctic dragon
Ender 3 S1 and Anycubic Kobra both tick the boxes within your budget. Not sure i...
sounds good. I don't need a particularly large bed
I'm used to the prusa minis at my school and they're more than enough
What's the difference between the ender 3 S1 and the cr6se? Microcenter has a sale and they're both similar enough in price
@arctic dragon
faint sky
A prusa mini is about $500, it's not really about the build volume. It's out of your requested price range.
The $350 price range is one of the most competitive ranges. There are many many options and they all have pros/cons.
heavy ether
Thx! I think the most important thing is that it auto levels and like something that is reasonably accurate.
faint sky
The nice thing about Prusa's is that they have excellent tech support. Most of the other printers out there have very basic support usually from an email address in China that responds with basic replies and broken English.
heavy ether
I have a reasonable handle on fixing things when they go wrong from my 2014 monoprice printer but I'd really like something that doesn't need like several hours of attention a week
faint sky
The Sovol SV06 and SV06 Plus are worth checking out. The SV06 I could see being a good first printer but if you have the option definitely go for the Ender CR-6 SE. It's by far the best value for the features right now at that price range.
heavy ether
Alright sounds good!
faint sky
There are others in that price range worth looking into from Artillery, Comgrow, and Anycubic. If you're a beginner though you might not know what features to look for. I think stej made a really good list.
All metal hotend, direct drive extruder, nozzle temps capable of printing PETG/ABS is almost mandatory. Big build volume at least 220mm preferably 300mm.
The CR-6 SE checks just about every box I'd have looking for a budget printer.
I have an Ender 3 S1 Pro and for the money if I could go back I'd probably get the CR-6 SE instead.
heavy ether
Alright sounds good
I also saw that some people were having underextrusion and qc issues in the reviews.
faint sky
That's user error.
coarse coral
cr6 has qc issues as do all creality products but if you spend a day calibrating these and if you get a good price creality is a real money saver
but there are others which are super popular too
heavy ether
faint sky
That's user error.
Glad to hear it
coarse coral
prusa is lovely, wish i could get one of those 🙂
faint sky
There is no 3D printer that exists that will do everything for you. They are just starting to become available though with actual auto bed leveling and such but they're mostly over $1000.
heavy ether
Yeah I wanted a Prusa but I'd blow my entire project budget on it lol
faint sky
Same, I'd love to get a Prusa. I just can't justify the cost vs their competitors for the feature set. :/
heavy ether
faint sky
There is no 3D printer that exists that will do everything for you. They are ju...
I understand. I'm more looking for a printer as a tool rather than a project to dump a lot of time into.
faint sky
Yeah lol that's how it starts for everyone. Then you learn it's really not like that, no printer really 100% does that.
Think of it like a car or a bike. They require maintenance and calibration to work correctly. All of them.
rough trout
heavy ether
I have a reasonable handle on fixing things when they go wrong from my 2014 mono...
I also have a Monoprice Maker Select- what a pain! Good learning experience though, it sounds like any of the Sovol SV06/Ender 3 S1 Pro/CR-6 SE will be a decent upgrade
heavy ether
Yeah most of the parts that I'm designing are medium scale, low precision relative to an sla
faint sky
messy, expensive, curing, liquids, but the level of detail surpasses what most FDM printers can do. everything has a pro/con.
heavy ether
rough trout
I also have a Monoprice Maker Select- what a pain! Good learning experience tho...
Yupppp monoprice maker select eating up entire afternoons to get it to print one part
coarse coral
worth considering i've had my fdm printer for 8 months, and wish i had another 500 to go out for an sla printer. that said, i don't know what price comparisons it is for PLA vs RESIN
rough trout
heavy ether
Yupppp monoprice maker select eating up entire afternoons to get it to print one...
For sure, I had to add a BLtouch just to make it work at all- the bed on mine looks like a topographical map of a mountain range lol
faint sky
My experiences so far with the S1 Pro has been relatively tame compared to some. Once you learn how to calibrate and maintain it you can rip off 30-50 prints before you need to relevel the bed. In terms of overall quality I have no complaints about the S1 Pro.
Yeah they all do to some extent. I've seen some bed meshes that are off the charts. It all starts with a good tram. It's such a basic thing but it's the cornerstone of getting reliable prints. All surfaces have some deviation.
rough trout
I got sick of tram and made it fixed mount, then spent some time fine-tuning the UBL mesh. I can print on most of the bed pretty reliably now- of course the first layer won't be flat, but I don't use it for parts that require such things
faint sky
Also, textured PEI metal magnetic build surface. I love it and don't ever want to use anything else.
rough trout
100% club PEI here too
PEI + spring steel for life
I still use Kapton for ABS though- it seems to stick too well to PEI
faint sky
The Prusa MK4 might change all of that though. I've seen people with solid spacers and I just shake my head. However the way Bambu and now the MK4 are doing it does make sense. If done correctly you shouldn't need springs. However I'd probably feel naked having a printer without them.
loud silo
I feel 3d printers now are like automobiles in the early 20th century: expect a lot of shade-tree maintenance
faint sky
They kind of are, perhaps that's why I've taken such a liking to them.
We've come a long way from the Anet A8's
I expect models of the future to be that 1-click no adjustment necessary lidar everything and self adjusting kind of thing.
coarse coral
glass for pla has been enjoyable for me, different results which all have merit with and without glue 🙂
faint sky
That is true, the surface finish from glass is drool worthy when it works. With PETG possibly taking a chunk of glass with it I'll stick with my textured PEI. 😉
coarse coral
have you tried squirting water on the print base before your print cools? i heard that helps for quick removal
faint sky
have you ever poured water on a really thin sheet of metal while it's really hot...
coarse coral
no, but some times i fry some bacon 🙂
faint sky
it warps. no thank you. nope nope nope.
coarse coral
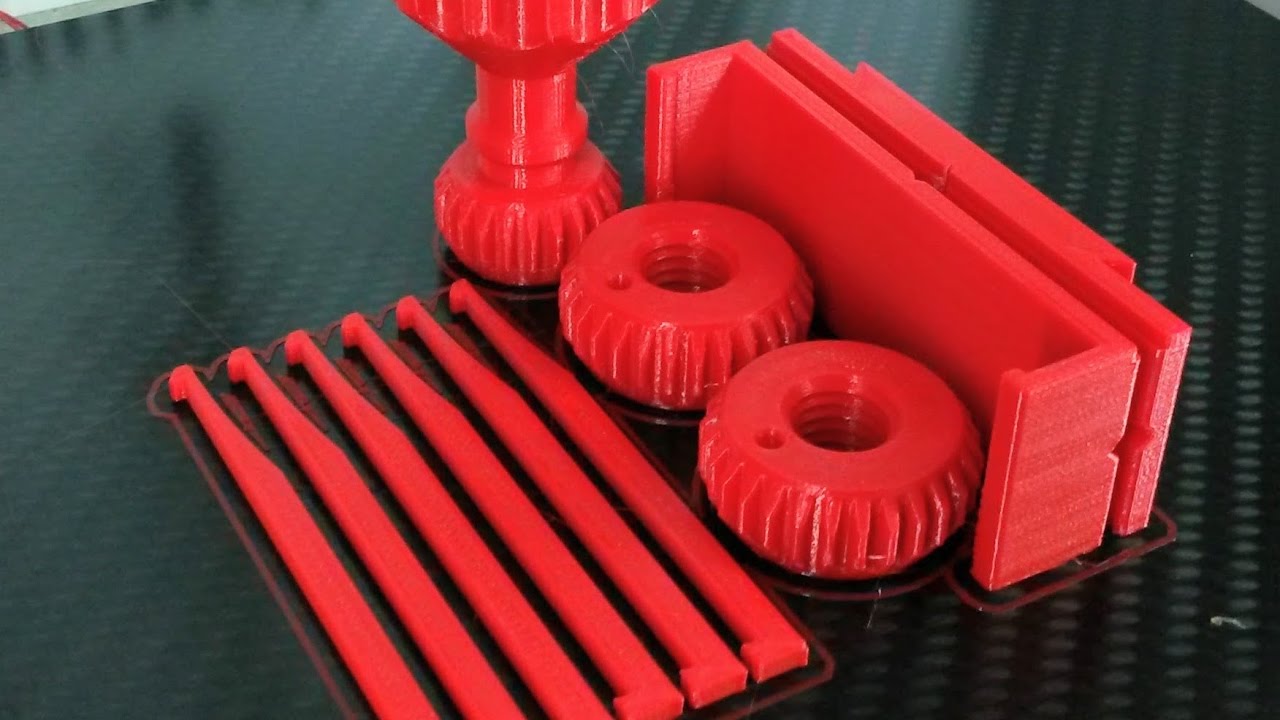
There are many hints on YouTube, how to get a 3d-printed object sticking well on a build-plate, but there is no good hint, how to remove it. My method is quite simple, I'm spraying a mix of water and alcohol onto the 3d-printed object and the build-plate, ant then the object can be simply removed. This keeps also the build-plate clean and intact...
faint sky
don't believe everything you see on the internet
good way to get your glass bed to explode
coarse coral
i mean the theory works, also creating surface tensions with fluid could be an idea especially on a pretty cool bed
faint sky
 coarse coral
LUL
faint sky
reddit
1,494 votes and 466 comments so far on Reddit
oh there's about 20-30 incidents like that. i see it on reddit all the time.
with 3d printers there's a pro/con to pretty much everything.
coarse coral
@heavy ether just throwing ideas around, would you be interested in buying a 2nd hand cr6se?
5 months old
i'm in the uk
heavy ether
If I was in the UK perhaps
I think I've settled on just "finding more money" and buying a prusa after talking to my profs
coarse coral
good idea, prusa have the mk4 being released now
but they are pricy, i'm sure you get what you pay for they have such a solid rep
heavy ether
Prusa mini more like lmao
faint sky
Interesting, I've not run into that before. You'd think the purge line should take care of that. I usually don't print small parts though. That's good to know.
At some point you're going to want to print larger things. It's inevitable, and the mini can't do it. It's better to have a larger bed and not need it than to need it and not have it. I thought 220mm would be plenty big enough for my needs and then like the 2nd project I ever did required a 280mm print. I've since learned I might be able to print it diagonally in the air on a 45 degree angle but it'll waste a lot of filament for supports.
While your needs might not warrant it now, the better you get at 3D printer the bigger you'll want to go. That's how manufacturers like Creality and many others are able to be competitive. They can sacrifice quality materials and tech support for a larger print surface. For the most part you get what you pay for in the 3D printer market in one way or another.
coarse coral
@faint sky yeh my printer doesn't purge itself so that's a manual process, even after manual purge and cleaning the nozzle there seems to be a blob. you can do pause at height and retract but since there's a manual purge the retraction is cancelled hence the blob
elder oxide
Found a headphones holder so I printed it

 molten arch
What would be a better upgrade for my case? I'm currently using a glass bed, but my prints are very hard to get off the bed after a print. Should I invest in a PEI build plate or a cr touch? 🤔
arctic dragon
molten arch
What would be a better upgrade for my case? I'm currently using a glass bed, but...
What kind of glass bed? What kind of materials do you typically print?
molten arch
arctic dragon
What kind of glass bed? What kind of materials do you typically print?
really just PLA
ender 3 glass bed
 rough trout
molten arch
What would be a better upgrade for my case? I'm currently using a glass bed, but...
rough trout
molten arch
What would be a better upgrade for my case? I'm currently using a glass bed, but...
I adore my PEI build plates- especially the textured one, it makes such a nice first layer
vestal thicket
If your bed is good and level, I'm a big fan of PEI build plates, too.
molten arch
i think my bed is becoming warped 😅
maybe i should get a cr touch too :/
arctic dragon
If you give the bed enough time to cool, I find the prints tend to basically pop themselves off that glass. That being said, if you just want your prints to pop off quicker and easier, I’d look into a magnetic PEI build surface.
molten arch
i probably have too much hair spray build up then 😅
maybe i should flip it to the non-textured side
arctic dragon
I never use hairspray haha
molten arch
yea, i never got good adhesion in the first place
arctic dragon
Hm, I found heating the bed to 55-60C gave me very little adhesion issues. Have you tried cleaning with soapy water and/or isopropyl?
molten arch
i have not 🤔
i guess ill try that then
arctic dragon
If soap doesn’t do it, try 90% isopropyl?
Finger oils have been known to cause adhesion issues on these glass beds.
elder oxide
Occasionally I wipe my glass bed down with 99.99% IPA
It’s what I have in a spray bottle but 75-90% would work well
 winged helm
My prusa mk 3 extruder is clicking/slipping when filament is inserted. The screw is in the right position. What else should I look at?
elder oxide
winged helm
My prusa mk 3 extruder is clicking/slipping when filament is inserted. The screw...
When it’s inserted?
Does it do it during printing?
coarse coral
yeh i use glue and find it hard to remove some times, a spatula or sharp knife helps and i always approach the removal at an area i don't mind being slightly blemished
better still if there is support material just remove from that point
also letting it cool first helps
winged helm
elder oxide
When it’s inserted?
Sorry for the delay. It doesn't extrude when printing, but doesn't click. The motor is very warm to the touch
coarse coral
that could be because your nozzle is too close to the build plate and it's not flowing but it can also be a residual build up leading to restricted flow within the bowden tube
if prusa uses bowden i'd take it out and clean the hot end side of the bowden, i'd also check that the nozzle isn't too close to the build plate
if you can't get bowden properly cleaned i'd snip a cm or 2 from the hot end side of it
does is click / slip when you are printing?
elder oxide
winged helm
Sorry for the delay. It doesn't extrude when printing, but doesn't click. The mo...
if you raise the nozzle off the bed, heat the hot end, and try to extrude; does it extrude then?
elder oxide
ah, yeah that makes sense
winged helm
 faint sky
One of the nice things about a glass bed is the smooth surface finish. Granted it's only on one side. Most times a perfectly flat face looks better than textured PEI. The texture PEI sheets have better adhesion than any other surface. If you don't like struggling with adhesion issues from glass plates then consider textured PEI.
The textured finish is from sandblasting so every sheet is going to be a little different which can introduce variations in the surface.
iron remnant
Well, that's an issue we'll never put to bed.
coarse coral
#help-with-3dpuns
faint sky
Designing a soldering station lamp. Webcam attachment, circular LED lamp, and built-in vacuum ports.


I'm getting tired of getting bonked in the head by this dangling cobbled together monstrosity commonly sold as a webcam lamp.
Cutting it close. I have to print it standing up. 😬
 short crag
Is there a way for a normal sla printer to print metal or metal equivalent
elder oxide
Probably not SLA style
I think FDM or powder bed printing are the only viable metal 3D printing options
And I’m including welded metal 3D printing with FDM because it works essentially the same way.
arctic dragon
SLA? You can use lost resin casting if you get the special casting resin for that, and the means of making the mold and pouring molten metal.
elder oxide
Yeah, that’s another option
arctic dragon
Not directly printed in a hobbyist SLA printer, as a resin with enough metal powder to be sinterable would be too thick to flow like a liquid, it would have the consistency of solder paste or something…
elder oxide
The closest you get to SLA is powder laser printers
But you need a very well controlled environment for that
Since, ya know… powdered metal is explosive lol
arctic dragon
elder oxide
The closest you get to SLA is powder laser printers
I believe most of the desktop metal printers use binder jetting instead of SLS. It needs one extra step in post processing, but it’s a lot faster and lower power compared to a laser.
Oh, wait, I got that backwards. Desktop machines use FDM, high volume printing prefers binder jetting for the speed.
tender sparrow
Any idea how to fix this? It appears to only be on the x axis (the one with the head moving left and right)

The layers are shifting
arctic dragon
tender sparrow
Any idea how to fix this? It appears to only be on the x axis (the one with the ...
Perhaps check the belt tension and make sure it hasn't stretched or loosened?
tender sparrow
I can’t test to see if it works because by bed adhesion just disappeared
arctic dragon
Well, isopropyl is usually the way to go. If it's glass, maybe soapy water first?
faint sky
This is not layer shifting. A layer shift would be a physical movement of the layer from its original position. This looks like uneven nozzle heating. Nozzle temp will naturally fluctuate as the mainboard attempts to keep it at a certain temperature. While it fluctuates you can get different flow rates and... colors. Most people aren't aware that the nozzle temp actually slightly affects the color produced from the filament. So when you see banding... in slightly different colors... nozzle temp is at least part of the problem and when combined with other unoptimized settings can easily contribute to poor outer wall quality.
If your adhesion just tanked then retram the bed, recalibrate z-offset, set your nozzle and bed temp appropriately for the material and do some small test pieces or calibration towers.
faint sky
 arctic dragon
faint sky
arctic dragon
faint sky
I doubt the belt is slipping, but I do think it still could be a loose belt. The shifts you’re talking about is only one type of shift caused by something skipping, and it’s probably fair that calling this a shift isn’t accurate.
I believe the picture is taken down the axis of the “loose belt” so it’s a bit harder to visualize?
faint sky
This is an example of layer shifting. Once it shifts it will never go back to a correction orientation. There is no automated recover from a layer shift.
 arctic dragon
Yes, when the origin is lost due to a skip in the belt. I think you may be too focused o the term “layer shift” though?
faint sky
possible, if they posted an image not actually showing the layer shift and showing it from the wrong angle then that's not as helpful. posting images from multiple angles would be very helpful.
arctic dragon
The origin in the print OP posted is not shifting, but the positioning of the axis could be imprecise due to a loose belt.
faint sky
That is possible yes, loose backlash could cause something like that. Umm actually about 20 different things could cause it.
arctic dragon
Banding due to thermal inconsistencies is also a definite possibility, though it’d have to be a pretty significant shift in temperature to have such defined physical bands.
faint sky
I kinda latched onto that one since stej had thermistor issues lately and not having a good PID tune could present as banding too.
arctic dragon
Yeah, too many variables. I prefer to start with the ones that are easiest to check, and work them down one by one.
faint sky
this is why i'm a huge proponent of Cura's calibration shapes plugin. you can self-diagonse most issues by running tests with that plugin.
wouldn't it be nice if there was 1 calibration test you could run to rule out every possible issue. i wonder if cura has like a magic bullet calibration shape.
it all starts with good bed adhesion though. if your print isn't adhering then you can't run tests and your back to square 1.
bed adhesion issues in my experience is almost always a combination of tram, z-offset, bed temp, and nozzle temp. Get those 4 things perfectly set and you should get excellent adhesion.
tram and z-offset should always be the same no matter what material you're printing with.
bed temp and nozzle temp can change depending on the material you're printing with.
For PLA a bed temp of 60C-70C and a nozzle temp of 200-210 is usually spot on. If you're having bed adhesion issues go with the higher setting in that range.
For PETG a bed temp of 70C-90C and a nozzle temp of 230C-250C is usually spot on. PETG is known for warping so that's a whole challenge in itself and I've found settings in the higher range of that generally help combat warping and adhesion but will increase stringing which means running retraction towers to dial in your PETG material profile.
part of owning 3D printer is calibrating profiles per material and every printer is unique so don't even bother attempting to use someone else's profile... which CHEP is known for promoting sharing his personal profiles heavily to the public... that is a mistake. profiles are unique to every printer.
Calibration Shapes (if you're running Cura) is the best way for anyone to help themselves.
coarse coral
I have this and a usb fan
 coarse coral
faint sky
This is not layer shifting. A layer shift would be a physical movement of the l...
coarse coral
faint sky
This is not layer shifting. A layer shift would be a physical movement of the l...
yeh i have a really good example of layer shifting which i attribute to corrupted firmware
faint sky
I have this fume extractor https://www.amazon.com/KOTTO-Soldering-Absorber-Electric-Extractor/dp/B07ZHH5H7N

KOTTO Strong Suction Hose Smoke Absorber for Soldering, Electric Iron Welding, 3d Printing Extractor Absorber Remover DIY Extractor Carbon or HEPA Filter
coarse coral
that'll do it


 coarse coral
it's an ideal solution tbh, a nice permanent fixutre to a workstation
i need a cushion for my chair
faint sky
but it takes up so much space and unwieldy i never use it. i do need it. so trying to design a way to integrate it into the lamp and fix the webcam mounting all at the same time.
coarse coral
or a new chair
you could mount it above
somehow to a wall
and just reach for the nozzle as needed
faint sky
it's on one of those cheap reticulating arms, will figure out a way to mount it to that. the reticulating thing came with the lamp.
 coarse coral
we literally have the same switch
faint sky
it has a little in-line lighting controller i velcro'd to the vertical arm.