#help-with-3dprinting
1 messages · Page 4 of 1
 faint sky
while the bed is hot i literally cannot remove the print from the bed, would require about 75lbs of force. after retramming the bed i get super adhesion now... thinking about having another go with PETG.
@coarse coral my Ender 3 S1 Pro comes with a PEI bed, filament sensor, CR touch and auto leveling (unified bed mesh leveling), and all metal sprite extruder. S1 Pro can compete with CR6 and Ender 5's easily.
It can't compete with the CR10's build volume and can't be extended in X axis with bed extensions like the other Ender 3's due to the plastic shell. You can however increase the z or y-axis like with practically any printer and give yourself a longer bed or taller gantry.
Ender 3's can also now run Klipper which I'm seriously thinking about for a future upgrade.
 inner cedar
Sometimes I think about buying another printer… but I already have 5 and haven’t been printing lately DX
 coarse coral
I like the ender but I ran into a few issues with the build quality out the gates. The springs on my bed were loose and couldn't get good levelling, it constantly had thermal run out errors, and the power supply was arcing. Ender 3 is notorious for being a total work horse but I'm just glad I got a few nice extras with the cr6. Slightly bigger build plate and just seems easier to work with. I use a glass plate.
 shy kelp
I'm sorry for the bad drawing, does exist any cheap extruder that's like this? where the hotend is one piece with the guide pipe of the filament?
 faint sky
yes that's an all metal throat and heatbreak when it doesn't have a PTFE lining.
 vocal flax
Does anyone have suggestion for single gear mk10 or creality extruder, and e3d v6 direct drive mount for prusa i3 style mount?
shy kelp
the resin that does not emit "bad odours", what's that? I mean is it any safer, or is it only about that it does not emit odours, but you do not know what are you breathing in? idk if I am explaining myself
faint sky
Seems the better creality extruder right now is the sprite extruder which is the one I have and why I feel no need to upgrade to anything else. The sprite extruder is a full metal hotend allowing you to print at 300C, dual metal gears (instead of 1 metal gear and 1 bearing), no PTFE lining, easy filament changes, good cooling fans, mount for CR touch, silicon sock (which has saved my butt multiple times).
I've never once had a clog with the sprite extruder, printing almost every single day for 2 months straight since I got it.
Most of the new print heads coming out recently are based on the sprite extruder, it's really really good.
It maxes out around 120mms for flow rate though. You're not going to be entering a speed benchy contest with it. It's designed for quality prints over speed.
Most people don't print above 60mms though so it's more than adequate for the majority of makers out there.
print i completed tonight. adafruit IoT Gmailbox. i like printing in concentric mode now.

you can see the reflection of my overhead shop lights in it. that was a good print.
 arctic dragon
Worth noting that only the pro is full metal, IIRC the standard sprite extruder is still PTFE lined.
arctic dragon
shy kelp
the resin that does not emit "bad odours", what's that? I mean is it any safer, ...
I don’t think there such a thing as a safe resin. Comparatively, though, some resins may be safer than others, but even the ones that claim to be odor-free can still release fumes you can’t smell and remain hazardous.
No matter what kind of resin you use, always handle resin as if it has some degree of fumes and limit direct exposure to uncured resin.
 elder oxide
And also, water wash resin waste still needs to properly disposed of because resin is well.. resin and bad.
Don’t go dumping your wash bath down the drain now 🙂
inner cedar
Resin will harm you, it’s more a matter of how much at a time will harm you
 hoary wind
Somewhat related to 3d printing, for CNC - I am wondering if anyone has a recommendation for free and opensource 2d software that's CNC specific?
arctic dragon
hoary wind
Somewhat related to 3d printing, for CNC - I am wondering if anyone has a recomm...
Are you looking for the equivalent of a CAD software or a slicer?
shy kelp
I'm annoyed by my current 3d printer
Does exist any already built witj5 odrive and autobevel 3d printer without an high cost?
(annoyed, because there's always something wrong with the extruder, feeding, add on top of that the slowness and fails = waste of time)
vocal flax
Idk what you're talking about odrive but you can make yourself auto bed leveling probe for cheap if you have some limit switches (klicky probe), servo+ir sensor or proximity sensor
It doesn't have to be expensive my diy M3 screw probe works just as repeatable as bltouch and cost pennies compared to bltouch
shy kelp
Yes I don't want to deal with any of that
vocal flax
And for detecting jams or something you can use filament encoder sensor. There are both off the shelf parts that you can buy or way to diy
vocal flax
shy kelp
Yes I don't want to deal with any of that
I'm sorry to say but in that case you gotta swallow the pill and pay the price
shy kelp
vocal flax
I'm sorry to say but in that case you gotta swallow the pill and pay the price
Indeed I'm asking for recommendations in fact
I was not able to find that many odrive prebuilds
vocal flax
I haven't heard of any consumer device with closed loop control yet
I misunderstood and giving common solutions to problems.
faint sky
Just looked up odrive, my god in heaven.
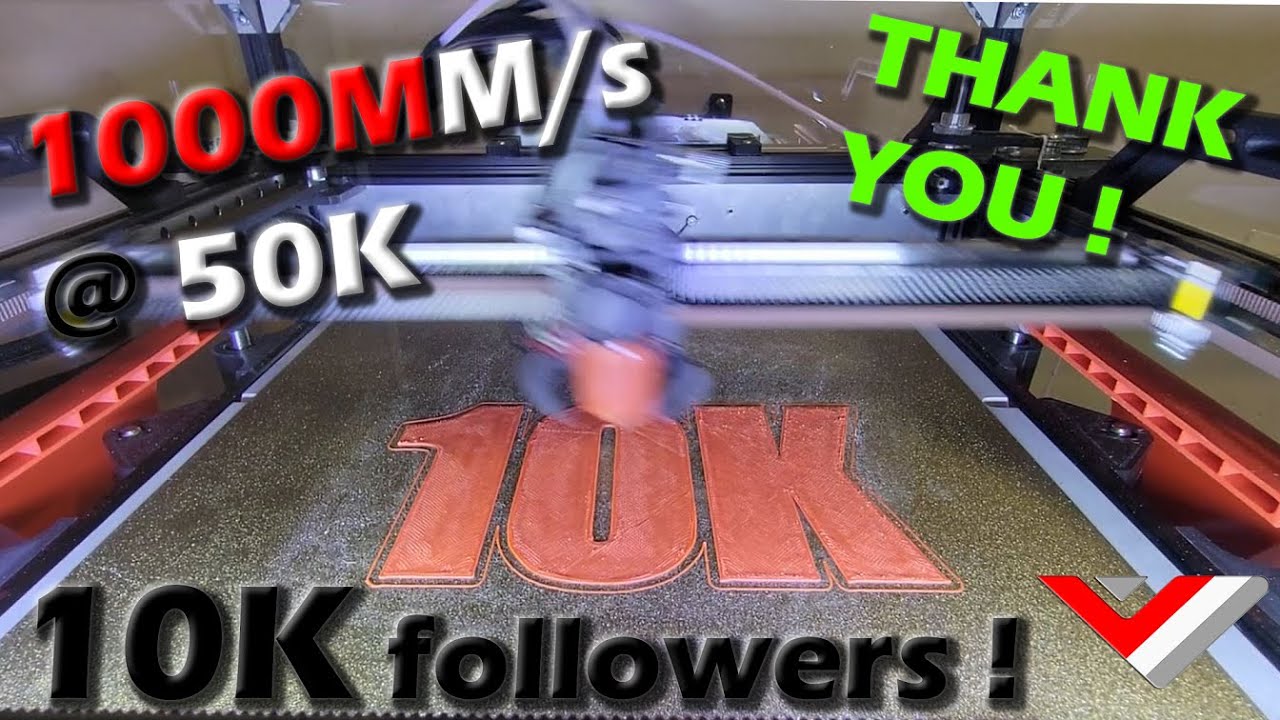
10 000 followers celebration !!! Thank you all !!
Pushing the printer to its limit on this one for the occasion.
-1000mms
-50 accel/decel
-150 SCV
-ABS Esun+ @260C
-0.4 Nozzle
-0.1 layer height
Thanks to Devin, Diemex, GodisVeryDead, Maze, Rac, Marco, for your help with administering everything. Very talented people.
Please join us on FB: htt...
How can I speed up my 3D printing? This guy is just like "Yes, yes to everything"
elder oxide
I’d love to print really fast
faint sky
speed printing is impressive because the accuracy required to do stuff like that is staggering.
It would take my printer hours to do what his does in minutes. However if there's a problem I could see a printer like that easily ripping itself to shreds. Even the smallest issue would be magnified.
That stuff is like drag racing for 3D printers, I can see the appeal. You're going to destroy a lot of printers before you get it right.
How in the heck his stepper motors aren't on fire I don't know. I've never seen a water cooled stepper before but now I can see a use case for needing one.
shy kelp
faint sky
How in the heck his stepper motors aren't on fire I don't know. I've never seen...
They are servos
faint sky
didn't know servos could be that accurate, neat.
shy kelp

(if my memory is right)
But in 8 years of cheap 3d printers they are just a waste of time in my end
arctic dragon
Odrive is not a standard thing in 3d printing, that’s for sure. I’ve never heard of a prebuilt odrive-based printer, though I imagine people have done these in diy if they do enough work with both odrives and printers.
Though at those acceleations, properly tuned input shaping is an absolute must.
shy kelp
Maybe maglev axis would be better to not deal with vibrations (and attrition)
But I am broke and dumb so idk
arctic dragon
shy kelp
Maybe maglev axis would be better to not deal with vibrations (and attrition)
Bu...
Maglev is expensive to implement, and doesn’t eliminate all of the possible sources of vibration. Not a viable option to pursue if you’re broke.
vocal flax
Even CNC machines I've never heard of odrive. I expect ethercat servos do same job tho
arctic dragon
In all fairness, odrives with brushless motors and encoders get pretty expensive pretty quickly, too. At least relative to steppers. There’s a reason why all of the popular hobbyist 3d printers use steppers and not closed loop control.
vocal flax
Consumer 3d printers just started to explore closed loop systems
shy kelp
arctic dragon
In all fairness, odrives with brushless motors and encoders get pretty expensive...
Wdym by closed loop?
vocal flax
In time I expect them to get there but even then it's probably gonna be expensive
vocal flax
shy kelp
Wdym by closed loop?
Odrive has feedback from motor so it controls the position with closed feedback loop
shy kelp
vocal flax
Odrive has feedback from motor so it controls the position with closed feedback ...
Do not some cheap TMC drivers do the same?
Stallguard was it? IDR
vocal flax
Steppers are open loop controlled, no feedback of position. No way to know if stepper missed a step due to external disturbances
arctic dragon
Closed loop feedback control is where you use sensors or encoders to detect your position and use that information to control your motion. Steppers are pretty well controlled without them so they’re generally run open loop.
vocal flax
Afaik stall guard closed loop controls the current not the position
You can detect something going wrong or missed step with current response. I don't think there is any attempt to fix the position. (My knowledge on TMC drivers are limited still stuck with a4988)
arctic dragon
Modern stepper drivers do have some means of detecting particular modes of failure, stallguard being one of them. It provides some feedback, though not necessarily enough to be called closed loop.
 iron remnant
I mean, if you wanted to make a printer with ODrive, all it really takes is a CAN do attitude.
coarse coral
faint sky
Seems the better creality extruder right now is the sprite extruder which is the...
Very cool to know, will keep an eye out for an extruder maybe in the future
hoary wind
arctic dragon
Are you looking for the equivalent of a CAD software or a slicer?
Looking for CAD Software.
arctic dragon
hoary wind
Looking for CAD Software.
Fusion 360 is usually my recommendation for free CAD software, as it also comes with CAM functionality. However, the number of options drop drastically with the inclusion of open-source.
That being said, the CAD software used for CNC is generally the same as that for 3D printing, and anything that handles 3D can do 2D as well.
LibreCAD seems to check all the boxes for 2D open source CAD software for CNC, but I’ll also throw in FreeCAD and OpenSCAD as alternatives for more specific 3d functions that may be useful for other things.
hoary wind
arctic dragon
Fusion 360 is usually my recommendation for free CAD software, as it also comes ...
Awesome thanks for that recommendation. I think, being new to CNC, I anticipated some different functionalities required for CNC separate from 3d printing, but it sounds like you just need a slightly different workflow?
arctic dragon
Pretty much. Instead of a slicer, you send your model to a CAM for your g-code.
Only other significant difference in the cad part of things is how you optimize your design to work best with how you plan to produce it. Design for manufacturability or something. For simple things, though, very little change. An extrusion of a 2D sketch will do just fine.
faint sky
Yeah most people around here use Fusion 360 because that's what Adafruit uses. You can directly import their models with .f3d project files. The .stl files are mesh only files but the .f3d files are directly editable solids.
Another alternative is FreeCAD
shy kelp
As free there is also salome
But I have not tried it myself
Otherwise you can look at list like those
https://alternativeto..net/software/freecad/?license=opensource
Try everything and pick your best pick
coarse coral
I've been using SketchUp web since I was running Linux but planning on returning to windows so I guess fusion is just another thing to learn
Have to say SketchUp web is pretty good but even using it in browser on windows seems to yield better performance than chrome for Linux
I didn't plan to make any game models so bypassed blender on that basis since it's got sooooo much in the UI
 toxic kite
crazy UI, been meaning to understand it for the past decade or somesuch myself
tempted to try recreating some artisanal chess pieces that went missing
faint sky
Actually same. I knew how to use Blender and Maya but found myself using sketchup most often because it was lightweight and fast. Fusion 360 is basically just Sketchup with more work put into it. If you’re familiar with Sketchup then the transition to Fusion 360 is much easier.
 loud silo
I have been using (browser-based) TinkerCAD. I found it more intuitive than SketchUp. Also used (for programmatic design) OpenSCAD, which has strange limitations due to its base semantics. CadQuery looks interesting but haven't tried it yet.
 sleek crag
The main problem with SketchUp is the lack of parametrization. If you decide to change a dimension later, it can take a lot of work to sort out. With Fusion360, it can often, but not always, be much easier.
 winged helm
What's the rule of thumb for upsizing holes (hexagonal in this case) in PLA? Is there a percentage?
sleek crag
Short answer: there isn't one.
It depends on the exact PLA, printer, and slicer settings. Best way is to print a test object with varying sizes to see what works best. If you're planning on shoving nuts in there, I suggest extra perimeters to help prevent it from rounding out.
 cosmic star
Does 3d printed stuff shrink? If I am making a box with a simple lid like this, do I have to make sure that underside part is slightly smaller the actual top opening into the box so that it will fit when done?
 vocal flax
They shrink a little bit but usually printer's tolerance plays more role. Every printer's tolerance is different and can change with material, too. I design my parts with 0.3 clearance for small dimensions (never printed anything bigger than 100mmx100mm) and the fit is usually lose enough to rock side to side. The small motion helps me align the parts. If your parts wont be glued, my suggestion would be making some small test parts with varying clearances to see which suits best.
faint sky
Same, 0.3 seems to be the most common tolerance at least by default. If you try for 0.2 you're going to have a bad time, it's just too tight.
For snap fittings my first designs used 0.2 and I had to smash them together with a mallet ultimately breaking the part in an attempt to make it fit. It's so tight now though that I can't get them apart. 0.3 is a good safe starting distance. That goes for hole offsets for screws and anything that needs to physically join together.
For snap fit I'd start with 0.3 clearance and if it's still too tight redesign the offset to be 0.4
Every printer is different though which is why doing some type of tolerance calibration test print is extremely helpful to find the clearance your printer likes the most.
faint sky
In Cura I highly recommend getting the Calibration Shapes plugin. It comes with a wide range of calibration tests to help you dial in your printer settings. I've highlighted the ones that I think are the most helpful in dialing in initial settings for a beginner or when working with a new filament type for the first time. I ran all of these tests the first time I ever tried PETG for example... and still ended up having a hard time because PETG is notorious for being hard to work with.

in order to do the dimensional accuracy test you need digital calipers to measure the printed part afterwards.
unlike the CHEP calibration cube the dimensional accuracy test is circular which can help spot smoothing issues on any axis.
and ignore the part that i have in my slicer, that's a mailbox for a project.
faint sky
tried printing some clear PLA and got very frustrated that it wouldn't stick no matter what i did.
it was coming out much thicker than expected so i bumped up the temp to 215, retrammed the bed, adjusted z-offset, and still failed to adhere.
i was just printing with some black PLA so it made no sense
then i finally broke down and looked at the spool to see the recommended heat range printed on the spool
and it said clear PETG... 
faint sky
Raised the temp to 240 and bed temp to 70. It started warping after the first layer.
Jacked the temp up to 250 and bed temp to 90. No warping, on layer 50 right now and perfectly flat layers so far. 🤞
Attempting to print a larger clear mailbox. A maximum print volume attempt. Cura ETA is 3 days 15 hours. 😬
coarse coral
faint sky
Attempting to print a larger clear mailbox. A maximum print volume attempt. Cura...
What nozzle size
faint sky
.4 😅
Since im still waiting for the pi to arrive i used a security camera for print monitoring. At least gives me some way of monitoring the print remotely for now.
Clear PETG because i intend to put some some neopixel lights inside for even more of a visible notification.
inner cedar
winged helm
What's the rule of thumb for upsizing holes (hexagonal in this case) in PLA? Is ...
I’d recommend making a small test panel — just a box with your desired holes with increasing offsets (0, 0.1, 0.2, 0.3, 0.4 should cover your bases) and see what works well with your setup. I’d rerun if you’re changing rolls of filament
winged helm
Thx!
shy kelp
not printing but 3d, does exist some sort of library management, or git for grabcad? so I do not need download, unzip, place, each time?
faint sky
do a hole test, there are test prints for that kind of thing available on printables.
if you're using cura i believe there's a calibration shape actually called hole test.
and a tolerance test is always a good idea. generally i know my printers tolerance is .3 so i design any grooves, snap fits, moving joints, etc.. with a .3 offset.
@shy kelp as for model downloads you always have to download them individually and unzip... unless you're using linux with some kind of GET and tarball command.
faint sky
grabcad, thingiverse, printables are not setup like repo's. since you have to know the specific url to download it might as well do it via GUI. yes it's time consuming i've often thought the same thing when getting models. it's so they can track the amount of views and downloads for metrics.
faint sky
50% at 42 hours, about 500/1023 layers. ETA is about 87 hours. So far so good. Basically a full sized mailbox in clear PETG. Have the bed cranked up to 90C. So far still sticking well after 2 days of heating. If PETG hasn’t gotten knocked off by about layer 20 good chance it’ll finish.
coarse coral
How's.your print going @faint sky
faint sky
getting close
coarse coral
Going strong nice
I'm trying to dove tail and drove a 2mm area on a box lid
Groove*
Bit of a leap of faith it's a 500g print
faint sky
haven't even reached the other set of pivoting holes for the top, so maybe 6-8 hours to go.
coarse coral
Have you put a hinge on it to print in place ? Let's gooo
faint sky
oof yeah mine is about 623g according to cura.
coarse coral
I can't do a hinge design on this it's needs to be hidden really.
faint sky
not print in place no, the front and back lids will be separate. just the main taco shell right now.
 inner cedar
mmm, taco...
inner cedar

coarse coral
leaves the conversation
faint sky
Current progress
90 hours just for the main shell
started printing on Friday umm it's Tuesday right now. Because it's PETG I have to print slow. 30mms
4 walls, 20% triangle infill. the infill pattern should be good for light dispersal. could make it more clear doing 100% infill but that would have raised the print time to like 150 hours.
the banding effect you see is due to the infill. the walls layer adhesion is fantastic and very clear.
after this i might try some smaller prints with 100% infill just to see how clear i can make something.
arctic dragon
Ooooo pretty. Overture PETG?
inner cedar
I usually do quarter cubic at like 5-10%, but not sure how that would look for clear...
arctic dragon
I’ve been a fan of gyroid infill lately.
faint sky
polymaker clear PETG, my go to brand is polymaker for no particular reason other than it's the stuff i found on amazon and it works. i'm not particular about brand.
gyroid is excellent for structure but the goal was to kinda try to allow light refractions and gyroid wouldn't be good for that.
arctic dragon
faint sky
4 walls, 20% triangle infill. the infill pattern should be good for light dispe...
Yeah, at that point you’re better off bending a sheet of acrylic or polycarbonate haha
faint sky
honestly didn't think of that
inner cedar
Sometimes the simplest solutions are the hardest to think of
faint sky
at least i get to test my full build height, something i've never even come close to doing yet. my tallest print prior to this was actually the mini mailbox and that's only like 4" tall.
i was extremely anxious even trying such a big difference instead of taking smaller steps up
arctic dragon
I do like polymaker for their pla, but I’ve honestly been hesitant to try PETG on my glass bed…
faint sky
i was careful during assembly to ensure gantry and sides were level all the way up so i'm confident in that. however i've done a lot of printing since then and haven't remeasured anything accounting for settling.
after i started this print i began to second guess myself wishing i'd remeasured every bit of the structure first. nope, i'm not that smart. just sent it.
i think the horror stories with petg and glass are from people not waiting for the surface to fully cool before removing their prints. the impatient ones that just rip prints off the bed.
after every print i turn off my printer and let the bed cool to zero for about 30 minutes... then i can literally push the print off with 1 finger. I have a textured PEI sheet though.
the bad thing about textured PEI especially with PETG is if something goes wrong like a power loss the bed will cool down and print will de-adhere on its own. it's a blessing and a curse.
i'm looking into a big UPS solution to ensure the printer never loses power
coarse coral
I'm just levelling the gantry every month or so. I use a glass bed and it's a touch uneven but I've got about 80% of workable area so I won't pad the build plate with tape for that
I re purposed the foam that came with the printer packing as a base. It seemed to absorb vibrations really well
I use uhu stick
For every print even though it will stick to glass I always have a glued plate and some times I don't need to reglue it until I start to worry about the finish quality of the part that sticks to it
inner cedar
uwu stick
coarse coral
It's amazing , some times I use so much I just raise the z offset by .5
inner cedar
That's a lot of glue XD
coarse coral
Never has failed me, infact the opposite it has saved a print that came unstuck. I used the spatula to paste some and stick it back down mid print
inner cedar
Nice
coarse coral
If you apply it when the bed is just warm it also goes on very very even
inner cedar
I use an invisible glue stick on my one glass bed -- as much as I love the glass-smooth undersides, I had an incident where a print stuck a little too well... took out a little chunk. Had to flip it and started to use glue, just enough to coat the surface, and had a good balance on adhesion
vocal flax
I can't stand consumables so I just use magnetic pp sheet and it works wonders for pla. I'm scared for petg, it might adhere too well.
faint sky
coarse coral
I re purposed the foam that came with the printer packing as a base. It seemed t...
That's smart.
inner cedar
I've had the same gluestick for years, lol... I just apply every now and then, like every 20-30 prints? One of my printers has a magnetic metal plate with BuildTak or something similar, which has the benefit of being able to bend to pop off prints... but I have had the BuildTak tear. Another uses a type of glass, I think PEI? It's textured and prints adhere well, but pop off when it cools, and have a mostly smooth bottom. Yet another has a flexible magnetic sheet that works well, but can be hard to position
faint sky
With some Enders like my S1 Pro can only raise z-offset in .5 increments. That annoys and frustrates me because it's what makes the leveling springs absolutely necessary in my case. Only way I can make up for .4 offset is to retram the entire bed.
oops, used a bad word. my fault, sorry about that mods. 😬
inner cedar
oooo, did you say a bad word??? naughty
faint sky
yes apparently a certain common phrase dealing with being frustrated isn't allowed here.. minor correction np.
 faint sky
is there a publicly visible list of disallowed words so i can actually see what NOT to say?
inner cedar
I don't think so
faint sky
so it's a minefield
inner cedar
... I'm really curious what in creation you said
inner cedar
faint sky
so it's a minefield
yup XD
 inner cedar
lol, yeah
elder oxide
Wut in tarnation
inner cedar
Japan
faint sky
inner cedar
I've had the same gluestick for years, lol... I just apply every now and then, l...
I do not bend my plate even though it can. Like... it's just one more thing you'd have to consider if prints start failing... is my plate warped from bending it too much? Nah I'm not even going to flex it, not even once. In fact I've never even moved my build plate since the day I got it.
Also, I try very hard never to even touch the bed surface with my fingers which leaves traces of oils. Once cooled I can push parts off with no problem. If something is kind of still stuck down i'll use a paper towel if it means coming close to touching the bed surface.
inner cedar
faint sky
I do not bend my plate even though it can. Like... it's just one more thing you...
A lot of the time things just pop off, but I find flexing preferable to using a blade to try to separate it... especially since I did ruin BuildTak on one >~>
faint sky
It's so that I never have to consider hand oils as a source of failed prints either. I do this stuff to cut down on the variables if a print fails. Makes sense to me.
So when watching youtube videos of 3d printing stuff and i see someone popping prints off by 1. touching the build surface and 2. bending the build surface... i die a little inside. 😛
inner cedar
TOUCH EVERYTHING
arctic dragon
Bed surfaces are generally considered a consumable for other reasons, but if it works for you, I don’t see why not.
 topaz viper
bending the build surface is fine, I just remmeber to clean them again before putting them back
inner cedar
Just don’t lick the plate

 sleek crag
Oof. Congrats on the no layer shifts.
faint sky
I know right! Because it's PETG there's so much that could have gone wrong.
 full falcon
@shy kelp can I have some help
shy kelp
No
coarse coral
faint sky
is there a publicly visible list of disallowed words so i can actually see what ...
I'd like to see this also if it exists
coarse coral
sleek crag
Oof. Congrats on the no layer shifts.
I've only experienced true later shifts with corrupted firmware
faint sky
I've seen it happen to others and it's usually due to a mechanical issue such as dual lead screws out of alignment or belt skip. I've seen some really gnarly exhibits too where things shift by a couple inches. Being on reddit's 3d printing topics you see a lot of stuff and get to learn from others mistakes.
Since it's my first time doing a full volume print it's inspiring to know that everything is aligned correctly and working properly. now i can tackle larger and more detailed prints with confidence.


servo fitment had some issues. had to clean up with snips. will have to fix the 3d design, the tolerances are way too tight. put the flag on from the mini mailbox just because. haven't printed the big flag for it yet.
gave the servo motor a surface to sit on, in hindsight it was unnecessary and complicated things.
arctic dragon
faint sky
is there a publicly visible list of disallowed words so i can actually see what ...
@coarse coral if any of us had one I’m sure we’d share. Because it’s something the mods are constantly tweaking and tuning on an as-needed basis, best advice I can offer is to save any lengthy messages to a clipboard or something, especially if you’re uncertain about any of its contents.
coarse coral
arctic dragon
<@1062612486915891200> if any of us had one I’m sure we’d share. Because it’s so...
That's a good idea when I may have made a mistake with words I will look at it a few times and then make the edits before posting.
coarse coral
faint sky
servo fitment had some issues. had to clean up with snips. will have to fix the ...
That is really cool you added servos. Is this battery powered and can your mail people just push the button to open it and does the flag pop up when the lid opens? That's so cool. I've got 3 x pla arriving tomorrow green yellow and black and some black tpu. I'm debating whether to do a test print first or smaller test prints. Need to verify where my model is at first
faint sky
The original small iot gmailbox has a servo. Seemed like a neat idea to keep it and throw it in the larger version. I'm printing the larger flag for it today.
It will be plugged in from a small hole in the side, a permanent wall mounted display.
The front and rear lids pivot on the large circle cutouts by hand, like a regular mailbox. Will be using magnets at the top to ensure the lids stay closed because like a genius i forgot to build the snap fit stuff into the main shell before printing. 😅
You can definitely power it with a small lipo if you want because it'll be running on a feather. This one isn't going outside so there's really no need for a battery.
I will be using it as a way to prototype for the electronics that will eventually go in the real mailbox outside though. 😉
That one will use a sonic sensor, rp2040, and lora featherwing.
Will also experiment with recharging the lipo battery for it with a small solar cell on the back of the mailbox. With wake timers hoping to make it low power enough that the battery will never need to be recharged manually.
There are 2 mailboxes involved here. The clear mailbox receiver will be wall mounted inside the house and the one outside by the street will have the transmitter electronics.
The flag only activates when it senses activity at the mailbox outside. There will also be a bunch of neopixels stuffed inside so it'll light up the same time the flag activates.

size of the 10W speakers to be mounted to the mailbox lids. 😉
Will be using Adafruit's 20W class D amplifier module inside.
LORA Boom Mailbox
The mailbox is the speaker enclosure 😉
inner cedar
“You’ve got Mail!”
elder oxide
inner cedar
“You’ve got Mail!”

 vast salmon


 gloomy anchor
anyone with experience in metal printing? what is it generally like
sleek crag
Expensive.
faint sky
Scam Alert: you really really have to be careful of cheap Chinese sellers trying to pass sintered aluminum 3D parts off as real aluminum now. This actually just happened to me this week. I purchased some aluminum extrusion L brackets and they sent a whole pack of sintered L brackets. The t-nuts and bolts are real but the brackets are obviously sintered.
faint sky
redesigned the lids for the 10w speakers. using 50% infill to hopefully prevent some rattling but it's going to take 24 hours per side. if i need to add ported holes i can calculate the volume and drill them afterwards.
 gloomy anchor
faint sky
Scam Alert: you really really have to be careful of cheap Chinese sellers trying...
gloomy anchor
faint sky
Scam Alert: you really really have to be careful of cheap Chinese sellers trying...
any thoughts on sintering vs melting?
faint sky
I have opinions only, no practical experience, so I'd rather not muddy the water without facts. Hard to find comparisons of aluminum casted parts vs sintered. Most places that offer sintering claim they're for prototyping parts only which implies they're lower quality than casted parts. I did find out you can actually polish sintered parts though. If you want real polished metal for cool aesthetics for costumes or trim pieces it's an attractive option. I wouldn't use it for structural integrity where weight/load/force is factor.
sintered aluminum is far more porous than casted aluminum and if you know anything about cast aluminum that immediately means weaker yield.
there are plenty of applications for stuff like that though. polished display stands, things that don't need to carry much if any weight. i think it does have a niche. since it's an expensive process it's less appealing vs using something FMD or resin printed then painting it to look like metal.
 fallow phoenix
https://www.pm-review.com/introduction-to-powder-metallurgy/properties-of-powder-metallurgy-materials/
Aluminium alloys Pressed and sintered Al alloys can deliver UTS of up to around 200 N/mm2 as sintered or up to around 320 N/mm² after heat treatment and tensile yield stress of up to around 170 N/mm² as sintered or up to around 320 N/mm² after heat treatment, but with quite low ductility levels (0.5-2% Elongation).
as far as the quality of industrial process from discount vendors, YMMV, of course.

Properties of Powder Metallurgy Materials. The mechanical properties available from the materials, commonly used for structural or engineering component...
arctic dragon
gloomy anchor
anyone with experience in metal printing? what is it generally like
Prior to binder jetting, the primary means of metal printing was selective laser sintering, which was slow, messy, expensive, and very wasteful. It did result in a basically finished metal piece when complete, so you would basically just pull it out and clean and polish.
Then, binder jetting came along in the form of desktop metal and made metal printing a lot more accessible and scalable. You have to cure and sinter the entire thing afterwards, so there is an extra step, but you save so much print time and can generally recycle far more of the unused powder than you could in the laser machine.
For the really brave and not as financially well-off, there even exists an FDM method for printing metal. Most metal filaments are just composite plastics with metal powder suspended within for improved material properties, but thevirtualfoundry.com offers a filament you can print with and sinter in a kiln for pure metal or ceramic. Probably the cheapest way to print metal, especially if you already have an fdm printer and access to a good kiln.
coarse coral
elder oxide
https://tenor.com/view/loud-music-speakers-explode-loud-rock-and-roll-gif-164821...
Didn't know adafruit sold speakers that size
elder oxide
Limited edition, only available through time travel
coarse coral
Got u
elder oxide
🫣
coarse coral
My pla and tpu arrived

What unusual yellow is that I hear you say
That's only j yellow by eryone
inner cedar

 inner cedar
Lol
coarse coral
 faint sky
Those speakers were from amazon. I have a 20W adafruit amplifier module so wanted some good quality 10W speakers to maximize the performance of the module.
RP2040 Feather > LORA featherwing > I2S audio module > 20W amplifier > 2x 10W speakers
elder oxide
faint sky
RP2040 Feather > LORA featherwing > I2S audio module > 20W amplifier > 2x 10W sp...
-> awesome end product
Lol.. it thought I was doing a block quote 😂
There we go
faint sky

Pump up the volume with this 20W stereo amplifier! This slim little board has a class D amplifier onboard that can drive 2 channels of 4-8 ohm impedance speakers at 20W each. Power it with ...
coarse coral
Fyi this is a case for a pi and screen combination
The HDMI connection juts out so needed a custom housing for it
gloomy anchor
arctic dragon
Prior to binder jetting, the primary means of metal printing was selective laser...
binder jetting seems quite cool, but its held together by glue
kinda feels a bit fragile
maybe you can place it in a furnace to be isoheated to get all the metal grains to fuse together?
coarse coral
Test print full send 26 hours
This has been such a hard thing for me to learn and do
6 months ago I said I'm making a handheld and it all started there with a background in web development
inner cedar
Spiral of creation
There are worse things you could have done with the last 6 months, lol
coarse coral
It's true and I always say to myself that I beat chatgpt to this one
coarse coral
Gnite
faint sky
looks good stendle, your dimensional accuracy and supports look better than what i can do. nice and crisp.
test fit looks pretty good.
small speaker grills arriving next week
wow, i have a 3d printer now. i could have just printed my own speaker grills.
faint sky

 coarse coral
faint sky
looks good stendle, your dimensional accuracy and supports look better than what...
coarse coral
faint sky
looks good stendle, your dimensional accuracy and supports look better than what...
Yes for some reason this project feels like it has dragged on by 8 weeks too much, the mechanisms on the first proofs didn't all work as planned and was always looking at ways to slim at least the left and right hand side down since this is with a model b and not a custom PCB. I 'think' the model b USBC supports data transfer so decided to only make one through hole on that basis.
I've had mixed results with printing in this orientation but overall the holes all worked out
coarse coral
faint sky
wow, i have a 3d printer now. i could have just printed my own speaker grills.
Haha I had this feeling tonight when I realised I can make my own models too
Test print failed at 2% it came unstuck . More glue and now at 3% .
faint sky
fitment looks good
when fighting against bed adhesion ensure your z-offset is properly set and bump up your bed heat by 5-10C.
bed adhesion is a combination of perfect z-offset, bed temp, and nozzle temp. those are the 3 main things.
coarse coral
I think I needed to lower the offset on this one however I try to be methodical with glue which raises its height and adds adhesion so it kinda works out quite fast. This pla is the cheapest I have and adhesion seemed less good than my go-to of eryone so glue glue glue . I did also take its temp up by 5 for the second attempt
faint sky
and of course a perfectly trammed bed but that's a requirement for doing anything
i've never used anything on my bed. when you get it right you should never have to. feeling the need to use glue, hairspray, or other band aids just means something is wrong.
coarse coral
I am with you to some degree but I don't mind using glue but very careful on final prints to be very even as it can affect the surface
Uhu is great and removes very easy by washing under hot water . Then I just use a blade and isopropyl alcohol then glue
I'm actually going to flip this glass bed onto it's smooth surface for the final print since this side has a small hex pattern that some times gets left on the print
faint sky
i treat my bed like a holy temple. nothing touches it other than filament, not even my fingers ever touch it.
coarse coral
What type of bed do you have? I know it's not flexible 😅
faint sky
that way it cuts out a lot of troubleshooting steps, don't have to worry about surface contamination or other factors if prints suddenly stop adhereing. honestly makes life easier in the long run.
textured PEI, i could touch and bend it if i wanted to, i just don't.
coarse coral
There's only two things I've seen bad adhesion with. A sudden raise in atmospheric temperature made my print warp and got unstuck. The next is lack of glue and bad offset. The offset it my fault the glue is a mix of the pla type and my application
faint sky
i don't touch it because it's textured, too much stuff could get captured in the little sandblasted craters
even hand oils
coarse coral
You'll cringe when you hear that I used a blade on this with force without really thinking 🤣
faint sky

everyone has their own way of doing things when it come to build surfaces. i'm very particular in how i treat my surface is all. to each their own, if it works it works.
and i do have ahesion issues from time to time, spring tension goes out of wack, vrollers wear down. retram, reset, redo. i've just found that leaving the surface alone completely eliminates those parts of troubleshooting that others might have to question.
coarse coral
Yes it will do that but I don't mind on a old or new bed using glue to get round the issues quickly and the adhesion is usually a 9/10 from there even with taller and more heavy prints
And in terms of tramming I just tighten the hot plate bolts a little bit more in some areas more than others to pseudo tram my bed
faint sky
yes but when even the glue doesn't help should be an obvious clue that something is really outside of spec and band aids aren't enough anymore.
coarse coral
Yeh
faint sky
and i think it was someone from hackaday that told me gluestick is only as a release agent and doesn't actually help with adhesion.
faint sky
i see a lot of people using it and swear it helps with adhesion, since i've never used it wasn't in a position to argue with the person.
actually the head of hackaday too
coarse coral
This is my second creality and I don't know enough about them to get it to be so precise yet even with the basics so I just say what the heck more glue
faint sky
but you can't coat the entire bed evenly with it or does that not matter
coarse coral
It's not so important to be 100% even just a good attempt to be a few small raises here and there doesn't particularly matter since it has enough okay the hot end tends to even it out . We are talking fractions of mm here
faint sky
i think the science behind it kind of checks out
you can use elmers wood glue to clean vinyl records
when it hardens you cool it down a little and it releases from the vinyl taking all the impurities with it
coarse coral
Now that's smooth
faint sky
so you'd get a little higher layer height with glue with the added benefit of it actually cleaning your bed surface when it cools
and you rip it off like a skin?
not sure if craft glue would do the same thing like a thin layer of wood glue would
coarse coral
Yeh not so much after a 12 hour print the glue becomes less flexible . It usually is good for a few prints but I tend to clean it off after a long print and go again to stop visual defects on the surface
faint sky
ah is it water soluable?
faint sky
sounds much more practical then
coarse coral
I seen this guy who made his ender 3 all white

Steal the BLACK FRIDAY deal and get Atlas VPN Premium for $1.70/mo + 6 months extra. Limited-time offer! https://get.atlasvpn.com/ScottYuJan 👈
↓ Links ↓
My Merch Shop: https://www.scottyujan.com
Part 1 - https://youtu.be/kG_YKeJDaX8
Part 2 - https://youtu.be/uBfMoOqCgPc
Part 3 - https://youtu.be/4jk6kZIwsQA
All music by Cameron Luck: https://t...
faint sky
i wonder if the wood glue trick would work to clean a printer surface hmmm
white would be a dirt magnet, most printers are black for a reason.
not a fan of the printer with the motor directly on the hotend. swapping to a pancake motor will lessen the weight but also reduce the torque, burning money.
having the motor relocated to one of the gantry arms like Ender 3's is the way to go. having ultra light hotends is one of the way to get faster prints. less mass and inertia.
coarse coral
I'm just glad all these fdm manufacturers never decided glossy black was a good idea
faint sky
it was a thing with the black acrylic kits in older printers though
coarse coral
Black and red is a sweet colour scheme
faint sky
black goes with any color 😉
coarse coral
 faint sky
so does white but white is easier to spot stains so black should always be the default base color for just about anything and then you add color highlights.
arctic dragon
gloomy anchor
maybe you can place it in a furnace to be isoheated to get all the metal grains ...
That is part of the post processing steps. I believe they use a furnace to debind and sinter after printing.

 vocal flax
faint sky
i wonder if the wood glue trick would work to clean a printer surface hmmm
vocal flax
faint sky
i wonder if the wood glue trick would work to clean a printer surface hmmm
Idk about non-cured version but i believe cured version has potential to be a decent build surface. Some people have used vinyl for build plate successfully and wood glues are usually polyvinyl acetate, so if applied well it could be nice diy coating. I want to test it some day but rn focusing on different upgrades.
arctic dragon
gloomy anchor
can glass be 3d printed?

The world’s first company for accessible glass 3D printing. With our Direct Glass Laser Deposition technology, 3D printing glass is as easy as printing plastic!
shy kelp
Question: so cura and other slicing systems account for tolerance? Or should I keep to account for it while drawing the model?
 amber garnet
are there any 3D models for the short single-color keycaps on Adafruit? I bought the cyan ones for a macroboard but i have an extra one that i wanna use on my actual keyboard, except its a lot shorter than my actual keys so i wanna 3d print a riser for it
amber garnet
shy kelp
Question: so cura and other slicing systems account for tolerance? Or should I k...
i might be wrong but if you're trying to design parts that fit together tightly definitely leave some difference between the two sections that fit together
like for example if you have a .125" peg and a .125" hole they almost definitely wont fit together without some sanding
 rough trout
shy kelp
Question: so cura and other slicing systems account for tolerance? Or should I k...
rough trout
shy kelp
Question: so cura and other slicing systems account for tolerance? Or should I k...
AFAIK they do not. I usually have to build tolerances into the model; mine are usually made to fit the inaccuracies of my particular printer
shy kelp
also does exist anything free that optimizes the material usage and speed of printing? like I can throw some vororonoi thingy to a base mesh, then suppose that it will save materials while printing, but thats not it
coarse coral
shy kelp
Question: so cura and other slicing systems account for tolerance? Or should I k...
Best thing is do a test print fit of your joint.
And yeh I make tongue smaller than groove usually. Only fractions of mm usually
5 hours remaining
faint sky
actually no, that would be a smart thing to do before building an entire project around them. 🤦♂️
just assumed they work, bad thing to do.
this is part of the 3d printing life. one day everything is fine, the next your prints are warping, shifting, blobbing, or ghosting.
supports are particularly frustrating to deal with sometimes, they're more fragile.
faint sky
rough trout
AFAIK they do not. I usually have to build tolerances into the model; mine are ...
This is why I'm not a fan of print in place models. It assumes the tolerances built into their model are the same as your printer.
I use middle absolute tolerance which is really bad for thin supports but better for dimensional accuracy. The problem with dimensional accuracy is you can adjust horizontal expansion but not vertical expansion. There is no xyz thermal expansion parameter which is important if you're squishing layers together at 0.1 layer height for highest detail. It might actually expand or contract vertically as well.
Depending on your layer height setting, a z-offset difference of 0.05 could mean the difference between a print expanding or contracting. This is why people build enclosures in an attempt to control the entire environment around a print.
yeah that sucks. pretty obvious it went down well and then warped over time afterward because the walls above it are still straight. i haven't seen that exact kind of warping before. low thermal transfer in that one particular spot along that edge somehow. do you use the silver heat tape and insulation on the bottom of the bed? check to make sure it's still adhered in that spot under the bed.
one thing i noticed when i was having extreme PETG warping: it was warping in the same spot every time, which happened to be right above where the bed heater ends under the plate. now that i've figured out i should be using 20C more bed heat vs. at the time i'm sure my warping was due to being on the edge of the bed heater and low bed temp.
your print still looks well within the bed heating boundary, couldn't hurt to raise the bed temp more unless you're already near the safety limit. (most beds will go up to 120C).
faint sky
You'll start getting elephants foot at the max bed temp for your filament type. That's when you know it's the max bed temp. Do small calibration prints like calibration cubes to dial in your max bed temp. Raise the calibration cube off the bed and use supports under it so you can test support adhesion with the bed temp too.
In my experience Creality printers like the max temp printed on filament spools. For PLA it's like 190-210, use 210. Same for whatever the spool recommends for bed heat usually 50c-70c, use 70c. For PETG go with 250C/90C.
However even using the perfect nozzle and bed temp will not stick unless your tram & z-offset are perfect.
coarse coral
faint sky
yeah that sucks. pretty obvious it went down well and then warped over time afte...
Turns out it wasn't a warp, that's a thin layer of support for a chamfer pointing away from us there. It was a weird support alone from the other supports. It did come loose however. My test fit sucked. Going full send now, I think it will work out with some changes. I found my dove tails sucked at 2mm but the squares just clicked into place with pressure. So opted for more square snaps (who knew a cube can snap into a cube indent) my tolerance is .2mm with the expansion they snap lovely
I haven't had elephants foot in any prints, I just run it at 60. Makes muse (iirc) said you don't really need a heated bed for pla
faint sky
interesting, i've never actually tried PLA without a heated bed.
coarse coral
Matte black here i go.
Yeh he also did tests showing energy usage being way cheaper for that usage
faint sky
because bed heating is built into the sliced gcode. might be fun to experiment with.
coarse coral
Yeh I'm just going to stick to 60 for now but I've got a project after this I will definitely test at 0 with
I can almost guarantee this eryone filament will stick with no problems
faint sky
if it works at 0 then the filament recommendations would also note that?
coarse coral
I love pulling a model into cura after doing some work on it and getting no errors
I think brand is very important for 0 just guessing tho
faint sky
i still have about 15 hours left on my 2nd mailbox lid. really interested to try that out. i'd do it right now i'm so interested but i have a print going.
because this is the last piece for my mailbox i can switch back to PLA after this
oh lol pretty much every model i make cura complains about not being watertight.
coarse coral
One thing I did notice is zero stringing this time . Looks like levelling the z lead screws and tightening gantry had a huge pay off
I printed at 120mms yesterday but I want to go back to 60mms and be patient
34 hours of patience
🫡
Yeh I think some plastic was pulled just a bit too quick in the print and jerkiness
60mms it is
So long tomorrow hellow Tuesday
faint sky
120 🥳
think i'm at around 30 for PETG and 50 for PLA
things start getting messy for me around 60
are you using klipper? how in the heck are you doing 120 on a cr6?
coarse coral
I think I just got lucky with things. I spent time tightening all bolts and belts within their respective assemblies and same goes for other areas. I'm using latest creality firmware .
This print decided to re level and flip this glass bed onto the smooth surface. This should be cool . Matte black feels premium by eryone
coarse coral
 coarse coral
No adhesion issues so far on smooth surface of glass plate but there is a long way to go.
2 layers of uhu down
coarse coral
I think cold plate and glue could be a solution since the glue will get mildly warmer with plastic contact and then solidify to hold
elder oxide
Just me over here printing reels for lose tape components that I have 👀
Had to make a few minor bed adjustments on the first layer
 elder oxide
Oh yeah, 100%
faint sky
Oh la la, very pretty.

 iron remnant
Came out reel nice.
elder oxide
iron remnant
Came out reel nice.
I knew you’d wrap things up nicely
coarse coral
Sadly my print failwd at about 35%
I can't seem to escape glue yet. But it does mess with the finish. So have reduced to a smaller amount this time. I really should get away from glue asap
2 day print now .
coarse coral
Great my y stepper motor has siezed and died. Hopefully I can get support from creality on this printer. 3 months old
faint sky
Awww that sucks. The print looked beautiful to that point. Looks like the support connection failed to hold. You can increase the thickness of the support connection but it'll be much harder to separate.
I don't think that'll actually help with the warping issue though. The warping is the main issue.
coarse coral
faint sky
Awww that sucks. The print looked beautiful to that point. Looks like the supp...
Yes it did look like that pretty much we agree there. My plan was to have more density for more grab points but I think wall thickness would be just as good.
The bad thing is my y stepper has died so everything stopped until figure out what to do there.
The warping I think it didn't make a good support connection and began to wobble but also think I had inadequate cooling this has happened before and not happened when I use external fan. Maybe the hot end is just too hot
faint sky
Is this on PETG or TPU?
 coarse coral
It's very rare for me to have warping honestly . 100% cooling yes
I think my machine is cursed
faint sky
I've had this happen on PETG. I think it was a combination of factors. Overextrusion (which judging from your walls and infill isn't a problem for you.
coarse coral
I had corrupted firmware (im sure) broken belts, X wobble, hot plate with a lot of wobble. Now y axis stepper and my extruder assembly seems Sus
Yeh I never had problem with flow despite not being able to access extruder
faint sky
Infill was too thin so I bumped it up parts became too fused together. Had to use a pick tool and snips to separate. So I reduced the flow rate to 95% on the infill. Also retrammed the bed and after that got perfect prints.
no more warping, even with petg
coarse coral
To be fair it's fine it will give me time to fix the parts in the model I was ignoring and eager to print . The customer support hopefully will either send me a new y stepper or finally exchange the whole thing.
This print is 100% infill
So my flow is actually pretty sweet it would really show
2mm walls
faint sky
ahhh yeah the constant heat/cool cycle might contribute to warping?
coarse coral
I'm not sure . Could you elaborate on heat/cool cycle?
faint sky
the parts that warped on me were close to 100% infill around the walls too yes
coarse coral
Oh
I think this will be solved with more cooling and stronger supports. I'm mad tho that was about 250g of plastic
faint sky
might be more pronounced in my case because i was printing at 250C
coarse coral
It's also possible my y stepper was grinding and it lifted it
It wasn't until I did first layer on next print that it really went wrong
faint sky
as the nozzle moves away the filament cools. because it's 250C at very slow speed about 20mm it heats up the entire area around the nozzle, then the nozzle leaves and the entire chunk starts to cool.
coarse coral
So we might not even be dealing with a warp
faint sky
it's obviously bending upward in your image though and separated from the supports, it definitely warped.
coarse coral
faint sky
as the nozzle moves away the filament cools. because it's 250C at very slow spe...
Ah yes like thermal transfer to surrounding area. It's very possible. I'm more inclined to say my y axis stepper was causing issues. Looks like it maybe got stuck on the same part which is what happened when it totally failed
It's warped yeh but very possible it got snagged and lifted
faint sky
yes exactly, that's all i can think of as a common denominator because my experience with warping is only with petg at high temps.
snag means over extrusion for some reason
coarse coral
Yeh I think we have definitely diagnosed the solution if it is entirely warp but since my y stepper catastrophically failed on the next print within the first layer I'm going to say since most of my other pla prints were fine that this is y stepper issue
faint sky
which can happen. sometimes i find little blobs here and there and while it's printing i'll clean things up with snips, keeping an eye on things every hour or so.
coarse coral
Same
faint sky
there's no y layer shifts which i'd expect with a failing y motor
faint sky
ok.
coarse coral
This side is where the nozzle was when it failed . It does look like a lot of snagging in that one area
faint sky
i'm looking to extend my y axis by about 2 feet which will require a much longer carriage, bed, and two sets of v-rollers. adding a lot of weight. so i looked up the torque of my creality y axis motor and it's barely got enough power to move the bed alone. add a heavy print on top and it does exceed the torque rating. i was kinda upset when i did the math.
if you end up replacing it try to find a y axis motor with higher torque but same max amperage requirement if possible.
because if a motor fails once from too much load it'll happen again.
coarse coral
I think it's possible to find stepper motors for reasonable price. Basic looks like about £20
Yeh
I'm thinking I'll go all in with this printer and do upgrades. I do like it and have commited to repairs . We will see what support say, I don't think the steppers should fail after 3 months but we all know creality qc is less than good
faint sky
the support layers look big and round vs your layer height for walls and other stuff
might be a mismatch of support layer height
coarse coral
Yeh I think it was not great contact but would always rip apart if the y failed since it would be gridning over x
Also when I removed the supports on this failed print they came off so nicely
So this plastic is definitely nice but small warp or grind made it fail . What a story 🤣
faint sky
almost looks like over extusion only on the support material. which would raise the height beyond your normal layer height. and next time it tries to print a solid layer it'll be gouging through the print.
coarse coral
If it was grind it wouldn't matter the support density. I had a test print of same model just before this and was fine
faint sky
i've had that happen, lots of nozzle scraping, a cringe sound like fingernails on a chalkboard.
coarse coral
Yep it could be but over extrusion or lack of movement leading to excess blob. All of it made it fail.
Yes but first I need a new y stepper
faint sky
3D printers... hundreds of things can go wrong which is why when everything goes right it feels like a huge victory.
coarse coral
I wouldn't change your habits on this, I do feel the y stepper has a lot to answer for here based on previous print success
If only I was paying attention when I noticed it failed. Instead I just powered off and removed the print
faint sky
true, the y axis failing certainly muddies everything for diagnosing anything else in this case.
coarse coral
Well the printer is unusable now
faint sky
you'll get back up and running, stepper motors are everywhere now
brand new cr6 too. that's a shame 😦
coarse coral
Belt looks healthy
Comparing to the x motor that alignment is so bad now
And it does not move I think the gears clashed and now the full motor is bad shape
faint sky
has this happened before? that's not a creality branded motor. all of my motors have creality stickers on them.
coarse coral
I disassembled they motor but didn't see anything obvious.
Not happened before the printer is stock so far
It looks like the rod is bent down lol
Either way it's time for a break again, which is important anyway. That's the good thing about 3d printers they tell u when to take a break 🤣
faint sky
they're hard to find but i found a 42-60 motor to replace my y axis motor with.
stock is 42-40
you should be able to find a replacement by searching for creality stepper motor 42-40.
coarse coral
Maybe the motor is fine and it could be the rod. I don't know the full assembly but just looked for stepper motor and they don't show teeth
faint sky
the 42-40 is the same one used on almost all of creality's printers.
coarse coral
So is the teeth (metal) on that assembly a part next to the motor ?
faint sky
yes it's a GT2 belt gear and gets added to the end of the shaft with a grub screw
coarse coral
Ah
faint sky
those are very easy to find as GT2 is a standardized size that practically all printers use

 coarse coral
Maybe it just came loose. I guess I need to fully investigate
 faint sky
possible the grub screw came loose or got sheared off. that's best case scenario.
remove the pulley and see if the shaft spins
coarse coral
Okay be home in 10 mins . Let's gooo
faint sky
or you could just look down into the pulley and see if the shaft is spinning inside, if that was the case then the pulley should just slide right off if it's not screwed down.
it's a half shaft design so a pully with 3 grub screws won't actually add anything to it. a pulley with 1 grub screw is adequate.
coarse coral
Well in here now legs see
faint sky
one reason this might have happened is too tight of belt tension, forcing the motor to have a higher resistance load than necessary.
not tight enough and you'll get backlash, too tight and you'll get high resistance on the motor. like everything else with 3d printers there's a sweet spot.
they should have been properly tensioned from the factory though, most creality printers are mostly prebuilt these days.
coarse coral
Yep I did tighten mid print on this occasion
faint sky
that could have been a deciding factor, live and learn
coarse coral
coarse coral
Yep I did tighten mid print on this occasion
Like a ****
faint sky
i honestly don't have a feel for what is too loose or too tight either so don't feel bad.
it's all kinda best guess when it comes to belt tension and belt deflection because there are no specs that come with it.
coarse coral
The good news it's disassembled

The bad news and maybe in wrong I'd this bolt has snapped off ?

Certainly looks like a snapped fitment to me
So that means new motor since it's deep inside the stepper motor. I removed the plate on the opposite side of this stepper motor and not really able to easily change that part.
coarse coral
faint sky
that could have been a deciding factor, live and learn
For sure. I didn't even tighten by much but that was enough. Definitely broken fitment now. I suppose it was on its way out if a couple of twists of tension can snap it. Eh
faint sky
oh my, yes the entire shaft sheared clean in half. motor is destroyed. 😦
coarse coral
Thanks for confirming. I've sent this information to the seller who do offer support. Hopefully get something under warranty here
Should I be blamed for this ?
It's sheared at the angle so yes very much broke. Super glue?
Maybe I can 3d print a new one 😩🤣
coarse coral
Yeh I agree , hopefully they send out a new stepper. Now we know the problem it's nice to take a sigh of relief
faint sky
it should have also made some really loud noises
coarse coral
Have a question for you whilst you're here
faint sky
something like this https://www.youtube.com/watch?v=ejII1fj7L-M

This is what happens when your acceleration cannot overcome the rotor inertia at a certain speed.
coarse coral
faint sky
something like this https://www.youtube.com/watch?v=ejII1fj7L-M
Yep but if a tiny bit of pressure causes it to bend so much can't be very strong steel
More like wood lol
Either way I guess it's time to give this machine a full clean
I wonder if my machine has been a refurbish since as you noticed there are no creality stickers on the motors
faint sky
it's very possible. i've never seen creality ship motors without that creality sticker on it.
coarse coral
I'm all for refurb and things but sold as new
faint sky
the fact the motor might have been replaced before means this is now a recurring issue and the motor failing is just a symptom and the real problem might be elsewhere
coarse coral
The mainboard fan gave up also
coarse coral
I'm going to see if they have a telephone number
faint sky
possible all the issues are related to a mainboard issue. possibly the mainboard itself is refurbed in some way too.
if they sold it to you as new then you did get scammed as we've already identified one unoriginal part.
be tempted to see what condition the mainboard is in... and if it's even a real creality board.
oh you've got a pi sitting on top. that complicates things as it's a modification. possibly electrical load taking away from the mainboard. are you powering the pi separately or from the mainboard?
i don't have solid spacers on my S1 pro. i have springs and tensioner wheels. have no experience with shims sorry. :/
coarse coral
The pi has never been connected in any way to the printer
Only used official firmware also
Let me get access to the board and will show you
Wonder what the "b" is
 vocal flax
Could that be, bad? 🤔
coarse coral
vocal flax
Could that be, bad? 🤔
It's possible

And a belt snapped on the X axis
Pffff
And my Bowden early on wasn't flowing very well
All stock parts have basically showed issue . Maybe it's just one that came out the factory badly kekw
faint sky
looks like B- so battery negative? don't know why that would be on the lid of the SD card.
coarse coral
Maybe this was one of the early kickstarters
I mean that type of manual work on full production seems unlikely
 faint sky
can remove the extruder bolt with some careful twisting with needle nose pliers, then find a replacement bolt.
coarse coral
Let's gooo
faint sky
having something written on the sd card lid seems normal. it's even in the video of the stock cr6 replacement video from creality official. https://www.youtube.com/watch?v=bmr3r4H-JEE

CR 6 SE Replacement of motherboard
appears as if the v1.0.0.3 boards are among the first versions yes. They're up to v5.2 boards now.
I don't know what the ERA means in the board model.
coarse coral
Thanks for helping , it is what it is .
 vocal pilot
https://cults3d.com/en/3d-model/gadget/macintosh-classic-housing-life-size I found this life Sized Mac Classic Housing and was hoping this can be great as a pi case in case I wanna turn a RPi 3B+ (or 4) into a Mac Classic Emulator

also not sure if a LCD Panel can fit into this 3d print
vocal pilot
https://www.thingiverse.com/thing:3551263 this is for a 10-screen

These are the two parts we designed for our recent DIY project to refurbish an old Mac Classic. You can see the process and the results here: https://youtu.be/nguN392TH-g
If you like what you see please consider subscribing to our YouTube Channel!
faint sky
the problem with a full size replica of legacy tech with 1:1 displays is finding a square 1:1 display large enough.
vocal pilot
I'm not worried about getting a LCD I can set the emulator to emulate 800 x 600 like I can do that on my old Macbook with 800 x 600 pixels
Raspberry pi can use any screen size like 800 x 600 even it's a 720P screen
coarse coral
@faint sky seller is sending a replacement y stepper.
faint sky
It's really scratchy but it's a start. RFM95 is sitting inside broadcasting & receiving.
coarse coral
I'm confused. Why do you broadcast "you've got mail" ?
What's the speaker inside the box for? The mailman m
?
faint sky
yes
there will be a transmitter in my real mailbox outside
let's me know when i have mail so i don't have to walk to the mailbox to check
which for most people isn't a big deal, but if your mailbox is like 1/2 mile from your house out in the country, that's pretty useful.
this is all just a prototype as a gift for a family member. wanted to get it done by christmas but that didn't happen. so maybe i can get it done by next christmas. this kind of project takes time to refine because it's not something you can easily modify once installed.
LORA Mail Boombox, ya can't buy that in a store. 🤟
 queen canopy
I'm working on a base for a toy fortune teller thingy. This isn't really 3D PRINTING related but I want to model in a spot for a battery case.


I wanna put it on the bottom
The guts of it is this device, an EZSound audio chip

It runs on 3.7 V
What size AA battery holder is the equivelent of that?
2 AA, 3AA, or 4 AA?

I'd imagine 1 of these would work
 faint sky
@queen canopy All 3D related stuff is welcome here. 3D printing is just part of that really.
actually having looked at the pcb i don't think it's advisable to power it with regular batteries unless you can power it from the USB jack itself.
it's for lipo rechargable batteries only. you can't use regular batteries with it.
you can get a larger battery that will last a much longer time.
any of these lipo batteries from Adafruit should work fine https://www.adafruit.com/category/917
Adafruit Industries, Unique & fun DIY electronics and kits : Batteries - Tools Gift Certificates Arduino Cables Sensors LEDs Books Breakout Boards Power EL Wire/Tape/Panel Components & Parts LCDs & Displays Wearables Prototyping Raspberry Pi Wireless Young Engineers 3D printing NeoPixels Kits & Projects Robotics & CNC Accessories Cosplay/Costumi...
queen canopy
Okay so I just got done printing a print that went fine. Now I’m trying to print something else, and I’m getting this “homing failed, printer halted please reset”
Any idea how to fix that
?
coarse coral
queen canopy
Okay so I just got done printing a print that went fine. Now I’m trying to print...
Some printers have detection of objects under the nozzle. If you put your hand near the nozzle at during a print it may give that error but also can give that error for other reasons. Try power on off, and reset factory settings on your screen. Also when you go into levelling press the homing button. Some times you just get this error and it will return to normal with power on off
coarse coral
faint sky
this is all just a prototype as a gift for a family member. wanted to get it don...
Yep I hear you there . Good stuff
coarse coral
@elder oxide any tips for printing without glue on glass plate shiny side?
Print height is about 60mm
230mm by 110mm
elder oxide
coarse coral
<@728676724522352733> any tips for printing without glue on glass plate shiny s...
Make sure your bed is level, make sure you’re at 60°C bed temps. Clean it with rubbing alcohol
coarse coral
Thanks . I'll do that, and probably get a calibration test also .
elder oxide
Weirdly, static cling (the force not the product) will be helpful, so not printing too hot is important I’ve found
coarse coral
That's interesting, I had an ender 3 for a little while and I wasn't using any adhesive. I did print at generic pla temps as set in cura which is lower than I have been with glue.
I think I need to do some calibration tests of lower temps with high detail to verify any discernable differences there and then adhesion at a level to sustain the larger amounts of plastic
Printing at 210 on this particular brand made the lines so smooth
But if that 5 degrees means I will get better grab to the build plate it's worth checking
 coarse coral
I literally printed the same dragon ! Ok maybe not .
elder oxide
I’d love to print one of those neat dragons
coarse coral
I did it at small scale and it turned out great, sadly I don't have a photo rn
I've disassembled my pc, sold my desk and waiting for a new y stepper in the post. To be honest I'm glad to have a few days break from technology
 tulip isle
Once again tried printing
Once again came out half sized and only some of it actually printing
Usually at least a good chunk of it sticks to the resin vat
coarse coral
Aw that sucks
inner cedar
winged helm
Literally/absolutely? No. Practically? Clean enough
 frozen wasp
Any suggestions for a DIY 3D printer to build? I don't currently have access to one and would like to go out and buy necessary parts for it, but I can't print anything
rough trout
Voron is a popular, good one
inner cedar
There are designs using motors, rails, and lasers from optical drives... 100% scrap
rough trout
I'm sure you could find sellers that sell a bundle of all the 3D printed parts for a Voron- the 2.4 seems like a really good machine
vocal flax
Problem: Ever since I changed to klipper i struggle with probe or z steppers I am unable to pinpoint the issue. Everytime I print the nozzle either too close to bed or too far away and it wasn't consistent on entire bed so I wasn't able to just tweak z offset and move on.
The system: acrylic laser cut bed slinger. Mega2560 and ramps. A4866 drivers 1/16 microstepping 0.9 motors. Raspberry pi 1 b+ running mainsail os. I am using 3d printed probe. Basically it's M3 screw cutting light, similar to link. Important features, electronically it has Schmitt trigger, mechanically it has spring but spring doesn't engage until the probe passes the trigger point. For the bed I've tried magnetic buildtak clone stuck to a glass bed and just glass. Pcb heatbed.
What have I tried: 4 point mounting 3 point mounting. I've tried the gantry alignment tool, bed leveling. The repeatability tests were better with marlin. Also the range was a bit big but i tried making 5 samples and taking median of samples, the bed leveling more or less looked same with 2 samples in height map.
Anything else you need to be able to help me, i can provide.

Background
I was using an inductive sensor as my main Z_min sensor. I was unable to use it as bed leveling sensor because I was using a very thin and soft steel plate under the glass. This lead to several issues: the glass itself is not perfect. The steel plate under it was not flat even when compressed so both the steel and glass does not repre...
vocal flax
frozen wasp
Any suggestions for a DIY 3D printer to build? I don't currently have access to ...
Are you looking for a hobby device or a device that spits out parts reliably with little or no tweaking?
By hobby device i meant a device you keep working on improving and/or tweaking
frozen wasp
vocal flax
Are you looking for a hobby device or a device that spits out parts reliably wit...
The former moreso, but I would like it to at least slightly work out the gate
vocal flax
In that case prusa printers are pretty good option
But recently seeing a lot of bambu labs printer. If you are okay with closed source device they seem really good
frozen wasp
But my main goals are: use the parts I have in my possession, and not have to 3D print some parts, I really want open source, and one I can build myself
frozen wasp
well, yes, but i believe those would probably be too expensive because they need to be shipped and getting anything shipped to Australia is usually prohibitively expensive
elder oxide
Probably the closest you’ll get to DIY for relatively cheap is an Ender 3/3 Pro
vocal flax
My printer is mostly scrap built, with some laser cut pieces.
But it's nowhere close to cheap considering today's standards
frozen wasp
Well, I don't exactly need it to be cheap, just able to be bought in parts
arctic dragon
frozen wasp
But my main goals are: use the parts I have in my possession, and not have to 3D...
Voron is open source, and they do have Print-it-Forward for all the 3d printed pieces. Looking at the provider list, there is in fact an Australian provider, so that is an option.
inner cedar
If you start with a scrap built printer, one of the great things is you can then print parts to improve it. I've known people who increased their accuracy and speed over time by simply replacing brackets and motors over time... 3D Printer of Theseus
vocal flax
inner cedar
If you start with a scrap built printer, one of the great things is you can then...
He said he wanted to be ready to go at least.
That transformation is really fun to watch. 🙂
frozen wasp
inner cedar
If you start with a scrap built printer, one of the great things is you can then...
Sounds like a cool idea, and what I'm considering doing eventually, I just need... somewhere to start?
inner cedar
frozen wasp
Sounds like a cool idea, and what I'm considering doing eventually, I just need....
You can do it with old DVD burners, cardboard, and duct tape or glue
I have done this
Also crying. Lots of crying. If you don’t cry it won’t work.
frozen wasp
Okay maybe something a little bit more... functional than that
vocal flax
inner cedar
*they
Oh I'm really sorry Artemis. Just an old habit.
inner cedar
frozen wasp
Okay maybe something a little bit more... functional than that
The cardboard is temporary… then you print upgrades and get a big boost on speed and accuracy :D
vocal flax
frozen wasp
Sounds like a cool idea, and what I'm considering doing eventually, I just need....
If that idea is intriguing, I'd advise more on the lines of sigma profiles and aluminum sheet. You should be able to make stepper mounts with sheet aluminium drill bend and stuff then use pretty much all other standard 3d printer parts. Belts rails etc.
And it is scalable to a reprap printer
vocal flax
vocal flax
If that idea is intriguing, I'd advise more on the lines of sigma profiles and a...
I haven't seen any build log of this kind of build
faint sky
inner cedar
Also crying. Lots of crying. If you don’t cry it won’t work.
Yes older 3D printers were partly fueled by the tears of their owners. Used to have to cry directly on the build surface to give it enough fuel for the next attempt. 😛
Things have come a long way since then.
A recent cheap entry that I'm kind of interested in is the Sovol SV06 plus. It's an Ender 3 S1 Pro clone. Does pretty much everything the S1 Pro can do at a much cheaper price. Prusa's are great because they're very highly supported.
rough trout
The neat thing about Voron is once you're done building it, you generally end up with a good printer- not something made of popsicle sticks and bubble gum that you immediately put in a closet. Not as cheap as some of the other ones, however.
faint sky
3D printing space is extremely competitive. so you kind of get what you pay for most of the time. except i think Creality is highly overpriced these days.
Voron's are very popular lately, if you intend to DIY your own definitely give those a look. Some of them are extremely impressive but like everything with 3D printing your mileage may vary depending on how deep you want to dive into them.
rough trout
faint sky
A recent cheap entry that I'm kind of interested in is the Sovol SV06 plus. It'...
Hmmm, $259 US is pretty good for everything provided! I wonder how it does X axis leveling with only one driver
faint sky
i know right. very competitive for the feature set... which is definitely on the high end for features except speed.
and as i've said many times and will continue to say, speed is nothing without accuracy. accuracy is the entire point of a 3D printers existence.
winged helm
What's a good way to fill in the bottom of this STL so that it has a flat print surface? https://www.thingiverse.com/thing:1638997
I use fusion but I'm open to new software. Preferably foss

This is a scan of a sea urchin, done with NextEngine Scanner at the highest setting. My friend found this 30M underwater, on the sea floor, off the coast of La Isabela, Dominican Republic, many, many years ago. I still have it :)
I thought that this would be a good item to evaluate the scanner with, and I figure it would also be an excellent tes...
faint sky
@winged helm Import it into Fusion 360, reduce mesh, convert mesh to solid, create a cylinder and stretch it to cover the base of the model and use the cut parameter to cut the model with a flat cylindrical base. I've already done it and you want to cut about 60mm from the base.
faint sky
Getting Fusion 360 not to crash due to the triangle count is tricky. Reduce the mesh too much and you lose all the detail in the model. Too many triangles and Fusion 360 will be slooooow and/or crash.
coarse coral
Heard good things about sovol also nice price , if the build volume is above 220 I'm all for it
coarse coral
faint sky
A recent cheap entry that I'm kind of interested in is the Sovol SV06 plus. It'...
Always wanted a prusa but build volume too small and price too high for me but I had that money I would have definitely got the biggest prusa
coarse coral
inner cedar
If you start with a scrap built printer, one of the great things is you can then...
Yes
DIY would be my next thing, after getting familiar with cr6se and ender 3 it was a good intro. I'd definitely consider a DIY with enclosure and after market parts
vocal flax
coarse coral
Heard good things about sovol also nice price , if the build volume is above 220...
Genuinely curious. What's the deal with 220 build volume? How many times have you printed something bigger than 220? (Anyone feel free to engage. Not for only stendle)
coarse coral
Handhelds for me
Nice to get a single piece for front and back and not have to break it into 4. Maybe I'm weird
That being said I'm working with rpi form factor
So with that in mind plus the screen I can get 50mm each side for hands to hold , until I figure out a new layout
For now it matches my beginner needs
When I learn PCB design and use cm5 it will be different but today it is what it is
inner cedar
vocal flax
Genuinely curious. What's the deal with 220 build volume? How many times have yo...
I don’t do it often, but I have printed 220+
Enclosures and racks and stuff
Also large numbers of things at once instead of smaller batches
faint sky
Well my first big print i actually had to cut in 4 sections at a total of 12” it was 3” bigger than my bed.
I outgrew my build volume on day 1.
Im currently gathering parts to do an approximate 600mm y-axis extension mod on the Ender 3 S1 Pro. Ender extender doesn’t make kits for the S1 Pro due to the big plastic housing. I have to modify it myself.
Why 600 when i only need 320 realistically? Growth, someday i might to print a sword, or maybe a robot, who knows.
elder oxide
I was outgrown of my Ender 3 Pro before it even arrived. I have big ambitions lol
coarse coral
inner cedar
Enclosures and racks and stuff
I'm thinking about enclosure now as my next project, would need four posts and perspex sheets?
coarse coral
faint sky
Im currently gathering parts to do an approximate 600mm y-axis extension mod on ...
If I had 600mm I would make a 600mm wide handheld
 faint sky
2020 extrusion is sufficient for an enclosure and easy to put together.
coarse coral
Could you tell me what 2020 extrusion is? Can I Google this?
faint sky
600mm handheld 😂 maybe a giant ds or switch?
coarse coral
Haha u kno it makes sense
I play golf with an oversized club so why not play games that is oversized 🤣
faint sky
Just holding it would wear your arms out. Technically handheld but more like armheld.
coarse coral
Exactly ha to be clear I wouldn't really do that unless it was a show piece
A giant handheld on your wall would be cool tho with LEDs
Maybe an LCD with pixel art
faint sky
2020 and 4020 is the aluminum barstock 3d printers are mainly built with these days. Your CR6 is made out of 4040 and 2040.
20mmx40mm is the profile dimensions.
coarse coral
I see
I still don't see how that becomes an enclosure? Just utilise it with some smaller prints to make the enclosure ?
faint sky
You buy it in long lengths and make a cube to surround your printer.
Ender 5 is a good example but thats built into the design.
coarse coral
Just seen a couple of ideas on yt. Reminded me I probably don't need an enclosure at the moment
faint sky
 coarse coral
Pla is all I'm printing with and tiny tpu projects
faint sky
Something similar to building that.
coarse coral
Yeh that's what I'd go for
Some people are using pop up photo booths made of canvas and can be bought for £15
faint sky
Ive seen those, no idea if they work or not. Haven’t looked into enclosure stuff yet. I can print petg without one so i don’t really have an incentive to.
inner cedar
Enclosure isn’t necessary at all for PLA, but helps keep things cleaner (printing crap from getting out, dust getting in)
I use a box from my laser printer for my MP10 enclosure
faint sky
Thats a good point. PETG does create a lot of hairlike dust everywhere due to the higher temps. I don’t have that issue with PLA. PETG in your lungs would not be good.
Well anything in your lungs other than air isn’t good.
inner cedar
PETG I’ve also found issues with open air printing in terms of adhesion and warping
faint sky
Same but I got lucky one day with a really good tram, z-offset, nozzle temp, and bed temp. It was like all the stars aligned. That's the only way I'd ever be able to do a full volume mailbox in PETG.
I've had so much practice with tramming and z-offset lately I can tell if it's 0.05 off by looking at the purge line.
Which is a valuable skill so you don't waste a single bit of filament more than you have to if it's going to fail.
Luck/skill sometimes these things go hand in hand with 3D printers. They have moods.
rough trout
inner cedar
PETG I’ve also found issues with open air printing in terms of adhesion and warp...
I just went to an all-metal hotend setup this week and am trying PETG now- already got some corner lifting, ugh!
faint sky
What temps are you using for nozzle and bed? I use 250C/90C. My printer really likes a nice hot bed. All printers are different though.
rough trout
faint sky
What temps are you using for nozzle and bed? I use 250C/90C. My printer really ...
I tried with 235/70. I just bumped it up to 240/85 and added some corner brims; hopefully that does the trick. I guess I should treat this a little more like ABS
faint sky
I use 20% cooling after the first layer.
I did a temp tower, retraction tower, and cooling tower. The calibration shapes plugin from cura is very helpful for dialing in your settings.
rough trout
Looking better so far!
 rough trout
faint sky
Oh a flashforge. Very nice.
rough trout
faint sky
Oh a flashforge. Very nice.
I think we've had this machine for 6 or 7 years, and it's still going strong! It has some ringing due to the carriage weight but it prints pretty much the same as day 1, which is pretty impressive. The only thing I really want out of it is for it to be quieter, so I ordered some of these: https://github.com/lty1993/SilentBotStep

GitHub
TMC2209 based drop-in replacement stepper driver board for Makerbot / Mightyboard / Flashforge. - GitHub - lty1993/SilentBotStep: TMC2209 based drop-in replacement stepper driver board for Makerbot...
faint sky
My printer has one of the new silent boards. Its very quiet in my bedroom. I fall asleep with it on all the time. The new silent stuff is definitely the way to go.
rough trout
faint sky
My printer has one of the new silent boards. Its very quiet in my bedroom. I fal...
For sure. I got an old Monoprice Maker Select from a friend and put a BTT SKR 2 in it with TMC2209 drivers and am amazed at how quiet it is
vocal flax
faint sky
Why 600 when i only need 320 realistically? Growth, someday i might to print a s...
At that point maybe a belt printer 🤔
rough trout
Ok, so before I said the quality on my Flashforge is as good as day 1, but that may have been a lie. The latest print is ok but the texture looks bad. In the pic, the only movement that was occurring would have been the X axis, yet its not smooth. Is this a belt tensioning issue perhaps?
 vocal flax
Looks like ringing. Belts are likely the culprit. In general anything that lowers rigidity can be the reason
rough trout
vocal flax
Looks like ringing. Belts are likely the culprit. In general anything that lower...
Makes sense. I'm assuming the recent upgrade to all-metal hotends added enough carriage weight that this is more of an issue. I'll add a little tension to the belts; also I have some TMC2209 drivers on the way to replace the stock A4988 drivers, so hopefully that helps too
vocal flax
Assuming torque lose isn't significant enough to cause problems, microstepping helps
rough trout
Hmmmm, I could temporarily remove the second extruder's stepper motor and see if the ringing goes away too
arctic dragon
Lowering max acceleration is an option as well. I believe you can change this in some slicers?
 viral needle
If I have to swap filament in order to continue a print What I have and he adhesion issues if I swapped it from white PLA to wood PLA?
rough trout
arctic dragon
Lowering max acceleration is an option as well. I believe you can change this in...
The artifacts in the print span the whole 7" side. Wouldn't acceleration only affect it near the ends when it's starting & stopping? I would assume for most of the length it would be at maximum velocity
faint sky
old printers, rubber belts... they do stretch. print doesn't look bad though. spend 2 minutes on reddit and see all the people with massive issues and you'll be like "wow my prints are perfect compared to those"
rough trout
Oh don’t get me wrong, the prints are totally serviceable. Looking through some older prints, the machine has always had ringing and “salmon skin” but it seems more severe after the all-metal hotend upgrade.
The thing with belts is that there doesn’t seem to be a solid metric on the proper tension. I know there are apps that measure the harmonic frequency if you “pluck” the belt but that’s also pretty dependent on the length of the belt. I guess the answer is “tighten it until it binds, then back it off a bit?”
 astral dragon
faint sky
astral dragon
faint sky
I built one my own with alu profiles. It's for my Prusa mini and MK3. Even with PLA it has advantages: Less dust, it's safe from touching accidenally when working in the same room/workshop. I have storage under the printer so it's more compact. The Prusa enclosure is good but came out some weeks after I built my one.
 novel aspen
Heyo
I'm planning to buy this printer: https://www.anycubic.com/collections/kobra-series/products/kobra-neo
Do I still need to use the adhesive on it? And does a "normal" adhesive work on its surface?
rough trout
novel aspen
Heyo
I'm planning to buy this printer: <https://www.anycubic.com/collections/kob...
I print on PEI as well and don't use any adhesive
rough trout
Um, it might actually stick too much
I've had that happen- you end up ruining the print sometimes trying to get it off the plate
novel aspen
so should I try printing without the adhesive first?
(I am currently in a deep analysis paralysis state if that wasn't clear... help me)
vocal flax
When heated prints stick to pei
When cooled they unstick
If it has automatic bed leveling confirm the z offset and you should be good to go
rough trout
novel aspen
so should I try printing without the adhesive first?
Yes absolutely
rough trout
vocal flax
When cooled they unstick
Depends on the material- ABS sticks so well that I've had to basically sand off pieces of it (I print ABS on Kapton only now)
novel aspen
novel aspen
Heyo
I'm planning to buy this printer: <https://www.anycubic.com/collections/kob...
Also, should I buy any extra nozzles or anything like that? Or are the defaults good enough?
...and can I print with "PLA+" plastic on a printer designed for PLA?
arctic dragon
novel aspen
Also, should I buy any extra nozzles or anything like that? Or are the defaults ...
Nozzles are technically consumable, but their lifetime varies heavily based on what materials you put through it. Depending on what you want to print, you could consider getting different sizes or hardness for nozzles, but if you’re just starting off with basic PLA varieties, I wouldn’t worry about it yet.
arctic dragon
novel aspen
...and can I print with "PLA+" plastic on a printer designed for PLA?
Yeah, those are generally only slight variations to a more traditional PLA; they should be pretty close to regular PLA settings so they shouldn’t need any special considerations printer wise.
You may need to adjust the temperature set points slightly to match the manufacturer recommendations but otherwise they’re basically equivalent.
novel aspen
alright, so to start I'd need...
- the printer
- PLA filament
- adhesive (just in case)
- a microSD card
rough trout
Honestly I would not buy adhesive
Unless you're printing on glass, you won't need it
Looks like it also comes with an SD card
arctic dragon
novel aspen
alright, so to start I'd need...
- the printer
- PLA filament
- adhesive (just i...
PLA especially is super easy to print, and with the removable magnetic bed you should have no issue popping the print off
Really no need for adhesive on PEI
If the bed is leveled properly, you should have pretty consistent results
novel aspen
alright, thanks everyone
faint sky
PLA+ has no advantages for a beginner. it's kind of a niche filament for those who don't have printers capable of the tougher PETG variants to find a little middle gound.
for a beginner PLA is hard enough to master and durable enough for practically anything you want to do. in most cases PLA actually outperforms PETG except for outdoor or high UV applications.
PETG is also more chemical resistant. saw someone printing gasoline canister lids with it. apparently PETG is ok with gasoline/ethanol.
PLA is great for rapid prototyping and iterative design. PETG is when you want something hard as a lego and more resistant.
3D printers today are kind of designed around the concept of using PLA filament for a reason, it's an excellent material.
vocal flax
In my experience pla+ is harder to get good results, while bringing minimal to the table.
shy kelp
I don't know maybe it's because I am happy with crappy results, but I did not found petg that hard vs pla
Pla though if I am not wrong has gone cheaper 10 euros for a kg spools vs 20 for petg
vocal flax
Does anyone know reprap style well documented sls printer?
arctic dragon
vocal flax
Does anyone know reprap style well documented sls printer?
https://github.com/MillerLabFTW/OpenSLS is the only one I know of?

GitHub
Open-source Selective Laser Sintering. Contribute to MillerLabFTW/OpenSLS development by creating an account on GitHub.
vocal flax
As far as I understand that's laser cutter conversion which makes it. Less affordable 😞
arctic dragon
I never thought I’d hear “affordable” in the context of SLS haha
vocal flax
Well i actually wanted to say less desirable
arctic dragon
To be fair, the last build here was dated 2020. Laser modules have become cheaper and more accessible, but it wouldn’t be a trivial task to update a build to accommodate newer laser cutters. Some of your own design work would be a requirement for something as niche as a DIY SLS printer.
vocal flax
Don't really want to retro fit things into a machine which I have to reverse engineer
arctic dragon
The laser and motion stage is actually the cheaper and easier part of SLS these days. It’s the bed, powder management, and enclosure that separates a good SLS machine from a mediocre one.
vocal flax
It's diy ofc it's worse than commercial mediocre SLS 😄 😁 😄
arctic dragon
Powder is freaking annoying to deal with.
vocal flax
It would be nice to catch at least 10% of the unique finish and texture of SLS
arctic dragon
I mean, you might not even need a laser cutter. I wonder if a laser engraver has enough output power to melt most non-metal powders…
Looks like you can melt nylon powder with a laser engraver. That means it might be possible to use an even cheaper system as a base.
vocal flax
I think one of those super fast fiber lasers would work
With minimal moving parts
It should be pretty good
arctic dragon
Fiber lasers are crazy expensive though. If they were cheap, everyone would have a laser cutter already haha
elder oxide
arctic dragon
Fiber lasers are crazy expensive though. If they were cheap, everyone would have...
I’d love a beamobox
A number of smaller maker business have them and they are so neat
rough trout
elder oxide
I’d love a beamobox
Looks similar to a Glowforge?
elder oxide
rough trout
Looks similar to a Glowforge?
Yeah, but it’s a little bit cheaper for essentially the same quality
rough trout
Nice, I got a diode laser engraver/cutter recently, which cuts a surprising amount of stuff for its power & cost
 timid birch
bruh
these past couple days I’ve been working on this project
and one of the parts keeps printing with like very poor wall quality on one side
I’ve changed absolutely every factor I could and was still getting weird prints
I just opened the print head up today and found this

left is what my bambu nozzle/hotend assembly looked like
 vestal thicket
Oh that's not good. And my Bambu arrives Thursday, I'm a bit excited
timid birch
yeah its an awesome printer if you dont bend the nozzle on accident haha
 lunar oar
[Slicer: Cura] Anyone know how to get rid of the scaring during ironing? I have monotonic layers on and nothing has worked yet
 faint sky
You have to get layer height just perfect in order to iron nicely. I have the same issue and wish I knew. If you figure it out let me know.
It's not a top height issue as in some cases i'll do 3-5 and in others 7-10 layers.
I've actually done it with combing off too and it doesn't make much of a difference.
It really depends on the slicer and how it slices that final top layer and the moves it makes. Lately I've gone to concentric because for large open spaces it prints a pretty pattern with less traveling.
Make sure z-hop is on, that definitely helps for situations where things start to warp a little bit to cause nozzle grinding but not enough to cause a failed print. It's better to have it on just in case.
elder oxide
Fantastic!
coarse coral

Now even tho I am printing a gcode called "finalcut" everything will still be a prototype 😂
rough trout
coarse coral
Now even tho I am printing a gcode called "finalcut" everything will still be a ...
finalcut_last_final1_test3.stl
elder oxide
I’ve only been up to like v8 or v9 on my watch case mark 2
faint sky
well something as intricate and large as the tr-cowbell requires a lot of revisions.
elder oxide
Oh definitely
faint sky
it's why at some point i started making the pieces modular. redesigning the entire thing every time was inefficient but i learned a lot.
elder oxide
I mean, making a watch case was fairly intricate
I need to redo it to be smaller though
faint sky
that's true, your tolerances are much tighter. i can make really big holes and get away with it 🙂
elder oxide
Current version is a bit big still because of the battery needs
faint sky
@coarse coral congrats btw. that's awesome news. so the belt and stepper were all it was? that's gotta be a great feeling to print directly on the bed again.
kinda like trying to ride a bike with a wobbly wheel and getting good at it. once you get the new wheel you're off to the races.
elder oxide
But the next version really won’t be RP since I’m going with a Nordic chip
faint sky
any particular reason other than the obvious BLE?
coarse coral
faint sky
<@1062612486915891200> congrats btw. that's awesome news. so the belt and stepp...
It's nice to repair these things with the modules and what not. It's good to know it's possible and exists plus of course the education is always thrilling with 3d prints. I'm less worried about 3d printing as I am my skill with basic electronics now , that has been quite disheartening when I returned a perfectly good battery as I couldn't get it to work and things like that
I'm glad to have stopped using glue that's the big one
 crimson merlin
well thats a first. My bowden tube popped out of the extractor.
Went to check my print-it was done alright but there was nothing there lol 😅 Found out the tube popped itself out.
crimson merlin
Oh, turns out. Its a bad coupling. Or what ever the thing is called
It holds the bowden tube on the extractor.
coarse coral
Good for you to verify that, what printer do u have?
crimson merlin
coarse coral
Good for you to verify that, what printer do u have?
Ender 5 Plus.
coarse coral
I wonder if it's the same as mine which doesn't actually have coupling they just sit on top of each other
Chep has a fix for it if that's the case
crimson merlin
The coupler was bad-the tube just kept sliding. Luckily I had an extra
Strange though. I dont print often.
🤷
coarse coral

Chuck shows you a simple hotend fix for your Creality Ender 3, CR-10 or just about any Creality Printer. He uses a technique created by Luke Hatfield to create a higher temp insert for the Hotend. But Chuck adds his own twist to the design to give you a higher temperature solution. He explains all the reasons behind the design so you will fully ...
He says it's a mod for ender 5 also
crimson merlin
Oh it wasnt the hot end, it was on the extruder
coarse coral
Oh I'm sorry you did say that
crimson merlin
but I'll check it out in the morn anyway
coarse coral
Brain fart
faint sky
That's a 2 year old video. It was probably true at the time but since the S1 Pro and other models have been released it's no longer true. The S1 Pro has an all metal hotend and doesn't use a PTFE tube.
As for the advice in the video I have no idea, I've only ever used the S1 Pro, never used a printer with a bowden setup and after hearing all the maintenance nightmares not sure if I want to. So far the hotend on the S1 Pro has treated me right and never clogged since the day I got it.
 cunning oyster
Hi All - I finally picked up my first 3D printer. It's an Elegoo Neptune 2s. I've been doing some test prints - initially with PLA, but I have a great source for PETG, so I did a test print with that last night.
I'm pretty happy with the results. Anyone else lurking around here with a Neptune 2? Happy to take any guidance as I'm a total beginner in this arena.

 faint sky
rocked it on the first print @cunning oyster very nice.
cunning oyster
Thanks! I just took a shot at the printer settings based on some info I took from a reddit thread. Seems to be okay. I can see where this becomes a deep rabbit hole very easily.
vestal thicket
Hey Jason! Yes, it's an easy rabbit hole. My 2nd printer is on the way...
cunning oyster
Oh hey @vestal thicket! What do you have, and what's on order? Just curious...
vestal thicket
I have an Ender 3v2 and a Bambu P1P on the way
cunning oyster
Nice.
I think this is printing well enough for my first real useful print. I have a project in mind, which was really the catalyst for this whole adventure.
rough trout
Not bad at all for a first print, especially with PETG!
coarse coral
Well my print has got a bow in it but strangely at the current layer it appears to be all level and the print will go on
Definitely my support density and not the y axis motor issue @faint sky
coarse coral
How can I get a bow like that yet current layer seems level
🤯
It actually looks like it just printed at an angle.
elder oxide
coarse coral
It actually looks like it just printed at an angle.
Might be because it printed near the edge and has weird tension
I’d try to rotate the print 90°
coarse coral
Thanks skerr I will in the future. So much plastic 350g
I think it was Einstein who said doing the same thing over and over and expecting a different result is the definition of insanity
Also going to get .6mm nozzles again this length of print is too much to handle
.4mm 80mms 28 hours
arctic dragon
Large flat sections also have a tendency to warp if cooled too quickly. This is common across many units without enclosure, though it’s far more common for such a deformity to occur on the base layer of the print.
When printing these large prints, it helps to at least partially enclose the printer, to prevent breezes and retain heat. If you can’t get a box to cover the entire printer, try to at least find a way to get walls of some sort around the sides.
coarse coral
Thanks hem, never really had warps and can't say if this is actually a warp I will give a close inspection when it's finished before removing supports. It's pla
sleek crag
To answer the specific question, the current layer always prints level. When warping occurs, the new layers get squashed in those areas. If the warping is too severe, the nozzle crashes, and you get horrible noises, belts slipping, offset layers, and detached prints.
coarse coral
Yeh that's what I was getting at, I'm surprised the current layer is still functional
But I need to check that specific area in the slicer
It's an unusual warp it looks like plastic is simply missing
Slicer looks fine
Had this very similar problem on the other side last week. Seem plastic and near identical warp
coarse coral
coarse coral
Had this very similar problem on the other side last week. Seem plastic and near...
My y motor gave up shortly after but I think it's an issue with supports breaking mid print
vocal flax
Increasing top support binding layers or whatever that setting was could help with bow.
For that other thought, a when hotend lays the filament it pushes down or squirts left right etc. The heat from freshly molten filament and or nozzle can flex filament just enough to lay some plastic before it moves away. And in time it flexes less and less and gets leveled. At least this is what my observation is.
coarse coral
This print has been a thing on those raised areas with support it failed last week on the right side almost identical to what it is this time on the left side. I think rather than increase support density I'll do what skerr suggested and rotate it next time
And maybe for good measure find the binding setting if it doesn't increase plastic amount much
faint sky
That sucks to see that happen. Once supports go theres no good way to save it. The rest of the print looks really good though!
coarse coral
It will work honestly not sure with those supports so messed how it held together
rough trout
What are you printing, BTW?
coarse coral
Rpi handheld is the goal
Using a model b
And a Hodge podge of parts
Fun project
faint sky
Looks like a commercial grade print other than the warp issue. Congrats!
rough trout
coarse coral
Rpi handheld is the goal
Awesome!
coarse coral
Has anyone done two filament prints? I set up a pause at layer script and the pause happened but when I did cold pull of old filament I got filament run out message and then it said "heat" but did nothing. So I did my pull and loaded and cancelled this message but the whole print cancelled. I then messed around with the gcode trying to get it to resume at that height but I couldn't get it to stick
rough trout
coarse coral
Has anyone done two filament prints? I set up a pause at layer script and the pa...
I might be in the minority but I never ever cold pull my filament- I always load the next one in right after the current one, and extrude a bit more until it looks clean enough
I did a two filament print where I printed a diffuser in white, then a frame in black and I did it as two separate prints. When the first one finished, I told the bed to preheat, then loaded the second filament and told it to start the second print. Obviously the second print didn't originate from the build place, but the printer doesn't care
coarse coral
When I say cold pull it actually hot , usually still at 200 ish. Not sure why I say cold at all I don't like cold either it can easily break within the Bowden
Was your second print starting at the z height your first print finished at?
rough trout
coarse coral
Was your second print starting at the z height your first print finished at?
Exactly!
I saved the model that way and just make the slicer keep the second model at the given height (rather than dropping it down to the build plate)
coarse coral
I use cura and there isn't a way to set it to start at specific z height unless editing gcode
Whatever prints get added in slicer they always go to the build plate
rough trout
Huh, you'd think there'd be some way to do it, that's strange
coarse coral
Yeh I agree
Got a weird hack for this to work need to trick the filament run out
So just back load and remove from extruder rather than filament run out sensor
And set standby temperature to 200
novel aspen
rough trout
Looks like it also comes with an SD card
ok you were right, it came with a 8 GB microSD card and a very fancy looking USB<->microSD adapter
and 10 meters of PLA
rough trout
Awesome!!!
novel aspen
the stupid delivery made two major dents in the package, clearly marked "FRAGILE"
though the sheer amount of buffer material inside save the thing
rough trout
novel aspen
though the sheer amount of buffer material inside save the thing
Hah I assume the seller/manufacturer figured out that more packaging was cheaper than having to replace printers/parts all the time!
novel aspen
Alright... I assembled the printer (Anycubic Kobra NEO) and it... doesn't turn on?
- The power cable is alright, I tried a different one as well
- The connection is grounded
- I have 220V in the wall so I set the switch accordingly
- I plug it in
- I press the red switch from
OtoI - The screen is black as night
what could be the issue?
shy kelp
Open it up and check connections, and if there's any output
novel aspen
open it up -- as in?
shy kelp
Wherever your electronics is
shy kelp
You should go by exclosure
If the connection is fine, it might be the power, if the power is fine, it might be the board
Hard to tell like this
novel aspen
was it really that hard to add an LED indicating that the power is on ;-;
now I have to find my multimeter, some thin wire and potentially ruin the thing
the instruction is maximally unhelpful as well
novel aspen
ok I have probed the uhh the thing
motherboard gets appropriate voltage, display gets appropriate voltage
I guess I'll just wait for the anycubic support to respond
rough trout
You can try flashing firmware to the machine but waiting for support might be best
coarse coral
On my stock cr6 I tried printing at 150mms and a .8mm nozzle. Two things happened, it sounded very noisy when moving on the y axis which made me feel the stepper motors just couldn't cope and two when laying down support after a few layers the imprecision was enough to knock the single support lines offset and thus had it went longer than an hour there would have been problems likely to damage my printer as is and the print itself
yeh if it's doa that's not a good thing, they might just send you a new power supply
be prepared to maintain some parts, these fdm printers of which i've had 2 now some times have 'issues'
i had thermal runout on every print on my first ender 3 and bad arcing on the psu. that was too much for me to handle and ultimately got returned after only a small number of successful prints, however my second printer cr6 is pretty solid, i've had to replace some stock parts with stock replacements from manufacturer but overall it's doing what it's supposed to. 3d printing is a learning curve, some prints just wont come out well until you adjust settings, re-level, calibrate your printer etc
coarse coral
as an fyi i've had decent results with eono as a cheaper pla under £15 usually for 1kg
 gentle grail
I recently had a clog and plastic got all over the hotend. Managed to clean it out with clippers and acetone.
Somehow this connection got broken - either I clipped it unwittingly or it was already broken from the plastic mess.
Either way, is it safe to solder it back together and use shrink tubing, or will shrink tubing be at risk of catching on fire being that close to the hotend?
It's a CR-5 Pro H, and max temp is 300°

 frank valve
gentle grail
I recently had a clog and plastic got all over the hotend. Managed to clean it o...
frank valve
gentle grail
I recently had a clog and plastic got all over the hotend. Managed to clean it o...
Maybe Kapton tape around the solder joint? It works as an insulator and can take high temperatures. https://www.adafruit.com/product/3057

Polyimide Tape (sometimes referred to by the brand name Kapton Tape) is an interesting addition to your toolbox! Polyimide Tape remains stable across a wide range of temperatures from ...
frank valve
gentle grail
I recently had a clog and plastic got all over the hotend. Managed to clean it o...
https://www.reddit.com/r/3Dprinting/comments/9tppms/soldering_thermistor_wires/ hmm this brings up a good point about the solder itself perhaps not being able to handle it if too close. I'd probably take caution and just get a new thermistor with it that close myself but will defer to others here as this is a newer subject to me as well (with it this close to the hotend). Perhaps given the kapton tape insulates heat it would be fine here though.
vocal flax
gentle grail
I recently had a clog and plastic got all over the hotend. Managed to clean it o...
NTC alone isn't that much expensive. you should replace it, but meanwhile for a short time is fine
Heat shrink doesn't melt but it smells bad at high temps (when burning) that's probably not good for human health
faint sky
If the thermistor breaks you should replace it. Using solder to attempt a repair on a safety device that can reach burning temperatures is generally not a good idea.
The thermistor wire is physically connected inside the housing. If it breaks the entire thermistor should be replaced.
If the thermistor was in an environment that's around 120C it might be ok to use solder. Anything that breaches the 130C barrier needs replacing generally speaking in any consumer electronics.
novel aspen
novel aspen
I guess I'll just wait for the anycubic support to respond
ok seems like the PSU is dead
 proud root
proud root
proud root
 honest kindle
i cannot get my 3D printer to work correctly
Ender 5 PLUS
3rd board
this time magnetic beause all the glass ones fd up
it's literally a 0,02mm difference all over the board when it measures. It's so greatly built that there's literally no way it ould f up but it doesn't stick and ive tried all the settings.
Do you have any way I an fix my board guys? 🙂
 potent thunder
Do you mean "bed" and not "board"?
honest kindle
I have no idea. I've tried everything to make a few of my cases and something always breaks
elder oxide
Any recommendations for SLA printers?
I don’t think I need anything big, I was looking at the creality one that’s 5.96” for the build plate
Okay, just went with the creality one
potent thunder
I'm happy with my ender 3 pro
elder oxide
potent thunder
I'm happy with my ender 3 pro
Same, I want an SLA printer to do some clear game console cases for some old game boys I have
Need to spruce up my modeling skills to make a gameboy color case
elder oxide
This is the best print quality I’ve ever got out of my Ender 3 Pro

 potent thunder
I think yo can buy GB/GBC/GBA clear cases.
elder oxide
you can, but I want to make my own 🙂
it's more based around the fact that I want to get better at designs, not so much that I need the cases.
potent thunder
Well there are a lot of really good Fusion 360 tutorials on YouTube. Really helpful. I used 360 to design an adapter for an out of production part for Project Tom Celica our 1985 Toyota Celica. 3D printed the prototype on the Ender 3
elder oxide
I've designed some pretty nuanced parts, though I want to do more assemblies like you'd expect for cases.

this was a friction fit case design for a watch I designed
 potent thunder
PiPBoy