#help-with-3dprinting
1 messages · Page 1 of 1 (latest)
 faint sky
 balmy pulsar
you still need a driver
 shy kelp
and by using math, it was the right answer
I guesss that I can try to make it a little bit more untill he does it right or idk
balmy pulsar
O_o
nt sure what you are doing, it has to be right, there is no "little bit more"
its either right or wrong
shy kelp
balmy pulsar
nt sure what you are doing, it has to be right, there is no "little bit more"
I mean by either using calculator online or the forumula with an offline calc, I get the same result, so idk
(which is 160x, 160y)
balmy pulsar
ok. and it isnt moving right?
shy kelp
balmy pulsar
ok. and it isnt moving right?
sorta of, it stops before coming to the edge, of the bed, so the area that it uses is kinda offsetted
 balmy pulsar
home switch not in right spot
shy kelp
I've tried to play with m206/offset thing but nothing
I'll try to put a piece of something between end axis and the switch so it starts linear to the bed, maybe
thanks
shy kelp
nope it does great, but now it probes outside the bed
 empty sedge
@shy kelp sounds like you're setting up marling from scratch. You can adjust a probe XY offset and also the min and max values for each axis.
Verify your axis move distances are matching what you expect by measuring a 100mm move, preferably with digital calipers but a ruler is probably close enough
marlin config.h and config_adv.h has a ton of settings to adjust. You can also set the probe offset X/Y positions and more
Usually I'd bounce between editing marlin config and pronterface/printrun when setting up a new printer that way
 cunning hound
in general doing things like putting pieces of stuff between the end axis and the switches should be an absolute last resort, You're jumping to weird solutions immediately instead of trying to fix things the right way. That will just cause more issues that you then have to fix later.
shy kelp
I think that I found the issue
for some reason it was saving the config file somewhere else, so when compiling it was compiling the old stuff
 patent sonnet
I have finally bought a 3D printer - a Creality Ender-2 Pro (small and portable but with a big enough printbed for 99% of things I might do). Can anyone recommend decent filament (UK based)
also - if I have larger prints - do I design them split or can slicing software do it for me?
cunning hound
slicing software CAN do it for you, but it does it in a pretty dumb way.
Agree with nofish that it's best to do it yourself unless you can't for some reason
balmy pulsar
as for filament, i use filaments.ca (cause they are local) but i think they are also good for international.
patent sonnet
so the slicing software literally does a "cut it". right. will have a look at Noe and Pedros videos, etc
balmy pulsar
yeah. just a bounds or a plane slice.
not strictly helpful for putting them back together
cunning hound
it does treat the cut edges as surface, so you'll get wall thickness there. you can glue them together. It works better than nothing, if it's someone else's model, you only have the stls, and it's not worth spending a lot of time
for anything you care about or are designing youself, there should always be a better option
 iron remnant
I mean, it's still something to get all bent out of shape over.
 median iron
Good morning
ive been chasing weird problems on my printer for weeks. i've got it tuned in pretty well, except for this one weird one
well, two.

1: when there is a sharp direction change, i get what appears to be a reaction in the opposite direction of movement,

you can see it there. I've tried an accelleration test, changing the values from 1000mm/s^2 up to 3k, by 200 increments:
but no real change in quality.
the second problem im chasing is the quality of the walls, you can see in the last image they are smooth (enough)


but you can see the reverse here, the walls are quite rough.
I've calibrated my e steps on the extruder, and it appears that my problem can be best described as:
- on layer change, innitial extrusion is "not good", but improves with distance traveled
- on direction change there is some kind of, "not ringing" recation to direction change, irrespective of previously traveled distance
printer is a voxelab aquilla x2 running marlin 1.3.5
material is pollyterra pla printing at 200 deg c, at 60mms , speed has not seemed to effect the print
shy kelp
isn't 100C too low to make a reflow?
because the sd port randomly stops reading the sd, but if I do put the board for a while under the bed at 100C , it will get back to work normally, for a while at least
then the problem starts again and I'll loop like this
empty sedge
median iron
material is pollyterra pla printing at 200 deg c, at 60mms , speed has not se...
Your walls look terrible. You definitely have something not great with your extrusion path.
The wave after corners is ringing. It’s partially something with your motion system like loose belts or lacking rigidity in your frame. You can spend days tracking this down or just print slower. I’d search YouTube for suggestions for that.
Back to the extrusion it’s like your filament is being pushed too hard and your drive gear isn’t round and there’s at least one more thing loose on the extrusion path.
That said I would try 210C or 215C hotend first
balmy pulsar
ringing is unavoidable to a point, but if everything is tight and your jerk and acceleration are tuned to something sensible, it should be minimised.
some of the rest i am not sure what im looking at
cunning hound
shy kelp
isn't 100C too low to make a reflow?
because the sd port randomly stops reading...
Wait... what? What precisely is 100C? What material are you trying to print? You're putting your control board ... under your bed which is at 100C? That's not a good idea. Am I just completely misunderstanding what you're saying?
shy kelp
cunning hound
Wait... what? What precisely is 100C? What material are you trying to print? You...
partly
I mean to time to time the sd/lcd board (they are under the same piece of pcb) doesn't read the sd card, I randomly found that by heating up the bed and then placing the lcd/sd board up to it for a while fixes the problem for a while
balmy pulsar
the sd card issue in the anycubic machines is common. bad contacts. The heat is not likely related. however, heat can cause the board to expand and contract, causing solder joints to break. nothing is melting, just cracking.
cunning hound
The only reasons I can think that might happen are all reasons where the board is gonna fully fail eventually
Yeah, bad solder joints being affected by the heat was my main thought
but as they continue to shift with use it'll eventually probably stop working
shy kelp
so what should I try? to check up for connections and then resolder?
cunning hound
If you feel comfortable doing so. I don't know how hard that resolder job is. But if fish's statement is right and it's a known issue, there are probably guides/videos online about it to help you see if you're comfortable doing it
If this printer is mission critical for you I'd get a backup control board ASAP on standby
balmy pulsar
mine works, until some point in the print and stops. i assume it only stops for a microsecond, but thats enough to crash it
my understanding is it might be corroded
not due to the heat
but... hard to know
as everything checks fine when you go to test it
 stuck trail
umm, anyone have any advice on handling exhaust filtering? I have a enclosure and options for exhaust fans but I don't know what would be required to filter properly, I know a lot of filaments are safe but I want to filter anyway.... I would like to filter and not exhaust out of the house by window as I rent and print on the first floor of my townhouse and I wouldn't feel safe with the windows opened up with a cutout...
idk what kind of filter I should be looking at for these types of fumes and I see a lot of clashing information online
please reply or ping me if someone responds to me, as I may not notice it otherwise
faint sky
@stuck trail something like this? https://www.amazon.com/WEN-3410-3-Speed-Remote-Controlled-Filtration/dp/B00LPD9BDI/

Remember when your workshop was full of clean air? Air-borne dust particulates can dirty up a woodworker's workshop and harm a healthy respiratory system, but with the WEN 3-Speed Remote-Controlled Air Filtration System, you no longer need to worry. This system eradicates these contaminants by ca...
stuck trail
faint sky
<@498334133412691968> something like this? https://www.amazon.com/WEN-3410-3-Spe...
well, more like I am unsure what grade filter is needed to scrub out any gasses/fumes that are bad from filament? like I know carbon filters get smell and allergens but idk about fumes
balmy pulsar
i think you want a similar system to what they use for laser cutters. obviously you wont have 1/100 the fumes, but check what filter types they use.
cunning hound
carbon filters is what most people use. though I agree with you that the trustworthy documentation on such things is pretty sparse. You have a lot of people asserting without evidence that the fumes aren't enough to be bad, and a lot of people asserting that any amount is borderline deadly. I honestly don't know where the truth lies, except it's probably inbetween those two extremes
And definitely depends on what kind of filament you're using. I personally print PLA without any filters at all and without worrying too much. I'm planning on gettin g at least a basic setup going before I touch ABS/ASA though
 exotic echo
@stuck trail My main concern about 3d printing plastic "fumes" is ultrafine particles (UFP) that are 0.1 µm or smaller. Which most filter media will not capture, as even Hepa filters do not capture dust particles below 0.2 µm , and carbon filters do not capture particles below 0.5 µm. Filters that can capture this small particle size tend to be prohibitively expensive for us hobbyists. As i only have one set of lungs, i have opted to vent my printer with a fume hood via a nearby window, and i suggest doing the same.
Here is my setup
 stuck trail
exotic echo
<@498334133412691968> My main concern about 3d printing plastic "fumes" is ultr...
stuck trail
exotic echo
<@498334133412691968> My main concern about 3d printing plastic "fumes" is ultr...
thanks for the reply, this was what I was honestly thinking would end up being the case, I will setup a exhaust like this that can be placed and removed from the window I guess, currently only have been printing with PLA but I know the risks so yeah.... rather unfortunate, I may see if I can take advantage of my dryers exhaust port or something as another option to consider X/
carbon filters I know would remove smells, but the smell was never my concern after all
 bronze iron
Im new to 3D printing world so Im looking to 3D print tmnt 1988 tmnt figure weapons. I cant really find anything in google search so May be someone can help me find a site with the proper diagrams or whatever to 3D Print them
balmy pulsar
etsy, thingaverse are good places to search for miniatures stl files
there should be lots though
search tmnt 3d stl or some such
its also possible noone has ever made any and youll need to do it yourself
balmy pulsar
If you can find someone. the issue is a true one off modelling job can be very expensive (100's or even thousands of dollars). You might find someone that will sell it on their own so you only have to pay a smaller percentage.
bronze iron
Alright
 plain bough
On every print I do, the purge line fails to bind to the bed and gets dragged into the print area (1st pic). The prints still end up ok mostly (2nd pic) but occasionally the whole print will either shift or get dislodged from the bed because of it. What can I do to prevent this? Maybe a higher bed temp for the first layers?

 empty sedge
And/or adjust your first layer height or brand of filament
empty sedge
plain bough
On every print I do, the purge line fails to bind to the bed and gets dragged in...
Can you post a close up of the bottom of a print?
balmy pulsar
generally, this is from being too cold as it starts printing.
i get it sometimes, i just watch for it and try to clip it off (dont pull it, it will pull everything with it)
plain bough
empty sedge
Can you post a close up of the bottom of a print?
Here’s the bottom of that same Benchy from my first post and a crate I printed today. The gaps are because of a dumb slicer setting I tried but you can see the stringing really well on it too.

 empty sedge
Your first layer is too high off the bed.
empty sedge
It should look more like this. No gaps between beads and they aren’t buckling under each other.
 plain bough
Thanks. I’ll get it lowered and try again tomorrow.
 subtle junco
@plain bough which Ender printer is that?
plain bough
subtle junco
<@240183417155616769> which Ender printer is that?
It’s an Ender 3 with a CR Touch bed level sensor.
subtle junco
ive got the Ender 3 Pro and my x-axis belt is meant to lay flat in the aluminum track. not sure if it's different for the Ender 3

just a thought
here's the diagram for how mine is set up

its underneath the wheels
cunning hound
Yeah, that belt path doesn't seem right at all. That said, the specific print issue shown is definitely height off bed.
Rule of thumb is that any belt segment that changes length must be parallel to its movement.
balmy pulsar
yeah that belt is wrong, but, i agree i dont think thats anything to do with the print issue
plain bough
I always thought that looked weird. Guess I’ve got another thing I have to fix. 🤦♂️ Thanks!
plain bough
OMG you guys. I re-routed my belt, installed a magnetic bed, re-leveled, and experimented with Z offset. And now my first layers look like this. 😍
 plain bough
Next I need to figure out how to print faster. I typically use Prusa Slicer's built-in Ender 3 profiles, and I start/manage all my print jobs from Octoprint on a Raspberry Pi. Any advice?
balmy pulsar
faster is about strategy and compromises
bigger nozzles, fatter layers
at the trade of less resolution
some other things are counter intuitive as well, like walls and infills.
iron remnant
Yeah, there's a lot of fairly hard limits to any sort of bed-slinging printer.
One avenue to explore is nozzles.
A considerable amount of things print just fine on a 0.6mm nozzle, especially with Arachne set in the latest PrusaSlicer versions.
I've got some BondTech CHT nozzles and they can lay down a considerable amount of material quickly, it's just that you have limits on how much detail you can print.
And some folks are doing interesting stuff with Klipper which has better motion control such that it can print even faster, but that's right now a lot of setup trouble.
Also, there's such a thing as design-for-speed-of-printing. If you have a long rod sort of thing, it'll print faster on the side than it will standing up vertically.
 coarse thistle
I'm not sure if this is the right place to ask about SLA/MSLA printing, but is there a way I can print a 0.5-1mm thick part flat on the bed and get it mostly transparent? I've noticed some parts with a flat top and bottom turn out mostly transparent when looking straight down the print, so maybe printing a thin part like that can get it almost perfectly transparent?
balmy pulsar
internally i think it will be clear, you might just have to polish the surfaces
subtle junco
plain bough
OMG you guys. I re-routed my belt, installed a magnetic bed, re-leveled, and exp...
very glad to hear it. Happy printing!
 hot fulcrum
I just switched my printers bed to glass and now I cant print without the bottom of the print warping and the corners coming off the bed, any ideas? Should I turn up or down the temperature?
cunning hound
Sometimes up, sometimes down. There's also two temperatures, the nozzle and the bed. Is it warping immediately, after a few (3-5) layers, or much later than that?
hot fulcrum
much later than that
like the first layers look great and then ill get home and its a banana
iron remnant
That might be a case where you want to add some PVA gluestick or hairspray
cunning hound
I am of the opinion that gluestick is a bandaid, and you want to find the real issue. But people do have good results with it. There's a setting in your slicer that can keep the part cooling fan off for a few layers, it usually defaults to somewhere around 3 to 5. If it's well after that, I would try increasing the temp of the bed.
balmy pulsar
glue stick (pva) is an intermediary, it adhered to glass, and it adhered to, for examlpe, nylon
plain glass with no coating does not adhere to much
so you need an intermediary
i have anycubic glass bed with a coating. PLA sticks very well
empty sedge
cunning hound
I am of the opinion that gluestick is a bandaid, and you want to find the real i...
I've pulled shards out of glass with PLA and PETG. I wouldn't recommend printing directly on bare glass.
balmy pulsar
ive heard this with petg on the anycubic beds. i havent seen it though.
i dont use much petg though
iron remnant
I mostly use PETG.
(Or nylon or TPU or PETT)
PETG on regular old glass is specifically warned against by a lot of people. I've not heard PLA doing that, but I guess I'm not super-surprised really because glass is a finicky material with catastrophic failure modes.
On a glass bed I like 3M 2090 blue tape and a little bit of gluestick, especially around the seams.
balmy pulsar
"plain" glass shouldnt be used at all. should be borosilicate (pyrex)
iron remnant
I am not taking bets on what your average glass 3D printer bed is made of. 🙂
iron remnant
Yeah, I just switched to a Garolite bed.
And, yeah, nylon won't stick without some PVA.
balmy pulsar
alot of companies (anycubic included) and doing flex beds (pei?).
i see how they would be much more user friendly
iron remnant
So far G10, while not being flexy to get the things off, is actually pretty good. Although I've never tried a magnetic flex bed because it's not easy to reverse if I didn't like it.
But, yeah, I think the important advice is really that you shouldn't use PVA glue as a substitute for actual proper bed tramming/leveling, z-offset settings, and bed temperature... but there are a ton of cases where PVA or other bed adhesion additives are really handy.
cunning hound
Yeah, I've only ever printed on borosilicate and have had no issues with pla. Haven't done petg and have definitely heard the warnings. I don't doubt there may be times when glue stick is actually needed. I just have a reason to glue stick being the default recommendation. A lot of the time there's an underlying issue that glue stick merely covers up rather than fixes.
If you know enough to say my bed is x material and y thermoplastic doesn't stick to that, you're fine. That's going a bit further than just defaulting to glue
 half dew
PETG was horrible on glass for me. PLA wasn't consistent either. I'm back to the magnetic plate and the biggest improvement was getting a machined bed thats actually flat
Glue on the bed is weird - its one of those things I wish the industry would just leave behind - but there are times its used to make things releasable rather than stick
hot fulcrum
Im using a brim now and that seemed to work well with pla and im seeing how it performs with abs
My bed level and height is really good from what I can tell
im trying to print ABS at 220 hotend and 85 on the bed
balmy pulsar
abs needs a heated enclosure
abs/acetone slurry helps it stick, but it will warp without an enclosed chamber now matter what
like, it will just warp the bed
some tricks you can use if bottom finish isnt important is raising it up on some supports. this gives it a flexible platform
also, i print abs with 100 bed and 230-240
220 is a bit cold
depends if its real abs though, or a "abs like blend"
hot fulcrum
Ugh that is frustrating thanks for the help though
subtle junco
hot fulcrum
I just switched my printers bed to glass and now I cant print without the bottom...
Not sure what printer you have, but I had a ton of trouble getting prints to adhere to the glass bed of my Ender 3 just printing PLA. A glue stick seemed to be the only thing to somewhat work, but I ended up going back to the magnetic bed in the end. Might be worth a revisit though, I recently learned that there could be a good bit of air pushed onto the print by the extruder fan even if the part cooling fan is off for the first few layers. Enough to cause warping and adhesion issues. A strip of Kapton might be enough to block that airflow from hitting the print.
 fading viper
Curious if anyone here has the capability to convert .f3d file to .stl? I'm interested in using an STL of this featherwing to design a case for it and a screen.

GitHub
CAD files for various boards, components and parts - Adafruit_CAD_Parts/3632 Joy FeatherWing at main · adafruit/Adafruit_CAD_Parts
balmy pulsar
fsd is a fusion file. install fusion, open, then export as stl
fading viper
Is it free to use it for that? I've never used fusion before
 vestal thicket
@fading viper Fusion360 is free for hobbyists
You can have 10 active / open projects at a time, than you have to archive one to create a new one, etc. That's the only catch
balmy pulsar
theres more catches, lots of disabled features. but still fine
cunning hound
Yeah, the disabled features is the hard limit. The active files thing is just an annoyance since you can toggle between active and archived at will
But the disabled features are mostly more advanced stuff. Your average user will never need the advanced stuff
balmy pulsar
disabling colab was the big one. disabling rapids for cnc another.
i mean, you get what you pay for, so you cant complain
 gusty shuttle
does anyone have experience with Tungsten Carbide nozzles and PLA?
 elder oxide
Sounds expensive
gusty shuttle
there's some 50 usd nozzles, I want a buy once and forget nozzle
balmy pulsar
im skeptical
nozzle are consumables, youre just goin gto throw it out like all the other. just maybe in a longer time frame
cunning hound
colab I don't personally have much use for and it mostly seems like a feature you'd use once you got large enough to where paying makes sense. rapids on cnc is something I didn't know was disabled. that one might suck.
balmy pulsar
colab is sharing projects. it wa skinda most of the point when fusion fist came out
cunning hound
I can export as f3d and share it through a variety of means if I just want to share. Collab is more for having more than one person doing work seamlessly, right?
balmy pulsar
no
i mean, it could be used that way, but no, mostly it is to simply share. you make shared folders and other people can access. like for example my mchinist
elder oxide
I mean, tungsten carbide would degrade at a much slower rate than brass or stainless steel nozzles would.
But I’m not sure if justify spending $50 for one
balmy pulsar
it also has lower thermal conductivity so will probably clog more
elder oxide
Most of what I’ve seen is it works as well thermally as brass
cunning hound
So collab is functionally similar to just throwing the f3d file on github, but a lot more conveinent and built in. Don't have to remember to commit on my end, and update on their end
elder oxide
I personally don’t print enough to justify a $50 nozzle that will get used maybe two to three times a month. Especially when I can buy a pack of 50 assorted brass nozzles for like $10
balmy pulsar
cunning hound
So collab is functionally similar to just throwing the f3d file on github, but a...
kinda yeah
i bought a steel nozzle and it just clogged on the first print and was ruined
petg
elder oxide
I haven’t replaced my nozzle in maybe a year so if that tells you anything
Stainless steel requires different heat settings to work properly
balmy pulsar
not stainless
elder oxide
Even steel would too, so regardless you need different PID profiles
cunning hound
I haven't seen compelling evidence for nozzles beyond the cheap ones and the slightly harder ones for abrasive materials. The ruby ones for example, last I saw someone do a deep dive, seemed to be mostly hype and expense
balmy pulsar
if all you print is pla you might go years on one nozzle. switching mats especially petg and nylong will just ruin them
for abrasives, thats a dfifferent topic
elder oxide
I’ve heard that tungsten nozzles are great if you print with nylon and similar materials.
But I don’t because I don’t have good enough ventilation for that
balmy pulsar
nylon clogs constantly with brass nozzles.
biggest issue
every 2nd print its ruined basically
(taulman bridge)
cunning hound
longer lasting nozzles might be a valid thing to chase if you have a print farm and have like 20+ printers constantly running. for a hobbyist though cheap nozzles last long enough it's probably not worth worrying about
elder oxide
cunning hound
longer lasting nozzles might be a valid thing to chase if you have a print farm ...
That’s what I’m saying, I print too little to make it worth while, and likely most people couldn’t justify it
iron remnant
I mean, I guess the "get it and forget it" aspect is kinda lost on me because my hot-end (Slice Engineering Mosquito) makes it easy to swap nozzles, but I've pondered the $50 tungsten carbide nozzles.
elder oxide
Just like all metal hot ends usually are not worth the upgrade
iron remnant
I need to actually finish the blog articles I have on 3D printing based on my present experiences before I'd pay $50 just to try one out.
I have noticed that the Slice Engineering Vandium nozzles are not as good as brass for non-abrasive filaments, tho.
elder oxide
I might get one if I built the ventilated enclosure I have planned
balmy pulsar
all metal is necessary for high temp, but is otherwise a terrible choice
elder oxide
Because I want to try nylon and carbide PD
balmy pulsar
bridge nylon is at the border for teflon
cunning hound
makes sense, the hardened nozzles cannot use the materials that are best for thermal conductivity, as they are either too soft or WAY too expensive
balmy pulsar
245
cunning hound
it's a tradeoff and you aren't gonna get the best of both
elder oxide
Indeed
balmy pulsar
hard anodised aluminium would be the most heat resistant slippery thing.
cunning hound
if you want endless bling, why not pure diamond? /s
balmy pulsar
ha
cunning hound
diamond is VERY good for thermal conductivity, actually
balmy pulsar
cause at elevated temps diamong gives off carbon to steel and plastics
so its actually not good
balmy pulsar
thats why you cant use cnc diamond tooling on steel
now, im not sure if 250c counts as elevated really
cnc cutting interface is more like 1000+
i always find if funny to think that at 20c (room temp) aluminium is all soft and weak cause it is too hot. it's like 3x stronger at -60c
iron remnant
Yep, isn't that the cold hard truth.
cunning hound
such dad jokes
balmy pulsar
....
iron remnant
taps the "Master Punner" role on this Discord server.
 tall osprey
cunning hound
makes sense, the hardened nozzles cannot use the materials that are best for the...
tall osprey
cunning hound
makes sense, the hardened nozzles cannot use the materials that are best for the...
Also like
If you're printing pretty much anything with additives you'll wear out nozzles pretty fast
cunning hound
Wow. Also, I'm watching some critical role right now and I hope your name is a reference
tall osprey
No it's just a common username
(also as a broad note pfte lined hotends have a worse time with heat creep issues because the gradient changes slower)
Whereas with good modern heat breaks have extremely tight thermal gradients
hot fulcrum
If i use a gluestick for adhesion should I clean the bed between each print or can that surface work a couple of times?
empty sedge
You don’t need to clean it off each print. Leave it alone until your prints don’t stick well enough, it gets dusty, or the glue looks too thick then wash glass with soap and water in a sink
balmy pulsar
you might find the print tears off the glue after removing it, so you'd need to reapply a bit and remove and lifted areas.
 heavy surge
Hey can anyone point me in the direction of a file for 3D printing a 64x64 front lattice for the 3mm pitch matrix? Similar to the grid shown in this link (but for 64x64) I've searched but can't find anything online.. Any help appreciated 🙂
https://www.thingiverse.com/thing:4812805

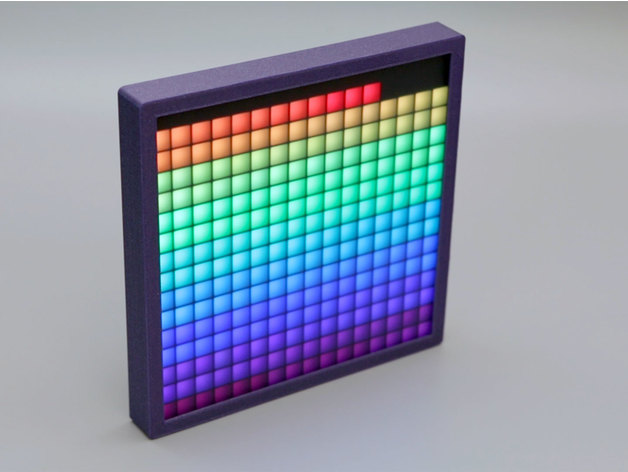
Build a square pixel display with a 16x16 NeoPixel matrix and black LED acrylic. Use a Feather and PropMaker FeatherWing to easily connect the display using a 3-pin JST cable. Make rainbows and LED animations using CircuitPython.
LED Animations in CircuitPythonhttps://learn.adafruit.com/circuitpython-led-animations/
16x16 NeoPixel Matrix – Adaf...
half dew
heavy surge
Hey can anyone point me in the direction of a file for 3D printing a 64x64 front...
Which version of the 64x64 do you have? There is one t hats 128mm with 2mm pitch and one that is 160 with 2.5mm pitch and one thats 192mm with 3mm pitch
half dew
heavy surge
Hey can anyone point me in the direction of a file for 3D printing a 64x64 front...
I made all 3: https://www.printables.com/model/252635-adafruit-64x64-led-matrix-grids Fusion 360 really didn't like the geometry and it was slow - also these have very thin walls so you need to make sure "Detect Thin Walls" is on or that you're using an engine with arachne
heavy surge
half dew
I made all 3: https://www.printables.com/model/252635-adafruit-64x64-led-matrix...
You legend! Thanks heaps, mine is the 3mm pitch (192x192) Appreciate your work 🙏
 silent veldt
Somebody please tell me that setting up a Prusa Mini is as simple as I think it should be?
Finally have a flat surface where I can set mine up and I'm having Fear, Uncertainty, and Doubt.
vestal thicket
silent veldt
Somebody please tell me that setting up a Prusa Mini is as simple as I think it ...
You can do it! A good friend of mine did his a few months ago, and I would not describe him as tech savvy
subtle junco
I know its overwhelming opening the box and looking at all the parts, but even my ender 3 ended up coming together even though it took me about 2-3 hours 😂
half dew
heavy surge
You legend! Thanks heaps, mine is the 3mm pitch (192x192) Appreciate your work �...
Let me know how it prints and even better post a make if it comes out well! I think its probably a little trickier to post than the standard adafruit ones
heavy surge
half dew
Let me know how it prints and even better post a make if it comes out well! I t...
Will do! I've sent it off to the local 3D printer shop to get printed, still need to build a wooden frame and wait for a few more parts to arrive but once it's all up and running I'll post something here 🤙
half dew
heavy surge
Will do! I've sent it off to the local 3D printer shop to get printed, still nee...
Sweet - I haven't printed it myself since I only have .2 nozzle on my printer right now and it would take days. If the shop comes back and says its unprintable let me know and I'll do my best to fix it
half dew
heavy surge
Will do! I've sent it off to the local 3D printer shop to get printed, still nee...
ourch, this takes a day to print because slicers are horrible at optimizing the print path... I think a solid cube and setting the infil to match the parameters would be way way faster
tall osprey
full control gcode would be the best option odds are
half dew
tall osprey
full control gcode would be the best option odds are
Yeah, it would be slightly better than just using infill... did a test and infill only makes the print time around 3 hours (on a slow printer)
heavy surge
No clue how my 3D printer dude plans to print it (my 3D printing knowledge is next to none) he says he has a sneaky workaround that he's trying out, am going past there today to see what he's done. Will keep you posted
half dew
heavy surge
No clue how my 3D printer dude plans to print it (my 3D printing knowledge is ne...
Sweet. I'm doing the infill hack now - I can give exact settings if you need them. You'll need a completely different version of the model
 jaunty bough
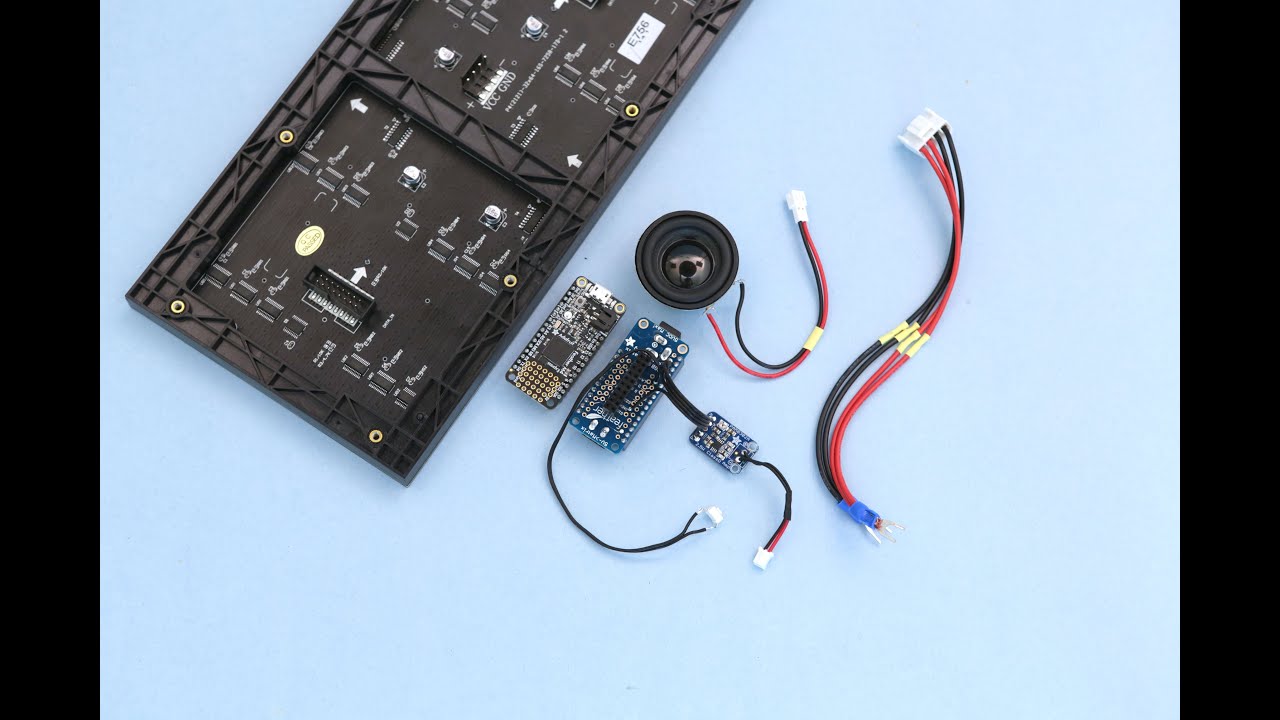
I have the 64x32 matrix and was hoping to find the legs from this. Has anyone seen it? (Or have a better recommendation.)
https://youtu.be/BkwFRK6I3fg
Learn Guides
https://learn.adafruit.com/rgb-matrix-slot-machine/
https://learn.adafruit.com/rgb-led-matrices-matrix-panels-with-circuitpython/example-adafruit-machine
YouTube
https://youtu.be/oTJibE0OcBQ
32x64 RGB Matrix Display
https://www.adafruit.com/product/2278
RGB Matrix FeatherWing
https://www.adafruit.com/product/3036
Feather M4 E...
half dew
jaunty bough
I have the 64x32 matrix and was hoping to find the legs from this. Has anyone se...
Not sure about the 3d printed parts but I recognize some generic camera parts on on there
jaunty bough
half dew
Not sure about the 3d printed parts but I recognize some generic camera parts on...
Interesting... Definitely don't need any camera parts, or the arm for the jackpot, just the legs. I could design it myself but it almost certainly won't be as good as what's been designed already.
half dew
jaunty bough
Interesting... Definitely don't need any camera parts, or the arm for the jackpo...

Adafruit Learning System
Fruits, Logos and Characters come up with a flick of the handle
jaunty bough
half dew
Found them: https://learn.adafruit.com/rgb-matrix-slot-machine/3d-printing
Ahh thank you, but now I remember why I bookmarked this, I can't find the corners they used for the mount in the video. Vs. the full frame.
Sorry for the confusion
half dew
ahh, yeah, no idea where those are. I have a feeling they just cut up that bigger frame and added the screw parts
jaunty bough
half dew
ahh, yeah, no idea where those are. I have a feeling they just cut up that bigg...
I really hope they didn't do that 😂
half dew
jaunty bough
I really hope they didn't do that 😂
I meant in the CAD software - not print and cut 🙂
balmy pulsar
anyone ever order an aluminum printed part? (DMLS etc)
jaunty bough
half dew
I meant in the CAD software - not print and cut 🙂
I have no idea why I read that differently than the obvious way that you meant. Especially in a 3d printing forum.
half dew
jaunty bough
I have no idea why I read that differently than the obvious way that you meant. ...
I do love the idea of someone spending the extra time to print stuff they don't need though.
 vocal pilot
okay how could I make Case mounts like for the pi I was thinkin' to use cardboard and make my own mounts
 arctic dragon
vocal pilot
okay how could I make Case mounts like for the pi I was thinkin' to use cardboar...
arctic dragon
vocal pilot
okay how could I make Case mounts like for the pi I was thinkin' to use cardboar...
Well, if you're mounting it to a 3D printer, chances are you already have a working 3D printer so you could start by looking at 3D printed designs?
vocal pilot
Only Amiga 500 were made no one tried making ones for the amiga 1200
vocal pilot
500 and 1200 are different in the back of the case
arctic dragon
Mounting to amiga 1200?
I guess you could make a prototype with cardboard if you aren’t comfortable with CAD
It probably isn’t the hardest thing to design a mount for if there are 3d models online to use as a basis
 night tapir
hey guys my ender 3 does this really weird thing where it seems to under extrude but only at like the top half of prints, it didnt use to do this but now its doing it on almost every single print even if its a short one.

I know I have some bed adhesion issues on this print but it also happens when i get really good adhesion
cunning hound
First thing that comes to mind is a partial clog
 strange ledge
Or bad feed to the extruder
half dew
Does the hotend fan kick in to turbo mode at the layers where that start by any chance?
balmy pulsar
yeah, nozzle clog is feeding slipping. Maybe the spool isn't unrolling cleanly.
night tapir
Hmmm okay that gives me some ideas of things I can try! Thank you all
balmy pulsar
hmmm. is there a service for metal printing that is more affordable than shapeways?

 winged helm
Metal printing, every time I look into it, is just absurdly expensive for anything cool
elder oxide
There’s a metal filament you can get and then send off for final processing that’s apparently fairly affordable.
balmy pulsar
no, i need real structural parts with predictable precision. the shapeways part is perfect, but, the price is about 2-3x more thn i can justify (need 7 or 8 different parts)
someone is doing it already, so i know it works. they cant be paying $340 though, cause the whole bike is only $4000 inluding a hefty profit margin haha

i assume they own the printers
ah, they are also usign titanium on some of the models
iron remnant
I mean, based on my limited time with them, metal 3D printing is just ridiculous.
balmy pulsar
it's coming down a lot. used to be that a tiny little titanium bolt was $500. now it's $10
iron remnant
I mean, even if they aren't owning their own printers, there's a bunch of fixed costs there so if they're doing a batch of them they might get a discount.
balmy pulsar
they make 100's
so yeah, should be as streamlines as possible
i expect they pay under $500 for the printed parts per bike.
faint sky
If you’re talking about the broken bike part why not find a local welder that can fix it… unless it’s some weird alloy a weld job so do fine.
iron remnant
Oh, no, for any metal bike worth repairing you need to go to a bike frame person. Way too easy to get a bike that comes apart on the road otherwise.
faint sky
Ahh so zip ties and duct tape it is then.
balmy pulsar
O_o
the broken part is sacrificial, cost 32 to replace.
im talking about a whole frame
the bike is already fixed
but, you cant weld on a 6061 frame if it was broken. you would need to heat treat and reset the geometry
which would cost more than just buying another
and need to be repainted as well
empty sedge
@balmy pulsar dude at work tried a chinese printing service for a stainless part. Price was good but they didn't clean up all the supports on the inside. Unfortunately I don't know the company
balmy pulsar
ah
empty sedge
it was kind of a weird tube with small holes on the outside so there wasn't a great way to reach inside.
balmy pulsar
ah, yeah. the trick is to design in a way there it wont need supports.
that cant be reached
shy kelp
balmy pulsar
hmmm. is there a service for metal printing that is more affordable than shapewa...
why not use a subtractive method?
I don't remember if it was protolabs or xometry, but they had a cheap metal printing service, but my part was pretty small so...
or even binder things are more affordable
cunning hound
xometry wasn't cheap for me, but I think I had some issues in my design that made it more expensive than it should be. The nice thing about xometry is that they take just like a single model and then tell you what it would take to make either subtractive OR additive and you can choose the better of the two
I wish they were better at telling you the why of big prices though. Like, I'm pretty sure with mine there were some tool changes necessary for radiuses that aren't critical dimensions and I could have changed if I knew which ones
balmy pulsar
anything cnc i can do myself. just some things aren't well suited.
ah, yeah. setups and tooling can change dramatically on 2 parts that look basically the same
cunning hound
if I had more experience running a cnc it was probably an obvious mistake ... but if I had experience running a cnc I probably have the capability to just do it myself 😉
shy kelp
then can't you like get a tube and then solder it with the other part?
balmy pulsar
cant find the pic, but i have spindle clamps on my machine. i made them universal (1 part used in 4 places). i wanted a rounded corner, and my machinist was like "yeah, thats like $400 cause i have to reclamp it 3 times." changed to a chamfer and $80
anything is a 3d surface gets very expensive for just time.
balmy pulsar
shy kelp
then can't you like get a tube and then solder it with the other part?
this is titanium, you dont solder titanium 🙂

stuff like this is not really viable in any other way than printing
you can of course cnc something that performs the same function from aluminium, but it will be heavier and probably cost a lot more unless you have your own cnc (which i do, but, still),
cunning hound
Yeah, I would love to have a machinist say "cause I have to..." but xometry just spits out a price via some software. If i cared more I would probably post the model somewhere and ask for feedback. the part I'm thinking of though I just ran through to get a rough idea if xometry was potentially reasonable when I have real parts
figured out, I think it IS, I just gotta put work into optimizing the model because 5 minutes can save a lot of money
balmy pulsar
the main think to keep in your head is "how would i hold this?"
if you use fusion, you can program it yourself, and get a handle on how it actually would cut, tool sizes, speed.
so like that print above, youd quickly find A no tools fit inside and B you need many setups and C the surfacing would take hours
plus custom fixtures to hold it
ten you go backwards from there.
the cheapest things are ones that fit in a regular vise with 2 sides (top and back) from standard stock
cut one side, flip, cut the other, done

most expensive part on this machine was the Z axis back plate, cause it had 5 setups.
even though the table and the base beams are much larger parts with more metal

 scarlet field
Is the ender 5 considered a good 3d printer? Beginner friendly?
vestal thicket
scarlet field
Is the ender 5 considered a good 3d printer? Beginner friendly?
The Ender 3 series is more beginner friendly. My boss has a 5 and i can't really recommend it
The 5 also has a much smaller community and it's harder to get help or find resources, imo
scarlet field
Ok, and it's cheaper. Even better
cunning hound
I thought the 5 had a bigger bed area, but a quick google says that's not true. What's the actual selling point of the 5?
balmy pulsar
ha, protolabs says $1400 for that print shapeways said $340
and i want it to be like $100
:
x
vestal thicket
cunning hound
I thought the 5 had a bigger bed area, but a quick google says that's not true. ...
I think Creality just wanted to build a CoreXY for the heck of it sometimes
cunning hound
oh, it's corexy, so jumping on the hype train
iron remnant
Naw, the 5 is not CoreXY.
It's a cubic-frame, I think Cartesian?
If you get a good one, it should print marginally better because it's not a bed-slinger, but some folks have been complaining that the 5 has worse QC.
shy kelp
I don't get it
why doesn't bed leveling marlin, compensate for high measurements?
empty sedge
beyond a mm or so you have something wrong
shy kelp
empty sedge
beyond a mm or so you have something wrong
some points have like 3mm of distance
like -1.5 to 1.5
cunning hound
if that's from corner to corner, you should get it closer using the hand dials. If there's that much variation in the middle of the plate, that plate is considered too far gone to fix with auto bed leveling
You might be able to tweak a setting in the code to make it not refuse, but that's why it doesn't by default
half dew
Some companies ship with really inconsistent beds that can have that variance when heated up
best bet in those cases is to shim the middle with foil
balmy pulsar
unless my memory is wrong, its a glass bed laminated to aluminum. theres not much you can do if it really is warped
empty sedge
It could also be something other than your bed, like the rollers aren't round or aren't properly tensioned
balmy pulsar
doesnt use rollers
 primal pulsar
what's a good sandpaper grit for 3d print finishing?
balmy pulsar
what material?
primal pulsar
pla
balmy pulsar
wet dry from about 80 or 120 grit, up to 400 does well if you are paintin
primal pulsar
cool, i'm not painting. my prints come out with a 'base' i think it's called and i can cut it off with a hobby knife, but i want to clean up the sharp edges as i like to print things for my young newphew 😅 appreciate it, i'll get something in between
balmy pulsar
ah, yeah. by 400 grit it is nice and mooth
smooth
ive take some prints up to a polish
they trick is to keep them wet
so the paper doesnt clog and print doesnt get too warm
subtle junco
just want to throw out a PSA - I was having bed adhesions issues with my Ender 3 Pro using the magnetic bed it came with. I was having to smother it with a gluestick. Couldn't get the tempered glass to work at all. I bought a spring steel PEI bed plate and I'm blown away by how good it works printing PLA so far.
elder oxide
subtle junco
just want to throw out a PSA - I was having bed adhesions issues with my Ender 3...
Which side of the tempered glass bed did you use?
I use the smooth side
Print adhesion quality is pretty great
subtle junco
I had tried both, with every setting you can imagine
different temps, print speeds, glue, no glue
elder oxide
Interesting
subtle junco
yeah. I think at one point I was able to get a print or two, but it was a very fragile process I couldn't replicate easily
half dew
glue on pei?
subtle junco
No glue. I'm saying the PEI plate solved that problem for me
shy kelp
balmy pulsar
doesnt use rollers
he might not be that wrong...
 elder oxide
Might run down a spool if filament for the first time ever
Usually I get down to like the last 10-20m and don’t have any prints that use that little lol..
half dew
I wanted sneaker skates that were "smooshed" so I designed and printed adapters in PA-CF to let them keep their natural shape (and also give it a slight 5 degree wedge for more comfortable skating


 iron remnant
A deburring tool is great for cutting off fringes of 3D prints.
iron remnant
half dew
I wanted sneaker skates that were "smooshed" so I designed and printed adapters ...
That's seriously neat.
Given that my feet are annoyingly large and shoes annoying I kinda want my own pair of sneaker skates.
 placid grail
sorry but I normally don't chat here, but textiles can be 3d printed now?!
placid grail
I don't know with these synthetic things maybe it doesn't need to be woven anymore or can be simulated by dropping small balls of textiles on a matrix (like they do with metal balls to 3d print automotive parts like from 1956 porsches)
balmy pulsar
thats not a textile though that is a composite
half dew
placid grail
sorry but I normally don't chat here, but textiles can be 3d printed now?!
There are companies that list things like 3d printed insoles that seem to be textile but I'm not sure what they're actually doing. Just to clarify though - I didn't 3d print the shoes, just the plate adapaters
cunning hound
something to keep in mind is that (unless legally restricted from doing so) companies will often use words incorrectly to make things easier to understand for users
They might CALL them textile without being technically textile
balmy pulsar
ah yes true
i have a bike seat that has "316 titanium" rails.
316 is stainless steel
with 0.5% titanium for high temperature corrosion resistance
so its mostly a lie
but they get away with it somehow and charge more even though it costs the same
silver carbon fibre is a good one too.... its just fibreglass
cunning hound
I was trying to be generous and talk about when they do it to avoid confusion, but yeah, somtimes they do it to create confusion, too
balmy pulsar
ah ok
ha
like tremolos on fender guitars. he got the word wrong, and now thats just what we call it
60 years later
70 actually, wow
i feel old
hehe
cunning hound
I had to look up the tremlo thing. Yeah, that sounds like a good example. It was probably originally called a tremelo as a way to trying to explain what the thing did in a way the audience could understand since they are somewhat similar in effect
balmy pulsar
i think he just confused the terms. he wasnt a musician. i forget the story. its is technically a vibrato.
turbo's are another one people mix up a lot. they see an impeller and just assume its a turbo.
half dew
balmy pulsar
3d printed insoles are just rubber
I've seen companies with cloth ones specifically
balmy pulsar
link?
probably misleading.
maybe a cloth surface over the printed foam
or a printed mold/pattern
placid grail
half dew
There are companies that list things like 3d printed insoles that seem to be tex...
Saw an article on Adidas using textile 3d printing machines but I guess it was PR buzzwords or something
half dew
balmy pulsar
link?
I don't have it anymore - it was when I was looking at custom shoes the other day - they were definitely a fibrous cloth-like material. I assumed they were doing some sort of felting to make them based on how they looked
balmy pulsar
adidas makes 3d printe dmid soles, but they are plastic, not a woven textile
half dew
Also, polyester is plastic and still a textile
balmy pulsar
when its a woven fabric, not a solid sheet.
placid grail
yeah I threw my polyester clothes in the trash when I found out
placid grail
what? they are cheap, don't breath and stick on a very hot day
I never liked them to start with
balmy pulsar
acrylic is plastic
99% of your clothes ar eplastic
lycra, elastane,
all plastic
anyhow
half dew
I don't think this is what anyone is doing but you can 3d print plastic that is the same geometry as woven fabric
shy kelp
placid grail
what? they are cheap, don't breath and stick on a very hot day
if they are 100% or close to it, you sweat like a pig in hot weather and don't keep your body heat in cold weather
they suck
balmy pulsar
you can hypothetically "print" a woven material, but its a lot easier to weave it
placid grail
imho the best textile is lexan/aramid/kevlar. Really handy against canadian hail in the winter
shy kelp
balmy pulsar
you can hypothetically "print" a woven material, but its a lot easier to weave i...
yeah there are other methods, but I feel like those companies are just exploiting the hype
balmy pulsar
yes
placid grail
kevlar helmet are used for artillery and hail is a kind of artillery so works well
balmy pulsar
ha
balmy pulsar
coconuts
strange ledge
Hahahaha
half dew
@balmy pulsar Ahh, found it - you're right - its TPU with fabrics applied after... maybe I'll have to 3d print some of my own insoles
shy kelp
anyway there's any cheaper sd/display module that uses the same pins?
shorturl.at/dpsV2
I checked up each display into marlin, and there wasn't so I guess not
strange ledge
Mortar-launched coconuts, yeah?
placid grail
strange ledge
So.. what calibre of arty shells can a Kevlar helmet deflect?!?
I feel that's off topic, but it's for the fragments, not a direct hit
balmy pulsar
kevlar is abrasian resistan and highly elastics. thats why its good for impact. but to actually stop bullets it needs to be super thick
strange ledge
placid grail
I feel that's off topic, but it's for the fragments, not a direct hit
I know, but I thrive in ambiguity. 😁
balmy pulsar
half dew
<@825075799093805138> Ahh, found it - you're right - its TPU with fabrics applie...
there we go. makes sense now. and yes you can do it yourself. i mean those adidas shoes if you knew how to design a shoe you can print at shapeways for $50
strange ledge
Just had a thought... When I get moved back to my local office, I can use some of the money I'd be using on train fare to build my 3D printer. 👍
half dew
Heh, I'd rather sew shoes from fabrics and leathers. I'll stick to 3d printing rollerskate parts for now... next up: Printing and annealing PC for standard quad plates and comparing their strength to ABS plates
placid grail
ah I was wrong, it's not 3d printing but basically a robotics textile machine with computer vision
nvm
half dew
Eh, its all additive manufacturing - companies just use the term 3d printing too broadly
shy kelp
I wouldn't ne surprised if they were only marketed as 3d printed, when in reality they use cheaper manufacturing processes for their batches 🙈
placid grail
I mean not surprised, electronics are often advertised with semi-magical properties especially the health-related stuff
strange ledge
Big question is... Use the Sanguinololu boards I already have, or work on a Pi Pico based printer?
balmy pulsar
there was something recent that was advertised as printed but was clearly not. forget what it was
pi pico?
strange ledge
Yarp
It's doable, but... Not so easy.
At least with the Sanguinololu, the board is already done.
I just want to build it as cheap as possible, really.. so I guess the Sanguinololu is the better option.
placid grail
bah I wish I can have a 3d printer one day 😦
strange ledge
What's stopping you?
shy kelp
just annoying to level
balmy pulsar
ha
strange ledge
That's not so much a blocker as an impediment..
placid grail
I'll have to repair it if it break or know electronics to tweak/mod it. And the cheap one are kits you build yourself
otherwise they are like 1 month of my salary after tax and charges
shy kelp
placid grail
I'll have to repair it if it break or know electronics to tweak/mod it. And the ...
well a good occasion to start
ninjed
placid grail
It has to be doable though
balmy pulsar
nah, you dont need to know any electronics to use a printer
placid grail
Not doable for me, not smart enough etc
strange ledge
shy kelp
ninjed
Eat my inb4!! Lol
placid grail
I still don't understand capacitors after years
strange ledge
placid grail
Not doable for me, not smart enough etc
Would it make you feel better knowing that my *ex-*colleague was fired today, for being too dumb for a babysitting job... ?
placid grail
but surely a mars 3d printer or a 3d printing kit has capacitors in it ?
balmy pulsar
why would you have to touch the capacitors?
strange ledge
You don't. Lol
placid grail
well if I have to build it myself in a kit
placid grail
I don't even know how to plug them so they don't blowup and splash me with acid
strange ledge
You touch the non-zappy bits...
placid grail
Last time I tried the capacitor lifted off
shy kelp
it doesn't matter
have you even had or use a 2d printer?
well that's the same (more or less)
it's like not wanting to buy an hammer because you don't know how to make an hammer
balmy pulsar
no acid in a printer
strange ledge
Electrolytic capacitors.
balmy pulsar
i am so lost again hahahha
placid grail
shy kelp
it doesn't matter
have you even had or use a 2d printer?
well that's the same (m...
well I don't buy hammers because of that, is that a problem? I don't know what materials make a good hammer and I feel that at the current price of 155$ per ton for iron I'm getting scammed paying 45$ for 1.5 pounds of iron
balmy pulsar
if you are afraid of using a 3d printer, maybe this whole computer thing isnt gonna work out
j/k haha
strange ledge
Generally, metal hammers are good for knocking in nails.. and knocking out teeth... 🤣
shy kelp
placid grail
well I don't buy hammers because of that, is that a problem? I don't know what m...
it doesn't matter, that's all market differantion
any hammer can do the job
placid grail
balmy pulsar
if you are afraid of using a 3d printer, maybe this whole computer thing isnt go...
nah that's fine I have a comptia
placid grail
Still surprised when I build my own computer and it works though
balmy pulsar
i have a compy from 2015
with some amount of ram
and cpus
probably a hard drive
strange ledge
CompTIA = IT certs
placid grail
got a comptia because I was sick of asking tech questions on the internets and it would devolve into 300 posts of a flame war and threats instead of helping me with my problem
balmy pulsar
haha
placid grail
Is there a similar thing for the circuits inside 3d printers or electronics ?
strange ledge
Not sure
shy kelp
don't
waste of money imo
placid grail
I didn't do the exam, I read the books and did practice exams, that's enough for me
balmy pulsar
inside a printer is basically an arduino mega (or arm system on newer ones) with some stepper drivers and very little else
placid grail
I don't really want to get hired to fix computer or do financial planning
it was just for personal use
balmy pulsar
i cant imagine there is a useful certification for them
strange ledge
Mine was purely for self-gratification... I've never seen any value from the A+
placid grail
same for jewelry I mentionned in another channel, don't want to make stuff at tiffany, just something I wanted to learn...
and thanks for understanding usually I get confused looks and endless questions
anyway I disgress, also what are smells/fumes like ?
balmy pulsar
for pla not much fumes
strange ledge
The only time I'm confused is when someone says they don't eat pork... 🧐
balmy pulsar
mmm 3d printed pork chops
placid grail
strange ledge
The only time I'm confused is when someone says they don't eat pork... 🧐
well.... we can talk about it in general-chat if you want
strange ledge
Haha
balmy pulsar
thats my dinner tonight. pinapple rice and pork chops.
anyhow
resin printed have fumes
placid grail
no pineapple either for me because they burn like acid for me (because of the enzyme in them and/or allergy??)
shy kelp
no matter if they are officially toxic or not, I wouldn't have them close, put them in a ventilated area
placid grail
Yeah my 12 sprinklers and 3 smoke alarms would probably not like that
and I'd risk drowning
guess I'm going to renew my maker lab subscription
strange ledge
balmy pulsar
nylon smells a bit like anise (licorice)
Liquorice and anise are not related, fyi. ☺️
balmy pulsar
anise is the flavour in licorice candy
i dont think real licorice is used in anything
strange ledge

Pontefract cakes (also known as Pomfret cakes and Pomfrey cakes) are a type of small, roughly circular black sweet measuring approximately 3/4" (2 cm) wide and 1/5" (4mm) thick, made of liquorice, originally manufactured in the Yorkshire town of Pontefract, England.
It has to be proper liquorice.
And, sorry... I have to continue using the British English spelling, of course. 😅
placid grail
does it matter what software I use to select a 3d printer ? Or should I just pay my sub because the maker space has 4k-5k$ machines that I never could afford ?
(I use solidworks maker if it matter for the 3d printer, I'd rather not have to convert anything in another software and have it works directly)
subtle junco
placid grail
I'll have to repair it if it break or know electronics to tweak/mod it. And the ...
you can get an Ender 3 Pro for 100 dollars with a coupon if you have a Microcenter around you - https://www.microcenter.com/site/content/specialoffer3dprinter.aspx Otherwise they normally go for about 200 online. Best printer to get started with IMO. You don't need to know the first thing about electronics to use it. Only thing you need is the patience to put it together

Micro Center
New Customer Exclusive! Sign up to get your coupon via text. Limit one coupon per person. One time use in-store only coupon. While supplies last.
I'm almost tempted to pick up a second one, 100 dollars for arguably one of the best <1k printers is crazy
placid grail
guess not (Is Micro Center planning to extend into Canada? No, they are not. Micro Center stores will not be expanding anytime soon.). Can't really buy in the US anyway
Seemingly the best option I have that come assembled(?) is an elegoo mars but it seems to be a unique printer that doesn't work like other printers at all
subtle junco
200 is still a great price for what it is. That's what I paid for mine
placid grail
ah they seems to have it on the am-word canada. thanks I'll check review and take a look
subtle junco
The Mars looks like a resin printer. You load up a vat with liquid resin and a laser hardens the resin on the print bed
the Ender 3 Pro is an FDM printer, prints from a spool of plastic layer by layer
placid grail
how does it compare to Printrbot / Tevo Tarantula and Sense3d ?
And are too a grade way above what one can have for 200$ ?
I mean the size of parts the ender 3 pro can do seems fine to me
I know some of these I wrote can do 1 cubic feet parts but that's not what I'm looking for
subtle junco
I don't have any personal experience with other printers, but I did alot of research before buying the Ender 3. The reason I went with it was mainly because of how much support there is online for it. Lots of room for upgrades, plenty of people that use it and can help troubleshoot with it
placid grail
possibly the biggest pieces I do would be a 90o joint that is like 5 inches by 5 inches
subtle junco
the print bed is about 9.25x9.25"
but I'll be honest with you, if you're setting out looking for a fully assembled printer, the Ender 3 was about a 4 hour assembly job
placid grail
ah at first glance it doesn't seem like I'll have to solder electronic component and pcb to each other and smd
just mechanically assembly and tighten stuff
placid grail
I lack this and I suck at assembly but I'll check the video from the company carefully first
subtle junco
its a pretty popular printer, so what the instructions might lack, there are tons of assembly vids you can find on youtube
but I dont remember having any issue with the instructions. was a big printout with color pictures
placid grail
last thing I tried to assembly was a deluxe for my rpi 2+ and the touch screen and I ended up with a diagonal case 😦
I even had to tape the wires inside and one of the screw to hold it in place while I assembled it because my fingers were too big to reach them
subtle junco
it's been a few years since I put mine together, but I think it would be difficult to assemble incorrectly
it's very well engineered. You'd know if you put something together wrong
placid grail
I just need some space when I assemble something
I'm not a mouse and I have big fingers
subtle junco
but yeah, I'll stop shilling for creality 😂 whatever printer you go for, I would just check and see what kind of community exists online for it. every printer is going to require maintenance and if there is a big community of folks that use the same printer you can rely on them for help when the time comes
placid grail
subtle junco
but yeah, I'll stop shilling for creality 😂 whatever printer you go for, I wou...
the maker lab I go to is in an high school and have old stuff, require us to help often, it is open to anyone who pay for a member card.
and since it's a school as well they often restrict the choices of solder/rosin/3d printing spool etc because of laws/regulations/etc and we share the computers
and they aren't open often, so if I do my own things at home unless it's a task that my gear can't solve I'd rather do those 2 main tasks(soldering/3d printing) at home. Also if it rain or snow I can't risk losing my electronics (as they don't like water) so there is very little time to be able to go there. Also 3d printing require supervision from home of the peoples who run the lab so you can't arrive 1 hour before it closes, you have to be there at the beginning, possibly have told them ahead of time.
vestal thicket
placid grail
and since it's a school as well they often restrict the choices of solder/rosin/...
If you don't want to go the Ender route, check out the Prusa - great starter printers, high quality and have the option of coming assembled. I have an Ender 3v2 because I have more time than money, my best friend bought the Prusa. Both great entry level-ish printers
subtle junco
yeah I've heard alot of good things about Prusa as well
tall osprey
I would recommend strongly against an e3 in current year due to the ever decreasing QC and the existence of other printers
There are a number of relatively similar price point printers that lack many of the flaws of the e3 and include a number of substantial features
See the artillery genius, anycubic Kobra, etc
shy kelp
strange ledge
Big question is... Use the Sanguinololu boards I already have, or work on a Pi P...
wasn't already there some 2040 based board in the wild?
 molten arch


 empty sedge
Looks like you’re over extruding
 sleek crag
Basically, more plastic is being squished out than is needed, so it gets pushed around by the sides of the nozzle instead of just the tip. With the correct amount of plastic, the flat tip of the nozzle will mostly smooth it out instead of pushing it around. Possible fixes:
- Adjust the extrusion multiplier. This will take the ideal numbers generated by ideal measurements and apply what is essentially a fudge factor to get the fed amount to be more in-line with reality. I typically do this because I'm lazy, but the pedant side of me knows it's not really the "proper" answer.
- Measure your actual filament and feed rate and adjust your slicer settings. Even though filament says it is 1.75 mm, the manufacturing process is not perfect and some manufacturers meet better tolerances than others, but it's basically never quite right. If you get your calipers out and measure the diameter in two different perpendicular directions at several places along the filament and average the measurements, you'll get more of usable diameter for calculating the real volume that will be extruded per length. Then you have to double check that the feed mechanism is actually feeding the length of filament it thinks it is, and adjust the feeds steps as needed. Then when you put the actual diameter in the settings, the slicer will more accurately calculate how much plastic to feed. This makes the pedants happy, but the downside is that you essentially have to do this every time you change a roll, and if the tolerances are way out, you may even have to do it several times for the same roll.
- Unusual, but possible: The particular filament you are using is expanding in volume during the printing process. While this is technically true due to the heating, most filaments will quickly revert to their former volume upon cooling, but some may not. In particular, there is "light weight" PLA that does this intentionally. I just put this option here for completeness, and it has nothing to do with your specific problem. It's also nice when a list has at least three items.
Even if you don't do all of item 2, you should still calibrate the feed rate. It's basically as important as calibrating the X, Y, and Z axises.
Another side effect of over-extrusion is that your perimeters will be wider than intended, throwing your X and Y calibration off. You'll want to re-calibrate those after fixing the over-extrusion.
half dew
Rollerskate plate printed in Polymax PC. Next step is to anneal it and then compare its strength to a standard quality non-toy ABS plate
balmy pulsar
how much does it distort
half dew
balmy pulsar
how much does it distort
I haven't annealed it yet - waiting until I'll be out for an hour or 2
faint sky
I’m thinking of getting the Creality Ender 3 S-1 pro based on adafruits highlight on. NPI. https://youtu.be/76AB3UVME84

This week's EYE ON NPI merges Creativity with Reality - we're showcasing the bumper crop of Creality 3D printers now available from Digi-Key! (https://www.digikey.com/en/product-highlight/c/creality/ender-3-s1-pro-3d-printer)
We've covered lots of tools (https://blog.adafruit.com/2022/07/13/eye-on-npi-jonard-tools-rapid-microduct-deburring-too...
My workshop is regularly above 60% humidity and 90F in Florida. Is that a big problem for a 3D printer? I’ve never owned one before. Is it a better idea to put it inside where’s there is air conditioning?
half dew
faint sky
My workshop is regularly above 60% humidity and 90F in Florida. Is that a big pr...
Its only a bad issue for filament types that absorb a lot of moisture. most PLA will be fine. Best bet is to get one of those filament dryers by sunlu or similar (get one that can go up to 70-90 degrees if you can). You can dry the filament in them and feed directly to the printer
subtle junco
faint sky
My workshop is regularly above 60% humidity and 90F in Florida. Is that a big pr...
indoors in the AC is definitely better since you have more control over temp and humidity, but like nlapenn said if you're printing with PLA I wouldn't worry about it too much. I've left PLA spools sitting outside of a drybox for over a year on end and they still print fine without any kind of conditioning.
I mean I don't recommend leaving them out because PLA is still a hygroscopic polymer, but just an example of my own experience to give you an idea
balmy pulsar
petg is bad in humidity. nylon slightly less bad. pla doesnt seem to care much. nor does abs.
that said im always in AC, so humidity is always at least a little controlled
iron remnant
Yeah, I had a roll of PLA go brittle after being out for too long, so it can happen.
empty sedge
nylon foams up during printing after it absorbs water. It needs a dry box all the time
faint sky
nice, thank you all for the advice. will probably pull the trigger on it in the near future.
 solemn estuary
hello and i'm working with this model but after i put it into Cura it became solid


i wonder how it happens and how i can solve it 😩 is there any settings about this?
balmy pulsar
what software? it is possible the solid to mesh conversion is capping the bottom (removing trims)
half dew
Normals could also be flipped
sleek crag
Yeah. That looks like a screenshot of Sketchup. That light blue color is is the inside while the white is the outside. To get a proper manifold in Sketchup, all of the outsides need to be white. Select all of the light blue faces and reverse the normals.
I gave up on SketchUp years ago because of a variety of reasons. Normal handling with complex constructive solid geometry was an annoyance, but the complete lack of parameters was the killing blow. I'd spend hours trying to adjust a single dimension by a millimeter.
balmy pulsar
sketchup is horrid. art departments love it but the geo it makes is always corrupt
cunning hound
sketchup is good at getting an absolute beginner from zero to very crude basic models. that's where it stops.
balmy pulsar
does that mean i can call the halo art department crude beginners?
cause, i kinda want to
😛
cunning hound
There's no way they're using it for more than rough box mockups, surely
balmy pulsar
entire set designs
massive ones
most productions use it
we keep trying to ween them off of it

they did that, as one file, with interior
then we had to actually make what you see there, only using theirs as a visual guide cause all the geo was corrupt and would make maya crash
it was easier to rip all the games assets 😛
cunning hound
that sounds like a nightmare for both parties, tbh
not sure why they do that to themselves
balmy pulsar
no idea
they are set designers. having them on computers at all is a relatively new thing
:x
for superman returns i was given drawings on paper. like... done with pencil
iron remnant
OOoooooH, OK, so I was visualizing a trade of people who went to art school where they could have learned Maya or something like that but instead they decided to do everything in Sketchup.
That at least makes... more sense?
faint sky
I like sketchup, used it for years for quick mock-up designs. I’d never try to use it for anything other than super basic stuff. Plus they sold off the entire community and started charging for access to assets that everyone in the community made in the first place. It killed all momentum of sketchup overnight.
For 3D printing guess I’m going to have to learn a real modeling program like fusion 360. Wish the Ruiz brothers would make more layer by layer videos. I’ve learned a lot from those and I don’t even have a 3D printer yet.
patent sonnet
my biggest issue since getting my 3d printer is getting measurements exact. need a 2mm pin support for a board? no problem. getting it in exactly the right place - nightmare. Just finishing a case for Pimoroni's Lipo Amigo Pro and am printing my fourth iteration. 3 mounting holes. got one right, then got another right and now the third (fingers crossed) - fortunately having someone like CHEP produce "Hyper Fast" profiles means I can iterate pretty quickly
iron remnant
The way I describe it, I taught myself Blender, FreeCAD, and OpenSCAD so that I could prove Naomi Wu right that we should all just get over ourselves and use TinkerCAD.
(Then again, I did learn Maya in ages past)
@patent sonnet Are you trying to print the final part each time or have you tried making fast-printing fit-check surrogates before trying to get the final part right? If I'm making a board mount, I'll just make a printable faux-board as the first step.
patent sonnet
That might be a better idea actually. The times I have gone "oooh, could have used an extra couple of mm there"...
balmy pulsar
O_o
measurements with pla usually come out pretty accurate untill you get to much larger items
i made a drilling jig that was 14" long and it was out by about 2%. enough to mess up the positions.
scale in the slicer, reprint. all good
iron remnant
Today in 3D printed bike lug news: https://bikerumor.com/new-no22-bicycles-3d-printed-titanium-dropouts/

No22's new 3D printed ti dropouts not only look as sleek as carbon, they make assembly and brake installs easier with perfect alignment.
(Apparently Silca in Indiana does 3D printing but doesn't advertise it? This makes me wonder because most bike-stuff brands are at least semi-illusory aspects of large conglomerations)
balmy pulsar
they could have least smoothed them.
 tardy juniper
patent sonnet
my biggest issue since getting my 3d printer is getting measurements exact. need...
tardy juniper
patent sonnet
my biggest issue since getting my 3d printer is getting measurements exact. need...
I designed & printed this vent replacement for my car and I believe it took me 8 iterations to get the geometry right https://www.thingiverse.com/thing:5412726

This is a replacement for the passenger side vent in a 2001 BMW Z3. This is designed to snap into the same hole that the OEM part fits into, so it is an effortless install.
balmy pulsar
yes but that could just be bmws fit and finish :x
tardy juniper
That too 🤣
balmy pulsar
This is why I stick to bikes. no glove boxes and cup holders to break off 7 times (thanks vw)
iron remnant
If it took me 8 iterations to get it right, I'd be venting about it too.
iron remnant
Like, how accurate are you trying to go?
vestal thicket
A lot of the headers do have datasheets though, is there a specific one you're looking at that doesn't have one?
Cool
iron remnant
Yeah, glad you fixed it but I was going to point out that there's a lot of different 0.1" headers but they are all mostly the same... so you can frequently just pick one (And NopSCADLib has the OpenSCAD generics for things like that), but if you wanted something that precisely fits a part, that's different.
iron remnant
NopSCADLib is great, BOSL2 is great, never really played with the rest.
One of the downsides of OpenSCAD is that it's not really got language support for libraries in enough of a way so it ends up that you can't always use multiple libraries in the same project.
iron remnant
Yeah, I think BOSL2 makes a lot of things a lot more ergonomic.
But... yeah, I think that a sufficently motivated and poorly regulated person or group of people could make an even more awesome OpenSCAD like language.
A lot of the BOSL2 things become first-class citizens of the environment and stuff.
 topaz viper
Just got a ender S1 pro, got most of it working but I am unsure on a step in the leveling process. When you stick the paper under the head assembly to calculate the distance between head assembly and bed should the paper slide easily or have a slight resistance when you move it.
Also my first test print with pla worked up to about 50% then came unstuck from the bed, not sure why. this model uses the magnetic plated stuck to the bed vs the glass bed.
iron remnant
So, the paper test is not accurate.
It's just the best thing you've got with that which you have at home.
(Feeler gauges are, arguably, better)
So, the point generally is that there should be some resistance, it needs to be the same amount of resistance at each of the points, and it needs to be the amount of resistance you've determined tends to mean that it'll stick properly to the bed.
(I didn't wait long before getting a BLTouch)
If the bed is not level or the bed needs to be a little bit closer to the nozzle, that can cause it to come unstuck.
half dew
Also, when you're leveling - make sure the nozzle and bed are heated to temp... you probably want to retract the filament as well to prevent oozing.
Also, the machined beds on Creality printers tend to be concave. I used to shim the middle of mine under the PEI sheet with some aluminum foil - even a BLTouch and mesh levelling wouldn't compensate for how bad it was. I eventually replaced it with a custom machined bed
topaz viper
ok I will check and yes I did the preheat step while leveling
half dew
Yeah, what you'll see if you have the same issue many many others have with creality printers is: In order for the head to be low enough in the center it literally collides with the corners.
topaz viper
ok I will check again
 tulip night
Preheat and wait/check that the temperatures have reached their point -> Use the paper with the material configurations that came in the box, it's the right thickness -> Do auto leveling and then the offset for the middle point first -> Then in aux the various corners should barely grasp on the paper
I learned it the hard way. Did them in the wrong order, so the extra offset scratched my magnetic plate. And always had it grasp too hard on the paper. It's really about the bare touch to get it right. I have the rabbit and XYZ cube printed on my S1 Pro now. Still need to make it slightly more loose as I saw the XYZ cube had a just slightly larger bottom layer...
placid grail
Didn't realize it could take several day to 3d print something with an hobbyist grade printer...
tulip night
There are various factors that contribute to extra time. You can do some improvements on that to shave off some time. But it'll take time indeed...
placid grail
I guess I won't get one at home then since it's not really suitable (don't want to sleep while something is heating/melting plastic and leave it without supervision)
tulip night
For small objects or enclosures for small electronics the hours are reasonable. But if you plan on bigger volumes that sounds reasonable
If you can somehow divide your model in parts it might still be feasible
I'm considering to print my case enclosures side-by-side and have some way to mount them perhaps...
strange ledge
placid grail
Didn't realize it could take several day to 3d print something with an hobbyist ...
I'm considering a DIY build myself, but my current starting points are either a Sanguinololu board or a Pi Pico.
I've got no idea where to go from there, except stepper motors, yadda yadda, other parts. 😛
I want to build one as cheap as possible, because my budget is horrendously limited.
placid grail
I can rent one for basically 70$ a year membership card(access to the electronics lab) + 3$ per day of use but it's annoying going because I have to prepare things and it's not really all-weather(rain could infiltrate my backpack & electronics case)
strange ledge
I don't do rentals, ever.
I mean, sure.. if there was a makerspace or something like that local.. I'd get some stuff done, but only to the end goal of building my own.
placid grail
yeah it's a makerspace
the other one is in a school and open like 4h a week so probably not enough time to 3d print something like a thick 100x100mm panel (but they do have several 3000$ 3d printers, which I assume are faster)
I guess my best guess at this point will be to order them over the web or something
strange ledge
I might have to do something like that.. or see who I know that can sort out some parts for me.
Working at a big IT company, there's bound to be a few people with 3D printers.
cunning hound
are the $3000 3d printers actually faster than hobby ones? They have a support contract. They often have bigger print volumes. They at least claim to have higher quality parts, but I didn't think they were appreciably faster.
If anything, I'd assume probably slower than a tuned home printer, because they want their safety margins.
shy kelp
g35 what does this mean? marlin
 strange ledge
What does what mean, specifically ?
shy kelp
strange ledge
What does *what* mean, specifically ?
all three lines, front right, I do suppose it's the location of the screw like thing that do hold the bed; But CCW and CW? by X turns, alright, but by X minutes, what does it mean?
about by turns and 28 minutes, for example, I can count 3 turns, but 28 minutes? roughtly one third of a turn or what?
strange ledge
"CW" = ClockWise.
"CCW" Counter ClockWise.
 outer narwhal
minutes of arc? (60 minute per degree) though if you're turning by hand, that seems difficult to achieve
strange ledge
Personally, I'd rather have torque settings.. lol
outer narwhal
could mean like minutes on an analog clock face, so 6 degrees per minute. but i think that's a confusing terminology and should be avoided
strange ledge
28 minutes will be just short of half-past..
11 & 13 will be short of quarter-past.
strange ledge
outer narwhal
could mean like minutes on an analog clock face, so 6 degrees per minute. but i ...
Yeah, seems odd.
shy kelp
thanks, I'll try ; I still don't get minutes, but I guess that I can try by tentatives...
outer narwhal
i think if you want to give angles relative to a clock face, it's better to give hours: "3 o'clock", etc, though you only get 30-deg increments 🤷♀️
cunning hound
minutes is a unit of measurement similar in concept to a degree, but much smaller. not commonly used by average people.
it has the same name as a unit of time, but no real connection to time
shy kelp
I had a reprap smart discount controller, it failed to read the sd card by giving media initialization fail
just in case I bought another display mks mini 12864 v3, and it gives the same issue, so I don't think it's the display/sd reader
what could be wrong?
I tried other sds and they gave me the same issue
tardy juniper
Hey guys, I'd like some advice on something
So I am making a reflow hotplate for smd soldering stuff


And I am planning on 3d printing the enclosure...
The aluminum plate at the top gets to ~220C, so I used 60mm standoffs to attach it to the enclosure. I also left a 4mm gap between the plate and the walls of the enclosure. If I print this out of petg, will there be any issues?
Since petg is usually printed at 260 I was thinking it should be fine as long as it isn't in direct contact
sleek crag
cunning hound
it has the same name as a unit of time, but no *real* connection to time
Both derived from "minuta prima", or "first small part". Both are one sixtieth. There are also seconds ("minuta secunda" or "second small part") of arc that are one sixtieth of a minute of arc, similar to time seconds. No one talks about tertia and quarta anymore, because those just get crazy small, and decimalization is usually used at that point instead.
topaz viper
Just a update, I have done the firmware update to my new Ender 3 S1 Pro, trick is do the screen first then the main board. This fixed some menu issues I had in the touch screen. Also one video I watched the person had the same issue as me with small objects and found the new PEI plate shipped with the pro was causing the sticking issues, he changed it to the plate used by the Ender 3 S1 non pro which is a different plate and everything printed fine. So I am waiting for the different plate and will try again.
iron remnant
tardy juniper
Since petg is usually printed at 260 I was thinking it should be fine as long as...
What you want to be careful about is not the printing temperature but the heat deflection temperature, except for nylon which doesn't deflect as much
tardy juniper
iron remnant
What you want to be careful about is not the printing temperature but the heat d...
Thanks, I'll look into that
Jeez, looks like its 70-80c for petg 😅
Hopefully that air gap is large enough then
cunning hound
air is a pretty good insulator, but with enough time heat will spread in anything but a vacuum
iron remnant
Might just get some thermal insulation sheets.
cunning hound
some of the cheaper thermal insulation sheets are barely more than stagnant air, tbh
tardy juniper
It'll only be running for a few mins at a time
So I'm just gonna see what happens
If it turns out that the gap is too small, I can always reprint with a larger gap
shy kelp
shy kelp
I had a reprap smart discount controller, it failed to read the sd card by givin...
if end up being pin config
 weary lichen
tardy juniper
Since petg is usually printed at 260 I was thinking it should be fine as long as...
weary lichen
tardy juniper
Since petg is usually printed at 260 I was thinking it should be fine as long as...
Now, just because it's printed at 260 doesn't mean it won't get soft at lower temps. PLA is printed at ~220c but will get soft and deform if left in a car on a sunny hot day.
That said, air is an excellent insulator so I think you'll be fine.
empty sedge
Glass transition temperature of PLA is about 65C
Glass transition temperature of PETG is about 85C
A hot car is about 70C in the sun on the dashboard. I don't think you need to worry about PETG nearly as much
tardy juniper
weary lichen
Now, just because it's printed at 260 doesn't mean it won't get soft at lower te...
Thanks! Yeah I ended up testing it out last night and the petg didn't deform at all which is great
Testing it again today and I'll actually try to reflow a pcb
weary lichen
As a free bonus, with it being 3d printed it's easy enough to modify the design if it did deform
shy kelp
this printer is driving me nuts
it was working
and now again with the endless media initialization fail
empty sedge
shy kelp
this printer is driving me nuts
it was working
and now again with the endless me...
I had similar issues. It ended up being the main DC power input wires were loose. Along the way I tried a bunch of different usb cables or none but fixing the loose power/ground wires fixed it for good
shy kelp
empty sedge
I had similar issues. It ended up being the main DC power input wires were loose...
this seems to have fixed it
I love you
they didn't look loose though
shy kelp
im gonna get a 3d printer
i dont know tooo much about 3d printing, what is the difference between bowden and direct drive
is direct drive a necessity for tpu?
 random urchin
A Bowden arrangement pushes the filament through a tube before it gets to the extruder.
Advantages: The print head is lighter and can accelerate faster.
Disadvantages: You're essentially pushing a rope. The force of pushing the filament puts a lot of tension on the tube, which can cause it to detach at one end if not fastened properly.
Direct drive pulls the filament into the print head, pushing it directly into the extruder.
Advantages: Avoids the whole "pushing a rope" problem. Mechanically more robust.
Disadvantages: Print head is much more complex, with more electrical connections running from the controller. Also much heavier, making acceleration more difficult.
Personally, I wouldn't touch a printer with a Bowden extruder. But that's just me. I'm very risk-adverse, and the thought of the tube deteching mid-print gives me nightmares. 😄
Oh, and regarding TPU... Yes, I expect direct drive would work better for that, since it's more flexible, but I wouldn't go as far as to say it won't work with a Bowden. I'm sure someone who has one can chime in on that.
 sacred reef
bowden is good I have an ender3 I recommend it to beginners
shy kelp
random urchin
Oh, and regarding TPU... Yes, I expect direct drive would work better for that, ...
thx
sacred reef
Chep recommended I replace the original with a ptfe type but I bought one and am still using my original
shy kelp
sacred reef
bowden is good I have an ender3 I recommend it to beginners
yea im getting an ender 3, i plan on alot tpu printing so just wanted to be safe
sacred reef
if you are printing abs or other hot stuff, I recommend an enclosed printer
shy kelp
alr thx
sacred reef
I can see why the bowden might not work for tpu it is soft. I have never used it
I haven't found heat settings yet
direct drive is prefered
210 to 230 C
Ah is that what ninjaflex is? that stuff looks cool

All3DP
TPU can be a tricky material to 3D print, but using the right temperatures is a start. Read on to find the best TPU printing temperatures!
shy kelp
yep
sacred reef
And they didn't used an enclosed printer so there's that I guess lol
yup they recommended it
shy kelp
i plan on using it for stuff like belts, necks, tongues etc(animatronics)
iron remnant
Oooooooh this sounds exciting, @shy kelp
I have printed TPU on my Ender 3v2 with a direct drive conversion (in my case a Bondtech DDX and a Mosquito hotend) and I guess you could probably do the less flexy TPU versions like 95A maybe but yeah, a direct drive is probably your best option
There is one brand of super flexy TPU that specifically wants a not-all-metal hotend but I think everything else is happy either way.
For animatronics the ability to print nylon or petg or other exotic materials might come into play.
placid grail
any idea what that 3d printer is ?
 sleek crag
Some sort of Prusa clone.
Would need pictures of other parts of it to even have a hope of being more specific, but it also looks like it's been modified, so it may be even trickier to identify.
placid grail
one happy choice doesnt seem to be related to 3d printing at all too..
sleek crag
That's likely just who made the bed.
 frail scarab
Guys, my Ender 3 has gone wack and I don't really know what to do anymore! I've been troubleshooting for over a week.
I have an ender3 with an upgraded 4.2.7 32-bit motherboard, a BLTouch, stiffer bed springs, and Marlin firmware.
Around 2 weeks ago my printer randomly started attempting to print about 1cm above the printbed. It ALWAYS does this regardless of if I level it right before or do any calibration. even after homing it always begins to print around 1cm above the printbed, just spilling filament around the place. Normally I could do some on-the-fly z-probe offset tweaks to try and clean it up, but it's just too big of a gap, and the gap always persists when I start a new print. It doesn't matter if I level every print or simply restore previous leveling data for the print. I've had this printer for around 2 years and none of the upgrades are recent at all, it's been working great and the BLTouch has been amazing until now.
After doing lots of testing with no luck I've just taken the printer apart and tightened/checked every bolt/belt, and I've downloaded Marlin over again and recompiled a completely fresh firmware for it with near-stock settings that just enable the BLTouch. I have no idea why it so consistently prints too high, even after leveling and homing.
I feel like it's a physical issue, since it now seems like my Z-probe offset needs to be a lot larger than it ever was for the last year. But I don't know what it could be.
Any ideas?
sleek crag
placid grail
one happy choice doesnt seem to be related to 3d printing at all too..
The logo matches, though, so I'm guessing the bed was something they sold in the past, but don't anymore.
balmy pulsar
i think its just the sheet made by that company. not the printer
sleek crag
Yeah.
sleek crag
frail scarab
Guys, my Ender 3 has gone wack and I don't really know what to do anymore! I've ...
Does it have a Z endstop switch? Does it automatically level before each print? Does it home to the correct position when not printing?
vestal thicket
@frail scarab The only thing I can think of is if it does it after every print after everything you've done - do you have some weird gcode start macro that raises it? Otherwise you've done everything I would do
placid grail
looks like the 3d printer above saw war to me but hey, looks really old and barely maintainable
balmy pulsar
placid grail
looks like the 3d printer above saw war to me but hey, looks really old and bare...
looks pretty new. it just has a head mod
placid grail
hot plate is held by paperclips...
sleek crag
placid grail
hot plate is held by paperclips...
That's pretty normal, especially when using a third party bed. Easier and cheaper than overengineering a solution.
balmy pulsar
yeah thats standard
sleek crag
I still have a Printrbot Play with just the metal bed. I've got a 6 inch wide roll of blue tape and and a whole package of glue sticks. I raft everything, so I don't care what about the bed texture or imperfections, and only print PLA, so I don't need a heated bed.
shy kelp
iron remnant
Oooooooh this sounds exciting, <@456226577798135808>
thank you, this has been very helpful
empty sedge
frail scarab
Guys, my Ender 3 has gone wack and I don't really know what to do anymore! I've ...
There is a lot to check but I don’t have a similar machine to compare to. Can you connect with pronterface/printrun?
 ashen moat
re: TPU with a bowden extruder, it helps to have a low-friction bowden tube, like the Capricorn stuff, and you need a very constrained filament path (no gaps!) between the drive gear and the tube entrance so flexible filament can't kick out sideways. you may need to slow down to 1/2 or 1/3 the print speed of PLA/ABS/PETG so you're not compressing and bunching the flexible filament in the tube. (I like bowden machines and I've done a bunch of TPU on one.)
if you expect to print mostly flexy stuff, and very squishy stuff like ninjaflex, direct drive is probably a better choice.
shy kelp
ashen moat
re: TPU with a bowden extruder, it helps to have a low-friction bowden tube, lik...
thx
cunning hound
Only thing wrong with the paperclips is that the arms are out on the bed, taking up print space. At least pull the arm back!
placid grail
eh I don't have control over it, just a 20$ maker space class on 3d printing had this pic
 ivory scroll
Hi all! Not sure if many folks here do resin, but I just picked up an Elegoo mars 3 pro and have been trying to tune the settings with some Siraya tech blu resin. I found Siraya had tested settings for that machine/resin combo, but I still am getting really messy bottomed prints (see below). All I can guess at this point is that the supports are bad, but I was just using the default Lychee slicer settings. Does this seem like a support issue or something else?
 bronze iron
Could someone create me an 3d peint file?
sacred reef
bronze iron
Could someone create me an 3d peint file?
Of what? https://www.thingiverse.com/thing:4727379/files
(I didn't make it...)

A turtle just for fun. No Supports or Infill needed. Can be scaled.
balmy pulsar
haha

 sacred reef
you want a file that produces that?
id, od thickness? I assume they overlap equally?
bronze iron

Yea i want a file to produce that
I don't have anymore measurements at the moment. That piece and diagram are at home im at work
sacred reef
5" doesn't make the center one overlap the bottom 2 the same. (assuming the bottom 2 are overlapping 1/2")

did u want symmetry more than just the left right mirror?
or:

 copper rose
Is it common and/or reasonable to, in a CAD model of an object, represent the fasteners that hold the object together? I'm trying to use a CAD model as the visual plan for a woodworking collaboration.
sacred reef
It makes sense that you include it. I suppose it depends on your minimalism.
copper rose
nice, thanks. I'm working in OpenSCAD, so it seems like it wouldn't be too much work to make a reusable screw/nail template ("module" in OpenSCAD terminology). I don't need it to be the exact size or appearance of the specific kind of screw or nail, just to indicate there's a fastener there.
sacred reef

GitHub
thread library for OpenSCAD. Contribute to adrianschlatter/threadlib development by creating an account on GitHub.
Or you just want a head? lol
you are the designer. whatever you want.
unless you have rules to follow 😦
I thought you meant hinges etc. Also
copper rose
am noob, no rules 🤘
though explicitly modeling the threads of a screw is definitely overkill for my case lol
I get why it's useful tho
thanks for the link!
sacred reef
coding to creat 3d models. like cli cad
like a nail like icon to represent a thing. Sauder (ikea etc) furniture plans...
 misty gyro
Just throwing my hat in the ring now, but for 3d modelling, I've settled on https://www.tinkercad.com Definite learning curve, but what 3d modelling software won't have that? Nice thing is that I can download an STL file from it, throw that at Cura, and boom: gcode file ready to rock and roll on the printer.
Your actual mileage may, of course, vary. 🙂
sacred reef
you can export plenty of object files from openscad. I feel like most cad are gui and I am not sure of any else like openscad where you HAVE to code.
I use microsoft 3d builder a lot lol it's generic
That's what those images were from
 copper rose
I think a script-based CAD interface will probably suit me better than a point-and-click one. I'm comfortable with programming, and just looking back to how bad I was at platformer games...
misty gyro
I'd probably be able to work in openscad, but it'd be a major gearshift. I do think very "numerically" when working in tinkercad, but I still always have that visual representation of the model to confirm I'm not way off in left field.
The only downside to Tinkercad is it's web based, done by Autocad. Mind you, they've been in business for something like 30 years now, so they're probably not going to vanish any time soon. The nice thing is that undo and redo persist across sessions on the same model. That can be a huge plus occasionally.
sacred reef
opencad exports You can "see" the math with code. I feel that it is best to have as many tools as you need.
copper rose
for me, the ability to comment and version-control the source file is a big plus
sure you can version control an STL, but the diffs are not as useful
misty gyro
Yep. More tools are always good. That why we have C/C++, Java, Python, Javascript, Lua, Groovy, Rust, ... Each of those has its place, so you can just about always find the correct tool for the job.
sacred reef
@bronze iron what file format do you want? stl, 3mf, obj?
Do you have a slicer? What printer is it for?
bronze iron
@sacred reef stl
Im just having someone from eBay do it i dont have a 3d printer
The 2nd one you made up
What program you use to draw them up?
bronze iron
If you print that will it make the 3 circles together or be layered seperate? Sorry if that's a dumb Q
sacred reef
Shoot sorry
Glad you caught that. Yes. Now I am at work and don't have any cad. Let me look. Technically whoever prints it has to slice it and theoretically if they have them placed that way, the slicing will merge them. But it should have been merged before. Let me see what I can do from here. Lol
bronze iron
No hurry you can do it later
sacred reef
maybe you can do it. what os do you use?
i can't install things on work computers...
random urchin
I think this gets what you want. OpenSCAD source included in case you need to play with the dimensions.
Top to bottom measurement came out to 127.72mm (5.02"). Hopefully close enough.
sacred reef
that sounds wrong then
i don't have openscad to play with. maybe 359 should be 240? but I know my first image was when I used the 5" to center the third ring. I had a gap between the id of more than the 1/2" when I moved it down to fit, it was obviously less
I like how you converted to metric first lol
maybe the .6 instead of .625 was something?
I only double checked the math on "id" I swear...
random urchin
Yeah, OpenSCAD is all millimeters. 😄
sacred reef
your example seems simple and to the point. I like the rotation. makes sense that would be the right way to do it. I plotted it on x/y
you defined a w, but I don't see it used.
why did you use h*3 to remove the core? just random > 1 to ensure you don't leave a "skin" behind?
random urchin
I imported your model and mine into PrusaSlicer. They virtually overlap. Nearly identical. Not bad, considering the completely different approaches. 🙂
 random urchin
sacred reef
why did you use h*3 to remove the core? just random > 1 to ensure you don't lea...
random urchin
sacred reef
why did you use h*3 to remove the core? just random > 1 to ensure you don't lea...
General rule of thumb I used when subtracting cylinders in OpenSCAD. I triple the height, then center vertically. Ends up with 1.5x the height below an .5 above. Avoids weird edge conditions.
sacred reef
i hate those
random urchin
sacred reef
you defined a w, but I don't see it used.
Yeah, w was the 5" shown on the diagram. I briefly created a 5x5" box to see if the set of rings matched that dimension. If not, I was going to adjust the offset value until they did.
sacred reef
but the way the drawing is was with 5" (< 5" actually though) on a certain line of symmetry the other axis would have been 5.25"
so i had to ask Pythagarus what my y was for the center ring
sacred reef
my right ring was centered at 0,0
my left ring was -(15/8 + 4/8), 0
and so the center of the third ring was simply:
1/2 * -(15/8 + 4/8), sqrt((19/8)^2-(19/16)^2)
lol
random urchin
I took the outer diameter of each as the inner diameter plus twice the band width, assumed the rings met in the middle at the radius of the rings, then assumed rotational symmetry.
sacred reef
I liked your way. I thought it was self explanitory.
I don't have a rotate function other than rotating an object or group of objects by their center point.
or I can not change the point by which I can rotate things?
I didn't use openscad ok? This is a perfect example of knowing how to use the right tool
lol
but seriously, should your 359 be 240?
cuz the picture you showed looks right
random urchin
OpenSCAD is great for creating engineering type stuff. Not so good for artistic things.
sacred reef
good choice of words
yeah try blender
that would be another dedicated channel. graphic arts
random urchin
sacred reef
but seriously, should your 359 be 240?
Yeah, 240 would've worked. I just type 359 out of habit. Basically, "keep rotating by the increment until just short of a full circle". 🤷
Since 360 would've been the next rotation, it stopped at 240. Just me being too lazy to type in the correct end value.
sacred reef
but isn't 359 360-1 and 360 is 0? there was 0, then 1/3 turn for the 120.
oh ok
yeah
that argument is for how many degrees it turns? then the third one says for how long? wait I will just go read documentation real quick.
random urchin
I've got this bookmarked: https://openscad.org/cheatsheet/ 😄
sacred reef
thats where i am. what does rotate([0,0,359]) do?
Are you punking me?
lol
i am not sure how it would have known to stop at 240.
sorry I like feeling dumb though. It makes me know that means I am soon to be gaining knowledge
random urchin
Oh! It never gets as far as 359. It does 0, then adds 120 to get 120, adds another 120 to get 240. Then, when it adds the next 120, it's 360, which is past the end, so it stops executing.
sacred reef
it always spins whatever around 0,0,0 unless you specify an alternative vector
why does it add 120 each time? I thought the values are iterating each one at a time?
rotate([0,0,0])
rotate([0,0,120])
rotate([0,0,359])
random urchin
Yeah, it rotates around the origin, but you can do arbitrary rotations by combining translate and rotate.
sacred reef
from the for loop
random urchin
The for loop statement contains [start, increment, max]. So, start at "start", keep adding "increment" until you hit less than or equal to "max".
sacred reef
unfortunately I must leave to do works. I will be back...
Oh good to know. that is exactly as I suspected and I asked if that's how it was. I did not notice that syntax. There are quite a few formats of rotate. cool thank you for the tutorial 😉
random urchin
So for(x=[5:5:24]) would do 5,10,15,20 then stop.
sacred reef
Yes. I figured it had to be that way for your picture to match
glad to know I wasn't going crazy
strange ledge
random urchin
Oh! It never gets as far as 359. It does 0, then adds 120 to get 120, adds anoth...
That makes no sense to me at all..
I mean, sure.. I can maths, but I can't fathom the ... Logic?
sacred reef
strange ledge
That makes no sense to me at all..
this is the key: [start, increment, max]
random urchin
strange ledge
That makes no sense to me at all..
Yeah, OpenSCAD is quirky at best.
strange ledge
But why would it assert that 359=3*120?
sacred reef
because you can create a spiral by rotating a thing for many times that of 360 and change a different axis nibbles extra
he could have said anything between 240 and 359
honestly the last number could be as big as you have room to overlap objects... after 360, they would just be placed inside each other
random urchin
True. I could've said [0:120:240] or [0:120:359.999] and it would've executed the same way.
sacred reef
so it starts at a value. iterates over the next value until it gets to the other value.
strange ledge
Is that some arbitrary limitation, or.. ?
sacred reef
you could have said 0:120:720. having 6 rings before the union would still be the same object.
That almost is how the $fn works
strange ledge
Can't it be incremented by 1... or.. 1.29735 ?
Seems odd to have a specific limitation of 120.
strange ledge
So you've set a restriction for $reason?
random urchin
The second value specifies the increment. So, yeah, you can increment by any value you want. If I wanted 7 values from 0 to 100, I could do for(j=[0:100/7:100])
sacred reef
you say restriction. we are defining the degrees of rotation for each iteration.
random urchin
I should've just put [0:120:240] in the original source, shouldn't I? 🤣
sacred reef
No! this was more valuable than that.
I felt like I understood, then I realized I was assuming, then I second guessed myself.
random urchin
And, yeah, one of the problems is that a lot of things in OpenSCAD that aren't vectors are written as if they are. It's kind of annoying. I mean, for(i=[1:3:28]) could've just been for(i=1,3,28) and been more readable.
...and sometimes the delimiter is , and sometimes : and it's not very intuitive when you use which.
sacred reef
I may have seen colons and assumed commas. I wasn't familiar with that format, but I could tell it would have made the math work.
 high path
Anyone know where I can find 1760mm GT2 closed loop belt that is 6mm wide? Can't find anyone selling this size.
sacred reef
sounds long and specific for a closed loop...
high path
well that's what I need 🙂
sacred reef
I see nothing with 580 teeth or 1160. 1140 seems to be the spot then the next popular is 1220
is this custom or replacement?
sacred reef
2 teeth off so close: https://www.mcmaster.com/7947K764
high path
sacred reef
2 teeth off so close: https://www.mcmaster.com/7947K764
This is not even close, I need 1760mm outside diameter.
And I need GT2
sacred reef
1760 i thought u said 1160 oopsie
that is 2 mm pitch by 6mm it would have worked I think
now it sounds even longer lol I may have seen one that was 2000
random urchin
Might have to resort to splicing something together out of something like this. https://www.amazon.com/Upgrade-Non-Slip-Version-Printer-Printers/dp/B08R93QQ8Z

5M GT2 Timing Belt, Upgrade Non-Slip Version, Width 6mm, Fit for 3D Printer and Most Belt Driven Printers
bronze iron
So who has the correct model?
random urchin
No idea. I'd say, grab both. Print the first couple layers of each and see which is the closer match.
Not sure how precise the model needs to be. Depends a lot on its purpose.
balmy pulsar
high path
This is not even close, I need 1760mm outside diameter.
try misumi. they sell some more unique items
high path
balmy pulsar
try misumi. they sell some more unique items
Already did, they barely go up to 1,000mm 😦
balmy pulsar
no custom?
sacred reef
Steve's is right. mine was separated remember.
bronze iron
I dont have a 3d printer
sacred reef
you did say that.
random urchin
Ugh. That makes things more complicated. I think I could dial it in a bit with 2 more measurements:
A - the widest part of each ring
B - the distance from the center of the part to the outside of a ring
Both can be inferred, but I'd rather be sure.

BTW, is they happen to be exactly the same value, that makes the calculations much easier.
strange ledge
random urchin
Ugh. That makes things more complicated. I think I could dial it in a bit with 2...
Praise be to Grandfather Nurgle! 😅
bronze iron
@random urchin A. 2 7/8 and B 2 3/4
random urchin
Based on that, I think @sacred reef's model is correct.
sacred reef
bronze iron
The 2nd one you made up
something must have been deleted about. I don't see anything between 4:13am and 2:54pm my time.
remember when you said this? that means the 5" is not correct. Steve's and my second are identical (should be) just rotated. And in those two versions of ours A = B
are you saying the 5" is true?
if so, what is the other length (perpendicular)
oh maybe the difference wasn't a lot and it just looks like 5...
bronze iron
Its hard to measure it with the circular shape so I just took a tape measure and measured the top to the where bottom circles end at for 5"
random urchin
Here are the two STL files. I corrected mine with the updated info. They look to be identical now.
bronze iron
Alright
random urchin
In both cases, the 5" dimension comes out to ~4.93". Close enough.
sacred reef
no problem