#3d-modeling
1 messages · Page 124 of 1
 calm goblet
teaching good practices
if people don't at least want to learn the basics of how to do it properly i'm not gonna tell them how to do it badly
they can find plenty of that just googling "vrchat avatar tutorial"
 devout scroll
Well that's fair
devout scroll
Read a book on anatomy, one on topology, one on rigging and one on animation for good measure
calm goblet
grant abbitt has some good character modelling and sculpting tutorials
 spiral sigil
on a serious note do you happen to know a good resource on human anatomy
calm goblet
devout scroll
Read a book on anatomy, one on topology, one on rigging and one on animation for...
read a book? nah you gotta practice
spiral sigil
all I have found is whatever is on lobrary gensis
calm goblet
spiral sigil
on a serious note do you happen to know a good resource on human anatomy
anatomy for sculptors ebook
and practice
spiral sigil
ok swick
devout scroll
Read a book on how practice efficiently
calm goblet
always use photos of actual humans in your references
spiral sigil
yes practice i dont want to be reliant on references after a while
calm goblet
always use references!!!!!!!!
spiral sigil
ou
calm goblet
doesn't matter if you've been doing it 3 weeks 3 years or 3 centuaries
 tulip condor
welcome to 2022 yey 😏
 azure rain
it's not 2022 for another 12 days
spiral sigil
death
spiral sigil
azure rain
it's not 2022 for another 12 days
timezones: good evening

 rain fjord
having problems with my lighting, tried removing ngons but it didn't work


 median pike
What's the best way to do skirts in vrc? Is the cloth component the way to go or dynamic bones?
 languid fog
@dapper herald don't do advertising here buddy.
languid fog
median pike
What's the best way to do skirts in vrc? Is the cloth component the way to go or...
you mean doing a skirt or making the physic?
median pike
That's not true
azure rain
the cloth component
median pike
You can use the cloth component
Just wondering which one do you guys prefer and why
I tried skirts with dynamic bones but even with colliders my legs still slip trough when sitting
Maybe a combination of constraints and dynamic bones?
I am guessing avatar dynamics will make this trivial but for the time being I need a solution
devout scroll
Shorter skirts can usually get away with weight paint on the legs and some dynamic bones
But constraints might be better if you don't want to ruin your skirt wrights
spiral sigil
AhaHh human models are hard
half the work is telling myself its not going to be perfect first time around and not letting it slow me down
if I have an entire arm should I make the chest from where the arm starts or no because i feel like that would be really clunky especially for someone who never done this
where ideally would i start polymodelling the chest?
spiral sigil
actually it took me 3-2 days or one to get to where i am today. ive obviously improved alot but it took 2-3 days for all this "skill"
calm goblet
spiral sigil
actually it took me 3-2 days or one to get to where i am today. ive obviously im...
you mean using a generator to create abominations 😛
calm goblet
spiral sigil
where ideally would i start polymodelling the chest?
if you're polymodelling i'd have started with the torso first, not the arm, but you can always start it as a block and fuse the arm later
personally i think polymodelling is the less efficient way to go for characters, even if you're going anime/stylized, but there's plenty of people who'd argue the other way lol
 foggy granite
calm goblet
personally i think polymodelling is the less efficient way to go for characters,...
foggy granite
calm goblet
personally i think polymodelling is the less efficient way to go for characters,...
I say both is good in there own way but the true legends take advantage of both
calm goblet
foggy granite
I say both is good in there own way but the true legends take advantage of both
for what they're suited to, sure
polymodelling is fine for making little hard surface bits, starting to block out some accessories maybe
foggy granite
I agree with that
But poly allow you block out shapes quickly then you can use sculpting to refine the shapes so you don’t have to retopo
spiral sigil
calm goblet
personally i think polymodelling is the less efficient way to go for characters,...
ok got it, and I will eventually get to sculpting but for now im going to stick with polymoddeling
foggy granite
spiral sigil
ok got it, and I will eventually get to sculpting but for now im going to stick ...
I say start using sculpting tool to refine some of shapes once you got a decently dense mesh to help speed up the process since you can edit multiple verts pretty fluidly
spiral sigil
that is true since w polymoddeling im kinda stuck with whatever i can do with proportional editing
calm goblet
foggy granite
But poly allow you block out shapes quickly then you can use sculpting to refine...
the problem with that is that when you polymodel and fix with sculpting after you're most likely gonna change the topology enough that you have to go back and fix your original topology anyway
devout scroll
you can always do both
i think multires allows for that but i never really tried using it
calm goblet
and specially when you subD model and you start adding creases and support loops to make shapes you're sompletely ruining the topology no matter what you do
calm goblet
devout scroll
i think multires allows for that but i never really tried using it
multires is for when you sculpt a blockout, retopo it and then continue sculpting for detail
spiral sigil
is there even difference between what subdivision surface and multires does
foggy granite
Yes
calm goblet
big difference
multires is just a subdivision level for your sculpting
it's real subdivisions
devout scroll
doesn't multires allow you to basically keep both low and high poly
foggy granite
Yeah
calm goblet
subdivision surface is dynamic subdivision, you can't edit the subdivided polygons only the original ones
devout scroll
so you can sculpt details
foggy granite
Then bake em
spiral sigil
OH so you have to use multires if you want to sculpt the subdivided geometry
foggy granite
Yeah
spiral sigil
and then you can roll it back to low poly
calm goblet
yeah, multires is so you can have subdivision levels while sculpting
you can do details on a high level, you can make proportional changes on lower levels
spiral sigil
did I miss anything horribly obvious in terms of shape or am I ok on that front for now


last question for a bit
calm goblet
all this zigzagging uneven shit, serves no purpose at all, having the hand completely detached also serves no purpose

the thumb appeard to be very square from that screenshot, and the rest of the arm seems a bit flat as well
ideally you should be aiming for nice even topology and shapes that match the anatomy of the character you're making
spiral sigil
another big problem probably has to do with me not having 1 single character im basing this off of
azure rain
https://i.gyazo.com/3fb9f7777e22368836751d76bc73fed9.png also noticed you had lines that go nowhere even though you had like triangles to do a converting 2 into 1
 azure rain
spiral sigil
another big problem probably has to do with me not having 1 single character im ...
azure rain
spiral sigil
another big problem probably has to do with me not having 1 single character im ...
then you would want to gather General anatomical reference
spiral sigil
I copied that weird triangle thing from a model I was looking at and im not exactly sure its purpose
calm goblet
also download daz studio to study the topology of the genesis 8 models
it's good topology
not perfect but it's good
spiral sigil
i will look at that then i like that idea
calm goblet
but perfect topology is defferent for everyone
azure rain
spiral sigil
I copied that weird triangle thing from a model I was looking at and im not exac...
like the way you have it currently the triangle is not serving its purpose
spiral sigil
oooops
calm goblet
you don't even need the triangle there, you're using all the loops
azure rain
like that might serve some purpose if you actually had your wrist and hand properly connected but you currently don't at the moment
calm goblet
like rain and i said, get some anatomy references, get daz studio and use those models as topology references
then you'll have a bit of an easier time putting together your base
spiral sigil
im going to be doing that since I like looking at other models who already have it done
calm goblet
eventually you'll come up with your own methods as you get more used to rigging and animating
but you'll have the same base
the differences will be in how you account for muscles and bones in your topology
 surreal flame
Something I feel people forget: You can be your own 100% realistic reference - why look online for hands when you have two of those?
calm goblet
surreal flame
Something I feel people forget: You can be your own 100% realistic reference - w...
do your hands have a wireframe?
spiral sigil
that and im also skinny
calm goblet
maybe you want to make the hands of a north sea fisherman, or a dainty princess, you need hand refs suited to those types of characters
surreal flame
Not bad. But I'm referring to the shape.
calm goblet
on the upside, you learning as a kid you'll already have some solid skills by the time you wanna actually make some money
spiral sigil
thats the plan
languid fog
spiral sigil
that is true since w polymoddeling im kinda stuck with whatever i can do with pr...
Use inflate, grab and etc
This tools will help you
A lot
You can do more organic shapes with it
spiral sigil
okay
languid fog
spiral sigil
I copied that weird triangle thing from a model I was looking at and im not exac...
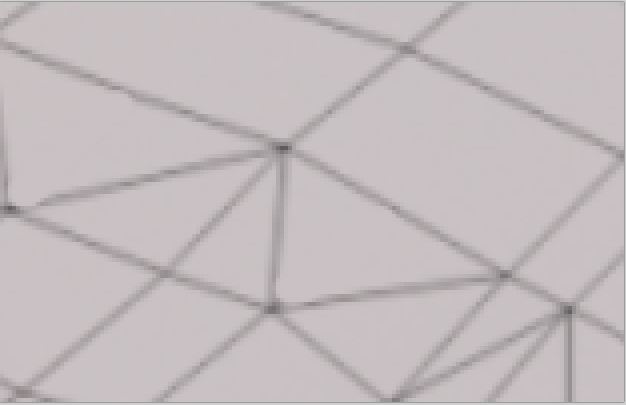
Thats a ngon 
I dont think you would like to have ngons there
 spiral sigil
calm goblet
you mean using a generator to create abominations 😛
spiral sigil
calm goblet
you mean using a generator to create abominations 😛
its more than just a generator
i do alot to those "abominations"
 tame sinew
https://gyazo.com/a9a0d429cd7830ecb85d8ed4371ae6a2
How do I fix these polys and make them all flat and regular?
 spiral sigil
can someone put my model in vrchat?
spiral sigil
spiral sigil
can someone put my model in vrchat?
Watch these official VRChat videos on how to do it yourself: https://www.youtube.com/watch?v=xjS8rreIMos https://www.youtube.com/watch?v=rRAnDMUbWt8

Part 2: https://www.youtube.com/watch?v=rRAnDMUbWt8
0:00 - Intro
0:23 - What You'll Need
1:26 - Installing Software
2:26 - Get the VRChat SDK
2:53 - Make a Unity 3D Project
3:26 - Import the SDK
Link [1]: (Example Avatar Files) https://assets.vrchat.com/misc/Tutorial_Avatar_Robot_v1.zip
Link [2]: (How to merge Steam / Oculus / Viveport accoun...
Part 1: https://www.youtube.com/watch?v=xjS8rreIMos
00:00 - Intro
00:19 - Importing Your Avatar: UnityPackage Import
00:42 - Importing Your Avatar: FBX Import
01:20 - Importing Your Avatar: FBX Rig Configuration
02:23 - Importing Your Avatar: FBX Material Setup
03:56 - Avatar Descriptor
04:25 - Avatar Descriptor: View Position
04:45 - Avatar De...
spiral sigil
tame sinew
https://gyazo.com/a9a0d429cd7830ecb85d8ed4371ae6a2
How do I fix these polys and ...
if you are talking about the hard corners you are seeing, you can shade your object smooth instead of flat. So youd just right click on your mesh in edit mode and select shade smooth and then import to unity and it should be better
this is done in blender btw
tame sinew
spiral sigil
if you are talking about the hard corners you are seeing, you can shade your obj...
That didn't work...
spiral sigil
tame sinew
That didn't work...
you should probably add some more geometry to it anyway
dont go overboard
just enough so that yknow its actually decently smooth
curious to see what its looks like in unity w smooth shading to make sure ye did it right
tame sinew
https://gyazo.com/1e9c69ef7c9bcf5b7d1dae93089d9151
Looks the exact same...
 spiral sigil
how are the normals on that thing? they look scuffed i think its the normals that cause that
 tame sinew
Honestly I have no idea
I had to manipulate the normals and geometry on this so much. Originally the back there didn't exist
 quaint jasper
if it's just hard surface without bevels, could all be flat shaded in the first place
spiral sigil
pog
tame sinew
https://gyazo.com/c7103e02e026ed35c316762f6e854629
Much better!
 spiral sigil
any specific reason they dont do the knuckle flow on the bend for the distal part of the finger (did I ask that right?)

 proven creek
I’m making a Marinette model for my avatar and having trouble finding a good outline node
spiral sigil
heres how all my avis start. Im making tuv. a darkweb spooky youtuber
 spiral sigil
heres how all my avis start. Im making tuv. **a darkweb spooky youtuber**
spiral sigil
spiral sigil
heres how all my avis start. Im making tuv. **a darkweb spooky youtuber**
thats not sog
who else makes darkweb spooky videos
spiral sigil
spiral sigil
who else makes darkweb spooky videos
whatchu mean
some ordinary gamers
sog
his 200 part series on youtube on the dark web
ive already made a model of him
ooh
 wicked iris
showing this, because I'm glad the underarm is poking out like a sharkteeth whenever the arms are out wide
 spiral sigil
i dont thonk elbows are supposed to be able to bend up like that uuhh
not when your arm is straight out at least
 cosmic tulip
not sure what you mean, that looks normal to me
cosmic tulip
spiral sigil
i dont thonk elbows are supposed to be able to bend up like that uuhh
are you not able to bend your arm forward when you outstretch your arm?
or are you referring to the armor the character is wearing?
spiral sigil
cosmic tulip
are you not able to bend your arm forward when you outstretch your arm?
up not forward
without the prt of the arm closer to the shoulder dipping
or wait mahbe you can but you have to force it with your shoulder and it feels a little odd
but since their palm is facing the ground its har
cosmic tulip
perhaps im misunderstanding something but i can perform both forward and up at about the angle seen in the screencap
also its worth mentioning the angle of the armor probably exaggerates the direction of the bend
spiral sigil
probably
calm goblet
spiral sigil
heres how all my avis start. Im making tuv. **a darkweb spooky youtuber**
you got an example of a finished one?
spiral sigil
calm goblet
you got an example of a finished one?
colors arnt 100% rn but heres an example
 calm goblet
any better images? can't really see shit on such a tiny screenshot
calm goblet
or just screenshot close enough that the face isn't a minecraft skin
spiral sigil
calm goblet
or just screenshot close enough that the face isn't a minecraft skin
its discords shitty image compression. this is close enough
 calm goblet
spiral sigil
its discords shitty image compression. this is close enough
calm goblet
spiral sigil
its discords shitty image compression. this is close enough
are you planning to do anything else with it? looks like a cardboard cutout atm
spiral sigil
calm goblet
are you planning to do anything else with it? looks like a cardboard cutout atm
wdym
calm goblet
it looks like you took a photo and stuck it to a mesh
spiral sigil
calm goblet
it looks like you took a photo and stuck it to a mesh
thats how the generator works
calm goblet
that's why i asked if you were gonna do anything with it
you know, something to make it look good
spiral sigil
what is there to do to it
calm goblet
you don't see a problem with that as it is?
spiral sigil
nope
azure rain
your avatar is going to look very silly in any lighting because you have all the lighting built-in because you took a photo
calm goblet
it's not even the lighting
you don't have separate hair, clothes, eyes, interior of the mouth, no normal map, no specularity, no SSS, and the fact that you ran a generator on a clearly fairly low res image means you have zero details
spiral sigil
interior?
 spiral sigil
calm goblet
you don't have separate hair, clothes, eyes, interior of the mouth, no normal ma...
spiral sigil
calm goblet
you don't have separate hair, clothes, eyes, interior of the mouth, no normal ma...
i can make a normal map
azure rain
spiral sigil
i can make a normal map
from what
calm goblet
spiral sigil
i can make a normal map
that isn't gonna help the fact that you have really blown out albedo and nothing else, you have no details you have no shapes in the mesh and nothing's separated out as it should be
 calm goblet
and it's a shit map
spiral sigil
calm goblet
that isn't gonna help the fact that you have really blown out albedo and nothing...
i make these for fun g i aint tryna be the best 3d artist there is
calm goblet
you're not a 3d artist at all if that's all you're doing
clicking "generate" on an app doesn't make you an artist
azure rain
and I'm wondering why the heck that tool generate a UV map with two faces in it
and that is also a lot of wasted space
calm goblet
you'd honestly be better off using something like daz or iclone
then learning how to reproject the textures so you can get them on a single UV map instead of having 8 tiles for just the body
languid fog
spiral sigil
colors arnt 100% rn but heres an example
can you show a wireframe view of the cloth ?
 languid fog
ic
spiral sigil
languid fog
ic
wut
azure rain
could you take a screenshot just showing the face in wireframe as it's so dense we can't see anything in that screenshot
spiral sigil
azure rain
could you take a screenshot just showing the face in wireframe as it's so dense ...
like this?

 azure rain
question did you just photogrammetry your head
because that is a bunch of triangles soup that's not going to animate good
spiral sigil
azure rain
question did you just photogrammetry your head
i have no idea what that means
azure rain
how did you make the head in the first place
spiral sigil
azure rain
how did you make the head in the first place
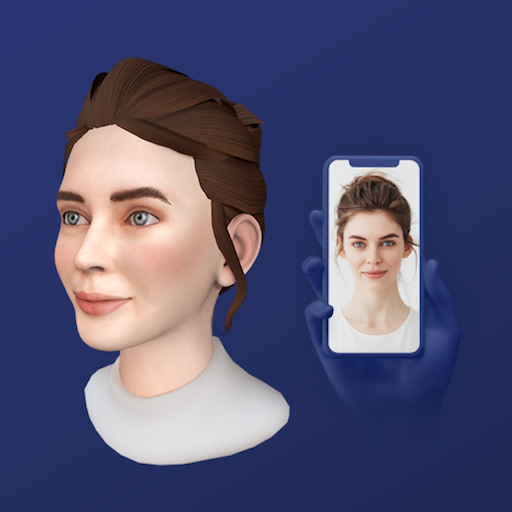
Avatar SDK
Avatar SDK is an advanced avatar creation toolkit that uses AI to create photorealistic 3D avatars from selfie photos.
azure rain
I'm surprised the tool generated topology like that
spiral sigil
azure rain
because that is a bunch of triangles soup that's not going to animate good
r u saying the shape keys wont be good?

 spiral sigil
azure rain
I'm surprised the tool generated topology like that
spiral sigil
azure rain
I'm surprised the tool generated topology like that
i also decimated it
azure rain
oh dear no wonder it's triangle soup
spiral sigil
 azure rain
oh dear
spiral sigil
heres what the normal unedited head looks like

 azure rain
the heck wow this tool does not generate good avatars
spiral sigil
azure rain
the heck wow this tool does not generate good avatars
its for covid businesses i think something like that
i just use it for my shitty avatars
azure rain
I might suggest trying a different tool next time
spiral sigil
azure rain
I might suggest trying a different tool next time
i use to use character creator 3
but its not that good imo
azure rain
hopefully it doesn't generate Dreadful topology character creator 3
spiral sigil

 fast nebula
curious if anyone here knows much or could teach me about asset/cloth creation. I just watched a couple vids but when i try and play the animation it the cloth crumbles on the base in blender. would anyone be able to run me through sewing and cloth creation pleaseeeeee
azure rain
spiral sigil
oh dear they're using a gear VR in that screenshot
 vivid crater
spiral sigil
i just use what abyssalgod cyberchimp and lolathon etc use
azure rain
not familiar with either of those people
spiral sigil
azure rain
not familiar with either of those people

YouTube
Welcome to the worst channel on the YouTubes
-------------------------------------------------------------------------------------
Frequently asked questions:
Q: Who inspired you to make videos? A: OfficialNerdCubed, Chuggaaconroy, GameGrumps, UberHaxorNova, H2O Delirious & Vash12349
Q: Where are you from? A: England.
Q: How old are you...

 spiral sigil
i think you should choose someone you really like to make a person, and make it a big project to somehow make it more realistic
I think it should be markiplier but yknow its your choice
@spiral sigil


 azure rain
8K isn't going to help if all it has is a smaller than 8K photo to work with
and does help that Markiplier's eyes don't look like he has a case of pink eye
spiral sigil
 calm goblet
azure rain
the heck wow this tool does not generate good avatars
calm goblet
azure rain
the heck wow this tool does not generate good avatars
you're seriously confused about why an online free tool that uses a single photo doesn't make a good model?
calm goblet
low res photos don't give eny info to work from
and these tools aren't meant for quality anyway, they're gimmicks
quaint jasper
spiral sigil
8K textures
8K doesn't matter if it looks like a PS2 game, should never go above 4K in general
spiral sigil
8k because funny haha
calm goblet
even if you're doing a proper photoscan there's a lot of manual work that goes into cleaning it up and refining it, making the textures actually work, then getting it into a form you can use
calm goblet
that's part 1 of the cleanup 😛
spiral sigil
poop
calm goblet
you also need to remove lighting from the skin so it's usable, you need to go in and add fine skin detail/remove glitches, gotta make the hair etc.
spiral sigil
anything to make lord markiplier king of fnaf
markiplier is glamrock freddy secretly
thats the lore
spiral sigil
spiral sigil
so dialated
cuz i make the eyes i got some "advice" from abyssalgod so
they were probably under the impression you wanted the character to be as uncanny as possible
i make mine just like theirs
calm goblet
using that generator? it's gonna be as uncanny as possible no matter what you do
spiral sigil
calm goblet
using that generator? it's gonna be as uncanny as possible no matter what you do
he uses it and no one says anything
calm goblet
who?
calm goblet
no idea who that is
spiral sigil
and lolathon
whats their socccials do they ever post their creations

That one imp from @VRChat with the memes | I make weird 3D models | Switzerland's first VR content creator & streamer | baaa~ 🐐
Tweets
4737
Followers
1064
 Twitter

VRChat Memer/Cursed Avi Maker | @Twitch Partner | Whiskateer Member
(YT) https://t.co/LoY1sfeU9b
(TTV) https://t.co/oS5Wr7MspZ
(Discord) https://t.co/qOF5PWMvJD
Tweets
4004
Followers
7672
Twitter
calm goblet
but if they're using that, their models will also look uncanny as hell
spiral sigil
Memer/Cursed Avi Maker

Twitch Partner and YouTuber with a main focus on Virtual reality http://youtube.com/VRlolathon
Tweets
5047
Followers
48530
Twitter
calm goblet
intentionally making bad avatars lol
spiral sigil
***I make weird 3D models ***
yeah and abyssal does like funny moments vrchat videos so
it makes sense
calm goblet
they probably saw the generator and thought "holy crap this thing takes so much work out of making dodgy ass uncanny abominations!"
spiral sigil
I think u should try taking serious time to learn how to make actual realistic huumans
spiral sigil
spiral sigil
I think u should try taking serious time to learn how to make actual realistic h...
im not doing this to become famous and be the best i just do it for fun
if its just for fun then you can do whatever buttt i think u should go some more in depth
just for funnn
calm goblet
just don't expect to make anything that looks good unless you're willing to put some effort in

 inner quarry
Hey uhh
anyone willing to rig a model for me
I already have the .obj
hopefully with textures
i haven't unzipped it yet
yea
it's there
but I need someone to rig it
and pop it into VRChat itself
simply because my stinky intel celeron can't hold unity
quaint jasper
inner quarry
anyone willing to rig a model for me
Try mixamo
inner quarry
kk
 young quail
Guys, hello everyone, I made a 3D motion style fan video for Quest 2 glasses here, please rate it!
- not advertising. I'm really interested to hear the opinion🙋♂️
https://www.instagram.com/ne.motion/tv/CXlwCpalzzk/?utm_medium=copy_link
 teal raft
Can someone let me know if this is possible, and if so, how? I downloaded this .glb and every single piece is separate. I have no problem taking the time to combine all the pieces to my liking, but what's annoying is that all the meshes are sub objects of these... coordinates? Is there a way to ditch the coordinates and leave the raw mesh behind?

 quaint jasper
teal raft
Can someone let me know if this is possible, and if so, how? I downloaded this ....
quaint jasper
teal raft
Can someone let me know if this is possible, and if so, how? I downloaded this ....
ctrl + J all the pieces, you'll be left with a single mesh, then select one empty transform object Shift + G > Type, that should select all the empty objects, feel free to delete those, then you can select your mesh, switch to edit mode, select everything and do P > By Loose Parts
teal raft
quaint jasper
ctrl + J all the pieces, you'll be left with a single mesh, then select one empt...
Thank you!
 quick bough
Is there any way to up the scale of an avatar in unity without affecting its size in game?
 unkempt anchor
Start of my a e s t h e t i c quest world
 spiral sigil
very dark
BUT an opportunity to make a faint point light follow each player!
or hang up spoopy dim lights
unkempt anchor
Yeah this is like still super early blockout phase, once i start adding signs and more light sources ill brighten it
this is where you "land" the subway station
you then work your way through the underground metro through some super weird spots and then up into some other areas
etc etc
 spiral sigil
OHH you were the one who posted the subway station thing earlier
its all coming togetheR
 spiral sigil
unkempt anchor
etc etc
spiral sigil
unkempt anchor
etc etc
wait is this a render or a reference?!?
unkempt anchor
reference!
spiral sigil
oh ok i was about to be worried for the questies
unkempt anchor
i should be able get very close minus the reflections
yeah im a technical artist/environment artist by trade
spiral sigil
ive heard reflection probes are good for this but i have literally never done much more than using a directional light for my obscrure worlds so
unkempt anchor
so im going to use trim sheets, and a lot of other optimization techniques to keep it very performant
spiral sigil
unkempt anchor
yeah im a technical artist/environment artist by trade
that is very epic
azure rain
unkempt anchor
so im going to use trim sheets, and a lot of other optimization techniques to ke...
very nice
unkempt anchor
can also keep it very low poly and combined for the most part too

super low batches, as opposed to kitbashing a bunch of assets in engine
azure rain
nice
 thin shadow
unkempt anchor
can also keep it very low poly and combined for the most part too
thin shadow
unkempt anchor
can also keep it very low poly and combined for the most part too
do you have any tips on the best practice on how to navigate and pan through closed space in blender? I know in unity you can hold right click on the game scene and use wasd + qe to move around which is very intuitive for navigating through closed spaces.
but in blender, the navigation style feels more orbit-around-the-object-oriented. Quite difficult to navigate through closed space.
unkempt anchor
thin shadow
do you have any tips on the best practice on how to navigate and pan through clo...
Yeah that’s just how movement is in modeling packages, I’d say just embrace it and get used to it. There should be a focalization hot key like in unity or may (f key) that helps you get to where you want to be and use the navigation to adjust yourself
I take it you want to do this to get better perspective from a player and for that it’s important you use scale reference
I always model in centimeters
And I make several cube references, that are 180cm tall, like an average person
For stairs and rails, etc I always look up proper size references and model to scal
spiral sigil
the focus key in Blender is the period ke on my numpad
and if u have num lock on or off it can affect it
idk if it works when its on or off i just toggle num lock till it works
 tropic zenith
Hello, does anyone here have the same character and different avatars for different clothes and haircuts? Do you use different blender projects? How are your things structured and is there a proper term so I can search it?
inner quarry
Can someone help me import a funny boy into vrchat
I would do it myself if intel celeron came with more than 10 gigs
DM me if you could do it 👉 😎 👉
(I do not have money)
 gritty gull
Not sure if this is the correct channel or not, but I've made a texture for a model in blender, imported both the texture and model to unity, and am now having trouble applying the texture. It just simply won't let me. I'm super super new to blender and unity so please bare with me :')
spiral sigil
gritty gull
Not sure if this is the correct channel or not, but I've made a texture for a mo...
are the materials greyed out and you cant change any of the settings for them?
gritty gull
Yup
 gritty gull
Alright I have another question, was trying to optimize my avatar and now it's saying there's no "Animator" attached to a game object and a script is trying to access it, and my builder tab in the SDK is empty
 spiral sigil
gritty gull
spiral sigil
gritty gull
put an animator component on the gameobject that holds ALL the contents of your avatar
its going to be the same gameobject that would have the Avatar Descriptor on it
asusming you put it on the right thing
gritty gull
ahh got it
uploaded it, and nothing works LOL
it is completely immobile, arms and legs dont move, no expressions or mouth movement
gritty gull
nope :')
spiral sigil
 spiral sigil
ok
spiral sigil
it means u didnt download the android target support module
unity tries to switch to it but u dont have it
do u have unity hub by chance
gritty gull
yep
spiral sigil
ok so
go to the installs section
find your unity ver 2019.4.31
and click the 3 dots and do add module
and find the android module
spiral sigil
np
spiral sigil
making mr bean. textured the suit n stuff looks pretty cool ngl


mr bean is female?
nope
surreal flame
That's a pretty bad texture stretch on the shoulder.
 solar fossil
when in doubt, blur slope
spiral sigil
jooooeee BIDEEN
 tropic zenith
Hello, is it possible to use the move/rotate/scale tools with weight paint? As if there was a bone? I'm trying to make shape keys for mouth movements.
devout scroll
You could just create a bone, make the shape keys then remove the bone
That's basically what you're describing
@tropic zenith
tropic zenith
To move the bone I'd need to go into pose mode. When I go back to the mesh's edit mode, it snaps back to resting position.
devout scroll
Apply the armature modifier as a shape key
Or well, applying will create a shape key with your pose mode changes as the shape key essentially, but will also remove the modifier
so use save modifier as shape key instead which will do the same thing but keep the modifier

Your modifiers might look different since I have an addon but there should be a button for it
And also if you click this it will allow you to show your armature modifier (pose mode changes) in edit mode
 tropic zenith
That worked, thanks!
calm goblet
devout scroll
so use save modifier as shape key instead which will do the same thing but keep ...
i didn't know that was even a thing, gonna have to use that in future for simple things like blinking
devout scroll
Yeah I've used it once to create lipsync and blinking visemes on some final fantasy character with no blendshapes but with face bones
There's a bunch of modifiers you can apply as shape keys I'm pretty sure
calm goblet
fair enough, for anything like lipsynch i think i'll still prefer to just do it in zbrush
unless the model already comes with a really good facial rig that allows for all the nice subtleties of facial movements to be captured
but for blinking, eyebrows, that kind of thing, bones would get it done nice and fast
median pike
tropic zenith
Hello, is it possible to use the move/rotate/scale tools with weight paint? As i...
You can use proportional editing
devout scroll
Bones are better than proportional because they're non destructive
Technically neither are shape keys but you don't want to have to start over if you messed up and can't undo
But you would need to split a bunch in order to avoid it grabbing what you don't need
devout scroll
calm goblet
unless the model already comes with a really good facial rig that allows for all...
lol no, it was just a bunch of bones for the face and a few for the lips and jaw
but my friend who asked me to do it for him didn't need it to be particularly realistic
I ended up making the 3 blendshapes that cats can use to generate the rest
But I made those as close as possible to reference mouth shapes so it looked pretty decent in the end
Making them all would have taken quite a long time
Still, it was a good learning experience
devout scroll
fair, but generally things that aren't "fix model" or the atlasser are pretty safe
spiral sigil
How would I go about making it so that one of these lamps is all of them at the same time, so id only have to mark seems and unwrap one, instead of every single one of these 17 times

yknow what nevermind ill just do it first before I distribute the hangs
devout scroll
stack them on top of each other
then optionally move all except one by 1 uv space to the right or up
those uv look like they might need a few more seams tho
calm goblet
devout scroll
fair, but generally things that aren't "fix model" or the atlasser are pretty sa...
i just don't trust it to get things right when it's gonna be approximating visemes based on what polygons were moved for other visemes
devout scroll
Yeah it just blends
spiral sigil
devout scroll
those uv look like they might need a few more seams tho
of course i wasnt going to leave it all in whatever the hell it was then lol
spiral sigil
Does anyone here know of anyone who tried/had 3d sculpted their own body? curious
 pallid pasture
So, I'm trying to put on the finishing touches for my model yeah? Yet the issue is I'm running into a problem where the material ends up like the black blob in the picture. When in reality...

It's meant to look like this...
 azure rain
did you set your material to use transparency
pallid pasture
Not 100% sure how to check..

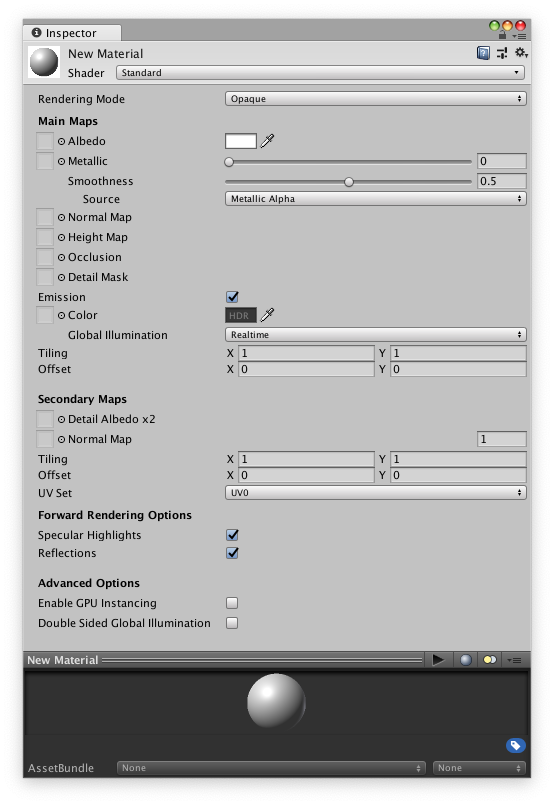 azure rain
basically you need to change the rendering mode setting at the top of the material to one of the transparent settings
pallid pasture
Yeah, turns out the issue arrives with the arm itself rather than the glove...
azure rain
then I suppose check the arm material?
pallid pasture
Arm material is fine

Issue is the sleeve part here of the glove, is somehow meshed with the arm material
But deleting that removes the cuff of the lower half, and the rolled up sleeve portion...Yay...
azure rain
then I suppose set the arm material transparent?
pallid pasture
Oh...
Wait
<-<
I had Albedo and Specular fucked up
Skin texture issue, but that's easy to solve.

Just rub out the tattoo bit on the skin texture and boom. Problem solved
azure rain
cool
surreal flame
Why do you have a separate transparent (=Quest incompatible) mesh for the tattoo if it is literally surface paint?
azure rain
yeah that is a good question as you could apply it to the arm texture and use less vram
quaint jasper
Isn't that super ugly to stack two different tattoos on top of each other though ?
pallid pasture
True. May just clip the tattoo bit and just use the stuff I got on the skin material
Makes it look more natural as well as it blends on the chest/legs/neck area
(Now I get to learn how to separate the thing! YAY)
spiral sigil
layers layers layers
pallid pasture
Looks way better
 spiral sigil
agree
pallid pasture
Too so many attempts to get the outfit to cooperate with everything XD
spiral sigil
khaby lame

thats the most accurate face yet
i found a different way of doing pupils
 quaint jasper
Still not how eyes look 
spiral sigil
quaint jasper
Still not how eyes look <:sweat:668314662059638784>
close enough
quaint jasper
For the most important part of someone's face, i'd say not really but ultimately up to you 
 spiral sigil
sheesh you really used all the space you could get
azure rain
very efficient UV layout
wicked iris
Now I have REDO the baking again
So i have to give it anti-aliasing using a stone age technique
Why tf does Blender have to be like this in it's default feature
What I'm doing is baking it as an 8K texture, then scale it down so the downscaling gives it the Poor Man's AA look
spiral sigil
are you talking about getting screwed over by mipmapping because you dont have color outside your seems
wicked iris
spiral sigil
are you talking about getting screwed over by mipmapping because you dont have c...
No, the black parts are the unused areas
spiral sigil
yea but doesnt the black bleed over onto the color its ajacent to when mipmapping does its thing
something something like that
wicked iris
Baking with Cycles doesn't give texture any AA
spiral sigil
oh nveermind iread wrong
quaint jasper
Make sure you give yourself enough padding for mipmaps
wicked iris
yep
spiral sigil
how do these stitches look?

 wicked iris
there's some space outside the UVs

so potential for mipmaps not looking like garbage
I went through mental hell doing this
quaint jasper
might wanna increase it slightly more just for safety
wicked iris
yep, checked it at 128-256 res, will be painting the background on these parts to prevent these lines
 spiral sigil
Sooo just realised you can texture paint with a gradient that acts like a color ramp node
kinda epic
 copper flax
just curious if anyone's found a tutorial for blender stuff for vrchat that's up to date for version 2.92 of blender?
spiral sigil
copper flax
just curious if anyone's found a tutorial for blender stuff for vrchat that's up...
Wym blender stuff for vrchat
if you are new to avatar/world/content creation you should really learn the fundamentals of blender via tutorials for random things before getting into avatars or worlds
if u go straight into avatars your going to frustrate yourself because you won't understand and will have a hard time learning without knowing other fundamentals prior
copper flax
spiral sigil
if you are new to avatar/world/content creation you should really learn the fund...
i remember following the tupper tutorial for setting the stuff up a while back and that got me on the right track, but it seems like blender's changed since then
copper flax
i was able to make a few avatars back in an older version of blender so it's just a matter of finding where everything is again
spiral sigil
just follow some beginner blender tutorial, i bet there is one specifically for people used to old blender to learn new blender
youtube has alot of videos who knows
obviously you know the stuff already but going through the basic stuff in new blender will show u where the stuff is
copper flax
i'm actually looking for only a few specific things actually lmao, where do you find the shapekeys and materials in this new version of blender?
wicked iris
quick question, VRC supports detail maps, correct? (plssayyes x10)
 wicked iris
thank goodness
calm goblet
detail maps? you mean normal maps?
calm goblet
weird way of doing it
i just put the pores in the main normal map
why bother having a whole extra set of images when you could put everything into your first texture set?
azure rain
this method let's use lower-resolution maps
calm goblet
but more of them
azure rain
yes but that's less vram overall
wicked iris
it's a way making blurry textures look bearable to look at up close
calm goblet
if you're repeating the same detail over the whole thing though you're not gonna have as good a look as if you just used 2k instead of 1k, or 4k instead of 2k
i doubt anyone that isn't on quest is gonna be screwed over by using higher res textures, considering they're way more screwed by multiple materials
azure rain
looks like it honestly might be more handy for environment art where it would be a waste to like use high-res textures when you only need them when you're sticking your nose at it
like I've heard it used quite a bit on like tiling wall textures & like rocks
calm goblet
that's what LODs are for
azure rain
okay but why would you want like a 4K Rock texture when you could get the same look with like a 2K and a detailed map?
calm goblet
cause you can't
tiling details will never look as good
and if the rock is important enough that you're gonna get that close, why wouldn't you just make it really nice in the first place?
calm goblet
depends how good you actually want it to look
azure rain
games have the texture memory budget to worry about so if that can shave a bunch off developers would use it
azure rain
calm goblet
i doubt anyone that isn't on quest is gonna be screwed over by using higher res ...
there are some map that are Quest compatible that outright crash the quest-1 from running out of RAM so yeah it's quite possible for there to be too much textures for the quest
calm goblet
you're replying to me saying andyone that isn't on quest is unlikely to have vram issues by saying that old quest models can have vram issues 😛
quaint jasper
calm goblet
if you're repeating the same detail over the whole thing though you're not gonna...
But yeah basically this is wrong because that's not what detail map is for, Miner's use of it will definitely look good
wicked iris
^


 devout scroll
I feel like detail textures and normals are a good idea when doing stuff like skin and other things with fairly low detail
Having a huge texture for some gradients and blurry shadows or whatever skin shading usually looks like isn't practical if you expect the normals will be detailed when you get point blank to your mesh in vr
quaint jasper
I abuse detail normals in my worlds now, it's like a superpower
calm goblet
devout scroll
I feel like detail textures and normals are a good idea when doing stuff like sk...
skin is one place detail maps doesn't make sense for, cause the type of pores you have on your nose are different to your forehead, different to your chin, cheeks, neck, hands etc.
either embrace the toon look and keep it smooth, or get in there with some alphas and make a proper normal map
 steady zealot
Detail maps are actually OP. They add a lot of nice close-up detail but while being relatively low res themselves.
Love them
For clothes and stuff mostly
calm goblet
that's one area where detail maps would shine, fabric texture
as long as you could get it to actually follow the flow of the cloth
steady zealot
Just gotta make sure those UVs are good
calm goblet
gotta make sure it projects properly as well
steady zealot
Of course yeah
calm goblet
some things just don't project that well
and you can't always make your UVs completely square and lined up, cause that just begs for stretching
quaint jasper
 devout scroll
that's cool as heck
quaint jasper

 hushed acorn
wicked iris
hushed acorn
wicked iris
Well done. I couldn't tell if that was really good 2D or really good 3D.
wicked iris
hushed acorn
Well done. I couldn't tell if that was really good 2D or really good 3D.
Thank you ❤️
Just one step closer to bringing it into VRC
spiral sigil
quaint jasper
https://fxtwitter.com/Ruuubick_/status/1474653382786883584
OMG HOW do u people texture paint stuff this good you fricking wizards
quaint jasper
No texture painting, just substance generators and a couple stencils
spiral sigil
WHAT
quaint jasper
I wish I could texture paint lmao, but substance is dogshit for that
spiral sigil
i thought it was meant for that i am confusion
quaint jasper
That's how they get you
spiral sigil
although when i tried it i didnt really get used to it the only good stuff was the procedural materials
they failed lol
quaint jasper
Yeah having to bring your textures to a proper image editing software to use a blur brush is mind-blowing
spiral sigil
blender blur brush SUCKS and is so slow
literallt everywhere else its so good and fsst
quaint jasper
At least it has one lol
spiral sigil
i supposeeee
i really want to make a smol candle in a little itty bitty bowl with that color scheme now
quaint jasper
I'll probably make another model tomorrow, should be easier to model but harder to texture 
languid fog
quaint jasper
I'll probably make another model tomorrow, should be easier to model but harder ...
The hardest part for me is the texture one ;-:
devout scroll
spiral sigil
blender blur brush SUCKS and is so slow
Blender texture paint sucks in general
But there's one thing you can do in blender that's not too bad
As long as you don't need layers
devout scroll

Just essentially take a screenshot of your viewport
Then open it in an image editor like photoshop
Make your changes and project then back onto your texture in blender
spiral sigil
why would you edit a screenshot of your viewport
devout scroll

Quick Edit is a really artist-friendly tool for texture painting that combines Blender with your favorite 2D painting app. It sends a screengrab of your viewport to the painting app so you can add a layer to it, and send that layer back to the textured model in Blender. How awesome is that?
Get the FREE Blender Secrets sample PDF: https://mailc...
blender texture painting sucks
devout scroll
it's not great if you're doing pbr and need normals and other maps
but for purely diffuse it's nice
devout scroll
not the best way to do it given the resolution but it's nice for little details here and there
i guess for terrain making a node setup that projects a texture based on vertex color would be nicer, then bake it to a texture
that is if you're not using substance painter
photoshop is just a lot more versatile
spiral sigil
well damn i didnt realise clone tool is good for that
devout scroll
as long as the hardness is low you can blend pretty decently
but maybe a rock texture wasn't a good example
 languid fog
devout scroll
but maybe a rock texture wasn't a good example
languid fog
devout scroll
but maybe a rock texture wasn't a good example
It is sucks but some ppl do amazing stuff with it
Like Shonzo
azure rain
very nice looking Miner out of curiosity the triangle count
surreal flame
That realistic rugged armor looks vs. the super smooth stylized anime face bothers me a bit.
devout scroll
languid fog
It is sucks but some ppl do amazing stuff with it
It's just very limited, with no layer support or material painting
You can do perfectly fine with it it just takes longer
I'm just waiting for them to improve it so I don't have to use substance
calm goblet
spiral sigil
whats the one thing you can do in blender
if you want a great texture painting tool, 3d coat is the way to go
they have a texturing only version called textura that's cheaper
but personally i'd recommend full 3d coat cause that'll do all your sculpting, retopo, UVs, and texturing way better than blender ever will
spiral sigil
i havent tried the trial period since you last mentioned it so ill have to download it today
calm goblet
it's an unlimited trial, just no exports
devout scroll
Kinda expensive
Textura itself is reasonable
But the full one is pretty expensive
calm goblet
cheap as shit considering the only way to get beter tools is to buy rizom, marmoset, topogun, and zbrush
devout scroll
Yeah but as hobbyists might be too much
spiral sigil
who says im staying a hobbyist
calm goblet
for a serious hobbyist it's not expensive at all
devout scroll
Well if you wanna get serious and can afford it, sure
calm goblet
i spent more on my first guitar, spent more on my first guqin, spent more on weights
and neither the wieghts nor guqin will ever make me money lmao
devout scroll
Well I could afford it now but a year or two ago would have been too much and I'd consider pirating
But I'd rather use open source than pirate
Just nothing is good enough yet
calm goblet
there's a problem with open source, blender is the best open source 3d tool
and blender sucks in a lot of ways
it's also great in a lot of ways
but it really does suck in a lot of ways lol
devout scroll
Blender is great compared to other open source software
spiral sigil
cant i just free trial spoof until i can afford expensive stuff
devout scroll
In other fields
calm goblet
spiral sigil
cant i just free trial spoof until i can afford expensive stuff
that's called piracy 😛
wicked iris
azure rain
very nice looking Miner out of curiosity the triangle count
currently around 64k
devout scroll
Image editors are pretty much all kinda bad
spiral sigil
calm goblet
that's called piracy 😛
frick
wicked iris
will go lower
calm goblet
64k and mostly in the hair and gun i'd guess?
devout scroll
But photoshop is just better
spiral sigil
in ur mom
calm goblet
devout scroll
But photoshop is just better
clip studio 😛
azure rain
maybe time for a wire frame
calm goblet
i'd love to see someone make a 3d painting plugin for clip actually
devout scroll
Yeah my brother likes clip studio, never tried it myself
calm goblet
CSP brush engine for painting 3d models....
devout scroll
I like Photoshop because it's general purpose but i hate adobe
calm goblet
clip has a lot of the techy tools you get in PS
devout scroll
I tried krita for painting but I'm not good enough at it to really comment on it
calm goblet
not all of them though
krita is decent but it gets laggy as balls as soon as you try to make an expressive brush
wicked iris
since I now baked the textures, I will be dissolving a lot of the linework
 calm goblet
you start layering things up to make a nice natural feeling brush in krita and it chugs
wicked iris
The gun i'm holding will be remade, as that's a placeholder
devout scroll
krita has a cute mascot uwu
calm goblet
wicked iris
since I now baked the textures, I will be dissolving a lot of the linework
you could retopo that down much much lower, no need for any of the panel lines to be geo if you use a normal map
devout scroll
I'll probably pick up csp soon
calm goblet
devout scroll
I'll probably pick up csp soon
wait for a sale, they run them often and it's always 50% off lol
devout scroll
yeah that's when my brother got his as well
wicked iris
yep, next time i'm up, will check out that
calm goblet
i bought it 4 days before a sale lol
devout scroll

calm goblet
it's still well worth the money
was just a bit annoying that 4 days after i bought it a sale came up
calm goblet
i have it installed on my surface and my PC
never tried running it on both at once cause why would i be painting on 2 machines at once?
devout scroll
Yeah that's fine
Some licenses are one machine only, some are one machine at a time
calm goblet
yeah pretty sure clip is one at a time
 tight merlin
How much it cost for anyone to make me a avatar
azure rain
a lot of money
tight merlin
Im just saying what is the price
 clear geyser
Varies from person to person
 bold urchin
Huge variance.
Depends on what you're asking for.
Can go from $50 to $5000 easily.
bold urchin
I recommend checking out commission sheets first and see the information artists asks for and what skills they'll apply to figure out what you want done.
tight merlin
Thanks for your help guys
azure rain
and if you want an avatar that looks kind of like you on the cheap https://readyplayer.me/vrchat

Make custom full-body VRChat avatars from a photo with Ready Player Me avatar maker. Easy upload to VRChat – no Unity or Blender needed.
tight merlin
azure rain
and if you want an avatar that looks kind of like you on the cheap https://ready...
Thanks bro
azure rain
it also lets you download a fbx file of the Avatar if you want to do modifications to it later
hushed acorn
tight merlin
Thanks bro
One thing you can do is learn to do basic avatar ports of models you like and do basic retextures and model edits
That's how I learned and still am.
If you want help learning, DM me. But keep in mind I'm also learning some.
languid fog
Thats a good way to start with 3d, editing stuff
spiral sigil
bruh 3dcoat makes me have to rebind my keys by hitting the end key over the gizmo
problem is my end key AINT working wih num lock on and off, its like split hetween the home key its in one key
nevermind i got it to sense my home key but it isnt registering my mouse when I click it for a hotkey
omg its so iffy when i paint on the edges this is hell for low low poly
spiral sigil
the brush tries to face the opposite way of the face its under which makes sense but its annoying on brush with low radius
i thought i was pixel painting
does me making the height 0% affect anything
calm goblet
no it just removes height from the paint channels
tight merlin
hushed acorn
That's how I learned and still am.
Thanks dog
spiral sigil
How do fix? Plz help lol
 bold urchin
So your normals (backfaces) are flipped on those weird sections, you can solve this by recalculating normals in blender and putting the model back in, or using a shader that has a setting that lets you not cull the backfaces
spiral sigil
i tried to do a cool weird render of vanny.
 copper flax
so I'm attempting to add custom clothes to my model in blender using the proportional editing tool, however it seems like when I try to scroll to decrease the effective range of the movement, I just zoom in instead, is there something else I should be doing?
bold urchin
You need to activate any type of transform like a rotate (R), translate (G) or scale (S)
Hit any of the hotkeys I put in parenthesis
copper flax
ahh, that makes sense, it works now, thanks!
 tardy elm
I'm looking to make things easier on myself. I'm working on things for VRC and a personal project, and I'm looking for a way to turn 20 material slots into 1. I'm having problems finding the tools to do this. I know the texture quality will suffer as a result, but if anyone knows of a blender plugin that combines materials, and creates texture atlases, @ me or DM me. I've been looking to speed up the process of making worlds for a game, and for VRC potentially if I ever work up the courage to do it again. There's a link in CATS to a page that supposedly has this tool, but it leads to a dead site.
azure rain
GitHub
Blender addon for material combining, uv bounds fixing - GitHub - Grim-es/material-combiner-addon: Blender addon for material combining, uv bounds fixing
copper flax
it also seems like the when i import clothes for a base, it seems like when I try to position the clothes on the model, it moves the base even though I don't have the base selected, how do I move the clothes without moving the base properly?
tardy elm
azure rain
https://github.com/Grim-es/material-combiner-addon
Oh! I saw this, and wasn't sure if it was legit. I count this as confirmation that it's the real deal. Thanks 😄
azure rain
if a prerequisite to have that installed for cats to do the material combining

Have any questions ask away
In this video I will be going over how to install addons like cats/material combiner then going over how to make a atlas for your avatar.
blender 2.91.2
LINKS:
blender https://www.blender.org/download/
cats-blender-plugin https://github.com/GiveMeAllYourCats/cats-blender-plugin
material-combiner-addon http...
spiral sigil
wait is the material combining the atlas maker thing?
tardy elm
Yeah, I need it for avatars, and for a game I'm working on.
I want it to pretty much be able to run on any system from 2010 onward.
spiral sigil
tardy elm
I want it to pretty much be able to run on any system from 2010 onward.
gl on that
tardy elm
It will look like a PS1 game intentionally.
So, more software rendering than OpenGL.
OH!
Not OpenGL, Good Luck! 🤣
 spiral sigil
this isnt cursed at all

 tardy elm
Add a bit of emotion to the sourpuss rabbit.
spiral sigil
tardy elm
Add a bit of emotion to the sourpuss rabbit.
u do realize thats a girl in a suit right? from fnaf security breach. its a like a fursuit head im tryna make it look natural talking for whatever reason

theres the original thing
tardy elm
Yeah, I know. They did the same thing to the Pyro from TF2.
 tardy elm
spiral sigil
all i really did was make her thicc
tardy elm
spiral sigil
all i really did was make her thicc
Nothing wrong with that. Trust me, I made all my avatars even further beyond thicc.
spiral sigil
tardy elm
Nothing wrong with that. Trust me, I made all my avatars even further beyond thi...
like this? but thiccer?

 tardy elm
- belly and the rest of the body. Sumo body.
tardy elm
I won't post here, last time I did, there was an outbreak of hell trolls.
spiral sigil
o no
bold urchin
tardy elm
Oh! I saw this, and wasn't sure if it was legit. I count this as confirmation th...
The Bake tool in CATS is very powerful
But UVPackmaster is also an incredible asset as well. https://uvpackmaster.com/uvpackmaster-for-blender/
SCROLL THE SLIDE SHOW TO LEARN ABOUT UVPackmaster FEATURES FOR BLENDER Previous Next https://youtu.be/-uunwDLWn7Ahttps://youtu.be/j9mDki-OsiU UVPackmaster 2 is an efficient UV packing engine available as a command line tool. The engine can be used in Blender with the UVPackmaster add-on (for Blender 2.8x – 3.x). IMPORTANT: in order to run the en...
tardy elm
I may check that out later. I want to test one plugin at a time.
tardy elm
Mashing all materials into one material with an atlas.
spiral sigil
light map baking or normal/reflection/glossy/diffuse baking
atlasing is considering baking now?
interesting
CATS can do it quick but ive had problems with it just straight up not working or breaking materials or leave too much empty space on atlas
manual atlasing is the best way since you can manage it yourself and cram stuff yourself if you are willing to learn it
tardy elm
I'm not sure how to do it. Do I make all the materials, then move the textures onto an atlas in an image editor, then take each UV map, and throw it onto the atlas somewhere? I'm not sure how to do it honestly.
spiral sigil
what the hell does that sentence mean?
spiral sigil
tardy elm
I'm not sure how to do it. Do I make all the materials, then move the textures o...
you gor the right idea yea, youd atlas a bunch of textures via photoshop. put it back in Blender and then transform the UV mapping to fit the new atlas
there is a little bit of math to do but its just ratios for scaling
so like say
tardy elm
Oh... Why am I now scared?
spiral sigil
you have x4 1024 textures you want to atlas
you put them in photoshop and make 1 atlas thats 2048x2048 now
give me a moment i always forget whoch way to divide
bold urchin
I personally let CATS start for me, export out the texture and uv mapping - then pare down the result in an image editing program, move pieces better and remove all excess, readjust the UVs to fit after back in Blender now that it's smaller with less waste.
spiral sigil
OOAY BACK
so because the new resolution is 2048, you would divide 1024/2048 and you would get .5 and thats how much you scale your UV half on X and half on Y
it sounds complicated but it becomes easy to do quick once u actually understand
if you atlased x2 1024 textures ONTO A 2048x1024 then you would need to only scale the UVs of each by .5 on the X axis not Y
you wouldnt on the Y because the Height stays the same
for that one person that cares about the stuff i make. i will start upload my avis now. cuz i finally got fullbody tracking
swag pog
spiral sigil
so basically. i redrawed all the skin on the face for an avatar i prob wont even upload


 shut mountain
https://sketchfab.com/3d-models/hexagon-wall-decoration-no-texture-sadly-d220ac4634484bee851d5bdc9c8b9226 i made a hexagon wall decoration for vrchat worlds, you can download it for free on sketchfab. The only problem is that the shader and texture for it are in progress.

Hexagon wall decoration , great for VRC world or comfy room render :3
Feel free to use, just please tag me somewhere :3333 - Hexagon Wall Decoration-no texture sadly :(((( - Download Free 3D model by Cup_Of_Tea (@trampiknunuka) [d220ac4]
 frank vine
Can someone PLEASE walk me through HOW to properly merge this jacket with my avatar ? i did a data transfer and a bunch of other things.. but i keep failing.. the biggest thing is that i cant get the jacket sleeves to STAY aligned with her arms. when i fix model it resets the jacket placement OR makes the sleeves go into her chest.


the jacket has an armature as well.. i tried merging that. didnt make a difference. i deleted the jacket armature and merged with body.. also didnt work
bold urchin
Ah yes, the Cyberpunk rigs
frank vine
bold urchin
Ah yes, the Cyberpunk rigs
??? this is a jacket made from scratch ... its not ripped from the game
 vale prism
frank vine
??? this is a jacket made from scratch ... its not ripped from the game
vale prism
frank vine
??? this is a jacket made from scratch ... its not ripped from the game
you need to rig it
aka weight paint it
frank vine
it has an armature ... and i DID transfer weightpaint over via data transfer
still not working
bold urchin
That's fine lol, it's still the similar design.
I'm just gonna guess your bone names (vertex groups) are not named the same so your weights aren't merging to the same bone.
vale prism
frank vine
it has an armature ... and i DID transfer weightpaint over via data transfer
bones must be named different, it you modeled them shouldnt be too hard to redo
frank vine
vale prism
bones must be named different, it you modeled them shouldnt be too hard to redo
no im working with prefabs
frank vine
bold urchin
That's fine lol, it's still the similar design.
I'm just gonna guess your bone ...
interesting.. care to tell me more about how to fix that?
like what do you mean exactly?
bold urchin
If you want Merge Armatures to work, your bones need to be named the same so that the left arm parts move with left arm parts.
As you can see here, my left arms are named differently and won't merge the bones together when I try to combine them.
The reason why people religiously hit Fix Model is because it automates a lot of the process of renaming bones to be closer to Unity standard rigs.

Completely stripped down example, take as demonstration - not practice
frank vine
bold urchin
If you want Merge Armatures to work, your bones need to be named the same so tha...
ahhh i gotcha.. ill work on that, thanks
bold urchin
And the reason your jacket is returning to place despite moving it is probably because you're posing the model, but not applying your new pose as the default.
So hit Apply Rest Pose.
Again - assuming you're using pose mode.
 frank vine
bold urchin
And the reason your jacket is returning to place despite moving it is probably b...
frank vine
bold urchin
And the reason your jacket is returning to place despite moving it is probably b...
i did actually
i hate blender
bold urchin
Neat, apply your transformations as well too
frank vine
bold urchin
Neat, apply your transformations as well too
??
 glossy totem
I've got an issue in Blender when texture painting, I have to click and drag to paint, I can't just click and paint a single dot.
I can't figure out how or why this happens, has anyone else ran into something like this?
quaint jasper
Make sure you don't have stabilize stroke enabled
glossy totem
It's off, first thing I checked
glossy totem
Fall off is just the shape/size of the brush, doesn't change anything switching between different profiles either
bold urchin
glossy totem
Fall off is just the shape/size of the brush, doesn't change anything switching ...
Press E to change the method of drawing your strokes in UV paint mode.
Space is the normal one we use, you currently have Line enabled.
 bold urchin
Any strength or pressure settings enabled?
glossy totem
Pen pressure settings don't change much either, and it's the same with a mouse and pen tablet
spiral sigil
is 3d modelling like say clothes hard?
 clear silo
Depends on how complicated the clothes are. The only hard part in my opinion is rigging and weight painting clothes
spiral sigil
clear silo
Depends on how complicated the clothes are. The only hard part in my opinion is ...
something like doc ocks coat

ive never 3d modelled anything and im trying to start with clothes and im just asking if its hard
clear silo
I think that wouldn’t be too bad! It’s just weight painting and adding bones and such to the cloak would be tricky. Also, clothes aren’t the easiest things to start with modeling in blender and such.
spiral sigil
clear silo
I think that wouldn’t be too bad! It’s just weight painting and adding bones and...
what should i start with?
clear silo
I’d say just start with simple character models
spiral sigil
clear silo
I’d say just start with simple character models
should i start with sculting? or what
clear silo
You should always start with modeling, then sculpting to make it look nice 👍🏻
spiral sigil
clear silo
You should always start with modeling, then sculpting to make it look nice 👍🏻
mk thanks 👍🏻
clear silo
No problem :3
 dense swift
Never been much for art, or modeling or design, never really touched any of it, but now this game has me wanting to make my own avatar and I dont even know where to start, im on the quest 2, and am wondering where to start and if my idea is even possible
spiral sigil
i got bored. and made this weird thing of snotty boy in like 15-25 minutes


getting there

sorta
spiral sigil
 dense swift
I'm wanting to make an avatar with some draconic features and wings that floats slightly off the ground at all times
 spiral sigil
my 2nd from scratch 3d model lookin good ngl.
 quaint jasper
 tight remnant
Normals are inverted, head is missing its texture
quaint jasper
spiral sigil
my 2nd from scratch 3d model lookin good ngl.
I wouldn't say good but it's definitely a start 
azure rain
and it's somewhat recognizable as the character so definitely a start

 spiral sigil

i guess im tryna aim for realism in a cartoon model. when im done with this i gotta make the body from scratch. that will be tricky

again. for my 2nd 3d model from scratch i did pretty good
spiral sigil
made some bad lips
 devout scroll
dense swift
Never been much for art, or modeling or design, never really touched any of it, ...
devout scroll
dense swift
Never been much for art, or modeling or design, never really touched any of it, ...
good start is always some YouTube tutorials
 still wadi
@spiral sigil looks like shit, keep up good work
 stoic spoke
i just want to appreciate the people who make these avatars such an amazing talent
spiral sigil
In Blender how would I make my view look at a specific face I select in a perfect orthographic way if that makes sense
similar to how i would be looking at a Plane i instanced into blender and went into Ortho mode and looked in top-down view
i know how to enable orthographic mode just not the locking the view perfectly onto a face
i cant describe this right and because of that google isnt helping me much
vivid crater
spiral sigil
In Blender how would I make my view look at a specific face I select in a perfec...
i believe align view to face is like shift + numpad 7
you wanted something like that?
spiral sigil
MURDER muahahahaa

some of my divots are more curvy than id like because in real life they would have rigid edges
spiral sigil
weird wip syndrome model thing


its better than my organic sculpting ill give you that much
devout scroll
look at some sculpting tutorials, there's a bunch of things you might want to know about dyntopo and stuff
sculpting with lots of detail or variable details
since some of your mesh looks less and more detailed
spiral sigil
dynamic topo is op
and maybe you should learn how to sculpt other things besides human stuff first
or at least like arms and limbs because its alot less complex than a face
by the time you master those you will have a much better sense of sculpting so your trial and error working on hard organic shapes like a face will take you less time
if u see what i mean
spiral sigil
anyone know what i could improve lighting wise for the renders

 spiral sigil
ok thanks
 short zephyr

Gumroad
calm goblet
spiral sigil
dynamic topo is op
dyntopo is shit
voxel remesh gives you much more control
there's only 2 reasons to use dyntopo, you just wanna do a really quick rough sketch and have no idea what you're making, or you wanna do some fine engraving on a couple areas
devout scroll
yeah i'm not sure when to use it myself
sometimes i use it then remesh
but i've mostly been sculpting rocks
calm goblet
the 2 times it's useful are the ones i just listed lol
but for the main suclpt it lags way too fast and doesn't give you as much control over your surface
spiral sigil
calm goblet
voxel remesh gives you much more control
oh yeah i forgot you can use voxel
spiral sigil
im going to lose my mind Occlude isnt functioning again
literally trying to save polygons here and it just paints straight through the plane with specially cut out holes I put in front/top of it
with the plane joined to the mesh im trying to paint on and not joined, with bacefaces facing me and facing against me
i even gave the plane its own material with an image texture i just made for it and it still doesnt work
the plane has thickness too its not just a plane anymore its a rectange with specially cut holes
I think I realise why i keep getting this problem
its because im masking to texture paint on specific faces, and I guess Occlude ignores the faces that are "masked"
fricking heck this should be in documentation
now it works
spiral sigil
yeah i just decided to restart, nose isnt the best rn. but we gettin there hopefully

 copper flax
just curious, but where's the model importing options in cats? the options like mesh, armature, physics, operator presets, etc aren't showing up on my screen
spiral sigil
 devout scroll
copper flax
just curious, but where's the model importing options in cats? the options like ...
devout scroll
copper flax
just curious, but where's the model importing options in cats? the options like ...
those are export options i think
devout scroll
Pretty happy that I got baking down
Going from a few textures to an atlas takes a few minutes

Baking emission for an alpha mask
Using uvpackmaster to pack but not entirely satisfied with how it packs
Sometimes you can get a prettier pack and leave a bit of space for whatever little details you might need later
Also just noticed

Glad that's dead for me now lmao
devout scroll
obviously not textured by me
devout scroll
just atlassed an existing outfit
spiral sigil
ohh
devout scroll
went from 4 textures to one atlas
spiral sigil
btw why are you feeding uv nodes into the img texture vectors
isnt they using the most recent uvs anyway like the new uv packed one
devout scroll
for baking
the bake uv is a uv with all the uvs in one unpack
and i'm baking from that to a new texture using the new uv




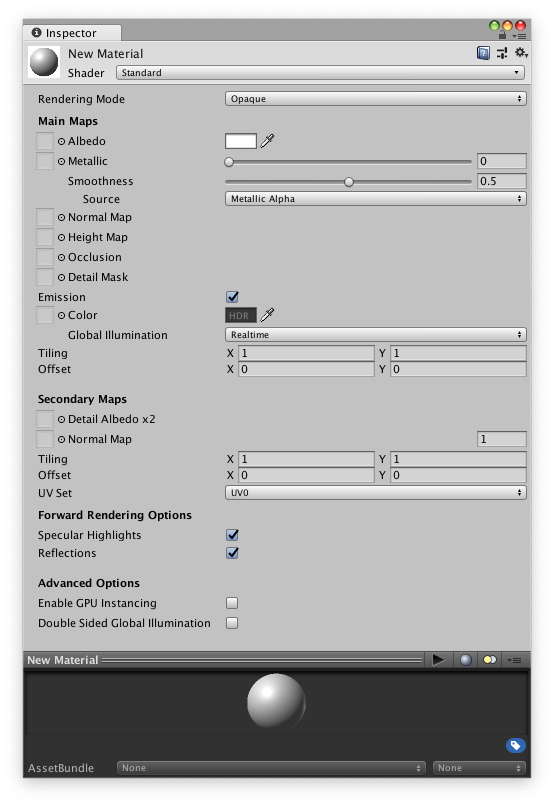


 spiral sigil
maybe I need to get UVpackmaster
devout scroll
i packed it manually but yeah you can
spiral sigil
oh nvm then
devout scroll
i mean I packed with uvpackamster first but then i changed it
spiral sigil
you can simply bake them in blender though
devout scroll
it did normalize the islands for me
spiral sigil
aaa
devout scroll
you can normalize manually with TexTools
spiral sigil
what does normalize mean
in this sense
make the image not get stretched
wouldnt apply scale fix that
eh... yeah but not really
it really depends on the model
ig sometimes the islands you want small are actually big on the model or vice versa?
something like that
uh?
nevermind its the morning
devout scroll
spiral sigil
ig sometimes the islands you want small are actually big on the model or vice ve...
yes, get even texel density
devout scroll
since some textures might be for small details and if you would just pack you would get your small details to take a lot of space on the texture
texel density just means how much space it takes on the texture
a texel is a texture unit, kinda like a pixel is a image unit
except uvs aren't calculated in pixels because they're relative
azure rain

This video isn't a fully comprehensive look into texel density but you should get a good understanding of what it is and why you need to consider texel density as you layout your UV tiles.
.......................................................................................
► Click Here To Subscribe: http://bit.ly/sub2joshvfx
Support me on ...
spiral sigil
might be getting it
i watch now
is it not common sense to pack your UVs to fill the maxiumum amount of space and have the more detailed bigger elements take more space than simple small ones?
bro obv im@not gonnna unpack one leg take half the UV space and make the next one like super smol or somethin
devout scroll
you want them to be have consistent density so that one thing isn't blurrier than the other
spiral sigil
yea
devout scroll
but it's not a rule of thumb, sometimes you want to give something more resolution
so you make it take more space
for example if you have a backface on something that's probably not gonna be seen much
you can make it smaller
azure rain
if you're map maker it's a lot more important to actively think about Texel density outside of just making sure everything is scaled proportionately to each other in one texture
spiral sigil
ive been thinking about it in pixels lol
devout scroll
oh yeah texel density is usually important for your scene as a whole so things are similarly detailed
spiral sigil
devout scroll
but it's not a rule of thumb, sometimes you *want* to give something more resolu...
if it's something you can get really up and personal with, you'll want it to have as many pixels as possible, and therefore be as big in the texture map as it can
devout scroll
it's not about the texture map, it's about how much of that texture what takes
azure rain
texel are functionally pixels there just a different term to distinguish between the textures pixels & the pixels that make up the final image on your screen
spiral sigil
what happens to texels if your texture isnt a power of 2 tho or a square
do they stay square shape or warp
azure rain
not quite sure off the top of my head but it's recommended to be a power of 2 because the graphics card likes that better but the power of two can also be a rectangle
512 x 1024 is a fine and dandy texture resolution
spiral sigil
if im making a texture for a sword I usually make it disproportionately more height than width for example
is that bad for performance even if the w and length are powers of 2
like a 1024x4096
azure rain
yes that should be fine
spiral sigil
okay good
azure rain
https://www.artstation.com/marketplace/p/nVn7/texel-density-and-other-bits-of-texture-theory a free 90 page PDF that goes into more detail into Texel Density

ArtStation
Tutorials - Texel Density and other bits of texture theory, USD $0.00. This tutorial is not software specific and focuses on general theory around textures for game artists with a focus on texel density. It was...
spiral sigil
oh fun theroy ill stash it
but for now i need to brute force learn how to make epic swords!! I will get it one day
azure rain
hope your sword goes okay and that's definitely a object where you would probably want even scaling on everything as you're going to be rotating it around constantly so you would see all of the sides pretty often
spiral sigil
yee i plan to make both sides identical so I just snap the UVs onto each other
azure rain
cool
spiral sigil
So fricking hard to texture im trying to mess around with procedural textures and make my own scratched metal but holy hell its hard
azure rain
and definitely would recommend the pdf later if you get around to making a vrcmap
spiral sigil
ive made a few but i didnt really keep that in mind much then heh
azure rain
https://i.gyazo.com/353df9c29d2523d7dbe441219bde02aa.jpg example of something where Texel density isn't paid much attention to