#3d-modeling
1 messages · Page 117 of 1
 snow fern
 steel skiff
is there any way to import animated mesh into VRChat like alembic?
I tried VAT and it doesn't support that much polygons
and this is the model I'm trying


 sturdy nebula
how to make new mix optoin to pop?
 open scarab
v small icon near
 ocean fulcrum
Hey, sorry, I'm sure this has been already asked a lot, but if I want to learn Blender from step 0, anyone got a good site/free online course for that? I have experience in coding and some Fusion 360 skills to design 3D printed parts (with no texture/animation/physics/anything), but actual 3D modeling seems to be a completely different beast. Obviously my goal would be to then move on to Unity and create some VRChat content but I suppose I must start with Blender first. (I already found some kind of courses/tutorials but they don't really go into the basics. It's just "click there, and there, do this, BAM it's done" and don't really explain anything, so that's not really helpful)
 unkempt torrent
I'd say Blender can do several distinct things, so you should probably pick a reference goal first and learn through that
 still wadi

YouTube
Get up to speed with Blender 2.8 in this updated official video series!
 thin shadow
is there a reason why sometimes the material combiner doesn't includes some materials, despite having the same shading graph as other materials
when adding a item (fbx) into the avatar, weight painted, joined mesh and everything, when using the material combiner, there's always some mysterious reason why that texture doesnt get included into the atlas
it becomes white
 quaint jasper
steel skiff
is there any way to import animated mesh into VRChat like alembic?
quaint jasper
steel skiff
is there any way to import animated mesh into VRChat like alembic?
I'm going to make a tutorial for that, but yes https://github.com/Gaxil/Unity-AlembicToVAT
GitHub
Alembic to VAT (Vertex Animation Texture) mini tool - GitHub - Gaxil/Unity-AlembicToVAT: Alembic to VAT (Vertex Animation Texture) mini tool
It's extremely fucking big in file size though, so be prepared
you might be looking at 100-200mb just for that effect
 small valve
finally got around to adding glasses

took me like 0 seconds to model dont know why i didnt do this earlier
quaint jasper
Might wanna throw a subdiv on it

 small valve
im reyling on my subsurf maps to do...something
you know what
i might just make these glasses red
small valve
quaint jasper
Where are these triangles coming from <:HEYMOONA:779319424385286154>
hell
i am not good at making curves with the least amount of geometry as possible
small valve
noted 0u0
ocean fulcrum
still wadi
https://www.youtube.com/playlist?list=PLa1F2ddGya_-UvuAqHAksYnB0qL9yWDO6
Thanks, finally back from work, will look into this.
Edit : Oh nice, that's actually several videos all going together, exactly what I was looking for I believe.
 spice pewter
small valve
finally got around to adding glasses
spice pewter
small valve
finally got around to adding glasses
Cute glasses
 radiant ridge
hey i cant separate these two bars from one another. can anyone help? i cant move one up without the other. id like to be able to put the animate bar back at the back hidden from view. but i cant.

having a slight Blender issue.
quaint jasper
Right click on the edge of the window for the options
thin shadow
thin shadow
it becomes white
I have found the solution. For some reason, the texture created when making my own props has the file extension fbm.
So unpack the texture (it will show as xyz.fbm), rename it as xyz.png or whatever file format supported by the mat combiner.
Replace it with the png, repack it again.
radiant ridge
quaint jasper
Right click on the edge of the window for the options
after that what exactly am i looking for?
quaint jasper
radiant ridge
after that what exactly am i looking for?
join areas and down
radiant ridge
quaint jasper
join areas and down
that appears to just get rid of the animation bar
quaint jasper
alright, explain what you mean by "back at the back hidden from view" then
radiant ridge
nevermind i just got rid of it. thanks for the help
 spiral sigil
Is there any commonly used license for selling avatars? Would be for selling them in a web like itch.io or similars. (I'm a programmer and maybe I'm mistaking drawing parallels with the importance of the licenses)
quaint jasper
spiral sigil
Is there any commonly used license for selling avatars? Would be for selling the...

In this Dec 2020 TLX session, Redhound provides an overview of Creative Commons and other open source licenses as they apply to VRChat creators
Check out other talks from the TLX December 2020 event at https://www.youtube.com/playlist?list=PLTgqlzYxsEMwKQ_6yzbOgjwp4P3kKX3To
Learn more about Prefabs TLX at https://tlx.dev
Follow TLX on Twitter...
 hazy falcon
Hey guys, I am having a problem with Blender.
I am trying to apply textures and in the tutorial video it shows that if I go into the shading panel, the objects should still look like if I were in layout, however in shading it is all dark with no edges to distinguish each object apart.
When I move it becomes distorted a bit, by this I mean that the previous location of the object stays visible when I move it. Hard to say and capture.
However here is an image of the problem right now.

I am new to Blender and all of the whole 3D arts thing, sorry if this was just a basic problem.
 fresh isle
hazy falcon
Hey guys, I am having a problem with Blender.
I am trying to apply textures and...
fresh isle
hazy falcon
Hey guys, I am having a problem with Blender.
I am trying to apply textures and...
You need to make a UV Map.
hazy falcon
fresh isle
You need to make a UV Map.
Oh okay cool, thanks for that, I'll search up how to do it 😄

 hushed acorn
Nice
I have a model where a little detail has the backface on the wrong side. Anyway to fix that easily?
I'm at school so I got no pictures of it rn
hazy falcon
fresh isle
You need to make a UV Map.
Hey there, so I've done a UV map of the object by simply using the smart UV object thing, however still it won't work and I've gone through two tutorials now on how to do it and have followed it but it still just won't display the texture.

Actually this might be a different question, sorry for that ping
Figured it out
I've had to change the color in the viewport thingy to texture, now it loads ❤️
 hushed acorn
How do I 3D model from scratch?
I've only done it using a base
Like using a 2D reference
 tough plover
hushed acorn
Like using a 2D reference
tough plover
hushed acorn
Like using a 2D reference
using references is totally fine. they are useful especially for characters
hushed acorn
No I meant how do I do it like that
tough plover
ah, I see
if you search up "Blender character modeling" on youtube, you should find some useful videos

Hi and welcome, in this Tutorial i want to share with you my workflow about character modeling in blender 2.9 if you like it
make sure to hit that like button and subscribe to the Channel
#Blender_Art
🏆 BLENDER ART 🏆
https://www.youtube.com/channel/UC1x2...
---------------------------...
that one is showing you "Box modeling"
hushed acorn
Like where people do it like this
 tough plover
the alternative is to sculpt then retopo https://youtu.be/f-mx-Jfx9lA
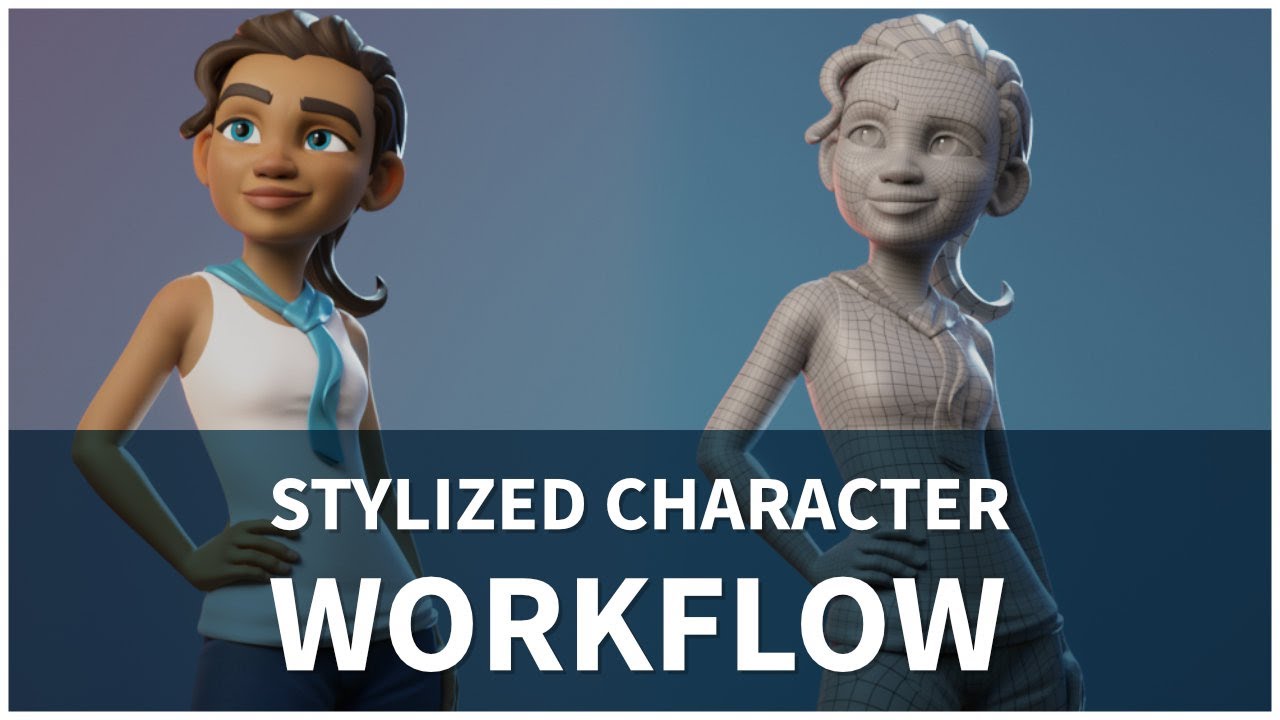
In this tutorial, Julien Kaspar will walk you through his process of creating a stylized character, using only Blender. Full training at https://cloud.blender.org/p/characters/5dd54d68a709ab2eb08aa5a1
The full training is available at https://cloud.blender.org/p/stylized-character-workflow/
Music in the Intro/Outro: "Inspired" by "Kevin MacLeod"
hushed acorn
I use Blender 2.8 but I think that will probably work
I'll look into it
I'm still at school lmao
tough plover
2.93.3 has been pretty good for me so far
hushed acorn
I usually use 2.8 cause I've had issues with CATS when I used it on 2.9
open scarab
2.93.3 is the LTS, cats had issues with 2.9 but not anymore
 craggy lintel
Hey guys does anyone know a good Patreon to buy crazy particle animations? I learn about things via dissection, would love some leads!
Ping me if you have an answer!!! 
craggy lintel
fresh isle
Hey Lone nice seeing you here UWU
hushed acorn
open scarab
2.93.3 is the LTS, cats had issues with 2.9 but not anymore
Oh, then I'll look into using 2.9 then
I remember when starting out, I had a issue that was caused by using CATS on 2.9
So I haven't used 2.9 except for like one or two things.
hazy falcon
I don't have a base color, it this what I am supposed to do with ambient occlusion?
Also I have no idea how to actually check the final result, clicking on the last node does not work or maybe I am just not in game to test it, but the texture changes when I click on the image source nodes.

Or in this case would my base color simply be the diffuse?
tough plover
hazy falcon
Or in this case would my base color simply be the diffuse?
so let me guess, you downloaded a wood texture pack from some website like poliigon?
hazy falcon
tough plover
so let me guess, you downloaded a wood texture pack from some website like polii...
sharetextures
tough plover
hazy falcon
sharetextures
alright. can you send a screenshot of all the textures that were included with the package? (with the file names visible)
hazy falcon
 tough plover
diffuse is the base color. you should also definitely consider using the normal and specular maps
hazy falcon
tough plover
diffuse is the base color. you should also definitely consider using the normal ...
Okay cool thanks!
I've already added the normal map node, just gotta add the specular map node then
tough plover
you can use AO if you want, but it's not required
could probably just use a math node and multiply it with the diffuse
the displacement map can be useful, but it requires the model to be high poly enough so that parts can be displaced
hazy falcon
tough plover
diffuse is the base color. you should also definitely consider using the normal ...
Did you mean something like this with the specular?
I'm confused, there was no other node in the list
 tough plover
no, you plug Color directly into Specular
hazy falcon
Oh okay cool then
tough plover
also, consider setting the Color Space to "Non color"
do this for everything that is not your diffuse texture
because they should not be read as color data
hazy falcon
tough plover
do this for everything that is *not* your diffuse texture
Okay cheers! Thanks!
hazy falcon
Hey guys,
I am having troubles with some of the nodes again.
The texture just isn't working anymore, I've made sure that I didn't make the mistake as the first one and that I am actually able to view textures and other textures. However for some reason my principle bsdf isn't updating the material output node, basically final changes are not being applied, all of the textures that I currently see are from me double clicking on the texture source.
Is there some sort of thing that I need to update?
I haven't found anything at all yet on the internet, the closest thing being similar but just the problem was only because someone was connecting the green connection with the yellow as they put the bdsf into a diffuse node and then into the material output node.
Below is a screenshot of it.
Thanks for any help and I appreciate it ❤️

Higher resolution screenshot of the nodes
It really is just the basic nodes but I had changed the colors around, such as the base colors.

 hazy falcon
If I go into the other ones:

XD
I've already done UV mapping as well, so I still have no idea why it is not being rendered.
This is my current workspace

Only with these settings am I able to view anything
Woops, actually forgot to UV that one, just did the UV now, but still not solved and unable to render the actual texture thing inside of the principle bsdf node
Actually it really might be because of a rendering issue and not something in the nodes, I'll take a look at it tomorrow then. Thanks Sacred!
 tribal goblet
Can someone help me
I made socks but they dont move along with the body
im in blender and using pose mode
 azure rain
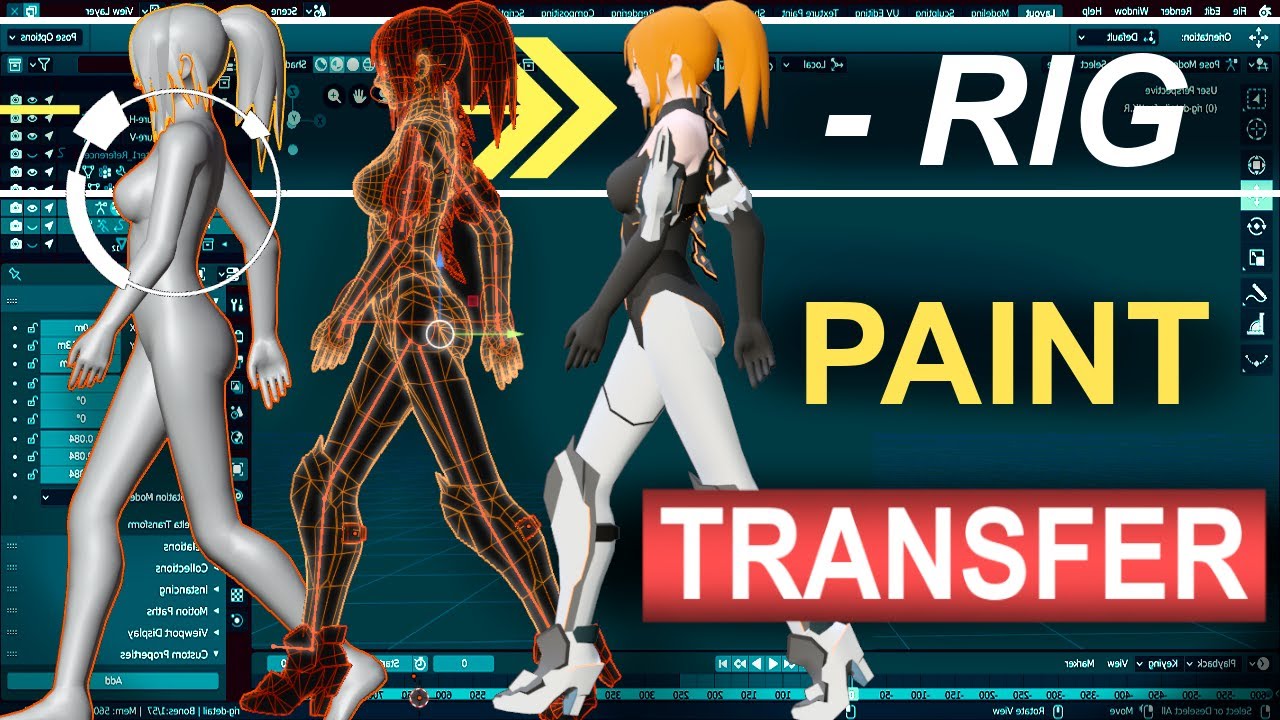
Never waste your time re-painting a new character ever again. In the next 60 seconds, you'll learn everything you need to transfer your Rig's weight painting from one character to another under a minute!!! Hope it helps :)
Free Female Base Rig Download:
https://www.youtube.com/watch?v=_XfvLpLyulI
Sayuri Artsy Weight Paint Transfer Video:
http...
tribal goblet
azure rain
https://www.youtube.com/watch?v=bR_Vke__voU
i dont get it
i still need help
 devout scroll
they're not weighted to the bones
so you don't have to manually weight paint them to the bones you can transfer weights from the legs to the socks
tribal goblet
devout scroll
so you don't have to manually weight paint them to the bones you can transfer we...
how..?
tough plover
tribal goblet
how..?
in object mode, click the body mesh, shift click the socks mesh, then switch to weight painting mode
then, do Weights >Transfer weights
set the mode to "Nearest Face Interpolated"
set Source layers to "By name"
set destination layers to "All layers"
then if you have CATS installed, hit "Delete: Zero weight groups" under Model options > More options
tribal goblet
How do I switch to weight painting mode
Also thanks
also that
didnt work
wait
wait
tribal goblet
tough plover
in object mode, click the body mesh, shift click the socks mesh, then switch to ...
didnt work me me
tough plover
make sure the socks mesh is parented to your main armature (can hold shift and drag in the hierarchy onto the armature)
and make sure the socks have an armature modifier on them, with "Object" set to your armature
leave the modifier there, don't apply it
tough plover
👍
tribal goblet
got both socks working
snow fern
tough plover
in object mode, click the body mesh, shift click the socks mesh, then switch to ...
You can also do this with a data transfer modifier which always feels safer to me.
(Also trying to pose your model while the data transfer modifier is active but not applied is amusing, because it keeps actively transfering weight even as you pose, so eventually your model tears off as the weights quit transfering)
tribal goblet
lol
ok i need help with one more thing
im using a shoes model but they wont move
when i use move tool nothing happens
spiral sigil
making vrchat avatars from scratch, whats better for making the body and head, sculpting or doing it the ol fashioned way?
snow fern
you mean sculpting+retopo vs building with good topo from the beginning?
tribal goblet
my b i had transform snap on
snow fern
another option is building a base mesh "the old fashioned way" with good topo and then using a multires modifier so you can sculpt on it at high res and then bake that onto your original lowres
multires modifier is pretty neat
spiral sigil
I am gonna look at demo videos for mr modif
snow fern
if it helps, it's like the combination of a subdiv modifier plus a blendshape on the subdivided version
but it remembers the modifications at every level, and you can push them up and down the hierarchy
and baking from it is super easy
spiral sigil
Oh ok I see what you mean now thats really useful wtf
tribal goblet
@tough plover Alright so I got one shoe working with weights but not the other
when i move the leg it was working with it moves both shoes
nvm got it sorry
tribal goblet
alright

 spiral sigil
may someone pls give me a Samurai shoulders for a avatars i cant find any
 ashen forge
who likes big fucker hands on their avatars to crumple people up into little recyclable balls?

 foggy granite
aw yes the rcycleable balls my favorite form of people
 lapis herald
How would you set up a skeleton if you wanted to make something ass tall as slender man full body
Without having the arms and legs super bent to accommodate a users height
quaint jasper
Constraints, but even then you'll run in some issues
spiral sigil
Hey, im having a problem with my UV mapping. I scale it up but on the model it acts like the texture doesn't exist unless im in that one specific location. I am not sure why this is happening and its really annoying since im trying to fix it from being a 2048x4096 with like 90% empty space (I wasnt responsible for that horrible auto atlasting I didnt make the model and yes thats why its so low resolution)


 quaint jasper
Did you apply all the transforms first ?
spiral sigil
I just applied the transforms on the mesh and it didnt seem to do anything
also if I smart uv project it again onto the texture its doing the same thing

also the texture im unwrapping too is the same one thats connected in the material
i just double checked
ill show ya just so you can be sure of it

ok so I have absolutely no clue why this was happening but in blender, the material was still previewing the old texture despite me switching it
and I had to change it to Toon BSDF from Princibled BSDF
and now it acts normal again
does anyone have any idea why
devout scroll
i think it previews the texture that's selected in the shader workspace
so if you have more than one, even if it's not connected to anything but selected, it will display that
if your viewport settings are set to texture
altho that shouldn't be a thing in material preview mode
only in solid
spiral sigil
yeah it might of been something weird in the shader nodes
again this isnt my model so who knows what other fuckery they did
like I didnt make it
tough plover
spiral sigil
Hey, im having a problem with my UV mapping. I scale it up but on the model it ...
there can be multiple UV maps. it's also possible that the material does not have the correct texture assigned
spiral sigil
Why is CATS telling me this texture is 23x23? That material is just a Toon BSDF with a texture in the base color that for sure ISNT just 23x23

I am certain this ties into my problem where when I atlas these all with CATS (its all on one mesh already) and only one texture is kept. Also all of the textures tell me its 23x23 but one
and the one that yknow actually tells me the right values is kept in the atlas and everything else is essentially discarded
I dont know if it matters but all the ones that dont work happen to be Toon BSDF where the one that works is a princibled BSDF
I also checked the shader node graphs for each material and nothing seemed abnormal but im not very familiar with it so I might of missed something
doesnt matter what the surface node is I just made one of the Toon BSDFs a Princibled BSDF and it still got its texture discarded in the atlas process
spiral sigil
does anyone else even use cats to atlas or do they just do it manually or smth
its still not atlasing correctly btw
 full ice
I have a few times. The times it has broke for me were when I had any material that was not using an image, only a color for the Base Color. It could also be that you are trying to atlas different image types, png, tga, jpg.
quaint jasper


A friend showed me @Sailor_Yon's Frog in a Car from Mother 3, instantly got to work and here it is in 3D ! I'll also be running with it in #VRChat so feel free to clone it🐸! https://t.co/ikk0eOwLq5
 Twitter
·
quaint jasper
Twitter
·
quaint jasper
he's too busy being cool
 idle obsidian
spiral sigil
poor thing doesnt blink
idle obsidian
spiral sigil
poor thing doesnt blink
frogs blink ?
because kameleon idk licks its eyeballs for example
spiral sigil
I think some have those clear lids things for underwater and that kinda counts
 unique sigil
How to hide bones on an avatar so can weightpaint without seeing them?

 azure rain
combine your objects together
 hallow dove
azure rain
combine your objects together
hallow dove
azure rain
combine your objects together
HOW
azure rain

Grants New LowPoly Short Course: Learn Blender fast: https://www.gamedev.tv/p/low-poly-landscapes/?coupon_code=GRANT&affcode=45216_9b6dqwx2
Grant's Character Course discount link: https://www.gamedev.tv/p/blender-character-creator-2/?coupon_code=GRABBITT&affcode=45216_9b6dqwx2
Grant’s Drawing course discount link: https://www.gamedev.tv/p/compl...
hallow dove
ok
hallow dove
azure rain
https://www.youtube.com/watch?v=bxelGdpMx-w
it says to click the objetc menu but there is no object menu
I DID IT
LETS GO
hallow dove
azure rain
https://www.youtube.com/watch?v=bxelGdpMx-w
do you know how i fix this?
 azure rain
that should be covered by combining your objects together
spiral sigil
manual texture atlasing ftw
foggy granite
18 materials bruh
hushed acorn
spiral sigil
manual texture atlasing ftw
I need to learn how to do this
I use CATS and maybe it's been improved (cause I been using an old version till now) but I've had it leave tons of empty space
 median pike
I haven't touched cats in over two years. Best decision I have ever made tbh
hushed acorn
CATS can be useful. I just disable alot of things before doing fix model
median pike
There's never a reason for me to press that button as I make my assets from scratch, the only real thing I found useful with cats is the set pose are rest pose feature
hushed acorn
Understandable
I use alot of the buttons it has
I've had to flip normals a couple times and it's made it easy.
Also I use the atlas thing cause idk how to do it myself yet.
 inner lake


 hushed acorn
epic
spiral sigil
ay something unique dont see that often
 crisp crater
fresh isle
crisp crater
fresh isle
woah what is this
crisp crater
hallow dove
how do i fix these things on this model? (I want to use it as a fallback avatar)
where did you get that robloxian model lol
fresh isle
crisp crater
woah what is this
Tasque Manager from Deltarune Chapter 2
thin shadow
fresh isle
Now that is some excellent topology
fresh isle
I need to post a higher quality screenshot of the test of the body but I have a close up of the face

Also the mouth works like this and I'm pretty happy with it. https://gyazo.com/17c697e9a9cbd3e0a9edb61ae926b0a8
 tough plover
interesting
median pike
hushed acorn
I've had to flip normals a couple times and it's made it easy.
But blender already has shortcuts for 90% of what cats does. Flip normals is shift N for example
devout scroll
Actually shift N is recalculate which doesn't flip them but you can check the box to do it
There is a dedicated flip button in the normals menu
Generally you can F3 and search for anything
tough plover
alt + N > Flip
redotix is right that a lot of the things CATS does are already part of blender, the point is that in a lot of cases it can help do things faster
and that remaining 10% are things that blender can't really do normally
merging bones and their associated weights is something that CATS makes a lot easier to do
devout scroll
yeah and even if you make your own stuff sometimes you might want to reduce bones
also armature merge is nice for when you get two close but one might have extra bones like twist bones and you don't want to just delete them and hope the vert groups match up fine
devout scroll
bake and atlas never worked that well for me so i don't use them
tough plover
atlas was meh
Bake worked super well for me
just need to tweak a couple of the settings and you get something really good
 real isle
I am getting the criticism that the model I made here looks rather masculine. Any tips to fix that?
 tough plover
real isle
I am getting the criticism that the model I made here looks rather masculine. An...
tough plover
real isle
I am getting the criticism that the model I made here looks rather masculine. An...
I feel like the hair is really flat
like
apart from the long hairs, it looks like a bowl cut
you should add asymmetrical strands of hair
on the top of the head, sides, and some in the front
real isle
Ah.
tough plover
using toon shading would probably help too
 obsidian nova
Dead serious advice, look up facial feminization surgery…I never understood how to draw women properly until I fell down that particular rabbit hole.
It’s a messed up process, but learning about it was hugely helpful in figuring out what makes a face masculine or feminine.
real isle
For the shader bit, I use Poiymi's.
As for the surgery bit. Wow.
Though I do see the logic.
obsidian nova
Weird little things, like, women generally have a lower hairline than men, higher eyebrows, smaller/flatter noses, and less room between their nose & upper lip.
This wiki page was a good starting point…luckily, there are no images and you can just skim past the parts about actual surgery… 💀 https://en.m.wikipedia.org/wiki/Facial_feminization_surgery
Facial feminization surgery (FFS) is a set of cosmetic surgical procedures that alter typically male facial features to bring them closer in shape and size to typical female facial features. FFS can include various bony and soft tissue procedures such as brow lift, rhinoplasty, cheek implantation, and lip augmentation.
Faces contain secondary se...
real isle
Ah. Intreasting insight. Grim reality of the stuff though, but that's a topic for another time.
craggy lintel
Hey guys
Does the Max VRC lens mod have Diff focal lengths, shutter speed, iris control, DB gain, and full frame?
I want to use my cinematography profession in game lol
spiral sigil
craggy lintel
Does the Max VRC lens mod have Diff focal lengths, shutter speed, iris control, ...
is this like a camera prefab or something?
spiral sigil
can you link it to me
craggy lintel
And if I could shoot LOG would be sick
spiral sigil
probably can gather good info from the source
craggy lintel

VirtualLensはVRChat用アバターに組み込んで利用するVRカメラ拡張ツールです。後処理による画質劣化を伴わない視野角調整などが手軽に実現できるようになります。 また、別売となりますが被写界深度シミュレーション拡張も用意されており、より写真的な表現を取り入れることも可能となります。 https://logilabo.booth.pm/items/1926188
spiral sigil
ig u can translate the stuff and the subpages they link u to on that page for the prefab while u wait for someone who knows alot about it
craggy lintel
Hey all
I want to ADVISE against UV stacking.
It is completely not called for unless you have a specific plan to do it. I would not recommend doing this action unless you're ready for hard painting. Or if you want two parts to be painted exactly the same.
 inland skiff
What's UV stacking?
 white moth
obsidian nova
Weird little things, like, women generally have a lower hairline than men, highe...
white moth
obsidian nova
Weird little things, like, women generally have a lower hairline than men, highe...
Anime messes with me because I see pointed chins as masculine looking
craggy lintel
inland skiff
What's UV stacking?
It’s the practice to stack UV’s to create either
A) a more visually pleasing Map
Or B) to create multi mesh textures at once
It’s sorta like telling two meshes in the texturing process to act as one and it can be a big mistake
azure rain
and I would honestly say that would be more like to cut down on vram usage by not having to uniquely texture the whole model
or like increasing perceived texture density
tough plover
I used UV stacking for the belt loops on the ZPD outfit
worked fine
and looks fine
definitely helped clean up the UV map
azure rain
like I'm not particularly sure what's the big problem with UV stacking if you do it properly?
like I could probably find lots of games still doing it
tough plover
it's just that it can make painting some parts of the model harder
because painting on one part would paint on all of them
azure rain
of course which is why you'd only be wanting to stack symmetrical things not stuff that's going to be textured differently from each other
craggy lintel
It’s not good for things you want to paint asymmetrically at all
Just wanted to point it out because ppl don’t
 frank vine
So im having an issue with backface culling... i want to NOT see through my tent as if the inside doesnt exist. i have multiple objects that do this. ive followed youtube tutorials but after flipping normals i now have the same problem only now i can see into the tent as if the outside isnt there.. Ive tried selecting all the panels that i flipped in edit mode to maybe duplicate and flip to see if that fixes it.. but i cant seem to figure out how? besides clicking on mesh for "duplicate and move" that doesnt work out.. how do i fix this?

Heres after i clicked "face orientation"
 devout scroll
craggy lintel
It’s not good for things you want to paint asymmetrically at all
devout scroll
craggy lintel
It’s not good for things you want to paint asymmetrically at all
Never was intended to be. It's used for mirroring mostly
if you're gonna paint either uniquely unwrap or paint only half then mirror
tough plover
frank vine
So im having an issue with backface culling... i want to NOT see through my tent...
in that bottom picture, select the visible faces that are red (don't select everything, only what should be visible from the inside)
then do shift + D to duplicate, and while you still have them selected, do alt + N > Flip
frank vine
tough plover
in that bottom picture, select the visible faces that are red (don't select **ev...
thank ya ill do it that way next time had someone tell me to dup everything and that fixed it but i can see how that wouldnt be optimized. especially since im building for cross platform.
 severe jungle
I suck at blender and I have a hard time even with yt vids
 silent cargo
Has anyone here used Google Blocks vr??
quaint jasper
frank vine
thank ya ill do it that way next time had someone tell me to dup everything and...
You can also use a solidify modifier to help with 0 thickness meshes, but if you don't want that, then just disable backface culling on whichever shader you'll use in unity
Or disable backface culling in blender when making stuff
craggy lintel
severe jungle
I suck at blender and I have a hard time even with yt vids
Keep working it then lol
spiral sigil
thank you catmill clark for somehow making my blocky couch curveeyyy

ignore the 52k tris thats irrelevant
hallow dove
crisp crater
where did you get that robloxian model lol
i exported my own roblox avatar from roblox of course and put it in blender
crisp crater
yes but how
 cobalt aurora
Hey party people, I have been looking into doing a body and face texture from scratch using substance painter, tho one attempt just looks worst then the next, does anyone know any good tutorial video that might help me in that direction or maybe if someone is feeling extra generous give me a Lil tutorial themselves? 👉 👈
Thanks in advance!
frank vine
Ayyy so is it safe to delete a "normal map" from my textures without issues? i hear they AREN'T necessary... but they are taking up SO MUCH SPACE, even after compressing ..
small valve
frank vine
Ayyy so is it safe to delete a "normal map" from my textures without issues? i h...
unless something has gone horrifically wrong (im talking some real eldritch shit that only drugged up shader programmers could dream of), removing normal maps from your material will not brick the entire asset and it should still upload as expected BUT...it sounds like you do not know what a normal map does, so you should probably understand that first before you make the decision
which i will also explain:
frank vine
small valve
unless something has gone horrifically wrong (im talking some real eldritch shit...
First thanks for that image and laugh BUT i DID look up what it is/ what it does
small valve
alright then
do a before/after of your model and see if it satisfies you
if you would rather keep your model's normal map, compress it better
frank vine
The person i get prefab from on patreon makes EVERYTHING high rez like 2k-4k- with like 4 or 5 texture images PER ITEM ... and each image/texture is like 2-5.7 mbs a piece aaand mostly like 0.5- 0.9 AFTER compressing and i simply CANNOT deal with that.. im building for cross compatibility here sobs why there no "lite" version? D:
frank vine
small valve
if you would rather keep your model's normal map, compress it better
How does one..... "Compress better"??? I dropped it down to 1% quality and its STILL 0.5 mbs
frank vine
small valve
if you would rather keep your model's normal map, compress it better
Actually here, look at what i mean.. this one is 0.7 mbs the textures from the prefab ALONE take up MOST of my 50mbs limit for Quest
 small valve
you should probably just delete the normal map on quest. if crunch compression isnt working out i would reccommend changing the acutal resolution of the texture in unity. also, mess with the compression presets (if its set to high quality it is always going to be really large no matter what, try normal. low tends to not be good for normal maps)

this is for the single 5.3mb texture atlas for my main avatar's normal map
ah, you cant change the compression quality on android, only on pc. but you can still change the resolution of the normal map
frank vine
same file
 small valve
though it may have less than ideal results depending on the material as in the actual texture of what you're going for (gentle gradients such as clothing folds tend to fare better than sharp details like hair strands or engravings)
frank vine
small valve
ah, you cant change the compression quality on android, only on pc. but you can ...
Wait... what do you mean you can't change the compressor quality on android? the slider is there, just as it is for pc
 small valve
frank vine
Wait... what do you mean you can't change the compressor quality on android? the...
small valve
frank vine
Wait... what do you mean you can't change the compressor quality on android? the...
not that, this:
 frank vine
ahhh thought you meant the slider.. i thought that carried over though?
 frank vine
from what ive seen i thought it did
small valve
90% on normal quality at half res
 frank vine
squints i cant teeeelll lol
 frank vine
OH! sorry im sleep deprived lmao
small valve
1k normal quality 90%

2k low quality 50%

(for reference, 2k high quality at 50% is 5.3mb)
frank vine
i cant tell much of a difference in the avatar.. but maybe thats just me??
imma T R Y removing the normal map from this dang bean bag chair .. paws crossed AAAAAAA
Thanks so much for the input!
small valve
frank vine
i cant tell much of a difference in the avatar.. but maybe thats just me??
to be honest i cant either...at least, in the editor
but in VR all of the differences will be come immediately more apparent
thats why for visual quality its best to test in VR and not just in the editor
frank vine
small valve
but in VR all of the differences will be come immediately more apparent
i feeeel that lol
small valve
which im about to find out
frank vine
niiice :3 good experiment i hope
small valve
also ive seen that beanbag asset reused so many times
im convinced that either people are using cubed's unity shaders for some reason, everyone else is removing normal maps, or that normal map on there does next to nothing
you can definitely get away with removing the normal map on quest
because i ddi not know it came with one until this point
frank vine
small valve
im convinced that either people are using cubed's unity shaders for some reason,...
hmmm interesting okay :3 thank ya! Im building an Unus Annus world with this prefab
 small valve
very coOl
frank vine
Im getting rid of and compressing stuff to make room for CAMP UNUS ANNUS right outside ! lol i NEED this to work!

 latent raptor
Working on my personal avatar! Not sure if this is the right channel to post this WIP hah
 quaint jasper
Looks cool !
 dusty heron
That’s amazing, even for a WIP
 digital hound
fresh isle
I never made an update post when I finished it did I?
digital hound
fresh isle
I never made an update post when I finished it did I?
is this from something, I just stumbled across it in a video
progress

 molten sail
so its been awhile since i used blender and cats but im trying to somewhat "optimize" my avi but i cant figure out how to properly join armature but leave the meshes and materials separated, i just want to combine the bones into one not the meshes. can anyone tell me what to do? please @ me if anyone has any help since i don't get notifications, thanks alot!
full ice
molten sail
so its been awhile since i used blender and cats but im trying to somewhat "opti...
Custom Model Creation, uncheck Join Meshes
molten sail
hm ok, i tried that before but i guess i messed somthing up, will do thank you alot!
full ice
If the Bones are all named the same, they will all be merged, if any aren't named the same in the Armature being merged into the one you want to keep, those bones will stay. Join meshes just does the same thing as selecting more than one mesh and Ctrl+J, making them a single mesh, which is what you asked about. Materials don't get changed in any of this
molten sail
hm alright thank you!
 random whale
Can I get some help if anyone is free? ;v ; I'm new to this stuff but I'm tryna export a model from blender to unity and for some reason the skirt gets all messed up in unity

 random whale
i think their straight? I'll look if the weight paint is on them
there isn't any weight paint on the skirt connected to the arms
 past stump
hihi i need help lol
i wanna do cartoony eyes but everything ive tried just doesnt look right
 small valve
past stump
hihi i need help lol
i wanna do cartoony eyes but everything ive tried just does...
small valve
past stump
hihi i need help lol
i wanna do cartoony eyes but everything ive tried just does...
do you have a reference for what you want these toon eyes to look like
some sort of drawing or anything
as wel as details about what makes these eyes "not look right"
past stump
yea i have 2 refs
heres the sketch itself


and heres what im wanting to do
i tried to make the eyelashes and they ended up being messed up due to the curves of the face
then i tried to put the eyes caved inside the head but it looked really uncanny and unexpresive
i would send an image of these attempts but for some reason discord really doesnt like it when my model is in grey
small valve
first id like to say that you should revisit inset eyes since they are most common for stylized avatars if you want pupil movements, next to just using planes for eyes. judging from the look on that toriel model it looks like those eyes folllow the same format. its really difficult to nail but when you get it right, it works. example: https://cdn.discordapp.com/attachments/869828593688117288/892471144454701136/VRChat_1920x1080_2021-09-28_01-13-03.692.png
using sharp edges helps a lot. you also want to try and hide as much of the eye contour as you can with the eyelash itself to hide the fact that its inset. a smooth edge like this is probably whats giving her that uncanny chuck-e-cheese vibe:
https://pbs.twimg.com/media/FAh4ELHWEAQOMqD?format=jpg&name=900x900

 past stump
the model i was wanting to refrence actually did the eyes like this which slightly confused me

but that could just be they cheated a little since the base color was already white
but even then i still really dont know how to do the eyelashes to cover the uncanny look
quaint jasper
that's just a mesh on top of the head base
past stump
im really new to modeling aha- ;;
small valve
second, try your best to simplify the planes of the face. undertale characters are definitely more on the toon side of stylized, which swings them further from say, beastars, which although is very stylized is still very much rooted in realistic design choices:
https://i.ytimg.com/vi/5WuH99G7bqg/maxresdefault.jpg
someone like louis for example has really realistic deer eyes, which are heavily cantered (there is a dramatic angle between them) as a result. it can be tempting to do the same thing since in 2d side profiles of toon characters and even anime characters, a lot of work is done to make the eyes still visible:
https://images-na.ssl-images-amazon.com/images/I/81u8kc88fnS.jpg
but the reality is that this side profile needs to be sacrificed a little in 3d. your reference may lead you towards making sure that there is a canter in anime characters, and especially in a lot of animal type characters, but the reality is that it also ends up making the overall face look a little uncanny, kind of like you are looking at it through a fisheye lens.
https://pbs.twimg.com/media/EjQr01vVcAEXEnd.jpg
https://cdn.discordapp.com/attachments/577999283916111885/893301475403501568/unknown.png
that's the first ever from scratch base i ever made. next time i do something like this, i would massively simplify the planes of the face so that way the angle between the eyes was close to 0 as it is on most professional 3d models, maybe at most a canter of 2-5.


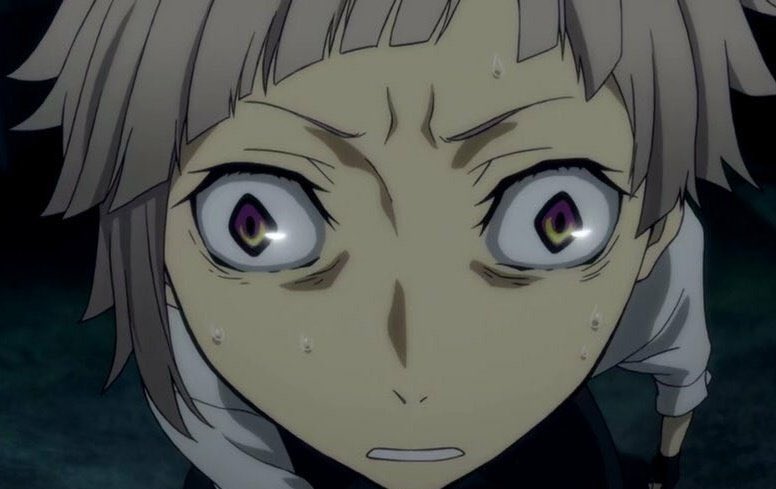
 small valve
past stump
but that could just be they cheated a little since the base color was already wh...
small valve
past stump
but that could just be they cheated a little since the base color was already wh...
likely. you could try creating white circles matching the topology of the face underneath, though you still need room for your pupils to move around without clipping. at that point you may want to make them a little more convex, but for that you would need extra room... its likely whoever made that toriel model is either an expert in topology, is not using pupil movements at all (which circumvents the entire issue), or that the normals have been so heavily edited that they have effectively rendered the inset invisible.
small valve
small valve
second, try your best to simplify the planes of the face. undertale characters a...
forgot to add, you can see in my model pictured first that the eyes are facing directly ahead, and in the toriel model you can see that once again the eyes are cantered by maybe at most an angle of 5.
past stump
Hm
alright
small valve
 past stump
ack hold on its blocking my image again for some reason
past stump
small valve
second, try your best to simplify the planes of the face. undertale characters a...
would you say these planes of the face are too complex then? i did try to keep them simple and optimized besides the mouth where it needed more
 small valve
here's an exampl eo fwhat i mean when i say simplify the planes of the face:

of course the rules, muscle structure, and anatomy of animal faces is different from human faces
past stump
ooh
small valve
but the idea of trying to break everything down as much as possible stays the same
especially the idea that most of the face should be a flat or curved / cantered plane facing the same angle (the white part in that image)


this face, while a lot smoother, does follow the same rules
past stump
well then i should be fine? as besides the mouth the face is almost flat (as ive adjusted it to be alot flatter inbetween my eye attempts)

 small valve
yeah that should just kind of work out. the canter is more dramatic but like, she's a deer. so it should work out
continuing, idk if you have viewed this model with flat shading but you could remove a lot of the uncanny "sunken in" eye look with flat shading and sharp edges around the eye sockets, as seen here:
how on earth was that image explicit
whatever lol
past stump
i would do flat shading but then it kinda
screws with the rest of the model
id add a subdivide but it removes alot of detail from the body
 small valve
 small valve
past stump
i would do flat shading but then it kinda
screws with the rest of the model
id a...
small valve
past stump
i would do flat shading but then it kinda
screws with the rest of the model
id a...
ah, thats not what i mean by flat shading
small valve
thats flat normals, but flat shading is what i just sent, where there isnt any shadows at all that would tell detail about your avatar's shape, so all you have to go off of is occlusion and silouette
ur good
everything except for some low poly hard surface objects should be using smooth normals even if youre going for flat shading
past stump
alright ty ill try this stuff out :]
small valve
yeyeyeye
its likely you will be using flat shading, or hard-edge toon shading, which can circumvent that problem entirely. you can also use normal smoothing on the head and eye sockets as a whole, though it is a little more advanced albeit accessible and achievable enough if you are already modeling
past stump
i do plan on using a toon shader, if it works for quest that is
i know shaders are kinda fucky with quest sometimes
past stump
OK cool ty
spiral sigil
does anyone have an absolutely amazing tips to combat lack of inspiration or motivation, or hitting a roadblock on what to learn next and what to go more indepth into
craggy lintel
Tbh
craggy lintel
past stump
i would do flat shading but then it kinda
screws with the rest of the model
id a...
I wouldn’t block out your hair like that
Curves look way better!
small valve
o yea u right u can do some low poly curves and get some neater lookin hair
quaint jasper
spiral sigil
does anyone have an absolutely amazing tips to combat lack of inspiration or mot...
That's like 4 different things, which thing is actually your main issue ?
spiral sigil
quaint jasper
That's like 4 different things, which thing is actually your main issue ?
mainly a roadblock on what to learn next
I probably need to start learning sculpting but not sure where to learn to apply that
probably searching the wrong things on youtube
lots of probablys
I have basic familiarity with it and dyn topo I just have no skill for turning it into anything i intend it to for worlds or avatars
quaint jasper
You should find one thing you know you want to make and start from there
you acquire the skills for things you actually work on, pointless to learn how to do things that you won't do
Doesn't matter if it's a piece of a world or an avatar, start small, acquire knowledge over time
you'll be there faster than you think
past stump
craggy lintel
I wouldn’t block out your hair like that
I kinda chose to have it that way as I didnt really like the look of curves
I wanted it to be one big thing for simplicity
I dont plan on really animating it or anything anyway
 wicked iris
Working on an avatar for myself, planning on doing VTuber stuff.
Don't have any good experience in VRC/Unity, so I'll be patient on some feedback for rigging, etc.
 quaint jasper
Looks great !
wicked iris
thank you ❤️
proud of it, feels good transitioning my ocs from drawn to 3D
Just recently joined this server, so I hope I get along here well
wicked iris
What's a safe amount of polycount for a model
for vrc?
Will be deleting polys that are unseen
wicked iris
Ok, my model is currently around 44k, but it's not in optimization phase yet, so could be at a more safer count later on
quaint jasper
44k is absolutely fine
median pike
Yea
wicked iris
another question, does VRC support lods for characters
quaint jasper
Nope
median pike
The image looked very high poly to me for some reason. But than again I have no idea if you will be baking it down or no
Yeah no lods sadly
wicked iris
Ah i see, would be cool if they end up being supported
quaint jasper
Might be a bit too intensive
median pike
Probably never will as 90% of the creators would never make use of them
Most people are completely content with avatars that are 500k polys and have 45 materials
So the game runs like crap :D
wicked iris
to me, kinda a shame, I like optimizing stuff
There are ways are limiting players from entering with overly detailed avatars, correct?
median pike
Yes
wicked iris
cool
median pike
Basically avatars get a performance rank depending on what is on the avatar
Toy can choose to block avatars above a certain performance rank
wicked iris
I see 👌
Also, to clarify, don't have VRC right now, but am looking forward to getting my mind used to it
median pike
Though again 90% of the players, at least on pc are "very poor" which is the worst performance rank. So if you choose to block them you won't be able to see most peoples avatars
 quaint jasper

wicked iris
Might do multiple versions of my avatar to pick, with different levels of detail
quaint jasper
Did you triangulate it already or is that with a triangulate modifer/shaded view with wireframe ?
median pike
Topology lookin good
quaint jasper
So pretty
wicked iris
thanks ❤️ Been fooling around with Blender for a while
Mindset of mine is making sure it all flows nicely with lots of quads
also, am a sucker for detail
median pike
Finally someone that knows how to cut holes properly in to a mesh
 latent raptor
Very clean. Heres mine so far
 devout scroll
Well we technically got one LOD
Performance blocked sends your avatar straight to the fallback brush avatar
Or if you used cats to decimate it to good quest rank

 dapper cobalt
yesss new fallback system is pog
thin shadow
https://streamable.com/u50zny
why does it do that when i try to bevel the side? must've something to do with the mesh not sublime enough for bezel. If so, how do i clean it up
 devout scroll
is your scale applied?
and also you have a giant ngon
you might want to connect some edges into quads and triangles
thin shadow
i think i have skipped a few steps
i might think of different approaches, like separating the segments into smaller pieces
devout scroll
 thin shadow
yeap the topology in this thing needs more workaround
 devout scroll
poggers
idle obsidian
 maiden phoenix
any blender gods in here?
maiden phoenix
any blender gods in here?
Yes, giv me your model and I will make it like above
True optimization
maiden phoenix
i dont want it optimized i'm just trying to figure out how to bind clothing to stuff ;3;
idle obsidian
maiden phoenix
i dont want it optimized i'm just trying to figure out how to bind clothing...
Try auto dresser on both
maiden phoenix
auto dresser? O-o
idle obsidian
Japanese magic
maiden phoenix
is.. that a plugin?
maiden phoenix
oh uhhh okay
idle obsidian
You want to bind clothing to you r character right?
tough plover
would recommend doing it in blender, not unity
there is most likely more tweaking needed than just putting the clothes on
idle obsidian
tough plover
there is most likely more tweaking needed than just putting the clothes on
Well auto dresser is made for clothes designed for your character
People often sell additional costumes
tough plover
that's expecting that the clothes are already made to fit a specific model
perfectly
maiden phoenix
so i'll need blender
tough plover
but that is typically not the case
idle obsidian
Still good tool
tough plover
any kind of model edits like that should be done in an actual 3d modeling program
like Blender
definitely a valuable skill to learn
maiden phoenix
thats what i'm trying to do lol
but.. so many things are on the screen it makes me dizzy ;-;
tough plover
I know exactly what you mean
the more time you spend in it though, the more sense everything starts to make
idle obsidian
I would rather never leave unity because I always break models in blender and it's billion times slower
idle obsidian
You can do lots of stuff in unity like mesh edit or texture edit in real-time lol
It's just convenient
tough plover
that doesn't make it better than dedicated programs
maiden phoenix
;3;
i just need someone to help me through it lmao
kinda.. stuck at one part and i tried watching countless tutorials on YT
tough plover
I could but I'm at work right now
and after work I need to texture a tiki hut roof for cnlohr's ballpit world
 oak hatch
Slooowly, new public bot avatar.
 tough plover
looks great
maiden phoenix
dang
craggy lintel
Hey guys
Complicated software question
Does Blender/unity create big Cache files?
quaint jasper
Lighting GI cache can be very large over time if you bake lightmaps/lightprobes often in Unity, other than that no
But even if it was that, it's not invisible files, so it's something else on your computer
thin shadow
craggy lintel
Does Blender/unity create big Cache files?
try to use tree sizer to see
dapper cobalt
linux is also a solid choice if it's an option for you
maiden phoenix
In blender right, you go to your cats plug-in thingy and click fix avatar to yknow fix everything. But for me it's like turning the model into a silhouette or something?
 dreamy epoch
Fix model should mostly be used on specific types of models, most commonly MMD. In other cases it might break stuff if you don't check what it is supposed to do.
spiral sigil
Is there anyway that I can make an ocean work once I get it into unity that moves via a displacement modifier on a subdivided plane and its coordinates are controlled by an empty game object
because when I import it to unity and move the empty it doesnt affect the plane at all which I guess makes sense since it doesnt support blender modifiers
nevermind
quaint jasper
a specific shader could do that but you'd need to find/commission one
spiral sigil
yeah I dont want to make a shader with like idk a flipbook of 100 states
spiral sigil
no water needed but it kinda is bland :{
 quaint jasper
could be clouds
spiral sigil
YES good idea
tough plover
spiral sigil
yeah I dont want to make a shader with like idk a flipbook of 100 states
mochie's water shaders look good
spiral sigil
i will try mochie soon
 lilac crater
I'm actually pretty proud of this chair


 errant furnace
let's say you have a chain on an avatar that you just want to move around. what is the best you can do with it to make it move?
foggy granite
errant furnace
let's say you have a chain on an avatar that you just want to move around. what ...
Dynamic bones
 jovial pebble
Can anyone tell me why using data transfer to make custom normals completely break/remove shape keys?
tough plover
@jovial pebble it's a modifier isn't it
you can't normally apply a modifier to meshes with shape keys
so when you export, blender discards the shape keys and applies the modifiers
the fix is to use ApplyModifierForMeshWithShapeKeys
a Python script add-on to do just what it says
devout scroll
You can do data transfer as an operator
It doesn't have to be a modifier
Just F3 and search for it
@jovial pebble
 craggy monolith
hello I have a question because when I play vr chat I get robots you must of people
 oak notch
what's going on with the nose, it's visible in unity aswell under the correct lighting
 quaint jasper
using a mirror modifier ?
Might have to assign your normal manually for that vertex if not
 past cloak
made all the polys connect so it's one object
 foggy granite
What’s the poly count
past cloak
 past stump
im so terified to rig but this is what i got so far

 warm fox
is there anyone who has free time to set me in the right track to making a avatar
past stump
warm fox
is there anyone who has free time to set me in the right track to making a avata...

this series will help
warm fox
ty
small valve
past stump
im so terified to rig but this is what i got so far
rlly good compared to a few days ago, nice work 0u0
rigging is either going to be a small or large pain in the ass for stylized avatars but for someone like her it should be somewhat okay. hands are the most tedious, shoulders are the most frustrating. everything else is managable, with each joint having unique challenges but ones you can figure out. except for shoulders because shoulders are fucking stupid but, its f i n e
past stump
im just super worried about the face
i might just have someone else do the rigging for me because its just
not clicking in my brain :(
small valve
rigging the face is the last tricky bit actually. your main issues more than getting the bones down is doing it without the normals messing up under deformation. had that problem last time and because i did not look up actual face rigging tutorials i put up with it and was like "welp guess im going to have sketchy shadows every time i close my eyes 😔 "
be smarter than me. learn how to rig faces, adn dont just assume you can do it because Oh I Can Rig An Entire Body Myself except for shoulders Without Mixamo
 merry vault
To me the rigging diffcultly depends on how the actual model's verts are set up, like if there's a lot of verts at joints for the kness and elbows etc.
small valve
the secret to good rigging honestly is its synergestic with good topology. if your topology is not good, no amount of rigging will save it.
merry vault
I could help rig but I only like doing my own stuff in my own time.
small valve
also depends a little on being smart about bone placement but thats the easier part
past stump
id like to say my topology is decent

but idk
the hood is where it gets a bit messy but eh
small valve
youll be fine. id say try to make the loops on her sleeve align more with her arm (forgot the exact keys you need to push) but everything else should be fine.
you can just weigh the entire hood to your chest
or thats what i would do 0u0
merry vault
Doesn't look too hard. The hardest part might be the elbows/shoulders.
 past stump
yeaaa thats where i got a bit lost
small valve
what i meant when i said align the loops to the arms* a little more
 past stump
id fix it
but it might fuck with my uvs
and i really dont wanna remake the textures
quaint jasper
If you edge slide, the UVs will be fine
merry vault
What's an edge slide?
quaint jasper
Pressing G twice
merry vault
🤔
quaint jasper
wait nvm, not edge slide, i'm thinking of another method that's non destructive
small valve
g twice. if you hit E it will match the shape to the adjacent edge loop, you can choose which one to align to with F. i believe what you would want to do is start by using even on the loop to the very edge of the sleeve and working up from there to realign every loop. clamp (alt or C) may also help
worse case scnario depending on the texture you can always rebake her coat
past stump
good enough for now ig

i just really wanted to get this done today fr
i thought id be able to grasp rigging just fine but it honestly has me extremely stressed
been workin on this shit for 20 days now 😔
small valve
should prob take a breather. rigging is one of the trickier parts, and also one of the less interesting parts for most people unless theyre like. animators. or me, because i like rigging 0u0
past stump
yeaa
ive literally enjoyed everything else but this
cos im more creative then technical
merry vault
I don't really find rigging hard. Just time consuming.
small valve
the good news is that if youre doing the bare minimum for vrchat, vrchat does not ask you to do much. you really only need to get creative with rigging if youre going to have stuff like eye blinking and mouth movements, but thats about it. me personally, im an idiot, so i did my first facial animations completely with proportional editing and not with an actual rig. why? who fuckin knows 0u0
past stump
i wanna mimic some of the sprites of this character tbh
small valve
i did want to learn how to rig faces really well the next time i modeled anatomy however after finding some very interesting black magic from twitter artists
merry vault
The thing that pisses me off is making face flexes it just takes SO LONG.
small valve


Been seeing a lot of rigs showcasing eye movement, but many of them lack the subtle changes that make ocular motion interesting.
Things to keep in mind 💡
1️⃣ The plica semilunaris is not stationary! It contracts and stretches with eye movement.
2️⃣ . . . https://t.co/rSP6wAF1xi
Likes
482
Twitter
·
this for example is something i would adore to add onto koyuki or one of my future avatars
past stump
suffering pain pain suffering
 merry vault
The funny deer.
past stump
i also wanted to do (ch 2 spoilers) her ||snowgrave|| animation as a toggle but i feel
like if i cant even get the rig done doing that will be impossible lol
small valve
i dont know what that is but if its like a prop or something thats actually much easier to do than rigging
past stump
its an attack animation
small valve
once you get into unity things very quickly become a breeze
past stump
i can send a video of it if youd like
small valve
perhaps
if you like already animate then you just need to learn how unity works on a technical level, a little bit about sdk3, and then go from there
but that is in the f u t u r e
merry vault
Reminds me how I want to make a low poly Spamton model but I'm lazy and haven't started it yet.
And I bet someone's already done that in 5 seconds of the game's release.
past stump
deltarune ch2 spoilers ||https://www.youtube.com/watch?v=7izeWzy0Z-g&t=5s&ab_channel=salasmisto||

Here are the best part of the snowgrave route
just the first battle
 past stump
i also wanted to make a toggle for her to have like
white finger trails to look like ice powers i dunno
small valve
yeah if you ||want to fly around like a scary bitch youd have to know how to animate characters. but literally everything else, the fx, the snow, the ice box - all of that can be done really easily with particles. the only thing im unfamiliar with is how to collide with player capsules as an avatar - if thats even possible - which if it isnt, its going to be very easily possible in t he very next major update whcih should be coming before the end of this year. but other than trapping people in ice, you can very easily do the snow n shit after learning unity particle systems for like an hour, and then figure out how to synergize everythign after messing with sdk3 for another hour||
deltarune spoilers
past stump
oh i didnt want the ||ice capsule||, just everything else lol
merry vault
I can make Unity particles but probably not really crazy shit.
past stump
i can probably figure out the unity stuff fine
seems straight forward enough
and ive animated in sfm
so i know how to animate
i just cant rig lol
merry vault
Have you tried compiling models for sfm?
past stump
nope
past stump
hjbjdfnkdn
merry vault
But if anyone by some rare chance needs to compile a model for Source then tell me about it.
past stump
lmao

 craggy lintel
Does anyone know the solution to gravity hair but not the hair being pulled down?

 ashen stag
craggy lintel
please lmk!
ashen stag
craggy lintel
please lmk!
How are you trying to get the hair to be pulled down? The gravity parameter of dynamic bones only works if rotated from its rest position where as the force parameter is always active
craggy lintel
Gravity parameter never renders for me in playmode..
@ashen stag
And I’m one of the rare ppl who actually bought dynamicbones
ashen stag
Just stop using gravity, I always just use force
 uneven bramble
craggy lintel
And I’m one of the rare ppl who actually bought dynamicbones
uneven bramble
craggy lintel
And I’m one of the rare ppl who actually bought dynamicbones
yep
spiral sigil
Hey I wanna commission someone but the only way I can pay is through steam items
craggy lintel
ashen stag
Just stop using gravity, I always just use force
Yeee but I am tho
It just deforms my sculpted hairs
as I sent previously

Left is force applied and right is no force applied
ashen stag
What do the bones look like? If they are already pointed downwards then nothing is going to happen if you dont move the model
 brazen depot
is this where i can ask help about why my avatar body and head is messed up....? I never used blender before
quaint jasper
messed up how ?
brazen depot
 quaint jasper
Did you try to join two different things together ?
brazen depot
mhm the head wasn't from the body at the first place (sorry for my english)
quaint jasper
In that case you need to use Cats armature merge, the head should have its own bone
brazen depot
mhm i merged it with Cats
quaint jasper
what does the armature list look like ?
brazen depot
like this (btw thank you so much for helping me)
 quaint jasper
Try opening spine and check if there's chest > neck > head
also how many meshes you're left with after

 quaint jasper
Is the head one of these meshes ?
 quaint jasper
Join all those you want, and rename that to Body
brazen depot
like this?
 quaint jasper
Yep, now try rotating the spine bone again
 quaint jasper
Alright, in that case, select the body in edit mode, select a single vertex on the face, and select Item in the side panel you open with the N key, it should show you what vertex groups those vertices are under
 brazen depot
 quaint jasper
Ah, do you have a vertex group called head in your vertex group list ?
the upside down green triangle on the side menu
 quaint jasper
what happens when you press "Select" at the bottom of that menu ?
brazen depot
 quaint jasper
Oh boy 
In that case i'd suggest going back to where you were earlier with everything not combined
foggy granite
why is the skirt so dense
quaint jasper
running the translation with Cats on everything first
brazen depot
 quaint jasper
Probably disable the checkbox and then translate all
brazen depot
it says i got ban by google translate...?
quaint jasper
 ?
?
spiral sigil
oh because CATS uses google translate
did you spam the button?
google translate might of got mad at you for that
rate limiting and all that
brazen depot
i clicked it once
quaint jasper
I wonder if it thought there was a bad word in there
Can you ask in https://discord.gg/zRd4m2Ev
 quaint jasper
Fixing the head would be easy, but as we saw, your chest is also weight painted to your head, so its a whole big mess
Where was the head before btw ?
Did it have an armature ?
brazen depot
In all honesty, should i redo everything?
i can try to work with the body only, i saved it in another file
quaint jasper
Yeah it would be good to make sure everything is correct first before trying to merge other parts in
from the names being translated and the vertex groups being correct
brazen depot
thank you so much
quaint jasper
np, lmk if you eventually figure it out !

 brazen depot
is there something I shouldn't check?
 quaint jasper
Worth saving and trying again if it doesn't work, but that seems correct, merging all bones might help if it doesn't work like that
brazen depot
damnit same probleme
is there a way i can make it so my head is considered the head?
foggy granite
 dense nova
It won’t affect the texture but it would affect how modifier interact with the mesh I reccomd just start with a cube subdivided a couple times
craggy lintel
ashen stag
What do the bones look like? If they are already pointed downwards then nothing ...
Hey, they follow the lines of the hair unfortunately
It’s just my rigging style
To have bones not physically touching hair, I just hate the process for it
 coral island
got bored so I made a donut, then I made this...
brazen depot
i think the problem came from wrong names so i renamed some but i still got problems
 quaint jasper
glad you're solving it ! That's why merging multiple items from different places is difficult, because they are often built differently
brazen depot
im ready to give up-
 drowsy rune
so this happened when I was previewing blendshapes in unity and I'm certain its an issue in blender.
How can I fix this?
 craggy lintel
Kiteman
quaint jasper
drowsy rune
so this happened when I was previewing blendshapes in unity and I'm certain its ...
All shapekeys ?
quaint jasper
brazen depot
im ready to give up-
Which issues do you have left ?
devout scroll
dense nova
How do I get rid of this weird darkspot at the tip of the beak?
the end is too sharp. select the pointy vertex and bevel it with ctrl+B then V for vertex bevel
dense nova
Thanks!
 grave forum
drowsy rune
so this happened when I was previewing blendshapes in unity and I'm certain its ...
grave forum
drowsy rune
so this happened when I was previewing blendshapes in unity and I'm certain its ...
Keep it looks cool
Make a great meme avatar
wicked iris
This is why I don't take my sketches up for granted, final look always tend to be slightly different proportion wise
 spiral sigil
Guys I wanna get into blender modeling how do I start?
devout scroll
spiral sigil
Guys I wanna get into blender modeling how do I start?
There's thousands of beginner tutorials on youtube
Watch a bunch, find someone you like the teaching style of and get a basic understanding of blender
spiral sigil
Ok thanks
thin shadow
spiral sigil
Guys I wanna get into blender modeling how do I start?
by downloading it first
 gloomy cipher
I have found something and i must make it a reality


 rough lintel
Nasus
gloomy cipher
Ah, susman, we've been expecting you in the reactoooor....
wicked iris
might've nailed the shape of the legs

 main gull

 lyric nimbus
quaint jasper
lyric nimbus
quaint jasper
https://ask.vrchat.com/c/commissions/avatar-commissions/35 @lyric nimbus@main gull

VRChat Ask
Post about commissions for avatars in this category. Requests are not permitted, we only permit posts from those providing services.
spiral sigil
pain machine 🙃
 idle obsidian
spiral sigil
pain machine 🙃
idle obsidian
spiral sigil
pain machine 🙃
no 
quaint jasper
That's a lot of material
spiral sigil
must be all those wires
 devout scroll
nice 3d printer
spiral sigil
spiral sigil
context:
Mom pick me up I’m scared
 exotic obsidian
spiral sigil
context:
exotic obsidian
spiral sigil
context:
Should I be glad to not know what that is/does?
 tame sinew
I have a model of a skull, but there’s this weird bump on the bottom that I can’t take off. Can anybody help?..
brazen depot
i was wondering if anyone know how to merge a skirt with physics on my body
tough plover
brazen depot
i was wondering if anyone know how to merge a skirt with physics on my body
physics is typically done with dynamic bones, all that requires is for the skirt to be rigged
if your skirt has an armature and you are trying to merge it to your main model's armature, that can easily be done in blender
some more context and screenshots would be helpful
brazen depot
mhm give me a second
so im basically wondering how to merge this skirt on my body. The skirt have bones and when i merge and fix the character, the bones disapear
 tough plover
oh jesus fuck the amount of bones
brazen depot
TuT should i abandon the bones?
tough plover
no, you should reduce the amount of bones
brazen depot
oo
tough plover
by for example, merging every other one into the one above it
 tough plover
hm
not what I was thinking of but maybe that could work, I was not aware of that option
let me test it
 merry vault
gloomy cipher
merry vault
gloomy cipher
My god what are you doing?
brazen depot
awesome, i dont need much physics on my body
tough plover
it seems to have only reduced the amount of bones in each chain
brazen depot
skirt*
tough plover
not the amount of chains in total
3-4 bones per chain and like 5-6 chains would be optimal I think
brazen depot
should i erase some manually?
tough plover
I would probably go the manual way
brazen depot
thanks
tough plover
I can call and show you an example
tough plover
blender is still a complex piece of a software and trying to explain where everything is over text is not always easy
brazen depot
 tough plover
seems a lot better
did you delete the bones or did you merge them
deleting them is an issue
tough plover
because there are still vertex groups on the skirt's mesh that are referencing those bones
merging with CATS also assigns the vertex weights to the bone you're merging with
brazen depot
i think i will look for a new skirt
tough plover
why?
that one will be fine after some optimization
can't expect everyone online to be putting out top quality work for free
tough plover
the worst that can happen is you need to go back to an earlier point
blender keeps autosaves
brazen depot
o
tough plover
 brazen depot
O_O
i didnt know this-
thanks
well if you really dont mind i would appreciate the call and the guidance, but i dont wanna be of any trouble
tough plover
I already whipped up a demo scene

 tawny pond

 wintry vector
do you know how to weight paint a model that occludes itself in the viewport?
does anyone know?
like if one part of the mesh blocks another part of the mesh that needs to be weight painted
and its all kinda clustered
tough plover
wintry vector
like if one part of the mesh blocks another part of the mesh that needs to be we...
select the part of the mesh you want to weight paint in edit mode, go to Weight paint mode and enable either one of these
 wintry vector
@tough plover Thank you. I've been doing blender for over a year and this was a major roadblock for me which is why I avoided weightpainting
tough plover
wintry vector
<@!93092275638251520> Thank you. I've been doing blender for over a year and th...
another pro tip: before entering weight paint mode, click on the armature first and then shift click the mesh. once in weight paint mode, ctrl + click bones to select the bones and the associated vertex group
you can then manipulate the bones using R to test the weights
wintry vector
yep
tough plover
note that it doesn't work if you have either face selection or vertex selection enabled
I recommend creating shortcuts to enable/disable those, I have mine on the keys 1 and 2
wintry vector
is there any way to hide the rest of the mesh while you weight paint only selected verticies?
tough plover
you could enable X ray mode while still in edit mode
you could also do ctrl + I to invert the selection, H to hide them, then A to select everything before going back into weight paint mode
wintry vector
tough plover
you could also do ctrl + I to invert the selection, H to hide them, then A to se...
ah, this
@tough plover how do we unhide them when we're done
tough plover
alt + H
wintry vector
these two tricks are going to make this so much easier lol
gloomy cipher
merry vault
My god what are you doing?
Now, now, if you follow standard insertion procedures, everything will be fine.
 ripe escarp
first time 3d modelling, following dikkos series and its going pretty well

 forest garden
Hi guys, just asking kind of noob question here, sorry 😄
I'm trying to put some 3D models into unity, those models we ripped from Xenogears by people much more klnowledgeable than me
The issue I have is that for some models, transparency is not rendered properly, while it should work.
When putting an asset into unity, is there something particular to do to force transparency ?
I wonder if i made a mistake importing it.
The only thing i'm making is 1) drag and drop the file into the scene / rotating this / select all and put a mesh collide so that the player does not fall of.
i end up with this :


while it should be this :


Also, as you can see, the textures are a bit blurry, could this be because of the scaling?
spiral sigil
forest garden
this first one looks like you need cutout on your shader
wicked iris
I barely have any Unity experience, but I can say, the textures should be fine, it's just the texture blur filter is enabled by default.
Best I could say is find the shader/texture settings that enables the alpha transparency and filter
forest garden
Oh there are shaders, i did not see
i'll disable anything then, let's try. thanks guys ❤️
wicked iris
this hair has 14K polygons, 50% of how much the body has lmao
https://cdn.discordapp.com/attachments/664340987430174720/894915313349574686/unknown.png


once it's all done, I'll remove all the polygons that are hidden underneath
spiral sigil
the hair do be like that
wicked iris
how it looks on the character


still adding some extra strands to improve the shape to how I want it
forest garden
beautiful, congratz 🙂





 forest garden
Ok
so I was able to go to the shader thing

I'm pretty sure the "opaque" rendering is the issue, but I cannot change it
doesnt do anything when i try to change optinos... Any clue?
with 'edit shader' i get this

which does not seem to lead anywhere, 0 option again :/
(ok found how to remove filter from textrue, going forward)
stioll strugling with transparency
tough plover
forest garden
stioll strugling with transparency
you don't edit shaders, you edit materials. materials are using shaders to determine how an object is rendered
as for transparency, you either need to use the alpha of the texture itself as transparency, or use an alpha map (depending on how the game was made)
forest garden
Yep for the no shader thing i edited the texture input

here by putting 'no filter' in Filter mode in stead of bilinear
I tried "alpha is transparency" but it does give anything yet, and i don't know how to edit this alpha
tough plover
careful, "material" is not the same thing as "texture"
a texture is an image, a material is something applied to a mesh which takes as input textures and other values and is governed by a shader to determine how an object is rendered
forest garden
Ok yes, this way diff alpha can be defined for diff objects i guess
then my issue remains that for materials, i cannot edit them
 tough plover
that's because it's trying to use materials included with the FBX
forest garden
would like to change in these options, for instance opaque > transparency, but i can do anything
tough plover
you either need to create new materials and assign them, or you can click "Extract materials" in the model's import settings
when you click that, it'll prompt you to select a folder. make a new one called "Materials"
it'll then create new materials for every material slot on the mesh(es), assign them, and dump them into the folder.
forest garden
Oh ok, and if I have a "level" made up of materials placed in good places, with right textures etc
( . dae file)
will there be also a new dae in this new folder with all the new materials ?
tough plover
no, it'll assign the materials to the original .dae
forest garden
Or will i have to swap themm all manually?
oh ok, even better
well, thanks a lots 🙂 trying to get this done asap (good that we did not made too much worlds already, sincewe now have almost to restart from begining)
thanks a lot
hope it'll work 🙂
oak hatch
Taking an old gun model I made and cleaning it up for use w/ an avatar. Sub 2k tris.

Need to make a holster, and redo the UV mapping
oak hatch
Melon Lobe! Cold dead hands! Reee 🤣
But yeah, having them makes doing some of this stuff so much easier.
And since they are currently gathering dust, because ammo prices; might as well use them to design some cool stuff.
spiral sigil
Yeaaaa
oak hatch
Next model will be a MacDaddy sorta thing with a little AFG. Basically a SciFi tec9
oak hatch
 oak hatch
Yes