#3d-modeling
1 messages · Page 114 of 1
 ashen stag
But you should look into texture baking so that your look isnt tied to just blender, once you have the textures it can work anywhere
 floral raven
Can someone tell me where I can find my pfp its my pfp on everything
 radiant ridge
Another question in Blender how can I make a Mirrored object two separate objects?
 tough plover
@radiant ridge you mean like, after applying the mirror modifier, take the mirrored half and separate it?
tough plover
np
radiant ridge
So when I tried baking my materials they just rendered black.

 azure rain
that looks like a reasonable triangle count hope your texturing goes well
 small valve
thanky
 worldly tangle
Modelling the first "Automatic" Rifle(/Revolver) for my 12th avatar (Merhon and Hollingsworth M1855)

 obsidian nova
More-or-less done modelling the bones for this tiny hangout world. Thought I'd share.

 worldly tangle
The first ever 3d model of the "Automatic" M1855 Mershon & Hollingsworth Rifle (🇺🇸)
Verts: 885
Edges: 1,625
Faces: 764
Tris: 1,722

 cobalt aurora
Sup guys, having a small issue, i cut this mesh apart some time ago, but had to stitch it back together using cats, tho now im running into the issue that eventhough i molded it back together it seems like these parts are still registering as seperate pieces, anyone a idea how to fix this?

I seperated it by using the bisect tool, tho a bit later i realized that i cut out too much, when i merged it back together using Cats this what it looks like now everytime i go into sculpt mode.
and now that these "shapes" are there i can seperate the Body by loose shapes
The main issue for me is, is that the edges mess with the weightpaint, which makes it unable for me to get smooth transitions
 white moth
I discovered that "Transfer Weights" in blender works much better if you temporarily subdivide the model you're transfering from like 20x times, transfer weights, then revert the subdivision.
Is there any way to mimick this without the subdivision?
tough plover
@white moth you can just set it to Nearest Face Interpolated
rather than Nearest Vertex
there are cases where one is preferable over the other
jacket that you fit onto the model? face interpolated
skintight fishnets that match the body topology? nearest vertex
white moth
I tried that but the results were actually different from, and not as good as, subdivision spam
For making clothes not clip with the underlying body
white moth
cobalt aurora
https://cdn.discordapp.com/attachments/390924397726138370/858420223019581450/unk...
In vert mode, select all non-manifold and it should highlight the he hard edges. De-select any that are actually important and meant to be there, like lips or eye sockets. Then run merge by distance.
 spiral sigil
anyone got a protogen model for blender
 devout scroll
It's a paid model
 quick egret
I need help. So in Blender ** i am merging my armature ( model ) with the top outfit ( wich becomes a toggle) so i unselect join meshes and select ** Merge all bones But when i do that i get this error suddenly. Does annyone know why its like this?

 dreamy epoch
If you are in Edit mode then switch to Object mode and try again. At least this is what allows me to merge armatures most of the time.
quick egret
nope its still gives the same error for some reason.
This is how it looks like atm

@dreamy epoch
tough plover
@quick egret what blender version are you using
quick egret
Blender 2.83 @tough plover
 feral veldt
I'm not sure if this is a right place for the question. I'm sorry if it's a wrong place and please redirect me to the right place. So my question is that I'm trying to make a tire. But I don't know how to put on the multi textures on an object like this one. Tire treads on the sides and a rim on the front and back. I checked the internet and couldn't find anything helpful.

 quaint jasper
You need specific UVs
quaint jasper
Ah, i don't think that's possible with probuilder
feral veldt
Really? I'm watching a tutorial right now. It's possible with ProBuilder
quaint jasper
To make custom UVs ? I've never heard of that, cool if possible though
feral veldt
Hmm. What about you? Can you show me how to do it?
quaint jasper
I don't know of any way to do that in Unity
tough plover
@feral veldt you should be doing that in blender
if you want to have any control over how to texture it, you need to UV unwrap it
feral veldt
I see. I'm new to Blender too XD
tough plover
a tire is a simple enough starter project
 spiral sigil
is this a place to ask for help?
I commissioned a model from someone but they don't know why the model imports in Unity/VRChat with parts of the body facing backwards
even my tech savvy bro doesn't know what's up
I think it might be armature or something
quaint jasper
screenshots ?


 quaint jasper
Put your chest bone in
quaint jasper
It's not in the unity mapping configuration, right side
spiral sigil
(I am not very familiar with this process, hence why I sought out someone to do this haha
oh my, I will ask if she could do that

this is their response about it
small valve
posting for gen chat

 loud pivot

 onyx berry
small valve
posting for gen chat
onyx berry
small valve
posting for gen chat
Have you deleted the polygons that are hidden by the clothing? And you can definitely lower the resolution on the hair.
Can we see the wireframe?
small valve
onyx berry
Have you deleted the polygons that are hidden by the clothing? And you can defin...
done, done, the distance from the hair makes it hard to see how many triangles it is. if anything, i feel like it might be slightly under detailed for VR purposes, and im gonna try to hide it with shader magic
the assets all together are 25k triangles, and that combined with the base im using (Koyuki) brings this avatar to a total of 50k, and id rather it not get higher than that
 onyx berry
Wait, could you set the viewport settings like this, that's hard to see
 small valve
it is set like that
i can just get closer
yuuuuniform (the vest does not have triangles, the white shirt does have triangles because the entire uniform will be togglable with that being the only article of clothing left
 onyx berry
small valve
it is set like that
onyx berry
small valve
it is set like that
Put it in solid mode
small valve
ah


shoooooz
hair

i might actually go through and lower the across-detail of the backhair

now that i look at it
also, get ready for sketchy topology

that i still need to adjust by the looks of it
onyx berry
You could get rid a lot of the loops on the hair and use prerendered cards for the thinner smaller strands.
And for the sweaters and vests you could bake that to the body mesh itself.
small valve
tough plover
depth is important
this. id rather not bake stuff like that. i already know what i plan to use as texture and what im going to add as normal
at some point im going to be messing with cloth in order to bake normals onto the coat and white button-up undershirt
tough plover
not a bad idea
don't forget about the Cloth brush in sculpting mode
there isn't really a way to adjust the size of the creases apart from the mesh density
so maybe subdivide 1x on a copy and use that
small valve
okok
radiant ridge
anyone know why my models shoulders are invisible for some reason?
 quaint jasper
Inverted normals
small valve
inveeeeeeerted nnnnnormals
 sterile swan
Hey, can someone help me attach a amateur to a avatar
 civic depot
where is the assets file for unity located?
 dusty heron
civic depot
where is the assets file for unity located?
dusty heron
civic depot
where is the assets file for unity located?
If you mean project assets, then: [Project folder]/Assets
civic depot
dusty heron
If you mean project assets, then: [Project folder]/Assets
aight in program files/unity?
dusty heron
civic depot
aight in program files/unity?
What do you meant by "Assets", Unity engine files? Or assets used in a project?
civic depot
dusty heron
What do you meant by "Assets", Unity engine files? Or assets used in a project?
im trying to add my 3d model into unity to put into the vrchat sdk and im not really sure
nvm i got it

 spice pewter

 broken whale

 spiral sigil
oh wrong channel sorru
 bold oar

 i made my first t-shirt
its not the most polished thing ever but im very proud of myself
spiral sigil
I need some help
I cant figure out why its not letting me texture paint on my image

 tough plover
what resolution are you rendering it at
spiral sigil
1080p
tough plover
check the rendering options
spiral sigil
1920x1080
tough plover
I meant like, all of the other options
radiant ridge
So I’m having an issue with my FBX models legs. The VRM models legs are fine. So why is it the models legs break when I import the same model in FBX form?
 tough plover
@radiant ridge click Configure under the rig tab, and reset the pose at the bottom under Pose
the issue is most likely that the leg is bent the wrong way
radiant ridge
Ah ok then. I’ll try it.
spiral sigil
 radiant ridge
so what am i looking at? @tough plover
 tough plover
oh tf
it's almost like the legs are also weighed to another bone they shouldn't
go to blender
go to edit mode
click one of the vertices on the leg
in the N sidebar, go to the Item tab
you should see a list of which vertex groups that vertex belongs to
radiant ridge
like this ?
 quaint jasper
you selected a face
radiant ridge
this is what is looks like weight painted

im confused what the N sidebar is
also how do i get the upper chest bone and right shoulder bone back. for some reason the bones arent there
devout scroll
N sidebar is the sidebar that pops up/gets hidden when you press N
radiant ridge
thanks pumkin
 tough plover
@radiant ridge in edit mode, click on any one vertex
radiant ridge
alright then whats next?
just check every one of the vertexs till i find one that isnt group to the lower right leg
tough plover
@radiant ridge no, you look in the Item tab to see what groups it's part of
you can clearly see that it's not just one vertex that's messed up, it's the whole lower leg
so you can just check any one of those
radiant ridge
right here is where im looking right?
 radiant ridge
how do i do that then? clean them i mean
just erase all the weight painting and start over?
sorry if im not understand much of this. its all very new and confusing
wait i think i got it. the clean up is in mesh in edit mode. but what do i just hit clean and thats it?
i did it but it doesnt look like anything changed
@tough plover should it look like somethings changed after i hit clean?
tough plover
@radiant ridge the other group should be gone
radiant ridge
oh the group here
 radiant ridge
select the whole model?
tough plover
ye
radiant ridge
alright
radiant ridge
ok so i cleaned everything but now its saying i have no leg bones when i change the type from generic to Humanoid

 dim shard
drag the bones you want to use as the leg bones into the assigning field. In this case the legs are assigned properly just the foot bones have not been
 radiant ridge
whyd this happen now?

 last chasm
dumb question, but how do i color my models and keep the color there? (models done but NEEDS coloring)
this is in blender fyi
tough plover
last chasm
dumb question, but how do i color my models and keep the color there? (models do...
if you want to be able to properly texture a model, you need to UV unwrap it. think of it like cutting up your model with scissors and laying it out flat.
if you just want simple colors, then you can create materials for each color, assign them to whatever faces you want. this is fine if you only have a couple of colors, but if you have more than 4 materials, you should definitely unwrap the model and either texture it manually, or alternatively, still assign colored materials to parts of the model, but then bake a texture using that.
sidenote, I like your name. sausage mcgriddles are great
last chasm
thank you, that helps, and yeah my names pretty good
since im creating a persona with a lot of colors (itll be a means of self expression and putting myself into the digital world with who i am written all over me), itll be a bit harder for me
tough plover
a very good program to texture stuff is Substance painter
yet another thing to learn I know, but substance is very powerful
last chasm
i dont mind having to learn stuff, as long as its functional and doesnt take a month to understand, im good
tough plover

 last chasm
oh that looks good
tough plover
indeed
I learnt substance just by looking at other substance projects and seeing how those were done
but there's good tutorials too
last chasm
do i have to make the model into one solid model before painting it?
tough plover
you mean join the meshes?
last chasm
yeah
tough plover
you dont have to, but you should for when you actually export your model as an fbx
substance has "Texture sets", which is essentially its own stack of layers per material on your model
any mesh sharing the same material will be using the same texture set
last chasm
alright, the pants my model has are ripped jeans and i want to make sure i dont miss anything or color the wrong things, so its good i can keep them seperate
i can show it real quick
tough plover
you don't need to try to paint on the whole model directly
like
what I recommend doing is duplicating your blender project
in your 2nd one, duplicate the model, and put the copy above the main one
then, "explode" that copy
separate each part so that you can easily texture each one
because both models are using the same UV map, you can paint on any of the copies of the model
last chasm
oh thats a good idea, thank you
tough plover
 last chasm
i see, alright
tough plover
anyways, what does your model look like in blender rn
 tough plover
so it seems to me like you took a base model, and added stuff to it, right?
last chasm
yeah, i cant model anything on my own, i had to modify the clothes to fit on the body though
i made sure i was allowed to use it for vrchat
tough plover
did you make sure the weight painting is fine?
last chasm
im not sure what that means
tough plover
weight painting is how you specify which parts of the mesh move with which bones
last chasm
ohhhhh
tough plover
each vertex gets assigned to one or more vertex groups. if a group shares its name with a bone, then moving said bone influences every vertex which is part of that group
when a vertex is assigned to a group, it also gets a weight, from 0 to 1
0 means it's essentially not part of it
1 means it's 100% part of it
a weight of 0.5 would mean that it would move 50% of the way when you move the associated bone
last chasm
makes sense, ill check sometime later, since im not on blender or anything right now
tough plover
if you don't make sure the weights are fine, then you'll go in game and see the legs moving, but the pants staying completely stiff as one solid piece
last chasm
alright
tough plover
to make your life easier, you can "project" the vertex groups from one mesh to another
using the Transfer Weights function
useful for clothes
last chasm
will do
spiral sigil
Here's a render i did of a Helmet xp
 spiral sigil

 vocal dune
i am working with a traditional model for the first time rather than my lowpoly style and I am really happy with how this is turning out :-)!!!!!! I just have texturing and then rigging left ! I am considering making a version for vrchat too if I manage to learn how to set up dynamic bones


 grizzled timber
 timber shale
praiseeee
timber shale
grizzled timber
praiseeee

quick egret
( THIS IS A NUDITY PICTURE OF A AVATAR I AM WORKING ON FOR SOMEONE MY APOLOGIZE ) So i am still working on my avatar with toggles. however this avatar needed 8 toggles for a reason. ( choker 2 toggles) ( xxxx 2 toggles ) and then we have bottom ( 2 toggles ) and top (2 toggles)= 8 . The person wanted this avatar to become nude. So i had to cut the avatar skin to make it work and it did! Only one problem i just have now. In unity, the skins are all the same material. But when i try it in worlds. the bottom part is either lighter or darker. Does annyone maybe have a solution for this?

 devout scroll
Drag the spine object into the anchor override box of all your skinned mesh renderers
quaint jasper
None of these should be separate meshes, they should be weight painted to bones and scaled...
 still wadi
as long as the poly count is low tho
quick egret
devout scroll
Drag the spine object into the anchor override box of all your skinned mesh rend...
This actually fixed it! The skin is normal now again! Thank you @devout scroll ^-^
devout scroll
But what ruuubick said it also true. Join your meshes if they there's no good reason to keep them separate
white moth
timber shale
What program? Noticed the face capture
 desert wedge

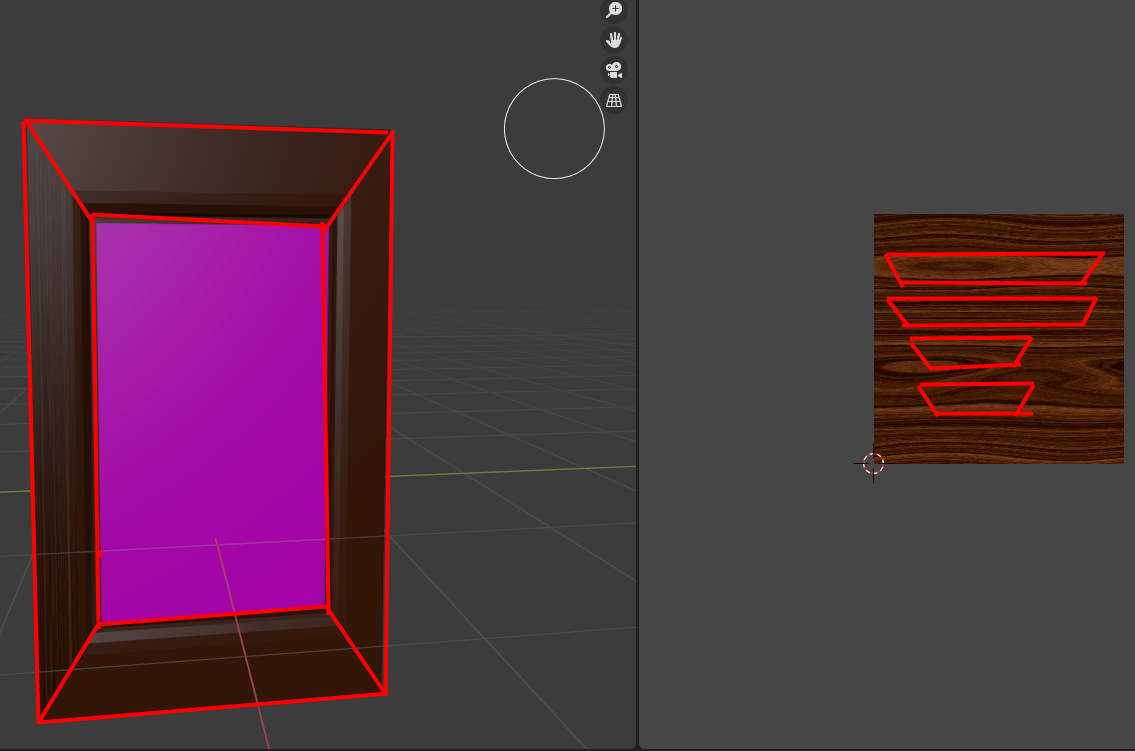
Is there a way to uv unwrap this so it takes the shape of the object?
The UVs are all just squares taking up the entire texture
And it obviously does not work like it does in probuilder
 glad mortar
desert wedge
Is there a way to uv unwrap this so it takes the shape of the object?
glad mortar
desert wedge
Is there a way to uv unwrap this so it takes the shape of the object?
Probably cube projection?
azure rain
where you would probably want your UV seams if you're doing it manually https://i.gyazo.com/7f8ca2d030df177d18e52ef268752a24.png
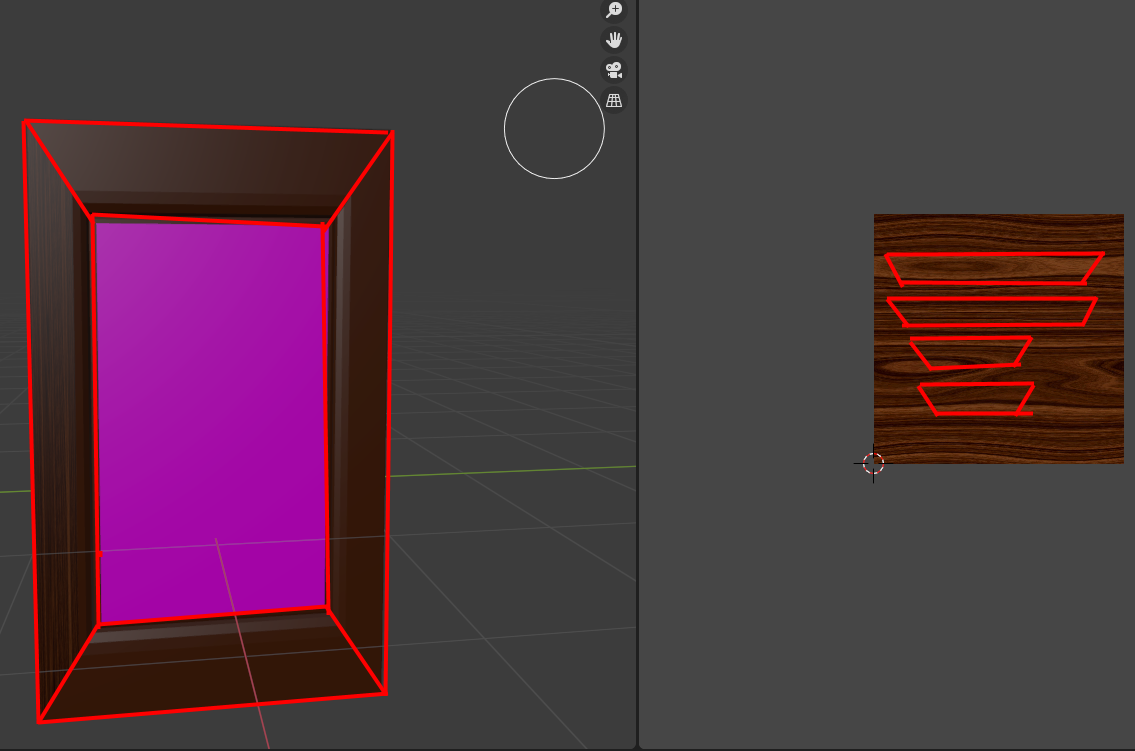 desert wedge
Thats what would make sense but fist there are bevels everywhere so a lot of faces. I wanted to know if it could automatically do it like this
 tough plover
@desert wedge no, that's not how UV unwrapping works lol
put the seams in the same way rainbow showed you
the bevels have no effect here
azure rain
and that would look weird having the wood be one solid piece like that
as you did not make a window out of a solid piece of wood windows are made out of multiple pieces of wood
spiral sigil
seeing how the UV is wrapped exactly would be nice too, just go into edit mode on the left panel or the panel that currently isnt in the UV Editor
desert wedge
I know how to do that, when I do it is just every face is either some weird shape or some square taking up the entire image for some reason
I have not mapped it or unwrapped it properly yet I would imagine
devout scroll
make sure your scale is applied in object mode before you unwrap
desert wedge
devout scroll
make sure your scale is applied in object mode before you unwrap
Noted. By the way, did you make the avatar tools?
devout scroll
Yes
desert wedge
Good work, I use them often
devout scroll
Thank you! 
spiral sigil
do people sell services for 3d modeling and rigging avatars (idk if its the same thing correct me
dusty heron
spiral sigil
do people sell services for 3d modeling and rigging avatars (idk if its the same...
People do, but more in VRCTraders in #community-servers-old
 vague parrot
I've been following a tutorial for making heads, and i had to use a other persons model because their isn't really any reference thing i could use and i couldn't remove the hair ;-; but here's my best so far still more to do though.
 spiral sigil
dusty heron
People do, but more in VRCTraders in <#407970838294560769>
spiral sigil
dusty heron
People do, but more in VRCTraders in <#407970838294560769>
ooh
 thorny ivy
s u s
 split aspen


 craggy lintel
The sharpness of the chin
 atomic hamlet
That's really good for a first avatar from scratch, don't beat yourself up and call it trash like that.
 foggy granite
Looks good but the nose looks a bit too wide should thin the bridge a tad bit but it looks good once you start texturing it should be even better
foggy granite
Head looks small
The body looks stretch mainly around the torso and arms
Elongated
Shape in general topology looks fine
Are you using q reference
And also yes
Yeah
And also I recommend using sketchfab to observe the edge of other models to make areas like the pecs more define
Alright and one more thing don't go too far above the poly limit
spiral sigil
^If you are going over 125k polys on a regular human avatar then you still have some room to improve in the geometry
The looks of it are great though
atomic hamlet
Well, not all anime style human characters have completely accurate proportions anyways, so i think it looks fine.
azure rain
cool
foggy granite
Nice that’s a good start
foggy granite
Okay that’s a good improvement
I would say to increase the size of abs and lower them a bit
tough plover
that looks really good actually
foggy granite
If you looks at photos abs reach the groin
tough plover
I feel like the pelvis bones could be more defined
foggy granite
And also the hips need a tad bit of work
tough plover
^
foggy granite
I would like to see a side profile
foggy granite
Calf need to be longer and shoulder need to be inflated so it looks more bold and define
One thing knee look a too low
Should push it up so it’s a bit below the center where the thigh and calf connect
Calves mainly looks short because of the position of the knee
foggy granite
The body looking good
Do he even have nips
Wow
I would say just refine the legs a bit and it’s ready to go
Np happy it turn out well what’s the outfit you got plan for him
Theirs a lot option
You can got for a simple Hawaii shirt and shorts to show off the body

 winged anchor
Thats a giant tail
foggy granite
Got to make them teeth
I make more props then anything but Im trying to get into avatar scene but it hard to get thing how I like them
But I know enough about avatar to fix issue and refine point but making them from scratch nope


 spiral sigil
guewd
small valve
improved it to be specifically for shirts
 tough plover
shouldn't be but could always fix that

 quaint jasper
can't recall seeing this topology on a shirt before
small valve
quaint jasper
can't recall seeing this topology on a shirt before
trying to go for good shoulder deformation while also having it look more like the way a shirt would deform, which meant moving seams around until they lined up with real life seams
i hung my real life white button-up shirt to refer to when making this
quaint jasper
yeah as long as it deforms correctly it doesn't matter
small valve
i could get rid of them but i dont plan on bringing it higher than this, theyre so small that any subdiv shouldnt fuck it up in case i want to bake n ormals from cloth or somth, and my current solution for converting the middle to quads is uh

not ideal
quaint jasper
that's worse than triangles
small valve
i like how i just massively leveld up my topology

this is so much better than my first set of clothes
though there are a couple of curiosities
 azure rain
small valve
i like how i just massively leveld up my topology
azure rain
small valve
i like how i just massively leveld up my topology
so good
small valve

yeah bitch
i saved some triangles too, which means that i can add more detail on some parts that really need it
 unborn lark
I just imported and added this shield I made to my avatar and somehow even though it's only 16K tris it makes the poly count jump from 136K polys to whatever this number is

 spiral sigil
i would love to figure out how model my own characters, cuz all these look amazing
spiral sigil
unborn lark
I just imported and added this shield I made to my avatar and somehow even thoug...
Odd, there should be a red error coming up in the builder tab for you to auto fix talking about mesh read/write.
The number is the 32 bit integer limit
small valve
which basically means something has gone horribly wrong, and thats not an actual measure of triangle count but an indication that something fucky wucky is going on
spiral sigil
Can you try seperating the shield from that avatar, adding a vrchat avatar descriptor to it, and then go select that one in the builder tab to see if you can get some big red error button to show up so you can auto fix it
if that doesnt work then something else is def going fucky wucky
unborn lark
there's no red error button >~<
spiral sigil
unborn lark
there's no red error button >~<
can you toggle "Read/Write Enabled" for me when you click on the fbx of your shield and look in the right panel in the inspector tab

or whatever other model type you have
You should set it ON
unborn lark
I didn't even know you could turn that off .-.
unborn lark
that fixed it, thank you ^~^
spiral sigil
perfect
quaint jasper
You just need to enable read/write on the mesh asset
 ashen trail
I have a question. The viewpoint ball on the avatar discriptor is nowhere to be found. I tried almost everything. Any suggestions?
 slow hound
Is possible that your avatar is either very small or giant. You can test this by creating a cube, which is 1m tall. Place it next to your avatar to compare their sizes. The view ball will always be about 1.5m (1.5 cubes) tall regardless of your avatar size.
ashen trail
Still won't show up weirdly enough

I scaled down the avatar to .3, and I clicked edit
I figured it out I think
small valve
me when i almost forget this avatar's fucking collar

now i can do the ribbons, bows, hairties, and socks
 lament pond
Wip

 hardy turret
anyone got good resource for texturing models from scratch?
tough plover
@hardy turret you should definitely consider using Substance Painter
hardy turret
no
small valve
im practicing blender renders since i also like doing those now i guess, but trying to mak e a good toon shader is difficult

me when i forget the outlines on the HAIR
it is O.K.
right now im doing a generic toon shader
still wadi
you need to handpaint at least some stuff to make it look good for this type of stiye, only depending on it will always look weird
small valve
and then im gonna try some really stupid shit to see if i can get that manga look
yeah ill hand paint stuff
eventualy
eventually
still wadi
it's almost the most important part to actually make model look good with any shader
 mild bluff
Anyone know why some imported models have this messed up shading effect on the mesh? Normals and quads look good otherwise
 mild bluff
cool thanks
Although Normals look good...

Flipping and recalculating normals has no effect
Clearing sharp also had no effect
tough plover
@mild bluff alt + N > reset vectors
mild bluff
Hey wow that worked!
tough plover
there is more to normals than if they're just pointing inside or outside
the angle matters a lot
tough plover
in that same menu where you found Face orientations, you can enable the normals at the bottom
 mild bluff
haha yup
 languid fog
One piece anatomy goes brrrr

 quaint jasper
Nice poles !
languid fog
thx m8
ashen trail
Anyone know what might of caused this with the eyes?
https://cdn.discordapp.com/attachments/545084902639534082/874398642369339412/4cb626fb31fca6b3de827941a50a0991.png

 full ice
ashen trail
Anyone know what might of caused this with the eyes?
https://cdn.discordapp.com/...
full ice
ashen trail
Anyone know what might of caused this with the eyes?
https://cdn.discordapp.com/...
possibly needs transparency on some parts of the eye that are clipping with the iris?
ashen trail
full ice
possibly needs transparency on some parts of the eye that are clipping with the ...
Apparently it's this. When I uncheck it, it goes back to normal
 full ice
ashen trail
Apparently it's this. When I uncheck it, it goes back to normal
full ice
ashen trail
Apparently it's this. When I uncheck it, it goes back to normal
I think that is still a transparency problem, some of the textures probably have alpha channels and whatever shader you are using for them should be set to cutout
ashen trail
full ice
I think that is still a transparency problem, some of the textures probably have...
How would I go about fixing that? My apologies. I have no experience with Unity
full ice
ashen trail
How would I go about fixing that? My apologies. I have no experience with Unity
Based on your first screenshot you have already extracted the materials, and are in the material folder, find the one from your second screenshot, NihonKawausu2 and change to Cutout like

you'll need to enable that object again for anything to show if that did work
ashen trail
full ice
Based on your first screenshot you have already extracted the materials, and are...
I feel like such an idiot. You're a saint. Thank you!
full ice
you will probably want to change off of the standard shader to something that looks better, or is at least more customizable, but if you are going to stay on Standard for now, check if changing any other material to Cutout makes a difference, there might be more that need to be
ashen trail
I already use Sunao Shaders for this one
Now, one more question, to change colours, do I simply put the 2d textures into a photo editing program and save as the same name as the original?
full ice
if you are just wanting to modify the textures and not change them dynamically with controllers and stuff in vrchat, yes, just modify the texture in some program and overwrite the old one, when when you switch to unity, it should automatically refresh and load that change
ashen trail
Thank you!
craggy lintel
Hey guys do i trust the light for normals in blender or in unity
Because in blender my normals are great but in unity it's displaying opposite shadows

Blender

Tbh I feel like I should trust blender
unity is usually garbage
Def a higher level question
azure rain
Unity is what would be actually displaying in vrchat
craggy lintel
Why tf is it so wrong
Why is blender showing me what I intended to do but unity is fucking things up for me?
azure rain
no clue
craggy lintel
Higher level question i knew it
base making has to be one of the hardest things to do

really close to giving up
like gonna cry type rn
tough plover
^ got it figured out
quaint jasper
What was the issue ?
tough plover
normal import settings
azure rain
maybe take a screenshot of what they should look like the normal import settings

 tough plover
fancy
 oak hatch
I went crazy trying to stay below the tri limit.
oak hatch
It's set up for standard shaders, too
quaint jasper
1k tris before or after triangulation ?
atomic hamlet
mild bluff
Is that what i think it is...?
 zenith cloak
Hello, can I ask for some avatar modeling help?
3 days ago I have created this and I feel like I've botched it in several places.

 glad badge
 thorn moth
zenith cloak
3 days ago I have created this and I feel like I've botched it in several places...
thorn moth
zenith cloak
3 days ago I have created this and I feel like I've botched it in several places...
Looks alright from the outside, what's wrong with the mouth?
zenith cloak
thorn moth
Looks alright from the outside, what's wrong with the mouth?
Well, it was supposed to have a shape key to switch it to a smile, but now it's not
By the way, here's how my model looks like in Blender
 thorn moth
Double checked that the shape keys are still there in blender?
zenith cloak
There's only one shape key, other that the "Basic" and it's the one that changes the eyes to "Angry"
I've deleted those that were there before, because Unity broke them
But now I don't know how to deform the mouth to a smile without ruining it
thorn moth
How long ago did ya delete em?
zenith cloak
2 Days ago
thorn moth
Ah, guess not any undo history to get back to em now
zenith cloak
I was in a rush and didn't save it
Any Ideas how to make a new one?
I'm just confused because proportional editing is being unhelpful and turning the mesh upside-down just looks weird when animating
oak hatch
@quaint jasper after.
thorn moth
zenith cloak
I'm just confused because proportional editing is being unhelpful and turning th...
Worse case could redo the mouth piece in a more neutral pose
zenith cloak
I actually accomplished the shape like this by using subdivision surface on a slightly deformed plane
 lone forge

I'm trying to get the hoodie to match its armature pose
so i had it t-posed, but when i set as rest pose it made the hoodie A-pose and now wont go back
devout scroll
Pose the armature in edit mode to match the hoodie
If you want to pose something you should use cats' apply pose as rest pose button
spiral sigil
lol
devout scroll
Applying rest pose in blender usually takes more steps like applying the armature modifier, applying rest pose and then attaching it back, but if you got shape keys it takes even more steps so just use cats' button for it
lone forge
well thats what i did and i ended up with this
devout scroll
hm
is the armature actually attached to the mesh
or mesh attached to the armature rather
not sure why it wouldn't match
 oak hatch
Speaking of clothes. Does anyone have suggestions on how to model/weight folded or wrinkled clothes?
 valid magnet
So i parented the face to the rig but my facial expressions refuse to follow even though they are part of the face. ???
 oak hatch
valid magnet
So i parented the face to the rig but my facial expressions refuse to follow eve...
oak hatch
valid magnet
So i parented the face to the rig but my facial expressions refuse to follow eve...
Can you show the weight paint?
oak hatch
lone forge
I'm trying to get the hoodie to match its armature pose
If you can revert to before you set the pose, that may at least help a bit. It's possible that the pose mode is messed up, or that there are keyframes being made; that can cause weird bone issues.
valid magnet
oak hatch
Can you show the weight paint?
As soon as you said that, i forgot to redo weight paint after assigning the bone
lone forge
believe i'll just re-import the hoodie, thank you tho
oak hatch
zenith cloak
Any Ideas how to make a new one?
Decimate the mouth, make the shapes needed, set your creases (edge mode, select sharp edges, crease) subdivide. You won't be able to apply the modifier because shape keys, but it should export correctly.
oak hatch
valid magnet
As soon as you said that, i forgot to redo weight paint after assigning the bone
Lmao, big mood.
oak hatch
lone forge
believe i'll just re-import the hoodie, thank you tho
That works. Watch out for CATS, it's a jackhammer. Useful sometimes, but it tends to break things.
white moth
My avatar has tennis shoes so I’m not going to give it articulated toe bones. But I’m told I should still make dummy toe bones so that the walk circles can have better IK.
Where is the most ideal spot to place the root of the toe bone? At the shoe tip? At zero height? I’m never sure.
ashen stag
If the toes are fake, I usually put them at the tip of the foot, if the toes have weight, I usually put them at the first knuckle of the middle toe
spiral sigil
hey guys do you have a sample VRChat model file my friend could analyze to fix their model?
devout scroll
depends what's broken, if it's the rig (weird leg position, animation etc) then you can check the example image in #avatar-rigging
craggy lintel
Hey guys
Before a base is released
How do you guarantee customer satisfaction? Do you have someone test it?
quaint jasper
Friend of mine goes to public instances and asks people in FBT to clone in and use it to know what they think
oak hatch
Sensible
 zenith horizon
how do you weightpaint shoulders so they dont look really janky when you lift your arms up?
 wispy verge
maybe, show a screenshot
zenith horizon
got it looking better

I wish I could view the skeleton in game to see what the bones are doing exactly, I always try to recreate the poses in blender but they never look how they do in game
zenith horizon
do you know which ones?
obsidian nova
Does anyone have a clue what's going on here? I'm trying to tile my flooring, and it’s doing this weird banking in the corner (along the topology). I don't think it's my normals (I’ve tried flipping & averaging them). Any advice is appreciated, I feel like I'm going insane over this. Might be caused by smooth shading & pinching in the bevel of the wall? Not sure how to fix that though.

 spiral sigil
devout scroll
depends what's broken, if it's the rig (weird leg position, animation etc) then ...
spiral sigil
devout scroll
depends what's broken, if it's the rig (weird leg position, animation etc) then ...
yea a LOT of it is broken
spine and feet import backwards
 ashen stag
Probably from who made them
small valve
me when i find out about averaging face normals and thinking about how every other avatar ive ever made could have looked as clean as this one 🙃
 oak hatch
zenith horizon
do you know which ones?
oak hatch
zenith horizon
do you know which ones?
Not offhand. Any avatar testing world aught to, tho.
I have one saved as my home world, but I'm out of office so I can't check it.
oak hatch
obsidian nova
Does anyone have a clue what's going on here? I'm trying to tile my flooring, an...
Check the UVs. It may have some weird bending/splitting, or your texture isn't perfectly tiling due to the image not being perfect. If you have Photoshop, you can offset filter the image 50% and it'll show you.
Wait no
It's smooth shading issue.
Pick an edge loop around the flat surface and sharpen the edge.
oak hatch
 stray thistle
how?
stray thistle
how?
If you have the name of them, check CGtrader, Gumroad, Booth, and Sketchfab.
 abstract knoll
how long do i have to wait to publish models?
oak hatch
It's based on trust level.
VRChat
The VRChat Trust and Safety system is a new extension of the currently-implemented VRChat Trust system. It is designed to keep users safe from nuisance users using things like screen-space shaders, loud sounds or microphones, visually noisy or malicious particle effects, and other methods that some...
IIRC, as soon as you're a new user (aka have an account) you can upload avatars.
tough plover
Visitor is the default rank
new user is the one after that
just having an account doesn't get you to new user
 dull gull
Finally got started on my second modelling attempt
I'll keep this low fidelity, since I want this to work for quest anyway

 hybrid stag
I'm not sure if this is exactly the correct place to ask this question but does anyone know how to fix this issue I've been having? I learned how to add accessories to my models and it works fine but it completely destroys the dynamic bones and makes the avatars stiff. I have to create a completely new unity project to fix it.
obsidian nova
Thanks @oak hatch For some reason, when I flip the UV (scale x: -1) it fixes the issue, but only like half of the time...
Otherwise it seems like it's just a matter of fiddling with the vertices on the UV map.
Then it suddenly clicks into place.
dull gull
Base model finished
Next I will attempt to do texture

 tough plover
 cyan plover
Hey I have a question, is a transparency like this posible in Unity/Vrchat?
cyan plover
Hey I have a question, is a transparency like this posible in Unity/Vrchat?
yes, but not on quest
cyan plover
fak- ok thanks
tough plover
can't do transparency of any kind on quest
cyan plover
guess I'll have to figure out a work arround for quest, thanks for letting me know!
 solemn quail
where do you make 3D models???
 inland carbon
solemn quail
where do you make 3D models???
inland carbon
solemn quail
where do you make 3D models???
Blender
solemn quail
k thanks
 unique sigil
Im not sure if i did smth wrong on this but i wanted to ask if anyone knows why the leaves are not on hte stem when i click offset object, object empty and do G Z to line it up on the stem
Like the leaves on the bottom are not attatched like i want them to be and also sjowed up on the bottom not even attatched to the stem
 quaint jasper
Did you apply your transforms ?
 onyx juniper
As much as I hate the big ugly square shell hatches on the offical current Blastoise's design...
https://cdn.discordapp.com/attachments/799591881922052116/875518981887361054/Spr_6x_009.png

They might be an elegant and purposeful solution to the problem I'm facing now:
https://cdn.discordapp.com/attachments/799591881922052116/875519218219647006/unknown.png

They have to pop out to go over his shoulders
 fallow isle
I wish there was a real Drifloon backpack like this, I'd buy one just to have it.
 spiral sigil
how does one use blender properly please dm me so i can learn this stuff
or so someone can teach me
devout scroll
look up YouTube tutorials, there are so many for anything
can't just teach you, you gotta look it up yourself and ask questions if you're stuck
azure rain
fallow isle
I wish there was a *real* Drifloon backpack like this, I'd buy one just to have ...
that's a very cute backpack
fallow isle
azure rain
that's a very cute backpack
Thanks 🙂
unique sigil
quaint jasper
Did you apply your transforms ?
I have not
If there is an apply button i did not see it
tough plover
unique sigil
I have not
If there is an apply button i did not see it
ctrl + a > all transforms
unique sigil
tough plover
ctrl + a > all transforms
Oh ok ty
Ill try that next time
 uncut scarab
so i have textures in blender from MMD that are .bmp. I need to convert them so they work in unity. theres a button in cats that says convert all textures to png, but when i press it it says converted 0 textures. can anyone tell me how to get it to work?
help! these .bmps have special channel properties too them so i need this tool to work because i assume it knows what to do to convert them correctly. i cant just open it export it as PNG
either that or somebody please walk me through gimp because these textures have like alpha, but not in the alpha channel, like if i just convert this to png it will erase the data.
 young vault
That sounds like you need to change color channels around
And then export as png
Although, I'm not certain mmd has any bitmaps that have alpha in color channels other than the alpha channel
But, it is model dependent so...
spiral sigil
tough plover
can't do transparency of any kind on quest
You can if you use vrchat particles additive
tough plover
sdk doesn't let you upload it
spiral sigil
Yes it does


 tough plover
@small valve well done 👍 looks great
small valve
 small valve
yes
tough plover
nice
small valve
taking into account that clothing will be removed (coat, vest, and skirt+bow+shoes+socks can be removed in stages)
tough plover
neat
wondering what would be best performance wise for all those toggles
stuff like the jacket and skirt could be their own meshes
I'm still not sure about the exact performance impact of shape keys, but last I heard it's actually not as bad as people make it out to be
small valve
gonna try the funny silent shader trick
tough plover
the issue with that though is that it won't work for people without custom shaders
I think
maybe the shader fallback system will work with it
azure rain
I guess that would depend if you would look silly or not with all of your clothing toggled on
tough plover
kek
for that reason I have my clothing toggles as separate meshes, with the default state of how I want it to look as the default
so hoodie + shorts + socks enabled, everything else disabled
I use parameter drivers to turn off other toggles when you activate one
for example, if you enable the sports top, it'll disable the hoodie
if you enable the thigh highs, it disables the short socks
so you never have stuff that overlaps
unless, of course, you want it to
you can also do this kind of stuff one way
like if I enable some outfit, it can disable the hoodie
but it won't stop me from re-enabling the hoodie afterwards
since parameter drivers run once
 hollow ermine
 tough plover
fancy
hollow ermine
I simplified a few things and added a few curves here and there.
quaint jasper
Personally preferred the previous outfit, but the new one is cool too
thorny ivy
New pants look like spandex/body suit but then... tuck into boots, which is honestly a bit upsetting as you try to figure out what's actually what..
Think the design might be more clear if the pants followed a similar pattern as the gloves.
Also hard to tell what's suppose to be "skin" and what's cloth since the two are both black + relatively close in shade too.
spiral sigil
thorny ivy
New pants look like spandex/body suit but then... tuck into boots, which is hone...
Now that you mention it I cannot unsee it
thorny ivy
[Curse successful]
spiral sigil
Maybe its intended
thorny ivy
Only one way to find out: @hollow ermine, was it intentional to make the pants look like a bodysuit/form-fitting only to tuck into the boots like regular pants?
spiral sigil
.
 vivid crater
yea thats what i was thinking, kinda looks like wrestling undies and knee pads
small valve
model is finally unified, after a quick texture atlas she can go to Unity

empty space is going to be for all the props and tools and fun stuff i will put on this avatar in the future
 foggy granite
What type of props
small valve
foggy granite
What type of props
for this character specifically, a knife, a taser, a giant duffle bag, and a large easel
foggy granite
A canvas holder?
small valve
mhm
and then maybe a cute smartphone
thats discounting personal items which i plan on having on all of my avatars which is just
a few signs
foggy granite
Alright I feel like a smartphone would fit nice
foggy granite
plot reasons
onyx juniper
I guess this guy is coming along. I need to remake the back shell
 small valve
v epic
hollow ermine
thorny ivy
Only one way to find out: <@!186001987580592129>, was it intentional to make the...
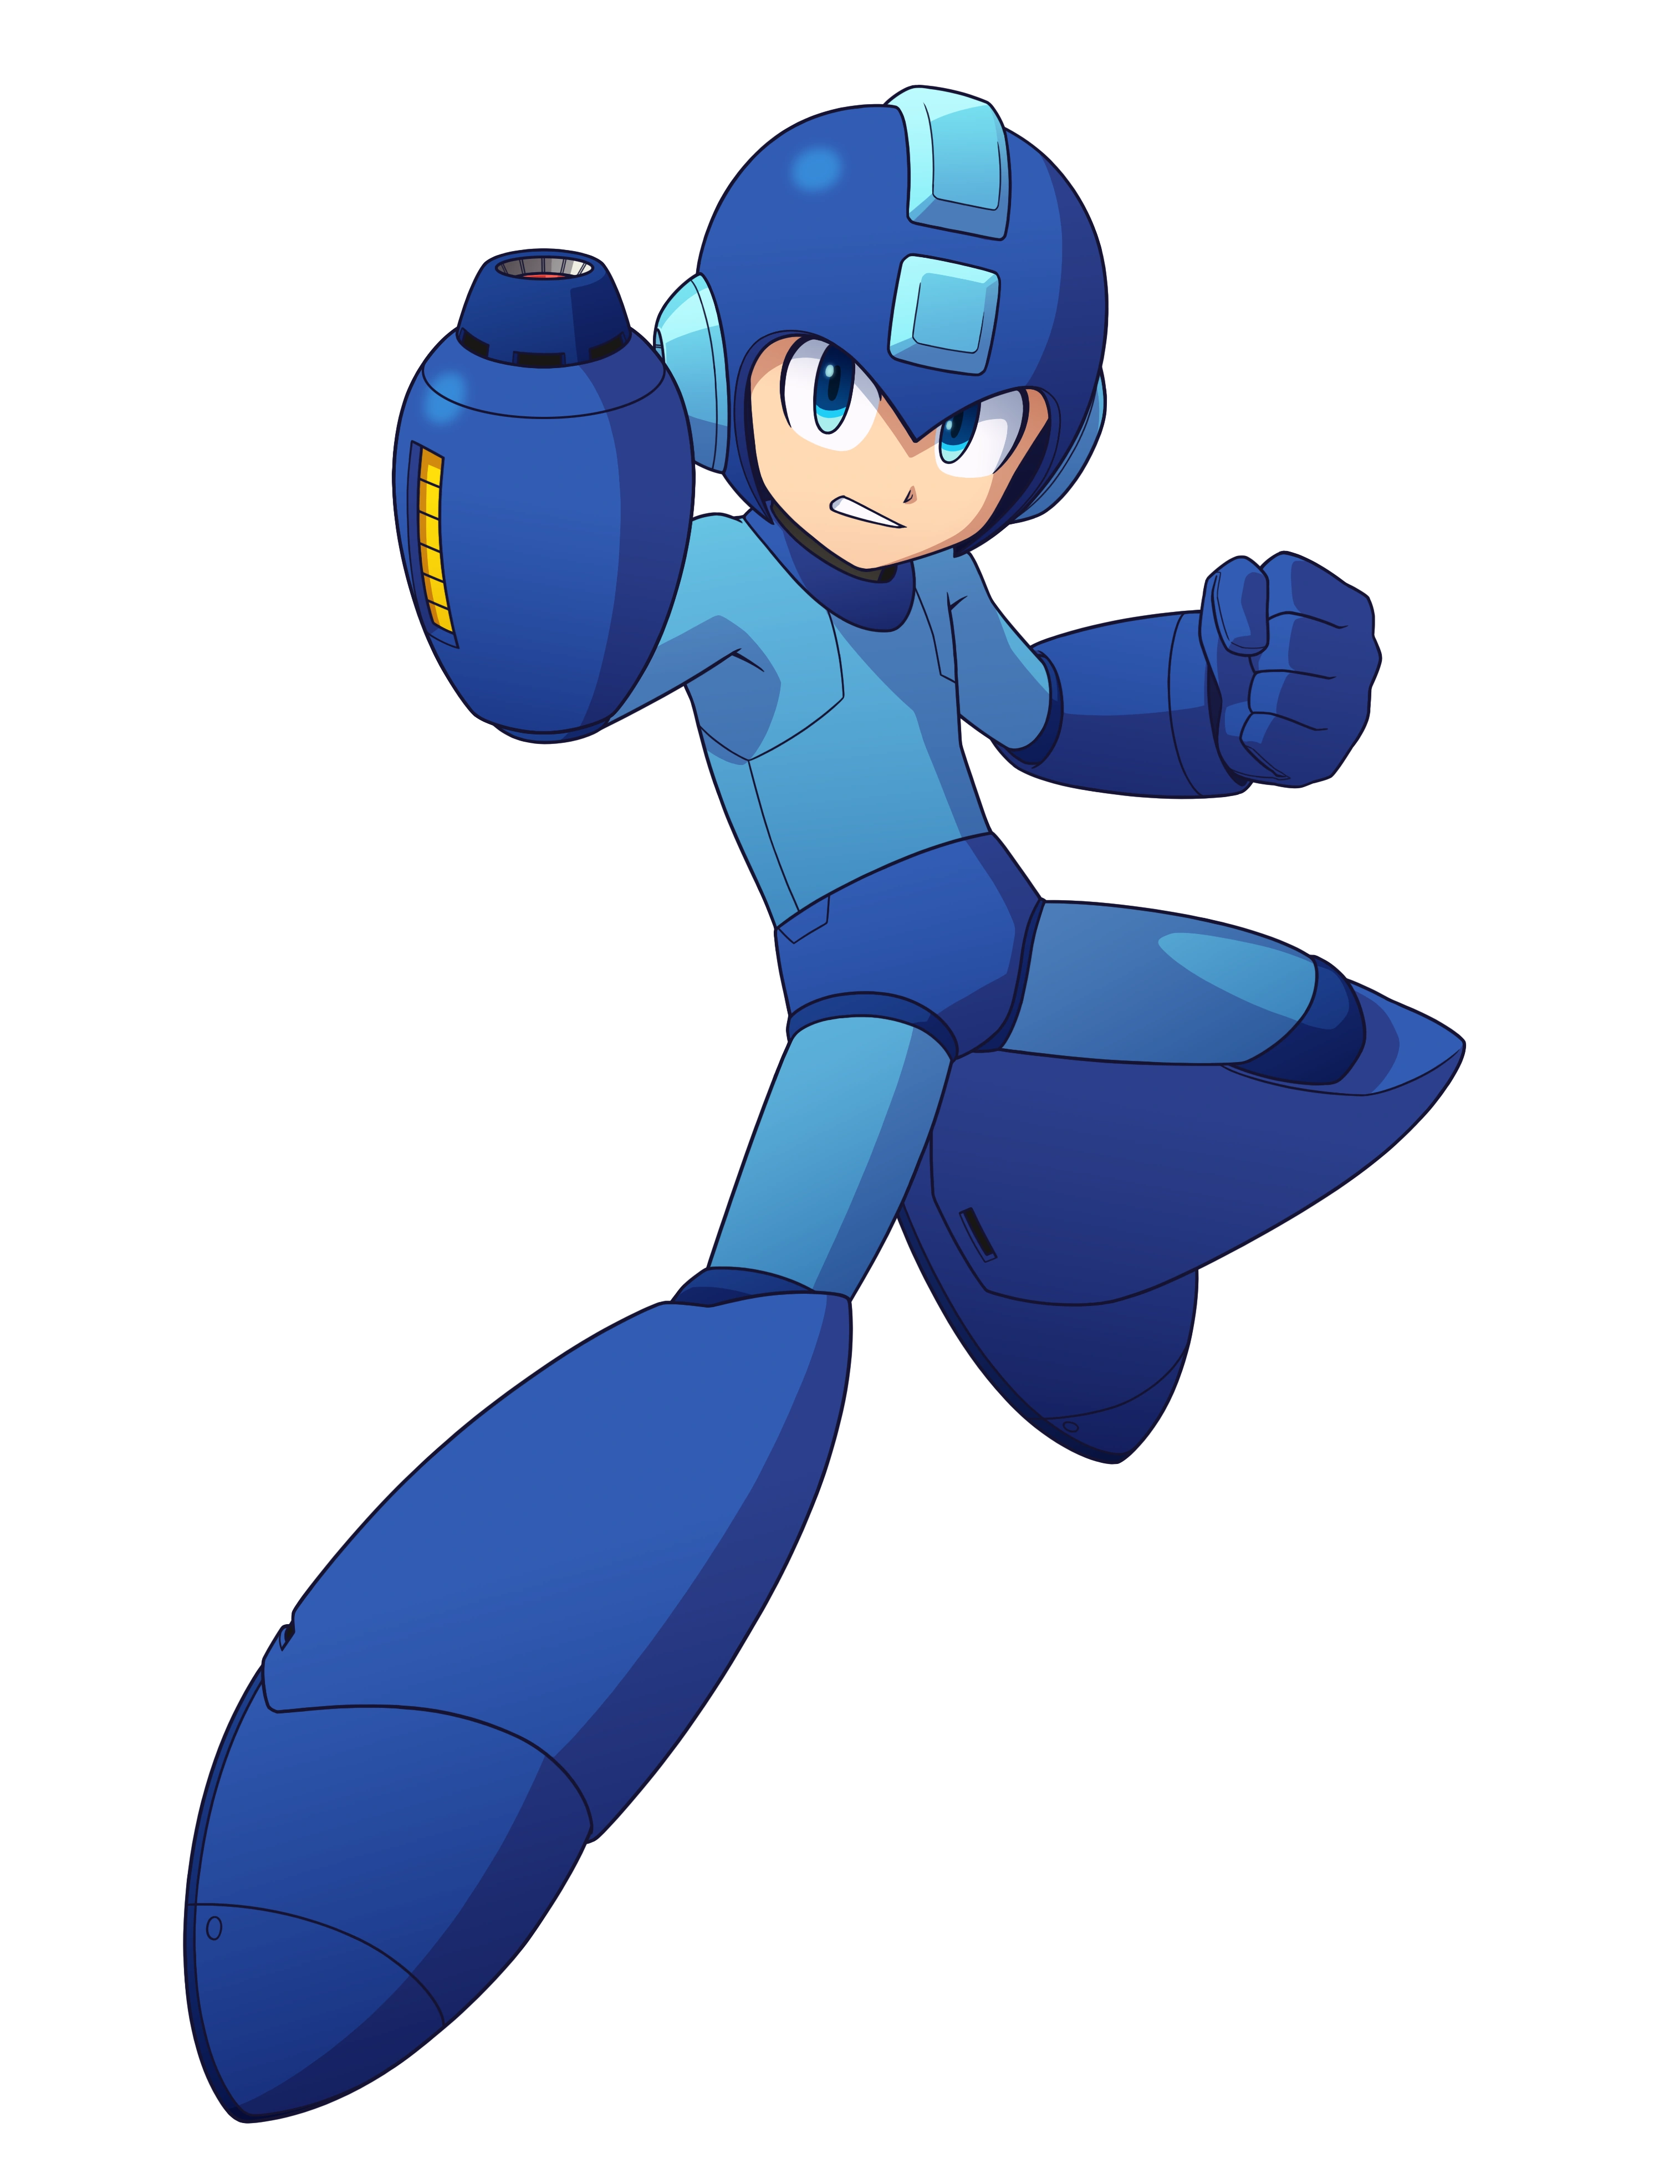
I will say the only clothes my character is actually intended to wear is a jacket, scarf, and a pair of boots. Those gloves are hands. Think astroboy or megaman
 tough fulcrum
Forgive the spam, but I want to show a sneak of a project I'm working on


Making a Vintage Aesthetic Diner basically
It's bare bones but I'm gradually working on it from time to time.
quaint jasper
Good start !
thorny ivy
hollow ermine
I will say the only clothes my character is actually intended to wear is a jacke...
Gotcha. You'll definitely need to adjust the design then to actually communicate what's worn and what's part of the body since multiple people (including me) expressed confusion as to what's suppose to be what.
hollow ermine
thorny ivy
Gotcha. You'll definitely need to adjust the design then to actually communicate...
You think if I make the knees silver on v2, that ought to fix things?
thorny ivy
hollow ermine
You think if I make the knees silver on v2, that ought to fix things?
No, don't think it will. If anything, it'll make the design even more ambiguous. This is what I suggest:
Strip everything away until it's just the body itself. Decide what color it is and have that color be exclusive to the body itself. Most people will assume the character's some sort of robot by the head alone so you'll wanna figure out what color fits your intended vision + communicates that best.
For the limbs (feet + hands), go with a different color. This'll help designate them as such and not blend in with the rest of design or get confused as another piece of apparel.
As for the hands and feet themselves, they look 100% like clothing. The hands' terminate like gloves along the arms + extend well past the wrist. The feet, well, just come off as boots with pants tucked into them.
Since you mentioned Mega Man, that's what I used as a loose design basis for my suggestion.
 hollow ermine
Will consider it
thorny ivy
In the end, it's your design + character, a visually distinct one for sure, but there's always room for improvement.
 stable acorn
I wonder how i should texture this though
 onyx juniper
kewl sward
foggy granite
stable acorn
I wonder how i should texture this though

It remands me steampunk/dieselpunk so their colors would look nice
 paper trail
So I've been meaning to either make or commission a personal avatar, and it would need to be mostly from scratch, but I've never modeled anything before and was thinking of starting in Blender. Does anyone have recommendations for me on a good video to watch to start learning, or where to find good assets to download, etc?
stable acorn
foggy granite
yeah I took inspiration from one of those kinds of swords
foggy granite
you done a great job
stable acorn
tyty
foggy granite
whats the poly count it looks pretty detail and smooth
hollow ermine
@thorny ivy I took a bit of your advice and decided to dial back for the time being while I consider my options.

In the meantime, the boots are getting attention
I plan on giving the old model this design change as well
tough plover
@hollow ermine have you considered adding cables going from the torso to the traffic light?
as the "neck"
could do like 4 really fat cables lol
4 because 3 for the lights and one common ground
spiral sigil
Hypothetically would I be able to play as this just sliding around everywhere
 hollow ermine
tough plover
4 because 3 for the lights and one common ground
hollow ermine
tough plover
4 because 3 for the lights and one common ground
I like this reason, honestly. I'll keep it in mind. Not sure if I'd do it, but I will keep. it. in. mind.
tough plover
👍
wispy verge
@spiral sigil yes
hollow ermine
tough plover
👍

Proof of concept
Given it some thought, not bad
Gonna sleep on it
thorny ivy
hollow ermine
<@!781969501297049640> I took a bit of your advice and decided to dial back for ...
Pants and boots do look better!
And digging the cable-neck, looks pretty cool!
hollow ermine
Butter my biscuit
 thorny ivy
To give a bit more structure, maybe have a large, central cable the other three, smaller ones wrap around?
tough plover
hey not bad
hollow ermine
I dunno, I dunno
tough plover
kinda like it
hollow ermine
I like the way it looks but I'm still into my floating head design
Maybe I'll try the wrap idea next
I'm of the opinion that assymmetry Makes It in some cases
 drifting depot
cries
my model is 600k polygons and I have no idea how to reduce it
tough plover
the clean way is to dissolve edge loops
the dirty way is to decimate
fast way to reduce poly count, but ruins the topology
stable acorn
spiral sigil
Hypothetically would I be able to play as this just sliding around everywhere
yes, you could even make the legs move but that's a bit more complex
drifting depot
YES! the decimate thing is working!
tough plover
@drifting depot definitely keep an original copy of the model. working on a decimated mesh is horrible
drifting depot
oh no I am keeping the original seperate for renders and animations I make
cause I spent a lot of time on it
70k triangles is too much right?
drifting depot
I've brought it down from 600k to 70k
small valve
drifting depot
70k triangles is too much right?
70k triangles can be kind of hefty but you can still get away with it if you separate your face+head from the rest of your body, since thats the part that has blendshapes or shapekeys, which control your mouth movements and what not, which takes more time to render than the rest of your mesh
if its going to be a high poly model at the least get it to below 70k even if its like 69k something so that way you dont automatically get blocked by people who are blocking very poor avatars by default
drifting depot
well its 67,065 to be precise
small valve
yeah youre fine, just bring it down to one mesh, or preferably two as i mentioned above, and itll be fine
small valve
i guess #animation @drifting depot
valid magnet
So i have a character in blender and i add fur to it but the fur also going into its mouth and teeth. How do i get the fur to not spawn in its mouth?
 steady zealot
Vertex group mask I imagine
tough plover
@valid magnet be very careful doing that, you could easily bring the poly count extremely high
typically fur is either done through texturing, texturing + modeled out fluffs, or using shaders
valid magnet
tough plover
<@389484150295494676> be very careful doing that, you could easily bring the pol...
Any alternate suggestions?
tough plover
the above
 dusty kiln
is there a way i can export or make my avatar hierarchy into an fbx? id like to put some avatars in blender for rendering but that would mean reassembling everything, which is not something i want to do
quaint jasper
export as fbx from blender ?
dusty kiln
no, like i built my avatar in unity, and ive added hair, clothing and other stuff like that, im hoping theres a way to export that in an fbx or some other way so i dont have to worry about setting everything up again
thorny ivy
Don't think there is as far as I know.
Unity isn't designed with proper avatar work in mind.
It's useful for making some adjustments/simple changes but anything more complex, you wanna do in a program like Blender.
ashen stag
There is probably some software on the store to export a scene somehow, but yeah should be done in blender in the first place. Doing it backwards otherwise
craggy lintel
tough plover
<@90325204173082624> definitely keep an original copy of the model. working on a...
Yeaaa don’t work with decimated topo!! it’s a nightmare
tough plover
dusty kiln
is there a way i can export or make my avatar hierarchy into an fbx? id like to ...
no, you should really have been doing that in blender from the very start lol
Unity is not a 3D modeling program, it is a game engine. you're meant to import assets into it to create a game/assetbundles
adding stuff to a model in blender is not that hard
can be done within seconds/minutes
 ruby cypress
Is there a really good tutorial on 3D modeling an anthro avatar?? I’m gonna try to model and rig my fursona in Blender, though I have little to no experience with Blender.
tough plover
ruby cypress
Is there a really good tutorial on 3D modeling an anthro avatar?? I’m gonna try ...
not that I know of, but it might exist. you could also look at other models in blender to get a better idea of how they are done
should definitely start by learning the basics of blender for sure
ruby cypress
Alrighty. Yeah, I’ve only ever modeled in something suuuper basic called Sculptris lmao.
tough plover
should consider following some Blender guru tutorials
tough fulcrum
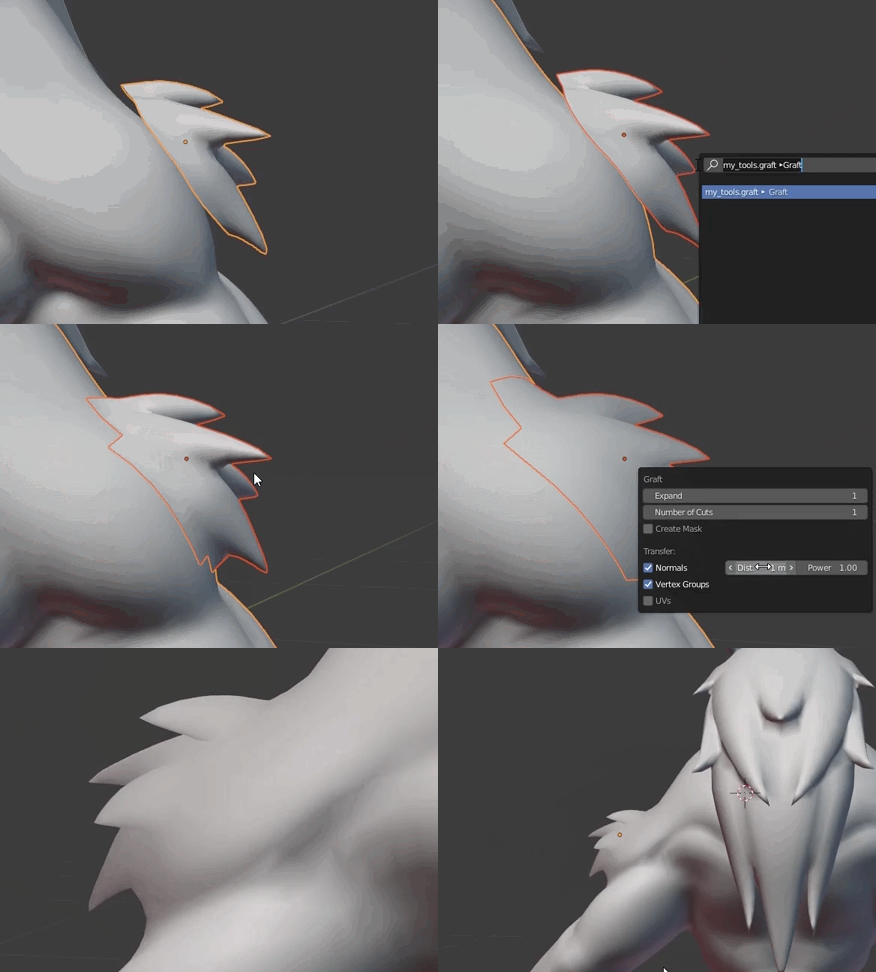
Okay this is something small but it makes it so much better using a tool called 'Graft' to help seamlessly merge objects together, like man, this would have taken me a good hour to figure out how to smooth this out seamlessly between three objects, this cut that time to just 10 minutes, adding in finer work to make it look nice.

Man I love this tool for so many reasons.
The Wireframe

Excessive for rounding on a small object I know but I will edit that later in optimization.
quaint jasper
What does the addon do exactly ?
tough fulcrum
better to just show the github
GitHub
Blender addons. Contribute to greisane/gret development by creating an account on GitHub.
its a load of multiple tools in one
I primarily enjoy Graft most
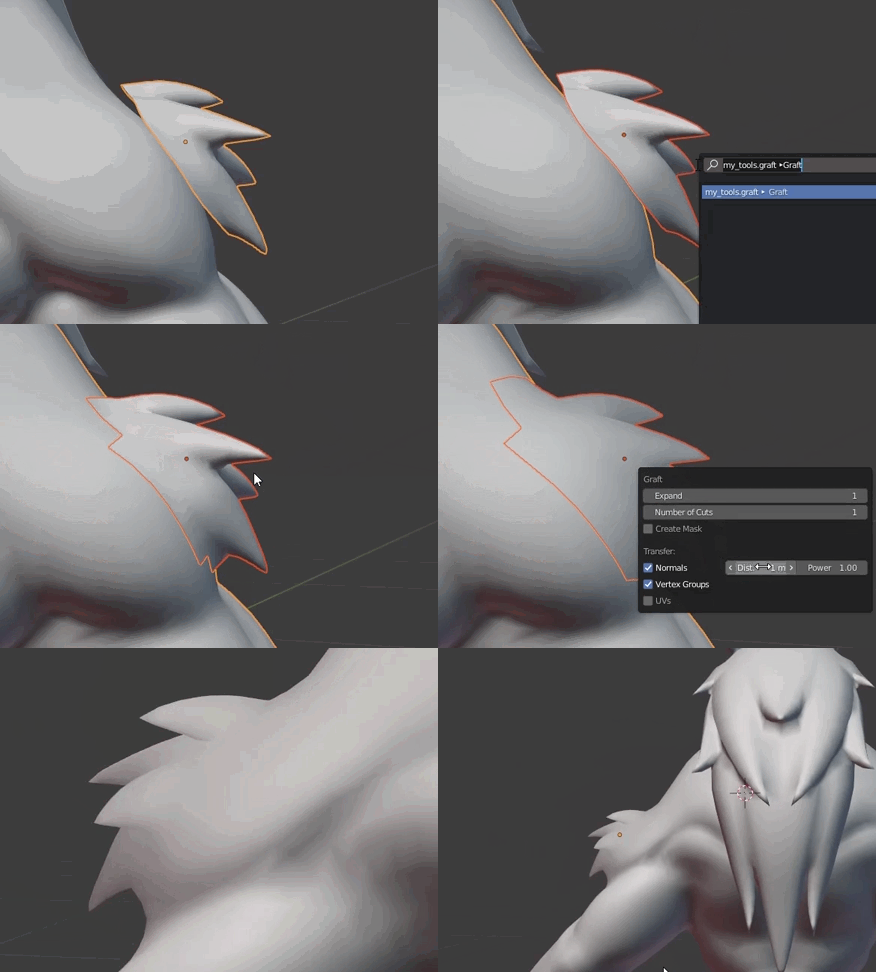
from the Github
But pretty much a good slice of everything to make modeling way less tedious.
quaint jasper
oh gret, yeah definitely
 unkempt nova
Blender or get custom from Vroid Studio
I am new in ..Vr avatar and Vr Home making..still trying
lament pond
tough fulcrum
https://raw.githubusercontent.com/greisane/gret/readme/graft-demo.gif
I've seen that before, it's like magic.
Wip
languid fog
The egg head
 limber walrus
is there a way i can have a shape key on this hand where i can have two mats one hand where its just this texture,another where its another texture
 foggy granite
You can't use shape key to change materials you should be able to have toggle-able material in unity though
foggy granite
limber walrus
how

Don't feel like doing it yourself?
Hire avatar artists on Fiverr to create your own custom VRChat avatar: https://bit.ly/3nZyJhV
Part 5 of our VRChat 3.0 Avatar Tutorial focuses on giving your avatar Toggles for props, items and materials.
If you found this helpful and entertaining, please consider coming a Patron.
https://www.patreon.com/Aggr...
limber walrus
thanks
 rigid cosmos
Nearly finished with the main sculpt for my avatar build

just need to do rigging and texturing
oak hatch
Buggy boy.
 languid fog
This fanart is taking a lot of work
 oak hatch
spiral sigil
I want that as a pet
oak hatch
spiral sigil
I want that as a pet
It's part of a collab, I'm making the torso, three others making the arms, legs and head.
End result will be a public avatar.
rigid cosmos
Got my model ready for testing
 quaint jasper
probably want to smooth shade it first ?
rigid cosmos
Ah, good point
 unkempt bear
Can somebody make me an avatar id rlly appreciate it
languid fog
unkempt bear
Can somebody make me an avatar id rlly appreciate it
You want to someone spent 2 weeks to do a entire custom model from scratch, mesh, texture, rig and unity stuff for free?
Thats not how it works m8
unkempt bear
I was only askin
 bright hollow
I mean if they didn’t really care what kind ready player me could make ya one quickly for free on their website
 spiral sigil
You NEED a fancy S Superman symbol sticker
Idk what its called but if you know you know
fallow isle
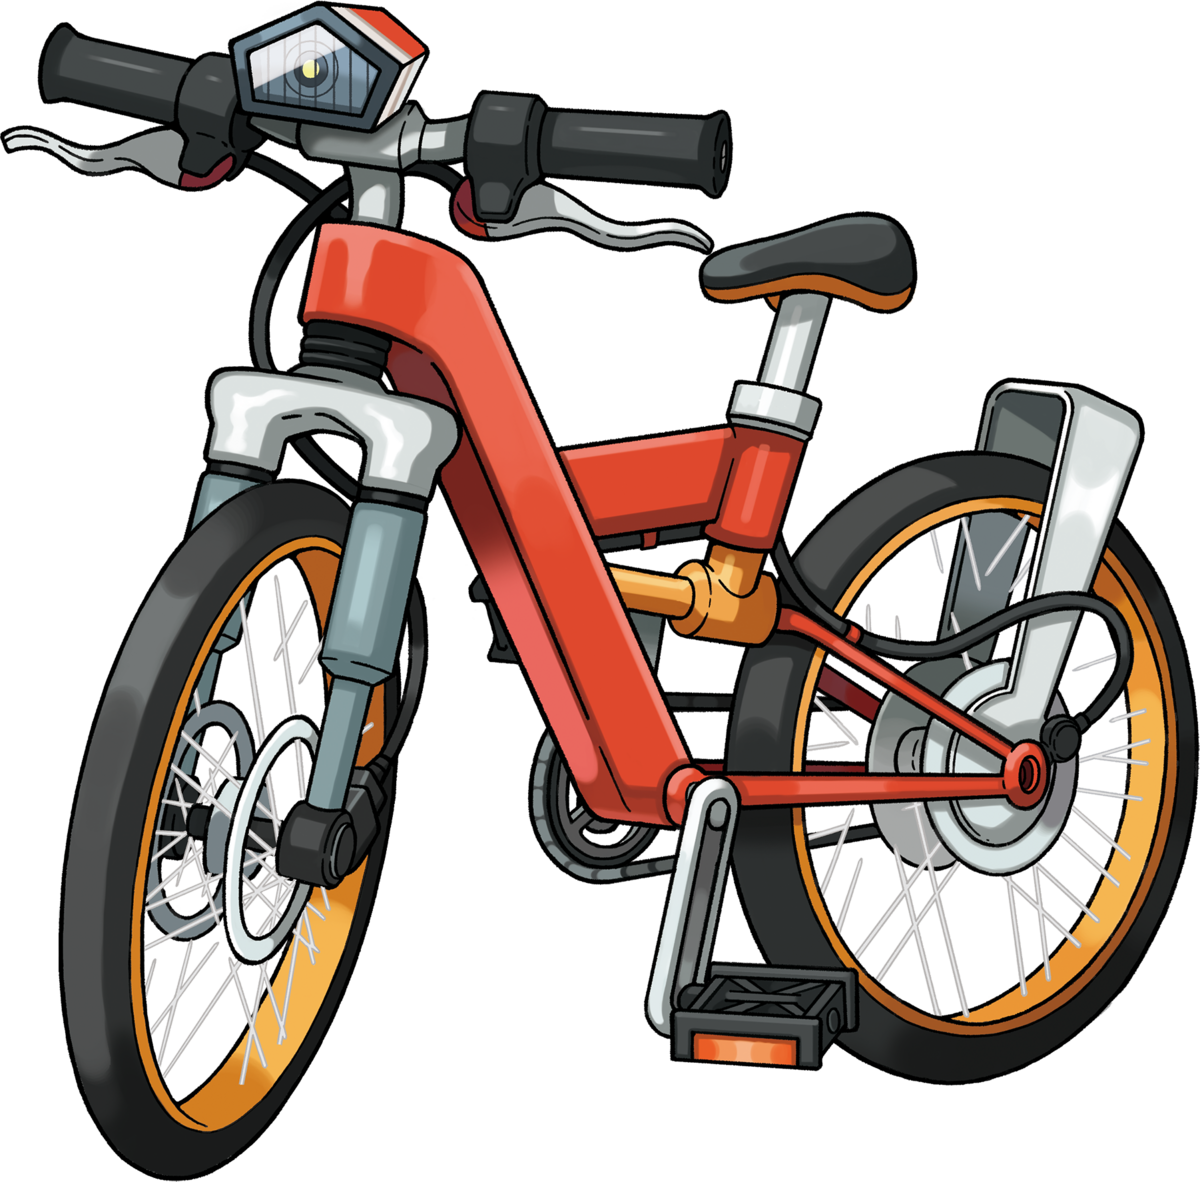
This is like 50 miles outside my comfort zone, and it took me around 4-5 hours yesterday. Did it for a personal project. Forgive the lack of gears and chain, I forgot about them completely and then couldn't figure out how to shoehorn them in so I forewent them and now this Acro Bike is just Ghost- or Rotom-operated. 🙃
Literally first time making anything even remotely like this.


I did NOT take the time to UV map. Didn't need it for the project. Don't know if I will take the time to UV map. Material nodes work fine for purpose for which I built it. lol
 quaint jasper
That looks pretty sweet, did you use refs from a single bike or used multiple and pieces stuff together ?
fallow isle
It's based on the Acro Bike from Pokemon, so I used some refs. Two were official (I think?) artworks of the bike, and the other is just a thumbnail of the actual 3D model from the 3DS games.
This was the main reference https://cdn2.bulbagarden.net/upload/thumb/3/31/Omega_Ruby_Alpha_Sapphire_Acro_Bike.png/1200px-Omega_Ruby_Alpha_Sapphire_Acro_Bike.png

Took some liberties with some of the design 😛
quaint jasper
Might be worth using a big bevel on the main armature piece, other than that it's pretty spot on
fallow isle
Thanks!
The geometry of the main frame piece didn't support an edge bevel very well due to the density of the mesh, so I unsubdivided that piece and beveled the edge then reapplied the subdivision. Looks much better now!

Dunno why I didn't bevel it to begin with. The other rectangular piece is beveled, so I should've beveled the main piece as well. lol
azure rain
out of curiosity any plans porting the bike into vrchat




 azure rain
is your console showing any errors
quaint jasper

GitHub
Unity Editor extension for making VRChat worlds. Contribute to oneVR/VRWorldToolkit development by creating an account on GitHub.
azure rain
vrchat doesn't support unity2020
 pearl quiver
oh okay thank you
azure rain
VRChat
This page lists the current Unity version you should use when creating content for VRChat, as well as links to the correct version for both Unity Hub and direct downloads. Current Unity Version The current Unity version in use by VRChat is Unity 2019.4.29f1. Ensure you are using this precise versio...
pearl quiver
i watched a video on how to make avatar i searched for dynamic bone on component but it shows nothing-
tough plover
pearl quiver
i watched a video on how to make avatar i searched for dynamic bone on component...
"Dynamic bone" is a paid, third party asset you have to buy on the Unity asset store
azure rain
that's because that's a paid add-on you have to install separately
pearl quiver
wait its paid? i had unity back in 2018 and i used dynamic bones on avatar i just messed with. Or am i just mixing it up?
tough plover
pearl quiver
wait its paid? i had unity back in 2018 and i used dynamic bones on avatar i jus...
yes, if you downloaded a model from somewhere, there is a chance that they included dynamic bones
which is piracy
pearl quiver
Oh i see
fallow isle
azure rain
out of curiosity any plans porting the bike into vrchat
Not at the moment, no. It's not even UV mapped, and it's over 300,000 tris. I made it specifically for a personal project in Blender. I'd have to UV map and significantly reduce the poly count if I wanted to use it for anything in VRChat.
azure rain
would be good practice for high poly to low-poly normal map baking
fallow isle
No normal map baking needed. Don't need practice with that, either. There are no fine details to the mesh whatsoever, just subdivisions.
Reducing the polycount and UV mapping aren't necessarily difficult, just time consuming and tedious with all the individual parts and pieces. There's no point in doing any further work on it atm, given it was created specifically to be a background prop in another project. Maybe someday, but certainly not anytime particularly soon lol
small valve
finally getting around to adding funny props

https://cdn.discordapp.com/attachments/740683034281508968/876986047391735808/unknown.png also did you know that every time i thought that i couldnt pull an ian hubert on a particular model i have been proven wrong every time


 snow fern
❤️ ian hubert's instinct for cutting corners
small valve
or rather, i prove myself wrong every time
small valve
snow fern
❤️ ian hubert's instinct for cutting corners
ian hubert is on another fuckin level
lament pond
Legs wip
 zenith cloak
Hello? Can I ask a Question? How do you make eyes? No, seriously, what in VRChat qualifies as eyes?
I'm asking because I have seen avatars with differently designed eyes (including those in all the wrong places) and I wonder how it's done so I can implement it in my own avatar I'm making.
quaint jasper
It just needs bones
zenith cloak
Ok, I see. Thanks.
tough plover
zenith cloak
But what if it's a 2D eye?
2D in what way?
like, on a TV head avatar for example?
zenith cloak
Oh, good question, because I have a TV-headed robot that's in a dire need of a face
tough plover
that is possible to do yes, but it does require some fancy rigging
rather than using one bone per eye, you'd be using 3
alongside unity constraints
once you understand how it works it's actually pretty straightforward
zenith cloak
Well, that's the problem: I don't quite understand it
tough plover
so this is the basic setup

the one in the bottom right is the head bone
we can ignore that one for now
the one on the very left is the one that the eye is actually weighed to, notice how it's also parented to the head
so by itself, it would not move
zenith cloak
I see
tough plover
the bone in the top right is the one you actually specify in the avatar descriptor and the rig config, that one is the actual pivot point
and lastly, the remaining bone is parented to the bone on the right
when the eye bone rotates, that one moves with it

the fun part is in unity
zenith cloak
And what is the bone parented to the head?
tough plover
that one is the one the eye mesh itself is weighed to. it's parented to the head because you don't want it to directly move with the eye bone that is controlled by the vrchat eye tracking stuff
now, the way to make this work is in Unity, using a Position contraint
a Position constraint will make the transform of object it's on copy the transform of the object set as the source
the key is that you can specify which axis(s) it should copy
in Unity, X is side to side, Y is up/down, Z is forward/back
you would keep X and Y checked, but uncheck Z
which means that when the bone rotate and drags the other one with it, the bone the eye is weighed to will move aswell, but only up/down/left/right
and not in/out
thus, you get an eye moving in a 2D plane
used on this model
 zenith cloak
Okay, but how do I pull this off on my model?
Which looks like this

Note: the screen is actually separate form the head and is supposed to be transparent, I just don't quite know how to pull this off.
zenith cloak
Yes
tough plover
hm, that might complicate things
zenith cloak
it's a plane that I deformed while following a tutorial
tough plover
so it's not actually 2D here
because it's curved, you could probably just rig it normally
zenith cloak
The space behind it is flat. so it might work
tough plover
but have the bone really far away from the head
so that the actual "radius" of the curve matches that of the screen
if you took a cross section of the screen, you would get a curve
now imagine you extend that curve to form a circle
the bone should be placed at the center of the circle
zenith cloak
Here it is again with the glass hidden

I know that it isn't perfect, but it's because I made it years ago, when I was just getting used to Blender
zenith cloak
Oops! I forgot!
Oh no, It looks broken...

Like I said, it's one of my first models
tough plover
probably because of that weird topology in the corners
that whole "cross" should be gone
zenith cloak
How do I fix this?
tough plover
you can just go to vertex selection, and dissolve the vertices in the middle of those crosses
to dissolve, X > Dissolve vertices
zenith cloak
It looks better now, but those polygons bother me...
Dissolving those vertices resulted in weird N-gons
Also, how do you fix normals in Blender again? I hit auto-smooth, but it doesn't seem to stay that way.
tough plover
alt + n > reset vectors
tough plover
blue edges mean sharp edges
you can add/remove those to make specific edges sharp
when using smooth shading
zenith cloak
I actually know that, I just am not sure that function assigned them properly
NvM, I just cleared the unneeded sharps
Now I'm guessing I need to add those bones you've mentioned, some planes for eyes and voila, am I right?
But how do I make that glass transparent, or rather semi-see-through?
tough plover
zenith cloak
But how do I make that glass transparent, or rather semi-see-through?
you change the shader settings for that, but the way it's done in unity and blender is completely different
zenith cloak
Will Poiyomi Toon shader do?
tough plover
yes
zenith cloak
I just change the "alpha" of the material
zenith cloak
BTW, what do I do if I want Quest support then?
I just want everyone to see what I made
ashen stag
You need to upload your model while your project is built for android support
zenith cloak
Now, I wonder, how those avatars with eyes AND Quest support work.
@ashen stag I know, it's just the requirements are strict
ashen stag
Yeah its the main reason I dont do it 😔
zenith cloak
One thing I noticed, is that Unity doesn't support quads and will convert them to tris on import, basically doubling the amount of vertices on my model.
ashen stag
Kind of a misconception, quads dont actually exist in 3d rendering. Blender is just faking it for you
zenith cloak
Oh, figures.
But for real though, is there a way to check in Blender how many tris there will be before importing to fbx?
ashen stag
The Tris value is always the triangulated result of your model, where Faces is the non triangulated value AFAIK
 zenith cloak
Thanks, I was just wondering, because the process of retopology is often irreversible.
ashen stag
Thats why you have a bunch of saved versions, should always save before destructive edits
zenith cloak
I have at least 5 backups for my Sadboi model, and there will probably be more once I finally learn how to make clothing.
Just letting you know.
oak hatch
HEADS UP, sharp shading breaks outlines in Poiyomi.
It may be wise to select all sharps, and apply a bevel modifier, then full-smooth the model. This will fix the problem, at the cost of Tris.
It sucks, I know.
 weak ermine
So I want to make this face curved, but don't know how to make it look good

What would you all recommend I do to curve this?
oak hatch
Oh, I can actually help here.
Step one, remove your subdivisions
Step two, add a single loop cut at the center. Stretch to the corner.
Step 3, bevel edge.
I'll post a pic, moment.

The corner is going to always be """past""" the curve you want.
IIRC, you want to set the bevel to "Percent" and the Percent to 100. Then merge by distance to clean up orphan verts.
weak ermine
How do you bevel?
small valve
weak ermine
How do you bevel?
select an edge and control b

in which i actually uv unwrap my hair instead of abusing project from view* because i need anisotropic reflections to work right
oak hatch
Oh that pain, I know it.
hollow ermine
I am become the monster
 hollow ermine
That's the idea, oh yeah 👍
hollow ermine
I had the idea this morning before I slept. I learned my buddy is a bit easy to scare. I wonder if this is his cup of tea?
tough plover
Poiyomi allows you to make something only visible in the mirror
or not visible in mirrors
or both
hollow ermine
Terrifying
tough plover
you could have the lights be visible in both
but the body not visible in the mirror
someone looking at the mirror would only see floating lights
until they turn around
hollow ermine
I like that
tough plover
if you need sound effects, I started replaying bioshock infinite yesterday
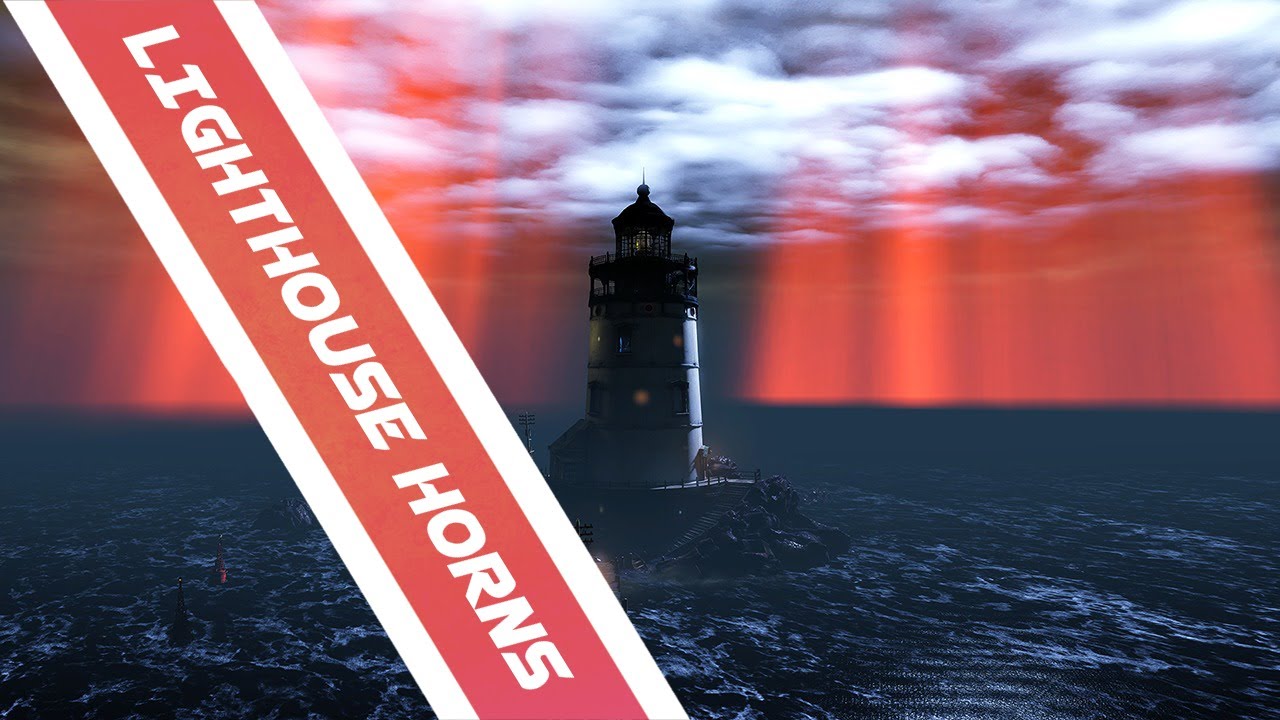
Ambience from the Lighthouse. Extracted with the help of this thread: http://forums.2kgames.com/showthread.php?223506-Audio-Extraction ; I do not claim any content as mine. Bioshock Infnite and it's sounds belong to their respective owners.
I really like ambient sounds in games, and especially in Bioshock so I've decided to make short movies...