#3d-modeling
1 messages · Page 108 of 1
 foggy granite
 azure rain
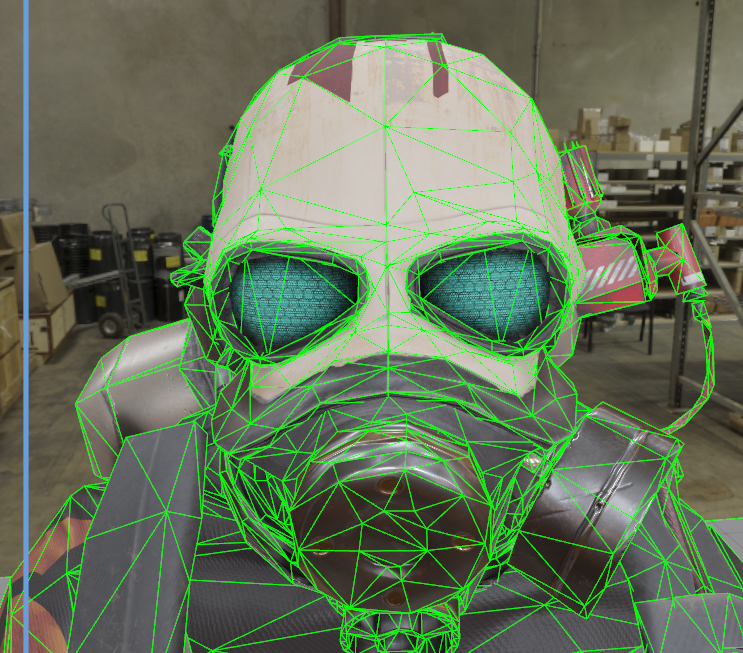
9,375 is the total for lod 2
foggy granite
That makes sense
azure rain
or they just took a decimate Hammer to it but a slightly less dumb one
foggy granite
Probably a mixed of both
 foggy granite
Yeah I would say they just deci the crap out of the model
azure rain
which works just fine as long as you leave the joints functional as there's no face articulation
like the Gordon Freeman model has no lod as it's not going to be seeing far enough away for one to be useful
foggy granite
Little optimization tricks
azure rain
like if it's helpful here's the distance it swaps to LOD 3 https://i.gyazo.com/153b0994f2247066e8d516ccfd3e837d.jpg


 gusty shard
Baking and retopologizing is probably the way to go
azure rain
oh most definitely if you're trying to make Quest avatars
video game LOD models service slightly different function past LOD 1
 median pike
So is there a specific way to render hair cards in unity properly? Whenever I try to they cull each other and it all looks like shit
I fear my only way to make good looking fur are hair cards but if I am stuck using cutout it's not gonna look much better
gusty shard
hair cards are just planes with hair on. mine are fine; here's a good tutorial on it I've found. https://cghero.com/tutorials/hair-cards-game-characters

CGHero
This tutorial looks at creating hair cards for game-ready characters.
I'm unsure if rendering changes anything, as I don't do that for my character
median pike
@gusty shardwhat shader are you using? Anything that I have tried has a problem rendering hair cards
gusty shard
median pike
<@!111504492893077504>what shader are you using? Anything that I have tried has ...
literally using no shader xD just dragging and dropping my model into unity, checking the rigging, adding the eye thing and publishing
median pike
😄
thats not how that works
by default youre using standard shader
and correct me if I am wrong but by default standard should have transparency turned off so your haircards should be opaque
even standard shader has issues rendering hair cards
this is waht happens when I try to do hair cards

as you can see the card above culls the card below it
gusty shard
hmmm, must be how I'm using the hair cards. tbh this is my first character model and my tutors aren't a big help so I've just been fumbling my way though. I think I shaped the hair cardds to exactly fit my shape and then colored the whole thing in
median pike
can I see?
gusty shard
hmmmm that is odd. and sure!
median pike
this is how it should look like
 gusty shard
here's how my cards are. I'm definitely not using it correctly/using transparency but it works for what I want
 median pike
wheres the texture?
I mean thats where the problem occurs, at the shader part with texture transparency
gusty shard
I add it in unity. I gotta redo it, just slapping color on
 median pike
well than yeah obviously you dont have the problem because youre not using transparency
gusty shard
yeee I'm not sure why it would cull partially your cards though.
 ashen stag
You can't layer a transparent mesh on top of itself as the render queue is the same.
 zealous pond
using cutout is the answer for hair cards btw
 white moth
ashen stag
You can't layer a transparent mesh on top of itself as the render queue is the s...
white moth
ashen stag
You can't layer a transparent mesh on top of itself as the render queue is the s...
Depends on the shader. Some do it.
white moth
You can also do it even on standard if the tri ID’s are cleverly arranged in the order they need to be drawn without overlap conflict
But that means a predictable order regardless of camera angle
But you can get away with it on some models!
 crimson gull
Been working on a female base model for myself to use

Not looking forward to building hands


pain peko
crimson gull
Yeah lol, not gonna be fun
 merry vault
Valve are crackheads and left in a shitload of junk animations that aren't even used in the model in gameplay lol.
Most are mocap leftovers.
But yeah they do use a lot of anims for the animgraph during gameplay.
azure rain
yeah. I suppose that's the case of it doesn't really give them too much benefit to clear all of that out
as it's not like animation files are huge on the file size
 onyx juniper
as if modern game devs care about saving disk space at all
azure rain
yeah but I sincerely doubt a couple of seconds saved on the download time would make that much difference to anybody
onyx juniper
I agree, but I'm saying they didn't do it because it's a negligible file size, I'm saying they did it because they're negligent with file sizes. They're right for the wrong reasons.
merry vault
Valve are so inconsistant about what they do and don't scrub out of their games before release.
 cold verge
could you uh explain a bit? i want to make ones that look similar to these kind of avatars. a lot of the girl avatars in vrchat are different but still almost all seem to have a similar/same and i wanna know if there's like a thing that people use like a model and then edit it or something. like i wanna make similar ones


kinda like these. i dont really know where to start and i dont really wanna like, start from the bottom if possible. i just wanna make an avatar or two for myself and thats it idk
azure rain
personally if you're going with anime avatars I'd recommend VRoid Studio as that doesn't involve getting yourself into the copyright infringement problems of MMD https://vroid.com/en/studio

VRoid Studio is an application to create 3D models of humanoid avatars (characters). The app runs on Windows and Mac and can be used for free by anyone. 3D models created with VRoid Studio can be used as avatars on various VR/AR contents, both for commercial and non-commercial use.
 kind nova
Help please i dont know what i touched in Blender2.8 but now my model looks all cubic

 neat viper
in Object Mode select the mesh, then go up to the Object tab and choose "Shade Smooth" iirc
 obsidian nova
@kind nova This made me smile. Shade smooth/shade flat was literally the first roadblock I ran into when I started modelling.
kind nova
Glad to give you a good time but this is an important model for me, i cant find that shade smooth option ?
nevermind i found it
thanks
 lunar dome
can anybody spare some time to screenshare some blender with me. having issues pairing glasses to face
no more tutorials that make things worse thanks
median pike
zealous pond
using cutout is the answer for hair cards btw
Cutout just looks so much worse than an actual smooth transparent fade though
 compact mulch
Experimenting with stylized wood https://gyazo.com/c85fe5e688405fd6020d8b19ff62a63f
median pike
Stylized wood is always super fun to sculpt
 fast belfry
I never get board doing wood, but its not ingrained in me. I can still branch out into other design, but its a slow, lumbering process. Gonna go out on a limb here and say you've done this before?
 sand pond
So im busy changing body texture in blender but it keeps only wanting to use a surten type of body texture is there a way to change what kinda style of body texture it can use?
 devout scroll
That entirely depends on the uvs of your model
devout scroll
cold verge
kinda like these. i dont really know where to start and i dont really wanna like...
These are mish mashed from mmd, which is more and more frowned upon these days, mostly because in the past everyone used them while it was never technically allowed. As someone else above mentioned, you can use vroid avatars or look through booth.pm. There are some creators that also sell models that look close to those TDA ones used in your examples, but if you want free just look at editing vroid models to make them look like you want
zealous pond
median pike
Cutout just looks so much worse than an actual smooth transparent fade though
Use dithering, it's a great way to fake transparency and poiyomi toon shader can do it
devout scroll
While not perfect it can actually give a pretty interesting effect, especially if you're making a horror style avatar ^
 tardy rapids
Why did I do this to myself
why did I decide "you know what would be a good idea?"
"Making an asymmetrical, complex hairstyle with absolutely no visual references except straight forward as part of your first original 3D model"

 terse junco

tardy rapids
Oh, also base model. That's fully custom too

View in edit and wire mesh too, because UV seams and edge ceases are important


Would you believe me if I said this model (with subdiv on the base model), hair included, is only around 40k?
This is the last I'll post for now. Would love feedback, though.

 zealous pond
tardy rapids
Would you believe me if I said this model (with subdiv on the base model), hair ...
zealous pond
tardy rapids
Would you believe me if I said this model (with subdiv on the base model), hair ...
40k polys or 40k tris?
tardy rapids
tris
zealous pond

tardy rapids
It's a miracle.
Hair was a nightmare though, cause I did it in a number of parts
The covered eyes, then the little side bits, all did it as a 2D outline with some single-poly extrusions
then I filled them, shaping them around the head on the Y axis to keep the shape on the Z and X axis
aaaaaaaand I'm just now realizing I forgot the long side-bangs

But yeah
connecting the front hair to the back hair was a nightmare
This is where most of it happened

 kind crag
pain
devout scroll
topology is a little wonky
but it probably doesn't matter
you shouldn't really try connecting everything imo, it's harder and isn't really noticeable
 meager crag
when i first got into making models ages ago i was told to make it from one part and that was hard and hellish
tardy rapids
devout scroll
you shouldn't really try connecting everything imo, it's harder and isn't really...
I'm a bit of a perfectionist and I hate myself for it If someone can look into my model and see a seam where stuff doesn't connect together, it'll bug me
Plus it means that if someone decides my model is something they wanna rip and try to use my parts for a new model... Have fun with the hair, cause unlike 90% of VRChat models, which come from MMD or Koikatsu, this thing's custom made and in one piece
No taking parts here unless you wanna learn how to take it apart. Which considering someone's ripping models instead of making their own... Yeah, not happening.
The hard part here's gonna be texturing this hair
Might grab some anime-styled hair textures to overlay on the UV instead of going 100% custom... Then again I'm planning to add this to a portfolio for 3D work, so I'd prefer to have it be 100% original
we'll see.
devout scroll
You'll have to cut it up with seams anyway so you're basically just making your life harder by not having different parts
It's about efficiency here
at least imo
tardy rapids
Worst comes to worst I can just use flat colors. Best case scenario, I can get some very basic texturing working
median pike
zealous pond
Use dithering, it's a great way to fake transparency and poiyomi toon shader can...
where is the option for it in poiyomi?
zealous pond
under alpha options-> enable dithering and then increase the dithering gradient and play with the alpha mod/cutoff to get the look you want
zealous pond
no problem, dithering is great
white moth
tardy rapids
The hard part here's gonna be *texturing* this hair
Volumetric 3D texture and then bake it to the UV’s
good for hair shine
If you learn blender’s shader nodes you never have to touch a traditional 2D art app
cold verge
devout scroll
These are mish mashed from mmd, which is more and more frowned upon these days, ...
i thought vroid is for more basic models tho, i wanted to do 3.0 with physics and stuff
azure rain
cold verge
i thought vroid is for more basic models tho, i wanted to do 3.0 with physics an...
that stuff has nothing to do with the model source as 3.0 with physics is handled in unity not the modeling software
cold verge
ouh. okay
devout scroll
yeah you can do all the other fancy stuff in unity with shaders and animations
cold verge
i see a lot of people with custom models nowadays
im fine paying for one and stuff sortof i just kinda wanna make or edit my own cause i want a lot of customizability and to make it the way that i want to
azure rain
this tool will let you take a vroid and Auto converted to 3.0 with all of the physics https://booth.pm/ja/items/1025226

Unityのエディタ拡張です。次の3つのツールが含まれています。 • VRMプレハブをVRChat用アバターへ変換 • VRChat用アバターをVRMへ変換 • メッシュ・サブメッシュの結合 Unity 2018.4.20f1 のプロジェクトに、あらかじめ VRChat SDK2、または SDK3-Avatars をインポートしておいてください。揺れ物の変換を行う場合は、Dynamic Boneアセットを購入する必要があります。 Unity 2018.4.20f1 unityhub://2018.4.20f1/008688490035 VRChat SDK2
cold verge
ill uh look into that if i use vroid thanks
azure rain
personally I'd recommend viroid over MMD kitbashing as it's less work for you and more legal
azure rain
https://www.youtube.com/watch?v=vggA0auQEF4&list=PLdI9TI7mJBsnVDSN6ygkNcOJo-WQitK8R&index=4 this video tutorial covers how to use the tool
Almost finished up with finals! Been neglecting my studies to keep getting content out, so please forgive me for not having full episodes out at this given moment! I hope this tutorial was helpful, as I know the process is a bit confusing.
Make sure to double check compatibility of the VRM Converter in it's description. This video is up-to-date...
azure rain
cold verge
i still dont know what mmd kitbashing or mmd is
are you familiar with those 3D dancing Hatsune Miku videos
cold verge
uhhh
yeah
is vroid able to like do similar to the models i showed or would it be more simple avatars
i have no clue about anything rn
azure rain
would you mind reposting so I know what model you're talkin about
cold verge
yeah
foggy granite
Vroid is mainly hair
azure rain
cold verge
up there
oh most definitely you can get something that Vibes like that
cold verge
okay
also a lot of people with high ranks but im still new user
doesnt uploading models help
or smth
foggy granite
No it just time based
cold verge
hm
azure rain
foggy granite
No it just time based
I thought the official answer is we're not going to tell you because we people gaming it
foggy granite
Dam I mess up
cold verge
well thanks for the help, ill look into vroid and the tool and try it out lol
is there like a preset of sort for some 3.0 functions?
azure rain
https://booth.pm/ja/search/vroid ?max_price=0 here's the spot to look for acquiring viroid parts

BOOTH(ブース)とは、pixivと連携した、創作物の総合マーケットです。無料で簡単にショップを作成でき、商品の保管・発送代行サービスも提供しています!
foggy granite
Vroid is super simple
cold verge
since a lot of 3.0 avatars have springjoint and pen and stuff like that im assuming its either easy to do or easily accessible
azure rain
cold verge
is there like a preset of sort for some 3.0 functions?
that conversion tool I linked earlier handles that
cold verge
i think ive seen booth before
foggy granite
It basically ark character creation for anime
azure rain
yep which has a nice side effect of making it very easy to put on different clothing as everybody is using the same asset just with different textures
foggy granite
Yeah and also a lot of free textures too on booth
azure rain
yep and it's all perfectly legal so that's nice too
and also it doesn't require you to touch Blender at all
cold verge
hm..
azure rain
VRoid skill level: Beginner
This is a quick overview on how to create rounded or pointed animal ears in VRoid studio. Although these aren't the only ways to make ears, I have found these methods to be the quickest and most efficient.
Music by "The Sleeping Dream" used with permission:
Music: chemicaltaint.bandca...
azure rain
cold verge
hm..
basically one less tool you have to learn
foggy granite
Honestly I perfer a mixture of vroid plus blender
azure rain
of course but that's more of an intermediate users step then just VRoid + Unity
azure rain
and honestly with a bit of practice you could probably get your profile picture in VRoid katienbeaux
foggy granite
But vroid is everything is hair
cold verge
should i get vroid off steam?
azure rain
yes that way you don't have to worry about updates
cold verge
so for vroid do i use sample models or go to that site
i think phia has a tutorial on this but idk
azure rain
you could probably work with one of the base models to start as BOOTH is for grabbing textures and pre-made hair pieces

VRoid Hair Tutorial has been a video that I’ve been highly requested to make. In this video, I go in depth through all the tools and functions to walk you through what is possible for making hair. I also show off some of my own models’ hair to better demonstrate the techniques of which I describe. I hope this video is helpful to you!! I’m going ...
cold verge
is there any way to make the vroid models look less like vroid though
they all have like the same colour and exact same face
azure rain
you can play around with the facial sliders and grab different textures off of BOOTH
 azure rain
there is a English setting for the software
cold verge

its already in english i think
as simple as this looks compared to blender i feel like its gonna be a pain lmao i overthink a lot
azure rain
you would be in a world of hurt if you're trying to do from scratch in blender
cold verge
yeah for sure
foggy granite
That’s because the creator is Japanese
cold verge
my main concern is changing the face to look more like this or just changing the model to be more detailed

is that even possible
cause it looks like vroid's models / face all really just look the same

i think i already decreased the brightness on my model a little bit but
foggy granite
Yeah unfortunately that’s down side with vroid same face
cold verge
yeah then im probably gonna have to
devout scroll
ironically, all the egirls use the exact same face texture too lol
foggy granite
Yeah
cold verge
devout scroll
ironically, all the egirls use the exact same face texture too lol
yeah and i want that
just not vroids
no offense but vroids face looks hella ugly
terse junco
pandas female head
cold verge
so if all the egirls use the same face texture is it something public or do they just model it the same
devout scroll
 cold verge
im probably not going to be able to learn blender anyway
azure rain
they're using the same pre-existing texture
devout scroll
it's some texture for a tda head
cold verge
where from
cold verge
sadge
devout scroll
it's probably just stolen from one another
azure rain
and that also gets quite the same face tda
cold verge
tda?
azure rain
basically where everybody steals their MMD models from that also breaks the terms of service of the model
cold verge
i uh basically want the same base model but with different clothing and hair and a bunch of customization. ive got time to learn blender but im not very intelligent so
terse junco
just use pandaabears female face
cold verge
whats wrong with mmd
azure rain
cold verge
whats wrong with mmd
a lot of the time they're disrespecting the Creator's wishes
cold verge
oh. okay.
cold verge
terse junco
just use pandaabears female face
don't know how or what / who that is lol
terse junco
dm
azure rain
which is why I tend to recommend vroid because it's setup to actually be used for vrchat avatars not stealing from a bunch of folks who don't have any interest in their stuff being used in vrchat
cold verge
how do all these avatar creators make their models then
since again a lot of them look insanely similar
do they all just steal
azure rain
cold verge
since again a lot of them look insanely similar
basically the answer is yes if they're gluing random MMD Parts together
foggy granite
Yes
devout scroll
most people used to just glue mmd parts together whether the original creators liked it or not
azure rain
mostly folks take random free to download MMD parts and use them in vrchat regardless of whether it would break the terms of service of the model
devout scroll
then people would take those and smash them together a few more times
foggy granite
Booth have some free assets to use just need to set up
devout scroll
some are allowed, some are free on booth, some use parts ripped from other games, it's all a mess, really
azure rain
foggy granite
Booth have some free assets to use just need to set up
yeah that's a better approach as those are properly licensed for use in vrchat
foggy granite
Yeah
 azure rain
which is why I tend to lean towards a vroids approach as that make sure you're not disrespecting the creators of assets
foggy granite
It say free but is still got certain rights and conditions
azure rain
cold verge
this one literally says free
does not necessarily have a terms of service that permits vrchat usage
 molten zephyr
honestly, vroid faces are okay if you change the textures.
azure rain
because commonly they have a only use it in MMD requirement
azure rain
cold verge
so which tos does it break
typically the person who made the models in the first place terms of service

A well-requested "bare skin" version of my skin base, with separated eyebrow, eyeliner, eyelash, and skin texture. This is a fresh-faced version you can use in many ways! LICENSE: CC by Attribution 4.0 International: https://creativecommons.org/licenses/by/4.0/ Contents of package: -- * Three skin

This is a realistic skin texture pack for VRoid! People don't tend to like this very much when you use them for VRChat avatars, but you can try (just prepare for people to say you look odd). However, these are beautiful doll textures. You can do lots of things with this, like dress up avatars to
cold verge
why are they posted then
azure rain
for use in Mmd

MikuMikuDance (commonly abbreviated to MMD) is a freeware animation program that lets users animate and create 3D animated movies, originally produced for the Vocaloid character Hatsune Miku. The MikuMikuDance program itself was programmed by Yu Higuchi (HiguchiM) and has gone through significant upgrades since its creation. Its production was m...
azure rain
yeah so we're basically stealing other people's game mods
foggy granite
Well that’s fine as long as you learn
azure rain
BOOTH(ブース)とは、pixivと連携した、創作物の総合マーケットです。無料で簡単にショップを作成でき、商品の保管・発送代行サービスも提供しています!
here's a list of all the free to download skins on vroid's to make the face more fun to look at
foggy granite
Booth is find just use google translate which is also free
cold verge
yeah idk. it just doesnt look the way i want to and i want more freedom to customization but i think im too dumb to learn blender or how to make models. though id like to.
thanks though
foggy granite
Blender is the best option if want the custom
cold verge
i'd like to learn it lol
i jus don' know
if i could, i'd make a few avatars for sure
maybe even public ones
but i'm not great with tutorials
foggy granite
Then try it just gonna take bit
cold verge
i tend to overthink and doubt myself a lot and that definitely doesn't help whatsoever lol
molten zephyr
i was gonna say, rainhet's tutorial was the one that got me started, it was super useful.
foggy granite
You can always ask here for help
cold verge
i heard it's good to start with.. "the donut"
foggy granite
I would learn the interface and tool frist
cold verge
are there any good tutorials i can use that aren't hard to understand
and if there's any way to start directly with modeling vrchat instead of simple things or do i have to
molten zephyr

Rain sensei here, ask me as many questions as you need, we’re making a head out of a cube.
btw that cube was 2m by 2m I had a slip up don't fight me.
I'm using blender 2.9
I’m sure you’ve seen a lot of people who get perfect circles and start pulling here and pushing there, and in no time they’ve got a pretty face. That’s sculpting, if you want...
cold verge
thanks
azure rain
cold verge
are there any good tutorials i can use that aren't hard to understand
unfortunately making a character from scratch is loads more complicated then VRoid or MMD
molten zephyr
this one approaches it like you're new to blender iirc, so it's just a good launch point that will net you a useable avatar at the end.
 spiral sigil
why is the transform data colored for the armature but when i click the mesh it is not? when i try to go into edit mode in armature it changes the scale
 spiral sigil
how do i get rid of it? and fix it from not changing scale when going into edit mode?
 latent charm
spiral sigil
how do i get rid of it? and fix it from not changing scale when going into edit ...
latent charm
spiral sigil
how do i get rid of it? and fix it from not changing scale when going into edit ...
Right click and clear all keyframes
spiral sigil
gotit
 zinc jolt
molten zephyr
https://www.youtube.com/watch?v=5JA0f8ZgIw0&ab_channel=RainhetChaneruRainhetChan...
zinc jolt
molten zephyr
https://www.youtube.com/watch?v=5JA0f8ZgIw0&ab_channel=RainhetChaneruRainhetChan...
Bro that looks so good
I wanna do that
molten zephyr
it's a super good tutorial i've been recommending to everyone interested in making an avatar, because it's what finally worked for me. she has another series alongside it that goes over everything a lot faster, so you can bounce back and forth between the two if you have a bad attention span.
zinc jolt
Let me guess, it's by Kimi Chimera?
molten zephyr
Rainhet Chaneru.
molten zephyr
i think it's linked on one of the videos- i'm not a member, so i don't have the link on hand.
zinc jolt
Oh alright then
 jolly river
Hey am i right here if i search Speacial Charaktaers for VrChat or 3D Models of Tonikaku Kawaii Tsukasa Tsukuyomi

 median harness
Modeled some goons over the past three days
They're for a Risk of Rain 2 mod but I'm gonna port them over to VRC once my part on the project has wrapped up
 terse junco
👍
tardy rapids
Oooo, Lobotomy corp
azure rain
those look cool
median harness
tardy rapids
Oooo, Lobotomy corp
Heehee, yep! Making the Red Mist as a Risk of Rain 2 survivor. We made An Arbiter last week, really gonna flex with this character. Blue Reverberation is the mastery skin for Red Mist.
Other dev sent me these this morning, she got the idle walk and run animations done and in game
But this is straying from VRC-centric, haha. I'm just excited to easily port it over, I used my usual skeleton (minus a fourth finger) and such so should be cake
spiral sigil
why does this happen it looks jagged

im trying to edit a model i found but i need to make the muzzle shorter and make it a different shape
but it keeps doing this! this is why i stopped modeling my own...it does this
and smoothing makes the whole thing go away
neat viper
Select the model in object mode, go to Edit mode and then press CTRL N to recalculate normals? o:
neat viper
weird, make sure that there aren't any v intensive things running in the background?
i.e make sure that your system's resources aren't being used up
neat viper
that's..vv odd o:
iirc there's a recover option in the File menu, if recalculating normals somehow broke the model
spiral sigil
if someone doesnt mind spending a bit of time with me, i could screen share and they could try to help me because i dont know how to actually use blender, tutorials confused me more than i already was
idk where anything is
i tried to sculpt once and this happened so i gave up
i looked on google and didnt really find a fix for it and no one knew why it was happening, and ive got to make some severe edits to this model
yeah i cant move anything the whole axis is gone
neat viper
try setting the transform pivot point to Bounding Box Center? o:

also, make sure that you have the Move tool or some other tool selected, rather than the Select tool
spiral sigil
why is this happening now

it didnt last time
i need to move it down because i cant see, theres no way i can see with it that high, ive tried adjusting my camera
i cant get it to go up
neat viper
in object mode, select the armature and move it rather than just the mesh? o:
spiral sigil
and where did the tools go...
 spiral sigil
im on the sculpt tab
how do i get their tools
it wont leave object mode
it did it automatically last time
 pastel condor
Do you have your object selected?
pastel condor
It should work if you have the object selected I think? The drop down doesn't have sculpt as an option?
 pastel condor
Why is pose mode there?
spiral sigil
got it, for some reason i had to go in the layout, and reclick it
pastel condor
Oooh ok
spiral sigil
idk i cant even use pose it wouldnt let me move the model
devout scroll
pose is for armature
object mode and edit mode is shared among multiple object types
 winged yacht
I want how can I to brawing a3D modelingʕ•ﻌ•ʔ!
What just you guy to do a 3D modeling i want to now≧∇≦!
 tough plover
@winged yacht I'm not sure what you're trying to ask, are you asking how to make a model?
winged yacht
Yesʕ•ﻌ•ʔ!i am sorry my english is not really great qqqq
devout scroll
Use blender, watch YouTube tutorials
winged yacht
This so cool! I will ture to make my 3D modelingʕ•ﻌ•ʔthank you !
devout scroll
👍
spiral sigil
Ok so i made new hair for a model but when i use one of the visemes it hides/messes up the hair how do i fix that?
 clear geyser
spiral sigil
Ok so i made new hair for a model but when i use one of the visemes it hides/mes...
clear geyser
spiral sigil
Ok so i made new hair for a model but when i use one of the visemes it hides/mes...
Highlight the hair in edit mode then while basis is selected use the search function for "shape propagate"
 languid fog
ok so sometimes i find models like this ones, idk how i supose to do the hair tbh, the distance between the start of the hair and the shape of the head is around the same amount as the nose to the chin, can someone gimme a tip here? :/

 quaint jasper
You should look for any tutorial on how to model anime hair, there's a few techniques
 lament pond
 quaint jasper
Do you never post these on twitter btw ?
 thorny ivy

After my first attempt at making 100% scratch-made boots didn't go so well, decided to work smarter and not harder by starting with a subsurface division. From there, did a lot of tweaking and eventually got to where I am with it now.
Still need to refine the actual boot shape but pretty happy with how the sole and toe guard (which're both metal) turned out though.
Any advice for doing that?
 fallow isle
Making footwear can be challenging. I've done it only a few times but I get better each time. Definitely a good start 🙂
Try to use edge creasing rather than extra edge loops where you need crisp edges. Adding extra edge loops just inflates the polycount.
May want to delete the faces where the mouth of the shoe is, as well, so you can better mold that area
It helps if you have a foot and ankle already there to shape it around
When I made the boots for my current project, I actually split it into multiple parts so I could better mold the individual pieces of the boot.
 spiral sigil
so i am making myself a model, and i modeled the head seperatly from the body, but im wondering would it cause any problems when i rig it? or would I just have to combine the two objects before rigging, or do i have to directly connect the vertices and such? there is this other model i have gotten that had a similar technquie done, but the head was a seperate object than the body, so i wanted to do something similar since it seemed like a better option for the avatar im making. thanks if anyone has any advice on it
fallow isle
It's fine either way, however rigging may become difficult if the head is not sewn onto the neck. E.g. you might have trouble with vertices on the edges of both meshes not staying together when deforming. The easiest way around that is, of course, sewing them together into one object.
If you absolutely must have the head separated from the body, you can separate it again after taking care of the rigging.
spiral sigil
ahhh okay, thanks for the info!
i was also trying to figure out, are there different techniuqes people use for modeling the joint areas (elbows knees etc for vrchat models) ?? the only two ways i have seen people do it is insetting more faces into the mesh area, or seperate the area of the vertices and make it into a gap they then fill (from a few speed modelings i have watched anyhow i noticed it was only around the leg areas)..
fallow isle
This is more a question of best practices regarding topology for animation
I'd advise looking up tutorials on topology for animation, and checking out other peoples' models to see how they've done it
Generally speaking, the area around joints like elbows and knees should have geometry to support clean deformations. In other words, not just a quad tube. 🙂 lol
In this regard, I'd advise against using MMD models for study, except for the original source models e.g. TDA's very own Miku Append, or Sour's very own models. Not stuff downloaded from deviantArt, as those oftentimes have been butchered and had their topology destroyed.
If you've ever purchased an avatar from Booth, those can be a good place to start looking to see how to go about the topology.
Here's the front-side of an elbow from a body I've purchased off Booth

And the elbow itself

Knees

 spiral sigil
ohhh okay, thank you again for the advice!
 fallow isle
Nice!
thorny ivy
Thanks! Think it turned out pretty well considering I didn't even look up any tutorials and my primary ref was an actual boot I own IRL.
Did take some inspiration from the Nike self-lacing shoe from Back To The Future though, thought the concept was neat.
fallow isle
Well it's a very good start! Keep going 😄
thorny ivy
Any tips for making it look less low-poly though?
 spark horizon
maybe just throw on a subdivide modifier and see how it looks
azure rain
spiral sigil
i was also trying to figure out, are there different techniuqes people use for m...

アニメーションしたときの曲がり方を考慮した関節部分のトポロジー、パッチの種類解説動画(https://t.co/tys3yUKEnn)
素晴らしかったので画像にまとめてみました
Pixar Elbowで曲げた時に文字通り肘の骨の部分とかが表現できているのが素晴らしい
Retweets
1160
Likes
3730

 Twitter
·
fallow isle
thorny ivy
Any tips for making it look less low-poly though?
Twitter
·
fallow isle
thorny ivy
Any tips for making it look less low-poly though?
Change it to smooth shading rather than flat shading, that'll eliminate the faceted look. If you wanna keep some of the edges nice and crisp (e.g. the boundary between the shoe and the metal), you can either utilize the auto-smoothing normals (in the object data tab, the one that looks like a triangle with dots at each point) and adjust the angle to get the look you want, or you can set the angle to around 60 or so and manually mark edges as sharp that you want to keep nice and crisp. If you add a subdivision modifier, it will smooth it out at the cost of doubling (or more) the polygon count, so try not to subdivide unless you absolutely need to have that extra geometry.
fallow isle
azure rain
https://twitter.com/HigenekoArt/status/1365385979154980864?s=20
Good piece of info, thank you. I'd also like to share this Twitter, it's a great anatomy source and reference: https://twitter.com/kato_anatomy

加藤公太。関わった書籍:『リシェの美術解剖学』『ゴットフリード・バメスの美術解剖学コンプリート・ガイド』『エレンベルガーの動物解剖学』『美術解剖学とは何か』『スケッチで学ぶ美術解剖学』
Tweets
2577
Followers
129349
Twitter
 limpid quarry
Hey i have a problem i can look into a wall that i modeld in blender when i put it into unity is there a easy way to fix that without changing the shader ?

 frozen dust
enable backface culling first https://nyanpa.su/i/OTZv1pzX.png
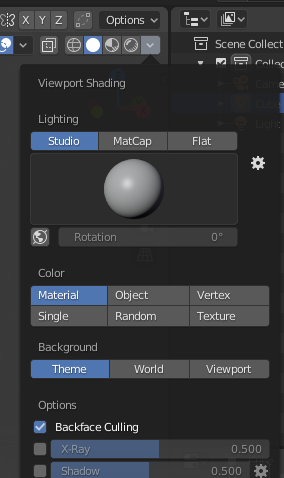
then select the faces that are inverted and flip them https://nyanpa.su/i/fgWz1q0M.png

could also just select the whole thing and recalculate outside and see if it gets it right
limpid quarry
frozen dust
could also just select the whole thing and recalculate outside and see if it get...
I tryed that one so if i do edits on the world in blender i can always just do that and it dosent break anything but thanks if worked ^^

 foggy granite
Looks good and pretty decent poly
tardy rapids
With subdiv applied, it's around 4k tris. Without it, it's around 500
foggy granite
That’s great
tardy rapids
Right now the full model's sitting around 70k. That said, I haven't done any optimization on the body yet, just the clothes.

I can get rid of pretty much the entire body aside from the upper chest, hands, and head
tardy rapids
Sure, I'll take one of each mesh
Subdiv hasn't been applied to anything yet, just added, but that shouldn't be an issue
foggy granite
Alright
tardy rapids
overshirt

undershirt (all removed except for the collar)

I do have a dupe of all the unoptimized parts lying around in this blender file though, so I can modify and reuse them as needed
foggy granite
That’s good to have backups


 foggy granite
Okay
I can’t wait till I get back into learning character modeling
Are you gonna model any props for her
tardy rapids
Probably gonna make her an Axe. She doesn't look like it (yet, I still really need to finish her overshirt and its uvs) but she's a Wyvern Rider. Think Fire Emblem. I'm pretty decent at making weapons. An example is the Murokumo, Es's sword from XBlaze (and BlazBlue, to a lesser extent)
 foggy granite
Oh you like making weapons too
tardy rapids
it glows
 foggy granite
I really need to get texture mines
tardy rapids
There's some minimal texture works needed on the Murokumo, but I don't see it as necessary right now
foggy granite


 tardy rapids
There's also this that I made... God knows how long ago

Like
"so long ago that I don't even have the .blend"
long ago
foggy granite
Dam
tardy rapids
This was actually the first model I ever finished
I have a very distinct feeling that if I went back to look at it I'd be looking at many...
Less than pleasant pieces of topology
 foggy granite
Yeah I agree with that
tardy rapids
That said, really happy with how it turned out
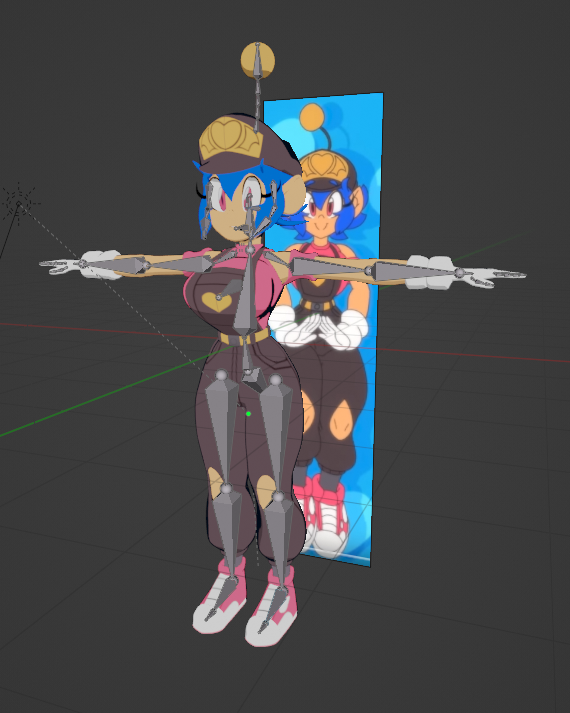
That was my first completed 3D model. My first completed character model, on the other hand

It is done. It'd be neat if @TheTwistedGrim noticed this, buuuuut I'm not gonna hold my breath. Still, really proud with how she turned out. Had to cut the back hair frills to a much smaller size and only to two, though. They REALLY don't translate well to 3D.
 Twitter
·
foggy granite
Twitter
·
foggy granite
Seems pretty low poly but still fit the style of the character
Quick question when did you start blender
tardy rapids
I started doing it on and off as a hobby around 2 years back.
I only really started getting back into it around a month back when I made that Emi model. Also here's a better screenshot of that, without all the bones in the may and without the toon material

This was also my first attempt at UV work
Looking back... I made myself do way too much work
I did all kinds of stupid stuff like assigning materials to faces for the sake of UVs, and I didn't even know UV seams were a thing
foggy granite
Welp it helps to experiment sometimes
tardy rapids
Here's the wireframe
 foggy granite
That’s pretty dense
tardy rapids
Yeah, not sure what subdiv I had it at. Also back view because I apparently never put that anywhere

Oh God I just remembered I used loop cuts instead of edge creases to define edges
Jeez I've come far in the span of...
Literally one model
foggy granite
Oh I was so happy when I learn about edge creases
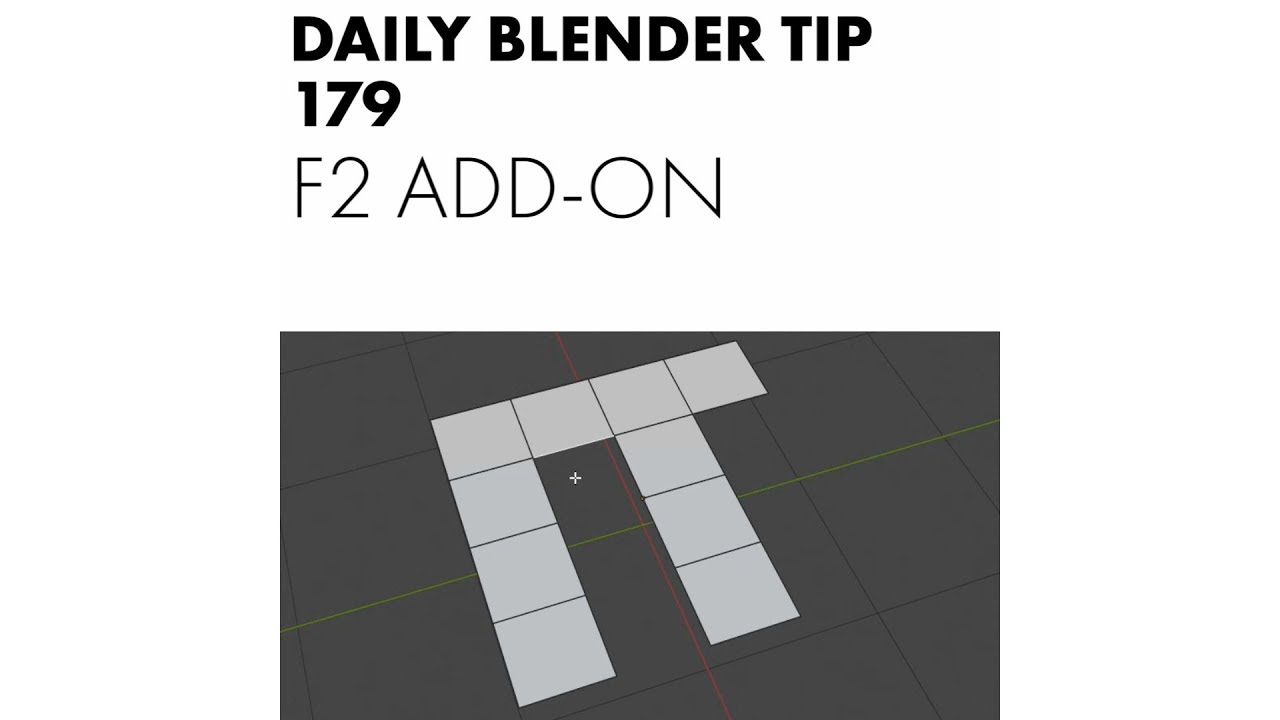
Btw do you have the f2 addon enable
tardy rapids
I didn't even know that was a thing
foggy granite
It speed up things immensely
foggy granite
I forgot to post https://youtu.be/j5ibu5vHwQs video old but the addon works the same
#b3d #blender #secrets #tutorial
Visit my website: https://www.blendersecrets.org/book
e-Book bundle (20% Discount) : https://gumroad.com/l/IxofeY
thorny ivy
So I'm trying to figure out how to do the UVs for the boots now that I'm satisfied with the model.
Any tips for that?
thorny ivy

Not sure how to mark this area up for UVs but doesn't feel like the best method.
There's four channels and not sure just how many seams there should be for each.
fallow isle
Doing the UVs is more or less just trial and error coupled with intuition/experience. Make seams where it makes the most sense, e.g. important boundaries like that between the body of the shoe and the sole, and the boundary between the metal and the shoe.
fallow isle
thorny ivy
Not sure how to mark this area up for UVs but doesn't feel like the best method.
What is this object? Certainly not a shoe 😛 lol
I wouldn't make more seams in those channels. You'll end up with a lot of long, thin strips in your UV map and it can be difficult to work with like that, depending how you texture, etc. Depending on the object and the importance of this particular area, I'm not sure I'd even have that first seam there on the left. It depends what the object is, really.
thorny ivy
fallow isle
What is this object? Certainly not a shoe 😛 lol
I wouldn't make more seams in t...
 fallow isle
Nice
thorny ivy
Decided to remove the seams for the channels and just leave have them at the ends of the blade mount.
fallow isle
That'll probably work out best. Like I said, that way you'll avoid having several long, thin strips in the UV map. I'd personally keep the entirety of the handle one piece in the UV map, save for the p iece at the very end of the handle. The handle shape is fairly uniform and so should unwrap quite nicely.
How long have you been using Blender/making 3D models?
thorny ivy
Not very long, honestly.
First model I ever made from scratch is from April of last year. Never did anything with it though.
And before that, I messed with avatars some but very minimal stuff.
foggy granite
Dropping this for any who need it
 fallow isle
Always good to have wireframes around for reference!
fallow isle
Know what? Let's keep it going. Great video showing a process entirely from scratch, start to finish, with what I have to admit is a really bangin music track. https://www.youtube.com/watch?v=5aSaXiXq3T4

#blender #anime #modeling
[Wonder Egg] Ai Ohto Modeling - Blender 3D
Character: Ai Ohto
Anime: Wonder Egg Priority
Song: SWAGGER - 圈妹 & 莹酱
Blender Boy Modeling Series: https://youtu.be/VZZuS1ucPAE
Blender Girl Modeling Series: https://youtu.be/fQZ7TEdFdMU
Blender Simple Body Anime Timelapse: https://youtu.be/pDZQnyy0f8k
Link reference: htt...
foggy granite
I like the videos I seen it a couple of weeks ago but that music
It will drive me insane I can listen only that song for a complete hour
thorny ivy
Using the first knife I made as a basis, decided to make another. This one's for cutting bread and made sure to adjust the design accordingly.

Size and design comparison
 spiral sigil
oo nice!
neat viper
cool! o:
thorny ivy
Making the serrated edge took way longer then I would've liked due to just how long the blade is but surprisingly, seems like it'll be performance-friendly with 572 verts and 1.1k tris.
spiral sigil
well it defeintly looks like a bread cutting knife
thorny ivy
Combined, the knives come in 2.7k verts and 4.8 tris (which I think is important for VRC) total.
I've tried optimizing both knives the best I can but relatively inexperienced in that regard.
And glad it looks the part - took inspiration from several models while using my own as a template.
foggy granite
I would just use vertex to make a triangle then just use the array modifier
 young vault
Looks like inverted normals
 tight quartz
How is it I fix this? I am new to doing armature stuff. 🤔
 thorny ivy
tight quartz
How is it I fix this? I am new to doing armature stuff. 🤔
thorny ivy
tight quartz
How is it I fix this? I am new to doing armature stuff. 🤔
Looks like you're lacking weight painting for the arms or an armature modifier for the model.
 atomic quartz
uh, i was working around in blender's shader editor, cuz i wanted to add some of my textures as bumpmaps

how do i find the texture that's refferenced as "Normal"?
atomic quartz
yea, it's in there but
i can't "right click and open location" or something
i wanna find it somehow in the project to save it for later
fallow isle
It looks like that texture is packed into the blend file. One of those buttons there will let you unpack it. I don't remember which one. Hover your cursor over each of those buttons next to the texture name and it'll tell you what each one does. Use the unpack button and it'll let you pick somewhere to unpack the texture.
atomic quartz
that's a pretty good explaination, thank you
the button to unpack is the one to the left of the X, but i thought unpacking would just remove the file from the project (remove from assets pack, or something)
fallow isle
Yeah, that's the one. 🙂
atomic quartz
also, with a camera above an ovea, trying to create interesting stuff i made this

set a camera to render something as "bump" and try with other models, could look nice.
devout scroll
You can always just save as in the image viewer
generated textures are not saved and will be lost when you restart so you gotta do that
 wicked lichen
When i upload an avatar to unity it always says missing monoscript what should i do
pls help
devout scroll
remove the missing scripts from your avatar
it should tell you where they are in the error
lament pond
 thorny ivy
Cute gal!
Also meant to share this yesterday but didn't get around to it


Serrations were a pain to do but think it turned out pretty crisp.
 lethal arch
Looks cool! Is that 572 on one or on all? Look at the wireframe, that gives a better idea of what you can still optimize. On 3ds max you can get the lines on top of the texture and optimise the lines, it's just hard to tell without it. Usually with mesh smoothing and a few mesh points you can get round ish, but still it's a matter of how far do you need to go.
 narrow kestrel
(I'm a complete newbie so pardon me if I sound stupid)
I've been trying to export a model using the CATS plugin but I'm stuck at atlassing, every time I try to save an atlas, the image I posted happens.
I'm guessing this could be a common problem so I went here. Any help, leads, advice, anything, will go a long way. Thank you!
 devout scroll
From my experience atlassing with cats never worked properly, or it did but hit the resolution too hard
I'd just skip the atlassing step
narrow kestrel
Will I still be able to import it into unity to use on VRChat?
without any hiccups of course
neat viper
Atlassing isn't required to upload a model to VRChat, but I definitely wouldn't recommend skipping atlassing entirely
v much depends on how many materials the avatar has to begin with as well, imo
 open scarab
'matcombiner' instead of the cats, does the same but sems to do it less wonky (will end up with a wierd not 1024 x Y tho) exsample same avatar cats vs matcombiner
 narrow kestrel
open scarab
'matcombiner' instead of the cats, does the same but sems to do it less wonky (w...
narrow kestrel
open scarab
'matcombiner' instead of the cats, does the same but sems to do it less wonky (w...
same thing happens sadly
open scarab
Should also check if you have multiple uv's if it goes really wierd
open scarab
It only use the first one for atlas, sometime refreshing the material texture location also make it not go white/blank
wicked lichen
devout scroll
remove the missing scripts from your avatar
oke tysm
thorny ivy
lethal arch
Looks cool! Is that 572 on one or on all? Look at the wireframe, that gives a be...
Glad ya think so! As for hard numbers...
Cutting blade (top): 59 verts. Total: 1,366
Saw blade (middle): 849 verts. Total: 1,826
Bread blade (bottom): 572 verts. Total: 1,549
Combined vert count for all three knifes: 4,741. Seems like a good number considering there's three seperate props and two have pretty detailed blade edges.
 thin shadow
narrow kestrel
(I'm a complete newbie so pardon me if I sound stupid)
I've been trying to expo...
thin shadow
narrow kestrel
(I'm a complete newbie so pardon me if I sound stupid)
I've been trying to expo...
This could happen when some materials dont have texture, they have solid colors instead. Try using the baking method.
narrow kestrel
thin shadow
This could happen when some materials dont have texture, they have solid colors ...
It was something with multiple UVs as Thulen mentioned, thanks for trying to help though!
tardy rapids
Another day another model update
 neat viper
If you're asking for a commission, #community-servers-old, VRCTraders and/or https://ask.vrchat.com/c/commissions/avatar-commissions/35 would be the places to look c:
lament pond
Wip of my new Haida model
 winged yacht
lament pond
Wip of my new Haida model
winged yacht
lament pond
Wip of my new Haida model
OMG It’s so cute ❤️🥺
 valid sun

Tired of "Projected Face Interpolated" creating massive holes where rays never intersected your target mesh?
Ever wanted to project vertex weights out from your body instead of in from your clothing?
I cooked up a method to do that using shrinkwrap, data transfer and proxy meshes.
Results are completely non-destructive and tweakable on the fly.
Note the shoulder strap and neck cowl don't have any hard, glitchy stretching artifacts from poor projection results. No manual cleanup was required.
Try it out sometime!
- Duplicate your body meshes and clothing and remove any unnecessary vertex groups. Remove armature modifier from the duped body mesh.
- Add Shrinkwrap and Data Transfer modifiers to the proxies.
- Add Data Transfer and Armature modifiers to the originals.
- Tweak proxy meshes to fit troublesome areas using shape keys (pulled the shoulder straps in to fix the armpit area) or project onto a modified base mesh. (removed the head and the cowl proxy stopped projecting upward to the chin)
- Hide proxy meshes and pose your armature to view the results.
fallow isle
Seems about like the same amount of work as if I just use nearest face interpolated data transfer and manually clean up lol
Data transfer is honestly a freaking godsend though. It saves SO much time in rigging clothing and accessories.
valid sun
It's really not the same tho', I'll get a comparison later today. Tweaking a proxy mesh to get the correct weights is much faster than manual cleanup and also non-destructive.
 dark portal
Just started working on an 80s inspired mall world  I'm trying to keep things low-poly, but probably not Quest optimized. I'm not a 3D model artist so this will take a while lol
 valid sun

A followup to my above post: Here's an example of using two proxys with a mask to smoothly mix between weights in the armpit.
One proxy projects to a copy of the body with just the arms, the other to just the torso. The results are mixed 50-50 and masked by a vertex group.
quaint jasper
Looks like a job for any kind of retopo algo 
valid sun
-facepalm- not the point, we're talking about weights here not polycount.
quaint jasper
Yeah i guess i'm not seeing the point in using a completely broken mesh and turning it into a slightly less broken mesh ?
valid sun
Whatever, not even going to bother.
 floral current
Doing things well takes a lot of effort. Like my very first avatar: every color on it is a separate material 'cause I thought doing that was easier than making a texture. LOL. I put a lot of effort into improving my avatars and formulating some kind of workflow and pipeline for making new outfits and whatnot.
 median pike
@valid sun he's got a point though. You wouldn't have the problems if your mesh wasn't you know. Ass. A normal data transfer would work just fine with proper topology
valid sun
Omg forget the topology. Yes I would still have that large discontinuality in the armpit whether I performed a retopo yet or not.
valid sun
That gap is a common artifact OF the plain old data transfer, and it's a pain to have to correct again if you need to re-project later down the road.
 naive flame
oh i see this may be the place i need to check to find out what tool i should use to make a custom avatar
devout scroll
Blender
foggy granite
If you want a more simple program vroid
tardy rapids
Decided to take a break from my original project (asymmetry on an outfit is a pain)
So here's a little wip of something that came from listening to a certain song for way too long on loop

I feel like most people should be able to recognize this
foggy granite
Yeah
foggy granite
ik it from a bit older song
devout scroll
looks good
 quaint jasper
pls fix the toe socks
tough plover
pro tip: try selecting the toes on the socks using Xray mode, and then use the smoothing tool in edit mode (in the list on the left)
should be able to easily eliminate the creases
tardy rapids
I just did some retopo on the socks to merge them like actual socks
 quaint jasper
Some smoothing and it's perfect
foggy granite
yeah
tardy rapids
 quaint jasper
Could be rounder but that's still much better than toes
foggy granite
some more adjusting and subdivision can help
tardy rapids
The hardest part by far will be the head
without a straight-on reference for the head, shaping it properly will be brutal
 wispy orbit
Maybe grab an anime head base and sculpt from there?
tardy rapids
I don't really do sculpting, never have
foggy granite
you should be able to find a refrence
tardy rapids
A reference, sure. The hard part is finding one for that character specifically
The studio that made the animation didn't seem to care for perspective in the concept art
foggy granite
yeah true
i would take one just from the video it self then work from there
like this

its decent but not the greatest

 vital drift
foggy granite
but can you tell me what creature is that
vital drift
foggy granite
but can you tell me what creature is that
girls on tv
foggy granite
hmm
tardy rapids
Any thoughts on doing this kind of thing for mouths?

This is the official model of Dizzy from Guilty Gear Xrd Rev
It allows the mouth to distort in ways that would normally be impossible for a mesh with normal topology
tardy rapids
Also, decided to use this frame as a reference

It's like the only one with near perfect facial symmetry
 foggy granite
yeah but gonna adjust the chin abit
lament pond
 white moth
tardy rapids
Any thoughts on doing this kind of thing for mouths?
white moth
tardy rapids
Any thoughts on doing this kind of thing for mouths?
You’ll need a shader that does not particularly care about normals or those large flat triangles are going to be very obvious
spiral sigil
how do you import a avatar into substance painter? its my first time using substance painter
 spiral sigil
thanks
its not letting me put in unity files

gimme a sec

nothing is showing up for substance painter
nevermind got it
lol
nevermind substance painter doesnt work for me
i'll just stick to asking for colors
thanks for trying take care

terse junco
just edit texture?
spiral sigil
yea how?
terse junco
photshop gimp ?
spiral sigil
no
substancepainter
something that doesnt cost me money
for something i already have
quaint jasper
gimp is free
spiral sigil
it is
terse junco
ye
spiral sigil
lemme go check it out
just in case can you send me the website to make sure im getting the correct one?
terse junco

The official download page for all things GIMP! Please only use the official binaries provided here unless you really, really know what you’re doing (it’s the only way to be safe). We try to provide binaries in-time with regular releases, but may occasionally be delayed as the packagers ...
vital drift
 terse junco
spiral sigil
apparently not just tried
terse junco
spiral sigil
apparently not just tried
u should be able to drag the texture in from file window not from unity but ur file explorer
spiral sigil
how do i make it do that polygon thing?
where you fill in the areas and it colors on the avatar
terse junco
elaborate i dont quite understand
spiral sigil
in substance painter it uses triangle like things and when you pick a color and fill it in you can see the model change color too
terse junco
oh ye well when u are changing 2d texture u cant rly see the result in 3d space until u apply that texture
in unity
spiral sigil
idk how to do that
terse junco
u save the texture and assign it to the model in unity
spiral sigil
in substance painter you can import the model and change its colors easier
terse junco
ye substance painter is better ofc
than my method
because u see changes in real time
tough plover
@spiral sigil what are you trying to import into substance
it should be a 3d model
like a .fbx
spiral sigil
been trying my awetter
spiral sigil
tough plover
like a .fbx
how do i turn files into fbx
spiral sigil
my awetter
tough plover
what format is it in
tough plover
what is the error
did you even bother reading it
or did you just go "damn it's not working"
spiral sigil
how do i find the errors?
tough plover
you're saying that it's not working when you try to import the model in substance
there must be an error message somewhere
spiral sigil
okay so one: it can import just fine the only thing im confused as to why is that the texture 2d page that it comes with doesnt work
azure rain
that's because it's just importing the model not the texture
spiral sigil
 azure rain
typically you use it for painting models that don't have textures yet
tough plover
if you have textures you want to use, you add a new Fill layer and add your texture as the base coloe
color*
spiral sigil
okay i'll come back if anything else happens
tough plover
but substance is mainly meant to texture stuff that isn't textured
azure rain
also see if your avatar comes with a substance painter file
azure rain
I'm not sure how that would take a long time either the zip file you got it from has one or it doesn't
okay I just checked it doesn't just the Photoshop files as I recognize that model
azure rain

Gumroad
What is the Awtter ?Just a cute furry otter model for VRC (VRChat) and CVR (Chillout VR) ! The package is full ready to use (very easy) and comes with tutorials ! It gets a lot of free updates and improvements overtime, stay in touch in Discord <3I live out of my creations, it's my full time job ! You can support me through Patreon : https://www...
azure rain
okay my mistake it does have one https://i.gyazo.com/cb9c9e8ad18944dcea648aebdb10f3a3.png
 azure rain
so yeah you want to open up that substance file that way it makes it easy to change stuff
spiral sigil
thank you so much
 copper marsh
Is it possible to use MTL files in Unity?
 dawn rose
furry
pastel condor
Started a new project~
 lament pond

 cloud spear
anyone know if blender has plugin to create stuff in vr
cloud spear
pastel condor
Started a new project~
why is it colored that way is that a depth field texture ?
quaint jasper
It displays the normals
Also Blender has a VR mode but doesn't really allow for creation in it
cloud spear
oof i tried some of the programs offered in oculus store and they are ... um not good or not intuitive
gravity sketch and masterpeice
neither seemed good
i wanted to try adobe but
my pc wont support running it through steam vr
quaint jasper
I know someone who makes beautiful models in gravity sketch https://www.youtube.com/watch?v=-uTAueGck2w&feature=youtu.be
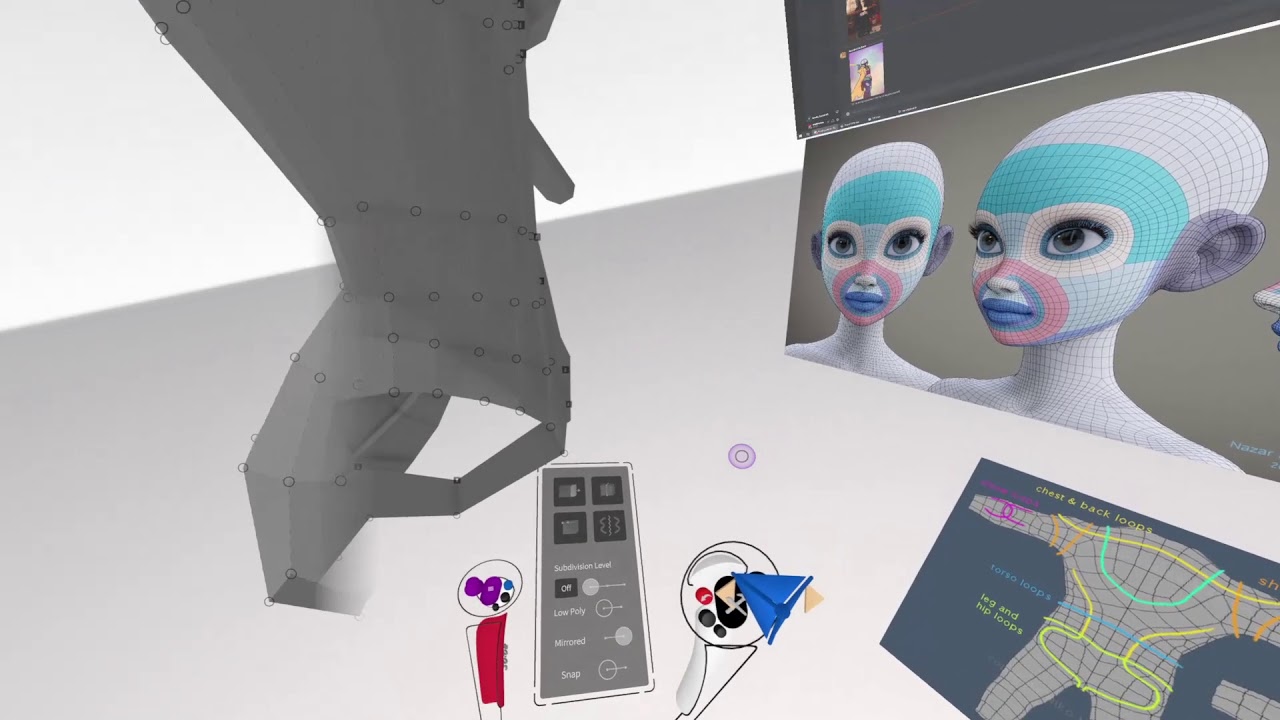
I did a really bad job of documenting it, but didn't want to just delete all the footage I had.
I literally didn't explain anything, but just DM me if you want to have any questions. Twitter is @MMMaellon
Apps used:
Gravity Sketch VR (Becomes Free on Jan 25th)
Blender
Clip Studio Paint
Songs used:
Glacier - Vantage
senzawa - kiss yo homies
cloud spear
i can run it through link but my gfx card doesnt support link or airlink yet
ah thats neat how they playing videos on the side lol
that would make working on stuff so much less daunting
pastel condor
cloud spear
why is it colored that way is that a depth field texture ?
What Ruuubick said, plus I just like how it looks. Better than staring at a vaguely gray blob for six hours lol
dark portal
dark portal
Just started working on an 80s inspired mall world <:vrcAevSip:56758084282246758...
a little more progress, still very early
 spiral sigil
im just trying to edit this nkd protogen base to have a "demon tail" i made in blender its a very simple thing but now the ears are acting wierd and the mouth isnt moving why?
spiral sigil
how? i never touched them
ever
the ears keep like not moving with my head properly
devout scroll
o then they're probably just not weighted to the head
or the bones are not parented to the head bone
spiral sigil
dynamic bones or just bones? which they should be i used a fully made base
and just changed out the tail in blendre
devout scroll
can't say without seeing the issue
spiral sigil
@devout scroll can i stream it to you then?
spiral sigil
ok fixxed it by changing the rig to another base XD
oki doki now the mouth isnt moving when i speak how do i fix that >w>
 sullen maple
any of you guys ever had blendshapes not export with fbx?
even when i reimport my model back into blender its not there 🤔
im on 2.91.0 and exporting like this if it helps
 quaint jasper
Try exporting with Cats ?
sullen maple
works perfectly in blender now, however changing the value of the blend shape to anything other than 0 in unity makes the model disappear 😦
...okay, never mind, guess it decided to work all of the sudden
(is it possible it's related to the fbx export scale? thats the only thing i changed since the last export)
quaint jasper
You should apply your scale in object mode with ctrl + A
quaint jasper
scale + scale + scale
spiral sigil
Hello, i was wondering if anyone could tell me sites to model 3D VRChat avatars.
foggy granite
spiral sigil
Hello, i was wondering if anyone could tell me sites to model 3D VRChat avatars.
to find and buy models or make them
spiral sigil
make them
spiral sigil
Ok thank you
foggy granite
blender if you want to make a fully custom model but also got a steep learning curve
spiral sigil
Oki
foggy granite
vroid is good since they have alot of free templetes people post for free and also extremly simple and quick to learn if know how to draw it be great but got limate selection with sliders and clothing options
i recommend learn vroid to start of with then work on adding custom assest (such as close and props) in blender till you figure out how to make an avatar completely from scratch
spiral sigil
Okay, thank you for the ideas
foggy granite
np other should also help if needed with any issue along the way
dark portal
Honestly, just hire someone off of fiverr to create a model for you. Getting into Blender and Unity just for the sake of a custom vrc avatar is just not worth it if you've never worked with 3D before
foggy granite
if you dont have the time sure this an option but nothing wrong with learning how to do it your self
neat viper
I wouldn't discourage someone from getting into blender/unity just because of VRChat, 3D modelling and Unity work is a valuable skill to have
not having the time or computer power to do it is one thing, but discouraging it just because it's hard/being done for one purpose doesn't make sense imo - nonetheless, VRoid makes relatively unoptimized models from what I've seen, and they won't be Quest-compatible by default (transparency), but it's an option
foggy granite
I agree with this 3D modeling is just nice hobby to have in general but for vroid it use a lot of transparent mesh to make detail like hair,eyelash, and clothes so if you want to have it work you might as well model that stuff in blender
tough plover
@spiral sigil Blender is a general purpose 3D modeling program, which is what most people use when making models for VRChat
it's not only useful for VRchat stuff though, you can make anything with it
and it's not just for models
the learning curve is steep though, just as a heads up
especially if you don't know anything about game design at first
 gusty bloom
hi! i know nothing about game design, or at least off the top of my head and im looking to get into blender and unity to create avatars
well, i know a bit but im hoping to learn a lot more from doing my own project like this
in future i might use the skills for something else but i still think it would be worth learning
 snow estuary
cool, you can start from doing sketches of your avatar
gusty bloom
i have a model from heroforge,com that ive made, can i use that as a reference?
dark portal
It's a nice skill to have for sure, but this is clearly someone completely unfamiliar with 3D, thinking there's a quick and easy way to do custom avatars. Telling them to pick up Blender and Unity is not the answer they're looking for
gusty bloom
im not expecting it to be easy, but im willing to talk to people who know a lot more than me, search through tutorials and learn from experience
thorny ivy
dark portal
It's a nice skill to have for sure, but this is clearly someone completely unfam...
Pre-existing avatars can cost momey and typically don't have commerical liscenses. Plus, you can only get so far modifying pre-existing assets.
 still wadi
 thorny ivy
still wadi
https://i.imgur.com/ELvtzI3.png
thorny ivy
still wadi
https://i.imgur.com/ELvtzI3.png
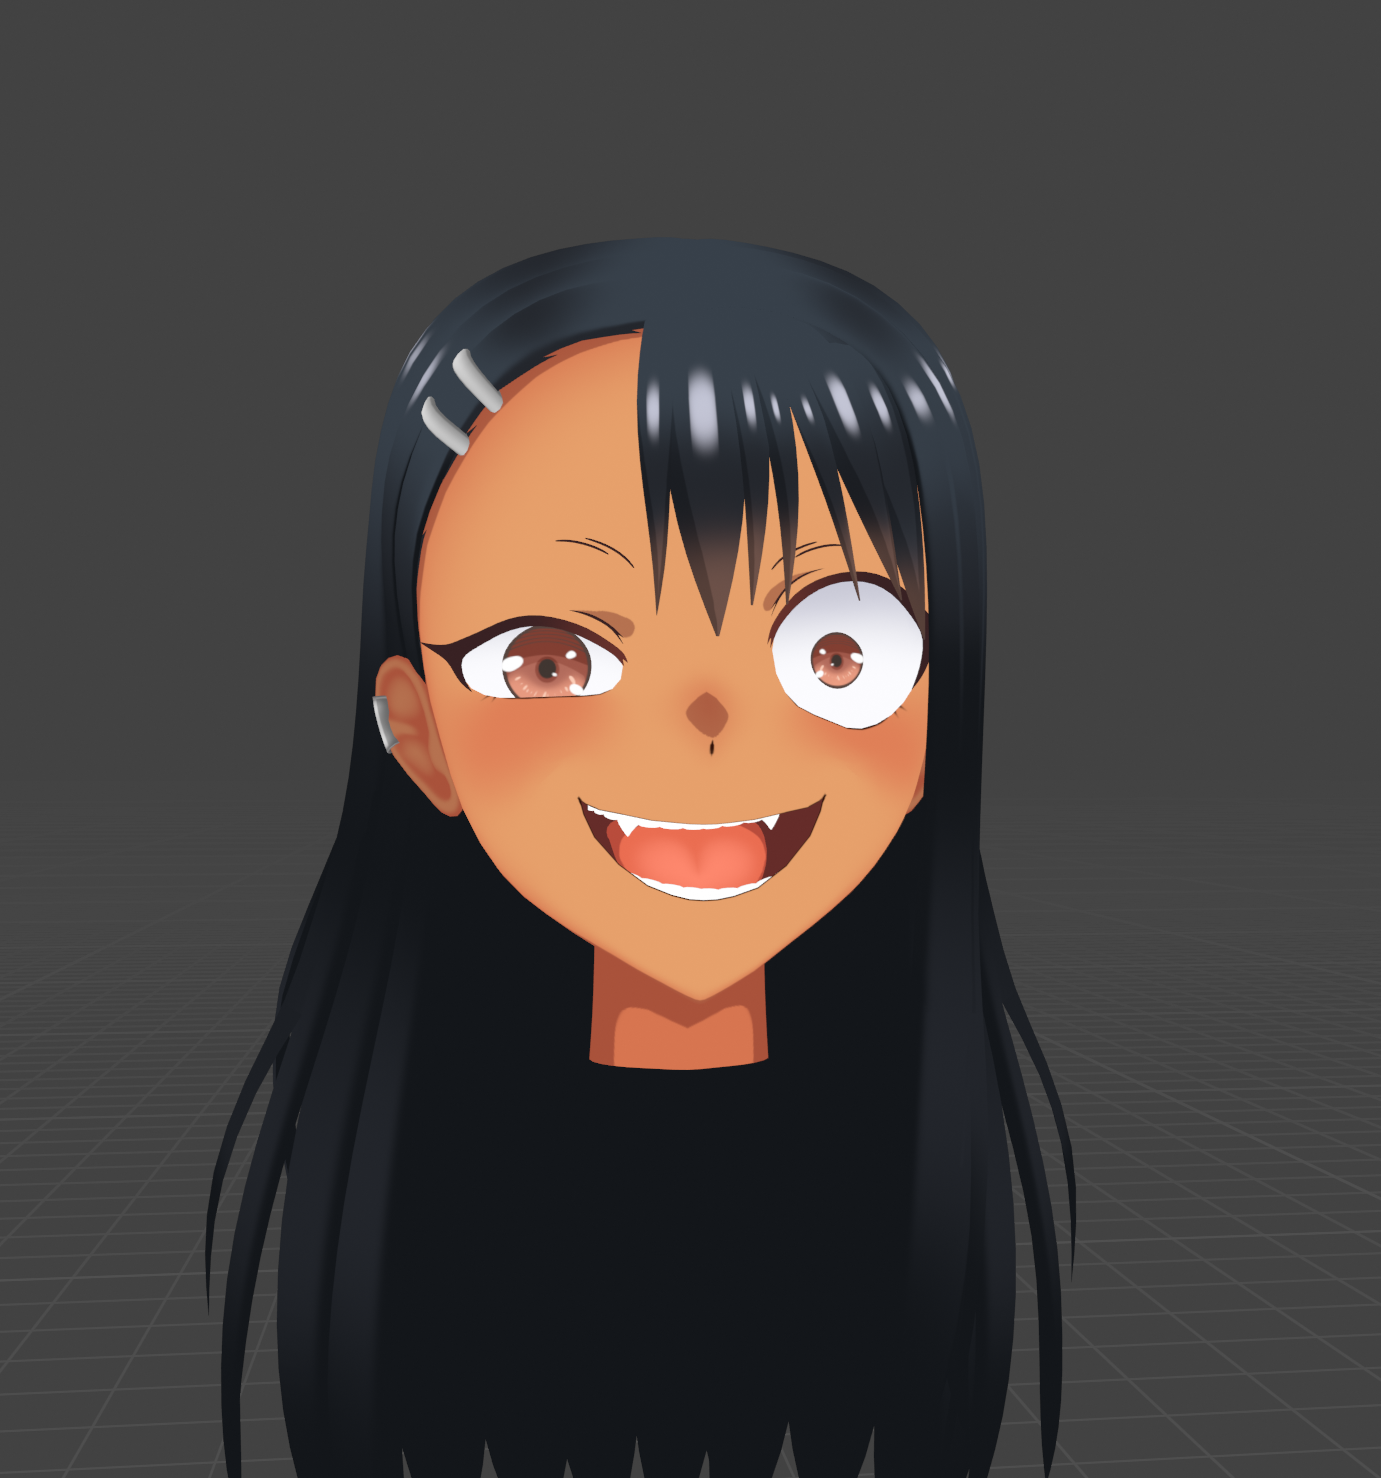
...how did you get it to look so good? Seems straight out of the show!
Seriously impressive work.
still wadi
just handpainted
spiral sigil

 candid copper
still wadi
https://i.imgur.com/ELvtzI3.png
candid copper
still wadi
https://i.imgur.com/ELvtzI3.png
I feel she wants to steal our cookies.... owo
looks good tho xD
thorny ivy
Does it look that good from every angle? Working on an avatar with a similar visual appearance so curious how it looks from other perspectives.
still wadi
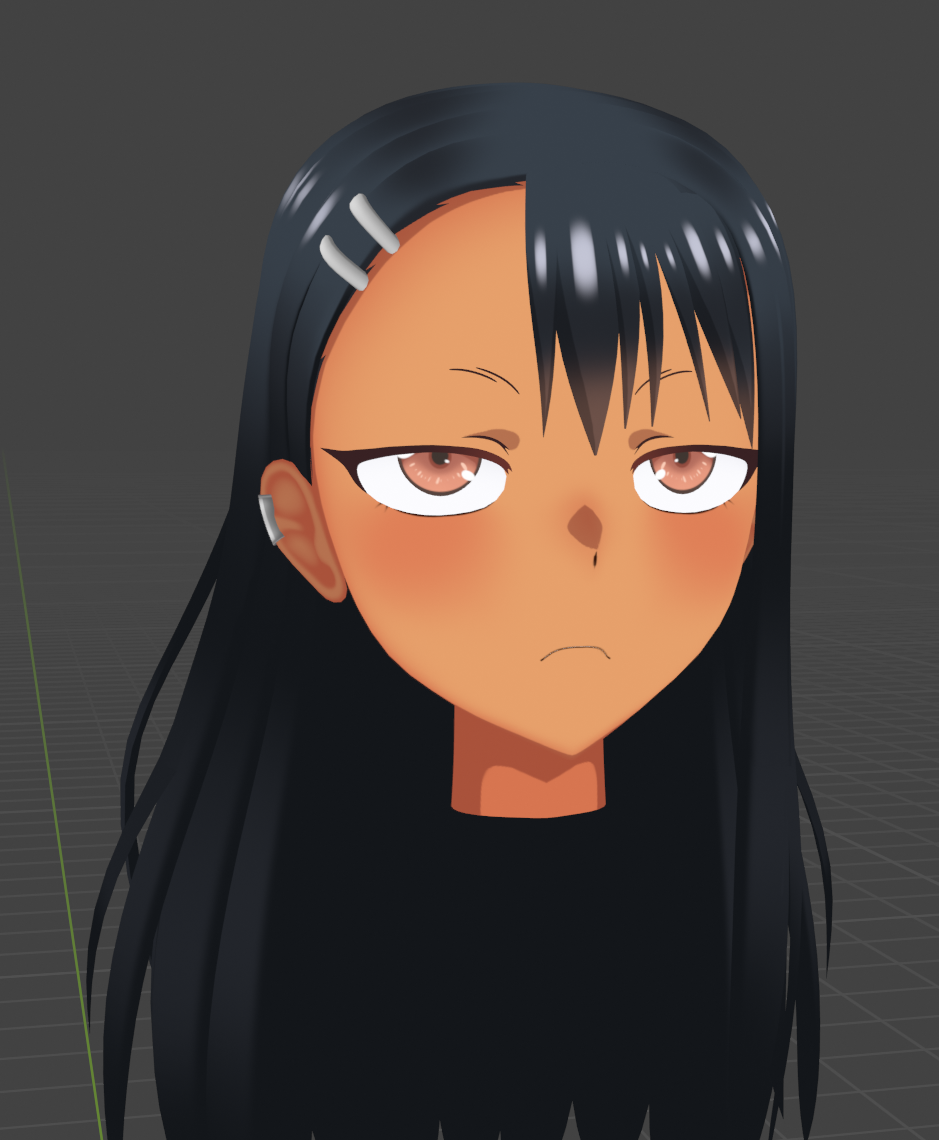 candid copper
thats the face I'd make if I see/hear drama about to happen
spiral sigil
thorny ivy
Does it look that good from every angle? Working on an avatar with a similar vis...
check his stream and you will see
thorny ivy
Stream? Where?
spiral sigil
check his discord profile
 plain hamlet
Does anyone know how to merge the skirt with the legs so they don’t clip through in blender?
spiral sigil
 gusty bloom
Question about character modelling, do you make each part individually then put them together? Like make the head, make accessories, make the body parts; then attach hand to arm, head to torso etc? Or is it all made together?
quaint jasper
Up to you, doesn't really make a difference
It's probably easier to keep it in different pieces when starting out so that you can focus on one thing at a time and hide the rest
neat viper
^ also at the end I'd definitely recommend joining your model to be one mesh o:
tough plover
plain hamlet
Does anyone know how to merge the skirt with the legs so they don’t clip through...
you don't "merge" it
you just weight paint parts of the skirt to the legs so that the leg bones have an influence on it
does not have to be part of the same mesh, they can be separate meshes
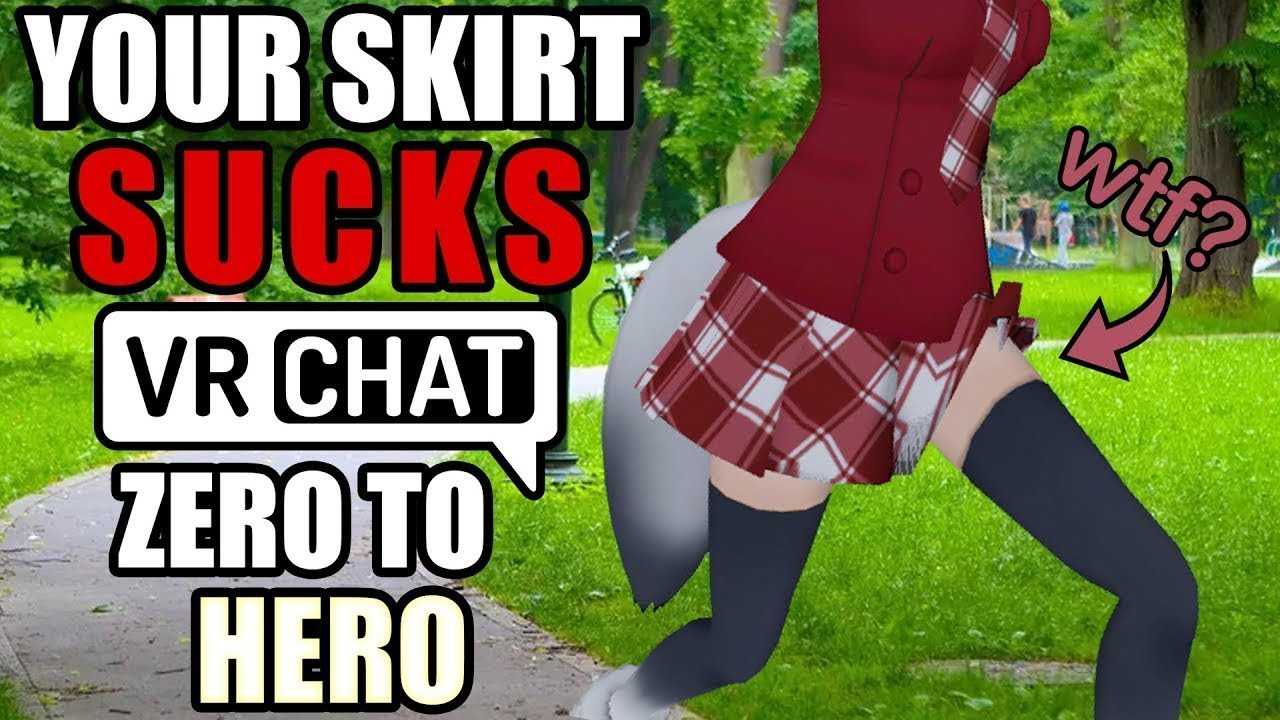
Join my Discord for help or meeting like-minded people: https://discord[dot GG]/uSEvuVw or scan my QR Code: https://media.discordapp.net/attachments/626502922120724480/626522415794618399/qr-code-Shanie-Discord.png
This is a Bob Ross-style video where you work alongside me to make your skirt better.
Your skirt is awful, it has too many dynamic b...
vital drift
my milk i modled
 gusty bloom
beautiful
 grizzled timber
Hello 3D modellers
 oak notch
Yello
oak notch
Something I've been cooking up lately
 foggy granite
Looks great but I fear them nots on the arm and leg
grizzled timber
Hello everyone, I am looking for some help from any avatar creator or editor of any level of experience. It is for a project assignment and I need to interview people as a simulation of field research just to understand your process of editing models and what problems do you face. This is just a mock project and I came up with this idea for the 3D modelers.
Is anyone willing to help?
spiral sigil
 still wadi
@oak notch https://i.imgur.com/UpoLxxS.png pain
 oak notch
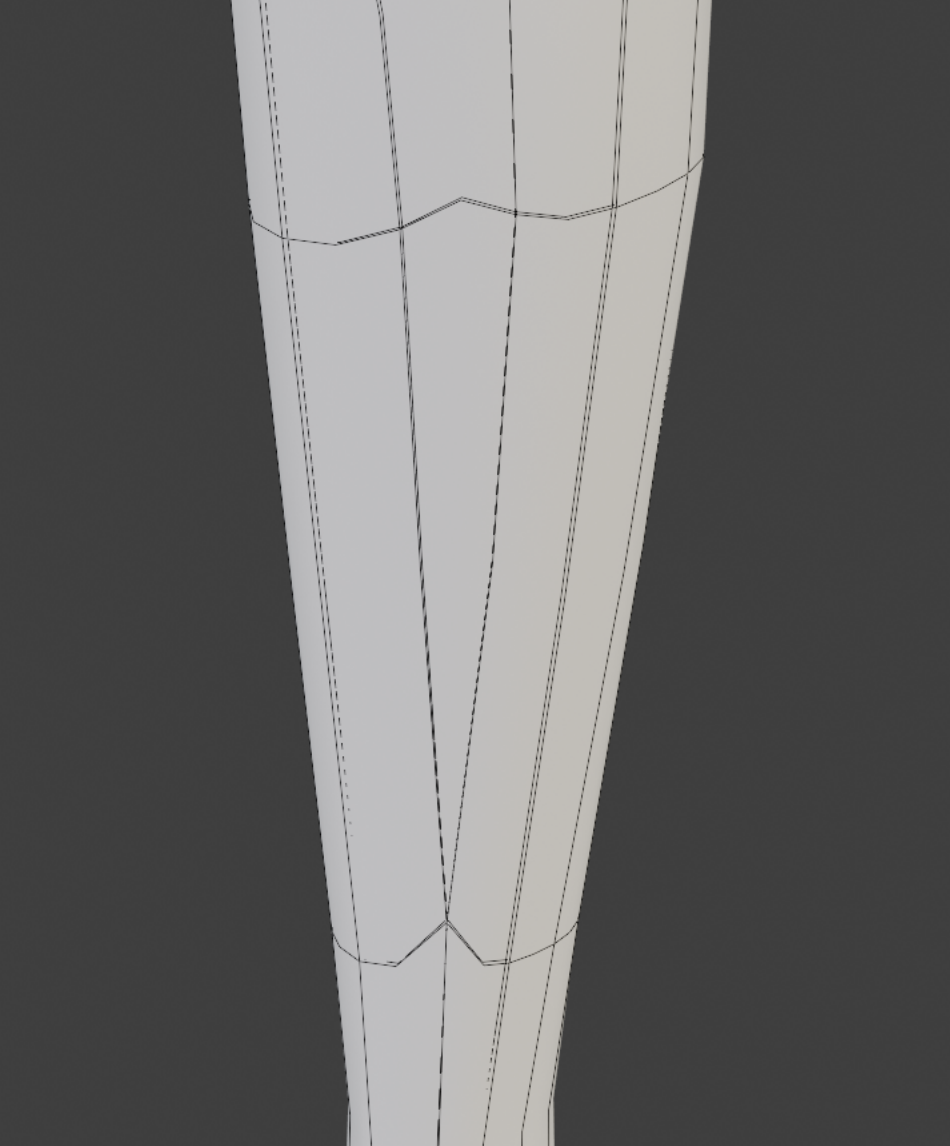
Triangle are oki in places that don't bend right?
tough plover
oak notch
Triangle are oki in places that don't bend right?
yes, but that is not a triangle
that's an N-gon
there are 5 vertices
 spiral sigil
is there a reason why so many models I find and use just have like 5 layers of hidden vertices over other vertices
depending on the spot more or less
quaint jasper
Cause the people making them are not good at what they do ?
quaint jasper
They don't know any better 
foggy granite
or just lazy
quaint jasper
I don't know anyone who knows how to do it but is lazy enough not to do it, generally it's not something you're fine with just letting stay terrible, if you have self respect that is
 merry tapir
Ummm in unity (which I believe is the easiest avatar maker to use though I’m likely wrong) is it easy to make things like robots or is there another program that would be better for that? I’ve never done this type of thing before.
I’m trying to make this guy
 ashen stag
Unity is not for modeling, its just the final step to get in VRC. If you dont have an existing model, then you need to use something like blender to create it
foggy granite
^
tough plover
@merry tapir Unity is a game engine which many games use, including VRChat. the Unity editor is what you use to take the assets you have, such as a rigged 3D model and textures, and put them together to make an avatar which you can upload to VRChat using VRChat SDK for unity.
Unity is NOT a 3D modeling program, or a substitute for one. for that duty, you would use something like Blender
merry tapir
tough plover
<@!663962320485220373> Unity is a game engine which many games use, including VR...
Ah. Thank you very much!
merry tapir
merry tapir
I’m trying to make this guy
Just checking that blender is good for making robots like this one?
quaint jasper
Blender can make pretty much anything
azure rain
except file your taxes
fallow isle
I dunno, you could probably write a python script to do that in Blender tbh
quaint jasper
azure rain
except file your taxes
in 2.93 you can 
merry tapir
quaint jasper
Blender can make pretty much anything
Thank you good person
thorny ivy
What if you recreated Blender in Blender?
foggy granite
what if you recreate yourself in blender making blender?
merry tapir
What if you recreate yourself in a blender in blender making blender?
 rose atlas
 vital drift
I hope these lips turn out alright

 cedar steppe
Anyone know how to plan good loop lines ? all the tutorials i have found use very curvy character references while mine is very broad
languid fog
👉 👈

 foggy granite
looks good whats the poly count
spiral sigil
@foggy granite
 foggy granite
That's extremely high for vrchat
spiral sigil
Sorry wrong one
 foggy granite
Okay now that's fairly reasonable
gusty bloom
How do you check that stuff?
neat viper
At the top-right, click this:

 vocal lichen
Can someone please make an elon musk skin ill pay pal or venmo or cash app o
neat viper
vocal lichen
Can someone please make an elon musk skin ill pay pal or venmo or cash app o
This isn't the place to ask for commissions - look in #community-servers-old, VRCTraders and/or https://ask.vrchat.com/c/commissions/avatar-commissions/35 instead c:
vocal lichen
Thanks

 solar fossil
languid fog
👉 👈
solar fossil
languid fog
👉 👈
Ah, finally someone has stepped up and took the matters into their own hands. I wish you great success in your quest fellow modeller.

 tardy rapids
Head done. Aside from the unique mouth I'm going for

 wintry gale
I need help, I can't figure out how to make the legs move with the armature, can anyone help me out?
 lament pond
 tardy rapids
wintry gale
I need help, I can't figure out how to make the legs move with the armature, can...
tardy rapids
wintry gale
I need help, I can't figure out how to make the legs move with the armature, can...
Add an armature modifier to the mesh and get weight painting
 vestal mural
Hello, I'm wondering if anyone could please help me with Blender... I am making a Quest avatar and I would like to cut away these transparent portions of the mesh (And other meshes with transparent parts) I'm a blender beginnner so I'm not even sure what term to search for to find tutorials? I can cut them away with the Knife tool but it's painstakingly slow and rough. Is there a way to do it automatically? What is the process called so I can look it up? Thanks in advance for any help 🙂
 tough plover
vestal mural
Hello, I'm wondering if anyone could please help me with Blender... I am making ...
tough plover
vestal mural
Hello, I'm wondering if anyone could please help me with Blender... I am making ...
as far as I know, you can't do this automatically easily. I looked it up and one possible way would be to use an SVG version of the file (vector image, which means it's made up of mathematical equations for each curve/line) to create a curve from the image. then, you could use that to cut the mesh
however, going through those hoops would take way longer than just cutting it manually
one thing to note aswell: because you are changing the geometry here, the shape keys will be fucked up. some of the vertices will move like normal, but a lot (the newly created ones from the cuts) will not, and thus the eyebrows will be super fucked
the fix is to go to edit mode, select the eyebrows, and do Vertex > Propagate to shapes
this will update all of the shape keys with the new positions for all of the eyebrow vertices
you may also want to manually fix some of the other shape keys to make them look right, primarily the blinking
vital drift
If anyone knows how to make a model look like it was molded from clay please let me know, I want to make some avatars look like that
tough plover
vital drift
If anyone knows how to make a model look like it was molded from clay please let...
wet clay?
getting the look of clay might be a little tricky, but should be perfectly doable with the Poiyomi shader
vital drift
Not really wet clay, but just a clay look
I’ll prob just have to model it to look like clay and use a clay texture then prob use the shader to make it look cooler
spiral sigil
wintry gale
Could do it the lazy way and parent the mesh to the armature with "automatic weights"
zinc jolt
Here's something I've been trying to do for my portfolio


Feedback is appreciated
Personally I think it should be a bit more saturated
thin shadow
zinc jolt
are those automated with blender tools or manually by hand?
the topology part
zinc jolt
Oh those? I used loop cuts and re meshing tools including short cuts to make it cleaner
Those are done by both blender tools and by hand
zinc jolt
Who here is good with remeshing and retopology? More specifically, how do I make something low poly look realistic?
obsidian nova
In Blender, the Subdivision surface modifier is a good place to start. It’ll add more polygons & smooth things out.
Don’t go too wild with it though, because it can get out of hand fast. Also, remember to “apply” the modifier afterwards.
Use “Shade Smooth”, not “shade flat” on all curved surfaces.
And it’s not re-topo, but I find ambient occlusion baking (with Cycles) will make any model look 10x more realistic.
spiral sigil
zinc jolt
Who here is good with remeshing and retopology? More specifically, how do I make...
Make a high poly version of your model then bakr the normals of the high poly and use this normalmap on the lowpoly model.
After that, work on the shading with matcaps if you want to control the shading a bit more
zinc jolt
That'll work
spiral sigil
@zinc jolt at home i have a few shading matcaps, ill send them to you. U can add me if ya want
zinc jolt
Alright then
 winter palm
Hey everyone. I am making a personal avatar for myself, and I am having trouble figuring out on how I may be able to model the hair piece of the head. any ideas on how I may do it?


 spare crater
okay cool it works
Ever completely trash your shapekeys and not notice until way after the fact?

I came up with an algorithm to fix them
 spiral sigil
they aint mergin
 quaint jasper
spare crater
I came up with an algorithm to fix them
quaint jasper
spare crater
I came up with an algorithm to fix them
Damn, what did it take to figure out ? Do they always break in a specific way ?
spare crater
quaint jasper
Damn, what did it take to figure out ? Do they always break in a specific way ?
yeah! It's basically what I did for 'smart' decimate in cats... they all deform the same way, so if you make a copy of the basis, let it get messed up, and un-apply it to everything else, it fixes them
Except in this case, we do a quick scan of all the messed up shapekeys to figure out what the messed up basis would look like based on what didn't move
spiral sigil
spiral sigil
they aint mergin
please
vestal mural
tough plover
as far as I know, you can't do this automatically easily. I looked it up and one...
Thank You Sacred, I'll try that. Cheers!
tough plover
did you read my 2nd message below lol
spare crater
actually if you get a SVG, it's super easy to import it to blender
but at that point you might as well just do it in blender
quaint jasper
spiral sigil
please
Delete the empty game object
spiral sigil
game object?
quaint jasper
scale it down
spiral sigil
k so i scaled it down and put it in the position i had it in but i still cant merge
spare crater
Are you just trying to join two meshes?
spare crater
Just shift-click first the headphones, then the character, and hit 'Ctrl+J'
spiral sigil
ight
spare crater
But you'll also want to make sure they're weight-painted to the neck or something, so they don't float off
spare crater
yeah, how much a peice is bound to each bone. For something simple like that, you can just select the headphones, go to the 'Neck' vertex group in object properties and hit 'assign' in edit mode
spiral sigil
ooooh
yeah but i stil cant merge
i try t hit ctrl j but nothing
(this is how i have the stuff setup btw)
 quaint jasper
Are you even selecting two object ?
spiral sigil
yes
quaint jasper
how ?
spiral sigil
click the nari ultmate and then shift click Body
i did it
i ended up using cats plugin ti do it
ok so iexported and opened it here to check but the texture for the headste isnt working

its fine in blender tho
also wtf happened to the eyebrows
 obtuse dome
I need help with the blender stage of importing my model. i'm trying to follow a guide, and it's adding poses for blinking and lip movement, and i need to find the modifier tab to apply the changes as a shape key, but i don't see that anywhere in this version of blender.
if it helps, this is the video i'm trying to follow

Tools used and Timestamps are in the description
Help Desk Discord: https://discord.gg/EdDV4VU (The quickest way to reach me with any questions)
Tools
FFXIV TexTools: https://textools.dualwield.net/
Paint.net: https://www.getpaint.net/download.html
Blender Version 2.79: ht...
neat viper
Assuming you're using Blender 2.9, it should be the blue wrench icon here, with an object selected:
 obtuse dome
ahh i got it. thanks.
spiral sigil
spiral sigil
ok so iexported and opened it here to check but the texture for the headste isnt...
k so they eyebrow problemn is just a shader but now i have another problem. the eyebrow just looks white. i really dont wanna redo this as its my 7th try but if i need to i will. anyways is there a way i could somehow import a png into the material for the eyebrow?
 mellow violet
I'm kinda dumb and every shape key makes the avatar explode. How do I not turn my avatar into a bomb?

The last time I worked on it, I just deleted shit and it worked, but now everything implodes it

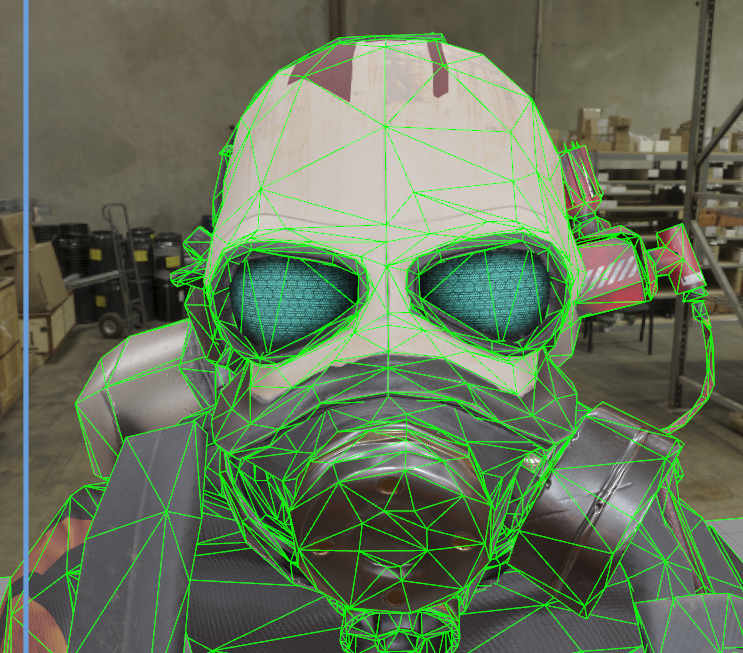
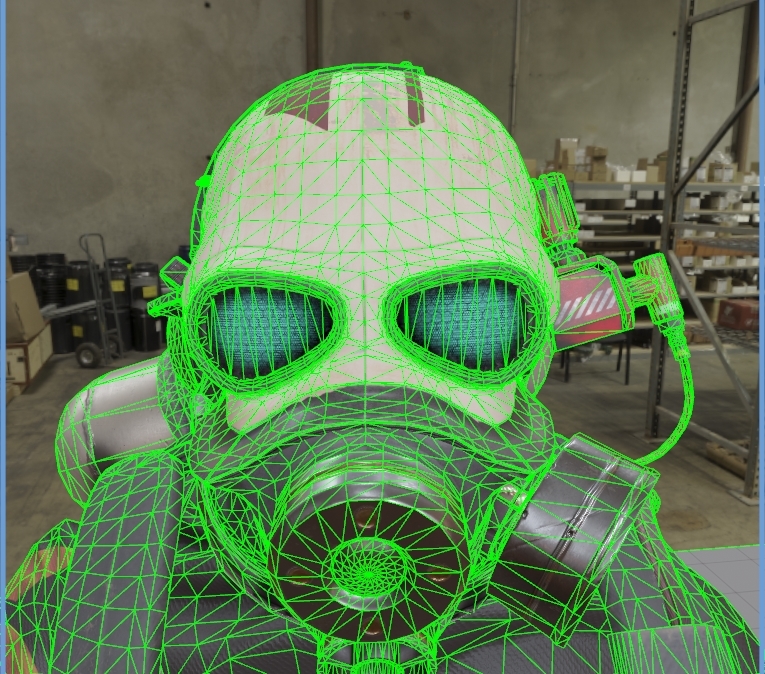
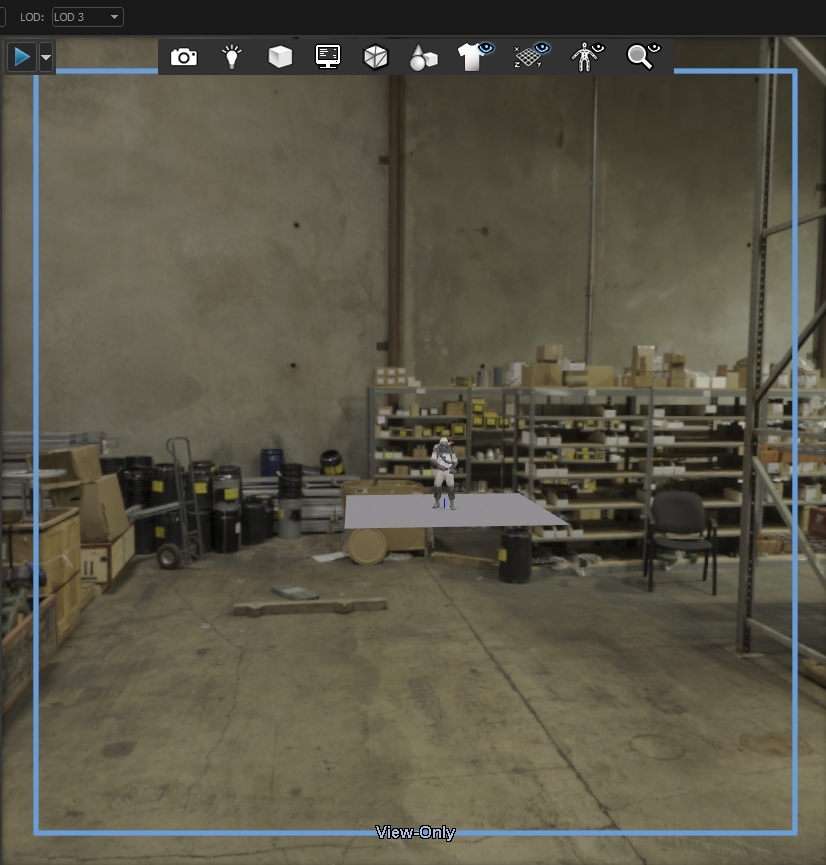
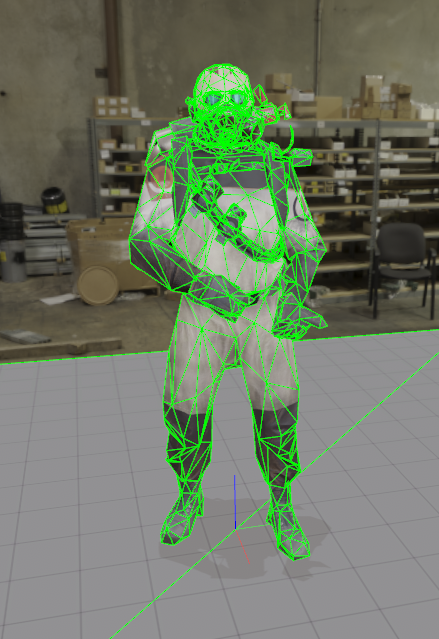
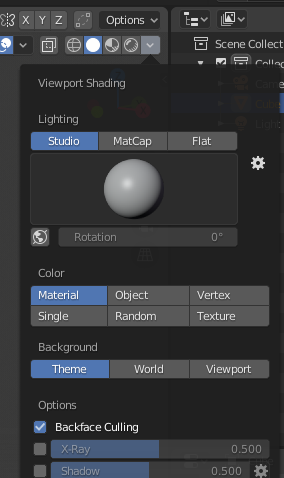
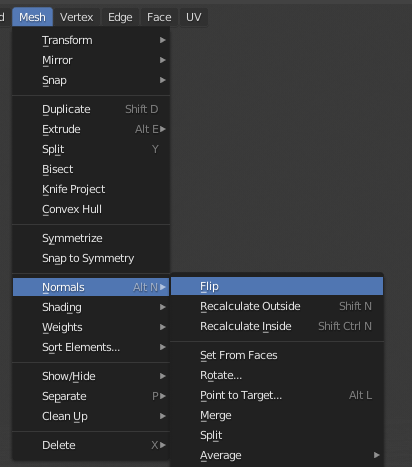
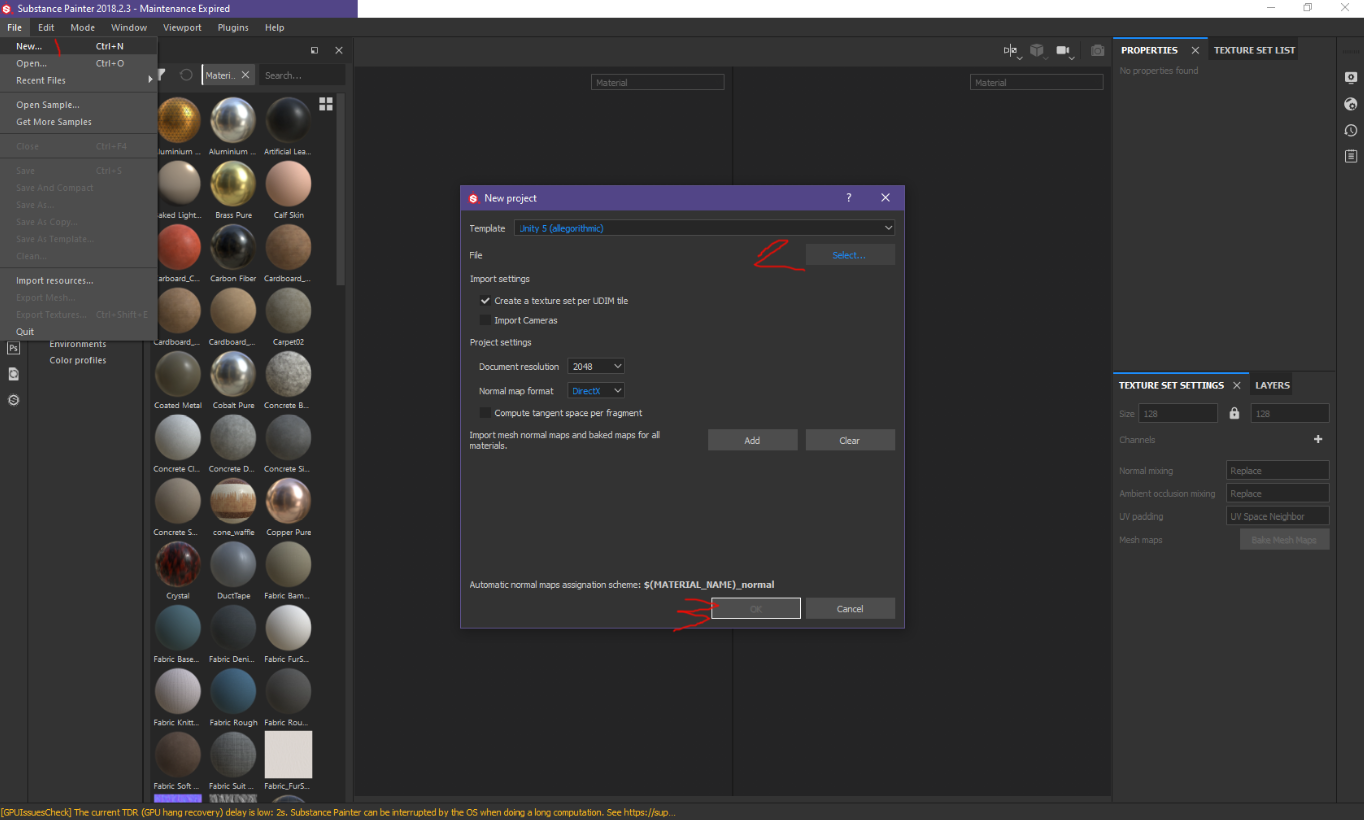
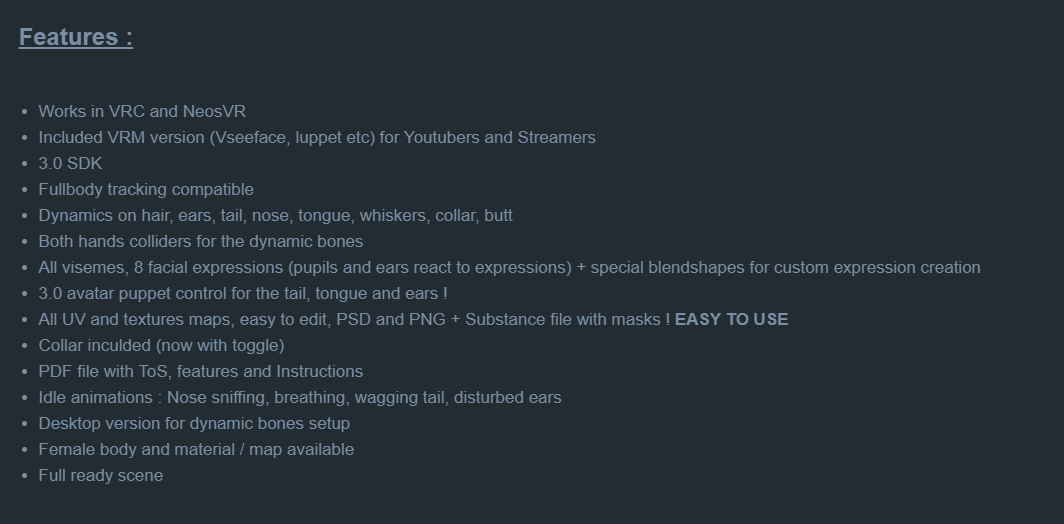


 wicked storm
 naive helm
is the mesh symmetric/not off center?
make sure to apply transforms to the armature
also check the the symmetry of both is about the origin (or that the 3D cursor is at (0,0,0) before symmetrizing it)
naive helm
how do you apply transforms
naive helm
wicked storm
is the mesh symmetric/not off center?
make sure to apply transforms to the armat...
sorry forgot the reply button
wicked storm
naive helm
sorry forgot the reply button
over here
 naive helm
 naive helm
wicked storm
over here
naive helm
wicked storm
over here
I dont see it 😦
wicked storm
naive helm
I dont see it 😦
make sure you are in object mode
naive helm
wicked storm
make sure you are in object mode
I did it and its still broken
wicked storm
did you check the other things I said already?