#3d-modeling
1 messages · Page 106 of 1
 devout scroll
 naive helm
How would I phrase my issue into google?
devout scroll
 spark patrol
would that be just holes in the mesh?
spark patrol
would that be just holes in the mesh?
can you show your mesh in wireframe


 silk silo
are those ngons
devout scroll
lookup quad topology and modelling a head tutorial
because it matters how your stuff is connected
 twilit condor
Hello everyone, I want to make a custom avatar. I already made one before by using vroid but I would like a lil more customization. Are there any good blender avatar making videos for beginners?
 left flicker
twilit condor
Hello everyone, I want to make a custom avatar. I already made one before by usi...
left flicker
twilit condor
Hello everyone, I want to make a custom avatar. I already made one before by usi...
https://youtube.com/playlist?list=PL2EEbgwoJzdt5kFVDyY2lliNqf7cWJeD3
This is the tutorial I followed. But there are tons on YouTube if you search for them. If you're completely brand new to blender/3d modeling, I suggest following some tutorials for house hold objects first just to get acquainted with the UI and tools

YouTube
Want to make your own Anime style avatar? For Things like VRChat, Vtubing/streaming and game creation? Stick around, I'm going to let you in on all my secret...
 tough plover
@twilit condor you can try using an avatar base model which you can find on gumroad or booth.pm
and then edit it in blender as you wish
making a model from scratch takes a ton of work
you can definitely go that route too if you want
 weary nexus
Can anyone lead me down the right direction for how to solve this? What kind of issue might this be?


 valid sun
It's a material transparency issue, most likely.
Check your materials for a Render Queue setting, try changing the type to Transparency.
Could be a backface culling issue as well, or in fact, it looks like every normal on your model is flipped inside out. Did you download this avatar or are you making it yourself?
valid sun
Yeah I didn't look at the body I thought it was just the hat.
 quaint jasper
Recalculate normals via the search menu
 iron terrace
anyone know how to put something into blender form unity
 gritty quarry
go to import, then whatever type of file the model is in (most likely fbx) and go to documents, then find the name of your project, open it and go to assets then find the model's name or if the model is in a folder then just click open on the folder then find the models name and click import FBX
 unborn acorn
The shadman samurai model im making

 spiral sigil
am i right to say that 3d models don't have a defined scale for the model?
unless it's STL
and the scale is defined mainly where you import the model into, say, unity
quaint jasper
The scale is set on export of whatever software it's made in
spiral sigil
so it is saved then? even in formats like obj?
whats the point in STL files then?
regardless, say a model is too big when imported into unity. you would scale it down in unity rather than blender, right?
quaint jasper
I would set the scale in Blender and apply its transforms
 ashen stag
STL usually has a scale because its mainly used, or exported out of, CAD software. Which has actual scaling instead of blender and unities rough "yeah that's a meter"
spiral sigil
Just got done texturing and 3d modeling a lowpoly truck xp

 neat viper
cool! o:
devout scroll
nice!


 thin shadow
 languid fog
whoa. now that's an avatar that i haven't seen yet.
but wouldn't it be nsfw-ish?
spiral sigil
an avatar completely naked, you think it will be ?
languid fog
thin shadow
but wouldn't it be nsfw-ish?
nope the model will have "censored" texture on the pubic regions
similar to the leg and hands
so you can say it will be more a "ecchi" type
like 95% of the female avatars on vrchat


 mystic lodge
Stupid question here. How do I select only specific bones in object mode for parenting to a mesh? clicking just selects the whole skeleton
left flicker
mystic lodge
Stupid question here. How do I select only specific bones in object mode for par...
You have to be in edit mode to select specific bones
mystic lodge
ok, is there anyway to only parent specific bones to a mesh. Im modifying a model and don't want to interfere with the existing mesh parenting
left flicker
mystic lodge
ok, is there anyway to only parent specific bones to a mesh. Im modifying a mode...
This might answer your question

Blender Stack Exchange
I have hands model which I rigged, now I want the gun to be parented to the left hand, where the problem occurs as left hand is the same object with the right hand, so by parenting the gun to the b...
mystic lodge
Thanks for the reply! Still having trouble though. the highlighted bones aren't parented to the rig. the rest is properly rigged. I attempted the "child of" constraint method suggested in the link you sent but couldn't get it to work
 tough plover
@mystic lodge the mesh will NOT automatically follow nearby bones. you have to tell the vertices which bones can influence them, that process is called Weight painting

when weight painting, you're not directly referencing the bones
instead, you assign vertices to Vertex groups
if a vertex group has the same name as a bone, then moving that bone will influence all of the vertices in that group by their vertex weight

a weight of 0 means the vertex is unaffected
weight 1 means that the vertex follows the bone 1:1
and 0.5 is half way in between
 merry vault
mystic lodge
Thanks for the reply! Still having trouble though. the highlighted bones aren't ...
merry vault
mystic lodge
Thanks for the reply! Still having trouble though. the highlighted bones aren't ...
With a model as low poly as that, you may as well assign verts by hand like I do.
quaint jasper
Use gradients !
mystic lodge
weight painting seems to have solved it, Thanks!
 fringe rock
for weightpaint I prefer having white at 0 and black at 1. So the model is not all blue but it texture. easy to spot what is weight or not
 languid fog
^^ you can change these colors on blender preferences
 mint ore
one of my friends is having an issue with his model
the lips are stuck sorta
like dried gum


 visual vigil
Hmmm
Depends on what I make tbh
A lot of work I get contracted is nsfw
It's my personal projects that aren't

progress since last post
 visual vigil
It also matters a ton if I have 3d model references or if it's just schematics or if it's eyeballing
Most of my work I have 3d references
naive helm
Not 2D?
visual vigil
Be it overhauling a former mmd kitbash into something proportional, original or just better
Other stuff I have character sheets
 visual vigil
Yours looks straight forward so it could be eyeballd
naive helm
I'm so much better in 2D than 3D
visual vigil
Human proportions
 visual vigil
I like them
naive helm
I have a 3D model can you critique it
visual vigil
You got creativity
naive helm

 naive helm
its really good
 visual vigil
naive helm
visual vigil
naive helm
i see no issues
naive helm
The hands here kinda suck idk how you put those shapes together like that

I did a boolean
visual vigil
everything with me starts with a flat plane / cube
and i just add some loops to it to make it round
i do not use booleans at all
theyre messy
naive helm
They are but how else would I connect parts
visual vigil
they dont have to all be joined like that
let me show you what it looks like on my end
if i seperated my model into seperate parts
naive helm
🥺 tysm

 naive helm
Wow
visual vigil

In this video I will show you how to solve common issues with boolean workflow for hard surface in Blender. I am using Blender 2.91 for this tutorial.
Blender Bros
https://www.blenderbros.com
https://www.patreon.com/theblenderbros
https://discord.gg/KhGTBhg
https://www.facebook.com/groups/276025076952400
Ryuu's links (stores / websites / por...
unborn acorn
its like legos but for 3d models
visual vigil

This video will discuss a more practical way to add holes into curved surfaces. Although the more traditional techniques work fine, I believe this way is more efficient and will be more helpful in your casual workflow.
Instagram: https://www.instagram.com/josh.gambrell/
Twitter: https://twitter.com/josh_gambrell
Artstation: https://www.artstat...
yes
naive helm
I saw that video! 😄
unborn acorn
that is a way better example
visual vigil
i use those types of videos involving painting, to pick up tips on texturing
Blending rusty washes over a winter camouflage can be a bit tricky, but not as much as me trying to paint my first piece of stowage!
Patreon: https://www.patreon.com/nightshiftmodeller
Instagram: https://www.instagram.com/nightshiftscalemodeller/
Enjoying my content? Want to get inspired and learn new techniques? Subscribe and hit the little b...
i used this video for my BT SV texturing
 naive helm
I've only done like 1 texture on any model
visual vigil
Substance painter, best texturing tool there is

 visual vigil
For modelling a character, draw out a front angle
A side angle
A back angle
These will help you so much
 naive helm
I had an idea for a game and that character is called the Jester
He reads out jokes to distract enemies until he levels up enough to make enemies laugh to death
visual vigil


keep at the quest for 3d modelling
it pays off
because its a skill
a trade
ask for feedback and questions often
look up tutorials on youtube
youtube is so helpful for new users
i wish the resources were on it when i started
that are available now
naive helm
I try to ask questions here and on the blender discord and get ignored often
I use google a lot too
some things you cannot ask google
visual vigil
this is true
this server and blender discord are not the best for feedback
as theyre too big
you need a smaller community
naive helm
I dont have many friends so
visual vigil
and more servers
im in....
31 servers that i actively share my 3d works in
Even with that, sometimes I don't get comments
Keep on posting and someone will respond
If you didn't ping me I would have never seen your comment
As in a hour, there's be 200 new messages
 frail light
Do i ask for help here with something on the 3d model i got?
visual vigil
You can
 zinc jolt
Question. Do you think porting 50k or 60k models are going to be a bit much?
spiral sigil
no
zinc jolt
Oh
Alright
As long as it's not 300k
Then again it depends on the person's computer
quaint jasper
Very poor limit is 70k
zinc jolt
That's why you don't think it's wise to port a 300k vert model into VRChat?
I originally wanted to
But decided not to
zinc jolt
zinc jolt
Question. Do you think porting 50k or 60k models are going to be a bit much?
That's how many verts the original fnaf animatronics have
quaint jasper
Well yeah it'd be poor performance

 zenith nexus
hello I've ran into an issue I think hehe. I tried connecting the tail bones to the hip but it was moving with my head so I'm trying to move the parent to the spine. It connects to the top of the spine. Is there any way to move the connection to the bottom or is there a better spot I.E. the base bone maybe? Heres a pic. I want to move orange line to green circle.
 quaint jasper
you can't
you're already a child of the hip bone
it shouldn't move with your head
also your hip bone needs to be straight up
Make sure the bone names are correct
zenith nexus
Okay, thank you for the info. I shall give it a go. This is a Vroid model so yea I'm just trying to fix it up.
quaint jasper
also connect your bones
zenith nexus
I figured out my problem. I did do all the things you said as well, renamed a lot of bones and connected the tail to the hips. Although my issue was the tail was 'Hair' in Vroid and it weight painted it to the base mesh and my head bones.
 quaint jasper
That'd do it !
zinc jolt
Want me to share some advice to people who have problems with dynamic bones? Just stretch out the bone to the end of the mesh and make it to where it maintains it's look
But don't connect bones
Cuz then it won't look proper
 echo plume
is there a way to get split normals out of a certain set of vertices?
quaint jasper
split normals ?
echo plume
normals that point in a different direction that they would naturally point in
zinc jolt
quaint jasper
split normals ?
it's a youtube channel for typology/other things useful for blender
echo plume
for example this pattern here uses split normals:

the purple normals are not natural
they have been artifically created#
i have a model where i want to get rid of the purple ones and go "back" to using the natural, blue ones
theres a way to do it for the whole object
but i want to keep some of them (like around the eyes, i have split normals that save me from using more topology to represent the same thing)
unity imports those split normals (they override the natural ones) and they make a piece of mesh look super effed up because of it (because of lighting)
this is the piece of mesh rendered without split normals (you can tell blender to show the "regular" normals)

and this is the same piece of mesh with the split normals doing their "thing"

oh god i finally found it, F3, "set from faces" will set the custom normals to the face direction so they're basically where they would be naturally again
(also i just realized thats actually not the case but it looks much better for now)
 dreamy jungle
Im looking for someone to comission to fully rig and viseme up a 3d model for me
frail light
Hey I would like some help with my model. It seems that it has not found my shoulders and knees attached and i have no idea how to attach them
languid fog
dreamy jungle
Im looking for someone to comission to fully rig and viseme up a 3d model for me
languid fog
frail light
Hey I would like some help with my model. It seems that it has not found my shou...
Can you be more detailed about it?
frail light
languid fog
Can you be more detailed about it?
Oh god someone answered yes
Basically
When i import from cats
the shoulders and knees are not attached
and when i go into unity i cannot use the atlas i created as a texture
languid fog
Hm
For what i undertand the knees and the shoulders are different objects right?
So you need to merge them
With ctrl + j
languid fog
07:50am
Here
Wake up to work ,_,
Well if you can select the knees and shoulders separately on object mode
languid fog
Maybe they are different objects
You need to merge them
Pressing on the knees and body (main obj)
 languid fog
Your entire body are one single object?
 languid fog
A
You only have some weight paint issue probably
Well idk how cats works bc i do my rig by hand
frail light
damn
languid fog
Calm down sjhshwbjs
Can you show me what is happening
To your mesh?
You can always do automatic weight paint or use the recalculate buttom from cats
Or do it by hand
frail light
Um
 spiral sigil
the middle pictures seems false to me
legs are supposed to be straight as far as I know
frail light
spiral sigil
the middle pictures seems false to me
you wanna have a look at it?
i can send you the thing
spiral sigil
a lot of people encounter the issue with the "bow" legs when they crouch
spiral sigil
I've rarely seen it work being outward (or inward)
it usually bends way too much in vrchat
so from front view it's always straight bones but from side the lower leg bone is slightly bend back
 marble warren
Is it possible to change UV mapping as part of a shapekey in Blender? (Wondering if I can do some fancy stuff without having to change materials during an animation in Unity.)
 azure rain
shapekey do not affect UV mapping they only affect the shape of the object
marble warren
Ah well, I figured that was the case... I couldn't find a definitive answer online in my (shallow) searching, so thank you very much
quaint jasper
you can move the UV offset with an animation tho
 dusk lily
Hello, everyone i would like to get more customizations for vroid, I heard you can use blender so are there any good tutorials?
spiral sigil
tutorials for blender ? there is plenty on youtube yes
zinc jolt
dusk lily
Hello, everyone i would like to get more customizations for vroid, I heard you c...
Most of the time I do it myself
Self taught is actually pretty useful if you keep practicing
languid fog
spiral sigil
tutorials for blender ? there is plenty on youtube yes
Oh shit, here we go again
spiral sigil
@languid fog
languid fog
Donuts tutorial go brrrr
naive helm
hey is eye tracking simple?
Can I just use a circle (2D) as the iris
Like to make it seem cartoony
 unkempt torrent
Hey all. I'm trying to symmetrize a mesh in Blender. The symmetrical geometry seems to be created in the right place and with the right material, but it reflects light the wrong way around. Any easy fix for this?
Should be smooth/continuous (as it is in the original)
 unborn acorn
unkempt torrent
Should be smooth/continuous (as it is in the original)
unborn acorn
unkempt torrent
Should be smooth/continuous (as it is in the original)
is it set to smooth shading?
unkempt torrent
"it"?
unkempt torrent
Face > Shade smooth seems to fix the new half of the mesh
Thanks
Is there a tool for getting rid of the seam? Merge the edges and vertices at the edge of both meshes, which overlap (are in the same positions), into single edges and vertices
I'm kind of a novice so I don't know the names of things
naive helm
naive helm
Can I just use a circle (2D) as the iris
just bumping this
unkempt torrent
For the vrchat avatar eye movements, Gin?

 unkempt torrent
I think they rotate two bones, one for each eye
You need to make it move with a bone
naive helm
blegh i'll do it later
unkempt torrent
Ok, this is really weird
One half of the mesh looks way better with shade flat, but it breaks the lighting on the other half
If I use shade smooth it looks bad at the seam
neat viper
recalculate normals? o:
unkempt torrent
No change
Ok I found a point in the undo history where the meshes are merged and looking good enough so I'm leaving it at that
For the record, I merged by selecting each set of overlapping vertices in edge mode (didn't let me select them both in vertex mode) and using M > by distance
 storm wadi
hey can i get someone to help me with some uv mapping stuff in blender?
valid sun
Ask away
storm wadi
so i got a model that i need to make the uv map for i need to make 2 meshes one for the front and back and set each one up
im not sure how i go about doing it
quaint jasper
Select the front, press 1 on numpad, press U > Project from View
then ctrl i, press 9 on numpad, press U > project from view
storm wadi
would you mind hopping in a discord call im still having problems
that way i can share screen
quaint jasper
am working sorry
storm wadi
thats fine i think im getting it worked out
echo plume
naive helm
Can I just use a circle (2D) as the iris
a lot of models do this, they use an inverted sphere as the eye and float an iris
with flat shading that just works

the iris is a floating plane kinda, a circle
and the eyeball is nothing like an eyeball at all
naive helm
wow wtf
zinc jolt
languid fog
Just that triangles...i hate them ,_,
I know how to fix those
thin shadow
how do i use the material combiner addon in this skp model? it works fine on vroid avatars.

it seems to discard other materials and only keep 1 texture
tough plover
ah yes, petronas towers
I think the issue is that some of the materials don't have a texture, and are simply a flat color
a fix would be to just create a very small texture that is filled with the same color
and then just putting it as an image texture on the material
rather than just a color
@thin shadow

 unkempt torrent
Any pointers for how to create a breathing in shape key?
quaint jasper
proportional edit the chest out
thin shadow
tough plover
a fix would be to just create a very small texture that is filled with the same ...
the skp file does have the texture embedded
 tough plover
thin shadow
the skp file does have the texture embedded
tough plover
thin shadow
the skp file does have the texture embedded
not what I mean

there are a lot of materials on that
some of those are single colored, not a texture it seems
that can cause issues with the material combiner
unkempt torrent
Thanks for the tip Ruuubick, was doing all the other blendshapes first but I will now look into what exactly that means
quaint jasper
You wouldn't put it on the other shapekeys, it'd be its own
and in 3.0 you'd have a specific animation for that shapekey
in edit mode you can press O to enable proportional editing, move (G) on the y axis and expand the area of influence with middle mouse
unkempt torrent
Normally I use the cats plugin to save shape keys, since when I looked up an alternative method all that came up was applying pose modifiers but that that destroys vertex weights. I never created one without using poses; would that be a destructive process?
Based on what I (don't) know how to do I was thinking of creating a free standing bone, painting the chest on its group, posing it and using that
thin shadow
tough plover
that can cause issues with the material combiner
i tried assigning all the color material to texture type material, still the same result
tough plover
which blender version are you using
thin shadow
tough plover
which blender version are you using
2.92
quaint jasper
unkempt torrent
Based on what I (don't) know how to do I was thinking of creating a free standin...
That's also an option !
echo plume
im having big issues with blender 2.91 and trying to weight paint while having other parts of the mesh hidden...
when i come from edit mode (while the parts are hidden) it unhides them right when entering weight paint mode. going back to edit mode they're still unhidden
if i hide them in weight paint mode, first the mesh still keeps being shown (only the wireframe), but when i try to paint anything, the hidden parts instantly reappear fully. when i use ctrl+z at some point, the wireframe also disappears but everything always reappears on click
so friggin weird
strongly wondering if this is some ugly bug
found someone with a similar issue after googling for a bit: https://blender.stackexchange.com/questions/198909/2-90-1-vertices-keep-hiding-unable-to-weight-paint-mask
Blender Stack Exchange
I have an issue with only a part of my mesh hiding the vertices, even though it will still show the faces and the complete mesh.
It will look like this until I press Alt + H to unhide the hidden ve...
going into sculpting mode (i havent even used it though) and hitting alt-h to unhide fixes that problem for some reason
quaint jasper
I mean, that's kinda what the weight paint vertex masking is for ?
quaint jasper
Why do you need to hide mesh to weight paint ?
echo plume
i first want to get some layer of clothing out of the way
quaint jasper
Ah I see
echo plume
dont necessarily want to split my mesh for it
quaint jasper
Any reason you're not moving to 2.92 ?
echo plume
the person on the stackexchange page had the same kinda bug in 2.90
im gonna check their bugtracker, maybe it hasnt been actually documented... but i have no idea how to trigger it again
maybe ill find out how to reliably trigger it, then i'll have a case to present
but it fixes itself if you go to sculpt mode and hit alt+h once (for some reason)
echo plume
the issue is that they just came back visible
they wouldn't stay invisible
and yeah you didnt have that appear for you
languid fog
zinc jolt
See this?
Yes i do
zinc jolt
Excellent
 junior hare
got a problem - im trying to merge a pair of legs with a model thats already existing, but when i merge the two, the materials, or the UVs (dont know which it is) gets messed up and either the legs lose their mapping or part of the main model loses the main mesh
 quaint jasper
make sure both meshes have the same uv map names
junior hare
where would i edit the UV map name? i dont know where blender stores UV data
 fresh agate
Pls help idk why my model is doing this when I try to pose it
 junior hare
quaint jasper
make sure both meshes have the same uv map names
junior hare
quaint jasper
make sure both meshes have the same uv map names
found it, thanks
echo plume
how do you accidentally paint a part of a mesh IN EVERY vertex group, i have no idea how i managed that but i have a few touches of blue that occur in every damn group, they're all weights 0.002 to 0.007??
echo plume
ended up writing a script to get rid of these mini weights
import bpy

mesh = bpy.context.selected_objects[0]

for vg in mesh.vertex_groups:
    mod = mesh.modifiers.new("VertexWeightEdity", 'VERTEX_WEIGHT_EDIT')
    mod.vertex_group = vg.name
    mod.use_remove = True
    mod.remove_threshold = 0.008
    bpy.ops.object.modifier_apply(modifier=mod.name)
you click and rotate the hip bone, that's exactly the result of doing that
devout scroll
echo plume
ended up writing a script to get rid of these mini weights
Pretty sure weight > clean does this already
with parameters
frail light
Yo question
I have input the eyes into cats to make a facial expression and tells me to rename them. After i rename them the cats still has the wrong name and basically has the name of something that doesn't exist. When i press to change it and look on the list of cats to find the renamed eyes they aren't renamed. Does any of you know what is going on?
unkempt torrent
Genos, can you explain your problem more clearly? What are you trying to accomplish? What did you press? What are the names of your eye...bones (I assume)?
frail light
unkempt torrent
Genos, can you explain your problem more clearly? What are you trying to accompl...
Well no idea
It's right eye and left eye but cats told me to name them Eye_l and eye_r or something like taht
unkempt torrent
What are you trying to accomplish? Eye movements?
frail light
mhm
unkempt torrent
Cats creates bones called LeftEye and RightEye for you that are correctly parametrized for plugging into the avatar descriptor
It does so based on your actual eye bones
If you already have bones called LeftEye and RightEye they might already be ready for eye movements
frail light
no idea
unkempt torrent
Either way, that's why after you ran the eye movement creation feature in the cats plugin, you found that the LeftEye and RightEye bones were still there - it created them again
You should try the preview feature in the avatar descriptor in unity
If the eyes work properly with those bones you don't need to do anything else
frail light
honestly i don't know which layers are the eyes now
unkempt torrent
Layers?
frail light
i mean bones
unkempt torrent
They're whichever ones work properly when assigned to the avatar descriptor in unity
unkempt torrent
Well I don't know either
Maybe you accidentally broke your armature
You can go into armature edit mode and try to locate bones that are positioned behind the eyes/inside the head and which have names that hint at them being the eye bones
 unkempt torrent
Then for each bone, go into mesh weight painting mode, locate the corresponding vertex group (same name as the bones), and check whether the eyes appear red instead of blue when it's selected
frail light
ill try
unkempt torrent
If there are too many bones for you to see properly in octahedral mode, you can change the way the bones look to something less dense
It's in the viewport display options when the armature is selected
Change octahedral to stick or something
(this is in those tabs in the bottom right in blender 2.8x or 2.9x)
You can also make it easier to zoom in closer by making the near clipping plane closer (I think this is in N > view, sorry I don't have blender open right now; change the 5cm default to maybe 1cm) and by enabling auto depth in preferences > navigation if you haven't done so yet
Someone can correct my vague recollections here if they have blender open or just know this better than I do
frail light
k

 weary nexus
Oh no x.x
I made a mistake and I can't undo it
I merged the mesh so the vertices connected but I didn't realize the teeth connected too.
Can anyone help me fix this?
unkempt torrent
Can you undo?
weary nexus
nope x.x
valid sun
Try separating by materials?
Also try: select a face, CTRL+L to select linked, F9 to change the link delimiter, try normal, UV seam, etc.
Depends how your mesh is setup...
weary nexus
Ty! I'll give that a try!
Where do you weight paint for breasts? On the chest bone, the chest root bone, or on the individual left and then right breast bones? I keep having the "jiggle" result in the breast clipping out of the shirt. I don't want to remove the body mesh under the shirt bc I plan on having multiple "outfit" types using the 3.0 avatar system.

 weary nexus
Which bone do you do that weight paint on?
echo plume
separate breast bone
under the spine
i have a blender file with a character that uses all sorts of systems like the metarig, visible controls that change bone and even mesh positions.. anyone have any hints on how to make stuff like this unity compatible? the armature has a million bones that all have some kind of meta functionality.
for example the visemes are bone movements, by that alone i would say i could just pose and shape key them, but they also move an entirely separate mesh that's the teeth (that has no vertex groups so it's moved entirely, not even through the armature??)
spiral sigil
?
devout scroll
I think those might be done through drivers and constraints
You can't have either translate to unity
So you'd probably need to get rid of them and see what you have left
 void vale
Anyone know how to fix this shape key in Blender 2.9 ? it is sticking out
 thin shadow
void vale
Anyone know how to fix this shape key in Blender 2.9 ? it is sticking out
thin shadow
void vale
Anyone know how to fix this shape key in Blender 2.9 ? it is sticking out
even when the shape key value at 0?
at basis, on edit, put the mesh back inside the head
void vale
@thin shadow 0 turns it off and puts it back inside but I was wondering how to make it look more clean and close to reality and not sticking out. Also what do you mean put the basis back inside? you mean the one in the shape keys and if yes how do I do it ?
thin shadow
i understood differently,
so in that case, you might want to use transparency shader that has cut out
see the black box outline? that's it
oh btw, how does the uv wrapping on the blush looks like
void vale
wait are you saying I have to edit the face texture to make it more transparent ?
also I see the black outline. When it comes to Shaders I think you mean on unity right ?
the wrap looks like the one in the picture like a box.I did not set it up btw
thin shadow
void vale
wait are you saying I have to edit the face texture to make it more transparent ...
no, and no,
shaders in blender
void vale
so the Shading tab ?
 thin shadow
void vale
so the Shading tab ?
thin shadow
void vale
so the Shading tab ?
for the uv wrapping thingy, if it looks like this,
the mesh extends beyond texture, it need transparency shader.
 void vale
Alpha Hashed did the trick, nice. But it's still sticking out. also what do you choose when UV warping? I use smart UV.
@thin shadow I don't know if you can see it
 thin shadow
void vale
Alpha Hashed did the trick, nice. But it's still sticking out. also what do you ...
thin shadow
void vale
Alpha Hashed did the trick, nice. But it's still sticking out. also what do you ...
because of vroid, my avatar's uv already unwrapped,
as for the sticking out, perhaps you can adjust the mesh itself when the shape key is selected in edit mode
void vale
I don't need to unwrap it to see how it was made but you can see it here
 thin shadow
void vale
I don't need to unwrap it to see how it was made but you can see it here
thin shadow
void vale
I don't need to unwrap it to see how it was made but you can see it here
yes, but how about on the texture itself
void vale
this is the one
 thin shadow
void vale
this is the one
thin shadow
void vale
this is the one
ah yes mmd texture, definitely the cutout type
void vale
So make it a cutout in unity ?
@thin shadow also I managed to sculpt the blush it was way faster and I made sure it is perfect
thin shadow
void vale
So make it a cutout in unity ?
yes
void vale
@thin shadow I hate my OCD , it hurts my head so bad and my jaw . I know it looks fine but I also know I will have to work more on it
 thin shadow
looks fine from this angle
void vale
I know I will come back for it later but for now it looks ok even though the right blush is facing the same way as the left if you look closer and harder. Sorry O.C.D kicking in lol. I need to take a break been working on this for 5 hours fixing tiny things here and there. Thank you so much for the help, you were great 🙂
thin shadow
void vale
I know I will come back for it later but for now it looks ok even though the rig...
welcomed
 spiral sigil

Google Docs
Name the armature “Armature”. Name the mesh containing both eyeballs “Body”. If possible, make the whole head or avatar a single mesh. Name the bone hierarchy like this. Bones not mentioned can be named whatever. IMPORTANT: You cannot have any bones interrupting the hierarchy. For example, you ca...
naive helm
Oh so I have to chose left or right?
naive helm
Oh
devout scroll
But only one will do anything
naive helm
Idk if I should have dynamic bones for the attenae
And Idk if I have to keep that seperate from the model
I'm scared to mess everything up lol
Also is there a way to test my lipsync in vrchat as is, without armature?
dunno if anyone is still helping out but I have a few other questions
For my model, I have the mouth separate from the body like this


Which means the body isnt a closed shape, will that matter at all?
azure rain
you would want to have them be the same object even if they're not physically connected
azure rain
no not really as all it cares about is driving blendshapes
 onyx juniper
Okay I think I've figured out how the four-eyed eye movement is going to work
https://cdn.discordapp.com/attachments/672464728668241929/833130273196474368/unknown.png
 devout scroll
naive helm
but does it have to be a closed shape
devout scroll
naive helm
but does it have to be a closed shape
It doesn't but you do want to extrude a bit of a lip inward so it looks better when it opens
naive helm
I dont mind since he's small I just wanted teeth and not a complete black surface
But I added arms and this happened :l


@devout scroll sorry for the @ idk how it works here
devout scroll
i dunno why that might happen
naive helm
me neither and its pretty frustrating
devout scroll
is that a sculpt
naive helm
Wdym?
devout scroll
the mesh
 devout scroll
might want to box model it
naive helm
Box model- ?
devout scroll
hard surface model? i dunno, basically not sculpt it
it's a simple enough shape to work fine
naive helm
Can I just make the arms separately?
devout scroll
things also don't need to connect. arms and legs can be separare objects
devout scroll
yes
naive helm
Ok
Is there a tutorial for it?
@azure rain I thought you said it has to be the same object
azure rain
was mostly just referring to the face and the mouth
naive helm
oh
azure rain
basically he had the mouth and the mouth bag as separate objects only one of them would be moving when you talked
 azure rain
whether or not a object is joined together like in the object hierarchy is completely separate from are the vertices connected
https://i.gyazo.com/496f868237bbcae2edefb71abf17cf80.png like here is one object but it's made out of multiple disconnected bits
 weary nexus
Generating mipmaps enabled without streaming mipmaps enabled error when uploading. Should I disable generating mipmaps or enable streaming mipmaps?

 desert crown
anyone know why filling faces doesn't work in blender 2.8 anymore?

back in 2.79 it would just do it automatically, but the face uv is broken
i already selected the correct vertices requirement and ctrl + f still doesn't work
desert crown
oh F forces my camera scene for front ortho view
must be another key?
is it one of these perhaps?
 neat viper
CTRL + F makes a new face iirc just F makes a new face, nevermind
desert crown
yes with a messed up uv which is what i am looking for, but its not working in blender 2.8
sometimes its perfect uv
neat viper
I'd image you'd just make the faces you want and then just shift + n to recalculate normals o:
desert crown
well thats nice that i can fix uv's with shift + n, but i'm looking for a fix on filling faces, which is not working
neat viper
def half asleep, 2.9 is a thing but 2.8 got a LTS release so I'm confused lmao
desert crown

neat viper
Assuming you have more than one edge selected, F should make a new face o:
not sure on what's bugging out, sorry
desert crown
i tried, but i changed the f to front ortho view instead
whats the f key normally called? i can look into that instead?
quaint jasper
Can you go to Edit > Preferences > Keymap > Blender 27X at the top
 devout scroll
It might depend on how the face gets filled
the uv doesn't mess up if the face is surrounded by other geometry
it just fills the hole in the uv
 lunar dome
can anybody tell me how to remove leftover textures from an import that i wanna remove in blender?

leftover vroid asset that i think was baked in?
devout scroll
you can go to file > cleanup
lunar dome
still there afterwards
devout scroll
then you can switch the outliner from view layer to blender file, then in images find it and delete it
lunar dome
okay might need to break that down for me ^^;
devout scroll
top right the list of stuff is the outliner
lunar dome
oh, thought that was the hireachy
devout scroll
there's a button on it with a picture stack
it's called hierachy in unity and outliner in blender
but same thing i guess
 devout scroll
expand images, find the one you don't want and delete it
lunar dome
perfect, thanks a bunch
devout scroll

devout scroll
eyes are almost never eye balls for anime models
lunar dome
yeah i know, kinda bugs me that part
spiral sigil
Hey is there like a tutorial to do toon-hair? Or maybe a tool? I’m working on a model and tried the bevel tool but it doesn’t seem to be doing the job that I’d like it to
can try to use curves
devout scroll
Creating stylized anime hair can be quite challenging it you do it manually. Luckily, there’s a workflow that makes it fast and easy, using Curves drawn on surfaces.
Get the free 35-page sample: https://www.blendersecrets.org/
Or the full 1000+ page e-book: https://gumroad.com/l/IxofeY
easiest technique
the thumbnail is pretty ugly but the workflow is good
spiral sigil
Thank you!!!
 deep dirge
Hey guys, please make fun of the left image.
(These are both 100% my models, pics taken months apart)

 rancid topaz
it looks good?
deep dirge
You would be very incorrect on that statement but sure
 flat fossil
(Nvm, got it lol.)
spiral sigil
It looks awesome
deep dirge
The left doesn't, bro what
ashen stag
Trying to get people to trash talk something with no context ain't it
deep dirge
It's my model lol
spiral sigil
is it ? absolute garbage
I hope to never see those models ever again
deep dirge
Owned
weary nexus
How do I merge 2 bones so the weights carries over into 1 bone
 spiral ether
do any of you know how to add your own particles to unity?
devout scroll
weary nexus
How do I merge 2 bones so the weights carries over into 1 bone
Cats has a button for that
There's merge weights to active and to parent
To active will merge all selected bones into active (last one selected)
To parents will merge all selected bones to their respective parents
weary nexus
devout scroll
Cats has a button for that
Oh!!
In CATS?
Oh!
No way! I just found it
wow
 gentle loom

Need some help with something
my full body is pretty jank as it sorta sags, I need some help with getting it working properly
is this rig okay?
or is something amiss?
quaint jasper
your shoulders should be flat in t-pose
you also have two spine bones
your leg bones aren't aligned
and you need to clear your bone rolls
other than that it's fine
gentle loom
Alright.
accidently triggered xray on wrong rendering mode and oh my god why is this so funny


Does that look better?
gentle loom
rolls are cleared
i'm thinking i just need to redo the leg rigging and keep the weights because that's their default position
 gentle loom
tried it but they are still tilted
i did a jank fix and alligned them all with the global y axis
OH! I found what the problem was, legs were not completely straight
 languid fog
Magnifique 🤌
 prime zenith
Why can't I see the bones ?
 devout scroll
they're probably inside the mesh
in viewport display and object display somewhere you gotta set thr render mode to wire and the display mode yo in front
prime zenith
Did it, did not help really, I see only this
 devout scroll
bones look like they might be tiny
 ornate bough
how do i fix this?

 true bane
languid fog
true bane
languid fog
Where did you find this btw?
spiral sigil
can someone render a blender file for me dm me
fringe rock
That's some sticky pants
 craggy lintel
Hey guys question
What was the hotkey for scaling in place
I can’t find this online rn
I forgot it, I did it not long ago
scaling without moving it’s position or playing with pivot point
just scaling in place. It’s a simple answer please don’t over complicate it. I just can’t find this hotkey rn and I’m very frustrated :/
neat viper
Are you trying to scale something in object mode or edit mode? o:
craggy lintel
okay so imagine a circle, I make a dupe of that circle, and I want a smaller circle inside the one I already have
but I don’t want to change all the settings or whatever, I just want a smaller circle
neat viper
yes, but are you trying to scale it in object mode or edit mode? o:
In object mode, select whatever you're trying to scale and press S - in edit mode, select whatever you want to scale and set your pivot to Bounding Box Center, and then press S

note that you def don't have to set your pivot every time you want to scale something in edit mode, I'm assuming that your pivot is set to something else other than Bounding Box Center o:


 young vault
Check face orientation. They look inverted.
naive helm
@young vault Nope its every model for some reason
nvm I still have no idea I recalculated so many times
Its normal like this

 naive helm
young vault
If it's red they're inverted.
naive helm
young vault
If it's red they're inverted.
 young vault
At the bottom. Face orientation.
naive helm
Ye I check it?
young vault
Yes.

 young vault
Invert everything that is red.
naive helm
Its not a part of the face itself tho

I didnt do anything to the fbx file, it was working before
young vault
Face might be transparent shader
naive helm
how do I tell?
naive helm
 young vault
Assuming you have the default blender view
naive helm
Ye
young vault
Then "Surface" if it's not "Principled" or "emission" turn it to one of those.
naive helm
its all set
young vault
Do you have backface culling on in the material?
young vault
Then you have inverted normals on the face. Just click a vertice on the face, ctrl + l, alt + n, flip.
naive helm

nope, I've tried inverting them too before no avail
should I just reinstall blender
young vault
I mean, if anything. If it's shader related it shouldn't matter unless you're atlasing
It could be UV, but, not for the teeth being seen. Those you have to invert probably.
neat viper
Try selecting all the faces in edit mode, and then pressing Shift N to recalculate normals? o:
young vault
That's another thing, it could be mis-matched normals, so one normal is facing us and the other not.
visual vigil

 limpid talon
unkempt torrent
limpid talon
unkempt torrent
Question. In Blender, by default, the model I got is correctly textured, but no matter what I do it won't let me edit the UVs in UV Editing mode. If I unwrap, the UVs show up and I can edit them, but it won't project them correctly onto the texture, even though it clearly has that information somewhere. Is there a way to edit the UVs that came with the fbx without losing everything?
devout scroll
yeah you should be able to edit them just fine
try edit mode
with everything selected
unkempt torrent
Nothing
unkempt torrent
In addition to the above question, which I still need help with, I have a noob one: I have a hollow tube made of a mesh of triangles. Is there any way in Blender I can grab the circular edge of the tube and lengthen it by adding another "ring" of triangles?
devout scroll
not sure what you mean
quaint jasper
You just that to extrude the outer most edge
tough plover
unkempt torrent
In addition to the above question, which I still need help with, I have a noob o...
hold alt and left click one of the vertices or edges on the ring, that is how you select the entire loop at once. then, hit E to extrude them
you can specify an axis to extrude on by hitting X Y or Z after beginning the extrude
unkempt torrent
Hm, unfortunately that extrudes from the whole seam of the tube, including the side seam
It's textured so it has a seam on the side
That is indeed the idea though
I guess I could just select the loop manually each time and still use E
Thanks
unkempt torrent
Thanks for the information
devout scroll
You could convert to quads so loops are selectable
unkempt torrent
This UV thing is driving me nuts. No matter what I do I can't get the stupid map to show in the UV editor in blender 2.8 . Plenty of people with the same problem if I google it, the solution was different every time, and none apply to my situation...
devout scroll
try unhiding with alt h
it was a solution to some other bug but worth a shot
you could also share your blend file and i could take a look
unkempt torrent
Not unhiding, it seems. Also not unpinning. Not syncing. I'm not trying to create a new map. Blender 2.9 doesn't show anything either so it could be something related to this project, but it's weird
thin shadow
1 thing i learned from uv wrapping is that, it is easier to seperate meshes first and isolate what you are doing
and then combine it back later
languid fog
You can always use vertex groups too
tough plover
wtf did I just read...
unkempt torrent
Blender 2.8x sure gobbles up RAM quickly when you remove shape keys for some reason
unkempt torrent
That makes perfect sense, but I hadn't encountered any other (series of) operations that crash it so quickly
Is there an easy way for me to merge all vertices in a mesh or selection that share a location and average their normals?
quaint jasper
M > merge by distance
unkempt torrent
Just found it
Everybody in my google results said alt+m or ctrl+m which I imagine is outdated information
quaint jasper
yeah, another layout
tough plover
unkempt torrent
Everybody in my google results said alt+m or ctrl+m which I imagine is outdated ...
changed from alt + m to m in 2.83
unkempt torrent
Ah, makes sense
Well now I know what to look for if it changes again
I'm trying to make a reference mesh I can use as a data transfer source for custom normals in order to fix the lighting on my boundaries between meshes
Hm, so I found out I need the reference object to include a full copy of one of the meshes whose boundary I want to fix or the data transfer modifier will take data from far away vertices instead of ignoring them. But even with a full copy, while it does fix the vertices at the boundary and keeps most of the mesh intact it still messes up some far away, unchanged normals for some reason
This is hard
 unkempt torrent
Isn't there a way to just copy the normals from a set of vertices to another by distance as custom normals?
Not so far, sir nightwolf
zinc jolt
Darn
quaint jasper
If it doesn't work with the data transfer modifier then i'm not aware of another way
unkempt torrent
I suspect what's happening is that for some overlapping vertices at that end that are not part of the seam (that are exactly the same in the reference mesh and the target mesh) the data transfer operation is mixing up the normals that it picks
Well, connected
I tried all selection modes and they always mess that up
Hmm, I wonder if I further separate, fix only the part near the boundary and rejoin it will at some point recalculate and lose the fixed boundary normals
quaint jasper
wdym by boundary normal ?
unkempt torrent
I only need to fix the normals at a single edge where the two complicated meshes meet. It's only like 20 vertices
I want the lighting to be smooth there
quaint jasper
then select those vertices and clear custom normal split data
or manually average the normal orientation
quaint jasper
it's in edit mode so yeah
unkempt torrent
Or, well, I could add the neighbors to the target mesh directly
Anyway, how do I manually average?
This is all a first to me, didn't expect to be doing anything remotely like this 😄 I guess I'm learning a lot though
quaint jasper
unkempt torrent
Thanks! I'll try that in a minute
onyx juniper
What about an eye socket on each side? And it can switch from there to the front on command? and what if I ever stopped overthinking my project?
https://cdn.discordapp.com/attachments/672464728668241929/834917413199413370/unknown.png

 tall cobalt
Anyone know what would cause this. Materials are the same and Textures are the same but they are appearing different and I can’t seem to pin down what the cause is. I have exported the version of the model on the left as a different name and it is showing up as the right as well.

Disregard just found the issue it using the wrong UV
languid fog
quaint jasper
Learning again with ruubick wtf
zinc jolt
I have a question for everyone here
does 27,000 polygons work for VRChat?
or is that a bit much?
spiral sigil
it's fine if it's not for quest
zinc jolt
it's not for quest
spiral sigil
then it's fine
zinc jolt
excellent
zinc jolt
does anyone know Super Mario Odyssey?
spiral sigil
anyone has any clue about what is this "objects" thing in blender ?
got a project from a friend and it was already in it when he got it
I can't find any info on this thing
it prevents any object under it to be moved to a collection
I can't rename, I can't delete it and I can't remove the objects under it either
 tough plover
spiral sigil
anyone has any clue about what is this "objects" thing in blender ?
got a projec...
tough plover
spiral sigil
anyone has any clue about what is this "objects" thing in blender ?
got a projec...
what happens if you hold shift and try to drag Body somewhere
spiral sigil
I can drag it under other elements but only if it's inside the "objects"
devout scroll
Looks like it's a collection instance
so the objects inside it aren't real
real ones are probably in another collection, but hidden
you can probably make them real but i forget how
spiral sigil

devout scroll
but i mean, to instance a collection there has to be the original in the same file
 devout scroll
was the original in another scene
spiral sigil
nope
quaint jasper
You should be able to just delete it no ?
visual vigil
spiral sigil

 rapid adder
I made this awhile ago on blender and I'm thinking if it's possible to add this into VRChat without having missing textures.
 quaint jasper
If it's made with nodes then yeah you can export that to actual textures
rapid adder
All of them are made with nodes so this is a great start. Do you know any good tutorials on how to export?
quaint jasper
not really, i've seen one but never had to do it myself, just know it's possible
maybe made by royalskiesllc
devout scroll
Depends
If you're using pbr materials it's better to just remake the materials in unity
If you're using procedural stuff then you can look into baking to texures
 tender sierra
Hey, does anyone here know how to make a decent avatar? I need help with an avatar that I want
valid sun

When I decimate this torus shape it fucks up the surface for some reason.
This is the decimate modifier using Un-Subdivide, but the same thing happens in Collapse mode.
I tried applying the modifier and then recalculating normals, doesn't help.
This is no material either, so it's not a UV issue.
Anyone have any ideas?
neat viper
try selecting all the verts of the derped torus and doing a merge-by-distance maybe? not sure o:
valid sun
Hmm good idea but it wasn't it, neither of them have any duplicate vertices to merge.
 winged jewel
alt+n smoothのrmal
valid sun
Uhhh? That helped a little bit...

It still doesn't make any sense though. Like that one face on the right side has white in each corner, but a black dot in the center?
Again, no material, no texture or nothing, so it's not a UV issue. It's like the normals are being averaged incorrectly.

NICE, I got it. ALT+N and select Reset Vectors does the trick.
No idea why Recalculate doesn't do the same thing. Figures.
quaint jasper
Feels like recalculate changed in 2.9+ in a bad way
fringe rock
doubt
 lament pond

 left lantern
can someone pls help me?
i cant get as close to my character like i use to before

 quaint jasper
it's 10 centimeters tall so yeah
spiral sigil
Click his name and press F @left lantern
spiral sigil
Hey guys, ive been working on my first model in blender and when i try to translate the models objects and materials, they wont translate.
languid fog
spiral sigil
Hey guys, ive been working on my first model in blender and when i try to transl...
I recommend doing texture maps of your materials and aplying it on unity
Btw, can someone give tips for Texture Paint? I really bad at that and i not feeling progress with what i doing...
lament pond
 tough plover
languid fog
Btw, can someone give tips for Texture Paint? I really bad at that and i not fee...
tough plover
languid fog
Btw, can someone give tips for Texture Paint? I really bad at that and i not fee...
if you're trying to texture a model, Substance painter is a lot better. it's a paid software, but free if you are a student.
languid fog
tough plover
if you're trying to texture a model, Substance painter is a lot better. it's a p...
Tbh i prefer using the blender one, ik how it works and etc i just really bad at painting by it self
Like doing shadows and coloring
Like i enjoy more rigging than painting dude
I not a normal person pepehands
 unborn acorn
shadman samurai im making
 spiral sigil
 languid fog
unborn acorn
shadman samurai im making
languid fog
unborn acorn
shadman samurai im making
Quest users go brrrr
spiral sigil
yo anyone know how to fix the camera
like i made a tiny avvatar and the camera is like way upp like its original size
or like defautl height or what ever\
devout scroll
you need to move the viewball in the avatar descriptor down to your avatar's face
 molten zephyr
learning 3d is pretty fun

 blazing plinth
What are you guys using for editing your avatars?
tough plover
Blender
free, open source 3D modeling program
useful for anything 3d really
it's pretty much what everyone uses
neat viper
Blender - I'd recommend getting CATS Blender plugin too, as it can help automate/make some stuff easier (shapekey making, atlassing, decimation, etc) c:
onyx juniper
molten zephyr
learning 3d is pretty fun
Nice textures
molten zephyr
onyx juniper
Nice textures
thanks man! they've still got a long way to go, but it's nice to have everything blocked in
 unique jetty
Hey I am new to 3d modeling so uhh sorry if this is a dumb question, I been looking at many guides and such on how to fit clothes onto an model but idk

I lined up the feet right, but every technique i see been used, butchers the jeans like it went into the razor fan
when I try and make the top bit fit
like when I see others just positioning the clothes, its almost perfect just needs some small adjustment, but for whatever reason, my legs be curvy lmao and pants never line up so easily
devout scroll
use proportional editing to fit it
 arctic valve
How do I get rid of the gray smears on meshes caused by blendshapes in Unity? I know there's a setting to toggle somewhere, but I can't remember it for the life of me
 frozen dust
legacy blend shape normals?
arctic valve
I thought that'd be it, but no dice.
 lunar dove
i seem to be having an issue where blender dissolves an edge that isnt even selected
unkempt torrent
Are you using modifiers?
lunar dove
nay
unkempt torrent
You need to explain your problem better. When did blender dissolve the edge? While you were asleep, under the cover of night? 😉
lunar dove
I have one edge selected and when I go to dissolve, an additional 2 edges will also be dissolved, that arent selected
 proper shadow
I followed kung's video.. and did this

but in unity it comes out the same scale

and thus my feet are not moved any lower...
maybe i wonder if kung could tell me why..
 open scarab
Avoid doing this if its a 3.0 avatar, you want it 1.1.1

 proper shadow
oh, alright
open scarab
you want to copy the settings/component/dynamic bones ect to a new one you place in scene after scale factor
proper shadow
luckily i hadn't put the bones on it yet
so you think it was scaling it via scale that messed up the foot position?
cuz i did what kung said and moved the feet up to where my orbs were
open scarab
Just had wierdness with 3.0 avatars if they are scaled, so now they are all 1.1.1, tiny bit in ground
proper shadow
well that's fine, OVR-A fixes that
open scarab
If you use an animation and tranform scale isnt 1, it tend to look off for others
unkempt torrent
I'm trying to scale a head but this appears to break the eyes associated with the head. Normally the eyes are in the vertex groups of bones called Eye_L and Eye_R that are direct children of the head, but only with partial weight (using full weight doesn't help either). After scaling, rotating the eye bones or bones generated by CATS "pulls" the eyes out of the sockets and, if tested in VRChat, it somehow contrives to push the eyes slightly in front of the face. Any common wisdom for what you should do to eyes when you need to resize a head?
 regal beacon
How do you guys import a model or a pack to your blender?
tough plover
regal beacon
How do you guys import a model or a pack to your blender?
you just do File > Import > FBX
or whatever format your 3D model is in
typically fbx
 lament pond
 naive helm
@lament pond how do you do cell shading like that?
lament pond
naive helm
<@!132596291812327424> how do you do cell shading like that?
Texturing and toon shading.
naive helm
ah
lament pond
naive helm
ah
Here's what it looks like without any shadows if you're curious
 naive helm
Could I have help toon shading my model ?
lament pond
The key in my mind for successful celshading is to be very selective on your colors and to have areas pretty clearly defined and separated into simple colors.
naive helm
i
lament pond
With some subtle gradients and toning to keep it from being actually solid colors.
naive helm
i'm not sure where to begin*
lament pond
Flat colors without and gradients would be the first step.

 gritty zinc
cool
lament pond
Another key part of proper celshading, is for the model to be built for it.
gritty zinc
its not bad at all
lament pond
A more realistic styled character in most cases won't look as well.
naive helm
Yeah- I wanted to try an outline still tho
lament pond
Outlines are simple, you'll just need a shader like poiyomi that support outlines.
lament pond
?
naive helm

it wouldnt let me send for a sec
but this is in sculpt mode
and the symmetry is ever so slightly off

More noticable here
How would I fix that, its not an origin point issue
lament pond
You can select a middle part of the model and create a new origin.
lament pond
subscribe to my youtube for more helpful tutorials


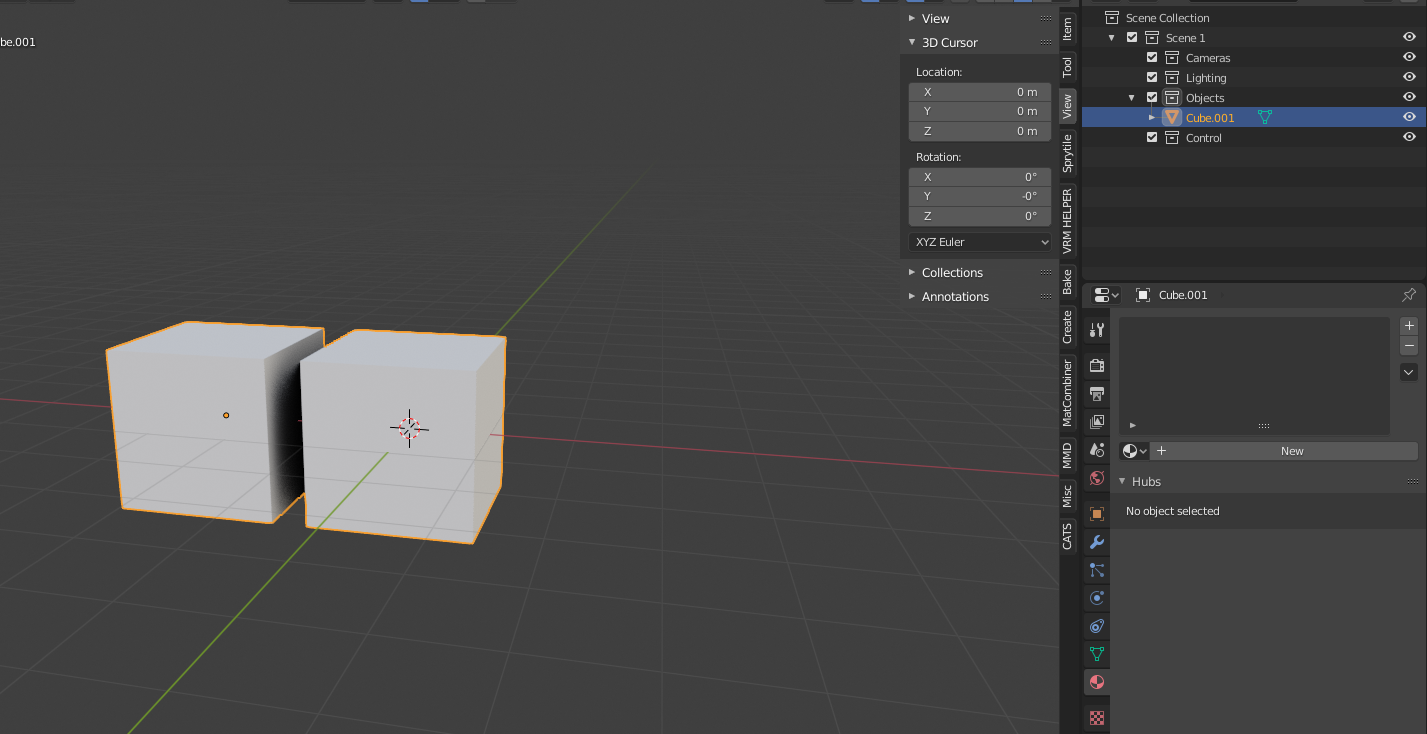
 lament pond
If the model is in multiple parts you'll have to do it for each part
 brazen ember
 modest shell
im trying to get a model to look smooth but using Shade smooth in bledner doesnt work. it still results in the faces showing like this on the model in unity .