#3d-modeling
1 messages · Page 102 of 1
 spiral sigil
 grand shuttle
ok well nvm now it says requires author
spiral sigil
Also this is the new Low poly arm

 cinder cradle
it looks not like arm ehem
grand shuttle
imma go to sleep all this VRM confusing me
cinder cradle
vrm files aren't from vroid?
 latent mesa
like this. the bear and skull can be toggled, but it's all in one FBX
 spiral sigil
I'm trying my best with 3D moddeling I'm not the best at it lol
latent mesa
spiral sigil
I'm trying my best with 3D moddeling I'm not the best at it lol
you're the best for being as fresh to the skill as you are. just keep at it
cinder cradle
none started and knew everything
 neat viper
cinder cradle
vrm files aren't from vroid?
neat viper
cinder cradle
vrm files aren't from vroid?
VRM's a community-made file format made for VR applications (VRChat avatars mostly, from what I've seen)
spiral sigil
I'm actually starting off of what I'm learning in college so far
neat viper
spiral sigil
I'm trying my best with 3D moddeling I'm not the best at it lol
keep at it! c:
 azure rain
neat viper
VRM's a community-made file format made for VR applications (VRChat avatars most...
azure rain
neat viper
VRM's a community-made file format made for VR applications (VRChat avatars most...
and lots of software for V tubing
neat viper
ah o:
azure rain
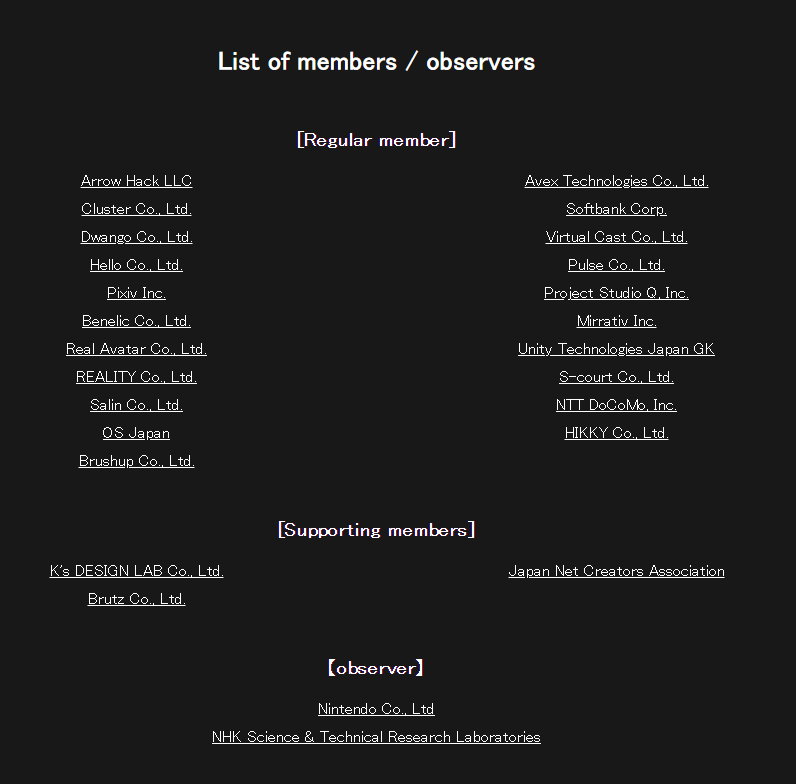
also several corporations are financially backing vrm https://vrm.dev/en/vrm_applications/
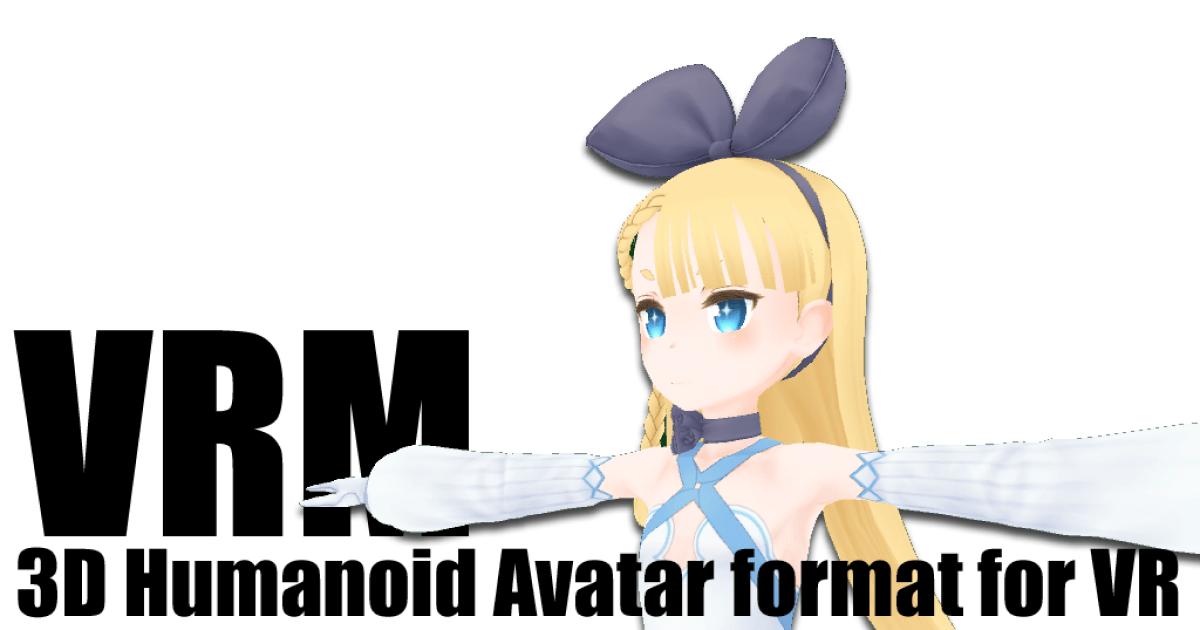
VRM
3D model submission platform The Seed Online Niconi Solid VRoid Hub Plug-in Application Platform UniVRM Unity editor extension, Unity library VRM_IMPORTER Blender add-on VRM4U UnrealEngine plug-in glTF-Maya-Exporter Maya script VRM Converter for VRChat Unity editor extension UniVRMExtensions Unity editor extension Character...
VRMコンソーシアムは、プラットフォーム非依存の3Dアバターファイルフォーマット「VRM」の普及と統一規格の策定を目的とした団体です。
 spiral sigil
cinder cradle
<@456226577798135808> you are in 3d modeling college?
spiral sigil
cinder cradle
<@456226577798135808> you are in 3d modeling college?
Yeah
I'm in game development actually .
Well learning it actually
latent mesa
so cool. i wish i had money for higher education. dumb education industry
spiral sigil
Oh nah I'm only 17
I started college last year since it works a bit weird in the UK
Anyways back to UV mapping
 latent mesa
spiral sigil
Anyways back to UV mapping
latent mesa
spiral sigil
Anyways back to UV mapping
i've never done it. I can suggest a beutiful tutorial using only a cube
 devout scroll
UV unwrapping is not that hard once you understand what it's trying to achieve
 mild nimbus
i just realized why should I remove IK constraints in Blender if I can just NOT map it in Unity
🤔
Makes it easier to simulate poses to for clipping
spiral sigil
cinder cradle
or maybe both
They was actually gonna teach us both We learnt unity first
But since The "Funny Virus TM" Happened we had to learn everything online and couldn't
cinder cradle
yes online learning is not as good as classes
latent mesa
cinder cradle
yes online learning is not as good as classes
true. it's easy to fall though the cracks. I took a distant learning psych class and got teamed up with a bunch of lzy bums who only logged in a few hours prior to the deadline
latent mesa
cinder cradle
like half of class can't even do what they need
right? and all the free services are on campus making it seem nearly pointless to do distant learning
cinder cradle
nothing we can do it's their choice to be lazy
mild nimbus
if you take classes thats only based off your own drive
you will be fine tbh
but thats just how university is
working with other students that are probably very lazy
i dont like dealing with others when it comes to education so i do courses that require me only and a teacher
latent mesa
anyone know how to prevent my mesh from being turned to ribbons when I use the sculpt tool?
 quaint jasper
ribbons ?
 latent mesa
quaint jasper
You need to merge by distance first
latent mesa
quaint jasper
You need to merge by distance first
k. i'll look up a tutorial

 latent mesa
spiral sigil
latent mesa
spiral sigil
i do not look forward to doing this with a mid level poly model /cry

 chrome hare
UVs for my models are thankfully easy, since i make every part separately
then i can unwrap them all individually and place them in their own little squares
 wary whale
can someone please provide Blender assistance?
I need to combine textures, reparent bones, and probably something else
quaint jasper
The cats plugin does all that
wary whale
it hasn't worked for me (also hi rubick)
I need my knees and elbows to be the first children of my upper arms and legs, but they're the last children for some reason
and it just will not combine my textures

 latent mesa
latent mesa
latent mesa
to modify matarials, separate by material, click the mesh, clck material in toolbox (red ball), select the mesh on top, change the material, go down. you can also change the texture by clicking the circled folder
quaint jasper
wary whale
The fix button does nothing ? Also what's not working with the combiner ?
wary whale
quaint jasper
The fix button does nothing ? Also what's not working with the combiner ?
I'm legitimately uncertain. I'm so new to this, you have no idea
I couldn't even begin to tell you what's going on.
if you want, I can give you remote access to my computer
latent mesa
 wary whale
I don't have anything important on it, so I'm not worried about you fucking with much
plus, I trust you
although it'll be a second, as I'm about to go finish making coffee
latent mesa
wary whale
although it'll be a second, as I'm about to go finish making coffee
what you're asking might not be possible, if you find out that your model is using more than 3 textures. (reducing down to 3 materials)
quaint jasper
There's very extensive videos that show the steps, it's not very complex
latent mesa
you can always manually atlas your model. you must really hate life to do it tho. like, give up all will to live
wary whale
latent mesa
you can always manually atlas your model. you must really hate life to do it tho...
give up all what? lmao
latent mesa
wary whale
give up all what? lmao
your will to live XD
wary whale
latent mesa
your will to live XD
I don't know what that means
/s
latent mesa
maybe it's an accent, like pop and soda
wary whale
no I'm just being an idiot trying to make a joke
the point is I don't have a will to live
latent mesa
oh, jokes haha, i get jokes XD
wary whale
clearly lol
I literally don't have the menu you're using btw
I have cats and everything, just not the Materials menu
and I have the Material Combiner plugin, too
nevermind I think I did it

is this any better
 quaint jasper
Make sure the atlas you generated doesn't have any duplicate either
quaint jasper
You have the armature selected ?
quaint jasper
show your window 
wary whale

I'm gonna try to reparent the bones in Unity since that works
and see if the textures stick
it didn't fucking stay textured
I'm so angy
I got the bones reparented tho
neat viper
In Unity, click on the FBX in the asset browser, go to Materials in the inspector, and use custom materials? o:
wary whale
that just made it pink
neat viper
that's likely a shader issue - check the materials folder it made and make sure that they're using a shader
neat viper
odd then, and nah standard Unity shaders should be fine o:
Would you mind sending a screenshot of the inspector, with the material selected?
also, make sure that the material is applied to the model, too
 neat viper
Drag your atlas' texture file into the Albedo checkbox, then see if it shows up? o:
neat viper
Just to make sure, the checkbox next to Albedo should have a tiny thumbnail of the texture you dragged into it, right? o:
wary whale
it does when I select one from the library, but that's not what I want
neat viper
sorry if I'm repeating myself lol, but drag the atlassed image (should be named something like Atlas_12345 by default) into the Asset Browser to make it a texture, then drag that texture from the Asset Browser into the checkbox next to Albedo
That should apply the texture to the material, and if doesn't then that's weird
wary whale
can i maybe save just the atlas as a .png?
neat viper
It already should be? o:
When you combine the material with CATS, there should be a popup that asks you where you want to save the atlassed image
wary whale
nope
also according to the thing in Unity I can't rig it as a human because I don't have a LeftLowerLeg
I've tried manually renaming the Knee to LeftLowerLeg, but that didn't work
neat viper
v weird
You can save the image from Blender by going to the UV editor, selecting the atlassed image from the drop-down box at the top, and then going to Image > Save As
and in Unity if you go to the Rig tab in the FBX's import settings, you can fix the rig there
wary whale
do you remember the scene from Cloudy with a chance of Meatballs where Flint is teaching his dad how to send an email?
that's how this feels right now, and it's making me angry, because I'm so used to knowing everything I need to know and more
keep in mind I'm not mad at you, I'm mad at myself for not knowing this shit
quaint jasper
Can't know before you learn 
neat viper
awh lol, and you're fine! Everybody learns somehow c:
wary whale
quaint jasper
Can't know before you learn <:NepOkay:668309483713462314>
u right but still
neat viper
To get to the UV editor, click and drag the top corner of the 3D viewport to open a new workspace, then switch it to the UV editor

 wary whale
I did that
I kinda did it, too

the only issue now is the eyebrows and that it's not a humanoid rig
and that's all because of bone things
neat viper
Select the material, and set it's shader to Standard/Alpha Cutout
might be misremembering the shader name but it's similar to that lol
and yus, bone stuff can be fixed in the Rig tab of the FBX's import settings in the inspector, assuming you have all the neccessary bones
wary whale
neat viper
and yus, bone stuff can be fixed in the Rig tab of the FBX's import settings in ...
I think I do
I've never gotten this far so I'm super scared of fucking it up
neat viper
always make backups and Save As before doing big changes! c:
wary whale
okay so I can't quite figure out everything, but I'm gonna try importing it to VRC
latent mesa
neat viper
always make backups and Save As before doing big changes! c:
i wanna add, save as in a logical format such as 1.1, 1.2, 1.3 2.0, etc to track which files are which without paying too much attention
wary whale
okay so the good thing is that it worked
the bad thing is that I'm stuck in a t-pose because I didn't finish rigging it to be humanoid (it was being a bitch)
 neat viper
latent mesa
i wanna add, save as in a logical format such as 1.1, 1.2, 1.3 2.0, etc to track...
neat viper
latent mesa
i wanna add, save as in a logical format such as 1.1, 1.2, 1.3 2.0, etc to track...
yus! o:
and cool to see the model ingame! c:
wary whale
agreed
chrome hare
my folders are a mess
i have like 6 blend files of every model because since i'm so new i try a bunch of different things
neat viper
lmao my 'naming convention' is terrible
"model" "modeltex" "modeltexatlas" "modeltexreatlas" "modeltexreatlas final" "modeltexreatlas finaler" "modeltexreatlas finaler2" etc
wary whale
hooray, Unity crashed while I was configuring my joints
:D
I fixed it, it doesn't have any errors anymore :O

guys I think i fucked it up
I changed the position of the view to the right spot, hopefully it'll work
hey @neat viper ? can I get your help with this please?
sorry for the ping, btw

the viewposition is in the right spot and everything
neat viper
Are there any colliders in your avatar anywhere? and you're fine! c:
wary whale
I'm 90% sure there are not
neat viper
Make sure that there aren't any collider components, and make sure that there aren't any Unity cameras either? o:
wary whale
"generate colliders" is off
wary whale

I have a general understanding of what all this means, but I don't know how to fix it
neat viper
try checking the "Import Messages" in your rig's import settings? o:
wary whale
that's what the thing on the right is, mate ;w;
neat viper
oh whoop sorry I'm blind lmao
neat viper
lmao
In the Rig settings, make sure that the eye bones are mapped if you have them?
past that I'm not too sure unfortunately, though you could do a search on Discord for camera issues potentially o:
 neat viper
would recommend search tags such as "in:avatars-2-general camera" or similar for the Discord thing, without the quotes
and that's odd o:
wary whale
 neat viper
Just wondering, how are you importing the model into Unity? (.FBX, .VRM, etc)
wary whale
not only that, but there is a description
I'm using a .fbx btw
neat viper
Is "Apply Modifiers" ticked under the Geometry tab while exporting? o:
wary whale
where exactly is the Geometry tab?
oh wait "while exporting"
while exporting from where tho?
from Blender or Unity?
neat viper
Exporting from Blender, sorry
neat viper
actually wait, huh

Try disabling it and exporting, actually?
def no promises on it working lol, esp. considering the Armature thing but maybe?
wary whale
alright, I did that and fixed everything, we're about to hit the moment of truth
neat viper
o: cool!
 chrome hare
earlier today i did everything perfectly and my model imploded because the hip was too low 😂
surprised it bends so well with how little faces it has really
i did make sure to split em up at the joints
wary whale
yeah i can't figure out what I did wrong or how to fix it
wary whale
yeah ;w;
neat viper
Looks like there's some weight-painting issues on the shin/foot and hand? o:
chrome hare
weird bending is usually a sign of weights being off yeah
wary whale
;w; I don't know how to fix that
I don't know how to do anything really
I just kinda do stuff
just like with everything else
neat viper
Would recommend looking up weight-painting tutorials in Blender, the pants and hand look like they're weight-painted weirdly/not at all in the pant cuff's case o:
 desert whale
regarding weight painting? or what
desert whale
well... the shaders you had in the original model did look better right? maybe you can copy the original model you had as a reference only, and apply the same shader and parameters to the new version
neat viper
I wouldn't strictly say you're doing anything wrong, you're just learning c:
Past the weight-painting issue, I don't think I spotted any other issues
wary whale
neat viper
I wouldn't strictly say you're doing anything wrong, you're just learning c:
Pas...
how does one alter weight-paintings?
desert whale
that's something you can do in Blender
wary whale
I'm aware of that much
I have blender open currently
neat viper
I'm assuming you're using Blender 2.8 - go to Object mode and select your mesh (not the armature/skelton), then go to Weight Paint mode
Select vertex groups on the right to change what bones modify what vertices, and past that I'd def recommend some tutorials on weight-painting
also, keep the blur tool/brush in mind while in Weight Paint mode o:
wary whale
the guy in the tutorial said to weigh down places with bones
so I did that

that's the result
neat viper
You have the weights all applied to one vertex group it seems - go to the Vertex Groups (third icon from the bottom in the toolbar, green icon) and switch to a different vertex group
would recommend a CTRL+Z too preferably lol
Only the forearm should be painted to the forearm bone's vertex group, the head to the head bone's vertex group, etc
wary whale
I don't know what any of that means
neat viper
You have (almost) all of your model's vertices painted to one bone, in short lol
wary whale
.... I'm going to fucking screm
neat viper
Go here to check your vertex groups o:

whichever one is selected (empty in my image) will be whatever bone you're painting vertices to
To clear a vertex group of it's painted verts, go to Edit mode, select all with the A key, then click "Remove" in the Vertex Groups menu
desert whale
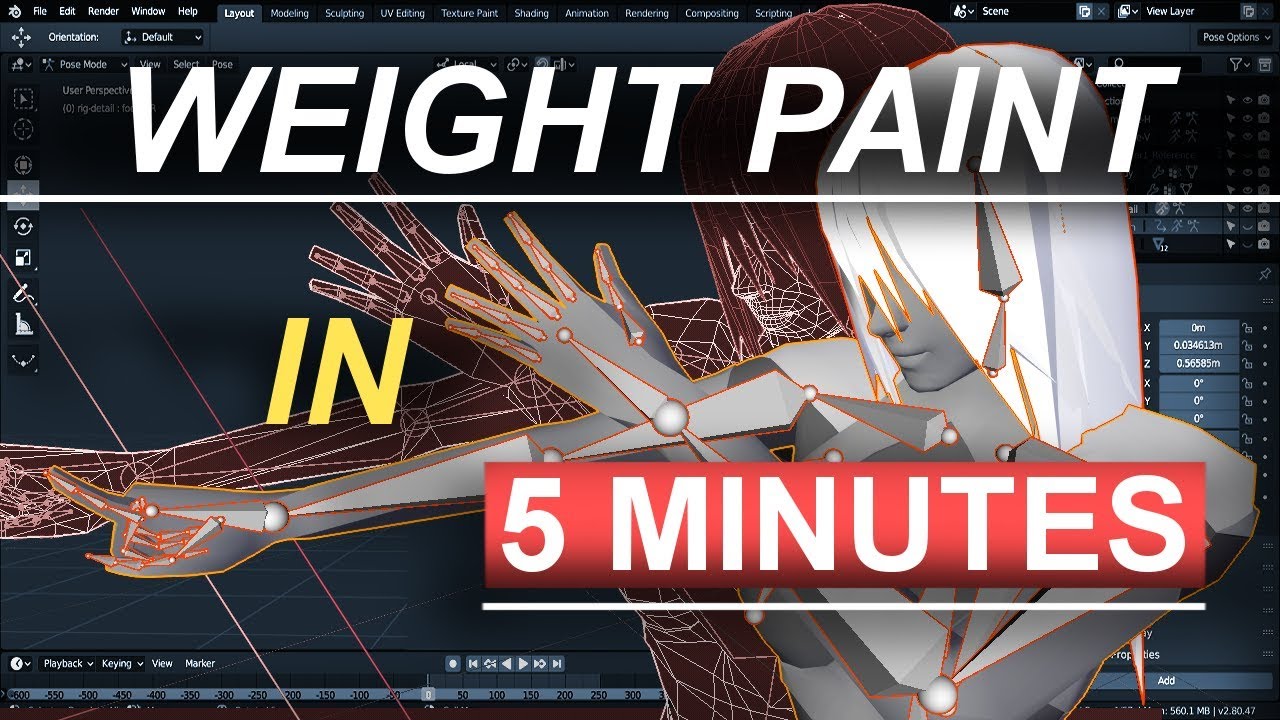
Hey everyone new Blender 2.8 tutorial! In the 5 minutes you'll never have to wonder how to weight paint ever again! Hope it helps you guys and don't be afraid to leave comments and questions below if you have them!
Song: [Chill]aKu - Love Shine
https://soundcloud.com/akuofficial
If you enjoy...
(it's not gonna be 5 minutes so don't feel bad if you need a while that's normal)
neat viper
yus! c:
wary whale
desert whale
https://www.youtube.com/watch?v=rG82fogtuCg
that's the exact video I watched
desert whale
where did you get your model from? I would have thought the weights were already set up tho
wary whale
desert whale
where did you get your model from? I would have thought the weights were already...
I made it in VRoid
desert whale
VRoid does setup the weights as far as I'm aware
 neat viper
Select one of the shin/foot bones' vertex groups and see if the pantcuffs are painted to it? o:
wary whale
look at my leg mapping, specifically
neat viper
looks fine to me o:
wary whale
I thought so
I checked off "optimize game objects" in Unity and now I'm trying to reupload it
if that doesn't work, I'll just.... idk
it didn't work..
neat viper
In Weight Paint mode, click one of the shin's vertex groups ("Left knee" here for example) and sent a screenshot? o:
wary whale
I can just send you the blender file if you want
neat viper
If you want, sure o:
desert whale

wary whale
desert whale
<:vrcSquidCat:658488045309263873>
test do you want the link to it as well, just for shits and giggles?
desert whale
I will believe in zuvali's wisdom (also am at work rn)
wary whale
ah alright
 formal locust
Does anyone else have frequent Blender crashing? Especially in relation to CATS?
latent mesa
only when I ctrl z after importing. I think my issue is memory
neat viper
in short the model was cursed imo lol
parts of the knee weren't moving with the knee bone, despite being fully weight-painted to the knee (and without being painted to any other bone), though clearing all the vertex groups and assigning the weights to new groups seemed to fix the issue? would require fully and manually re-painting the model legs, however
desert whale
maybe there was a problem when importing the vrm?
neat viper
potentially? o:
Could try importing the model into Blender as a VRM, then exporting as FBX
wary whale
that's.. what i did
neat viper
I have no idea then lol
you can import VRMs into Unity directly with a plugin, though I don't remember how well that worked
desert whale
maybe try a reimport and check if the knees work properly this time
wary whale
neat viper
I have no idea then lol
you can import VRMs into Unity directly with a plugin, t...
that's another thing I did, separately
wary whale
I will make this character work
and if I can't do it myself, I'll get someone else to
latent mesa
wary whale
and if I can't do it myself, I'll get someone else to
Oh yeah? Lol
 latent mesa
bad crop? shut up, it's beautiful. keep up the good work
latent mesa
chrome hare
but thanks
it's really cool watching you progress. ❤️
wary whale
so if my Model is truly cursed ;w;
which I think it may well be
a billion dollars (not really, I'm poor) to whoever can lift the curse
nobody can figure out what's wrong with it, but it just doesn't bloody work
spiral sigil
what's the issue exactly?
 spiral sigil
well
let's get the obvious out of the way first
only the leg bones are controlling that part, correct ?
wary whale
and the wrists
apparently I've got someone tackling this lol
additionally, they seem to think that it's a Rigging issue, not a Weight Paint issue like the people here thought
but they're consulting someone who apparently makes models for VRC so idk for sure yet
latent mesa
wary whale
additionally, they seem to think that it's a Rigging issue, not a Weight Paint i...
i can see where they can see that
wary whale
latent mesa
i can see where they can see that
yeah, it really does make more sense
latent mesa
i just got here... going to bed. I'm just uber excited about (self promo) sp I'm kinda staying up for no reason
wary whale
sleep tight!
latent mesa
I'll see how your model is doing tomorrow, and I can look at it as well if you'd like another set of eyes
wary whale
I'd love that, if it's not working still 😂
desert whale
did you try reimporting into blender to see if it magically solves it?
wary whale
yes, yes I did
and it solved nothing
in fact, it caused more problems if i recall correctly
desert whale
why would it cause more problems
spiral sigil
if the wrist are controlling the legs
you just need to remove the weight pain
also be sure that all bone rolls are set to 0
wary whale
bone rolls?
spiral sigil
yes
wary whale
I don't know what that is
I'm legitimately angry at this model tho
Svel if I send you the link to the .fbx file can you take a look at it?
desert whale
bone rolls could be a problem I guess
if you don't know what that is, now is as good a time as any to look it up
wary whale
I really wish I had money now so I could put a bounty on this damn model
I would honestly accept a knockoff at this point, too, as long as it looks decent and similar
desert whale
if your problems are the bone rolls it is easy to fix
 quaint jasper
surprising how all fucked up it is in the first place when vroid exports are usually very painless
wary whale
agreed
desert whale
yeah! I don't get it lmao
wary whale
I tried making another VRoid too, but had the same sorts of issues
desert whale
did you do something really weird in vroid?
wary whale
desert whale
did you do something really weird in vroid?
not really I don't think
desert whale
wary whale
Ruubick how did you fuck up the game this bad?? (I am, of course, joking)
whenever I try to publish the avatar it says there was an error saving the blueprint, now
at first, a few hours ago, I assumed that was my internet since I was having issues
but now I doubt it
devout scroll
You likely have missing dynamic bone scripts on your avatar
wary whale
do I fix that in Blender or Unity
devout scroll
Unity
type t:script in the hierarchy search bar and look through the filtered objects
if you have any Script components with a warning on them in the right side inspector window, right click and remove those scripts
wary whale
I do not
desert whale
it's a vroid model
exported into blender, and from there to unity
I don't think dynamic bones are at cause here
wary whale
me, standing on the sideline with no idea what any of this means:
desert whale
a lot of people buy models that have jiggly bits, but for the jiggly bits to work you need a unity plugin called dynamic bones, which is not free
so if you don-t have it, you'll get errors when importing the model
 dusty heron
Or joints, but who uses those?
wary whale
yeah I definitely haven't bought anything
as a note, there were no results when searching t:script in the hierarchy
test are you still at work mate?
wary whale
gottverdammt
I have not
nothing came up when I searched "unity bone rolls" on youtube
wary whale
ohhh okay
 tight quartz
Can I put collider on the objects in Blender so I don't have to do it in Unity?
spiral sigil
no
 prime zenith
trying to figure out how to hook up my ambient occlusion map

here's the actual map

not really sure how to go about this
mild nimbus
I guess I share this here
Still massive wip
But when it's done I plan to release it
Been taking quite awhile for the proper normal editing
And additional add-ons to model for the character


 prime zenith
ok cool
but
how do i pipe in the ambient occlusion map
if i try it just goes pale
mild nimbus
Multiply it over the base color map
Using a Mix rgb node
Or go into Photoshop and combine it to the base color via multiplication
Or whatever photo editing software you use
Hope that helps
It should help lol
prime zenith
k thanks
mild nimbus
Mhm
prime zenith
so i mix it with the albedo?
mild nimbus
Yes ma'am / sir
prime zenith
with colour or AO?
mild nimbus
Set the AO to non color first on the image texture node
Since it's not using color
Only black and white
prime zenith
right
mild nimbus
Then just multiply it over your albedo
prime zenith
so
mild nimbus
With a mix RGB node
prime zenith
i don't feed it through the ambient occlusion node?
mild nimbus
You can but I prefer it to be mixed via multiplication with your albedo map
And all goes into 1 output
Base color
prime zenith
how can i feed it through the ao node though
mild nimbus
Let me create a node setup for you
 mild nimbus

Node in the middle is a Mix RGB node
yellow node
Make sure you set the Mix RGB node from Mix to Multiply
prime zenith
will it still function properly as ao?
mild nimbus
yes you are just literally
overlaying the black areas
on your albedo map
or base color
prime zenith
so it'll still interact with lighting
prime zenith
oh
mild nimbus
Doing all this hook up wont even transfer to Unity
you are just doing this for it to look right in Blender
Look into the different texture maps and what they do
for starters
xD
prime zenith
i know what they do
i just don't know how to use them
i haven't even touched the sdk yet
i just want to make sure everything works rihgt
mild nimbus
well the ao will work
if want to simplify it
multiply it in photoshop or something
so you have one map with your albedo and AO on it
in one image
so u can just plug right into base color
and has your AO with it
prime zenith
if the ao won't work as an actual ao i'll plug it through unity instead
thanks for the help though
though i don't understand why it would be seperate anyway if it's just applied over the albedo
I was under the impression that the point of AO was it stops effecting in direct light
 knotty hawk
my Z axis does this and my Y axis makes objects move up + down instead of fwd + aft. The X axis still works fine though.
Any ideas how to fix it?

 proper wyvern
knotty hawk
my Z axis does this and my Y axis makes objects move up + down instead of fwd + ...
proper wyvern
knotty hawk
my Z axis does this and my Y axis makes objects move up + down instead of fwd + ...
Not sure you needed to show a picture of your model for this question but okay... Either way I cant help ya boi so get used to everything being fucked on your end. In the meantime I shall enjoy your suffering! X3
Actually... Im most likely going to regret helping you because I wanted to enjoy your crying a bit longer but how about you copy paste this sculpt to another project? @knotty hawk
prime zenith
OK so currently
on my AO map
what would be transparency on a regular map is instead represented by white
how can i change that
 knotty hawk
proper wyvern
Not sure you needed to show a picture of your model for this question but okay.....
knotty hawk
proper wyvern
Not sure you needed to show a picture of your model for this question but okay.....
 proper wyvern
prime zenith
how can i change that
proper wyvern
prime zenith
how can i change that
What character are you making?
prime zenith

Octotrooper
trying to get all the textures hooked up
i'm porting a model
the issue is there's a lot of textures with normally engine specifc names
so i have no idea what to hook them up to
Trying to assign textures you don't understand the function of is a fucking nightmare
chrome hare
do you really need all them though?
i'm not sure if vrchat even uses all those maps
it looks fine as it is honestly
 young vault
You could use all of those maps depending on your shader.
 onyx juniper

Dynamic wrinkle maps & skin slide test in Blender. More info: https://blenderartists.org/t/human-progress/1143224/891?u=chrisjones
https://www.chrisj.com.au/
https://twitter.com/cjones3D
https://gumroad.com/cjones?sort=page_layout
Thanks for the comments!
spiral sigil
thanks I hate it
chrome hare
that's pretty cool
 lean creek
Here are some very useful videos for anyone who needs a hand with avatars: https://www.youtube.com/channel/UCwj-o3b5QnkX4ARQnBe3tRA

YouTube
I mostly have an idea to narrow down on digital art including VRC avatar content creations.
this image is currently being developed and is in it's early days. Let's see if we can get to 100 subs for a custom url :3
If you need help or have questions in general about VRChat avatar upload, discord will be your best bet
Helpful links: ...
quaint jasper
I wouldn't recommend that shirt editing video lol, suggesting to destroy UVs to customize a shirt isn't the best 
 shell wharf
question
does having multiple meshes in a model add more material slots
or are they unrelated
neat viper
unrelated afaik but you should still preferably only have one mesh for your model
quaint jasper
@shell wharf Yep
chrome hare
having multiple meshes will tick the sdk off in its own right
quaint jasper
If you have two meshes sharing the same material, it still counts as a material instance, but can be GPU instanced
Yes, always
shell wharf
is it possible to make a uv map from several materials?
like lets say we have a model with several materials
quaint jasper
Separating the head mesh is usually good for perf, but depends on the model
shell wharf
is it possible to make a uv map off of it so it only uses one material
neat viper
That'd be called atlassing
quaint jasper
You can, that's called texture atlasing
neat viper
CATS Blender Plugin/Material Combiner (which is included in CATS) can do it mostly automatically c:
chrome hare
i've never had things go well with the cats thingy
quaint jasper
Always worked really well for me, but it needs quite a bit to make sure it's setup nicely
shell wharf
how do you atlas
quaint jasper
There's a few ways, the cats addon has an automated tool to do it, or you can do it manually https://youtu.be/lqe8JRiYuu0

If your bake miss texture. Be sure to double click the texture node we add on each material.
I show how to bake multiple textures so you will run better in game. VRChat player and you will have better performance if everybody have fewer materials.
Here a VRchat world with super optimize Quest compatible Avatar with asset like this one.
https:...
wary whale
hey Ruuubick do you have a patreon?
and, additionally, can I transfer funds from one patreon account directly to another
quaint jasper
Nope, i make my money from vrchat in the form of a salary 
wary whale
well idk, maybe you have a side hustle for all I know
I was gonna pay you to help with my model ;w;
quaint jasper
I'm not that good of an artist for that lmao
wary whale
I don't need a good artist lmao
quaint jasper
Have you looked at Phiabunny's tutorials ?
they make a lot of stuff specifically for vroid
wary whale
I may take a look, thanks for the recommendation!
shell wharf
@quaint jasper what is the cats addon
quaint jasper
a blender add-on that has a lot of tools for avatar making
shell wharf
how do you do it manually for comparison
quaint jasper
It's in the video I posted above
onyx juniper
Lol "salary." Crazy Ruuubick and his get-rich-quick schemes
mild nimbus
I watched the tutorial for vivace I mean sure it's cool but destroying the UVs to edit the shirt is not okay. Even the Texel Density is destroyed because of it. Alot of basic controls he used were also not addressed to someone who probably has no experience in the software what so ever. Example he said "go into x-ray mode to see through the model to select the vertices" what you should of said was "Go into wireframe mode and press Z" you only said x-ray mode but did not say the key
Alot of the importing process was sped up also so was a bit unclear.
prime zenith
i'm not sure if i should redo my model with cats or just go ahead and sort everything within the sdk
 fossil dust

Anybody know a relatively easy way to smooth out the whole surface of these fingers? They aren't human fingers fyi
But they're generally very rough around the edges and when using shade maps on it it looks pretty bad on the hands
proper wyvern
fossil dust
Anybody know a relatively easy way to smooth out the whole surface of these fing...
Use the smoothing tool in sculpting.
 muted raven
@fossil dust You could also Smooth your weight painting , or if its just the mesh that needs smoothing , you can sperate the hand from the body, and then apply a subdivision modifier as you please
fossil dust
I can mess with that then
 flat fossil
knotty hawk
my Z axis does this and my Y axis makes objects move up + down instead of fwd + ...
flat fossil
knotty hawk
my Z axis does this and my Y axis makes objects move up + down instead of fwd + ...
Make sure your transform orientation is on "global".

 lunar dove
how would I go about importing something into blender, from unity, that isn't just one object?
like, it's meant to be 2 objects merged but probuilder won't let me union them
neat viper
There's Export to FBX, though I'm not super sure on the specifics o:
neat viper
should be a thing in Unity itself, though I also found https://github.com/KellanHiggins/UnityFBXExporter
def might be a better way to do it though, not personally sure
chrome hare
is there a good unit scale for blender where the models won't be the size of a barge when i import them
lunar dove
@neat viper ty ❤️
prime zenith
how do i select a specific bone in blender
cinder cradle
@prime zenith alt+z for xray to see bones
prime zenith
i was told to go into pose mode i need to click the bluish green man
which works on the video
but for me does nothing
cinder cradle
you need to click any bone and than go to pose mode
prime zenith
right
well, on the drop down menu pose mode isn't there
i don't
alright, i have no idea what i did, but it works now
prime zenith
Yeah for some reason i'm locked out of entering pose mode or selecting parts of the model
chrome hare
i'm horribly late but you need to click the skeleton to enter pose mode
 lunar dome
Is there an easy way to reduce the poly's and tri'd from a 3d scanned model. i mean REALLY high
spiral sigil
retopo

 cinder cradle
@lunar dome you need to do retopologizing in blender
spiral sigil
how many polys is that
lunar dome
i don't know how to tell, but that is in blender
cinder cradle
but it's 3d scan i doubt decimate will work on it you need to remake it using this 3d scan
lunar dome
think thats the blender version?

if it helps, i'm using blender without any additions or alterations, default layout
lunar dome
go figure 😂
so where do i find the info tab ^^; sorry completely new to blender and just tackling obstacles as i come to them
cinder cradle
you need to right click on blender version at bottom right and mark scene statistics
 cinder cradle
well 6 milion
lunar dome
wait, verts too i guess?
 cinder cradle
3 milion verts oof
lunar dome
but i would assume this really needs to come down 😂
cinder cradle
even zbrush isn't that bad
 latent charm
lunar dome
Is there an easy way to reduce the poly's and tri'd from a 3d scanned model. i ...
latent charm
lunar dome
Is there an easy way to reduce the poly's and tri'd from a 3d scanned model. i ...
You could try using the quadriflow remesher. It's in the mesh tab (green triangle button) and the section called remesh and the mode set to Quad

 latent charm
Tweak your number of faces to what you'd consider a reasonable level of detail for the model.
lunar dome
whats the max allowed?
latent charm
There's no limit, but going over 70k tris will put you into very poor.
cinder cradle
best to be at 10k max
lunar dome
hmm... for moderate then?
latent charm
Also consider what else you want on the avatar
cinder cradle
but i doubt you can do that
lunar dome
well i saved it ahead of time so worth a shot
latent charm
cinder cradle
but i doubt you can do that
You could but then you'd need to be doing some more stuff to keep the detail.
cinder cradle
true
 cinder cradle
you lose detail it's normal.
lunar dome
the left and right calf have different level of detail
cinder cradle
you pressed a?
latent charm
Oh, I'd undo and redo it with preserve sharp enabled
lunar dome
yeah theres intentional indents for where they'd be on the real deal
weird though, that one calf is still uneffected
cinder cradle
the whole thing is one mesh?
lunar dome
it's 24 meshes actually ^^;
each part of the doll is assembled by me moving and rotating them till they fitted properly


i won't go image spamming but you get the idea
cinder cradle
you should watch some tutorials for quadflow remesh to make it best
lunar dome
i noticed i can't unselect one of the parts though. might have something to do with it
and when i select everything, one is always brighter outline than the others
cinder cradle
you select all by pressing a
lunar dome
yes
lunar dome
so i shouldn't be concerned by the top left here
 cinder cradle
it shows you what you have selected now or what was selected last

 cinder cradle
you should do retopology
it should be not hard with model already
watch some tutorials
lunar dome
what i was able to find out about that is remaking the model from scratch using the original as a guide
that sounds a lot harder
cinder cradle
it does but you could make it with much less polygons
lunar dome
I was thinking using the merge tool might do the same but without as much experience needed
I had trouble even finding how to make spheres

 latent sorrel
 tired lance
yo this snivy has drip
chrome hare
you could say i'm.... winging it.
 wary whale
can I get someone to help me with mapping my vertices in blender? I can send a dropbox link to the file, and depending on how Patreon works, i may be able to pay as well
chrome hare
if i'm making a character with wings where should the feathers point in t-pose so it looks best in vrchat
wary whale
down
wary whale
the second "knee" is actually the same as a human ankle

I use that guide when drawing them
chrome hare
well yah but how do i get that into vrc
wary whale
that may be a bit more difficult
chrome hare
i've learned that playing with rig proportions doesn't end well
devout scroll
 quick panther
how do i connect meshes
quick panther
how do i connect meshes
select them all and ctrl+J
chrome hare
hard to get legs i'm happy with, also if i try to scale it to the armature proportions vrchat likes it looks off
eh, we'll see where this goes
 chrome hare
well, going nicely i suppose

now here's the kicker: rigging it in a way that doesn't end with me burrowing underground in fullbody because vrchat does not like it when the arms are very long and bones do not work well when distant from the piece they influence
 visual vigil
https://cdn.discordapp.com/attachments/669760923321499678/813397472951926854/unknown.png https://cdn.discordapp.com/attachments/669760923321499678/813397550185840720/unknown.png


https://cdn.discordapp.com/attachments/669760923321499678/813397614900805652/unknown.png https://cdn.discordapp.com/attachments/669760923321499678/813397689265160242/unknown.png


https://cdn.discordapp.com/attachments/447433083000455200/813398323171033098/unknown.png
progresss
mostly to back of the hips, hands and thighs

 tawny arrow
it's the brass man

 cinder cradle
you tried pressing ctr+j? after you marked them
chrome hare
i think they want to physically connect the meshes
young vault
chrome hare
well, going nicely i suppose
You could do dummy bones. 1 for the IK and the 2nd one to follow to keep proper deformations. Should work
quick panther
devout scroll
select them all and ctrl+J
thank you
chrome hare
now in stunning eyeburn
 quaint jasper
Keeping it flat shaded ?
cinder cradle
quest users finally got their saviour
chrome hare
im using poiyomi shaders ingame
i don't know much about blender beyond making a model
quaint jasper
chrome hare
im using poiyomi shaders ingame
Select the mesh and search for smooth shade
 steady zealot
and mark sharp edges if you want to keep harsh angles. You can also use automatic smooth shading in the normals tab
spiral sigil
Made a crown of light and coin pouch today.
https://i.gyazo.com/a2de2a4bcda9719eae418d89de027212.mp4
https://i.gyazo.com/495f8871809a7fc90c4a0facccf13370.mp4
 runic nymph
So you're Viego in disguise. 
chrome hare
very nice
 gloomy prawn
hi hello! does anyone know where i can find an avatar software? to make one as such
neat viper
gloomy prawn
hi hello! does anyone know where i can find an avatar software? to make one as s...
Blender is a common free choice, though there's also Maya and 3DS Studio Max o:
VRoid is a common choice too, which afaik is more of an 'avatar maker' and not general modelling software
neat viper
Blender's def compatible with Linux, can't speak for the others though (afaik Maya is compatible with Linux, not sure about 3DS Studio Max)
would also recommend looking into CATS blender plugin! c:
gloomy prawn
aah cool! thanks so much :]
neat viper
yw! Good luck with the modelling c:
spiral sigil
People kept saying I look like Viego so I just went ahead and made a similar sword too. lmao
wary whale
jesus christ dude can I commission you sometime???
gloomy prawn
now the real question is how the hell do i open it

does anyone know how i open this???
neat viper
pretty sure you can download Blender straight from Steam o:
wary whale
I downloaded it from the site
gloomy prawn
neat viper
pretty sure you can download Blender straight from Steam o:
oh??
neat viper
works for Windows through Steam, should work for linux o:
gloomy prawn
wary whale
I downloaded it from the site
same here mate, now im just confused
im gonna try the steam ver
oh dude i have a wacom one tablet i maybe able to use it with blender
WOOO IT WORKS!
now how the hell do i use it
now how

how the hell does it work
neat viper
would recommend watching blender 2.9 tutorials on character/humanoid making c:
 true sierra
On another note, i feel like respect should be mutual, asking for how stuff works is completely fine, demanding for it seems kinda forceful c:
spiral sigil
@wary whale For sure.
wary whale
spiral sigil
<@!700879818329423962> For sure.
I suppose I'll be adding you for later
spiral sigil
So my vrm converter isn't installing into unity?
How do I fix that
I'm using a Mac so that could be the issue
neat viper
could also try importing it with CATS in blender, then exporting as FBX? o:
spiral sigil
Lemme try that- it won't let me import the converter as a package for some reason?
wary whale
I have sixty eight materials on my avatar ;w;
 quaint jasper
This may be the worst screenshot ever posted here, please use windows capture tool or install ShareX
 spiral sigil
I guess the head is clipping through the hair? I'm not too sure this is my first time making avatars jfjxjfbx
quaint jasper
How did you set up the materials ?
 leaden arrow
UVs could be flipped too
lunar dome
can i not have this happen

.> screen splitting my brain
decimating polys by hand because it's too much to do automatically i think. and it's hell

or i just suck at it
lunar dome
no?
spiral sigil
why ?
lunar dome
i'm not gonna be able to remake this thing
 devout vault
gloomy prawn
oh dude i have a wacom one tablet i maybe able to use it with blender
devout vault
gloomy prawn
oh dude i have a wacom one tablet i maybe able to use it with blender
i have this tablet too
spiral sigil
I'm trying to recreate my room in vrchat but I can't get the scale right in unity. I've created a fusion360 file that has all the correct measurements but from fusion>blender(for texturing)>unity the scale messes up. Does anyone have any experience with this?
desert whale
spiral sigil
I'm trying to recreate my room in vrchat but I can't get the scale right in unit...
check the import settings of the model in unity, might have some weird scale set
also check your export settings when exporting the file
chrome hare
so i edited a bit of a model AFTER making shapekeys, and obviously the edit didn't apply to all shapekeys
is there a quick way to make this happen
nvm just found it
propagate to shapes, take notes
muted raven
Love it when my models look good

@quaint jasper Im sorry i didnt use normal map for freckles, i just like the way this looks alot more!
quaint jasper
It still looks great !!

 summer moth
should I fix these quads with 180° angles? IS there a way to fix them?

 edgy fog
What's the consensus about which Blender to use? I heard here before that some version(s) in the 2.9 range were buggy/crashy, and that 2.83 was the way to go at the time that I read that which was November 2020. Has much changed? ::)))) Currently using 2.79 while finishing a project but looking to update for future projects.
edgy fog
summer moth
should I fix these quads with 180° angles? IS there a way to fix them?
It's best to fix them because if they were to be deformed past 180 degree angles then some fucky wucky might occur.
If you do it in blender you'll see how it looks. May look different if that were to happen in Unity™️ or in VRChat™️.
summer moth
any tips how to do that, or is it fine for non-deform object?
edgy fog
Ah no. actually easy
You just manually triangulate them

Best to do it manually coz Unity, when importing it, may auto triangulate them badly.
Did that do the trick, @summer moth? 🙂
summer moth
edgy fog
Did that do the trick, <@!225332041217081345>? 🙂
did it do what? there were no problems, I was asking if it would cause problems in the future possibly
 edgy fog
Well the point is that those quads are going to be converted into tris anyway, but you can do it manually to avoid any potential issues.
visual vigil
https://cdn.discordapp.com/attachments/721965082459766814/814075137108082688/unknown.png
https://cdn.discordapp.com/attachments/721965082459766814/814074997583904818/unknown.png https://cdn.discordapp.com/attachments/721965082459766814/814075675304001546/unknown.png
600k tri v 33k tri photoscan retopology comm wip
seems discords in the 'wont embed' mode
chrome hare
why is triangulation a thing anyways
what makes triangles so much better for games
 ashen stag
A quad is really just two triangles in the end
azure rain

Stack Overflow
Why are triangles always used for drawing surfaces in 3D? Why not a square or some other shape?
chrome hare
ah
always nice to learn something new
swear i learn more, and more valuable things just by talking to strangers
but that won't pay the bills sadly
devout scroll
welcome to the club
 oak glade
i cant create avatars yet but whatacha thinking
 muted raven
 chrome hare
oak glade
i cant create avatars yet but whatacha thinking
chrome hare
oak glade
i cant create avatars yet but whatacha thinking
Let's hope you never get the ability.
 wintry glacier
chrome hare
Let's hope you never get the ability.
wintry glacier
chrome hare
Let's hope you never get the ability.
that aint right 😐
chrome hare
just banter
it's law to make fun of brushes
desert whale
It's a complicated subject eh, on the one hand, it's really cool for the avatar author of the brush to have become so popular. On the other hand, that avatar has become associated with 8-10 year olds who shouldn't be in the game
 stark ore
chrome hare
just banter
it's law to make fun of brushes
stark ore
chrome hare
just banter
it's law to make fun of brushes
bruh
lunar dome
can anybody explain what retopology is, definitions i find are varied
and usually very expensive
azure rain

 gentle badge
basically it's using tools to edit/recreate the topology (vert/edge/polygon layout) of a model to better suit your target use case
often taking a super high res sculpture or photoscanned object and making it a suitable polycount for realtime rendering and have good topology for animation & texturing
 tawdry goblet
I have these uvs for a knob on a mesh I've made. Like in the split window on the right, theyre all overlapping for space reasons. Is there a way I can repack my uvs so it will preserve the way the uvs overlap?

also is this fine in the long run? Will it ruin things like baking if I have overlapping uvs like this?
devout scroll
There are addons that can do it but I'd do it manually I guess
baking will be ruined yeah but you can easily work around it
by keeping only 1 in your main uv space
then offset the rest by 1 u or 1 v
(the uv repeats forever)
go to view and untick pixel coordinates (in the N menu)
then you'll be able to just G, x 1 enter
to move everything 1 uv space to the right
everything outside the main uv gets ignored when baking
tawdry goblet
oh so pretty much basically what youre saying is sort of just tile the uvs instead of overlapping it, so it stays out of the uv
devout scroll
yeah
uvs tile forever into every direction
shaders can clamp (ignore) those tiles but I think by default it's set to repeat instead of clamp
 trail shuttle
Hey So I bought an avatar and was hoping to add some additional custom facial Blendshape animations, but the FBX file is in ASCII so I can't easily import to Blender
Does anyone know how I should work with something like this?

 muted raven
Well ladies and gentlemen, Monke man is being released to the wild

This concludes todays 1 hour model
 quick panther
when i paint the hand it also paints the arm
what can i do?

 buoyant crater
more then likely there the same material so you have to set one as a different one
 manic phoenix
ive been working on some Photogrammetry for a project im undertaking
 quaint jasper
might need some more pictures to avoid the artifacts between fingers
quick panther
buoyant crater
more then likely there the same material so you have to set one as a different o...
how
do i do that
 thorny ivy
Evenin', ya'll. I'd like some feedback on a custom head I've been working on, semi-realistic in design and intentionally avoiding making it anime-esque like most humanoid models I've seen thus far.

Found a base online (no rigging) and went from there, changing the ears from regular to more pointed and rounding the face some among other tweaks. Haven't added eyelids yet, not sure how to do that, but going for an overall more mature facial structure.
Feel like the area around the ears is too pronounced and/or the ears stick out too far from the head.
quaint jasper
Are you working off of a visual reference ? If not i'd highly suggest that
It helps with proportions and shapes, it's very difficult to look at it objectively the longer you spend on it, so it'll seem normal to you while very odd to others
thorny ivy
A couple of them but mostly just eyeballing things.
 obsidian nova
Your eyes are crossed, ears too far out; heads are usually flat on the sides. You need a more defined brow, nostrils & chin.
spiral sigil
Has anyone got a tiara prefab
Or a masquerade ball mask
I'm unable to pay at this time
chrome hare
think i might fire up blender again today
i should probably make it from one mesh instead of joining multiple so it doesn't look like a doll this time, but not sure whether to extrude or try sculpt
 still wadi
 spiral sigil
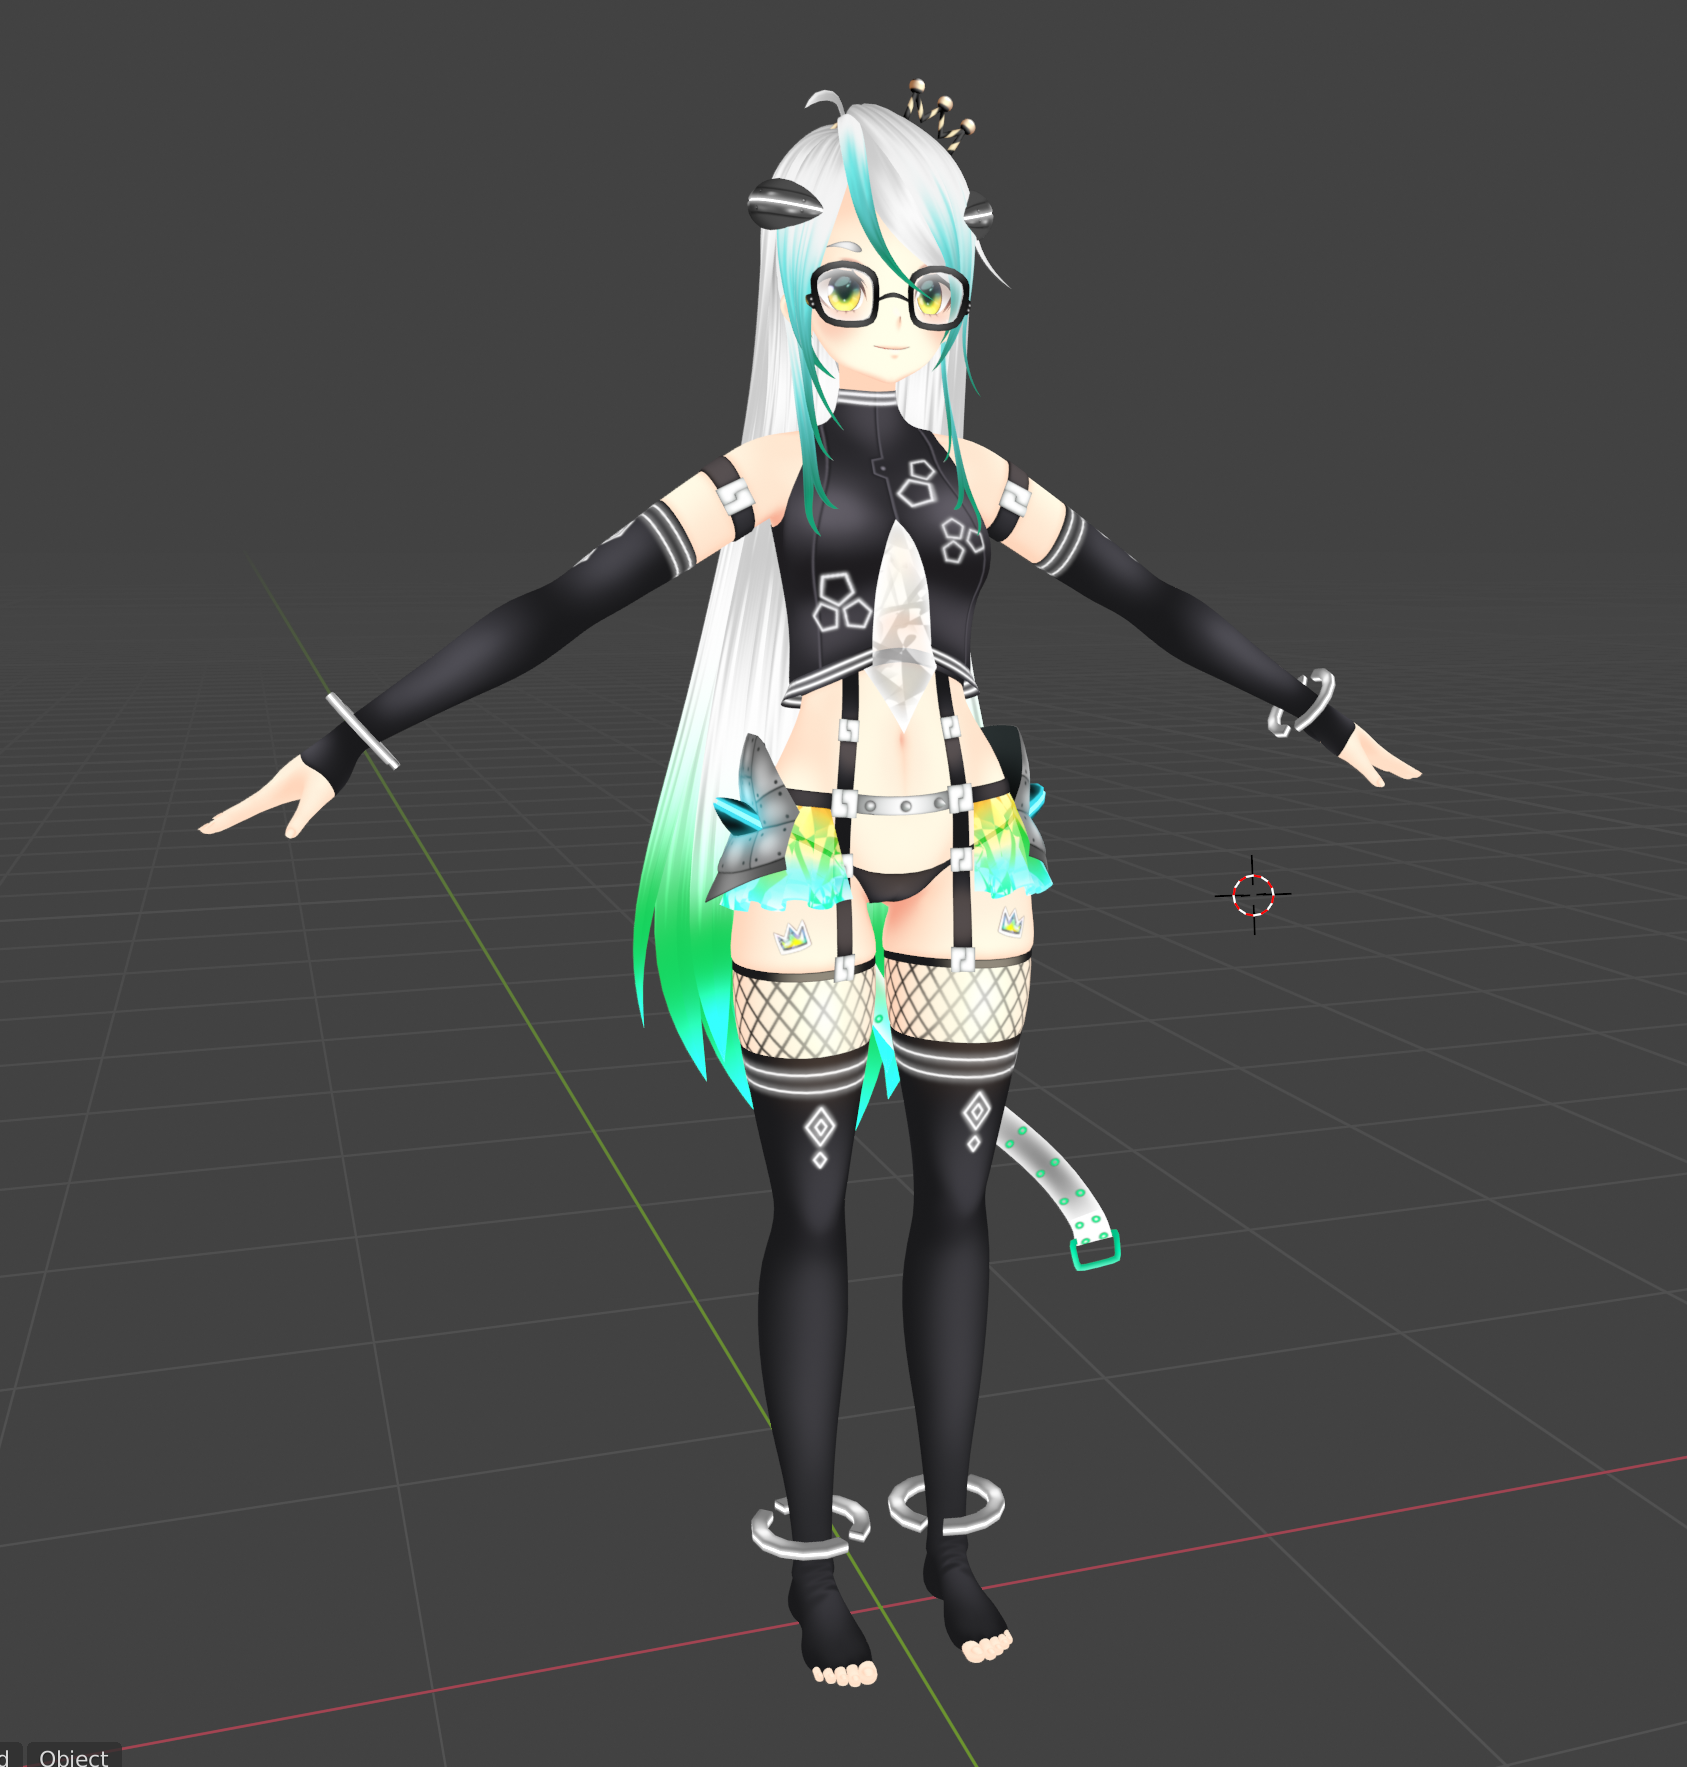
my own work in progress model im making its going but i kinda wonkily put on the shirt and underwear to cover the naughty bits to show it its a long process but its getting there slowly 🙂
 quaint jasper
still wadi
https://i.imgur.com/AZ6vjWj.png
quaint jasper
still wadi
https://i.imgur.com/AZ6vjWj.png
Miku inspired ?
still wadi
uhm not rly
i did notice how it looked like loli miku as well tho
dumm discord
won't load
quaint jasper
The feet look a bit too tiny no ?
still wadi
perspective
quaint jasper
the thighs seem to get smaller very fast, so the whole leg proportion seems off, but could be the angle
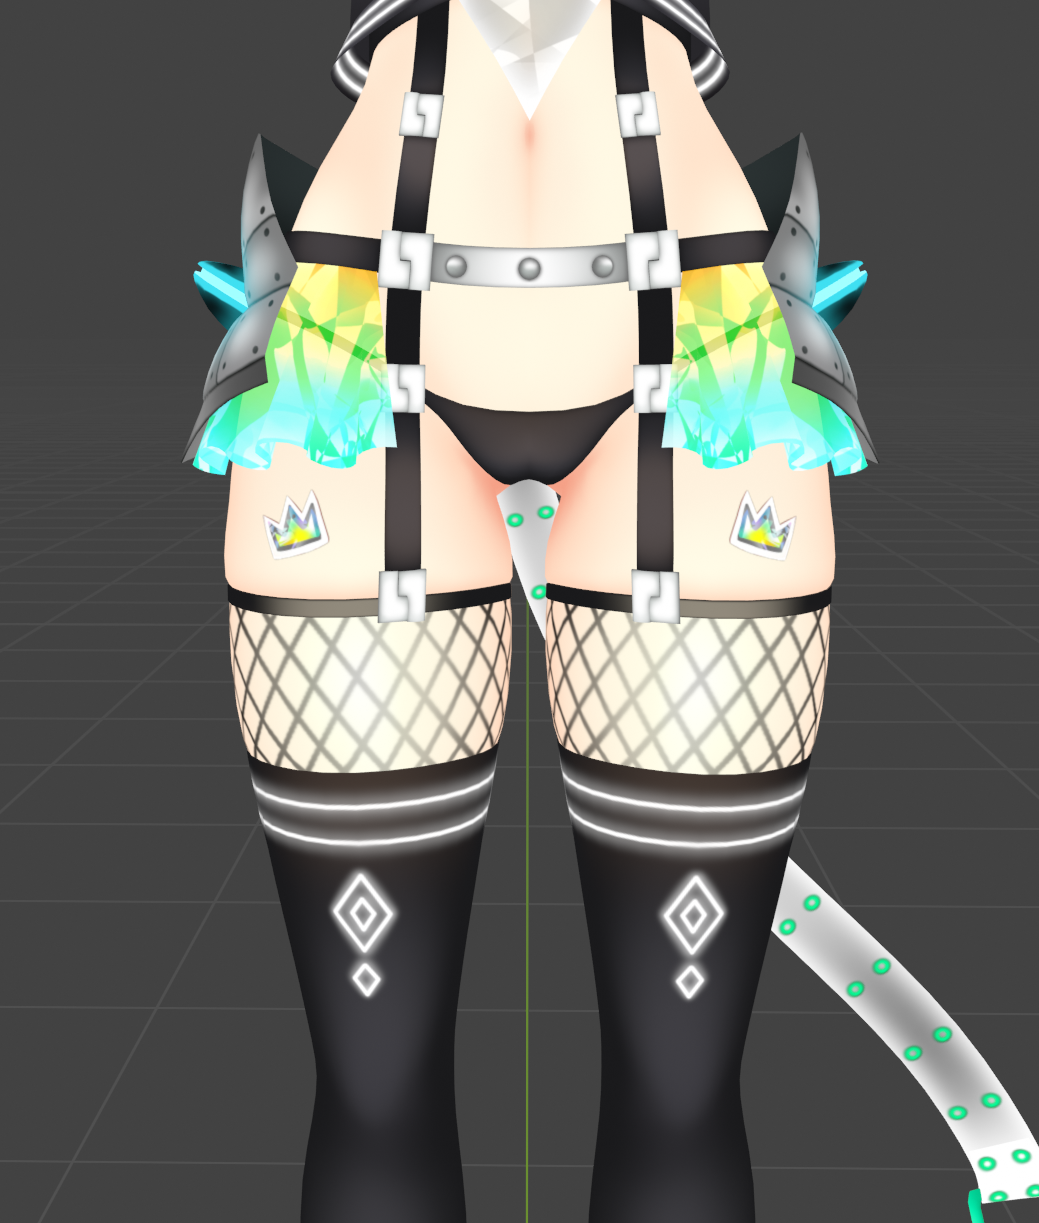 quaint jasper
i guess it's a classic case of "those socks are three sizes smaller than they should be"
Those sides metal pieces are screaming for a solidify modifier tho
still wadi
they are solid
quaint jasper
oh wow yeah, that's like a millimetre of thickness
quaint jasper
Female armor be like
quaint jasper
i assume you'll be making a metallic map for that least ? it'll look nice
 past cloak
making this cool dude
 chrome hare
oh nice
realm was a personal favorite, even if i can't be bothered to play it anymore
might go whip up a mystic here
now i've got myself thinking how i could recreate the orb 😅
chrome hare
what the cinnamon toast fuck
 brazen chasm
pretty much the reaction I aim for yeah
 rotund bronze
brazen chasm
wanted to try those visemes
rotund bronze
brazen chasm
wanted to try those visemes
fuckin 👌
brazen chasm
haha thank you
 deep dirge
You will become a serial killer one day. Nice.
chrome hare
time flies when you're having fun, eh

ok so what do i do with my eye bones to ensure they aren't rotated 90 degrees in unity
chrome hare
it is done

 fresh storm
I am stuck in the weight paint of the left shoulder bone

And i want to go to the left one
Help
chrome hare
stuck?
fresh storm
Like, i can't weigh paint the other bone
chrome hare
if you mean what i think you do, click the tab that looks like an upside down triangle on the right menu to see your vertex groups
deep dirge
hat

 lament pond

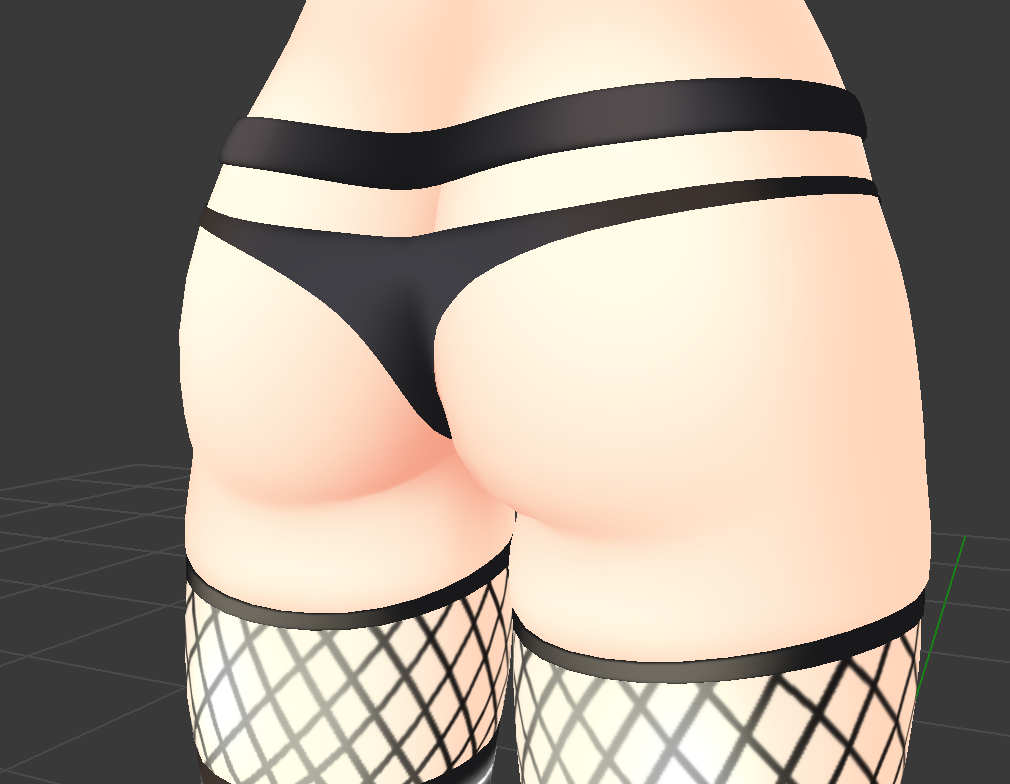 devout scroll
owo
deep dirge
bruh
thorny ivy
obsidian nova
Your eyes are crossed, ears too far out; heads are usually flat on the sides. Y...
Noted.
I've mainly been using the clay strip and smoothing to make changes to the face. Would other tools be more suitable?
young vault
thorny ivy
Noted.
I've mainly been using the clay strip and smoothing to make changes to ...
To squash the head, use the grab brush, you'll have to re-do some finer detailing on the ears. And grab it from facing the front on the side. For the eyes, I'd say re-do and center them. For brow and chin, just do clay strips or normal sculpting, then smooth a bit, rinse and repeat until satisfied. Have a low strength on smoothing so that you get fine control over it. For the nostrils, it's the opposite you have to go in from the bottom of the nose and do smooth, then go in, smooth, go in, smooth. You'll probably have to increase poly count for this since usually nostrils are hard to get good with mid-poly sculpting. High to mid retopo it becomes better though. And, since you'll have to retopo later, it's probably a good idea.
young vault
Although, a lot of people do a lot of these things a bit differently.
obsidian nova
I think you could just flatten the temples by selecting the ears & moving them closer together with proportional editing on (in modelling mode)...Other than that, I’d say follow Elphea’s tips.
young vault
I'd say if it's not too high poly that's an option that I would recommend. If it's too high poly then edit mode sometimes slugs
past cloak
gonna be honest most of my avatars are variants of different avatars i made already

 signal helm
 spiral sigil
Im making simplistic cartoon-style hair for my character model, Ive been making the hair 3d but I am worried about all the extra geometry. I dont know if the hair would look nearly as good If I made the hair 2d
 hard burrow
 signal helm
M9 Berreta empty clip
 steady zealot

anybody know how to fix this?
The Normals are the right way around, auto smooth is set to 180 degrees, edges are marked sharp, there are no doubles, and recalculating normals from faces produces this
when I set object to shade smooth, it seems to ignore my sharp edges
 median pike
you have baked normal split data
steady zealot
median pike
you have baked normal split data
How do I erase it
nevermind
found it

 median pike
👍
steady zealot
That's been driving me nuts on a few models
spiral sigil
I'd like opinions

Just blocked out simple colours before modelling the feet and proper texturing
quaint jasper
Opinions on what ? It looks great, cool shapes, proportions and colors
still wadi
you just make it and export it
 jolly verge
how?
still wadi
just make it
jolly verge
export it in vr chat?
in blender?
then?
ok
also
do u know how to poop as nutter butter?
idk how
no one replys to me tho
alr bi
spiral sigil
quaint jasper
Opinions on what ? It looks great, cool shapes, proportions and colors
Just on it in general, I guess if there aint much issues with it then I'm good to go. Thanks btw
spiral sigil
 signal helm
Cool model
spiral sigil
Thanks man
 dusk compass
 signal helm
spiral sigil
Thanks man
signal helm
spiral sigil
Thanks man
yeah..no problem
spiral sigil
This is the first proper character model I am making. Just finished the hair and the hat. Im pretty happy with how the hat turned out

Hair is tricky.. at least they way I did it, but its not too bad I think
 median harness
i've always liked that style of hair, has a very comfy clay-esque feel to it. is cute!
been working on this for the last week:
https://photos.app.goo.gl/EYHfJcmSXfhLzuZFA

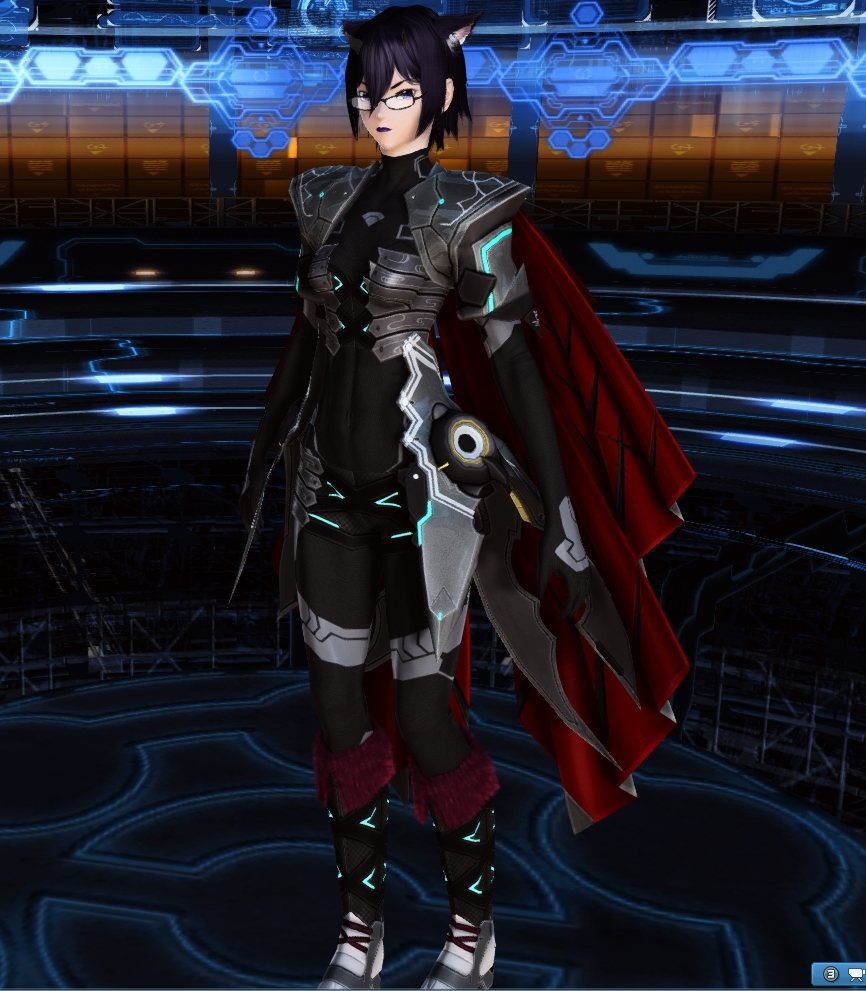
100% from scratch recreation of an MMO player character from Phantasy Star Online 2. This is her in-game, for reference.
https://i.gyazo.com/420744844c49894772fe0fe531ab64be.jpg

Think she came out pretty alright~
quick panther
when i try to paint his hand it doesn't let me and when i paint the start of his arm it paints the whole thing, what can i do to paint the hand and the arm separately
spiral sigil
Is it unwrapped properly?
quick panther
spiral sigil
Is it unwrapped properly?
what do you mean?
spiral sigil
Did you go into edit mode, press "U" and unwrap the model?
quick panther
let me go try it out
i unwrapped the model but it still doesn't let me
paint the hand
spiral sigil
Try smart uv unwrapping
quick panther
what's that
spiral sigil
Go into edit mode, press "U" and select smart uv unwrap
spiral sigil
No problem
signal helm
@quick panther remember to always check the UV mapping before Painting the textures!
spiral sigil
Not sure if these textures are final, though they are finished for now

 round haven


 spiral sigil
signal helm
Is that Eevee or Circle rendering?
spiral sigil
signal helm
Is that Eevee or Circle rendering?
Its eevee
quick panther
how do i save textures
signal helm
spiral sigil
Its eevee
oh nice
 vague orbit
How do people make hair, like im looking at tutorials and everything but I just cant, need to make some messy hair
devout scroll
Use curves

A tutorial on how to make hair in Blender 2.8 with curves, a method that is very simple and effective that I have been using for my character sculpts.
▼ Sculpting Uraraka Ochako:
Re-Sculpting My Old Art | Uraraka Ochako in 3D [My Hero Academia] | Can You Improve In Only 1 Year?!: https://www.youtube.com/watch?v=iYNdfef1Uog
▼ My Gumroad Store (...
jolly verge
how do u make a avatar with unity
vague orbit
tough thing is the top of the hair, really cant find a tutorial of it, trying to make something similar to my pfp
cinder cradle
@jolly verge blender is for that not unity.
jolly verge
how do i use blender for it?
cinder cradle
you are clearly thinking it's easy to do but watch some tutorials on yt to see how it is done.
signal helm
vague orbit
How do people make hair, like im looking at tutorials and everything but I just ...
I use simple plane and add a grid on it
vague orbit
interesting, might have to try that because im at a loss for most things lmao
signal helm
Yeah you can see it on YouTube too, there's a lot of way how to create a hair
all i can do is just modelling guns and Interriors
haven't try to make a vehicles, no...not yet 😀
jolly verge
i cant gb
i cant get unity
it says this short cut doesnt work

there
what is wrong?
signal helm
Check the license@jolly verge
Settings > Preferences > License:
-
Activate New Codes
→ Unity Plus / Pro
→ Unity Personal! -
Manual Activation
||{You can choose which method did you like to active it!}||
If this methods doesn't work, try re-install your unity !
signal helm
Check^
 vital drift
off brand version of one of my friends avatars
 signal helm
DNA
vital drift
yee
he makes amazing dna avatars so Im gonna make a off brand dna, like a mutated or under developed dna strand
signal helm
Lol
 velvet flame
VRChat
This page will help you get started with VRChat. You'll be up and running in a jiffy!
visual vigil
https://cdn.discordapp.com/attachments/669760923321499678/816202940372221952/unknown.png https://cdn.discordapp.com/attachments/709210012123398194/816202842397474826/unknown.png


 signal helm
@jolly verge i'll let you know later okay