#3d-modeling
1 messages · Page 95 of 1
 quaint jasper
 radiant moon
I've actually had to scrap several avatar projects cause I get this issue and don't know how to fix it
 deep dirge
merge by distance
radiant moon
I used "Smooth normals" which automatically creates sharp edges
sorry, someone started yelling at me
 devout scroll
merge by distance then select everything and clear sharp
radiant moon
I can't clear all sharps though, cause there are sharps i put onto the model manually that i need
deep dirge
then clear what you dont need
devout scroll
then clear the ones that you don't want only
radiant moon
I did that, but now the normals are inside out again
deep dirge
flip them
radiant moon
quaint jasper
recalculate all
radiant moon
Flipping them causes the wack shadows though
quaint jasper
set normals from faces
radiant moon
how
quaint jasper

deep dirge
quaint jasper
either you turn off auto smooth, or you have sharp edges
radiant moon
They're all blue, but they're still inside out
deep dirge
wh
quaint jasper
no
quaint jasper
if you can't see through, they're facing the correct way
if they look like shit, that's another problem
radiant moon
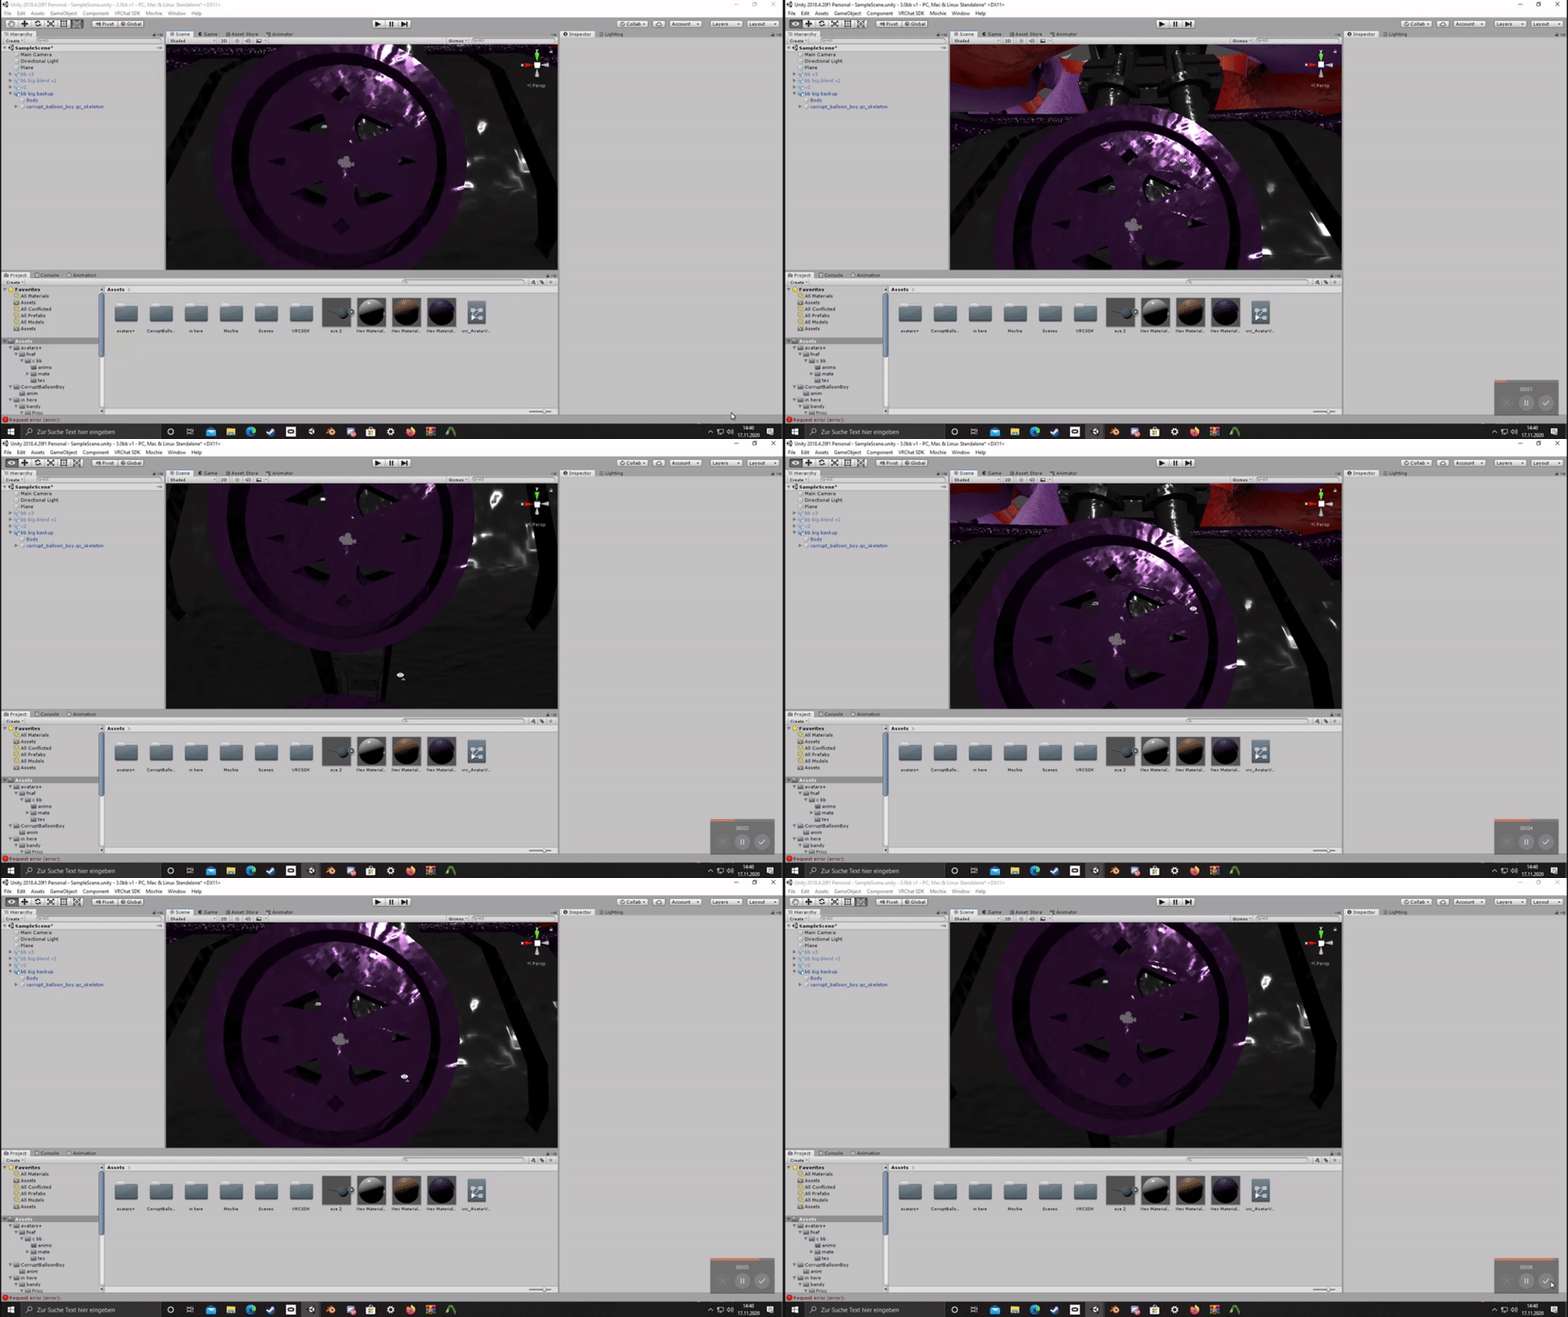
But they're see though in unity
radiant moon
They're normal in blender, but see through in unity
bruh
Shot from the front in blender
Shot from the front in unity
quaint jasper
Select all in blender and apply all transforms
and merge your meshes
export as a new and make sure you have default export settings
radiant moon
I can't merge the meshes since it's a toggleable hat
but thank you, applying transforms seems to have fixed it
quaint jasper
you probably had negative scale on stuff
radiant moon
I have absolutely no clue how it would have gotten negative scale lol
deep dirge
You can still use a single mesh with the hat
deep dirge
how do you activate it?
radiant moon
A toggle in the menu
deep dirge
use a shapekey
radiant moon
Uhhhh i don't know how to do things with shapekeys, imma just stick to the material swap
deep dirge
It will work just fine unless it has weight painting on more that one bone, that creates issues
shapekeys are far easier
take the hat
scale it down to 0.1
inside the head
make a shapekey, and scale it back up to the correct size (scale it to 10 if you scaled down to 0.1)
radiant moon
ooooook i still don't know how to use shapekeys
radiant moon
I'm just going to stick with material swaps, thanks for the help
deep dirge
deep dirge
Shapekeys I believe give better performance
its just normal av3 expressions stuff where you make an animation with a shapekey set to 100
radiant moon
I've made tons of 3.0 avatars and still have no clue how to make animations by hand
I just stick to pre-made ones or animations that only do one thing
deep dirge
not that
you just create an animation clip, add the shapekey, set both start and end to 100
then do the rest of av3 expressions menu setup
Its beyond simple, and works perfect if the hat just stays on the head at all times.
deep dirge
hm
do the props on the hand have weightpainting from fingers?
if so, youll probably want to stick with what you are normally doing
deep dirge
are there fingers?
deep dirge
you do need bones there I believe, as ik wont work without them
radiant moon
yes, that's why i need to add them
deep dirge
though if only one bone moves an accessory, its quite safe to use shapekeys
id assume by full outfit, there is a shirt
radiant moon
No shirt, just hat and props
deep dirge
oh
radiant moon
deep dirge
well if the hat is still weightpainted to only the head bone, and props to hand bones, you could try
but its your choice
radiant moon
Ugh, now I'm having a rigging issue
deep dirge
What is it?
radiant moon
So I mirrored a mesh after symmetrizing the bones I added, and now moving a bone causes the mirrored arm to go flying, it didn't mirror properly
deep dirge
Try mirror then symmetrize?
deep dirge
I have no idea if you can mirror weights in blender other than having them mirrored while making them
deep dirge
Check for other bones affecting the arms that shouldnt
radiant moon
For some reason, it isn't mirroring when I weight paint
deep dirge
I think the left arm is affecting the mesh of the right arm
so check the left arm bones
radiant moon
The right arm doesn't have any weight painting at all
It's all attached to the left arm, that's why i'm saying it didn't mirror properly
deep dirge
I guess that happens
Search the world's information, including webpages, images, videos and more. Google has many special features to help you find exactly what you're looking for.
radiant moon
Half of the problems I have I can't find on google
it's usually too weirdly specific
deep dirge
That happens to me a lot
radiant moon
Waiiiiitwaitwait
I think I have a solution
oh christ no i don't
Guess i really gotta fucking redo the weight paints again, huh
The more i try to fix it, the more fucked it becomes
this fucking sucks ass, I worked so hard on this model
I've taken the problem to #avatar-rigging
 spiral sigil
I kinda made grant abbit's well but I wasn't patient enough for all chapters of the tutorial lol
 sullen blaze
i edited a model in blender and theres a mesh missing in unity
its all assigned to the armature and what not
and the mesh is there
but theres one area its invisible
deep dirge
normals
sullen blaze
how
deep dirge
deep dirge
blue should be the outside
sullen blaze
ok ez
deep dirge
help
 merry plume
Yo fellow 3D modeleres is it allowed to make a cursed avatar that looks like vrpill
Of course not against tos bad just cursed
deep dirge
This is my first time texture baking. Anything I should do to make it look better?
and maybe a way to not have this be so dark
quaint jasper
Apply all transforms to it first
spiral sigil
Making some progress on the avatar. Now all I gotta do is retopologize, texture, rig, then it’s off to VRChat!
quaint jasper
select all and ctrl + A in object mode
and make sure you check the shapekeys in blender
 cobalt prism
hey there i wasn't really sure were to ask but i have a lil texture issue in blender, every lil face of my curve mash shows its own texture start insted of one big texture, does someone know how to fix that ?
quaint jasper
what do the UVs look like ?
quaint jasper
well
they're all overlapping
so they're probably all disconnected
merge by distance
cobalt prism
i cant find the by distance option only "at center" "at cursor" and "collapse"
cobalt prism
and..
 clear geyser
In 2.7 it's called remove doubles
cobalt prism
well
thats not it
i treid that
its like all those faces are stacked above eatch other in UV
quaint jasper
they are
cobalt prism
quaint jasper
try pressing U to unwrap again then
but there's no seam in the middle
you'd need a triplanar shader or something
 subtle jackal
No. Make a seam down it and then unwrap.
cobalt prism
Follow active Quads kinda fixed it
subtle jackal
go to edge select mode, alt+right click one of the edges going down the length of the candy cane (preferably one that will be the least visible in use), then ctrl+e and mark seam, then hit u and select unwrap
for bonus points align all your UV edges so that it's a perfect rectangle and scale as necessary to get the number of repeats/alignment of the stripes you want.
 latent charm
Or even better for something like that, select all faces, press u for uv menu, select reset. Now select a face so it's the active face (it'll look slightly different to the selected faces) and press u again for the uv menu, this time select Follow Active Quads and hit ok. In the UV editor the uv should be a fairly large evenly spaced square of the UVs, now you can scale it around so it looks right.
 shell sandal
does anyone know how to fix or flip textures that are turned around??
 solar fossil
you can either edit the texture in an external program to flip it or flip the uvs
 craggy lintel
I’d mark seams if I were you
 toxic wyvern
Currently learning how to do texture atlasing in Blender 2.9, but it seems like transparency isnt coming along for the ride.
I heard mention there's a way to render that separately (so they can be combined into one image with photoshop) but I'm not certain how
 rain totem
Any ideas on why an avatar is stuck in t-pose after uploading to VRChat? I have ensured it is rigged to Humanoid, which was the main cause I found when googling.
devout scroll
Stick your textures' alpha channel into an emission shader and bake that. You'll end up with black where transparency is needed. You can then stick that black and white atlas into the alpha channel of your other atlas to make it transparent @toxic wyvern
https://youtu.be/_U8lkyVKTAU
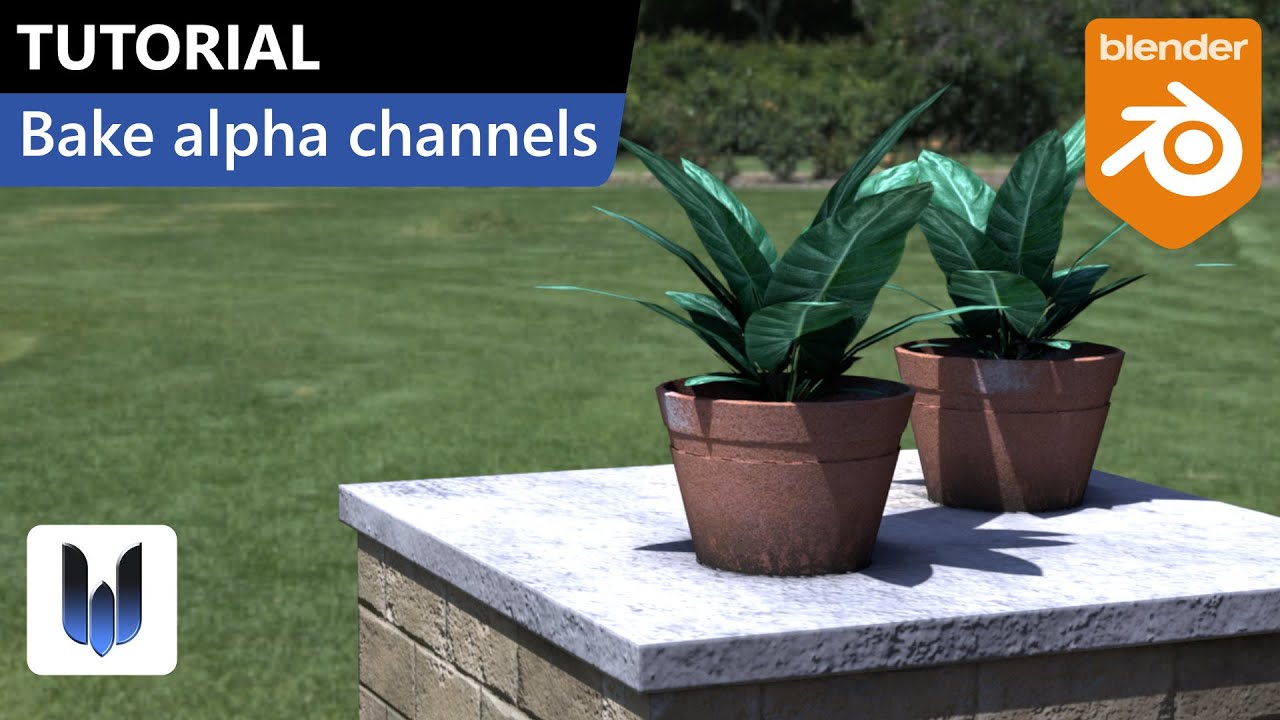
In this video tutorial I show you how to use the baking system in Blender 2.8. Especially in this episode you‘ll see a solution for baking the alpha channel to display transparent textured objects. Alpha channels won’t be calculated automatically when it comes to baking textur...
 white moth
Any ideas on why an avatar is stuck in t-pose after uploading to VRChat? I have ensured it is rigged to Humanoid, which was the main cause I found when googling.
@rain totem do you have any warnings above the upload button?
rain totem
@white moth Nope, all is green 😄
white moth
In that case t posing would indicate the game thinks you have fullbody and is waiting for you to calibrate
Are you in vr?
rain totem
@white moth, I tried it in desktop mode, but I will also try vr (oculus) later tonight.
although since I tried it in desktop mode, shouldn't it have worked?
 glad steeple
@toxic wyvern why is the face so stretched?
toxic wyvern
When I started to lay out the UV map it wanted to do it that way and I didn't question it. 🤷 probably weirdness with the model I picked
this is my first time ever importing something for VRChat and next go around I'm gonna be more selective with source material and customize it and stuff.
 vivid crater
were you deliberately trying not to say, why the long face?
 turbid willow
how does one make a jaw for talking
radiant moon
Place a jaw bone in the face, or if you're using 3.0 you can use a blendshape instead
glad steeple
No n8 im just not funny so i did not think of that lmao
 azure rain
very cute
 brave compass
Yes
 swift quiver
what a cutie uwu
deep dirge
No, fbx breaks all your shapekeys, bones, and geometry
jk
fbx is the most used/ recommended format
 median pike
^^
@turbid willow also you can literally just put your .blend files in to unity and they will open like they should
Unity and blender work very well together
latent charm
Eh, be careful when doing that. By doing that you lose the ability to easily set any export options as unity just runs blender & the fbx exporter silently in the background.
If you experience any odd behaviour and/or problems doing that, try doing a manual fbx export.
turbid willow
do i have to manually add the textures as well in unity?
deep dirge
You can also drag and drop into unity, then onto a model
spiral sigil
 violet matrix
Will someone make me a model real quick? I have the textures and fbx model but I just can't figure out to get it to work no matter what I do or what help I receive
 winter plinth
wdym?
spiral sigil
Anyone know how to keep your avatar’s feet from clipping through the ground? I made an avatar and the feet and the calves seem to clip through the ground
 lucid orbit
@violet matrix VRC traders in #community-servers-old
you can pay for models there if ya want
winter plinth
they said they had the fbx and textures already?
@spiral sigil have you tried adding colliders to the feet? im not an avatar maker but it might fix it
spiral sigil
Nope
It’s clipping pretty much the feet and the calves
Walks properly though
Tried resizing and scaling but it doesn’t work
Even if I lift the avatar above the line it still doesn’t work
devout scroll
Can you post a screenshot in blender and in unity
spiral sigil
Fixed it 🙂 thanks though
white moth
@turbid willow also you can literally just put your .blend files in to unity and they will open like they should
@median pike In my experience that makes unity extremely laggy when you attempt to change anything on the model as it reimports the entire blend file
turbid willow
Thanks
 dusky parcel
Biggest project so far. Still wip
solar fossil
looks noice
 solar fossil
yaar harr mates this yeer ol map will get us to the booty
 drifting thicket
i want to know how to texture like that
spiral sigil
Final character design is done. I’m pretty happy with the results!
spiral sigil
Bit of a long-shot but figured it wouldn't hurt to ask.
I've found a good temp texture for my custom avatar but the original files are .DDS. I want the spaces and cracks to glow but not sure which of the files (normal, spec, and detail) I'd use for emissions.
devout scroll
make a copy of your texture and just paint black everything you don't want to be emissive and you got yourself an emission map
 opaque hearth
 fresh harbor
alrigtys cool kids
i have a mega super cool question for everyone
how do i ✨ 3D model ✨
devout scroll

Home of the Blender project - Free and Open 3D Creation Software
and youtube tutorials
fresh harbor
i have blender downloaded,
spiral sigil
Good news, everyone!
You can do a "patchwork" edit of Visemes which adds stuff to it via vertex parenting.
Bad news: Vertex parenting is lost upon joining meshes.
fresh harbor
i have no clue what any of that means B)
spiral sigil
I barely do and I'm the one who said that.
Anyways, this is what I managed to do
The piercings and sharp teeth are additions I made to the visemes via the method I just mentioned.
Now to see if they actually work as intended in VRC.
Because they have disproportional movement when bones get involved for whatever reason.
 brave vapor
can one of u make an avatar for me?
spiral sigil
That's a big undertaking and not really something done on a whim.
You could commission one or learn how to do it yourself though.
brave vapor
ah, bc its complictaed for me, i only have my characters colored
plus the dynamic bones are $20
spiral sigil
Well yeah it's complicated, it's avatar creation. Nothing about it is simple.
But the skills you learn can be really beneficial and allow you to do things you'd unlikely to be able to otherwise.
IE: modeling things from scratch, create and edit textures, do stuff in Unity, programming (if your avatar has features which require it), skills like that.
Even if you just cobble something together using pre-existing assets, you're gonna have something you made and you customized on top of it being a unique avatar (more or less).
median pike
@brave vapor Someone making an avatar for you would cost over 100$ usually
 stark ore
A full scratch is waaaaay more
 glad basin
Blender question. Recently, 'Assign Automatic weight from bones' has left me with some strange results (worked fine previously) Now it likes to do this... if I go to the other leg, and tell it to assign automatic to fix it, then the previous leg will get wonky. Any ideas?
So, if I fix one leg, itll apply the strange weight painting to the other and vice versa.
--- Nevermind! I'm a derp, somehow had Z symmetry on and it was doing this.
 royal chasm
looking to commission someone to make a buildable prop for me in vrchat. i have all the assets and design done just need soneone to throw it all together
or a world if its easier that way
spiral sigil
median pike
Can lots of faces clipping trough each other cause lag? I have a character with multiple tails and point where they meet seems to make people lag (if the look closely at it)
The tails arent that high poly, Around 1k each.
 white gazelle
Maybe an intensive shader?
median pike
I am using Poiyomi cutout. Only using a albedo and no other maps or effects
spiral sigil
so obviously the lower the poly count the better and it all depends on how many bones, dynamic bones, materials, etc but is there an amount you would suggest to stay under? like i mean how much is too much before it starts to get too big?
im at 179k faces rn which ill obviously lower. just difficult getting the hair how i want without it looking like PS1 blocky graphics
 ashen stag
Since being above 70k polygons makes your avatar ranked  then thats usually the limit people aim to be below
clear geyser
Look at your tris not faces. Tris is your polycount
ashen stag
I hope the 179k faces is tris not quads 👀
median pike
hes probably work with mmd hair so probably tris
 atomic hamlet
Quads get converted to tris when you import into Unity anyways.
median pike
not the point
if theres 179k faces and they are quads, that would mean more faces once they are tris.
deep dirge
hahaha help me
deep dirge
Idk, I just felt like posting it
deep dirge
That looks like Roblox to me, I don't know why.
 junior bobcat
that's a first, lol
deep dirge
Its like a map youd see in Phantom forces
swift quiver
hahaha help me
@Yaya#0001
damn dats prett good
 wooden radish
y'all i need help
i can't figure out how to move an individual vertex without moving the entire model
using blender 2.8
deep dirge
turn off proportional editing
spiral sigil
or use the scroll wheel to make it smaller
deep dirge
yeah that too
wooden radish
so the thing is way to obig that's been the issue all along??
spiral sigil
yes
spiral sigil
yes
wooden radish
thanks y'all
spiral sigil
enjoy
 soft belfry
My first model/render, proud of it to be my first so i'm excited to get a hang of this!
 abstract python
That looks really nice
soft belfry
ty, theres a lot of messups especially the tongue since i had no idea what i was doing but practice makes perfect, i love modeling a lot
 young vault
That honestly looks awesome
ashen stag
@radiant moon How much experience do you have with constraints?
If you think about it fundamentally, rotation at a distance has translational movement. You can grab this translational movement with a constraint on each eye (they need a bone obvi) and restrict the axis so it wont move forwards and back.
Not really sorry, you should just play with limiting constraints and having them displaced from one another to see the effects
Only bones you would need to add for this to work are fake eye bones for VRC to use and real bones that have 100% weight on your eyes
Not a rotation constraint, should be a position constraint targeting a displaced child of the VRC controlled eyes
There are a bunch of constraint tutorials, I'm not sure how else to word it sorry
Thats about it, you would need to constrain the eyes with limited axis to prevent it from moving forwards or backwards
And you probably want a dummy per eye, instead of sharing one
Because the real eyes are rotating from VRC influence
They will dip into the face near the edges of the eyes if the circumference of rotation isnt large enough
You can have those two axis enabled, while having the other disabled
IMO two bones is better as it keeps em separate but 1 would probably work
 desert cedar
Nice hardsurface modeling!
I do have a question. Is there a dedicated channel I could put a request that I'm seeking to commission a retexturing?
median pike
theres a server called VRCtraders that is full of people who do commissions
I think its in #community-servers-old
 wild tendon
Made some lockers!
devout scroll
You need to set your anchor overrides for every mesh to the same thing, usually spine
Download pumkin's avatar tools, go to tools > Set skinned mesh renderer anchors, or do it manually by going to each skinned mesh renderer and setting the anchor override to spine
unity
 warped merlin
@devout scroll *headpats* thanks
 warped merlin
Same problem like star
devout scroll
o
devout scroll
'Even when using fullbody'
Full body is where most issues happen lol
Post your armature from blender from the front and from the side in #avatar-rigging and let's troubleshoot there
or ask in #full-body-tracking
spiral sigil
hey aynone can help me
winter plinth
what is problem?
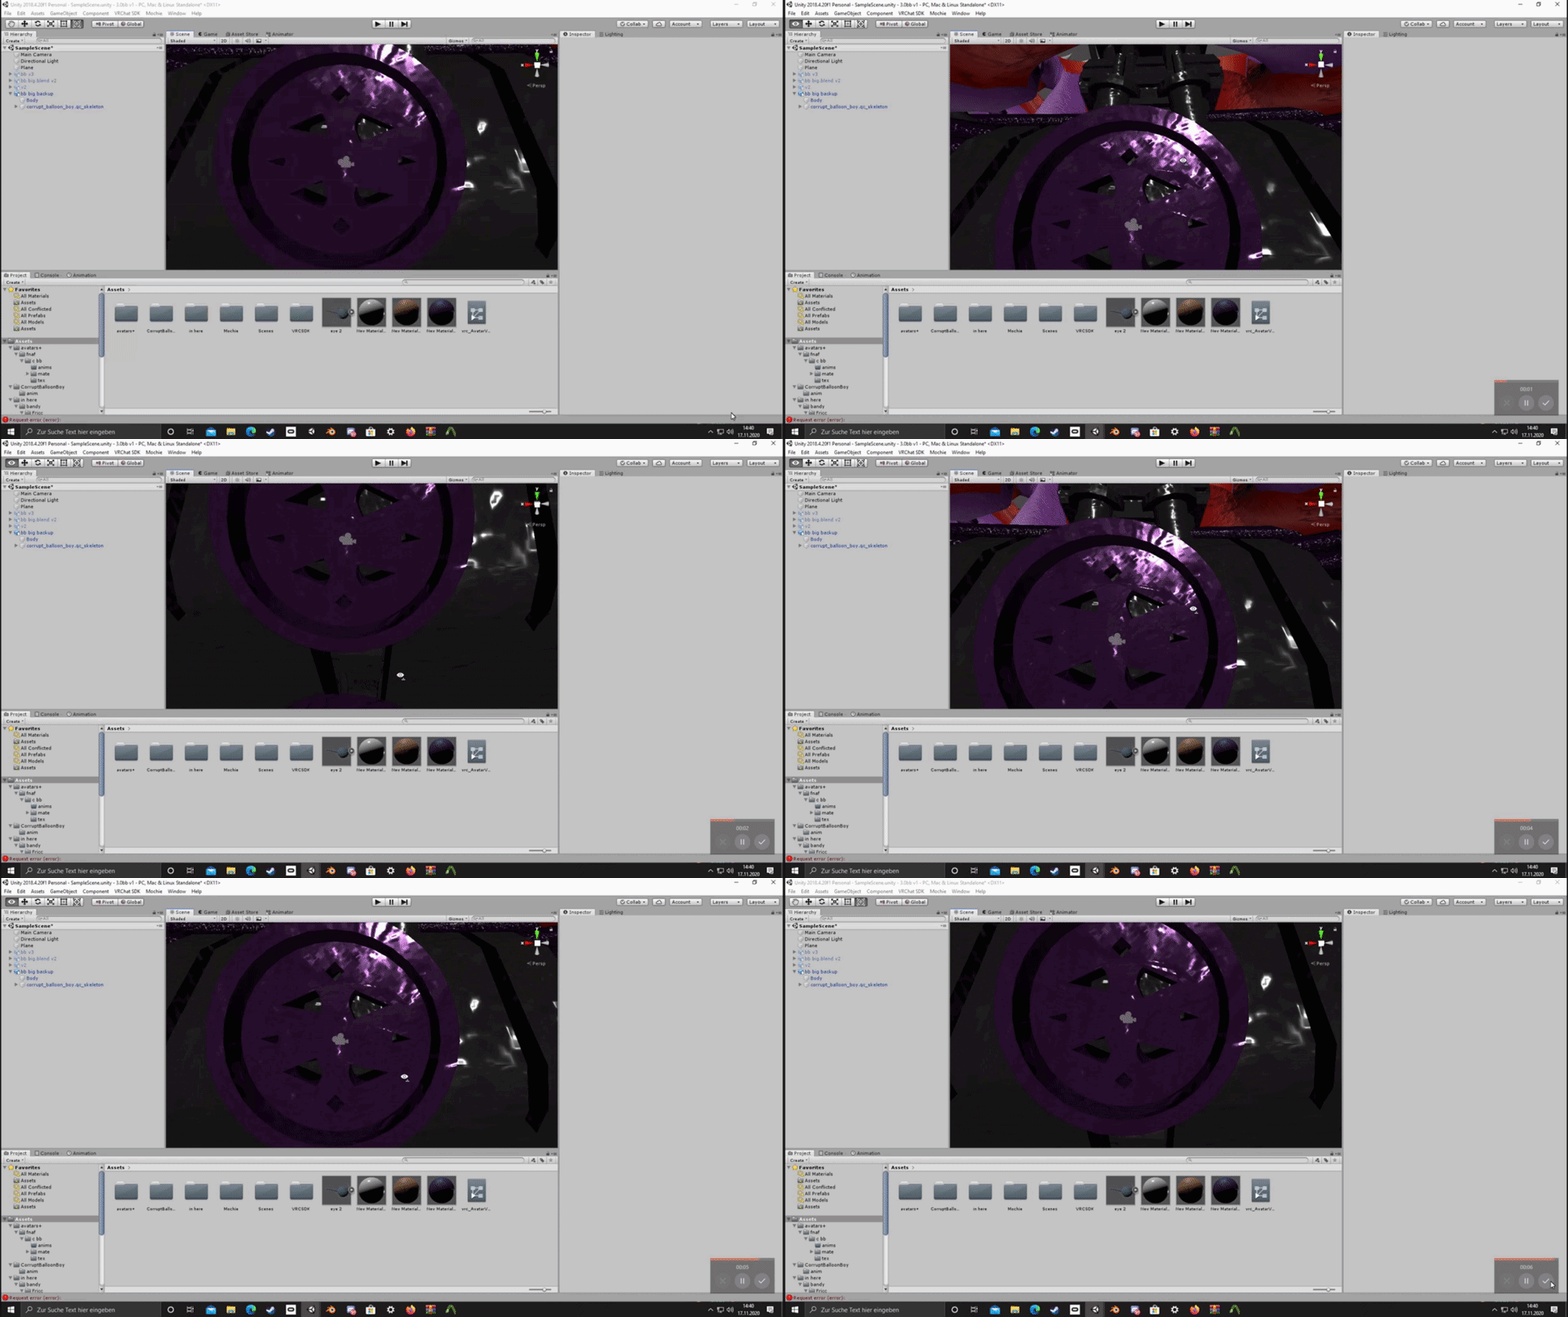 winter plinth
hmm, i couldnt quite see too well, but im assuming theres flicker?
winter plinth
did you check that you imported the normals correctly?
winter plinth
or mess with the material settings?
in unity
blender usually does normals correctly first unless you tell them to flip or something in blender
winter plinth
gj
winter plinth
change material settings
winter plinth
then whatever is wrong can only be fixed in blender. from what i can think to do
 sleek mesa
Is it possible to make a Rayman style Avatar or is that more of a rigging thing?
 obsidian nova
You’d just make an avatar without arms...Weight paint everything as usual but don’t include any weights on the forearms, shoulders or upper arms.
white moth
Is it possible to make a Rayman style Avatar or is that more of a rigging thing?
@sleek mesa all avatars are a rigging thing... but yes it’s entirely possible
obsidian nova
It’s possible to make an avatar that’s just a hand...
deep dirge
Is it possible to make an avatar that has no mesh?
deep dirge
epic
white moth
That will make a non-humanoid avatar yes though if you want one with invisible limbs to attach game objects to, you will need to make an armature in blender and import it
Or just import any avatar and delete the mesh
I don’t think you can make a humanoid avatar within unity itself without any imported assets
winter plinth
how tall is a basic cube compared to a normal player?
quaint jasper
1
winter plinth
a cube is as a tall as a player?
spiral sigil
1m
quaint jasper
a cube is 1x1x1
winter plinth
i thought the width and length were equal to the player box
idk, ill see what happens lol. ty
latent charm
Unity units are equivalent to metric meters. The default cube in unity is 1 meter along each edge.
winter plinth
ok, but is a player 1x1x1 then?
latent charm
No
Players are variable size
Unity units are absolute
One unity unit is always = 1 meter
winter plinth
like the height box so players dont "bump their heads"
deep dirge
make your character 20 meters tall, it will equal 6 ft
winter plinth
since vrchat has an absolute height box
winter plinth
yea like 6 ft ig is the heigt right?
i just wanna make sure i didnt make my walls too low
deep dirge
dont make a character 20 cubes tall
do this or something idk
I just use the blue guy from sdk2
white moth
For Americans 1 meter is basically 1 yard (3 feet) it’s not exact but it’s good enough for modeling
deep dirge
if your character is Ganondorf, make it 2.286 meters tall
white moth
Another way to think of a meter is a Minecraft block. 2 blocks tall is slightly taller than the average person. As a person is slightly under 2 meters tall
VRChat skews shorter but huge avatars usually don’t expect to fit inside places
winter plinth
yea, i made a stair case with a 4.65 ft POD from the nearest surface for a food cellar, had to remake the whole hole to get anyone in no matter how short
quaint jasper
laughs in metric system
deep dirge
Imagine liking any kind of measurement system, they all suck
winter plinth
agreed lol
quaint jasper
Nah y'all are just sad about yours lmao
Metric system is wonderful and makes complete sense
winter plinth
well you know me. 1=2, 2=1
deep dirge
Literally no system makes sense
quaint jasper
what doesn't make sense for you in the metric system ?
deep dirge
everything
spiral sigil
chad
quaint jasper
what the fuck is the average human height
deep dirge
idk
deep dirge
no
quaint jasper
it changes with every single new human born, dead, or alive, what do you mean
deep dirge
I saw a image of a averge human used to show the scale of a rocket before
 quaint jasper
yeah, what's the average height in your country
vs my country
vs other countries in the world
deep dirge
idk
quaint jasper
yeah, because that'd be dumb
deep dirge
My shoe size is 11.5
latent charm
Even the moon uses the metric system
 gaunt abyss
I'm American and I even admit that the imperial system is stupid. We're just too used to it to drop it at this point.
winter plinth
everytime my computer says its 50 C, i keep thinking its colder than my room somehow lol
white moth
I don’t know what they’re teaching in American schools these days but the metric system was focused on way more than the American units. People just don’t pay attention in school I guess. I know metric inside and out, I have no idea (nor do I care) how many feet are in a mile. Anything involving distance math uses metric, even here.
young vault
The US system isn't even true imperial system.
white moth
Metric system is easy, water boils at 1 hectodegree. Easy.
young vault
The US system is literally just Americans being "WE DON'T LIKE METRIC" so the government had to (by international convention) do a conversion of the old imperial system to metric. So all the imperial units used back then (different in certain parts) were measured up in metric and then they just said "ah, yes, this averaging of the feet measurement is... 3.28084", same with cup, pounds, etc.
So the US imperial system is just metric, but with extra steps because older gen Americans didn't want their kids to learn something they didn't like and didn't understand.
white moth
we’ve been teaching metric for a long time now
Anyone who pays attention in school learns both, and only remembers metric.
Everyone else remembers neither
young vault
A long time ago, American schools, for about a month or so only taught metric.
Except for some red states.
white moth
That would be very impractical
You should definitely learn the units that are posted all over the roads, maps, history books, thermometers, rulers. Even if they aren’t used in academia or actual professions much anymore
young vault
Adeon, this was before the US imperial system existed. Each state and city had almost it's entirely own set of measurements.
And most roads and stuff were supposed to be replaced with metric
white moth
Probably we should move this to a diff channel
young vault
Move to #general-media ?
Hm, wait, that has slowchat... #vrchat-general-1 ? Doesn't really fit the topic though 🤔
That also has slowchat, that's... interesting.
 lapis cliff
I need help,
so after manually merging the armatures of the jacket and body bone by bone (auto-armature merge on cats scuffed it for some reason), for some reason despite the weight painting looking fine (I checked and it isn't weight painted to anything unnecassary like the legs or anything) it still acts strangely when posing the spine, chest or even hips. Despite having fitted the jacket to the character properly, when posing it moves at a different rate than the body like shown in the picture and I'm stumped on what the problem could be
 fossil sparrow
Best would be to repaint the weights from beginning. Its hard to say whats the problem when we cannot check the file ourselves.
devout scroll
Weights are stored in vertex groups
If the vertex groups on the jacket and on the body don't share the same names, they won't be combined
And if the vertex groups don't share names with bones, they won't work either
If that's all in order check that the jacket has an armature modifier with the armature your avatar uses as it's target
 glad spire
I think I need a little help over here, it's with the UV mapping...
That's it when it's normal
and that's when I use the smart UV project... the textures go wrong
devout scroll
Uvs tell the mesh where to take texture information from
Obviously if you change the uvs it samples from different parts of the textures and doesn't look the same anymore
glad spire
Well...What should I do😅
devout scroll
Better question is what are you trying to do
devout scroll
Create a second UV
And bake to that
But I wouldn't use smart uv project because it will put lines in bad places
Like look at how it's splitting stuff poorly https://puu.sh/GOJPi/47a733e0f7.png

You should place seams manually and unwrap yourself

Add seams like this
You'll put seams on either side in the middle of the sweater up until the sleeves, which you'll put all the way around the arm where it starts
then on each side of the neck collar thing
they should all connect
Also, your arms aren't gonna work right since they're just cylinders, you need to add some loop cuts so it can bend properly
Just add some loop cuts with ctrl+R like this https://puu.sh/GOJSe/7ef84ddaeb.png
 glad spire
I'm sorry that I don't know much about it, and thanks for helping me
I can make another texture but I don't know how to separate them><
For the seams I'll add them but I don't know too what to do next
and for some reasons I can't add loop in the sleeves, it appears strange for me (like I can't select the sleeves)
devout scroll
You just select edges and right click, mark seam
Then after you're done instead of doing smart uv project you do just unwrap
if the seams are fine it will all separate into pieces separated by your seams and look right (with no weird stretching or pieces sticking out)
if you can't select stuff try unhiding everything in edit mode with alt+h
it's a blender bug causing stuff to be unselectable
make sure you're unwrapping into a different uv map tho
Create a new one here https://puu.sh/GOJZ5/dbd45cebd6.png

So we don't break the old one just yet
devout scroll
Yeah, might need a few more
Can you deselect everything so I can see the seams better
glad spire
Please wait I will just fix them
devout scroll
You just need them to connect so they can split the mesh into pieces on the texture
 glad spire
The sleeves are joined but not connected
devout scroll
you still need to put a seam down the middle of the sleeve
that'll split it into a flat plane
glad spire
working on it
devout scroll
it's just important to understand what seams do
then it becomes easier to figure out where to put them
your aim is to flatten the mesh onto a texture without it overlapping or stretching too much
so you cut it into different pieces and it unfolds
devout scroll
yeah
mm, not too bad but needs a few changes
seams should go all the way around generally

Get rid of these and add one around the collar https://puu.sh/GOKm6/47d3932b50.png
 glad spire
that'll split it into a flat plane
@devout scroll Sorry but could you please explain this more><
Because the sleeves are not connected with the body, the seams can't be connected too
with the sleeves I mean
devout scroll
That doesn't matter, where something isn't connected basically acts the same as a seam
seams split on the texture but here it's already split if it's not connected so that's fine
glad spire
Some of the textures have the same background, maybe if I seam the limit of the background it will appear better?
glad spire
Yes, Image tex + uv map for ea mat
devout scroll
If you change to the old uv map it will look fine
Then you'll bake to a texture that uses the new uv map and as a result the new layout
young vault
Did you remove the other UVMap and renamed the new UVMap? Or did you do texture bake from object to object?
young vault
...yes, but, did you remove the old one? No? Unity by default uses the first UVMap, which should be named UVMap
Or well, most shaders.
It's not really unity itself, just, shaders.
young vault
But, is the new one, the one you baked the texture to the only uvmap and is named UVMap exactly?
glad spire
It's named UVMap.001
But don't I have to fix how it looks first before checking the other info?
young vault
If it looks fine in blender while viewing the UVMap with the right texture. Then the last step is to remove the original UVMap and rename it to then have it show properly in unity
glad spire
The problem is that it still doesn't looks fine ><
young vault
Then revise the UVs
Find where they're looking weird, move them around, maybe a smaller margin.
glad spire
young vault
Maybe try emit baking rather than diffuse baking
glad spire
It supposed to look like this
young vault
Swap the material on the mesh to use emission and emit bake. It's faster and has the same color accuracy (or even better) as it's unshadowed. Diffuse baking doesn't do pure unaltered baking.
young vault
Another good question is. Do you have any overlapping UVs that look the same but has different colors on the same uvcoordinate?
glad spire
Different materials but the same background
young vault
That doesn't answer the question I asked in the least.
young vault
and you're positive you swapped and looked at the baked texture?
glad spire
Yes
 tame sinew
Could I request someone to make a low poly helmet for me? I tried to use blender for it, but I can’t figure it out...
deep dirge
Vrctraders possibly
Or figure it out yourself
Because lowpoly helmet sounds incredibly easy
tame sinew
Regularly, yes
Unfortunately my avatar has a cylinder in the back of her head so she needs two circles to be cut on the sides so they can be seen
deep dirge
knife tool
or model around it
I use knife tool because I dont care about terrible topology
white moth
Are the topology tool and knife tool different?
deep dirge
Just as it should
 south willow
...
deep dirge
not like its being deformed
white moth
I swear I missed the “rules of topology” class that everyone else seems to know.
Good topology, bad topology, where is it being learned?
deep dirge
Isnt the only rule to not use ngons
white moth
I wouldn’t know.
 still wadi
get into weight painting you will understand why
white moth
I do weight paint. I just rarely make my own models
deep dirge
I do quads for everything that needs it lol
white moth
I feel like everyone else has this class on topology theory that I missed
still wadi
no you're just acting smug
deep dirge
If im just making a hat, I wont care about the topology
white moth
I know blender as a tool and how everything works. But not good model practices
How am I acting smug?
I’m wondering where to learn this stuff
 thin bison
Triangles can be really messy in areas that deform, and you should generally not have more than 5 edges meeting at a pole
deep dirge
They dont deform
white moth
@still wadi
deep dirge
noooooooo how could I use tris and quads like that noooo
spiral sigil
eww
deep dirge
ewu whats this?
thin bison
The main idea around topology is keeping a consistency in the size of the faces and limiting the number of poles to areas where they won't cause trouble. And also to create a good flow
spiral sigil
i had a picture on how to reduce the numbers of faces
let me see if i can find that picture
here, just a small example
white moth
I thought T-intersection of edges were bad? Since the quads will make collapsed tris
5 to 3 also has 5 edges around pole?
Just asking maybe I’m misunderstanding it
spiral sigil
if you look at most head topologies, you will see a lot of them
usually around the same place
like around edge of mouth/botom of cheeks
around the nose
around the eyes
another one, you can see that the poles are roughly around the same areas
thin bison
You can't get away from using poles, the important part is where you put them and that they're limited to 5 or 3 edges
 proper shuttle
heya so how do I stitch these together well
like they have different vertex counts so is there a way of making this easier for myself
because I've been trying all day and I cant get it to not go weird
white moth
You’ll need to bridge them with some going 2 to 1
Or just copy the ones from the face and make the eyelashes from those so the count is correct (that’s what I’d do)
proper shuttle
thats a good plan tbh I'll do the second one, much less of me going insane trying to stitch these haha
spiral sigil

 spiral sigil
🤢
south willow

 molten scroll
does anyone happen to know why this maybe be happening when i export my model?
devout scroll
try exporting through cats
molten scroll
i didnt even know that was possible, thanks, ill try it
 fringe rock
Yes convert to tris since unity will do it anyway but might slide some in the wrong direction.
 coarse kestrel
the successor to the lexichi v4
(can't show the head because apparently it'll cause discords anti nsfw thing to delete it)
obsidian nova
Too thick for discord 😔💙
@molten scroll Your bones or weight painting layers are being assigned to the wrong places; make sure that your bones follow the right hierarchy & that the names of your weight painting layers match the names of your bones.
@coarse kestrel Yo, is this a public or private model? Would love to buy this as a base once it’s available.
coarse kestrel
it's gonna be paid on my patreon for the $10 tier along with a bunch of my other models. gonna be releasing the beta for it once I've done some textures and some shape keys. you can find my patreon just by googling my name. @obsidian nova
spiral sigil
@deep dirge um, but you do know why quads are what you want right?
deep dirge
no
spiral sigil
I can't tell if you're being sarcastic
deep dirge
I dont understand why I have to use quads for everything
spiral sigil
You cannot subdivide tris
spiral sigil
Maybe not this second... but
deep dirge
I dont subdivide ever
spiral sigil
Industry professionals have "best practices" for a reason
Have you done any UV painting yet?
spiral sigil
May I see?
atomic hamlet
You do know you don't HAVE to follow the "best practices" 100% of the time.
Some people prefer to work with tris.
quaint jasper
It's just all tris in the end 
obsidian nova
Looks wayyyy nicer than the hellscape I’m working with. Can’t figure out how to fix it without downgrading the image quality either.
Problem for another day.
median pike
@spiral sigil yes animating and movie assets use quads because of subdivisions. Theres plenty of workflows and techniques that involve tris and even ngons when it comes to game assets
spiral sigil
ngons in professional assets? for real?
median pike
Yeah. They dont matter on flat surfaces they will just get converted to tris
spiral sigil
I mean, I suppose. I wouldn't call hiding a bunch of tris from an ngon using a flat surface as "plenty of workflows and techniques" though
median pike
Its commonly used
Maybe I didnt word myself right. Point still stands. Tris and ngons are okay
devout scroll
ngons also don't really matter on meshes that don't deform
so static things
but they're harder to work with because can't loop cut through them and so on
 random parcel
Looking for a 3d modeler who is good at modeling faces from scratch! pls dm me ❤️
 wintry coral
i have a problem with my smoke sim in blender it is creating smoke only like every fifth frame pls help me
deep dirge
@random parcel check VRC Traders, server link at top of #community-servers-old
wild tendon
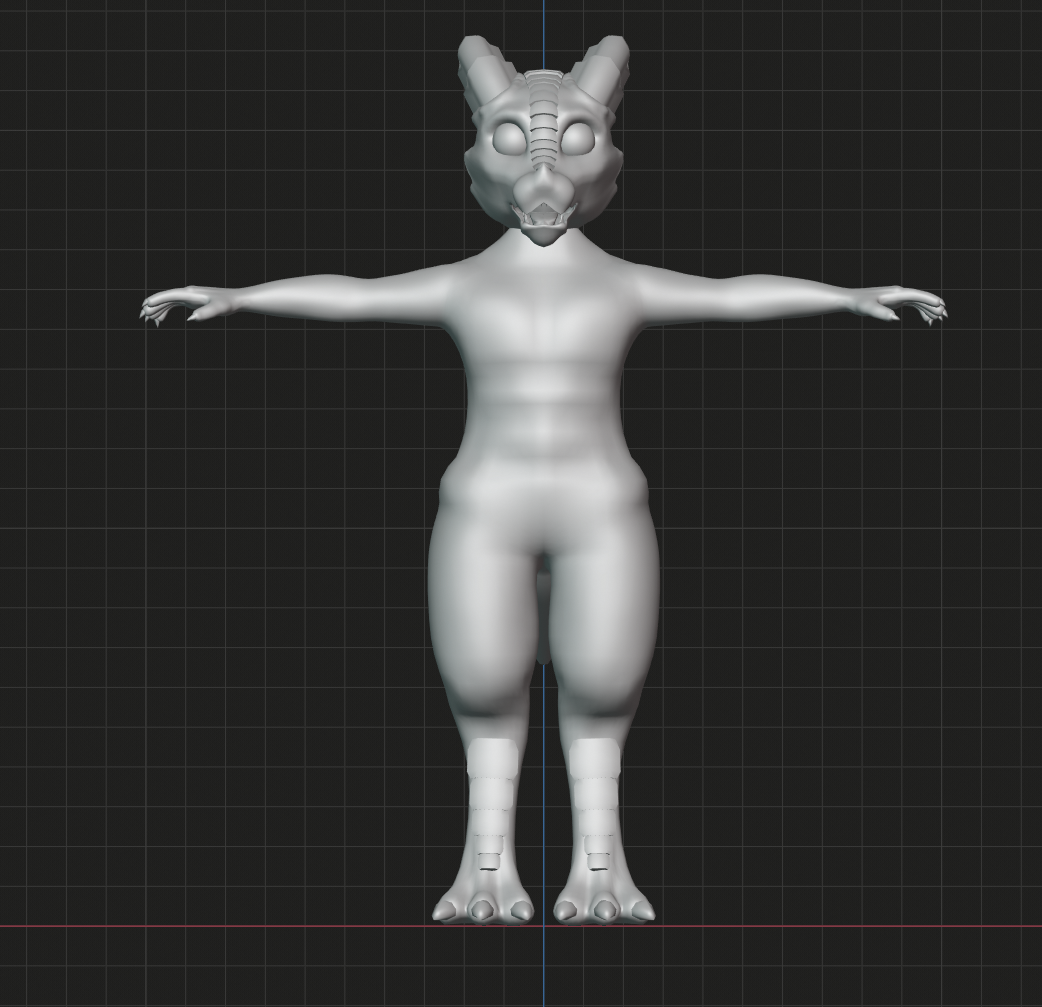
Making a kobold base, does anyone have any ideas on how to improve it?
https://i.imgur.com/CyAbEY1.png
Are the proportions good? https://i.imgur.com/stiSiGu.png
 coarse kestrel
@wild tendon you clearly want to bring in correct anatomy but I don't think you've enough practice look up a book called "anatomy for sculpters" I think you're on the right track just very unrefined.
hands and feet fit a kobold but the proportions are just not there. good rule for arm length is the middle of your wrist when brought down to your sides will be level with the bottom of your crotch and the distance from your finger tip to your foot is about the same length as your arm.
The head needs a lot of work. the horns look great but the whole snout and eyes just don't look right. perhaps too much distance veritcally, the snout being very weirdly shaped. it feels like you took reference from dnd referneces from like 1995. I'd say go for more recent references for kobold heads. more dragon like.
also from the front image it is FAR too bottom heavy. even out the mass between the waist and arms
make the neck thinner and refine the shoulders
A poses are better for shoulder geometry, T poses work but blow hot ass
wild tendon
Thank you, that's some good feedback
coarse kestrel
here's an example of what I've done for an idea of whatI'd consider good proportions for a smaller character
coarse kestrel
it's about on par with the lexichi v4 which is around 24k tris
I wouldn't worry about tri count though
regardless good luck with your kobold
wild tendon
Still impressive
and thanks!
Is this slightly better? https://i.imgur.com/Otpqj1S.png
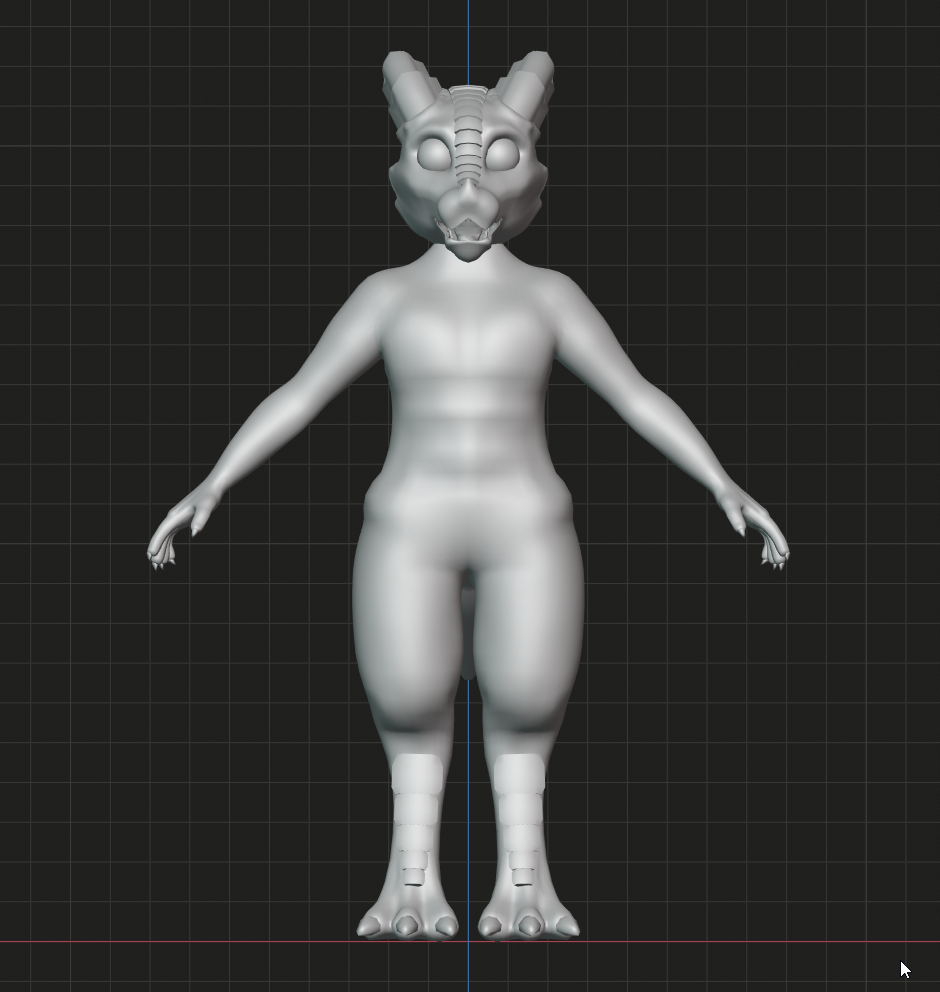
shoulder/arm wise?
coarse kestrel
yup looking a lot better
coarse kestrel
everyone does em different checking sketchfab and seeing how others do it would be a good place to start
 uneven sinew
deep dirge
uneven sinew
deep dirge
what does this have to do with this channel
 mystic tangle
I hope this is the right place to ask this; Does anyone know of any good (or at least decent) MOBILE modelling applications? Particularly for iOS. I’m terrible with doing artistic stuff on computers-
deep dirge
As if those exist
 sharp galleon
XD
deep dirge
and if they actually do, youd get nowhere lol
mystic tangle
oh well
sharp galleon
the first part maybe but defiantly not for ios
devout scroll
Yeah, very unlikely to get anything done on ios
mystic tangle
Time to go mess around with my computer until my 2 brain cells figure out Blender
winter plinth
good luck
devout scroll
Watch some tutorials, there are loads
And keep in mind that it's not a short process
deep dirge
make sure to use as many tris as possible, always smart uv unwrap with an angle limit of 0, always render with cpu, subdivide at least 5 times, and use automatic weights.
devout scroll
now that's just unnecessary
deep dirge
Thats how professionals work!
devout scroll
I mean your jab at them
devout scroll
smh toxic 3d modelling community 😔
deep dirge
Because cpu stands for cool processing unit, and gpu means garbage processing unit, therefore cpu is faster
wintry coral
my gpu is faster than my cpu
wintry coral
Can i get help?
deep dirge
with?
wintry coral
my smoke sim
deep dirge
I cant help, someone else do it plz
 proper wyvern
Not sure what I messed up here but out of nowhere Blender wanted to dye the arms blue and when I try to add or remove something it just removes everything. 👍 I swear ive done better things than this. X3
So I ended up starting again with everything and it works normally for like 5 seconds and then it flips everything that ive learnt so far completely upside down by making + (that used to remove stuff) and - (that used to add stuff) into both removing everything and making the material either bend left or right while removing it. 🙃
Its doing it again! What have I done to deserve this curse?! DX
What the flip is going on?! Now the skull is starting to look like shredded cheese over here!
devout scroll
smooth until it looks fine or remesh it
proper wyvern
Ive been smoothing it but its not helping. I mean sure it took away the shredded cheese BUT its not fixing the issue of this skull not wanting to grow into an adult skull from this tiny little blehh that it currently is XD
How to remesh?
What is remeshing?
devout scroll
there's a button top right that will remesh based on your selected resolution
that you can change with the slider in the remesh menu or with shift+R
proper wyvern
Thats taking everything away aswell XD
devout scroll
it... remeshes your mesh, which often gets rid of issues
proper wyvern
The skull is just vanishing one small step at a time infront of me
Why does fixing mean taking everything ive done so far away? Now im able to add stuff but its all shredded cheese. FOR FLIPS SAKE! 🤣
What if I add stuff here? Would that fix the problem?
That did not fix the problem but only made the skull go inwards from the backside... Then when I pressed ctrl z it all turned green. I have never in my life had these issues before!
devout scroll
those are face sets
essentially let you group parts of your sculpt
look at a up to date tutorial on sculpting and it should all make sense
proper wyvern
Alright. Thanks!
spiral sigil
For a gradient-complex texture like this, what would be the best way to have the emission intensity scale accordingly?
As in dimmer around the edges and then growing stronger towards the middle
Would something like this work?
Think I need to turn up the contrast/make the white stronger but not sure how in GIMP.
spiral sigil
How does this look?
quaint jasper
nice
spiral sigil
Yay!
Got another part I'd like some feedback on, the mouth and tongue.
Is it strange for those to glow? Definitely but I think it's a neat feature.
Normal texture
Attempt 1 at emission.
Their blood is bioluminescent so the idea is that the tongue would glow brighter due to having more in it while the lining is darker.
quaint jasper
Sure, it's grey scale
But you only want the part to glow to be within that grey scale, anything else should be completely black
spiral sigil
Hrm, okay. Does help with optimization some.
spiral sigil
Using a placeholder horn model but which style looks better to ya'll: dark (sharp curve) or light (gradual curve)?
 compact mulch
Tyty
 upper hamlet
Do you know of any tools I could use to make modeling a building easier than bodging it together with probuilder?
winter plinth
id say use maya or use a software that isnt vertex based
creating buildings is easier without vertex
upper hamlet
Ok, will I get my head round it in a day?
winter plinth
i mean, imo. using a software that acc follows the definitions of extrusions and constraints is probably like an hour or so and youll be good to go
but there are also plugins for blender that allows real extrusions and 2d extensions, but icr what its called for the newer blenders
upper hamlet
I've not used blender in a couple of years, it is any easier now?
winter plinth
bro, im still using 2.4-2.5, idrk lol
i heard 2.8 is the best its ever been, but ithink it still uses its vertex system since that is what blender is know for
quaint jasper
2.83
upper hamlet
Well I just wanna be able to measure out a building and make the right sized walls and doors, not very complex shapes but not quite as simple as lego blocks
winter plinth
yea id suggest maya or inventor if you can get your hands on those software
especially inventor, its like 100% just numbers
 spare vector
I assume this is the right place for my issue but I'm not sure. When I make visemes in blender for an avatar using cats blender and then put it into unity, the mouth becomes slightly broken when making any kind of face. Like smiling for example, the middle of the mouth will be weirdly flat with the edges tilted up. Please help ;-;
south willow
proper wyvern
That did not fix the problem but only made the skull go inwards from the backsid...
You should retop the skull
fringe rock
@compact mulch you need more space between he piece. Or you will see line appear when you are at distance of the model.
spiral sigil
Started this at 4pm. I'm excited for that Twewy website page and had to model something.
proper wyvern
south willow
You should retop the skull
I was able to fix the problem but thank you anyway you great Lord Harambe. 🙌
 wet mirage
who have rabbid model from big all's coridors
proper wyvern
Need a small confirmation here... So am I or am I not supposed to make the entire body from one mesh or multiple ones that I then join together? :/
devout scroll
when sculpting it doesn't matter, one piece is fine
proper wyvern
Phew 😅
devout scroll
But you'll have to retopologize it later into different pieces that you'll probably later connect
proper wyvern
ah.... Im NOT looking forward to that.
Another question
How do I make the armature and body parented? Its not doing it the way it does it with assets. Do I need to manually weightpaint everything to make the body follow its skeleton?
devout scroll
yes
proper wyvern
OOF
devout scroll
but people generally do automatic weights then fix them up
proper wyvern
Ah well that might make it easier. Im pretty sure ill be crying about that later. 😅
spiral sigil
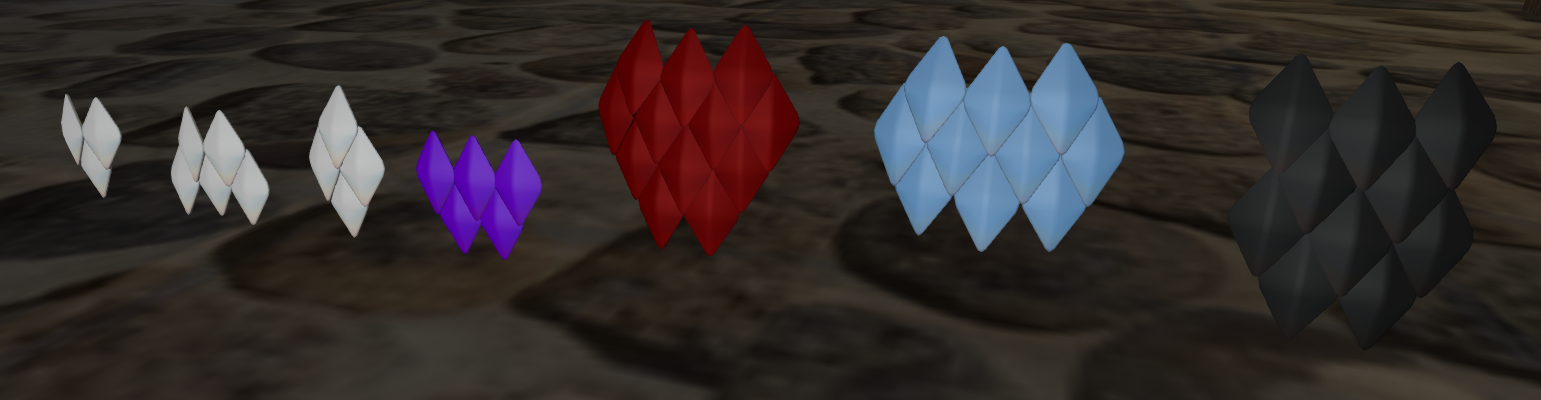
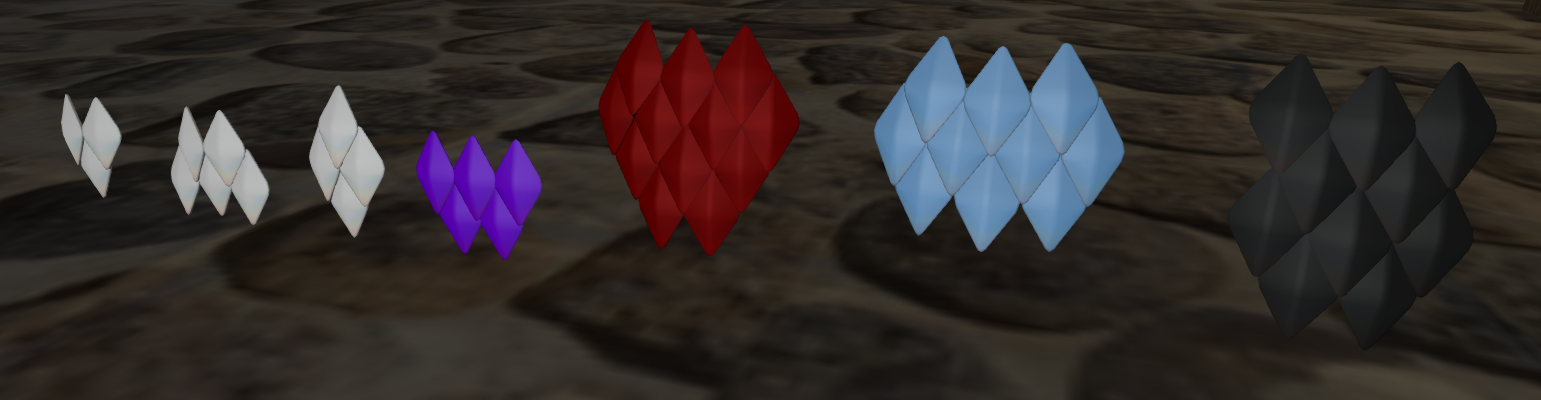
I made some dragon scales and horns for my character.
 deep dirge
epic
 ashen forge
Looks very cute!
 frosty plinth
ty
trying to make it match the theme for vrc+
ill add portals to common worlds and such
 faint heron
Just curious before I start trying do you think it would be possible to make a full body avatar like this?
deep dirge
Doesnt look like it would work well even without fullbody
obsidian nova
Anything is possible.
frosty plinth
spiral sigil
Looks good
ashen forge
Done :D
 zenith fable
 raw pecan
Working on modeling the venue chain reaction. https://cdn.discordapp.com/attachments/759247762385666088/779942094017789952/unknown.png
 wild tendon
How do the proportions of my new WIP kobold base look? Is there ways to improve it further? https://i.imgur.com/pUd8GQF.png
spiral sigil
how do i fix this, its like attacked to the ground the mesh is
devout scroll
those vertices are not weighted to anything
go into pose mode and select the bone of the right foot
then shift select the mesh and go into weight paint mode
brush over the stuff that's sticking out
proper wyvern
Not sure if im doing this right... 😅 Does it even look like hair?
proper wyvern
Did I do a good job? 😅 I mean this is the very first time ive done hair and im so confused if I even did it the right way or if I now screwed something up.
I mean this mode here turned see through so im not sure if I did something wrong with that....
And lets not even talk about this sculpting mode mess 😫
devout scroll
i thought those were some kind of wings
look into modelling hair with curves, it's easier

A tutorial on how to make hair in Blender 2.8 with curves, a method that is very simple and effective that I have been using for my character sculpts.
▼ Sculpting Uraraka Ochako:
Re-Sculpting My Old Art | Uraraka Ochako in 3D [My Hero Academia] | Can You Improve In Only 1 Year?!: https://www.youtube.com/watch?v=iYNdfef1Uog
▼ My Gumroad Store (...
 thorny sage
proper wyvern
devout scroll
i thought those were some kind of wings
thorny sage
proper wyvern
devout scroll
i thought those were some kind of wings
LOL youre not the first person to say that XD
Thanks for the video btw :3 Pumkin over here being very helpful ^_^
devout scroll
👍
in blender 2.9 i think you don't even need a second curve
you can do the shape in the menu using a custom profile, but following the tutorial should be easier
proper wyvern
devout scroll
you can do the shape in the menu using a custom profile, but following the tutor...
The tutorial makes it all seem so flippin easy. 😌💖
 stuck wadi
Does vrchat support using dds files out of curiosity?
I've always used PNG but the native files are dds, and I'm trying to skip a few steps.
spiral sigil
 deep dirge
nice
obsidian nova
Gravity sketch or blender?
 wraith shore
Quick question for anybody looking: What is the approximate "size" of 1 unit in VRChat? Meters or feet? Or is it completely arbitrary?
I usually model with the assumption that 1 unit = 1 meter, but, each program simulates things differently
deep dirge
1 cube in unity is 1 meter
south willow
@obsidian nova blender
obsidian nova
@spiral sigil It’s the little details in assets like these that make a world believe able. Great job man.
white moth
1 blender unit sometimes comes into unity as 100 meters though
If so you can change import scale to 0.01
devout scroll
that happens if you export with default settings
default blender units is meters as well I'm pretty sure, you just have to export with units at to fbx all in the export dialog
spiral sigil
Can anyone create a Rigged Cape?
proper wyvern
@devout scroll I have to tell you how much I flippin appreciate/love it that youre so helpful to everyone with their avatar problems. 😌💖 It truly puts a smile on my face that you see the extra effort and show some kindness to literal strangers online. If Ruu is reading this then I appreciate you too man but you already know that without me even needing to tell you. 😂💖
devout scroll
proper wyvern
<@153828849497407489> I have to tell you how much I flippin appreciate/love it t...
Thanks! 
warped merlin
catch ya! *headpats Pumkin*
devout scroll
warped merlin
I want to thank you on behalf of the Russian community and on my own behalf: your advice and programs saved a lot of nerves and time for me and our creators
so yea, thanks again :в *headpats*
devout scroll
💙
proper wyvern
warped merlin
I want to thank you on behalf of the Russian community and on my own behalf: you...
THIS... This is the type of wholesomeness we need in this community. 😌💖
 covert jetty
devout scroll
💙
covert jetty
devout scroll
💙
wait... you're Pumkin who made Pumkins avatar tools?
 runic nymph
he is
covert jetty
hui... well, thank you for that awesome tool, it probably saved me dozens of hours... and thanks for fixing the bugs I reported ;)
proper wyvern
runic nymph
pumkin is gay
Erm....? 😅 I wasnt trying to flirt or anything...
This turned a bit awkward now but I did have a question which is why I checked this chat here... I just got my main laptop back from repairs so can I just export my sculpt from my old laptop to this one as an fbx without it breaking or something? 😅
Or do I need to use some other way of doing it?
proper wyvern
Ah well its fine. <:P
runic nymph
and wdym export from laptop to laptop? you mean just trasnferring files? that shouldnt cause any issues, apart from your texture paths being different in your projects
proper wyvern
Its just a sculpt for now so I guess that means its going to be 100% fine. Thanks! ❤️
runic nymph
you should just trasnfer the project file itself, as .blend or whatever other program you use
dont need to export as fbx
proper wyvern
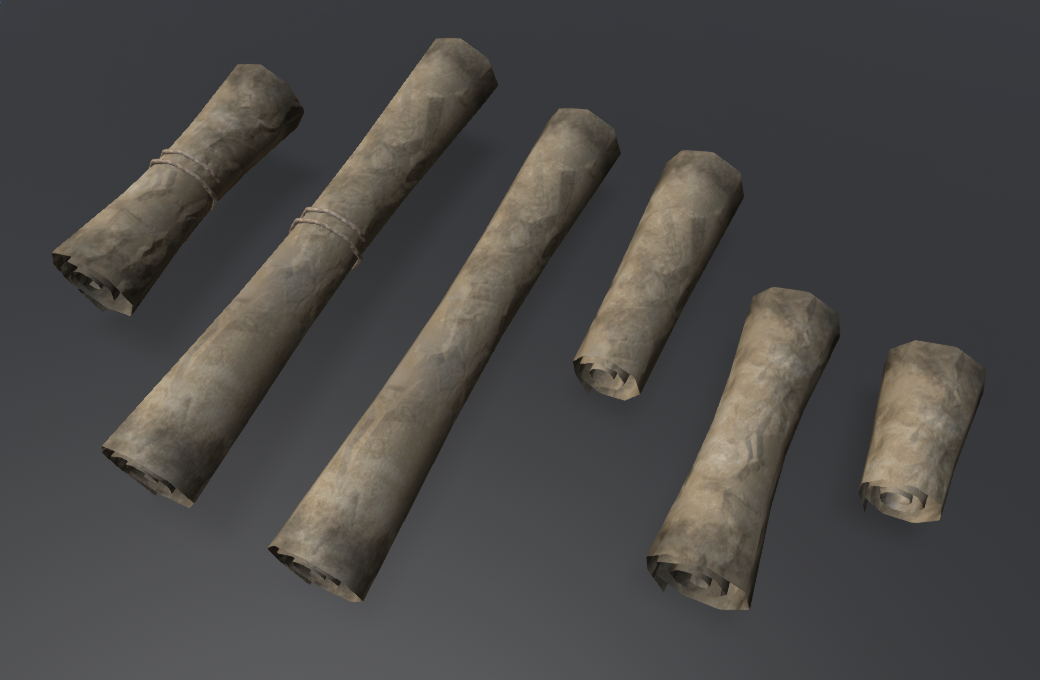
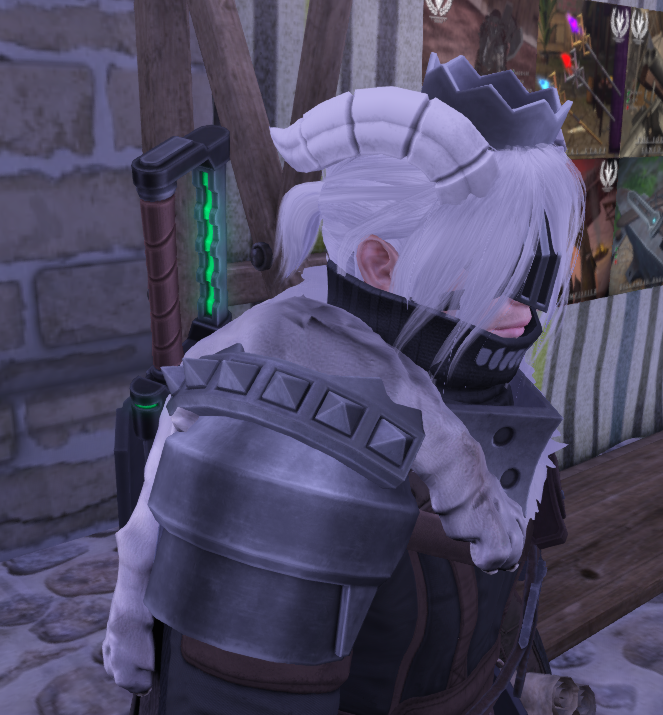
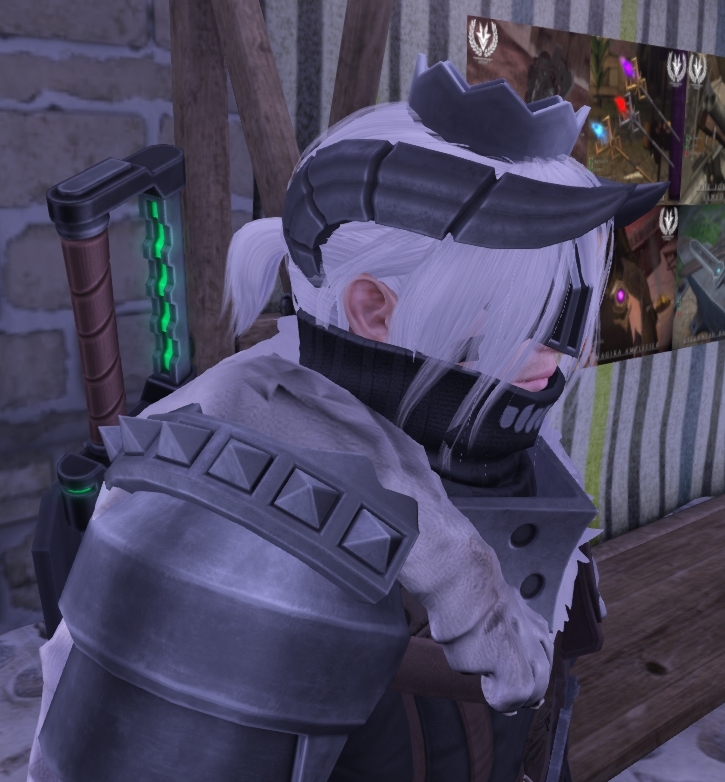
Well I dont know how that works... I had to export into fbx, then move it to google drive (too powerful for discord apparently) and then move it here but now its here and im visibly upset at how horrible it looks like compared to my previous unfinished sculpt... 😦 This is the current one:
This is the previous one that I just found from my main laptop that I had totally forgotten:
Im going to do the thing that Pum gave me a tutorial on with the hair. I spent so much time on that hair only for it to turn HORRIBLE.






 runic nymph
gud luck
proper wyvern
Im actually doing it!!! 🤩 I learnt how to add color too thanks to that video ^_^
proper wyvern
Mmmmhmmmm ^_^
tame sinew
Could I request someone to make a rather simple 3D model for me? I don’t know how to make models in blender...
runic nymph
there are multiple sources for commissions
vrctraders in #community-servers-old is one
or the ask site, which you can find in the pinned messages here
 sleek pawn
yo got a question for anyone who might know whats going on here, so im weight painting a set of wings and the left wing I weight painted and is working correctly (2 bones one from the back to the first pivot point and then a larger one for the rest of the wing) but when trying to weight paint the right wing the second larger bone does not move the texture at all when I try to rotate it to see if i weight painted everything correctly, tried it multiple times remaking the bones and got the same result
sorry for the long post
spiral sigil
 storm wren
dunno if this is the place to ask but i was modeling a building in blender with the interior but it ended up just going in with leaving the interior walls see through and i need help fixing that
runic nymph
use a double sided shader in unity
spiral sigil
storm wren
didnt work @runic nymph
 thorn lantern
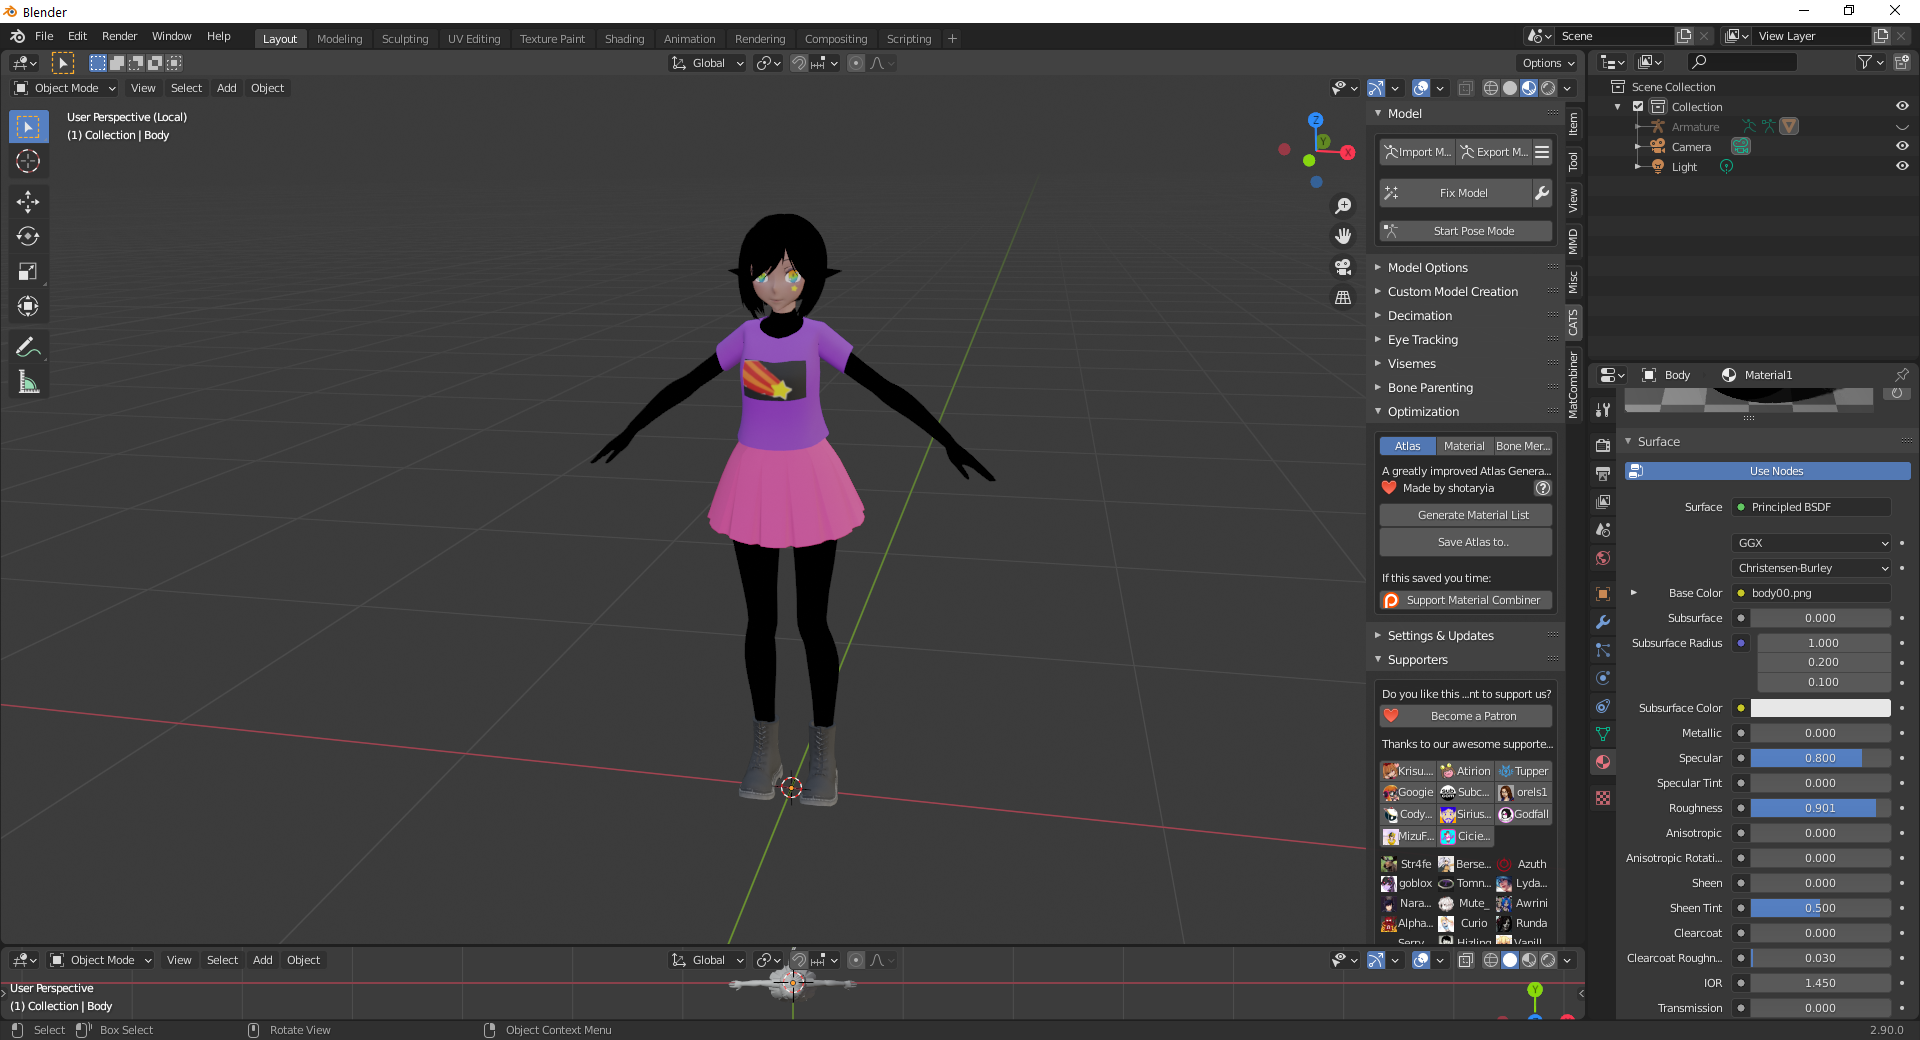
Hiya! I'm working on getting my model to work on the quest so I'm trying to minimize the materials. I have imported my model to blender but half the materials are black, how do I fix this?
 quaint jasper
@thorn lantern How materials do you have
thorn lantern
How many? 14
quaint jasper
Yeah that's a but overkill for quest
You should use 2.83, cats doesn't support 2.9 fully yet
And then use the material combiner
thorn lantern
Yes I know, but the materials in black aren't supposed to be black
ashen forge
Did a full texture revamp on one of my older models. (Left is old, right is new)
ashen forge
Also that sweet sweet atlasing  💕
💕
devout scroll
I dunno how I'm supposed to recommend the material combiner to people if it makes materials blurry
But it seems to be the case every time I try to use it
quaint jasper

runic nymph
manual atlas™️
 hardy lake
not sure if this is the right channel to ask, but can Unity render images (like Blender can render camera view into an image file) or is taking screenshots of the viewport my only option?
my goal is to have an image that will represent the way my avatar will look in game. taking photos in game doesnt work cause for some reason the vrc camera warps my avatar in a kinda fish-eye way, distorting the proportions
runic nymph
when you upload it makes an image of the scene for you with the vrc cam ?
hardy lake
well yeah
devout scroll
that's what i do but most people will just keep their 40 materials
hardy lake
im not sure where those images are located
devout scroll
you can get a script that takes a highres screenshot
hardy lake
@devout scroll can you point me in the direction of where i could find that script?
runic nymph
if you want an image to be a thumbnail of your avatar, why would you need to dl it, i must be missing something here
hardy lake
i dont need it as a thumbnail
runic nymph
🤔
thought thats what you meant when you said "an image that will represent the way my avatar will look in game"
devout scroll
i can't find the one I've used online
hardy lake
yeah but i dont need it on a thumbnail, i need it as a high res image file xD i think i found the script, need to test it out