#3d-modeling
1 messages · Page 93 of 1
 twin flare
 tulip condor
right now i trying to get used to new blender version
but i run into some problem manipulating with the object
which cursor (gizmo) and edge command not working as expected
here you will see compression between 2 blender which 1st (old blender) have what i want
but newer doesn't sims to accommodate my needs
so did i make something wrong
or what else shod i do so it will be how i want?
any help please
 median pike
change this to global
tulip condor
oh yeah i found it
but why gizmo is not on edge place
how to make it to be as in old blender ?
tulip condor
damm 😒
median pike
did you import anything from 2.7? Like settings or anything?
tulip condor
nope
i poke with new blender settings before
but i forgot what i done
median pike
do you have the same issue when you create a new cube?
Shift+A
I mean, you have a bunch of weird buttons and markers everywhere, god knows what you have installed or altered
by default it works just like blander 2.7
so its something you have done
you can reset it to default settings and see if that changes anything
tulip condor
oof why is not auto aligned like in old one
anyway i succeed in creating an object SHIFT+A
tulip condor
 near dust
Any tips on making this look less bad?
tulip condor
@median pike
i guess i need to find out by myself
but not today
i will now try to have some good time with my friends
maybe tomorrow
but thanks for trying to help me
 solar fossil
thats one weird blender
why does it apply position when you release the cursor?
it might be a plugin you have installed, i see you have some stuff enabled
solar fossil
why doe
median pike
no idea
I told him that most of what those plugins do can be done in blender by default
solar fossil
huh, wonder why they even exist than
dont think they are very old plugins he installed on a new version of blender since they usually break between major updates 🤔
median pike
they are probably addons like CATS. They do exactly what blender already does but they just add a button for it for people that dont know where the features are located
 frank geyser
Anyone have any tips for modeling mouths?
Ideally i want it to be able to open and close without the interior being see-through
 lucid orbit
question for all of you 3d modelers: how did you learn 3d modeling?
 radiant moon
I started with the sacred Blender Donut tutorial and branched off from there
 orchid glacier
I changed my pose pos to rest pos on my armature, but only the bones go to the new positon and not the mesh. anyone kno why?
 woven trail
 tight quartz
Anyone know how to make so it splits up automatically in Blender while importing it as a Reference/Background?
median pike
splits up?
 ashen stag
You can manually move the image so that the correct pose is at the middle
 devout scroll
Or use the import images as planes default addon then add loop cuts in between them all
then separate
near dust
How do people do teeth for VR chat? I want to save poly count and just do a curved image for teeth but idk how to make it look good.
solar fossil
@near dust like this
near dust
sorry I asked
solar fossil
im just doing my best im sorry 😔
solar fossil
ok if you want "normal" "human" teeth than you can just go with a long white strip
no real texture on them aside from some very unnoticeable redness at the intersection with the mouth
 quaint jasper
I've made cylinders of different amount of edges and the extruded/merged vertices/decimated
 stable barn
wow
solar fossil
ok, you and your fancy teeth
quaint jasper
it's only fancy if you don't see the topology
 vivid crater
No vore
 solar axle
vOwOre
 deep dirge
Stop
solar fossil

 spiral sigil

 mild nimbus
@near dust It looks fine to me overall perhaps the eyes are to far apart and the iris is to far up on the upper lid. I also realized your little goatee is slanted and not symmetrical. The side of the model looks amazing the front overall is okay once a shader is applied to it
Anime models never look the best in basic shading
and needs to be flat shaded or cel shaded
Continue to texture the face for flat shading and see how it looks
if it still does not look as you intend it to be continue to do adjustment tweaks of the face via proportional editing
you will be suprised the most simple and slightest change that can fully change how the character looks
especially with eyebrows
eyebrows determine alot of the characters personality
just slightly changing it will make the character look like a different person.
You also did not add color to the eyes so he looks dull and souless inside
try adding some color to the pupil and iris
then you will really start to see how the character is forming
flat color eyes will never help you get a good idea of the character untill you add detail into them which gives it more life
tulip condor
@median pike
today i finally figured out how to resolve gizmo problem in blender 2.80
and here it how:
spiral sigil
tengo una pregunta yo hablo español y puedo compartir mis diseños 3d por aqui o no?
o uso el canal spanish?
 magic wadi
i wish someone made an avatar of this little guy.
tulip condor
@median pike
when i was testing new blender version
i was clicking on every option,tabs etc etc to see what's what
but i forgot to turn off some functions that i previously enabled
so that's why i didn't know what i did that gizmo selection act's weird
but now all goes fine...for now
median pike
I suggest you reser to default config than
You might have messed other things up in the process
tulip condor
@median pike
probably...
i reset my config to default
from now on...i will be more careful in the future
thanks ✌️😉
tight quartz
Or use the import images as planes default addon then add loop cuts in between them all
@devout scroll
How do I do that? 🤔
devout scroll
 rigid anvil
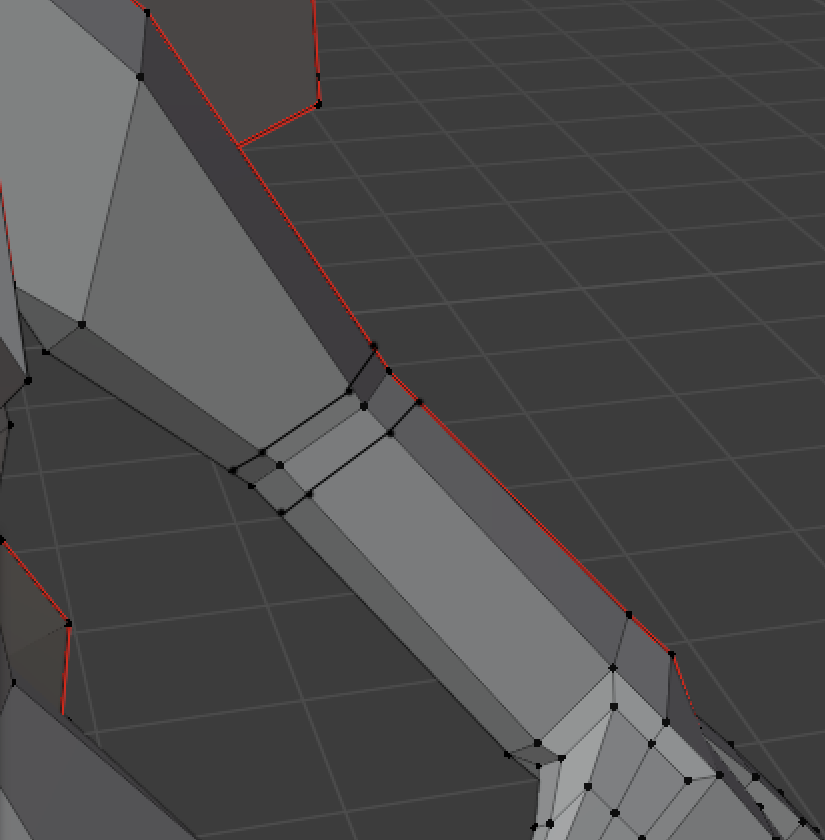
So is there a way to make a seam on a separated part on the body, not so crazy different from the body?
Example https://i.imgur.com/Va7OXFU.png
 quaint jasper
in 2.9 i think so
rigid anvil
oh o.o
is it finally time to jump to from 2.83 to 2.9 
hmmm still does it in 2.9 @quaint jasper
i seperate by selection and poof looks fucked
:/
quaint jasper
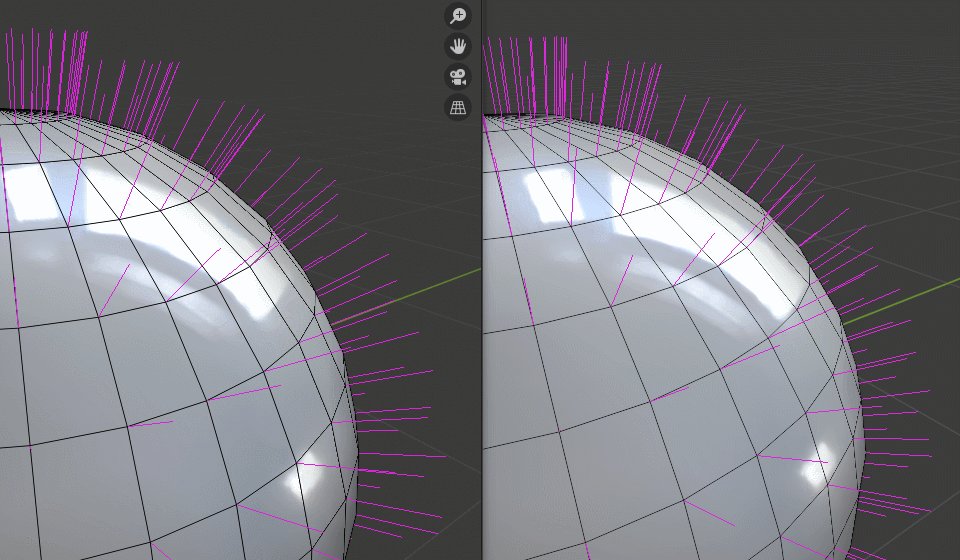

Say what you will about the upcoming #blender 2.9 update. This right here though? This is the real game changer. https://t.co/EcbomFpwDe
Likes
104
 Twitter
That's literally a new thing, so i don't know how you're managing it
 quaint bronze
@rigid anvil If you have or make edges in the area that you want the seam you can mark them sharp and get that result.
rigid anvil
@quaint jasper
Sorry for the late respond i had to take care of some real life stuff, cat passed away
 viral vessel
😦 sorry i know how it feels my cat jj died when i was bout 5
black nd white cat didn't like to go inside
quaint jasper
@rigid anvil condolences
so did it work with the other methods ?
deep dirge
What is that twitter video trying to show off?
spiral sigil
Any tips for making the edges not so prominent even with a texture?
Used bevel and smooth, how does it look now?
 vital drift
Minecraft Kirby
vital drift
yes
spiral sigil
Any advice on how to get rid of these hard model lines?
They're suppose to be natural claws but it's pretty obvious they're just polygons atm.
 primal narwhal
shade smooth if I'm not mistaken. Just highlight those faces then right click and it's usually there. If not and you're using 2.8 it'll be under the faces tab at the top left of the viewport area.
spiral sigil
...that could've saved me a ton of work earlier.
But now I know and my poly count thanks you.
 subtle jackal
You can fix this by averaging the normals or copying one to the other @rigid anvil You could also use Data Transfer modifier and copy them from a merged version, limited by vertex group.
spiral sigil
Human-type hands with actual claws!
Completely removed the original nails, modeled the claws myself from scratch, and then bulked up the finger tips so they could, ya know, actually look like they'd have room for claws in them.
 torn sun
So I chopped my model apart in blender, As I want to do something with the shoes alone. How can I export this as a normal 3D object file so I can import it into unity and use it?
nvm i worked it out. just needed to export it...
 white gazelle
Prolly really n00b question...
If i want to make a new object, how the heck do i put it into my original avatar?
I cant parent it to anything because it has its own armature, and i cant use cats to merge the 2. :O
devout scroll
thats not an armature
click the orange Cube and shift click the armature
then ctrl p and armature deform
median pike
Hopefully I will finish it until Halloween
 prisma dawn
is there a way to get a base of a model of a man hand how do i get it
srry i meant a base model of a human
quaint jasper
Check out the internet
prisma dawn
i did but i couldn't find one that would work
quaint jasper
Try looking on stores like artstation
 proud widget
im new to modeling and have been watching alot of tutorials ect, anyone know whats the best way to make really puffy looking paws? im modeling my fursona but i cant figure out a good way to make some really round ones. ( pics for ref of the model im working on)
quaint jasper
I assume the inflate brush
proud widget
ill give that a try, im truing to keep it as low poly as i can lol
 elder mirage
I don't see a channel for textures, so I'mma ask here, how do ya'll go about texturing?
 ashen forge

New model based off one of my characters! (No it's not HollowKnight)
Still very wip
vital drift
looks like hollowknight inspired, very spooky tho
prisma dawn
can any one help?
vital drift
im not sure :/ im not big with modeling yet, maybe create a hollow oval?
spiral sigil
Currently Modeling more wings Heavily wip
 swift quiver
they look like beautiful daggers
tight quartz
Anyone know a tutorial for making characters?
solar fossil
it really depends what you want to make, what is your skill level in blender, how much time you got
 merry plume
vital drift
merry plume
vital drift
First Minecraft Kirby avatar? I hope I did this before someone else did
median pike
https://cdn.discordapp.com/attachments/757354757114429470/764528228399972352/unknown.png
https://cdn.discordapp.com/attachments/757354757114429470/764520275181436938/unknown.png


poggers
I mean
progress
vital drift
SPOOKY!
solar fossil
poggers progress
spiral sigil
proggers
median pike
YES
 onyx juniper
gud stoof
 still wadi
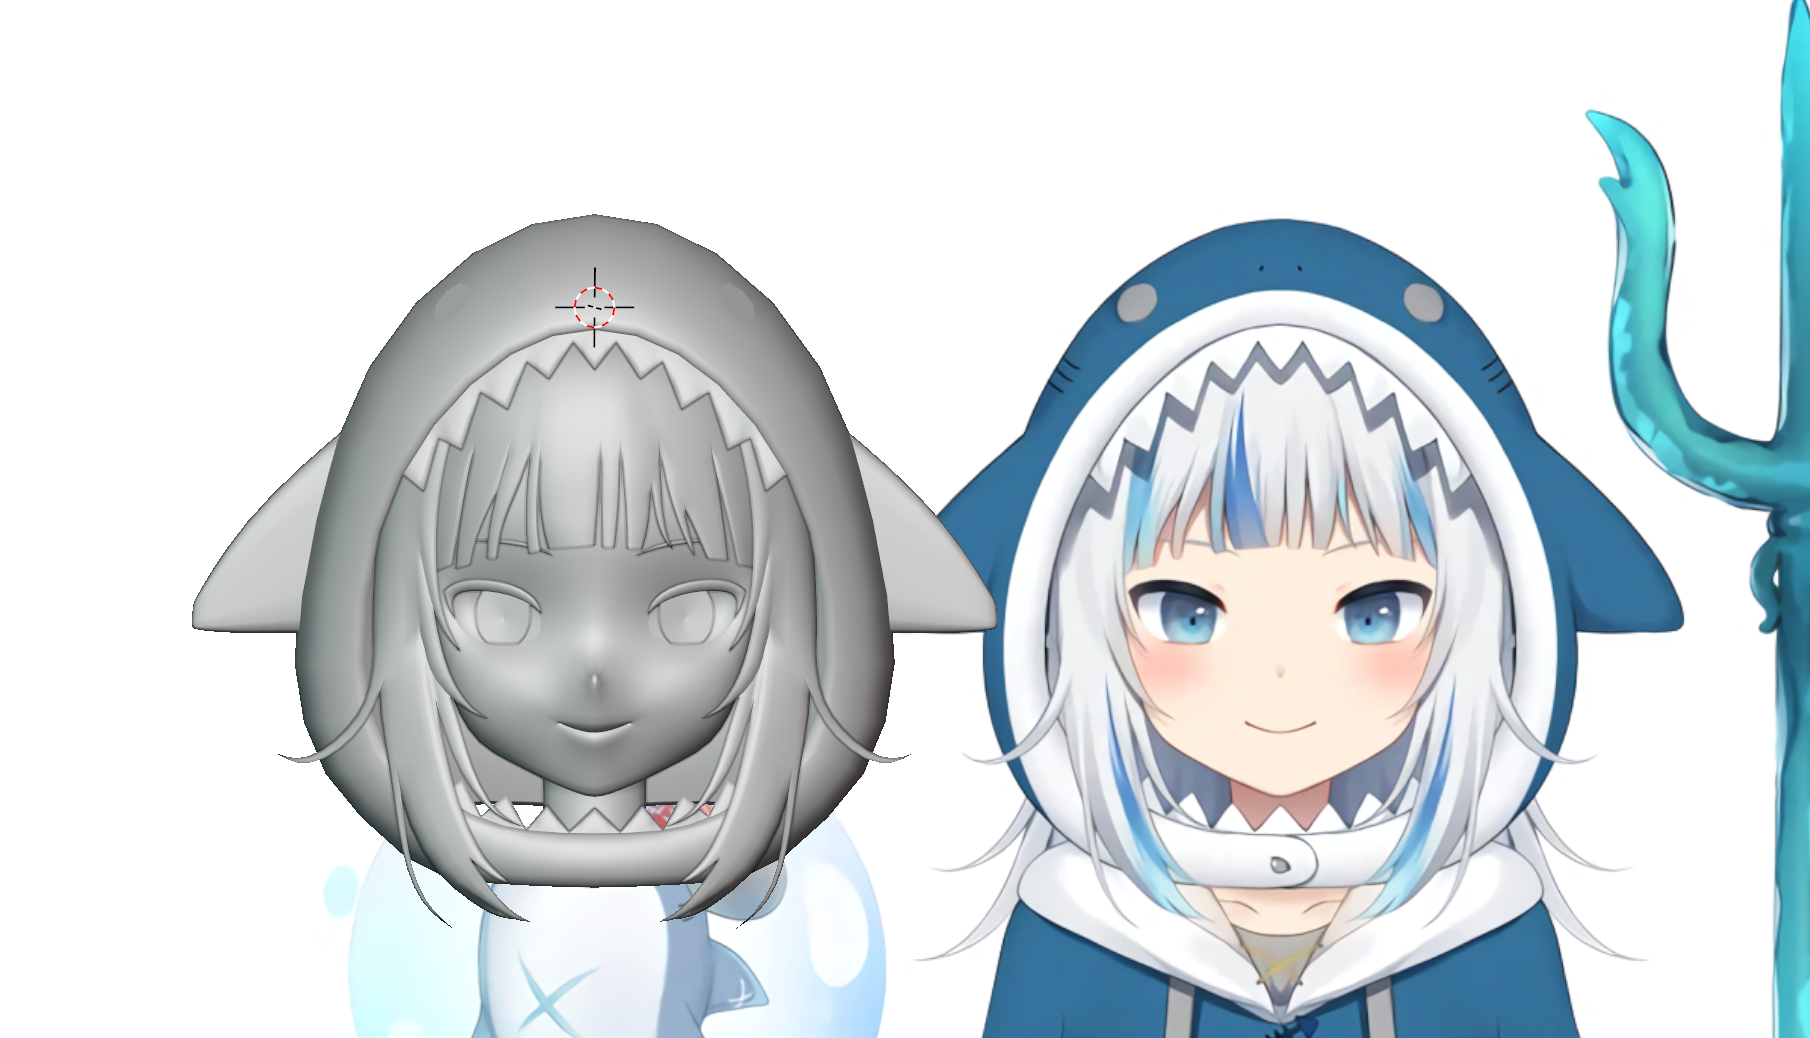
 granite bloom
not even sure if this is the right channel but i need help with this
(screenshot from the unity editor)
im super new to this and using probuilder and ive got quite a few objects in the same area and its just clogging up the screen with these blue lattice icons
i cant find anything online about this and its making it virtually impossible to work in that area
anyone know of a setting to just disable them or something?
 gentle kite
is there anyone willing to do 3d modeling for other people
i tried playing with blender for 3 hours and could only spawn in a sphere and a cone
if no one here could you point me in the right direction
i dont think it would be too complicated but i have never even tried to use a 3d modeling software so if anyone is willing please let me know
vital drift
I’m super excited to have this complete, I hope I can get it out fast enough before more people make models for the character
 stark anchor
does anyone here have a good tutorial for making vrcaht avatars? my skill level is zero and id just like to get into it a bit. basically creating my own avatar would be a little side project soo if anyone has anything let me know
and if you respond to this please @ me as i have over 70 servers im in and im very forgetfull
quaint jasper
Everything is pinned in the avatar channels
stark anchor
welp guess im just stupid xD thanks
 clear geyser
@gentle kite In #community-servers-old the VRCTraders discord is where you can go for that
quaint jasper
increase the angle ?
deep dirge
Angle has no effect...
I might need to just add more geometry to the tris
I should also just see if its a blender thing and wont show up like this in unity
deep dirge
Yeah ill just make the tris thicker
proud widget
anyone know how to fix a bone from deforming the hell out of a part on your model? literally the head on my model gets totally messed up when i move the head. ive already done the weight painting and everything, but it doesnt do the thing.
when i say deformed , i mean my guy looks like hes saying " ruh roh raggy"
how hes supposed to look:
proud widget
tbh ive done that so many times already ;-; ill check again though
devout scroll
or multiple bones
turn on normalize when painting
when you have multiple bones have 100% influence over something it stretches weird like that
proud widget
i did it so the head is covered with 100% of the weight, and i even deleted the fact tbh
since the face isnt rigged
devout scroll
it wouldn't stretch like that if only head had 100%
what about bones, no scale on them?
proud widget
the only bone i scaled was the head when i first was scaling it to size, but i hadnt rigged the model til after tbh
ill try re rigging to see if that might fix the issue i have, hopefully it does oof- this is the first 3d model ive ever made lol so im abit worried it wont be good
WAIT
actually , could the eyes be something to do with it? cuz the eyes are the only other thing that has 100% on them
proud widget
OOP- Re doing the rig from scratch fixed it. not sure what happened with it, but now its working 100% no weird head deforms.
vital drift
Can we get some love for blocky Kirby? Modeled him myself and I’m proud 🙂
 silent shell
@vestal glacier for the skirt problem, use blender weight painting, not colliders
 vestal glacier
idk how to use blender. i dont even have the program installed
spiral sigil
I need help on fixing these both, The model on the first png needs fluff and i've already spent 70$ on them, if anyone can help it would be very much needed and appreciated!
solar fossil
yeah, you will have to model it on
extrude some faces and scaling them down should do the trick
 thin sparrow
if you dont know how to use blender id look up some tutorials
cause if we have to explain how to extrude faces
spiral sigil
I need to make the fluff like the bottom one!
Not the other way around!
I feel unheard!
I commissoned them cause i didn't know how! I only know how to do bones for an amiture!
 hallow bough
Did you ask the person you commissioned to add the fluff? If not you might have to commission them or someone else to add the fluff if you can't do it yourself.
thin sparrow
I need to make the fluff like the bottom one!
@spiral sigil and we told you how.
solar fossil
@spiral sigil there you go
 dreamy jackal
I had fun doing this for the spookality, what do you think?
devout scroll
very spooky indeed
dreamy jackal
I put animations to change the textures from Toggles, roughly to change the color of the outfits and the eyes that I put on the avatar, and also to change the shape of the hat.
Without forgetting the facial expressions like other any avatars
spiral sigil
That sound pretty nice
 solemn elm
You're gay!
 junior pecan
I know
spiral sigil
Tips for smoothing out the outer edges of this?
Bevel doesn't really work due to the size of the geo atm.
It's suppose to be an organic horn with "steps" for each segment.
Subsurface Modifier eats up the steps which what I don't want.
quaint jasper
how is bevel not working ?
spiral sigil
I subdivided the segments and still no dice with bevel. I think it's because the geo is flat and thus not actually having anything to bevel.
spiral sigil
Well, I'm trying to make the outer part more round and not sure how else to do it.
Want smoothness for an organic look, not sharp and artificial.
quaint jasper
well, bevel the two edges in that case
spiral sigil
Which two edges?
quaint jasper
of each section
 wraith osprey
have you changed it from shade flat to smooth in object mode?
then you can mark the edges you want to be sharp
might get the look you want
quaint jasper
i think that's the opposite of the look they want
 gusty stratus
I do 3D models! But got no idea how to take it to vrchat
wraith osprey
rig it, export as fbx and import into unity
 fleet hill
Hm
elder mirage
So 15K tris is kinda low compared to what most people consider to be average for avatars, right?
quaint jasper
yes
solemn elm
that's actually really good in terms of optimization, but it should be said that it depends on how you view the quality of the model.
if you think it's too low poly then you can raise it. if not then just dont change it if you dont want to.
proud widget
anyone know how to fix this weird issue i have? in pose mode theres a black mass that shows up and im not sure what it is, i dont have any black on my model at all and the rig was done AFTER i modeled everything ect.
quaint jasper
Is it inside your head
spiral sigil
I have two objects
how do I remove the inner part of the mesh to create a thru hole?
I don't think bool modifier will work
devout scroll

#b3d #blender #secrets #tutorial
Visit the Blender Secrets website: https://www.blendersecrets.org/book
e-Book bundle (20% Discount) : https://gumroad.com/l/IxofeY
I would do #7 to have good topology
 elfin mural
Silly question, but how do I arrange the arms & shirt together?
It usually gets deformed if I drag with the sculpt tool (Blender) 😩
quaint jasper
Weight painting
elfin mural
🤔 ?
clear geyser
@elfin mural you can put your avatar in a-pose using pose mode
quaint jasper
Move the bones in position in pose mode and then weight paint the shirt accordingly
spiral sigil
thanks it worked out
devout scroll
shirt should have the same vertex groups already so you can try going into pose mode and match the arms to the sleeves, then use cats to apply pose as rest pose
devout scroll
yep
as long as mesh has armature modifier with the right Armature selected and vertex group name matches bone name, it'll move
I do that a lot instead of mirroring
can't get mirroring to work right
so when i manually mirror an arm for example, i split vertex group into two and rename one
(make copy and remove vertices one one side for it)
vertex groups are pretty simple and versatile, they only store vertices and weight, it's the armature modifier that does the rest
in fact vertex groups and weight weight painting can be used for lots of other modifiers
elfin mural
I cant figure it out ugh 😩 All the vids I see are different versions, so gonna download a diff version I guess lol
Ty tho. 🥺
elfin mural
Okayy, been using 2.90.1 :0
Ill get that one, thanks bub
devout scroll
after 2.8 they're all mostly the same, but if using 2.9 you gotta update to the development version of cats plugin
 sturdy lichen

Low Poly PS1 styled Delorean
Made with Blender and Krita
Open Source is love
Reference from Roger_goulart - Retro Delorean - Download Free 3D model by Liron (@CaioVB) [391b1ce]
Something I just finished
Been playing around with pixel art
Something that I found out is, pixel art with normal map looks amazing
 azure rain

I recorded another tutorial by viewer request: How I Made PBR Pixel Art Textures https://t.co/TczRAOkq7L
 Twitter
My 3rd @VRChat world Pixel Cabin is done! It's a 3 week experiment in ultra small textures, only 2 128x128 textures. Given the time constraint I'm happy with the result, and learned a lot. Go check it out! #MadeWithVRChat https://t.co/wn7HZs2qOn
Likes
115
 Twitter

 quaint jasper
@sturdy lichen That looks awesome
 versed ledge
When I press builder on unity nothing happens
Is my game too big?
quaint jasper
If it's freezing then probably yes
quaint jasper
Can you take a screenshot of the game window with the stats menu showing
versed ledge
Wdym stat menu
 astral quarry
....
versed ledge
o_0
astral quarry
I have unity 2018.4.20f1 and I don't have the avatar descriptor in my add component. is their a plugin i can download? this just seems silly that only specific versions have this component.
versed ledge
Cant help you I got my own problems.
astral quarry
you are so helpful.
quaint jasper
@versed ledge That's the SDK panel
the game window is called game
next to scene
@astral quarry Did you add the vrcsdk to you project ?
astral quarry
where can i get that?
quaint jasper
on the vrchat website
astral quarry
that would explain why my googling wasn't providing any information about the component.
versed ledge
@quaint jasper here
Is that what you wanted?
Cause you aint giving intructions to fix the issue
Your giving me "stats" but idk how to check them cause I was never told
quaint jasper
Yeah 
quaint jasper
What did you add ? video players ?
quaint jasper
Yeah, three enabled by default like that is maybe unnecessary
versed ledge
wdym by three
ooh
I do have 3 of them
even with 2 it still freezes
maybe its my pc itself
versed ledge
yes
quaint jasper
mmh, then could definitely be your pc
astral quarry
I got the script now. thanks
median pike
progress on the arm
only a few body parts need to be finished before I am done with the first step of the model
https://cdn.discordapp.com/attachments/717162866515640430/765967877173542913/unknown.png
https://cdn.discordapp.com/attachments/717162866515640430/765967937106214972/unknown.png

 spiral sigil
looking good 👌
devout scroll
is that a sculpt?
median pike
yea
median pike
thank
tulip condor
hi all
(using blender 2.80)
any way to make edge shrink to their center at same time
here is an video:
solar fossil
Generating tutorial please wait...
tulip condor
aaaaaaa.... what ???
ok if it's not a joke i guess
😏
solar fossil
by selecting individual origins and using alt+s you can move scale the edges based on normal direction
tulip condor
anyhow cath you folks tomorrow
have a good time everyone
solar fossil
as long as the normals are set up properly it should work
so, well, see you tmorrow i guess
devout scroll
don't think you need to do individual origins , alt+s already scales down by normals
solar fossil
but i like individual origin :sad :
devout scroll
it's ok
 serene epoch
new model i have been working on for 3.0
quaint jasper
Get yourself so rim lights, looks good but can't see it properly !
 summer moth
https://cdn.discordapp.com/attachments/530360261635211274/766257928452702218/unknown.png https://cdn.discordapp.com/attachments/530360261635211274/766257946354253824/unknown.png
any tips how I can make this not look so weird? (the reflections or whatever that is)

 solar fossil
in the material tab you can set the roughness or specular
summer moth
nope, still is weird where there's a lot of lines close to each other at any setting
tulip condor
@solar fossil
unfortunately as you can see...
"individual origin","default pivot point" with post combination of "S"=R,Y,S,Z or X not working
so only the @devout scroll's recommendation as... ALT+S will work's for me
i even try on older blender but it's same
here is an video:
but thank you both for your effort helping me
✌️😉
solar fossil
but i did say to use alt+s 😔
dunno why its not working for you since changing the transform pivot point should not affect it when scaling by normals 🤔
tulip condor
@solar fossil
i didn't dep't on your experience with modeling stuff
but i think that is probably because i install some new addons for improved modeling
and those addons auto-retarget same default blender hotkeys for deferent purpose i guess
i need to check those addons hotkeyes and to revert it as default
devout scroll
also worth mentioning that if your scale is not applied (ctrl+a to apply) or your normals are weird (alt+N to recalculate), it will not scale correctly
tulip condor
understood
thanks
spiral sigil
im still a beginner at 3d modeling and currently using blender. on soild mode it looks like this, yet on other modes, it looked fine, do you guys have any ideas?
(happens only when im on the texture paint tab, but nothing happens when im on other tabs.)
devout scroll
select your hair and recalculate normals
spiral sigil
i see, thank you very much
devout scroll
Also worth going into your other views and enabling backface culling

It will make the backfaces hidden so you'd know you need to recalculate those faces
 woven egret
hey can people help me with my avatar in blender i cant get clothing to work and check it my bones are correct maybe
 white moth
https://cdn..com/attachments/530360261635211274/766257928452702218/unknown.png https://cdn..com/attachments/530360261635211274/766257946354253824/unknown.png
any tips how I can make this not look so weird? (the reflections or whatever that is)
@summer moth you have odd normals. I’d recalculate them
summer moth
tried that before, didn't help, I fixed it kinda by using Offset Edge slide and merging it by distance, that made it flat like I wanted
different problem now
oh, recalculating normals worked on these
spiral sigil
hello im looking for any tutorials on modeling anime style characters. if anyone knows i would rly appreciate it
 glad steeple
 shut cloud
Hello. How do I make it so that I can kill objects. I got the combat system but how do I kill objects?
 wheat delta
sounds like a #event-system-sdk2 issue, but my wild guess is that you need some triggers/colliders on the objects so the system can detect when the weapon intersects with the target in order to kill it
shut cloud
@wheat delta I figured but I want things to have like a hp amount the rapier does .5 damage the katana does 1 damage
wheat delta
hopefully you'll get the advice you need. I have nothing to offer
shut cloud
Alright. Thank, you.
 hollow radish

YouTube
This channel is mainly about 3d modeling. I also like to throw in videos about art and drawing. Most of the works are related to anime so hopefully if you sh...
 real verge
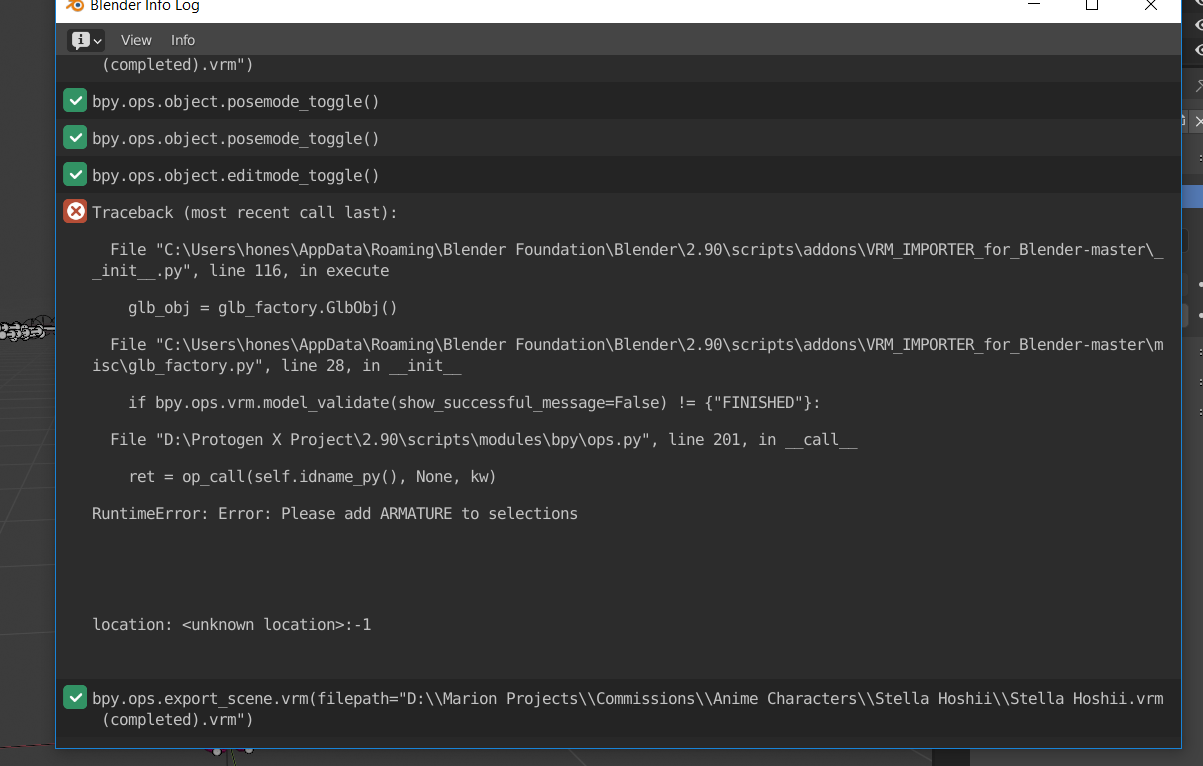
https://i.imgur.com/GrS5jpB.png so I keep seeing this message whenever I try to export the model I am working on in blender I only been using blender for about 3-4 days now and would like to know what the problem is.
 subtle jackal
I mean it tells you what to do in that error message...
 obsidian nova
Generally, bodies work better when the bones are attached.
 visual vigil
https://gyazo.com/d1d3c7150c54188b5f828be6570f67e8 Any help as to why my mesh wont react to sculpt tool edits? Only the face skin reacts. All the mesh is joined under the same object, theres no mask.
 devout scroll
what about face sets
 granite isle
can you guys help me with my avatar
still wadi
@visual vigil mask ? press alt +m
 ornate harbor
oh god blender 2.9 is scary
 knotty quest
should i model in blender or unity
devout scroll
blender
spiral sigil
Unity is not a 3d modeling software
it's a game engine
 young vault
Some addons would like to differ
obsidian nova
@young vault That’s like adding pedals to your car and calling it a bike.
young vault
No, not really. A bicycle has two wheels, not four.
obsidian nova
That’s my point.
Unity is not really optimized for modelling; whereas the UI & back-end in blender are custom built for it. I’m sure you “could” model in Unity, but “should” you?
glad steeple
just because you can doesnt mean you should
good luck finding a tutorial on how to model a character in unity 👀
azure rain
and the best you're probably going to manage would be geometric primitive man
solar fossil
Tried modelling in unity just see how it is, and my God was it an unstable, buggy, hot mess
quaint jasper
Why would you even try lmao
solar fossil
I was a young naive lad ok
young vault
Unity modelling is the best /s
solar fossil
Yeah, it was really promising in the first 12 seconds
 candid cloak
Might need help. I started doing blender a few months ago and I'm alright at it. The only thing I haven't done is character modeling and I have a concept I want to develop into a vrchat avatar. Should I do an image as a plane and than go from there? I just don't know where to start. Here's the character:
quaint jasper
yes, definitely use your image as a background
then start box modelling
lots of tutorials on youtube
candid cloak
ok thanks
deep dirge
Discord Moderators
solar fossil
That is, hands down, the best nanachi edit
Congratulations, you move on to the next phase
clear geyser
Glorious
quaint jasper
it's called photogrammetry
prisma dawn
how do you do that
quaint jasper
you can look that up, lots of tutorials out there
devout scroll
a plane with a texture on it more likely
quaint jasper
if it's a single image then there's not much you can do
prisma dawn
damn
astral quarry
has anyone worked with VRM before? Or does anyone know a discord that might point me in the right direction?
I'm getting an error message that prevents the .VRM file to be made and I have no idea how to read it to correct the error. All i can tell is that a Texture is borking it. not sure how.
 obtuse quartz
so im trying to add a hoodie to my model, and everything was going well until i pressed fix model on the hoodie and now my avatar looks like....
like the opposite? of whats supposed to be going on when i press "fix avatar"
any tips on how to fix this absolute mess
quaint jasper
Before doing fix model, apply all transforms to everything
devout scroll
Fix model does these things https://puu.sh/GEpmV/e2d9e1fe9d.png

But why press it if you don't know what it does
Look for an auto save

 fallow fable
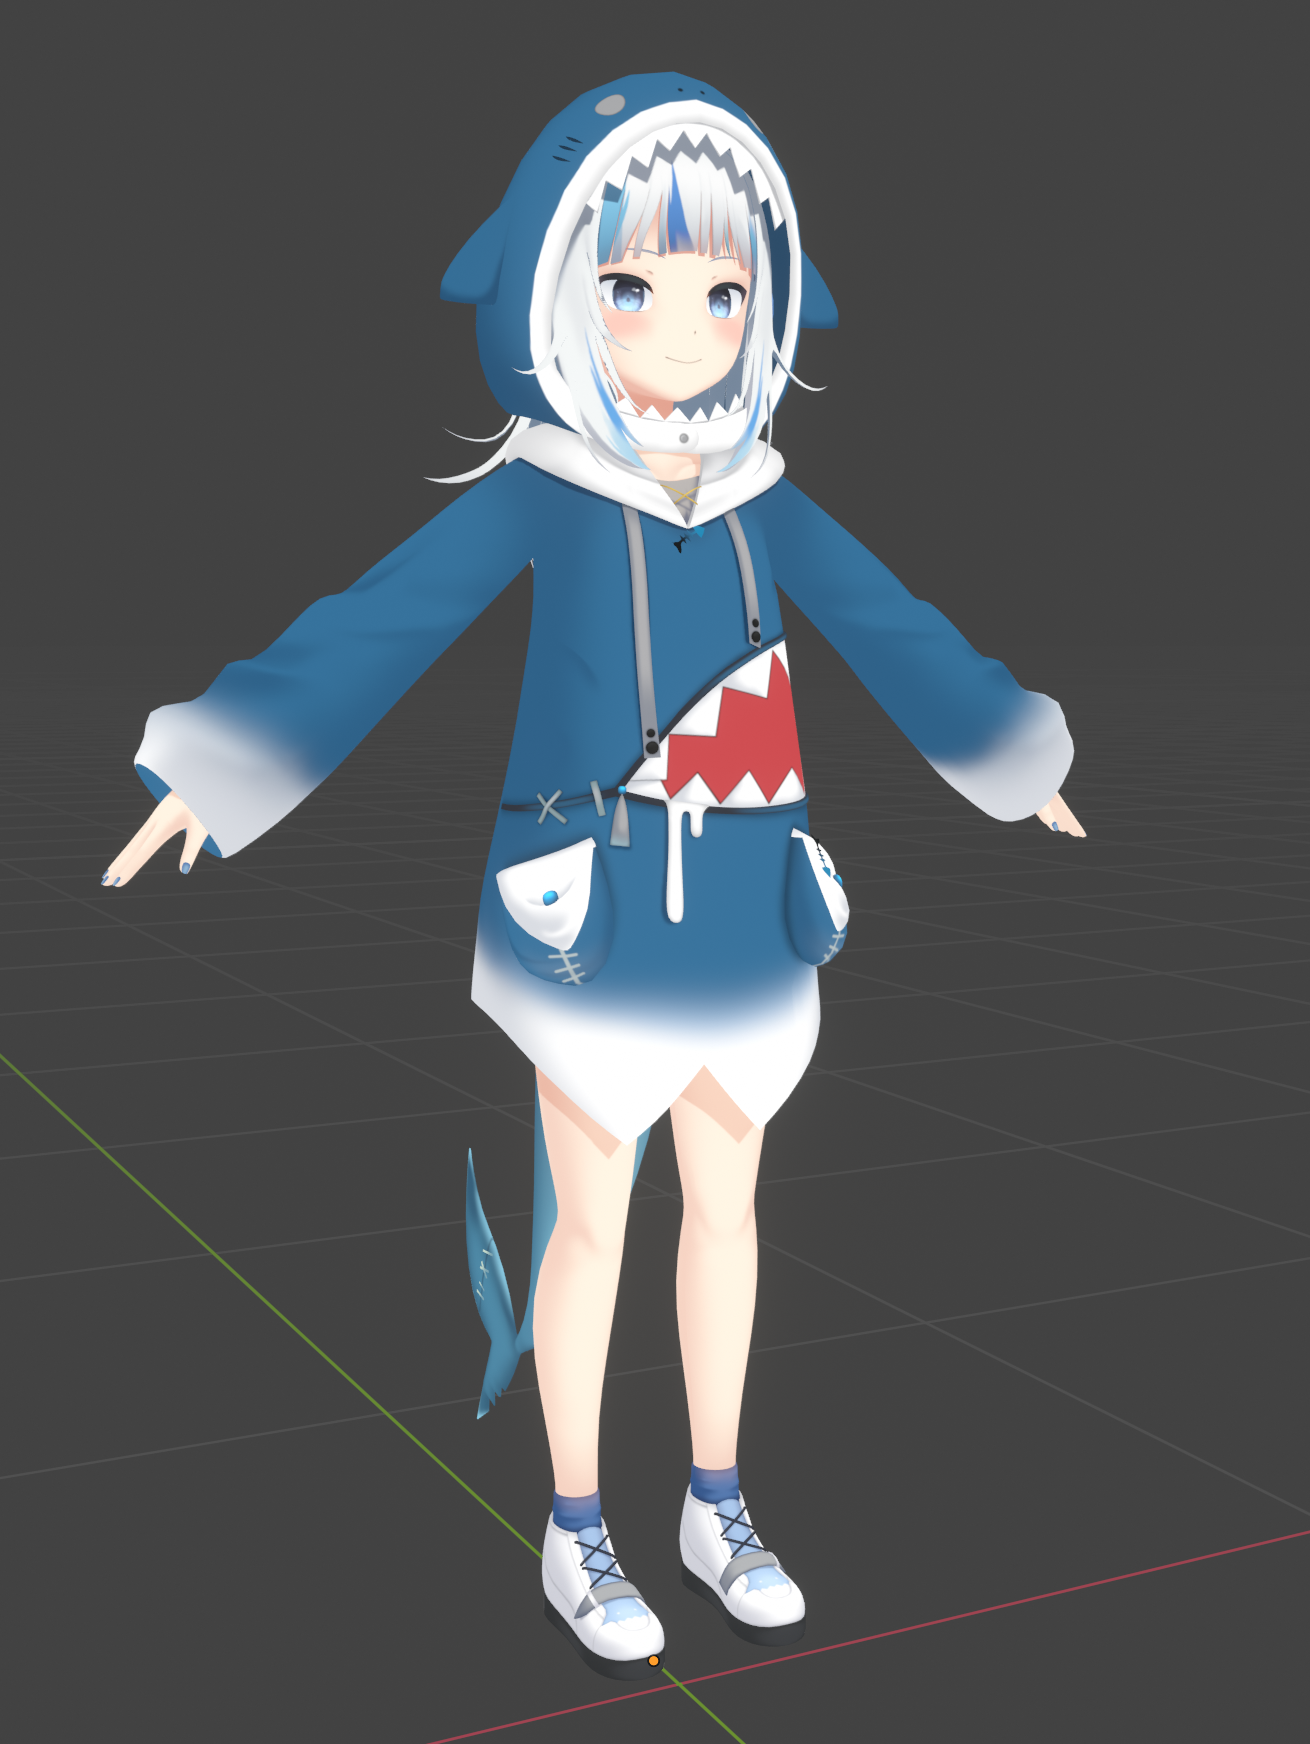
looks perfect to be honest
nice work
I don't think she even has a 3D avatar of her own yet so wow
@still wadi did you put it in vrchat yet?
I'd like to copy it
 torpid moth
Hey so I can't edit a section of a mesh in any way(edit mode, weighting, sculpting, etc.) I can select only faces and edges in edit mode but can not do anything with them.
Is there a toggle I am missing when I had these verts selected?
quaint jasper
screenshot ?
torpid moth
deep dirge
can you see the vertices when you enter vertex select?
quaint jasper
don't use 2.9.1
A few people have had that issue already
highly suggest not to get steam blender
for this reason exactly
version control is too important and you can corrupt your projects
torpid moth
I can only visibly select faces and edges on just the blue textured section. Also I have been switching versions/saves to see if it'll change and I haven't had luck yet
torpid moth
other parts work fine
I'll mess around with other versions for a bit, hopefully I can come back with a solution
quaint jasper
that's the solution
don't use experimental unstable versions
use 2.83
works there
torpid moth
well the same thing works in 2.9 but I am sticking with it in 2.8
 barren quiver
@quaint jasper 2.91 isn't experimental, it's just bad
 torpid crag
Im individually mapping and modeling all 75 of hatsune miku's bones
For school
Fun
barren quiver
Blender's terminology is just confusing with these, where 2.90 is more like 2.84 and rather than being a stability fix it's "more features and more bugs!", so I'd just say "version Y is buggy, version X is not"
Good luck with Miku!
torpid crag
Thank you
I already have a miku avatar uploaded (i ported it for quest) but i deleted the mesh and wa left with the armature and was like "oh this cool" but armatures be invisible so im modeling all the bones and lining them excactly, vertices by vertices.
quaint jasper
same thing in my book 
solar fossil
ill stick with blender 3.1
vivid crater
Blender 2.9 is the new features version now whereas 2.8x is now the LTS version, and both are stable release
It's just one is way more stable than the other 🤪
fallow fable
how can I fix these discolored lines in unity?
the lines are appearing inbetween my meshs UV islands
devout scroll
try increasing the padding on the uv islands
as in extend the texture more past the edge of the islands
fallow fable
I'm looking for a different sollution, because if i extended them any further i'd lose detail
I mean by the looks of it, that red patch is at least 5-7 pixels wide
it's already at like 4 pixel padding
there has to be a reason why unity is doing this
devout scroll
is the mesh shaded smooth in blender
young vault
How big is the texture? 🤔
fallow fable
I messed with some things for the settings that appear when you click the literal image in the project resource viewer
Aniso level to 16 helped, and then switching from 2048 to 4096 fixed the rest!

it's a big texture
5000 x 5000
I think the problem was that the UV was made for this 5000x5000 image, and I had it at 2048x2048 ?
that's my guess
Thanks again for being there for me Pumkin, and Elphea I think you were probably on the right track with the help there, thank you too.
I can sleep now yay.
 open scarab
You can limit blender to 2.83 lts , wouldnt really go above that for now
white moth
Cats plugin currently has some pose mode issues with versions after the LTS
white moth
I don’t, but good to know a fix is coming
devout scroll
You can just update in the update tab of cats
It's been working for weeks but who knows when the version will go live
 craggy aurora
anyone know anything about weight painting in blender could use some help
visual vigil
@still wadi
spiral sigil
The hair on my model keeps having this weird outline that shows the same color as the material's diffuse in unity- it isn't my shaders/texture margins/anything in blender. Does anyone maybe know why this is happening?
https://gyazo.com/e8eaff7fbb3a0e02af289c0e87ee9ba7
 devout scroll

solar fossil
slams hand on table VERY POOR!
 spiral sigil
not 69'420
Reality is often disappointing.
 gritty turtle
What?
spiral sigil
Nice
clear geyser
👀
spiral sigil
👀
devout scroll
other parts work fine
https://cdn.discordapp.com/attachments/390924397726138370/767596904988672050/unknown.png
@torpid moth
It seems that unhiding the mesh in edit mode fixes this. No idea why you can see and select the hidden mesh, but it's a bug I guess
 quaint jasper
don't use 2.9
 covert shard
 next aurora
I modeled this in blender:
and no matter how i unwrap it, smart or not, it's garbage
devout scroll
You need to add seams
next aurora
ah
devout scroll
so it knows where to cut up your uvs
next aurora
also does it help if i mention that sometimes the uv is just a dot in the corner and i cant change it?
also, not quite sure where im gonna place those seams
probably just one down the middle
quaint jasper
nope
find a tutorial on this
it's a lot more complex than random lines
if you have bad UVs, you'll have a bad time with texturing
next aurora
figured as much
devout scroll
 next aurora
i'll try loop cuts?
devout scroll
that's how i'd place them but yeah, it's complex
next aurora
yeah
i mean the thing is
wait wait
i just realized
if i mark a seam
will it be flat in unity?
devout scroll
seams only tell uvs where to cut and nothing else
devout scroll
but it will still look like an intrerrupt in the texture
next aurora
ok
quaint jasper
place the islands correctly and it won't
quaint jasper
that should be a single mesh though
next aurora
it's one mesh
just like
split
by the way, the biggest issue is the top sphere
it's a part of the mesh
but it isn't directly connected to any vertecis
regardless, when i unwrap it...
it's either a square or a triangle
devout scroll
that means the mesh can't unwrap properly
it needs to be cut and if it deforms like that then it can't unfold
devout scroll
still lots of free space so you could make it a bit better
but it works
you can enable stretching overlay in the view panel on the right
blue is good, no stretching, towards red is stretching
so you should put more seams or put them differently
like here
 next aurora
ah, i see
the bottom half is just kinda small
doesnt need to be too perfect, the model itself is mainly flat except for some key details
devout scroll
but by splitting it, the big part will use more texture space and everything else will be bigger too
next aurora
but im definitely gonna wanna fix that
devout scroll
since when unwrapping stuff tends to be scaled uniformly
aka if the big parts are smaller then so will the small parts
devout scroll
yeah but if you unwrap only a part it will ignore the rest and unwrap onto the whole uv space
so it's better to just unwrap the whole thing
next aurora
cool, gotcha
also
is there a way to fix the issue where me moving one part of the UV moves another?
i get it's connected to the seam, but it makes it impossible to move around the UVs
devout scroll
move in face select mode
 obsidian umbra
does vr chat allow objects that are closed to be loaded with a playermodel?
like the difference between these two
quaint jasper
Yes it makes no difference
obsidian umbra
aio
 oblique bison
Any good free programs for Microsoft? I want to make just one custom avatar once it will allow me to but I have no software to do it.
median pike
blender
median pike
nice
median pike
I know, I wish there was away to do that for multiple shape keys at the same time though
oh wait
you can
thats literally its job
I am retard
I used blend from shape
devout scroll
yeah propagate does all shape keys
median pike
I dont think I can get this done until spookality
median pike
I didnt realize just how much of nightmare it is to rig something like this
devout scroll
try rigify or mixamo
then fix it
never tried bone envelopes but can look at that too i guess
white moth
Bone envelopes are evil
devout scroll
I think that's how 3ds max did it ages ago
 pearl bear
Would anyone be willing to give their opinion on my model (first time and need some opinions without getting thrashed for my awful work)
I think i have the base mesh finally finished but im almost certain ill have some problems with it, or odd proportions or something.
quaint jasper
Promise i won't trash you
pearl bear
Fair warning, its supposed to be headless, and chest is supposed to be pushed up slightly
Im mostly worried about proportions, I've started over 2-3 times over bad meshing but im fairly happy with the mesh this time around.
And im hoping i can finally move on to the modeling clothes phase after slight adjustments*
It's meant to be more anime styled btw*
pearl bear
That may have been before or after i shortened them
The arms should be roughly the correct length, i was constantly checking proportional reference for it
onyx juniper
The pelvis and upper thigh area together make me think of a bucket handle. I think the crotch needs to be lower, or the hips need to be higher
quaint jasper
It would be super helpful for you to use a reference to sculpt over to get basic proportions/shapes correctly
Using references is too important to skip over, especially when you start
pearl bear
I have been using references, though i did intentionally make this character with wide hips
quaint jasper
reference sheet or random drawings ? can you share them ?
pearl bear
Not at the moment but just a mixture of stuff i found. Ive been careful to use one good reference for proper proportions though
hollow radish
some idea buts anime stuff tends to have longer legs
you can use the amount of heads to judge how tall they should be
can go with 7-8
if you put the arms down, the hand should be past the crotch and the elbow should be where the waist is
if you go full body, its a bit more tricky and advise to use your own proportions or just get an avatar
that works for you as reference
for women can make the hips and the shoulders align, and for anime can make the shoulders even smaller,
so the torso is smaller
If you don't use pure ref, I advise you should
clear geyser
Cute
 opaque hearth
thanks
honestly the rigging part is probably gonna be really complicated im thinking of paying someone else to do that part for me
azure rain
are there any Loops at the elbows as I can't quite tell from looking at the picture
opaque hearth
yeah there are
azure rain
okay good because otherwise it's not going to bend good
azure rain
no it is not that's not enough loops https://i.gyazo.com/3565f5fdbdda046103077137617451a5.png
 azure rain
that is a very helpful website for learning 3D modeling
opaque hearth
thank you so much
its late for me so im a go to bed
like i said im probably gonna hire someone else to take care of the rigging or something i dunno
azure rain
https://sketchfab.com/EllisKittyland21/collections/furries-in-3d also here is a sketchfab collection of fursonas in 3D if you want topology references for handling the animal parts

Furries in 3D - A 3D model collection by EllisKittyland21 (@EllisKittyland21)
opaque hearth
do you do work?
azure rain
have texture painted some friends fursonas but I'm not too great at rigging
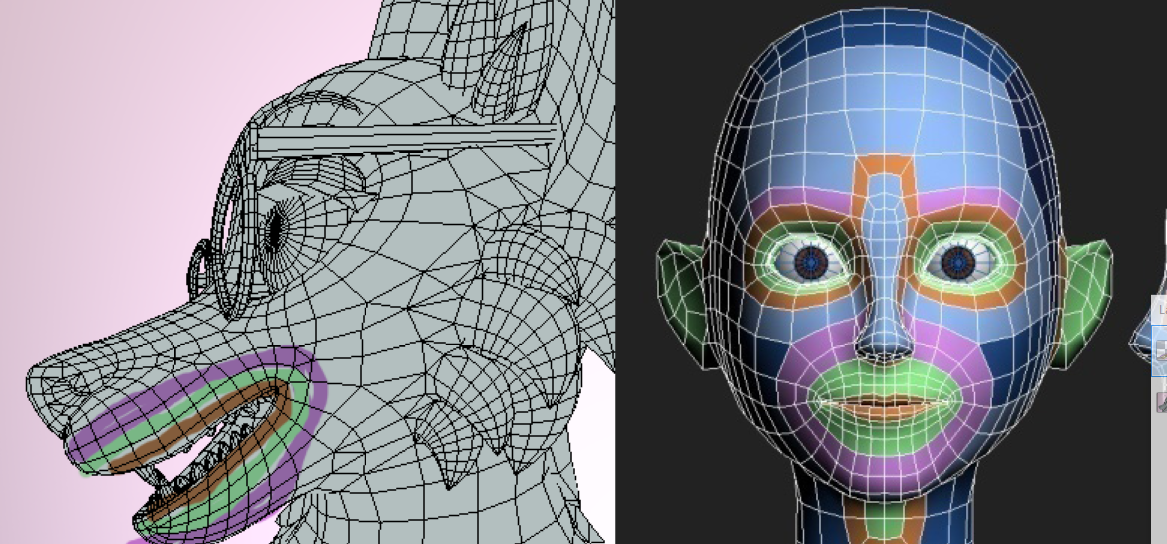
https://i.gyazo.com/843a61488dd1711551290d0d5e2eb3a7.png really rough draw over of how you would translate The Edge loops on a human to a fursona when it comes to faces
 opaque hearth
nice
azure rain
hope you sleep well
opaque hearth
thanks man
obsidian umbra
still working on textures after decimation
red lines
im also working on the joints
quaint jasper
This screams for retopo
azure rain
or Edge Loop dissolving instead of decimation


example of results with Edge Loop dissolving
spiral sigil
Im not even sure how im gonna add a mouth 🤦♂️
 white pecan
These models are neat!
azure rain
you use the current head as a retopology dummy so that it has proper Edge Loops for a mouth

 azure rain
that looks cool even just with the solid placeholder colors
 woven halo
how would I go about relaxing these UV's so they're as true to the size of the actual mesh?
 lament cave
torpid crag
lament cave
torpid crag
Not a vrchat thing but heres my water simulation
quaint jasper
@lament cave There's also #3d-printing !
quaint jasper
Beautiful 
 stray tulip
✨
solar fossil
yeah, the eyes and shape of the face is very ori like
 frosty plinth
solar fossil
frosty plinth
solar fossil
so shiny
stray tulip
Yes its a character based on Ori :>
white moth
That looks great. It also makes me really want to see an avatar of [Ori 2 Spoilers].
 surreal umbra
im completely new to blender and vrchat avatar stuff so i have a few questions
if anyone can help
first off i have a model with a rig in unity but i need to bring it over to blender to apply the textures
I installed CATS blender plugin to export it from unity to blender but I'm not sure how I can do that and still keep the whole model and the rig
quaint jasper
you import the fbx
quaint jasper
yes there are a lot of tutorials, especially the ones pinned in #avatars-2-general
surreal umbra
couldnt find one that helped with that
should i just start over and put the model in blender and add textures before touching unity?
quaint jasper

VERY IMPORTANT - PLEASE READ:
This tutorial may still be mostly useful, but there's a few major changes that you need to pay attention to. First off, VRChat now uses Unity 2017.4.15f1, not Unity 5.6. Additionally, there's some new tools for helping with atlasing that you shoul...
unity is the last step
 dusky parcel
made this recently. might texture it later
dusky parcel
another blade to the collection
radiant moon
So I hit "Recalculate normals" on my model, and it suddenly turned into a shiny ball of crumpled paper. I don't have a normal map on this model, so I can't figure out what's causing this.
(PS those two seams at the heel are supposed to be there)
I tried to upload a photo with that but it wouldn't send
 formal flower
Hey is it possible to have a model that has two sets of hands move synchronized if imported into vrchat?
radiant moon
clear geyser
@radiant moon Recalculate normals
 narrow yacht
radiant moon
narrow yacht
radiant moon
@clear geyser That's what I did to cause the issue in the first place
and i've tried it several more times
 tepid wagon
Try to flip normals, clear custom split normals data or set normals to autosmooth 180 @radiant moon
radiant moon
ooh thanks, i'll try that
I couldn't find any of the things you were talking about, but I hit "Smooth Vertex Normals" and that seems to have fixed it
woven halo
Does anyone here use Zbrush? UVmaster is giving me incredibly scuffed results
quaint jasper
You should redo UVs in maya/blender
woven halo
yee but blender has no pelt option does it?
quaint jasper
What feature are you looking for exactly ?
Doing proper seams and unwrapping should get you most of the way there
woven halo
gonna try .^.
 regal summit
Hello, when I publish my imported custom avatar in Unity it doesnt take me to the screen where I can upload it to VRChat and says Future proofing your content instead, am I missing something? Thanks
hollow radish
you should never uv unwrap in zbrush
regal summit
Hmm?
quaint jasper
@regal summit disable future proofing in settings
regal summit
Okay, now it brings up Inspector
woven halo
the only reason I'm doing it is cause i keep having scaling issues when i export from zbrush to blender and vice versa
@hollow radish
i cant get it to line up identically to blender
i always have to rescale shit
no clue why
so its hard to get my highpoly and lowpoly to line up
after UV-ing in a different program
hollow radish
yeah zbrush has weird scaling issues
you can use goz to smoothly transition from both blender to zbrush
but you should scale it first in blender then put it in zbrush
idk, but sometimes I hit duplicate after import and it sort of fixes some scaling
woven halo
ahhh
regal summit
Inspector doesnt give an option to publish it though so Im still a bit stuck
hollow radish
bit old but should be the same process

GoB Files: https://goo.gl/c26jyQ (The link broke and I couldn't find the original so I'm sharing from my own Dropbox. If the creator sees this and is not happy about it please contact me)
Please support me on Gumroad: https://gumroad.com/dannymac
Instagram: https://www.instag...
I think I followed this specific vid
hollow radish
how are you modelling?
zbrush first then blender?
i think there's a scale master in zbrush 🤔 or something like that
woven halo
ye
hollow radish
unsure though
woven halo
zbrush first then blender
hollow radish
umm
woven halo
honestly i could redo the highpoly quite quickly
its literally just smoothing with some adjustments on creasing
etc
hollow radish
eh probably a good call
woven halo
im like || this close to fucking just hitting auto UV in blender and only applying fancy shaders
yes make sure the material order is the same in blender
use dem arrows
after merging ofc
 lapis cliff
so I've started using shape keys and have already made a few that work perfectly fine, however upon making a new one (with basis selected and not even editing anything) it automatically sets this scuffed mess as when the shapekey is set to 1
nevermind I figured it out, but for anyone who ever has to deal with shapekeys scuffing the model when you literally just made the shape key, just use the search bar in edit mode and search "blend from" and blend from shape, then use basis or whatever you want to use
quaint jasper
@lean cloud Why does material order matter
ashen forge
i like trees
 merry tapir
trees are good
ashen forge
Found the scatter addon for blender, incredibly useful
devout scroll
You can do that with particles too




 ashen forge


Tasty
Ignore if anything looks weird or off, I don't intend on making it look super perfect in Blender since I'll be putting it into Unity.
ashen forge
The wireframe is also peak chaos and I love it https://media.discordapp.net/attachments/605982426342359050/770117616630890516/unknown.png


 potent edge
wondering if i can post this here, ive been retexturing and editing a model from doom eternal in an attempt to create a better demon reskin
ashen forge
Interior design is difficult
subtle jackal
it helps when you reference things to proper scale, that room must be pretty massive
 stable edge
god i wish my room was that big
 plucky jolt
Been working on making Megas XLR https://www.youtube.com/watch?v=5nxwDKlDCV0
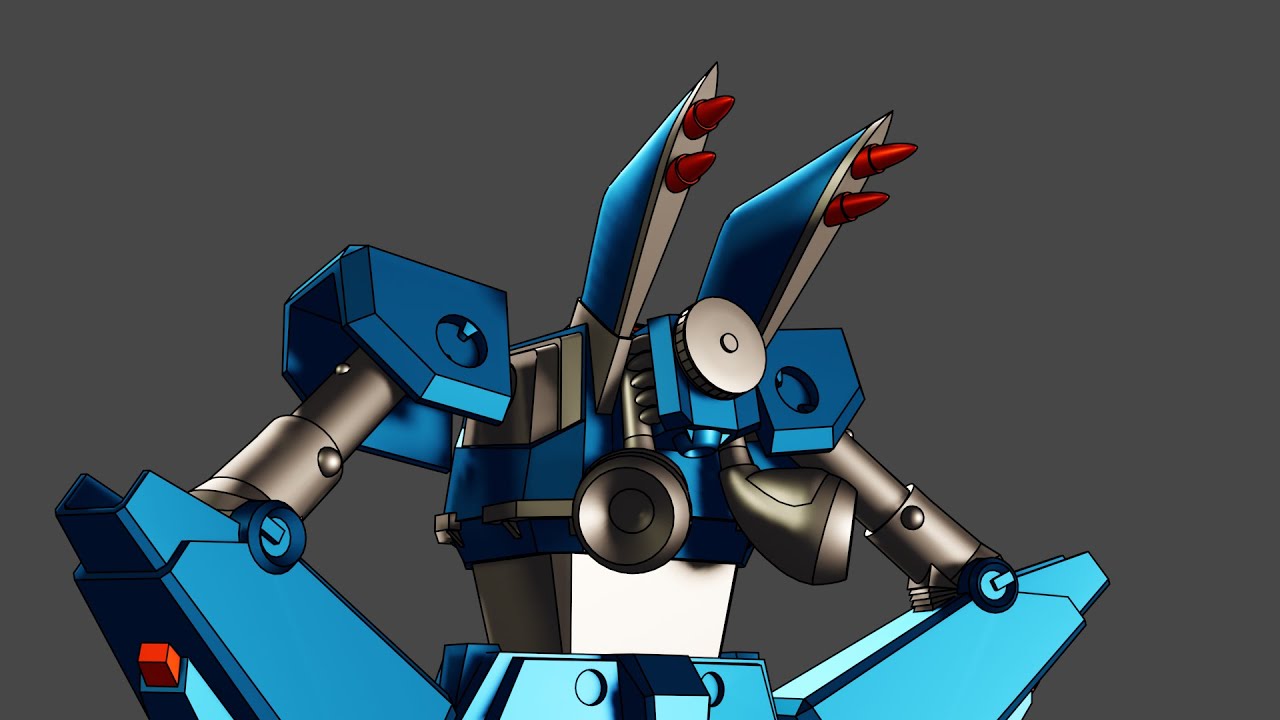
Finished modeling, have to make the texture and then make a shader with BNPR. This is a test render to make sure freestyle outlines everything properly.
#MegasXLR
ashen forge
it helps when you reference things to proper scale, that room must be pretty massive
It's actually fairly smaller than what it looks, it is probably slightly bigger for what it should be but I have an incredibly long and detailed lore for that!
 safe grove
When doing avatar modeling in Blender, CTRL+J merges meshes, yeah?
 gaunt abyss
Wow I never noticed the car from Megas XLR was a 1970 'Cuda. The 71 'Cuda is just outright my favorite car haha
And yeah Im pretty sure thats how you do it Steve
devout scroll


more progress on texture painting this thing
I took such a long break on this since I painted the metal gates and buoys that now the styles kinda don't match
safe grove
CTRL+J doesn't seem to be working at all.
Keep on doing CTRL+J but they don't combine into a single mesh.
Unless I'm somehow doing this wrong?
devout scroll
Do it in object mode
safe grove
Welp, megafuck. Figured it out by manually doing it instead of the shortcut, but now all of my work sizing the parts onto the model resets to their original values.
devout scroll
undo it
then apply scale before joining
with ctrl+A
you can apply all transforms in fact
safe grove
Still resets
safe grove
Nah, Meshes in Brush mode
devout scroll
the order you select stuff in matters before joining
but it shouldn't do that if you apply all transforms
ashen forge
Modifiers?
safe grove
Okay, I figured it out finally. I have to do the Scale apply in a specific order
devout scroll
order shouldn't matter as long as you do them all
safe grove
Select meshes > CTRL+A > All Transforms > Object > Join.
I had to do that exact order.
I should theoretically be able to delete the bones now, yeah?
For the parts I'm attaching, not the main model.
devout scroll
You need to join the bones to the main armature as well
You can only get rid of bones that don't do anything, if you deleted parts
safe grove
Well, I somehow messed up. I joined them all together, but the parts don't move together.
devout scroll
bones need to be parented to each other as well
and your mesh needs to have an armature modifier with your armature selected
safe grove
Well it shows that the parent is the main body in the modifier.
Aha! Had to set it from "Object" to "Armature"
Success!
However the bones don't seem to move together, just the meshes. I assume that's normal.
safe grove
Will it work though?
devout scroll
they need to be properly parented
for example if you add a skirt to your model, you need to parent the skirt bones to the hips
only the starting bone
if they're the same bones
for example you're adding a shirt that has spine, hips and shoulder bones
then you can just delete the new ones because your old ones are already in the same place
and have the same names (that's important)
devout scroll
if they're in the same place yeah
safe grove
They're not exactly the same, but pretty much.
devout scroll
You can try then
safe grove
I'm gonna shoot myself. Blender just crashed.
 stuck geyser
does anyone know some good tutorials to get started with Blender (from what i know u need to model a character (or object) in blender and the rest is done in unity)?
quaint jasper
Blender tutorial for beginners! The long awaited reboot of the popular donut tutorial, completely remade for Blender 2.8x. New videos will be uploaded every other day to this channel.
Get the shortcut pdf: https://mailchi.mp/ef5b15a32043/subscribe-to-the-newsletter
--------...
solar fossil
what's in the box? WHAT'S IN THE BOX?!
devout scroll
40 material slots
solar fossil
close enough
quaint jasper
cavity goes brrr
solar fossil
yeah, looks very bland without cavity enabled
speaking of cavity, what else should i add to it, apart from legs and arms which i yet have to make
the eye/head portion looks a bit barren
quaint jasper
gonna be an avatar ?
clear geyser
👀
ashen forge
I LOVE!!!
solar fossil
📝
 sullen blaze
yo i need some help with a model, in dms ;-;
median pike
https://cdn.discordapp.com/attachments/737203645879287878/770930314712449024/unknown.png
https://cdn.discordapp.com/attachments/737203645879287878/770930358602170388/unknown.png
https://cdn.discordapp.com/attachments/737203645879287878/770930412520341534/unknown.png
https://cdn.discordapp.com/attachments/737203645879287878/770930465351663646/unknown.png
What do you guys think? Also would this be considerate nsfw?


 spiral sigil
looks good
median pike
shame I missed the spookality deadline
quaint jasper
Looks awesome !
visual vigil
quaint jasper
Bird up !
 pine herald
Snail down.
solar fossil
also that model reminds me of mr.X final form with the whole hand claw thing
 frail flint
@solar fossil you could add a screen to the front side of the robot, it could play an animation when the parts come out or something. just a thought
 glad spire
@quaint jasper Could you please lend me a hand😭
solar fossil
oo a pop out screen would be interesting
glad spire
I'm stuck with baking item. For some reasons this black thing appear
quaint jasper
what are you trying to bake ?
glad spire
The whole burger into 1 map
solar fossil
well, he is trying to bake a burger
quaint jasper
oh the mat combiner
duh
Make sure the UV's aren't out of bounds @glad spire
if it's all fine then that can be done manually very easily since it's just colors
quaint jasper
oh, check the UVs after the combiner, it's probably missing enough padding
you can fix them manually afterward, probably scale down the UV islands
i'm assuming you're on 2.83 version or earlier
glad spire
2.90.1
quaint jasper
cats and mat combiner are not compatible with that FYI
glad spire
you can fix them manually afterward, probably scale down the UV islands
@quaint jasper You mean the Island Margin?
I'm not using cats with this one
quaint jasper
what are you using ?
glad spire
Only blender with its normal tools
glad spire
Never heard of it before
quaint jasper
substance painter ?
glad spire
Not familiar with it ><
quaint jasper
oh
easy then
select all, do S 0.99
hopefully it scales them all at their center
quaint jasper
maybe it wasn't enough, add a bit more
s 0.95
should look the same, but no pixel bleeding