#3d-modeling
1 messages · Page 92 of 1
 bronze walrus
 gaunt abyss
So, just wondering... how would you go about making a characters mouth on a character being made from scratch? The lips to the interior of the mouth. This is my first character Im making from scratch so I kinda hit a wall.
 median pike
are you sculpting it?@gaunt abyss
 iron agate
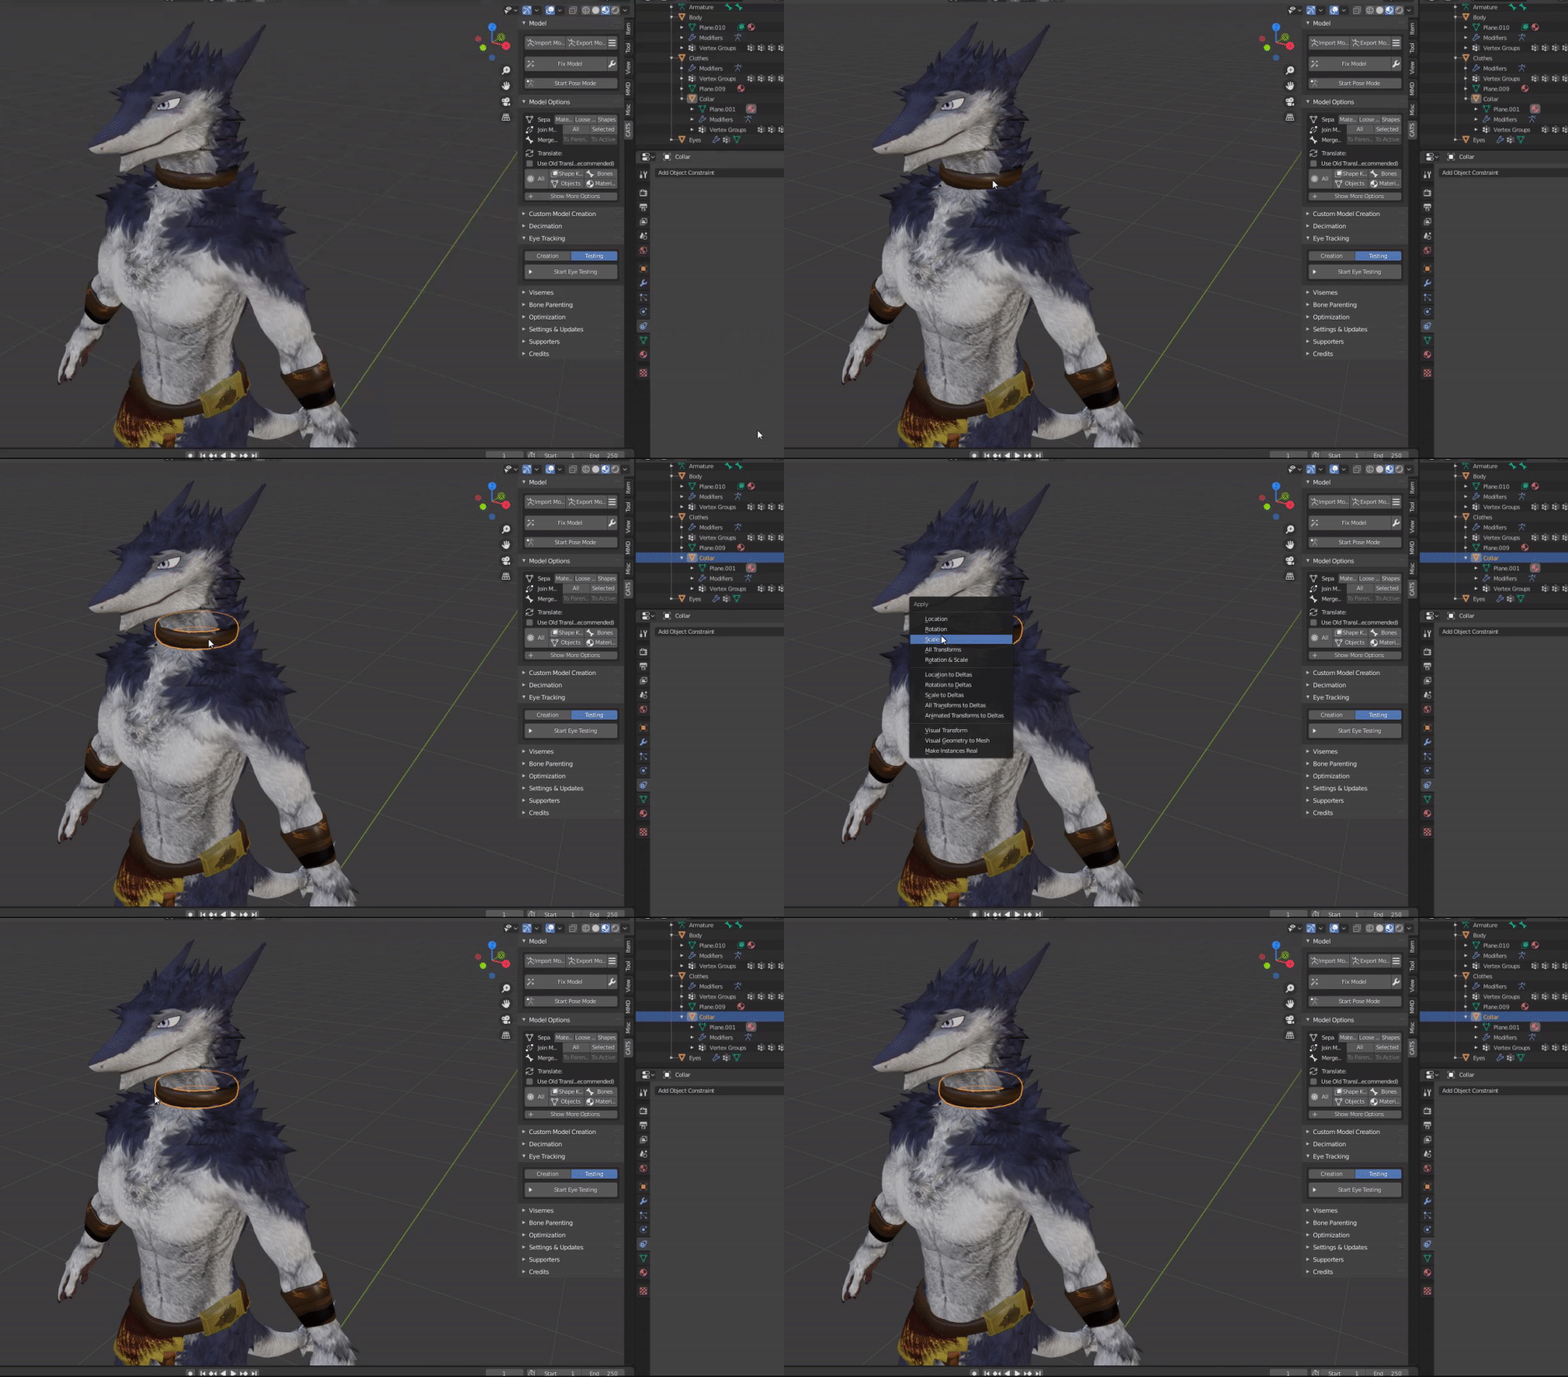
So I'm getting weird scaling issues in blender
iron agate
When I create a new mesh and join it to an existing mesh, after I import the fbx to Substance Painter, the original is tiny, while my addition is huge. What's going on?
 quaint jasper
Apply transforms first before export
iron agate
to the whole model, or to my addition?
Do I apply visual transform or object transform?
quaint jasper
you apply scale
iron agate
Can you explain where that is?
iron agate
while selecting the new mesh?
quaint jasper
yes
 quaint jasper
Is none of your model weight painted ?
But yeah that should be it, if that's not it i'm not sure
iron agate
No, I haven't done anything else to this model but add that collar
why are you asking about weight paint?
@quaint jasper Hey, I reloaded a previous save and tried again and it worked
Must have messed some scaling up while I was trying that solution
 daring isle
any idea why its doing this?
gaunt abyss
@median pike really sorry for the late response, yup I'm sculpting it.
If it makes a difference, it's a cartoony character with a mouth that can open pretty wide.
 prime veldt
is their an easy way to remove hair avatar on blender
quaint jasper
Press L on the mesh, or select a face of it, ctrl + shift + G > material
prime veldt
do i have to click fix model first?
quaint jasper
nope
median pike
@gaunt abyss well if youre sculpting it you have two options. Sculpt it with the mouth open or just dont worry about it now and model it when youre retopologizing
prime veldt
nope
Ruuubick#7777
ty
median pike
Finally done rigging
 elder mirage
So after making a character model, would the next steps be 'rig, weight paint, uv map, texture, then animate'? Or is a different order the way to go?
quaint jasper
Correct steps, aside from animate, which you don't need to do
Unless you want to, but that's done automatically otherwise if the character is humanoid
elder mirage
I thought it would only be automatic if you're using stock/default animations or no animations at all cause of fbt.
quaint jasper
Fbt can still chose to use animations for locomotion
 solar fossil
ay, nice clothes Redotix99, how did you make the folds? they look really nice
gaunt abyss
Alrighty thank you Redotix! I barely have any experience with sculpting so we'll see how this goes. Closest thing I've done so far is add a mouth to a mouthless character and the results were less than ideal. I just made a cut where the mouth would go and put a red inverted sphere with the front cut off for the inside of the mouth and put a bunch of white triangles behind what would be the lips for teeth. The result was this abomination haha
Yours is looking great btw
 valid dirge
Do questions about weight painting go here?
solar fossil
i think this is more about the process of making the model mesh, try avatar-rigging
 spiral sigil
you gonna do only head or whole body too ?
spiral sigil
nice
 frosty plinth
very easy
im a clone
lol
took me 3 days
because i spent 8 hours straight
@spiral sigil
when i was making the last eye part
spiral sigil
triangles ? isnt that an hassle
frosty plinth
yes
i added movied merge
again and again
till it looked like that
and yes
but what ever
ive teached some people on how i speed make models
i mean you have to be doing this a long time to be fast
spiral sigil
I thought triangles were bad topology
solar fossil
huh, that is a weird technique to start a model
quaint jasper
it really is 
solar fossil
cant really complain tho since im the guy that sculpts low poly models 
 young vault
And half the vertices aren't merged, right?
solar fossil
wdym half of them are not merged?
 ashen forge
Bastard
young vault
@solar fossil if you have ripped vertices and you sculpt they draw away from eachother causing a hole.
solar fossil
ah, got it, yeah, no ripped vertices here, all manifold :fingerguns :
also verry noice model trixxed
oh @ashen forge mind showing topo ? 👀
ashen forge
I'd love to but I don't have my PC right now, I can say it's probably around 11k tris though.
 stark ore
I love it @ashen forge
spiral sigil
whhhhhyyyy i just want to import a reggie model for unity QwQ
but i cant because i need to be invested in the community
can someone do it for me
stark ore
bro
 coral stratus
might make a public version of this to roam around now after what happened ❤️
median pike
@solar fossil I used marvelous designer for the folds and baked that in to a normal map
 fresh schooner
 muted raven
I’ve seen that among us avatar running around already in multiple various worlds @coral stratus
 radiant moon
I've seen other versions too that more closely resemble the actual game, with custom animations and stuff too
I had them threaten to kill me at taco bell
quaint jasper
M
quaint jasper
enable vertex snapping and auto merge and try with that
 tight quartz
aaaaaahh
quaint jasper
Shift + S to snap cursor at the main vertex
Snap cursor to Selected
then select the other one and Shift + S Snap selection to Cursor
tight quartz
uhh
quaint jasper
in edit mode
tight quartz
yea
Ok that works
thx
Is there a easy way to make it like this?
So it's curved
quaint jasper
use the scroll wheel to reduce the radius of importance
quaint jasper
that's just the rotation circle
quaint jasper
That's because you have no edges to make a curve with
quaint jasper

Blender Stack Exchange
I need to curve a single edge of a plane.
I tried vertex bevel but either it didn't work or I did some mistake.
The plane I have:
The shape I want:
As can be seen in above images I need to curve...
tight quartz
I have low bloodsugar aswell, I am getting really confused thats also why xd
radiant moon
What i'd do is make a thick bar vaguely in the shape of a scythe and then do "subdivision surface"
quaint jasper
That's just basic modeling, you'd need to find tutorials to teach you that tbh
ashen forge
Can I post neat Blender tips/tutorials I find here that could help other people?
quaint jasper
Sure
ashen forge


#b3d ナイフプロジェクト / 両オブジェクト選択、Edit Modeに入り、ナイフ側の面を選択した状態で発動させる。F3検索でkniとでも打ってメニューをだす。複製はShift + D、ミラーはCtrl + M + X。モディファイヤでないミラーも意外とよくつかいます。 https://t.co/0NiPrWCZkH
Retweets
932
Likes
3614
 Twitter
The video is all y'all really need to look at
quaint jasper
oh, saw that yesterday and bookmarked it, definitely useful
i didn't know about knife projection
 astral ocean
hey y'all quick question
im a blender newbie and I noticed something odd
in object mode my avatar mesh looks like this
it has lots of little gaps and holes thanks to me crushing the polycount
but
when i go into edit mode i get this gorgeous mesh with everything smoothed and filled
so my question is: which one makes its way into unity and vrchat?
 barren quiver
@astral ocean Modifiers have a toggle on them that shows whether they display in Edit mode. If you're decimating the mesh using a modifier, then the modifier won't change the mesh in Edit mode until either that is toggled or the modifier's applied. The mesh will only be modified when it's applied, and whether it's applied on Export depends on whether the modifier can be applied automatically. Meshes with shapekeys (i.e. face expressions) won't be able to apply the decimation modifier, so they won't get it.
astral ocean
hmm, my decimate modifier doesn't have an edit mode toggle, just a realtime and a render toggle
for context I have a solidify, planar decimate and a smooth in that order
and even if I toggle all the viewport toggles off the edit mode mesh still looks better
thats completely bizzare, wtf
hmm figured it out, applying the modifiers made it match the obj mode mesh
edit: jesus getting the p-count down for quest is hard
solar fossil
nice style Duskitty 👌
 magic talon
@tight quartz You can use Curve path with bevel circle like this
 supple stag
tight quartz
supple stag
tight quartz
@magic talon How do I use it agin? XD
spiral sigil
Decided to use some glasses that came with an avatar. However, the inner panels around the lenses are facing the wrong way from what I can tell.
quaint jasper
you can disable backface culling
spiral sigil
There's also a smaller mesh within the glasses themselves. No idea what purpose it serves.
Should I just flip the normals and remove the inner mesh?
quaint jasper
or you can disable backface culling
spiral sigil
Will that make the inner panels show properly in Unity?
quaint jasper
if you set cull to off in material yes
spiral sigil
My main issue is I'm unsure about how the glasses should look. Haven't messed with anything like them before and thought I'd just toss them on because why not.
 fervent light
Any particular reason why joining armatures in blender offsets the mesh under the join source? Both armatures will stay in place, but for whatever reason one mesh returns back to where it was when it was first imported into the scene
quaint jasper
Apply transforms first
fervent light
Can't do that with shape keys apparently
 coral plover
Its been awhile I been working on my desgins in vroid yet then my laptop started to have issues took awhile to get it fixed yet heres a charecter I made I plan to use her for streams as well any advice will be great
Program Vroid
Also I attempted to use blender cause I have a cartoony style and doing anime is hard for me yet I couldnt figure it out-
quaint jasper
spiral sigil
satan
 onyx juniper
Substance-y!
quaint jasper
@onyx juniper yeah I can't texture to save my own life lmao
 stable edge
Do not
onyx juniper
Yeah, screw texturing!
Although I know a guy who's really good at it and every time I look at him I need to go to the jelly School
quaint jasper
Yes, it's unfair, why can't i be skilled 
stable edge
I don't actually remember posting that
 nova yacht
Hey this is probably such a dumb question but how would I go about importing this glass effect into unity? Or would I have to recreate it in unity?
 mild nimbus
Recreate it or bake the entire shader in Blender and bring it into unity as a texture
@nova yacht
 drifting depot
Hello. I've made a 3d model and I now have it standing. But I need help with rigging it. I know how to rig but what should I label the bones and what bones should I put in?
 brittle veldt
So I am trying to edit my avatar in edit mode
however the parts that I want to edit aren't showing their vertices when in vertex select mode but other parts do show their vertices (as shown below).
I'm a bit lost as to why this is the case because I was able to see those all the vertices before.
 fringe rock
Press 1
median pike
its finally done. I am tired.
solar fossil
mega nice
spiral sigil
hmm
quaint jasper
@median pike Looks fantastic
median pike
thank you ❤️
spiral sigil
@median pike I love your nanachis
brittle veldt
@fringe rock I'm already in vertex mode it's just that some meshes don't show vertices while others do
quaint jasper
spiral sigil
satan shroom
median pike
Infected mushroom.HAHAHAHA funny joke
 tulip condor
hallo everyone
i wonder what to do next so my model will be smoother
do i have to add more edges on it,change resolution or what else and how ?
here is an video:
https://streamable.com/gg8o0s
any suggestion ?
 quaint jasper
Subdivision modifier, bevels
tulip condor
@quaint jasper
thanks for your suggestions
 subtle jackal
Subdivision is the Monkey's Paw of smoothing. It will do what you desire, but at great cost. Never subdivide what you can fix by redistributing existing edges.
tulip condor
@median pike
thanks i will keep that in mind
@subtle jackal
that's true indeed
thanks
quaint jasper
looks like a metallic map
spiral sigil
it's missing most of the uv for some reason
quaint jasper
what did you bake in ?
spiral sigil
quaint jasper
How did you set it up ?
spiral sigil
hang on
really basic so I could just color it in substance painter, I'll screenshot it
I feel like I've done something dumb, because this has worked before on other models
spiral sigil
I think it might be because I don't have a light source?
@quaint jasper yeah I wanted everything as one texture
and one material
but when I bake the AO so I have something to look at in substance painter I see it's mostly black
quaint jasper
why don't you bake AO in substance ?
spiral sigil
I can do that?
quaint jasper
yeah tht's literally part of the baking maps process
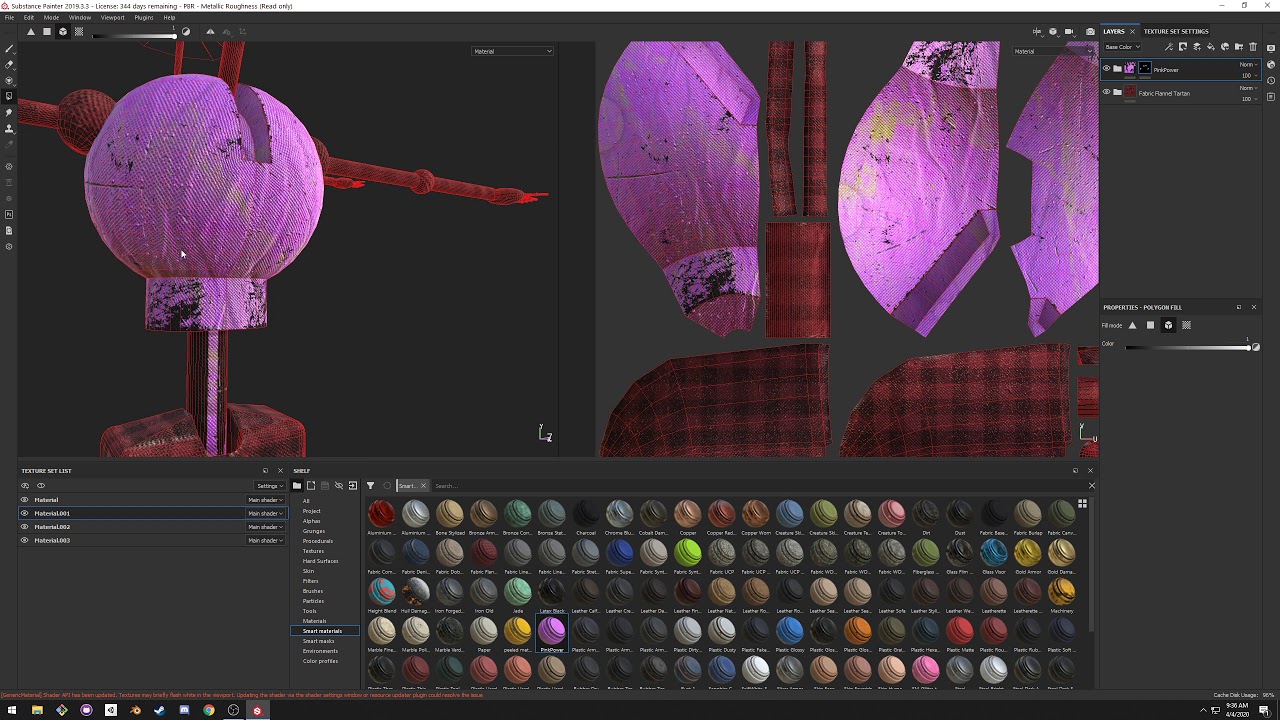
This mediocre tutorial goes over the basics of substance painter for the VRChat avatar/model creation workflow.
spiral sigil
@quaint jasper same problem after baking in substance
spiral sigil
I hit recalc outside and Im rebaking
 timid stirrup
Anyone have any energy to make a avatar for me? I’m not being rude I don’t know how to make avatars
Want this guy as the avatar(this is my tv on my ps3)
 primal prairie
Can I get some help with something basic? I've altered and added to some clothing that was made for my model, and I'm trying to export it from blender, but it seems to be missing an armature and I'm not sure why that would be.
spiral sigil
@quaint jasper this looks right to me
idk why some of the mesh is that color though
do you have a single UVmap ?
[10:25 PM]
yes
quaint jasper
i'm kinda stumped then
@primal prairie did you weight paint it ?
@timid stirrup No one will make something for free here
@spiral sigil Does baking the other maps results in the same problem ?
primal prairie
@quaint jasper No I didn't.
quaint jasper
then yeah it won't work
primal prairie
Ah okay then I'll look into wieght painting it.
subtle jackal
You have one or more faces unwrapped to the entire 0-1 UV space, @spiral sigil there are UV verts in each corner.
I'm guessing a lot of them since the UV space is white and wouldn't normally be.
primal prairie
@quaint jasper I think that it may already be weight painted:
quaint jasper
in that case you'd need to merge it all together
primal prairie
You mean the bones or the meshes?
primal prairie
As the bones are already under a single armature.
quaint jasper
but it needs to be a single armature in the end
spiral sigil
@subtle jackal explain a little more?
primal prairie
Yep all the bones are a single armature, and if I export with the selected item I can export the armature, but when I export the fbx and bring it in unity there's no "armature" object under the fbx.
primal prairie
quaint jasper
ok so merge your meshes to begin with
subtle jackal
It means there are singular faces unwrapped over the whole UV space @spiral sigil Make sure the entire model is unwrapped, that all your seams are proper etc.
quaint jasper
and then parent your mesh to the armature with empty groups
primal prairie
Okay I'll give it a try!
Right all joined.
Then do I just need to shift drag the mesh under the armature in the heirachy window?
quaint jasper
ctrl P
primal prairie
Do I set it in the window here?
spiral sigil
@subtle jackal zoomed out I dont see any
primal prairie
As the armature is not an object I can parent it under?
subtle jackal
it's unwrapped over the space where everything else is. Try island select and select where you think there isn't anything in the UV space
primal prairie
Like so @quaint jasper
quaint jasper
yep
subtle jackal
no problem
primal prairie
Okay now when I export it the armature has hips as the root bone, and it's got the wrong up direction.
But when I place it in the world it works fine.
Until I tried using the clothing combiner tool in unity and then it breaks completely.
quaint jasper
ctrl + A on everything before export
primal prairie
Hmm, I gave it a try but the same thing happens. I also has no rig. Do I need to make it generate a humanoid rig?
quaint jasper
nah something in your export is wrong
primal prairie
Okay I'll look into it, thanks again for all the help!
I'm trying to get it finished in an hour so it's really helping.
primal prairie
Hmm I'm struggling to figure it out so I think I'll have to concede for now.
tulip condor
hi everyone
i trying to make my car more smoother
but i run into some weird issue
like...when i create 4x4 single face it triangulate it
but when i click diagonal edge it doesn't indicate that that edges exist
here is an video to related problem:
anyone knows why it fake triangulate
and how to fix that
please help
median pike
quadas are made out of tris
they are always triangulated technically
its the weird ass lighting youre using
it looks like you fucked with your blender a lot
also what version are you using?
you should use 2.8 or 2.9
it could be your normals. Turn on face orientation display to see if you have fucked normals
 vivid crater
It looks like the entire theme is just weirdly colored, not the lighting
 brave prairie
It also looks like you have a ton of duplicate verts and edges. When you selected the bottom edge to create a face the left edge highlight looked like it disappeared under a duplicate. Could be wrong since it's hard to see much with that video res and theme 😅
 lapis steppe
anyone here use autocad? I use it for school for designing stuff and I'd like to take what I do in autocad and import it into unity and make really legit houses
if anyone knows how to do that let me know
 analog shore
Spent about 6 hours on this clubhouse for my putt putt game. I wanted to see what people think.
analog shore
Its a club house 😄 not a home
Its also for quest so I cant add to much to it. Its only 1500 tris
analog shore
Yes, its just to make it look less.. boring 🙂
 magic elm
anyone knowhow to turn off colliders for this? the tentacles are supposed to be the legs and drag behind but they are all sorta inside each other.
analog shore
Wait? @magic elm If you don't want them to go inside each other you need colliders. Without colliders they will intersect. Also the root of all the tentacles are intersected which would cause errors unless you boolean them all together.
magic elm
@analog shore so the point was that to fit the amount of tentacles i wanted they had to intersect. however, i was told that having them intersect with colliders still there would cause them to not work properly. this is what the top of the tentacles looks like.
my other issue is the "skeleton" of the model is weird to make, because the only things that are semi-normal on it are the hear and torso. the rest is not proper human.
analog shore
I dont think I understand what you're saying? @magic elm
You don't need to have colliders if you're trying to do dynamic bones.
magic elm
oh ok
Another issue is since there are bones on each individual tentacle it doesnt work when i try to join them all together. When i join the tentacle to the torso, even if the bones for the tentacle are selected, they do not join and then no longer move the tentacle.
im sorry if this is hard to understand im very bad at explanations.
analog shore
Are you trying to parent the bones from the tentacles to the torso?
magic elm
no im trying to join the tentacles and their bones to the torso using the actual Join function. would the bones work if i parent them to the torso after joining the tentacles to the torso?
analog shore
You would need to parent them to the armature?
magic elm
so for some reason only on the tentacles works fine and its the right arm one. i dont know why but when i join those together the bones in there work.
analog shore
@magic elm Try watching this tutorial and see if it helps :D
https://www.youtube.com/watch?v=SBYb1YmaOMY&t=654s
Learn how to Rig Characters for Animation in Blender 2.8!
Go to: https://www.hostinger.com/cggeek and use Code: CGGEEK to get up to 91% OFF yearly web hosting plans. Succeed faster!
Downloads on Patreon: https://www.patreon.com/cggeek
Free Low Poly Character Model: http://bi...
Dont worry about the IK part, mainly just how to parent and name your bones correctly.
magic elm
ok ill watch it, thanks for the help
 next aurora
Hey guys
question
you're gonna hate me
but
im trying to use a shrinkwrap modifier in blender to put Quagmire onto a toilet
doesnt need to look too good, it's just a shape key
but im not quite sure how to go about it
i keep getting something like this:
but i want it to fit naturally around the toilet
is there a way i can do that?
i also have to make him big beforehand with another shape key, which pretty much breaks the entire thing
next aurora
i just want a simple way of giving one object a shape key that is another object
next aurora
i was hoping to have one object morph into the other
at that point i'll just have seperate meshes
radiant moon
You may end up having to model the shapekey yourself
A dramatic change like that would require a lot of polygons in order to make it not look like shit
next aurora
figured as much
magic elm
anyone know how to fix this? the tentacles that replace the legs mostly fix with the fill face tool, but this section refuses to work no matter what i do.
quaint jasper
convert the curve to mesh ?
stark ore
you going to reduce the poly on those tentacles?
 ashen stag
Yeah topology looks fine so you should just dissolve a bunch of edgeloops before you get too involved
magic elm
everything was joined the issue was just some of the points refused to work with the fill face tool but i got it fixed
how do you check the amount of polys there are on the model in blender?
This creature
I drew it in 8th grade and decided to make an avatar for it
Im not doing the back tentacles tho
They were annoying to figure out
ill see if i can use those if thats fine
ill try that at some point. this is my fist model ive made and i started from scratch, so i am gonna leave the back ones off for now. i will probably try adding them at some point later tho
magic elm
Im having trouble getting the bones to work in blender. i got all the bones set up correctly, i parented everything the way i was supposed to, but the mesh still refuses to move with the bone. does anyone know how to fix this?
 clear geyser
@magic elm Are your bones weighted?
magic elm
Yea
 cerulean barn
Hey I might be an idiot but I realized way too late: I was editing a model in unity instead of blender but I got it looking perfect, I just need to get it back into blender to do some finishing touches. How do I get it out of unity WITH the changes to proportions I made?
I can't find a way to edit the mesh in unity otherwise I would
coral plover
ey whats the reccommened bone settings for animal ears cause I decided to mess with em and now they look hecced up when moving qwq''
heres a perfect example of how bad I messed up id say somethin else yet nah -3-
idk how to fix it someone please help the peep qwq'' also its made in vroid
Please help the peep who fucked up QvQ
 pure haven
@coral plover do you mean the dynamic bone settings?
These never let me down
I think I used the hair settings for my ears
 spare skiff
I don't know why some areas on the back side are showing the texture and some are not
How can I make sure only the front side shows the texture
quaint jasper
disable culling in the shader
spare skiff
now I find out it is the problem of the vertexes, somehow there are many redundant vertexes close to each other and they create those faces on the back side, and I have cleaned them up
but now my problem is there are so many black lines on my model
(object mode)
quaint jasper
i don't think that's a texture issue
 gaunt aurora
blender render doesn't like unity export materials from substance
subtle jackal
All you really have to do is pull the correct channels and know that the "roughness" map is inverted, or just use the roughness version of the unity standard shader
also don't forget everything but the albedo map should be set to Non-Color data
 cold flint
 slim ginkgo
https://media.discordapp.net/attachments/757134788674191401/758327293768105984/image0.jpg?width=754&height=563 My friend and I are making the real Sonic movie because many loved the old design

but not all
 pearl karma
you know there is a moddle of the old sonic someone made
Custom / Edited - Sonic the Hedgehog Customs - Sonic (Original Movie Design) - The #1 source for video game models on the internet!
@slim ginkgo ^ might save you truble
slim ginkgo
this is joke version were actually making it look like him
pearl karma
oooh derp XD sorry
slim ginkgo
https://media.discordapp.net/attachments/757138414930755715/758483378227249192/Screenshot_20200923-202147_Gallery.jpg?width=1160&height=564 if you can see it almost looks like him
 pearl karma
BURN IT
 still wadi
quaint jasper
still wadi
quaint jasper
ngl the outline is weird
and the squish hurts to look at
but otherwise it looks great
subd goes brrr
still wadi
it's just placeholder shader
 lyric token
anyone know how to retroactively add an edge to a past bevel in maya
subtle jackal
if my game art class knowledge served me well, you might be able to find it in the history stack and change it there
 wispy orbit
Check the model in blender for those polygons and remake them, most likely they're poorly behaving n-gons
radiant moon
Nothing seems out of the ordinary
It probably has something to do with the shitty way I boolean'd the jaw to the rest of the face
wispy orbit
check that all the vertices are merged?
radiant moon
How would I be ablte to tell if they were merged?
wispy orbit
Move one by one, and the edges should follow.
Had an issue where I had accidentally split an edge and it resulted in the same issue
wispy orbit
looks like that first one is the issue
radiant moon
I don't even know how that happened
wispy orbit
could be a mispress honestly, all it takes is pressing v
radiant moon
How do I fix it?
wispy orbit
Either delete the offending faces/vertex or merge them with alt+m
radiant moon
holy fuck the more I try to find the issue faces the more of them show up
wispy orbit
the remove doubles button works wonders
radiant moon
Where's that
 atomic hamlet
@radiant moon It can also be caused by having n-gons in your topology, aka faces with 5 or more points.
radiant moon
That just started the animation timer
wispy orbit
hmm
In 2.79b it's in the left panel
dunno about 2.8, too stubborn to let go of the 2.7 design
radiant moon
Yes i just found that put
It didn't do anything
It said "Removed 0 vertices"
And when I try to turn it up it sews the lips shut (Since the mouth is supposed to be flat and hidden when not open)
I won't be able to do any more with it tonight anyways, i need to go to bed
stable edge
Make sure you've got all verts selected
stable edge
also  hide the verts you dont want to merge
 calm anchor
I've got an issue with uvs rn. I have my uvs properly oriented on the image i want to use, but it's displaying random parts of the image on the actual model. Am i doing something wrong?
calm anchor
figured it out, lol
ashen forge
A model I quickly made in about two and a half hours I'd say. It's 1k polys and 1 material, yes, the fortnite dance is mandatory.
A better look at it with a bootleg turnaround-ish.
quaint jasper
You should submit it for the spookality contest !
 static vapor
i want to offer some adivce for people who has this problem called backface culling.
median pike
@static vapor thats an awful way of fixing backface culling. Please dont tell people to do this
youre adding unnecessary geometry this way
best way is to turn on "face orientation" and make sure everything is Blue by selecting parts of your mesh and flipping your normals
tulip condor
hallo there
I'm currently trying to install some sculpting addon from github
in blender 2.79,and 2.80
but it wont add it to addon list and it wont gives me any error
it simply ignore's it like nothing happen
ps
the addon is .py and it's packed in .zip file type
anyway
why is that happen and is there a any way to fix it ?
thanks in advance
median pike
I dont think .py can be installed trough the addon installer
you have to open it trough the scripting tab and run it
static vapor
ah yes i dont use 2.8 so i cant find some things
tulip condor
@median pike
it can
because i try that and i install some of those packed in zip file or without zip file
median pike
if its just a .py file you can try running it from the scripting tab
median pike
tulip condor
@median pike
oh ok i will try it
i hope it will work for me
thanks
static vapor
i dont see any tutorials on this for 2.78
median pike
its the same process in 2.7
https://www.youtube.com/watch?v=NWrtxR4oxTs @static vapor too me less than 10 second to find

Video Added: 27th May 2014
No serious description given.
...ok, maybe one thing: in Blender 2.80 and later, they hid the "Flip" and "Recalculate" buttons in menu "Mesh", Normals".
Music: Montezuma's Revenge - Main Theme (from unfinished Atari 800 game)
trivia: the music is c...
static vapor
well im still gonna do the solidfy for skirt lol cuz one side is empty
median pike
turn off backface culling in your shader for them to be double sided
thats a very bad way of doing it. Youre more than doubling the polycount for no real reason
 devout scroll
i've literally seen people yell at me for suggesting not to do solidify and instead turning off backface culling
can't win either way I guess?
though turning off backface culling also doubles the face count
static vapor
iv turned off backface in the past still makes skirt one sides
median pike
it doesnt lol
static vapor
i had to make up for with shader
median pike
thats literally the job of backface culling. It wont cull the back face if its turned off
static vapor
iv been told that for the past 2 months now
median pike
than youre doing something wrong
devout scroll
backface bulling in unity*
static vapor
exactly
devout scroll
backface culling in blender doesn't do anything but hide backfaces
but exported mesh is the same
median pike
thats not how that works
thats not how unity renders at all
unity shows the whole mesh if at least a bit of it is in the view
what pumkin said is that if you turn off backface culling in blender it wont change anything in unity because those two render independently
you have to turn off backface culling in your unity materials
stable edge
which you shouldnt do, as its less optimal than having those extra faces
You're choosing between adding a little bit more data to ram, or adding another drawcell.
those who know this better than me can feel free to go off, but from my knowledge:
you're choosing between adding a few more verts and faces to their respective buffers to an already existing mesh with its already existing material,
or
youre telling the computer to render both sides for that material which impacts all other meshes that use that material, meaning you draw everything twice, which is like saying the computer has to double everything itself and then send that off to render instead of just a few things,
or
youre making a new material which means your computer will have to say ok cool lets see what they want from me and lets make a whole new instance of whats needed (instead of using what the other materials use) which takes a chunk and then we render that mesh
tl;dr:
making a whole new double sided material for one mesh so you can have it render double sided is suboptimal, making all meshes use the same double sided material is suboptimal, using solidify is recommended unless of course you want a toasty pc and in that case go the material route and freeze some poor low end users computers
ah fancy letters that i cannot type
median pike
I wasnt aware that it renders double the geometry
stable edge
materials arent the way to go buddy
median pike
well I cant speak on the skirt issue but I think we can all agree that using solidify to flip normals is very unnecessary
stable edge
youre basically saying render it twice and also new material soooo 🔥
i dont actually know what the issue is with @static vapor lol
also @devout scroll because relevant party
id say that the person who made the skirt only made one side (the outside part) though which is fine but some people like immersion or something in a virtual game
alsooo lets see @tulip condor 2.8: preferences>addons>install. If its for an older version of blender it should warn you but if it doesnt search what youre expecting the addon to be called there and it should show you something
devout scroll
fair enough
stable edge
I can't say for 2.70 etc because ewwww old blender get outta here
static vapor
no
stable edge
not that i didnt use it i just like using things that are being actively developed heh
devout scroll
also if you're installing addons, don't unzip them
devout scroll
if you got a py file don't you need to manually put it into your addons folder
stable edge
also,
no
?
devout scroll
or run it in the text editor if you want to use it once
no idea how blender handles it
stable edge
it depends if they wrote it to actually be an addon or not
py / zip blender if you install addon blender will put the files in...
C:\Users\USER_NAME\AppData\Roaming\Blender Foundation\Blender\BLENDER_VERSION\scripts\addons\
so if theyre proper addons youll be fine to just add them
you can tell if theyre proper addons if they have bl_info at the start of the script or if theres more than one .py file, usually
bl_info = {
    "name": "",
    "description": "",
    "author": "",
    "version": (0, 0, 0),
    "blender": (0, 00, 0),
    "location": "",
    "warning": "",
    "wiki_url": " ",
    "category": "",
}
hopefully thats not too much info to confuse people
 visual vigil
https://cdn.discordapp.com/attachments/613129770833805312/759412439456022538/lower_angle_shell.png https://cdn.discordapp.com/attachments/613129770833805312/759412450541568000/top_angle_closed_.png


i think im finally doneeee
 silent depot
I dunno what I signed up for lol
Does anybody know a good place to learn how to create an avatar for vrchat from scratch?
or any place actually
tulip condor
@stable edge
right...
i will try that
thanks
 wraith badge
Hi. I have a Problem with imported 3d Objects from Blender. I can't use textures at this objects.
ashen forge
Decided to use this spooky guy for the Crossplatform Spookality thing, left is the PC version and right is the Quest version. The left uses Poiyomi for the outlines and right is just normal scaled outlines, it adds a lot more polygons but to be honest this thing is only 1k polys so another 1k isn't anything.
I should give him a different name though
 livid storm
manual effort will generally look better than a generalized shader
Like manually modelled fur vs fur shader
less expensive as well 😉
ashen forge
I generally just enjoy the fixed sized outlines, which are kind of difficult to replicate in such a manner.
My models are typically very high performance too. Majority of which are 1 material and around or under 15k tris. I pride myself on it :')
 vagrant saffron
hello! i’m new to 3d modeling, (very beginning) and i’d like to know if you guys have tips for getting started.
devout scroll

UPDATED VIDEO: https://youtu.be/-cfz7CQqDVs
Blender 2.8 Launch Pad Course: https://academy.cgboost.com/p/blender-2-8-launch-pad?affcode=206256_je5wtd2f
Get free resources here: https://gumroad.com/curtisjamesholt
Visit my website: https://curtisholt.online
Blender 2.8 First...
still wadi
@vagrant saffron https://www.youtube.com/playlist?list=PLa1F2ddGya_-UvuAqHAksYnB0qL9yWDO6 it's 2.8 but for fundamentals it doesn't matter

YouTube
Get up to speed with Blender 2.8 in this updated official video series!
 covert moth
Made this cutie. Needs rigging and triggers for expressions. Need to learn how to do that.
devout scroll
cute!
 wild orbit
he will be beautiful
i've only made a few avatars so still figuring it out
but plan to make this guy the most functional one
covert moth
 deep dirge
I feel nothing but pain
spiral sigil
same
deep dirge
I not even making that model for myself, its for a friend who likes the character
 hallow bough
Nanachi has seen things, I don't blame her. Very well done model!
radiant moon
How can I get rid of the jaggedness on the lips?
deep dirge
@radiant moon Open edit mode, I would like to see
radiant moon
deep dirge
oh lord
radiant moon
This is the high poly model for normal mapping
The weird mesh was caused by having to remesh it during sculpting
quaint jasper
voxel remesh 
radiant moon
Bro why you making fun of me
Trying to use the remesh modifier usually end with the program crashing for me
When I do get it to work it just does the same thing
That's on smooth remesh
It's also probably not a good idea to laugh at people who use your game
deep dirge
Edit the vertices manually
move
merge
delete
Please make fun of my bad topology
 valid sun
bruv
deep dirge
should I not have such curvy topolgy?
radiant moon
She's not "bruv"ing you
radiant moon
looks pretty good to me
I'd just check from all angles to see if there's any weird shit going on
young vault
8/10 on that. It looks pretty clean. The whisker pad things look a bit weird, but, other than that, I see no real problem with it.
 uncut flax
Is there a way I can stop blender from exporting the fbx in a way that Unity thinks the rig is scaled at (100, 100, 100)?
Apply Transformations isn't doing anything at all, and the usual apply-scale trick doesn't really work for armatures
quaint jasper
experimental apply transforms
uncut flax
That's what I meant with apply transforms, doesn't work.
In Unity, I have the model itself and two children; one for the armature root ('rig'), and one for the mesh. Both are scaled x100, and the armatures are also rotated (-90, 0, 0) because reasons
Actually nevermind; the mesh itself is now proper, but the rig is still off. The root object for the armature is scaled/rotated
I can get it to scale properly if I set it to "FBX All" instead of "All Local", but then the model's origin is in the center
which I guess I can fix by hover the entire model in blender but uh.
subtle jackal
scale to 0.01 and uncheck apply unit.
you also have to tell unity not to futz with it as well
keep in mind it will break any translation-based animations on your model as well
quaint jasper
kinda have to apply transforms on all tho
devout scroll
i think all you have to do is set the apply scaling to fbx all
on export screen
origin being in the center could be a unity thing if it's a 0,0,0 in blender
are you sure center pivot isn't enabled
uncut flax
I can't really scale it, as it's the armature/rig that's being scaled/rotated wrongly
I mean, I can, but that seems to mess up the model in all kinds of weird ways
and yes, I'm sure - because the avatar's stuck in the floor
uncut flax
The root bone is at the origin in blender
devout scroll
in blender, for both the Armature and the mesh
uncut flax
mesh too.
I've had tried the FBX All export instead, and manually adjusted the origin, and that seemed to work - but the bounding box for the renderer was all wrong, and I didn't really investigate in what else broke on top of that
devout scroll
How do I rip a curve into two?
For vertices it's just V but for curves I can't seem to find a way to do it
spiral sigil
Working on this in blender xP
 lucid orbit
anyone know of a good anime male base for modeling?
 thick crag
@lucid orbit Try to find those in google, here is an example that I found in google:
It's better if it has side view too.
lucid orbit
thanks\
spiral sigil
i finished the wings i was working on
lucid orbit
kew
 stray tulip
Newest texture work ❤️
lucid orbit
That looks awesome!
deep dirge
God damn how do you make stuff look that damn good?
 zealous pond
@spiral sigil Nice work, those are amazing 
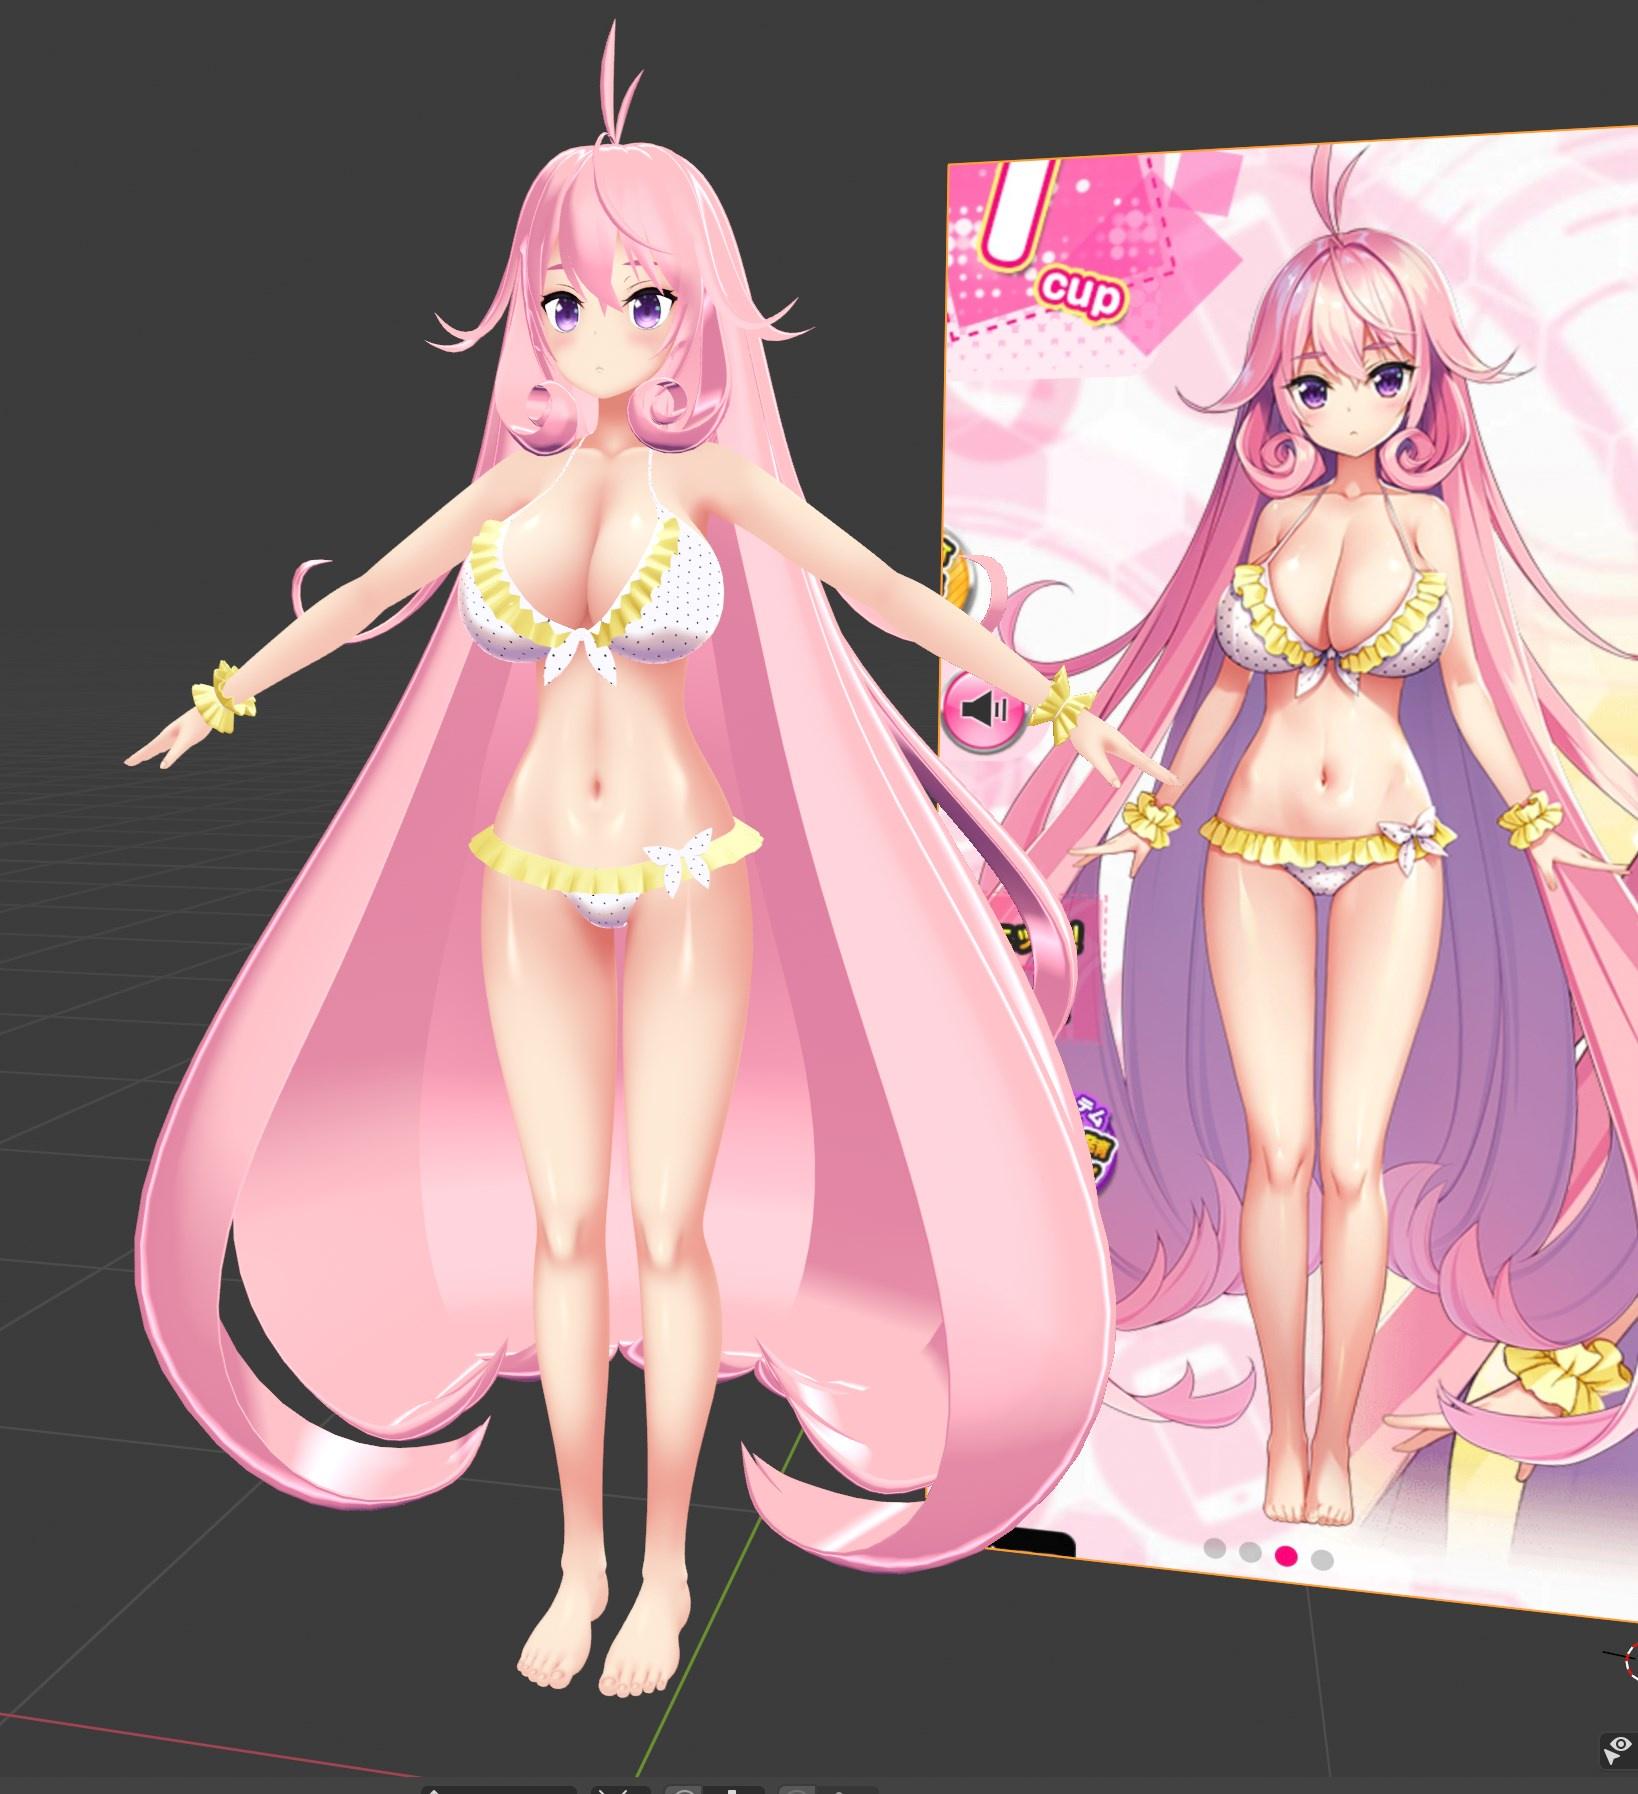 spiral sigil
monsterous mammories
jumbo jugs
thunderbuckets
two midget in a headlock
I really like the texture
good stuff 👌
magic elm
(i had this in the wrong channel oops) so, i have had SO much trouble with this damn thing. first, does anyone know how to have the mesh of the model move with the actual bone? i have tried so many things and i just wont work. also, the "arms" refuse to work as well. the bones in there are not moving them at all. does anyone know how i could fix this? i have tried so many tutorial videos and none of them help me.
 maiden vale
its t-pose man
hallow bough
I mean if you want to accomplish what you're describing you're gonna have to weight paint XD You might have made it a little too complicated for yourself if you're just learning about it.
 white moth
Select both verts that are next to each other, and merge each pair
Though I don’t see why separation should have created a seam like that
white moth
Hm I never use the shortcuts hit spacebar or whatever you have set to open your command search and just type merge?
static vapor
its just alt m but the more longer way
white moth
I don’t know old blender :x
quaint jasper
bridge is bad
you should merge the vertices instead
easy way is to dissolve the edges you created from bridge edge loops
static vapor
Yeah Ill do that
I'll probably use merge in the chest neck verts and creat a 2nd body for hiding poly for clothes
white moth
Be aware that merge can totally botch your shapekeys if they aren’t disconnected
static vapor
Well the face shape keys and body shape keys are separate
There's no shape key for body infact I might make the body into shape key as to a alternative
I found something better
in edit mode remove doubles
cuz since the vertices where created whehn meshs were created it created an extra vertices therefore by removing the double vertices it can fix line clipping
stable edge
merge by distance and remove doubles are the same thing
spiral sigil
for some reason, whenever I do any sort of key frame this moves.. anyone know how to fix this?
static vapor
u have keys on ur body
onyx juniper
@spiral sigil Your Robot Chicken reference did not escape me
devout scroll
gotta take it back to blender, edit mode, select all the bits that stick out, press f3 or space if you're in old blender, type in propagate shape
@spiral sigil
stray tulip
https://cdn.discordapp.com/attachments/483155106389295104/760727576997789716/2020-09-29_22-58-11.mp4 Got a nice idle and also the eye textures!
lucid orbit
question: when using vroid and putting it into blender can you remove and or add things to the moddle, for example say i wanted to add a cybernetic arm to a model i made in vroid, would i be able to do that?
still wadi
you can make cybernetic arms in vroid ? 
lucid orbit
no like i make a custom model in blender and want to use it to replace the arm already on the vroid model
silent depot
So I wanted to use CATS on my custom low poly model but so far it's doing me more bad than good, like renaming or removing vertex groups
Do I really have to use it to have my avatar work?
Also are triangles necessary in a vrchat model rather than polygons?
 spiral sigil
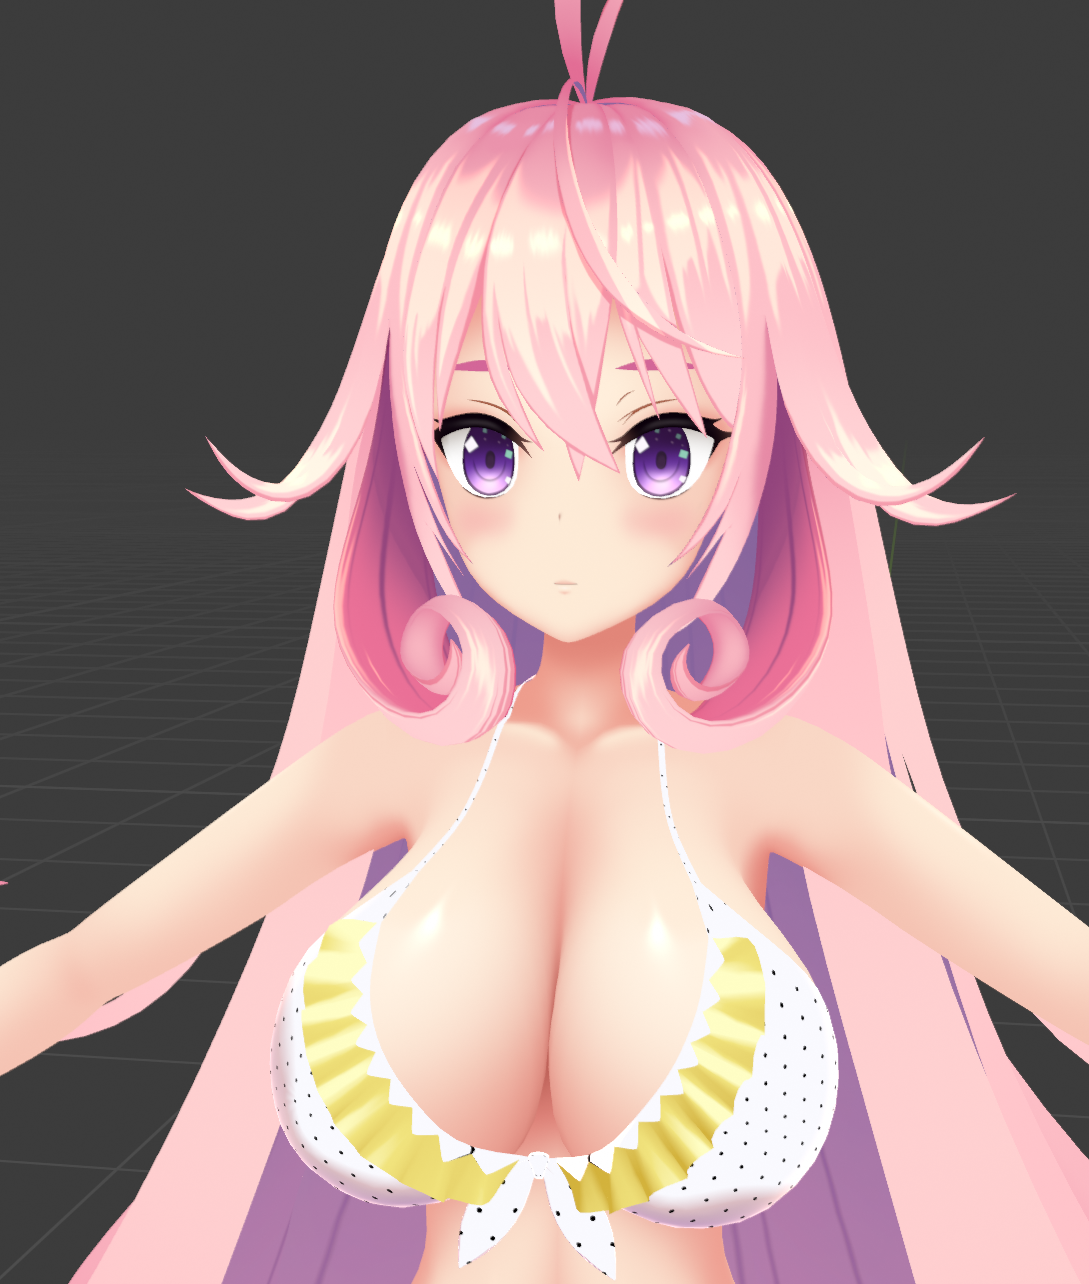
I've found that while modeling that things look better just merging two objects rather than having everything connect by vert. Is this bad? I've seen it done on a few models where the objects are merged but the topologies are over lapping
The only problem I really see with this is non visible polygons in your uvs
 twin flare
I think this goes here
So, did I put an input wrong for my visemes (first time trying visimes)
quaint jasper
Select everything that isn't part of the face mesh, and do "shape propagate"
twin flare
Wheres shape propagate?
 tight socket
quaint jasper
tight socket
quaint jasper
Yeah if the actual mesh for the shapekeys used is busted then you'd need to redo them manually
twin flare
ah dang
 lyric pumice
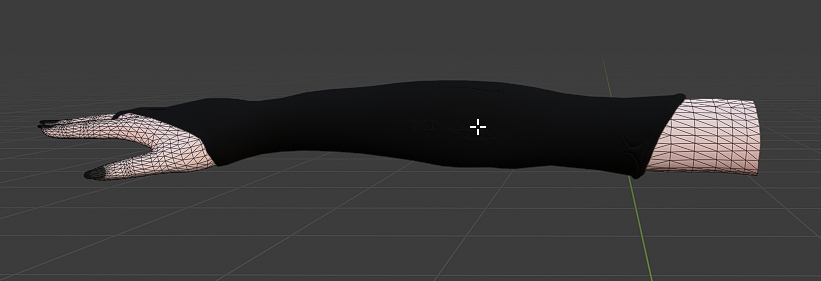
Does anyone in here know by any chance what is the easiest way to take the entire design/shape of the black part and make it so the arm pretty much becomes that https://i.imgur.com/ER20KGP.png ?
 quaint jasper
You want to merge the mesh or remove the arm mesh ?
lyric pumice
I want to want the Arm mesh to become the exact same shape as the black mesh.
quaint jasper
I don't think there's an easy way, without breaking other things by doing it
wispy orbit
with some tweaking you could try shrinkwrap, but it may not go super well
 unborn canopy
lol
 sharp rain
hmm
 umbral crystal
 empty solstice
Ok if i may ask is anyone down for making me a avatar just dm me if you are
tulip condor
hi
when i try to install addon from github
that addon will not work in blender 2.79 and up
what i need to do so that addon will function ?
here is an video to related problem:
please help
devout scroll
contact the addon developer
or realize that 2.79 is deprecated and people are unlikely to support addons for it for long
tulip condor
@devout scroll
hm...right
ok thanks
devout scroll
time to start looking at transitioning to blender 2.9
devout scroll
they have bad eyes apparently
spiral sigil
Not a surprise when you use themes like those
devout scroll
shrug

Made some glasses and collar
Also blenshapes to change stuff on the fly look pretty good
quaint jasper
that's some smooooth skin
 spiral sigil
cute
quaint jasper
Did you mean to keep the glasses edges smooth though /
devout scroll
I shade everything smooth
With autosmooth normals occasionally, but it doesn't matter that much as it looks fine with a shader on
quaint jasper
i guess anything looks fine with toon 
devout scroll
It looks like that because I messed with roughness and specular in blender
But the edges are beveled so it should look a little smooth I guess
looks fine in unity
I have a texture for the lenses but the frame is still just using a matcap
Also working on a tank top

I tried just simulating one from sewing patterns but I couldn't get it right no matter how hard I tried. Probably because the chest is a little big
So I ended up just modelling it
spiral sigil
me like
devout scroll
Need to figure out how not to tank my performance rating. I think in theory I should be able to swap the mesh out in a skinned mesh renderer
If they use the same bones it should work, in theory
quaint jasper
two midget in a headlock is my all time favorite
spiral sigil
same 😹
quaint jasper
@devout scroll Did you sew that together or was it made from the base mesh and extruded ?
devout scroll
top i modeled with shrink wrap and many vertex extrusions
sweater was from body with gaps closed off manually
quaint jasper
I highly recommend the free sewing addon, really fun to play with, and result looks a lot more realistic
devout scroll
I tried
garment and modelling cloth
but i couldn't get the pattern right
chest 2 big
maybe i missed some settings
haven't tried sewing tho
will check it out next time
probably still gonna try simulating some wrinkles
young vault
Take up sewing. You'll learn that you need more material to stretch around big boogaloos properly.
Which means a more advanced stitch pattern.
wispy orbit
working on a low-poly alyx avatar, opinions?
modeled off the hl:alyx model, that was a pain to import for references
quaint jasper
dope, good wind waker vibes
vivid crater
What wind waker did you play 😩
quaint jasper

Idk the face reminded me of beedle immediately in a good way
the triangle nose in that game is a classic
wispy orbit
funnily enough, never played wind waker myself
just wanted to do a low poly avatar and the nose worked
vivid crater
Ohhhh lmao
quaint jasper
looks great, i love it
 mellow echo
which substance painter PBR option (when making a new project) is recommended for VRchat
zealous pond
^curious about this too tbh
 fallow fable
ever spent hours cleaning up some discoloring around edges that suddenly appeared from something you did?
any idea how to fix this faster?
perhaps some script that can extend every pixel 3 pixels within the border to duplicate the same color to the 2 pixel border around it?
devout scroll
blender texture painting kinda sucks
if you're not painting straight on it will cause artifacts in places
i don't know of a script like that but you could scale your uvs down a tiny amount
with individual origins
but that also might be because you have ngons there
spiral sigil
so uhh i tried uploading my own avatar on unity but the log in on unity doesnt work
or better said i cant find it
mellow echo
well i just fixed a nightmare scenario somehow.
no idea how it happened, but a shape key i made somehow got negatively applied to every other key. (the right cheek moving up, somehow turned into neutral right cheek with ALL other keys moving the cheek DOWN. applying multiple keys would make it look like i was having a stroke) fortunately i still had a key with the left cheek moved up exactly the oppsite amount on every vertex. so i mirrored it, then blended it into every other key, add box ticked. took a few mins but saved me an insane amount of work x.x
fallow fable
@devout scroll blender does suck for coloring, what should i use?
devout scroll
You can get a free student license for substance painter
(even if you're not a student)
You can still use blender but just be careful on how you paint, if you're painting over a bend for example, the brush gets projected in 2D and it causes ugly smears over the edge
Blender needs layers and a 3D projected brush like in sculpt mode and it'll be a million times more useable
 ornate root
i deleted the sdk2 from my unity proj
installing the sdk3
does not work at all
avatarvalidation keeps referencing sdk2
devout scroll
Replace sdk2 with sdk3 here https://puu.sh/GxCG8/eb5a7cd84d.png
 devout scroll
For the collar I made i put the vertical seams here (and horizontal ones at the top but that's irrelevant)

They are visible but not too bad
I'm wondering if it's a good idea make more use of texture space
It kinda trips up substance painter's generators and normals look pretty bad in some cases at the seam
devout scroll
Should move to #user-support-old or #avatars-2-general / #avatar-help
spiral sigil
It's all fun in games until you forget to save
devout scroll
Well cloth simulation sure is great
It literally never gives me good results, there's just so many settings
solar fossil
Peps that get good cloth sims are gods, no questions asked
devout scroll
Modelling cloth addon works a bit better
Plenty of creative stripping animations possible
vivid crater
because blender knows whats up, free those milkers
 gritty crystal
so im just done at my new map
designed at cinema4d
the only problem, i dont know how to import it to vrchat
hahahahahah
vrchat can handle this huge map right?
i've never seen a huge map before at vrchat
gritty crystal
@spiral sigil yeah, among us...
I've sent a proposal for 3d cross platform development which supports Nintendo switch how ever it was declined.
then tried to convert it as roblox map, it fails... but now i think it will work on vrchat or gmod(not sure yet).
spiral sigil
I believe there is a gmod one
and yes that should work for vrchat
though you may need to optimize that
gritty crystal
yup i'll try to work with that soon but im going to read docs tomorrow
quaint jasper
@devout scroll Which addon are you using ?
 muted bough
Hi, I've got a quick question. I'm pretty new to 3D modeling and I was wondering if anyone has advice for modeling faces for avatars? I'm really struggling to figure out how to make the mouth for example.
muted bough
Yeah I've tried looking at tutorials and whatnot but I haven't quite found what I wanted. I'll keep looking though
muted bough
Alright I swear every video in existence starts with "I expect you've already got the mouth modeled" and I'm losing my sanity
 primal narwhal
Alright so I'm messing around with Substance Painter trying to figure it out, got most of the basics down, however my model keeps getting its world normals baked like this, and the edges around those poly's are showing up in the AO map, the Curvature map, and then the regular Normal map.
I have checked, double checked, and triple checked the edges on the model, and there's no double edges, no edges that are just super close together, no double faces, and no double verticies in these areas.
I've recalculated normals, made sure they're pointing the right direction, I've reset vectors, set them from faces, smoothed them, etc...
There are no seams along these faces, no sharp edges, just plain faces. I am not baking from a high-poly model, I'm using the "Use low poly as high poly" option because I don't have a full high-poly mesh to bake from.
Does anyone have any idea what the problem is? Again, everything in Blender seems to be in order and I can't for the life of me figure out what these are caused by
I am also using pretty much the default baking settings. I've only changed the size and antiailiasing, and changing any other options seems to make no difference.
primal narwhal
I should mention that letting Substance Painter regenerate all the UV data has fixed it but I don't really consider that a solution so much as a convenience
 tepid wagon
Did you try using triangulate modifier on your model before exporting? If I remember correctly what you have may be caused because you have two mirrored halves of your modeled overlapping on the UV map and without triangulating before export they get triangulated randomly by SP @primal narwhal
primal narwhal
Interesting, no I hadn't tried that. I'll give that a shot and see what I get out of it
tepid wagon
You don't need to apply it btw. That way you can still have nice quad mesh to modify if you want but exported model will be triangulated
primal narwhal
Neat
tepid wagon
Make sure the modifier is after mirror modifier
primal narwhal
Hm, no that didn't seem to make much of a difference. I'm also not using any modifiers other than the armature and now triangulation one. The mesh is symmetrized, but manually not through modifiers.
well, "manually" being through the mesh options
tepid wagon
I see. How is the model unwrapped? Does it have two halves separate or are they overlapping?
primal narwhal
When you mentioned they overlapped it reminded me that I do have the skull's UV's overlapped so that I could have them take up more space on the texture instead of two smaller yet identical halves. So I can imagine that's the problem then
tepid wagon
Maybe try deleting half of your model and mirroring it again with the modifier?
Although since you didn't use mirror mod before I am not sure whether you rigged and weight paint it differently as well and don't know whether that might brake something else so make sure you save before doing it if you decide to test it @primal narwhal
primal narwhal
No I'm pretty sure that I could do that and it would work I'll just have to test and find out later. Thank you for your help, very insightful
tepid wagon
You saw what Ruuubick told you before. Usually you would use shape propagate for the parts that don't have visemes but since the face is busted too you need to redo them. I don't think bones have anything to do with issue you have so don't delete any bones
twin flare
dang, it was a different model to
quaint jasper
@tepid wagon If the face is also broken then they fucked up too badly and then they need to do what Justin suggested
devout scroll
@tepid wagon worth noting that if you mirror and want to export to substance, you should move the mirrored uvs out of your main uv space, you can do that by going to data and sliding U or V to 1 in the mirror modifier
devout scroll
that should get rid of the ugly seam down the middle and the overlapping uvs
I'm not 100% sure if substance had an issue with the seam down the middle or blender baking did, but it should prevent that anyway
spiral sigil
Can anyone do a commission?
 near dust
is there some sorta guide on doing scruffy beard hairs anime style? I tried using blenders particle system but it just didnt look right. 😂
quaint jasper
@near dust what's your reference for the look ?
anime and hair particle probably don't match
you'd have to sculpt it most likely
near dust
Actually, I figured out the beard. Just going to mimic. What I actually need a good guide for is how to do hairstyles.. I watched guides on making hair strands, but actually getting the hairstyle I want seems to be impossible for me to get right blind. lol
 frank geyser
Hey quick question for folks well versed in Blender:
Is there a way to save a file you're working on with it's textures?
Every time I saved (and crashed) all of the texture work I did went away
frank geyser
how would I check? this is my first attempt with Blender
vivid crater
what version of blender are you on?
on the newer versions it prompts you that you didnt save the texture if you try to close it
frank geyser
just downloaded it today, so it's most likely a newer version
I've clicked the Save Texture button and saved the project as a whole, but the textures keep on disappearing for me
it's pretty frustrating
 latent charm
To make things easier on yourself, don't use blender 2.9 yet since it's more of a public dev build and potentially has unknown (as of yet) bugs.
As for the textures, saving the images to disk then saving the blend file should be enough.
In the image editor there is a save all images menu item which may also be of some use
frank geyser
alright, good to know! Can I grab an older version right off of the Blender website?
frank geyser
great, thank you!
Just playing around with the sculpting is a ton of fun, and I'm pretty happy with my first project tbh
This was my first attempt, but he was missing something vital
it was legs (:
primal narwhal
the legs are predatory and gives me fear but good job 👍
frank geyser
Thanks! I'm actually really happy with how the legs turned out
I had a ton of fun just turning them into fucked up raptor legs
Here's a better pic of one of them
near dust
So I am using Path curves to create hair, and a single hair segment is 4k tris. How can I lower this?
devout scroll
lower the resolution at the top of the curve tab
 reef cloak
Working on a model and a thought occured to me that it would be nice to have a ruler in blender like the one in Avatar testing. Anyone know where I can find it or one like it before I model one from scratch?
quaint jasper
there's a ruler on the left tab in edit mode afaik
actually in every mode, the measure tool
reef cloak
yea i know @quaint jasper but only in edit mode
quaint jasper
devout scroll
Make your own
Blender units are meters by default
You can make a bunch of cubes and scale them then duplicate and by using vertex snapping perfectly snap them on top of each other
quaint jasper
blender cube is 2m cubic btw iirc



 stable edge
-1 to 1
spiral sigil
So I’m new to this blender stuff and my issues are I can put my material on it in unity and also the avatar doesn’t move in vrc
quaint jasper

VERY IMPORTANT - PLEASE READ:
This tutorial may still be mostly useful, but there's a few major changes that you need to pay attention to. First off, VRChat now uses Unity 2017.4.15f1, not Unity 5.6. Additionally, there's some new tools for helping with atlasing that you shoul...
median pike
is this possible to do in vrchat? Setting up constraints for a rig so the hydraulic piston moves along the arm with ik?
or IK chains like these
tulip condor
hi there
is there a way to make (blenders 2.79 and up) sidebar properties tabs to be horizontal instead vertical
because it's wary difficult for me to read vertical tabs name from bottom an up
plus i got to many tabs because i install many other addons
so tabs name becomes more dense and its really really hard to know what is what
i mean who in the world make this nonsense anyway
it's horrible i tell ya
tulip condor
tulip condor
@devout scroll
ah i was afraid of that
yeah...but it will be much better and easy to know what is what
why they didn't make like that
i mean
if someone have Brocken neck
maybe that vertical tabs will help them lol
think's for the tip
devout scroll
You probably don't need that many addons for what you're making tho
You can hide different addons in different modes
So you don't have them all on at once
tulip condor
@devout scroll
yeah i will try to guess how to make them hidden
because i only work on modeling stuff and animating rigged models
devout scroll
Not sure how in 2.79
devout scroll
in 2.8+ it's called filter addons https://puu.sh/GzGr0/a1f605f075.png

 tulip condor
@devout scroll
seriously... i will need to migrate to new version oof 😔
devout scroll
it's much better laid out, just play around with it until you are ready to move over
you can always keep both
tulip condor
@devout scroll
yeah ... infect i got 2.80 and 2.90
and they are great
but something stopping me to go in there
because i was working on my models on older one
idk maybe I'm afraid of deferent options , naming , hotkeys
you know ... those things can little confuse me
I'm little old fashion guy that is more used on old stuff because i got more experience in old one instead new one
devout scroll

This is a video for those wanting to transition from 2.79 - 2.8
It shows where all the important tools and some new ones are located.
I'm sure I have missed some but you can always comment below and if I know I'll let you know.
My website www.gabbitt.co.uk
discord server htt...
tulip condor
@devout scroll
wow so far so good
i like the old to new transition
plus it's little more comfort and it has pc-windows hotkey manipulations
it's much more compact that i expected
in wary near future i will delete the old one for sure
thanks
devout scroll
👍
tulip condor
@devout scroll
one problem still exist for me
which is addon transfer
is that location is for blender addons?
if yes then can i transfer some old addons to new blender version
that i show in this video
because some addons is possible to work from old to new and vise versa
devout scroll
You probably want to just reinstall them through the addons thing
 alpine swift
Dm if you want a vrchat meme
tulip condor
yes i do have some .zip and .py backup for my addons
but some addons are only packed in folder because they are old
and i by mistake delete their .zip or .py backups
devout scroll
you can still install them through the install button
you can zip them back up i guess or if it's one file just click on the file
tulip condor
hum never thought about that is possible
i will try that
thanks 👍
median pike
@tulip condor why do you need so many addons? I only have one.
I am just curious what do you use them for? Because I mean, blender can do most things you need to make models already
tulip condor
@median pike
yes that's correct
but i install some of those because
it more simplifies and speed up the modeling process
but for the rest integrated addons i will plan to hide them
so in the near future i will migrate to newest version
and do what i mention before
median pike
yeah I just recommend going to newest version and use the least amount of addons needed
ashen stag
@median pike You can do simple A->B pistons with constraints but anything past that is legit IK so you need FinalIK
median pike
is final IK intuitive? I only ever used it with a spider character and it was horrible to work with
ashen stag
The spiders are a mess of workarounds and abusing mechanics, for a piston you would just need CCDIK/FABRIK
Keep in mind due to NetIK you would have to have the piston's bones constrained to your main armature instead of being children
solar fossil
final ik is pretty easy to start with, but the difficulty increases for very complex stuff because you are not really using it for what it is intended for anymore, so workarounds are required
median pike
@ashen stag why is that necessary, thats stupid. I avoid doing stuff like that because I have done similar with rigid bodies and fixed joints, which offset over time in game
ashen stag
It's necessary because it was broken when Netik released and since barely anyone uses Final IK for their avatars the devs wont fix it
median pike
so its a vrchat specific issue?
ashen stag
Oh yeah
median pike
whats the behavior if you children it?
ashen stag
Its the same thing where you need to constrain world particles
If you have it as a child, it will work for you, but be displaced for everyone else
median pike
great
ashen stag
since you are not telling other people where those bones are specifically since you are only sending the tracking points, not the bones in between
median pike
well I guess I will giving up on that than.
ashen stag
Another complicated way to do it is have everything be a child of the armature, duplicate the bones of your piston so its outside, do the final IK on the duplicate, then rotation constrain the original to it
 vestal glacier
hey can someone help me with dynamic bones? i bought an avatar from booth last night, and it got prerigged with most dynamic bones. except when my avatar crouches, the legs go straight through the skirt
i already tried some stuff with adding dynamic bones to the legs but i am a bit lost tbh
(if this is the right channel idk there are so many related to models)
median pike
is the skirt rigged?
vestal glacier
think so yeah
median pike
I mean
you have colliders on your legs
are they selected the the skirts dynamic bone script
?
if yes than you will just have to set up some constraints
vestal glacier
i added those leg colliders myself. dynamic bone collider, but they dont work.
if yes than you will just have to set up some constraints
how do i do that?
this is my first time with dynamic bones, thought it would be easier then it turns out to be
twin flare