#3d-modeling
1 messages · Page 89 of 1
 visual vigil
i could actually use this node set up for camoflagues
since 2,83 added new feature on noise
 next jungle
<@&397642795457970181> spam pings ^^
 onyx juniper
This is like the WALL*E of tanks
 still wadi
 vivid crater
😳
 left sentinel
Hiii just wanted to let everyone know about this addon I just made that solves a really annoying problem in blender when you're working with the mirror modifier AND shape keys and it won't let you apply the mirror modifier
GitHub
Mirror a mesh object in blender with shape keys. Asymmetrical keys (i.e. with "Left" or "_L" as suffix) will be split with extra shape key for "Right&am...
It also creates asymmetrical blend shapes during the mirror (like if you have blink_left it will auto generate blink_right as it creates the mirrored mesh)
Give it a shot and let me know what you think!
Tag me if you have any questions
vivid crater
damn that sounds great, thanks 🙏
onyx juniper
Krystal is not amused
vivid crater
lmao got banned for what
 queen elbow
IDK
onyx juniper
"HOW DARE YOU! Our foxy waifu is always perky and sweet!"
vivid crater
i physically frowned upon reading that
queen elbow
 austere sky
thats some emoji worthy faces
 subtle jackal


 acoustic lichen
Anyone know any good anthropomorphic gryphon avatar bases?
 meager prism
 stable edge
Bone roll probably
meager prism
@stable edge one of the shader was opaque, changed to faded and it fixed
stable edge
try not to cross post servers so much btw
vivid crater
thats when you truly ascend
 spiral sigil
I just started blender, and this is my level. Any thing else I should make?
this is my third thing
My first one is from a tutorial second one is a trash pistol
 quaint jasper
You should do the texturing parts
spiral sigil
nvm I gonna do texture and not now
 open haven
Need help in Blender, I added a skirt to my avatar and I can't Ctrl+J(oin) to make them one object
It's my first time using in it, sorry if it's a dumb question
I click Skirt, then Shift+Click my avatar, then press Ctrl+J but it does nothing
Like that, I press Ctrl+J and nothing happen
quaint jasper
@open haven They both have armature so that doesn't work
you need to use the cats plugin to merge your skirt's armature into your model's armature
open haven
Idk what I did but it worked
quaint jasper
Check the weight paint then, also all your other meshes are not merged
open haven
Does that seems okay ?
quaint jasper
Yep ! Might want to reduce those bones if you plan on using dynamic bones though
 ornate harbor
Whoa that is a whole lotta skirt bones
 olive drift
I kinda wish there was a better way to do skin weights in maya, iz very tedious stuff
 thin gull
can someone help me move this mouth?
the verts are kinda weird
I tried to select the lip but it causes deformities
 drifting thicket
just hide one of them so
 vernal lion
I tried to select the lip but it causes deformities
@thin gull okay go uv editing for accuracy and search for a button that looks like two parallel arrows to your top left what they do is that everything you select in uv editing you get in the model
from there uhh well good luck because you might need to know some art and anatomy to make it look good
thin gull
@vernal lion lol, it's hard to do it this way
thin gull
not my model, from boneworks ¯_(ツ)_/¯
thin gull
yes
there's supposed to have shape keys setup too, but that didn't get exported on the .obj
thin gull
shape keys for the face. meaning I wouldn't have to do this 😐
you can only export as .obj
for meshes
vernal lion
oof okay golly boneworks love your game but you sure as hell make it hard
can you export anim
thin gull
definitely, and I don't think so
vernal lion
because if you can it would be smart to steal their grunting anims to make it work
and im impressed it took your blendshapes
since the game is unity
thin gull
all I need is "aa, oh and ch" to make visemes
vernal lion
best thing you can do in try to separate the body parts each by each
vernal lion
separate it for a bit so that geometry mess is not there
so you can do blendshapes
then unify
im amateur so thats all i can do sadly what i told you is all i know 😦
thin gull
hmm alright
honestly it's good enough for me without visemes, but i'll give it another go
vernal lion
gl
 runic goblet
@thin gull AFAIK Shape keys dont get exported on OBJ files, they're a very old 3D file format. Is there any other file format you can use when extracting them?
onyx juniper
Something is screwy with Subsurf in Blender 2.8
spiral sigil
wip
spiral sigil
I said stuff here yester day showing my only 3 creations cause I kinda just started, update I made hands and added it to my ar
I have been making renders to make it look cooler
low poly
 queen moth
Robot and his little plasma cutter I made
spiral sigil
cool
stable edge
Nice green VRC lol
queen moth
@stable edge yup based it off of him lol
Half because I love the show half because his name is K-VRC or Kool-VR chat
stable edge
I can understand that, the design that they came up with for the episode was nice thou I'm not sure if your design differs enough from just a recolour of the original
queen moth
Very similar yes, because that’s what I was going for. To be honest I was just gonna make him exactly as he was in the show but decided I wanted to change up a few minor details to make him a bit more personal. Such as a slightly more angular torso and small changes like that
stable edge
Ig
still wadi
 spiral sigil
if anyone is on here. i need help with the diff/merge.
still wadi
@spiral sigil you almost got me there
spiral sigil

 sick onyx
quaint jasper
sick onyx
quaint jasper
Don't ?
vernal lion
hmm alright
@thin gull hey buddy your thing worked?
drifting thicket
does anyone know how to split this part in 2 ?
cuz basically this cylinder is much much bigger and i want just another part of it to make it move , and not all of it
 young vault
Select the edge loop and press v
 tame hatch
Hey
Help me pls
I ma just joining random server to ask for help, I have no clue what's wrong :(
Can someone help me With blender?
I can not set a keyframe, it just stays orange and jumps back to the same Value???
Noise modifier.
Bye
 slim tundra
My model is made-
I’m happy i finally got it to work in unity aaaagh
 plain spruce

how do you fix the normals on this wall? I've tried recalculating outside and flat shading but nothing seems to work
quaint jasper
Set normal from face ?
plain spruce
oddly i think the material with it was just weird with a specular and metallic shading
i reset vectors
and it seems to be fixed no
now
thanks lol
 tender tendon
The mushroom man sees it.
Making avatars without arms and legs feel so weird at times
vernal lion
@vernal lion unfortunately not
@thin gull oof
 deep shell
I'm having some issues in blender. Currently trying to apply a jacket but can't seem to get it right :c LMK if any got the time to help me out
deep shell
So after i try to data transfer the vertgroups from the body to the jacket, it does this weird thing where it goes in like this, where before i had sculptured it to fit n' all... idk why
Basically the arms goes inwards and moves with the armature correcly. However the jacket is now over the arms
 pallid halo
Question. Can someone link me. Tutorial on a good Uv mapping for blender 2.79? I’m looking to edit textures on my model. Can’t find one for eyes for instance
young vault
Why not switch to 2.8?
But, as for UVs. Pretty much find any blender tutorial and it'll be explained almost as good in any version as long as it isn't too old
pallid halo
I can’t seem to get cats to work in 2.8. If someone could tell me how than maybe. I’m not home though
quaint jasper
it just works if you get the latest version
pallid halo
Oh so it’s auto in there?
quaint jasper
No, you need the latest version of cats
 violet vale
Heyo, Im trying to get/make a running/movement animation for an avatar where it simply floats in place but unsure how to do it O:
 tacit turtle
Oof I have no idea how to animate
I was just about to ask if any of you guys could help me with texture atlasing
@luke did you try fixing model
Usually the way I put jackets on is parent it to the corresponding arms
quaint jasper
@violet vale #animation might be better
@tacit turtle #avatar-optimization has ressources
tacit turtle
Yeah but I can't download Atlas or materials combiner
If that's what you mean by optimization
quaint jasper
Why can't you ?
 tight dagger
anyone know how to fix this? 
drifting thicket
hide the 2nd shirt on blender
tight dagger
@drifting thicket i mean , the bone 
drifting thicket
map it ?
tight dagger
can i fix it in 3ds max? or just blender
tight dagger
i know
tight dagger
it's okay now , but now i have to deal with her blazer layer. any idea? 
spiral sigil
delete the shirt under those parts
you won't see it anyway so no reason for it to exist
tight dagger
@spiral sigil i can't , if i delete that shirt. this part will gone too. it's the same layer...
spiral sigil
separate it then
also it doesnt even matter
if you open it in blender
if you go into edit mode you can just select what vertices you want to delete
quaint jasper
For free ? @round cloak
spiral sigil
im trying to get psk and psa addon into blendr but its not showing up even after i added into the system. how do i go and fixing that issue?
nvrmind i found the issue
queen elbow
 inner steeple
So I’m trying to export my roblox model to blender and make it a vrchat avatar for the meme of it. I managed to export said model but when I put it into blender it doesn’t have any joints. It’s all one singular model, so when I try to select an arm or a leg it just selects the entire model
 torn hull
why is it that when i rotate my plane around my texture still face the same way lol
quaint jasper
What happened to the leg weight paint ?
queen elbow
Idk
queen elbow
Loving the new avatar update
 bleak tree
https://gyazo.com/0c0bbda136b001fbf165bf2b8273b5ff I'm making an avatar just for 3.0. He's ready to be unwrapped.

 deep dirge
Me when I see the results of blenders auto weightpainting
 jade steppe
If anyone is willing to help me make a scarfox head please dm me ive been struggling to get real help without someone sending me a link to a tutorial ive seen already
still wadi
why not comission it if you can't make it yourself ?🤔
spiral sigil
go back to making great ass, shonzo
spiral sigil
I fucking love that face
spiral sigil
So how would i go fixing this, When i throw this into Unity it says it needs 15 bones yet i can use the weighted pelvis bone for leg bones.
queen elbow
last adjustments
 still cobalt
hey guys i need help. i wanted to download the mmd tool to my blender but it says i need an updated version (i do have the 2.83) what can i do to open my files now?
 stray tulip
Render of my Avatar c:
 white moth
nice
 uncut moss
I am Just learning to use blender and I'm on my way to make my first full original avatar ^^ I made quick textures for my avatar so I can see better what colours work !
quaint jasper
Do you keep the roughness low on purpose ?
 whole zinc
So i have this 3d model i found from the model's resource, and blender can't quite import it 100%
in windows model browser it shows this, which is correct
but it doesn't quite work in blender
anyone know if i can fix this?
uncut moss
Do you keep the roughness low on purpose ?
@quaint jasper
I haven't yet tweaked the materials, so the roughness value is default for now
 shy trellis
should I be using pngs or jpgs for my textures? a 4k PNG is like 10 MB, but a 4k JPG is many times smaller than that, maybe like 1 MB
quaint jasper
Depends on whether you need transparency or not
shy trellis
ah, in cases where I don't it's fine to use jpg?
whole zinc
are your textures more cartoony or realistic?
whole zinc
yeah jpg is fine
shy trellis
nice, thanks
whole zinc
jpeg adds artifacts which are rather noticable on less detailed images, but not so much on more detailed images
young vault
@shy trellis It doesn't really matter too much in the end except for download size. Memory usage will be equal between png and jpg.
stable edge
dxt bruh
 latent charm
@shy trellis Always use a lossless format like png or something like tga for your source files. Avoid jpeg and any other lossy formats if you can.
Reason being that when you build the avatar/world in unity they get converted to a game-suitable format, and the less lossy conversions the image has the better quality it will end up in VRC.
quaint jasper
No weight paint on that vertex
spiral sigil
but I don't even have an armature
spiral sigil
it was blender shapes conflicting with each other
I deleted the extra blend shapes and it fixed it
er, shapekeys
sorry
 severe mantle
Hey can anybody help me find a model that works with Blender
 verbal hatch
I'm making my first model!!
severe mantle
@verbal hatch can you dm me I need help
verbal hatch
bro i have no idea how to do this i'm not the right person to ask for help XDD
severe mantle
Bruh okay
 hallow bough
Looks good! For next time you can use the printscreen button on your laptop so you don't have to take a photo 👍
verbal hatch
true- i usually use the snipping too thing to take screenshots I'm just lazy XD
hallow bough
I like the pink outlines! Gives it a very cute pastel look 😄
 median pike
thank you
spiral sigil
Does anyone know anything about messing with unreal engine stuff in blendr?
median pike
@visual vigil what its for?
visual vigil
vrchat if i get out of the lazy
verbal hatch
hey dudes i need some help- googling doesn't seem to be helping and i did a bad
so I made my model using shapes, mostly the UV Spheres and there's a bunch of mesh on the inside of the model that i don't want, is there a trick to getting rid of that? otherwise I'm just gonna go in and manually delete all of it
 ashen stag
Use booleans, probably difference
verbal hatch
just tried that- no good.
what i wanna try and do is just have all the exterior mesh. trust me I've tried selecting it all it's a god damn nightmare
wait I think I found a tutorial .o.
 sleek ether
Hey! So i've just made my first avatar and i have run into a little problem. Whenever the character moves in vrchat the bottom part of the hair seems like its stuck to the body and the top part of it acts like a bobblehead. Any help would be appreciated, thanks in advance
median pike
you havent weight painted the hair to the head
queen elbow
 spiral sigil
dem textures tho
 celest mantle
I want to design my own avatar, but I dont now how to start? Anyone go any tips?
uncut moss
@celest mantle draw some ideas on paper! and pic your favourite idea, do some quick sketch and start modelling ^^ I Have really rough idea on paper what I want to make and those guidelines help me to get started ^^ Here is my Avatar in progress!
celest mantle
Thank you!!! And cool avatar! I love the color scheme!!!
uncut moss
@celest mantle well thank you! I like also to do characters with some sort of a story. That way Its easier to sculp them look like they have personality 😄

 wispy orbit
Any tips for modeling super low poly clothing? I'm making an avatar with a minimalism approach and can't quite figure out clothes.
 desert cedar
@wispy orbit Are you wanting it to follow physics or be static?
wispy orbit
Static, physics wouldn't suit the avatar well.
desert cedar
And what's your poly count limit and current poly count right now?
wispy orbit
I don't have a limit, it's more of a stylistic thing. Right now, 1.5k faces/1,390 vertices.
desert cedar
And what type of clothing?
wispy orbit
Casual, preferably a jacket of some sort.
It's hard to get it to not look blocky but also have depth
desert cedar
Hm...
Try and create a cylinder, turn down the rings on the cylinder to four?
And then work from there?
wispy orbit
I'll try it.
visual vigil

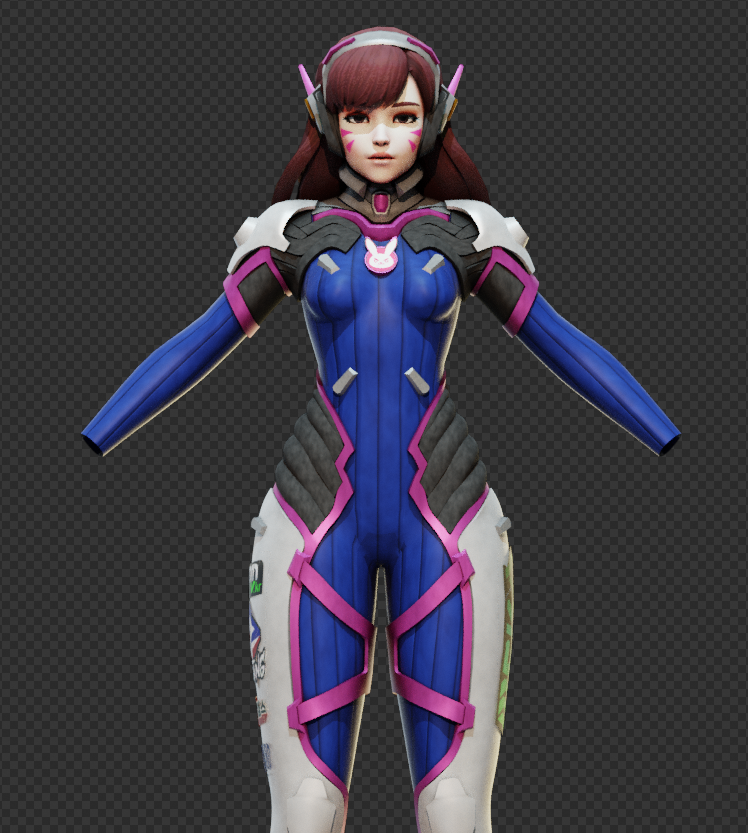
Comparison and update to yesterday's work. New leg and lower stomach areas. This is going to suck to rig and weight paint.
Face, hair, decals still being reused and are untouched besides my shader.
#Overwatch #OverwatchFanart #B3d #3dmodeling #Dva
 Twitter


 stable urchin
Hey I'm looking for someone to make a detailed avatar with props (and if possible animations) I am willing to pay
desert cedar
@visual vigil Good work!
 hoary gorge
 dreamy sable
Is there a reason why the material atlas CATS makes is a super blown up image but with the actual textures just tucked into a corner? It's double the size it needs to be
spiral sigil
because the width or the height is larger than was the dimension can hold so it got moved one size higher
for example : if the height or width is larger than 4096 then it's going to make the atlas 8192
dreamy sable
Ahh I see, I added one extra thing so that must've bumped it over the edge
Appreciate it
 magic birch
in cats is the rest post the idle pose?
queen elbow
Vrchat automatically gives your model the idle pose, cats rest posr should be a tpose or an a pose, depending on which one your model is doing
i think
magic birch
would changing that unfuck my model animation because the back of my model is always facing sligthly forward
its a bit annoying
also what do I pair something navel height?
the hips or the spine
 hallow thicket
What to do if my avatar is pink in unity?
quaint jasper
Apply materials on it
 frail grotto
Hi, I am not sure if this is for here but I got a model I imported into blender and made ready for unity and vr chat and this happened where in blender it shows the model perfectly fine but in unity the model is different (And I can't edit it in unity) here is what's messed up
blender
unity]
quaint jasper
@frail grotto Apply pose as rest pose through cats ?
frail grotto
I did that rn and exported but the problem still happens
quaint jasper
Are you doing something to it in unity ?
young vault
Could be normals?
frail grotto
no there aren't any normal maps on the materials
It may be the mesh itself conflicting with the hat.
idk if there is a way for me to select only the hat and maybe change its size so it will go over the hair
quaint jasper
no dynamic bones ?
frail grotto
nope
I think cats meshed the model together so I can't target specifically the hat or the sword and shield for example with the object
quaint jasper
yeah that's expected
frail grotto
is there a way to prevent that and select which things shouldn't be merged?
quaint jasper
You can do it manually, but there isn't really any reason to not merge
frail grotto
yeah but when I merge I don't have access to individual props of the character
quaint jasper
select all bones in edit mode and do alt + r
yeah, unless you want to disable stuff you shouldn't need individual meshes
frail grotto
If that is something I want what should I do?
quaint jasper
you select the cap in blender and press p
frail grotto
are the individual meshes here somewhere? this is the model before the cats fix
this is weird. If I go to edit mode I can see the areas where the unity problem of the hair going out of the hat occurs but outside of edit mode I can't see those areas
ok I may have fixed it by menualy going in edit mode, selecting faces and draging them into the hat so they wont show out
quaint jasper
That means the pose is different though, do you have specific shapekeys maybe ?
frail grotto
what are shapekeys?
and yeah it seems like there are different options for this model but unity imports them all under the body mesh
quaint jasper
Did you have the same issue in pose mode ?
frail grotto
in unity or blender?
quaint jasper
There's only pose mode in blender
frail grotto
oh ok, excuse me if I am being ignorent I haven't dived this far into blender so far
quaint jasper
Check on the model before you fix the mesh manually if it happens in pose mode, if not that means you didn't apply the pose which is good, because that's an easy fix
frail grotto
it doesnt happen in pose mode
quaint jasper
Cool, so use cats apply pose as rest pose
frail grotto
ok I did that
quaint jasper
Now reimport as a new file in Unity
quaint jasper
i'm really confused then
If it doesn't happen in pose mode and you applied the pose as rest pose then it shouldn't be happening by default
desert cedar
I'm wondering if anyone else does this in Blender, but there's an option to make multiple materials but instead of using them for textures, having them blocked in different colors as you model to keep in mind what's the essentials and what's extra for like backgrounds?
white moth
Alright this is driving me insane - I have an avatar that actually works perfectly in VRChat. it's fine. There's nothing wrong with it. But in Posemode, in blender, the hip never moves. I've checked it's weighting, it's fine, it can be posed perfectly in Unity AND VRChat, but only in blender the hip just stays locked in space. Everything is parented correctly and the verte groups match the bone name, both are "Hip"
Even tried exporting it as fbx and importing into a new blender file and it still does it
 frank fable
You checked all restraints right?
onyx juniper
@white moth What about the bone settings in the right panel? Maybe something's locked there?
I mean the right panel in blender
 broken aspen
absolute new, doing a basic thing with proportional editing, but this happened :
i cant edit it in the way it should be, why would this happen🤔
spiral sigil
scroll wheel to make the affected area smaller
frail grotto
I fixed the problem from yesterday by the first method of going to individual faces where the hair was going out of the hat and pushing them inwards so they won't show out, doing it to the basis blendshape. appearntly the sword and shild were controlled by a blendshape so thats great but the hair isnt so I had to do that menually
spiral sigil
Trying to model this into vrc, Need some help with figuring it out.
Sorry i am new to blender and have been trying to learn things, I've wanted to make an avatar since 2018 though i didn't know how to make one and still am having issues on doing a lot of the learning curves.
spiral sigil
This is what i have so far.
drifting thicket
that looks sexy man
spiral sigil
Thanks, Though now i gotta smooth the wings down.
spiral sigil
Can anyone help with shading? I'm trying to get it smooth but it keeps ploygoning itself.
Even if i shade smooth.
wispy orbit
Are the faces, edges, and verticies set to smooth?
young vault
Subsurface
spiral sigil
How do i get to subsurface?
It's all having to be on flat
otherwise it does what it does in the image,
i'm gonna take a break as i'm getting a bit stressed
young vault
It's in the modifiers.
or you can do it manually.
By clicking a wing and doing ctrl+L for selecting all linked
and then right click "subdivide"
I always say subsurface, but, I mean subdivision surface.
wispy orbit
More polygons is always smoother, but can have a performance impact. Plus, subdivision surface only applies in Blender. You can "Apply" it, but it generates more polygons and you might have to watch out for it quadrupling your intended count.
On a model that size though, it shouldn't be a huge deal.
white moth
Any advice on why a fairly simple fbx file instantly crashes any unity project on import?
quaint jasper
check blendshapes in blender
white moth
Anything I should be checking for? They seem ordinary
quaint jasper
make sure they work and that they don't explode
white moth
CRAP
quaint jasper

white moth
Well I wonder when in the past 5 hours of work that happened
spiral sigil
when you modified a mesh with shapekeys.
white moth
I swear I disconnected part of the mesh before doing some merge by distance, cleared it's shape keys, then joined it back... still blew up.. .that process was supposed to be safe. oof
Thanks though, I wouldn't have checked shape keys for a few hours
 fringe rock
thats an issue with the vertex order
 surreal trout
anyone know how i can merge vertices together in blender in order to make something less complicated, while also not ruining the UV map. i already tried merging, but in the UV map there are a lot of empty space since a lot of the vertices are scaled to a smaller size and dont fit together like they did when there were more of them
quaint jasper
Unwrap better ?
surreal trout
my problem doesnt have to do with something i am trying to unwrap or create myself. i am currently trying to edit this uv map on a model i own. if you look at the picture, you will see a blue sharp edge on the thigh on the right. and on the left, circled in red, is where that edge line is. my aim is to get rid of all teh small edges and many vertices that are creating the tiny triangles both in the uv map and on the mesh itself. in blue, i circled a couple of vertices that represent the standard size of the vertices that make of the rest of the thigh itself. my goal is to remove the small vertices from above and below and make them into large ones that mimic the rectangle shape circled in blue. i want the new vertices to be the same size as the blue one as shown using the green arrows which show where i want them to connect on each end. i hope someone is able to help me, im inexperienced when it comes to UV maps and i would love to figure this out
from looking at the way the small vertices connect together, i can make out that is is possible to make the big ones like i plan.
i just dont know how to do it without ruining the UVmap and creating spacing between vertices
desert cedar
May I ask why you're trying to do UVS for tris? That just makes it harder for yourself.
desert cedar
@surreal trout Make your polygons 4-pointed (quads) instead of 3-pointed (tris)
surreal trout
ill that that for sure, thanks
desert cedar
It'll make your UV-mapping much easier! :> Of course!
whole zinc
i tried to make the pig cop from duke nukem, but then i realize i suck at making textures.
quaint jasper
intentional flat shade ?
whole zinc
sure
wispy orbit
How's this for a first go at a flat shade avatar? still working on the clothing and layout, but for the most part it won't change too much
quaint jasper
pretty cute !
wispy orbit
Thanks!
bleak tree
@spiral sigil I seriously want to see the end result of your project. Reminds me of 02 from the Kirby series
https://gyazo.com/bd4bc90ae87b86bd0a7f322e84a98f7d My avatar is a cheeky little sod and I don't know where it all went wrong.


 stray tulip
Started a model of one of my original characters, textures are just placeholders till I make the real texture
 somber orbit
Hello everybody i just wanted to ask something. since im new to modeling and stuff like that i wanted to ask you guys how to map a texture inside of a Cube. I already made the Textures but i have no idea how to Map them to the inside. i would appreciate any kind of help.
spiral sigil
how do i separate and rejoin meshes without creating doubles (or rather, when i rejoin them, automatically merge the doubles that were created upon separating?)
 onyx crane
@spiral sigil Is this a situation like a coat lining? Most of the time, doubles won't be created upon separation unless you have a situation like that (usually clothing). Hide everything that isn't involved so you can clean up a little easier, then use Edit Mode -> Mesh -> Clean Up -> Merge By Distance and play with the sliders. But just a warning, this can often result in weird looking armature deformations. (I've had bad experiences with it).
A more foolproof way is to delete the doubles by hand. Click on a face, then press L to select the linked faces and x to delete. Keep doing this until all of your doubles are gone.
spiral sigil
no i mean
literally when you separate meshes
it will create doubles along the edge of the split
which makes sense
both meshes shared that vertex, and now the meshes are separate, the single vertex become 2 (one for each mesh)
i want the rejoining process to merge these doubles
onyx crane
Ohh-- so you have basically a seam that's broken is that right
spiral sigil
probably
onyx crane
I don't know of a way for the rejoining process to merge those doubles vertices, but I think the fastest way to do what you're talking about would be to: 1. highlight all of the faces involved 2. save them as a new vertex group and name it 'seam' 3. click on the vertex group and use 'merge by distance' to quickly sew them together when you do the rejoin
and that way if you need to do it over and over, you always have the set of faces easily accessible for you to perform the merge by distance on
someone else may have a better solution....thats what i would do
spiral sigil
i would think that would fuck things up tho
since they all belong to specific vertex groups
and reassigning them like that would be destructive
(?)
onyx crane
i think you can have a vertex in multiple vertex groups?
onyx crane
yeah because like
if i have eye tracking set up and then i create a vertex group called 'pupils' and select only the pupils
my eye tracking will still work
spiral sigil
i think your method might not work though
unless it merges beyond your selection
because you'd be selecting only one of each of the doubles
i think

maybe not
onyx crane
oh i'm talking about like selecting both sides' faces
spiral sigil
because you select before hand
onyx crane
like, imagine a zipper
select both sides of the zipper and add them both to the group
spiral sigil
that's not really feasible since i'd be selecting by material
but i think it might work anyway
since you assign the verts before the split
onyx crane
yeah that's what im thinking
spiral sigil
so when it splits, both verts will belong to the group
pinteresting
thank you chailatte, i'll try that next time
onyx crane
u welcome, good luck 😄
spiral sigil
Does anyone here make avatar-modeling comissions?
stray tulip
Quite a few people do commissions around
 clear geyser
@spiral sigil join the VRCTraders discord in #community-servers-old for commissions
 viral light
Does anyone by chance know why sculpt mode disappears when I put a avatar in blender? Trying to add clothes.
Help anyone please
desert cedar
@viral light Look above and click on the sculpting tab at the top.\
clear geyser
@viral light You need to have the mesh selected
viral light
Got it to be sculpted but when I move it to vrc and select all the shaders it just breaks
 swift dock
Not sure where the best place to ask this question would be, but does anyone know where this particular model/prefab comes from?
 tiny dome
am i supposed to ask for help doing avatars here ?
quaint jasper
yes
tiny dome
can someone help me doing an avatar im new and i would like to to custom avatars and animations for avatars ?
quaint jasper
help how ?
ashen stag
You should start on youtube videos of the basics, then ask here if you get stuck on something specific
tiny dome
yes but i think i would understand more like in a voice chat where i can actually interact with the explanations and show my work to see the mistakes
ashen stag
That is asking a lot from someone to walk you through step by step. Good luck finding someone who will without paying them. Maybe start with your friends that have the talents you're looking for
swift dock
You're probably going to have a hard time finding someone to sit with you and walk you through all the basics step by step. That's usually called tutoring/schooling, you will be hard pressed to find someone to spend a huge amount of their time for free.
The basics alone are going to have you busy for hours. Just find YouTube tutorials, follow them step by step. Yes it's be easier to have someone sit there with you and tell you what to do, but that type of thing generally isn't free. Most, if not damn near all, of us started with YouTube videos and googling.
tiny dome
ok
 muted atlas
i've been 3d modeling for 7 years
and i am still learning new things so eh..
i learned most of my skills from watching people stream 3d modeling
and i just mimiced what they did
onyx crane
@fringe thicket It's hard to tell what I'm looking at from this angle but I thiiiiiiiink what you are looking for is the "Occlude" checkbox. Go to your texture painting tool section on the right, click Options, and then change the checkbox that says Occlude.
Also try the backface culling on/off checkbox while you're messing around with that. I swear some combination of those two being on and off fixes what you're talking about.
 fringe thicket
I saw someone say something like that before but the screenshot I saw of their tools bar looked different. Am I in the wrong place? or was there an update that moved the option?
Oh I found it
onyx crane
No, you're doing the right thing, I can't think of the exact reason yours looks different but you can also get that by clicking "Falloff" I think
 tawdry dune
@swift dock Does it have back legs? If not, it looks sort of like a slugcat- idk
 devout scroll
@fringe thicket tab into edit mode while in texture paint and hide what's in the way, or select what you want to paint only and then go back to paint mode and turn on masking with M
 velvet rain
Been teaching myself blender basics by recreating my little chibi art with my avatar! I think it's turning out great 🙂
 molten thorn
Looks amazing!~ keep up the good work :))💖
velvet rain
Thank you! 🙂
 halcyon citrus
👍
velvet rain
At it again! Getting kinda meta with this project 😂
 karmic owl
So i was working on my avatar, and i couldn't help but notice some verts weren't weighted
100% to my armature's movement (for example the collar on the neck, it just clips through it even though i tried to add its weight)
Anyway, i started messing with it and now it doesn't look any better. I was wondering (because i know you can automatically assign vertex groups to bones) if i couldn't redo the whole weighting of the neck altogether. I have no idea how this works, and i have already created an armature with the mesh assigned to it (we are only talking about the neck bone in this case)
the neck might not be the best example, but there are many other joints like arms or legs that behave the same way, i was wondering how to fix this
guess i messed around with the weight painting too much so now i wanna do it over
drifting thicket
does someone know how to make a face with those vertexs ?
young vault
...uh, select 3+ vertices and press f?
drifting thicket
i already found it but thx anyway
 rough totem
Anyone ever had this problem when creating a texture atlas?
all the single color materials all turn white, and don't even show up on the atlas png
velvet rain
Decided to work more on my first project, got him in an actual room now!
velvet rain
Thank you!
onyx juniper
How's this smile? Ignore the sharp color border, I broke the UV's when I fixed her face
https://cdn.discordapp.com/attachments/356209135949316096/745402668452675764/unknown.png
 drifting thicket
you should maybe increase it a bit
onyx juniper
<--> ?
velvet rain
quaint jasper
@onyx juniper corners of lips might need to go outwards instead of inward on the face ?
 weary swift
hey can anyone help me?
how do you turn blender shape keys into a default pose
Face pose I want
one I want to replace
drifting thicket
you can do that on unity
u just go to the fx and put your neutral anim face on all the gesture
weary swift
oh
sounds easy
but if possible can I have a location of the fx in unity pls? and thx you
drifting thicket
not sure but i think its on the VRCSDK3 > Example3 > Animations > Handgesture layer or something close to it
but this will only work on the Sdk 3
quaint jasper
I mean, just set shapekey as basis ? It'll fuck up all other shapekeys though
drifting thicket
yeah you shouldn't do that if you want to use the others blend shapes
but you can still try
ah i dunno for that , im using 2.8
check on google maybe you'll find something
weary swift
yo know, ill try the unity one. I have some ideas for the face
 tawny rapids
So I was commissioned to make someone an avatar. I've finished the avatar except I cant upload since I havent "spent enough time" in VRChat. This is a problem since I don't have VRChat, I'm just a 3D artist. Anyway to upload it/let my commissioner use the avatar?
error message for context
uncut moss
So I was commissioned to make someone an avatar. I've finished the avatar except I cant upload since I havent "spent enough time" in VRChat. This is a problem since I don't have VRChat, I'm just a 3D artist. Anyway to upload it/let my commissioner use the avatar?
@tawny rapids
Send avatar via email/dropbox/googledrive?
tawny rapids
Send avatar via email/dropbox/googledrive?
@uncut moss Like the unity file?
uncut moss
@uncut moss Like the unity file?
@tawny rapids
No just the avatar and textures!
That avatar file form what you can get out from cats
velvet rain
When I commissioned work on a model the modeler setup a github thing to where we could both pull or commit which made things easier
tawny rapids
@tawny rapids
No just the avatar and textures!
That avatar file form what you can get out from cats
@uncut moss so the fbx straight from blender? I'm sorry for how inept I am, I'm kinda new to making avatars for VRChat
uncut moss
@uncut moss so the fbx straight from blender? I'm sorry for how inept I am, I'm kinda new to making avatars for VRChat
@tawny rapids
Yes! Thats the same file you were uploading with unity anyways ^^ Now your client can upload it under their account.
You can also send whole blender file if you want to give more detailed editing tools for your customer ^^
tawny rapids
@tawny rapids
Yes! Thats the same file you were uploading with unity anyways ^^ Now your client can upload it under their account.
You can also send whole blender file if you want to give more detailed editing tools for your customer ^^
@uncut moss But wouldn't that lack all of the things that you have to do in the unity file?
uncut moss
@tawny rapids
When you put your avatar trough cats and export it then that model is good to go.
that avatar should have all textures coming with it.
Your customer just have to do basic setup for avatar before uploading from unity.
If you are planning to do some magic in unity, then its more complicated, But if you have just avatar with textures its pretty easy to go!
If there is some dynamic bone stuff then its different story if your client wont have that addon.
are we still in the same page? 😄
tawny rapids
@tawny rapids
When you put your avatar trough cats and export it then that model is good to go.
that avatar should have all textures coming with it.
Your customer just have to do basic setup for avatar before uploading from unity.
If you are planning to do some magic in unity, then its more complicated, But if you have just avatar with textures its pretty easy to go!
If there is some dynamic bone stuff then its different story if your client wont have that addon.
are we still in the same page? 😄
@uncut moss Yeah I think so! I'm pretty sure my commissioner has no Idea how to work unity, (typical) and there were a few things I had to fix in the unity project. Is there a way to maybe import the fixed model back to blender perhaps?
uncut moss
@tawny rapids Hmm.. You can import that avatar easily back to unity just replacing old avatar from the files.
but you need to do that setup in unity if im wrong..
but no, you cant get avatars to vrchat without unity and you have to do that unity stuff.. So You can start to play some vrchat, Or your client cant start to watch some unity tutorials, or you can ask for your clients log in informatioin, witch is not even an option.. 😄
That fbx file keeps all stuff storet what happened in blender, but not in unity, unity has it own ways to store that data, It looks like it keeps it in that Project folders or something!
Sounds like you are in difficult situation ! :/
tawny rapids
@tawny rapids Hmm.. You can import that avatar easily back to unity just replacing old avatar from the files.
but you need to do that setup in unity if im wrong..
but no, you cant get avatars to vrchat without unity and you have to do that unity stuff.. So You can start to play some vrchat, Or your client cant start to watch some unity tutorials, or you can ask for your clients log in informatioin, witch is not even an option.. 😄That fbx file keeps all stuff storet what happened in blender, but not in unity, unity has it own ways to store that data, It looks like it keeps it in that Project folders or something!
Sounds like you are in difficult situation ! :/
@uncut moss And I'm guessing sending them the unity project isnt an option? or could I just send it to them, have them login and upload it to their account?
uncut moss
@tawny rapids I can't say for sure, But there is a chance that it could work if you have nice clean project with this avatar in unity!
I would try that my self ! ^^
tawny rapids
@uncut moss Alrighty! I'll try that approach, thank you SOOOO much you're a life saver!
uncut moss
@tawny rapids No problem ^^ You were in right place in right time! I hope you can figure that one out !
Wip. I have just "finished" second outfit for my avatar, Im not sure what direction I will go before my avatar is done, But It already look's pretty nice!
onyx juniper
@weary swift In the mesh object in Unity you can set the blend shape values, they will start off this way in play mode and VRChat
These are also inherited from however they're set in Blender on export
weary swift
thank you @onyx juniper, found it
acoustic lichen
So I'm trying to modify a protogen avatar to match my own character, I have a decent amount of progress but with my limited knowledge of both blender and unity, it's been difficult, lol. That being said, here's what I'm trying to make

And here's my progress...

Mind the giant fan. Lol
I only have a few things left to do, but I have no clue how to do them. One, I need to set up all of the RGB (haha, the name makes sense now, I have achieved comedy). Two, I need to slap the fans in this thing and figure out how to make them spin.
What should I work on first, what changes should I make to the model to accomplish these things, and how do I go about doing those changes
weary swift
@onyx juniper Thank you for the instructions, I was bummed out for a minute.
acoustic lichen
I guess you could say you thought you were boned
I regret nothing
Fr tho I need help
lol
 pseudo hawk

Basic
not finished
still working on it
but uhh
help for eyes and mouth when i get to it would be nice, so i know how to make them correct for animation
so i cant blind and talk in vrc
velvet rain
Current state of my little Blender project. Coming along great! Mainly focusing on lighting adjustments and filling out the shelves at the moment
spiral sigil
did you model all of this ?
velvet rain
I used VRoid for the main character models, the rest of the models I've found online or already had downloaded like the Neptune on the top shelf is just one of my old VRchat avatars haha
It's just a little thing I've been putting together the past couple days to teach myself some basic blender skills and alleviate boredom
 warped merlin
would anyone be willing to teach me to make avatars or help me with making my one one day when you have free time dm me
drifting thicket
i maybe spend way to much time on this , but i guess it looks cool
quaint jasper
@warped merlin there's a looot of tutorials out there, but no one will hold your hand through the process for free
desert cedar
@acoustic lichen What you'll need to do for the fans is have them be joined to the object or in the same group, with a bone attached that only controls/has weight paint for the fans. If you're wanting it to not be just normals but an active part of the model, of course. Then that way you can assign the bone or area there in Unity/SDK as a dynamic bone to have as a passive or part of your neutral anims.
 tired moss
i cant seem to fix the textures?
desert cedar
I'm unsure about the RGB, but I'm sure that could be set in Unity to having an active/animated texture @acoustic lichen
@tired moss What about the Atlas texture?
acoustic lichen
Ayy, actual advice. Gracias amigo
desert cedar
Of course that's of my limited 3d modeling experience.
tired moss
i think i tried @desert cedar
desert cedar
It might be less taxing on resources to try and have the fans be animated normal maps @acoustic lichen
acoustic lichen
Wym by that?
desert cedar
Well in your Protogen's picture, the lights are also below the fans.
And depending on how you have the lights set up for emissions--0
You don't want to do true dynamic lighting otherwise you'll kill people's performance and your own when the system has to constantly do checks on the lighting.
And the normal map will take the high res of the fan and turn into into an animated texture to reduce resources being used to calculate every plane.
acoustic lichen
So it would basically be pre-rendering the lighting effects of the RGB at the cost of... a 2D fan, I guess?
desert cedar
It's partially why the joints have the flat cylinder divet/inset for applying textures. Check your polys/tris as you try and model and shift+d fans.
Pre-rendering, but the normals will have it look 3D.
But it will be just a texture and at the cost of potential animations. You'll have to weigh how important and what kind of light/emissive you'll want the RGBs to be.
desert cedar
Yes it would.
Normal maps are fancy textures taken from hi-res models to make low-res models look more detailed.
If you want the lighting with less impact on performance, you might want to try 'baking' the lights, or pre-rendering them as you said.
I suggest this. A lot of lighting done in worlds can be taken and used in kind to help with emissive characters.

VRCat: Community-Run VRChat Forums
Greetings! Over my course of playing VRChat I've noticed that most worlds, mainly the ones that have baked lighting, are done poorly, or in an...
Do keep in mind I have only a small amount of experience. If you want more help on the lighting/optimization issues #avatar-optimization would be your friend.
acoustic lichen
Cool, cool. So, how would baking the lights work? Would it just work on my avatar and not affect the surroundings?
desert cedar
That I'm unsure of it. I know with materials like metals it'll do reflections yeah.
But I'm unsure. Feel free to ask #avatar-optimization
acoustic lichen
👌
desert cedar
ye ye. Glad I could help.
 hot belfry
help idk how to make avatars I'm a beginner an idk where to start
desert cedar
Working on a skeletal dragon bot.
@hot belfry Try Blender. Look up a tutorial on how to make a donut first. Then work your way up to the complexity of avatars.
hot belfry
thank you!
desert cedar
ye ye/.
And if anyone does have tips for hardsurface modeling characters, feel free to let me know. I'm always up for improving :>
warped merlin
@quaint jasper I know that I’m not looking for that at all I’m just not good at the basic tools at all and just looking for help to just learn how to use blender period I’ve been watching videos trying to learn but when they use the keys and short cuts to model I just can’t follow the instructions I thought it may help to have someone talk to me about it in discord
quaint jasper
You should do the donut tutorial for blender
it's the best one of all to learn the basics
 solid hill
Hey. I was wondering how common it is to commission a 3D artist for VR -Chat. Also wondering where one should post their work to advertise commission availability if it is a common thing
warped merlin
@quaint jasper I saw that a lot of people were using that to start and thought about it thanks for the tip
desert cedar
@solid hill It depends on the type of 3D art you do. The best place would be the VRC forums. I've also seen Booth.pm be used, but that's more for Japanese and Eastern artists, I believe. I'm unsure if we have commission sections here to post, but I'd assume currently would be #shameless-self-promotion
 dark geyser
I have a really easy question that i cant seem to figure out
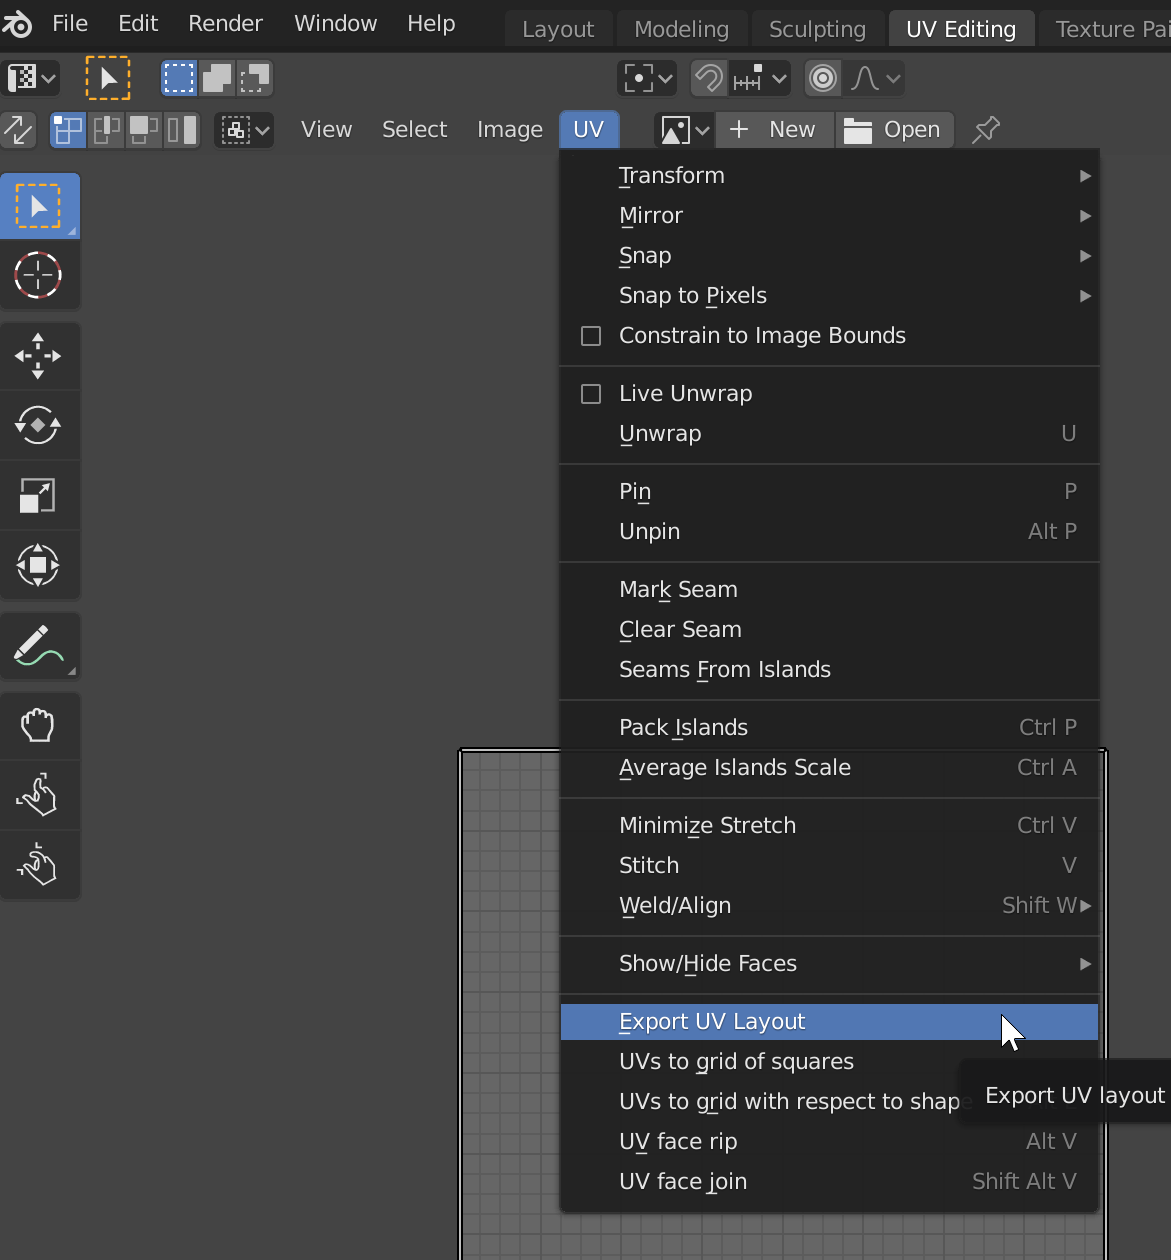
how do i export this uv map (not the white image)
wispy orbit
You may have to bake in texture data for the map and export a photo of that
dark geyser
ty
 wintry vector
My armature went away. Its still there in the scene, but even when I click to make it visible its still gone in the 3D viewport. Wat do?
 atomic stream
ALT+H
wintry vector
?
atomic stream
oh thought u ment blender. usually that unhides stuff
wintry vector
I do mean blender (2.8)
alt + H won't show
still shows up here but not in the scene
atomic stream
wierd im using 2.8 aswell and works on my end
entering and exiting pose mode makes it visible also
wintry vector
Not for me
I can enter pose mode, still no armature. It also hid my clothes meshes
the only mesh visible is my body mesh
 analog shore
@wintry vector Did you sent the bones to infront. If not, it can be found in one of the tabs with the green bone. Under viewport display there should be a boolean setting for it
wintry vector
@analog shore thanks. But when I click the infront button on or off, there is no change
analog shore
select the armature amd goto edit mode. Let me know if you see the wireframe of the bones
wintry vector
no wire frame
I also can't see the meshes for my clothes or hair
just the body mesh
analog shore
This is just blender, correct?
wintry vector
blender 2.8 yeah
atomic stream
and your in Layout view? "i know stupid question"
wintry vector
Solved
quaint jasper
@dark geyser You have a function through blender, export UV layout
i assume you wanna use that a layer mask in photoshop or something
quaint jasper
Also look into UV Packmaster Pro 2, it's the fucking bomb for uv unwrapping
velvet rain
A few days ago I had only enough Blender knowledge to convert a model for use in VRchat. Today, I have a project that looks like this! I feel like I've learned so much working on this 🙂
Here's the render for the project as well!
devout scroll
nice
velvet rain
Thanks!
stray tulip
An avatar/3d model of my OC I started making from scratch, working a lot on the textures!
 wraith condor
what application is that @stray tulip?
stray tulip
It's Maya, thought I don't do modeling in Maya itself @wraith condor
wraith condor
thx
 silent shell
@velvet rain nice project seriously looks pretty sick so far, also I know you lol
still wadi
@dark geyser https://i.imgur.com/0AFBa0Z.png
 still wadi
not knowing something doesn't make u dumb

 still wadi
not sure how to feel
dark geyser
nani
 spiral sigil


#SubstancePainter in VR Prototype. Will be exciting to see the next generation of artist tools in VR. From https://t.co/0hCCXMBOhD https://t.co/8WFqmq77uT
Retweets
170
Likes
983
Twitter
velvet rain
Thanks @silent shell! And yeah I'm pretty sure we're friends in VRC lol
 sharp cloak
how does this happen? i mean the tearing in meshes
i didn't change the mesh at all
onyx juniper
Did you apply an edge split modifier?
desert cedar
Yeah, that'd do it. Edge split or some other issue.
 primal dew
figured Id do a show off of something im working on, Since Ill be done the basic structure by the end of today. I gave a shot to sculpting, had a stroke, and went back to my comfort zone with edge loops and box modeling.
concept
Actually while its here, are there any low poly methods reconmened for fur? The lower part in kinda poofy.
primal dew
I thought that might be the best option but I wasn't sure. Thanks then I'll see how that works.
 lament pond
 terse cliff
I need help with the unity part in avatar making
Im hoping I can get this part done for me for free cause YT didnt help
DM me if you want to help
(Edit: I need someone good at baking)
 atomic hamlet
That moment when you almost crash your entire PC by setting a value too high in Blender... No joke, my PC froze for 5 minutes before Blender eventually just crashed, couldn't move the mouse cursor or anything.
lament pond
I accidentally set subsurf to 23 once
My computer became so unresponsive I just had to force it off
primal dew
Once I had hands (should be quick) Ill be able to start rigging. I still need to hair card the bottom, but any folks know a way I can get the solid colour things to look a little less clay like?
onyx juniper
Is longer neck better?
https://cdn.discordapp.com/attachments/521552543181176844/746490728288616508/unknown.png
 quaint jasper
i think so, it fits with the rest of the body
velvet rain
Quick update on my little project! Finally utilizing a proper environment map instead of my primitive little skybox, I extended the ground, and added a fence, as well as a lot of tiny lighting tweaks.
quaint jasper
no Ao or shadows ?
 valid moat
How do you start 3d modling characters from scratch?
quaint jasper
By following tutorials
valid moat
Okay
white moth
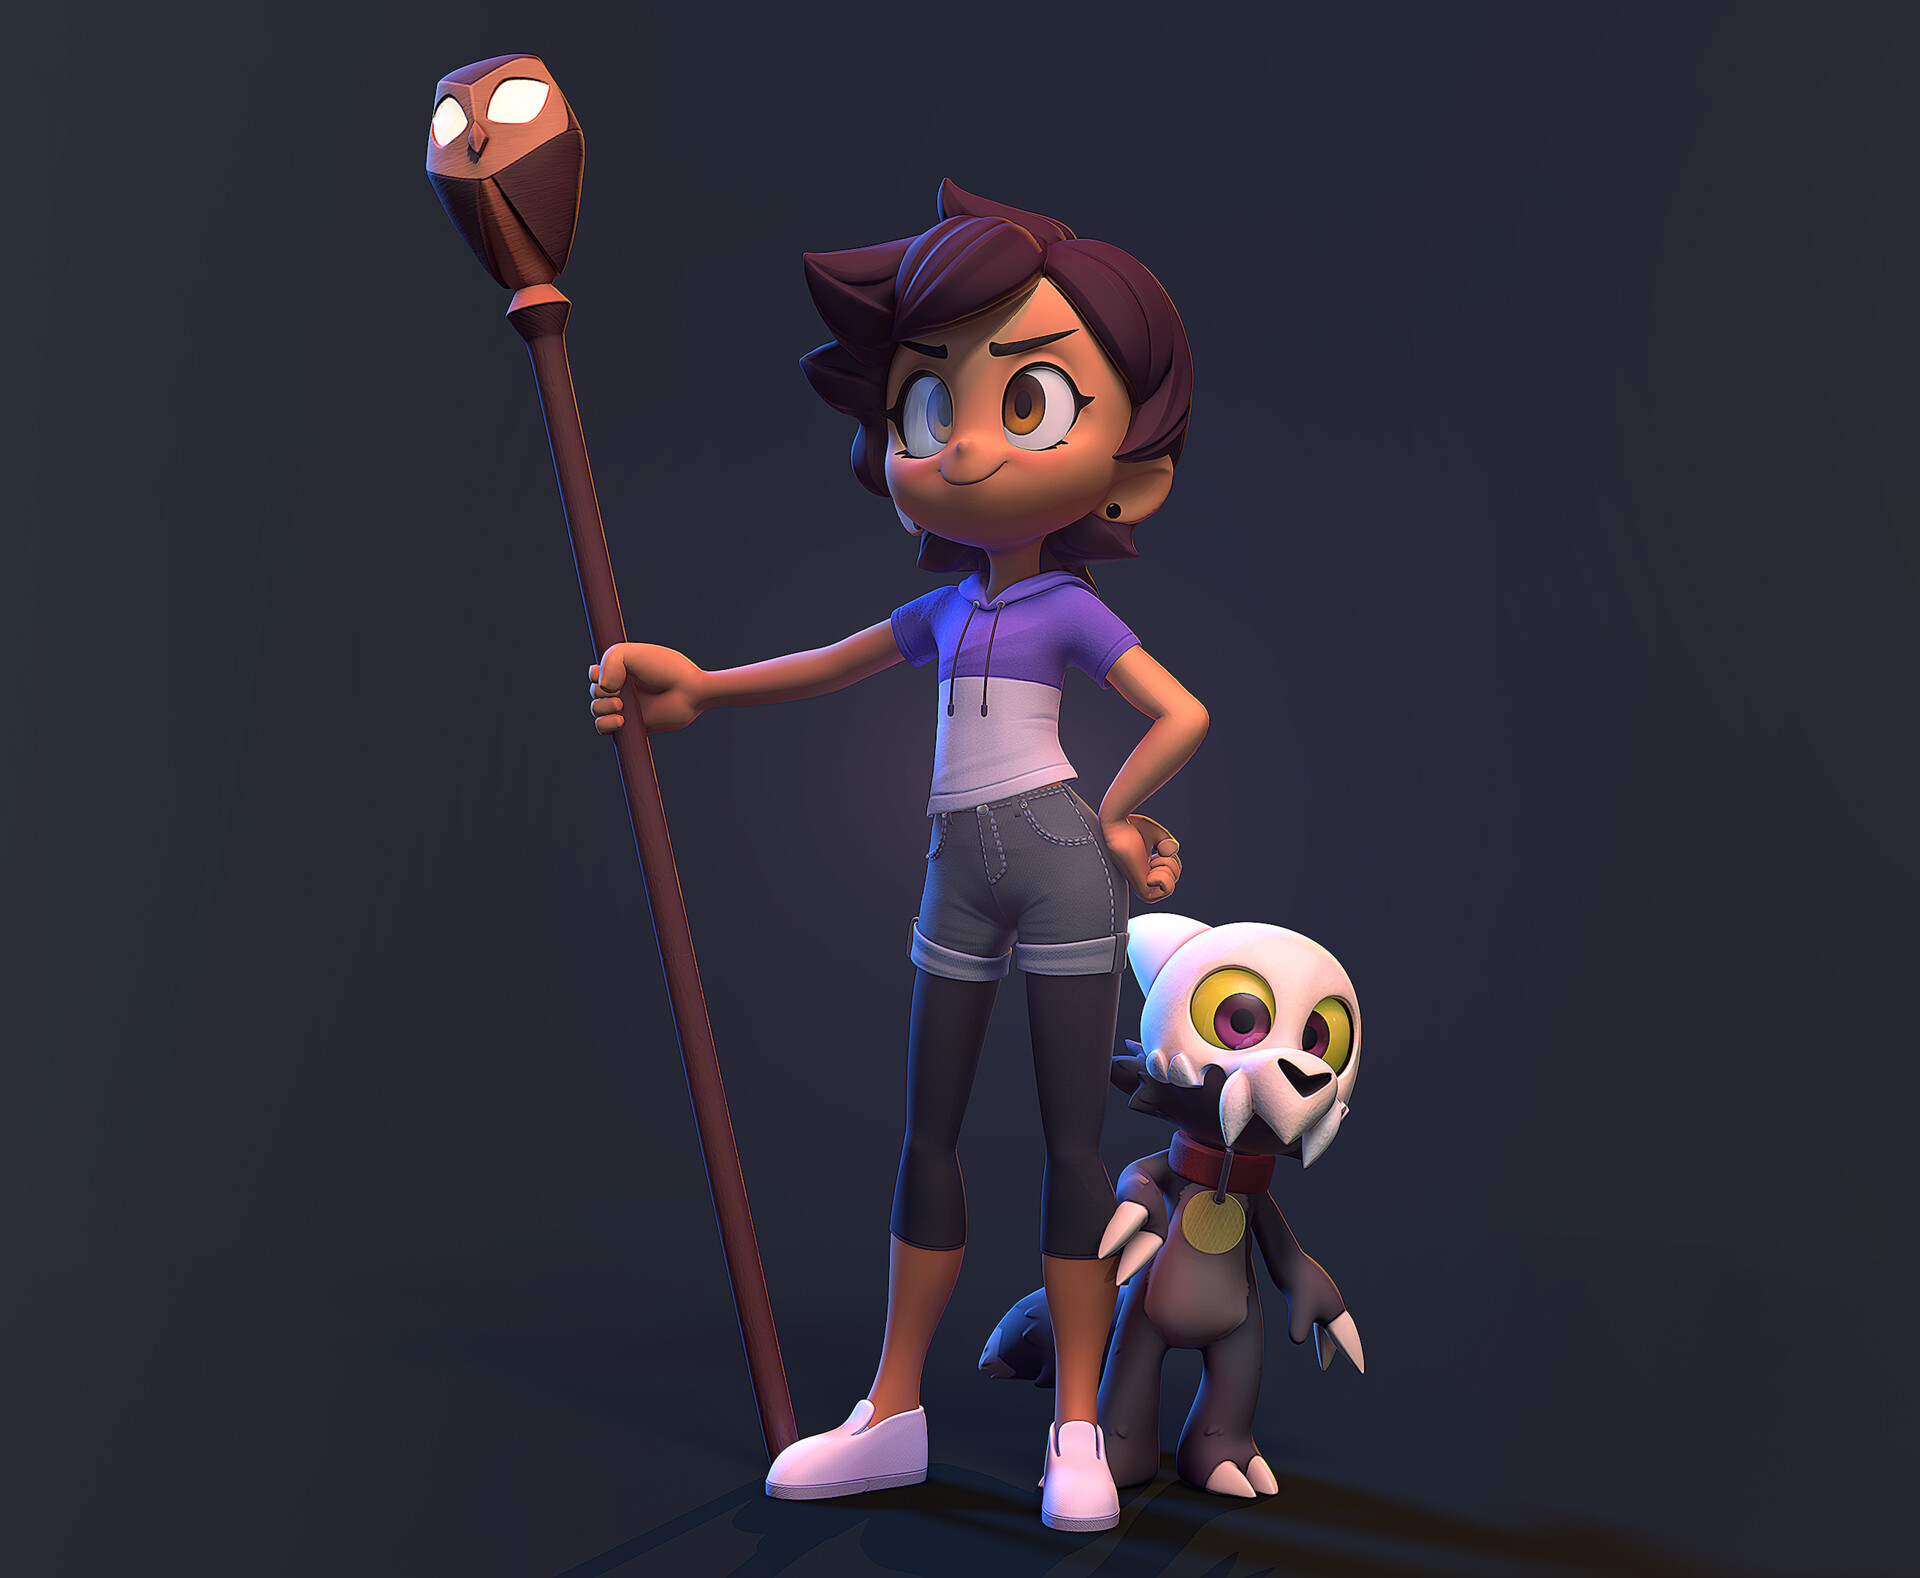
Make a sphere and add details

#StartToFinish #StartFinish All you have to do is add detail to a sphere
Retweets
3852
Likes
28550
 Twitter
 onyx juniper
It's that easy
 cosmic owl
is it possible to create UV shape keys in Blender? genuinely cannot figure it out and google doesn't help.
do I have to clone the face of the low-poly model and have the two faces swap positions or something? because it seems that blender only saves a new shapekey if a vertex moves...
preferably, if its possible to turn an animation into a shape key, that would work just as well
fringe rock
you can drift the offset of a texture in unity animation but that face need to be a separate mesh
cosmic owl
yikes, that's not optimal at all
is there really no way to have a texture's uvs move via shapekey?
fringe rock
that what they do in game
fringe rock
for the quest I have 2 skinned mesh and slide the offset on an atlas that have 4 time the same texture with different color

as example
for your model. have the face separate and animate the offset
cosmic owl
i C, that can easily be done
i was just curious on if it could be performed without bumping up the number of skinned mesh renderers
fringe rock
the old way was do have multiple duplicate of your face go in and out. but that add a lot of tris.
cosmic owl
i wonder if i can optimize one of my avatars, then
hmmm
fringe rock
its a good practice to have the mesh with blend shape as a separate skinned mesh in general
2 skin mesh is fine
 azure rain
yeah that way the blend shapes only affect the face not having to calculate the triangles for all the rest of the body that's never going to change
onyx juniper
The trick then is to hide the seams
cosmic owl
how would you do that?
azure rain
put the separation point between the two meshes behind hair
cosmic owl
ah
hm
but what if the separation point cant be masked behind hair
like
i think you would have to make the whole head the separate mesh to hide it properly then, not just the eyes (bc said eyes are done via texture)
onyx juniper
You also have to go through the neck, assuming any of the visemes have jaw movement
cosmic owl
hm, but how would atlasing play into this?
assuming you merge everything and then texture offset in an animation for expressions, the whole model would get distorted
unless im being stupid
azure rain
looking at like Pokemon model rips the mouths and eyes are separate textures from the rest of the body when dealing with 2D animated facial features
cosmic owl
funny, i plan on using this info to optimize a pokemon model
one of the G6 cutscene models though, so the eyes are textured/the mouth is modelled
azure rain
yeah they kind of need to be separated so that when you go one Sprite sheet tile down you're not moving the rest of the body
cosmic owl
which is why im wondering how i can separate eyes from the rest and not have seams
azure rain
Nintendo modeling their stuff isn't terribly concerned about having 60 of them right next to each other
cosmic owl
hm
i considered modeling proper 3D eyes for it tbh but i have no idea how hard that would be on a finished model
bc then you'd have to do some retexturing, tweaking the UV map for space, and all that
oh.
actually, i don't think it would be that hard.
just recolor the eye textures to be nothing but eye whites, separate those vertices and place them inside the head, then add a flat plane eye, no?
onyx juniper
The eye texture borders might not line up with the vertices in their area
Unrelatedly, look upon this monstrosity
cosmic owl
yeah i found out that they dont line up, which is unfortunate
rip, i may just be stuck with the "switching panels" approach
velvet rain
@quaint jasper Funny you point out the lighting issues, that's what I ended up spending most of today on lmao. This is where I'm at atm with it. Still trying to figure it all out but I think it's looking pretty decent so far
 proven flare
Anyone know what the average price will be if I want to commission an avatar? Just model, no rigging or anything
stray tulip
Modeled by me from scratch! :DD
Hopefully I can start Avatar commissions soon when I make a couple more
stray tulip
 onyx juniper
Hey, we were talking about separating the face mesh from the rest so only the blend shapes on the face are calculated
What about using face bone animations instead? Would that be more performant?
quaint jasper
Yeah it's much more performant, but that requires avatar 3.0
terse cliff
anyone here good at baking?
 zenith fable
welp it is a commission work
devout scroll
Finished my first commission 🙏
https://cdn.discordapp.com/attachments/563427481827147850/746767712428228608/Unity_Preview_1.png
https://cdn.discordapp.com/attachments/563427481827147850/746767712834814043/Unity_Preview_2.png

 clear geyser
Ah you took the vape commission. Very nice
spiral sigil
Looking nice
devout scroll
Thanks 
spiral sigil
noice
onyx juniper
Nice
Do these look like granny boobs?
https://cdn.discordapp.com/attachments/225627036029419530/746869806422032485/unknown.png
spiral sigil
no
quaint jasper
nah they're nice
vivid crater
Bery nice 
onyx crane
evening yall! so... why does my flat/solid lighting look awesome, but when i click studio/solid it gets really nasty looking? It's never been an issue in VRC since I use toon shaders, but I've always been curious why certain parts of my model look so awful under 'normal' lighting! (Specifically I'm talking about this camouflage looking effect on the hair, horns, glasses sort of)
spiral sigil
is anyone willing to make a avatar for free
azure rain
question what happens when you recalculate normals on the hair
onyx crane
@quaint jasper Yep :/ they're facing out (blue) i don't see a problem with them....I think it might be vertex related but I don't know enough about vertex smoothing, vertex painting (or whatever this is related to) to say what exactly
quaint jasper
What does your topology look like ?
onyx crane
quaint jasper
and you did recalculate normals right ?
onyx crane
I actually haven't tried that. Let me give it a shot real quick
Yep, looks the same. (Both recalculate outside and recalculate inside come up similar to what you see above)
quaint jasper
Tried "set normals from face"?
onyx crane
Let me give that a shot
Omg you fixed it!!!
It looks so clean now. Thank you so much @quaint jasper !
quaint jasper
No, you fixed it 
onyx crane
Can't play VRC because of the memory leak issue but these normals are fresh out of the wash for when I can 😂
quaint jasper
I'm more interested in how that broke in the first place
Memory leak on your side or in vrchat ?
onyx crane
The broken stuff is just straight VRoid rips
VRC, I've done all of the fixes I could possibly find. Basically, everything's great til I hop into a world that tests my GPU just a little (ex. Visualizer world). I go from 90 frames, 20 GPU usage down to 15-20 frames and 80-100 GPU usage every time. I go somewhere optimized to get my frames back-- even completely alone and somewhere totally optimized-- and from that point on, I'm stuck at the low frames and super high gpu no matter if I'm alone or where I go.
Never used to happen before, but now I'm hearing about other people experiencing it as well. It's that big thread on the canny 😦
quaint jasper
Mind posting it here if you know what it's called ?
onyx crane
Absolutely! Shoot, I would do anything for it to be seen by more people. Hang on.
People have kind of complained about it on and off, but ever since June(?) talk about it has gone from 0 - 100. I'm not sure what happened that got so many people.
quaint jasper
We fixed quite a few leaks since this thread was created though
Would be good to know in which worlds this happens, as it might be component specific like it was in some cases
If it happens in every world then i doubt it's a VRC issue
onyx crane
Certain worlds are definitely better and worse than others by huge degrees. I can make a short list of those I know of.
quaint jasper
Yes pls !
onyx crane
There are some worlds where I can hang out forever, and other worlds where months ago I was totally fine and now suddenly I can't be in there for more than five mins 😂 Okay, awesome. I'll DM it to you, unless you'd rather me post here? I know we are off topic lol
quaint jasper
In the canny would be even better !
onyx crane
Doing now! You da best!
There we go. @quaint jasper I edited my post (top comment)-- the list of working and leaking are there along with how many players i was with for each and what the leak looked like 🙂
Certain worlds I can even hang out in with 19 people, while other worlds I get it even when alone. Woo!
 nocturne juniper
Can anyone help me with this?
 flat cloud
do you need a digital tablet for 3d modeling ?
onyx crane
@nocturne juniper maybe save your work, reopen it and give it another try? I have usually been able to resolve those errors just by undoing and redoing the command again or closing and reopening the project.
onyx crane
@flat cloud You don't, but it really makes it much easier and definitely more enjoyable. I tend to use the mouse for inorganic shapes (hard surface modeling) and my cintiq for organic forms like animals and plants.
flat cloud
ah ok
i know u need for 2d art
but i wasnt sure since i didnt know how 3d stuff works
onyx crane
@flat cloud it's surprisingly similar to 2D art in some ways 🙂 you don't need something expensive. even an older wacom will work (of course, if you can get something like a cintiq or xp pen, more power to you!)
Grant Abbitt has been my teacher for a long time. you can check out his thoughts on tablets and recommendations here: https://gabbitt.co.uk/graphics-tablets/index.html
gabbitt.co.uk
flat cloud
ty <33
onyx crane
@flat cloud good luck, i'm happy you can experience 3D modeling for the first time because it is such a cool and awesome journey! check out Grant Abbitt on youtube for some amazing beginner tutorials (and don't worry, you don't need a tablet for them until his sculpting and painting vids that are later in the series!). I actually almost quit 3d modeling early on because i had difficulty learning from another popular youtuber, but after I found his videos his teaching style made it so fun it was addictive. I'm excited for you!
 stark ore
Redone my base to be at just above 4k Tri's
also started to blender paint my design on to see if it works as intended. some alters have been done already lol
karmic owl
so i noticed my model's face has some gaps (probably because i separated the mesh. all verts are still in the same place though) and i want to re-merge them, but from past experiences it messes up the topology and therefore the blendshapes. is there a way i can reconnect these vertices in blender?
quaint jasper
select them, alt + M > test your shapekey
karmic owl
secondly, is there an option so i could see the unconnected edges better?
nocturne juniper
@nocturne juniper maybe save your work, reopen it and give it another try? I have usually been able to resolve those errors just by undoing and redoing the command again or closing and reopening the project.
@onyx crane
still not working. i can't even add anything to avatar 😦 btw i bought from BOOTH
 velvet aurora
Hellos ^^
cosmic owl
i mean if it’s a humanoid model i’d imagine the bones are fairly straightforward
just test them in pose mode
onyx crane
@velvet aurora run it through CATS and that should clean it up a lot. It looks like you'll still have quite a few bones that are there as dynamic bones; you'll want to optimize those (take a closer look at that after cats processes it)
velvet aurora
Ok ^^
quaint jasper
Might be better to import it back again and check the "Automatic bone orientation" in the armature settings for fbx
if it's an fbx
quaint jasper
Before the cats fix, rename the missing bones with the correct names as shown in the error
velvet aurora
Ohh, ok
I'll try that. ^^
Pretty weird, a segment highlighted, but I thought I had the right object to rename (wish it highlighted it).
Inside the head, lol
Wonder what those dotted lines are for that's touching the other bones.
the dynamic stuff around the waist, I got two options on cats, merge weight to parent or active.
quaint jasper
For the skirt ?
velvet aurora
Yeppers
quaint jasper
just leave those and add dynamic bones
but if you don't have leaf bones then some are probably missing
velvet aurora
Trying to apply the empties keep disappearing, lol
I think I just want the bones work out, and jump into the dynamic stuff laters. ><;
 errant sentinel
dear lord help me, it looks fine in blender, but the spaghetti monster attacked unity!
velvet aurora
lol, sure does look crazy.
errant sentinel
dont laugh at my pain, HELP!
errant sentinel
HELP
errant sentinel
well, i fixed it, thanks for the extreme lack of help..
velvet aurora
<--- Doesnt know how to.
errant sentinel
not saying specifically you, im more upset nobody else popped in and helped
velvet aurora
Ohh, yeah. :/
quaint jasper
 odd take
errant sentinel
but i was most upset that blender and unity are so unstable
some how, some way, without me even closing the file i was working on, a blendshape got corrupted...
and it wasnt even some random ass blendshape!
velvet aurora
Hrm
errant sentinel
it was BASIS, the blendshape that has been perfectly fine and working for the 3+ months ive had this model!
velvet aurora
Ohh, I'll keep note of that.
errant sentinel
ugh, sometimes i wonder who the hell checks blender for errors.
cause obviously, they dont check well enough.
velvet aurora
- sigh *
errant sentinel
luckily im smart and saved just before i started trying to fix my first problem, cause the second problem was caused by me fixing the first one in apparently the wrong way.
velvet aurora
Yeah, I didnt want to face any screwups as well, so do the same thing.
onyx crane
@errant sentinel for future ref: spaghetti unity monsters can be fixed by importing Pumkins Avatar Tools, dragging in a new copy of the mesh (essentially act like you're about to remake the avatar from scratch) and then in the pumkin add on click copy components from another avatar and click on the things you want to copy. I usually click avatar descriptor, materials, and dynamic bones. boom, now you haven't lost any progress despite using a new copy of the mesh
quaint jasper
Or use the sil shapekey as new basis
 quasi trellis
hey, not entirely sure if this is the right place to ask about this, but it seems like the best place,
I'm trying to do a system of 2d facial expressions on my avatar where small planes that are exact copies of the mesh pop out with different textures, but I'm getting some lighting artifacts, does anyone know a fix? I've already given recalculating and flipping the normals a shot but it didn't seem to do anything?
onyx crane
@quasi trellis i love avatars like this, so cute! try changing your view to solid mode, clicking "flat" and (if anything else looks strange) clicking the button that says something about backfaces. Assuming you're using some kind of toon-y shading once you get in unity, that will mimic the way your avatar will look in game much closer and assuming you can't see it in that view you won't see it at all in game
(of course, this is just a workaround, i'm not sure if there's a way to do this better!)
Ruuubick was also able to fix some of my lighting issues by directing me to the "set normals from faces" option
quasi trellis
thanks for the info!! I'm a bit new to blender, do you know where roughly those flat and backface buttons are? I'm not entirely sure where to look for them
oh, found them, nevermind! thanks again!
onyx crane
no problem, good luck with your project!
acoustic lichen
I'm making a protogen avatar with fans instead of screens, and I've already cut out cylinders into where all of the fan blades will go. Is there any way to make sure I perfectly align those fan blades in the center of the holes I want them in, or am I just gonna have to get as close as I can to that by dragging and rotating?
stark ore

taking a short tea break from it. but i really love the side profile of the model right now. it's super Sharp!
 Twitter

Gotta Texture the helmet, but this is turning out quite nice so far
 coarse light
Anyone see any good dragon wings anywhere
nocturne juniper
can anyone help me with this?
i can't add this for my avatar, even this model made for it 😦
 waxen pewter
@acoustic lichen if you select the edge loop of the hole then use "set cursor to selected" will put the 3d cursor in the centre of your selection.
devout scroll
You can also use shift+s to bring up the cursor menu
nocturne juniper
can anyone help me 😦 any tutorial for add closet 😦
acoustic lichen
Once I do that, is there any way to snap an object to the position of the cursor?
spiral sigil
also in the shift+s menu
 glad steeple
nice gobline
 plucky jolt
Still WIP, with family and my laptop really struggles with blender. Can really work on it in about a week
spiral sigil
megas xlr ?
acoustic lichen
The hole I'm trying to get my fan blade into is at a bit of a weird angle. I've got it centered in the hole now, but is there to also make it line up with the direction it's facing?
also, I'm gonna have to do this on both sides. Is there a way to duplicate that object in the exact position it's already in but just mirrored across one axis?
quaint jasper
yeah mirror modifier
acoustic lichen
how do you use that
quaint jasper
Blender is Free and Open Source Software
The character Rig will be freely available next week on https://cloud.blender.org
Download: https://blender.org/download
Support core Blender development - https://fund.blender.org
--
This tutorial is part of the Blender Fundamentals ...
 merry plume
but thank,you
merry plume
h ow do i make a good looking 3d model like the one in in the video from ruuubick
spiral sigil
practice ?
quaint jasper
yeah, i'm not sure what kind of answer you expected
"work and practice consistently for weeks/months/years"
watch a lot of tutorials
merry plume
i mean like in sculp mode there is no way to make a good looking abatar
quaint jasper
as a beginner ? yeah obviously
merry plume
i mean how to make it smot
quaint jasper
that's why you learn how to model
merry plume
smooth
quaint jasper
smooth brush
merry plume
not polygony
quaint jasper
if you want to learn blender generally you need to do this https://www.youtube.com/watch?v=TPrnSACiTJ4
Blender tutorial for beginners! The long awaited reboot of the popular donut tutorial, completely remade for Blender 2.8x. New videos will be uploaded every other day to this channel.
Get the shortcut pdf: https://mailchi.mp/ef5b15a32043/subscribe-to-the-newsletter
--------...
spiral sigil
and if you want to learn sculpting in blender
here you go https://www.youtube.com/playlist?list=PLn3ukorJv4vvJM7tvjet4PP-LVjJx13oB

YouTube
devout scroll
purple donut
quaint jasper
Horny donut
spiral sigil

quaint jasper
Show us your donut Svel
devout scroll
ngl purple donut looking pretty cute
I never made a donut so i'm not a real modeler 😔
spiral sigil
@quaint jasper here. Most basic possible version of it since I just wanted to learn the new interface
still wadi
now make it covered with cum
spiral sigil

quaint jasper
votekick shonzo ?
spiral sigil
🤔
 river tulip

devout scroll
ez cloth donut
spiral sigil
pills
still wadi
@quaint jasper bruh
wintry vector
@quaint jasper how come I can't move anything in sculpt mode?
spiral sigil
you can with the grab tool
wintry vector
@spiral sigil is the correct bone notation to x Mirror weights Leg_L or Leg.L ?
spiral sigil
both should work
 tulip condor
i have a weird face positioned mirage problem
any way to prevent or fix this
here is an video:
https://streamable.com/ltlw28


 devout scroll
can you go into perspective mode
it's kinda hard to understand what's going on in ortographic
 stuck sequoia
can anyone please help me making a avatar, im tryna make a youtube video on vr and become some what of a vr channel
quaint jasper
what do you need help with ?
velvet aurora
Ok! I'm back, lol. I merged all the meshes, and used metarig for the bones setup, but when I used cats plugin, it tears off the neck and head.
stuck sequoia
im looking for someone to teach me how to make an avatar for a video and give me tips and tricks of doing so
velvet aurora
tulip condor
@devout scroll
is this video will help ?
quaint jasper
@stuck sequoia Have you looked at any sculpting/modelling tutorials ?
Start with this https://www.youtube.com/watch?v=TPrnSACiTJ4
Blender tutorial for beginners! The long awaited reboot of the popular donut tutorial, completely remade for Blender 2.8x. New videos will be uploaded every other day to this channel.
Get the shortcut pdf: https://mailchi.mp/ef5b15a32043/subscribe-to-the-newsletter
--------...
stuck sequoia
i have but im tryna make a video myself
quaint jasper
i'm confused
stuck sequoia
of someone teaching me and showing people if its hard or easy to make an avatar
devout scroll
looks like overlapping faces
velvet aurora
<--- overlapping faces?
quaint jasper
making an avatar is hard, no one can teach you but yourself through tutorials and practice @stuck sequoia
velvet aurora
oh, nvm, lol
tulip condor
@devout scroll
btw
the discord will not show you the bottom of blender option but in order to fully see my video you have to download it
stuck sequoia
:/
 winged flax
i'm having a problem when i export my model from blender the textures don't show in unity with the fbx
devout scroll
talking to @tulip condor
select the big face then ctrl+ to select more and do m, by distance to merge stuff
stuck sequoia
i mean, im just looking for someone to teach me for a video
its to show the people if a average slow jo can make an avatar
devout scroll
depends on complexity