#3d-modeling
1 messages · Page 88 of 1
 tepid granite

Obv that's how the mesh is, but iunno how to keep it smooth when sculpting a bit. Would dyntopo work?
 atomic hamlet
Dyntopo will destroy your UV's if you already have them setup.
 azure rain
and also you don't want nipples that have more triangles than your paws
tepid granite
She just downloaded the model from somewhere so I got no clue :P
 fluid dock
hey can someone help me with texturing to a character for hair and jacket i need help getting the textures out of unity can some one help me with the textures getting them out and then back in on the character?
?
...
tepid granite
i fingered it out, had to move the vertices and individually merge them
 spiral sigil
can someone tell me how to fix this
for some reason my tail is in two different places in object and edit mode and it's messing stuff up when I try to weight paint
 west river

So I like #WanderOverYonder a lot and I love Commander Peepers and his Watchdogs

 Twitter


i did some woy fan art in maya
 young vault
@spiral sigil do ctrl + a and "apply all transformations. It should then be in the same place in both edit mode and object mode.
 tight quartz
How do I find pictures that is with front view side view and stuff? Is there like something you search for?
spiral sigil
reference sheet or a turn-around
tight quartz
Ok thank you! ❤️
spiral sigil
@young vault tried that. I selected it in object mode. Object > Apply > All Transformations
 zenith fable
spiral sigil
zenith fable
spiral sigil
@young vault tried that. I selected it in object mode.
Object > Apply > All Transformations
@spiral sigil
Nvm I remembered how to do it
 fair patrol
hey, anyone can help me parent this object to chest bone?
i dont want it to deform
just follow the bone
or join it with another piece of clothing that already follow the bones
fair patrol
ok this was super weird, i had to add a bone, parent bone relative to the mesh, apply scale rotation etc., THEN join the bone with the rest of the body armature and parent that meshes bone to chest.
it works in blender, hope it wont break in unity xD
fair patrol
o hell yeah it does break
xd
flies all the way there for no reason
got it working through another way
trial and errors dudes
xD
 onyx juniper
Which position of the white trim is better?
https://cdn.discordapp.com/attachments/521552543181176844/734537267816956048/unknown.png
https://cdn.discordapp.com/attachments/521552543181176844/734538325469167677/unknown.png


 white moth
Am I blind
 quaint jasper
look at chest
white moth
Ok top one
I feel like the change from the bottom to top should be even more pronounced actually. Top is better but tilt it even more
onyx juniper
I'm pickin' up what you're puttin' down
You want the rack to be more like a shelf 😉
quaint jasper

 sleek stratus
@onyx juniper very cool
onyx juniper
Thanks, looks like ass in-game
 steady ridge
why ass?
quaint jasper
Shaders and lighting is weird, also we can't compare to a render
onyx juniper
Ruuubick knows the score
sleek stratus
she just needs some textures
steady ridge
are you texture baking from the render?
onyx juniper
She does need some textures. I've been putting that off because I haven't truely truly finalized the model yet
Indeed, I'm in here now asking where I should move some geometry
sleek stratus
WIP of an avatar me and @steady ridge are working on
quaint jasper
That texturing is not fair 
quaint jasper
@sleek stratus Is that a commission or something you'll make public ?
sleek stratus
it'll be public
quaint jasper
Will it also be quest compatible ?
sleek stratus
probably not haha, not sure how to do that
quaint jasper
It depends on the poly count, but the process itself is super simple
VRChat
Setting up Unity to create Quest content is actually pretty straightforward. This image covers it pretty well: If you're starting a brand new project, this won't take long at all. However, if you're converting a Windows platform project to an Android platform project, you will...
steady ridge
thanks! we'll try to shoot for that
quaint jasper
Hopefully you two can submit it for the next featured avatars submissions
quaint jasper
From last year's https://medium.com/vrchat/vrchat-quest-avatar-creators-get-your-avatar-into-the-featured-row-54361c661f44

Medium
Want to get your avatar into the Featured row on Quest? Check out our Blog to see how!
onyx juniper
Love Rock's stuff
white moth
Alright I've been bashing my head on this kind of thing for a few weeks now and I still haven't managed to figure it out. I have a bunch of shape keys that I want to reverse the 0.0 <--> 1.0 slider for. Does anyone have a step-by-step process for that?
It's difficult because they all manipulate the same verts.
what I mean by reverse is I want it to look like it's on when it's off and off when it's on
 stable edge
Uhhh doesn't unity let you set change the default value
So you can import the model into unity > change the keyshapes value to 100% > upload to vrchat
 devout scroll
If you apply a key to basis it leaves a reversed copy @white moth
white moth
Yes but every other shape key also gets the reversed copy...
devout scroll
shrug then, i never reversed more than one at a time
stable edge
Just upload the model with the keyshape at 100% yo
white moth
The idea is that shape keys that are always on don't alow GPU instancing
so I want to reverse the shape keys i need to always have at 100
i could just apply them to base, but then i can't use them
 latent charm
I'm sure I've done this once before but fuck if I remember exactly how. It probably involved negative shape key values and blending from one of those to another.
tight quartz
How do I remove a shortcut I don't want anymore?
I accidently pressed wrong keybind for the shortcut .-.
spiral sigil
no
 quick thunder
no
 jovial radish
no
white moth
It concerns me that people use the word “hentai” when they mean “anime” not realizing hentai means porn.
spiral sigil
pretty sure he knows what he is asking for.
white moth
That’s slightly not as bad
white moth
How can I reset a command's parameters in blender? Blender hangs when I use Smooth Vertex due to unreasonable settings.
young vault
Ya, it's called "restore factory settings"
 vivid crater
you might be able to append it from another file, not sure which options you can choose tho
young vault
uh
 ashen forge
I made a short and quick video explaining how to fix that bug with blender where blendshapes/shapekeys seem to "explode"
 quaint jasper
A much faster way to do this is to select all non face shapekeys and shape propagate
ashen forge
That too
 torn cosmos
I'm wondering but i'm not sure where i should ask this but, is there people here that create models for others/tweek models? (paid or not paid), cause i'm honestly thinking of trying to pay someone to fix/import the model for me
 calm saddle
Whatya need fixing btw?
torn cosmos
Well i made a pretty simple model with some simple bones that i wanna use as a avatar when i can upload them but it's all messed up whenever imported in blender (I used 3ds max to make the model)
when exported to fbx and imported in unity without passing by blender, it doesn't show right either
calm saddle
Oof, that sucks. Got a screenshot of how messed up it turns when you grab it into blender?
calm saddle
Don't think we're clogging it. This is kinda what's it for. And this way someone might have a better idea and stuff.
torn cosmos
Alright! so basically these are the bones and the body
in 3ds max
and in blender, importing that as a fbx gives me this
calm saddle
Yeah, that's messed up. What's most odd is that it added extra bones.
torn cosmos
Yeah that's just extra weird
calm saddle
Did you weight paint it in max too?
calm saddle
It tells the vertexes where to move in relation to the bones.
Could be different in max I suppose, It's been ages since I used it
torn cosmos
oh you mean linked the bones and the flesh?
if i move the left bone it also moves the left arm
calm saddle
Yeah, that. Could be weight painting is a blender term
Is the model itself fine, just the bones messing up?
torn cosmos
in blender i don't even see the model to tell the truth
I tried exporting it as a .obj but i was told .obj doesn't keep bones sadly
(and the textures were kinda wonky)
calm saddle
Can you drop the export in DM? I'll test it on my end
torn cosmos
sure ! thank you
calm saddle
We kinda found the key issue. Anyone got experience with 3Ds Max fbx exports only exporting animations/bones and no geometry?
torn cosmos
I'm not entirely sure how to check that
stable edge
uhhh when you exported the model as an fbx theres probably some settings there
torn cosmos
I got the FBX export menu here
stable edge
I don't use max but I can guess
There should be a skeleton/armature option too?
blender might have an option to ignore leaf bones too
torn cosmos
the closest i can see is the animation tab but yeah
calm saddle
Biggest issue is that the FBX exported only bones. Even when pouch later imported the same FBX into max, there was no model I believe?
torn cosmos
yup
calm saddle
I helpededed
stable edge
Is that fixed now? sometimes exporting as a different format can help
calm saddle
Pouch is now on 2.9 version and OBJ export came with bones, but they aren't weighted to the model.
calm saddle
Best solution I can think of is just reweighting in blender.
torn cosmos
well, same thing kinda
stable edge
uhhh well why are you using an object file then
torn cosmos
Basically the only import that works in blender is the .obj import
the fbx has no model, just messed up bones
stable edge
the bones are fine though
calm saddle
More like FBX doesn't export correctly, since even max could import the object
Dunno bout fine, there's about twice as many and in different positions as original
torn cosmos
the bones were like this when imported in blender (from the fbx) https://media.discordapp.net/attachments/390924397726138370/735262571040342047/unknown.png
 calm saddle
O rite, max and maya had those bones with fins right? Like a missile
torn cosmos
pointy bones and 'nob'
zzz is that 3ds max or blender?
it looks different on my version of 3ds max, (if that's 3ds max)
stable edge
blender
torn cosmos
alright, trying it then
stable edge
turn that on when you import
torn cosmos
Sure!
If anything, Wyvern is teaching me a lot about blender rn, they are lovely
probably gonna try to remake the whole thing in blender
if it doesn't work
 fringe rock
obj a only a mesh
young vault
Uh
Why not use game exporter instead of FBX exporter
pretty much the same thing, but, it's pre-made for games rather than modelling pipelines
also allows a better workflow for importing into Unity
young vault
Ya
spiral sigil
Figured why not do the all powerful donut lol 😂
 bleak pelican
Does anybody know how to do a knee on an anime leg because I have no idea how to do it. I already have the legs but from the front and from the back you can’t really tell what way they go.
Dm me plz
😃😃😃
calm saddle
Donuts are the future
onyx juniper
SHIT when did I do THIS?
vivid crater
excuse me what the fuck
onyx juniper
Oh damn it, I know. I was using C circle select in wireframe view to grab some hip verts and didn't check if I had grabbed anything else before moving them around
calm saddle
easiest would be to cut off the finger and duplicate and weld one of the others prolly
unless you saved the hand as it's own asset?
white moth
If I color tint different parts of a model using materials (but same UV’s) can I bake them all to a colored texture of the UV map? Not an atlas.
 green moon
Blender is a little hard does anyone know something easier say for like 45 bucks or lower I can get that makes it easier
(preferably on steam if it costs money)
azure rain
unfortunately there isn't anything at that price as all of the paid modeling software is dreadfully expensive
azure rain
I only have experience with blender so I have no clue if any of them are actually easier for noobs
as 3D modeling is complicated in general
green moon
Damn. I wish I knew how to make models in blender, I tried but it is too hard
azure rain

YouTube
The new Blender Donut tutorial, completely remade for Blender 2.8
green moon
I did that tutorial
azure rain
so what's currently the bit that's confusing you
as changing around modeling software isn't going to change the fundamental workflow what you do
calm saddle
Blender is about as easy as it gets imho
Max and maya are even more complex and not always in a good way
You could try lowering the standards a bit and do low poly lego looking stuff like this dude, he has a ton of low poly tutorials. Once that's easy, ramp it up to fancy stuff. https://youtu.be/NDAalAojTvo

In this video I model a low poly character in Blender 2.81. Watch until the end to get a bonus tip of how to get some nice shading for your low poly objects. I try to keep it condensed and to the point in this video and I make sure to repeat the shortcut keys as those will be ...
white moth
50 minutes in, I have made poor choices.
azure rain
oh dear
spiral sigil
I applied the wireframe modifier to a separate mesh and now I need to make the one thats still a plane be the same thickness whats the best way?
spiral sigil

Pixologic is happy to present a sneak preview of some features that will be available in the upcoming ZBrush 2021.
ZBrush 2021 will include some game-changing features that we know you’re going to be excited about. It will also be free of charge for all registered ZBrush user...
 tepid wagon
Change selection type to vertex snap, select edge of the plane object, press G + Z to restrict movement to z axis and ctrl select vertex on your mesh object to where you want your plane to reach (probably to the vertex on the top of one of the slopes) @spiral sigil
jovial radish
Would you guys have any idea of how to procedurally apply an effect like this through modifiers?
I'd have to do it on lots of geometry so I'm looking for a procedural solution instead of manually shifting the vertices
onyx juniper
Procedurally?
The shear function (shift + crtl + alt + s) in Blender does this with all selected vertices, oriented around your specified pivot point
Er, in that's the shortcut in old blender, I don't know if they changed it
 shy trellis
I'm making a map that I'd like to also explore in VRChat. Are there rough guidelines for how many triangles it should have, how many materials, and how many textures?
white moth
Just keep it under 200 megabyte.
Everything else is up to you.
Otherwise it’s just Unity best practices
shy trellis
Hmm, not sure how big that'd be in terms of polygon and textures, but probably not that bad. I'm not familiar with those best practices either, I'll have to find them
white moth
Storage-wise polygons are essentially free. Audio eats up the most space, followed by textures.
It’s not going to yell at you for having too many polygons. That’s an avatar thing
Polygon count doesn’t matter much in games anymore, shaders are far bigger factor in if you will lag. But if you just want a number, over 5 million might be an issue
azure rain
and it's a bit more of a concern if you're trying to make a quest map
quaint jasper
@shy trellis As long as possible for everything, as long as it looks good
shy trellis
interesting, that's a ton of headroom, gives me lots of space
when I texture individual objects, can I throw 4k textures on everything to make it look good?
when I did my avatar I think I just have one 4k texture atlas for everything
azure rain
you're probably going to run out of vram if every individual prop has 4K textures
shy trellis
does it swap things out as you navigate the world, or load the entire world into VRAM?
azure rain
you also have to consider download speed
people are not going to visit your map if they have to wait forever because you have 4K coffee mugs
white moth
Assuming you give all your objects reasonable render boxes they will be culled when not in view, though mirrors and camera rendertextures make it so less of the scene can be culled.
shy trellis
I see. When just roughing out the world's layout I'm using a single object for the floor plane of the entire thing. I assume it's a good idea to break that mesh into multiple objects once I'm done? (like rooms)
white moth
A single floor object is like, 2 triangles? You don’t need to cull it
shy trellis
I see. Thanks!
Oh, and number of lights? I'll try to bake lighting into all the textures
but is it common to have a few dynamic lights?
white moth
If you use unity terrain it has its own lod
azure rain
https://docs.unity3d.com/Manual/StandardShaderMaterialParameterDetail.html this can also help out don't need huge textures
 azure rain
basically if you can use no Dynamic lights that's even better because Dynamic lights are expensive
azure rain
and don't forget about tiling textures
shy trellis
with proper baking I bet that won't be a problem. I've not tried to bake large-scale scenes in Blender yet, though
azure rain
you would be doing your baking in unity
shy trellis
why's that?
azure rain
the unity lightmaps include a lot more detail
like the blender lightningmaps isn't going to contribute anything to the characters or dynamic objects
shy trellis
ah, I meant, baking it into the textures themselves. Like, I can set up as many lights as I want in the Blender scene and do a super long render, then bake those out into textures
that way I can get all sorts of lighting effects and AO for free
azure rain
yeah but you get a bunch of trade-offs compared to letting Unity doing the baking
like baking everything to the diffuse texture is going to make things blurry because you have to uniquely unwrap all of your color information as well
shy trellis
I could investgiate that. I had heard that Unity has a limit on what it can bake, like I was at a fairly normal sized world (coopertom's mall) and heard him say he can no longer bake it in unity, as it's too big
azure rain

VRCat: Community-Run VRChat Forums
Greetings! Over my course of playing VRChat I've noticed that most worlds, mainly the ones that have baked lighting, are done poorly, or in an...
quaint jasper
don't forget to generate lightmap UVs ^
azure rain
because good UV layouts for tiling textures and lighting look different
shy trellis
damn, I can see I'll have to learn a lot about lighting for it
azure rain
yes

Leonardo Iezzi created a little set of tablets, which will help you to get the right texel density for your meshes.
helpful article about texture size so you're not using 4K textures on toothbrushes
shy trellis
nice, thanks
 summer bluff
shy trellis
summer bluff
shy trellis
I think I've seen that anvil tutorial
summer bluff
Don't know how to make round objects be rounder, but definitely making progress.
The anvil tutorial is really informative for concepts. Him using an older version of Blender makes it really hard to follow, though.
quaint jasper
bevel modifier usually
shy trellis
I hate that. that's my major complaint about Blender right now. tutorials <2.8 are often misleading, sometimes wrong
summer bluff
At some point I have to get brave and try to make a humanoid
white moth
Unity’s AO (reducing light influence) is way better than blender’s AO (fake shading)
azure rain
and also Unity has light probes so that you can lights Dynamic objects using the baked lighting
onyx juniper
Ooh real AO
Is there something I should be using to get good AO for avatars?
Something other than Blender, I mean
quaint jasper
substance
onyx juniper
I thought that might be the case. Is it the same kind of difference as baking in unity, or is there an advantage in unity because it's the same engine you're ultimately targeting?
quaint jasper
You can't bake AO on avatars in Unity
onyx juniper
I mean, is Substance Painter's AO reducing light influence vs. Blender's fake shading?
latent charm
Blender's AO isn't fake shading, and the default way blender can apply AO is different to unity.
The AO generated when baking in blender is still perfectly valid (a range from 0 to 1 indicating the amount of occlusion at that surface point)
white moth
True. But I always see it just baked into diffuse. I guess that's user choice though
 dreamy pulsar
while wrong for a pbr workflow baking ao into the diffuse can be quite effective for more toony characters, however i would always recommend using it in a separate ao slot as using it that way you wont darken direct light from dynamic lights and such
 brazen pulsar
Currently working on a custom model base uwu
spiral sigil
uwu
brazen pulsar
c:
 muted raven
Very Curvy indeed 🙂
calm saddle
Currently working on a custom model base uwu
@brazen pulsar That's a real good silhoutte and shame, dang
 vapid egret
Im currently trying to put hair on a head piece. Ive got the front how I like it but the back is off. Is there any tricks that I can use to fit the back on properly?
brazen pulsar
Thank you @calm saddle !
vapid egret
Daz spotted 👀
brazen pulsar
UwU
Also @vapid egret normally i take the hair apart and then resize the bits to fit together
It takes a bit tho f
Also owo is that for ur guild avatar mayhaps¿
vapid egret
@brazen pulsar Hmmm alright. That could work! Although the textures might screw up a bit! Somebody also suggested cloning the hair in the back to fill it in
Also... perhaps...

brazen pulsar
O:
vapid egret
You get a sneak peak. shh dont tell anyone
brazen pulsar
C:
I could totally tell lol
It looks good!!
Are u gonna use the uniforms or like
vapid egret
Thank you sm!! I havent done any texturing so he'll look a bit different after im done
Yeah im going to put him on the member uniform ^^
brazen pulsar
Niiiice
Yea I figured since he hair was still grey
Unless u want him to b an old man lol, no judgement
vapid egret
Lol he'd be REAL old if he had grey hair as a pure elf
brazen pulsar
Trueeee
So he’s an elf huh
Tbh elves are super underrated
There’s so many avatars on vrc with like, wolf ears n stuff
But you don’t rly see elves as much f
I’m excited to see it when it’s done c:
 umbral crystal
anybody wanna help me with some modelling advice
im having a real hard time trying to imagine this character in 3d space
was wondering if someone could help me
this is what i have so far
made a 2d reference and some 3d models but couldnt really go from there
also might get rid of the "handles" of the glasses as theyre not part of the character but i think it looks weird without them
umbral crystal

 queen elbow
What if the default cube DIDNT get deleted?
 green ember
too bad it did
queen elbow
NOOOO
devout scroll
cubeless default file 
 pearl viper
hey
 zinc jolt
guys, no offense but you got nothing on my skills
check this out
jk, it's not complete just yet
 waxen pewter
yeah - lets see it in game -
green ember
looks okay i guess
summer bluff
Been working on my first humanoid the past two days. This is a struggle and it's absolutely going to look like an abomination.
onyx juniper
Work outside of subsurf more, and accept that you have to manually tweak individual vertices
umbral crystal
^ thats what i had to do for my hand
i still have a subsurf on the body but not the arms
onyx juniper
I want to be clear that I don't mean don't use subsurf at all, I mean work with it turned off more
umbral crystal
ye i have it on the body still but to make hands
i had to turn off subsurf for the arms
atomic hamlet
I wish i was even remotely decent at modeling...
I've tried both poly modeling and sculpting. But I've never really managed to make anything that works...
Same with 2d art...
quaint jasper
How long did you try for tho
atomic hamlet
I've been doing it off and on during some of my spare time. It's something i keep coming back to even though I'm trash at it.
quaint jasper
Can't get good until you practice a lot
atomic hamlet
I know... As much as i want to learn modeling, i just have other things i would rather be doing with said spare time.
 autumn agate
I have been making the doughnut in blender
its a good tutorial set for beginners, they teach you the tools making something simple, a dougnut
atomic hamlet
I tried that tutorial once, failed at it as well.
I just seem to be cursed to lack any artistic abilities...
quaint jasper
there's nothing artistic about the donut tutorial
autumn agate
I lack all artistic abilities too, I can make alterations. I want to make a game, but I want to know enough to add animations and modify any models I purchase/comission
quaint jasper
it's just a set of steps
atomic hamlet
But i mean, when you can't even follow said series of steps without screwing something up, that tells you something...
I am fairly familiar with Blender, I'm just trash at making anything with it.
 static vapor
Instead of donuts I recommend watching a guy make a humanoid avatar.
autumn agate
the donut toturial is good because it's an introduction to blender, more than it is an introduction to making anything else.
static vapor
This way not only do you get the basics but your also able to make other humanoid avatars based on the tutorial
atomic hamlet
I feel like programmers (like me) being bad at art is fairly common...
autumn agate
he spends 2/3rds of the tutorial on keyboard shortcuts
atomic hamlet
Maybe if i just sit down for a while and ACTUALLY try, i might see some progress. But like i said earlier, in my current state, i would rather spend my spare time gaming.
 chrome tree
3D modelling is like any skill. You get better at it the more you do it, and the more ways you search for to improve.
 autumn agate
My goal once I finish the donut
is to animate some bites being taken out of it
and bring it into VR in unity
so I can eat it
static vapor

chrome tree
If you do, I suggest making it a shapekey so that it's easy to use in VRChat!
autumn agate
The ultimate end goal is to make some games that are good for VR newbies. My wife is good to test stuff out on she gets motion sickness if you grab her head and tilt it back and forth
I want to make like, an Area 51 clone in VR or anything like the old 90s light gun shooters because the games that move you smoothly through the level like pistol whip don't bug her
step 1 is modeling and screwing around in unity / vr chat 😄
any good tutorials on models and shape keys (new term I just learned) etc. Seems like shape keys are something i'll need in unity too
from quick googles
static vapor
Step 1 is failure then more failures and more failure
Until one day you peak higher then mount everest
autumn agate
I have 12 years of professional experience coding, I am a cross platform application architect. I know failure 😄
static vapor
Yeah I failed about 6 times making my avatar perfect
One model after the next it got better
One of my friends think it will take me 3months but I proved him wrong and did in 3 weeks
autumn agate
Cross platform coding is great, you do all your research ahead, make a solid plan, write a good abstraction interface, then some weird quirk in android bites you in the ass and you re-write your abstraction layer 4 times
static vapor

autumn agate
it's always android -.-

 umbral crystal
@atomic hamlet took me like 2.5 days to make this so am satisfied
im not very good modeller either cuz this is like my 3rd character without doing sculpting or drawing
but i still learning so theres a lot u can accomplish with effort and patience
atomic hamlet
Dang, that's pretty good for only your 3rd character.
umbral crystal
without sculpting or drawing
only references i had for this was front views in 2D
atomic hamlet
Maybe poly modeling would be better for me if i took the time to learn it, i have trouble doing anything precise with sculpting cause my shaky hands (same reason why i suck at drawing, well, aside from not putting enough effort into my work anyways...).
summer bluff
give the 2.83 donut and coffee cup tutorial another shot
I know for me, I watched him do level 1 before I actually followed along with level 1
it really helped because I kinda knew what was coming next
atomic hamlet
I was already doing that actually. Started an hour ago, going well so far!
umbral crystal

 clear geyser
Very cute
atomic hamlet
My PC BSoD'ed last time i tried to render something in Cycles with my GPU... Hopefully that doesn't happen again. Made sure to save this time before trying.
It also does it whenever i try to use the GPU lightmapper in Unity... Which tells me it's a problem with AMD's drivers, as usual...
Well, it managed to crash my GPU without BSoDing...
Did some research and lots of other people are complaining about the same issue, so it is once again AMD's drivers being trash...
 strong pumice
stable edge
strong pumice
stable edge
check the pins
 foggy cosmos
thank you 
stable edge
no probbbbbbb
queen elbow
Very happy with how this render came out
except for the fur things, I didnt know how to fix those
queen elbow
@queen elbow shouldve mentioned I figured out the fix for it when I finished.
summer bluff
ffs are there any good character modeling tutorials?
quaint jasper
Yeah tons, why ?
quaint jasper
Nope, you'd need to find one that fits your skill level, as in steps you can follow easily
 coarse light
anyone know how to translate vismes in blender
devout scroll
use CATS
coarse light
Can u install it via winrar @devout scroll
quaint jasper
You might have to material atlas first
stable edge
Hahaha the uvmaps have to have the same name not the same naming conventions
summer bluff
this is such a longer approach to head modeling. It's working better for me but damn
@outer plank have you tried highlighting the specific spot you want to apply the texture and hit select and apply?
also could you show us a screenshot of your materials panel
The only thing I can think of is that you're sharing a material on all three meshes.
coarse light
does anyone know how to make a models head invisible from the inside of the head?
queen elbow
@coarse light pretty sure it does it automatically when exporting it to vrchat
summer bluff
results vary. I've been inside of quite a few objects that I could see as inside out.
looks like the 2.8 way to do it is to make the material itself not use backface culling
coarse light
@queen elbow but i want to do it for neos vr
queen elbow
vivid crater
LMAO
 hardy lake
can anyone help me fixing this pole? cant wrap my head around how to avoid this ><
it's screwing up my subdiv because its a vertex connected to 5 other vertices as far as i understand
tepid wagon
You could separate the strap and give it some thickness or crease the connection between bottom of the shoe and the strap together with an edge that goes from vetrex you have selected on the picture to vertex on the other side of the shoe, so it is not affected by subdiv @hardy lake
hardy lake
i separated the strap, thank you ❤️
 subtle jackal
it's screwing up your subdiv because it's a T-shaped face joint, not because it's a 5 edge pole.
 lilac shale
@coarse light you can do that by using the tool in essential tools > avatar tools and there you have a near clip setup if you use that you can slide to how much you want it to be culled what also works is making the mesh single sided which it should be on default import and then just add the near clip to get rid of the rest that's in the view
@coarse light it's in here
Sorry for the old UI but I was trying to search for the exact location on neos mobile which doesn't have the new UI yet but the folder and item locations are still the same
coarse light
@lilac shale thank u!
 robust niche
spiral sigil
robust niche
spiral sigil
Hi can anyone help me with the error when i try to publish it says "FileNotFoundException" and then the path. is there any way to fix this?
devout scroll
check your console for other errors and post in #avatars-2-general
spiral sigil
k
lilac shale
@coarse light need to slide it a little bit back till it's just at the right point
It should only cull the head
It it's slided too far it culls out a big part of the body
spiral sigil
I want to slice a part of my model at an angle and create a face on either part
so I can hide part of the model with an emote
(I'm making cake)
what's the best way to do this?
Knife tool, separate the meshes, then add the faces?
quaint jasper
You can select a vertex in the middle and use Select > Side of active
then you either extrude, move, cut or whatever is best
 sly reef
#3d-modeling how does Lolathon make is avatars go invisible and make them scare people pls help me
lilac shale
@sly reef that's a shader
jovial radish
Looks really nice, tho it does look a bit heavy in polygons
 lone sapphire
Thanks! I am mainly practicing right now, though each time I try and create 3D models I keep trying to push the polygon count down, I also turn mesh compression off when taking the images so that might also be why they look a bit heavy.
foggy cosmos
ım not quite sure how a ı going to do t but ım going to try makeing 3d modeling
if you would like to use the ref sheet ım going to send it too
 dawn locust
hello :3 this is a character model i want to become my avatar, but i have never used unity, so gl me i guess.
 runic nymph
thats a fancy default cube
waxen pewter
default cube is beautiful - why ppl delete it is beyond me
white moth
delete default cube, default camera, and default light
save as startup file
 silver flicker
Hi I was wondering if I should use DirectX format or OpenGL format for my normal maps. Or does it depend on shader?
fringe rock
cancel default cube
young vault
@silver flicker use OpenGL format.
vivid crater
white moth
That could very well be humanoid though
 stark ore
but it's much more fun to be generic on 3.0
i mean, look at this cool walk cycle i can give him
he is just vibing
white moth
What causes Unity's material list to be reordered compared to blender?
young vault
Alphabetic I believe
 exotic tangle
onyx juniper
exotic tangle
onyx juniper
@foggy cosmos Your posted reference is going to give you trouble, since some parts don't line up between the two views. At least one of the toes is much bigger, the ear angle is different, and the wings are higher
 odd rune
New to modeling, any thoughts?
onyx juniper
That looks like it's turning out how you want. 👍
queen elbow
devout scroll
How would I unwrap this? https://puu.sh/GczAZ/1e700c2f7a.png

Normally I'd got for this kind of unwrap https://puu.sh/GczCQ/8a436b0bd7.png

But since the edges are beveled i'm not sure what the best approach is
Would this be good https://puu.sh/GczIw/368da631fe.png

because before I tried to kinda reduce the amount of seams around the edges so I'd end up with something like this but i'm not sure if avoiding these tiny seams is worth deforming the bigger, more important UV islands for https://puu.sh/GczJz/7886210661.png

 wary gull
I have a tiny question, if you'd be willing to help please ping or dm meee ( Sorry if this is the wrong channel )
spiral sigil
wary gull
Ah, so sorry. I'll go ahead and ask? I have the blender app, but how would I even start on making a model? Once more I am sorry.
 ashen stag
Everyone starts with tutorials, get the basics and if you get stuck on something specific thats when you ask
 fresh coyote
just finished the body/textures of this derp. now i just gotta rig him/animate him. then wander around worlds in all this derpy glory xD
white moth
“ hey guys I’m just learning blender how does this look it’s my first scratch model” proceeds to post triple A quality modeling and texturing
I’ll just be over in my trash can
onyx juniper
Picture unrelated
onyx juniper
I mean the loli within the image
spiral sigil
more relatable if it's weeb shit
onyx juniper
It's like when people add dreamworks minions to their opinions on Facebook
spiral sigil
🤢
onyx juniper
Exactly
 glossy matrix
Can you port 3D models from mobile to vrchat oculus quest
Or can you make models in vrchat
 hallow bough
You make models in Blender for example.
glossy matrix
But I don’t have a pc
jovial radish
You can use a mac if you only have that, or comission an avatar. Other than that there's no other way.
jovial radish
what's tafi @devout scroll ?
devout scroll
some character creator vrc partnered with at some point

Tafi’s easy to use, highly customizable Avatar Creator is now available for VRChat users. Tafi’s application allows you to personalize your avatar with over 400 components from species to outfits. Enjoy creating.
but it's nothing compared to building your own
glossy matrix
Thanks
onyx juniper
I keep failing to post an image
I obviously have lower texel density around the boobs, but clothes do stretch that way, right?
https://cdn.discordapp.com/attachments/508004023362912266/738533810031034398/unknown.png
onyx juniper
Is it detecting too much sexiness?
vivid crater
The density is being stretched over the boob compared to the rest is what he's talking about, but yea pretty sure that's good
Wouldn't know for sure tho I don't have bobs
I'd imagine that's how it works for an outfit like that
quaint jasper
I think it's just an artistic choice
Unless the point is for the character to stretch the fabric
if not then the outfit would have been made with that shape from the beginning, and the pattern wouldn't be stretched
 lyric compass
If anyone wants to can you please make a 3D model of this please dm me if you start making it
lyric compass
Oh never mind
onyx juniper
There's a server called VRC Traders where you can commission avatars
 median pike
I get these awful seams when using mask editors, or any generator for that matter, How can I prevent this? I though the position and curvature maps should fix this
tepid wagon
@median pike You would need to change projection to triplanar with UV you have. Perhaps it would be possible to use UV projection if you had rectangular shape on the UV and scale it appropriatly so it tiles. Think there is also an option to copy fragment of a texture and paste it somewhere else to cover up the seam but it won't work for those shapes that look like cuts in a wood
median pike
@tepid wagon you cant use different projections with generators
anyways I got around it a while ago
 still wadi
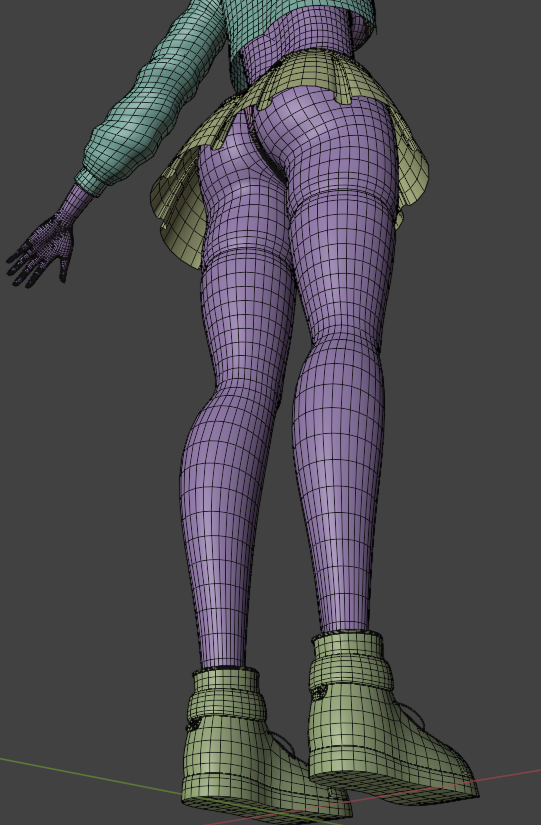 spiral sigil
ass
median pike
that looks very high poly
onyx juniper
No one else is wearing a mask!
But speaking of high poly
Is her head too small?
https://cdn.discordapp.com/attachments/225627036029419530/738785164716540034/unknown.png
 jovial radish
Eh, head could be bigger but the shoulders are a bit too high
Unless she's shrugging constantely
onyx juniper
That's sort of what I was going for, a perpetual sexy raised shoulder, but I feel more lately that should be done with animation instead of geometry
 vagrant swallow
New skirt how you like baby
 knotty grail
wait, i didn't understand what it was at first, oh god haha
 brittle raft
"Ohh it's not orange... those are vertices!"
atomic hamlet
[Insert Knuckles "Oh no" here]
 stray tulip
Hi! Here's a model I finished yesterday based on Iris from Megaman X4, currently trying to port it as my first custom Avatar cx
I made her all from scratch using Wings 3d, Maya and 3DS Max
brittle raft
neat
 real coral
I agree
stray tulip
I can't see her yet couse I'm new to VRChat and I need friends to publish her 😦
brittle raft
You mean like rigging and animating stuff?
stray tulip
No, she's all set up and ready
But I can't upload her because I haven't "played enough" in the game
brittle raft
Ohh yeah, that lol. Might wanna just wait, play enough, friend a few people to hit blue. Because if your friend publishes it it will effectively be credited as your friends creation in game.
Unles you don't really care
stray tulip
Of course I care LOL I'll just walk around a bit then
stray tulip
I don't have any friends in the game at all, none of my friends play it T.T
stray tulip
5 days / 30 hours or so
brittle raft
Not bad
stray tulip
I have experience, and people told me I should do VRChat avatars so here I am XD (I port to Gmod)
 brittle raft
Cool, I'm sort of dipping my toe into 3D modeling ATM sussing it out
median pike
https://www.artstation.com/artwork/VgJxy8 I made a thing

ArtStation
Finally got around to trying Zbrush and WoW. Its amazing.
I wanted to do a stylized World of Warcraft style weapon for a while so here it is.
Had lots of fun sculpting it.
 swift quiver
how long did it take you to make?
onyx juniper
I have completely forgotten how to use Substance Painter 2
 rugged mountain
how do i get a normal map when there are no textures for the hair and it's just a single color
azure rain
get your normal map from somewhere else
 rose thorn
 remote lantern
@rose thorn that polycount is way too high!!
you'll have an easier time working with lower detail and using subdivision surface modifier to see what things look like smoother
young vault
Tbh, it's entirely fine. Not the conventional blender workflow, but, it'll work.
 ember lintel
k wanna hear a noob question? what do I do with SPCs?
 past rose
Wym?
past rose
i misread SPC as scp... fml sorry
young vault
My brain still doesn't wanna think about what SPC stands for
ember lintel
It stands for:
Si don't
Pknow what
Cit does
young vault
I also read it as SCP tho, so, eh.
zinc jolt
show me pls
ember lintel
ember lintel
yeah terrifying lol
past rose
@ember lintel dont use "transparent"
use one of the two other settings in the tab
i know, its stupid
cutout or fade should do it
ember lintel
opaque, cutout and fade also dont work
past rose
huh
ember lintel
i'll try these shaders
past rose
weird
young vault
On the texture. Have you ticked... "Alpha is Transparency"?
ember lintel
so heres the thing
i was using the wrong texture
because for some reason there is no eyelash texture, but theres a mask and normal map
so im confused
also im not sure the purpose of that weird lip over the eye
past rose
Eyelid, i presume
ember lintel
the model cant blink though lol, im so lost
young vault
Is it a rip from a game? Or from an animation? If so, it could in that iteration of it.
 young vault
Ah, yes. Then, that'd most likely have an animation in the original game and bones for the eye lids to close em.
And move em around
ember lintel
i have no clue what im doing
ember lintel
i've managed to remove the eyelids but eyelashes still have no texture
why isnt it here 
ember lintel
how do I put my unity materials in a blender project?
devout scroll
You can't
But you you can still have textures
You can just drag all the textures you need into the material and link them to the right slots in the shading tab up top
ember lintel
literally drag them into a material?
just all of the textures into one material?
i've made one material and its just going onto the dress, skirt, arms and head and nowhere else, what is going on!?
devout scroll
Well, when you import something it should already have all the materials it needs and maybe even know about the textures
If it doesn't you gotta drag the right texture into the right material and assign as base color https://puu.sh/GdGLc/0d0a653057.png

shading tab
ember lintel
when i drag a material onto the place it should be, its just turning every other material into that dragged material. how do I fix that?
devout scroll
can you show a screenshot of your shading tab
devout scroll
well, it looks like your material is used in 3 slots
so 3 things use the same material
ember lintel
ok, i've clicked that number and its gone away
devout scroll
i'm not sure that's what you want
can you undo that and show yourr materials tab
 ember lintel
i'll make all the materials I need to and be right back with you
k i've done it
if i drag the dress material onto the dress, it turns Body into a Dress clone
devout scroll
Well, when I said drag textures, I meant from windows
You shouldn't be dragging any materials around, those are already assigned to what they need to be
ember lintel
so why aren't they there? how do i fix that?
devout scroll
Kinda hard to tell without looking at your files
How did you import it into blender
What file format was it
ember lintel
the textures? they are .tga 's
devout scroll
The mesh
ember lintel
the model is an fbx
devout scroll
then it should have all the materials setup, just the textures might not be showing
ember lintel
i dont know what you mean, i made all the materials as new materials with an image texture for each one, do they set themselves up because its an fbx?
devout scroll
yes, so you generally don't need to make new ones
you just assign textures to existing materials
ember lintel
it didnt come with existing materials
well it came with two that were just black voids
and didnt seem to even be in use
devout scroll
thing is if you make new materials you'll need to assign them to parts of the mesh as well
unless it looks fine for you now i'm misunderstanding
ember lintel
so the model comes with two black materials, I disregarded those and made my own, placing them on the body in the hierarchy. I'm wondering why its only showing the highest material on the hierarchy of materials as on Unity i can just drag the materials to where they need to be once making new materials
im using the word materials a lot, sorry lol
devout scroll
It's a bit different in blender
In unity you can drag new materials onto your mesh because the fbx knows which parts have which material
like if you make the legs have one material and the head have another, you can drag any material onto one leg and it will do both legs because that's what it was set to
ember lintel
yeah
devout scroll
but if blender if you create a new material it doesn't know what parts of the mesh it should affect
unless you click the number, in which case it just creates a unique copy of the material that you have selected now
so it keeps the information of what to affect
ember lintel
so what are you saying i should do?
devout scroll
Import the fbx, select material, drag in texture, select different material, drag in different texture
ember lintel
what in this is keeping the material pitch black? i've added the image texture...
devout scroll
go to edit mode with tab, then in materials click select https://puu.sh/GdILc/3649d543a3.png

the button will be there, see what it selects
remote lantern
what viewport are you using
oh i see it now
are you sure it's actually loading the texture
queen elbow
her rig isn't done yet, hence the blank expression.
but what kind of clothes should she have
remote lantern
also make sure you don't have "use world lights" or somlething enabled in the viewport settings
@queen elbow wrestling
or weightlifting
devout scroll
Could be some kind of weird overlay texture thing
What happens if you delete the mesh, is something underneath
ember lintel
are you sure it's actually loading the texture
it should be, nothing is stopping it
i fixed the model with CATS and that didnt help
queen elbow
I've already decided one of the pieces would be a kimono
remote lantern
yeah you probably need to read up a little bit on using blender
ngl
it's probably just something weird you have configured
devout scroll
Yeah, would help
remote lantern
or a setting not set right
ember lintel
What happens if you delete the mesh, is something underneath
nope
remote lantern
@queen elbow roller derby
devout scroll
Is there a texture atlas for the whole model then?
if you plug the texture in there it should show up on the mesh that lights up when you press select, so I don't see why it isn't, unless the texture itself is black
queen elbow
@ember lintel Are the textures in the folder, are they there, if not, then it could be trying to find an image in another directory, not finding one, hence the black
devout scroll
wouldn't it be purple if it was not found
ember lintel
i'll make a new folder with the model and textures i want and report back results
queen elbow
well maybe check in case
remote lantern
huh do you need special permissions to upload images
oh i know what it is
huh maybe not
weird
devout scroll
doesn't look like it
devout scroll
thanks, i've been trying to figure out texture painting
remote lantern
the bottles look nice
ember lintel
thats look great so far!
remote lantern
not overdone
ember lintel
^^^
devout scroll
Also done some of the metal gate
The safety thing and the buoy has some light speculars, but i'm not sure about the metal, looks a bit odd to me when i'm on anything but shadeless
ember lintel
i have no roles and i can, how strange
remote lantern
maybe a lite shadowban, lmao
remote lantern
wehhh
it's definitely some setting for me on this server
because i can upload images to other servers jsut fine, lol
devout scroll
Weird
ember lintel
k i've made a folder with:
the optimised model
every necessary texture (every one i seemed to need before)
every normal map of those textures
... and it still doesn't work when i 'Fix Model'
theres still just 2 completely black materials
do i need to put the textures in a folder called Textures or?
ember lintel
how do i check?
remote lantern
select the mesh object, go into edit mode, select > select all, then switch the window to the uv editoer
take a screenshot when you do that
ember lintel
i can make the wrap on the left the whole screen and zoom in so it isn't a black and grey blur if you need that
remote lantern
that's fine
ember lintel
where should i go? there doesn't seem to be any VCs on here
remote lantern
you can dm me
past rose
so my first sona was a success so im giving it a second form (not 2nd version)
remote lantern
neat!
onyx juniper
Good stuff!
past rose
thanks yall
so far my idea are tentacles that copy my arm movements (behind), floating eyes and being massive
i'm not sure about anything else
onyx juniper
Are you planning this for Av3.0?
 fringe notch
trying to join all these meshes but the one titled Mesh.010 won't join the rest of them, what would i do here?
queen elbow
@fringe notch pretty sure that cant be joined
orange triangle is a mesh
click the first orange triangle inside that group, then shift click the last one@fringe notch
onyx juniper
If anyone knows how to use Substance Painter 2, my ao bake is being a turd - setting some of the hard shadow areas to be white for no apparent reason. You can see the values leading into the shadows and then BAM, white!
It wasn't like this last time I tried, but then I had separate materials. Is that the problem?
EDIT: Okay nevermind, some options just didn't show up those previous times for some reason
 meager prism
Its illegal to get 3d models from a game’s assets and use them in vr chat, right?
onyx juniper
I think it's actually against the TOS but that isn't enfored at all as far as I've seen
There are a crap ton of avatar worlds for copyrighted video games and their characters
quaint jasper
If you have permission you can, that's what the upload checkbox you click says
meager prism
@onyx juniper thanks! Anyone familiar with getting 3d models from bluestacks or nox?
past rose
finished design of form 2 of my sona
 normal geode
Great work guys
 severe walrus

Humble Bundle
We’ve teamed up with Packt for this game design and animation ebook bundle! Includes books like Learn the Foundations of Blender, & Practical Game Design.
white moth
That top needs a new unwrap
Probably project UV’s from front then you can put printed logos on jt
@queen elbow
queen elbow
@white moth OH no that image was a joke
 elder mirage
Does anyone have any tips on how to have multiple outfit meshes for one character model, or would that be more of an #avatar-rigging question?
white moth
It’s a feature that’s super easy on 3.0 but until that is out it’s pretty tricky and requires doing some hacky things with animators that doesn’t make sense but works somehow
rugged mountain
I Wana make my own like soft warm cuddle room for vrchat where would I start is there any udemy courses I can take or something
quaint jasper
You can google blender tutorials on how to make the pieces, and then you put them all in a room in Unity, upload and you're good
 sharp cloak
how do i "cut" open the lips so i can add a mouth cavity?
the orange line is where i want the cut to be
quaint jasper
V
sharp cloak
V? this just takes the lines so i can drag them no?
sharp cloak
thank you SO MUCH, it worked!
queen elbow
@elder mirage I just made different clothes, rigged them to the base, then whatever piece I wanted in vrchat I would join the meshes, export, then undo the join mesh.
queen elbow
queen elbow
 frosty plinth
frosty plinth
frosty plinth
 gaunt aurora
what exactly am i looking at
 sweet moss
i have no clue what im doing lol
spiral sigil
hi, im having trouble modelling hands, can someone find me a demo of proper topology?
?
subtle jackal
https://polycount.com/discussion/200564/hand-topology-for-animation like 15 seconds on google, or basically just bookmark polycount in general.

polycount
hi everyone when i sculpted this hand i did a quick retopo in order to have a cleaner model and now that im cleaning everything up for baking and texturing i wanted to ask you if this is a good topology for animation in stylized characters, what do you guys think? many thanks...
spiral sigil
ah, thank you xD
 olive drift
Actualy, I wana ask somethin about maya, for some odd reason, one of the shoes on the model im puttin into vr chat has the uv shell on the inside yet for some odd reason, it wont let me flip it so that they show up on the outside, not sure what else I could try
subtle jackal
oh wait, my bad, that's not the wiki http://wiki.polycount.com/wiki/Limb_Topology
waxen pewter
@olive drift if the models are for MMD you might see vertex groups locked idk about maya but blender needs them unlocked to flip normals
olive drift
Ah, well I got it now, just one more thing I wana adjust, which is a way to ensure the coat does not clip into the body in ze game
Would it be easier to put some joints onto the coat or should I just use the paint skin weights thing?
sharp cloak
heey i added a mouth to my new avatar from an old one and since i connected the body with the mouth part, it lost its texture. when i try to UV map only the mouth cavity, it only lets me pick the whole body sadly, can i somehow just unwrap the new mouth in the UV editor?
olive drift
What software ya usin?
sharp cloak
blender 🙂
olive drift
Ah, im not that used to blender, I know with maya though you can select faces and add new materials to it to do uv mapping
sharp cloak
argh i see, but thanks anyways!
devout scroll
either hide all other geometry before unwrapping with shift + h for hide unselected
or disable/enable sync with selected top left of the uv editor, it's an icon which looks like two arrows
then it shouldn't unwrap everything
olive drift
But yeah, at the very least I wana stop things like this happening
Where it has a bit of clipping
sharp cloak
@devout scroll thank youu ! it worked
 runic salmon
I'm trying to help a friend with their model, but I can't seem to un-hide the armature.
bones aren't showing at all either, and they're not hidden from what I can see in the viewport display
quaint jasper
try unhiding them in pose mode
runic salmon
Well the thing about that is I can't leave pose mode either
when I try to leave pose mode it throws an error
quaint jasper

quaint jasper
Try leaving pose mode from blender menu and not cats
quaint jasper
restart blender ?
runic salmon
tried that
The only thing I can think of here is that they used blender 2.79 to make the model and I'm trying to work with it in 2.8.
Other than that, I have no idea..
spiral sigil
model broke
 frank hazel
I made the legs shorter on a model and now the fbx file went from 3mb to 8mb https://i.imgur.com/PVTO4h8.png

I must have done something else, but what
I separated the legs into it own mesh to resize it and I guess when I put everything back together it must have doubled something. 🤔
spiral sigil
Select everything and remove doubles, that might reduce the bloat.
frank hazel
That reduced it a tiny bit.
I am just going to roll with the big file.
Should I have resized the legs without putting them into a separate mesh?
devout scroll
Hide/unhide does this https://puu.sh/GeOAr/93a886f4f9.png

But it's likely disabled in viewport
click filters and turn on this filter https://puu.sh/GeOB2/4755ba9e05.png

Then enable it https://puu.sh/GeOBH/feff0f638b.png

@runic salmon
Models don't "just break"
runic salmon
ah yeah that was probably it @devout scroll
I just put it in 2.79 and that fixed the issue for me.
devout scroll
Making stuff unselectable is pretty useful too, for example the mesh while you're working on the armature https://puu.sh/GeOES/16f601fa14.png

You should probably know this too @spiral sigil
runic salmon
ah okay, thanks for the tips.
spiral sigil
yes
stable edge
Isn't
Ones so you can't select it ones so you can't see it and ones so you don't render it?
quaint jasper
Yes, but they don't appear by default
 lost dagger
aye! does anyone here have any experience with modeling a anthro character for vr chat? and are open for commissions
quaint jasper
You can find a lot of them on twitter !
lost dagger
oh alright! my friend just said I'd have luck here thanks
btw! any suggestions that be helpful <w>
quaint jasper
Not really, if you have any furry friends they should probably know better, they don't advertise themselves on the regular channels or the vrchat ask commission board, so they're harder to find
spiral sigil
this character is a real funguy
sharp cloak
Okay would anyone be willing to help me with a certain UV problem through DMs maybe? since i need to explain a bit more
it's about "separating" meshes into a new layer of UV and making it work lol
quaint jasper
@sharp cloak What issue are you having ? It's a straight forward workflow
sharp cloak
okay i try to explain as best as i can
So, i added a mouth+insides from an older avatar to my new one, since it didn't have a mouth. i connected everything and now i'm stuck with putting a texture on. I don't know how to "map" only the mouth parts. i tried making a new UV image with only the mouth cavity, the tongue and the teeth.
my idea was to create a really simple png image with some colors on them and putting the UV islands on it so everything is colored in the right way.
i created 3 new vertex groups, one for each part. here i tried to make the teeth faces white but it just won't show up. when i go into render mode, not only the teeth are white but the whole mouth part
is there a way to assign textures to vertex groups?
 open scarab
err you just move the uv around on a image to where you want it, if you want every group to have their own material with texture, you have to seperate (kinda pointless tho)
open scarab
seperate into materials
right now everything is shown
you can also click the material in the list, then click 'select' and it will only show that
(this requires you to pin the uv first)
sharp cloak
okay i separated it now
quaint jasper
You could easily use the same materials and textures as the main model though
sharp cloak
now i just need to make the islands don't clip on each other and make a png image with the texture i want right?
open scarab
Pretty much, atlas the thing after, you can also do it first unless you are adding more things first
sharp cloak
okay i will make a png quickly, i have another question but for now i feel like i got a step closer thanks alot!
 last kestrel
i wish dat i was like u guys good at blender
spiral sigil
just git gud
spiral sigil
i forget, if your gestures are causing shadow and light issues, do you set blendshapes to import or calculate?
import
 white moth
Latest SDK as an auto fix button for this and won’t let you upload unless it’s checked. That also means you aren’t using the latest SDK. Do update your SDK
 drifting thicket
hey , i'm trying to add shape keys to an avatar and i heard of a "mirror setting" to make the thing easier , i've never tried it before but when i was doing random things to understand how it works i noticed that
its like there were another instance of the model , inside the model
but i noticed nothing weird on the hierarchy
drifting thicket
i tried , same result
- i kinda need the proportional editing for what i want to do
stray tulip
Question, I know the limit should be at 70,000 polygons for them avatar, but just to be sure, is it 70.000 quad or tris?
ashen stag
VRC converts quads to tris automatically, so the only metric that matters is tris
 woeful hemlock
 whole zinc
Hey hey hey
 solar fossil
woh, thats noice
stray tulip
Finished this character's textures <3
 hot ibex
That's so dope!!!
stray tulip
Thanks!
 visual vigil

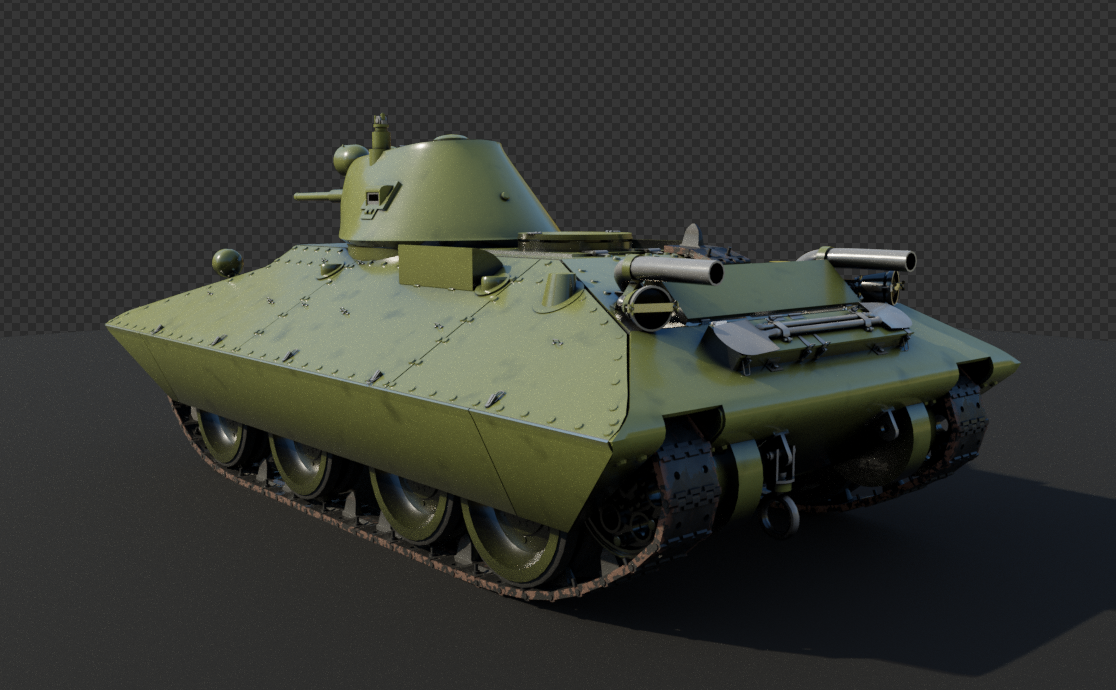
BT - SV / 2 Tank ; viewport
Pretty satisfied with the basic blender metal shader.
This is my favorite 'odd' tank of the WW2 era!
Exterior modelled in 24 hr; DP-28 + Shovels are from Gaijin's BT-7. Eventually I'll replace them.
#b3d #Blender3d #3dmodeling #WW2
 Twitter

 spiral sigil
i'm surprised that the human example is not hyper inflated





 spiral sigil
joking aside, it looks good
did you use a specifique image for the texture or is it randomly generated ?
visual vigil
its just a mild noise texture on a flat color