#3d-modeling
1 messages · Page 80 of 1
 bleak tree
I'll have to look into that.
bleak tree
Mmh
bleak tree
The normals screw up a bit when I merge everything. Some stuff appears soft when they shouldn't
 quaint jasper
Did you check the normals on the entire model ? there's a face orientation shading option
bleak tree
Ahah
 mild nimbus
oh
Check if you have sharp edges on
or bevel edges on
if you see like blue high lights or hot pink hightlights
and also select everything and try CTRL+N
to recalculate normal outside or do them manually
bleak tree
And turn off auto smooth I guess since that changes everything.
mild nimbus
Oh
if it was already smoothed out
but you extrude more geo
it will extrude in flat shade
so you need to do smooth shade again
to normal smooth the new extruded geo
bleak tree
Yeah. I'm done extruding now. The model's done.
mild nimbus
👌
bleak tree
I found some meshes with flipped normals.
bleak tree
It's okay. I can now fix them. It's good that I found them
https://gyazo.com/e4a17672587eeda1808f3839a9d1c43f Clean as a whistle.

So now I'm going to go in and sharpen edges manually. I'd rather have more control over it anyway.
quaint jasper
A good thing to try is to go in edit mode, select nothing then type "select sharp"
reduce the angle at your choosing it might do a lot of the work for you
bleak tree
Don't seem to get that.
quaint jasper
bleak tree
Space bar just plays animation for me. I'm not using the same interface.
quaint jasper
ah, what's the key to open the search for you ?
bleak tree
Object name comes up when I press enter
quaint jasper
maybe F3 ?
bleak tree
That's top orthographic view.
quaint jasper
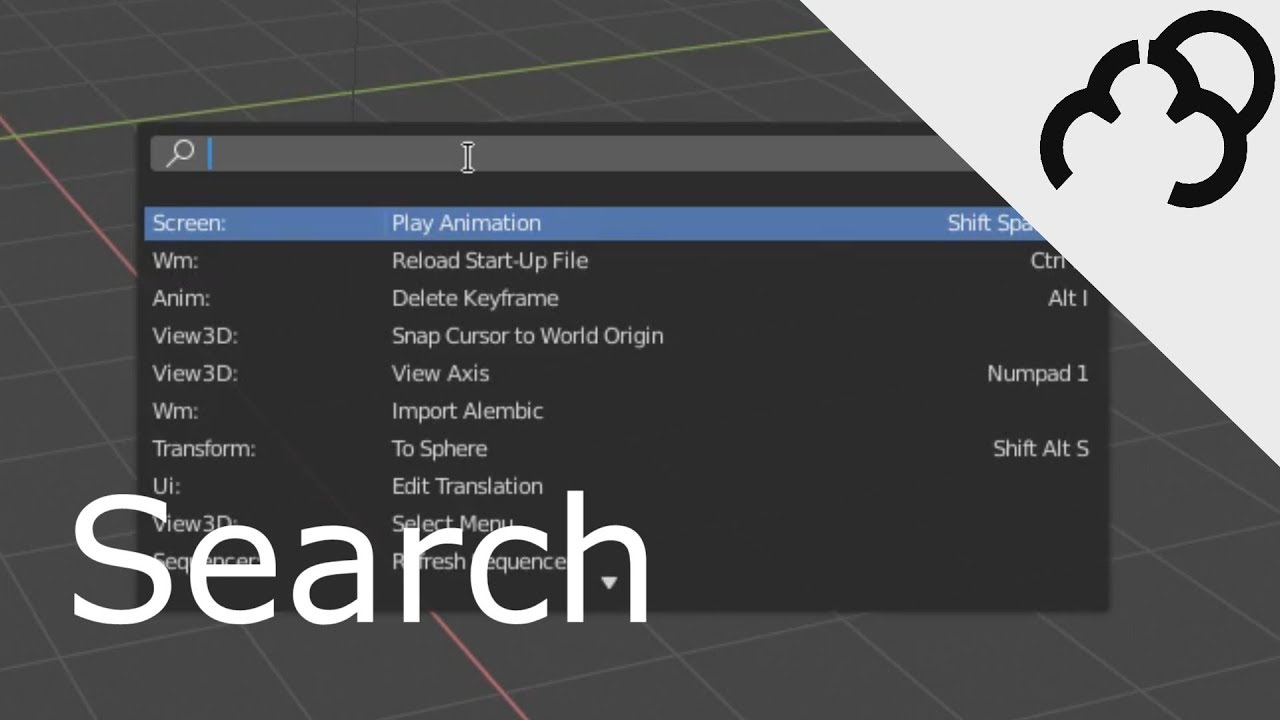
The search function is very easy to use and it gets you to so many tool quickly
+++++++++++++++++++
www.markom3d.com
www.facebook.com/markom3d
https://www.instagram.com/markom3d/
spacebar search is too convenient not to have it
bleak tree
Why does everyone smack their lips in tutorials?
I'll find it in preferences then
It's TAB
Can't I just mark sharp the edges I want to be rigid?
That's all I want.
quaint jasper
you can, this just helps finding them quickly
 quaint jasper
you're in face select mode
mild nimbus
if you are on 2.79 controls
search is space
2.8 is f3 i believe
Im still stuck on 2.79 controls :lul
quaint jasper
same, ill never change
bleak tree
That's fine. I admire anyone that's mastered the previous interface. I just migrated from Maya so I have the worst time adapting
quaint jasper
blender is sooo easier to get compared to maya imo
bleak tree
Blender's definitely powerful in certain things that put Maya to shame.
mild nimbus
so i generally just know how to use it now xD
The only thing Maya has going for themselves
is there UV unwrap tools
T B H
But blender is currently tackling that right now
bleak tree
The animation tools are really nice too.
mild nimbus
and its looking pretty nice
Ya Maya will always uphold animation side since its meant for that
maya is generally better for animation vs Blender imo
quaint jasper
For now 
bleak tree
Hehehehehe
bleak tree
I would LOVE to see Blender become a great animation tool.
mild nimbus
rigging is really smooth in Maya
quaint jasper
we have Pablo with us, we;re unstoppable
mild nimbus
xDD
bleak tree
That's my role in things. I'm an animator.
bleak tree
But since I'm at home waiting out this virus, I'm working on Elenor.
quaint jasper
i'll share the first blender anim i made last week
quaint jasper

mild nimbus
where an unknown UFO is in middle of a field
and they try to teach the language
to read time or something
i forgot the exact name
quaint jasper
Arrival
quaint jasper
been working on it for a while, wasn't good enough to make some of it so i stopped for a year
mild nimbus
practice practice~
Actually based on statistics of stocks right now
America is technically in a recession right now
quaint jasper
i get paid in dollar so not a whole lot of fun going on xD
quaint jasper
the 3D industry should prevail, working from home shouldn't be too hard
mild nimbus
oh ya definitly
literally working remotely
film production and like game producion will prevail
Source Control makes life great : ' )
bleak tree
I have something I made in Source Filmmaker
 bleak tree
I'll post it somewhere for videos.
quaint jasper
@bleak tree here is fine !
bleak tree
Alright
mild nimbus
animation is alot more fun when you make the model and rig it personally
bleak tree

Not everyone hits the ground running.
Credits:
Animation and Visual Effects: Musetrigger
Sound Design: Optimus97 and Musetrigger
Music: Musetrigger
Voice Cast:
Shark: Musetrigger
Keely: Musetrigger
Moray: Lily Lammers
Portside: SuperVario64
Programs used:
Source Filmmaker
A...
quaint jasper
Damn, that's fantastic
mild nimbus
This was amazing
bleak tree
Thanks.
mild nimbus
you over exaggerated the faces pretty well
especially for a style like that
the movement seem natural to me
not to stiff
bleak tree
Yeah, I wish I had a bit more freedom but the rigs were limited.
mild nimbus
ya i feel you
bleak tree
Oh, I have more stuff, but it's not released yet. It's for this festival that's supposed to host thousands of people, but it got postponed because of the damn virus.
mild nimbus
Do you do the 11 second club?
bleak tree
I thought about it but never got around.
mild nimbus
Its fun when you choose a random 11 second clip
and imagine what you can make it from it
and the winner gets quite the benefits to
I see you act out your animations physically to
This is key to being a animator.
Good job
bleak tree
Oh yeah, I'm really into it.
bleak tree
I'm trying to find some animation work. I'm stuck building a portfolio and helping out on a mobile game.
mild nimbus
I use to act out my stuff to. You got something going for yourself 👌
I wish you best of luck on your journey tho
bleak tree
Mmh
bleak tree
Yeah, after years of fumbling.
mild nimbus
Everyone awakens to there skill set sooner or later
bleak tree
I'll have something else to show before long. Something I animated in Maya. A dancing crawfish.
mild nimbus
I look foward to it 😄
bleak tree

Guess mark sharp was what I needed.
https://vignette.wikia.nocookie.net/phantasystar/images/7/71/Pso2tcg_elenor_montague.png/revision/latest?cb=20190319013021 The pink parts of her outfit have a sheen to them, especially her middle, so I was thinking of having those in a separate material. Her eyes too.
 quaint jasper
that can def be a single material
bleak tree
Oh good.
I'm excited now. I can keep my momentum and unwrap her tonight. I REALLY want to see her all texturized.
Even slapping a test image on her UVs will be enough.
 ashen stag
You can have different stuff on the same material via maps like metallic, roughness, and emission
Even then, one 4k is more optimized than two 2k IIRC
bleak tree
Glorious!
 barren quiver
Keep in mind that texture sizes are power-of-two, so any combination of (512, 1024, 2048, 4096) can be used. Like, 2048x2048 is fine, but you can also have an atlas of 4096x2048
bleak tree
Oh really. That's neat
barren quiver
They aren't out of bounds.
Out of bounds = outside the range of 0-1 = wraps around to the other side
But I think you need to set the document in Substance up to have the right texture size or it'll squish it into a square.
bleak tree
On the fence over cutting the face's UVs down the center and layering the islands on top of eachother, to have them mirror.
 quaint jasper
Substance doesn't like overlayed UVs afaik
barren quiver
It doesn't at all
bleak tree
I'm not using Substance
quaint jasper
What do you plan on using for texturing ? @bleak tree
bleak tree
I do have photoshop.
quaint jasper
So you'll manually create all your masks ?
bleak tree
I just don't want to use student software. That's why I'm making her in Blender
quaint jasper
Substance is industry standard
Student is just one of the many licenses
Blender is less standard than substance is even
 daring karma
What issues were you having with stacked UVs in Substance? The only issue I had was that it made the bakes unusable so I had to spend a dumb amount of time manually painting in dirt, etc. to blend which sucked
I only ever dealt with tiling or stacks in non-unique environment geo, though. I think avatars are probably worth a unique unwrap
bleak tree
I guess I better look into getting substance. It's not like I'm profiting from this. Can't really.
It's a personal project
daring karma
You could look into ArmorPaint or I think Quixel Mixer is free now + is a full texture painting suite. (You'll still probably run into the limitations with bakes and stacked UVs though)
 azure rain
if you put the overlapping uvs one UV unit over any direction that would help with the baking
 barren quiver
That helps in Substance?
azure rain
I've heard that it does as it's not trying to process the uvs that's not in the zero to one space
daring karma
It's definitely worth a shot if you can get SP - it's the standard as Ruu said + def has the most finessed workflow vs those other apps.
bleak tree
I still have connections with my old institute that got me Student Maya for a couple years, just to play around in.
daring karma
wait, is there another issue with stacked islands in Substance besides bakes getting fucked? I feel like weird things happen all the time in SP and I can never figure out what causes them so that might be one of the causes
bleak tree
Better not overlap my textures then, just in case. I'm working with 4k, I can handle that.
And fuck Photoshop. I'll try Quixel, see how that fits.
For now, I need to finish this unwrap
 mild nimbus
@bleak tree I dont reccomand using Udims
if you are using Udims
Thats not good for games
only for film
bleak tree
Udims. Explain.
mild nimbus
when you import seperate UV tiles
instead of seperate materials
Over lapping UV's are fine with SP but you need to do it right.
bleak tree
Right. I decided I won't be overlapping any UVs
mild nimbus
You can overlap everything in 1 UV tile just make them seperate materials.
bleak tree
Just to make it easier on myself.
mild nimbus
It will seperate everything appropiatly with its corresponding materials and UV map
1 material
bleak tree
Or one texture file.
bleak tree
You got me. I am flying blind here.
mild nimbus
Material ID map comprises of basic colors to zone out specific part of the mesh under 1 material
So you can plop like metal on color red
leather on color blue
bleak tree
Oh cool, I see.
mild nimbus
under 1 material

Tutorial about the simplest solution of creating Color ID Map with Blender 2.8 and Cycles Engine
bleak tree
That's what the other friendly fellow person was talking about.
bleak tree
Thanks. I'll give it a watch when I finish this unwrap.
mild nimbus
You can either bake the ID maps or export it with vertex colors
👌
I advice vertex colors
easy and fast
and SP can detect it upon import
Baking the ID map is more for like photoshop
bleak tree
I won't be able to get SP for some time.
I talked with my old director. He says he'll talk to someone about it.
bleak tree
For now I need to work with what I can get.
Well I'm waiting on them. All I have is an email. I graduated three years ago.
mild nimbus
Setup vertex colors as the ID map just in case
So if you know areas that will be metal
make all that red
leather blue
etc
bleak tree
Yeah
mild nimbus
can use any color btw
doesent need to be R G B
Make sure the colors are not to similar to each other. The application may get confused and treat it like the same color lol

 dusty heron
Looks neat.
 desert crown
wow shes cute
 stable edge
Looks great!!
 opaque pier
Looks good, good job!
mild nimbus
Causally see toyko free field from pso2
@bleak tree the texel density seems okay
I don't see anything on the face though
bleak tree

https://gyazo.com/c0f38a616c438c4649ddeecf071b4043 The way I unwrapped the head, it sorta made the face less resolution

I'm revisiting it.
mild nimbus
Because it's the smallest uv
Which is NOT what the face should be
The face infact should be the biggest uv for good resolution
Hope that UV map is 2k also
Consider looking up texel density.
bleak tree
It's 4k

Better
And you're right. The face must always be the main island.
Unless the legs need a bit of love...
 hollow radish
🙃 4k should never be used unless you are very very strict on making it one entire texture
or you want people to see the detail of your entire eye when you are literally close to the face
bleak tree
It's all one texture.
hollow radish
guess its fine
bleak tree
Makes sense never to make a bunch of 4k textures.
hollow radish
you should use uvpackmaster
or you could be a mad lad like this guy https://www.artstation.com/artwork/xzGvV1

ArtStation
Marksman Giant - Realtime Character
Collab done with my great friend Stefan Berentzen (OccultArt). It was an awesome experience to work along one of the best in the world ! Hope you guys like it !
Follow us on ArtStation and Instagram.
hollow radish
that's fine, I went through stupid decisions as well, its all in the process
bleak tree
Well, it's not like I did terribly.
But I DID pick a very advanced looking model to try unwrapping
mild nimbus
That's triple A standard
That's what I do at work lul
3 seperate maps
Head body cloths
bleak tree
It's glorious
hollow radish
yeah seen him before
bleak tree
It's late, and I don't feel like depression.
hollow radish
but yeah, just look at what AAA does, or mobile games (but usually AAA has more resources and standards)
you can adjust to your need and figure out why they do things
usually figuring out what type of quality you want, is the first step.
This is so you can pinpoint what you need to work on
bleak tree
Right
Well, this isn't bad for my first try, at least. A bit ambitious. I'll throw it into a texturing program tomorrow and see how much I'm kerfudgied everything. For now I've earned my sleep.
 mild nimbus
It's looking better
bleak tree
Thanks
azure rain

an example of a 1 texture UV layout but it's also compartmentalised in to different body parts
which now that I think about it is kind of the same thing as the picture above just squished into one rectangular texture
and that Texel density looks a lot nicer in your screenshot with the new layout
bleak tree
My next project will not be so cluttered with pointy things, that's for sure. I can have a UV layout like this.
bleak tree
Trying to see if I can paint directly on my UV map in Quixel mixer
bleak tree
I found problems in my UV layout, addressed them, and even added some more resolution to her emblem and arms.
 bleak tree
I painted her in Blender. When I got to the last island, it crashed and I lost the paintjob.
So there's more I need to figure out.
bleak tree
Well, at least I still managed to strengthen the UVs while going through it.
bleak tree
I feel like Quixel Mixer is more for making terrain with bump maps and what have you.
I'm not able to do anything for my model.
quaint jasper
substance painter is what you want
bleak tree
Yeah well I can't get it until I go through a couple things, and I don't feel like waiting.
I'm working on it though.
daring karma
I've seen people texturing hero assets in Mixer 2020 on Quixel's livestreams so it should be ~do-able~, but SP is unequivocally going to be the best for what you're trying to do obviously
Texturing in Mixer did seem like a pretty big headache
bleak tree
Oh yeah. I've seen what it can do.
It's disappointing that everything I've tried just gives me trouble when I know what's best for me.
quaint jasper
You can still get a trial license for now
bleak tree
Yeah.
casts Quixel Mixer into the fire
flips off outdated photoshop
I'll give this trial a shot.
bleak tree
Okay I got it. I'll pick it apart tonight.
 sharp light
quaint jasper
sharp light
quaint jasper
If you mean texture pain then you're using your texture as your brush
 brittle ferry
I am a Fn idiot and I deleted a vert that I shouldn't have, and didnt notice till I was in game, obviously after saving over my .blend and FBX files... I mean... if I HAVE to redo everything it is what it is.. just wondering if anyone here may have an easy fix for it though
 olive roost
Does ur unity still have the fbx file?
 steady zealot
Select the points, hit f, and then in the UV editor manually line up the new polygon in the texture
In blender
olive roost
hes sayin he saved over em tho
steady zealot
No he's saying he saved the blend file
As in saved it after the change and can't go back
But he can still fix it in the blend file that he still has
brittle ferry
you actually just gave me the idea
just drag a vert in blender over the empty space
steady zealot
F is fill
It will create a new polygon where you need it
And then it's just a matter of placing it in the correct spot on the UV map
And you may be able to line it up perfectly if you can find an existing hole in the UVs
brittle ferry
I think I got it ty
steady zealot
You're welcome
 daring plover
how can i fix it?
daring plover
Alright ill try, thanks for reply
 bleak tree
Substance Painter is fantastic.
I figured out how to only paint certain parts at a time.
 quaint jasper
Glad you're enjoying it !
hollow radish
if you don't paint on uvs, substance painter paints on the surface of you object
so you can redo uvs, and your paint should be still the same
(though some things are a bit finicky, you'll figure it out)
 dull canyon
yeah, it's like black magic
I had to re-do the UVs a few times after I already started texturing, but it was not a problem, everything still was in place after re-importing the model
and yes, masks are your best friend. ID maps, polygon masks, UV island masks
bleak tree
Making the textures 4k was a good decision.
hollow radish
would say, you can always downscale it
but your ram might die like me 🙃

ArtStation
Hello everyone, I have decided to share my Grenade project and provide all files used to create it under an creative commons license, free of charge to anyone that wants to learn or use it their own project commercial or otherwise. Feel free to modify them and use any part of ...
I suggest taking a look at what other people do for substance painter
its a long process...
if you are going for a physically accurate root, its a lot of refs
slapping a material and some procedurals won't net you a good result
bleak tree
Ran into something interesting. I got to work on her legs, but the symmetry isn't accurate. I fear that my mesh might not be perfectly symmetrical.
bleak tree
Eh, I can do this in Substance? Because I don't want to re uv anything since it took me hours.
Well I managed to go in and fix it.
hollow radish
yeah
this is why you shouldn't take too long on a process
I think this partially the reason why materials are split into head,body,clothing,metal
material and also reuving things
hollow radish
just take notice next time
bleak tree
For sure.
hollow radish
not like I had the same problem and spent a few days
hollow radish
but yeah
time is a huge deal for 3d modelling, cause it take 40hrs to do even a prop
bleak tree
Oh I spent days on the modeling portion.
Next project it won't be so complex.
I'll likely just model a MAG to go with Elenor.
hollow radish
have you looked into workflows?
bleak tree
I try to hold true to a sensible workflow.
I think I did pretty well with the modeling aspect.
hollow radish
anyway its a learning process
bleak tree
Yeah
 bleak tree
I'm gonna need to import textured into this so I don't have to draw a hexagonal composite pattern on her legs.
bleak tree
I so got told.
 spiral sigil
Any tips for patching these two into one piece without skewing the texture?
Original had a dumb strap that ran along the outside of the helmet - didn't have an interior side either.
 spiral sigil
Dang, feared as much. Got no experience with texturing.
bleak tree
Well that's how I'd do it. You'd have to make new geometry there anyway.
spiral sigil
True.
Any tips for doing so + making a texture patch that fits with the rest? Like I said, zero texturing experience and I'd rather keep the weird strap then have just a gross grey stripe that clearly doesn't match the rest.
bleak tree
So how about this. You can make a new geometry there, to fill it in, and that one bit of geometry can be given a totally new texture. Of course you might have seam issues.
I'm not too sure. I never ran into this scenario before.
bleak tree
Guess I'll add extra stuff in Photoshop after I finish the bulk of it in SP
 bleak tree
So I got a height map, AO map, base color. Dunno what to do with all that.
hollow radish
use a shader that uses it
substance painter is more physically based
or
you can translate the height maps into normals
hollow radish
well, the shader you use should accomodate the textures you output
unity standard is basically fine
unless you want to use something else
bleak tree
Huh.
hollow radish

Unity 5 uses physically based rendering, which is a new lighting model that simulates the natural interactions of light rays and real-world materials.
if you are slapping an unlit shader or cubed, why are you using substance painter
(unless you explicity only focus on the base colours)

In this video you will learn how to export textures and create export presets.
Support thread: https://forum.allegorithmic.com/index.php?topic=6297.new#new
from what I know you can translate metallic into specular textures, cause thats what I do
spec/gloss or metal/roughness is the same texture in unity. in unreal its two seperate textures
anyway depends on your shader
bleak tree
Yeah
hollow radish
I'd say just use unity standard if you don't want to mess with shaders and like what it looks like
it susbtance painter
remember there are two versions
bleak tree
Yeah, pretty overwhelmed here but I'll watc hthe tutorial
Yeah, I think Unity Standard will be enough for now. I might change that later.
I like the way she looks.
dull canyon
from what I've heard and read the metal/rough workflow is the most widespread one, but don't quote me on that
my biggest gripe with substance painter is that you still can't export multiple texture sets into single textures, ie have only one albedo/alpha, one normal, one metal/roughness texture
like, you'd think that wouldn't be so hard to do if all the texture sets use the same UV map/UDIM
daring karma
What do you mean? You can change all that in your config unless I'm misunderstanding
dull canyon
you're probably misunderstanding
say I have 3 texture sets
I want to export for instance the albedo for all 3, and have them in 1 single file
that's not possible
it will generate a separate file for each texture set
daring karma
ah, yeah Substance can't atlas those. It might be on the horizon tho bcs they just added auto unwrapping. I usually just figure each texture set = a material + pack shit prior to texturing
dull canyon
well in some cases you need separate texture sets to work properly on the model
like the clothes and hair for instance
but they'd need to be atlased afterwards
which isn't that hard when you're only working with RGB textures, but once you add the A it becomes difficult
if it's just RGB I can just drag all the files into Krita or whatever and save it as a new PNG
since I can use for instance the Base Color channel for the Alpha of the texture so each texture only has stuff where there is something painted on
 lean rampart
Anybody have a clue why a piece of the mesh disconnects from the main mesh when moved? It has a dynamic bone attached to it
I looked at the mesh, and it seems that the hair isn't connected to the head. But even though I did connect the meshes together, I still get the same result. I mean vertices. It's obviously all one mesh technically
(Ignore the face expression)
 broken bear
I think your dynamic bones are just too intense. The root of the hair shouldn't move that much at all
lean rampart
I use these settings for my other models, and they're fine
I'm moving both the hair ends by placing a dynamic bone on the head bone and excluding all other ones that shouldn't move. Perhaps there's a better way (without placing a script on each hair root)?
Placing a dynamic bone on the root of only one hair bone works, but I can't do that for both or I'll waste resources
Changing the settings doesn't solve the problem. There's something up with the model
spiral sigil
I have a problem with my Avatar.
It works finde in Desktop and VR, but when i go in Full Body and went trough the stuff like with T-Posing the avatar always goes in desktop mode.
Someone knows that issue and how to fix it?
ok i think i got it...i had no chest for some reason
bleak tree
If I could somehow bake my height map onto my texture I would be happy.
 silent junco
i think you can in blender
 eternal scroll
I'm not sure I'll have to check soon I'll let you know
bleak tree
If I can do that, I can move on to working on the texture in Photoshop, add text, and fix the seams in the inner thigh.
bleak tree
Maybe if I attach it to a shader, and save the resulting texture as a png?
hollow radish
well, if you have a height map in substance painter that's baked from highpoly, you can
just use masks and generators
though if you make a height map in substance painter by painting, there maybe a way but unsure
how to do it myself
daring karma
What do you mean by baking your height map onto your texture? You should be able to import the map into SP as a texture and apply it on a fill layer. It should work as long as the UVs haven't changed, and your scale is 1:1
Unless you mean like AO based off the new height information you've painted - you can do that by using HBAO in SP
bleak tree
Well, I mean I want to preserve the detail I made with the height brush in SP
Hmm. I need to export it with all the maps combined.
The mesh maps I mean.
hollow radish
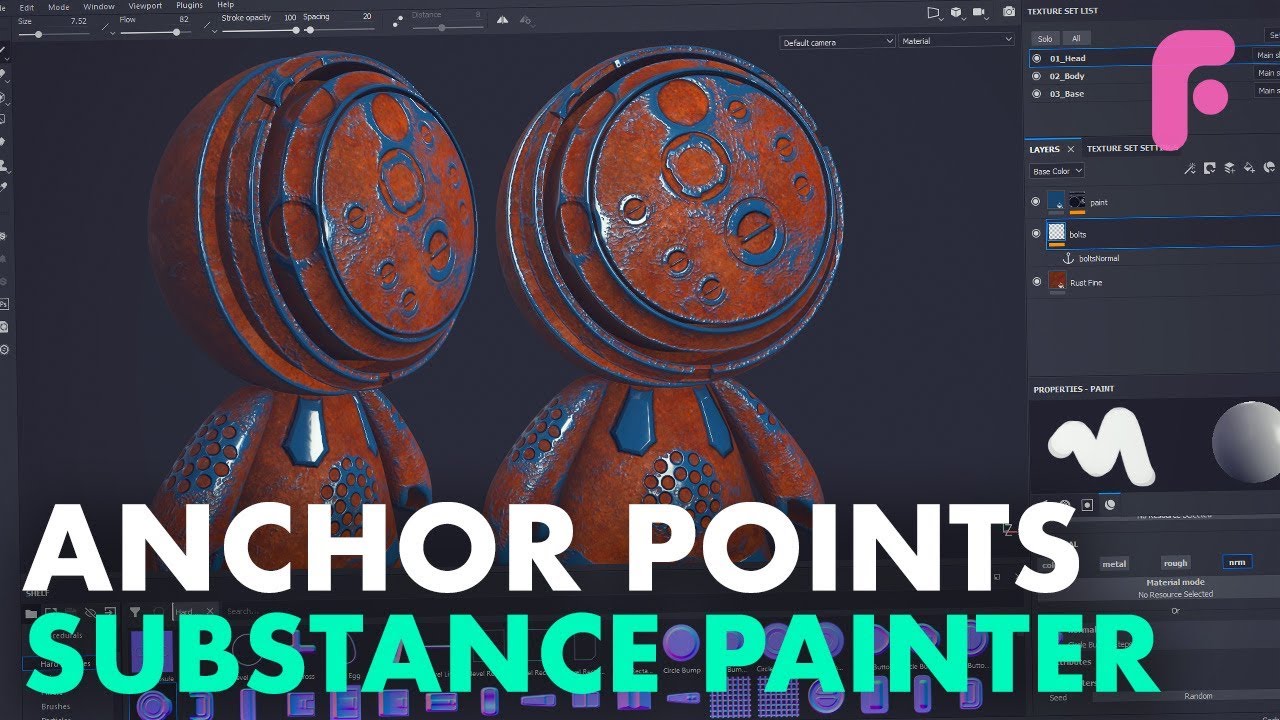
In this Substance Painter texture painting tutorial, we are going to have a look at how to use Anchor Points along with Normal maps to really speed up your texture work.
Make sure to follow us social media to stay up to date with what we're up up!
Subscribe now!
https://www....
this might be useful to you
Just remembered it now
bleak tree
It's interesting, but I don't know if it's what I'm looking for. I might just have to settle for attaching the height mesh map through nodes.
If I can even use it for VRChat
spiral sigil
So I'm doing a mock-up for an custom avatar's helmet and would like some feedback regarding the color scheme. The character's name is Wild Card and, surprise surprise, has a card game motif. The setting they're from is post-apoc so I don't want it to be super-flashy or anything but still distinct.
Should I have the primary colors be dark and light (black/grey + white) and have red as an accent or...?
 tranquil glade

ArtStation
Axe pistol from Germany based on a real reference. Made it as an assignment last semester in university . Renders done in Marmoset.
it is done
hollow radish
pog
spiral sigil
does anyone know how i would slice a circle into a generally flat mesh like, say a waffle, and make rings out of it? i thought at first knife projection would be the way to go but it doesn't seem to be working
 fringe rock
boolean modifier
spiral sigil
thanks, i'm not familiar with it, i'll check it out!
bleak tree
Think I'll just focus on rigging for now.
dull canyon
so, lets say my avatar is wearing a jacket by default, and I wanted to be able to permanently toggle the jacket off and on using emotes, do I need some extra script for that or can that be done with just "vanilla" unity?
olive roost
It can just be done through vanilla unity! However there is a prefab to make it easier that basically does the whole setup for you https://github.com/Xiexe/VRCInventorySystem @dull canyon
GitHub
An Inventory system that is easy to set up for your avatars, using emotes. - Xiexe/VRCInventorySystem
dull canyon
thanks
I like how 7 is the max number of additional objects you can have so people are discouraged to go over 8 skinned meshes 😄
 still wadi
 dull canyon
ayaya
 halcyon hare
Looks great!
dull canyon
I still wish people would stop using open and closed hand gestures. no index knuckles user will ever use your avatars...
fringe rock
You mean. Handopen and Fist
dull canyon
yeah
fringe rock
for most of my model I have the eyebrows lift up a little with handopen and the reverse for fist or nothing.
mild nimbus
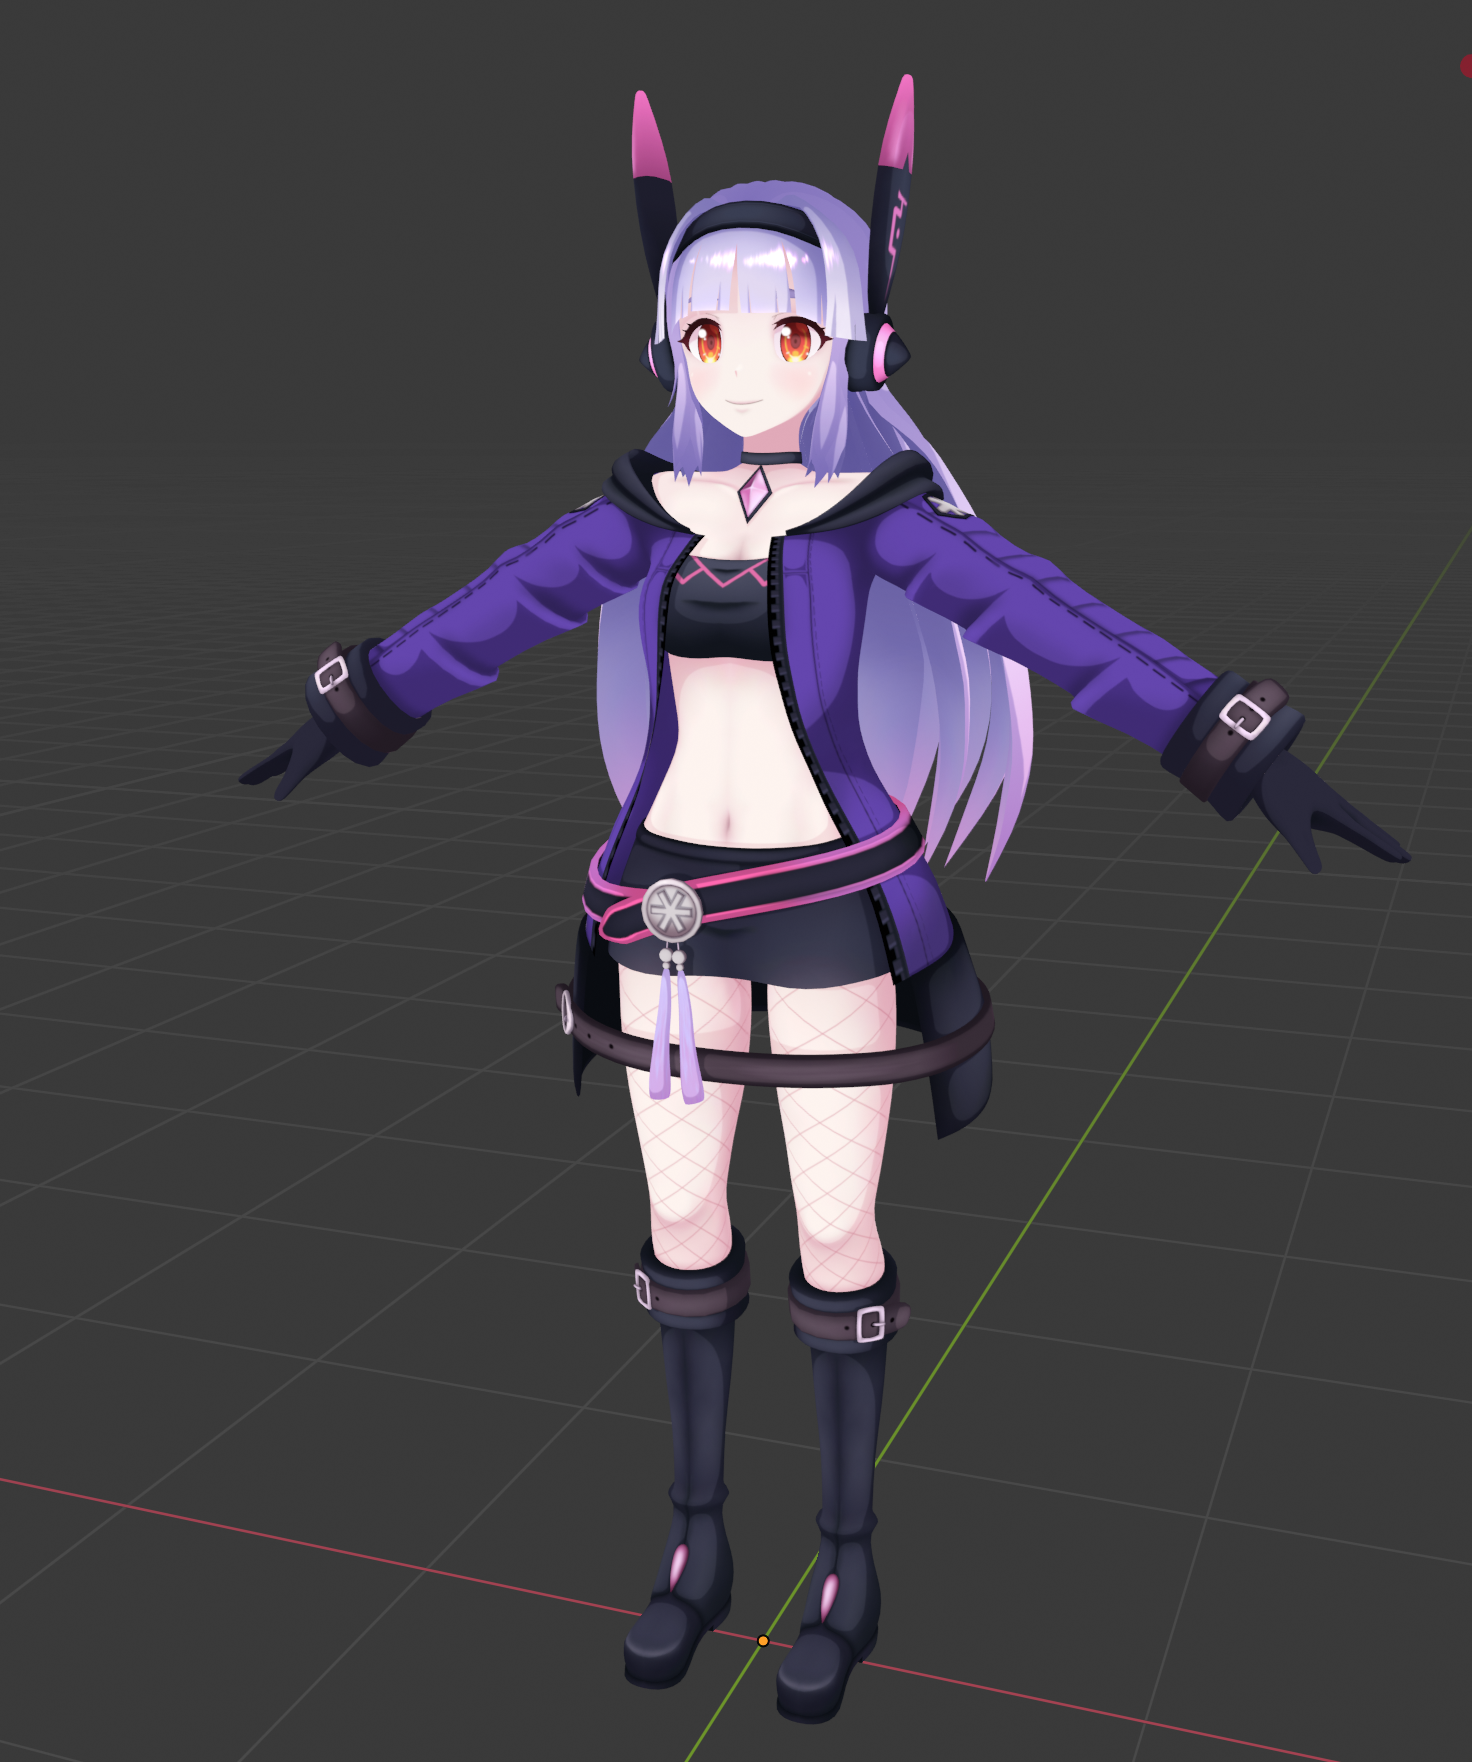
@still wadi Its nice but my only critique from this model is why is that last belt on the bottom of the parka dress there
Dont really see a purpose in it xD
dull canyon
fashion doesn't always have to be functional I guess
 barren plover
Hello and good night, I'm hiting a brick wall with my head since yesterday and I can't find any solution. I'm importing xps files to blender and then exporting them to fbx for unity, but when I load them to Unity the model have missing textures. I'm using CATS for importing the xps file if that helps
I could add the textures one by one put the are a lot of them with normal maps so is a really pain in the butt doing it all by myself
 barren musk
hello there, im having a problem with an fbx file in blender, when i load the file its just gray like theres no textures, i have a textures folder in the same location as the file but i cant get the textures to work
 frank sail
Fix model, MMD shading, switching to material or texture viewing mode
Any of these would do it
 daring roost
I'm not sure what i've done. but when i updated blender last, my textures no longer showed on my model
Gonna googles around for some answers, but if you have a solution before i've deleted this, then please @ me
or add me to dm
desert crown
@daring roost you gotta double check the shading things
if that doesn't work, then your shaders are screwed and need to re-apply textures properly
daring roost
can't seem to find that menu anymore 🤔
desert crown
oh sorry i meant your materials
its in the MMD tab
kinda have to tilt your irl head
daring roost
desert crown
double check on the arrows down there, maybe its under Material Sorter
desert crown
maybe its Misc
daring roost
yeah
desert crown
click on shadeless and see if that helps
desert crown
have you tried clicking on fix model in cats plugin?
daring roost
uhh last i did that it broke a whole model
desert crown
yeah that happened to me too
desert crown
scroll down and it should say something about adding textures at the bottom, find your texture file
then click on shadeless
daring roost
and it just crashed.
desert crown

daring roost
unity being unity still
desert crown
are you sure you are using unity or blender
desert crown
my only assumption now is that your model file is too far outdated
what is your model file type
desert crown
go back to the older versions of blender and export it into fbx and then import that fbx into the newer versions
it will work
daring roost
sounds like a lot of hastle of deleting a lotta 💩 to reinstall older versions for the 1 thing
i'll save it for last resort
desert crown
Well if you didn't know, you can have multiple blender versions installed and use them individually
daring roost
yeah i figured
desert crown
yeah i used 2.79 and 2.8 respectively
daring roost
well right now, what i need to re-find is the texture menu in this version
just menu's have been changed so dramatically i can't find the most basic of things again
desert crown
@daring roost texture menu is the sphere thing that i showed you
and the checker icon right under it
thats where you apply the textures again and then > Click on shadeless in Misc
to update the preview
desert crown
Oh scroll down in what you see here on that screenshot all the way to the bottom
daring roost
use node?
 junior maple
Okay guys, I have an issue.
When I use subdivision surface when I extrude, this happens.
and also when i create a vertice in the middle of miror, i can only move them on Z axis ..
daring roost
so i can't use one that's already attatched to the save, and not double it up
desert crown
@daring roost yeah you gotta delete the broken one
go back up and click the Minus sign on your right
daring roost
is there a way to get it out of my UV map panel too like that 😮
click the X but it just closes not removes
junior maple
you can go to default on top of blender
daring roost
default?
junior maple
daring roost
nonono not that
i mean clearing these out from the save
so they're not leftover junk data weighing things down
junior maple
oh, that I dont know
daring roost
rip
junior maple
you can press X ?
daring roost
thats why i wanted to re-use
junior maple
the cross
daring roost
pressing X closes it from preview
junior maple
ah I see
daring roost
doesn't remove it
junior maple
no one can help me on my issue ? it is really hard to work with that, it wasn"t like this before i went on 1.8.1
desert crown
@daring roost go here. See the top window?
uh...snow queen...lets see i have trouble with subdivide before and fixed it unknowingly
desert crown
this was because I knew i was pressing Wrong shortcut keys and it permanently screw it up for me
so i had to like restart the session
daring roost
thank you 😄
junior maple
I see
daring roost
that helps me clear up so much more too
desert crown
@daring roost in the blend file you wanna open up the materials arrow as seen on there and the textures(the checker icon)
and then right click delete
junior maple
So, should i export FBX file on another cleared session ?
desert crown
yep just save everything and export it again into a new fbx
then import it as new while still having everything intact then resume where you are going to do
daring roost
perfect
junior maple
I wont have my modifiers anymore ?
desert crown
probably not, but it should be easy to resume right?
junior maple
I guess
daring roost
even the re-meshed parts kept their spacing
desert crown
well there you go
daring roost
now to retry the painful experience of weight painting
desert crown
Use Mixamo to weight paint the basic bones for you
Unless its already rigged before, you should be fine
daring roost
yeah you don't wanna see the nightmare fuel that came from miximo
daring roost
junior maple
on edit mode i have that now
daring roost
yeah it didn't take too well
desert crown
@junior maple is that good or bad
junior maple
I think some vertices are smooth, how do i smooth / unsmooth on 2.8 ?
desert crown
i don't remember actually ;-;
maybe this could help https://www.youtube.com/watch?v=LXbfcFu1oPc
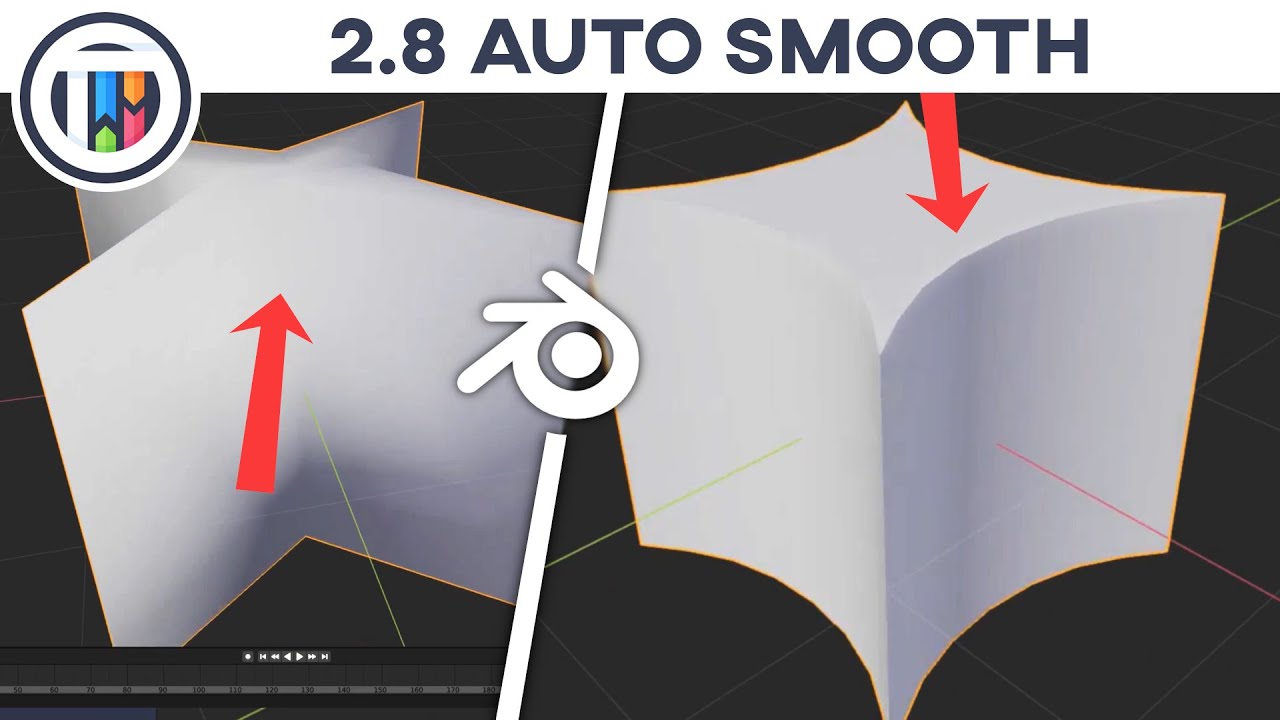
Today, we use the Auto Smooth feature in Blender 2.8, to keep our meshes edges... while keeping a nice smooth quality when using Shade Smooth - or a Subdivision Surface Subsuf Modifier!
IMPORTANT LINKS:
Blender https://www.blender.org/
SOCIAL MEDIA:
Twitter https://twitter.c...
daring roost
without the bones for the skirt, this is what i have
also planning to put some bones for the bead jiggle on the left arm
desert crown
👍
daring roost
miximo shat it's self with the ponytail and actual tail. skirt lining probs didn't help
desert crown
when i mentioned Basic Bones, it only rigs the Head, Neck, Chest, Spine, Hands, Fingers, Waist, Legs, Knees, Ankle and Toes
You only then have to add the hair, tail, skirt bones
daring roost
soooo basically strip her
desert crown
and rig that manually
strip her of her bones yes
trust me, this will benefit you in the long run
daring roost
skirt too?
desert crown
Oh no i didn't mean that
junior maple
well, it still does the same
desert crown
her tails and skirts can stay
daring roost
oh
desert crown
@junior maple :(
daring roost
export as what format for miximo is best
desert crown
@daring roost mixamo will definitely rig her tail along with her body if i see that. But you can zero weighted it in weight painting easily
Unity FBX Original Pose
just make sure you put the rings correctly
daring roost
okidoke. freshly debonned fox girl exported to fbx
rip
yeah the clothes are too big to mark her right
desert crown
no its fine
it will be rigged with the waist/body
But you can Zero paint it so it doesn't move with the body
daring roost
desert crown
the crotch needs to be a bit higher
 glad steeple
the skirt isnt the crotch
desert crown
^
daring roost
clearly
desert crown
You can't see it, but you have to play by mind on this one
so you will have to imagine it and gamble where it is
daring roost
shit, just realised this was also the old AF model that had no optimise
desert crown
you can always optimize it
daring roost
i did mine by hand because auto screwed everything
desert crown
because You can make a separate file out of it(without the bones) and then throw it into the new bones assuming it has the correct shape and size
after it is optimized
daring roost
the mesh
that was the issue
ok forgot the key to select by all by surface. i manage to select all without issue, but not by area
dull canyon
I really wish there was a way to set a default remesher resolution in Blender...
 light perch
Will this head work or is it completely off? **Plz dont bully its only been my first few hours after messing around with 3D modeling **
quaint jasper
you need a lot more vertices, but yeah
also if you want to achieve something similar to the right, you need sculpting, not modeling
light perch
oh yeah i know i just wanted to make life easier and 3d model it to as close as possible
fringe rock
Give up on poly modeling. You have to sculpt
light perch
Ill try but how dose one start off a sculpt? 🤔
fringe rock
Sculpt mode
light perch
lol it was more of a rhetorical question but what id like to know is how do you sculpt out a mouth?
I get this issue
quaint jasper
you should look up basic tutorials on how to start
will prevent mistakes like that
light perch
Ive tried to look them up but the models already come with their mouths hollowed out in the tutorial
quaint jasper
i meant tutorials on sculpt settings
the above is because you don't have dyn topo enabled for example
light perch
ah
 frosty plinth
Nick From Zootopia
My Friend Said If I Make Him One That Looks From The Movie, Ill rig up your Juddy Hopps lol
wish there was a easier way of smoothing out the clay looking build
Hey @quaint jasper any Suggestions on how i can scrap off the looks of it being bumpy some areas wont smooth out..?
quaint jasper
smooth vertices in edit mode ?
you should upgrade to 2.82 and use the retopology tools
you can't get something smooth if your geometry is like that
frosty plinth
hmm yea been thinking about it, downside is layout is new to me
to get use to it will be long.. but i'll try
thanks
light perch
whelp since i cant find the old avatar i used to have ive decided to make one myself wish me luck lmao never done this before
 solar fossil
may the sculpting gods be on your side
 silent acorn
good luck!
light perch
quaint jasper
ayy, you're a natural !
light perch
😄
 fierce tundra
That's amazing
light perch
Thanks! Actually now that you've pointed that out... 🤔
frosty plinth
Wildwood Nj Rec Center
oh dang it
i just realized the roof is supposed to be wavy ugh
oh wait nvm
ill cut it
light perch
if your model has to many polys or is too big how to do scale it down if its already established?
frosty plinth
making a whole new one
light perch
(╯°□°)╯︵ ┻━┻
 tender pelicanBOT
┬──┬ ノ( ゜-゜ノ) There you go
light perch
At least i have a reference model smh
solar fossil
you want to go the sculpter way?
quaint jasper
@light perch Retopology
either manually (difficult and takes time) or automatic (result is a tiny bit worse, but blender 2.82 can do that, or zbrush trial with Zremesher)
solar fossil
backup the backups and make backups for those backups
 keen grove
I barely remember
solar fossil
well there is no hard limit
keen grove
I think it was 15000 or smth around there
 vivid crater
70k before you get to very poor, but no hard limit
quaint jasper
It's good to go as low as you can without altering the look
light perch
Even if its a stupidly high number?
vivid crater
ideally you wouldnt use a sculpt without retopologizing
 weary olive
This might be a dumb question, but I've been working on a model in Blender v2.78, apparently, and I guess I didn't realize that Blender doesn't automatically update itself? So if I downloaded v2.82, the model I was working on should still work in the new version, right? Again, probably a dumb question, but technology can be weird sometimes and I don't want to risk losing progress.
solar fossil
yeah, porting form 2.7 to 2.8 should work
just make sure when you open the project to deselect the layout import or that will mess things up
quaint jasper
@light perch If it's a sculpt the number is stupidly high regardless
that's not usable as is
solar fossil
got this thing from ~1.600.000 down to 54k using the simplify brush, but your mileage might wary since your model is much more complex
solar fossil
i usually do it in unity if the size is not to drastic
but if its like 10x bigger/smaller than it should be than that will be a blender job
oh protip, use the wireframe viewport shading to see the topology density in real time when simplifying
mild nimbus
I'd retopologize that sculpt regardless of remesh
Lol
Just for the best deformation performance
azure rain
and also before you do that it should probably have a details sculpt done to it so that you can bake a normal map from it
solar fossil
Ah I kept the high poly version of it in a separate blend save so can use that for baking
Also lotus, I did not use the remesh since it would mess up the fingers regardless of settings, it was all done using the simplify brush
spiral sigil
hey masters of 3d modeling guys create my own avatar as well and sending to my PM. in private. if costs. i don't have problem with that.
spiral sigil
Vrc traders in #community-servers-old if you want a commission done for you
silent junco
That’s a lot of shoulders
 lost wasp
i'm texturing it. i'm so scered right now
barren plover
I can't organize bones in the outliner in blender 2.8 and is driving me mad
any help with that?
 brittle veldt
So I tried to geet some shoes to my avatars and while I was checking the bone rotations this happened idk how to fix this
spiral sigil
rotate the shoes back to normal>
light perch
I finally found the model! omg 2 days of searching :c
Anyone know how i can recreate that thin layer like those cracks?
this was what i came up with but I'm not happy with it i want it similar to the original
brittle veldt
@spiral sigil Well in normal position they are fine but when I started rotating the legs they seem disconnected
quaint jasper
@light perch You can extrude some of the faces from the mesh, and smooth vertices
light perch
smooth vertices that's a modifier right?
hollow radish
you won't get the same results since you are doing it organically
I suggest looking at speedsculpts and figuring out what people do,
usually they are in zbrush
light perch
oh, ok
hollow radish
having multiple objects is one way of doing it
but in the end you should merge them and whatever version of dynamesh blender has
(but it is fine in certain circumstances, its just the baking process that's finicky)
you would still need to retopo though
and then bake down
this is an entire process that takes time, so I guess looking up pbr workflows
the one you linked ontop is a high poly baked on to a low poly model
high poly is the sculpt, low poly is retopologized model
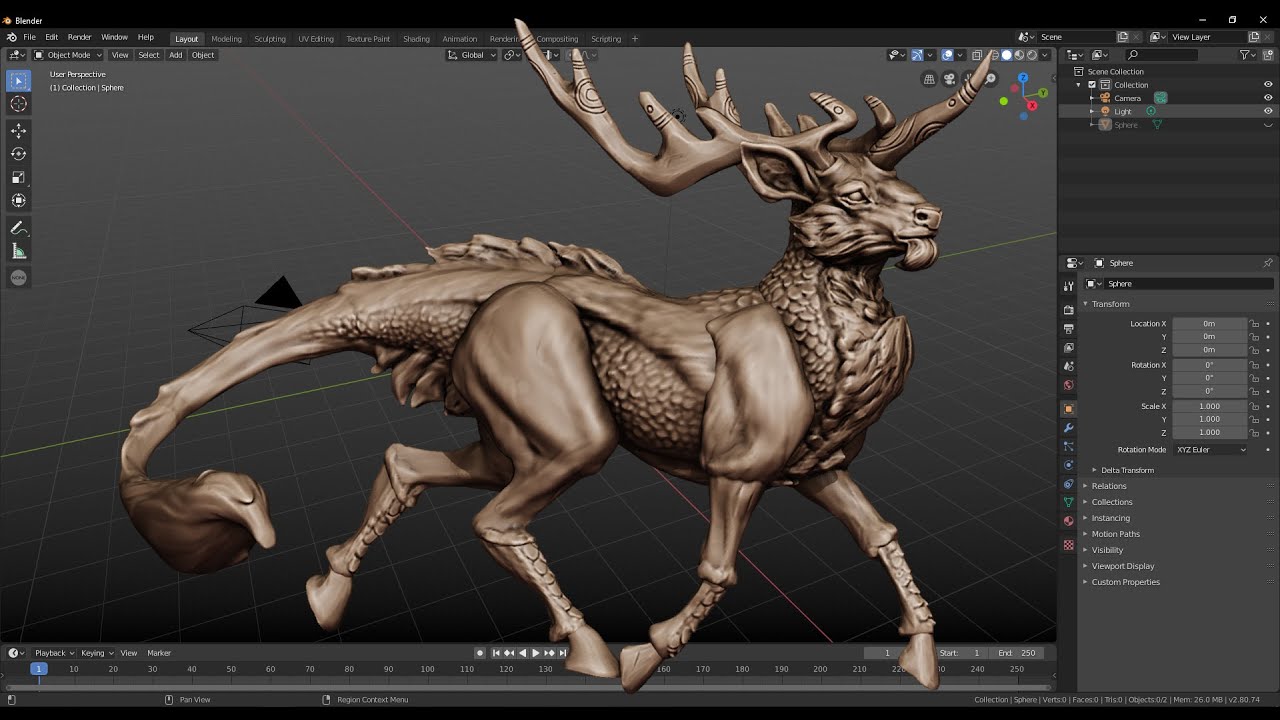
Original time is 7h 20min
Speedsculpt challenges every week on: https://vk.com/blendersculpt
Concept by Becca Hallstedt (https://www.artstation.com/artwork/QzmmWZ)
Music by Ansia Orchestra (https://vk.com/ansia_orchestra)
this might give you an idea
light perch
hmmm
spiral sigil
Any tips for avatars with gloves? The original ones for my custom avatar are super-janky and just don't look right, especially considering the rather-slick appearance of the rest.
quaint jasper
What kind of tips are you looking for exactly ? Do you have screenshots of your issues ? @spiral sigil
spiral sigil
The fingers look... not-natural. They're in gloves, sure, but they seem distorted to me. Got weird angles at some parts and look chunky.
solar fossil
that's, an, interesting way to hold your thumb
spiral sigil
Yeah, that's one of the issues I'm wanting to fix. This is the model's default posture without moving the skeleton any.
weary olive
Do you think the fingers are too short, and that's making them look uncanny?
solar fossil
i'm not qualified to give an opinion on hands since my attempt only resulted some sausage fingers
spiral sigil
The model is stylized so that may play a part. However, they just seem overly angular in some places and seem more like a mess of sloppy polygons then fingers in a glove.
solar fossil
well the model is really low poly
quaint jasper
@spiral sigil Easiest way you be to pose back the fingers in a normal way, and then smooth out the mesh
spiral sigil
Is there a tool that'd be good for that? I imagine so but not that versed in Blender yet.
quaint jasper
sadly not, you'd just have to rotate the bones manually
light perch
I get this issue every time i try to Mirror the plates to X Global
Is there a better way to mirror one side to the other?
light perch
I have them on one side of the face but i want to directly mirror them to the other
quaint jasper
yeah symmetrize
+X to -X
make sure all your transforms are applied
Did you smooth shade your model btw ?
 visual vigil
https://cdn.discordapp.com/attachments/504420906005954580/693111661053083658/godzillatest.png https://cdn.discordapp.com/attachments/504420906005954580/693116529109237830/godzillatest2.png https://cdn.discordapp.com/attachments/504420906005954580/693121826011742328/unknown.png


 light perch
Yeh yeh i just did but symmetrizing it isn't working @quaint jasper
frosty plinth
light perch
This just keeps happening every time i try to mirror
quaint jasper
then scale x -1
light perch
Just seemed to flip the Jaw plate but still not at the right angle
quaint jasper
you need to merge those objects then
light perch
to the head?
frosty plinth
Nice Horror Modeling
quaint jasper
no just the objects together
they need to be scaled as an entity
you can unmerge them after if you need
quaint jasper
well no, you just select each part by pressing L on the mesh and press P
hollow radish
this should be applied or 0
your origin is not where you want it to be
so it mirrors where based on this
apply transform/scale/rotation
mirror has an object to reference
you can just get a empty object/mesh
and reference that
tender pelicanBOT
┬──┬ ノ( ゜-゜ノ) There you go
light perch
Oh blender gods why do you hate me
quaint jasper
You're skipping over essential steps
light perch
What did i skip?
solar fossil
still lacking facial expressions, but i think he turned out pretty well, bonus points for peps who know where he is from 👀
quaint jasper
symmetry is supposed to be flipped
light perch
so i flip the Symmetry before i mirror?
quaint jasper
it's either, not both
light perch
Welp turns out i have to delete the plates and start from scratch 😭
light perch
finished the plates after doing them over three times 😩 and added some better teeth. All i need to do is figure out how to animate the plates opening and closeting.
dusty heron
looks neat.
quaint jasper
@light perch You'd have to weight paint each bone to a plate, or you could do it as a blenshape
light perch
blenshape? I haven't heard of that 🤔
 weary olive
Very nice.
vivid crater
I'd say off to the scrapheap with him, but it looks like he just left there
Love it 👌
 past kraken
hey i'm having an error when uploading an avatar
ArgumentException: Getting control 0's position in a group with only 0 controls when doing repaint
can someone help me please
ok nvm i'm having ALOT more error than that and i'm lazy i'll just give up
frosty plinth
Noice Job Ruuubick Looks Cool, reminds me of Astro Boy Movie
 quaint bronze
That looks dope Ruuubick!
light perch
those textures doe
spiral sigil
@weary olive
weary olive
A'ight.
 ripe lotus
looks like deafult substance materials in substance painter
 blazing gyro
how do make avatar
dusty heron
Find a yt tutorial.
light perch
Why is this pulling on the other >:c are they too close together ?
quaint jasper
weight paint ?
quaint jasper
are you sure they're not weight painted to the incorrect bone ?
light perch
Uh... Im not sure... I haven't messed around with weight painting till you suggested it
 light perch
Could it have something to do with that random line? I tried to mess with the angles and they all merged into the opposite end of the line near the head
light perch
Any bone?
stable edge
The bone that's supposed to be weighted to one of the plates
light perch
Sure what do you want me to do with it?
quaint jasper
it needs to be red
bleak tree





How the Hell do I get this Cube shape unparented from this thing I accidentally made?
Maybe that's just how it's supposed to look. The outliner in Blender is new to me.
light perch
bleak tree
Well, no. The one in Maya is similar, somewhat
light perch
painting it red seemed to help but still the same issue
quaint jasper
That's not the problem, it's that the thing that move that should move is weight painted to the wrong bone
so it moves when you move the bone on the other side
stable edge
Paint it red again with autonormalize on
It's under options under brush
@light perch
light perch
I got it. I just separated them then reparented them back to the main skeleton
 amber dagger
anyone know if anyone has made a book for vrc where you can turn the pages or made something similar or any idea how to make it?
light perch
Nvm i have the same issue again >_>
I tried auto normalize but dun help
How do i check how its weight painted to the bone? @quaint jasper
stable edge
Auto makes sure all weights add up to one
You probably didn't paint everything red again
 brittle crane
In Blender go to pose mode. Select the problematic bone. Select your model in object mode and change the mode to weight paint mode. made sure that all the bone section is in full red. Here is an example:
@light perch
light perch
Oh did paint everything red but then it didn't move at all to the bone it was partnered to
when i delete the problem bone it dose work but comes back again after i add the bone and it doesn't matter how close the bone is to the opposite model
brittle crane
did you parented correctly your model to your armature? The parenting hyerachy should look like this:
in the hyerachy tree, drag the model to your armature and a popup menu should appear (automatic weights)
light perch
Ahh i see the issue
I cant select the individual bone
the only time i get to select the model is when im in object mode and i can only select the whole bone frame
light perch
same results
spiral sigil
Hey! I was wondering if anyone would like to do some modeling together. Like screen share and just talk while we model things. Dm me!
brittle crane
in weight paint mode, select the bone shown on your image and using a substract brush, delete the red part of your mesh and repaint over the desired part of your model
 arctic parcel
Is it possible to add ProBuilder to Unity 2017 still?
spiral sigil
yea
arctic parcel
Well,how? It's no longer in the asset store
quaint jasper
2018 package manager
barren quiver
I don't think that'll work, the 2018 version uses newer APIs
arctic parcel
I heard the new version of VRChat will use Unity 2018, and it should come any day now, so then it will be possible to use ProBuilder in Unity, right?
 spark river
Does anyone know a good, step by step, guide for someone who is a beginner (at 3D modelling and having no artistic knowledge whatsoever) using Blender, wanting to learn how to create canine models? I just need a starting point.
stable edge
Pins
spark river
Thanks. Just noticed there are a few vids in pins.
 latent charm
The ones in the pins assume you already have an absolute basic knowledge of how to operate blender, you might also want to check out the basics for that on the Blender Foundation's youtube channel

 swift zephyr
Any clue why this would be happening to an imported model? I haven't had this happen before.
 sharp oriole
Looks like 2 meshes on top of each other, i.e. the outside of the jacket and the inside lining. Shouldn't be an issue in game if you have backface culling on
Or you could shrink down the inside a little so they're not overlapping
quaint jasper
definitely zfighting !
brittle crane
The normals are wrong positioned. In blender, import your moder, next go to edit mode, select all your model with A key and using CTRL + N will fix your normals
spark river
Thanks Gallium!
brittle crane
Blender 2.7 is the best. Blender 2.8 changes the gui drastically so much of the old stuff is confusing to find in the new version
sharp oriole
Just learn 2.8. Yes its a massive ballache cos its so different to 2.79, but its worth it. Once you're used to it you'll never want to go back to 2.79. Apart from weight painting which is super scuffed, 2.8 is objectively better in pretty much every way
dusty heron
If you've never learnt 2.79, then 2.8 would be better.
fringe rock
2.8.1 😘