#3d-modeling
1 messages · Page 59 of 1
 subtle jackal
 dull canyon
yeah, I guess
subtle jackal
there are a lot of people I tried to help get into 3D who give up because they burn out or tried to do something too complex for someone starting out
dull canyon
well, luckily I'm kinda stubborn in that regard
subtle jackal
It's a lot more encouraging IMO to get something made even if it's a little wonky than to throw yourself in the proverbial meat grinder striving for absolute perfection
even my first VRChat avatar was ugly af. I deleted that thing as soon as I made another lol
dull canyon
mhm
sadly I suffer from "perfectionism"... I'm well aware that I should just get something done and finish it even if it's bad, but actually acting upon that knowledge is hard
subtle jackal
I guess I'm thankfully too impatient for that lol, but you've done well so far. If it's what works for you then by all means keep at it
interested to see what you end up with
dull canyon
hm
maybe I'll just try and do a super low poly humanoid looking thing to start out
like, really just some primitive shapes without any actual sculpting, just general anatomy
and get that into vrchat, just so I can finally go through the whole pipeline already
and then go from there
 onyx juniper
Are any of those references orthographics that would be good to import as background images?
dull canyon
the ones in the anatomy for sculptors are I think
onyx juniper
"Tracing" is fun and easy!
onyx juniper
A lot of good detail but I have trouble making heads or tails of it overall
Maybe it's just the black background hiding the wheels, and the lack of lighting
Oh. I guess also because I'm not familiar with the source material
 little bramble
Yeah. I need to go back and save an image renter that doesn’t have a black backdrop. I wasn’t really worried about shading too much because the textures are set to Shadeless.I’ll probably render a different image tomorrow
 formal fractal
anyone got any good methods of modelling hair for this guy? not very experienced in modelling hair lol
dull canyon
you can look up tutorials on how to make hair with curves
formal fractal
I tried that method, didnt seem optimal for making more game-friendly objects
dull canyon
only other way I can think of is just using planes with subsurf, or sculpting
formal fractal
Is there a way to use much less polygons on the curve method?
subtle jackal
You could use the curves method to lay out your hair and then merge things together and delete anything extraneous
 latent charm
Just turn down Preview U from the default of 12 to whatever resolution is acceptable for your use case.
Preview U set to 12 on the left, 3 on the right
 oblique wagon
so i was exporting some thing from maya becuz the file was in a maya format and i wanted to use blender well it broke really bad unless this is how there suppose to look https://i.imgur.com/lZoyTO7.png?1 i exported it as fbx know nothing about maya
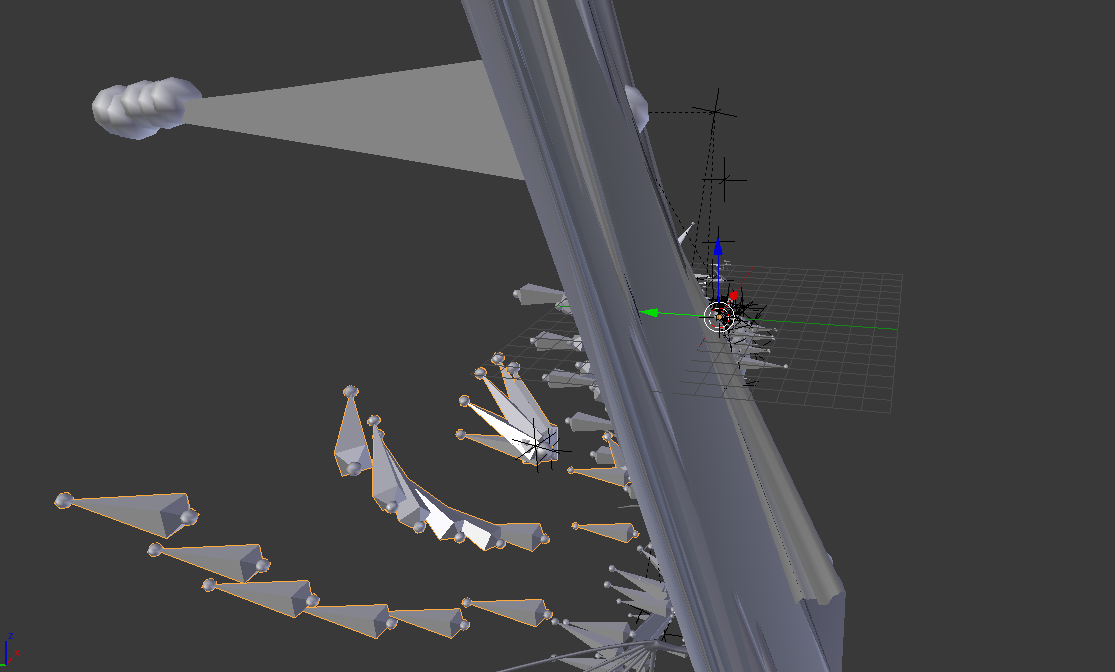
 spiral sigil
hey is ther somone who have the time and might be abel to help me out .. iam trying to add hair to a body but iam not sure how to do it
 rose geyser
blender wizards help
attempting proportional editing for the first time
in edit mode, did this

when i switch back to object mode, does this

how do make it apply these transformations I'm trying to do in edit mode?
oops I'm an idiot
was the shapekeys
:^)
realized i was editing a shape key, and just applied it to the basis
ezclap
 thorny fractal
for as much experience in blender that i have this is somthing i still mess up with from time to time lmao
 foggy maple
@rose geyser I think an easier way to scale things up or down is scaling the bone in pose mode and then applying it as the rest pose
 mighty adder
he got it already, i hate it when I accidentally edit on a shapekey lol
any zbrushers in here? just wondering how many of you make UV's in zbrush, or if you prefer to do it in blender/maya
I'm using a zbrush / substance workflow and i'm wondering if it's better to just UV in blender
although polygroup UV doesn't seem too bad
 zinc furnace
Wasn't zbrush a sculpting tool? Seems like if you retopologize your stuff, making UV's directly on the sculpt would be fruitless
mighty adder
well i'm using ZRemesher a lot to get the low poly
since i'm doing a lot of hard-surface stuff
I was just curious mostly if people actually used the tool
subtle jackal
I'm sure it's plenty serviceable but I suspect Blender has more powerful UV tools, especially with a few addons like UV Packmaster and the ability for pinning etc.
 sly basalt

thorny fractal
i use zbrush but i always do my UVs in blender. zbrush is great for sculpting but i hate its overall workflow and ui in general so i like to keep my use of it to a minimum
 small valve
0 0
 silent acorn
aaaand done!
 dense kelp
Looks pretty neato
 runic temple
can someone make this for me?
 torn marlin
Anyone knows how to deal with shape keys moving & working but broken? (mouth is moving but the skin is blocking it, like the mouth "doesn"t open) example: http://prntscr.com/nkas5w
 dull canyon
https://i.imgur.com/PTdPvPw.png starting from scratch again, this time trying to keep things as simple as I can
 subtle jackal
Head looks kinda big but overall better already I think
dull canyon
yeah, I noticed that too after looking at it after a break
guess it'd fit the anime style Kappa
 sharp abyss
I think the head would look weird even with anime style but overall not bad. I need to finish my nanachi remodel. i redid the body to remove seams and jagged edges. but now i got to do the annoying parts. and figure out the best place to make it public since i dislike the one website
onyx juniper
@dull canyon Good on you for averting the sunk cost fallacy, although I can't say if your previous attempt was a lost cause
dull canyon
well, I mostly wanted to start over in Blender 2.8 and I wanted to try a different approach the whole week
thorny fractal
if your going for an anime look i would make the head a lot smaller. its pretty to make yourself make the head be bigger because of how big it appears in actual 2d anime but youll eventually notice that the head being that big actually looks kinda odd in 3d
nailing down good anime like proportions in 3d can be kinda hard
dull canyon
well, that was mostly a joke
 small cloud
What could be an issue for transparency artifacts? http://prntscr.com/nkddp6 (normals are fine)
 subtle jackal
That's just an issue with double sided alpha blending, as far as I know. You should probably avoid it where possible
small cloud
is there a way to fix it? cuz it's an issue in unity as well
small valve
so i have a bit of a complex question
i have multiple tools - a pickaxe, sword, and torch - that i wish to add to an avatar
not through unity like most people - i want to put them on my model in Blender and turn them into shape keys
the idea is that i have them all in my hand and have a shape key where they expand to full size in position for me to use them
i also have to model them from scratch but that will be kinda easy
what im wondering is what would be the easiest way of going about thhis?
because im also going to create a texture atlas for the entire thing when im done combining the meshes successfully
its a minecraft rig that i already made a few days ago so i plan on also making the texture image easy for me to go into and swap the skin image if i need to
subtle jackal
You could try using something like Xiexe's dithered transparency @small cloud
small valve
i made it from scratch and rigged it, though i have no idea how to do shape keys
thorny fractal
daniel krueter has a pretty good video on shape keys
 devout mulch
I gave heels to my character but the heel part ends up below ground because my base model is flat footed. Any way to push up the whole model a little bit without messing everything up?
zinc furnace
Yes, go into the humanoid rig config and raise the hips up
Until the feet are on the floor correctly
@devout mulch
devout mulch
Alright. thanks 😄
 dry notch
So for the first time ever making a thing in blender solo
How would you rate this progress so far
subtle jackal
Honest opinion? C- "Needs improvement"
dry notch
I mean, it’s unfinished so I was just checking progress haha
 fringe rock
Pretty bad
dry notch
😰
fringe rock
Too much egdeloop in the y axe
dry notch
I mean the sleeves are unfinished for real
And how am I gonna improve with it?
Like I said, it’s my first one so it’s a learning experience
fringe rock
Select an edgeloop and dissolve it(x)
subtle jackal
Yeah the sleeves aren't really the problem. I'm guessing you started with a circle or cylinder but you didn't adjust the number of sides, so you have a LOT of vertical edge loops, this has caused your mirror to look weird, and will continue to make the construction unnecessarily complex. I would start with a cube, have both your body and sleeves be square until you're farther along.
dry notch
Started with a torus and killed the inner workings of it
subtle jackal
That's even weirder
dry notch
Plus I didn’t actually mirror anything
subtle jackal
Also the main shape is extremely thin for how wide it is
fringe rock
Start with a cube and add some edgeloop to it
fringe rock
And start to move stuff around and extrude etc
dry notch
The intent was to turn it into a hoodie to wrap around an existing model I have from DAZ
Regardless I’ve saved it and will restart
subtle jackal
https://imgur.com/a/PVhQ1kM This is roughly how I'd start a shirt-like object

really you want your reference in the scene so you can build around it, too
in other news, after a few days working in Blender 2.8, I can definitively say that autodesk purists must have stockholm syndrome. Left click select is cancer. I already cannot count the number of times I've been unable to select something I want because the gizmo is in the way. Right click select is king for speed and accuracy and was a brilliant UX choice.
dry notch
Left click would seem weird
fringe rock
Its because you get use too right click for everything
subtle jackal
Left click is to manipulate, right click to select
separating those two things makes things SO MUCH SMOOTHER it's almost criminal that Blender is the only one who thought of it
there was a great video on why it's an amazing idea, lemme find it

Blender's default setting of rightclick-select is probably the most controversial feature of Blender. But it's not just for the sake of being different, nor ...
fringe rock
You can change it back anyway
subtle jackal
well previously I think all it did was swap the two
Thankfully in 2.8 it actually properly makes things the old way again
also toggle-a is an option which is a life-saver because I always just quickly tapped A to remove a selection
already working faster this way.
spiral sigil
I'm currently looking for someone to alter a 3d model of a house for me, only needs slight alterations from its base model to be perfect but I really suck with blender. I'd be willing to pay so commission artists dont hesitate to message me!
 limpid birch
hey why are those in a different color ? it seems to mess up with the shading & more when rendering
latent charm
Inconsistent normals. ctrl+n in edit mode on the mesh should fix it.
 mint prawn
@torn marlin did you extract that model from sfm?
crowbar sometimes auto removes doubles
no way to really fix that unless you know scripting
id suggest making the visemes from scratch
torn marlin
@mint prawn Interesting note, thanks. Although I managed to fix it on my own in the end
mint prawn
ah nice
dull canyon
https://i.imgur.com/9jDHaJK.jpg almost looks like I'm making a budget mega (wo)man now 😄

 turbid gyro
SOON to be world coming to VRchat. its small for now until i run more test so the low end pc's can have the great experience. EXPECTED: city, mountains, controllable aircraft(s) , and many more. This video is just me messing around to showcase it a little
NOTICE: yes this video shows a small straight line with hardly anything to it but its my video with a small straight line with hardly anything to it.
 crude frost
isnt that from a tutorial from blender guru(idk the guy but def someone made a tut for it)?
dull canyon
it is from a tutorial yeah
turbid gyro
Yes it is actually, it’s what I was inspired by. I’m gonna make it much bigger and remove the camera. Y I said it’s not finished
 hollow radish
 weary star
wow
subtle jackal
More world progress. Slowly converting HP to LP stuff and getting it textured.
dull canyon
neat
rose geyser
Anyone have some tips or useful materials to read on shader stuff for unity?
I'm needing to get more knowledgeable on this shit
 paper idol
Man... I'm doing terrible at this texturing thing. 😛
 dull canyon
nice
I guess doing anything about the body clipping through the clothes would be too much for vrchat to handle properly?
hollow radish
its really not worth my time
if it was a shorter skirt I would have paired it to the legs
dull canyon
aha, so how would you generally go about doing that? I've not gotten to that point yet
is it just something with colliders or something else?
 tight sundial
Quick Question: imported XPS model to blender > (all looked great) exported as FBX > Imported to unity and somehow the mesh is all messed up looks weird, missing face :S any suggestions what could solve that?
zinc furnace
Screenshot?
tight sundial
I followed the guide saying to change all the materials to opaque and colored white
on blender though, everything looks great
zinc furnace
It seems the normals may be flipped.
Flip all face normals by selecting the faces and in the spacebar menu do Flip Normals @tight sundial
tight sundial
@zinc furnace flip through blender, right? I tried that with the spacebar and also with "CAT"
I'm pretty sure your right, because everything really seems flipped, but didnt worked 😮
thorny fractal
@dull canyon using colliders with dynamic physics dosnt work that well and hits performance quite hard. A better way to do it for vrchat use is to either have the skirt bones set as children to the thigh bones so they move along with it or weight to skirt to the legs. Neither of these options or perfect and can result in u realistic movement but it works. The best way to do a skirt would probably be to run cloth simulation of it on all the animations you need and have it baked into the animation but that's so thing I've never dabbles with and probably wouldn't work to well for VR anyway
 chilly kite
Cloth simulation hits performance so hard that I had to delete the character entirely just to play vrchat because it would just crash anytime it tried to load the character. The best way that I've found to have it pretty realistic is to weight most of the skirt to the closest leg bone and then paint only the last bones of the skirt seperate and run dynamic bones on the last bones by leg. That way it doesn't clip through the legs and the bottom still flows somewhat independant so it's not really stiff from being parented to the leg bones. It also doesn't have very much of a hit since you're only moving a few bones.
Doing that takes some messing around with bone placement for the dynamic bones parent you plan to use and settings in the dynamic bones sliders but it's far better then colliders and doesn't use very many bones so there isn't a noticable hit to performance. My computer is pretty old and I've had no issues.
dull canyon
@thorny fractal that's for avoiding the hands clipping through the skirt for instance?
thorny fractal
hands will still clip through the shirt this would just make it so the legs dont. if you dont want hands to clip you would have to use cloth simulation or dynamic bones with colliders on the hands. but even then results can be kinda dodge with some clipping here and there and a lot of other issues. plus performance
if your worried about hands clipping when your in your idle post or somthing i would just get a different idle pose
 polar sun
"I know what it's like to lose. To feel so desperately that you're right, yet to fail nonetheless. It's frightening. Turns the legs to jelly. I ask you, to what end? Dread it. Run from it. Destiny arrives all the same. And now, it's here. Or should I say, I am."
https://gyazo.com/14651e32b0eed4d9fb735ed4a6c0e3bd
 tight sundial
Trying again if someone can figure out what is the problem, I tried "flipping normals" through blender and through the "CATS" addon but still has no effect when inserted into unity, maybe it's something I'm doing wrong along the process, I'll appreciate any kind of help, thanks!
 stable edge
uh what you wanna do is go into wherever you usually save your unity documents and replace the fbx within unitys resources
also, you can test within blender the way the normals are facing
in the non beta version its in the right toolbox
(iirc the default shortcut for the toolbox is n)
with blender 2.8 its...
with previous versions its just in the (right open-able) toolbar, somewhere
@tight sundial that should cover everything
fix in blender with backface culling on then export the fbx
i dont know if you can just straight up replace the fbx like you can with the older version but you shouldnt have too much work to re-do anyway
good luck!
 dawn junco
@tight sundial
I've had something similar before with certain models. It's because some materials need to be set to things like transparent/cutout/fadeout or even other unique shaders. And sometimes even the texture itself needs different settings and require manually changing. Or even sometimes straight up need to be completely reworked in something like Gimp depending on the way the model was originally meant to be set up with specific shaders. Lot's of models may use a very slight blush on another heap of polygons basically on the same yaxis (blender axis). It all just works differently in Unity than in MMD and Blender.
Also because of this some materials may need to be manually added to the model when put into Unity. Because Unity can automatically add the materials to the model incorrectly.
tight sundial
@stable edge Thanks for replying, I'll just play some more in blender with the Culling on to see when it fixed before I switch to unity, actually managed to get something to look less transparent, hope to get a perfect result, @dawn junco thx for replying as well 😃
onyx juniper
https://cdn.discordapp.com/attachments/521552101021843458/575786532263428106/unknown.png
https://cdn.discordapp.com/attachments/521552101021843458/575786605500170241/unknown.png
https://cdn.discordapp.com/attachments/521552101021843458/575786721724334096/unknown.png


 spiral sigil
😍
formal fractal
those of you who made your avatars from scratch- how did you make the hair?
 manic iris
dull canyon
manic iris
dull canyon
okay so I'm getting way ahead of myself here but, is it possible to give my character a mask that she normally wears on the side of her head and make it so I can put the mask on? if so how exactly would you do that?
like, can you make it so the mask snaps to either the side of the head or the face of the model and I can pick it up with my hands?
dawn junco
@dull canyon
If I had to try doing that I would use either 2 ideas
-
I would do a particle system with the mask being made by the particle system. So if I touch or activate the mask with a unique layer in the hand, then it will collide with it and get destroyed. And the hand will spawn a mask in it that will happen when it touches an invisible layer where the mask originally was. Something like that.
And make it so the mask that was on the head that got destroyed will birth an invisible particle after say 3 seconds. And that particle will spawn a mask when touched again by the hand. -
Try using the infinite gesture idea that will alter the mask between being on one side of the head to being on in the hand and being on the other side of the head. And make it loop back and forwards like that.
dull canyon
okay, as I thought that's going over my head right now, but in theory it would be possible?
dawn junco
Should be.
dull canyon
nice
dawn junco
Never used the infinite gesture thing myself yet. And not sure how much of VRChat has changed since I been in it. But I would imagine because idea number 2 uses a gesture toggle system. Then it might be buggy when sitting on chairs and getting off?
In that case maybe make the masks all on the model itself. And instead use shape keys to shrink the mask instead of turning them off. But this would require making the avatar's mesh itself inside the toggle system soo...
 sly parcel
can i have some help the veiw positon is not showing up
dense kelp
@dull canyon you could simply use a gesture that triggers shapekeys based on what you want, you could in essence have 3 mask instances (all in the same mesh) in which you had the default state with the following setup
Mask inside of head that will be on face on trigger, Mask on side of head that will go inside the head via a shapekey, and a mask inside your wrist that will be tracking your wrist and can be triggered to look as if you just grabbed your mask.
i.e.
Gesture 1: Hide sidemask, Show facemask
Gesture 2: Hide sidemask, Show wristmask
You could also hide the sidemask altogether if you'd like in said instance
It's more of a visual illusion than anything else, but i'd say it's far more performant and easier to setup
dull canyon
okay, that sounds simpler yeah
 stark crystal
@formal fractal how did i make the hair...
well it really depends on the character, since there are different ways of making hair
one way is just sculpting the hair, for some styles of hair
another is just manually modelling the hair
some do it by just modelling stripes of hair and placing them all over the head
and oh yeah if you're gonna do that make a separate mesh that covers the head in the same material as the hair
so it looks like the head is full of hair and doesnt show skin
stark crystal
yeah vroid is also a thing but i was talking about using normal 3D software like blender
though you can do the same thing vroid does
vroid is very clean though
i havent used it but i've seen it
@zinc furnace do you recommend it?
zinc furnace
It has probably been updated by now, but the first time I used it, it didn't even have a "remove" button if you accidentally made a wrong hair type
Only Undo
And if it was out of your undo history, gg
zinc furnace
It's probably been updated and fixed by now as I hear other people saying good things about it.
stark crystal
oh that sounds promising!
well i'm a hard surface guy, but i recently made my first character because i fear organic stuff
can i show you?
i wanna get some opinions @zinc furnace
zinc furnace
I'm on mobile data and can't download images, sorry.
stark crystal
oh it's alright
onyx juniper
Oh wow, Blender 2.8's UI is complete bullshit
Can I have my mnemonic, intuitive icons back?
 zenith relic
i made my wings but i cant duplicate them because they break 😦 (with bones of course)
i tried mirror or manual duplicate...i cant seem to succeed in making the other half of the wing working..
i cant seem to succeed making the other half
small cloud
@zenith relic bones must start with Left/Right or end with .l/.r, then you can symmetrize bones, apply position/scale/rotation to everything > select all bone sin edit mode = W > symmetrize > then apply mirror modifier to wings, then if weight isn't carried over enter weightpaint mode, select Blur and change to 0.00001 values, enable x-mirror for weight and blur all weight which will mirror to other side
zenith relic
i did...but usless they break apart...they bind the objects wrong or partialy.. @small cloud
😦
small cloud
when u have just one side, outside of edit mode select armature and mesh, then hit ctrl+A > location/rotation/scale
then you symmetrize bones and then mirror the mesh
zenith relic
not really sure if i understand..
small cloud
can't explain it any easier
zenith relic
"symmetrize bones"
here is what ive tried
frist made a mirror with all pieces of the meshes..
then apply
or made a duplicate of meshes.
for the bones i duplicate them then W flipping names and once i was done with it
it didnt work how it should
it somehow interfere with the other wing like it still has connection with it..
not with everything just once piece.
zenith relic
@small cloud change values to what exactly? im a little confused
small cloud
strength and weight
zenith relic
and then just blur?
dont i need to apply the bones to the new meshes? ctrl+p then auto?
strength and weight its 0 with values that u gave me..
@small cloud help me out here
if i dont bother too much.
i did what u said about bones
then mirrored the wings then apply
small cloud
I'll go as simple as I can. First you have 1 side of wing, all bones either start with Left/Right or end with .l/.r, be sure mesh is parented with empty groups. Then you select armature and mesh, press ctrl+A and do it for location/rotation/scale. Then you enter edit mode for armature and select all > W > symmetrize. Then you select mesh and parent it again to armature with empty groups > then you apply mirror modifier to mesh
I forgot about the parenting 2nd time after symmetrizing bones
zenith relic
but now i think i need to apply again the trick just like i did with the frist wing
a
small cloud
so the vertex groups show up on list
zenith relic
a..
when i mirror the meshes...they should appear as a second object?
i mean mesh
hmm.
il check the parenting
hang on a sec
the parenting the frist wing doesnt seem to have it anymore..
when i move a mesh the other one that is child it should move as well but it doesnt.
well the parenting pretty much is gone..
😄
i guess i still can re-parenting the frist wing and then the second..?
ok i just woke up with doubled meshes..
ive just noticed that after re-parent thing done.. i need to apply the bones to it again and the other wing does the same process at the same time..
it should happen that right?
ive applied only those pieces... so they wont move with the other wing anymore
it moves from the other bone but again..f-up.
..
im still stuck
i think i just do manualy thing but i cant fix the broken parts for some reason
there will be always a bone that grabs other meshes that i cant fix or find the right one
alright ive re-parent the meshes
all and removed the other parts that confused me.
the bones seem to work fine for frist wing.
without making the wheight of each bone for each mesh
small cloud
join all the meshes..
zenith relic
now il try to apply the mirror to the meshes
small cloud
why the hell u haveso many
small cloud
in cats there is "join all meshes" option
cuz you need to apply location/rotation/scale before doing that
small cloud
when it's 1 mesh, then you follow the steps i wrote down
1 mesh, 1 side of bones
then u do everything i told u
and it will work
zenith relic
i cant make the wings open if i make them in 1 mesh.
small cloud
yes you can
zenith relic
but broken
small cloud
you have bones for that..
zenith relic
it grabs the other meshes as well.
then parenting is no needed anymore?
if i join meshes all in 1.
small cloud
just start from beginning, where you have just ONE side of mesh and ONE side of bones
and follow the last explanation
step by step
zenith relic
a..
small cloud
i can't go any easier than that
zenith relic
why cant i let them be parent an child?
alright il try to join them
joined all meshes in 1 except the bag.
for blur i can only change it to 0.
@small cloud
this happens every time
small cloud
just send me the blend
it's gonna be so much faster
dont need to use blur or anything after i thought about it twice
zenith relic
cant do that while in 1 mesh
small cloud
yes you can..
zenith relic
nope
trust me i cant
or its gonna take hell lot of weeks to make it
pixel by pixel
when they were split in meshes i could just select the mesh and bone and then it was ready
thats why i didnt wanted to make it in 1 mesh
unless there might be a trick to make the weightpaint differently.
small cloud
you can assign selection to a specific bone...
if you want for a piece to move with just 1 bone, then you do it through assigning in vertex groups
or there is also face selection masking, which allows to paint only selected area
it's too much to explain overall, too busy

is easiest
zenith relic
well duh i need to attach mesh piece to a bone without breaking the others.
a...u can still see the meshes by pieces?
small cloud
you can select individual pieces by hovering a moues over a vertex/edge/face (depending on mode you're in) and press L, or select a vertex and hit ctrl+L
zenith relic
what i want to do...is to select a part mesh together with 1 bone
without affecting the other meshes.
im still confused.
a..
there is some pieces that i cant select if so.
hmm.
a
i think i understand what u saying.
it still attaches to other objects i think.
probably because the meshes i made are a little way to close to each other
it still happens.
it still grabs the other meshes...well now surfaces since its in 1 mesh
oh..
when i tried to assing a selected part it just showed me something already selected...
also there are way too manny surfaces to unselect to assing to the bone.
nope
cant figure out.
What should happen exact when i click assign ?
ok i think i see some differences
i have to add the surfaces to all bones
but in a different way
this should happen
alright il try to finish them all.
wonder how i deselect the others...
a.
so i can actualy select and d-select the nearby meshes t remove it from a bone that i dont want to attach to it.
zenith relic
@small cloud ive finished Right wing by attaching the meshes to the bones.. and detached the other leftovers from the bones that shuould not be attacked to..
probably i should do the same wth the other wing as well right?
small cloud
no, you'd be doing double the work
that's why mirror modifier exists
and it has to be 1 mesh
zenith relic
im not really sure how to use that mirror.
small cloud
don't make it million meshes, it's not good for performance
small cloud
it's more than 1
there is no possible way why would you need more than 1 mesh
to move parts seperately, for that bones and weightpaint exists
zenith relic
im not really sure how to use that mirror tho.
some times im ending up by breaking the hole work.
i actualy fixed the mirrored wing made.
i think il just do the same thing to the other wing and then i hope ive finished with.
zenith relic
done with both wings...
ok... now how the heck ima gonna make an animation 😄 xD
probably similar like unity..
@small cloud ive finished with the thing
i guess it is possible to limit the movements of the bones right?
small cloud
i havent made animations in blender
zenith relic
well it does has same stuff as unity..
there should not be much difference
also or probably i should watch some tutorials
of how to make "eye tracking" movements to be adjusted from a button
its not eye tracking
but its the movements
zenith relic
a new challenge is to make new bonees that are elastic to connect all the fingers to make the entire wing.
ffs
dense kelp
Well one things' for sure, animating in blender is far easier than unity when it comes to humanoids
After figuring out the shortcuts it should be fairly simple to get an animation going, and they might seem simple but will transfer into a bunch of keyframes in unity, so i'd advise any fine-tuning be done in blender
latent charm
Yeah, Unity's animation tools are horrid compared to... well almost anything else.
 rare lily
Well Unity is not made for animation in first place... : P
stark crystal
@dense kelp i dont think so... if you were to recreate a blender animation in unity to 100% accuracy you'd have the exact keyframes. better yet, in blender you could edit the animation curves instead of adding more keyframes to achieve some desired effects. So not only do I think that blender should be used for fine-tuning, but it should also be used for making the animation in the first place xDD
blender is easier to animate in when it comes to anything other than humanoids too!
@rare lily and yissss agreed
dense kelp
Uh, isn't that what i stated? .-.
stark crystal
@dense kelp oh i thought u said that blender is for fine tuning only
i missunderstood :((((
so as an apology
i present
this cake 🍰
:)
dense kelp
No worries, i guess it could be a bit confusing
Basically, blender has a "simple" display for transitioning keyframes, but when it gets imported into unity it gets a bunch of keyframes to properly translate the movements, so it's both best to create keyframes in blender and to finetune them in it, even after exporting, as it'd be very complex in unity in comparison after an export
stark crystal
oh yisyis
i see 🤔
so if i make changes to the animation curve in blember without adding keyframes, unity translates them into more keyframes? @dense kelp :O
i didnt know that :O
then wow keyframes would be a nightmare
dense kelp
Well, technically blender still has the keyframes in the animation for the animation to properly move to begin with, but it's displayed in a more linear than detailed manner, but unity doesn't have such a functionality and as such just imports them in bulk
Atleast from my understanding
dense kelp
No worries
zenith relic
still gonna be a pain for me to make an animation...also i need few more bones to complete and/or make the animation easier for it.
zenith relic
guy i got a little question
how to u connect the bones in order to have an elastic opening for the wings.
zenith relic
i need a teacher/sensei
 ripe lotus
ripe lotus
ripe lotus
 little bramble
Just finished Maria.
zinc furnace
Ooh, that looks sweet!
little bramble
Thank you!
onyx juniper
Rigging is hard
stark crystal
this is my second avatar that im making
modelled from scratch in blender
i tried lol
 signal zenith
Hello, I'm learning how to sculpt in blender and I'm trying to learn how to make an anime styled avatar, but I'm not sure if the shape of the head is right.
stark crystal
@signal zenith oh! i can help!
for anime avatars, you don't really sculpt
wanna bring this to DM?
:))) i'll gladly help
stark crystal
Oh and make sure you use a reference image to see if the structure of the face is right
I’ll DM you
thorny fractal
honestly i stopped using sculpting for the head/ face. its personal preference thing but as far as it goes for me i just have way more precise control over the overall shape and sillouette of the face when i hand model it. then i usually go back and retopo is even tho its lower poly just to get better topology while still retaining the shape.
thats just my own advice based off of my own opinions but it could be somthing you could try
then what i do is i take the hand modeled hea and stick it onto the body sculpt and bool them together and when i bake the normals i usually just hand paint out the normal map for the face area cuz i dont really want it to be affected by the normal map anyway
but for the ears or somthing you could definatrly benefit from still haveing baked normals
stark crystal
@thorny fractal ooooo I personally find hand modeling the body gives me better control
Ofc topology flow matters and that’s difficult part
But I find it to be very convenient. Maybe I’m just bad as sculpting
But I wanted to ask, how do you go about hand painting normal maps?
I’m curious :0
ripe lotus
You bake normal maps
latent charm
If you want to paint them, have fun because you'd have to account for things like tangent basis and other fun stuff.
Better off painting a displacement map and baking that to a normal map, since displacement maps are super-easy to understand. Black is low/no change, white is high, and the rate of change from one to the other over a distance translates to a surface angle.
Roughly.
little bramble
I also hand sculpt the face to have a very precise control of the edge looping especially on the face. Edge flow is so important to having a good model in my opinion especially when it comes to facial shape keys and various blend shapes
subtle jackal
Generally, you'll want to bake normal maps. You can, technically, hand paint them if you're a masochist. Get an image of a semi-sphere and sample from there, painting and blending the direction you want your normal to face, basically. However the far easier way to create normal maps by hand is to paint a height map, instead, and then convert that using something like the Nvidia plugin for photoshop (GIMP has a clone plugin as well).
For modeling an anime styled character however, you really just... don't need normal maps. They don't really have the detail necessary for it, any lighting information you gain from a normal map will likely be lost with the way you want them shaded. You may be interested in tweaking vertex normals though (not done with a normal map) to get some parts to light differently. Many shaders also have shadow masks to help as well.
ripe lotus
You can use normal maps to bake into the diffuse if you want to preserve some kinda of body detail though
 zinc furnace
You can still use normal maps on anime-styled models, it just depends on the shader.
Cubed's probably won't use the normal maps very well. Noenoe can, and Xiexe's XSToon, Cibbi's Toony Standard, Poiyomi Toon definitely can
stark crystal
@zinc furnace yeah i was aware of baking them, but not actually painting them
thanks though :)

 deep edge
How exactly do I add bones to existing models using unity?
I'd like to resize something on a model that doesn't currently have a separate bone (a tail, to be exact), and maybe make leeway to making animation for it in the future.
 upper hamlet
back to blender with you
thorny fractal
i bake like 99% of my normal maps but i do a bit of hand painting on the face area sometimes. mostly if im doing cel shading since i find it easier then hand editing the vertex normals. but i usually just take the default normal color and paint that accross the face so it dosnt really have normal map detail on it.
after i hand edit the head and face ill bool it onto the body for sculpting and when i retopo ill usually just put the face on then retopo the head and ears since i usually change those a bit in the sculpt
ive done some actual hand painting normal map editing before for cel shading since i find it a lot easier then vertex normal editing. (ik in the guilty gear GCC they talked about artifacts with using normal mmaps for cel shading but ive never really ran into the issues the way i do it)
and techincally you can kinda hand paint out errors in normal maps but its kinda considered a bad practice but sometimes when its not a big deal i do it anyway to save time with messing with cages and stuff

I painted over this image of Frederick Douglass using a sphere palette made from a normals sphere. I brought it into Photoshop as a normal map in a 3D layer ...
ive also done it for pixel art stuff for some cool dynamic llighting in unity before too but im not really good at explaining how exactly to do it
thorny fractal
and althought you can take height information and convert it to a normal map like asami showed normal maps dont really store height information. If you hand paint them you can do some things that probably wouldnt make mushc sense in a height map for stylized reasons

 rare lily
Looking good!
hollow radish
I think retopoing it in blender is much faster than trying to do that in 3d coat...
zinc furnace
Usually this means the prefab instance is broken, or you have duplicate bone names.
Make sure you never break the prefab instance and that your avatar objects are still colored blue.
@zenith relic
Basically, it searches for those bones in the humanoid rig definition but it can't find them
Can also happen if you tick "Optimize game objects"
Not suer how many skinned mesh renderers you have but consider merging meshes
zenith relic
@zinc furnace actualy the avatar its exactly the same nothing changed...to make that error dissappears i usualy do show and hid the avatar descriptor and the error is gone.
wierd.
zinc furnace
It can also happen if your avatar is not correctly posed in the scene
It could be in an animation pose for example
If you didn't animate on a duplicate
zenith relic
you right here with the animation.
another old issue i have with an old avatar...
every time when i position the avatar descriptor ball between the eyes....
the actual camera in vrchat is located on the chest...
@zinc furnace
ring a bell?
i heard that u can modify the camera of descriptor somehow.
but even the movements are coming from the chest.
zinc furnace
This is a discrepancy between the humanoid rig configuration and the model's resting pose
Enter play mode and give the model the SimpleAvatarController controller
You may see the model being shifted up or down
In the humanoid rig configuration where you configure which bone goes where, you need to make sure that the T-pose has the feet flat on the floor
If they aren't flat on the grey grid floor, raise the hips up or down until they are.
zenith relic
they are on the floor..
i mean...the avatar looks just like other avatars..
or probably could be the extra bones it has?
on the feet
il try later to remove those bones with blender since they arent really used.
subtle jackal
@thorny fractal painting a height map and converting works because the plugins derive normal data from the changes in height. The image I attached to the post describes how it all works and demonstrates it pretty well I think. It's for the same reason that you can e.g. generate terrain data purely from a height map. It doesn't describe the way each face points, but because you know how high each point is, you can derive it from that.

 signal zenith
Hello, I was getting lessons from someone on how to make a model from a d image and I've outlined the face with vertices like they said. Do I do the same with the rest of the body?
rare lily
@signal zenith you’re not starting the right way... This is far from an optimal and standard method to model lowpoly. Who gave you the lesson? :-/
A bunch of quick points:
- Yes, you have to outline the character... But using solids already. Lines are not meant to be used like this. For the head, you may start with a simple sphere or a box either.
- It’s best to model using a symmetry morpher (dunno what the name is in Blender), so you have to model just half of it; the other half will be generated automatically. Asymmetric details can be added later.
- You have to use reference images on two different split views, not a single one!
- Eyesh, mouth, brows and such details will be added later, after you have a good overall shape
 midnight void
does anyone have this model? can you throw? https://cdn.discordapp.com/attachments/466251507331891200/577521324562579485/unknown.png
 rare lily
I’d love to point you to a good tutorial but I’m on the train back home and 3G/4G is super weak now
The tutorial I followed tears ago, still relevant, is down I believe
signal zenith
Thank you @rare lily , also the one who was giving me the lessons was omarspider.
rare lily
No idea who he is, sorry
signal zenith
Ah, well I'll have to fix it when I get back from work cause I have to leave soon.
rare lily
Got it
signal zenith
I was also wondering if you could send me the tutorial when you get home, that way when I get off work I can watch when I get home.
rare lily
Absolutely!
Give me half an hour. If I can find the same I used, that would be great
Otherwise I’ll search for something valid
rare lily
This is the guide for everyone, if you are interested: https://3dtotal.com/tutorials/t/low-poly-character-modeling-and-texturing-athey-nansel-moravetz-model-man-low-poly

3dtotal
One of a wide range of 3D and CG art tutorials on this and other creative tools on 3dtotal.com.
It’s specific to 3DS Max but the technique is good and can be used on every other software.
stark crystal
@rare lily i'm the one giving @signal zenith lessons. i told him to outline the character, but didn't expect him to give it that many vertices. there are also unncecessary outlines he has done. i did tell him to set up separate views, but he didn't. i also told him to not make the mouth horizontally, only vertically, as well as the nose, but he didn't. it was about 2 am for me, so i couldnt stay with him for very long
here's something similar to what i've been trying to make him achieve
i've created good heads this way
i've only been with him for like 10 mins
rare lily
How do you create the actual 3D heads after lying down the lines?
stark crystal
and only through text, so couldnt tell him much
i'll show you after, but can i show you the final result of some @rare lily i'm just currently studying
oh and that isnt the actual head reference i'm using
the eyes are different
rare lily
I’m actually interested in the workflow, not the final result
stark crystal
oh alright
rare lily
Because it looks way daunting
subtle jackal
It's a legitimate workflow, but then there are very few that aren't if you know what you're doing.
stark crystal
oh to me it's very pleasant, since i'm able to plan my workflow out
rare lily
But maybe it’s some Blender tools I’m not aware of
rare lily
(I use C4D for instance)
rare lily
Why not!
stark crystal
:D
but @rare lily i know you dont wanna see the final result
i'll show it though
because why not
https://cdn.discordapp.com/attachments/576979865325273089/576982225791483904/unknown.png
https://cdn.discordapp.com/attachments/576979865325273089/576981849960742912/unknown.png
https://cdn.discordapp.com/attachments/575720531693666304/576852260231839745/unknown.png
earlier one:
https://cdn.discordapp.com/attachments/302575953673191434/571824189938597888/unknown.png
https://cdn.discordapp.com/attachments/576979865325273089/576982246335053834/unknown.png
https://cdn.discordapp.com/attachments/576979865325273089/576981969884151808/unknown.png
@rare lily YEEEET


 subtle jackal
It's not all that different from a workflow like https://www.youtube.com/watch?v=xls25e08sSg this, really, you're just laying down vertices instead of faces

This tutorial shows most efficient and quick way to model a head. should work great with any polymodeler. The proper edge flow is easy to achieve this way. F...
subtle jackal
yes
stark crystal
but i think it differs a bit, especially the nose
this setup is really good for wrinkles
i may wanna take a look at that sometime
subtle jackal
always good to study lots of different workflows and examples, yes
stark crystal
yep
rare lily
You're not creating the polygons from the lines actually
stark crystal
oh?
rare lily
I'm watching the video
rare lily
Ah no sorry, I thought you posted that!
rare lily
Lets' talk DM!
stark crystal
sure! :D
 clever condor
What's a good way to fix ugly normal mapping such as this?
 graceful wedge
Hey guys! When in pose mode and moving the head back and forth, my avatars jumper has these two bits that stick up, like they're attached to the neck part of the jumper
what's the best way to fix this? it's the first piece of clothing I've ever properly attached to a base model so, I'm not very clued up about it
when looking down, this happens
fringe rock
Weightpaint some of the collar to the neck/head bone
graceful wedge
ahhh yeah that could work hmm

 rain flax
I suspect a large amount of the rounded surfaces are too high-poly, you could play with vert/face normals and smooth it out with simpler geo
pipes/cylinders that bend tend to have that issue
it looks really cool though, well done 😃
 ashen nacelle
I can cut a rather large amount of details and remove the pipes, ya. It's what I did on the original.
Thanks a ton. He took me a long time.
He's in the due process of getting UV mapped and rigged for SL
Once I release and sell him it'll be down to decimating him and getting him VRChat ready.
However, in the mean time:

Is my current VRChat avatar in progress. Sergal with the classic Protogen LED mask.
And hair. Cuz I wanna pet myself.
onyx juniper
Robot looks cool
ashen nacelle
Thanks!
 fossil inlet
Textured my character's eye for this comission, no shine layer yet, just getting the iris/sclera detail in.
thorny fractal
@subtle jackal im aware of that, just for some things its easier to paint the normal map directly because it can be hard to visualize it as height information. but this would be for more strictly stylized stuff. im very familiar with substance painter and substance designer both which use height information converting to normal maps. i paint my normal maps for the faces by hand some times for cel shading if youve ever seen the guilty gear xrd gdc. doing it in that regard would be much harder to visualize as height information
spiral sigil
does anybody know why when i go into pose mode i can select and pose the bones on the first armature but not on the second armature? when i try to select a bone on the second armature it just highlights the entire armature. https://cdn.discordapp.com/attachments/478941902276788224/577681277101146130/unknown.png

the second armature has bone groups but not sure if that matters or not
dense kelp
@spiral sigil they're different armatures, so the mode you're on is exclusive to your actively selected armature
spiral sigil
even if im on the second armature and go to pose mode it just automatically goes to the first armature
dense kelp
If on your first armature you go into object mode, does going into pose mode on the second one do the same?
spiral sigil
i just tried it again and it worked. when i entered pose mode from CATS plugin it didnt work. weird
dense kelp
Going into pose mode through CATS influences the one selected through CATS
spiral sigil
is it possible to get fbx models into vrchat?
stable edge
🤔
stable edge
maybe so
fossil inlet
VRC support for LoD’s when? 🤔
dense kelp
Pretty sure LoD's are supported for maps, unsure about avatars
latent charm
I remember they work with avatars, but not properly with mirrors, you'll see all of them at once.
In worlds they have full support though.
spiral sigil
they work but unity picks very low LOD meshes when in vrlow or desktoplow profile making things look terrible
latent charm
Yeah, and other than picking those settings there's no good way to tune when the different LOD groups switch, since even at 99% in VR it's still too early/late to be reasonable.
graceful wedge
I asked this yesterday and someone suggested weight painting the top to the neck bone, this doesn't seem to work, just makes it drag more of the top along with it. Can anyone help? To me it seems like I just need to "disconnect" that part of the top from the collar
sharp abyss
You could give the collar a 0 weight and it won’t move. You probably added more weight. The weight should be I blue I think. Not sure what 0 is in blender.
Other way is to remove the collar separated it give it a bone and then attach it to your rig and it should stay
 hushed owl
I think I'm just about ready to call this one finished.
dull canyon
shiney
spiral sigil
is there anyway to get fbx models into vrchat
i've been spending like the whole day watching things and learning things
spiral sigil
i've got them into unity now 👀
signal zenith
Ok I'm following a guide on youtube on how to model and so far I think i'm doing good, though I'm not sure if the placement of the eyes are right and I'm currently trying to figure out how to do the nose.
 radiant latch
Looking decent. However, you don't really need that subdivision on it. Since you're making a character for a game, your end result is going to be the low poly version (unless you're making your avatar over the 70k limit then ree you). This way you'll know where to add the vertices and edge loops yourself. Like that eye isn't going to look very smooth with it off, so it might pay to add some more cuts to the eye to make it more round. Then the end of your nose is gonna be pretty darn smooth where it's already good enough
But there is always cleanup later if using the sub division works better for shaping and smoothing, so it still isn't bad to have if that what works for you
signal zenith
I'll think about that when I get back from work today, thank you.
 hallow bough
When I started I approached it from little detail to more subdivisions as I needed them. It'll spare you from having so much point pulling to do in just the shaping phase. That bridge of the nose doesn't need that many subdivisions for a sample.
stark crystal
@radiant latch hmm... i use subsurf and my models end up around 30k tris. :O maybe it depends on how you use subsurf
@hallow bough and yis
:3
 thin bison
 errant patrol
signal zenith
errant patrol
signal zenith
Ok, I think I have mostly everything covered, I'm just not sure how to do the nose and lips, do you guys have any pointers?
errant patrol
Draw out the shapes with extrude edge, if the edges dont match the rest you can use "edge cut" to cut the faces and connect them
dawn junco
Different ways on doing things based on the style and way everyone does things.
I can't help but notice but it seems you have a ngon and a triangle on your face.
Anyway you could do the mouth shape and extrude out and easily attach with by adding edge loops and merging verts.
Or shape around then extrude in.
Each vert should have 3-5 quads attached to it to direct the edge flows.
Good to use a reference on muscle flow even for anime faces.
dawn junco
For example I am working on an entire model myself for the first time. This is how I ended up with my topology.
I don't even use subsurf and it all looks nice and smooth
 void narwhal
http://wiki.polycount.com/wiki/Topology
http://wiki.polycount.com/wiki/FaceTopology
http://wiki.polycount.com/wiki/Subdivision_Surface_Modeling
besides that look up good references for anime stylized faces
subdivision isn't really necessary unless you're baking normals for vrchat
signal zenith
Ok I'm gonna be honest, working on the lips and nose may be a bit harder to work with, also I now feel like I have a whole bunch of unnecessary vertices.
Like I'm trying to fix them but then i just end up getting triangle or more vertices faces.
dawn junco
Also generally everyone always works around the ear and leaves it as an empty whole like you do with the eyes.
Also you don't need to do the entire scalp when it's going to be under the hair. Or not going to require any extra skin showing at certain angles.
onyx juniper
It might be helpful as a point of reference or extrude base. Definitely cull it once you're done though
Or keep it seperate, in case you want to add a new hair style later
signal zenith
Sorry if I keep asking questions, I'm like brand new to this and I wanna start making my own character and avatars and I knew it was gonna be tough but I know at the end it of all the frustration it may be worth it.
dawn junco
as a comparison this is how my head is with an actual official side image from the game
signal zenith
Huh, so just cut out a majority of the head that's not gonna be seen? I can try to do that and hope the mesh doesn't collapse on itself.
dawn junco
In your case I would also spread out that huge cluster of verts in front of the ear
signal zenith
Yeah I'm aware that I have too many verts hehe
dawn junco
and probably move the end of the eyes more forward
signal zenith
Trying to work on that now.
 long ice
Anyone know how to make visemes in blender? I'm kinda lost and could use some help
dawn junco
Actually easy and plenty of videos on youtube.
Basically in object mode make sure you have a Basis and then hit the "+" to the side and it will make a new Key.
Rename that shape key to whatever you want in Edit mode and move the vertices into the position you want them to be and done... basically.
long ice
I will pay you to help, if you got time
dawn junco
I don't really do these jobs for people. And already taking weeks slowly being picky with my own model 😛
dawn junco
seriously its easy than you think to do that xD
onyx juniper
@long ice
onyx juniper
In other news, I hope this tragic casualty of the rigging process terrifies inspires you all

 scarlet dust
two-handed sword
I love to use Unity shader with his Normalmap fuktion: https://gyazo.com/4e2988c143f424d73667e30a57a4e9ea

you can just create a second texture of you mesh and use it as a Normalmap or create a new one for a nice optic:
https://gyazo.com/2d67e2cd19cda3d87cb608752b6b20a9
https://gyazo.com/3ecb2d936377f1711c5223a5e5a94853
https://gyazo.com/4cc8131ba41d36a64f7692ac8acca7ee


 wheat delta
looks like Blender to me
spiral sigil
what is the best app for making a mesh, free or paid?
onyx juniper
ZBlend Max
void narwhal
there isn't exactly a "best"
but most commonly used ones are something like Zbrush/Maya/Cinema4d
thorny fractal
i feel like cinema4d is kinda phasing out from most peoples workflows but i could be wrong. i just dont hear about it much anymore.
void narwhal
probably i don't really know for sure
generally 3d modeling programs are used with specific jobs or workflows in mind
for a large variety of reasons and sometimes it's just preference
spiral sigil
been wanting to make my own mesh so i can make a body fit me perfectly for full body
void narwhal
if you don't have knowledge in regards to 3d creation try blender
spiral sigil
i've used blender quite a bit
void narwhal
diving into the deep end isn't necessarily a good thing
spiral sigil
it depends on the app i suppose
i was able to get 3ds max for free for example through my school
i figured there may be some others like that
void narwhal
maya is also from autodesk and you can get a student version of it
maya is mostly used for character creation & rigging from what i understand
void narwhal
probably
thorny fractal
it dosnt really matter either way if you have experience with 3ds max just use that. dont switch to something just because thats what x people use. it dosnt matter that much in the long run. it takes time to learn the program anyway so if you already have experience with one program just use that
void narwhal
yeah you can definitely stick with 3ds max or blender
but i assume he wants to learn either 3ds max or something else and dive deeper
onyx juniper
Stick with what you know, and only learn parts of other programs that it can't do
spiral sigil
i just thought there might be an easier option for sculpting than blender
void narwhal
zbrush is the king of sculpting blender isn't that bad at sculpting tbh
just make sure you use blender 2.8 for sculpting
thorny fractal
the main issue with bl;enders sculpting is the performance and its a lot better in 2.8. the lack of auto retopo tools sucks too but theres plugins that can do that blender for sculpting is more then usable
at this point mudbox tho feels kinda abandoned to the point that i would use blender over it. i personally use zbrush tho
spiral sigil
Blender's mesh modelling tools are amongst the best and the fastest in the industry, if the defaults are not enough for you, you can always check one of the custom workflows. Retopology is pretty fast using F2 addon, Bsurfaces and the built in tools. You can also go Retopoflow if it fits you. If you're not into Blender, you can try Houdini, it's Maya's biggest competitor right now, and it's not Autodesk, so they actually develop software and listen to the userbase or sth xD
Blender's UV tools suck, texturing is meh, you don't have the ability to fine-tune normals without external addons. But then again, there are dedicated tools for these things now like Rizom or Substance.
There are some sculptors that swear by Blender's dyntopo as being super nice, and take models to Zbrush only for detailing. Like this guy: https://www.artstation.com/mmaaxx

in the long run, it doesn't matter what software you use, as long as you know your way around it, and it fits your style of doing things.
void narwhal
really it's just a matter of learning terms and techniques and gaining experience
on that note of UV tools for blender have you tried addons like Textools for example?
i haven't done much with it so i'm looking for input in regards to that
spiral sigil
It's not an unwise decision, the api in 2.8 was still changing some time ago... I don't know what's the status currently. 2.79 is a lot better with older GPUs and VMs, so I tend to stick to it, waiting for 2.8 to mature.
I got burned several times with Blender by downloading the latest version
void narwhal
2.8 api got finalized a while back i believe
or at'least got put into the status of addon development ready
spiral sigil
Ooh, nice 😃 I did prod it from a safe distance, but there's too much to do currently for me to do the jump. Still stuck in 2.79.
void narwhal
https://wiki.blender.org/wiki/Reference/Release_Notes/2.80/Python_API
Please note: Blender 2.80 is now in the beta stage of development and is being prepared for a final release. Add-on authors can now work on updating their code to run on 2.80. The Python API should be considered mostly stable, but there may be some minor chages related to bug fixing and user feedback. Breaking changes may still happen, but will be kept to a minimum.
still a bunch of good addons with neat workflows in 2.79
 lilac rover
personally hate blenders skeleton tools
spiral sigil
Yeah, I guess 2.79 is going to stick around like 2.49b did. Lots of useful stuff won't get ported, and someone's gonna always have it running to keep that one old script from 2012 functional 😛
lilac rover
but it's sculpting is amazing
and i'm still a fan of how you can do blendshapes from joints -.-
[maya why]
spiral sigil
@lilac rover Blendshapes from joints? Can you tell me more about it?
i never used any other rigging tool, so I don't know how Blender compares to Maya for example.
lilac rover
you know... now that I think about it... i might not have done that with blender....
thinks
spiral sigil
They have a great DVD on rigging from a few years ago: https://www.youtube.com/playlist?list=PLE211C8C41F1AFBAB

YouTube
Welcome to Humane Rigging, the 8th DVD in the Blender Open Movie Workshop series! This DVD assumes that you have a basic proficiency with Blender, and are us...
void narwhal
he wants to create a morph shape from posing and blend the shapes together
spiral sigil
ahh okay so baking pose to shapekey right?
lilac rover
yeah
void narwhal
baking a pose should be possible as for blending the shapes together i wouldn't know
lilac rover
cause i have this nice little jaw bone
and it would make doing visimes sooooo much easier
especially with teeth and a tongue
spiral sigil
Yeah, gotcha, that's a nice feature. Also, being able to sculpt in shape keys. Doing corrective deforms on joints is great with this, to counter compression or rotation pinching.
void narwhal
blender does this in basically one button which is pretty neat tbh
lilac rover
don't see why. Would seem logical to allow for rigging to work for that.... otherwise i'd just develop it as an animation in VRC but... not sure how to do that either
void narwhal
you could blend the poses/animations together i think
lilac rover
yeah
probably just cause I'm not baking the animations
like i even have lip rigs so
would be superduperhelpful
void narwhal
you could port it to blender :^)
lilac rover
i did find a doc on that
gonna see if it'll work and if the IK's will work
if i can't use the existing skeleton though
nope
void narwhal
IK would probably break but you don't need it
lilac rover
yeah
problem was the knees
my models in blender just... the knees were super wonkey
but Maya ones... oof that was solid crouching
void narwhal
🤔 REEEEEE
lilac rover
this one.... been super nice. And the hands omg the hands are amazing ;;3;;
Okay the thumb isn't but
that's cause the bones are a little far back there
void narwhal
if you wanna use the IK for animating you can always export it and use it on the one with blendshapes
void narwhal
but still gotta setup the armature for the IK one aswell for vrchat
lilac rover
i think i'm just being lazy cause I spent like 2 hours modeling this morning before 8 hours of work training xD
void narwhal
and bake it
void narwhal
when in doubt just say "it just works" everything will be fine
lilac rover
eh
lilac rover
if i could figure out why the vrc jaw bone decides that it wants to keeps mouths open forever
then i could probably fix that at least and be lazy about it
but there really isn't documentation on why that happens
just "don't use it, use blendshapes"
which personally if we had facial tracking somehow that could be neat....
void narwhal
i believe it might be based upon view position and the muscle settings
or related
either way jaw flap bone is bad it looks like a puppet
you can search this discord for other people experiencing similar issues with perhaps a solution
sometimes you will find more than simply googling
@lilac rover actually i think i just realized your issue with the jaw bone try unassigning it in the rig settings in unity
void narwhal
i think it is dependent upon the settings within the descriptor not* the rig
void narwhal
🤷
lilac rover
i'll give a go soon
lilac rover
"the angle of your hip to your thigh bone should be 180 degrees. This one is 173"
-.-
i am far too lazy to go fix that
void narwhal
you can just ignore it
void narwhal
it just works
lilac rover
well
in good news
the mouth isn't open
in bad news, jaw flap doesn't work lol
¯_(ツ)_/¯
i'll figure it out eventually
void narwhal
😢
 vocal ermine
How do I put VRM Helper into Blender?
 north remnant
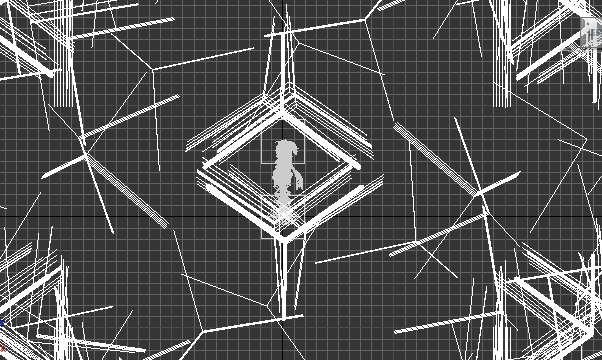
anyone can tell me how to get rid of this mess of lines in 3ds max when opening FBX files?: http://prntscr.com/nq7ufp
 coarse saffron
So, I've decided to start learning modelling, gone through blender tutorials and just about to start figuring out how to tackle my first modelling project. Question is what's the deal with tris vs quads? The reality is, most vrchat models seem to be made with tris, yet quads generally seems to be better I've read, and by default blender is set to quads. What should I do?
void narwhal
quads are used during the modeling process mostly due to subdivision and other tools and functionality
but you can model with tris assuming you aren't going to do retopology
and you are making a low poly game model
 willow lintel
Please set your User Preferences' 'Translation Branches Directory' path to a valid directory"
What is this
void narwhal
did you delete stuff within the blender local folder or something?
coarse saffron
What's retopology? Heard of it, but don't know more than that.
void narwhal
i assume it is related to international fonts and you can set the location in the user preferences
@coarse saffron it's basically a process to reduce the polycount and to give clean topology for deformation
think of it as though you are making a wrapper around the existing geometry you created
coarse saffron
I thought that was decimation?
void narwhal
decimation is just a lazy automated messy process
coarse saffron
Well I'll take decimation for now, since I'm the most beginner of beginners 😃
void narwhal
well retopology is at its core a fundamental technique for 3d modeling in general
coarse saffron
I don't recall if it was mentioned in the blender tutorials by blender
void narwhal
onyx juniper
Decimation necessarily gives you a reduced poly count, but does not necessarily give you a clean topology for deformation
 flat oriole
(blender) i have a FBX file about 490 mb with assets, i joined some meshes together and export it again to FBX and after export it is now about 540 mb.. is that normal? my earlier experience was the files get a bit smaller after joining meshes
 empty gulch
hello, i changed weight paint in blender but whenever i export it doesnt seem to acknowledge that i did change the weight paint
even tho in blender it works fine
in unity it uses the old weight paint
subtle jackal
are you actually overwriting the file in your unity assets folder? Unity makes a local copy when you import it
 lament pond
fringe rock
lament pond
fringe rock
Make the legs to far aside wont make the ik go wut wut ?
 plucky crater
I had a similar question to the above actually, my model's feet seem to tilt outwards when standing up in vrc, but they're flat in blender/unity and the bones don't have any roll on them. What could cause that to happen?
spiral sigil
Hi !, I've ran into some issue, and I dont know how to fix it. So I've got 3D model ready and UV mapped, everything looks good, but when I try to import this model with materials to unity,but materials are gone when I click and drop the blender file, and I dont know how include them :/
(I'm new to unity, and I have basic understanding of blender, every help would be appreciated :3)
spiral sigil
Ok, Imma try to check if it works, thanks for answer :>
zinc furnace
Don't use external materials
And definitely do not set the search to project-wide
Set it to embedded materials and then Extract @void narwhal @spiral sigil
void narwhal
yeah if you have it embedded in the blend file
project wide will default to creating a local mat folder in the case there isn't a material in the project already
zinc furnace
Yeah but "project wide" could select the wrong material entirely in case you have anything else imported at all, which is often the case
You don't need to do anything special to make embedded materials work, it already works
By itself
void narwhal
i haven't had that issue though 🤷
zinc furnace
Even without materials
void narwhal
but that's just due to how i work
zinc furnace
If you have two different TDA models for example, one will mistakenly use the other's material
Since they'll both have materials called "body"
Or if you atlas and call your stuff "atlas" or whatever.
Embedded Materials is better because it keeps hard references to the materials. If you wanna reuse materials, you can use On Demand Remap to automatically find them, even project wide
void narwhal
ok
spiral sigil
I mean, If I use embedded materials, then I cant find any
zinc furnace
Set it to use embedded materials, then hit "extract materials"
It will make new materials in the folder that you point it to.
And these should still have their texture assignments from Blender, such as diffuse and normal maps
spiral sigil
well, I have materials, but not the ones that I needed
I mean those are from that model, but new ones are missing
Have i missed some step in texturing ?
void narwhal
materials but not the one you needed??
like did you add new materials if so did you reimport the asset?
or is the issue simply you're missing textures
void narwhal
far as i understand there isn't a "primary" asset
you can delete the existing one in the scene or the asset and insert the new one
or don't even bother deleting and throw it in and it gets renamed
spiral sigil
Where can i find assets folder ?
void narwhal
you can right click assets and show in explorer if necessary
you can drag n drop into that section aswell
spiral sigil
Can i describe more in deph my problem to you i priv chat in a second? You'll know more then and I'll try to give as much info as i can
void narwhal
you can also do it here but sure
spiral sigil
Ok, but i didnt want to spam
void narwhal
this is a little off topic i believe this is more suited for #avatars-2-general anyways
void narwhal
ok
spiral sigil
Thanks a lot :3
signal zenith
Hey guys, I'm following this YouTube tutorial online on how to make avatars, but after looking at the thumbnails for the next videos he does they cover the entire body and than put clothes over them and I don think that would be necessary for vrchat especially since you wont see the underside of the shirt.. Should I skip some of tutorials and move on to how to make the shirt and hair or should I keep watching them all? The Youtuber I'm watching is named Daniel Kreuter
subtle jackal
Having a base model can be beneficial if you want to have different outfits later on.
signal zenith
True, though the model I'm working on may need some outside help since I know some parts of it don't look right and I'm never really sure if I can fix said problem parts.
coarse saffron
So I've been modelling a character so practice blender and its shortcuts, mesh editing tools etc. I know very little in the grand scheme of things, but from what I've read so far, avoiding tris (if possible) is generally better since you get better deformation, easier for loop cuts etc.
This is one of a few sections that hasn't joined together too well and I'm left with a tri (center of model) Anyone know how I could remove it?
Don't worry about how I'm modelling the character, as I'm sure there are better practices overall :)
Thanks!
dull canyon
tris aren't bad necessarily
especially in a place like this that nobody will ever see normally
what you wanna pay more attention to is your edge loops tho
coarse saffron
Just like how most people seem to answer it
I just want to know, in case I ever need to, figure out how this problem might be solved
dull canyon
cut the quad to the left of the tri in half
dull canyon
that shouldn't matter
coarse saffron
Its very difficult to show even from another angle, since they are all small and close together :/
dull canyon
you just add 2 vertices
dull canyon


 coarse saffron
Is that kind of a quad not bad? Seems like it wouldn't be that different to having a tri in the first place haha
dull canyon
that's the point.
and no, it wouldn't matter really afaik
in some cases tris simply can't be avoided
coarse saffron
That just screams "bad practice", but then I don't know what I'm doing anway ha
Yeah I did wonder if that would ever happen
dull canyon
you're also missing a lot of geometry because you don't have any vertical edgeloops yet
so your edge flows will be fun later on
coarse saffron
well I was planning to bevel it all at some point
coarse saffron
But even testing that it didn't work out too well ha
I'll add those lines I guess and see how it deforms if/when I get to rigging
Thanks
dull canyon
o7
disclaimer: take everything I say with a grain of salt, I have no idea what i'm actually doing either
coarse saffron
Join the club
Realised until I actually try to make something on my own, I will never learn anything practical
So I just started trying something. Don't really expect it to work well
dull canyon
well, I'm kinda tired of seeing the same base models everywhere so I want to learn to make my own
that's how I've always gotten into learning things
 daring roost
any idea about this blender error
dull canyon
 coarse saffron
Well I think we can both agree that your resembles a human body a lot more than mind does ha
dull canyon
¯_(ツ)_/¯
void narwhal
the only thing that can't really be avoided is 3-poles or 5-poles for specific surfaces/curvature
which only matters for subdivision
tris are mainly used for game ready models for better deformation with lower polycounts
you either work with good topology in mind for a game ready model
or work with a high poly subd then retop it
ripe lotus
The topology for that entire area is incorrect
Its not something to be fixed but to be redone correctly.
 willow badger
What number of triangles to aim for for avatars?
small cloud
70k is max, but more doesn't mean that it always looks or works better
small cloud
gotta retopo
dull canyon
so, what all can you use for your model in Unity? obviously the model itself, textures, normal maps. what about bump maps? glossy maps? materials in general?
willow badger
Bump and displacement maps ?
subtle jackal
Height maps tend to look pretty weird in VR from my experience. For regular PBR I'd say go with Albedo, Normal, Roughness, Metalness (or smoothness, as unity likes to use, because y'know, to hell with standards)
And of course if your avatar uses emission then emission maps and masks if necessary