#3d-modeling
1 messages · Page 53 of 1
 fossil inlet
 barren quiver
Then I would advise you to keep your advice to the things you personally have experienced.
fossil inlet
My point stands.
I have much more experience in game development than you if you're going to try to pull that card. Please.
There's a reason the max SDK limit was 20k for the first year of VRChat's lifetime.
barren quiver
That's really no excuse for parroting what other people have told you, unless your clients are experts themselves!
fossil inlet
If my clients are other creators, I tend to trust their judgement.
I wouldn't have said it if some random had told me that. :p
Cutting out dynamic bones doesn't help, by the way. The reason dynamic bones have a bad rap in VRChat is you get these "3d artists" who take an MMD model with 150 skirt bones and add dynamic bones and colliders to all of them.
At that point you're essentially trying to simulate cloth the hard way.
barren quiver
That's wrong
fossil inlet
You only need a couple of dynamic bones to accomplish a satisfactory result.
barren quiver
That's true, but because dynamic bones are single threaded, they still have a high performance cost because of how linearly they scale.
fossil inlet
Unfortunately there's no other way to accomplish soft physics in an optimized way without them. Cloth is out of the question for VRChat, I don't know why they have it enabled, to be honest.
barren quiver
No arguments there...
fossil inlet
While I have you, did you change something with your shader between Unity 2015 and 2017 versions?
Seems different but I can't put my finger on it.
barren quiver
Yes, I think the biggest change between them was an improved method for determining light directionality
The current version in testing, 1.3, has some further improvements on that too
I've got a comprehensive list of changes between each version on the Gitlab page
fossil inlet
Ah I'll have to check it out. Thanks!
barren quiver
If you have any questions/comments about my shader, just mention me and I'll try and respond as soon as I can!
 umbral crystal
cloth is pretty decently optimized
considering its handling much more than dynamic bones for what it is
also prob run on gpu physic thing
but still not the best
 zinc furnace
@fossil inlet it says it on the site
Over 70k is very poor, under is Good
It's specially mentioned that way, but the behavior is also consistent with everything else
 fathom heron
When not previewed, my model is stuck in the animation position. Tried to fix it by recording t-pose, which works until I do the preview again. It just breaks again and I try to fix it again.
fossil inlet
@zinc furnace except that’s not the case at all, and avatars are divided into tiers based on poly count. 70k is just the maximum, not the maximum for the best tier.
My point still stands though - there isn’t a single avatar that needs to be over 31k. You can achieve detail perfectly fine with better baking and retop techniques.
Your avatars aren’t as detailed as you seem to think they are - just unnecessarily high poly.
zinc furnace
Yeah but I can't get the best tier anyway
Because of a variety of reasons
Also, properly making something low poly essentially involves re-modeling it using the original as reference
Such as retopo
fossil inlet
Your point?
zinc furnace
Hey don't ask me, you were the one who initially pinged me for this discussion. @fossil inlet
Fewer polys is good, but many people don't have the 3D modeling experience required to properly retopo something.
fossil inlet
Inferring that you’re too lazy to retop is a pretty terrible argument for not going under 31k.
zinc furnace
With the current limits, the game is well within the recommended scale that Oculus recommends
I didn't say "lazy" but feel free to keep putting words into my mouth
fossil inlet
“Properly making something low poly essentially involved re-modeling it” “such as retopo”
Yeah, it does. Doesn’t stop you from doing exactly that
zinc furnace
If 20 people are at 70k polys, the world itself can still be 700k polys without going over the limits as recommended by Oculus
And my world is like 70k polys in itself
fossil inlet
I don’t care what Oculus recommends.
zinc furnace
k
fossil inlet
There’s still no reason for your models to be over 31k. They aren’t that detailed.
zinc furnace
Sure there aren't any reasons, if you ignore the reasons everyone else is listing.
fossil inlet
• Lazy
...?
I’ve worked in the industry as a 3D Character Artist for 6 years. You people just need to learn to optimize your models rather than saying “eh, good enough”
zinc furnace
If only your degree came with common sense
 mental blaze
quitting ahead is the fun part 😄
zinc furnace
I never said "lazy", if you're going to keep putting words into my mouth then you're just gonna be talking to a brick wall. Cya 👋
fossil inlet
This isn’t the MMD channel. You shouldn’t be talking if you aren’t modeling everything yourself.
 mental coral
I have to say, rigging for VRchat is actually teaching me a bunch of things fast that I wasn't figuring out just by doing tutorials / making my own game models.
Visemes are cool as heck. Any good tutorials on cloth / tail / hair simulations? I haven't even tried that stuff yet and I want to.
Also: I've never bothered to re-topo manually but decimating a model is... criminally bad sometimes so maybe I should. Usually I start from low-poly though so I don't have to. Only reason my models balloon in tris is from using subdivision surfaces.
fossil inlet
Decimating is okay for static object like rocks or things that aren’t going to be rigged, but for avatars you definitely want to retop
Your edge flow will control how your avatar deforms, so something as erratic and inconsistent as decimate is out of the question
mental blaze
what if they avoid decimating areas that bend
fossil inlet
Generally it’s good practice to retop your entire thing; you can tell a good modeler by how clean their edge flow is :p
Also looking for specific loops and rings which are important in making a character deform correctly. Everyone can tell when you do something like zRemesh or auto-retop because it lacks those features
mental coral
I work in the same building as pro animators so I got some good Crits on my edge flow.
fossil inlet
👍 that’s an excellent resource
mental coral
So useful! Things you don't get from most tutorials.
mental blaze
wish i could meet people in my field in person
mental blaze
the ticket prices :<
fossil inlet
...are a tax write off if you work in any professional capacity :x
umbral crystal
oof
 versed ember
https://cdn.discordapp.com/attachments/467218861167738890/543230046194892822/unknown.png Thanks to whoever said that the textures were lacking it pushed me to upped the rez and make it a little brighter to make it pop up now i don't look like I'm from a 2bit game.
 fossil inlet
I don't think it has anything to do with the texture resolution, they just look overblown and corrupted
versed ember
Then how would i make them less overblown and corrupted i just wanted to make them look less pixilated but if you see a problem i open to input
fossil inlet
Wait for the full game to release for better models/higher res textures :X
versed ember
Thats a plan then imma release them to people who ask cause they are gonna have awesome rigs and more options for customization.
 wet kiln
Can shapes be bent to make something like a walking animation?
 royal steppe
It doesn't work as well as you would like because the vertices go straight to the end location instead of arcing like bones would. Rigging isn't as bad as everyone thinks once you get used to the proper tools to do it.
wet kiln
I'm a complete noob to any of this, so I don't know how to go about doing things myself, which is the reason I come here to ask questions.
¯_(ツ)_/¯
 visual vigil

 daring crow
Looking great!
 stable edge
Hat band looks like it's clipping a bit though
zinc furnace
Could be the angle
mental coral
@versed ember That texture looks easy enough to reproduce too. What's it from?
 ripe lotus
Looks awesome @visual vigil!
 waxen pulsar
Can blender turn a leg with muscles into a relatively smooth one? I want the shape to move towards that of a cylinder
I've tried Googling it, but none of the solutions are related
versed ember
It is from a game called anthem
umbral crystal
blender can do a lot of things if u either do it manually or semi-manually or sometimes theres tools for it
waxen pulsar
I want a tool for this, but I don't think it exists. I'm still kind of new with Blender though
umbral crystal
can always try shink/fatten with proportional editing
waxen pulsar
Thanks, I will try. It's much easier to mess things up than to make them look better though
 humble stream
how do you make a custom avatar
 latent charm
@waxen pulsar I'd have a look at the smooth or laplacian smooth modifiers, both of which you can lock to a set of axes, so you could make it only operate on x and y, or only z, etc.
waxen pulsar
I will give those a shot, thank you!
latent charm
Also that there's a slot for a vertex group so you can limit the modifier to specific regions and intensities.
 knotty storm
I'm attempting to use the sculpt tool to see how effective it is in the creation of floating islands.
So far, I'm satisfied with where this can go. https://i.imgur.com/GVjC9Nj.png
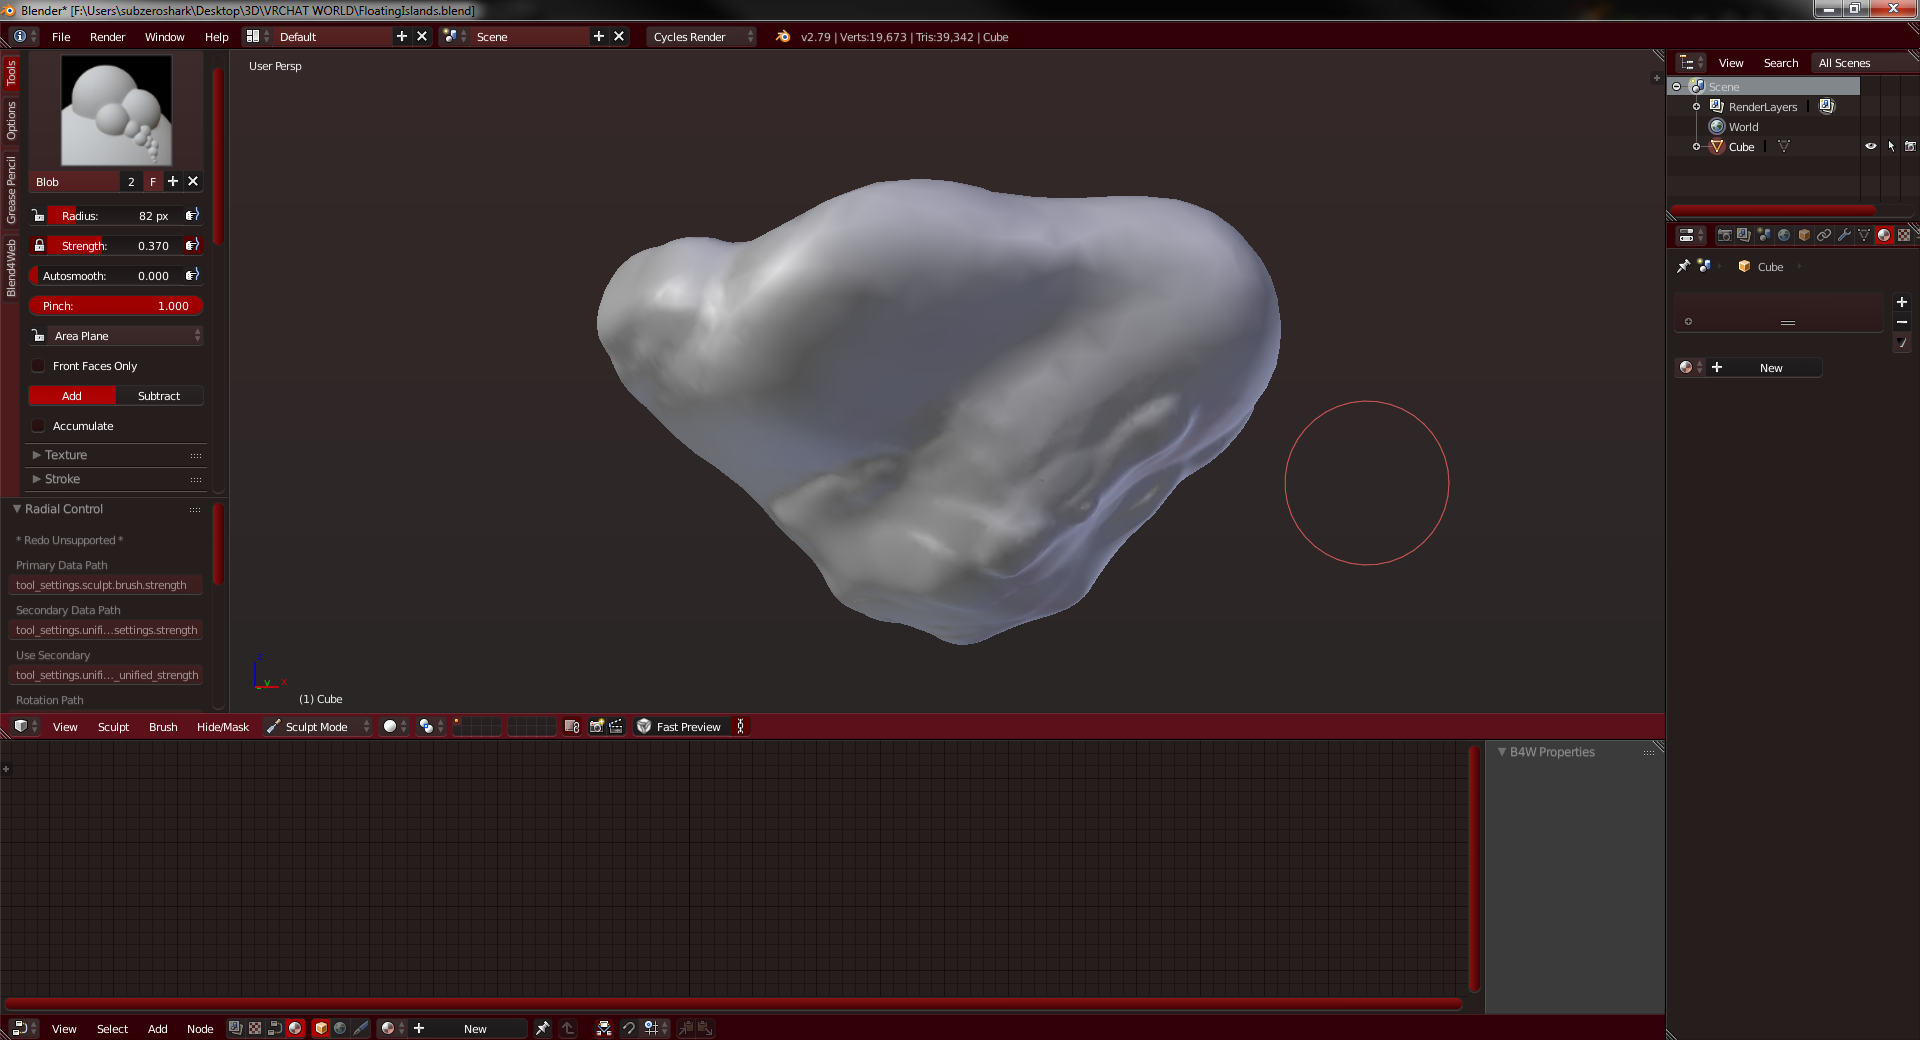
I scarcely use the sculpt tool. This is one of the first times I've used it so extensively.
 mortal slate

dfajsldkfjsdalkfjs
its like blender but ill update when i get it unity ready if im able to lol
 tacit chasm
i need help

I have this daft punk model i ripped from SFM, and I can get the full model into unity, but I cant texture it.
 tacit chasm
all the textures i've compiled are TGA
 mental topaz
yi extract materials in unity after you select the model
and tga just an image format
tacit chasm
I thought i had to. SFM stores models and materials seperately in VFT and MDL files
mental topaz
when you covert mdl it do materials
 mental topaz
select model in Project, and extract materials in material tab

 mental topaz
which shader are you using? its broke
tacit chasm
oh fuck
I forgot I had to reinstall
I dont have the sdk or cubed shaders installed
okay so sdk and cubed shaders are in now
he's no longer pink
but he's still gray
the model i'm using didn't really come assembled, they're all SMD pieces
I assembled them in blender and sent it out as a usable OBJ.
So should I maybe just reformat each pieces as an individual OBJ?

What should I do?
mortal slate
mabe try to export as fbx??
tacit chasm
oh?
see the thing is
the helmet is in a few seperate pieces
i dont know why

it's 4 seperate meshes

why the fuck


What do I do? T_T
I cant figure out how to texture it in blender either.
umbral crystal
first of all don't ever export with that many meshes just because it was made that way, try to make them all go together into a single mesh if possible
tacit chasm
it was like that when I got it
umbral crystal
also the texturing part is simple look up how to apply textures online in blender
it doesnt matter
#avatar-optimization is a thing
and there are limits and ratings u can read about on the docs
tacit chasm
well the model I put into unity is all one mesh I think
mental topaz
ctrl+j after you select meshes to join in blender
umbral crystal
or use CATS fix model or whatever
umbral crystal
i told u 2 look it up
umbral crystal
If u have the images u can pretty easily change textures around until it applies the right one
umbral crystal
and ur probably not even using a mode that can render materials
such as texture, material, or render
tacit chasm
i'm not THAT bad

 umbral crystal
r u in the material draw mode and is the light set to hemi
 umbral crystal
u should not unwrap
tacit chasm
this
umbral crystal
thats a really bad idea if u have textures
unwrap moves the UV coordinates around but it doesnt move the textures around so
completely ruins it
tacit chasm
so what do i do then
umbral crystal
u don't unwrap..??
umbral crystal
u literally did it before
tacit chasm
assume i dont know ANYTHING
umbral crystal
bc ur probably again
not in material mode
bc u can view as solid, wireframe, render, texture, material, etc
 umbral crystal
lol
tacit chasm
i want to die
see theres still
the helmet
hmm
I'll try this is and see what happens with the helmet
omfg it was THAT easy
it's perfect now
okay
ALSO
Can I use normal maps?
The kit came with them, how would I use them if at all?

this stuff
oh wait
i think i figured it out
yup i figured it out
umbral crystal
mark as normal map and turn on normals while turning off colors
 mental topaz
why you need normal map in blender? are you want to do render? because unity create own materials and that stuff is just for things inside of blender )
mental topaz
in unity materials have a property "shader" aka code about how it will look, and some of them (standard one for example) have ability to normal maps, so can put them in materials settings after
umbral crystal
blender materials != unity materials
but doesnt hurt 2 add them 2 test
they do however carry on export
if u have all textures stored in unity
should automatically map them to the standard shader
tacit chasm
they do
umbral crystal
if u mapped in blender
tacit chasm
blender and unity are both using the same source folder
umbral crystal
doesnt mean it will stay mapped when using other shaders tho
tacit chasm
So I combined all the helmet meshes
so now it's just the helmet
so all I have now is suit, helmet, hands, and neck
Should I join more of them?
mental topaz
you can merge everything together for optimization purposes, + separated meshes can cause bug of hiding on some angles of view
tacit chasm
Is there a downside?
mental topaz
i'm usually combine everything into 1 mesh, if that not a world map with 15m polygons )
mental topaz
do shape keyses can replace this thing for body swapping with scale to -1^10? 🤔 like even with weights with so small size it not must be visible
umbral crystal
u should not use shape keys for that
say u have 10 different outfits
u would have 1 face and 10 meshes
but u only have 1 outfit active at a time
so in turn thats only 2 skinned meshes at a time
tacit chasm
Oh okay.
umbral crystal
better than say havig every single outfit mixed into 1 mesh
and also polygon limits stricter for that
bc all the active polygons
mental topaz
what a detailed 3a outfits you are planning to use )
tacit chasm
lol
umbral crystal
like im saying
if each outfit is a total of like 20 sometjing k polygons
20k*10 is 200k polygons
well over the limit
but again its literally nothing if ur activating one at a time
each could even have their own material as its still only 2 mats being active
mental topaz
those mmds that 10 outfits is more then 50k )
umbral crystal
but yea overall
mesh body swap better than blend shape body swap
performance-wise
mental topaz
did you export materials from your model in unity? and move your model after you move textures?
tacit chasm
Yeah, all the textures and normal maps are in here.

Attempt 2 is the model I just finished in blender, which had all the textures applied
mental topaz
do you have more then 10 textures (except normals)? if not try to assign them all by yourself) you can even check which one in blender, after you export materials from model properties in unity
tacit chasm
and Daft Shared and Thomas are where the actual textures are stored
there are 6 textures I used, not including normals
mental topaz
select your model in this Project folder, then in Inspector you'll see some properties, in the last tab you'll see materials with button called export (or something like that), then you need to select folder where to export them, so after you can drag textures into each this material (for that you also select material in Project folder and in Inspector you'll see properties of selected material, and you need to drag the texture into box called Albedo)
@umbral crystal actually both things are good but depends on what you have, until 1 material + shapes has better performance then 2 materials + 2 meshes shapes method will be better 🤔
 umbral crystal
u don't **need **multiple materials
mental topaz
@tacit chasm heh
@umbral crystal by materials i mean draw calls cause of them (yip i don't know stuff :d just draw calls word)
umbral crystal
ew did u click legacy materials
tacit chasm
no, that's under the embedded materials menu
umbral crystal
o ok good
 umbral crystal
u can just extract
tacit chasm
How?
mental topaz
@tacit chasm send me .blend i'll check
umbral crystal
extract material button
mental topaz
he's button is grayed )
umbral crystal
into a folder called material (make if there not one)
tacit chasm
it's blocked off, yeah
mental topaz
try to delete all this models from unity and materials if you extract them before and retry, but keep textures
tacit chasm
ok I deleted and reimported the whole Paft Dunk folder
which is where everything was stored

it's there now
mental topaz
you exported model as .fbx?
mental topaz
that's a problem heh
tacit chasm
It is?
mental topaz
obj doesn't contain bones and etc, so you'll be like a solid object, then second obj also export mtl file with information about materials, you doesn't import that with a model so its create one material for the whole model
so do the same but export as .fbx or if you want to be static import obj with mtl (actually for me .obj have more file size then .fbx)
tacit chasm
okay so go back to blender, and export the textured model as an fbx?
mental topaz
yes
tacit chasm

Well that's a good sign I guess
the normals are in the asset folder though, so... Do I have to mark them as a normal somehow?
because right now they're TGA's like all the other textures
mental topaz
you need to click fix now, unity just will mark them for itself those images as normal maps
 mental topaz
extract materials and select them all, then near Albedo box in Inspector tab you'll see box with " - ", click on it and choose white color in color picker
box that on the right side, because left one for the textures
 mental topaz
also to be not static and have all anims you need to select your model and in Inspector window go to Rig tab and change from Generic to Humanoid
umbral crystal
do u know wat an obj file is lol
it doesnt even support bones or animations
u actually dont even need 2 export at all
unity can read straight from a blender file
but if u want 2 thats ok
and u still need 2 configure the model after its humanoid 2 check bone mapping and rotation
and for vr users will need 2 apply full body tracking fix
also typically smd model have broken fingers
can be fixed by tposing in blender and reseting pose in unity
or fixing finger bone direction and enforcing tpose again
mental topaz
rotating them in Configure
tacit chasm
Is there a way to lower polygon count in unity, or do I have to do it in blender?
cause i'm WAY over the limit
100k

and also this^^^
fossil inlet
Yeah, delete edgeloops or retop it.
There's no reason you should be even close to 100k
tacit chasm
111,195
fossil inlet
What did you do, subdivide it?
tacit chasm
i didn't make it
tacit chasm
because we just spent the past two hours fixing it in blender
trying to get textures to work
^^^Read up^^^
So how do I do those things?
zinc furnace
This channel is about 3D modeling in general, not necessarily about doing everything from scratch. The rig question is offtopic though.
You go back into Blender to lower the polycount. @tacit chasm
So either retopo it or use decimation
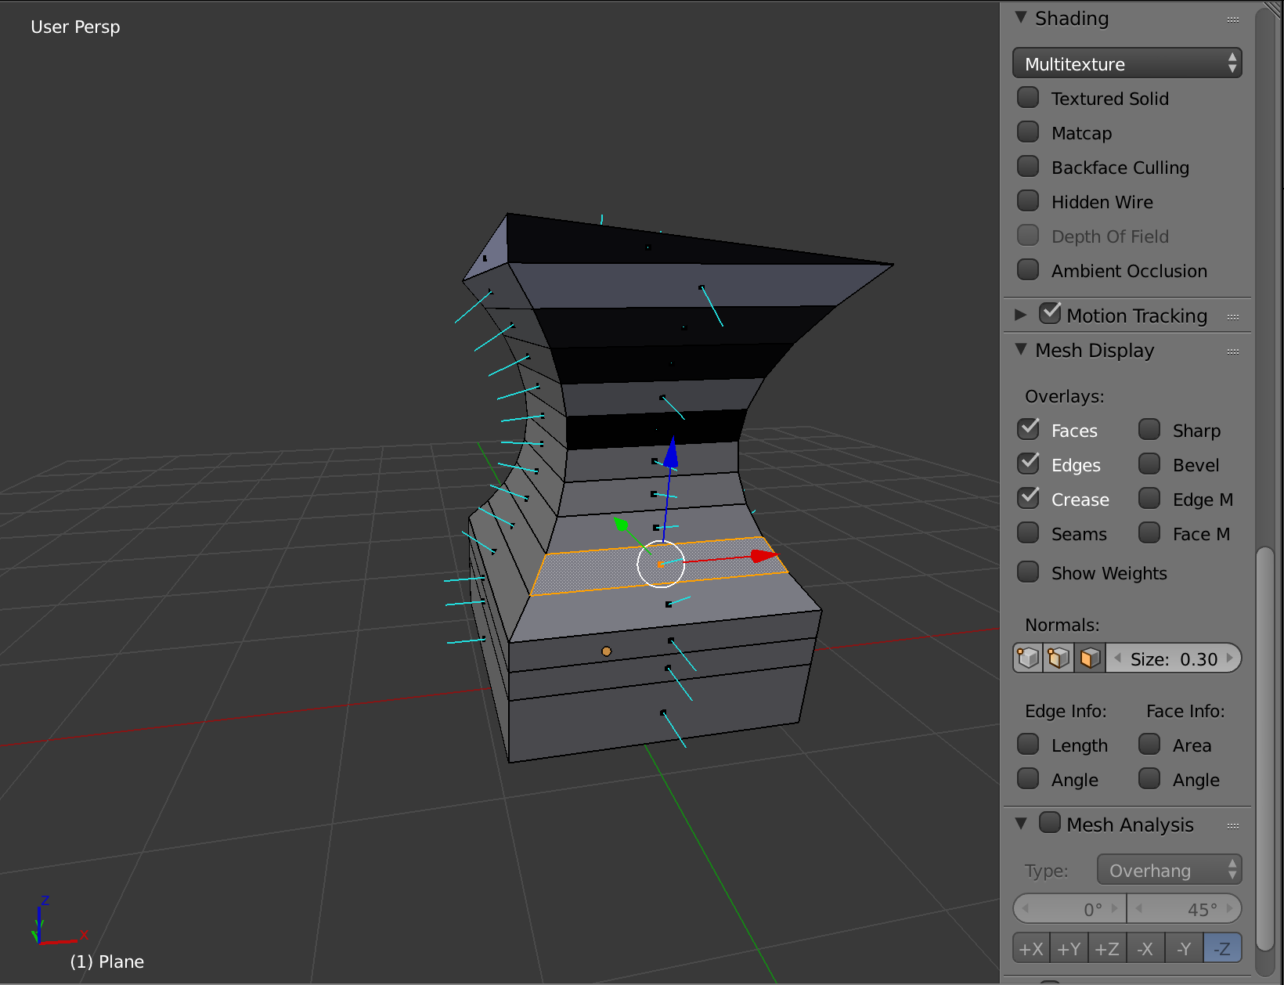
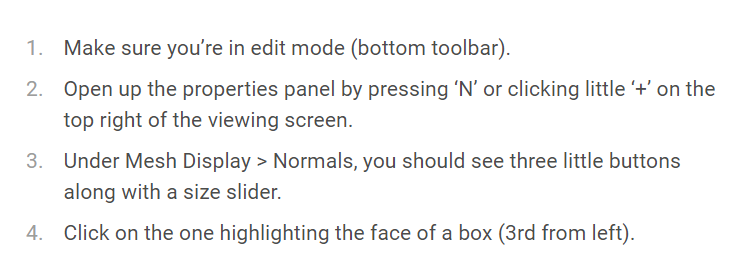
Is there an easier way to view face normals in Blender? I find it a little hard to tell sometimes and don't want to keep toggling backface culling
umbral crystal


also usually mmd shirts and pants etc have holes on the inside
can be fixed by extruding or using solidify modifier then removing interior faces
zinc furnace
@umbral crystal perfect, thanks!
 muted goblet
hello? can anyone help me with a development of a small mobile app im making?
muted goblet
well i need 3d modeling
its something super simple and mod's im so sorry if this isnt allowed
I just need one simple model
fossil inlet
You can commission someone and pay them for it :p
You're asking for a specialized skillset; expect to pay quite a bit more than minimum wage.
 subtle jackal
https://i.imgur.com/B1eoRKv.png while my first avatar was technically a success I wasn't super happy with the results, so taking a new approach! Pretty happy so far. Hair is such a pain tho.
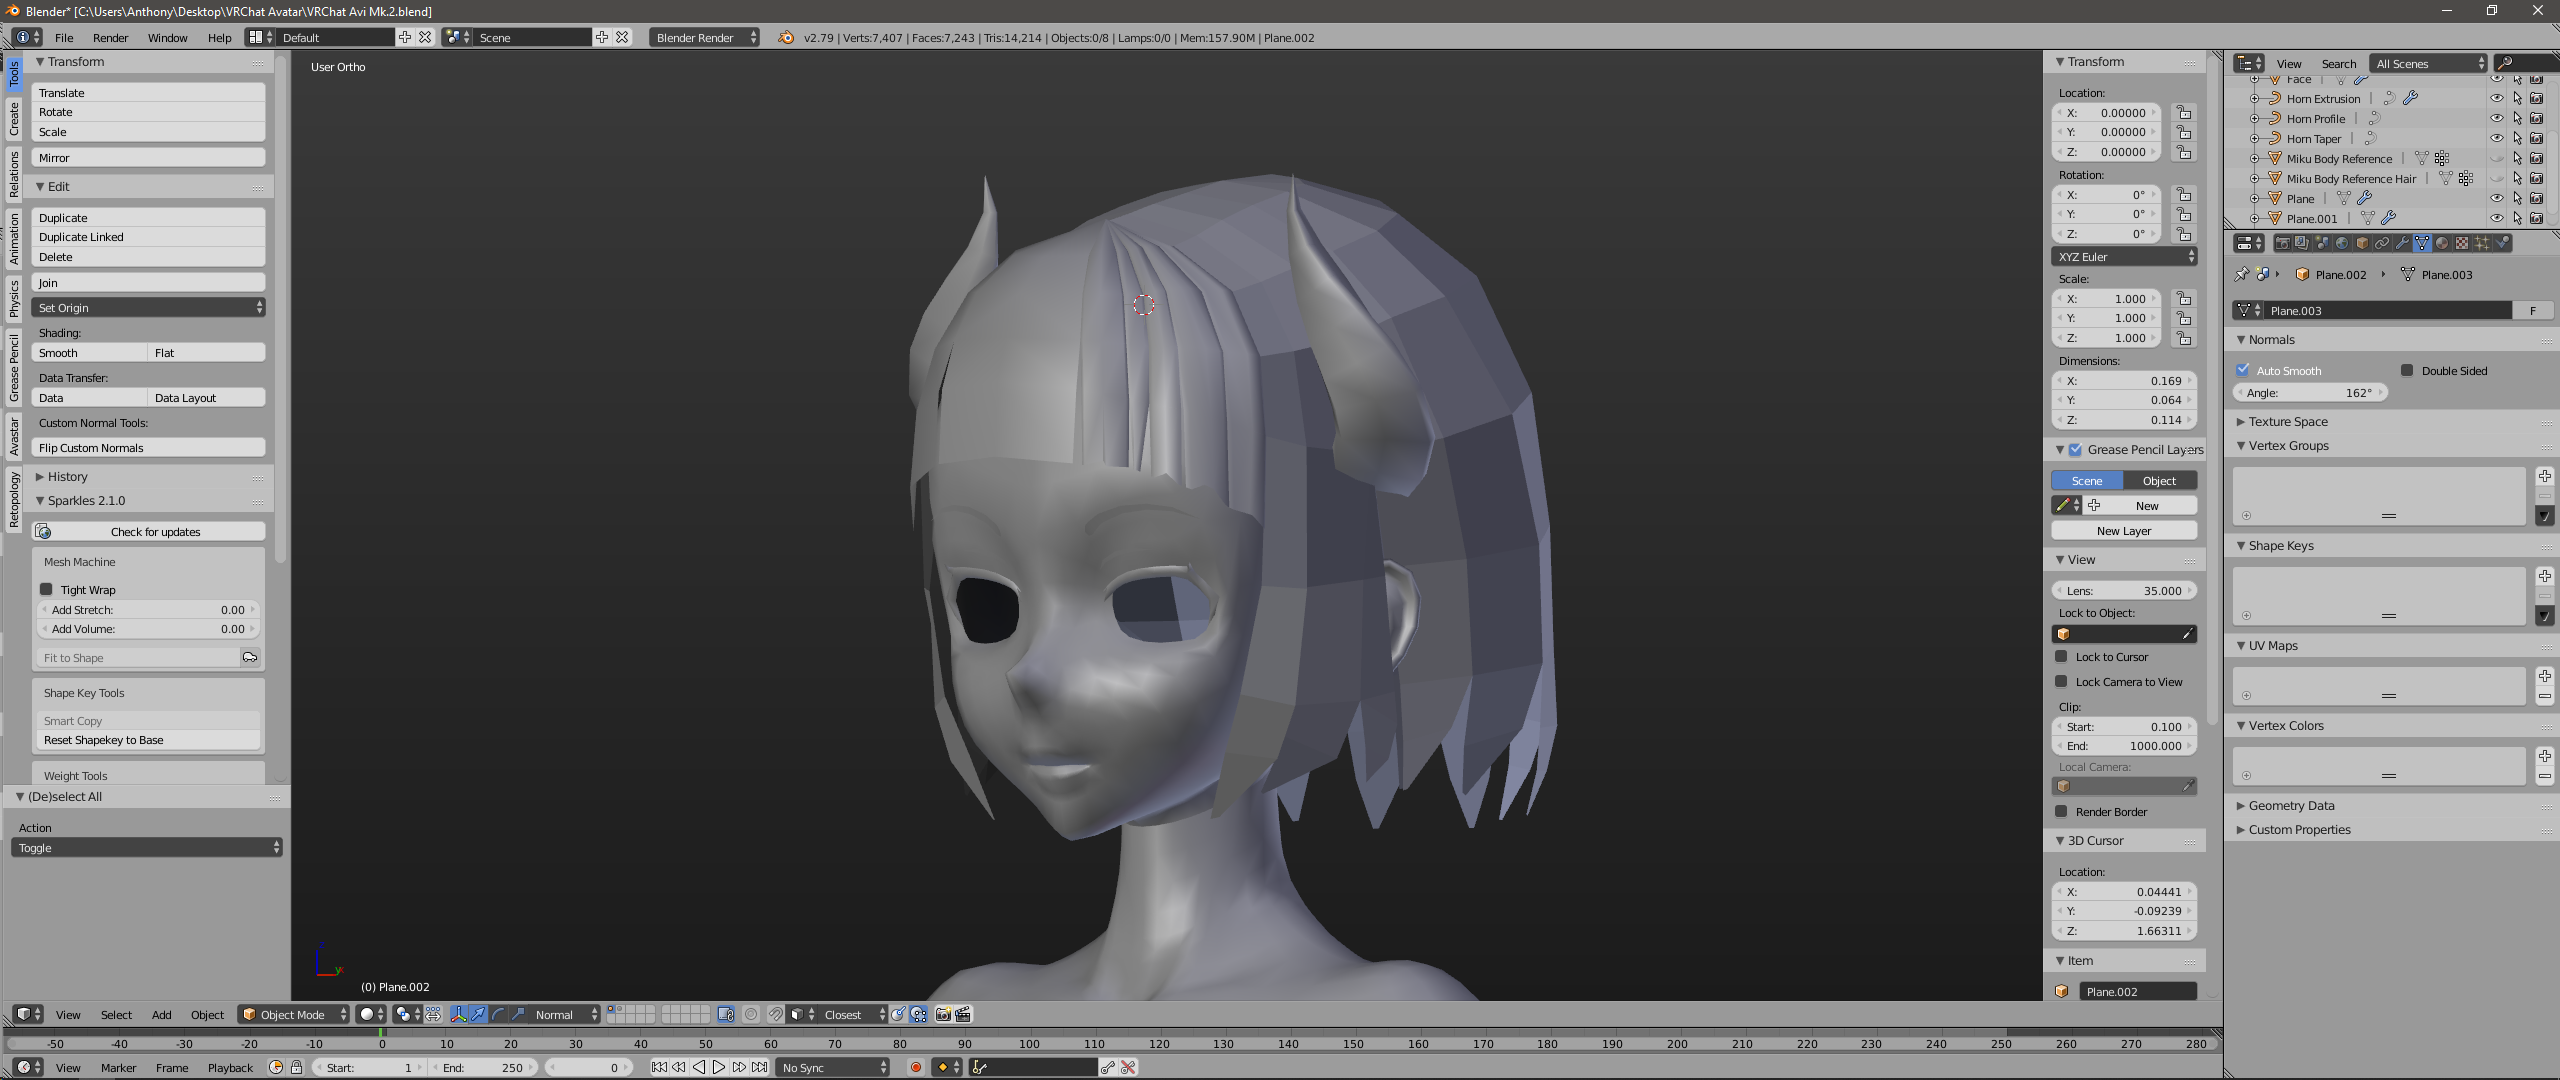
 primal jolt
Does anyone know how to apply surface subdivision to only a specific zone of a mesh, or do i need to create 2 seperate objects?
zinc furnace
Can you select a vertex group in the modifier maybe?
primal jolt
I'll try that hold on
No, i dont see a way to select a vertex group in that modifier. is there a way that im not aware of?
zinc furnace
Apparently that isn't possible. Your only option is to select the area, press P to separate selection into a new mesh, then apply the modifier to the new mesh.
primal jolt
i think we're looking at the same forum post 😛
zinc furnace
Nah, I just looked in Blender real quick
There's no slot for a vertex group so I'm assuming you'll just have to split the meshes manually
You can rejoin them later
primal jolt
sadly :/ IDk how to rejoin meshes yet, however I'm still with-holding my cautious optimism that stitching them together will be easy lol
zinc furnace
CTRL+J to join selected meshes
primal jolt
ty ❤
subtle jackal
You can also manually subdivide parts using the subdivide operator. There's a button for it but I went into preferences and set it to "d" for me since I use it quite a lot
it's quicker and more accurate (and less buggy) than the knife tool for a lot of things 😛
 spiral sigil
I wants to be able to make em but i cant why is that @quaint jasper
 clever cypress
Could you specify which part you're having trouble with?
primal jolt
This is what ive got to show so far for my custom avatar model in blender: https://imgur.com/a/jzYTZ03
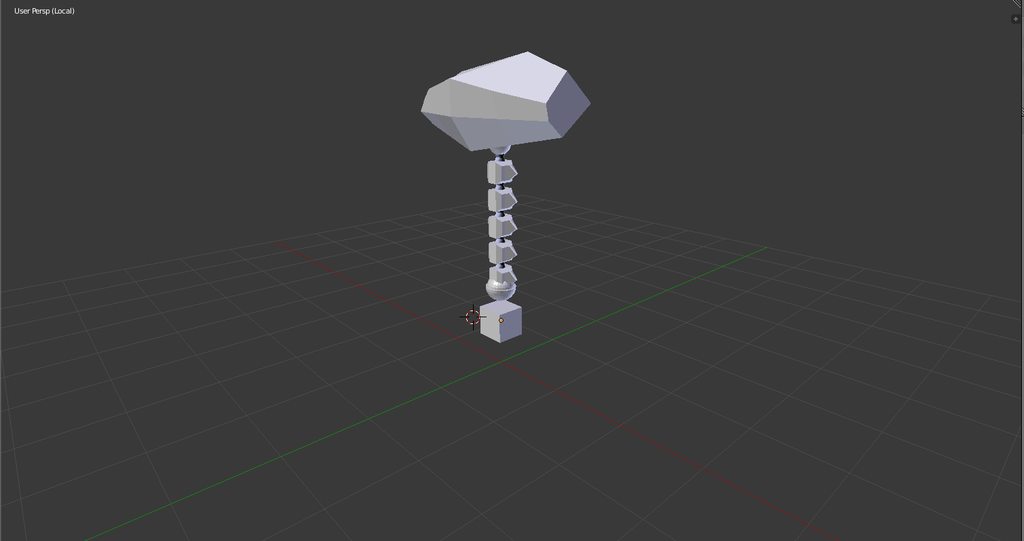
any critiques, comments etc would be greatly appreciated
 silent junco
a spine?
 fringe rock
What is that

 crude frost
it looks like a gmod bg
 shy vale

I saw someone turn this off once before, and wanted to be able to see the actual color I'm painting with. How would I go about this? I'm using blender for textures btw.
umbral crystal
?
umbral crystal
wym 'mark'
 charred echo

okey
have tried to fix this for a long while now
but i can't figure out
why its missing parts off the arm pit and shows a white color on the neck
anybody have an idea of whats going on?
at this point it seems more reasonable to just delete the hoodie entirely and find something else to wear
 swift heart
seems like you've also got some n-gons in your mesh, so try triangulating those if the normals idea doesn't work
spiral sigil
I WANNA 3D MODEL SO BAD
subtle jackal
 fossil inlet
@spiral sigil Your profile picture has never been more relevant.
 long sonnet
hi I'm new and i would like it if some one would make me a custom avatar
long sonnet
oof'
primal jolt
Dont know if yall already know this, but for those who want to optimize WHILE modeling, remove sub surf (as much as you can without loosing aesthetics), select all faces (that apply) > W > shade smooth, it will bring out the smoothness and lower poly for the most part on lower poly areas.
examples (album): https://imgur.com/a/4oZIj6T
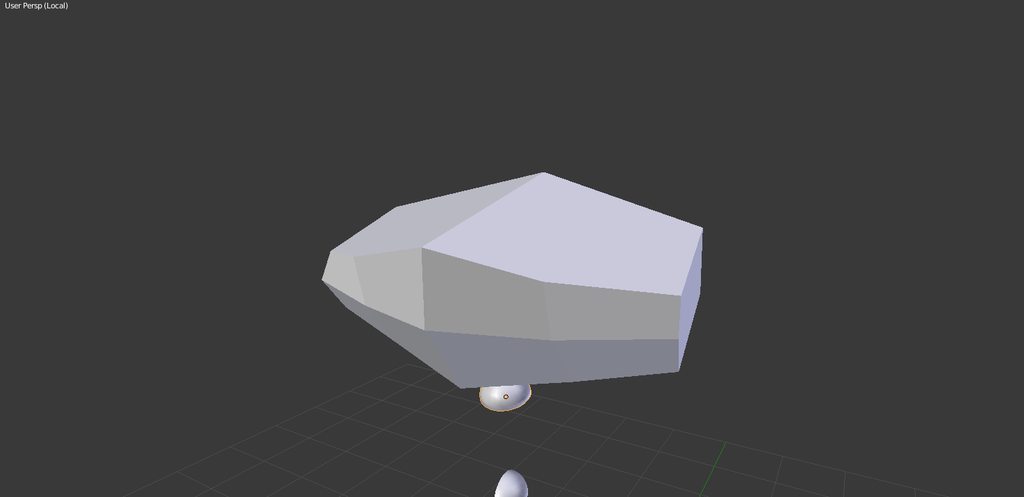 subtle jackal
Did... did you think you had to subdivide a hard-shaded model until it looked smooth? o.O
primal jolt
im brand new to modeling. like, i spent all of my sunday this week watching tutorials and taking notes.
subtle jackal
Ah, well. Surface normals is definitely one of those things you should probably learn quickly lol
primal jolt
Surface normals?
subtle jackal
it'll help you when hand-triangulating parts for the best results on low poly surfaces, and once you get really deep into it, you'll learn about custom vertex normals 😛
yes, surface normals are essentially what decide how your model is lit. Normal maps, for example, alter those normals to change lighting on a per-pixel basis
primal jolt
OwO more?
subtle jackal
Uh, jeez, it's one of those things where there's a lot of information to get into. There are multiple sorts, per face, and per-vertex, for example, and split normals in a way give you multiple normals per-vertex (this is what hard-shading is, essentially)
primal jolt
got a link to the read-info?
subtle jackal
I'm not reading it from anywhere, but you could probably google stuff like "vertex normals" to get some info
primal jolt
Gotchya, thanks! o7 gotta populate my notes...
subtle jackal
a normal is, at its most basic, just the direction something points, and you can manipulate this data for different results
one of the more common ways to manipulate it is to smooth the lighting transition between two split meshes for technical reasons, for example if you have multiple heads for the same body, you could keep the head separate and manipulate the normals around the neck so that they all look seamless, even though the meshes aren't actually joined
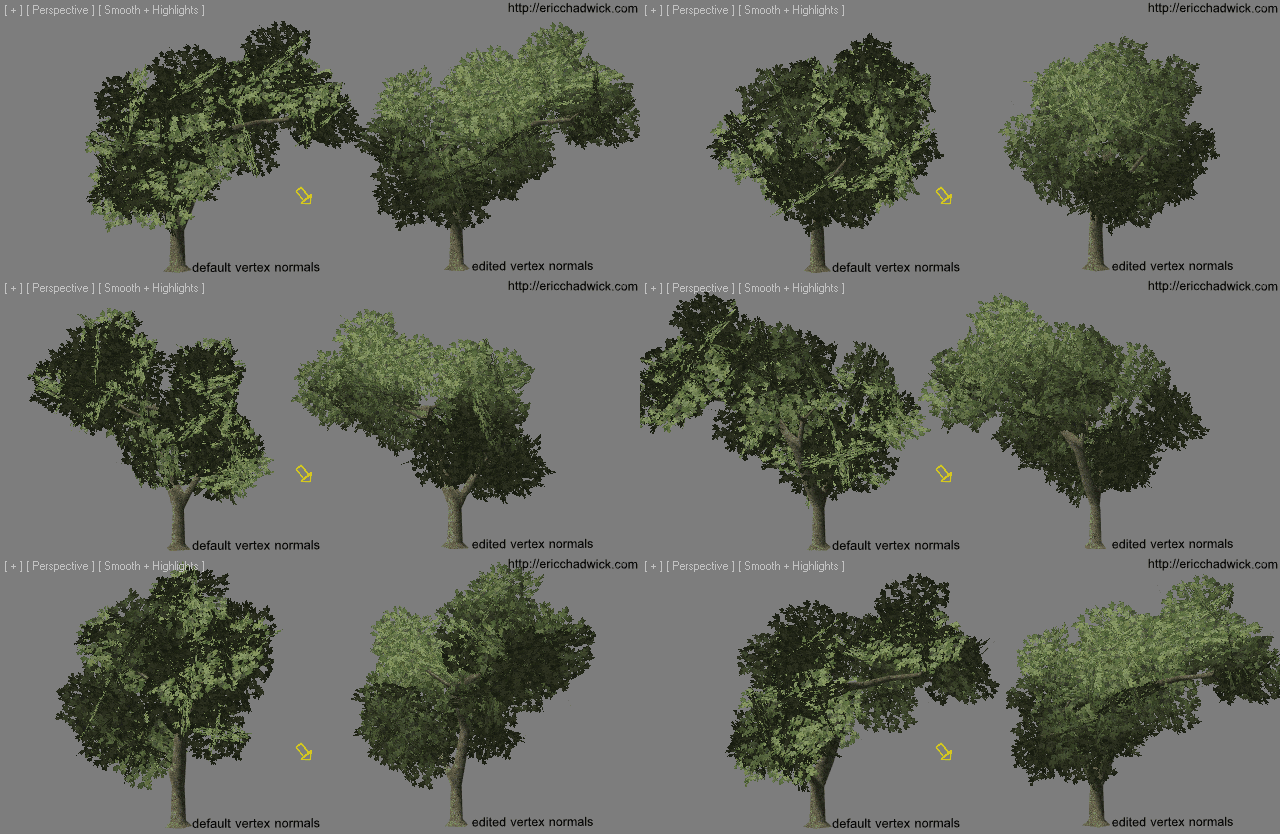
it's also common to adjust the normals on trees in low poly games so that they are shaded more nicely
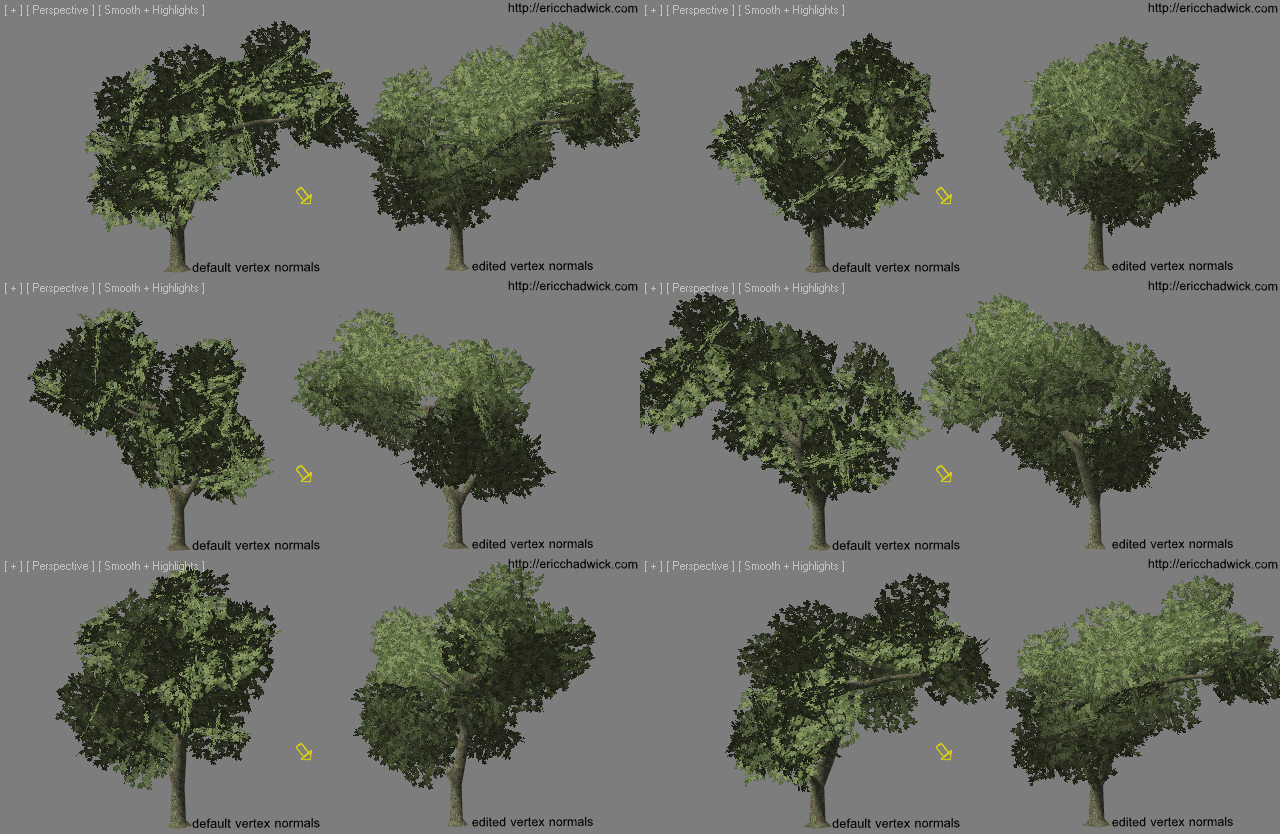 primal jolt
(obv bluehole visual devs didnt learn this till after pubg was released by the looks of it)
subtle jackal
lol
primal jolt
Blender manual has a really good explanation of how to use etc
subtle jackal
https://www.artstation.com/artwork/rdoWe only tangentially related but this looks pretty neat too
primal jolt
defo saved, will be useful for making map visuals, thats my next big project
@subtle jackal to join all meshes without all taking on all of the modifiers of the others, i should apply them (the modifiers) before merging right?
subtle jackal
yes
primal jolt
kk ty 😄
subtle jackal
some modifiers allow you to use vertex groups, so it's possible to have certain modifiers only on parts of a joined mesh, but in general you'll need to apply them.
primal jolt
My first avatar is going to be really simple to just dip my toes into the lava that is blender modeling 😆
First avatar progress going okay: https://imgur.com/a/JxiFU41
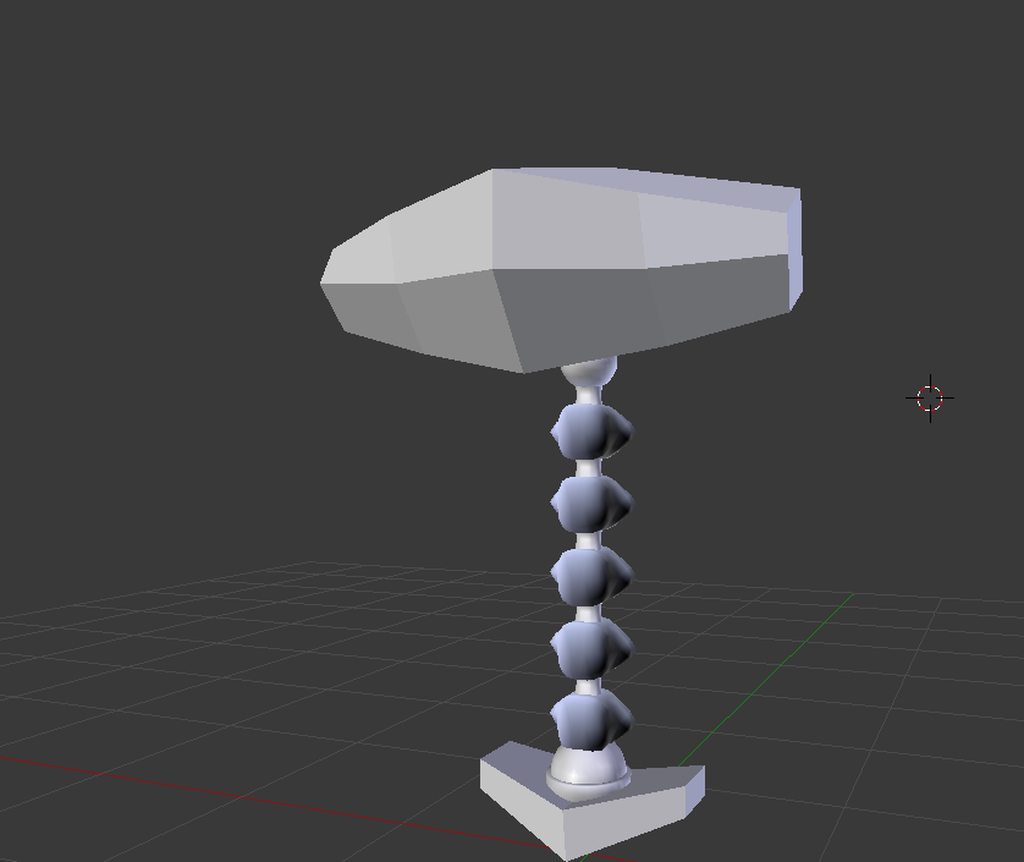
chest area done, arms and legs are going to be interesting
4,402 poly so far
 keen heron


Been working on a bar for me and my friends. Loving how its turning out.
(Renders done in Cineam4D)
 obsidian ingot
I'm kind of new to Blender and Unity but I'm slowly learning how to 3D model to make avatars from scratch. Anyone have any recommendations on videos or forum posts to view to help the process go through a bit smoother? (Any and all help even if it's just how to create armature or whatever)
royal steppe
Daniel Kreuter on youtube. Has a few tutorials on modeling characters.
Here's a very basic but more than adequate texturing tutorial https://www.youtube.com/watch?v=BCfh7xWCc5w

CGC Members can submit their exercise here: https://cgcookie.com/exercise/texture-painting-an-ax This exercise is designed to be a sandbox for texture painti...
 wheat geyser
hey guys
stable edge
hi
 drifting inlet
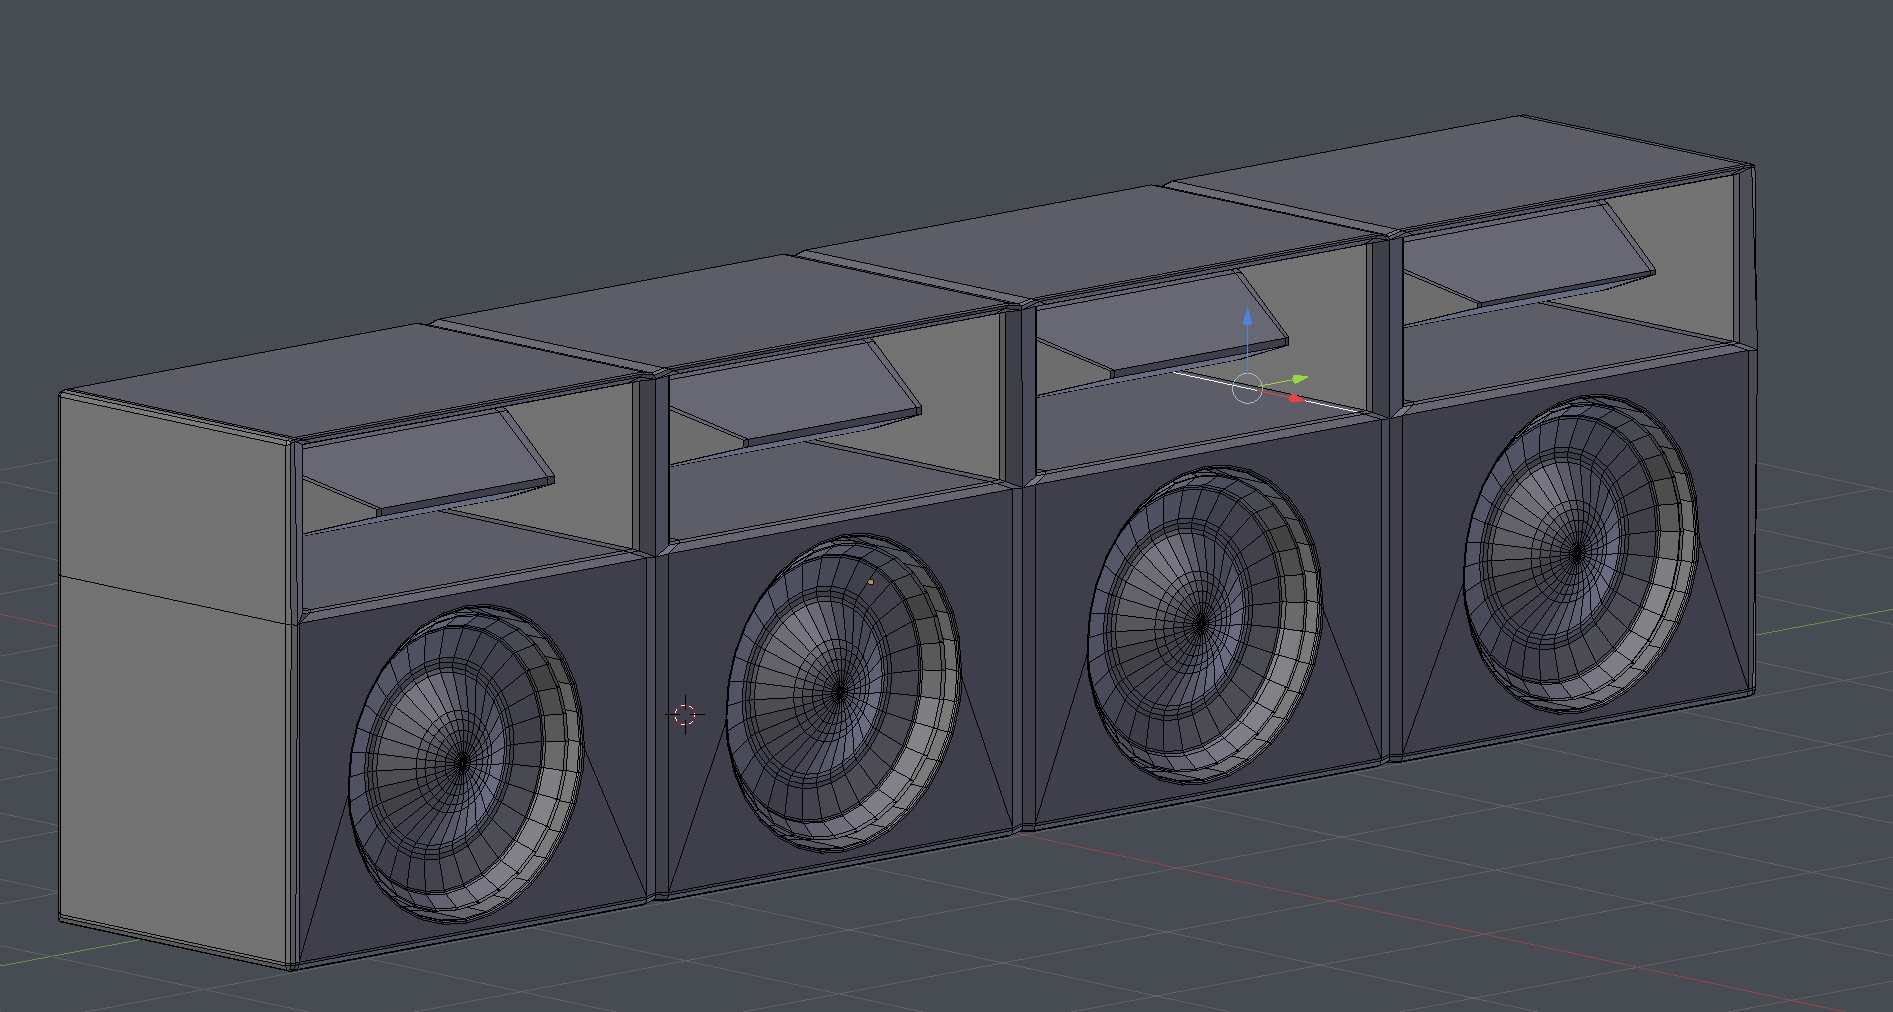
heyo, do you guys think this is good enough?
oh, can't paste pictures here, aha
 zinc furnace
That looks pretty sweet! Good topology too
drifting inlet
yeah, i try to stay as clean as possible to not die when doing UVs 😄
learned that the hard way
fossil inlet
Holy ngons
topology is not good, don't listen to the other guy
you can't just boolean impressions into a primitive and expect it to work like that; you still need to keep everything to tris or quads.
Go back in and add edgeloops to fix the topology.
Just because it looks clean doesn't mean it is.
@drifting inlet
drifting inlet
I mean, since then I reworked it a lot, since it was 4K polygons 😄
Even tho I wasn’t getting any artifacting due to n-gons in the actual game
fossil inlet
that's because Unity triangulates your model when you import it.
Still not good practice to just be okay with ngons
drifting inlet
I know it does
fossil inlet
You don't need those bevels either; you unwrapped it yeah? Just delete the bevels and bake them into the normal
you can cut out a lot of the edgeloops in the concaves and bake them too.
drifting inlet
I unwrapped it yeah
I really want to reduce the maps amount I have already honestly
My material count is slowly breaching 50
With every one being a 4-5map one it piles up fast
In its current state it doesn’t have ngons but still has bevels since it’s not using any bespoke materials (reusing general stuff)
fossil inlet
your materials should never breach more than 1 or 2
You should really look into baking your texture maps, if you unwrapped it there's absolutely 0 reason to have more than a couple of materials for your entire mesh
You don't need materials to give you bevels
just bake that into your normal
Get xNormal or something and take your low poly and high poly meshes, then bake the high to the low.
subtle jackal
You can also manipulate vertex normals for cheaper, but higher-quality bevels (1 bevel face with the appearance of 3 or so). This is pretty common especially for more hard-surface stuff.

It also allows you to forego full high-poly meshes and just bake floaters where you need extra stuff like handles or screws or such, because you don't have the gradients in your normal map from baking to a regular smooth-shaded low-poly
zinc furnace
Pretty sure you can keep quads in the import settings although this is generally only done for tessellation
Vertex normals will probably be more important than the normal map in this case
drifting inlet
I guess I need to look into normals way more, since I have no idea what are you guys talking about 😃 (I’m a total noob at this whole thing, I just split meshes into vertex groups and assign them materials I get from poliigon)
fossil inlet
Does nobody here know what a normal map is?
You don't ever import a model without a normal map. That's lazy and inaccurate. Normal maps are made to make your models appear higher fidelity than they actually are.
drifting inlet
I know what a normal map is, I just only used them with materials
Normal / height maps
Never used them with models, so now I know I need to research that, so thanks for that
I know you can make a specific material for a part of a mesh with a normal map for that particular mesh
But that would mean having a separate material for that particular mesh as I understand it
Maybe I’m wrong
Like when I was playing with Warframe models - they provide normal map that gives most of the detail
So you need to make a material for that particular part of the mesh (like “chest”) that contains maps only for that mesh
(Non-tiled)
latent charm
It's possible to use one material & texture set for multiple objects if they're fairly small or don't need that much texture resolution.
Just have to do the UV layout for it
drifting inlet
Well I use one material for all the walls, one for all the floors, etc
Since it’s a tiled material with albedo, normal, height, occlusion and specular map, etc
So basically you’re saying I can combine multiple meshes to use one material as well, it will just be a material tailored for those particular meshes
Basically a reverse of what I was doing till this point
latent charm
Sort of. The meshes stay unjoined, but share textures.
drifting inlet
Yeah
I really need to look into all of this 😃 since I know how to unwrap, but have no idea how to bake normals, etc 😄
latent charm
https://en.wikibooks.org/wiki/Blender_3D:_Noob_to_Pro
Some of the sections show or reference old versions of blender but most of what's there is generally correct.
drifting inlet
👌
 viscid temple
Does anyone know if there is a way to have a really basic template model that I can edit and test quickly in order to make a model that meets my body proportions like arm length and leg length etc...
because I want to have a guide because I want to make a model that will work really well with full body, but I want to do all of the testing etc on a template so I can start fresh with a new model and get my proportions right at the beginning and not worry about it later and have the chance to easily fuck it up
zinc furnace
Y Bot is apparently pretty good for full body.
@viscid temple
You can get Y Bot for free off of mixamo
Importing it into Blender will probably require you to take it through Autodesk FBX Converter 2013 first.
viscid temple
yo, awesome thats the one I was looking for. Is there ANY way to scale the model and test it in full body without uploading it to vr chat?
because that is just about the most time consuming thing ever to do
 vapid obsidian
I hope this is the right channel, but does anyone know how to convert MMD bone morphs into shape keys? One of my models uses bone morphs for blinking and mouth movement.
fringe rock
If its like an animation. Pause when its a the desirable place and in cats apply as pose
 minor mural
hello
spiral sigil
hi
 silent acorn
oh, welcome! make sure to ask if you've got any questions
programs like blender are always complicated at first, but they're really nice to work with once you know all the shortcuts
drifting inlet
follow-up for a discussion yesterday
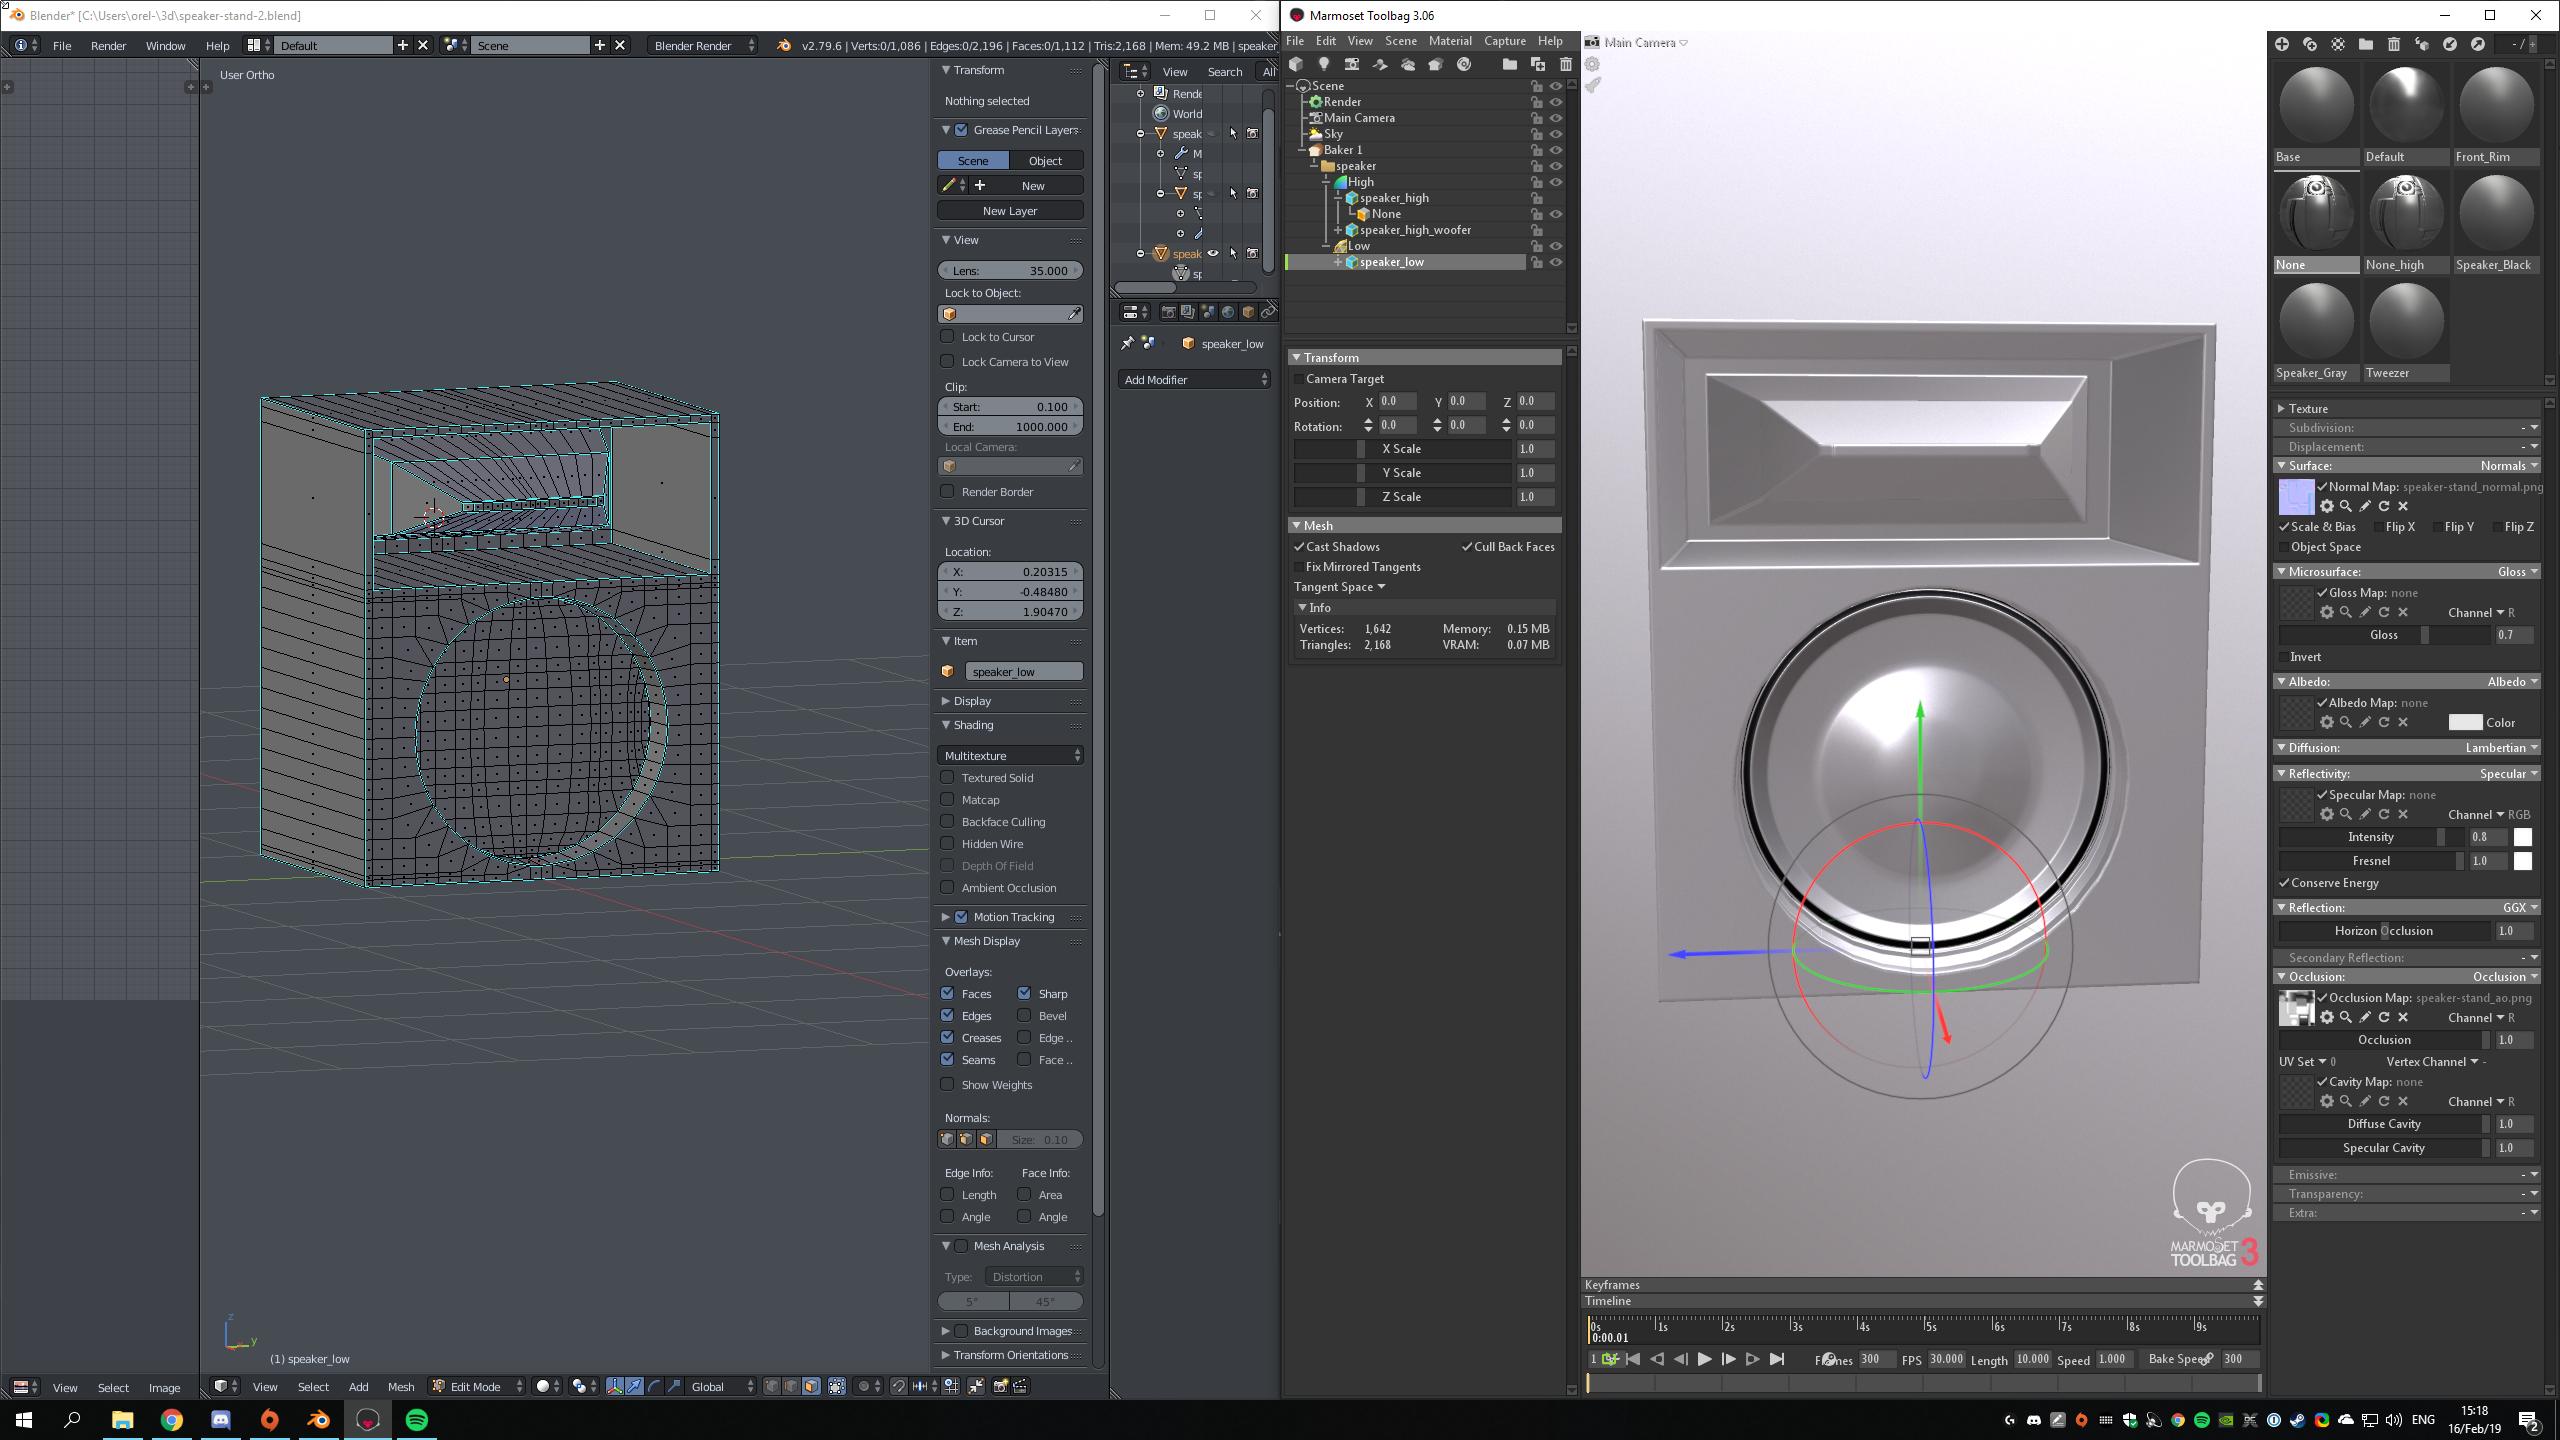
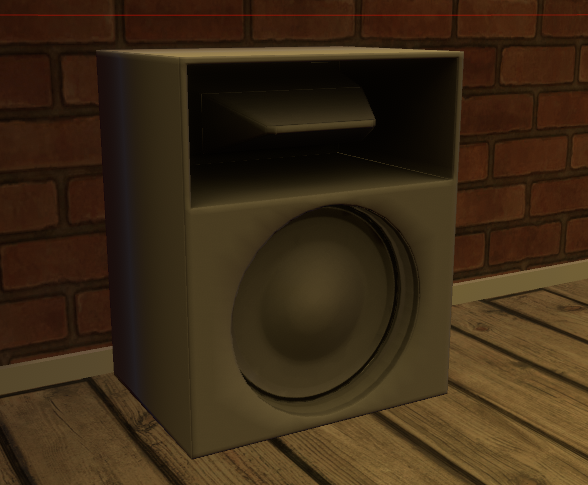
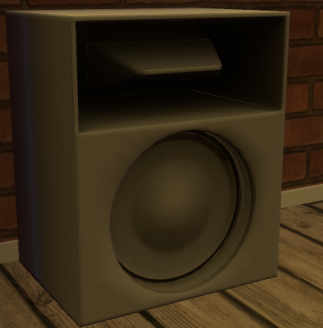
re-did the thing, made a separate high-poly asset and baked it (the actual "speaker" part was baked as a floater so i won't need to mess with it)
latent charm
That topology is a mess.
This is more along the lines of what you'd want to be doing for the low poly one that's gonna wind up in unity.
drifting inlet
the speaker comes out too angular even after baking
the actual round part
basically i wanted to preserve real edge loops and stuff
how are you doing the circles part? subdivide + alt+shift+s?
latent charm
Yeah
drifting inlet
basically this is what i did yesterday 😄 could've just stopped there then =/
since i went back and thought that it would be good to have some that actually connect and go around the whole thing
(now let's see if i have undo history far enough)
back to the drawing board) 😄
spiral sigil
@drifting inlet real edge loops is something you could technically achieve using Normal maps, so doing what Gallium recommended is definitely a good route, then for more smooth round-offs, depth and other aspects you can use a normal map to achieve that result
latent charm
Same mesh (mostly) + normal map
spiral sigil
A roughness map can help to smooth the edges too, if I remember correctly off the top of my head
drifting inlet
ok, so i'm unable to make it exactly like that so far 😄
looks fine in unity with baked normal https://imgur.com/0EM5tv2
will continue working on this
 latent charm
heres my .blend file, might be of some help.
drifting inlet
some edges are a bit harsh, since i didn't spend enough time offsetting stuff properly in marmoset, but again, since i'll be rebuilding this thing once more - i'll throw the current result away anyways :D
still, at least i baked my first normal map
drifting inlet
the somewhat end result with 218 polygons. now I just need to actually assign proper materials to parts of it as I planned 😄 https://imgur.com/8z3l1ZB
Thanks for all the help. 218 polygons total
 umbral crystal
why the whole hting smooth shaded
drifting inlet
because why it should be flat shaded oO? the final shape is baked with bevels all over it, looks as expected (the one on screen is the older bake, but still)
umbral crystal
because the center of it isnt really smooth
or at least the bevelling inside
smooth shading does not work very well across sharp/hard edge angles
i liked the way it looked before better
https://i.gyazo.com/3535416170fa85e3c13129fdda3f93dc.png
has more definition and looks more realistic
https://i.gyazo.com/47ec7898f80f086c24eccffeb87687b2.png
this kinda blends everything together and adds really harsh shading on the interior kinda like it was bent and dirty
drifting inlet
it s the same asset though
umbral crystal
o then its just something u did with it
drifting inlet
just with baked light
at low resultion
(20), so yeah, a lot of artifacting makes it weird
will be better at a nicer bake (like 50-100)
 glossy tangle
hey people,. I have a question regarding texture transparency in blender internal.
I have a model I want to add blush to and have that mesh push forward. Problem is that I dont know how to set transparency to a texture in blender internal. Does someone know of a good guide on that?
 rain flax
I have enabled direct image attachment in this channel.
zinc furnace
Why not just on all channels?
It makes sense for this channel but I can see it helping in just about any channel
glossy tangle
Thanks Tupper 😃
subtle jackal
@glossy tangle You don't have to do anything special with blender for transparent textures that I'm aware of, but the viewport render doesn't display them particularly well.
 cursive wedge
i would recommend you to put an image of the file when sending a .blend file, makes it easier to know whats up 😉
glossy tangle
@mortal slate Thats in cycles. I'll save it and study it. Thanks. I'd love to be able to do it all in cycles but the workflow calls otherwise 😐 Last night I managed to kind of figure it out. I had to make the image in photoshop and then bring the png into blender. Unless there is a way to paint transparent textures that i am not aware of in blender internal.
mortal slate
Which render is it, game or like blender render, ill take a look at it when i get the time
 livid maple
finally finished another prop :o https://twitter.com/The_Shadix/status/1097197513990438912

#ApexLegends : Wraith Knife [FREE MODEL]
Here it finally is !
Everyone's currently in love with this game and so am i :)
Enjoy !
RTs really help me out alot!
VRCMods: https://t.co/9HliuAECC0
DeviantArt: https://t.co/rV5YM0epjj
Thingiverse: https://t.co/c8xXe1Edt1
#VRChat

 Twitter
mortal slate
Twitter
mortal slate
@livid maple did you make that in fusion??
livid maple
SolidWorks
livid maple
i used RealView graphics for that screenshot
mortal slate
can i render that in blender??
livid maple
sure
 pulsar skiff
I created a bug thing in oculus medium. Thoughts?
spiral sigil
my headswap/merging tutorial
mortal slate
why it so small?
 elfin peak
thats what she said
vapid obsidian
Is there a way to make a shape key toggle the visibility of a material? I currently have a blink shape key that works with the model, but the eyelids are halfway closed in the mesh, so I'm trying to make it so that the material makes the material visible at the start of the shape key and make it invisible again at the end of the shape key.
mortal slate
@vapid obsidian are you talking about be blender??
vapid obsidian
Yes.
mortal slate
ahh, you can key frame transparency idk if that helps
 thick wraith
mortal slate
thick wraith
mortal slate

CGTrader
Model available for download in .blend format Visit CGTrader and browse more than 500K 3D models, including 3D print and real-time assets
Im gonna work on making it vr ready now
umbral crystal
where r the shadows
mortal slate
i put a shadow catcher under it but the hdri was pretty diffuse
 livid saddle
@spiral sigil this is not the channel to just be posting random art
This is supposed to be discussing 3D modeling
visual vigil
https://cdn.discordapp.com/attachments/457861345342259210/547269375627886602/unknown.png https://cdn.discordapp.com/attachments/457861345342259210/547270357371846656/unknown.png


AO baking the hair is really not cooperatong
spiral sigil
working on a model and i'm trying to mirror it but i can't as it has shape keys, how can i apply the mirror modifier without getting rid of the shape keys?
visual vigil
you can try the Multi Shape Keys plugin @spiral sigil
it would apply the modifier and keep the shapekeys
spiral sigil
@visual vigil i found one, idk if it's the one you was probably on about but i got it to work now, thanks
visual vigil
do link, cuz mine stopped working
spiral sigil
gimme a sec
visual vigil
ty
visual vigil
stable edge
rip dio
spiral sigil
Doing an MMD characterr
I'm sending it here bc it was deleated from avatar optimization, but I guess it's not the proper channel and It's also wearing rll little clothing 👀
so I just put the top part
fossil inlet
Wouldn't #avatars-mmd be the more appropriate channel?
stable edge
Pixl, Poppies work was done with Vroid
if you want to learn to model with blender anime-style see Daniel Kreuter's stuff (youtube)
 storm kelp
yeah but like... its so much effort for just an avatar.
stable edge
Vroid isn't though
stable edge
old (official) video

■VRoid Studioとは VRoid Studioは、人型アバター(キャラクター)の3Dモデルを作成できる、Windows・Mac用のアプリケーションです。誰でも無料で利用できるキャラクターメイカーで、モデリングの知識がなくて...
it has english language options
stable edge
yup!
i dont know if they have a male body base yet
anyway here is the sites dl page:
 swift heart
they do have a male base
stable edge
oh nice!
storm kelp
yeah but i suck at it
subtle jackal
Some weird topology on that model tho. Looks like they took a lower-poly base with a few triangles and just subdivided it to get quads. I mean, I doubt it matters in a practical sense, especially in VRChat, where all the facial animation is handled in shape keys and you can smooth out any weirdness, but eh. I'm a stickler for clean topo.
fossil inlet
What if I told you that you’ll initially suck at everything and only through hard work and dedication can you become good at something?
subtle jackal
^ this tbh. It's why I sigh internally whenever someone says "Oh you're so talented " Like no dude I've just been doing this for a decade now. Put in your 10,000 hours and you can too.
fossil inlet
Literally same. Talent is just an excuse people make up so they don’t have to face the reality that someone who’s really good at something has been doing it for a long time and they don’t want to put in that kind of work
Usually kids who are “talented” just started drawing really young and doing it a lot. You draw every day, you’re going to get good at it, relative to your knowledge of art fundamentals. Still gotta learn those, they don’t just come through epiphany.
subtle jackal
yep
spiral sigil
Vroid is rlly easy to use, I have made 3D models with ZBrush, but I don't think they are actually rlly good and I just don't wanna send them here. Even tho Vroid is rlly easy to use I made all the textures myself, except the base for the face and body I just re painted them over the base. But yea, I agree. And btw avatars-mmd didn't let me send pics
And by 3D models I mean modeling
 crimson cove
I like using VRoid for just making the face, then I slap the head on a different model base
swift heart
yeah vroid is god-tier for modeling hair from scratch
spiral sigil
yea
 autumn ledge
so I've made a sword and I gave it some particles in Unity, but I dont know how the SDK works
zinc furnace
VRoid is not very great at bodies so you're probably using it the right way
I'm not much of an artist so vroid hasn't really been useful for me
But apparently hair is super easy in there
spiral sigil
The normal body, I just edited the body with the normal comands and edited the textures, I also adaded thing with z brush but i don't think that is what you mean
livid saddle
Normal body from what? Vroid?
 hollow radish
I make everything from scratch, even hair 👀
has more flexibility but it takes time and getting better at it allows me to really do a lot more
 dawn ember
so uhhhh
Anyone good with blender in the house?

This is what my materials look like with a normal node not attached

And this is what they look like with the normal map node attached
Nothing is connected to the normal map node, but just putting it there messes up the whole thing
Okay this only appears to happen when using Eevee and tangent space is selected
weird
spiral sigil
been working on this model for weeks and now finally had enough free time to finish it, now rigging
 dull jungle
Nice
dawn ember
Nice
 cyan ice
Noice
 dull canyon
so. can you lovely people describe roughly what your workflows are for creating an avatar from scratch to "ready to prepare with cats"
spiral sigil
Make sketch Make rig and name bones Right Shoulder, Right arm, Right Elbow, Right Wrist, Right Leg, Right Knee, Right Ankle and vice versa for Left Side and Hips, Spine, Chest, Neck, Head, Eye_L, Eye_R
dull canyon
I meant an actual original avatar, not with a premade model or somethinig
silent acorn
I usually start with concept art, the more detailed the better- it's waaay easier to correct a design problem from the drawing board than with a complete model
Then it's modelling, texturing, rigging, etc
But yeah, having reference art is incredibly important
Oh, one more thing! I find that instead of detailing one area at a time, slowly advancing the entire model is a bit easier
But that might just be me.
dull canyon
okay, and when modeling/sculpting, especially human(oid) characters, do you start out with a sphere and then just sculpt it into the shape of the body, or use multiple objects, or is it all just personal preference?
stable edge
i mean i usually start with a cube for the legs and then build up
make sure you dont leave the cube connected in the middle at the chest
and do more complex parts separately (head hair etc.)
dull canyon
okay, and are stuff like clothes and accessories also best kept as separate objects? like, if I wanted to give the same character different outfits, what would be the best way for that?
oof, so from what I gathered I first have to learn 3d sculpting, and then retopologizing >_>
also, so once I have my model retopologized, if I want to add the details I assume you do that via the texture and baking?
fringe rock
star with a side view of the character and front and build from that
dull canyon
mkay
fringe rock
like that since I didtn learn zbruch of other sculpt program https://twitter.com/i/status/1023954680743772160


板マン途中まで立体へ、厚みを付ける工程が見たいと言われたけどわかるかな https://t.co/BfDt748QxM
Retweets
3159
Likes
9949
Twitter
dull canyon
okay, that's kinda what I figured
so I guess sculpting is really just learning the tools and having a good concept art reference
retopologizing looks like a different beast
fringe rock
the best way is to scult and retopo after so you can have an bump map/occusion map
be f you do a anime style you dont really need that i tihnk.
dull canyon
well, I wanna go somewhere inbetween anime and realistic
like, very clearly anime style but more detailed than most MMD models I've seen so far
fringe rock
in general you (bake the normal/bump/etc) of a sculture on an low poly model.
dull canyon
and how do you create a normal/bump map?
fringe rock
when you sculpt in zbrush or blender. You have a lots poly so it very realistic. After that you envelope it with a low poly version so its easier to rig. On that you bake the normal and other thing .
But for noe
since you begin
just model thing from box or sphere
dull canyon
okay
fringe rock
try make low poly character first
dull canyon
so basically I want to not have dyntopo enabled in the beginning of the sculpting?
fringe rock
Yeah I would say so. At least to start to be familiarised with 3D stuff
subtle jackal
How you approach the high-poly is really up to you. Most people do sculpting but if you're not great at precise brush control you can also do high-poly subdivision modelling (you don't even have to worry about edge flow, really, as long as your surface normals look alright. (example of a model I was doing purely for normals: http://artificialincarnation.tumblr.com/image/100476232425 ). I usually like to do a hybrid approach where I model in some things on the high-poly and then sculpt others. But I use Blender for everything so it's easier that way for me. (Here's an example of a hybrid-sculpted one, I modeled the seams for accuracy but then sculpted the wrinkling: http://artificialincarnation.tumblr.com/image/127198447720 )

3D Modeling, Games, and Content Creation by Asami

3D Modeling, Games, and Content Creation by Asami
Dyntopo doesn't matter, by the way. But I've found unless you really know what you're doing and take a lot of time, it's easier to get a clean-looking result with a multires sculpt instead of dyntopo.
dull canyon
ok, that was a lot of words I didn't really understand 😄
what exactly is "sculpting" and "high-poly subdivision modeling"?
also, is anyone by chance using this https://blendermarket.com/products/retopoflow ?

Blender Market
A Unique Market for Creators that love Blender
subtle jackal
Ah, I thought maybe you'd had a bit more experience in 3D I guess. Sculpting is the process of creating a 3D model by sort of... deforming a surface with brush-strokes rather than, for example, regular poly modeling where you extrude things or create new faces. High-poly subdivision modelling is where you create a sort of base "cage" mesh and that adjusts a much-more high-poly surface under it.
And yes I've used Retopoflow, it's pretty nice. I especially like the Tweak and Contours tools, they're the most useful of the lot in my experience.
polystrips is still a little too fiddly in practice to be as useful as it looks
ripe lotus
I personally start with the eyes when building from scratch
dull canyon
okay
yeah no, I'm completely new to this all
I started reading up and doing tutorials a few days ago
only 3d modeling I've done before is with CAD software for 3d printing
@ripe lotus why the eyes?
ripe lotus
Just how I do it
dull canyon
ah, okay
ripe lotus
As artists, there it no one way
dull canyon
yeah, I guess
I've had the same issue with drawing, I never really figured out where to start
I never found my workflow
ripe lotus
Try and experiment, failing is fastest way to success
dull canyon
yeah, I know, but as weird as it sounds failing is still hard for me. I know I have to fail to get better at anything, but my brain just has a hard time accepting failure and defeat >_>
ripe lotus
Ever heard of Alessandro Baldasseroni?
dull canyon
can't say I have
ripe lotus
Blender Guru did a interview with him, hes one of the most successful and top character modelers in the world. He talks about his journey to where he is and how he did it.
might help you improve
dull canyon
I'll check it out sometime. I've watched a lot of other good 2d artists, like sycra or achmed aldori or bobby chiu and they've all shared their experiences and stuff and I understand it, it's just hard applying it yourself
ripe lotus
Honestly his biggest point is, if you're not passionate about it, you're never going to do well.
dull canyon
yeah, makes sense
what I've observed about myself in the past is that I tend to get really passionate and interested in something, but at some point I'll hit a brick wall and if I can't get over that wall at the second or third attempt I'll get super depressed and stop doing it
was that way with IT studies, Japanese studies, drawing, programming (that one's mostly on my current job tho)
I got really into 3d printing end of last year and now that some other issues have come up and the fact that my printer requires a lot of tweaking and shit to work well I'm rarely using it compared to at the beginning
https://docs.google.com/document/d/1eJirtacoSyc4cgHsalu6zye6Y06Xy75WUWCv-1UC5tw/edit?usp=sharing so this is what I quickly came up with for now... things with ??? I have absolutely no idea if they're right, even less so than with any of this. I appreciate and comments on things that I'm missing or getting wrong or should do in a different order or whatever

Google Docs
Avatar creation workflow character sheet front, side, back 2D concept art for design, theme etc body, clothes, accessories sculpting in Blender start with simple shapes for body model hair and other body accessories model clothes and other accessories do more detailed work wi...
ripe lotus
There is no one right way.
dull canyon
I know. I'm just trying to figure a general workflow out... like things everyone normally has to do when creating an avatar for vrchat from scratch
and everyone needs a starting point somewhere, someones work(flow) they can initially follow to get started
ripe lotus
What feels right for you?
dull canyon
I don't know cause I don't know all the steps involved yet
I have no idea what actually is all involved in applying a texture or bumpmap or normal map or whatever for instance
fringe rock
dont wait. start now
dull canyon
well I tried yesterday
ripe lotus
Find a picture of something you like and try making it
and if you fail, try again from what you learned
dull canyon
https://i.imgur.com/3RTCBC5.png this was the result...

I had no idea what I was doing with sculpting mode 😄
ripe lotus
a popular practice for beginners is to try and make an anvil
ripe lotus
Alessandro Baldasseroni actually mentions it too
fringe rock
anvil-chan
subtle jackal
You can skip and modify steps depending on what you're doing. For my most recent avatar I started with an idea and looked at boatloads of images to find a design I like (it ended up mostly from one image but with a few modifications). After I had an image down I decided I wanted to heavily mimic an existing base but basically redid the entire thing myself (just to make it easier to get good looking expressions etc.) So with that I modeled the base body, then head, then hair, then accessories (didn't need a sculpt for this). Rigged those to ensure I didn't need any geometry adjustments for good deforms, then UV mapped. Then textured. Then once that was all looking good I modeled the outfit, took that low-poly model and use it as a base to do a little high-res sculpting for normal and AO maps. Rigged, UV'd, baked maps and textured that. Then I combined the models and took them into Unity to do the rest.
(Just to give an idea of a workflow)
This is the result, for what it's worth.
But I'd agree with others, a full rigged character mesh for VRChat is probably not the best jumping-off point if you're easily discouraged by failure. You're gonna make a few potato-tier avatars before you get the hang of it.
dull canyon
" I modeled the outfit, took that low-poly model and use it as a base to do a little high-res sculpting for normal and AO maps." what exactly does that mean? I still don't know a lot of the terminology
so you made some clothes with low poly objects and then added detail in sculpting?
subtle jackal
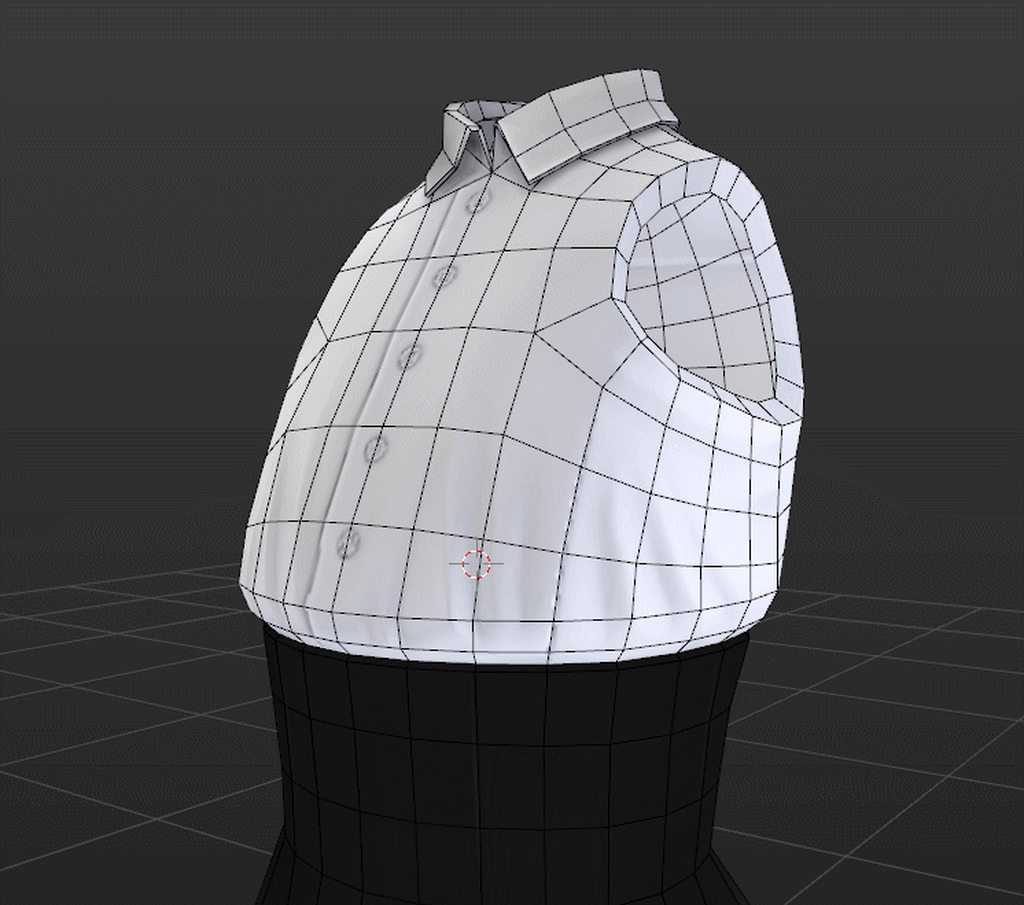
it means I made a copy of the low poly mesh, added some details, added a multires-modifier, and then added wrinkles and such, then baked those back to the low poly
sec, I'll take some pics
The low poly dress
the high poly with extra detail modeled in, mostly seams. Note the multi-res modifier on the right, I'll show the result of that in a sec
the high-poly. I'd show wires but they're too dense to really make out lol
the buttons are separate objects, also.
dull canyon
okay, got it, I think
and then you'd take the high res version and... bake it onto the lowres?
subtle jackal
basically the low poly dress is the one I actually have attached to the model in VRChat, the high-poly ones are used for baking, essentially it uses image maps to modify how light reacts to the low poly on a per-pixel basis, which makes it look like it has more detail than it actually does.
dull canyon
okay, now things make a bit more sense, I think
thanks for the detailed explanation
I guess my best course of action would be to just start and ask and figure things out as I go...
but I'm a thinker and I like to overanalyze things >_>
like, I'd spend hours watching tutorials without ever actually doing anything with the knowledge cause I always feel like I'm missing something 😄
so, again on terminology. is "sculpting" basically drawing/chiseling/clay forming and "modeling" changing the mesh on a vertex basis?
subtle jackal
correct
dull canyon
alright
subtle jackal
https://imgur.com/a/nH7B16J an example of how normal maps work, also. This is the low poly model with wireframe showing, yet you can see how light reacts to the wrinkles and such as though that was actual geometry
 dull canyon
and the normal maps are created by using the high res model?
subtle jackal
yes
dull canyon
okay, now it makes sense
I was always wondering how you'd create those for this kind of thing
thanks again!
subtle jackal
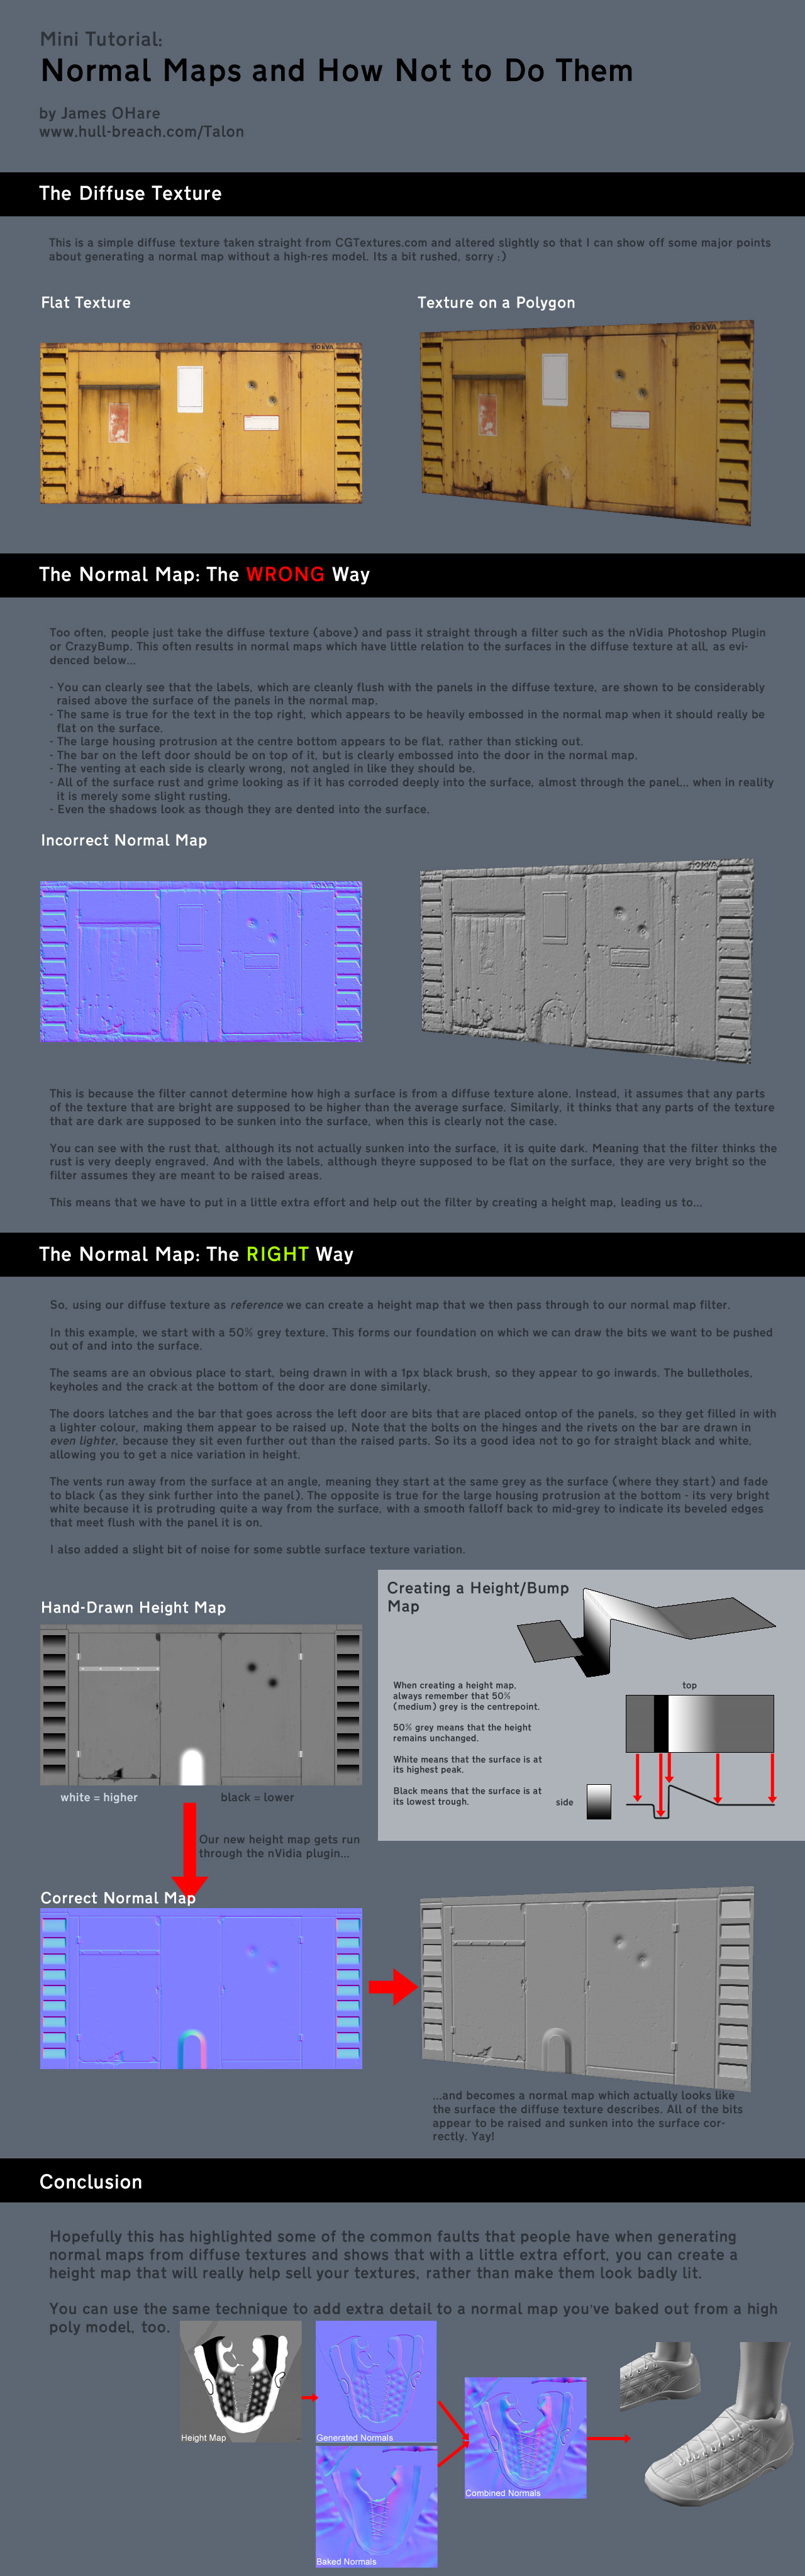
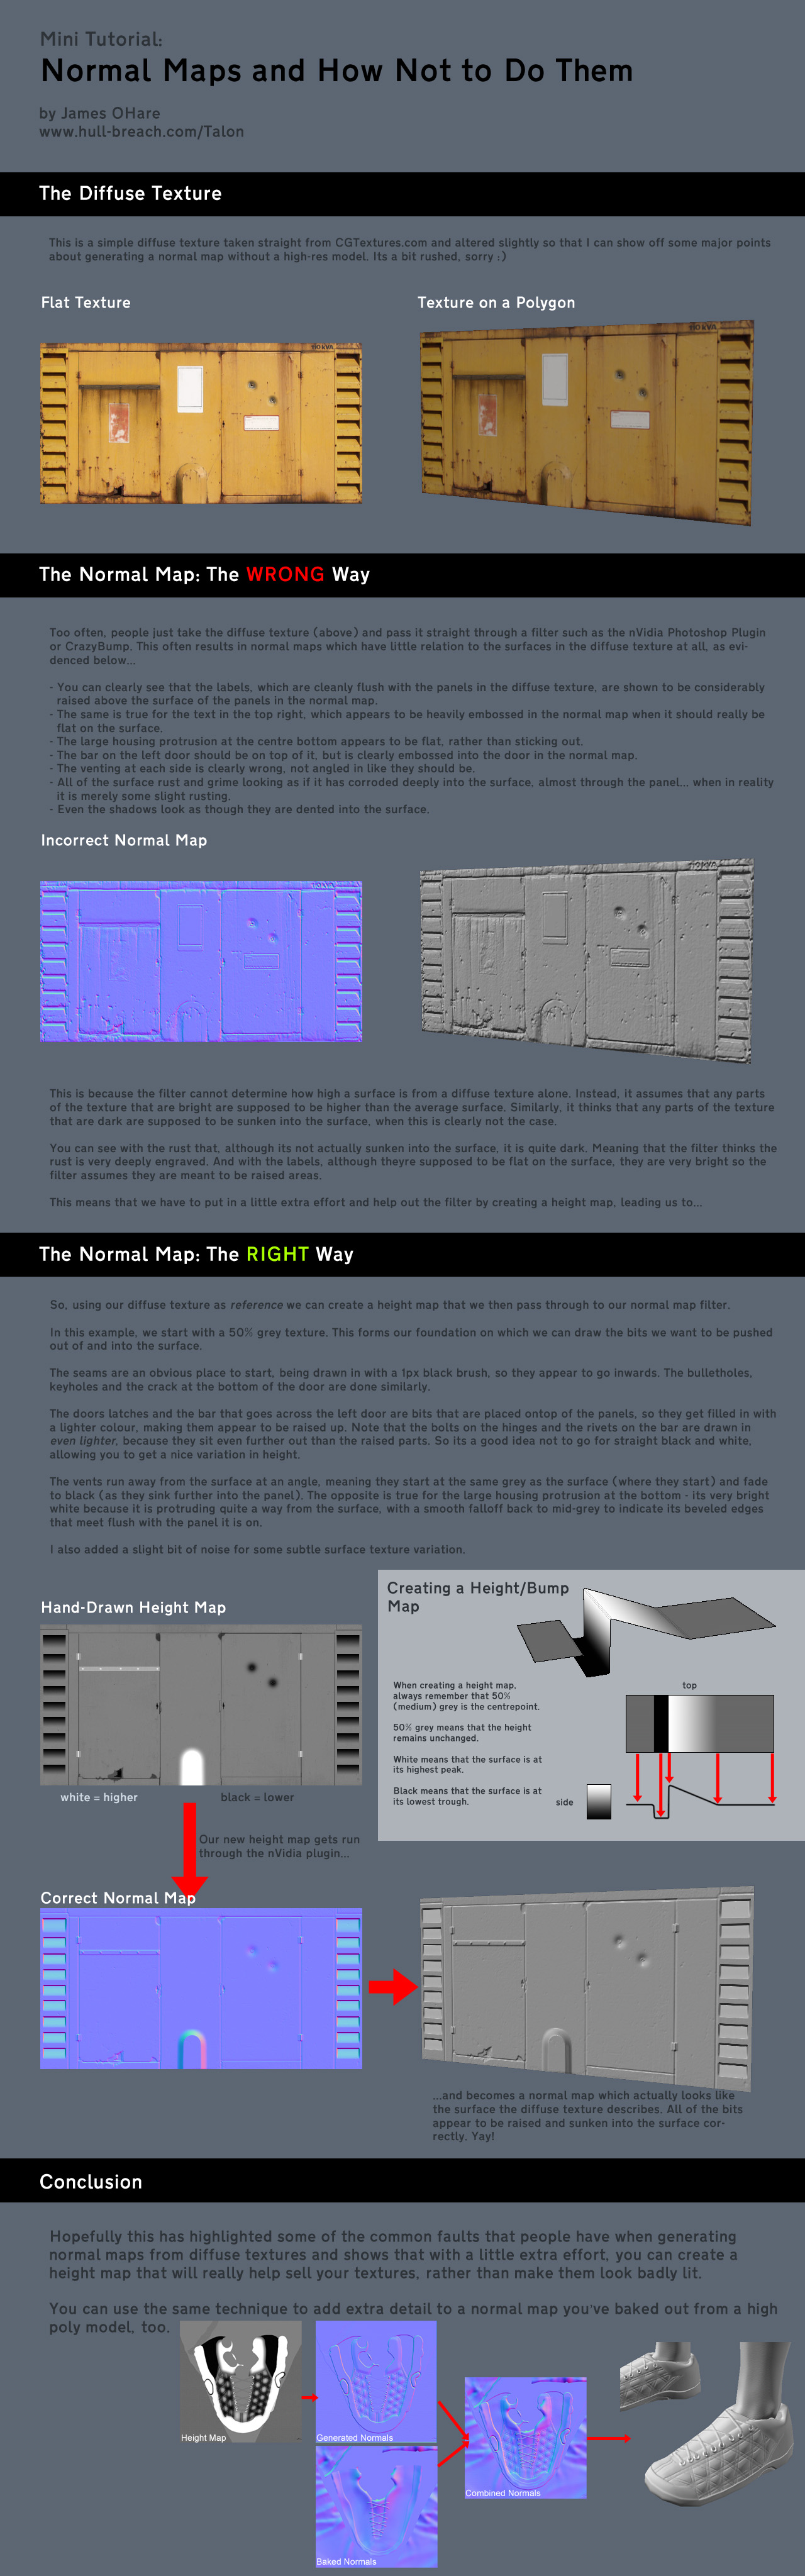
The two main ways are using a high-res model or by painting height-maps and converting them, or a combination of the two
silent acorn
Good luck! That basic model you posted earlier is waaay better than my early practices
subtle jackal
http://www.opengl-tutorial.org/assets/images/tuto-13-normal-mapping/normalMapMiniTut.jpg I like to refer people to this for an example of heighmaps, it also briefly goes over combining maps made this way along with baked normals. There is a lot to cover so I'd say your best bet is to do some googling, honestly. I could go on for hours about the particulars lol
 dull canyon
@silent acorn I hope you don't mean mine cause that one's horrible 😄
@subtle jackal yeah I'll probably just try to take one step after another and keep pestering you guys with questions as I go along
for now I have to give my brain some rest, it's 11pm already
subtle jackal
np, happy to help
dull canyon
❤
ripe lotus
I feel like one of the worst things to do is try to take to much information at once and run with it
when your beginning I mean
fossil inlet
Normal maps are great, you can have much higher rez detail on a much lower rez mesh. Like here it looks great - another trick though, is to bake your lighting so that your mesh still retains high detail texture without the help of lighting. Since most maps in VRC don't have dynamic lighting, your normal map isn't being used at all, outside of maps with proper lighting. So having both baked lighting on your diffuse map and a normal map will help push your textures really far.
ripe lotus
Start a portfolio and have people look at your work regularly, critique once you get into it is a road to improvement!
dull canyon
mh, sounds like an idea
well I'll keep spamming the stuff I make here so 😄
not sure where else I could post stuff like that tbh
I don't like using deviantArt anymore
zinc furnace
I wouldn't recommend using actual baked lighting on your avatar, whether in the texture or using an actual Unity lightmapper
Although using a shader that can substitute a fake light direction is definitely a good choice
latent charm
I somewhat agree with Rokk. Baking some lighting into the albedo is permissable if you have limited but expected lighting situations.
In my opinion, go for the normal map route. Then when people complain it looks bad, forward that annoyance to the world makers using poor lighting setups and make them fix their shit.
zinc furnace
I find that most popular worlds have "proper" lighting anyway. And to be entirely honest, what a lot of people refer to as "proper" lighting is actually just "realtime lights". That's not always an option
There have been more and more VRChat-oriented shaders which are geared towards fully-baked lighting setups, and it's pretty great
Cibbi's Toony Standard, Noenoe, Silent's etc.
Standard handles baked setups pretty well too
 thick lodge
Does anyone know how to edit a material's shape keys without the use of an animation? Like I have an umbrella for example, its one shape key is open/close. But I'm working with states and gesture states doesn't allow actual changes in shape keys, so I want it to be permanently opened while in unity instead of its default closed
thick lodge
where?
thick lodge
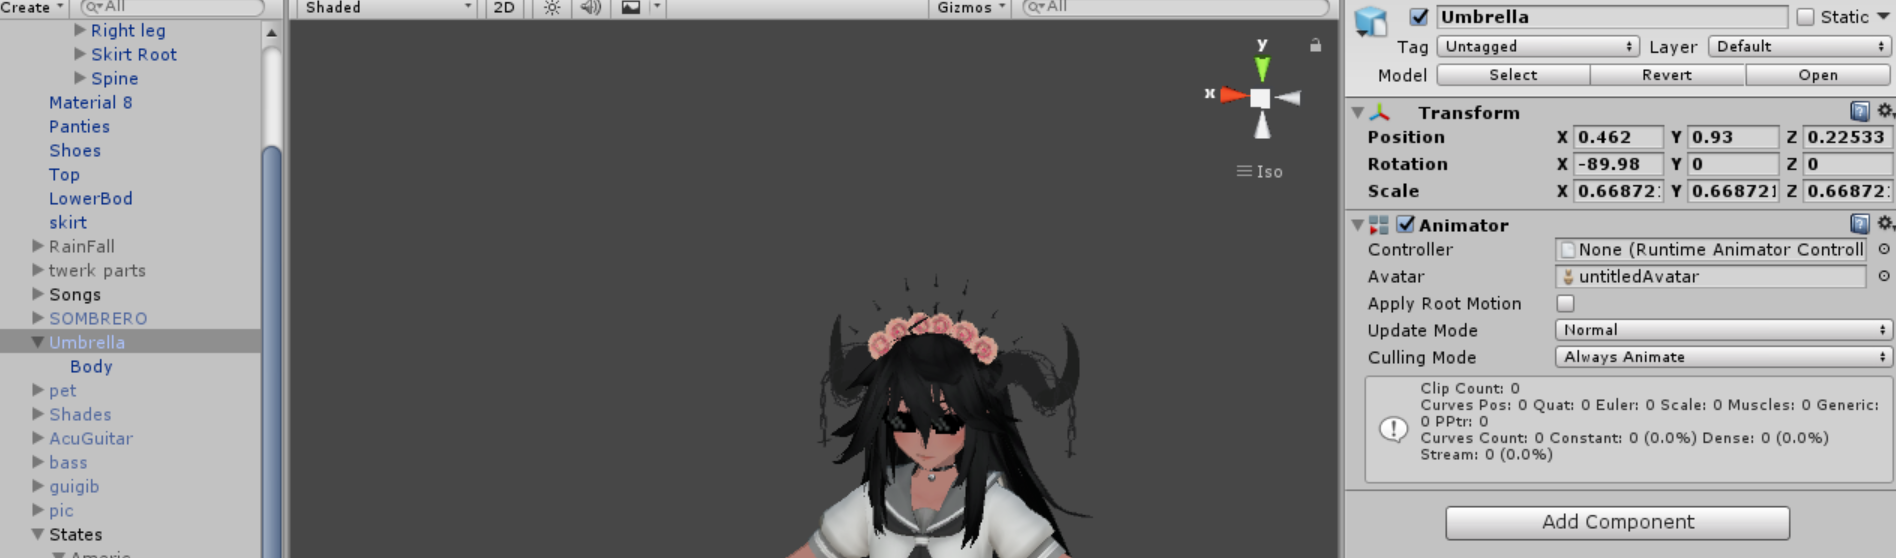
not with an animation component.
I plan to do the same with multiple heads that have different expressions, each disabling the other to take their place.
thick lodge

 ionic trench
umbral crystal
ionic trench
umbral crystal
theres no shape key for opening it
so go in blender and add one
or add bones and rotate those
ionic trench
i can show the entire lay out of them there two seperate weapons
ionic trench
am still pretty new at body modals
zinc furnace
@thick lodge non-skinned mesh renderers have no shape keys
 weak orbit
hey is there any good fox/cat ears that are good that can link?
 urban gust
@fossil inlet thats a really well done model. great work!
fossil inlet
@urban gust thanks! The full breakdown can be found on my ArtStation 😃 https://www.artstation.com/artwork/W2Bm4N

ArtStation
Game-ready version of K/DA Akali from the K/DA Pop Stars music video by Riot Games & Fortiche Production

 chrome tree
Cute!
ripe lotus
OwO
spiral sigil
ripe lotus
i BELIEVE
dull canyon
so, what drawing tablets are you guys using, if any?
just out of curiosity. I have a Cintiq 13HD
fringe rock
Small intuos
dull canyon
hmm, wasn't there some option in the wacom preferences to set it so the tablet is rotated 180°?
hm, guess that's not easily done with Cintiqs...
dull canyon
@subtle jackal is that an ultrawide you're using?
subtle jackal
Yeah
dull canyon
nice, which one?
subtle jackal
LG 25UM57-P
dull canyon
I guess and ultrawide makes more sense for stuff like Blender than having 2 monitors
subtle jackal
eh yes and no. I do wish I had a second monitor
dull canyon
https://i.imgur.com/us21MJd.png welp, it definitely shows that it's been a while since I've drawn something...
 dull canyon
has anyone been using blender 2.8b for some amount of time? how stable/buggy is it so far?
 rancid mirage
Its stable. About as stable as 2.79
but if you plan on making VR Chat assets, dont use it
rancid mirage
you need 2.79 for VRchat assets (if you want to use cats)
dull canyon
okay
rancid mirage
and the 2.8b files arent backwards compatible
rancid mirage
you can copy verts back but
thats inefficient
the new UI and whatnot is really nice though
dull canyon
yeah
I'm watching blender gurus video on it
the UI is so much better
and the whole UX in general
rancid mirage
would be nice to see cats updated for it, curiously enough, I saw a message when loading it on 2.79 that it was made for 2.8
but it doesnt work
dull canyon
well, lets hope 2.8 becomes a stable release soon then and stuff updates to it
stable edge
havent tested but id assume you can export/import as fbx/dae etc. to get data between programs
rancid mirage
possibly dae, fbx doesnt include textures so for Blender's purposes dae is much better
spiral sigil
fbx can have embedded textures
zinc furnace
Yeah, it's the embed media option when you set path mode to copy in Blender
3DS Max also has an embed media option for the textures
I don't embed textures anymore though because it bloats the FBX filesize a bit
rancid mirage
but its a bit annoying, like when exporting to unity if I want to set custom shaders I have to modify the materials anyway, which embedded doesnt allow
zinc furnace
Embedded materials is different from embedded media/textures
That's just a new Unity 2017 thing
And to be honest I don't like it. There is almost zero chance that a model will look good with the default Standard shader settings, even with a normal map.
So I always have to extract the materials anyway
Although if you embed textures you will have to always extract them anyway, even if using embedded materials
The one good thing about the new 2017 method is that it doesn't automatically create wrongly assigned materials anymore. It used to generate them by texture name which caused all kinds of issues. Every time I would have to delete the materials and change it to use the model's material names instead
I have this room, what's the cleanest way to cut a hole in it for a window?
I tried a cube with a boolean modifier. Problem is that it turns the wall into a bunch of ngons
It also creates some junk faces because Blender thinks of the room as "solid" on the inside, but that's another matter that's easily resolved.
latent charm
Select frace, press i to inset face, scale to proportions and delete the face to make the hole.
rancid mirage
why not just knife tool a plane to create essentially 3 quads, then cut a smaller quad in the middle quad, and continue from there and turn it into tris
or insetting
zinc furnace
@latent charm ohh, thanks! I didn't even know this tool existed. That's perfect!
@rancid mirage I considered the knife tool, but for some reason the opposite wall is also affected when I'm not in perspective mode
rancid mirage
but insetting immediately isnt as good if you plan on adding other parts to that wall, like a door
did you disable mirroring
modifier and cube attribute
zinc furnace
I haven't used mirroring at all
rancid mirage
hm
zinc furnace
I'm used to a more probuilder-ish workflow so an inset is what I was looking for
Is there a way to move the vertices while keeping the textures/UV's the same?
I could unwrap it again later on which wouldn't be terrible, just wondering.
latent charm
Edge slide by pressing g twice, then F6 and Correct UVs
zinc furnace
Ah, thanks!
glossy tangle
is there a way to orbit around a selected model in unity? I find orbiting a bit wonky (coming from blender)
Right now i seem to have to make many many adjustments just to get the right view. or im doing it wrong.
zinc furnace
Press F
To refocus on the selected object
Not sure if you can "orbit" around an object. I prefer Unity's way as it works better for scenes rather than individual models
glossy tangle
oh...i've been doing it wrong all this time... Middle mousing... Found its : Rt click... WASD
zinc furnace
ALT+LMB does it @glossy tangle
It orbits similarly to Blender after focusing on an object
zinc furnace
Alt is handy, you can also alt+rmb to slowly zoom in/out
glossy tangle
ah~ yes! usability went up 10000x
ooh :3 now i can get uncomfortably close to my model ❤ Thanks.
wtf?
testing or looking to get blocked?
granted.
 gritty kiln
Hello. New here. I've been doing lots of prop modeling and was wondering if 7,558 polys for a fridge was a bit high. It has workable shelves, doors, and freezers.
 glacial pasture
not high
gritty kiln
Yay! Thanks.
dull canyon
I really need to get better at not falling into the masterpiece trap... I always end up trying to perfect something that's actually just meant as practice, taking way too much time for it >_>
zinc furnace
I think the bottom one looks better
 thorny fractal
alright thanks
i was a bit conflicted on what to do
rancid mirage
I need help, Ive got a random vertice sticking out of my mesh but when I load the fbx in blender theres nothing sticking out
dull canyon
@thorny fractal both look good, the dull one would work too since the rest of your model doesn't seem to be very shiny either, but the shiny one looks more realistic I guess
rancid mirage
the vert doesnt show up in unity either
latent charm
@rancid mirage Move bones around (it looks like it's around the left leg so start there), could be a stray vertex that missed being weighted properly.
rancid mirage
Ive moved bones and verts and renormalized weights
 opaque linden
I don't know if this is the right chat to ask but I've tried to import a model from Sketchfab and it doesn't have it's colours. I'm hoping someone knows how to fix this.
storm kelp
Could anyone help me find a base character with messy hair?
Anime or not idgaf
Preferably not tho
Or should this go in avatars
thick lodge
Is possible in blender to change a model's shape keys and have them permanantly stay like that and load in with those expressions into unity?
fringe rock
Select the shape key click on the arrow on the right and select base something
@thick lodge
Or in unity selct your body and put 100 on that shape key
thick lodge
@fringe rock i'm using a state machine to switch between different gesture groups, the only down side is that it doesnt allow for editing shapekeys, or if you do, youre still very limited. So what i plan to do is making copies of the head in blender with different expressions on them, and use the state machine to turn off the default head and active the ghost head, repeating this over multiple gestures
fringe rock
Ok
Thats why my friend told me that shape key broke in game engine
Thats why they have a lots of bone in the face
thick lodge
Yus yus, so can you ask your friend what he did? ;u ; @fringe rock
fringe rock
it was in movie vs game. not vrchat/unity thing discussion
umbral crystal
it does allow u 2 edit shapekeys
just place the animator in the body mesh too
if its not a face thing then u should just move the object into the armature by grouping it in ur modelling tool
also clothing for example u should typically not use blend shapes for
swapping the meshes might be more efficient bc u don't have those wasted verts and tris still on teh obejct
dull canyon
can someone recommend a tutorial (preferably video) of someone showing step by step, in realtime, how to do retopology in Blender?
subtle jackal
https://www.youtube.com/watch?v=Hz1_SndKKwU not really real-time but this guy does basically what I tend to do.

Retopology of a shirt in blender with commentary. twitter: https://twitter.com/gamedevfred instagram: https://www.instagram.com/gamedevfred/
dull canyon
thanks
dull canyon
what are these addons he's talking about? I can't really understand him there 😐
ah, F2
subtle jackal
F2 yeah
and he's using the pie menu addon
doesn't really change the overall workflow though
subtle jackal
F2 just modifies the function of the F-Key to make it a bit more useful. I highly recommend it
dull canyon
okay
https://i.imgur.com/rxWne8T.png so I have obviously no idea what I'm doing. is this too detailed already?
 fossil inlet
Too many edgeloops
The circles around the eyes are fine but the splits are far too dense
dull canyon
okay
so, like half would be enough? or even less?
https://i.imgur.com/eZ2PKNs.png still too much?









 silent acorn
My usual rule of thumb is to start with only enough detail to get the point across. Working with more complex models will always be more difficult, so it's nice to get a good simple basis going before fleshing different parts out.
dull canyon
okay
silent acorn
looking better, though! I'd maybe cut down a tiny bit more, but then again I'm a weirdo who's into low-poly