#3d-modeling
1 messages · Page 14 of 1
 hushed umbra
 serene roost
Hello, I am currently rigging a backpack with a keychain that has Physbone propertys. However after weight painting and the shoulder straps, the keychain does not follow the arm bone due it being a separate object. Anyone know what I can do in this situation?


 devout orchid
i kinda fail to see the question. you can only have one armature for your whole avi (k you can have more but its unrelated)
so backpack's mesh can be a separate object but it must be the same armature
serene roost
its it the same armature. the keychain is child of the arm joint it is just that the keychain and the bag are separate meshes
 steady zealot
serene roost
its it the same armature. the keychain is child of the arm joint it is just that...
steady zealot
serene roost
its it the same armature. the keychain is child of the arm joint it is just that...
I see the issue. The strap moves slightly when the arm bone moves, but since the chain is a child of the arm bone, it moves way out of place, and you'd like it to stay connected to the strap, yes? Unfortunately, as far as I know, other than using a complex system of constraints, I don't think there is a good way to keep it in place (relative to the new position of the strap upon deformation) since the arm bone moves much more than the strap does. The closest I can think of would be to set the chain to not be a child of the arm bone
serene roost
Okay thanks!
 trail patio
hey guys im just wondering how to enable the smooth edge when using subdivide.. please helpppp ;-;
 devout orchid
@serene roost jut make it a child of a shoulder/chest and weight paint is the same shade for an upper arm/shoulder?
 quaint jasper
trail patio
hey guys im just wondering how to enable the smooth edge when using subdivide.. ...
quaint jasper
trail patio
hey guys im just wondering how to enable the smooth edge when using subdivide.. ...
You're looking for this menu

It's crease
trail patio
quaint jasper
You're looking for this menu
Hi sorry I suppose there’s a little misunderstanding here. I was wondering how to make the outline of the subdevided mesh curvy (like in the screenshot) I really appreciate the reply tho!! Thanks!!
quaint jasper
trail patio
Hi sorry I suppose there’s a little misunderstanding here. I was wondering how t...
Wdym by outline/smooth edge? Do you have an example of what you want to do and what you currently have?
trail patio
quaint jasper
Wdym by outline/smooth edge? Do you have an example of what you want to do and w...
Mmm like in the tutorial I watched (the one in screenshot) I noticed the things r like that

But in my blender it’s more like this

Idk if that explains it, I’m not one that’s good at such ((
quaint jasper
trail patio
Mmm like in the tutorial I watched (the one in screenshot) I noticed the things ...
So, you have the subdivision modifier on your mesh?
trail patio
quaint jasper
So, you have the subdivision modifier on your mesh?
Yes, the modifier is working but it’s just the outline box thingy that’s still looking very.. low poly?? It doesn’t effect the modifier but kinda itches my brain
Could it be because I’m using 3.6?
devout orchid
@trail patio click buttons on top of modifier while in edit mode, one enables preview of mesh itself, the other smoothes control points
 eager mural
I am having issues applying textures to a model that i imported from blender into unity. I believe i baked textures in blender ok. But when i add some textures to my model in unity, the orientation of the texure is off. Do i need to make sure my blender model has the same coordinates when imported into unity. If so, the how? Any advice appreciated
devout orchid
make sure you have only one set of uvs in blender, usually baking requires two (old/baked)
 subtle panther
 mint silo
next model im working with 

 steady zealot
Progress on my first from-scratch avatar. (final Fantasy inspired)

 dull crater
Currently working on this
My first time getting this far. Trying to figure out what the next steps are after
I plan to make it quest compatible


 gaunt flame
I'm excited I'm making a 3D tutorial course for the community. https://youtube.com/playlist?list=PL9TGeh1VR5NBKFC6aIbRmtIgEZQY6vLp7&si=BnPYTlsVyvAo0W9N
YouTube
I'll guide you through the entire journey of crafting your own 3D stylized character from start to finish. We'll delve into rigging, dubbing, UV unwrapping, ...


I just upload one today. https://youtu.be/rUdSTqfkjwM?si=O25JiSlRmFX9b_xU
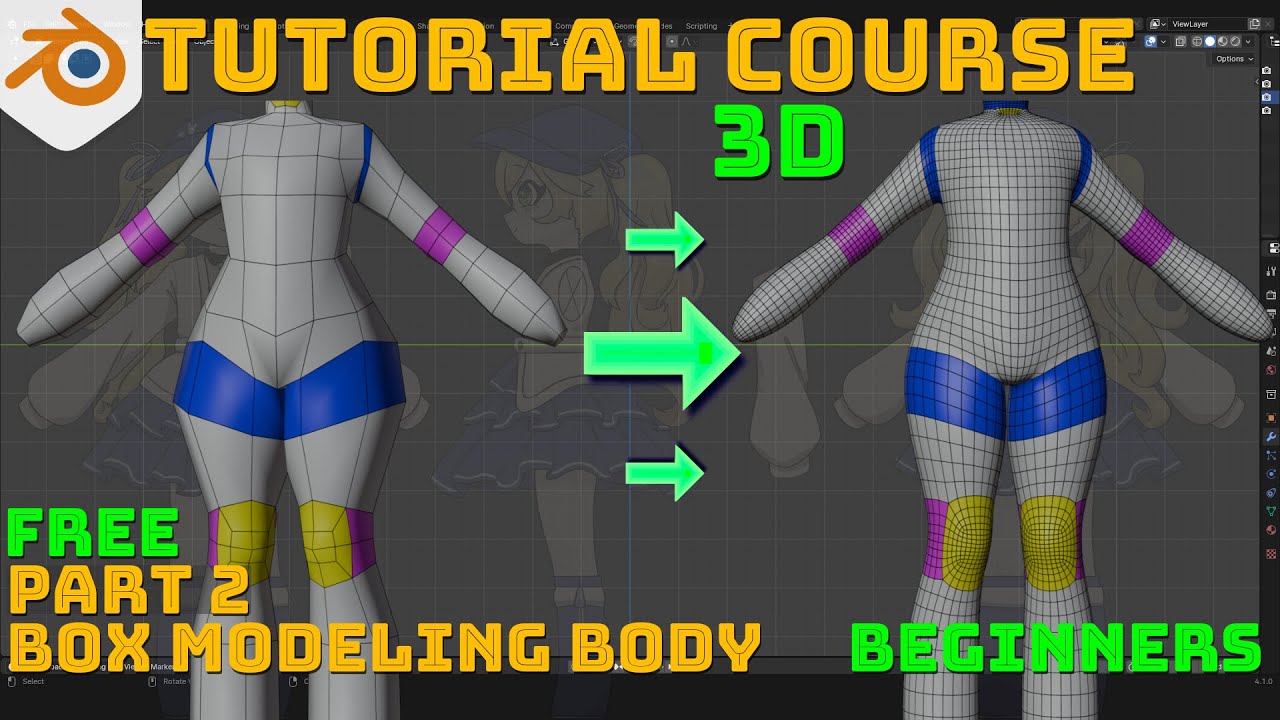
I'll guide you through the entire journey of crafting your own 3D stylized character from start to finish.
We'll delve into rigging, dubbing, UV unwrapping, texturing, adding clothing, and accessories, and finally, seamlessly integrating it into platforms like Unity, VTuber, VRChat, and beyond."
https://youtube.com/playlist?list=PL9TGeh1VR5NBKF...
 vague sonnet
Does anyone have any recommended workflows for modeling hair? I’ve been using the curves method for a bit but I’ve been hoping to find a method that would help make the hair look like it’s all the same object, if that makes sense
Because the curves are all separate, that sort of deal
steady zealot
vague sonnet
Does anyone have any recommended workflows for modeling hair? I’ve been using th...
You could try sculpting hair, and then going over it and retopologizing it
Besides sculpting, and curves, you could try box/poly modeling it with subsurf, if you're comfortable with that (creases are your friend)
though, those methods will look sort of clay-like unless you really buckle down into the details
Though sculpting and box/poly modeling allow you to bake your high poly sculpt/model to the lower poly retopology, so you can keep the details in texture form. And using something like substance painter, might help (smart materials/masks) with shading the crevices and such
vague sonnet
steady zealot
Besides sculpting, and curves, you could try box/poly modeling it with subsurf, ...
I’m looking to try both of these methods this week, what do you mean by creases?
steady zealot
When using a subsurface modifier in blender (and I assume other programs as well) you can select edges and in the item tab of the toolbar on the right, you can adjust the crease value.
 steady zealot
vague sonnet
I’m looking to try both of these methods this week, what do you mean by creases?
steady zealot
vague sonnet
I’m looking to try both of these methods this week, what do you mean by creases?

it basically tells the subdivision surface modifier that those edges should be sharp, and not rounded over
vague sonnet
This is extremely helpful, thank you
steady zealot
vague sonnet
This is extremely helpful, thank you
You can also use the bevel modifier set to "weight" mode, and then mark edges with bevel weight values (located in the same area) to make them a little more defined and less smooth (in terms of shading)

 steady zealot
You can also use the bevel modifier set to "weight" mode, and then mark edges wi...
steady zealot
steady zealot
You can also use the bevel modifier set to "weight" mode, and then mark edges wi...
Alternatively, you can turn on "Auto Smoothing" in the normal data tab, and then mark sharp edges as sharp.
 dull crater
How do you add eyes and then what comes after sculpting?
steady zealot
steady zealot
Alternatively, you can turn on "Auto Smoothing" in the normal data tab, and then...
 steady zealot
dull crater
How do you add eyes and then what comes after sculpting?
steady zealot
dull crater
How do you add eyes and then what comes after sculpting?
Retopology in Blender 2.8 - full 4 hour series on retopo in Blender
https://flippednormals.com/downloads/retopology-in-blender-2-8/
In this Blender 2.8 tutorial, we'll teach you how to retopo using vanilla Blender 2.80 without addons. The techniques taught can be used to make topology for any character or 3d model. #b3d #blender
05:31 - Retop...
This is what you should do after you've finished your sculpt
It turns the messy sculpted mesh into a clean, game/animation-ready model
dull crater
Sounds good
steady zealot
And typically, Eyes are just spheres (or half-spheres) with bones (armature) where the root of each eye bone is directly in the center of the sphere so that they rotate smoothly

 steady zealot
That should probably come later
After you've done the retopology
When the time comes, you can just add a sphere primitive
dull crater
Alright, thanks for the help btw
steady zealot
No problem!
dull crater
Running into a separate problem when I try to start
When I spawn the plain, it is not aligned correctly and appears away from the model. Which may make it impossible to properly allign for retopology
 steady zealot
dull crater
When I spawn the plain, it is not aligned correctly and appears away from the mo...
steady zealot
dull crater
When I spawn the plain, it is not aligned correctly and appears away from the mo...
Watch the video I linked, it's very useful and covers everything you need to know to get started
they use project from view to align it with the surface of the model. And to get it there to begin with you just kinda gotta move it over there with the widget
dull crater
Problem when we got to mirroring.
It mirrored onto itself rather than the model
 steady zealot
dull crater
Problem when we got to mirroring.
It mirrored onto itself rather than the model
steady zealot
dull crater
Problem when we got to mirroring.
It mirrored onto itself rather than the model
You have to set the origin to be the middle of the scene (or the same origin as the sculpt). Then you move the plane in edit mode
dull crater
steady zealot
You have to set the origin to be the middle of the scene (or the same origin as ...
How do I do that?
quaint jasper
dull crater
How do I do that?
CTRL + A > Apply all transforms
You can Google most things for Blender though
 bleak mica
Hello everyone i have a question can someone also depinarize p3d files and fix the distortion of those files? i managed to debinarize some p3d models but they are distorted and i dont know how to fix that. Is it possible can anybody help with that?
 hushed leaf
what is "depinarize"?
dull crater
I have gone through several videos and taken all of the advice. I still cannot set the origin point
Every time I try, the plane spawns to the side and will mirror into itself
 barren meadow
Objects are added at the 3D cursor by default. After you add it, while in Object mode with the Plane selected, you do as Ruuubick mentions (ctrl + a, all transforms). Then you can add a Mirror modifer.
The 3D cursor sticks to the surface of the mesh you double-click on. Making it very easy to start the way you're planning to. Though, there are other programs and workflows for retopo as well.
dull crater
I'll give it a shot when I get home from work
I was not aware of a double click so that may help
Just to make sure
Object mode
Double click on model of bird
Ctrl + a, all transforms
Add the plane
Add mirror modifier
Is this the correct order?
 azure sluice


 azure sluice
Modeling a critter for a friend of a friend
dull crater
dull crater
I'll give it a shot when I get home from work
I was not aware of a double click ...
Sorry I keep asking about this
quaint jasper
dull crater
Sorry I keep asking about this
Yeah that seems correct
 solar fossil
Another option is to use the eyedropper/dropdown from the mirror modifier tab to set the base mesh as the reference for the mirroring plane, but it only works right if the base mesh has the origin in the middle.
dull crater
This has fixed the initial issue
Although I believe they should be 100 percent on the same spot on the other side, which is not the case
 dull crater
Added context
The one on the left is the mirrored while the one on the right is the original
dull crater
Or is this something I don't have to worry about?
barren meadow
@dull crater Do you know what your Origin is and how to move it around?
Every object has an Origin. Knowing how to manipulate that Origin is an important aspect of navigating, modeling, and modifying in Blender.
In this case, either your origin points are not aligned or your mesh's origin isn't in the center of it. It could be that your mesh isn't perfectly symmetrical or that it was mistakenly moved off of the 0 point of the X axis.
Your Origin will look like a little point that matches the color of your selection outline by default.
If your mesh is symmetrical and its origin is still centered, then the mesh needs to be moved back to the 0 of the X axis.
If the origin is offset and the mesh is symmetrical, you can set origin to geometry using the search function.
If you want to play around with manually moving the origin, you can move it to the 3d cursor as well.
dull crater
barren meadow
If your mesh is symmetrical and its origin is still centered, then the mesh need...
How do I do this part?
Due to how the sculpting process works for me
It tries as hard as it can to be symmetrical, but there are spots where it just couldn't
 restive sorrel
trying to put it in a pose but getting this error any ideas
 steady zealot
azure sluice
steady zealot
azure sluice
this is really good! Also a very cute design
azure sluice
steady zealot
this is really good! Also a very cute design
Thank you! I appreciate the kindness and support :3
 quick thunder
azure sluice
quick thunder
azure sluice
looks sick
what if you incorporated little glowy particle strings inbetween each joint? could look cute
azure sluice
quick thunder
looks sick
what if you incorporated little glowy particle strings inbetween each...
That'd be cool, but I didn't wanna stray too far from the original design that I was provided -w-
I usually do add small details like that on all my models though, cause small details just make things look way more nicer to the eyes :3
quick thunder
Fair enough ye
azure sluice
Im just trying to find out what to model next tbh, I have a long list that Im workin through currently
dull crater
dull crater
How do I do this part?
Once again, sorry I keep asking these things
quaint jasper
dull crater
Once again, sorry I keep asking these things
Go in edit mode and select the entire model then search for the Symmetrize function
 tired marsh
This is just a clean up job I've been working on still working on it I'm sure everybody recognized the avatar and the character


 frosty void
Prop only shows in mirrors...why?

 cursive summit
Idk how this even happens, but I import the model into unity and it looks like what it does on the left, the right is what its supposed to look like

 devout orchid
triangulate your stuff
 hallow epoch
Was wondering if anyone could help me, i just bought a model for an avatar i want to make, i just need to retexture it, i want to do that by mmoving it from unity into blender, can anybody helpp?
 wheat delta
You probably got a .fbx or .obj file in there. Blender is able to import those, but hitting file>import and then the format you want to import, navigate to the model file and select it, should be all it takes.
You can't just drag the file into Blender, if you tried that.
 shrewd hazel
why is this plain's uv mapping infinitely thin


 manic siren
what happens if ya select all the faces of the object?
shrewd hazel
 manic siren
don't know a ton about blender but that looks like an edge by itsef
but i could be wrong
 faint bronze
Could be an extra edge, yeah. That's what it looks like. Try adding a texture to the object. My guess it it'll look fine, and you'd probably be safe to delete the extra edge
faint bronze
shrewd hazel
im a masssive idiot when it comes to blender
select the edge and delete it. see if anything change. it should remove the weird UV
shrewd hazel
faint bronze
select the edge and delete it. see if anything change. it should remove the weir...
wont that also delete the face though?
like i want the face that is pure black but idk how to texture it because its mapping is so thin
wait i have an idea
manic siren
if it's an extra edge it shouldn't be connected to the face, you should be fine to remove it worst case undoe the change
faint bronze
manic siren
if it's an extra edge it shouldn't be connected to the face, you should be fine ...
yeah this is what I was trying to get at
shrewd hazel
deleting the edge also deletes the face
manic siren
make a new face?
faint bronze
Did you delete the one that's creating that UV or did you just select the edge on the object, cause if there was an extra edge you could have selected the one connected to the geometry by mistake
manic siren
ive had it before where blender would make random extra edges and i'd have to go through deleting edges and replace the faces
manic siren
couldn't say didn't notice till after revisiting a project
but it's very possible
i do fat finger more then i'd like to admit
faint bronze
I do it all the time too 🫠
shrewd hazel
i dont think there are any extra edges because i cant find them
faint bronze
Have you tried creating new UVs?
shrewd hazel
also i feel like i should of said this sooner but i made the face by going to vertex -> New Edge/Face from Vertices
shrewd hazel
faint bronze
Have you tried creating new UVs?
i dont know how to do that
faint bronze
oh
shrewd hazel
i am very basic at blender
shrewd hazel
i made a new material and texture and it still has the same result
but i have a feeling this isnt what you mean
shrewd hazel
im so sorry i dont follow
faint bronze
ignore the UVs for now
Put a texture ON the object. Does the object's textures look as they should on EVERY face?
if they do, honestly I'd ignore the weird UV
faint bronze
okay, then you'll need to redo the UVs. I don't know how Blender works since I use Maya, so for your cause I'd look up a youtube video for how to UV map in Blender
shrewd hazel
i just did somthing by accident and it seemingly fixed my problem
i just dragged from the middle of the line
and now its not a line anymore its a triangle
 lost panther
Anyone know why the UV isn't showing here? It came with made UVs, but it won't show. Even if I do "Unwrap UV"

 quaint jasper
lost panther
Anyone know why the UV isn't showing here? It came with made UVs, but it won't s...
quaint jasper
lost panther
Anyone know why the UV isn't showing here? It came with made UVs, but it won't s...
Unsure if you've solved it, but have you tried deleting that existing UVMap and making a new one to unwrap on? Depending on which blender version this model was made on, it might have lost data on the way if yours is less recent
 uneven quartz
Trying to edit a model's blend file AGAIN, and whenever I opened it, I got this. I checked it out in Unity, and this error causes the upper legs to deform in such a way that is catastrophic. If I leave the unity project and re-enter it, it gets even worse and looks even more diabolical, as in, it looks like the model was sucked into a black hole. Does anyone know a fix or something that I need to do in order to prevent the leg deformation and the black hole effect?

I'd show a picture of what both parts look like in Unity but I'm hella too afraid to even go in. I get nightmares even thinking abt it.
 keen sierra
my 3-week wip <.< (censored bc discord be discord aye)

 pseudo knoll
cooking /w the fallback protogen

got it down by 1k polys, so I have more headroom to add bits and bytes
got this sloptology (the ear crease)

looking like this instead

snap to symmetry is also a godsend when you'reworking with an already complete avatar
 versed kettle
 dull crater
Hi. It me being dumb again
What buttons is it again to duplicate the planes in topology?
It's all aligned now so that's fixed up
I just forgot what buttons to press to actually duplicate the planes
 solar fossil
If you want actual duplicate it's shift+d (alt+d for linked duplicate, only in object mode)
Select an edge and press E for extrude if you wanted to do that instead
 cobalt tiger
Head under 5k from scratch

might make low poly regular looking dudes with these. hope to make the head a popular head base
 sour thorn
Is anybody here good with blender, I started learning it last week and I tried to reopen a file I was working on today but when I remeshed I got this:


Second picture is the problem im having, first pcture is what it looked like before the remesh
 proven wraith
What’s the ideal Blender version to use that Cats work on?
devout orchid
dev/forks work on 3.6
 empty fox
proven wraith
What’s the ideal Blender version to use that Cats work on?
empty fox
proven wraith
What’s the ideal Blender version to use that Cats work on?
Probably the latest 4.1 if you use the unofficial continuation https://github.com/Yusarina/Cats-Blender-Plugin-Unofficial-

GitHub
A tool designed to shorten steps needed to import and optimize models into VRChat. Compatible models are: MMD, XNALara, Mixamo, DAZ/Poser, Blender Rigify, Sims 2, Motion Builder, 3DS Max and potent...
proven wraith
Thank you both for the information! Been meaning to upgrade for a long time now from 2.8
empty fox
Official CATS has been pretty much abandoned, tuxedo is the continuation when it comes to baking textures and this is the overall continuation.
barren meadow
sour thorn
Second picture is the problem im having, first pcture is what it looked like bef...
Remesh doesn't like holes in your mesh.
If there's a hole anywhere before you try to remesh, remesh does this.
lost panther
quaint jasper
Unsure if you've solved it, but have you tried deleting that existing UVMap and ...
I did fix this. I was in image editing, not in the UV editing thing haha


 pastel tendon
i made a cool robot arm thing


 steel fable
pastel tendon
i made a cool robot arm thing
steel fable
pastel tendon
i made a cool robot arm thing
It would have been cooler if it was Gut's prosthetic arm from Berserk with an arm cannon and all.
 swift jolt
swift jolt
swift jolt
Mostly done . Phew


 burnt glacier
Does anyone in here have any good videos on how to bake normals into a mesh? ive never done it before but it seems like it might be a bit easier then manually making things like folds and creases
swift jolt
burnt glacier
Does anyone in here have any good videos on how to bake normals into a mesh? ive...
Super easy gimmie a sec to find one

How to bake normals from a high poly mesh to a low poly mesh.
#blendertutorial #blender3d #3dmodeling
This one is pretty straight forward. He talks a littlw fast tho so 0.75 speed is good
burnt glacier
thank you ill be sure to check it out
 solid minnow
Redoing my chibi base I started a while ago. What do you all think so far?


 solid minnow
Redoing my chibi base I started a while ago. What do you all think so far?
solid minnow
solid minnow
Redoing my chibi base I started a while ago. What do you all think so far?
More detail added :3
 pseudo knoll
quest has extremely limited shading, so "true emissives" and whatnot" cannot be achieved, solution?
Just make the emissive parts of your avatar face towards the same direction, normal-wise, so you can become unshadeable and your emissives will pop out on quest
 pseudo knoll
sour thorn
Is anybody here good with blender, I started learning it last week and I tried t...
pseudo knoll
sour thorn
Is anybody here good with blender, I started learning it last week and I tried t...
poly count so high you're getting Moiré Patterns
create some duplicate projects and tweak the retopo tool settings until the issue is fixed, if not then try using various retopo add-ons and see what changes
dull crater
Running into a new problem. I try to duplicate the plane with Shift + D
But it's invisible. Only thing I can see is a single line
Not present in the photo

But the white line that gets copied is identical to the white line selected on the plane in the photo.
pseudo knoll
pastel tendon
i made a cool robot arm thing
did kirby steal kay jay's hat (from virtual insanity) and then consume an android lol
looks nice
pastel tendon
pseudo knoll
did kirby steal kay jay's hat (from virtual insanity) and then consume an androi...
what
lmfao
thanks
pseudo knoll
pastel tendon
what
not enough people abuse the "crispiness" of not using texture filtering / bilinearization
pastel tendon
pseudo knoll
not enough people abuse the "crispiness" of not using texture filtering / biline...
true
dull crater
dull crater
But the white line that gets copied is identical to the white line selected on t...
But yea, it copies the tiny highlighted white line, but not the plane itself
 keen sierra
my 3-week wip <.< (censored bc discord be discord aye)
keen sierra
keen sierra
my 3-week wip <.< (censored bc discord be discord aye)
Still on this x)


 indigo sedge
One of commissioned models made by me 👀 🍄
 dull crater
dull crater
dull crater
Yea, this is the best way to describe the issue I've run into
quaint jasper
indigo sedge
One of commissioned models made by me 👀 🍄
That's super cute
keen sierra
maw!
 keen sierra
progress on the maw
 solid minnow
She's almost done!! She will be getting some clothes as well though.
 dull crater
Again, sorry for all the issues I've been running into
Hopefully this will be the last one until I've finished the topology.
But I tried to copy the plane, but I don't see the plane, I see the side of the plane it copied, but nothing else.
Image edited as example

 vague galleon
How do I use viseme in blender because it seems that that is the only way to get it to work
?
Is this correct

I am new to all of this
the mouth always is open WTF
I'm really getting pissed off at this
bro is typing an essay
vague galleon
barren meadow
Not for you, dw
Hey is the picture correct of how to get a viseme to work?
 azure rain
vague galleon
the mouth always is open WTF
azure rain
vague galleon
the mouth always is open WTF
you did literally put the exact same blend shape on every viseme except like two so that's not exactly going to result in changing mouth
vague galleon
azure rain
you did literally put the exact same blend shape on every viseme except like two...
I told you I'm new to this
azure rain
sil would be the no talking blend shape
vague galleon
where is a vc so I can show you
barren meadow
Talking and mouth is like "AAAAAAAeeeAAAAAAee"
azure rain
vague galleon
where is a vc so I can show you
there is none on this server
vague galleon
damn it
vague galleon
barren meadow
Talking and mouth is like "AAAAAAAeeeAAAAAAee"
?
vague galleon
azure rain
there is none on this server
I DMed you
azure rain
are there any other blend shapes available for the Avatar besides those two
vague galleon
azure rain
are there any other blend shapes available for the Avatar besides those two
well, yes but idk where to put them
also I called you in dms
azure rain
you're in the right spot you just need to match them up with the same letters so ff goes in the ff slot
barren meadow
That's an unrealistic expectation to have of a stranger imo
vague galleon
azure rain
you're in the right spot you just need to match them up with the same letters so...
there is only A E I O U
vague galleon
barren meadow
That's an unrealistic expectation to have of a stranger imo
what to you mean?
I need a visual help but idk
azure rain
vague galleon
what to you mean?
expecting me to get in a call with you
barren meadow
There's a lot of free online resources.
vague galleon
azure rain
expecting me to get in a call with you
dude I said I need a visual help FFS
barren meadow
Give me a moment.
azure rain
what is there to show you just match up the letters the closest you can
vague galleon
what is so hard to just help someone who is new to this
barren meadow
Expectation of a stranger to commit to being your personal guide for free is a bit unrealistic. Being rude is likely to discourage others from helping you in the future. They were trying to help you.
Give me a moment to get a link to VRC School.
vague galleon
barren meadow
Expectation of a stranger to commit to being your personal guide for free is a b...
It's just for this part ffs yet all y'all say that I need my hand held for every single micro feature
Really unrealistic of you tbh
azure rain
https://developer.oculus.com/documentation/unity/audio-ovrlipsync-viseme-reference/ here's what each of the letters in the VR chat viseme look like visually
A complete table of visemes detected by Oculus Lipsync, with reference images.
barren meadow
If you are new, you don't understand the complexity of things you're asking.
Be nice.
A server I'm in has people compiling data and help here.

Everything you need to know to make VRChat Avatar Systems
It can help with things later on as well.
That mainly compliments the existing Docs VRC officially provides.
 keen sierra
we have a tongue and its rigged ^_^ finally i can move on to other body parts lmao
 dull crater
Does anyone know how to fix this issue I've been having
I'm trying to copy this plane, but this is all it does

 river geode
Hey guys not sure which channel is most proper. So I have a model I wanna slap some clothes on.
The workflow I usually follow is to resize, sculpt, cut the base avatars bones down, do a data/armature transfer etc.
The issue I'm hitting is that my model is T-Pose and all the clothes I want are A-Pose. Not sure what steps I should follow to make this work.
devout orchid
store t-pose as a separate pose, then a-pose model, store it as rest pose (cats or manually), attach etc, load old pose, store as rest pose
oh, you edit the og armature. not sure how it would work
river geode
Nah, that worked-ish. Issue I hit after that was the model I grabbed had almost 400k Faces, and had internal faces, AND they didn't weld seams
So I have to decide if I want to continue sinking time into it. Or find another model
 proven linden
I have been struggling how to model this in Blender. If you could really help me, I would really appreciate it by, providing me the steps. Also how do I make bend onto the face.

 subtle axle
why when i try to loopcut the cutting goes in a very weird way???
i am trying to add more polygons on that sleeve, i just don't know how
 devout orchid
edge loops works only on quads, at least in a meaningful way . try tris to quads first, otherwise just use knife with cut through (and hand itself hidden to not be in a way)
dull crater
Apologies for me bringing this up again
I am unsure what I did wrong here, but the plane doesn't seem to be copying correctly. Instead only copying the edge of the plane
(Retopology)

Additional details
Upon moving the plane away from the copies, I'll find multiple edges in the spit I originally copied from. But upon deleting them and trying again, the issue happens again
dull crater
dull crater
Additional details
Upon moving the plane away from the copies, I'll find multip...
I had also gone back and watched the tutorial that I was sent when I was having some other problems with this.
Everything is set up the same, however, the video says nothing on this particular issue
devout orchid
wdym not copying, what exactly you do, what shortcut and when what is selected
keen sierra
If youre retopologizing, you dont want to duplicate anyway, you want to use e on an edge in edge select mode and extrude
dull crater
keen sierra
If youre retopologizing, you dont want to duplicate anyway, you want to use e on...
Ah, I'll give that a shot in a little bit, for the longest time, I thought it was just shift + D
dull crater
Update: thank you guys so much
It turned out that yes. I was using the wrong buttons
 dull crater
These are the three spots the issue is present in
More minor issue
I can't go in object mode to fix this since they are both technically the same
And no matter how I orient it, I can't use
Ctrl + alt to select both to merge
I am trying to merge these into one


Ignore image 1, accidentally sent that
But there are three points I'm trying to merge together, but no matter which way I orient them, I can't select them with ctrl + alt to merge
Or would removing the part on the top of the head work better?
devout orchid
uhhh if its the same mesh you use smth like f (select two edges to connect with a new quad) or select two or more verticies and use m - merge to connect them into one.
no idea what ctrl+alt merge is
dull crater
Both of these are part of the same mesh
Somehow, I managed to separate them from one another
devout orchid
to join two separate objects just select both and ctrl+j in object mode
dull crater
They still count as the same object and both light up when I select one or the other
devout orchid
then why you think they are separate objects
dull crater
It's not that it's two separate objects. What had happened was I started with a spot on the beak, worked up the head, then branched down towards the mouth. Causing spaces between with I was doing with the head and mouth. Somehow, I accidentally deleted the vertices connecting what was on the top to the bottom
devout orchid
just f/m as i said
dull crater
 devout orchid
theres also an automerge button when two verticies are close enough so you can just drag them, but i dont know if its usefull for retopo since you need to use other type of snapping
dull crater
Where's that?
devout orchid
somewhere around shading selection i think? top right corner of 3d
dull crater
Cut it down to only a small few vertices atop the head.
The problem I'm running into now is automerge refusing to work. I am not sure what I'm doing wrong with it
keen sierra
dull crater
Cut it down to only a small few vertices atop the head.
The problem I'm running ...
Dont take what im going to say as rude. If you are following a tutorial, and that tutorial tells you to remesh this dense, you may be looking at the wrong thing. Remeshing is not only meant to reduce vertice count, but it also is supposed to give you a nice base with good edge flow that is rather basic - meaning you can always add more topology by adding loop cuts later as long as your edge flow is okay, but more topology from day 1 also means you have more to decimate, fix and merge later. You dont want to need to retopo your retopo'ed model. Furthermore, speaking about edge flow, if you are expecting this model to move later, you have more things to think about than just density: Areas with a lot of movements need right topology to deform correctly. A prime example for this is the eye and mouth area. Both need "rings" around them so you can make the model deform smoothly and more as expected. It makes sense to map out areas that need this certain type of topology first, kinda like patches, and then sew them together later by filling in the rest. Also I must point out you seem to have skipped every basic blender tutorial out there. I cant say i didnt, but i did that knowlingly, and while doing so did my own research whenever i needed using google. This issue you are having is very basic. Again, Im not trying to be mean here, but maybe i can convince you to watch another few more basic tutorials so you can make decent progress on your project without gettings stuck all the time. Anyway, if auto merge merges vertices incorrectly, click the "Options" bar at the top right and set the merge distance lower.
Here's a few things you may want to consider watching: https://youtu.be/gLIKFCFxnIM?si=qSh3hTUuMh2gpNEo https://youtu.be/3EG7krYP1h0?si=HRH1A4B4UrQts6G- https://youtu.be/OY7FlJ8xTz0 https://youtu.be/JAVuPYCcd1k
My Gear:
My 3d Printer | Elegoo Mars 3 Pro https://amzn.to/3ju4AJd
Resin Printing Wash & Cure Station | https://amzn.to/3WP8j2q
3d Printing Ventilation Fan | AC Infinity Cloudline https://amzn.to/3GuAX3D
3d Printing Ventilation Box | AC Infinity CloudLab https://amzn.to/3i48Bnu
3d Printing Ventilation Ducting | AC Infinity Ducting https://amzn.t...

My LinkedIn: Anton Aleknavitsjus
My Artstation: https://asmedia3d.artstation.com
My Email: asmedia3d@gmail.com
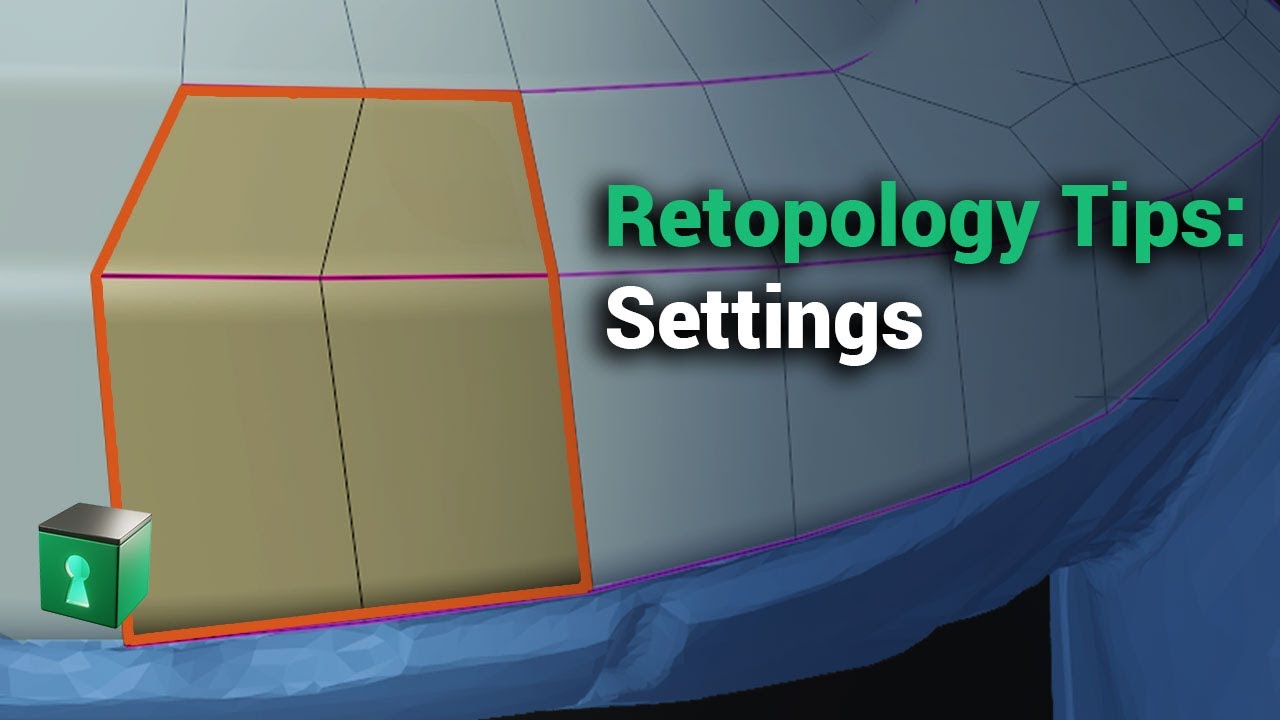
In this video we look at the basic settings that will ensure a trouble-free retopology workflow.
Get the free Blender Secrets sample PDF: https://mailchimp.blendersecrets.org/freesample
Get the 1000+ page Blender e-book with free updates: https://store.blendersecrets.org/l/IxofeY

Continuing with the retopo tips, we have a look at the F2 add-on that ships with Blender by default. It helps us quickly add faces.
Get the free Blender Secrets sample PDF: https://mailchimp.blendersecrets.org/freesample
Get the 1000+ page Blender e-book with free updates: https://store.blendersecrets.org/l/IxofeY
Oh also, since you're modeling, i have a tip for you. If your topology becomes rigid a lot and the squares deform a lot, use the smooth brush and set it to "surface" rather than "laplacian". This will smooth the topology while preserving most of the volume. Ofc this isn't 100% perfect but it will help with evening the quads out. You can best see the effect of it if you enable wireframe in the viewport settings.

 dull crater
Yea, I watched another video last night after posting this too
In which they went over methods to get the face done easier. Making sure it's clean and able to be merged more easily
pseudo knoll
Manual Semi-mirrored (to allow non-symmetrical details in the chest regions) UV unwrap, broke three blendshapes I spent so long on but it was worth it because clean uv's hell yea

 proper ice
in blender, how can you tell what units you're working with? (meters, feet, inches, etc.)
quaint jasper
proper ice
in blender, how can you tell what units you're working with? (meters, feet, inch...
It's metric units by default
pseudo knoll
I've decided to install blender on steam and transport my config there so I can keep track of how much time I've been starting at a gray screen with lines and polygons on it
the hours are stacking up fast, help
pseudo knoll
blursed 2d-eye movement solution (creds to crazium for teaching how in casual conversation)
 pseudo knoll
0.0001 of a degree is enough to move it 1/20th across the face holy cow

very afraid of point precision errors
azure sluice


 proper ice
pseudo knoll
blursed 2d-eye movement solution (creds to crazium for teaching how in casual co...
proper ice
pseudo knoll
blursed 2d-eye movement solution (creds to crazium for teaching how in casual co...
What is this in reference to?
 onyx jewel
pseudo knoll
0.0001 of a degree is enough to move it 1/20th across the face holy cow
onyx jewel
pseudo knoll
0.0001 of a degree is enough to move it 1/20th across the face holy cow
likely you are using the wrong transforms
check for Eye.L or Eye.R as that's the most common error I see
pseudo knoll
onyx jewel
likely you are using the wrong transforms
nono
its so I can have 2d eye movement
the longer the eye bone is, the less it will rotate and the more it will slide around an "axis"
got it working yesterday
pretty neat having an led screen have fakeish eye movement
 rose gust
hey this is a lil random but does anyone know a good way to possibly model like toony serrated teeth? been making a custom mouth on a model i like and im not sure how to tackle this part/idea. Mid artist rendition for reference
 pseudo knoll
rose gust
hey this is a lil random but does anyone know a good way to possibly model like ...
pseudo knoll
rose gust
hey this is a lil random but does anyone know a good way to possibly model like ...
toony works with toony, be cautious when mixing toony with realistic / organic structures, you may get something blursed,
you could always model real teeth in a toony artstyle that are sharp triangles, mirror modifier for symmetry and place them around until it looks satisfactory
rose gust
hm alright... was just wondering if there would be a better way to do it than just that lol. mainly with wanting to have the teeth fit together nicely, or at least close enough to nicely as i can manage
pseudo knoll
that requires doing it manually, if you look at the rex's teeth solution, it was either: modelled then placed by hand, or sculpted, decimated, and placed by hand
it requires expirementation and looking at a reference for consistency
hushed leaf
rose gust
hm alright... was just wondering if there would be a better way to do it than ju...
you could literally draw those lines using the knife tool
steady zealot
pseudo knoll
the longer the eye bone is, the less it will rotate and the more it will slide a...
It's not about the length of the bone. It's about the distance of the pivot of the bone from the plane where the eye needs to move on. For example, keeping your eye bones the exact same size, but moving them farther behind the head, and turning the max eye movement way down will work too.
this is my shittily drawn diagram to demonstrate

the green dots are the bones, and the light blue circles are the radius from the center of the bone
as you can see, due to them being further behind the head, the dimension that they move on is much more "flat"
pseudo knoll
steady zealot
the green dots are the bones, and the light blue circles are the radius from the...
the thing is is the polygons of the eyes are so close to the head (ridiculously close) that I needed them to be that far out
since its a visor, the surface is really flat
rose gust
sorry to be asking again but i was trying to fix/remake the corner of the mouth to be better but when smoothing it it keeps doing this weird thing and im wondering if anyone knows what might be causing it. I know its rough in that area and im working on it but it shouldnt be doing whatever that is...

 pseudo knoll
any blendshapes attached to the verticies?
vert normals might be borked, usually caused by a blendshape left active, using modifiers or residual weight paints
select vertices
Alt + N
Reset vectors // smooth vectors
rose gust
there shouldnt be any blendshapes and if so i royally did something lol but ill check that to see if it helps! also still tried to clean up the mouth and ended up with this. its just the area i cut out/redid ;w;

oh that sorta fixed it?! that was with reset ill try smooth thanks

the separate sections seem to be shaded differently but it looks smooth/right so thanks!
quaint jasper
You might want to check the normal orientation of these faces
rose gust
.... O H H

 spare plover
What blender version is good?
 fleet parrot
I think this is where i'd ask but which unity version should i be using as a first timer? Or is there not much of a difference
devout orchid
@spare plover 3.6 for avatars (cats plugin), the latest for worlds (just becuse why not, more powerfull nodes etc)
rose gust
so i did a slight goof: do you guys know a good meathod for mirroring something in blender? ctrl M keeps doing something weird and i cant seem to duplicate it either-
i mirror modifier-ed this and now i need to add it to something without the modifier
devout orchid
uh, just split it, add mirro, apply, combine back? hard to understand the issue
devout orchid
well normally to mirror stuff you just add mirror modifier
rose gust
and when i tried to do the duplicate or mirror shortcut parts were getting stretched and im not sure why concidering im pretty sure i have everything selected. used ctrl l to help with that
devout orchid
dto duplicate along some axis
rose gust
i used the mirror modifier but
devout orchid
then your origin is in thef wrong place
rose gust
im putting it on the model that doesnt have a mirror modifier
oh
how could i fix that?
devout orchid
shift s - cursor - to 0 or whatever its called
theb obect - set origin - to 3d cursor
rose gust
got it working! just now im stuck on another thing lol
is the mirror modifier the only way to mirror adding and removing vertexes?
needing to attach it and edit stuff on both sides but the top mirror thing seems to only mirror moving parts

this is called i did not think ahead
pseudo knoll
I have no clue where to ask but with the deprication of the Q1 will we see perf rank poly-count limits on Quest ever change? I'm looking forward to some insight for some future-proofing / prepping
azure rain
pseudo knoll
I have no clue where to ask but **with the deprication of the Q1 will we see per...
the poly limit has already been adjusted for the Quest 2 when it came out
pseudo knoll
oh
 heavy sonnet
rose gust
hey this is a lil random but does anyone know a good way to possibly model like ...
heavy sonnet
rose gust
hey this is a lil random but does anyone know a good way to possibly model like ...
cut them out with the knife tool
i've done this before
does anyone know how to change instances rotation to align with normals in blender?
i don't know anything about geometry nodes btw so i haven't been using them
they stay at the same orientation

even though the plane is rotated

i just don't want them to be deformed along the curve, only rotated to the same orientation as the normals
heavy sonnet
nvm i think i figured it out
rose gust
heavy sonnet
cut them out with the knife tool
honestly would have been easier than what i ended up doing lol
eh
but uh im trying to start the blendshapes part of working on this but for some reason the shape key section is only editable in object mode. when i go into edit i cant interact with it and the words are greyed out
there are some previous shapes still on it but i cant do much more than change the value
 pseudo knoll
it will be cannon soon that the fallback protogen uses nuclear fission for battery power instead of having a generic battery icon on the back
 pseudo knoll
last phase, I had to manually bake the emission light bounces, but because the mesh is not static, I had to manually overpaint it so it would make sense ^^, not fun, but its worth it since its the public fallback

 lone blaze
finally stepping out of my comfort zone and trying character modeling


 quaint jasper
lone blaze
finally stepping out of my comfort zone and trying character modeling
quaint jasper
lone blaze
finally stepping out of my comfort zone and trying character modeling
Ankles feel quite far back on the ref sheet, and torso is minuscule (proportions and location of bones is relevant for FBT) rest seems good !
barren meadow
Stilts don't bother some peeps. Gotta be animu.
lone blaze
quaint jasper
Ankles feel quite far back on the ref sheet, and torso is minuscule (proportions...
Well atm this is the blocking process. Haven’t gotten to sculpting yet
Plus not really using it for vrchat
 tawny pollen
 azure sluice

I’m cooking without scrap metal this time..
Still a W.I.P and literally the first furry model I’ve made, be nice :(
(Commission btw)
#vrchatfurry #Commission #commissionart #3dart #3DModel #3d #commissionopen
rose gust
lone blaze
finally stepping out of my comfort zone and trying character modeling
thats looking good!
quaint jasper
azure sluice
https://fxtwitter.com/chegg_chegg/status/1786100519498572072?s=46&t=M5lGWoW1SkBP...
I'm curious about all the changes you've made from the reference sheet to the model, is that stuff you're working on with the person commissioning it?
 quaint parcel
I've designed this avatar, how is it?
 azure sluice
quaint jasper
I'm curious about all the changes you've made from the reference sheet to the mo...
azure sluice
quaint jasper
I'm curious about all the changes you've made from the reference sheet to the mo...
oh! yeah, we're friends lol, we both had some ideas (like her being sorta chubby)!
Its been really fun and interesting making something thats not robotic lol
quaint jasper
Yeah I bet! Can't get away with ball joint weight paint anymore 
azure sluice
quaint jasper
Yeah I bet! Can't get away with ball joint weight paint anymore <a:KEK:793610287...
unlucky right...? 😭
but hey! Im always down for a challenge
quaint jasper
🫡 stay strong soldier
azure sluice
quaint jasper
🫡 stay strong soldier
Of course! Im just sorta hoping I dont attract the furry masses (I will not be prepared for the OC invasion)
joking of course, business is business
tired marsh
Hey I don't know if it's okay to ask for helping here in the section unless there was a measure part of the server that I couldn't notice but I do have this problem with blender every time I click on an object it creates a new UV setting and stuff selecting the model and I'm not trying to do that it's just create a movie layout and I'm just trying to select the model without click and drag and highlighting it basically I don't know what's wrong everything else works it's just the clicker it's not working correctly
quaint jasper
tired marsh
Hey I don't know if it's okay to ask for helping here in the section unless ther...
Could you record a video of the issue? I've never heard of a problem like that
tired marsh
quaint jasper
Could you record a video of the issue? I've never heard of a problem like that
All right hopefully you'll be able to hear me I recorded using my phone
quaint jasper
Have you ever customized the Keymapping in the Preferences window?
Any add-on that could be doing this? I assume it started at some point or is that a fresh Blender install?
tired marsh
It just recently started doing this I don't know if I accidentally hit something using my keyboard or something but it just started doing this and it's the first
quaint jasper
Can you make sure you didn't disable selection in your collection? You can see it in the top right corner, there's a cursor icon
tired marsh
With that being settings?
quaint jasper
In the top right corner where the collection is, the one that lists your light, cube and camera, on the right of that there should be icons
 tired marsh
Would it be better if I pop in one of the discord called channels and that didn't work cuz I did make sure and it's still not working
quaint jasper
tired marsh
Would it be better if I pop in one of the discord called channels and that didn'...
Try this
 tired marsh
Thank you it worked I must have click it somehow by keyframe by accident I don't know which one that was but thank you
quaint jasper


 tired marsh
Okay I have an update from my zhongli Geo archon outfit the textures and stuff are pretty much done I'm just working on rigging it tell me what you guys think of it so far I would like to hear what you guys think and don't worry he's going to be a public 😁


I apologize this was taken with my phone


 rustic pecan
Can someone give me a reference for making visemes
azure rain
rustic pecan
Can someone give me a reference for making visemes
A complete table of visemes detected by Oculus Lipsync, with reference images.
rustic pecan
Tysm
subtle axle
why any model made with Umodeler is invisible when placed on an avatar?
there is a unity package called Umodeler which adds a 3d modeler to sketchup, which can make models but i have tried that to model in unity but any model i make becomes invisible and i have no idea why
i would use it to make multiple props but it keeps disappearing and i don't really see why as it doesn't let me change the visibility of my models or maybe i don't know where to change it
i literally have no idea why i made models in Umodel and they are invisible while using them on an avatar, although, when i make worlds with umodeler everything works just fine, so why does everything made with umodeler disappear on an avatar? what could the issue be?
in the past i have tried modeling guns for avatars in umodeler but it did not work but i still want to try, umodeler is very good for cubic shapes
i just need help to find out what do i need to make those umodeler models appear on the avatars
 jovial seal
made armor for my custom wickerbeast model :P

 glossy roost
Does anyone got tips for 3d modeling vrc avatars because some people start it differently and was wondering if anyone knows anything to help start making vrc avatars
 thin shadow
glossy roost
Does anyone got tips for 3d modeling vrc avatars because some people start it di...
thin shadow
glossy roost
Does anyone got tips for 3d modeling vrc avatars because some people start it di...
Start with a template like vroid. Or start with free booth models. After that, explore it with blender
glossy roost
Ok tbh I don't prefer vroid for quest stuff but I can try booth
Modeling is there any tips to make it more easy is what I meant tho
thin shadow
yes. of course it's highly subjective.
barren meadow
Being mission-oriented is a good way to learn.
After you look at some basic beginner videos on stuff like navigating and common hotkeys, open up the program with a goal in mind and start pressing buttons. If you notice something you're trying to do feels really clunky, there's probably a better way. Ask questions or Google at that point.
You can always watch some videos of someone modeling something that has their keystrokes displayed on-screen and pick up some of their workflow and techniques.
Most importantly, you're probably not going to create a masterpiece for a bit. Be content with progress. The more time you spend in the program, the more comfortable you'll become, and thus your hands and the program will start doing what you want more frequently. Expect it to take time to produce things that you genuinely impress yourself with.
OH. And use references until you feel comfortable doing something from memory!
thin shadow
short version :
 barren meadow
Or, you know, you just be dismissive when someone asks.
quaint jasper
glossy roost
Modeling is there any tips to make it more easy is what I meant tho
Rainhet has a wonderful playlist on her YouTube channel for beginners for an entire avatar from scratch
 mint torrent
just wondering, is there any way to make disconnected faces (for extra face toggles on a low poly avatar) have the same normals as the rest of the head mesh?
right now they look obviously disconnected like this
 devout orchid
data transfer modifier - face corner data - custom normals, or smth like this
maybe for copies you just need to disable autosmooth before splitting so it doesnt try to recalculate them
 wild briar

 runic mesa
subtle axle
i just need help to find out what do i need to make those umodeler models appear...
runic mesa
subtle axle
i just need help to find out what do i need to make those umodeler models appear...
Hi @subtle axle
I'm a developer at UModeler. Did you use the Skinned Mesh Renderer for the avatar? If so, UModeler won't work because it only supports static mesh modeling. Instead, how about trying UModeler X? It supports rigging, so you can edit the mesh in the Skinned Mesh Renderer.
Here's the homepage of UModeler X: https://www.unity.umodeler.com/
If you have any more questions, feel free to ask.

Unity | UModeler X
Model, Rig and Paint your 3D Models Seamlessly with UModeler X for Unity.
 glass marten
Can someone teach me how to make a model for vrc quest
 valid needle
glass marten
Can someone teach me how to make a model for vrc quest
valid needle
glass marten
Can someone teach me how to make a model for vrc quest
youtube
pseudo knoll
quaint parcel
I've designed this avatar, how is it?
about this, problem with the internet is that a decent amount people will be too nice to give constructive criticism, and those that do may do it rudely and / or void the "what stands out that is good and bad" part, the great determination of whether an avatar looks good [in your case] comes to how well humanoid proportions are done, including muscle tone, head size (accounting for muscle), your artistic direction looks like it will be great, however from an outsiders perspective the head has a very-common issue where its that uncomfortable blend between human and animal, take some account for the head / face culture of VRChat by stopping by gumroad and seeing the trendy furry avatars, most of them have a animalistic-leaning and organic head shape.
for a buff character with that 7-8 head tall height, I'd (personally) expect to see some sort of head figure that compliments it, like a sharp jawline or that "focused eyes" look
it looks like it has great potential, the main issue with avatar (from the ground up) creation is always going to be respecting that balance between proper human and animal proportions
that is the best critique i think I can offer atm, not much but worth a shot
subtle axle
runic mesa
Hi <@245209914249707520>
I'm a developer at UModeler. Did you use the Skinned M...
Hi @runic mesa
i tried creating a model in Umodeler X but i could not find any useful tutorials, plus i have tried making a shape in Umodeler X and then rigging it but it did have the same exct result, the shape did not appear inside of VRChat, please could you explain how to use the skin mesh render? i tried making static models as well but it did not work...
jovial seal
when making single material models is it worth using a 4k texture or can i use 1440p
devout orchid
whos 1440p, its powers of 2. it never hurts to have more intially and you can always lower it in unity. if pc is up to the task.
 fair mason
ight so mb to the mod who timed me out, not normally in this server but anywho..
I finished the Charlie model thing. i despise how it looks from the front but whatever


looks like one of those easter peeps 😭
 cerulean shoal
pretending his nose is actually his mouth from the front. hes so happy 🙂
quaint jasper
fair mason
ight so mb to the mod who timed me out, not normally in this server but anywho.....
That looks really on point! I wonder if you can the two eyes very close to each other by default like they look in the left image, as is the ref
https://art.ngfiles.com/images/2275000/2275364_bergmik_charlie-smiling-friends-turnaround.gif?f1641237675
 fair mason
im still going to experiment with the head but the way i modeled it might be a bit challenging. still keeping at it tho. 'preceate it man 🙏
quaint jasper
I think if you move the two eyes closest to the nose together, you'll still achieve the side view effect while being able to see them from the front closer together
FYI just in case of the "push/pull" Blender function
What you've achieved is already pretty dope
quaint jasper
fair mason
im still going to experiment with the head but the way i modeled it might be a b...
Just thought of another idea, but if you were to have only two eyes, very close to each other as default is, and weight paint them to a bone in the middle of the head, and to the use a rotation constraint on that bone to one of the real eye bones, you might achieve the effect of the eyes facing the players no matter which direction they are in front of you. Worth experimenting though!
 raven ridge
Might be able to use a vertex displacement shader to adjust how sunken the side eyes are based on viewing direction
runic mesa
subtle axle
Hi <@444313228349014048>
i tried creating a model in Umodeler X but i could not...
Hi @subtle axle
I'm very happy to hear that you've tried UModeler X for VRChat. Here are the basic tutorials : https://docs.umodeler.com/docs/basics-tutorial
You mean that the skinned mesh created with UModeler X doesn't appear in the VRChat runtime, right? We'll look into this issue soon.
subtle axle
runic mesa
Hi <@245209914249707520>
I'm very happy to hear that you've tried UModeler X fo...
Hi @runic mesa
excuse me for insisting, but i have already seen that tutorial and it doesn't guide me step by step in creating a proper model, for example an avatar for vrchat or a normal object like a phone, or anything like in this tutorial https://www.youtube.com/watch?v=Sdrxv-uGsjc&pp=ygUqdnJjaGF0IGhvdyB0byBtYWtlIGFuIGF2YXRhcnMgZnJvbSBibGVuZGVy, i give you this tutorial because it is the most comprehensive that there is on the web, the skinned mesh created in Umodeler X does NOT appear in VRChat, i can cofirm that, if it supposed to work in VRChat then i can confirm this bug, as i have tried multiple times making avatars and gadgets in umodeler in multiple instances, it never worked, please if is there any way to fix this just tell me, i'm very happy that you are here listening to the users of Umodeler and this is very nice of you. ❤️
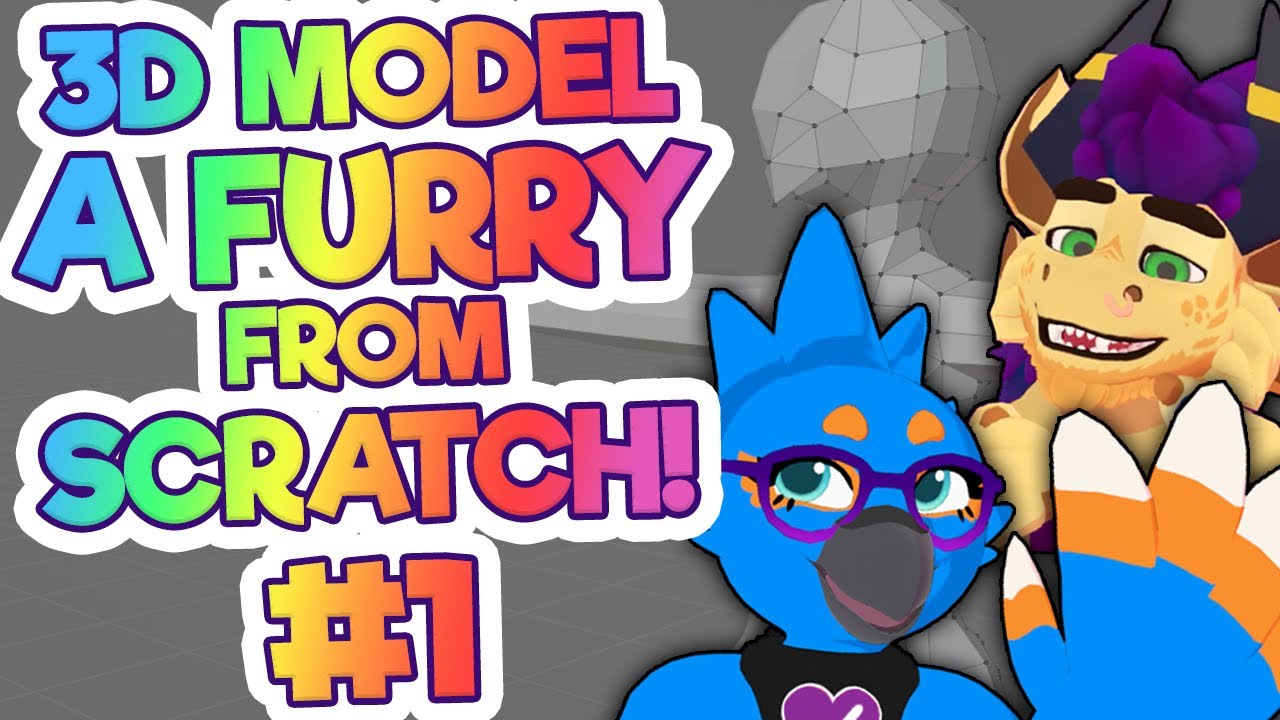
Hey cuties!! In this video KaideArt teaches me AND YOU how to 3D Model a Furry Avatar in Blender!!
Hi I'm BlueBirdBreeze, but you can also call me Breezy (she/her)!
Find me on Twitch: https://www.twitch.tv/bluebirdbreeze
and Twitter: https://twitter.com/BreezeBlueBird
Kaide is an amazing 3D Modeler and streamer, find him on:
YouTube: https://...
azure rain
subtle axle
Hi <@444313228349014048>
excuse me for insisting, but i have already seen that ...
You cannot use any runtime c sharp scripts in VR chat so you would likely have to just convert the models into an fbx using the fbx exporter
 viscid scaffold
anyone got any advice or links to good tutorials on how to model clothing? ive been trying to model a few pieces of clothing but didnt really get far
wheat delta
What approach have you tried so far? And what sort of clothing?
viscid scaffold
so far my method was to take the body mesh, size it up and adjust a little, it worked for a shirt (which i have yet to properly rig) but im trying to make a dress and idk how im gonna do that
 limber dirge
viscid scaffold
so far my method was to take the body mesh, size it up and adjust a little, it w...
limber dirge
viscid scaffold
so far my method was to take the body mesh, size it up and adjust a little, it w...
You can "sew" the dress in Blender, by making 2 flat pieces, front and back and simulating them to sew into a finished garment. Or model the top parts by snapping them onto the body, like retopology and then extrude the bottom down.
This explains the sewing method https://youtu.be/5t2WQJMoQDM?feature=shared
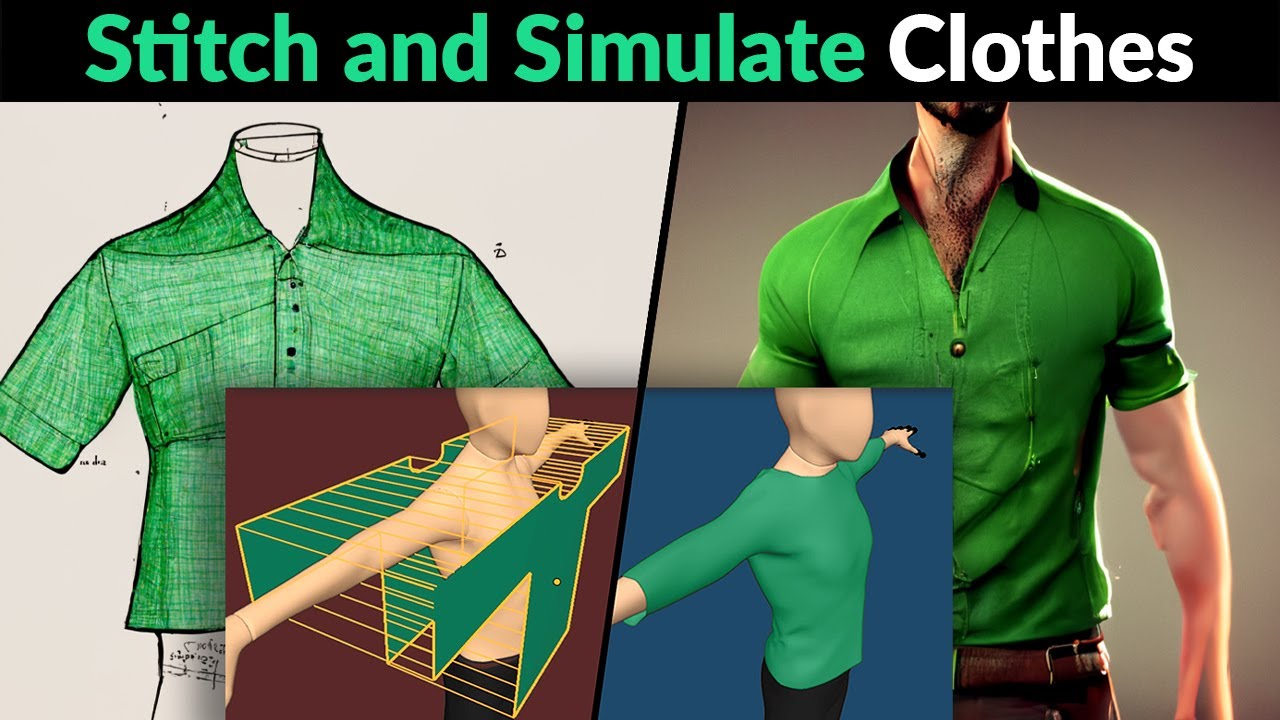
You can easily create clothes around your character by using the Sewing function of the Cloth sim. It works best if you use the settings demonstrated in the video.
⇨ Free Blender Secrets e-book: https://www.BlenderSecrets.org
⇨ Full e-book on Gumroad: https://blendersecrets.gumroad.com/l/IxofeY
⇨ Full e-book on Blender Market: https://blender...
runic mesa
subtle axle
Hi <@444313228349014048>
excuse me for insisting, but i have already seen that ...
Hi @subtle axle
We'll test UModeler X with VRChat to ensure that skinned meshes created with our tool can be exported correctly. We appreciate your patience and value your decision to use UModeler X for your projects. The video tutorial you shared is indeed helpful for understanding avatar creation for VRChat, and it has inspired us to produce more tutorial content specifically for VRChat users. We will keep you updated on new developments and tutorials.
Thank you for your feedback and support
 spring ruin
So I'm working on a model and all of the rigging on it works but when Iine up the view point it doesn't actually line up with the character in game
Like I have it centered on the face but for some reason it's far off to the side
 gritty quarry
:p joost
 quick thunder
gritty quarry
:p joost
quick thunder
gritty quarry
:p joost
oliver tree headass
 lavish sedge
Bowl cuts, a very specifically questionable fashion since the days of yore.
Also I take it that fabric hair is still beyond vrc capabilities ( or the pc / quest limits)
 twilit holly
does anyone have any guides for learning 3d modeling? like topology and all that?
keen sierra
Id end up spamming the channel
Also depends heavily on what knowledge level you start off with
runic mesa
subtle axle
Hi <@444313228349014048>
excuse me for insisting, but i have already seen that ...
It will take a week or more to test the avatar in VRChat because my trust rank is 'Visitor'. I suspect the reason the avatar made or edited with UModeler X disappears is due to differences in the hierarchy of the body and bones compared to the original. There are 'Armature' objects containing bones and 'Body' objects that include the skinned mesh component. However, when you convert the Body mesh with UModeler X, the bones end up under the 'Body' instead of in the 'Armature' folder. Furthermore, the 'Armature' and 'Body' should share a common parent object, but the one converted with UModeler X does not. This is all speculative at this point. I plan to find a precise and straightforward method to upload avatars edited with UModeler X once my trust rank upgrades to 'New User'.
 subtle axle
runic mesa
It will take a week or more to test the avatar in VRChat because my trust rank i...
subtle axle
runic mesa
It will take a week or more to test the avatar in VRChat because my trust rank i...
Another test that you can try is this, making a prop with umodeler and attaching it to the hand of a pre-made avatar, it gives the same result, the result is that the prop becomes totally invisible inside VRChat, for example if you attach a Gun made in Umodeler to the armature of the hand, and publish the avatar, you will see that the Gun will be invisible inside of VRChat, the positioning of the armature does not affect the rendering of the Umodeler model, if it did affect the model then you would see the avatar always T posing inside of VRChat, but instead, anything made with Umodeler becomes invisible.
To rank up and become new user it only takes a handful of hours in VRChat, using the microphone and moving around
although, when making VRChat worlds, Umodeler is perfect for worlds because it successfully renders each model with very accurate colliders.
mint silo

 jagged moat
what 8 hours of mirror dwelling a day does to a mf
mint silo
jagged moat
what 8 hours of mirror dwelling a day does to a mf
"when did you last go outside"
"when did you last see your friends"
"your family"
 mellow marlin
Hello ! I recently got a tingly bone feeling to start learning how to make objects on blender from scratch... but its boring by myself and i know lots of others want to learn to. anyone wanna be buddies and chat and make fun art projects while learning blender?
i need more vrchat friends too anyway
jagged moat
The cloth simulation artefacts are just showing off now
 cobalt tiger
Second head model of anime head. WIsh me luck!

 ruby tendon
Is it possible to rig the model when it still have the mirror modifier on in blender?
 devout orchid
i dont think so, but rigging itself can be done with x mirror enabled (not modifier but the icon in the right top corner)
barren meadow
For testing purposes, you can rig the existing side of the model and it'll deform the mirrored side. But you shouldn't rely on that for too long.
subtle axle
jagged moat
The cloth simulation artefacts are just showing off now
idk what you are trying to do but it's very cool
subtle axle
azure rain
You cannot use any runtime c sharp scripts in VR chat so you would likely have t...
does the FBX exporter work with umodler models?
azure rain
I personally haven't tried it hopefully it works
 onyx ingot


 sour ether
recently bought a booth model but it doesnt come with a blender file, so importing the fbx breaks the normals like this, is there a way to fix something like this?
 sour ether
turns out it wasnt because of fbx import, its mostly because of setting blendshapes to default apparently

 trail patio
 snow estuary
Anyone teach me how to model hair
snow estuary
Anyone teach me how to model hair

This is MY way of making hair, im sure there may be better/ easier ways or different ways to make it but this is how i make it!! you can buy the hair on my gumroad too!
join my discord - https://discord.gg/darcyvr
buy on my gumroad - https://darcyvr.gumroad.com/l/LadyHair?layout=profile
runic mesa
Hello
I’m thrilled to announce that a new UModeler X blog post has been published! This post covers the UModeler X Game Jam in collaboration with Future Inspire Academy, focusing on creating 3D games using Unity. It highlights exciting new features like the Weight Mirror Tool, improved Standard Brush Tool, and Auto Generate Mesh Collider. UModeler and UModeler X continue to be recognized as valuable assets for VRChat content creation. Additionally, the game “Little Kitty Big City,” developed with UModeler, is now available on Steam, Xbox, and Nintendo Switch, receiving positive feedback.
For more details, visit https://docs.umodeler.com/blog/May-26th-2024-blog

Join the UModeler X Game Jam hosted by Future Inspire Academy and explore exciting new features like the Weight Mirror and Auto Generate Mesh Collider tools. Check out UModeler X's success in VRChat and the newly released game, Little Kitty Big City, developed using UModeler.
pseudo knoll
ᵗʰᶦˢ ˢᵒᵘⁿᵈˢ ˡᶦᵏᵉ ᵇˡᵉⁿᵈᵉʳ ʷᶦᵗʰ ᵉˣᵗʳᵃ ˢᵗᵉᵖˢ
 pseudo knoll
 lean zephyr
ouch
lean zephyr
ouch
i don't think mr AI generated(maybe?) PFP knows that VRChat is full of small time hobbyists and not linkedin entrepreneurs
 lean zephyr
lmaooo yeah
never really understood paying for 3d modelling software unless you're like a huge company like pixar or disney
pseudo knoll
runic mesa
Hello
I’m thrilled to announce that a new UModeler X blog post has been publishe...
😬
lean zephyr
realistically, blender can do everything those apps can do, at least for hobbyists
pseudo knoll
lean zephyr
realistically, blender can do everything those apps can do, at least for hobbyis...
i feel like blender's limitation is always going to be enterprise level collaboration, which is what most other paid 3d programs are for, only other one I think is an appropriate paid alternative is zBrush for sculpting
lean zephyr
yeah
i can also kind of get behind substance painter (but it's a monthly cost for one application)
pseudo knoll
the typical VRChat "suite" is going to be zBrush, Blender, Substance Painter, and Unity
pseudo knoll
lean zephyr
i can also kind of get behind substance painter (but it's a monthly cost for one...
i can get behind legitimately and legally acquired substance painter 🥲
lean zephyr
i texture in blender because i do not have the disposable income for that LOL
i'm already broke paying an existing creative cloud subscription 😔
pseudo knoll
i can totally get behind a software that was great, but was bought out by the subscription shark adobe corpo giant
/s (but it still is great)
lean zephyr
we neeeeeed to bring back perpetual licenses
like i don't even care if it's a "rolling" perpetual license where i have to buy the next MAJOR release
like i'd be fine using old versions of software for a one time cost
but i'll be fucking damned if adobe is taking any more money outta my pocket every month
"special" sites for getting legit copies of sp tho :)
pseudo knoll
lean zephyr
"special" sites for getting legit copies of sp tho :)
last thing, adobe's products cost what they do because the audience is not individuals usually but small studios and business, so, if you're not the target audience, don't pay the price, its not really for you (but they wouldn't mind you paying anyways but don't fall in)
runic mesa
subtle axle
Another test that you can try is this, making a prop with umodeler and attaching...
I love your feedback. I've purchased an Oculus Quest 3 to play VRChat! I'll try it this weekend.
runic mesa
lean zephyr
ouch
X is free

 crude heron
So bought an avatar and her blendshapes are all in Japanese
Would there be any potential issues if I translated all the blendshapes into English?
quaint jasper
crude heron
So bought an avatar and her blendshapes are all in Japanese
Would there be any p...
Shouldn't be! The Cats blender addon should be able to do it for you automatically too!
azure rain
I guess that would depend if there's any animations tied to the blend shapes outside of the Avatar descriptor as far as if they would get confused from the name change?
crude heron
I tried using Cats before and I feel like it did something extremely wrong
i haven't (re)started the blender project yet so i don't have pics but
crude heron
azure rain
I guess that would depend if there's any animations tied to the blend shapes out...
I have i think it's called facial gestures that helps me create my own expressions and such so i can make those from scratch, I think
oh i think i remember what happened i think
my entire blender project got backburned because i moved to a new computer
and i couldn't figure out what version of blender i needed to make cats work
azure rain

GitHub
A tool designed to shorten steps needed to import and optimize models into VRChat. Compatible models are: MMD, XNALara, Mixamo, DAZ/Poser, Blender Rigify, Sims 2, Motion Builder, 3DS Max and potent...
the main developer of cats hasn't worked on the project in ages so here's a fork that works with more recent versions of blender
crude heron
ahh that's why it's unofficial
azure rain
like one of the contributors to the cats split off their own contributions into a new add-on because there was no new cats versions
crude heron
is that what this is?
azure rain
GitHub
A Blender plug-in to facilitate producing game models, namely by baking everything into one atlassed model with Blender's own rendering engine! - feilen/tuxedo-blender-plugin
crude heron
I also want to work on fitting outfits to my avatar since she hasn't seen anything new in years so
azure rain
tuxedo is only the portions of cats worked on by
feilen
crude heron
so should i have tuxedo installed in tandem with unofficial cats?
azure rain
probably?
crude heron
man
i feel like
this is a lot lol
i used to know only enough to fit an outfit on an avatar
and i forgot it all


 solar fossil
Huh, first time I see someone posting SketchUp models here
subtle axle
runic mesa
I love your feedback. I've purchased an Oculus Quest 3 to play VRChat! I'll try ...
i'm glad you appreciate, if you need any more help do not hesitate to ask, i always respond^^
subtle axle
lean zephyr
125$...
that's the old Umodeler, the new one called Umodeler X is free
 worthy sorrel
Does anyone have an effective way to reshape clothes from one base to another?
I feel like im able to get a pretty good result with what ive been doing but it feels pretty hacky and definitely doesnt get as good of a result as the original cloth creator’s adaptations, so im wondering if im missing something..
crude heron
worthy sorrel
Does anyone have an effective way to reshape clothes from one base to another?
...
i've just been using the sculpt tools to shape the clothes around with
lot of trial and error lol
does anyone have a blender tutorial they personally recommend? I know only bits and pieces, enough to waggle my way around very specific avatar things but I'd like to know more about just the whole thing in general
like bones, and weightpaint, and all the things in that hiearchy tree in the upper right, and the stuff in the bottom right
worthy sorrel
crude heron
i've just been using the sculpt tools to shape the clothes around with
thats what im doing, but like i said, it feels really hacky and doesnt ever get the quality that the original creators get to. making new blendshapes for other bases also is incredibly difficult without it looking weird most the time
like i can get it to look good, but sometimes there are some things that i cant avoid such as texture warping
 waxen ivy
worthy sorrel
Does anyone have an effective way to reshape clothes from one base to another?
...
waxen ivy
worthy sorrel
Does anyone have an effective way to reshape clothes from one base to another?
...
What have you tried? Basic clothes, using shrinkwrap modifier helps a lot, but it often doesnt work for me if the clothing is layered, scultping is prob the most common way, I like to warp transform and do it by hand
worthy sorrel
waxen ivy
What have you tried? Basic clothes, using shrinkwrap modifier helps a lot, but i...
liberal use of proportional edit and sculpt mode (primarily add/subtract, smooth and flatten) has been the best for me. It really depends on what a mesh is supposed to look like ya know?
i generally never use shrinkwrap bc it gives me weird results and only works on stuff thats supposed to be skintight (or close).
i do use data transfers and surface deforms to help with weight painting and blendshape creation, though sometimes surface deform is an unviable option, especially dealing with something like a chest area
waxen ivy
worthy sorrel
liberal use of proportional edit and sculpt mode (primarily add/subtract, smooth...
I often had the same issues with shrinkwrap modifier, but applying vertex groups allows you to isolate the less or more complicated areas and give you better control for quicker shaping if that makes sense
 uncut scarab
does anyone have Maya that would be willing to open a .mb file and export it as an fbx for me so i can bring it to blender? there is NO mb importer or converter.
jovial seal
idk how this looks and what i hould change design wise (spear head that turns into knife thingy)

also i there any good tutorial on how to end cap cylinders i uually jusst subdivide cubes to get nice looking topology atm
would like a real solution tho
 quaint jasper
jovial seal
also i there any good tutorial on how to end cap cylinders i uually jusst subdiv...
quaint jasper
jovial seal
also i there any good tutorial on how to end cap cylinders i uually jusst subdiv...
That's the basis of low poly subdiv modelling, it's not an incorrect way to do it, I do it too
jovial seal
xD
just figured i thought i had to have an odd amount of verts in a circle then use J to join them to create the faces but like that always seems to leave trys
but so does even
jovial seal
if i grab texturess from google imagess and use them as masks for my texture brushes does that mean i cant sell the asset?

 pure dagger
The front door is off to the left
quaint jasper
 limpid grove
Neat! Reminds me of Moopleaf's OC!
 regal canopy
Hello everyone! 🙂 Here's my latest model, a 1950s truck that has seen better days. Loosely based on the 1956 Ford F100. Not sure if I will use it in a project or not.

 white gazelle
anyone know how to delete an edge in blender x_X Ive looked all over, i just want to remove this diagonal edge xD'. Ive tried merge everything, ive tried deleting, hitting X, nothing.

 stone pine
select the edge, press x, then only edges and faces should do it
jagged moat
white gazelle
anyone know how to delete an edge in blender x_X Ive looked all over, i just wan...
There has to be at least 2 edges connecting, you can't dissolve that one if there is only 1 other
could be causing that
 heady crater


I have discovered Re-Routes and Node groups, Now I have very organized materials in blender with satisfying noodle traces
 dull willow
facepalm moment
 winged kiln
For those of you who make avatars from scratch, can you please tell me which more recent blender version + cats plug in works the best? I'm new to it
 static vapor
dull willow
facepalm moment
static vapor
dull willow
facepalm moment
oh i see whats wrong
the baking caused the wheels to be baked
dull willow
static vapor
the baking caused the wheels to be baked
yes, you want to bake these separately

 solar fossil
dull willow
facepalm moment
solar fossil
dull willow
facepalm moment
The classic forgot to explode the model before baking
 proven plinth
Modeling one of my monster fellas! Just wanted to post a WIP of the initial block-out :] Next post I make on it, it'll be completed 


 quaint jasper
Yeah the data transfer modifier can do that, if you've not figured it out already!
Bit of an old blender screenshot, but it's the exact same thing
 static vapor
@quaint jasper are you doing okay?
quaint jasper
As good as I can be! Thank you for asking 🫡
 vast blaze
idk if this is the right channel or not but i was wondering if anyone could help me figure out how on earth i could make the hands of my oc im tryna model (pics of my progress and full ref) any sort if help would be appreciated.

 vast blaze
idk if this is the right channel or not but i was wondering if anyone could help...
vast blaze
vast blaze
idk if this is the right channel or not but i was wondering if anyone could help...
Upd: i did hands but im not that happy, if anyone is able to give any form of help it would be greatly appreciated
 stone pine
vast blaze
Upd: i did hands but im not that happy, if anyone is able to give any form of he...
stone pine
vast blaze
Upd: i did hands but im not that happy, if anyone is able to give any form of he...
I recommend Rainhet's tutorials if you want to learn anything modeling related
vast blaze
Thank you ill make sure to check that soon
burnt glacier
im not sure how to describe it well enough for google to help me so is there a way i can straighten out my meshes lines? i did a quick decimate and now ive got this going on in some areas
 empty fox
burnt glacier
im not sure how to describe it well enough for google to help me so is there a w...
empty fox
burnt glacier
im not sure how to describe it well enough for google to help me so is there a w...
Firstly, why do you want them straight?
Unity converts your quads to triangles anyway, all game engines do.
But if it is something you really want to do then you can do "tris to quads" (just search for it with f3), but whenever I have done that it has always messed up the UV map so I don't really recommend it.
The other, way more manual, approach is to click the stray lines, click delete and "dissolve edges", it won't make them straight, but it will remove the triangles.
burnt glacier
i dont have a proper UV setup yet so ill try out the tris to quads thing first thnxies
empty fox
burnt glacier
i dont have a proper UV setup yet so ill try out the tris to quads thing first t...
I'd personally just go back to before the decimation and use dissolve edges on loops.
Or just unsubdivide
Decimation to me is just something you use when you don't intend to touch the mesh again.
barren meadow
While it does convert quads to tris, good topological flow is still important.
You can be lazy and try using the sculpt tool for relaxing topo.
waxen ivy
Does anyone have experience with making hair, mine's flipping on itself.
stone pine
Yeah that happens. You just have to rotate it back to where you want it
 compact compass
anyone got a tip on modeling hands?
i think hands are one of the main reasons i barely make avatars
compact compass
compact compass
anyone got a tip on modeling hands?
nvm i'm giving him puppet hands
 wheat pendant
How do you guys draw textures in Blender? Any tips?
I currently use a bunch of 8k textures for face/body/clothes etc. I realize that this hit performance, but. How do I make quality texture and also have good performance in Blender? Because currently it's unusable
Maybe 8k textures is an overkill if you think about it...
waxen ivy
stone pine
Yeah that happens. You just have to rotate it back to where you want it
Doesn’t work, it’s not rotatable on any axis, and manually moving the path is long and time consuming, I don’t think this is the answer
 spiral sigil
waxen ivy
Doesn’t work, it’s not rotatable on any axis, and manually moving the path is lo...
spiral sigil
waxen ivy
Doesn’t work, it’s not rotatable on any axis, and manually moving the path is lo...
you can tilt with Ctrl + T
azure rain
wheat pendant
How do you guys draw textures in Blender? Any tips?
I currently use a bunch of 8...
yeah 8K is complete Overkill
make sure your UV unwraps aren't wasting lots of space
wheat pendant
azure rain
yeah 8K is complete Overkill
The idea is, that I make hi-q textures and then I'll pack them all into atlas. I use unwrapping and packing, so space is filled as much as possible. But yeah...
azure rain

if you have any repetitious fabric detail you can put that on a detailed map instead of the main texture
waxen ivy
spiral sigil
you can tilt with Ctrl + T
That was it, thanks
quaint jasper
burnt glacier
im not sure how to describe it well enough for google to help me so is there a w...
https://github.com/BenjaminSauder/EdgeFlow/releases/tag/0.8
This is one of my favorite addon!
You can also always go back from a step like that by doing Tris to Quads or Triangulate the other way, and adjusting the settings
burnt glacier
is there a way i can decimate quickly/efficiently without using the decimation modifier?
devout orchid
not that quick, but dissolve edge loops
 viscid birch
There's also Mesh → Clean Up → Decimate Geometry. Which is a little easier for decimating part of a model compared to making a vertex group and adding to the modifier.
burnt glacier
😔 guess ill just stick to yucky UV's
 chrome scaffold
Is there a way to get alt-z/x-ray to work in 4.1 while I'm weight painting? I could do that in 2.79 (left), but I for some reason can't do that in 4.1 (right).

 hushed leaf
chrome scaffold
Is there a way to get alt-z/x-ray to work in 4.1 while I'm weight painting? I co...
hushed leaf
chrome scaffold
Is there a way to get alt-z/x-ray to work in 4.1 while I'm weight painting? I co...
you can set the transparency in the view options, that might do the trick
chrome scaffold
hushed leaf
you can set the transparency in the view options, that might do the trick
How would I do that?
hushed leaf
chrome scaffold
How would I do that?
Play with the view options at the upper right, I'm not sure which without looking at it
chrome scaffold
You mean upper left? The view tab is on the upper left. (I just got off the computer so I can’t check 100% rn)
hushed leaf
no, upper right, the little icons where you can change which view mode you're in, there are some dropdowns there with view options
the upper-right-most icons in the right-side image you shared
chrome scaffold
I'm playing around with the settings on the upper right, but nothing really fits that x-ray thing I'm looking for sadly. 
hushed leaf
aww, I was hoping
 exotic obsidian
I'm planning on making my Animal Crossing character into a VRChat avatar
(I didn't model it, I just re-assembled assets I ripped from New Horizons)
 devout orchid
quite a confession, nintendo would love it 🇫
 faint vapor
All my homies hate the Nintendo legal team
 static vapor
exotic obsidian
I'm planning on making my Animal Crossing character into a VRChat avatar
(I didn...
static vapor
exotic obsidian
I'm planning on making my Animal Crossing character into a VRChat avatar
(I didn...
Careful nintendo legal team no joke
swift jolt
static vapor
Careful nintendo legal team no joke
If its a public avatar yea. If he uploads it as private its probably fine even if the funny nintendo hitmen decide to go after vrchat
exotic obsidian
Yeah it's just for me since it's my player character
static vapor
Private then no one cares.
static vapor
People really be firing those dmca when it's public.
 pallid cradle
hmm

 haughty cedar
pallid cradle
hmm
haughty cedar
pallid cradle
hmm
jolt my beloved
 obtuse meteor
pallid cradle
hmm
obtuse meteor
pallid cradle
hmm
Is this a nearf gun XD
pallid cradle
yes!
hushed leaf
pallid cradle
yes!
you going to make it shoot fireworks? 🙂
steady zealot
When baking high to low, is it standard practice explode the model, bake normals, and other stuff, and then re-assemble and bake the AO maps after the fact? Or do people usually bake AO in the disassembled stage
 ocean salmon


Проделанную работу можно посмотреть тут и при желании скачать.
The completed work can be viewed here and downloaded if desired.
http://games20.3d3d.site
Поддержать меня:
Support me:
https://www.donationalerts.com/r/games20_donatalerts
https://boosty.to/games20
 sinful plinth
Image 1 is in Blender's Layout workspace, image 2 is in the Sculpting workspace. What's the autosmooth modifier? @hushed leaf @onyx berry


I just realized the triangle count is also too high. I think I'll work on that last.
stone pine
Did you right click then hit shade smooth in the layout tab?
sinful plinth
Completely new to Blender, sorry. Where would that be?
stone pine
right click
sinful plinth
Thank you. That fixed it.
stone pine
yw
hushed leaf
that's the thing I figured was missing 🙂
sinful plinth
hushed leaf
that's the thing I figured was missing 🙂
Thank you as well.
sinful plinth
sinful plinth
Image 1 is in Blender's Layout workspace, image 2 is in the Sculpting workspace....
So this Boba Fett model shares similar proportions to Boba Fett's model from Battlefront 2, and Battlefront uses FBX bones like VRC. So could I get the Battlefront 2 rigging, slap it into the Blender file, and it'd all be set up for VRC? Or will it more complicated than that?
On second thought, I don't think these bones are usable. I have no idea what I am looking at.
 hushed leaf
oh, we're talking game rips? doesn't surprise me at all these are weird and you'll have to do significant reworking of the armature for VR
sinful plinth
Yeah. The model itself isn't from Battlefront, but unfortunately it sharing the same proportions as Battlefront's Boba Fett didn't really help as much as I hoped when getting the ripped rigging from BF2.
devout orchid
just use mixamo
 acoustic halo
not sure if theres a better place to ask this, but is there any way to simultaneously use a texture brush and a corresponding normal map brush?
keen sierra
acoustic halo
not sure if theres a better place to ask this, but is there any way to simultane...
In substance painter, you could use color and height at the same time, granted the brush has both and the layer has both channels enabled. You didnt spedify what program you use, so this is kinda hard to answer
acoustic halo
keen sierra
In substance painter, you could use color and height at the same time, granted t...
the only program I use currently is gimp, though I'm interested in any programs that have that sort of capability
I saw that Krita has a 'tangent normal brush engine', but I figured if anything had what I'm looking for it would likely be substance
chrome scaffold
Does anybody know how to transfer a UV's scale and transformation by chance? I had to modify the mesh a bit and it messed up the UV, so I'm trying to see if I can match up the new UV map to the old one without having to do it manually. I don't know if I worded this right, but hopefully you guys understand regardless.
 chrome scaffold
Found a workaround. All is good!
 flint patrol
brother bob

 river hound
Howdy folks! 👋🏻
I've been working on a companion mod of my own for FNV with western themes and a pretty extensive questline. I've made quiet a lot of progress but I'm starting to realize a lot of what I wanna do might be beyond my current skillset and/or might be too large of a workload for myself alone. I am looking to focus more on the story elements of the mod and hopefully collaborate with a few people on the more technical aspects of the mod. If you or anyone you know might be interested in collaborating on this project with me please reach out to me!
Follow up with me via DM if you're interested. It's quiet a large project considering it's my first real attempt at a big mod.
I'm looking for some people who might be able to help me with the following mod elements:
- Voice acting
-
Custom armors/outfit meshes
-
Custom armor/outfit textures
-
Custom armor/outfit world models with collision
-
Custom weapons (potentially with custom animations)
-
Custom weapon meshes
-
Custom weapon textures
-
Custom weapon world models with collision
If you're interested in learning more feel free to reach out via DM! 👍🏻
flint patrol
My oc

 gaunt crown
Idk how to turn this into an avatar.
 sinful plinth
I tried using Mixamo to rig this, but I think the cape caused a little confusion. The left side of Boba's ribcage is stretching itself to follow the arm. Any easy way to fix this, or would I have to re-rig this without the cape? (this model was also originally in an A pose. I exported it as a T pose in Mixamo, if that is also causing the issue.)
 valid needle
sinful plinth
I tried using Mixamo to rig this, but I think the cape caused a little confusion...
valid needle
sinful plinth
I tried using Mixamo to rig this, but I think the cape caused a little confusion...
I only use mixamo for rough rigging and only on simple body bases then weightpaint to fix every issue mixamo causes
 ivory flume
how would i add an object to a preset vertex group for weight painting? i brought in a custom asset for a friends commando armour (the blue shoulder piece in the second image), and i want to weight paint to the left shoulder, however i dont know how to so

 sinful plinth
I also tried using actorcore, but it keeps asking me to sign in in order to export it, only to not let me sign in afterwards.
sinful plinth
valid needle
I only use mixamo for rough rigging and only on simple body bases then weightpai...
I exported it as both a T pose and the original A pose the model was in, just incase changing the pose caused any issues. Should I use the A Pose file instead and re-weightpaint the model to the rigging?
hushed leaf
ivory flume
how would i add an object to a preset vertex group for weight painting? i brough...
Assuming your new object is a separate mesh object and you've added the armature modifier, in object mode: click armature. ctrl+click new mesh object. go to weight paint mode. select appropriate bone. paint. Vertex groups will be added when you start painting
hushed leaf
Hmm is there a way in Blender to select which vertices are affected by a shapekey?
ah that seems to be tricky, have to do a script
ivory flume
hushed leaf
Assuming your new object is a separate mesh object and you've added the armature...
assuming i did it right, this is what it looks like now
 hushed leaf
red = 100% weighted to that bone
ah but your armature modifier is wrong - you need to specify which armature in the object slot
ivory flume
would i need to repaint it?
 hushed leaf
no, weight paint is contained in vertex groups which match bones based on their name, you can swap armatures all you want
ivory flume
👌 sounds good. will ask again if anything fucks up. appreciate the help
hushed leaf
you're welcome!
sour ether
sorry if this is the wrong place to ask this, but i have a very specific and obscure question with no answers so far
how do i make it so that the vertex normals of a mesh are set to a specific blendshape's?
a booth model i bought have socks that are by default shrunk to minimum to hide it inside the model's skin, however as a result the vertex normals are completely broken when the blendshape is used (left image is one with the blendshapes being used and how it looks like right now, right image is one with the blendshapes set to default, and how it should look like)
i've tried using data transfer and it does not work, one time it seems like i got it working but it corrupted the basis instead, other times i managed to get it working, i exported, saved on blender and loaded the same blend file and it reverted back to being broken on export


also i'm using blendshape normals set to none in unity, but changing it to legacy blendshapes does nothing, and changing it to calculate gives a similarly bad result regardless
 sudden jackal
heyp o meed help
so im trying to sttach this other models arm to a diffrent model
i managed to parent them but each time i go to delete the red of the other model it highlightd the stuff i wanna keep
example
 swift jolt
got eevee renders in blender look soo nice... work in progress map im not going to be able to get this nice looking ingame

 white vault
sudden jackal
example
white vault
sudden jackal
example
Amazing
pure dagger


 static vapor
Oh...
pure dagger
Never put this amount of face bones on your rig guys, this is for animation rigs. but i added it just so you can actually make out that people are talking/looking around
 pure dagger
Yea, it was made for spooktality because its a "skeleton"
static vapor
I'll prefer if vrchat added the blue man as a fallback
pure dagger
static vapor
I'll prefer if vrchat added the blue man as a fallback
wat blue man
static vapor
Don't mistake the triangle loading
pure dagger
@glad ember whatcha think? boney enough?
 glad ember
idk what any of that is but neat 😄
glad ember
oic
pure dagger
yall fuck with the glasses?
 ocean salmon
The Neverhood https://www.youtube.com/watch?v=-ER-C6HTWkY&t=65s


Проделанную работу можно посмотреть тут и при желании скачать.
The completed work can be viewed here and downloaded if desired.
http://games20.3d3d.site/2024/07/new-version-nh3d-06.html
Поддержать меня:
Support me:
https://www.donationalerts.com/r/games20_donatalerts
https://boosty.to/games20
steel fable
Making a funny man
 swift jolt
ocean salmon
The Neverhood https://www.youtube.com/watch?v=-ER-C6HTWkY&t=65s
swift jolt
ocean salmon
The Neverhood https://www.youtube.com/watch?v=-ER-C6HTWkY&t=65s
Looks wonderfull yet again
ocean salmon
swift jolt
Looks wonderfull yet again
Added a lot of new things and have already started creating the castle
swift jolt

 glossy grotto
Making the Bill Graham Excision stage with 0 experience in blender 


I just need the stage in total, connecting the 3rd/2nd floor together with wedge going down, hangover below the 2nd floor
 pallid bobcat
Hello, I'm running in to the issue that my texel density is too small due to my UV islands being smoll, do I have to unwrap the whole mesh on one UV map or can I use multiple UV maps to make bigger islands?
azure rain
pallid bobcat
Hello, I'm running in to the issue that my texel density is too small due to my ...
modifying your UV unwrap sounds a lot less complicated than trying to involve a Shader using multiple UVs
 long shore
Is there anyone here interested in a commision?
 compact glen
long shore
Is there anyone here interested in a commision?
compact glen
long shore
Is there anyone here interested in a commision?
Can you check your dm
I can help you with your commission
valid needle
ew
glossy grotto
glossy grotto
Making the Bill Graham Excision stage with 0 experience in blender <:vrcAevSip:5...
scratch this i just found a stage on sketchup lmao
 lofty river
How would I fix the faces to actually work as I want them to? I've tried all the settings and they're still broken or act weird
 quick thunder
xd
lofty river
quick thunder
xd
Very funny indeed
 abstract heart
Somehow turned on this wireframing look on my mesh. How to turn it off?

 solemn abyss
so i have no experience with blender and im trying to setup this book to have custom pages


firstly, im having issues with the textures
i was able to get the cover to work but i cant get the pages to work
hushed leaf
is this some sort of script?
hushed leaf
what printed that message on the right?
hushed leaf
ohh
solemn abyss
i think i got the page textures
hushed leaf
ok I'm not sure what you're asking then
solemn abyss
 solemn abyss
hushed leaf
ok I'm not sure what you're asking then
solemn abyss
hushed leaf
ok I'm not sure what you're asking then
um in this case now i need help with animation
the book came with an animation
but how do i play it
 hushed leaf
you might start with the basics of working with animation in blender, something like this (first link I found via google): https://renderguide.com/how-to-animate-in-blender-beginner-tutorial/
RenderGuide.com
This How to Animate in Blender tutorial teaches you everything a beginner needs to know to start animating in the Blender. Timeline, keyframe and much more.
 uncut herald
@solemn abyss if you plan on transferring this to unity for an avatar, which I assume you do, blender animations will be useless. At least I'm fairly certain this animation will be
solemn abyss
oh
so how would the animation work
the one in blender is the pages of the book flipping around
i was just thinking of just transferring the book into a fbx file and putting it into blender without doing anything
uncut herald
Idk. Idk what exactly you want to do. Yes you can export blender animations to unity, but the way the image material is setup in blender is going to be different from the way you would need to set it up in Unity to change pages.
Wait are you trying to change the image of what it looks like or actually make the pages flip? Are they separated where you can do that?
The mesh?
solemn abyss
uh they should be seperated
Geometry node book rig in Blender. I am officially the globglogabgalab.
Get: https://t.co/oH5momfEin
#b3d #Blender3d #blender

 Twitter
·
Twitter
·
this is a video of the book working
im trying to get it just like the video
of course with different images
uncut herald
Oh it's using geometry nodes. Yeah I got barely any idea how to use them, much less make it into and animation and then transfer it to unity
It may not be possible considering it's not bone movement but instead mesh movement, but I dont think you'd be able to make a blendshape out of it either
hushed leaf
that's a really impressive animation. Definitely not going to be easy to do in Unity 🙂
solemn abyss
yea lol
solemn abyss
ok so im following this tutorial of how to make a book from scratch
but i think i messed up something in the book cover rotation
idk how to fix it
hushed leaf
@solemn abyss I have no idea what you're trying to do or what you've done, so really have nothing to say here, sorry
solemn abyss
im trying to make it close like a normal book but the opposite cover keeps flipping
hushed leaf
but if your intent is to bring this to unity, you'll likely want to rig the thing and animate bone rotations, not mesh objects themselves
uncut herald
Lmao
 sour lion
I don't understand why the weights at 0 are still affecting the mesh

 hushed leaf
child bone weights non-zero?
also are you sure it's actually zero? You often can't tell just by the color
sour lion
hushed leaf
also are you sure it's actually zero? You often can't tell just by the color
Is there another way to check?
hushed leaf
you can see it in the info for a vertex in edit mode, or sample it with the sample tool
I mean, you can just delete the vertex from the vertex group too, that'll make sure it's not affected at all
sour lion
hushed leaf
you can see it in the info for a vertex in edit mode, or sample it with the samp...
The weight is around 0.026 in that area
sour lion
I painted it to 0 and checked but it seems to have not changed? I also checked the child bones
cursive summit
Idk where to post this, but basically I imported this model and for some reason all of the props are greyed out like they're hidden but they aren't there, how do I actually show the mesh?

they show up in the render, but not in edit mode
nvm, figured it out
jovial seal
when making Eye lid blendshapes for winking and expressions, how do you make it so that when they are combined it dosnt turn into an eldritch abomination?
is there a ''simple solution'' or do i have to manually animate all the expressions overriding eachother and what they do
devout orchid
tracking control
or do manual blinking layer
i personally use separate blendshapes for eyes and mouth and combine whatever fits/disable mouth part for lipsync etc.
 gritty junco
cursive summit
nvm, figured it out
gritty junco
cursive summit
nvm, figured it out
how’d you figure this out?
cursive summit
gritty junco
how’d you figure this out?
In blender there is a "hide in viewport" option next to the eye, but its not on by default, so you have to add the option, unhide it, then it'll be there
gritty junco
cursive summit
In blender there is a "hide in viewport" option next to the eye, but its not on ...
thank you!
 steel sparrow
what should the finger bones be named?

 jovial seal
steel sparrow
what should the finger bones be named?
jovial seal
steel sparrow
what should the finger bones be named?
use rigify!
steel sparrow
jovial seal
use rigify!
no.
jovial seal
¯_(ツ)_/¯
hushed leaf
the one I have in Unity right here has: f_index.01.L and f_index.01.R
increase number going down to the finger tip
extrapolate from there. It doesn't really matter, but if you have the .L and .R then symmetry stuff works properly in Blender without fighting it.
 alpine mica

ArtStation
Butsuma Senju is the father of the first Hokage Hashirama from the show naruto, Naruto shippuden, Boruto next generations. Goal was to make Butsuma Senju
jovial seal
i am making yet another outfit

 atomic flare
How would I scale the breast size in blender. I know how to do it in unity but I need to know how to do it in blender so I can sculpt the clothes on properly
 cold plaza
Is it safe to scale something to 0, with a blend shape?
As a way to hide it.
I always see people scale objects so they go inside the body where they're still visible.
Been wondering why they're not scaling to 0?
hushed leaf
Yes, generally. if it's got physbones you'll want to also disable those.
It really only works if the thing you're scaling has its own bone.
cold plaza
atomic flare
How would I scale the breast size in blender. I know how to do it in unity but I...
You can use pose mode in blender to scale bones the same way you do in unity.
Then you click the armature modifier and apply pose as blend shape.
You might also want to apply the changes to the bones, which is something like apply pose as rest position.
cold plaza
hushed leaf
Yes, generally. if it's got physbones you'll want to also disable those.
It rea...
You mean it needs to be rigged to have blend shapes right?
hushed leaf
no, blend shapes have nothing to do with rigging
cold plaza
I thought only skinned meshes could have blend shapes
hushed leaf
those are purely mesh deforms
oh - in Unity yes
but it could just all be attached to a single bone
cold plaza
Ah, ye
ruby tendon
in blender when i go to texture paint the whole seems suddenly is empty, any ideas?

 shrewd nest
How do i reduce polys? I want under 5K and all my clothes and person are individual items

 azure rain
dissolving Edge Loops is a pretty decent method that doesn't completely destroy your topology
and I might suggest starting with your hair as that has a lot of triangles and probably deleting the body that are covered by your clothing @shrewd nest
shrewd nest
Mkie I'll do that when I get home
atomic flare
cold plaza
You can use pose mode in blender to scale bones the same way you do in unity.
Th...
Awesome!! Ty!!!
Is there a way to get my model back into the normal pose without the reset position button?
hushed leaf
manually 😦
hushed leaf
always make backups!
shrewd nest
;-; i didnt make a backup
hushed leaf
my deepest sympathies - I've been there 😦
 tired cedar
So yeah @supple fable, basically, holes and patterns in the simulation like this is what I'm trying to talk about.

Because those look complicated to get right in a simulation.
In fact, splatter simulations like this is what I'm looking forward to learning how to make. In fact, how do people even make bursts of fluids in Blender anyway?
 supple fable
tired cedar
In fact, splatter simulations like this is what I'm looking forward to learning ...
supple fable
tired cedar
In fact, splatter simulations like this is what I'm looking forward to learning ...
You can play with the viscosity of your fluid to give someting very liquid like water or more density like honey https://www.youtube.com/watch?v=oPSjXpGrfto

Showing diffrent viscosities in 8 simulations.
Each simulation had a 200 resolution
supple fable
tired cedar
In fact, splatter simulations like this is what I'm looking forward to learning ...

In this tutorial, we'll make a honey simulation using Blender fluid simulation(Mantaflow). In the previous tutorial, we made a honeycomb model. You can watch this tutorial below the link.
Modeling Honeycomb ➤ https://youtu.be/2NLWcvG_gqg
Download HDRI Image➤https://polyhaven.com/a/signal_hill_sunrise
00:00 Introduction
00:14 Adding Liquid Doma...
but again has i say do step by step made small test to practice before include a complex fluid simulation in a project
tired cedar
Fair enough.
jovial seal
what could i do to improve this model?

 golden rover
Looks like it's a model of some clothes? Improvement is kinda vague, in what way do you want to improve?
subtle axle
jovial seal
use rigify!
what does that do?
jovial seal
golden rover
Looks like it's a model of some clothes? Improvement is kinda vague, in what way...
generally just techniques or modelling aspects i can use to make my models look better.
jovial seal
subtle axle
what does that do?
auto generate humanoid rigs with names and other stuff
 haughty violet
Made this model, who wants to give me a hand and upload this to vrchat cus i dont have a pc

 onyx sail
haughty violet
Made this model, who wants to give me a hand and upload this to vrchat cus i don...
onyx sail
haughty violet
Made this model, who wants to give me a hand and upload this to vrchat cus i don...
i can
 steel stirrup
when i turn my alpha down this happens

help 🪦
nvm this thing has 10 material slots
pseudo knoll
this topology is optimized but the process it took to make it has given me nightmares
 pure dagger
pseudo knoll
this topology is optimized but the process it took to make it has given me night...
pure dagger
pseudo knoll
this topology is optimized but the process it took to make it has given me night...
Why is it spiraled? You could get the same look with just one loop at the bottom then one loop at the top
pseudo knoll
pure dagger
Why is it spiraled? You could get the same look with just one loop at the bottom...
i'm matching an artstyle, it would be a normal traffic cone otherwise
pure dagger
pseudo knoll
i'm matching an artstyle, it would be a normal traffic cone otherwise
wdym? like texture wise?
pseudo knoll
pure dagger
wdym? like texture wise?
oh, I'm wanting the world-filesize to be small by using and abusing vertex colors
the traffic cone I'm referencing from is a spiral rather than a stripe
pure dagger
Ah, im unsure about sizing when it come sto vertex vs regular textures
pseudo knoll
vertex colors are superior in almost every way
except for the fact that if you want higher fidelity visual detail vertex colors are the worst option
and the cost is exponential to the amount of verticies since its extra metadata per vertex
pseudo knoll
pure dagger
Ah, im unsure about sizing when it come sto vertex vs regular textures
you can also mix the two, at least using poiyomi, not sure about quest
azure rain
pseudo knoll
you can also mix the two, at least using poiyomi, not sure about quest
all of the quest shaders multiply vertex color on top of textures
pseudo knoll
ah
 glass axle
pseudo knoll
this topology is optimized but the process it took to make it has given me night...
glass axle
pseudo knoll
this topology is optimized but the process it took to make it has given me night...
these can be reduced further
 heavy sonnet
pseudo knoll
this topology is optimized but the process it took to make it has given me night...
heavy sonnet
pseudo knoll
this topology is optimized but the process it took to make it has given me night...
You could probably use a single 1x2 pixel texture instead with interpolation disabled if you messed with the uvs. If you wanted to reduce the poly count
 south saddle
doing that can make it better for flat toon and sharp lines and the only thing that give it depth is lighting so for the full texture for that map could be a 32x32 sheet of just base Colours. for the world and that's it.
 lament umbra
been trying to think on what should be the way to go about this cardigan i am making. i would like to have the ability to have it in 3 different states (closed, semi buttoned, and fully opened). my thought would be that i probably just have to go about giving it it's own rig? i know blendshapes was a possible option but my thought was that it would behave weirdly in states where the faces are no longer over the faces they were original weighted to (which would cause the weird looking behaviour/movement?). Im just curious if you guys have any suggestions/sources to help cause i havent been able to find anything

-# btw theres more geometry to the cardigan (just has a multires modifier on currently)
 fickle lion
I hate rigging, got it to work but it was sooo teddius

 opaque trellis
Hey everyone. Sorry for the question, but which setting should i choose to calculate normals for blendshapes but still take in account the imported ones ? I'm using custom normals in blender but I'm having insue to have them behave with blendshapes in unity

here are the custom normals that i wanna keep ( note the fur on side of the head and the tail )

Here is when i use a blendshape

if I put blendshape normals on "import" chest is fluffed

 desert flame
So I tried to use Pumpkin Tools to copy the traits from an Karin avatar (the original model) to a new FBX I just imported with an additional outfit. All the Physbone colliders are wacked, but the transform numbers are accurate...
Unity 2022, VRChat beta SDK (before new constraints) and Pumpkin Tools 1.4.5

 tough plover
@opaque trellis you should enable Legacy Blendshape Normals, and use Hai's "Recalculate Normals" component. it is the best, no compromise solution.
Improves the shading of SkinnedMeshRenderers by recalculating select blendshape normals (and tangents).
hushed leaf
I noticed using Import worked in Unity 2019 and I think 2022.3.6 but doesn't in 2022.3.22
hushed leaf
tough plover
https://docs.hai-vr.dev/docs/products/prefabulous/universal/recalculate-normals
ooh this is interesting
opaque trellis
tough plover
<@295676544313982978> you should enable Legacy Blendshape Normals, and use Hai's...
Thanks a lot ! I'll try ♥
 simple flame
family guy death pose

i put a hold on modeling for a bit and decided to kick this up
spiral sigil
im very proud of this one

 unkempt shore


 swift jolt


 pure dagger
 valid needle
 uncut basin
are...are you showing off one of the older angel dust models that have been on vrchat for years like you made it ?
steady zealot
Made some horns

 north lantern

 low silo
Tanjiro's Katana!


 gray drum
does anyone know some updated videos for tutorials on how to make vrchat avatars? i tried some and tbh i cant get a handle on it
 crisp axle
imma kill these hands

 crisp axle
gray drum
does anyone know some updated videos for tutorials on how to make vrchat avatars...
crisp axle
gray drum
does anyone know some updated videos for tutorials on how to make vrchat avatars...
i could send you one that got me started and into it
its a playlist tho
gray drum
crisp axle
i could send you one that got me started and into it
its a playlist tho
please? Thank you
crisp axle
gray drum
please? Thank you
I sent you a thing in dms
most likely went into spam though knowin discord so
 alpine remnant
north lantern
alpine remnant
north lantern
LA LA LA LA LAAAAAA
(he's so squishy!! you did an amazin job!!)
north lantern
ty :>
fleet parrot
In unity, is there a way to go back to previous saves? I just royally screwed up anf deleted everything and in perfect timing it saved just then and there
empty fox
fleet parrot
In unity, is there a way to go back to previous saves? I just royally screwed up...
Unity doesn't really have saving, duplicating your scene file is the closest to saves you'll get.
Assets at the bottom are just gone if they are deleted.
Stuff in the hierarchy/scene are somewhat savable as you can undo most things.
north lantern
fleet parrot
In unity, is there a way to go back to previous saves? I just royally screwed up...
Not natively. I recommend using something like Github for version control.
devout orchid
theres a way to load a scene after a crash but overall no, if you screwed yourself its on you, backups/version control.
 devout scroll
unity doesn't back scenes up, no
but if you prefab things you can save them to assets separately from scenes
 royal flower
north lantern
royal flower
north lantern
it's billy!!!!!!!!!
 timber tide
this small part of the sweater isnt moving with the armature like the rest of it is, i tried redoing the weightpant and data transfer thing with all the other options but still didnt work, what do i do?
 steady zealot
Would you believe me if I told you this was one material?


We love trimsheets in this house


 steady zealot

 pure dagger
(sorry for watermark) Anyone got any doodles they want added to my home world im making
 waxen ivy
Im working on an avatar world, I created a simple wall prefab to snap together but in order to bake the light properly In unity, I think I need to have face orientation on all sides. Firstly, is there a light setting in unity for this? I was thinking it would be less of a performance issue and less complexity if I simply made planes to snap together for the walls of my world, but as you can see in the pic, the light obviously goes through the walls if it only has one face orientation. My question is do I go back into blender/solidify, do I just use poiyomi and turn off culling in my bake, do I do something else, or did I unknowingly sabotage myself and miss something not creating my room right and I should redo/start from scratch? Simultaneously, using poiyomi with culling off, there's this light bleeding through despite the fact that there actually isnt a gap between the floor and the wall. Any help from people who have experience in this field would be greatly appreciated.

 waxen ivy
timber tide
this small part of the sweater isnt moving with the armature like the rest of it...
waxen ivy
timber tide
this small part of the sweater isnt moving with the armature like the rest of it...
Go into edit mode > Vertice Select > Select all those stranded vertices that wont move and apply a weight to them to whatever it is, im assuming the shoulder from the picture.
waxen ivy
timber tide
this small part of the sweater isnt moving with the armature like the rest of it...
Diff ways you can mess with it, just did it with a bean bag
 timber tide
waxen ivy
Go into edit mode > Vertice Select > Select all those stranded vertices that won...
timber tide
waxen ivy
Go into edit mode > Vertice Select > Select all those stranded vertices that won...
Ty! I’m out eating rn but will def try
waxen ivy
Meanwhile if any world creators have any experience with lighting in unity, id love to hear from you. I really need to learn how to properly create prefabbed drag and drop pieces for floors and walls, if anyone would be willing please take a look above, hopefully I can find a solution to save myself from recreating my world pieces again.
devout orchid
@waxen ivy backface culling doesnt affect baking, only realtime. you probly just forgor to mark stuff as static.
azure rain
steady zealot
We love trimsheets in this house
yeah trim sheets are very cool
waxen ivy
devout orchid
<@386713179159527424> backface culling doesnt affect baking, only realtime. you ...
What do you mean it doesnt effect baking? The light is going through the mesh you can see it in the picture
waxen ivy
waxen ivy
What do you mean it doesnt effect baking? The light is going through the mesh yo...
... ???
 waxen ivy
devout orchid
<@386713179159527424> its not baked on the picture
waxen ivy
devout orchid
<@386713179159527424> its not baked on the picture
So you saying face orientation doesnt matter, and the current lighting isnt properly represented? When I go to bake it, it will treat that back face as if it's there?
devout orchid
yes, when baking lightmaps, unity ignores backface culling
having onesided meshes is perfectly fine
waxen ivy
Im doing a test now to see if it fixes everthing and to check if theres a bleeding effect
 heavy sky
how did ya'll do that?
waxen ivy
@heavy sky Do what @timber tide Did it work? @devout orchid Tried testing it out, been debugging, everything is baking white, thought it was reflection probes removed them, thought it was overlapping UVs but they appear to be fine, minus one asset, but in general everything looks good. Unity is weird sometimes.

 timber tide
waxen ivy
<@1104847399865815121> Do what <@529058994656903169> Did it work? <@960486335095...
timber tide
waxen ivy
<@1104847399865815121> Do what <@529058994656903169> Did it work? <@960486335095...
it kinda was, but the gif was a little fast and kinda confusing to follow since i just started blender a few days ago, but i lookd at another post on reddit that said to jus remove the blending entirely from the diff sections and that worked, but im trying w the other arm and the very end of the sleeve is stuck in place, is this weight painting or bones issue?
 devout orchid
@waxen ivy may be the shader, never messed much with poi world but normal poi defaults to lit ie unshaded?
waxen ivy
Im using standard on most of the materials
waxen ivy
sinful plinth
On second thought, I don't think these bones are usable. I have no idea what I a...
Diff games have different armatures, importing things made for different games often does what you're looking at. You can etieher get lucky and delete the extra bones that arent currently necessary such as the super large bones, or youll be unlucky with an unusable armature and you'll have to re-rig it for vrchat. Hope this helps. Most's comment about Mixamo is prob the best advice, im curious if you stuck with it or still need help.
waxen ivy
devout orchid
<@386713179159527424> may be the shader, never messed much with poi world but no...
My last world I've baked with poiyomi all over and overlapping UVs it was a nightmare compared to this one and im surprised I was able to bake it successfully. For this new siimplified avatar world, I specifically made the floors/walls in pieces so there'd be no overlapping UVs and not currently using poiyomi on anything, not sure why the world is baking brighter than the sun. It's super strange. On paper this should be an easy bake.
 gloomy moat
Any help with this blender issue would be greatly appreciated
So odd scaling issue.
I have an avatar which is scale 1.0, but the body is 2.5 in Unity This is fine, everything is set up fine. It's whatever.
I've imported this fbx into blender to make some modifications and in blender the armature scale is 0.025 while the body scale is 1
I can't seem to figure out how to export this, or which things to apply scaling to, to end up with the old 1.0 and 2.5 so that all the physbones and more importanlty my shader outlines and things look the same
it ends up exporting as 1.0 and 1.0 or 1.0 and 0.025
devout orchid
@waxen ivy unity handles overlapping uvs just fine in my experience? did yoy enable generate lightmap uvs? its actually doublesided meshes that are a problem, since they share shadows for both sides.
@gloomy moat on export set scaling - fbx all
waxen ivy
devout orchid
<@386713179159527424> unity handles overlapping uvs just fine in my experience? ...
I always generate light maps on imported fbxs, I believe there's even warnings about overlapping uvs in light baking in the vrc sdk somewhere. Not to be condescending but Overlapping UVs are absolutely an issue, it causes errors in unitys light calculations, which creates artifacts, you're just getting lucky if you're baking without issues with lots of overlapping. This is like super widely known and talked about in YouTube videos etc. In the pic I provided you wouldnt see those squares if there were no generated light maps if my understanding is correct.
waxen ivy
devout orchid
<@386713179159527424> unity handles overlapping uvs just fine in my experience? ...
As far as I understand all I need to do now to trouble shoot is: 1) Fix my UV maps on my bed asset b/c unity is complaining, 2) I removed reflection probes and will bake them after as some people on unity forums have experienced the same super white walls baking with reflection probes.
Im smacking my head against unity, I specifically tried to make this process easier with prefabbed parts and no overlapping issues for a more "professional" workflow. Figured it would be easy this time around but im hitting unknown errors.
gloomy moat
devout orchid
<@360409609858711553> on export set scaling - fbx all
fbx all sets the scale of the avatar to 1 and the body to 0.025
I want it do ideally be 2.5
tough plover
gloomy moat
fbx all sets the scale of the avatar to 1 and the body to 0.025
make sure the scaling isn't messed up in blender, you may want to apply transforms beforehand.
gloomy moat
that's what I'm trying to figure out. What to set scaling to in blender.
Pretty much the avatar isn't correct in unity. Avi is 1 and body is 2.5. BUT. It's been set up with these settings and I don't want to rework everything from scratch.
So I'm trying to essentially export it incorrectly so it ends up with avi 1 and body 2.5
tough plover
using FBX All will ensure the scaling in Unity matches the scaling in Blender
gloomy moat
I can get avi 1 body 1, or avi 1 and body 0.025, but can't seem to manage 2.5
tough plover
if it's not, you likely aren't using FBX All, or your model in unity was unpacked
gloomy moat
can I change the scale but not the size in blender?
tough plover
is there a reason why you're not applying that 2.5 scaling so that it ends up 1?
gloomy moat
tough plover
is there a reason why you're not applying that 2.5 scaling so that it ends up 1?
in unity or blender?
gloomy moat
yes
tough plover
so if you want the model to be 2.5x bigger, why not scale it 2.5x in blender and apply transforms?
gloomy moat
but, unfortunately, this avatar was set up in unity with a messed up scaling. And setting it to the ideal 1 scale messes a lot of things up
tough plover
it might be best to fix the scaling in blender, export as a new FBX, and use Pumkin's to copy components. there is an optional setting when you expand things like contacts in pumkin's to try and fix scale
gloomy moat
I'll keep that in mind. I'll run a unitybackup
tough plover
if you click Copy, and you notice something is messed up, delete the new model and drag the FBX in again
otherwise, there will be leftover stuff after undoing
gloomy moat
Much appreciated
 stray nebula
timber tide
it kinda was, but the gif was a little fast and kinda confusing to follow since ...
stray nebula
timber tide
it kinda was, but the gif was a little fast and kinda confusing to follow since ...
Definitely looks like a weight painting issue it looks like either some of the arm is being deformed by like maybe a leg bone? Or all the hand bones don't have any weight painting on them anymore so the model just leaves them there when it moves.
You can test if it's being deformed by another bone like a leg bone by moving the other bones around individually and if the arm starts to move then that's the bone you need to remove the arm weights from
And you can test if the hand doesn't have any weight painting by grabbing the Root bone like the pelvis or whatever that bone is called on your model and moving it around if the hand stays in place in the world that means it doesn't have any weights on it and it will need to be added
stray nebula
Here's some of my past projects haha I'm a blender artist but I'm hoping to learn more about unity and exporting to VR chat from this server :D oh spoilers for the last image it's got really bright colors it's a sparkle dog


 velvet sluice
when i get a high rank i am going to launch the Creme Egg UK Avatar.

What does anyone think of it?
south saddle
velvet sluice
when i get a high rank i am going to launch the Creme Egg UK Avatar.
Nom the EGG!
velvet sluice
based on here today, goo tomorrow creme egg uk Adveritsments [sorry if i'm bad at typing]
stray nebula
velvet sluice
when i get a high rank i am going to launch the Creme Egg UK Avatar.
This is so silly I love it
timber tide
How do i fix a top not having physbone but the chest does? whenever i go into play mode in unity and move the avi around to check the physbones the chest moves but will clip outside the shirt as it just stays in place
steady zealot
man do I hate weight painting...

Any tips for weight painting pants/hips/lower shirts to not look like complete garbage when sitting cross legged?
hushed leaf
make them shorter? Otherwise yeah, this is pretty difficult
steady zealot
I think maybe twist bones are the way to go

 steep cliff
working on this goober rn
 spiral sigil
Hello everyone
I'm here to make friends
 winter iron
spiral sigil
Hello everyone
I'm here to make friends
winter iron
spiral sigil
Hello everyone
I'm here to make friends
You dont need to spam this in multiple channels
steep cliff
winter iron
You dont need to spam this in multiple channels
let them girl boss how they want
winter iron
steep cliff
working on this goober rn
Looks nice
steep cliff
tank you :3
spiral sigil
winter iron
You dont need to spam this in multiple channels
Ok thanks 👍
stray nebula
steep cliff
working on this goober rn
Dude this is so hype
 quiet coral
Hey, i was wondering if anyone might know what my issue might be, for some reason the bake isnt going super well. im trying to use a curvature generator but due to the bake not being good its clipped at the seems and has a lot of weird fragmentation. Im not exactly sure what could be causing this since im not very skilled with substance. I made sure there are no overlapping verts and moved mirroring verts over 1 on the x axis in blender. Besides that im not sure what could be causing this fragmenting.
 tough plover
quiet coral
Hey, i was wondering if anyone might know what my issue might be, for some reaso...
tough plover
quiet coral
Hey, i was wondering if anyone might know what my issue might be, for some reaso...
firstly, that UV map could be a lot better and waste less space, but the main issue here is that you're baking it with stacked UVs. you should move all of the UVs for one half one UV tile to the right, so that the texture looks the same but gets ignored when baking