#avatar-rigging
1 messages · Page 128 of 1
 dense latch
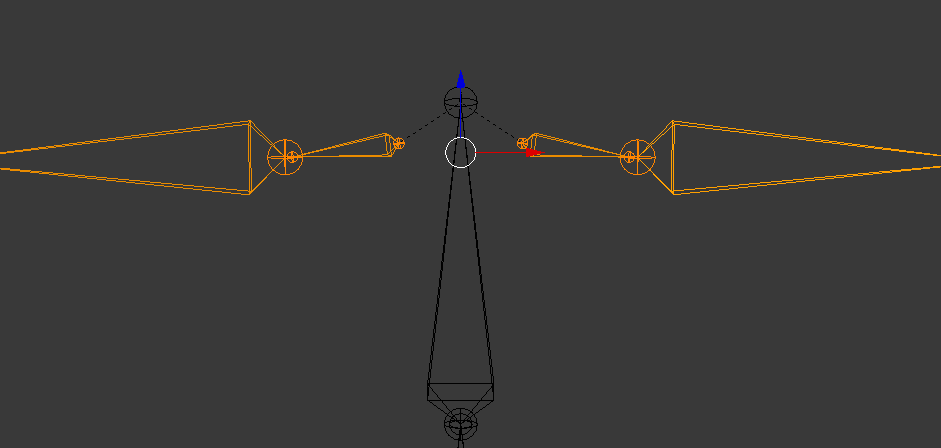
actually, i noticed something odd about the axes

the left one is the right arm from a top front view, and the right one is the left arm from a top front view. are they supposed to have identical axis line positions?
dense latch
they're all at zero
i'm gonna just try rotating the bones a bit and see where it goes
 golden crown
The model I got had the upper chest already mapped, how would I remove the bone?
I tried to find it in Blender but it doesn't seem to be working
dense latch
If im understanding this right, you can try merging it with the chest bone with CATS
golden crown
do you have a link for it? everything I search comes up as feline cats
 crisp tendon

You can select two bones in edit mode and press space, type merge, you should have an option to merge two bones
Or you can add the Vertex Weight Mix modifier to the mesh, then do this
group a being your chest bone, and group b being the upper chest bone
after than you can go in edit more and delete the upper chest bone
actually group a or b doesn't matter, just need to make sure you connect the bones after you delete one of them
golden crown
Is there a way to just select and see all of the bones in edit mode? I've only been using Blender for a day so it's all really confusing, the model is so detailed the wireframe is just a jumble of black lines
crisp tendon
golden crown
I think I fixed the chest but now it's saying "root hips 1" not found in HumanDescription"
and then when I deleted it it said "Transform 'root hips 1' for human bone 'hips' not found".
so it doesn't like it being there but it doesn't like that I removed it?
 sleek isle
in edit press A twice @golden crown
 opal rover
Hey is there a way to mirror weight painting? I got a model that is missing weight painting on the right upper leg and foot, but has it on the left.
 naive tree
@opal rover two ways, either delete one leg and mirror modifier the 2nd, or in weight paint mode have 0.0001 blur weight and x-mirror checkmarked and then paint the weighted leg - will carry over the weight to other leg
opal rover
Thx I will try that later 😘
 timid obsidian
got an issue in blender making an avatar, but parts of the mesh/skeleton like to stay in place when moved, im guessings its part of a vertex group/edit, but i cant find how to remove it. got pics. should upload?
 fading verge
hey guys what's the best way to cut up a avatar?
like if I want one part of a avatar to use on another one what's the best way to go about doing that?
timid obsidian
thats beyond me, but i know blender can merge armatures, n custom model creation, if you have cats, but i dont know what thats for.
 lofty aurora
@fading verge like a body part?
i just do a back up, select the part i want. alt+i to select everything but what you just selected and i remove
remember to select the bone too.
after i save as a fbx like if i was about to to upload an avatar to unity.
back up the part
because why not
after i go on the avatar i want to paste the part. i import the body part with cats and i merge it with the bone i want with ctrl j if i remember ?
its hard to help when i dont do it t the same time lol
but thats resume what i do
it can also be ctrl i to select everything but what i want
fading verge
Does anyone know the name of this avatar? https://imgur.com/a/1YrIItG

 late kernel
does anyone know how to make gestures work without full body ik
 drowsy wharf
@late kernel you MUST have a humanoid rig with the proper bones for gestures/emotes/head/eye tracking to work
even if those bones aren't actually weighted to any part of the mesh
 real reef
help when i want to parent a bone to another one to move the whole body the bone structure turns strangely


all the other bones work
 thick karma
Is the mesh weight painted to the bones? Does the mesh have the armature deform modifier? Did you move the bones in pose mode?
 lusty sphinx
Is blendr the most common boning tool, or is there anything else that I can use?
 ancient marsh
@fading verge you cant just post the same question in a different text channel and expect different results
fading verge
Ohh, ok sorry
 topaz stag
does anyone know how to apply pose position to rest position? i mean like making the pose as default?
topaz stag
ahh thx
 warm coral
I just use that option in Blender without using CATS
fading verge
guys how to make costume avatar ?
i dounwload everything but it keep telling me that i need to play more vrchat
to make costume avatar
help me plz
how to upload avatar it not allows me to upload
drowsy wharf
@fading verge you need to play more on a non-steam VRChat account.
Idling will not help, just play, explore, and make friends.
Also...don't spam different channels with the same question
if you're not sure where to put an avatar-based question, just put it in #avatars-2-general and wait
 tacit current
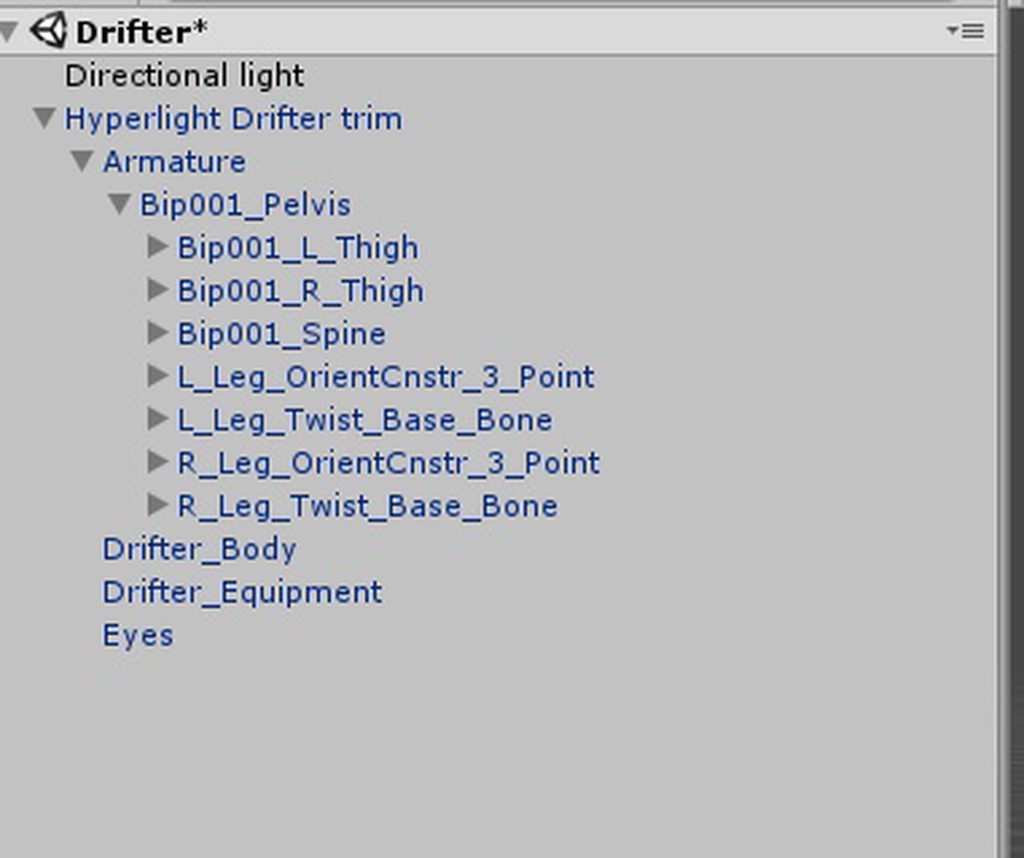
how do I add parts to this menu? https://imgur.com/a/5LZwQvb I need arm to be there, so I can add an object for animation
 drowsy wharf
@tacit current assuming you're talking about adding arm bones that move the arms when they do, you don't do that in Unity at all. It's done in a 3D modeling program like Blender.
You're going to want to look up tutorials on rigging and weight painting. Fair warning, it's not a simple click and done thing, it'll take learning and work.
 remote sigil
so... i need some help with applying physics to the shimakaze skirt so it doesn't clip
 short nacelle
Hey !
I have a small question,
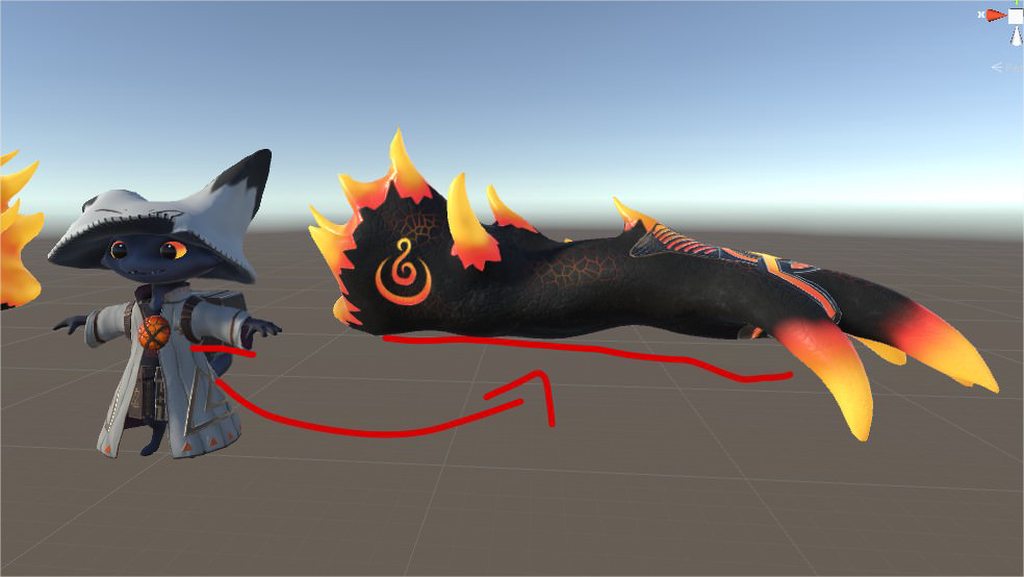
I want the big arm here to follow my movement i'm doing with the cats. So I did a small script allowing me to do that which work fine, but apparently Vrchat doesn't allow character scripts in game.
So is there another way to do it that would work in vrchat ?
(both arms have their own bone rig with the same hierarchy)
https://imgur.com/a/7pbsmdi
 naive tree
@short nacelle you use fixed joints for that and lock therigid body positions of the exo-arm bones
short nacelle
Alright, I'll try that, thanks (:
 hoary crystal
Hello sorry to bother here, I have a question for anyone who uses mixamo. When I upload a certain character it seems to skip the step in which I choose the areas for wrists and all those parts and automatically throw them in. This is causing some issues with my character bending over when in an idle position. I was wondering if it was some sort of user error causing this to happen or an issue with the model itself.
It also appears to be missing its assigned textures in the auto rig for whatever reason
fading verge
https://gyazo.com/c81847731aa3e3933dde456dee8eaddd i have a problem with the scene tab

first, the entire model is on "tongue.003"
and everything (incl, rigs and stuff) and separated in scene tab
how do i merge them together again?
fading verge
@fading verge Select the mesh you want to merge and hit Ctrl-J. Cursor on the 3d viewport, make sure one of the objects is active. (yellow, not orange)
bit it doesnt do anything
everything on scene list is still there
I'm not sure why you wanna merge them, Unity understands separate objects, and they're all parented to the armature.
It may be that you're trying to select objects under different hierarchies, so you can't merge the objects that are outside the armature parent with objects that are inside that.
Can you upload the model somewhere? I'll check and send back. PM is fine.
fading verge
ok

 gritty nest
First of all, why so many colliders
Second, why are the colliders on the skirt bones? That's not how it works
And third, the skirt bones have weight on the entire skirt. Try applying a stiffness curve or merge the first layer of skirt bones up in Blender.
@remote sigil
fading verge
collider should be on the hip bone
root bone
and should be the size of the buttock or atleast fill the entire side view
gritty nest
Collider can be anywhere you need them really, hips is a decent choice
fading verge
depends on how far the skirt is
 oblique latch
so i have been away from the vrchat community for a long time is the avatar rigging better or still like the old days ?
naive tree
@oblique latch everything has beenmade easier with cats plugin and available resources
oblique latch
I used cats back in the day has it had a lot of updates
gritty nest
Yes
 mild basin
I have a model with two sets a feet, one with boots on and one with just bare feet. How do I go about creating a shape key that swaps them out or atleast makes them transparent so one doesn't show up in Blender?
sleek isle
separate the mesh and create an animation that hide the feet and make the boot appear. vis versa.
drowsy wharf
You separate the boot/foot into separate materials. Then you swap the boot's material during animation
mild basin
I'm not familiar on how to do that
gritty nest
Make a shape key that scales the boots up and the feet down
Have the boots be inside the feet initially, but smaller
sleek isle
those are 3 thing you can do chose one

 grim ibex
same material?
you might wanna adjust the lower material so it fits the facial one
just a bit of colorcorrection or something
 spiral fog
it's the same material and color
it blends in unity even have the vertex normals facing the same direction
 spiral fog
I'd love to but wouldn't that mesh with the blendshapes for the face?
grim ibex
you can try using cat's to join them, it might keep the visemes
spiral fog
I'll take a look thanks for the idea
grim ibex
no prob 😃
 pseudo sedge
@spiral fog also try to remove doubles after selecting the neck verts after joining
sleek isle
the vertex are probably no join
spiral fog
The vertex probably didn't join because the mesh were separated, I didn't want the file size to blow up after joining the meshes
sleek isle
so the normals is maybe not smooth
spiral fog
forgot that's not how blendshapes work
thanks for the tip on combining the meshes again ^_^
 tawdry yew
So i have a problem i need to connect the tails from the parent bones to the children but the connect option just pulls the head to the tail! Is their an option to connect the tail to the head or do i have to do this manually?
drowsy wharf
@tawdry yew copy the "Head" location for the child, and put it into the "Tail" location for the parent bone. I don't know of an automatic way to do it.
tawdry yew
@drowsy wharf yeah i figured out something way easier and faster: you select the bone head then " shift>S cursor to selection " then select the tail of the other bone and then press " shift>S selection to cursor"
 calm needle
shift s is so usefull for many things. Very usefull on centering the eye bones on semi circle eyes if they get misaligned
sleek isle
yeah I use that alots
drowsy wharf
I've even used that for UV Mapping, why didn't I think to mention it...
 granite bay
Anyone here an expert on full body rigging? I need someone to hit me up on an issue
drowsy wharf
@granite bay explaining the issue instead of stating "an issue" is far more likely to get you responses. Someone less experienced may even have run into and solved it while a more experienced hasn't seen it yet.
granite bay
Well the thing is, I’m not the one doing the rigging of the model, but the closest explanation I can get to the issue is that both of the thighs on the model are rotated differently than one another, far from normal.
drowsy wharf
Have a checklist:
Both upper legs pointing straight up?
Hip pointing straight down?
Cleared all bone rolls?
 pale hull
@granite bay https://vrcat.club/threads/comprehensive-full-body-tracking-rig-setup-tutorial.1382/
This might help

VRCat: Community-Run VRChat Forums
EDIT: As of 2018/04/02, Cat's Blender Plugin now includes this process automatically with version 0.7.0. Go check it out!
Heyo~
So I've been using a...
 static parcel
I read you only need the thumb, index and ring finger for humanoid rigging to work but does it need all three knuckles of each?
static parcel
Thanks
 crystal vector
Thumb, index and ring? I thought middle finger instead of ring finger. Or is that irrelevant?
crisp tendon
Middle finger instead of ring yep
 vocal cairn
umm i have a problem with shape keys, is this the right place to ask help about it?
fading verge
not really, more #avatars-2-general i guess
vocal cairn
thanks ill make sure to post there then.
fading verge
Hei together,
Im having an issue where my model (with cat paws) apparently has unassigned fingers but when i assign them in unity and click apply it throws the assignement out of the window
vocal cairn
I don't know if this will work but when you are done assigning the fingers press Ctrl + S and it will ask you to save the file at the same time it will create a new scene. Im not 100% sure that will work but give it a try.
 thorny totem
@fading verge cat paw bones were joined with the armarture i hope?
thorny totem
Ah ok good 😁
 junior isle
Greetings,question, i have an avatar that works perfectly fine on vr and desktop mode, however when in desktop, once you open an menu the rig screws up for some reason and when you look down the avatar just bows down so mutch that you go throu the ground. any idea why this is happening and how to fix this ?
gritty nest
Getting the same issue sometimes, not sure why it happens. I have had it happen when I changed a sphere on my model from a regular mesh renderer to a Skinned Mesh Renderer.
What is your real height set to?
junior isle
1m62
 elder crescent
can anyone explain in short why at zero weight (blue) vertices stay still, but at any weight above that all the way to red they move the same amount? i never understood this
do you need two groups to control the amount of movement or something?
junior isle
@elder crescent if if you weight paint it to 2 bones that is where the amount comes in
static parcel
Doing a character with three fingers (index, middle, pinky). is there a way to stop the pinky rotating so far in some gestures?
crisp tendon
You can maybe assign those pinky bones to another finger, or you'll need custom animations for finger gestures
static parcel
Yeah I was thinking of just making them the ring finger
Thought about custom animations but they seem to be triggered by both hands
gritty nest
@static parcel they won't be triggered by both hands as long as the pinky is assigned in the humanoid rig
There is masking applied, so the left gesture will only affect the left hand's fingers.
Right hand remains unaffected.
And vice-versa
static parcel
Oh neat. Wondered how it tells them apart
sleek isle
in video game. they have some time 3 finger bone. thumb, index and the other one(middle) control the 3 other. so do the same
 fringe cipher
Yeah my 3 fingered avatar has those three fingers. Full body tracking is turned off because of it only having three fingers though cuz it can't map the other two. .-.
gritty nest
@fringe cipher it should be turned on if you have thumb, index and middle finger mapped
Just leave the others unmapped
fringe cipher
I do /-\ Odd. Don't really mind personally since I don't use full tracking lol
gritty nest
@fringe cipher full body IK affects much more than that though
You can't crouch in VR or desktop and cannot use hand gestures if you don't have finger bones
fringe cipher
Yeah i know but i never crouch and i didn't put any facial expressions etc on the override
 grave mantle
Anyone know what might cause this issue? https://media.discordapp.net/attachments/489879545038503946/505147958610624532/what_headbone.PNG
 sleek isle
neck pain
gritty nest
@grave mantle just rotate the head upwards forcibly
Can also maybe be fixed by resetting pose and then enforcing T-pose
grave mantle
Thanks, I am going to have to forcibly rotate it, I have already tried your second suggestion
vocal cairn
i think even if you force rotate in unity it will give you something as "not on t pose"
you might have to take it back to blender and rotate it there.
calm needle
double check the head bone in blender. See if its facing sideways or straight up
sleek isle
not the end of the world if not in t pose
calm needle
true since it should still act as intended
its just a nice habit to get into fixing it in blender so you dont have to fix in unity 😛
fading verge
Sammy is in need of assistance
 astral mango
so ive been having a problem ive been pulling my hair out with im trying to upload a avatar i got off sfm but it has an upper chest bone and wont upload with it but also gives me errors when i try to remove it then upload
crystal vector
@astral mango You have to fix that in Blender. You can use cats to make that easy
astral mango
i actuqally dont know how but i guess i could try to download cats and see what i can do
static parcel
Weird, seems the bones on the left hand are animating the wrong direction on one axis. Instead of spreading, they close together.
gritty nest
When using automatic weights in Blender to weight a mesh only to specific bones, the calculation still seems to take all bones into account.
So if another non-selected bone is nearby, that part will simply remain unweighted
Any way to prevent that?
 opal aurora
You could possibly make it a bit convoluted, having a bone in the area to then transfer said weights from, or making it so that the bones that should inherit the weights simply not apply (i think disabling deforms had something to do with that but i'm unsure)
Or, even more convoluted, saving bone values in a screenie and removing the problematic bones, to then re-create them
After autoweights
You can also increase or decrease the total amount of bones that affect a single mesh area
Default is 3 iirc
gritty nest
Eh, I ended up copying the mesh to a separate armature with only those bones
Then doing automatic weights, and copying the mesh back
This seems like a bug tbh
opal aurora
Mhm, das another way around it since it keeps vertex data
gritty nest
Or at least not the behavior anyone would want
opal aurora
I'm pretty sure there's a way to exclude bones from auto weights but i'm unsure of what...
gritty nest
Apparently you can untick Deform on specific bones
But there's a lot of irrelevant bones around the area I want weighted
opal aurora
Yeah that can be a major hassle
Getting it fixed up on a new one with just the desired bones seems to be the best course of action in such a case
It essentially takes the whole armature into account when calculating weights but lets you define the specific bones for it to use at any one time, however it does not ignore unselected bones due to calculating the entire armature, so it's not perfect but it can get the job done pretty nicely given the right variables
 crude pagoda
Does anyone know in what channel I can ask a question about an error that keeps occurring in Blender?
I can't find a solution but if I don't fix it all my avatars won't be able to blink or talk I think
gritty nest
 umbral ocean
when you forget where teh view ballthing is in unity
fading verge
I have an avatar that is an inanimate object from Super Mario 64, I got it from model resource. I dont need to auto rig it. How can I put it into Unity?
 slow gyro
Throw it into blender and export as obj, I would do 🤔
fading verge
@slow gyro Hey thanks buddy
 inland snow
i need some help with a 3d model... its kind of rigged but when i try and convert it it goes carzy
inland snow
some vanity shots of the model https://pbs.twimg.com/media/Dqf3Wr3XcAAdGdm.jpg:large

 grim belfry
made a new model and my issue now is uploading it. Should I update? it says "error saving blueprint blueprint" 🐧
grim belfry
I updated and its still the same sadly
 mellow yarrow
this happens after i select body and then the bone and then set with automatic weights. and i dont know what is wrong or how to fix it and iv redid the bones 3 times now https://i.imgur.com/ltHylmu.png?2
 fading verge
did you check on google why it can happen ?
mellow yarrow
yup but i did remove doubles and still get the problem the other one i dont know how to check for other meshes that may be apart of the model
fading verge
if you use the default layout
on the top right you can see all the meshes
gloves, left eyes, etc. Are all meshes
if you have the CATS addon you can press the "join meshes" button
or manually join them with ctrl+J
mellow yarrow
no i dont have any thing there other then the one mesh
fading verge
there isnt a lot of stuff that can create this problem
not connected vertices
separated meshed
X-axis mirror turned on but armature isnt perfectly symmetrical
mellow yarrow
i had this same problem befor but after i just remade all the bones it worked
 subtle moth
soooo... ive got a model here
the weight for the middlefinger is on the thumb
i recreated the missing middlefinger bone
is there any way i can transfer the weight from the thumb onto the new bone?

 naive tree
@subtle moth modifier > vertex weight mix, new bone > old bone > add/replace
subtle moth
thanks @naive tree
sleek isle
https://gyazo.com/5426c2c777b2d5ff809f255b163bb7d4 kind of hard to not have clipping. Go to hell cloths thing
 formal summit
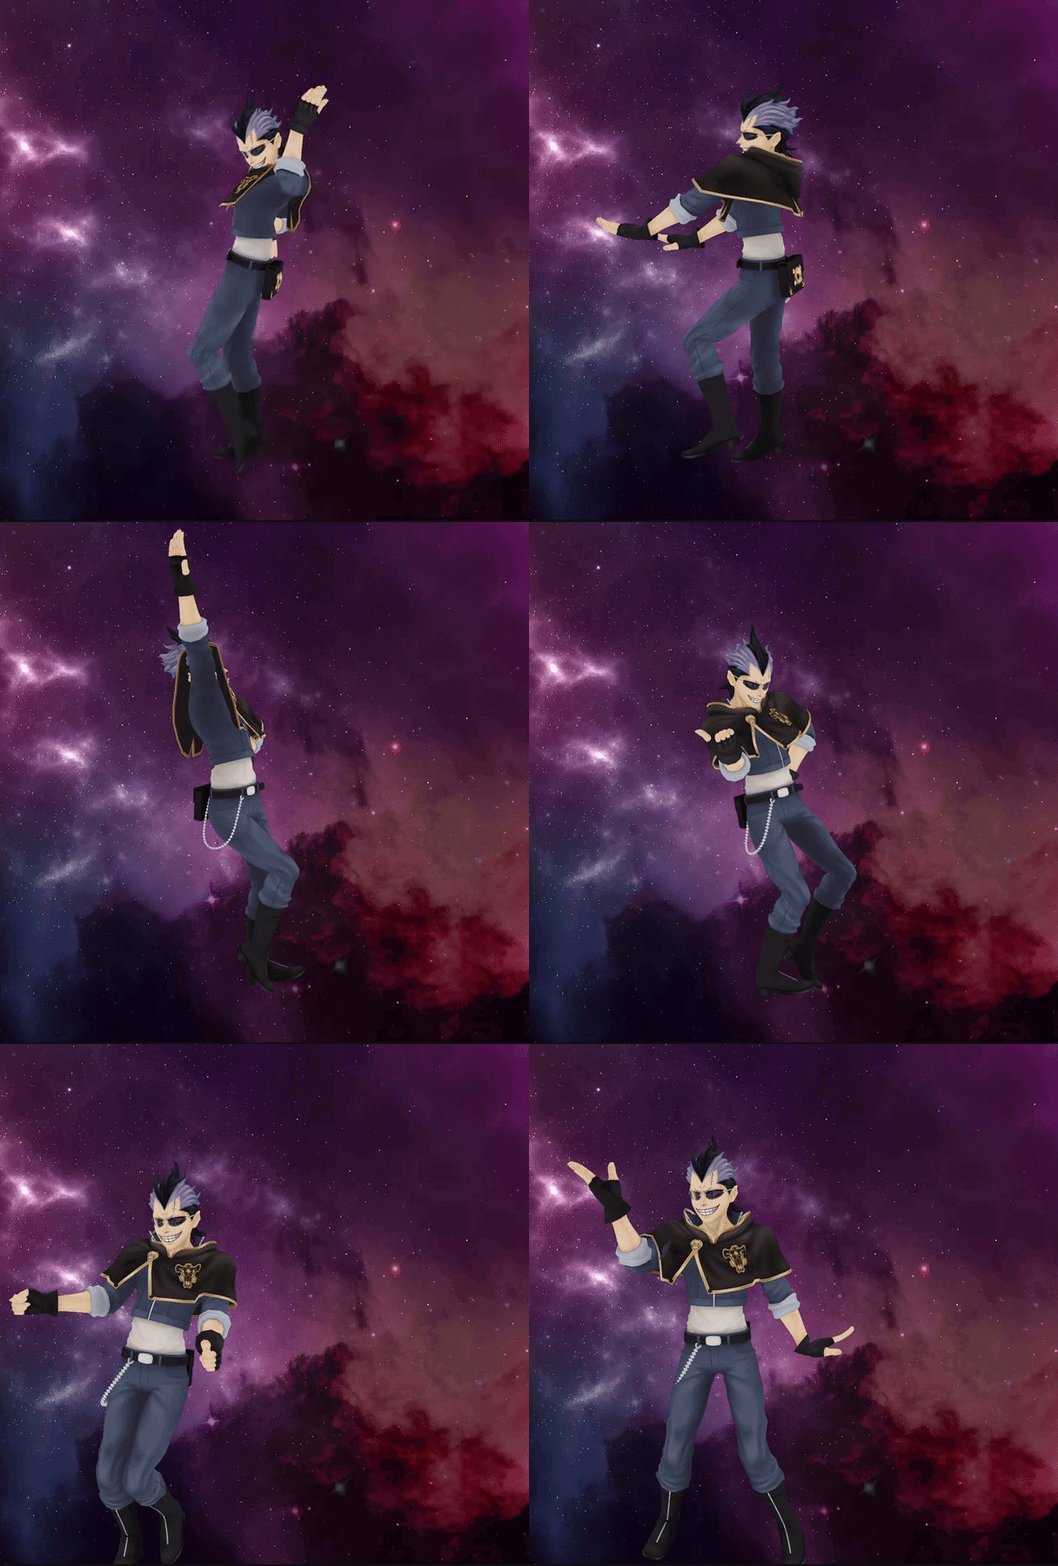
I used CATS to autorig and weightpaint my model, but when testing the different bones and how it looks when they rotate didnt work out too well, so i decided to change some weightpainting to certain parts, but for some reason it spazzes out the mesh when i do, is there any setting i can do to change this in blender?
crisp tendon
Is your pose the same in object mode and pose mode ?
gritty nest
@visual sable with Cats installed, reparent the bones you want to merge, to the bone that you want to end up with
Then select them in edit or pose mode
And click "merge weights"
 solid adder
Looks like you need to lengthen the spine bone or chest to me.
Should be further down
Should be able to move that in edit mode without messing with weightpaint
drowsy wharf
Bones always rotate at the head (wider side) of the bone. Weight painting just tells it to move with the bone, not how to move.
Your bone was moved up from where it normally sits, but the weight painting is the same, so it just moves in a different rotation now.
As Daemon said, move the bone down or lengthen it.
 austere merlin

 lost sundial
Hey, I've got kind of a weird issue with the bone rig in Unity
For some reason one of the breast bones won't show up properly and can't affect the mesh

Like so
The bone is there in the hierarchy and it works fine in blender as well
If I reassign the chest bone I can make it show up but as soon as I press apply and exit out of the configuration and then enter it again the bone has disappeared

Not sure how to fix this
sleek isle
dont mind how unity display bone
lost sundial
Well the model doesn't work properly unfortunately
The collider shows up fine and moves as it should but the mesh doesn't actually move
 raven helm
how can i apply the weightpaint from left leg vert group to right leg vert group?
 harsh wagon
Is that possible to copy the weight paint ? >> I make custom avatar and the problem is when i merge the mesh it's break the weight paint and i have to do it. So i want to copy/transfer the weight paint from the original pmx to the clothe in my custom avatar is that possible ?
 turbid spear
@raven helm select the vert group then click the select button under the vertex groups (in edit mode), then pick the other leg's vertex group and press assign, that will move all weights from selected vertices one to the other
If both legs end up having weights for those vertices (shouldn't happen I think) just click remove after you selected them to remove them from a group
raven helm
thank you^^
 cedar scroll
recommended dynamic bone value for short skirts?
fading verge
.88
.27
.3
.88
cedar scroll
thanks
cedar scroll
my avatars pupils keep dissapearing on vrchat even though it dosent look that way in unity, i tried moving the pupils up as far as it can go without looking like its popping out of the eyes
actually it does show up in unity when ipress play, but it dosent do that in its t-pose
drowsy wharf
@cedar scroll check the model in blender, are the eye and head bones pointed straight up? If not they tend to act weird
cedar scroll
i checked, it looks like theyre straight up, why does cats plugin create a new bone when making eye tracking? im still having the same problem
the eye tracking and everything is working perfectly in blender, just not unity/vrchat
opal aurora
Perhaps you have the wrong eye bones assigned in unity, when creating eyetracking CATS tells you which bones to assign exactly
cedar scroll
did that, now my characters eyes go crosseyed when i press play
opal aurora
That's pretty unusual not gonna lie .-.
Not entirely sure of what could be making ehm do that
cedar scroll


i guess for now i can just not attach the eyebones in unity but i want eye tracking back soon
calm needle
did you make changes to the rig after aleady having the model set to humanoid?
sleek isle
I have problem with my eye tracking too. I dont know what am doing wrong. the hierarchy and the bone name are named the way it need to be and the viseme are in the right order
crystal vector
@sleek isle What problem exactly?
drowsy wharf
@cedar scroll your eyebones are pointed straight up, correct?
If not fix that.
If they are try moving your view camera further backwards (as is you wouldn't be able to get up close to anyone without going through their head), fairly sure a camera too far foward causes the crosseye effect.
Generally I have mine sitting just at the bridge of the nose barely visible.
 merry ravine
I dont know if this is the correct channel but i have a question about FBT
I know theres a button in Blender to make the avatar Full Body ready but i was wondering where the button was?
fading verge
#full-body-tracking
you need the CATS addon for blender
merry ravine
I know and i do. Where do i find it in CATS?
fading verge
fix button
cedar scroll
@drowsy wharf tried all that, still not working
fading verge
I get this error when trying to upload my avatar https://gyazo.com/ac692822b78e989a261f6a098e961a95

remove that component then
shuriken is the unity 2018 particle system ... 🤦 whatever you're trying is not 5.6 compatible
gritty nest
@fading verge wait, what?
That isn't true
Shuriken is just the name for the new particle system in Unity 5
The stuff that isn't "legacy"
fading verge
is it?
gritty nest
Yeah
fading verge
then why would a method be missing?
gritty nest
Err, where do you see a missing method?
gritty nest
??
He downloaded a particle prefab off the asset store and it has a script attached
That's all the SDK is complaining about
fading verge
who adds scripts to their avatar? lol
gritty nest
You must not spend a lot of time here lol
People add prefabs to their avatars, and those prefabs have scripts attached without their knowledge
fading verge
I forgot that was a thing...
 prisma root
Hello! Is is possible to tie the voice response to something other than mouth viseme? I'd like to have my avatars eyes glow in response to me talking.
drowsy wharf
Visemes are just normal shape keys. Anything you can do with a shape key is an option. You could enlarge/shrink transparent sections to dim/brighten the glow for example.
Or just shift it forward/backward to turn it on/off
prisma root
hmm okay. Any way to tie it to the actual light-emit value on the material in Unity?
@drowsy wharf ^
drowsy wharf
@prisma root No. Blend shapes have nothing to do with the shaders, only the movement of the mesh itself.
Your best option is as I mentioned. If you want varied levels of light, use multiple "shadow" layers to darken the original eye with emission. (since it's partially obscured).
If you want differing colors or just an on/off, swap layers back and forth that have the emission applied to them.
 craggy pelican
so i have a problem with my armature changing when I place a weapon on it
has anyone had this happen before?
any help appreciated. thanks in advance
prisma root
@drowsy wharf okay cool, thanks. That gives me an idea for how to do this.
gritty nest
Should be fine
Uh, I dunno
I think it might be preferable to have the weight in the chest instead if that's even possible
You would have to test it
I don't know
 celest bridge
here's a question, I've encountered models here or there meant for animating- that seem to be rigged with autorig pro. theyve got all those boxes and shit around them meant for posing and whatnot. Cats doesn't like those because all the bones are named wrong.
how does one go about converting that to something useable by cats? is such a thing possible? or more trouble than it's worth?
crystal vector
@celest bridge Well you can report this model to me and I might be able to make it cats compatible
 abstract shore
Hi, I got a quick question regarding hand gestures. Is it possible to set up an animation that only plays on one hand rather than from both?
crisp tendon
Not currently afaik
abstract shore
Alrighty, thanks.
 coarse halo
Which bone does the hip tracker influence?
is it the "Hip" bone?
For example, if I wanted an avatar where moving my hip would move my whole torso, should I weight it all to the hip bone?
gritty nest
Basically, yeah
 patent halo
the armature of my model disappeared after i rigged it to humanoid ;; aaaa
 sharp pewter
Like was not even in hierarchy?
fading verge
Shouldn't there be a way to mitigate that? Like, push the bone rotation through a function, or "map" the rotations of the limbs from the trackers to the rotation of the limbs in-game?
pale hull
The quick and dirty way is to just rescale your limbs in your scene before uploading.
If you can't reach the floor, make arms longer or legs shorter. If you reach through the floor, make legs longer or arms shorter. Might take few uploads and eyeballing to get it right.
 karmic turtle
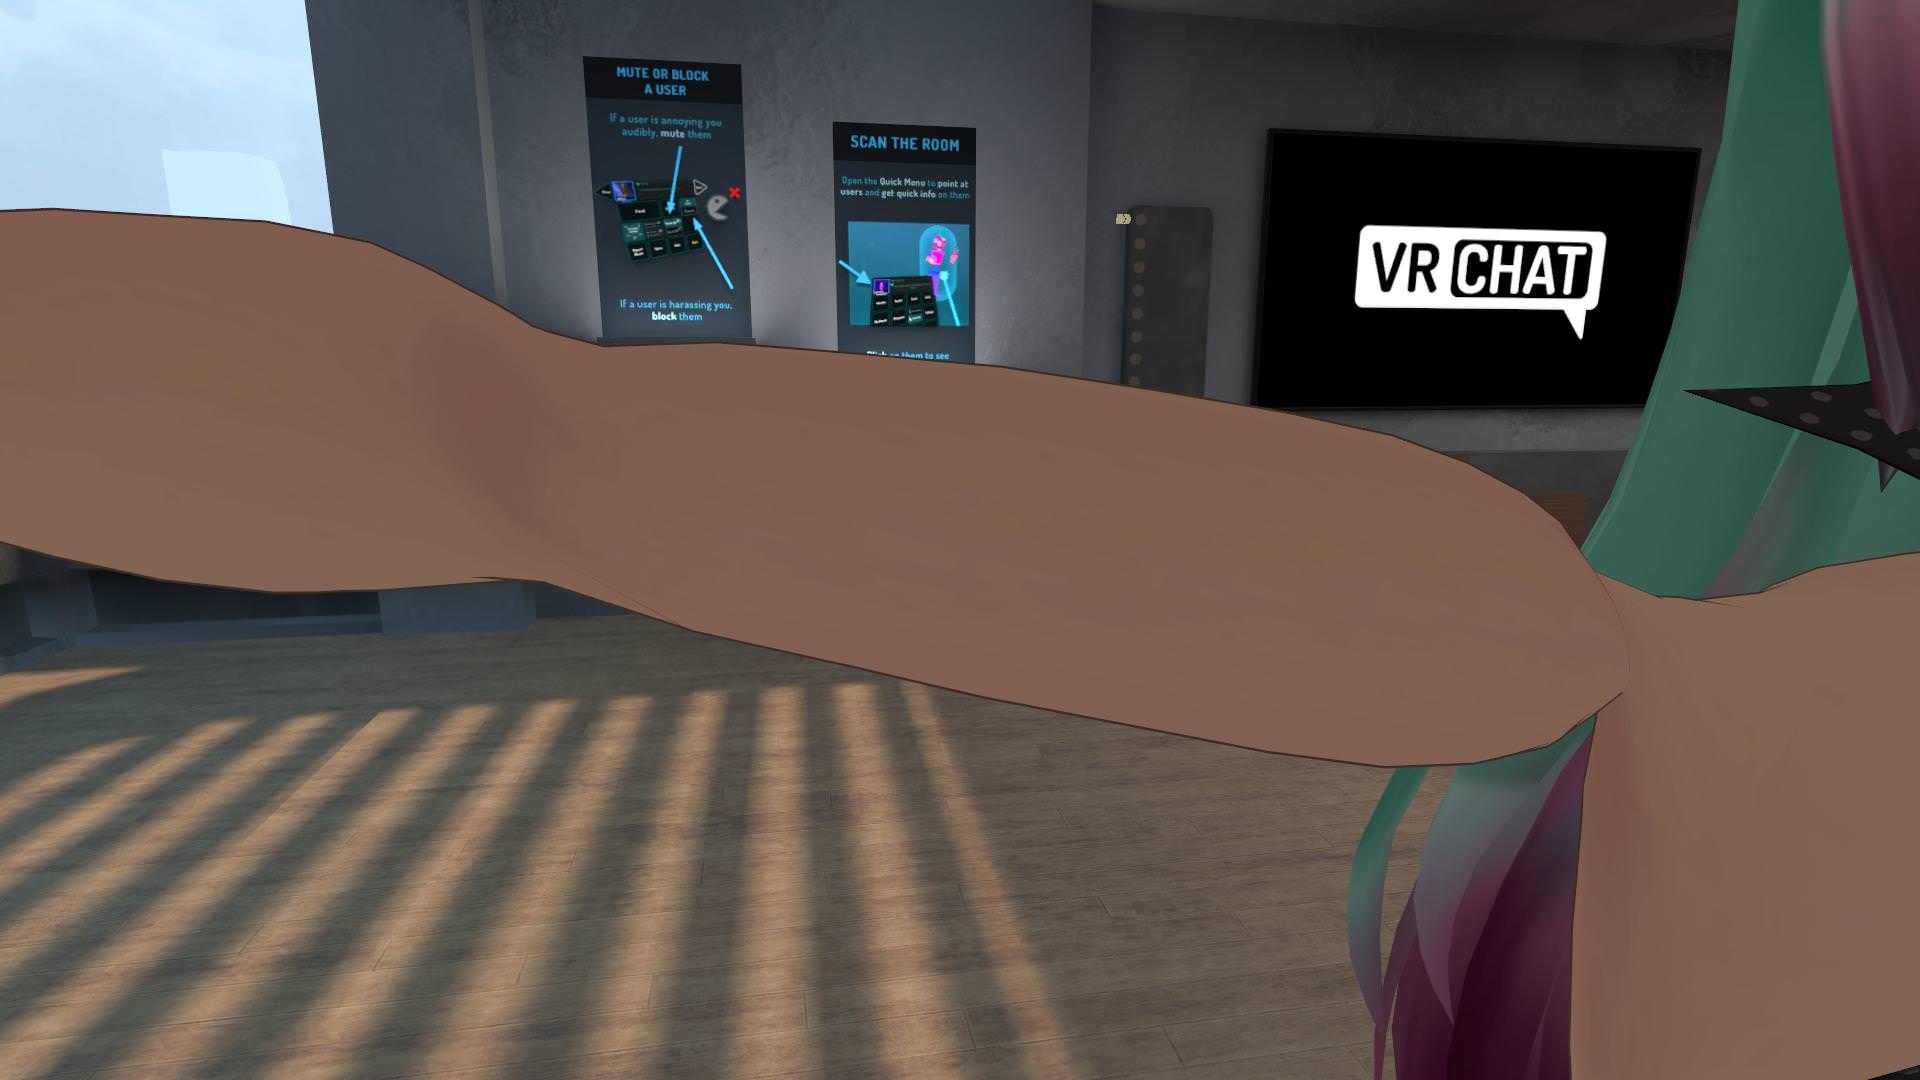
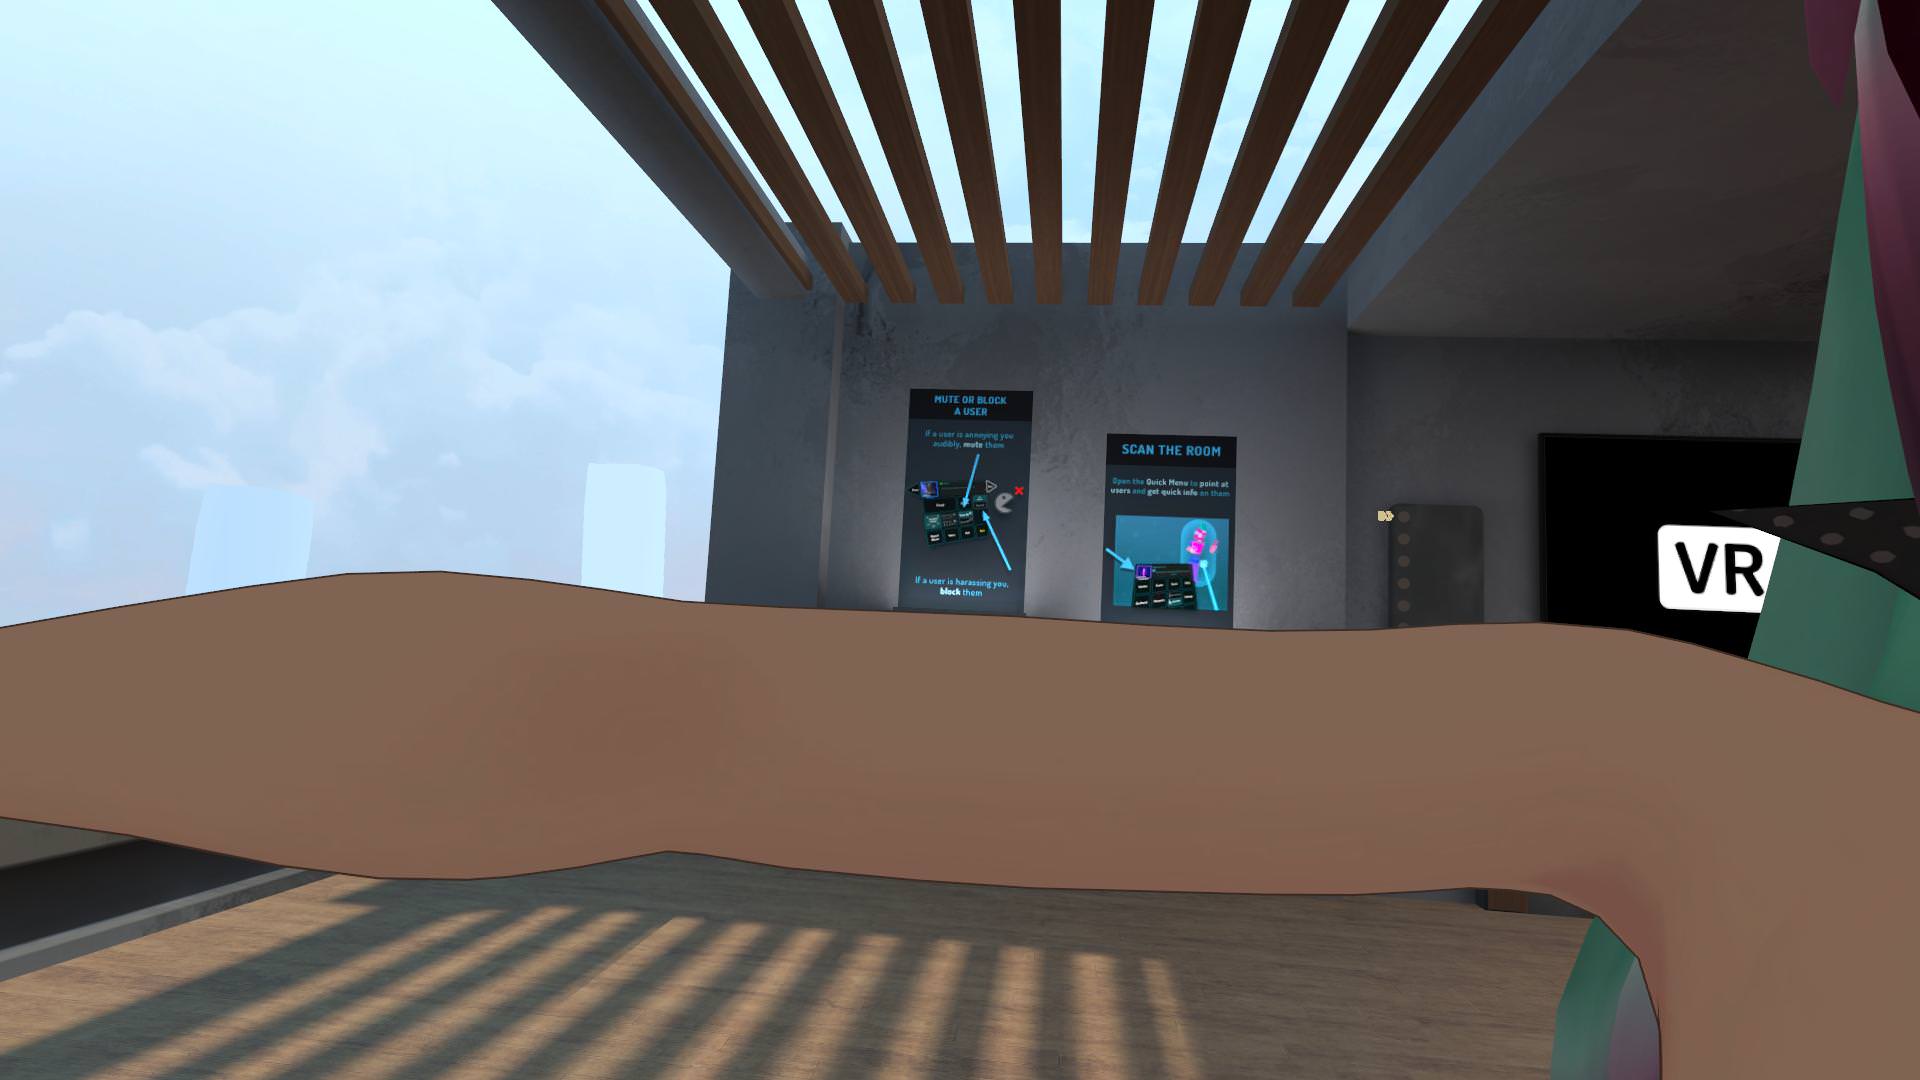
good morning, i have a twisting problem with my shoulders when i extend my arm full and look into it's direction in full body. i tried to fix it by changeing the rotations but i never had that problem and i am not that into blender... maybe one of you can help me? here is what it looks like ingame and the bones in blender
https://i.imgur.com/Jl8hVf0.jpg
https://i.imgur.com/gMDDtwN.png
 fading verge

A guide for scaling and tweaking VRChat avatars for fullbody tracking. Covers information on in-game, blender, and unity. It also has a fix for that bending ...
karmic turtle
yeah thats what i followed but it just cant get it to not twist :/
fading verge
it's only in FBT ?
karmic turtle
one moment, i'll check again
yeah only in full body
with only in vr it looks normal https://i.imgur.com/NB8hydQ.jpg
 fading verge
maybe the folks in #full-body-tracking have more clues on what's going on
links is broken btw
karmic turtle
it looks like when it tries to move the shoulder backwards when i turn my head, a bone just spins around :/ okay, then i'll ask there^^
 brittle tapir
https://puu.sh/BVCSr/c7d4295ea7.png has anyone had this error before

when it looks fine in the hierarchy
fading verge
show a screenshot of the avatar mapping tab
brittle tapir
 fading verge
you didnt reparent anything in unity ?
brittle tapir
no
it was giving me a different error with the default mapping
actually same error nvm
gritty nest
Probably looking at the wrong model, try selecting model in the scene and clicking Model->Select
 ivory radish
ok for some reason
the avatar i set up keeps looking down at the floor
with the eye tracking

but in the game his eyes always look down
gritty nest
@ivory radish the head and eye bones both have to point up
Select the tips of the bones and make sure they're above the base of the bone
ivory radish
ok so head also straight up?
gritty nest
Yes
You can just do this in edit mode
Keep in mind that you will have to go back to the humanoid rig configuration and go to pose->reset and pose->enforce T-pose
 gritty nest
Yeah, that looks fine
ivory radish
lul i like
modelled it from a sketch then painted then rigged
i knew how 2 do the rigging but the modelling took 4 ever
ended up with that
ivory radish
click the gif thing 2 see as video
ok so the eyes work however
why does he keep
looking down on idle
gritty nest
Don't trust mirrors too much
ivory radish
but it works fine on mirror for other avatars
gritty nest
A lot of models tend to do that, MMD's are the most reliable for eye tracking in my experience
I dunno
gritty nest
I don't know
gritty nest
So your head is looking down?
Major difference is that MMD's have two sets of eye bones and thus LeftEye and RightEye will have less weight on them anyway
gritty nest
You could try generating eye tracking with Cats using your original eye bones as reference, unless you already did that
ivory radish
i have a Left Eye and a Right Eye from when i rigged my avatar
gritty nest
Just make sure the original eye bones are not called LeftEye and RightEye when you do that
ivory radish
But i made a new LeftEye and RightEye bc it would rotate too much
gritty nest
Ahh
ivory radish
and it works in unity
and when eye testing
but when in the game it works until
a few sec later he just kinda look at floor
idk how 2 record bc im on vr
gritty nest
I have that issue too, I don't pay it any mind because it only happens locally
ivory radish
rlly
ok
thx
mayb it like
the eye looking toward my viewpoint
bc thats what avatars do locally
look at ur viewpoint every now and then
and bc mine a bit lower than eyes
looks down
probably
also how do u minimize air humping and tiptoeing/crouching
when u look up/down
is it just worse the further away from the head bone it is
also another problem
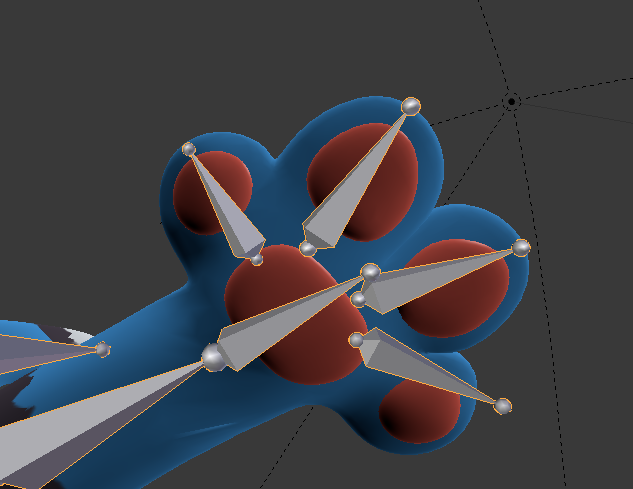
i dont know how to correctly rig the paws
bc they have a cartoony design

when i set it up like that the fingers on the side do not bend inward
and instead they roll
crisp tendon
Shorten the hand bone, shorten the finger bones, place them correctly, reset the roll, correct weight paint
should be good
crisp tendon
By following the steps above 
gritty nest
@ivory radish in Unity's humanoid rig configuration, orient the paws so they're not rolled
Should be in T-pose
The arms might be twisted which will cause this
Handpalms normally point straight down
patent halo
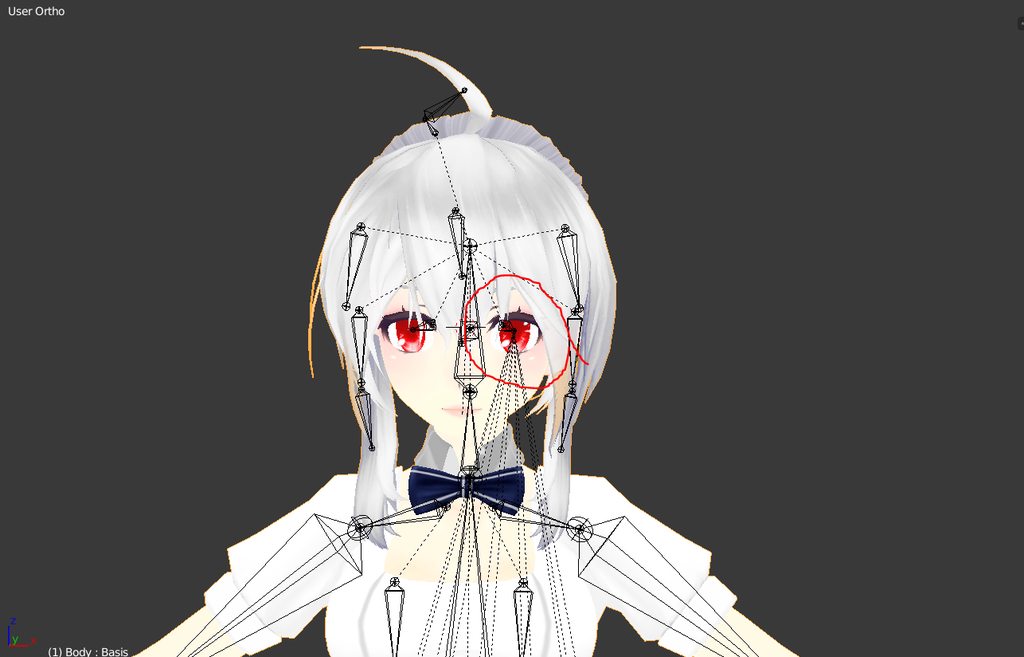
do you guys know how to unparent bones ? the skirt bones are parented to the left eye aaaa https://imgur.com/a/PCMrpHB
 fading verge
select the armaute
go into edit mode
select the skirt bone
go into the bone data tab
and change the parent
patent halo
thank you thank you thank youuuu !!
since its the second skirt bone should it be parented to the bone above or the hips?
fading verge
bone above
you usually have
skirt_Root
--Skirt1
----Skirt2
-----Skirt3
and so on
repeat that for all the skirt bone around
patent halo
oohh okay okay ill do that !!! thank you again for your help !! @fading verge
gritty nest
I see MMD's with weird parenting a lot, I'm assuming it's simply not an issue in MMD due to the physics or something
I've seen jackets parented to the hair too
ivory radish
is there a way to make Weight Gradient work with the X Mirror
or do i manually have 2 copy the vertex group and paste X mirrored in edit mode
 muted beacon
https://youtu.be/UOxkGD8qRB4?t=83 is it possible to make visemes like this?

K/DA Ahri, K/DA Evelynn, K/DA Kai’Sa, and K/DA Akali take the world stage with their debut single. Keep the show going on the Rift with these new Epic skins....
fading verge
probably yes
drowsy wharf
100% yes. Swap a mesh with the textures back and forth for each "sound"
muted beacon
oki i think i found it, and is it possible to make visemes in unity do material changes by chance?
fading verge
i dont think that you can change material with visemes no
i think your best bet
is to make 2d visemes
i'm pretty sure that would be the best way to do it
sleek isle
you could make multiple mesh with different texture and in the shape key, make one go forward and the previous one go backward
fading verge
yeah
that's the 2d way

EDIT: If you are using an MMD model please read below! In this video I will show you how to make your 2D eyes/mouth type avatar have a blinking animation and...
this video explain it very well
it's really easy to do
but require a bit of a setup
sleek isle
I would put the white part in png format with transparency so the mask part don't move
but if you want to make that effect in unity for a gesture you could switch the material/texture of the mask with an animation
ivory radish
visemes are based on sounds
but like if u wanna change things with a viseme u cant do that unless u use the blend shapes 2 move things and scale them
bc the blend shapes are just relative offsets of vertices
fading verge
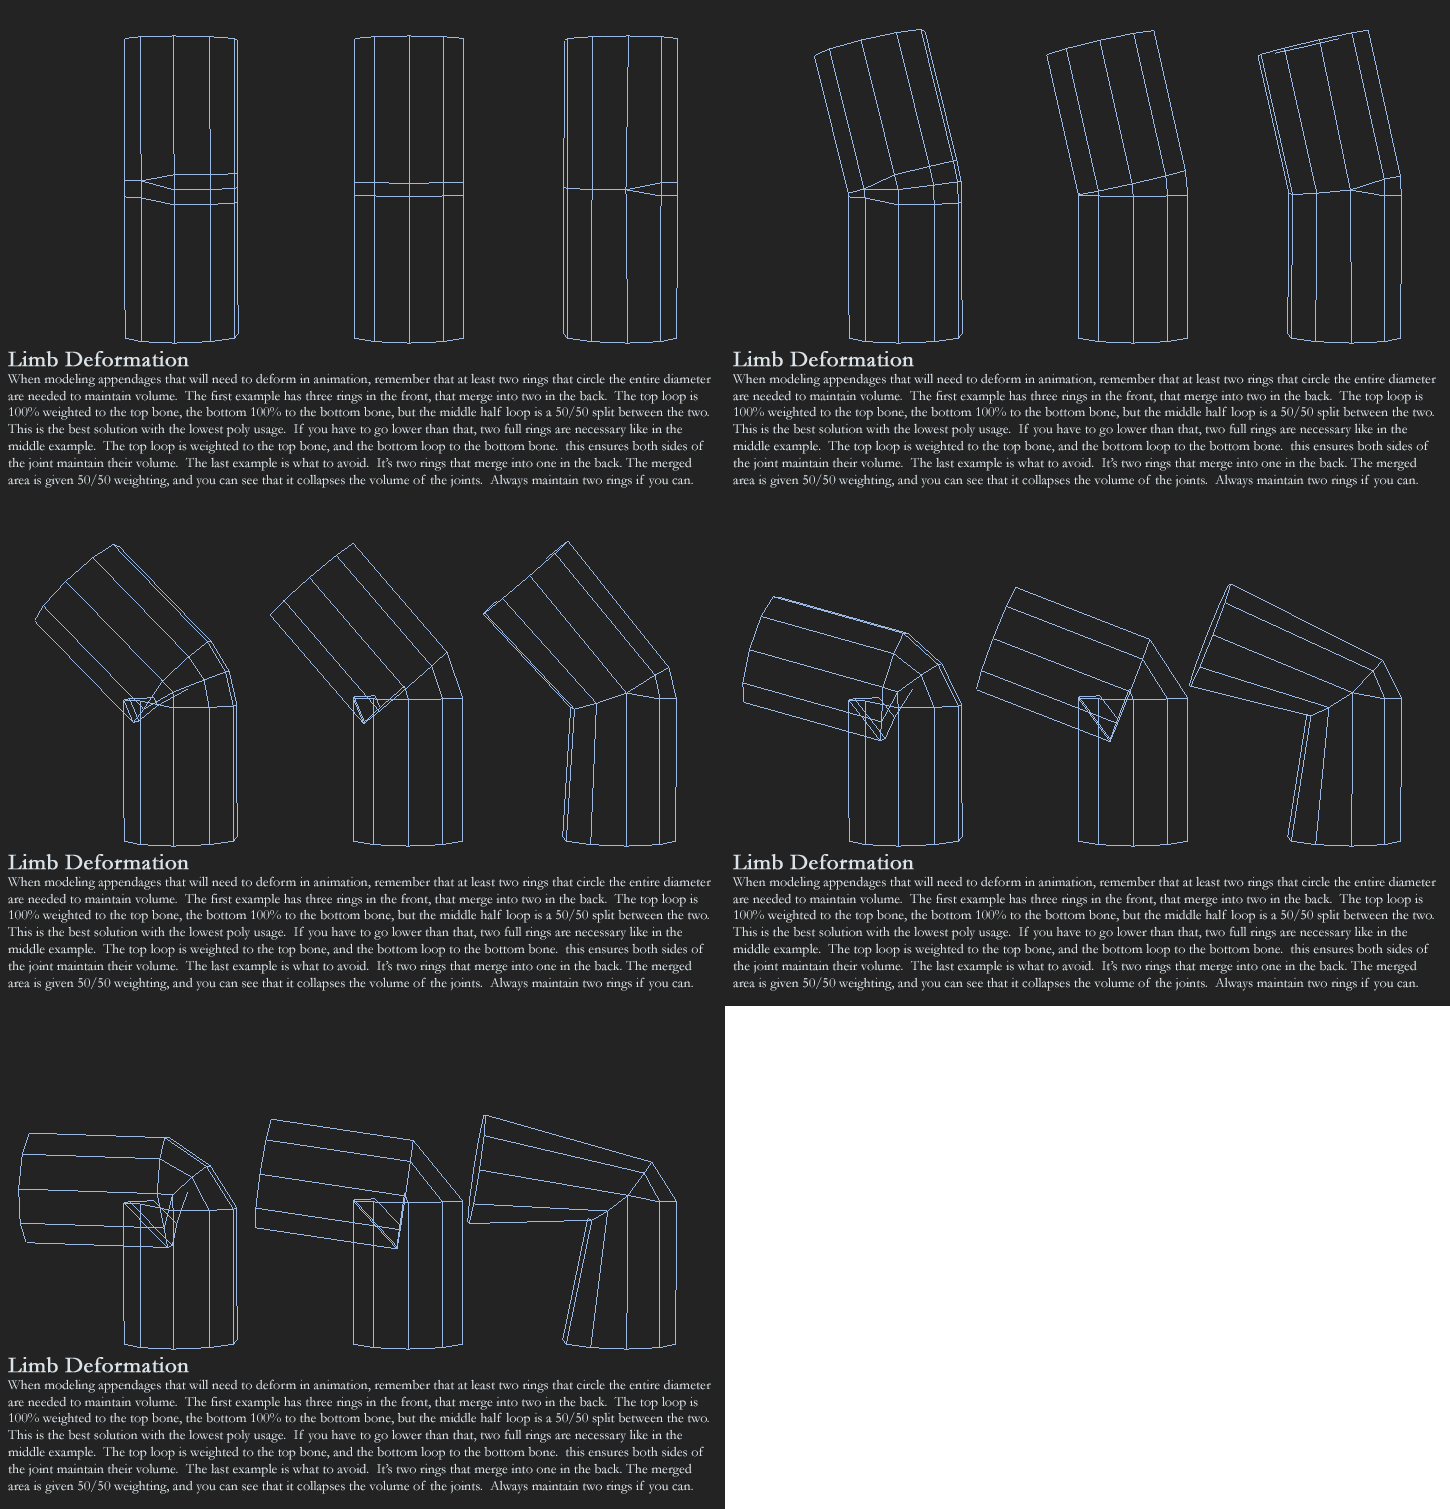
@ivory radish if you haven't resolved rigging those hands yet, the answer to this is "depends on how you want them to move like" x) So, you have to figure out how you want them to look like when moving (design the animation motion), and design the rig to get a desired result The way they are on that screenshot, I think you're gonna have a lot of compression on the mesh with single bones, because you're essentially deforming a bunch of spheres that are close together. Personally, I'd use more bones to counter the compression, or use shapekeys linked to bone rotations to correct it.
http://wiki.polycount.com/wiki/Limb_Topology kinda deals with the subject
especially this gif http://wiki.polycount.com/w/images/d/d1/BenMathis_limb_deformations.gif

thanks for that
it should be pinned tbh.
it's how it's done "properly", so with fine tuned weight painting only, and predictable collapsing of the mesh.
Polycount in general has a lot of great resources, though a lot was lost in the threads when they migrated to the new forum layout. Some links are outdated.
ivory radish
@fading verge that is not what i am talking about
i am saying the outer fingers will roll instead of close in like its grabbing something
they rotate on their sides instead

they should be turning inward not rotating like that
crisp tendon
Did you fix the bones like i suggested ?
fading verge
@ivory radish what Ruuubick was saying, it seems Unity is rotating the bone around a wrong axis. The movement is correct, but the axis is not. Check in Blender what axis is the rotation happening on, and rotate the bone in edit mode so that rotating the bone in this axis transforms the finger correctly.
like, go into blender, and try to rotate the bone in a way that replicates Unity behaviour
see what bone axis this is
you can display bone axes in the properties panel
crisp tendon
Resetting rolls should fix it if palm is facing down
fading verge
okay, yeah, you're right, roll basically describes the orientation of XZ axis relative to the bone Y axis, so this may be that.
turbid spear
That might be the same problem that person from yesterday was having with the broken thumb
fading verge
Hello, can anyone spare a few minutes to help me properly rig an avatar I'm working on?
To specify, I just need help with setting up the bones properly in blender, that's it.
crisp tendon
You can use the sample avatar provided in the SDK to see what a good base is
fading verge
When you say Sample Avatar, you mean the Tutorial_avatar.fbx right? Just making sure I haven't misunderstood anything.
I opened up the Tutorial_Avatar.fbx in both unity and blender, and It helped none at all mate, sorry.
ivory radish
ni
fading verge
ni?
fading verge
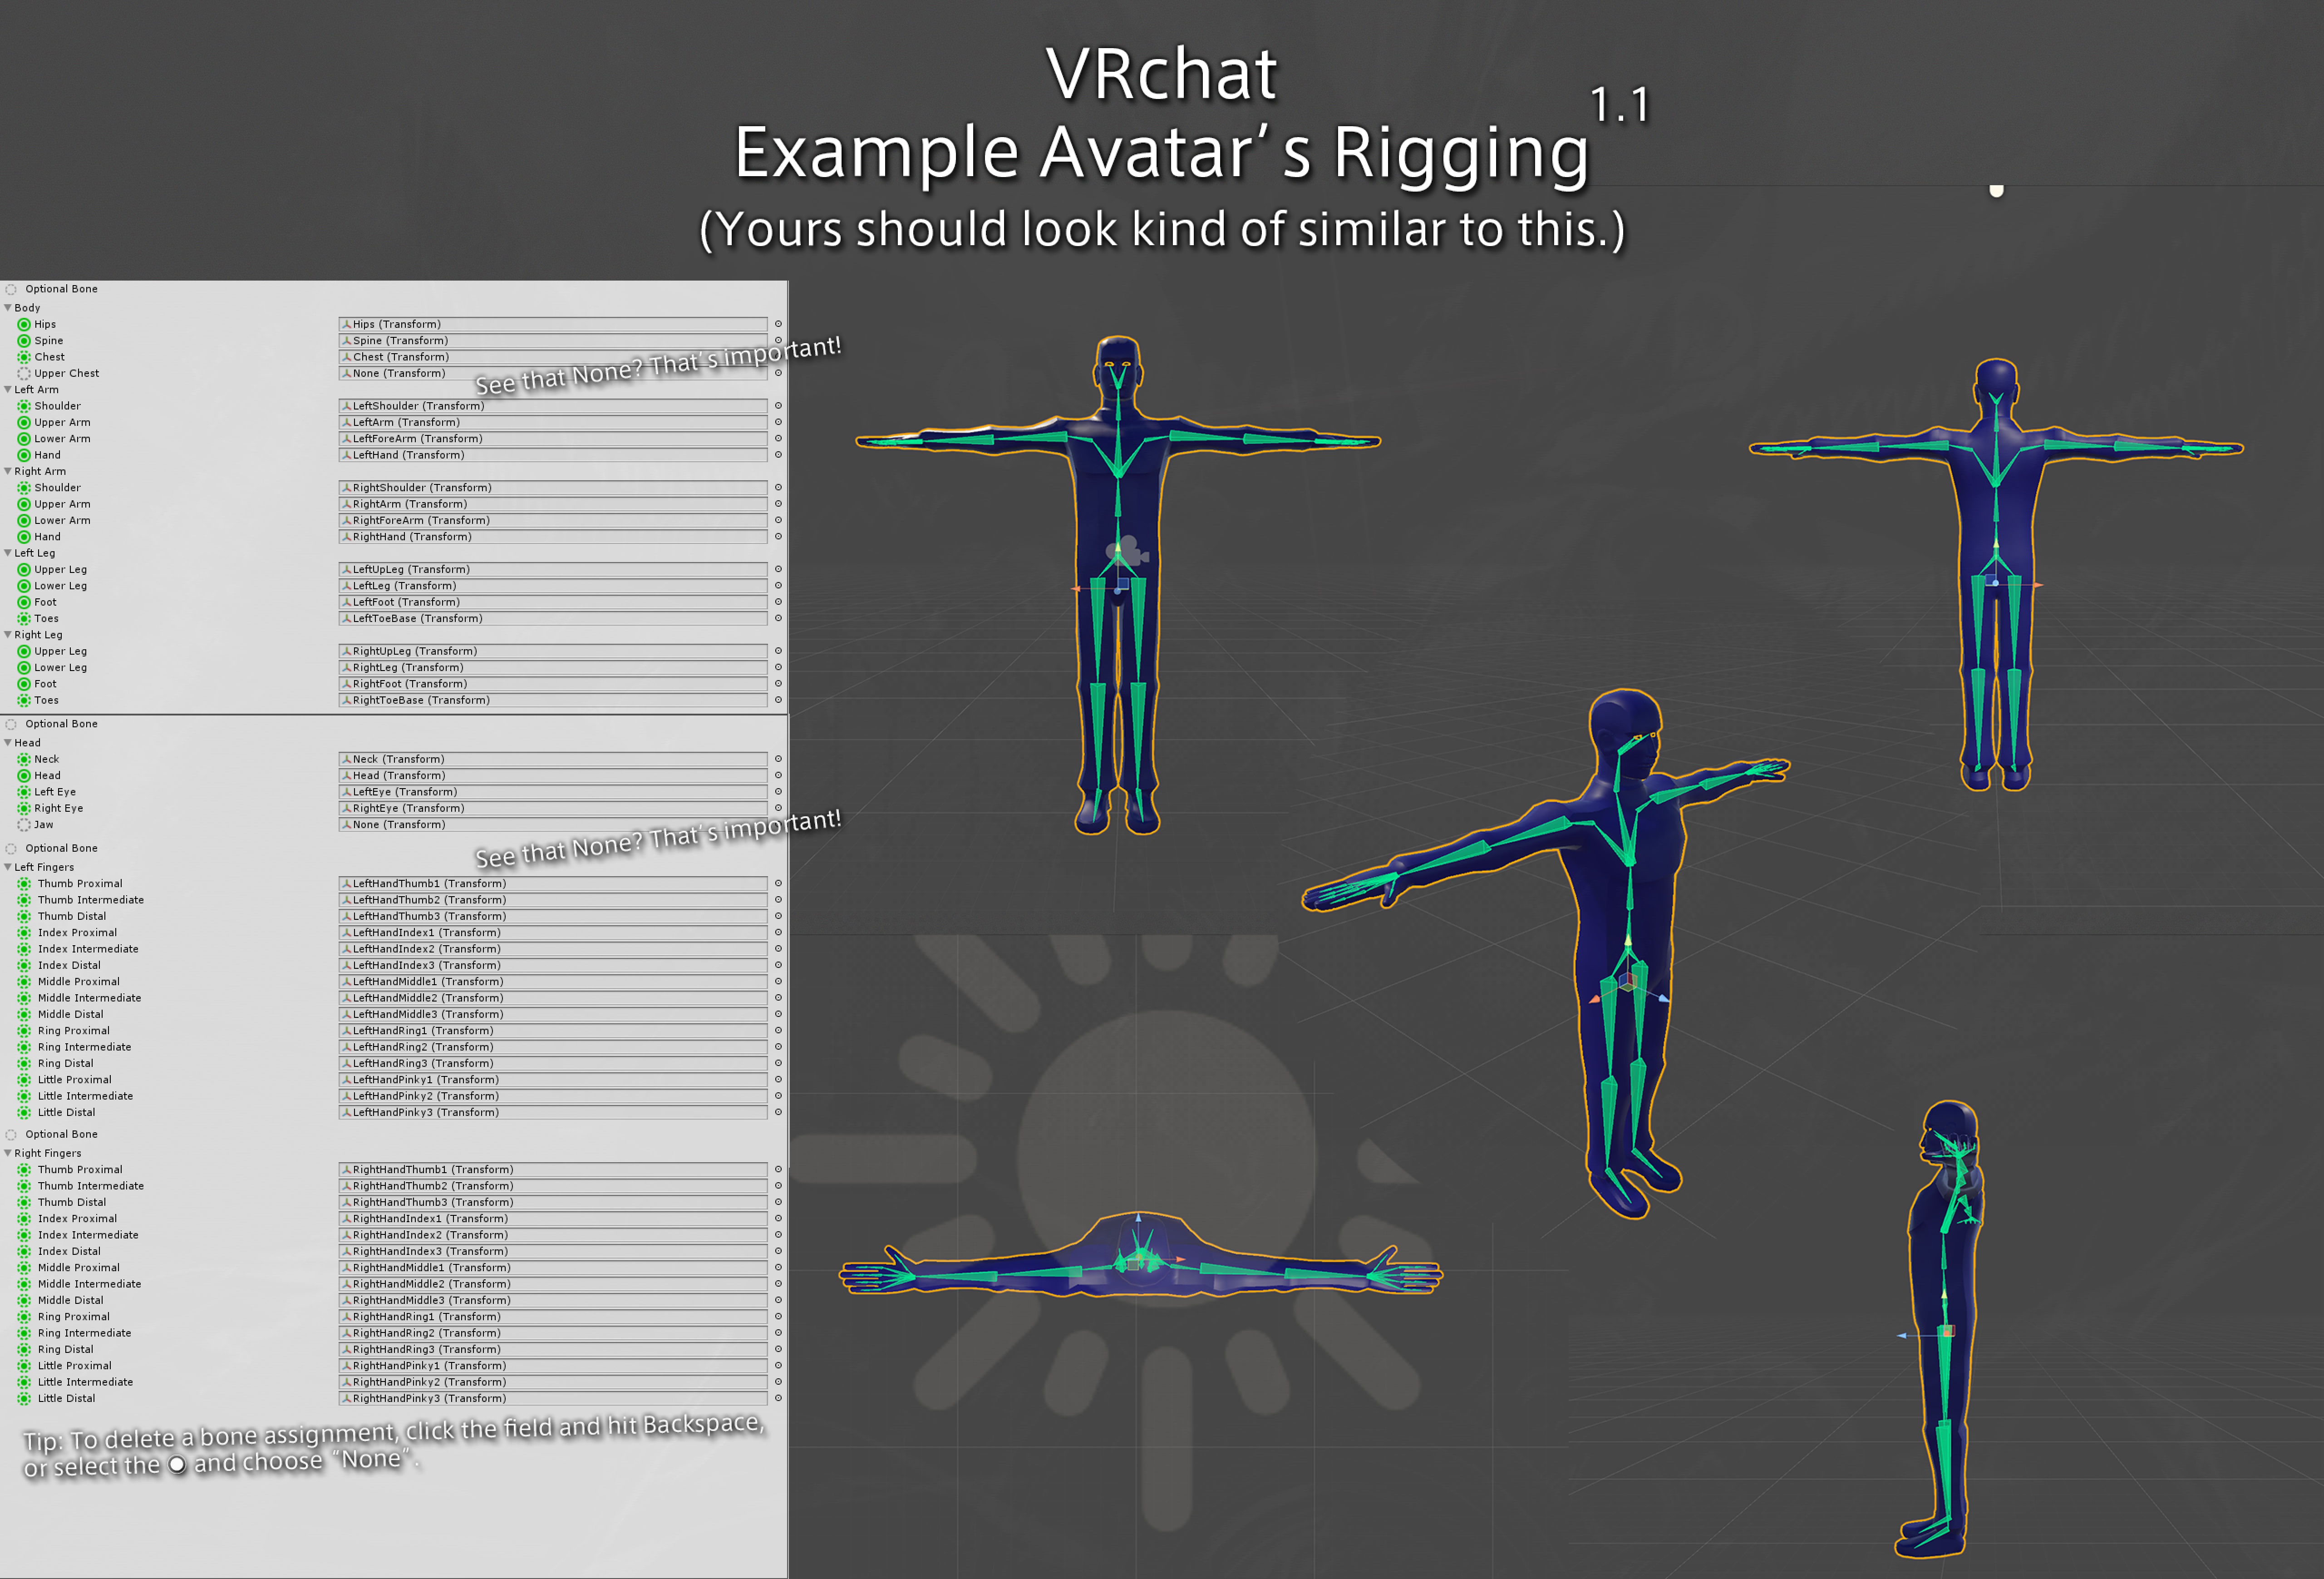
the part where it looks like this https://files.catbox.moe/q85jfj.jpg
 fading verge
it means that unity isn't showing all the bones in the rig editor.
fading verge
I need some help understanding how to properly connect and parent them and also how to fecking legs.
ivory radish
should be btu some will be invisible
u just parent them in extruding order
start from hips and every consecutive bone is a parent of the one before it
fading verge
Not when I do the legs i'm afraid.
ivory radish
so hip -> left leg -> left knee -> left foot -> left toe
no it applies for every bone in the chain
fading verge
Okay, i'm going to go try this, and then i'll send you a screenshot of the result, deal?
ivory radish
if ur legs arent parented to hip then thats ur problem and u gotta fix it
but yea u just go out from the hips
and the next bone is parented to the one before it
another example if
[hand <- elbow <- arm <- shoulder] <- chest <- spine <- hip
where [] is for each arm
it would also help to name them correctly so that unity already knows whats what
and also to t-pose the character in blender as to remove artifacts from Enforce T-Pose
in here u can see how each bone is connected to its parent
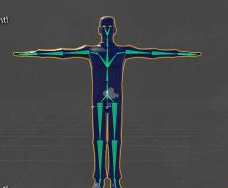 fading verge
I see that, doesn't mean I understand it sadly.
ivory radish
again u literally parent them to the one before it
starting from hip
and its somewhat obvious
bc u want the arms to move with the chest
the chest with the spine
the spine with the hips
so u should have them parented to eachother
u dont want to move the hip and the leg to stay there
etc
fading verge
I'm sorry?
ivory radish

when u parent bones they will follow changes to their parent
if u dont the bone will just stay by itself
fading verge
whilst I have your attention, what does it mean if there's a giant grey cone in between a models legs in unity?
ivory radish
see the huge difference

and that just means u exported it incorrectly or there is an extra root bone
for the most part it can be ignored but if its called Armature then next time u use FBX Export, do not use Selection, and turn off the Camera and Lights options
 fading verge
I am exporting the model as an FBX don't worry.
The model was originally made in SculptGL and therefore OBJ, I've spent the last 2 days porting it over to FBX, easy, and then re-making it's textures by hand.
ivory radish
obj doesnt have bones so u could use mixamo or just rig it urself
if u rig it urself u should follow common naming schemes and make sure to mirror the bones
fading verge
porting it over to FBX, as in I remade the thing in FBX format.
ivory radish
and it would also help to have a mirror modifier or to mirror the object on the X
o ok
and the format is just a way to store a model
its not like a 'u do this and u can export to fbx'
fading verge
Do i need to do any Vertex Grouping or weight painting by the way?
ivory radish
so ur not rlly porting anything ur just remaking it and exporting it to FBX
well obviously yea if u want the bones to actually do something
weights are values that indicate how much influence a bone has over a vertex
if u move ur bones around in pose mode and nothing happens then obv needs weight painting
 fading verge
Okay! Alright before that, I did the extrude parenting thing you told me to do and this is the result.
 wet eagle
gritty nest
wet eagle
gritty nest
Select armature and enable xray
If you want them to be solid rather than wired, select the armature, and in the object tab (orange cube), set the draw type to solid
 white briar
so i am trying to swap a skeleton from one model to another as the model i have has a completely broken rig. as in, every bone is on the origin.
i thought if i line the skeleton from a working very similar model up to the model and then use CAT'S merge armature's function, it would transfer all the weight painting over to the new skeleton, but it doesnt seem to be working. it just deletes all the bones and uses the broken armature
crystal vector
@white briar it might work if you keep both models as they are without deleting any meshes and then merge the broken one into the working one. This should merge all the broken bones into the fixed armature. Then do separate by materials and delete the meshes from the base model until you only have the mesh of the broken model on the fixed armature. You can also try to check Use Same Bones if the armatures use the exact same names.
white briar
Thanks for the assistance, I'll try it out.
crystal vector
Nice 👌
slow gyro

fading verge
I posted about this yesterday but haven't really gotten much further with it, and I'm starting to get tired of grinding my arse off without progress, so if anybody could join me for a voice call and guide me through the process of setting up bones in blender properly, I'd appreciate it tremendously. Thank you for your time.
crisp tendon
What progress have you made so far ? Creating an armature is very easy
fading verge
 gritty nest
So, what is the issue you are having exactly?
fading verge
This is my progress, my problems is that it Unity doesn't detect the feet bones properly, as well as the head bone.
gritty nest
Have you tried manually assigning them in the rig?
fading verge
Yessir.
gritty nest
Just one thing to note, Unity's bone system is entirely joints, not heads and tails. This means you might not even see the foot bones there if they have no child bones.
So after manually assigning the bones, what issue are you running into exactly?
@fading verge
"Your avatar is humanoid, but its feet aren't specified", perhaps?
fading verge
More like Thumb Index and middle finger bones are not mapped, full body ik will be disabled.
and also that grey cunt cone.
subtle moth
Add dummy bones
fading verge
I'll need a good dose of google for that one
gritty nest
Yeah, you need to extrude bones from the hands to act as fake finger bones. Or just ignore that warning but you'll lack crouch.
In Blender, select armature, enter edit mode with tab. right-click tip of hand bone to select it. Press E to extrude. Repeat until you have at least one thumb, one index and one middle finger bone. Bones can be "fake". Manually assign them in Unity.
The grey cone is not an issue, that's a "root ground" bone probably.
fading verge
Alright, wish me luck.
 brave saddle
So my avatar's legs are rotated 180 on the Z axis when I load it up in game with FBT
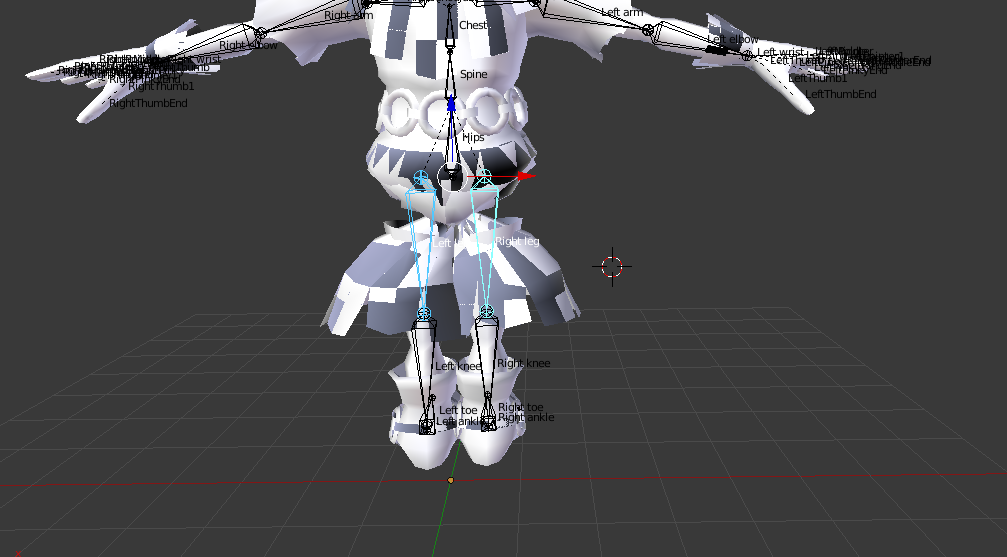
looks like that in game... any ideas on whats wrong here?
ah it seems my ankle bone has no size its a bit broken in unity rig configuration too
 ocean crane
Is it possible to add more bones to a finished rig in Blender?
I imported a rig from a GMod character but they only have 3 finger bones
drowsy wharf
select the end of the bone, press E (for extrude) and drag outwards.
You can also press X, Y, or Z to lock it to that axis after pressing E
be aware you'd want to add weight painting for those bones as well. A non-weighted bone won't move anything
sharp pewter
G for grab can also be used with xyz to lock them and r for rotate can help you get bones into place
Keep in mind you only need 3 bones per finger
ocean crane
Sweet, thanks guys.
sharp pewter
You might wanna look up a guide on rigging to get them painted correctly
Or you will have stretching or the bones will do nothing
And if cats fixed model is used it will delete them so take care
ivory radish
u dont need full fingers tho
u just need the index, middle, and ring to be mapped with at least 1 bone for full body 2 work
but yea u will have 2 manually weight paint them
this will be increasingly difficult if u did not use X symmetry when decimating or the model is not mirrored on its X
bc u will have 2 repeat the process for each side
otherwise u can just symmetricize the bones and use x-mirror option in weight painter
ocean crane
Do I have to manually joint the fingers as well?
I just noticed the other fingers have these ball things but the bones I just added don't
ah shit my mind's about to explode
 gentle vapor
when i rigged my model and imported it to unity all the though animation keys are yellow and i cant move my arms :/
 drowsy wharf
@gentle vapor yellow properties in the animation window mean incorrect paths.
Triple click on one and you'll see a path. Check that path against your avatar, fix whatever is wrong.
gentle vapor
not working
naive tree
is it rigged as humanoid (in unity) to begin with? @gentle vapor

 deft crown
Yea I have no idea what I did lmfao
subtle moth
😂
deft crown
i dont even know how to adjust it right because of how big it is
naive tree
@deft crown check your keyshapes, something is stretching your mesh into infinity
and get rid of that keyshape
 native sail
I'm just about to lose it with maya's weight painting
I spent 2 hours weight painting everything
and it all just went back to when it was auto weighted
does anyone have any advice? I have no clue what I did wrong, and I'm too far to go back a save, or undo
 gleaming falcon
I have never weight painted in maya. 😐
 woven leaf
Yooooo I wanna add some extra bones for some hair and cloth stuffs in blender for my comeback avatar XD but I have no clue how . . . can someone pity me and halp ❤ I just wanna run through of how and some pointers of where they would look good
pale hull
You should look up manual weight painting tutorials
Should be countless of them on youtube and on the net
ocean crane
I'm about to give up on this weight painting
This flippin' gmod model has all the fingers glued together and crap
 median echo
How do i parent a bone to another bone when they are not apart of the same armature? I tried merging the armatures but and error that i can't see- pops up
naive tree
error?
gleaming falcon
You would clear the bone from the armature... I forget the shortcut
opal aurora
Ctrl+J to merge things
Object you want to merge is selected first
Object you want to merge into is selected last
gleaming falcon
^^
naive tree
be sure to apply transofrmations before merging with ctrl+A when mesh and armature selected
cats for whatever reason doesn't do it properly on merge
opal aurora
I could've sworn it did before... but maybe that was just me preemptively doing such out of habbit
 unique cliff
Hey guys. I'm having an issue. In blender and in unity by model looks fine, but when i upload it to vrchat the body/head/legs face backwards and the feet/arms face the right way. Tried a few things like applying transforms and rotation in blender but to no avail. anyone have any ideas?
gleaming falcon
My guess is Unity humanoid configure, your bones are switched around. Like Left arm is set Right arm, ext
Had that problem before
unique cliff
! never checked that
opal aurora
Setting bone rolls to 0 and make sure your bones aren't too straight, also after every bone change, you must re-apply the humanoid config, otherwise it keeps the old settings instead
gleaming falcon
Could be bone rolls too
naive tree
@unique cliff be sure that your bones are bent the way they should bend, and are not compeltely straight or bent backwards
you need this for shoulders, arms, elbows, leg-knee
hmm eventho
unique cliff
issue 1, the model was inverted on the x for some reason lol.
naive tree
that should be a problem only in fbt
unique cliff
im not an expert on rigging but the rig does look like any other one ive worked on. looking into bone roll now
ok got the bulk of the body facing the right way! thanks guys. now to fix the new issues that happened lol
calm needle
if the model was inverted, try checking the scale values in blender and apply them if they have any negatives in them
fading verge
http://prntscr.com/lflje5 How to fix? (P.s. The Rig is actually fine it just SAYS it isn't and won't let me upload.)


Ping me if you know something about it.
median echo
Anyone know why in blender when i select the bone i want to weight pain to the mesh, they dont move together after finishing
is there steps i missed?
thick karma
did you set the mesh to have armature deform as a modifier?
median echo
Noooo
only the arms arent working but the rest of the body is fine
i never used that modifier before
thick karma
are the arms a separate mesh?
select the mesh in object mode, on the right hand side there should be a little wrench button, when you click it, it will show you modifiers you can add and remove.
median echo
What part do i add the mod to and the part im working on is connected
thick karma

in the object box you select the armature that's going to deform the mesh
don't hit apply
just leave the modifier there
median echo
You have Armature highlighted, am i suppose to click that. cause i hit Mesh deform before
and okay
thick karma
yes it's supposed to be armature
median echo
okayyy, so now i can do the weight painting work again?
cause i already had the weight painted work done and then added this mod you told me to place. idk if it matters if i put the mod in before i do the work or not.
thick karma
you shouldn't have to weight paint it again
it should work now if you go into pose mode
if it doesn't could you screenshot the weight paint and the bone selected.
 thick karma
im guessing it's still not doing what you want it to do? i see that your upper arm is weight painted, but the bone isn't selected.
like this
 median echo
How do i select both together? im just right clicking the bone then the mesh then switching to weight paint mode
thick karma
that is how you should be doing it... how are you entering weight paint mode? i right click the bone, right click the mesh, and cntrl+tab to enter weight paint mode.
median echo
okay i just tried that. I right click the bone and it glows blue. then i right click the mesh and the whole thing turns gold but the bone is no longer blue. Then i cntrl+tab in weight paint mode and nothing is selected blue or gold but i can still paint the mesh.
so its still doing the same thing for me
thick karma
ahh... that's really weird. but the mesh still doesn't move when you move the bone in pose mode right? is the armature set as a parent of the mesh? can you check what vertex group you're painting on? https://gyazo.com/e86525762af4c7d5abdbfd5b7bbde870

it should be the highlighted one
median echo
yeah the Mesh doesn't move in pose mode yet just the bones.

it says left shoulder when i right click the mesh
Okay im seeing the issue
im just not sure yet how to fix it
so the bone above the bones i want to use, is moving the meshes
thick karma
i'm sorry, i don't know why it's not letting you select the vertex group from selecting the bones in pose mode. alternatively you should be able to select it from that window.
median echo
Does it matter what the bone is named as?
My bone is named Arm_L rather than Left Arm
sleek isle
what is the modifier that apply weight on other mesh near them again ?
woven leaf
soooo my armature moves from where it's positioned in edit mode when i go into object mode 😦 that an issue ?
 humble apex
If the vertex group and the bone names are different, the mesh will not deform with that bone.
r_r
So the vertex group for Arm_L would similarly be named Arm_L
Otherwise it won't do anything.
I am also having a similar issue as Lionhearted in Unity: the model functions fine for previewing animations but in play mode and when trying to upload, the model simply does not animate.
It acts as if there's some problem with the rig configuration, but if that was the case, the model shouldn't be able to move at all when previewing animation files.
It's bizarre.
:l
 wicked quiver
why not rig http://prntscr.com/lfr7eb
 sharp pewter
 wicked quiver
http://prntscr.com/lfr9e8 look like is
 sharp pewter
oboi
for human you need 3 spine bones
hips >spine> chest
if not it can only be generic
and that makes it so default animations dont work
not sure what else
 cobalt frost
generic = no vr support or animations
subtle moth
i meaaan
turbid spear
I've also had avatars behave weird if hands are missing fingers and don't have dummy bones mapped to them
subtle moth
you dont need those
XD
i made dummy shoulders
looked freaky
but it worked
xD
a dummy spine tho
not sure how thatll turn out
sleek isle
I have a bunch of avatar with dummy neck, shoulder and spine Work perfectly
Since they are chibi/sd size
 high raptor
how do you add custom gestures
turbid spear
Make animations for them with something like muscle editor then plug them into an override controller and put that onto your avatar descriptor. All that is in unity
turbid spear
Yes, you just change the shape keys (visemes) in the meshe's skinned mesh renderer component while the animation is recording
But it will break your hand gesture so you will have to remake the hand and finger positions because it looks like a half open fist by default
 gleaming mesa
i dont know how many bones i should put in a tail for it to work good... i came up with this for now https://i.imgur.com/uI0dHWC.jpg
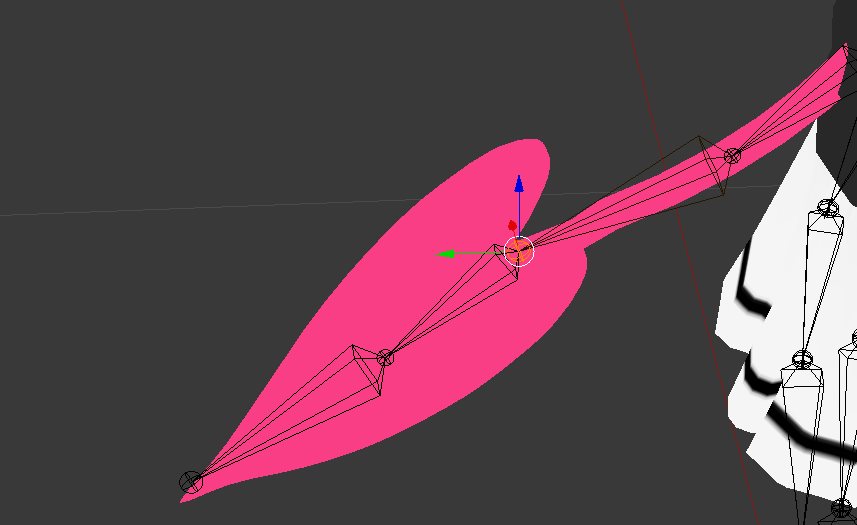
also when weight painting the same, what's the best idea about which areas to paint to which bones... overlap, etc?
fading verge
usually you paint half-half between 2 bones
gleaming mesa
so uh
what do you mean between 2 bones, at the joint?
so where the joint is, i go a little bit around the joint and there i do half half?
fading verge
yeah
i meant the joint
usually you have a edge loop of some sort at that spot
so you paint half-half for that edge loop
woven leaf
Yo could I get some advice on weight painting complex shapes / adding some extra bones ( for cloth and such ) to this model I'm making ? It's the first time I'm fully making my own rig and I wanna use dynamic bones but want some advice on placement and such 😃
sleek isle
you can look at a model that have a scarf for example and mimic the weight on yours @gleaming mesa
gleaming mesa
oh that sounds good
gritty nest
Automatic weights also does a good job in general for dynamic bones
gleaming mesa
@gritty nest do you know of a shader that has the sphere add texture possibilites from mmd?
gritty nest
.sph? I don't know of any which do that.
I heard of a cubed's edit which can do that
gleaming mesa
yeah those
blender can render it if you multitexture with the mapping set to normal
 kindred blade
What is the right way to setup facial animation (phonemes, eye tracking/blinking, etc.) manually? When I google, all that comes up are tutorials on how to use a plugin to do it on mmd models. (making a custom model here)
 dense ingot
the mmd plugin itself is called cats, it works with both mmd and other avatars so long as it can be imported into blender. the plugin creates visemes to that your mouth can move when you speak. it is extremely helpful, and i suggest you watch this video: https://www.youtube.com/watch?v=dl5F4uNAKvQ , or this video: https://www.youtube.com/watch?v=ars__r731LE&t=56s for a much better explanation

So you've got an avatar with no shapekeys / blendshapes and you want it to talk and blink. Using proportional editing in Blender, we can make custom visemes ...

Viseme recreation in Blender to viseme application in Unity. Cats Blender Plugin: https://vrcat.club/threads/cats-blender-plugin-0-0-9.6/
kindred blade
Does this use shapekeys or what?
How do I tell it what shape the mouth needs to be for a phoneme?
dense ingot
in unity, you can assign the shapekeys to different sounds. sil->sil aa->aa ou->ou etc.
you can do this in the avatar descriptor
FALprofessional really helps with a majority of custom avatar stuff, he helped me alot when i started out
kindred blade
The youtuber?
dense ingot
yes
kindred blade
Cool
dense ingot
good luck
kindred blade
So he has videos on that stuff?
dense ingot
a majority of them, yes
this playlist has a bunch of his videos, as well as ones that touch in other areas for vrchat

YouTube
kindred blade
Cool. Thx
dense ingot
np
 gaunt dock

 undone harness
Weight?
sleek isle
what is the problem hard to figure it out @gaunt dock
turbid spear
Could be an extra bone at the joint
I've seen a model with an extra bone at the wrist and it did some funky stuff like that
fading verge
So I made fangs in blender but now in VRChat my mouth is opening when I look down?
Can I have some help here?
I want fangs on my model but I've never messed with the teeth
turbid spear
I had that problem for the longest time
Make sure you have lowerlid visemes right under the blink visemes
And that they don't get removed when you export for being empty
Either unity or blender removes visemes that don't do anything sometimes so if that's the case just move some stray vertex by a little bit inside the head somewhere and assign that to the lower lid viseme, then make a copy for the other eye
The reason the mouth opens is because it uses your AH viseme instead of lowerlid
Because it's the viseme right after blinking
fading verge
So...
Run me through the steps I need to take.
Cause I'm not one to use blender a lot.
turbid spear
First of all go into unity and to your avatar > body > skinned mesh renderer > blend shapes, then check if vrc.lowerlid or something along those lines is there, under the vrc blinking visemes
If they are missing then it is indeed what I described, if they aren't... then I'm not sure what's going on
 fading verge
How do I check if I do?
turbid spear
 fading verge
Again, I don't use blender
 fading verge
N/A not there
turbid spear
You'll have to create them then
Click the basis viseme then the arrow to the right that says create shape from mix, that will just create a copy of an empty viseme basically
Then move it under blinking like in the picture
With the arrows on the right
fading verge
Done
turbid spear
Select the viseme and slide the value all the way to the right
fading verge
Done
turbid spear
Then go into edit mode, select vertex and go into the head and select some vertex that you can't see, usually some of the hair that clips in the head, press G and move it a tiny bit
turbid spear
Then press the arrow and create shapekey from mix again
Then move it under the blinking again (just press the down arrow, it will wrap to the top of the list)
fading verge
Yea
turbid spear
Then rename either to vrc.lowerlid_left and vrc.lowerlid_right
Press the X above the value slider to set all visemes to 0, select the basis viseme and you should be done
fading verge
So... does this fix the mouth opening when I look down problem?
turbid spear
It should, export it and try it out
fading verge
Do I have to re-do visemes or eye tracking?
turbid spear
Nah
fading verge
Mkay
http://prntscr.com/lghgwt @turbid spear

I only have left
Should I have done the same thing with right?
xD
turbid spear
Yeah, but
If you created a copy of it with create shape from mix when vrc,lowerlid_left was slid to 100
it should have made a copy of it
But yeah if not then do the steps again I guess :x
turbid spear
Create shape from mix blends all active visemes into a new one, basically
And since all other ones were on 0 and you have one selected that's on 1, it basically makes a copy
turbid spear
shrug
fading verge
Thank you though, this was the last thing I had to do on my model to finish, now its a complete model
If you want I can show you what it looks like in dms?
turbid spear
Sure
 bold locust
Not sure what to do if SDK says I must have bones mapped for a humanoid rig when they already are mapped in the rig config.
I've rechecked so many times. Frustrating to get a model finished and be blocked by an error on the SDK.
I've already dragged a new model into the scene after editing the rig config too.
Multiple times.
😩
gritty nest
@bold locust is your model half crouched into the floor?
Show a screenshot of the error you're getting, as well as a screenshot of the model in your scene. Finally, a screenshot of the inspector with the avatar descriptor object selected would help
bold locust
Heya, @gritty nest. The issue I was having was because I reorganized the hierarchy of my arms to clear some warnings on the SDK and it somehow broke my rig in the scene. I've done this several times before and never had this problem, so it caught me by surprise. My arm rotations are fine though, so I left the arms as they were and it didn't give me the error.
Thanks for replying though.
gritty nest
Oh, alright
sleek isle
Sometime when you modify to much you model and just update the fbx file in unity. Drag another object in the scene might fix problem
 charred sorrel
i'm getting such strange errors on my model but the armature seems to be fine... like the fingers in the bones are all messed up, it's saying there's parenting issues in the arms
lemme get screenshots real quick. i can't figure out why the fingers are messed up
crisp tendon
Check the pins, there's an example of what an armature should look like
charred sorrel
i checked, it seems to be fine
like everything's parented correctly, it's so strange

everything's green and all but then i get this errors when i go to upload
 kindred blade
Just because it's green doesn't mean it's ready
charred sorrel
http://prntscr.com/lgqw3e this is also happening with the hands
 sharp pewter
you wanna screen share your blender i can prob help you with this
or you can make sure all the finger bones are parented to each other
and then check the weight painting
to make sure they match the bones

bones like this
go into pose mode

right click the mesh and select weight paint mode

and make sure it lines up with the bones
charred sorrel
one sec, lemme go into that
crisp tendon
That's something to fix in Unity too
charred sorrel
i can screenshare @sharp pewter ?
kindred blade
My (custom modeled) avatar seems to do this every time I load it with full body tracking: https://cdn.discordapp.com/attachments/500754631672987648/510890198197075968/VRChat_1920x1080_2018-11-10_10-50-26.189.png

It works fine without
gritty nest
@kindred blade did you apply the full body fix? That is necessary on some models
Easiest way to do it is to enter edit mode and scale the hips bone by -1
But that will break the model in non-FBT unless you follow some more steps after that
VRCat: Community-Run VRChat Forums
EDIT: As of 2018/04/02, Cat's Blender Plugin now includes this process automatically with version 0.7.0. Go check it out!
Heyo~
So I've been using a...
kindred blade
I'll take a look at that.
gritty nest
If your model is compatible with the Cats blender tool naming structure, you can just hit Fix Model with the full body fix checkbox ticked
kindred blade
How do I know if it's compatable?
gritty nest
If you hit Fix Model and no errors pop up
Otherwise you'll have to do it manually
Mixamo rigs work for example, most MMD's and XPS do too
gritty nest
What do you mean "fucked up"?
I think you can untick combine same materials
But that shouldn't matter
kindred blade
It changed the remder engine to Blender Internal and made everything a plain diffuse when I switched back
I plan to do a rendering of the model
gritty nest
Ahh
Well in that case you should probably not use Fix Model and just do the fix manually
It shouldn't take too long anyway
kindred blade
How do I fix it manually? the pelvis is already bound to the spine.
gritty nest
The manual fix is as that thread describes. The hip bone should end up pointing down.
With the base of the hip bone in the same place as the spine's base
And then add additional leg bones that point straight up
kindred blade
The thread describes what to do if the pelvis is unbound
gritty nest
No, it describes what to do if the hips and the spine don't have their bases in the same place. The wording of "connected" is a little misleading to people with prior experience in Blender, that's all.
Because connected bones within Blender normally means that the tip (tail) is connected to the base of the next bone down
And I seriously doubt any sane rig would normally have the hips and the spine in the same place
kindred blade
Wait, so assuming I made my armature in a sane way (extruding from the pelvis to get the spine) what would I have to do?
gritty nest
Follow the guide
Step by step
It's really easy, he just scales the hip bone to -1 in edit mode and edits some positions
kindred blade
How do I do that without screwing up the rest of the armature?
Or most importantly, how do I get the spine to come from the right place?
fading verge
So I'm in blender and I'm putting together a model, but when I finish and slap it in unity it does this http://prntscr.com/lgrium

Help?
All the bones are in the right spots, all the bones are connected to the right spots.
 modern elm
im not very experienced, but the only thing I can think of is that the weight painting is messed up.
crisp tendon
What are the parts floating everywhere in your screenshot ?
sleek isle
ive you put outline ?
 brisk pendant
Looks like the result of a messed up decimation
turbid spear
That's also what usually happens when you replace the fbx of an existing model in unity with one that had it's bone structure changed in some way
charred sorrel
okay dumb question cause i literally am so bad at this
so i'm trying to take a model's head and put it on another body but they're the same exact head, just one has eye tracking and the other one doesn't, that's why i'm just replacing the head entirely
i can paste it so they're right over top of each other but how do i join it the body w/ weight paints?
sleek isle
You only have to weight the bone to the eyes and use cats eyes tracking. No need to replace the head
charred sorrel
oh no it was added manually but
i figured out how to replace the head, but for some reason the uv mapping messed up
 odd shoal
Hey there, I'm trying to get a humanoid avatar to work and it's behaving really strangely.
I set the rig correctly, I only had warnings about the pelvis angle. I was able to build my avatar and publish it on my VRChat account. I even played it! But then, I noticed it wasn't moving its arms at all. So I went back in Unity and noticed an error that wasn't there before: https://puu.sh/BZP14/99b346fba0.png

But looking at the configuration, it's all fine: https://puu.sh/BZP0y/da8b0bcb85.png

What can I do?
odd shoal
nevermind, answered in #avatars-2-general
 hybrid venture
Asking in multiple channels 
sharp pewter
No u









 fading verge
Does anyone know how to set a key to shrink or move certain meshes like removeing clothes or something?
In blender
 robust gull
How are hands supposed to look? My hands look fine in blender but in unity thumbs moves place and looks off, when i try to animate it, been trying moving the bone around and nothing helps
@fading verge Make a new shapekey select the mech you want to scale, and scale it down in edit mode
Or you can press the pose mode and scale the bone that have the mesh you want to scale and press apply shapekey, but that will scale everything weightpainted to the bone and the parents