#avatar-rigging
1 messages · Page 7 of 1
 burnt goblet
Well If the clothing hasn't already been weight painted it will need to be, You can do so easily with blenders auto weight function after you get the mesh parented to the armature
are your pants parented to the avatars armature yet?
 fading verge
Pretty sure that's done already.
The weight paint i meant.
And i already parent the pants to the armature by using CATS but the issue is that the avatar has extra bones that the outfit doesnt have.
burnt goblet
Im not really sure what you mean, There should only be one armature and not multiple, If your pants have their own armature that isn't the avatars armature that will not work, you will need to copy the weight paint from the armature on the pants to the respective bones on the avatars armature after you move the mesh into the desired location on the avatar
Is this what you mean?
fading verge
I am probably not explaining it right. Usually, I just show it to people using Discord to get a better understanding on what i'm doing or what i want to do.
burnt goblet
Can you do a screen snip
 pale pumice
It's fine to just overwrite it, Unity will just reimport, but if you're messing with bones you may need to redo the rig
pale pumice
fading verge
I am probably not explaining it right. Usually, I just show it to people using D...
You add an Armature modifier to the clothing and set it to the avatar's armature, then make the clothing objects children of the armature, like the body is.
fading verge
I'll try to be clear as much as I can. Because this model in particular is a modified to the original, the only thing the clothes doesn't have are these weight paints and vertex groups.
I wanna apply them to the pants but i wanna know if i can just copy data from the avy to the pants. Hesitant that i might screw up if i'll try to do it manually.


 pale pumice
Yes, you can copy the data over with a Data Transfer modifier
pale pumice
yep
fading verge
Wanna show me how it's done?
pale pumice
nope, just want to point you at the documentation, 'cause I've never actually done this 🙂
fading verge

burnt goblet
Just search up the modifier and how to use it , I myself have never used any modifier and have just used time and effort to manually make any clothing weight paint similar to the avatars weight paint. You can't really screw anything up, After your done seperate the leg mesh thats under the clothes and delete it if your not going to have the clothing removable
Its really as simple as selecting the bones on the mesh that are going to control the pants and auto weight painting and cleaning it up a bit if thing dont look exactly right
fading verge
I'll try to look it up.
pale pumice
weight panting attaches mesh to bones, so it moves with the bones. So yeah, it'll have them - ideally the avatar's armature
fading verge
I'd imagine all i have to do is weight paint since i already parent the pants with the avatar.
As long a item is parented with the avatar, they should have it's bones, right?
pale pumice
no, each mesh object needs the armature modifier too
actual parenting in Blender does nothing here
 humble beacon
fading verge
Wanna show me how it's done?
humble beacon
fading verge
Wanna show me how it's done?
For your clothing mesh, add a modifier called Data Transfer, select you body mesh as the source, then select the checkmark that says "Vertex groups", click the "Generate data layers" button and then apply the modifier. This will create the weight groups in your pants based on proximity to the source mesh. One problem however, is that these weight paints are usually badly normalised and can behave in a weird, blocky manner. So what I usually do after this is go to weight paint mode and manually smooth all of them out with a blur brush
Oh, and don't forget to delete all the old weight groups from your pants before doing this
fading verge
So i figured out how to transfer data and i smoothed out the weight paint with the blur tool.

Any idea what could be the issue here?
 kind mortar
fading verge
So i figured out how to transfer data and i smoothed out the weight paint with t...
kind mortar
fading verge
So i figured out how to transfer data and i smoothed out the weight paint with t...
Might wanna make the mesh bigger
fading verge
kind mortar
Might wanna make the mesh bigger
I had the feeling, i just wanted to hear opinions about it. I'll see if that changes anything.
 quaint cosmos
Yeah, you can use the inflate tool on the pants a bit or if you don't need the leg geometry underneath, just delete it.
 soft dagger
i merged the bones together (there were several for each individual tail) and the weights are messed up but, im unsure how to reweight each seperate one? theyre all in one material together, im totally unsure on how to even weight paint in blender :(

 dusty bramble
alright im not really sure where to put this but my friend cant verify into the server so im speaking on his behalf, he says "Can someone help it's saying the upper arms aren't specified and I don't know how to fix it" on this, does anyone know how to help?
https://cdn.discordapp.com/attachments/1043400655714402304/1064280558135418931/rn_image_picker_lib_temp_61fa89ab-584e-46c8-8194-10acaccbb62d.jpg
https://cdn.discordapp.com/attachments/1043400655714402304/1064280659687911514/rn_image_picker_lib_temp_709fc229-8d2e-412c-8917-4da55e190a03.jpg

 quaint cosmos
Have you tried assigning them manually? I imagine the automatic configuration tool is having a hell of a time finding them with them all named bone.xx
dusty bramble
quaint cosmos
Have you tried assigning them manually? I imagine the automatic configuration to...
he said he's already tried/done that
quaint cosmos
It would be good to get a clear shot of the hierarchy. Windows has a screen snipping tool so you don't need to take pictures with your phone
It looks like there are a bunch of bones assigned in the torso and I don't know what those are
dusty bramble
quaint cosmos
It would be good to get a clear shot of the hierarchy. Windows has a screen snip...
alr hold on i think he's getting one
dusty bramble
quaint cosmos
It looks like there are a bunch of bones assigned in the torso and I don't know ...
he's confused what you mean by it, sorry im not really sure how to make avatars im just a middle man, would it be alright if in a few minutes i can make a group chat with you and my friend to make it easier?
quaint cosmos
I'm pretty occupied with other stuff. The spine should just go hips, spine, chest, upper chest (optional), neck, and head. If there are other bones there, they're probably getting in the way. The legs should just be upper leg, lower, leg, foot, and the arms should be upper arm, lower arm, hand, and then 3 finger bone per finger. If there are bones getting in the way, get rid of them.
It would probably best for him just to watch some VRChat rigging tutorials as there seem to be a lot of bad practices here. You can find a bunch of avatar creation tutorials out there
dusty bramble
alrighty, thank you for the help
 opaque crag
Can I get an armature example for a FBT avatar that has a really good 'rolling' hip movement motion
my model just.. Doesn't do that very well
fading verge
my vrc sdk thing says humanoid avatar must have head, hands, and feet bones mapped how do i fix this?
pale pumice
fading verge
my vrc sdk thing says humanoid avatar must have head, hands, and feet bones mapp...
Have you mapped those bones properly?
pale pumice
That's probably not at all what you want, unless it's actually not humanoid
fading verge
its a trans former guy
pale pumice
I'm assuming that means "humanoid" in which case you want the rig to be humanoid
 wet wren
help

 last brook
When I use the CATS plugin to merge my body armature and my hair armature, the hair will only respond to the HEAD bone from the initial body armature. The hair no longer responds to the hair bones. How can i fix this? checked the hair, and it is still connected to all the proper hair bones. Before linking with CATS, I could move the hair properly with the bones.


What can i do to fix this?
pale pumice
last brook
When I use the CATS plugin to merge my body armature and my hair armature, the h...
it is still connected to all the proper hair bones
How do you mean, connected?
 steady acorn
trying to rig my av and the bone wont show up nor has any size, I tried changing size location and set it to wire but theres nothing
o nvm I was trying to view it in sculpt 💀
steady acorn
ok im back nd im tryna extrude the bones with e but it aint working, did they update that or?
kind mortar
last brook
When I use the CATS plugin to merge my body armature and my hair armature, the h...
Probably should just weight paint the parts yourself, be easier then relying on Cats entirely, lotta people do that and wonder why it goes wrong, it's a helpful tool but it's not a fix all
wet wren
wet wren
help
Dont mean to be annoyung but can someone say what happened here
humble beacon
wet wren
Dont mean to be annoyung but can someone say what happened here
What am I looking at here?
wet wren
humble beacon
What am I looking at here?
The leg got all messed up and got all twisted up towards the back
I just finished rigging it and yea
humble beacon
How does it look in blender? Does it become this twisted after importing yo unity?
wet wren
humble beacon
How does it look in blender? Does it become this twisted after importing yo unit...
Yeah only after importing it
Looks normal on blender
humble beacon
Maybe you have some stored roll in the bones
humble beacon
Yeah, if you select a bone in edit mode in blender, you can check the roll of it
wet wren
Honestly this is my very first avi from scratch so im just new ish
humble beacon
Sometimes it can be set to something like 90deg or 180deg and not be visible, but cause problems later on
Or maybe you saved some sort of pose in pose mode in blender
wet wren
Im not at home atm but i will be in a few hours, is it ok if i send u a freind req to help me later?
humble beacon
wet wren
Im not at home atm but i will be in a few hours, is it ok if i send u a freind r...
Yeah sure, but don't know if will be available
steady acorn
trying to parent neck bone and head but the box shows up gray, how do I fix it

is there another way in the settings I can set neck to child of head?
 brazen island
@steady acorn could it be two separate armatures? in object mode select both (main should be yellow) and ctrl+j, then you should be able to parent
also head is child of neck, youre going from hips
last brook
kind mortar
Probably should just weight paint the parts yourself, be easier then relying on ...
I'm not sure why. But I figured out the issue. Apparently my blender is bugged, and once i merge the armatures (this was not necessary before) I now have to select the object, and.... go to weight paint mode. Not DO anything, just put it into weight paint mode, take it back into obj mode, and its... fixed. What a headache...
steady acorn
brazen island
<@680892344060739606> could it be two separate armatures? in object mode select ...
that was it ty
steady acorn
cant select a bone in weight painting

the armature and sheet are the only things active
quaint cosmos
Can you select the vertex group on the object? That's how I usually weight paint
 median fiber
my rig is not lining up to mesh when parented
quaint cosmos
median fiber
my rig is not lining up to mesh when parented
Have you applied all the transforms to the mesh prior to parenting? Ctrl + A, then Ctrl + G, Ctrl + S, Ctrl + R
median fiber
quaint cosmos
Have you applied all the transforms to the mesh prior to parenting? Ctrl + A, th...
still doesn't work
quaint cosmos
And you applied the transforms to every piece? Not sure why this mesh is made of like 100 different objects, I would join them first and then apply the transforms.
median fiber
quaint cosmos
And you applied the transforms to every piece? Not sure why this mesh is made of...
I joined the meshes and applied the transforms. it didn't work tho
quaint cosmos
median fiber
I joined the meshes and applied the transforms. it didn't work tho
It might be that your armature has been moved. Try opening it in pose mode and clearing all the transforms.
median fiber
quaint cosmos
It might be that your armature has been moved. Try opening it in pose mode and c...
ok I fixed it
 oak garnet
can someone please tell me what I'm doing wrong? I can't for the life of me figure out how to keep it from creasing like this

 kind mortar
I mean it looks fine to me but if you hate it try darkening up the weight paint there and removing and or lighting up the weight paint of whatever else it's painted to
oak garnet
this doesn't look unnatural to you ?

maybe I'm going nuts since I've been on these legs for days
I should also mention I want this model to be really flowy, I don't want any hard creases or angle, I figured there was a method to make that happen
quaint cosmos
It doesn't really look bad to me but you might be able to reduce it. You've tried blurring the leg weights up closer to the torso? Generally softer transitions = less creasing.
oak garnet
softening the wp on the thighs and the hips makes the crease rounder and softer, but it also makes it bigger
 sleek isle
penetration is usually better then big crease
oak garnet
thats what I'm trying to do
sleek isle
remove one edge loop maybe
oak garnet
if by penetration you mean ahving the vertices lass eachother so the point where they cross makes a smooth surface
?
let me try that
sleek isle
people have low standard in vrc so don't worry too much
sleek isle
I have a dream, where user are not judge by their avatar but their behavior.
oak garnet
buddy I just want this thing to look chic and smooth
sleek isle
bone placement can help
oak garnet
control bones, right ?
sleek isle
no just place the leg bone in other place to see if it help
oak garnet
think the joints at the top of the thigh need to go higher ? or lower?

this is my first model btw
so I might not know everything
oak garnet
thanks a lot, I didn't eliminate the crease but it looks pretty good now
 cyan edge
Is there anyone that can help me fix the rigging of my Avatar and maybe help me change the scale of the limbs to better match me irl? It just feels so off in game and the wrist bends are so cursed
Looking for assistance, not for someone to do it entirely for me at the moment
 vast compass
I'm trying to use the "surface heat diffuse skinning" Blender Add-on, but it's not showing up in my Blender for some reason, anyone run into this? 🤔
https://github.com/meshonline/Surface-Heat-Diffuse-Skinning

I'm on Blender 3.4.1, but I've tried it on old versions too, including 2.9, 3.0 and 3.3
Should be a "Mesh Online" tab in there
Might try buying the voxel plugin, as I'll probably end up using it anyway, but I worry I'll have the same issue
(Tried buying the voxel version, which includes the surface plugin, works fine. The github version might be borked!)
steady acorn
the bones have no affect on the head stuff

did I miss a step?
actually scratch that, can someone point me to a good weight painting guide
humble beacon
steady acorn
the bones have no affect on the head stuff
Did you add an Armature modifier to the mesh?
 winter orchid
steady acorn
the bones have no affect on the head stuff
winter orchid
steady acorn
the bones have no affect on the head stuff
Will this avatar be made public?
 tawny cloud
So i have these two models and did a headswap with them, however in the process of fixing the model n stuff the body somehow managed to lose the breast and butt bones so now i can't add physbones, is there anyway around this??
humble beacon
tawny cloud
So i have these two models and did a headswap with them, however in the process ...
Need to add the bones in blender and weight paint for them
quaint cosmos
The weights are likely already there unless those were destroyed as well, you should just need to add bones and name them to match the vertex groups
 wispy agate
Hai guys I was just wondering when it comes to the bones in my armature, is the roll for all of them meant to be set to 0? and for like the bones that are in the middle so Hips, Spine, Chest, Neck, Head etc is the X axis supposed to be set to 0 as im not sure how or when it happened but its seems the roll has different values on each bone and the bones in the center seem to not all be set to exactly 0, after some google searching I found a setting called recalculate roll but im not sure if that results in the correct roll, hmm might be best to just leave it as is, just been trying to figure out how to fix somethings with my model for awhile and not sure if the roll value might be affecting things
humble beacon
wispy agate
Hai guys I was just wondering when it comes to the bones in my armature, is the ...
Absolutely the bones you mentioned need their roll to be set to 0. Otherwise your eye tracking will not work correctly and sometimes the avatars locomotion can be affected aswell
This also includes the eye bones, btw. Just select those bones in edit mode and hir Alt+R.
 brazen crater
Hello I was planning on making a spider person avatar how do I get the legs to move correctly? Any help would do. Thanks anyone that answers.
steady acorn
winter orchid
Will this avatar be made public?
probably
dont get ur hopes up thought it might not b great
brazen crater
brazen crater
Hello I was planning on making a spider person avatar how do I get the legs to m...
If anyone else needs help with mult limb models this video is helping. https://www.youtube.com/watch?v=GVEI36F-bj8
In this video I go over how to create a spider-like avatar in VRChat using Final IK. Most of the Unity work is automatically done via an editor script that is provided further down in the description. If you run into any problems during the process, feel free to join the discord and ask for help!
Time Stamps:
0:00 Introduction
0:47 Blender Star...
pale pumice
brazen crater
If anyone else needs help with mult limb models this video is helping. https://w...
oh neat
steady acorn
brazen crater
If anyone else needs help with mult limb models this video is helping. https://w...
do u happen to have a tutorial abt weight painting
ive been trying to get this for like 4 days now ;-;
brazen crater
steady acorn
ive been trying to get this for like 4 days now ;-;
If you are untalented in weight painting like me you can always select the vertex s you want to effect. Then go to vertex group section to manual set the weight for those vertex's.

I've been meaning to update this video for a very VERY long time. But, we're finally here. Everything you need to know in order to start painting weight layers onto your character!!! Hope it helps :)
Female Body Model Link:
https://www.youtube.com/watch?v=_XfvLpLyulI
If you enjoyed this video, please don't forget to like and subscribe!
You ca...
If my explanation didn't help this is a quick video on weight painting basics.
 spring birch
Dumb question: In Blender, how do I copy the weights from one bone to another bone within the same armature? I'm trying to reduce the number of hair bones I'm working with on a model I'm prepping for VRC, and since I cannot weight paint worth anything I want to just take the existing weights and put more of them on fewer bones, then delete the redundant ones. I know this is something I've done before, I just can't for the life of me remember how.
kind mortar
spring birch
Dumb question: In Blender, how do I copy the weights from one bone to another bo...
you can merge them with cats merge weight to parents for each bone you want gone, sometimes it doesn't merge all the way and you might have to weight paint a bit, it's pretty good
 spring birch
That helps partially but some of what I want to merge would be like adjacent bones belonging to the same parent
kind mortar
Yes, merge the weights to the parent bone, it says right there

 robust crescent
select one bone then other -merge 'to active'
kind mortar
Yeah, I don't see the issue 🤷♀️
spring birch
robust crescent
select one bone then other -merge 'to active'
That's it, thank you
spring birch
kind mortar
Yeah, I don't see the issue 🤷♀️
Merging to parent would be adding those children's weights to the parent, rather than just adding one child's weight to the other child.
 broken trout
Follow up question: should twist bones be added to shoulders or am I just bad at weight painting
pale pumice
broken trout
Follow up question: should twist bones be added to shoulders or am I just bad at...
Shoulders are really hard
steady acorn
brazen crater
If you are untalented in weight painting like me you can always select the verte...
ok tysm
 urban plume
plan on rigging this for full body, where do i even start?

 formal wolf
Basic ass question about weight-painting in blender: I'm having an issue where the 'draw' brush is too powerful and so is subtract. And it takes too long to switch between them.
The strength I can handle with Shift-F. But is there an easy way to switch between the Draw brush adding and subtracting while weightpainting? Like the way I can reverse a sculpting brush with ctrl in sculpt mode.
quaint cosmos
formal wolf
Basic ass question about weight-painting in blender: I'm having an issue where t...
I think you can use numbers (might have to use the numpad vs the top row). I would recommend using a combination of strength and weight so keep the strength pretty low (maybe .05-.1) and keep the weight below the max weight you think you'll want for a given area.
brazen island
urban plume
plan on rigging this for full body, where do i even start?
surgery
urban plume
brazen island
surgery
seriously though do u actually know what bones need to go where and stuff? i know it can be done, in fact i already have a full body raptor avatar but only in my avatars menu
 void girder
guys
my clothing won't attach to my mesh
so it can't move
i tried some stuff but nothing is working
i asked 10 ppl they all don't know
when i click on transfer weights this happends

 rare nest
void girder
when i click on transfer weights this happends
rare nest
void girder
when i click on transfer weights this happends
Could I see the modifier stacks and the vertex groups for both the avatar and the clothes?
void girder
rare nest
Could I see the modifier stacks and the vertex groups for both the avatar and th...
uhm im kinda don't know blender in the back of my head
so where is that>
?
rare nest
One sec, I'll get screenshots to show you
This is the modifier stack

This is the vertex groups

Seeing these things for both the avatar and the clothes will let me know more about the issue you're having
void girder
this is the modifier of the avatar
 urban plume
plan on rigging this for full body, where do i even start?
urban plume
urban plume
plan on rigging this for full body, where do i even start?
any help?

 void girder
rare nest
One sec, I'll get screenshots to show you
void girder
rare nest
One sec, I'll get screenshots to show you
this is the vertex group of the clothing
 rare nest
void girder
this is the vertex group of the clothing
rare nest
void girder
this is the vertex group of the clothing
Alright, those seem about right. Next thing I want to check is if you select the clothing, go into weight paint mode (press tab and click on weight paint), then find something from the torso like "Chest" or "Left Arm" in the vertex groups and click on it, does it show any colors other than a dark blue?
void girder
no
it's still blue
my chest is called spine 1
not Chest

Spine 1 = Chest
idk why but the original owner set it that way
rare nest
The name doesn't matter much for this case, it seems like the issue is that the mesh didn't get any weight data so it doesn't know how to move with the avatar
void girder
so what can i do?
rare nest
Was the clothing originally made for the avatar you're putting it on?
void girder
No
i got it from something else
i watched a tutorial on how to make clothing on diffrent avatar fit
but the pant's and undershirt work fine
it's just the cropped hoodie
that isn't moving with the avatar
rare nest
What did the hoodie look like before you tried doing the transfer weights thing? I see in the screenshot you sent earlier that the arms on it are pointed down after you did transfer weights
 rare nest
Yes
void girder
that is how it looked before the transfer weight
if u mean how it looked on the model i took it from?
rare nest
void girder
when i click on transfer weights this happends
Oh no I meant this picture, the picture you just sent is the one I was asking for
rare nest
Okay, next thing I'm gonna have you check is to click on the armature and go to this tab. Click on "rest position" and see what it does

I think the problem may actually be that the arms have been put in an A-pose when it's T-posed by default
void girder
 rare nest
Yep, that's the problem. Move the arms of the hoodie to match that and redo the weight transfer
void girder
i moved it before i started putting it on
void girder
rare nest
Yep, that's the problem. Move the arms of the hoodie to match that and redo the ...
OKII!!
im getting a error
i can't pose in rest pose mode
 rare nest
Oops, forgot that was a thing. Okay, switch back to "pose position," go into pose mode on the armature, select everything by pressing A, then alt+R to reset the skeleton to the default pose
You may want to remove the armature modifier from the modifier stack first as well
void girder
how do i do that
rare nest
Click this X in the modifier stack of the hoodie
 void girder
ok
rare nest
That's just to make sure you don't accidentally end up with two of them
rare nest
Oops, actually you didn't need to do that, it's been a while since I've had to transfer weights so I forgot the process and got it mixed up with parenting with automatic weights. You'll need to put that modifier back and do the data transfer while in T-pose still
rare nest
You can just undo with crtl+z until it shows back up in the modifier stack
void girder
but will it still be in t-pose?
rare nest
If it's not, you can repeat the process of selecting all the bones in pose mode and pressing alt+R to reset it to T-pose
rare nest
Okay, as long as the arms of the hoodie are lined up with the arms of the avatar, you should be able to do the weight transfer like you did before without issue
rare nest
What kind of weird?
 rare nest
Oh, yeah I see what it's doing. Undo that, find this, and click it to turn it on. It might be on the top or bottom of the window depending on what settings you used while installing blender. It's a setting that basically smooths out the edges of the edits you're making, you can adjust how far it extends by using the scroll wheel. You'll probably need to do more edits after that, but this is the easiest way to get the hoodie into T-pose
 void girder
it still doesn't look normal
rare nest
It's something you'll have to work on a bit, the hoodie wasn't made to do what you're doing with it
void girder
wait
rare nest
Oh, turning on this setting may help as well, I forgot to mention that
 rare nest
Oh it might be false-flagging the image as containing nudity, that happens sometimes
 rare nest
You'll have to move the arm of the hoodie up, not just rotate it
void girder
just finest discord
void girder
rare nest
You'll have to move the arm of the hoodie up, not just rotate it
if u do that the hoodie won't fit
rare nest
Again, you'll have to edit it until it does fit. They weren't made to fit together, when putting incompatible parts together you have to be the one to make it work
Scale it, move it, rotate it, use the sculpting tools if you have to
void girder
ok
 indigo lake
for some reason my elbows and knees are locked into this kinda stick figure
i know i did the weight painting right since when i move the bones in unity they work fine
was i supposed to put any IK for the elbows?
urban plume
urban plume
plan on rigging this for full body, where do i even start?
anyone?
rare nest
indigo lake
was i supposed to put any IK for the elbows?
Did you make sure to have the knees and elbows slightly bent in the base armature?
indigo lake
ah
rare nest
From the VRChat docs
 indigo lake
i think im going to have to restart from scratch
because
in the process of trying to fix it
i
deleted
all of it
nice
rare nest
That's good at least
indigo lake
yeah
rare nest
But yeah make sure the bones in the limbs aren't fully straight and that should solve the problem, IK systems generally have trouble with fully straight limbs
rare nest
I'm not really sure in that case, I'm not super familiar with Unity/VRChat's IK system yet
void girder
@rare nest
is there a way to mirror the arm
so i don't have to do both sides of the arm
rare nest
void girder
is there a way to mirror the arm
Easiest way to do that would be mirroring the whole model, though this does mean that the hoodie will look identical on both sides as a warning. Blender has an addon you can enable to do this automatically. Open the preferences, go to the addons tab, search mirror, and enable the Auto Mirror addon. From there, go to the edit tab in the side bar (you can open and close it with N if it's not there,) and you should find the Auto Mirror menu. I'd recommend enabling "Apply Mirror," then click the "AutoMirror" button. This will cut the model down the middle, mirror it, give the mirrored vertex groups the right weights so it moves correctly, and applies the mirror modifier so you don't have to do anything afterwards.


 void girder
yooo
this is amazing
YEP
oop
Thanks @rare nest
i asked 11 ppl to help but they didin't know how to
rare nest
You're welcome! It's not a very common problem so I don't blame them for not knowing how to help
void girder
haha
indigo lake
i got a photo of the legs not working
 rare nest
Basically what happened was when you did the data transfer to the hoodie after posing the arms down into an A-pose, it was still treated like the avatar's arms were T-posed, so the hoodie arms moved down even further to match how the arms had been moved down. In the future, don't move the skeleton at all before you do the data transfer or that might happen again


 rain mountain
according to the tutorial i used the head should move with the bone but it's not and i really don't know why. i added the armature modifier to the head model, i made a vertex group for it and assigned the group to the head, and yet i still cant get the rig to affect the model
quaint cosmos
rain mountain
according to the tutorial i used the head should move with the bone but it's not...
Is the vertex group called "Head"?
 quaint cosmos
rain mountain
yeah
quaint cosmos
rain mountain
yeah
And when you go into edit mode and press select with the Head vertex group selected, it selects the head?
rain mountain
quaint cosmos
And when you go into edit mode and press select with the Head vertex group selec...
yes
quaint cosmos
rain mountain
yes
Could you post a screen of the armature modifier?
 quaint cosmos
Oh wait, I see what it is. You're moving the bone in Edit mode, that won't move any verts, you need to be in Pose mode
quaint cosmos
It's one of the modes in the top left along with object, edit, etc.
Top left of the 3D view
 stoic zenith
rain mountain
according to the tutorial i used the head should move with the bone but it's not...
stoic zenith
rain mountain
according to the tutorial i used the head should move with the bone but it's not...
your in edit mode
oh
never mind u found it
fading verge
I'm a desktop user and I am having an issue with my locomotion layer. I am trying to make my avatar stand like in the attached picture, but anytime I upload one it looks like it's standing on an invisible foot stool and it's not cute, not at all. Is there a way to fix it so that the avatar stands the way it does in unity?

Ideally so that my hands, eyes and head move the way they are supposed to but the arms, legs, feet and body look like the pose.
fading verge
what would be the best way to rig this guy. I realize that vrchat doesn't like it when the neck and head and head doesn't align with the spine and chest

or will it be fine
am I missing required bones

the arms bones will be normal but not weighted to anything
quaint cosmos
Pretty sure you need a spine, chest, neck, and arms to make it a humanoid but if you don't need it to be a humanoid, you can just create your own animation sets. It's a lot more work but it's probably going to be necessary for something like that.
fading verge
is it going to be probematic if the head/neck don't align with the chest/spine?
brazen island
@fading verge do you really need viewpoint to be where eyes actually are? id just place head in the middle of fish.
fading verge
brazen island
<@456226577798135808> do you really need viewpoint to be where eyes actually are...
will that actually work
https://www.youtube.com/watch?v=r2PPdcUxWCQ
old but relevant. it shows how to rig a dinosaur but still have a humanoid skeleton
you could then bend the armature with an animation, in the action layer, and add a posespace component in the layer to correct the view to the head.
brazen island
@fading verge why not. youll be like inside mascot. remeber that vrchat scales head locally to zero so if you paint fish mostly to the head should be fine
fading verge
I guess I misunderstand how the viewport actually works
with it so inset I won't end up seeing the inside of the model will I?
fading verge
fading verge
<https://www.youtube.com/watch?v=r2PPdcUxWCQ>
old but relevant. it shows how to ...
I'll check it out
brazen island
@fading verge as i said, whatever weightpainted to the head or children of it getting scaled to zero, you never see your hair hats etc.
 pale pumice
This fish looks pretty hilarious, I hope you get it working 🙂
fading verge
I feel silly not thinking of this sooner
 kind ore
FISH
 whole valve
Is there an accurate way to copy the rotation and position of a "bone" in unity to its actual bone in blender (rather than manually trying to line it up so it looks the same)?
I currently have a few objects (weighted to single bones) that sit at 0,0,0 and in Unity i've been parent constraining them to EmptyGameObjects to actually place them in the positions I want. But I now want to basically "bake" a default position into them, so i can remove one constraint source for each (some minor optimization). For example, I usually constraint a sword to the hip, but I instead want to reposition the sword bone to be in that location on the armature itself, by default. The gameobject positions that Unity shows bones as in a scene dont have any values that relate to the bone tail/head coordinates in blender, afaik - I'm hoping there is maybe some technique i can use to accurately copy the position...
Not sure which channel this belongs best in.
 jolly skiff
fading verge
I'm a desktop user and I am having an issue with my locomotion layer. I am tryin...
jolly skiff
fading verge
I'm a desktop user and I am having an issue with my locomotion layer. I am tryin...
the culprit for you is the IK taking over in desktop, trying to imitate foot movements. What you need there is set the tracking of feet to "animation" instead of "tracking" . Gogolocomotion (creator franada) as well as LocomotionFix (Creator/developer me) have capabilities for that built in, if you do not want to edit the locomotion layer by yourself.
 abstract ember
Using bones for movement for a tie for a shirt. Acts like just 1 joint isn't properly bound to the mesh when I try to pose it. Messed around with Parenting and re-pairing to the mesh and it still won't act quite right. Any solutions? (Blender novice/beginner) help is greatly appreciated!

 buoyant stump
abstract ember
Using bones for movement for a tie for a shirt. Acts like just 1 joint isn't pro...
buoyant stump
abstract ember
Using bones for movement for a tie for a shirt. Acts like just 1 joint isn't pro...
At a glance looks like weight painting for the mesh itself. Is there any influence from the main parts of the body like the torso?
rare nest
abstract ember
Using bones for movement for a tie for a shirt. Acts like just 1 joint isn't pro...
That's a result of there being overlapping weight painting for sure. The more bones that a vertex (the little dots that form the points of a polygon) is weighted to, the less it'll move with any of the bones. It looks like the weights across the whole thing is going way past the intended bones, with that part that's not moving probably having weights from all 4 bones. The vertex groups needs to be fixed so that the weight painting sections only overlap slightly with each other
abstract ember
I used automatic weights, I haven't done any weight painting. When I try to redo the parent with automatic weight, it gives me an error message, "Loop in Bones" what does that mean?
rare nest
abstract ember
I used automatic weights, I haven't done any weight painting. When I try to redo...
Oh, that usually means that somehow one of the bones is the child of a bone it's also a parent of. Go into edit mode on the armature and check the parents of the bones in it
If you can't end up figuring out where the problem is, just delete and remake the armature since it's a simple line of bones
 remote obsidian
its not moving with the body
rare nest
Saw an error pop up on the bottom there. The "failed to find solution" error typically happens when you have disconnected, intersecting meshes like the head and the body. Separate the model into parts and do the parenting individually then join the model back together
Anything that overlaps with another mesh needs to be separated out
remote obsidian
um so like
how would i unjoin the head from the body
so i can parent them
im new to modelling lol
rare nest
Go into edit mode on the object, select everything by pressing A, press P, separate by loose parts
When you want to join everything back together later, select all the objects you want to be one object and press ctrl+J
remote obsidian
uuhhh
didnt work
its still one mesh
eh i might just throw it in mixamo then fix the paws
rare nest
Weird, I haven't seen that not work before. Oh well, if mixamo works then there's no problem using that
rare nest
Might be time to learn manual weight painting in that case
remote obsidian
i tried it but i still cant get the armature to connect
rare nest
Try parenting with empty groups instead of automatic weights
quaint cosmos
You can always edit a Mixamo rig. It will often mess up the hands but having to correct those is easier than having to do the whole thing manually
remote obsidian
quaint cosmos
You can always edit a Mixamo rig. It will often mess up the hands but having to ...

🥹 👍 mixamo moment
quaint cosmos
It does do that but just move the bones into place in edit mode and do the weight painting for the hands manually and you should be good (along with the head, most likely). Otherwise, you can either rig and weight paint the entire body or fix every vertex group when automatic weights inevitably does a terrible job.
remote obsidian
i fixed the paws
but when i go in and out of objext and edit mode the model moves slightly idk why and it stretches the hand
is there a way to fix?
rare nest
Looks like the armature got shifted a bit. Go into pose mode, select all the bones, and press alt+G and alt+R (the order you do them in doesn't matter) and that should put the armature back in its default pose
remote obsidian
rare nest
Looks like the armature got shifted a bit. Go into pose mode, select all the bon...
it didnt do anything
its in the right place in edit mode
but in pose or object mode its in the wrong place
rare nest
remote obsidian
it didnt do anything
Can you select the armature and turn on rest pose, then tell me if it does anything?

 rare nest
Okay, change it back to pose position. The problem is what I said before.
Rest position is a kinda debug thing that will temporarily clear anything done to the armature in pose mode, therefore it's something that needs to be fixed in pose mode
remote obsidian
rare nest
Okay, change it back to pose position. The problem is what I said before.
its still doing the same
 marble harbor
Is there a good way to immobilize a bone? The big silver part is rigged to the upper arm and attached at the shoulder bone. The shoulder moves freely, taking the upper arm with it (disconnecting it from the round black part, as pictured).
Can I specifically stop the shoulder bones from moving so that everything stays connected? The SDK won't allow you to remove the shoulders from the rig mapping.

 fading verge
marble harbor
Is there a good way to immobilize a bone? The big silver part is rigged to the u...
fading verge
marble harbor
Is there a good way to immobilize a bone? The big silver part is rigged to the u...
In unity, play with rotation constraint, assuming you want it to rotate. else parent constraint.
wont be quest compatible. have to weight paint it to the bone you want it to move. so if you want the upper arm to move it, remove the weight pain from the shoulder and apply to upp arm
marble harbor
fading verge
In unity, play with rotation constraint, assuming you want it to rotate. else pa...
Already got it rigged that way unfortunately, nothing weighted to the shoulders
 abstract ember
Using bones for movement for a tie for a shirt. Acts like just 1 joint isn't pro...
abstract ember
abstract ember
Using bones for movement for a tie for a shirt. Acts like just 1 joint isn't pro...
Made another info sheet thing for my problem that I still have. I had a job interview and errands to run today, but I went back to it a little while ago, I tried a bunch of things with the armature/bones/parenting and even messed with the weight painting a bit, but it still won't move quite right. Maybe something on here will hint at my problem to more experienced eyes. Let me know if there's any other pics that could be helpful in troubleshooting and I'll gladly share them!
 abstract ember
Okay quick update, I moved the parent(?) bone to a more fixed position outside and above the tie mesh and added a new bone to take its place. It moves much less wonky now, and i'm thinking it's functional now if I just add some limitations to how much the bones can bend?

 rare comet
How do I stop this it from poking out like this when I am weight painting?
I've tried to delete the blendshape but that doesn't work
Every time I try to subtract it from the chest bone, than it goes to the spine bone
The same with the spine bone
 kind mortar
rare comet
How do I stop this it from poking out like this when I am weight painting?
I've ...
kind mortar
rare comet
How do I stop this it from poking out like this when I am weight painting?
I've ...
you need to smooth your weight paint a bit more
rare nest
abstract ember
Made another info sheet thing for my problem that I still have. I had a job inte...
If you're able/willing to, send me a the .blend file in a dm and I'll fix it for you and send it back (for free, don't worry lmao)
I like weight painting and it'd take me maybe 5 minutes to fix
abstract ember
rare nest
If you're able/willing to, send me a the .blend file in a dm and I'll fix it for...
I just recently saw this, thank you so much I would really appreciate it! I'd love if you could explain what all you do to fix it as well so I can learn from it 🙂
rare nest
abstract ember
I just recently saw this, thank you so much I would really appreciate it! I'd lo...
Yeah of course!
broken trout
I have been trying to weight paint the 2 pants for the better part of the day and no progress has been achieved in making the lower section look good while sitting


Are some meshes just not detailed enough to accurately model complex movements or am I just plain ol' bad
 grand hull
broken trout
Are some meshes just not detailed enough to accurately model complex movements o...
grand hull
broken trout
Are some meshes just not detailed enough to accurately model complex movements o...
I think mixing the weight from both left and right legs should work
example


if all else fail, then mixamo and combine the hip parts, lastly clean up from there
broken trout
Gave it another go with more overlap, I am so glad to not have to deal with weight painting anymore
Thanks for the example, it helped a lot
 delicate kelp
can someone help me rig
quaint cosmos
delicate kelp
can someone help me rig
That's what we're here for but we need more to go on than that.
delicate kelp
wdym
 crimson latch
So, lets say my reference is leaning forward slightly
If I still have the spine accurate to the body (spine leaning forward for example), will VRChat compensate and make the character upright?
 gilded ermine
Can anyone help me with a fallback
quaint cosmos
gilded ermine
Can anyone help me with a fallback
That's what this channel is for but you'll need to specify the sort of help you need
gilded ermine
So I downloaded this premade fallback of a jokey show my avatar IDIOT but it has no like avatar. It has the body and things but no avatar so I can upload it.
gilded ermine
quaint cosmos
That's what this channel is for but you'll need to specify the sort of help you ...
 quaint cosmos
gilded ermine
So I downloaded this premade fallback of a jokey show my avatar IDIOT but it has...
quaint cosmos
gilded ermine
So I downloaded this premade fallback of a jokey show my avatar IDIOT but it has...
I think that blue guy means it has a rig, do you mean it has no avatar descriptor? You can add one of those by just adding a new component and then searching for avatar. Then, you just need to put the view position to the right height and that should be enough for a basic setup.
gilded ermine
quaint cosmos
I think that blue guy means it has a rig, do you mean it has no avatar descripto...
I've never done that I have no clue what I'm doing
quaint cosmos
gilded ermine
I've never done that I have no clue what I'm doing
Did this video help you? Consider sending me a tip on Ko-fi! https://ko-fi.com/sippbox
Welcome to my updated tutorial on the basics of uploading avatar with SDK3! This video goes over the simple aspects of getting your avatar up and running in SDK3, including eye look, lip sync, and view point. My previous tutorials were lacking a bit, and i'v...
gilded ermine
quaint cosmos
https://www.youtube.com/watch?v=dTlZXDJueks&list=PLt8qiEFqNHFkPqpKLnVRx-G78mGvjP...
I still dont know what to do
quaint cosmos
gilded ermine
I still dont know what to do
And you watched all the videos? Where specifically are you lost?
gilded ermine
Yeah I was able to add a descriptor thingy but it's the trying to upload it. Its all rigged but it says I'm missing this and when I go look its already rigged so I don't get it
quaint cosmos
gilded ermine
Yeah I was able to add a descriptor thingy but it's the trying to upload it. Its...
If you're getting errors, post the error so we can know what's going wrong.
gilded ermine
 quaint cosmos
gilded ermine
quaint cosmos
gilded ermine
If you open the avatar in the project tab at the bottom and then go to the inspector on the right, under rig, you can go into rig configuration. Can you go into there and see if it has the bones it's looking for and if they're assigned properly?
The specific process of getting to the configuration window can be found about 30 seconds into this video https://www.youtube.com/watch?v=uzMuZZ8G3-A
In this clip I go over the required bones you need to add in Blender to get the rig properly functioning in VR Chat
Website: https://kaide.art
Twitch: https://twitch.tv/kaideart
Youtube: https://youtube.com/channel/UCwCk5zX6...
Discord: https://discord.gg/wA2F395PDn
Commission Telegram: https://t.me/kaideartcommissions
Gumroad: https://kaideart...
gilded ermine
 quaint cosmos
Can I see the head and the feet? The head configuration is under head towards the bottom on the left side of the green image
gilded ermine
It looks right
quaint cosmos
So the foot bone is assigned properly in the foot slot and the head bone is in the head slot and you've applied that?
gilded ermine

 quaint cosmos
Hmm, that looks right to me and it's not complaining about hierarchy issues. I'm kind of stumped, it all looks good as far as I can tell but the builder is saying it isn't.
gilded ermine
I think I found why? I looked at the scene thing and it has the model and that box thing but not the rig but I know the model has the rig attached ive checked twice is that normal??
The box thing is called fallbackbasic and the rig is just fallback

 quaint cosmos
gilded ermine
I think I found why? I looked at the scene thing and it has the model and that b...
quaint cosmos
gilded ermine
I think I found why? I looked at the scene thing and it has the model and that b...
Yeah, that's not right, the rig should have a dropdown arrow where you can see the hierarchy but this doesn't. And you haven't made any edits to it other than dragging it into your scene?
gilded ermine
I dragged it on and added the descriptor thingy and made sure it was in the middle. I couldn't do anything else
quaint cosmos
gilded ermine
I dragged it on and added the descriptor thingy and made sure it was in the midd...
Made sure what was in the middle? The avatar descriptor? Can I see the inspector of the object with the avatar descriptor on it?
Or do you mean the model?
It's weird because the rig configuration recognizes a rig but it doesn't seem like the object in your scene has one.
gilded ermine
quaint cosmos
Or do you mean the model?
I fell asleep and im still tired ill show you in a lil bit
 reef coral
how do i fix the weight painting on the shoulder so the weird bend on top of it doesn't happen?


 grand hull
reef coral
how do i fix the weight painting on the shoulder so the weird bend on top of it ...
grand hull
reef coral
how do i fix the weight painting on the shoulder so the weird bend on top of it ...
you might have to check and reduce the influence from your chest or upper chest bone
reef coral
hmmm
i checked how it looked on a different avatar that has proper weight painting and it seemed the same
sec


i'll lower it a bit
oh yeah that helped

thank
 robust mantle
Hello do anyone use Maya for rigging ? if so can you tell me what joint orientation and rotate order should be set for vrchat avatars ?
gilded ermine
@quaint cosmos good morning! So I rember the box that drops down has the descriptor on it. The model and the other box doesn't. I also have no clue what the box is either I don't think it even has anything it's just a invisible box I can move and the only components is transform
 modern crystal
Should I auto rig before doing avater dyamnics or do the opposite?
quaint cosmos
modern crystal
Should I auto rig before doing avater dyamnics or do the opposite?
Pretty sure avatar dynamics are dependent on having a rig. At least physbones are, maybe there are other things that can work without them.
robust mantle
robust mantle
Hello do anyone use Maya for rigging ? if so can you tell me what joint orientat...
I figured it out for anyone else in the future its : x forward and y as bend axis
 vague crane
Does anyone know how I can make the claws on this crab avatar open and close this far when I grip.
 neat leaf
rig a circle
mirror it
apply armature to one half to mirror the motions to the other side
save the armature deformation as a shape key
and clean it up after
vague crane
sorry im new to making avatars. is there a tutorial or visual i could use?
crimson latch
The Rainhet Chaneru tutorial says to make a Blink_L and a Blink_R, but AFAIK the unity component only has a single blink shape key. Did there used to be separate blinks?
quaint cosmos
crimson latch
The Rainhet Chaneru tutorial says to make a Blink_L and a Blink_R, but AFAIK the...
I think so but yeah, just the one now.
brazen island
@crimson latch you still probly want to wink
and make one out of two wsy easier than separate both eyes to left/right
fading verge
how do i rig an avatar that is already made by someone and was imported to vrchat, yet you have the model of it since you bought it
like do i do it via blender?
or unity
cuz im tryna convert it to a FBT compatible avatar
like 11 point tracking compatible so if i ever upgrade its already ready
brazen island
@fading verge any humanoid avatar is already fbt compatible and how well it works depends on bones placement and proportions
any fixes to those are to be done in blender
fading verge
brazen island
<@456226577798135808> any humanoid avatar is already fbt compatible and how well...
ik but not all are correct
the one im using doesnt have foot bones so when im moving my feet trackers it just moves the entire leg
so ima fix its rig
modern crystal
Does anyone here have a humanoid rigging for VRChat and how to place it this model without it looking horrible when it moves?
 quaint cosmos
modern crystal
Does anyone here have a humanoid rigging for VRChat and how to place it this mod...
quaint cosmos
modern crystal
Does anyone here have a humanoid rigging for VRChat and how to place it this mod...
Does it even have edgeloops for the elbows and knees? No amount of rigging will make it move well if it doesn't have the geometry to move properly.
modern crystal
quaint cosmos
Does it even have edgeloops for the elbows and knees? No amount of rigging will ...
well how do I add edge loops on them?
quaint cosmos
modern crystal
well how do I add edge loops on them?
Edge loops are one of the tools on the palette on the left when you're in edit mode. Basically, your mesh can only deform where it has edges that allow it to do so, so you generally want to have more dense geometry in those areas and be mindful of the flow of those edges so things deform cleanly. You might have something usable with a couple edgeloops but if you're serious about making characters, you're going to need to develop a stronger understanding of topology https://www.youtube.com/playlist?list=PL3GeP3YLZn5irhqsD6_Srf-CeimYPonaK

 visual arch
i think this is a rigging problem, anyone know why my test avatar is freaking out like this? here's my rig in blender for ref
 brazen island
@visual arch i cant see shoulders bones
visual arch
they're there but small since i need them to be small
 shut copper
I basically have no knowledge in anything with 3D rendering and I commissioned a thing for VRChat but it's not rigged help
I'm at work rn and I can post the files later
It's also made like a fucking shortstack and is super chubby and I don't want it like that but I don't know how to edit that either
 warm shore
shut copper
I basically have no knowledge in anything with 3D rendering and I commissioned a...
warm shore
shut copper
I basically have no knowledge in anything with 3D rendering and I commissioned a...
If you have the time still I can take a look at it
shut copper
I've gotten a lot of messages and I can't afford to pay anyone for this, I'm tight on money. Is that alright?
warm shore
shut copper
I've gotten a lot of messages and I can't afford to pay anyone for this, I'm tig...
You already paid for it, I'd just rig it and add adjustments, no need for payment lol
shut copper
Alright awesome lol
warm shore
shut copper
Alright awesome lol
Just send the files in pm whenever and I'll send back a working unity package so you can put it on your account without hassle, do you know how to upload avatars to your account?
warm shore
shut copper
No 💀
 I can help with that too no worries
 real gate
so im trying to make a quadruped rig with CATS, and i adjusted a premade rig in blender accordingly with what i need, but i have a few questions...
-
would i need bones in the feelers/tendrils in order to flow with the avatar, similar to how tails/other accessories flow on other avatars in comparison? for context, there were bones in the original rig, but bringing that old rig into unity ended up breaking it
-
any ideas on what the attached error message means? occured after fixing the model/rig with CATS
-
the third image is the after effect of fixing my rig with CATS, compared to the first image (beforehand). will it affect anything in unity?
this is my first time doing rigging for a vrc avatar, so any guidance will be greatly appreciated


 fervent hornet
real gate
so im trying to make a quadruped rig with CATS, and i adjusted a premade rig in ...
fervent hornet
real gate
so im trying to make a quadruped rig with CATS, and i adjusted a premade rig in ...
You shouldn't be using CATs for this type of model, it's not designed for things that stray from basic humanoids.
Also not sure by how you want the legs to "flow" with the avatar. Do you want them to drag behind you like a tail or do you want them to walk under you like legs?
brazen island
@fervent hornet final ik is whitelisted component so should be possible
fervent hornet
Most of my avatars are spiders that walk for me, it's less a question on what is possible and more a question of what they want to do
real gate
fervent hornet
You shouldn't be using CATs for this type of model, it's not designed for things...

basically this
and noted about cats
fervent hornet
Having it run like that would require manual animations in your locomotion animator instead of the base ones. Though you can use FIK to automate walking. https://youtu.be/GVEI36F-bj8
In this video I go over how to create a spider-like avatar in VRChat using Final IK. Most of the Unity work is automatically done via an editor script that is provided further down in the description. If you run into any problems during the process, feel free to join the discord and ask for help!
Time Stamps:
0:00 Introduction
0:47 Blender Star...
Keep in mind you can get the FIK Stub so that you don't need to buy FIK
real gate
fervent hornet
Having it run like that would require manual animations in your locomotion anima...
so would having the base animations just make it run on its hind legs then?
fervent hornet
Base animations would make it run on whatever legs you told vrc were humanoid, you could then use rotatation constraints to make the other pair follow
real gate
gotcha...ill use FIK since it seems easier to do that way lol
real gate
fervent hornet
Base animations would make it run on whatever legs you told vrc were humanoid, y...
im about 3 mins in to your tutorial (https://youtu.be/GVEI36F-bj8?t=204), and im confused if i want a Single Point, or a Multiple Point thing for my avatar
In this video I go over how to create a spider-like avatar in VRChat using Final IK. Most of the Unity work is automatically done via an editor script that is provided further down in the description. If you run into any problems during the process, feel free to join the discord and ask for help!
Time Stamps:
0:00 Introduction
0:47 Blender Star...
on top of that, getting this error when i checked console...hasnt affected anything, video said to check (4:57)

@fervent hornetsorry for the multiple pings, but i just tried fixing the constraint target error with the multiple points thing, and got this new error....retried with single point, no new errors from i can tell, but no idea if it worked

 fervent hornet
You want single point, which should be your humanoid hips (constraint target). If you have the stub the only way to test it is to upload to vrc (if there are no errors)
real gate
ah, gotcha. thanks
real gate
fervent hornet
You want single point, which should be your humanoid hips (constraint target). I...
oh great...not sure if i was supposed to do this or not, but i tried changing the rig to humanoid and it couldnt find my head bone

and no, it didnt work
 fervent hornet
Make sure you configure the humanoid properly before upload, unity auto construction isnt very good
real gate
fervent hornet
Make sure you configure the humanoid properly before upload, unity auto construc...
this is what its currently spitting out (just mapped chest and upper chest)
 fervent hornet
Hips is set as your armature, you need to redo most of the setup
real gate
in blender?
fervent hornet
In unity, just because its green doesnt mean its right
real gate
fervent hornet
In unity, just because its green doesnt mean its right
this is what its showing me, and it isnt allowing me to reparent stuff

@fervent hornet got the parenting sorted out, but it keeps on reverting for some reason

 fervent hornet
Not sure why it's reverting, maybe some console error? Make sure there is no red on all screens (body, head, right hand, left hand)
real gate
no red on all screens, no errors in console
real gate
fervent hornet
Not sure why it's reverting, maybe some console error? Make sure there is no red...
would it be best to send you the files or something?
 scarlet patrol
So my model is doing this weird thing where the whole torso and upper half is moving to whatever angle my hip tracker is at. I currently have it head locked and changing it doesn't help. In half-body, when I walk the hands just cycle and jiggle around. Seems the ik for the hand and head positions is being wack. I've done a bit of work on it in blender but pose mode seems fine. I think the rigging in unity is messed up. Here's a video for reference where I am moving around my hip tracker.
fervent hornet
real gate
would it be best to send you the files or something?
I'm not available to work on your model for you. Im unaware of anything that would revert humanoid configuration
real gate
fervent hornet
I'm not available to work on your model for you. Im unaware of anything that wou...
No worries, I’ve closed out for now anyways
robust mantle
visual arch
i think this is a rigging problem, anyone know why my test avatar is freaking ou...
its the orientation of your joints they do what is called a gimbal flip
visual arch
robust mantle
its the orientation of your joints they do what is called a gimbal flip
oh, thats good to know but how do you fix it though ? do I roll them to 0 or do something esle in blender edit mode?
robust mantle
visual arch
oh, thats good to know but how do you fix it though ? do I roll them to 0 or do ...
i do not use blender, i use another 3D package but maybe there is a similar tool in blender, you want something called orient bones or joints and the goal is to have most of your skeleton orientation to the same value.
i will give you an exemple screenshot
Here is my avi in Autodesk Maya as you can see the X axis of every joint is pointing towards the next joint, i think the flipping on your avi is caused by faulty orientation thus the IK system tries to adjust himself with the "offset" caused by the faulty orientation this results in a flipping of the geometry.
If you can see the orientation axis of every bone\joint in blender you could re-orient them to be similar to the screenshot i find that X towards next bone and Y for main rotation works very well in unity

Rotation values should be at 0 degree as well because if they exceed 360 the IK system may not perform like intended
visual arch
robust mantle
Here is my avi in Autodesk Maya as you can see the X axis of every joint is poin...
oh thank you! ill look into this and try to fix it! thank you very much ^^
robust mantle
i found this link regarding Blender and orientation https://blenderartists.org/t/blender-joint-orient/662837

Blender Artists Community
I started off in Maya and am making my transition to Blender, I notice right off the bat that the axis are different, Just figured out how to mirror joints, still don’t know if there’s a “Select Hierarchy” or “Search and Replace Names…” option but Is there a way to ORIENT JOINTS in Blender?
if you are still having issues feel free to DM me I can orient your bones in Maya in like 2 clicks and send it back
scarlet patrol
scarlet patrol
So my model is doing this weird thing where the whole torso and upper half is mo...
found out it was due to a physbone component on the chest
 stark shuttle
How would I rig a armature to hair in blender? There doesn't seem to be a automatic weights option?
kind mortar
stark shuttle
How would I rig a armature to hair in blender? There doesn't seem to be a automa...
you could just paint it manually if you need to
stark shuttle
I saw a video about that but I also dont know how to weight paint hair haha
Kinda newish to avi stuff on blender
stark shuttle
kind mortar
you could just paint it manually if you need to
If you know of a tutorial on youtube other then this https://youtu.be/gTdRGZA4TXA

Hair animation, can be one of the most frustrating parts of Character Design for new users. But, luckily there are a few tricks that can literally save you months of pointless manual animation. Learn everything you need about rigging hair in the next few minutes!!! Hope it helps :)
Wiggle Bones Download Link:
https://blenderartists.org/t/wiggl...
That would be amazing
kind mortar
stark shuttle
If you know of a tutorial on youtube other then this https://youtu.be/gTdRGZA4TX...
https://www.youtube.com/watch?v=4fICQmBEt4Y&ab_channel=RoyalSkies this one is good too
I've been meaning to update this video for a very VERY long time. But, we're finally here. Everything you need to know in order to start painting weight layers onto your character!!! Hope it helps :)
Female Body Model Link:
https://www.youtube.com/watch?v=_XfvLpLyulI
If you enjoyed this video, please don't forget to like and subscribe!
You ca...
stark shuttle
Thanks watching now
stark shuttle
kind mortar
https://www.youtube.com/watch?v=4fICQmBEt4Y&ab_channel=RoyalSkies this one is go...
Okay new issue, I got automatic scale thing to work, but it connects the whole body and cloths to the hair?
Any way to just select the hair only?
 mossy locust
Im not sure if anyone can help with this but Im having an issue where the weight paint that I drew on the fingers of my model just doesnt move the mesh, this issue is only happening with this finger and only on this hand, the other hand works fine
 humble beacon
mossy locust
Im not sure if anyone can help with this but Im having an issue where the weight...
humble beacon
mossy locust
Im not sure if anyone can help with this but Im having an issue where the weight...
Most likely misspelled the vertex group name. Happens to me all the time. Double check it
mossy locust
humble beacon
Most likely misspelled the vertex group name. Happens to me all the time. Double...
idk if I understood it correctly but my vertex group automatically has the same name as the bone and I just checked if the correct verts are selected and it looks fine for example the top of the finger is connected to the ring_finger2 which is the last bone of the fingers
 quaint cosmos
I'd go through the vertex groups and see if that area is weighted to any other bone in addition to the bone it's suppose to be weighted to
mossy locust
to me it looks fine


 astral quest
could be possibly painsted to another bone aswell, id check all the bones in the hand to make sure its not painted to anything else
mossy locust
astral quest
could be possibly painsted to another bone aswell, id check all the bones in the...
ohhh I accidentally painted a tiny bit on it while doing the spine... thank you so much lol
 faint cypress
Question, if i want to have an avatar without legs how would i set it up?
The idea is to have the head/body working as the feet and the tail training behind

 bold field
faint cypress
The idea is to have the head/body working as the feet and the tail training behi...
bold field
faint cypress
The idea is to have the head/body working as the feet and the tail training behi...
What do you mean head and body working as the feet?
faint cypress
I don't know how to really put it into words but
Not having feet is the main thing i'm trying to figurate out
bold field
faint cypress
Not having feet is the main thing i'm trying to figurate out
Okay. You should still add the bones for the legs/feet, but dont weight paint any of the body to it
So it doesnt actually move the model, but you’ll still have a humanoid rig (which is needed for vrchat)
faint cypress
Got it
I assume i can just add two bones where i want it to stand and name them like feet and legs?
Something i need help is with this

Whenever i try to rotate the bone in the z or x axis the head becomes all screwed up
How can i fix this?
quaint cosmos
faint cypress
How can i fix this?
Weight painting. Are you familiar with that?
faint cypress
I am weight painting yeah
quaint cosmos
Seems like you just have a bit of a harsh transition in your head weight and should probably blur it towards the torso
faint cypress
Got it
faint cypress
This is how i have the head weight set up

But it does this when i try to rotate it

How can i fix this?
brazen island
@faint cypress probably weighted to something else too
 strong saffron
I Have An Issues Regarding The Viewpoint On My Model, It's Set In The Middle Of The Head But VRC Puts It In The Shoulder And For Some Reason No Matter How Much I Move It, It Will Not Move
quaint cosmos
strong saffron
I Have An Issues Regarding The Viewpoint On My Model, It's Set In The Middle Of ...
You're changing the values in the view position fields and it's not changing in Unity or not changing in VRChat or both?
strong saffron
It's Changing In Unity But Not VRC
quaint cosmos
Hmmm, okay, can't say I've seen that behavior before so I'm not sure what to recommend. Assuming it isn't too much trouble to set it up again, you can always take it from the top and give it a new avatar descriptor, that could resolve the problem but I've never encountered this so I can't say.
strong saffron
I Unfortunately Have Several Times, And Even Created A Whole New Project For It. This Is A Project I Gave Up On For This Particular Problem And I Can't Seem To Find Any Solution. I've Tried Seeing If It Was An Issue With The Model, I've Rotated It And Tinkered With It Every Which Way In Blender, Applied All My Transforms And Nothing I Do Seems To Work.
I've Seen It Mentioned In Here Before, But Could Be Something To Do With The T-Pose? It Has And Odd Skeleton To It Because It's Digitigrade, But As Far As I'm Aware I Have That Set Up Properly
quaint cosmos
strong saffron
I've Seen It Mentioned In Here Before, But Could Be Something To Do With The T-P...
I couldn't say. I could see it perhaps having a weird interaction with the view position where it ended up being offset from where you expected it to be but I don't see how the rig could cause it to have no influence at all.
strong saffron
Mrm, Let Me Test It Again To See
No Such Luck
Might It Have Something To Do With The Rotation When Exported From Blender?
quaint cosmos
Kind of the same situation, I'd think. Could it cause the view position to be wrong? Sure, maybe, but if you're putting the view position 20m in the air and nothing is changing, I don't think that's a rotation issue. I have to assume it's on the right object or else it wouldn't let you publish at all. It is staying where you put it in Unity, yeah? The values aren't reverting on publish or anything like that?
strong saffron
Mrm, I Went Back And Edited It To An Extreme (Put The Viewpoint Up To Like 50 Y) And It Did Update, Just Not To The Scale I Moved It
quaint cosmos
What sort of values are we talking in the view position? I guess if it allows you to keep pushing the view position farther, it's a solution, if a cumbersome one to dial in.
strong saffron
Wdym By What Sort Of Values?
quaint cosmos
What are the x, y, and z values in the view position?
strong saffron
-.314,2.43,0 But That's With Me Trying To Narrow Down The Sweet Spot
quaint cosmos
2.43 isn't really that extreme. It's big, a bit under 8 ft but not not that extreme. but I can see it being annoying to work with if it's significantly above your avatar, it just seems reasonable to work with if necessary so long as it's working in VRChat.
strong saffron
Yeah, I Originally Moved It Up To About 45, But That Was A Good Distance Above Where It Was, So I Guess Now I Just Have To Narrow Down Where It Thinks It Is
quaint cosmos
Is the avatar itself very big? Can you scale up a cube to get a size in meters?
strong saffron
I Have No Idea How To Do That
quaint cosmos
In the hierarchy on the left, you can press the + to create a cube, then change the Y value until it's the size of your character, how much do you have to scale it to equal your character height?
The Y value in scale, of course.
strong saffron
About 2.4
quaint cosmos
Okay, well then I'm not sure what's going on with the display but it seems the numerical value of the view position is about where it should be relative to your model. Is your model intended to be 8 ft/2.4m tall?
If you scale the cube to right where the eyeline is, that should be the value you use for the view position.
strong saffron
In Messing With It More, It Appears VRC Is Seeing It At A Different Rotation And Scale Than Unity Is? At Least In Terms Of The Viewport Because If I Move It Along One Axis It Changes It To A Different Axis In VRC And Moves At A Much Lower Scale
Or Higher Scale? It Moves Less In VRC Than It Does In Unity, Even Though I've Applied All Transforms Multiple Times
quaint cosmos
I'm not sure on that but it seems like those settings you were using were getting close to the correct values which is the correct values for your avatar, unless I'm mistaken. The x value (the first one) should generally be 0 since that is the left to right axis and most avatars want their view in the center of their face but if a Y value of 2.43 is about right for where you would expect your view to be but a bit too high, that lines up with what I would expect from the height of your avatar. It seems like you might be overcomplicating things but I'm not seeing what you're seeing.
strong saffron
Well I've Set It In The Center Of The Head, Exactly Where I Want It, And When I Do, It Appears Instead Much Lower And To The Left In VRC
quaint cosmos
It appears to the left when you set the X value to 0?
It seems like we might need to work with the values and not the position of the ball for whatever reason but that doesn't complicate things too much.
strong saffron
Mm, Not The X, No, But Putting In Values Manually Instead Of Using The Gizmo Seems To Help
quaint cosmos
Try values of 0,Y,.15 Y being the Y value at the top of a cube that starts at the heels and goes to the eyeline
You might need to move the Z value a bit farther out for an avatar that large but that's a good starting point. Having that at 0 will have it pretty far inside the head when I usually like to be right on the face between the eyes.
At least if the view position gizmo was working properly.
strong saffron
Mrm, Putting In The Numbers Directly Is Fixing The Scale Issue, But It's Still Moving In The Wrong Direction, Which I Guess I Can Just Suck It Up And Figure Out The Sweet Spot For It
quaint cosmos
I'm still not sure what you mean by moving in the wrong direction. Is the view not centered with 0 in the x value? Seems like that would have to do with the object not being centered at the origin.
strong saffron
As In, Instead Of When I Adjust The X Axis It Moving Along The X Axis, In VR It Moves Along The Z And Vice Versa
It Looks Right In Unity But Wrong In VRC
quaint cosmos
So when you change the X value, it moves the view position closer or farther from the face in VRC?
strong saffron
If I Change The X Value It Moves It Forwards/Backwards In Unity But Left/Right In VRC
quaint cosmos
Okay, then don't pay attention to what it does in Unity, we've established that's unreliable in this case. If your object is centered at the origin, use a value of 0 for X and start with a value of .15 for Z, you can try moving that .05 up or down if it doesn't feel right.
The X value should move it left or right so the values I gave you for the X,Y, and Z should generally put you in the right spot
strong saffron
Well It's Moreso That I Just Need To Set The X What I Want The Z And Vice Versa
The Y At Least Seems To Behave As Long As I Add The Values In Directly
quaint cosmos
No, you need to set the X to what you want the X to be because that's the axis that's actually being influenced and unless your model is offset from the origin on the X axis (which it shouldn't be unless you exported it that way from Blender) that value should be 0.
strong saffron
And What I'm Telling You Is Adjusting The X In Unity Is Adjusting The Z In VRC
So Yes I Need To Set The X As The Z And Vice Versa
quaint cosmos
But you just said adjusting the first value (the x) moves it left and right in VRC. That's what it should do.
strong saffron
strong saffron
If I Change The X Value It Moves It Forwards/Backwards In Unity But Left/Right I...
No, I Said It Moves Forwards/Backwards
But In VRC It Moves Differently
quaint cosmos
strong saffron
If I Change The X Value It Moves It Forwards/Backwards In Unity But Left/Right I...
^
strong saffron
So I Need To Swap The Values
strong saffron
No, Right, That's The Other Way Around
It's Moving Correctly In Unity But Not VRC
I'm Stupid Don't Mind Me
quaint cosmos
Okay, fine, then. Try values of .15, Y, 0
strong saffron
Well I Have It Working Now
quaint cosmos
Okay, cool. Glad it worked out.
strong saffron
It Moves The Way I Want If I Directly Put In The Values And Swap The X And Z
 torpid burrow

 golden sandal
hey so when i made a mesh i made it not in a t pose but my imported armature is in a t-pose how to i fix that ade make it so that when i move a bone it moves the mesh i have no clue the first thing about rigging
for quest ofc
quaint cosmos
golden sandal
hey so when i made a mesh i made it not in a t pose but my imported armature is ...
I'd just move the bones into place using edit mode before parenting the mesh to the rig
golden sandal
quaint cosmos
I'd just move the bones into place using edit mode before parenting the mesh to ...
i alr pressed to parent it how do i unparent it
quaint cosmos
golden sandal
i alr pressed to parent it how do i unparent it
Alt + P
You might also want to remove the armature modifier on the mesh
golden sandal
thank you so much ill try it shen i get back on
quaint cosmos
I think the last version of Blender that properly supports CATS is 2.9
brazen island
@fading verge you need to use N letter (ooh scary) in main window to bring out the extras panel where you can see the cats and some other tools
@quaint cosmos panel itself works anywhere, import/export/fix model - not
@fading verge and yes, if youe blender is too new get a dev build of cats, probly from github and if not they have discord with dl links
golden sandal
whats going on here i use a new mat and put this in normal map and boom blue

i got it
crimson latch
His feet continue to lift off the ground for some reason

I notice that when I crouch his feet hit the ground normally
But why is this an issue?
Here's his rig for reference
 quaint cosmos
Those feet bones are kind of awkward, very steep angle there when they should generally be close to flat. First thing that comes to mind.
crimson latch
So does the very end go to the tip of the toes?
quaint cosmos
I think it should start where the foot and leg bone connect roughly and go to about where the toes start but I think the main thing is the angle, I'm not really sure how far it should be brought out ideally.
 quaint cosmos
crimson latch
quaint cosmos
crimson latch
That's certainly better. It could perhaps be a bit more flat but it should be an improvement.
crimson latch
Does view position have any affect on the rig?
quaint cosmos
crimson latch
Does view position have any affect on the rig?
It can cause the model to get up on its toes if it's too high or gent bent knees if it's too low, yeah.
crimson latch
I set the view point to his neck and the feet are still on his tip toes
No change when I set it high up either (I also set it further back into the body)
I turned off “enforce T pose” and it broke even worse
Aaaaaa I don’t get it

What is wrong here??
What is causing his heels to lift up when standing still??
 robust nacelle
Does anyone have any tips or anything they can teach or tell me about making or putting new clothes on an already made avatar in blender to edit basically cause I want to make a personal edit of this model and want to model this type of shirt. using that as a reference.
 stark shuttle
hey everyone just wondering if there is a way to export an armature from unity into blender? Cause when I export it as an FBX it doesn't seem to port all of it?
fading verge
can some one help me this is my first ttime attempting to rig somthing
fading verge
stark shuttle
hey everyone just wondering if there is a way to export an armature from unity i...
Blender's fbx import is bad, you need BetterFBX addon.
crimson latch
fading verge
Blender's fbx import is bad, you need BetterFBX addon.
Does the CATS "Export" button just trigger the standard Blender FBX import with no changes or does it do something else?
fading verge
cats export button has been buggy
fading verge
crimson latch
Does the CATS "Export" button just trigger the standard Blender FBX import with ...
I know it has more settings when exporting/importing. don't know the exact difference, and never messed with those settings
crimson latch
It always seems to reverse my avatar regardless of “forward” direction setting
It’s made moot by Enforce T Pose, but still weird
stark shuttle
fading verge
Blender's fbx import is bad, you need BetterFBX addon.
Where is that found?
Only thing I can find is a website called Blendermarket
 soft elk
can i just delete the finger bones if i dont want a model to have fingers?
fading verge
stark shuttle
Where is that found?
It costs money, yeah. maybe instead try to play with Cats FBX import settings, might work too
quaint cosmos
soft elk
can i just delete the finger bones if i dont want a model to have fingers?
I think so? Some bones are required for humanoid but I don't think fingers are one of them. You could also add fingers and just not weight them to anything.
soft elk
quaint cosmos
I think so? Some bones are required for humanoid but I don't think fingers are o...
ty!
quaint cosmos
Is there an avatar descriptor on your avatar?
Ah, well then I dunno, never used gogoloco
 bleak lantern
it may have something to do with you editing a prefab instead of being in a scene
 stark musk
crimson latch
His feet continue to lift off the ground for some reason
stark musk
crimson latch
His feet continue to lift off the ground for some reason
This is a VRChat thing & has nothing to do with your avatar. If you are in half tracked VR & look down, you will see this happen. Looking up brings your lower half back into position.
Mine does the same thing, though moving the bones closer to the ground may fix it slightly.
crimson latch
stark musk
This is a VRChat thing & has nothing to do with your avatar. If you are in half ...
Actually I fixed it by unbinding the toe bones
You can also prevent the look-down-causes-float by moving the view back towards the spine/into the head
stark musk
crimson latch
Actually I fixed it by unbinding the toe bones
Oh, interesting.
stark musk
crimson latch
You can also prevent the look-down-causes-float by moving the view back towards ...
I don't understand this
stark musk
But what does "look down causes float" mean lol
crimson latch
Ohh, when you look towards your feet, it lifts the rest of your body upwards
 devout epoch
Anyone ever successfully used Cascadeur to make an animation for a VRC avatar?
quaint cosmos
devout epoch
Anyone ever successfully used Cascadeur to make an animation for a VRC avatar?
Never used it but it looks like it can export to FBX so it should function like any other animation once exported
devout epoch
That's the thing, getting it to work with my avatar to make the animation is the issue. It has a really specific rigging system and I've tried setting it up, but it constantly gives me errors.
quaint cosmos
devout epoch
That's the thing, getting it to work with my avatar to make the animation is the...
You might want to look into retargeting so you can apply the animation to your own rig rather than having to use the rig exported from the program.
devout epoch
Oh interesting! I'll look into that, Thank you!
 cold cliff
I'm working on an avatar built to match my real life proportions, but when I touch my shoulders in the avatar, my hand is like six inches above my avatar's shoulder.
The weird thing is: this is the second avatar I've made this way, and it worked fine in the first one, and I can't identify any differences between that one and this new one that could account for this.
maybe related: when I extend my arms out to the side, the avatar reaches flat-elbows at the same moment that I do; but when I extend my arms FORWARDS, it reaches flat-elbows BEFORE I do, and when I extend my arms DOWNWARD, it NEVER reaches flat-elbows. on my previous avatar, it always reaches flat elbows at the same time I do.
but the bone lengths are VERY similar between the two avatars....
humble beacon
@cold cliff try moving the avatar pov point
I mean the little grey gimmble that you usually place between your eyes
cold cliff
that's also placed in basically the same place between the two avatars though....
what direction should I try moving it?
the pov point is definitely in the right place vertically; I tried moving it back from "between my eyes" to "center of my head", and it didn't help the shoulder thing
it might have helped the elbow thing a little when reaching forwards, but not with my arms by my sides
humble beacon
Try moving it up and down. Not between you eyes, but on your forehead
cold cliff
then it would feel like everyone's looking at my nose when they try to look me in the eye
I got this working correctly with my old avatar so I know it should be possible without having to do that
 warm citrus
Having an odd issue with my first custom avatar. The hips seem to have a mind of their own. I kept them above the legs like the documentation said as seen here: https://i.imgur.com/HtaevZe.png
But they seem to float off to the side in neutral pose: https://i.imgur.com/Dh60Eid.png
When walking, they fly around wildly from side to side although I couldn't get a good screenshot, but here's what happens in the dance animation, they seem to float in space and oscillate side to side: https://i.imgur.com/T70awNj.png https://i.imgur.com/JiK66eW.png
Edit: Never mind, I made a careless mistake and the hip bones were parented to LeftFoot_End. Fixed that, re-weighted, works now. Oops. https://i.imgur.com/Jv1OKv4.png
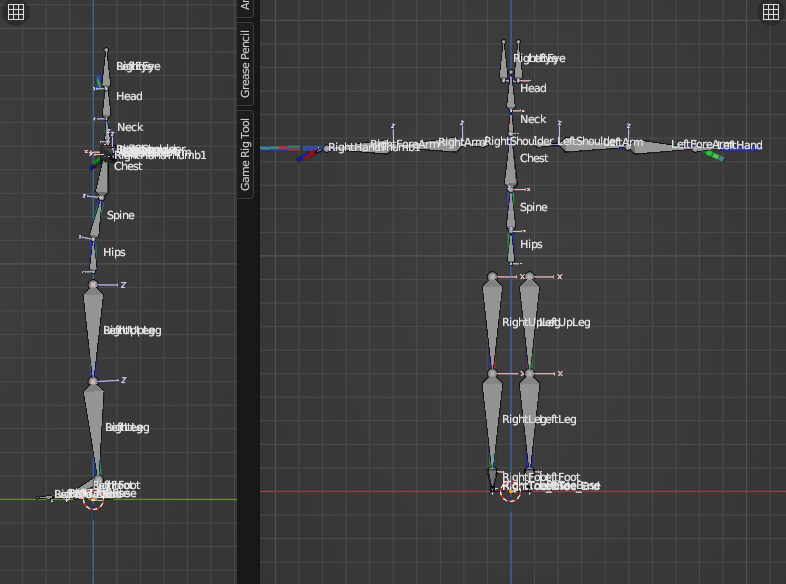
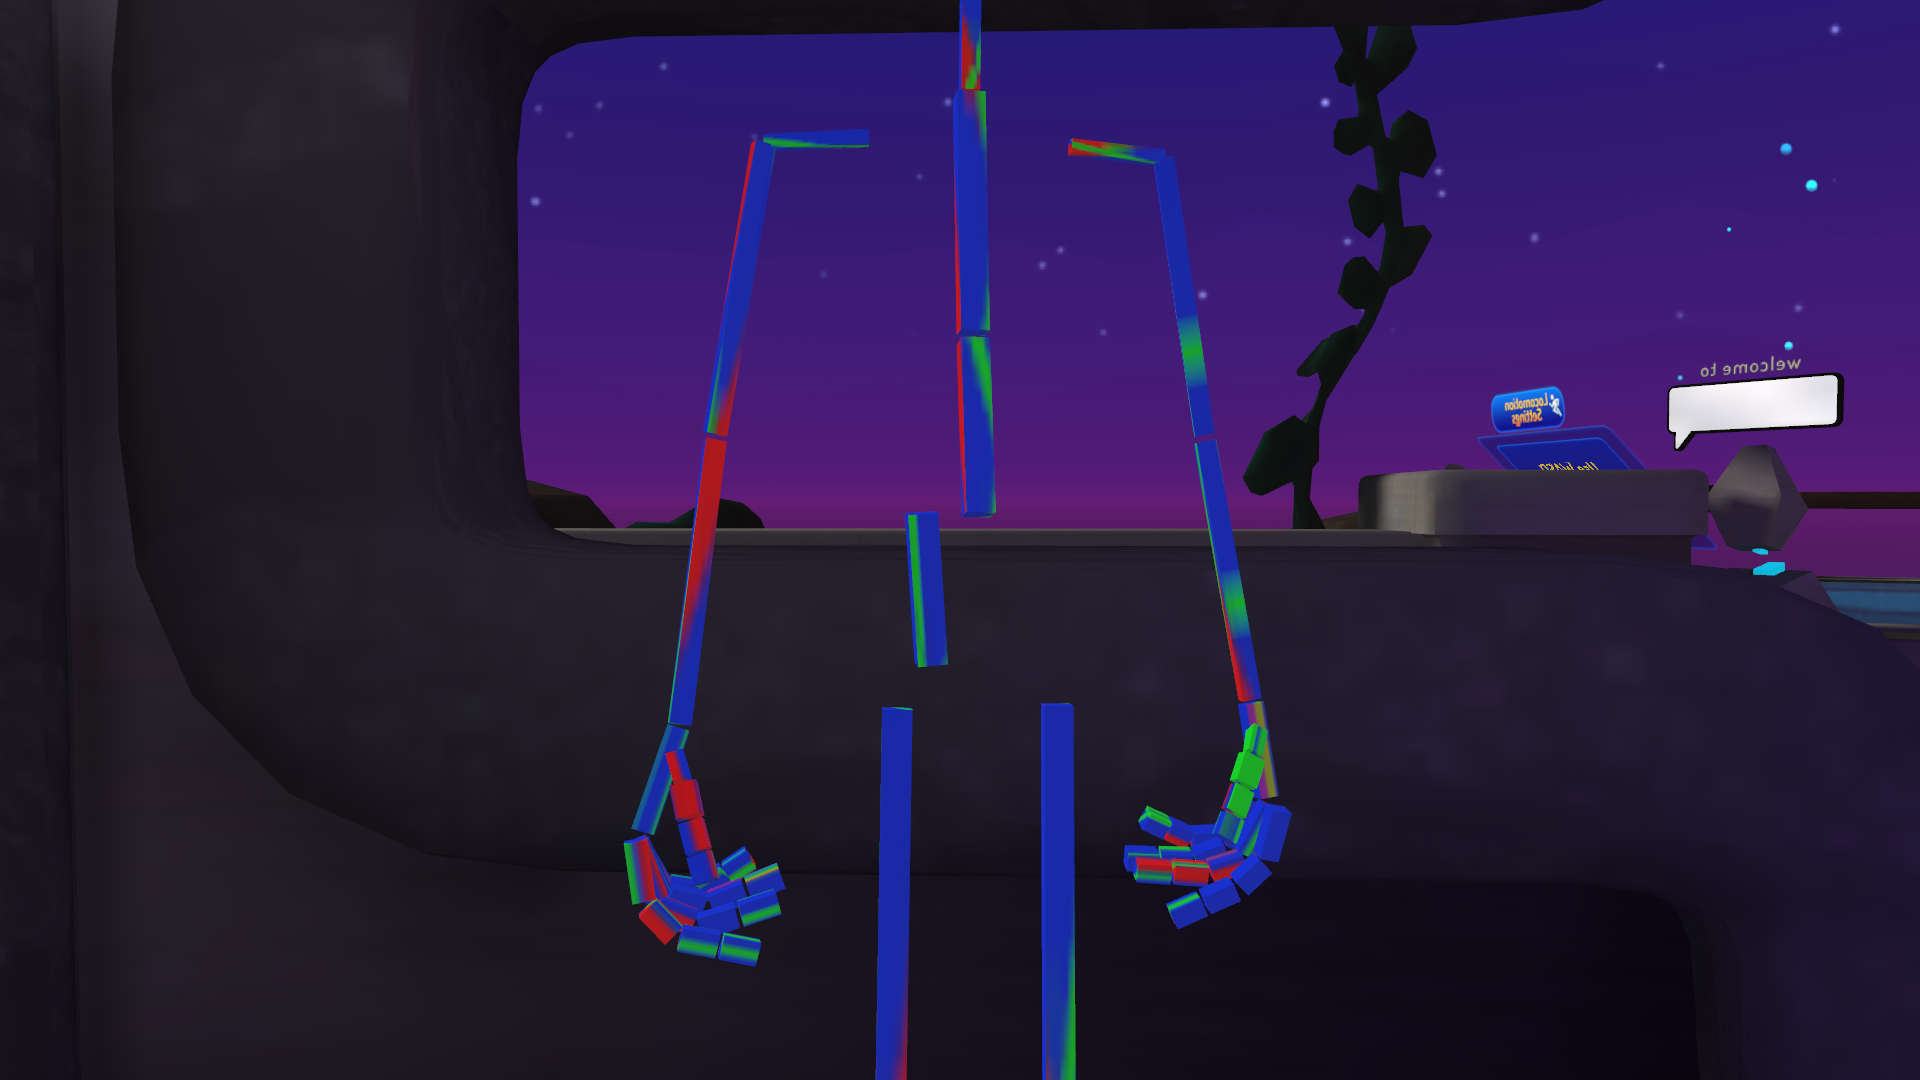
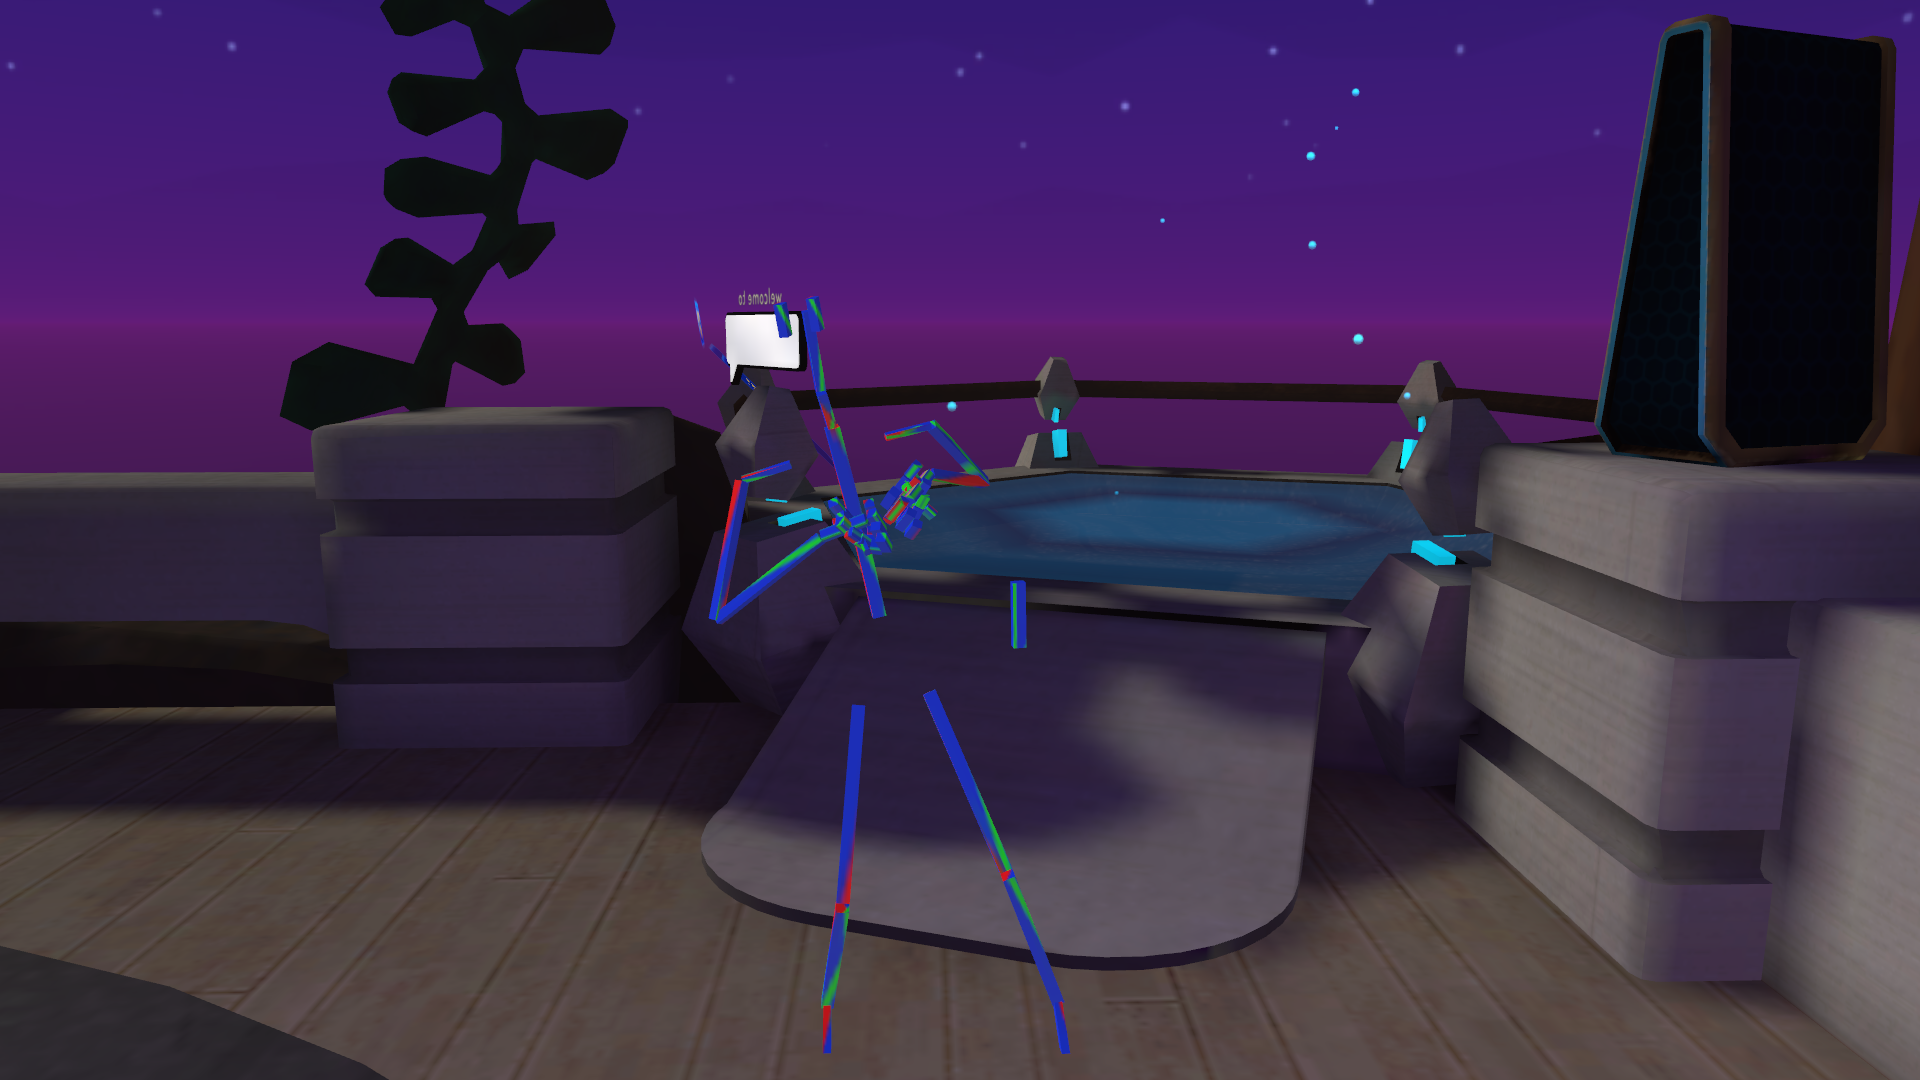
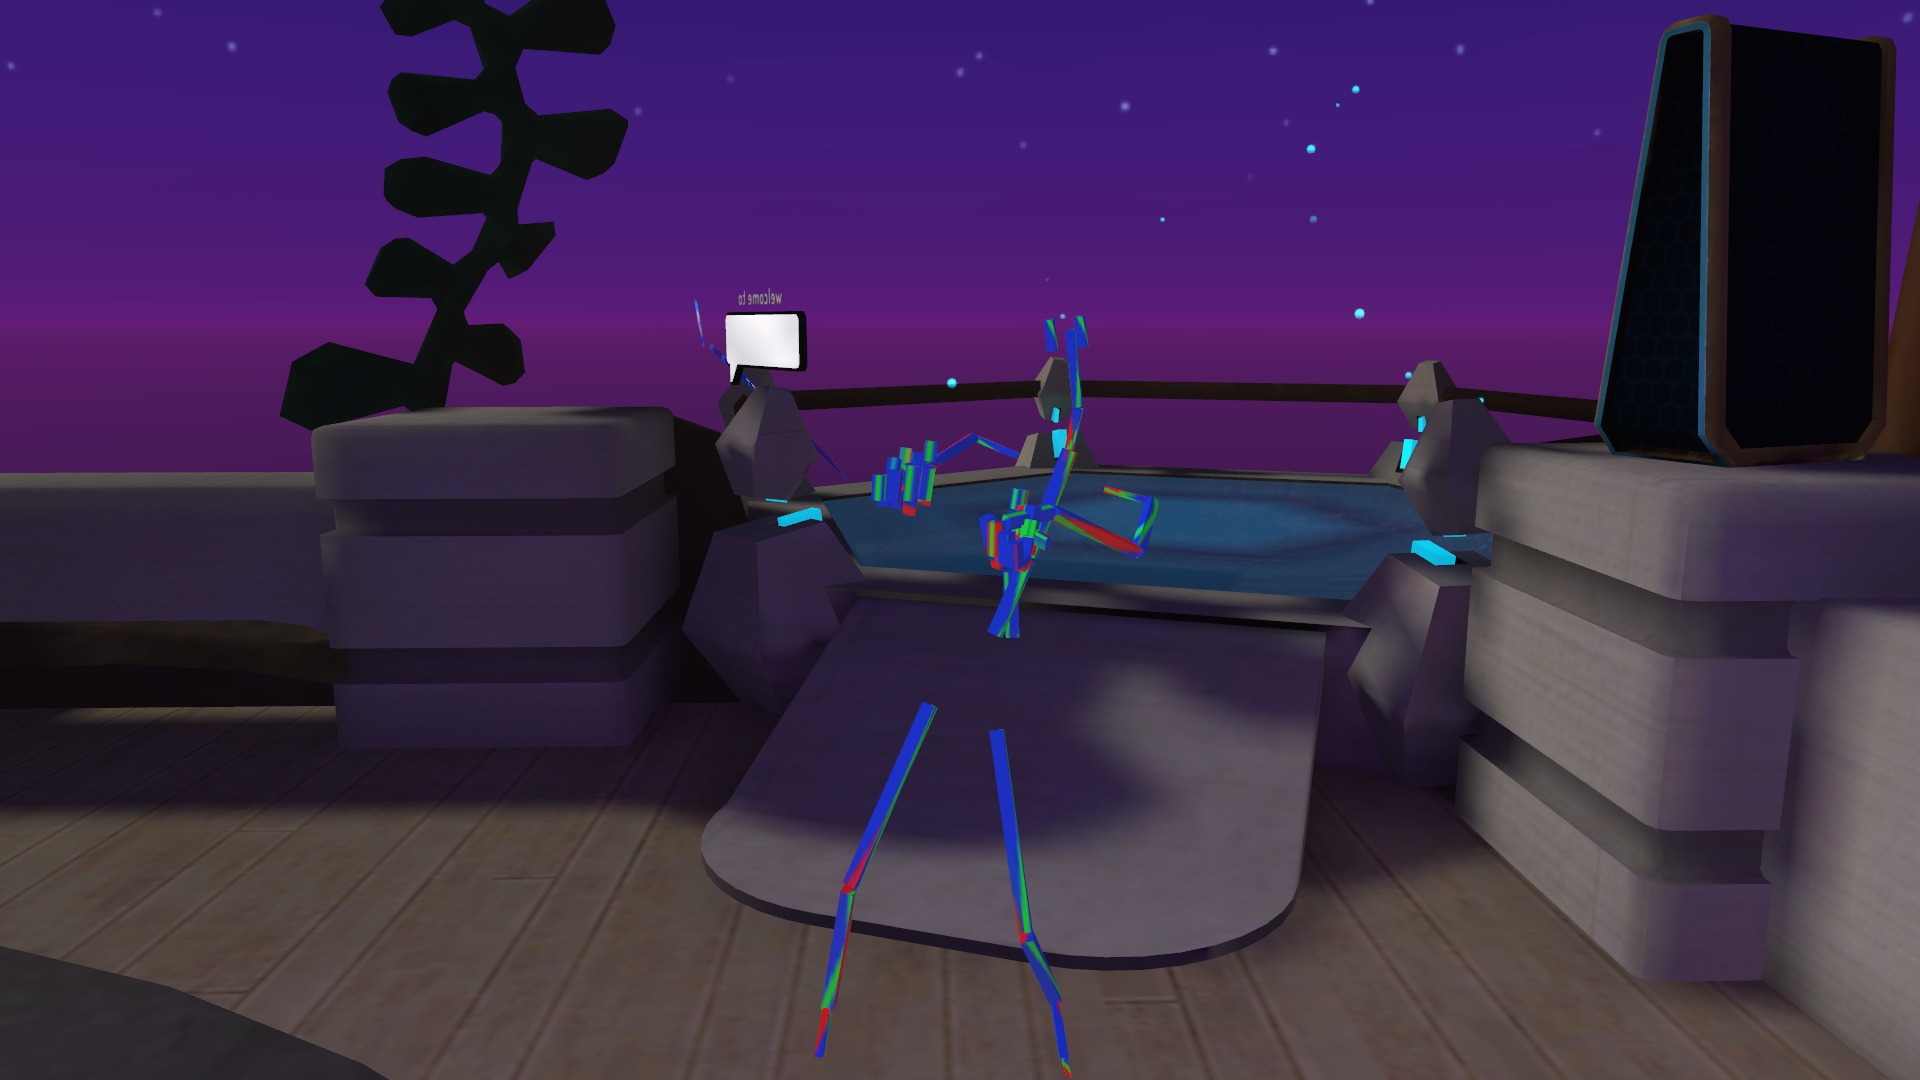 cold cliff
I'm realising it might just be because the scale is off by like 10% on the new avatar and I hadn't noticed....
 finite silo

what do i change with my avatar's armature to avoid this thing with the neck scrunching up?
i use head lock so my eyes are accurate
but...
as you can see in the video, my neck tilts backwards

 surreal anvil
why are the legs getting offset between configuring the rig and in normal unity view? legs look perfectly fine when im configuring the rig but once i leave rig config the legs rotate themselves outwards a bit, clipping through the clothing. there's no transforms affecting the legs, all there is is the avatar descriptor and some phys bones i added for testing


this is the first time ive had this happen so im pretty confused about it
pale pumice
fading verge
Blender's fbx import is bad, you need BetterFBX addon.
what's bad about it?
fading verge
pale pumice
what's bad about it?
https://www.blendermarket.com/products/better-fbx-importer--exporter
they describe it pretty well
Blender wasn't made to handle Unity's stuff, it's its own thing. ton of things aren't transferrable, like bone constraints/shaders/lights in Blender to Unity, etc.
pale pumice
oh huh, I was going to say "most of that looks irrelevant for Unity" but constraints would be pretty cool
hmm the features listed don't seem relevant or seem to be already supported, and it doesn't list constraints other than IK
fading verge
pale pumice
oh huh, I was going to say "most of that looks irrelevant for Unity" but constra...

I don't know how to fix most blender shader stuff, so I port it to Unity then fix it there.
then use fbxexporter in Unity to make a new fbx, that contains all the edits.
that then isn't compatible with going back to blender, and betterfbx fixes that
quaint cosmos
fading verge
What's going on there? My avatars export just fine between Blender and Unity, at worst they're posed weird so I just zero out the pose but these are all kinds of exploded. Maybe it's just because I don't use too much fancy stuff like constraints.
fading verge
I just explained it. say you got an fbx. you add it to the scene, it's a prefab. you make edits, you want it back to an fbx to take it to blender. you use Unity's FBXexport to export the prefab to an fbx. that then doesn't go back into Blender very well. there's where BetterFBX comes in
brazen island
@fading verge why would you do edits in unity
fading verge
because I don't understand blender well enough to make extensive edits there
brazen island
i see, skill issue
fading verge
why would I devote an obsence amount of time to learning blender when I can use shortcuts?
brazen island
knowing what you can and cannot do in unity it's like 10min blender guide
quaint cosmos
fading verge
I just explained it. say you got an fbx. you add it to the scene, it's a prefab....
Yeah but it usually does go back just fine, these must be cases where they're doing something exotic causing it to explode like that. I take my already published avatars all the time and bring them back into Blender to make small edits to the model or the weight painting and they transfer just fine. Not saying that there are never issues, they just must not happen with the standard no-frills avatar building process I use.
fading verge

This here is the avatar example included in the sdk.
it also does not survive Unity's FBXExporter, to be exported to an FBX then imported to unity.
right is blender native fbx, left is blender betterfbx addon
you can try it yourself. if you can find a way to make blender's native fbx work here, that'd be amazing
most of the fbx that doesn't go through, this process are probably fine
but at times some ask how to do it, and I just offer what works for me
quaint cosmos
Looks like a physbones avatar, yeah? That might break it, I don't generally use physbones. I'm not saying it's not worth the purchase, I might pick it up myself to avoid issues in the future, that's just not what happens with my avatars and if they do import weird, it's usually just a matter of resetting the transforms in pose mode which takes 5 seconds. Looks like that might be what's going on here but I can't say for sure without doing it myself.
fading verge
fading verge
resetting the transforms... you think that's a problem in the third avi from the left here?
And I can test removing the physbones, if that's the problem, it'd be...a funny revelation
(except there are no physbones on the example)
 rotund kraken
usually cats fix is for mmd models so that issue can be solved by just not using that button
brazen island
fading verge
it also does not survive Unity's FBXExporter, to be exported to an FBX then impo...
why to export when you can just open model that is bound to be somewhere in assets
quaint cosmos
No, I don't think that's the issue with that avatar but that's also been "fixed" with CATS which doesn't always work great
Yeah, you only need the exporter when the FBX is ASCII. That usually works alright but I don't often find myself needing to do that for avatars.
fading verge
brazen island
why to export when you can just open model that is bound to be somewhere in asse...
did say, what if I made changes in the scene? longer hair, shorter arms, etc... it won't be shoved back into the fbx, as for as I know
fbxeporter, prefab to fbx, is that
quaint cosmos
If I make a bunch of changes to the FBX, I just import it as a new FBX and then it's pretty quick to set up the visemes and stuff but again, that's not making all of the edits some people make to these avatars so I can see the value in streamlining it if it means not reverting a bunch of gestures and animations.
fading verge

So if I edit this thing, add other things. change materials, bunch of things.
I can just...reimport it as an fbx back into unity and use it instead? even to blender
it stops being a prefab in the scene? there's an option for that?
afaik, that's fbx exporter, to make a prefab into an fbx. but if there's another way?
rotund kraken
if you don't unpack it you can just navigate directly to it through blender while you're exporting and itll replace it automatically
your descriptor will stay the same
brazen island
@fading verge no you dont
but once again, noone is doing your pipeline, everyone's edit models in blender and replace fbx in unity's assets leaving them as unpacked and so very consistent prefab
fading verge
most good edits need an unpack, like to rearrange gameobject hierarchy, Riley
And that's what I'm saying, Least. FBXExporter and BetterFBX is a combo that works, Least
ance for your reference, there's several that often ask...how to import something from Unity to Blender. Was one here, was one in general a bit ago. Some days ago too. I only asked them if they were working with a prefab, if yes...then told them that they could use this method
brazen island
you dont need to rearange hierarchy of rigged fbx. you can easily slap props on top of it, you can reuse mesh renderer if prop (built in main fbx) in wrong place/needs parenting
fading verge
brazen island
you dont need to rearange hierarchy of rigged fbx. you can easily slap props on ...

Have to unpack? I'm just following the documentation, if there's another way?
quaint cosmos
Seems like that would be pretty easy to change in the bone relations in Blender
brazen island
just ignore it since it works just fine for me on many different rigs? or goto blender and make it first one
with or without twistbones
fading verge
if you want to go to blender, that is, sure
I'd just fix it faster in Unity
Maybe I should have asked, specifically for a unity solution to avoid unpacking. but i assume that repacking it afterward is fine
brazen island
fading verge
I'd just fix it faster in Unity
well, i guess technically you cannot break import for new version of fbx by doing so, if you never make one
 pale pumice
oh wow yeah, I don't know why I'd ever go from Unity back to Blender, how fascinating.
I also never unpack my FBXes.
I also don' t use cats.
robust crescent
you can just sort bone order in unity without unpacking - its 2 clicks https://gitlab.com/s-ilent/silenttools
 fading verge
Unity thinks the face of my avatar is on the opposite side. I tried rotating the avatar but now I get issues with my hip bones (worked perfectly fine before I rotated it in blender).

Should I change these settings?

Force apply t-pose fixes the hip but it rotates my avatar 180
modern crystal
Is there a way I can rig this inhumanoid character without the body being non-proportional?
 pale pumice
fading verge
Should I change these settings?
pale pumice
fading verge
Should I change these settings?
You want Apply Scalings to be FBX All, otherwise that's good
You generally want your avatar to be facing -Y when in Blender, and of course at 0,0,0
fading verge
pale pumice
You want `Apply Scalings` to be `FBX All`, otherwise that's good
I tried it but It still faces the wrong way in VRChat. It's facing -Y in blender and It's at 0,0,0. I'm so done with this.
pale pumice
fading verge
I tried it but It still faces the wrong way in VRChat. It's facing -Y in blender...
You can rotate and scale the avatar in Unity though, I'm not really clear on what the issue is here, but it looks like you have some leg bones which are horizontal, Unity isn't going to like that.
fading verge
pale pumice
You can rotate and scale the avatar in Unity though, I'm not really clear on wha...
it looks like you have some leg bones which are horizontal, Unity isn't going to like that.
It only looks like that in unity. In blender I deleted those bones and then parented the UpperLeg bones to the hip bone.
pale pumice
yeah I'm not sure what's wrong then
fading verge
I've been trying to fix this for like a week now and I can't find anything online ._.
pale pumice
what's the current actual problem?
fading verge
It's facing the wrong way in VRChat.
When I turn it the right way the rig gives me issues in unity
fervent hornet
What direction is your models face when you look at it from the front in blender (numpad 1)
fading verge
It's facing -Y
fervent hornet
I can't picture that, can you post an image?
fading verge
 fervent hornet
What does the armature look like?
fading verge
 fervent hornet
Make sure that you clear the rolls of all your bones and that your armature doesn't have any pre existing rotation
pale pumice
ooh bone roll - that could definitely be it
Make sure your objects, armature and mesh, have rotation applied - you can do ctrl-A in object mode and then select from there, likely just "all transforms" to be sure
and the object origins are the world origin
fading verge
pale pumice
and the object origins are the world origin
What do you mean by world origin?
fervent hornet
fading verge
What do you mean by *world* origin?
0,0,0 on rotation and scale
fading verge
pale pumice
Make sure your objects, armature and mesh, have rotation applied - you can do ct...
Yeah they do have that. I'm just wondering what you want me to do with the roll value?
pale pumice
Set all humanoid bones to roll zero
fading verge
pale pumice
Set all humanoid bones to roll zero
It didn't work. I think I'm going to give up.
pale pumice
yeah I'm really baffled as to what you're doing here


 quaint cosmos
 analog aurora
How exactly do I rig something like this?
analog aurora
How exactly do I rig something like this?

 soft elk
automatic weighting isnt working, ive already tried scaling the mesh, recalculating normals, removing doubles... i was gonna save adding tail bones later because i just wanted to see if it worked without tail bones so thats why these screenshots dont have tail bones, but i even tried automatic weighting with bones for the tail and that didnt work. do i need to add bones for the mane too and thats why it's not working?? i really want automatic weight painting to work lol, dreading having to do it manually

 rotund kraken
you cant get a clean weight with automatics. its good for a baseline to edit off of imo but if your goal is to make the mane and tail have the wiggles youll need to make bones + weight paint those
if you separate the tail from the body and rig it that way, you could probably get away with automatic weighting then rejoin the armatures together
soft elk
yeah i meant having a baseline would be better than having to do the entire thing manually
ohhh ill see if i can do that
rotund kraken
theres also a bug where weights dont apply until you restart blender so probably something to keep in mind
soft elk
ill have to see if that works later, thank you
analog aurora
quaint cosmos
https://cdn.discordapp.com/attachments/390924372782612480/991844903044788355/Dig...
Thank you good sir/lady
 marble apex
I'm having an issue with some stuff about my avatar, some people said it could be the rigging and anchor points, I asked them how to get to it, no response
analog aurora
What the fuck is this

The face of scp 106
If I replace this face rig with a rigify one will that break the animation file that was included in the files?
quaint cosmos
analog aurora
If I replace this face rig with a rigify one will that break the animation file ...
Probably. It might work okay if the bones names are the same but it might look off if the weights are different.
soft elk
rotund kraken
if you separate the tail from the body and rig it that way, you could probably g...
this worked!! thank you :) i learned a lot in the process
 sinful path
Can anybody tell me why the Physbone component will not affect the second bone on these earrings? I've tried messing with a few different options but it doesn't want to affect that last bone

 sinful path
a friend helped me out, it was the endpoint position
modern crystal
Is there a way to fix this? It’s happening on the arms and legs
I used autowighting btw
 quaint cosmos
modern crystal
Is there a way to fix this? It’s happening on the arms and legs
I used autowigh...
quaint cosmos
modern crystal
Is there a way to fix this? It’s happening on the arms and legs
I used autowigh...
Do you have enough geometry to allow that bend to happen?
modern crystal
well what amount of geometry is enough
quaint cosmos
modern crystal
well what amount of geometry is enough
You need to have edges in the right areas to allow the model to deform. Armatures aren't magic, they're just a way of telling the model how to move. If you put a human armature in a box, its still just a box, it can only move according to the vertices it has.
modern crystal
quaint cosmos
You need to have edges in the right areas to allow the model to deform. Armature...
Oh ok!
I did that on one of the arms and it functions more!
quaint cosmos
You can get more advanced with it, there have been some specific topologies crafted to allow for the most realistic knee and elbow deformations possible with the fewest vertices but a good starting point is to have an edge loop where the model will be bending and 2 edge loops fairly close to that on each side.
 quaint cosmos
Sure you can scale them in edit mode or blend mode. The size of the ears shouldn't impact the rig at all
Sorry, I meant to say sculpt mode. The scale of the ears still shouldn't impact the rig so long as their placement relative to the bones remains pretty constant. Of course, if you were to move them away from the position of the bones, then the origin of the transforms would be offset from the geometry. You might also consider just scaling down the bones in unity if that's an option.
quaint cosmos
For both of those things, you'd want to unparent and remove the armature modifier first or else the bone transforms will effect the mesh so you'd be scaling down the ears and then scaling down the bones which would scale down the ears again but if you separated the mesh from the armature, scaled the ears, scaled the bones to match, then added the armature modifier back that should work
Actually, in edit mode it wouldn't scale so it should be fine either way but I would remove the armature before messing with it just to be safe.
brazen island
@copper otter if ears themselves have bones, try going to pose mode for armature and scaling first bone, it may or may not give decent results. if it looks ok, youll need to apply this pose as rest pose after scaling
rotund kraken
its using the weight of the other ear since its mirrored
if you're doing something simple as reducing the ear size you can just go into sculpt mode and do them each manually or turn symmetry on

 spring tapir
anyone loooling for rigging or 3d model dm me commsion on
fading verge
hmmm
 spare barn
I am having just the WORST time weight painting. It's been a stone wall for me for MONTHS.
I dunno if it's due to bugs, or how I set my models up, but they just never seem to work properly.
Is there anybody who'd be willing to help me out? Walk through the process with me and maybe catch where I'm messin' up?
 modern beacon
Creating my first avatar, what bones do I need?
rotund kraken
modern beacon
Creating my first avatar, what bones do I need?
yay the bot didn't get mad
 solar geyser
Anyone know why the avatar leans like this (desktop)
 soft elk
this is the first thing i started on to try to learn blender and uh. im coming back to it now bc ive learned more about rigging and weight painting, but i still dont know how to get past this roadblock with the toon outlines doing.. that. i wanna have the toon outlines for rendering stuff AND have it be part of the avatar, could i accomplish that easier through unity though?? (sorry if thats a dumb question, i havent touched unity much in my learning process)

idk i guess im just asking if theres an easier way to accomplish this
rotund kraken
i think poiyomi can do that or you can fake it with a matcap for quest
for blender rendering, this might work? i just found it
https://felineentity.gumroad.com/l/ZmTIT

Gumroad
The Outline Helper Addon for Blender 2.8 helps you to quickly set up inverted hulls for multiple objects simultaneously! You can find its feature set right here: UPDATE:V1.1 is now live! The new version generates a Cycles supported material now, adds vertex groups to all new outlined objects and can edit vertex weights in Edit Mode through the A...
 grizzled delta
Anyone know why this is happening? The vertex groups and weight painting is correct, but the arm won't follow the bones correctly and also has this weird squash and stretch sort of

Everything else moves just fine, it's just this
grizzled delta
Huh. Turns out they were assigned to vertex groups I never assigned them too, lol
 warped hinge
I am trying to merge a two armatures together but the butt and boob bones aren’t merging. Everything else is merging but not those two bones. They are named the same and are ALMOST lined up perfectly with one another

 acoustic tendon
Hello, I have a model that has been set up in blender and as you can see, the weight painting is working when in pose mode in blender.
However, when exporting through CATs blender plugin, it does not work in unity. Any idea as to why?


 broken compass
acoustic tendon
Hello, I have a model that has been set up in blender and as you can see, the we...
broken compass
acoustic tendon
Hello, I have a model that has been set up in blender and as you can see, the we...
Try to export it normally instead of CATS
acoustic tendon
broken compass
Try to export it normally instead of CATS
I tried to export it through the normal FBX export option without CATS but same issue
brazen island
@acoustic tendon make sure you have no modifiers other than armature
acoustic tendon
brazen island
<@139941563399798784> make sure you have no modifiers other than armature
Hmm your onto something, I don't usually need to delete the copy data modifier once I use it, but doing this in Blender causes it to now behave the same as Unity. I wonder why its relying on having that modifier there for this asset but not others
Right, Rookie mistake forgetting to hit apply to the modifier after copying
 proven narwhal
What are peoples opinion on using Auto Rig Pro for rigging an Avatar in Blender for VRChat, or is there another way people recommend rigging an Avatar from scratch?
quaint cosmos
proven narwhal
What are peoples opinion on using Auto Rig Pro for rigging an Avatar in Blender ...
Auto Rig Pro works well since it has a Unity export setup that removes unnecessary bones. No automatic rigging is perfect, you'll still likely need to clean up the fingers and head weights but it's a great start.
proven narwhal
quaint cosmos
Auto Rig Pro works well since it has a Unity export setup that removes unnecessa...
Thank you, yeah I have been learning with Mixamo and yeah, thought as much, considering both are with an AI, both would require 'polishing up' I just think that doing it all inside Blender would be nice, thank you for your response
quaint cosmos
I've used Mixamo and Auto-Rig and I much prefer Auto-Rig, especially given it has tools like retargeting. Usually for the fingers it's not so much that it doesn't rig the area of the finger it's supposed to, it just also weights adjacent fingers to the bone of the one finger so it's usually just a matter of selecting each finger in edit mode and removing the weights from adjacent fingers. I also use the voxel heatmap skinning add-on but I'm not sure how much of a difference it makes.
 stray harbor
warped hinge
I am trying to merge a two armatures together but the butt and boob bones aren’t...
stray harbor
warped hinge
I am trying to merge a two armatures together but the butt and boob bones aren’t...
late but you could try to use 'fill between with joints' (its called something like that) and then dissolve the middle joints
stray harbor
acoustic tendon
Hello, I have a model that has been set up in blender and as you can see, the we...
I just import from blender to unity via FBX export and i haven't had any issues
 serene bane
I’m making an avatar with FBT for a client, I matched the avatar I made to a skeleton with realistic proportions as well as asked them to send me a full body traced picture of themselves in T pose. I’m to be honest not sure what I can do to help make it work well, I don’t own FBT myself nor do I have much experience with it (this was known to by commissioner beforehand). Could someone please give me some tips? I’m not sure what I can do on my end, when they can’t tell me what is not proportioned well for them. I’m not sure what the general workflow is when handling FBT, nor do I fully understand what part is up to me to figure out
I informed myself on all relavant information, FBT documentation and watched tutorials, at this point I’m just not sure what the issue is. It’s probably either the legs or arms that are too long/ short, what would be an effective way to figure out where the misalignment lies?
fervent hornet
serene bane
I’m making an avatar with FBT for a client, I matched the avatar I made to a ske...
If your client cannot give you information on what is wrong besides "it don't work" there is not much you can do. Maybe they could show you in VRC what they don't like?
serene bane
fervent hornet
If your client cannot give you information on what is wrong besides "it don't wo...
They've now sent me a video, from there on I could tell it was the arms that are too long. They where able to align all other things nicely when ignoring the arms, so that will likely fix it
Thanks for the help ^^
 jolly ledge
I want to 3d model a character, but I don't know if I'll need to make them individual shapes, or how rigging works?
brazen island
@jolly ledge you have armature and mesh has things called vertex groups, via weight painting that adds data to these vertex grouops you telling which vertex reacts to what bone and to what extent. It doesnt matter if its one object or multiple as long as they all have whatever vertex groups they need and an armature modifier that links this exact mesh to follow this exact armature. https://youtu.be/4fICQmBEt4Y
I've been meaning to update this video for a very VERY long time. But, we're finally here. Everything you need to know in order to start painting weight layers onto your character!!! Hope it helps :)
Female Body Model Link:
https://www.youtube.com/watch?v=_XfvLpLyulI
If you enjoyed this video, please don't forget to like and subscribe!
You ca...
jolly ledge
So it can be a singular object?
brazen island
ofc, and normally good avatars are one object unless you have toggles like different clothes etc.
jolly ledge
I see. Cool-
So, I can only rig them via Blender?
I use Nomad on my tablet, which does not have rigging.
So, I'd have to load the .obj to blender?
brazen island
yep. you can try autorigging via mixamo/accurig as a starting point tho if your char is humanoid enough.
jolly ledge
I see-
I ponder if I could like, get someone to rig it for me. lol
My computer is like, a potato. It can barely run discord. lol
brazen island
mixamo is a site
and blender also not heavy at all if were talking about quest level of details and not making cg movie
if it runs unity youll be fine
robust crescent
1 day on vrchat discord first thing they say is an ad with broken english , great job there
pale pumice
What's the ideal position (in Blender) for the tail of the lower leg bone in a plantigrade humanoid? I'm assuming 0,0,0, but I've seen lots of rigs where this isn't the case...
robust mantle
jolly ledge
I want to 3d model a character, but I don't know if I'll need to make them indiv...
Depending on the software your using you can rig prety mutch anything,
I would suggest seing with your rigging artist first his preference. If your doing it yourself model in a way you will enjoy working with later.
If you need help to know the tips and tricks of how to properly model for animation ( rigging ) see youtube tutorials or feel free to dm me i will be more than happy to help you
robust mantle
jolly ledge
I see-
I ponder if I could like, get someone to rig it for me. lol
My computer...
Mixamo gives mediocre results if you seek perfection consider getting it done by a pro or doing it yourself. Rigging can be done in various softwares most of them are paid.
robust mantle
proven narwhal
What are peoples opinion on using Auto Rig Pro for rigging an Avatar in Blender ...
Hot take, do them yourself its not that hard Mixamo and auto-rig yield crap results 90% of time
quaint cosmos
If you depend entirely on the auto-rigging, you're going to get bad results but I think it saves a fair amount of time to adjust the weights on an automatic rig vs manual rigging
 thick haven
Hey @robust mantle thank you for the offer but someone has already serviced me! 
quaint cosmos
Auto-Rig (and Mixamo to a lesser extent) tends to do pretty well on most bones, it's just the head, fingers, and sometimes the armpits that tend to need refining.
robust mantle
agreed to some extent you can save time by only refining altought i prefer the control a custom skinning can offer
 fringe spade
Anyone know why my eyes aren't restrained down properly when using the CATS plunging eye tracking tool? It's like the eye traction creation won't make a set limited to the eyeball, it just goes everywhere.
 nocturne whale
I have an issue where my model hands and my irl hands are anywhere from 2 to 6 inches offset. I am not sure what is wrong. First time making a custom model and I cant find anything on this anywhere. Anyone expirence this before?
showing the offset of my contrillers

 pale pumice
fringe spade
Anyone know why my eyes aren't restrained down properly when using the CATS plun...
pale pumice
fringe spade
Anyone know why my eyes aren't restrained down properly when using the CATS plun...
is that thing even necessary anymore? I didn't think it was...
 floral zealot
Hello everyone, lets just say I have a lot of custom models and want to start uploading avs and worlds asap asap but
my trust is still low so before I get to all that I want to know what I should avoid. I have read mixamo is not ideal so
do you guys recommend a better standard bone rig
for a humanoid
lets say I have a character with face blend shapes and a mixamo skeleton
is that good to go?
I must admit when it comes to 3D I'm skilled in just about everything except custom bone rigging
nvm on the trust thing i fixed it
quaint cosmos
I think Mixamo is fine, you just need to check how the model moves and adjust your weights accordingly. Mixamo will never give you perfect weights out of the box but it can generally be adjusted to work fine and it saves time compared to manual rigging.
 modest kiln
my rig is not being automatically detected as humanoid by unity even though it meets the requirements. i cant seem to get it to work no matter how hard i try. any thoughts?
pale pumice
I noticed sometimes it has trouble if you have bones slightly misplaced, or perhaps upside-down - is there any error message in the console or the rig import window?
modest kiln
It says missing required bone upper left leg
quaint cosmos
modest kiln
It says missing required bone upper left leg
Have you checked that it's assigned in the configuration menu? Sometimes, bones won't get assigned properly even if they're there due to naming or other issues so they need to be set manually.
modest kiln
quaint cosmos
Have you checked that it's assigned in the configuration menu? Sometimes, bones ...
I dont know how to get into the configuration menu without it being a humanoid rig. I did double check the names and even used the cat addon to try to fix it
quaint cosmos
modest kiln
I dont know how to get into the configuration menu without it being a humanoid r...
Hmm, it should generally be possible to set something to Humanoid even if there are errors in the configuration but it just won't let you set it that way at all?
modest kiln
quaint cosmos
Hmm, it should generally be possible to set something to Humanoid even if there ...
How do I access that menu?
quaint cosmos
modest kiln
How do I access that menu?
You select the rig in your project panel and then go into the rig tab (which is where I imagine you've been setting it to humanoid) below that, there should be a configuration button.
modest kiln
the configure menu is empty
 quaint cosmos
modest kiln
the configure menu is empty
quaint cosmos
modest kiln
the configure menu is empty
Sorry, I mispoke, I meant just select the FBX, not the rig. The parent object before you expand anything out.
modest kiln
quaint cosmos
Sorry, I mispoke, I meant just select the FBX, not the rig. The parent object be...
I did select the prefab made from the fbx
quaint cosmos
modest kiln
I did select the prefab made from the fbx
That picture you posted looks like you just have the rig selected
Where did you initially go to try to make it a humanoid rig? Did you just do that in the SDK?
modest kiln
i dragged the file in and then when to the import settings. it was for the rig, mesh and all. it recognises bones but no human structure
 quaint cosmos
modest kiln
i dragged the file in and then when to the import settings. it was for the rig, ...
quaint cosmos
modest kiln
i dragged the file in and then when to the import settings. it was for the rig, ...
That's where the configure button is,what happens when you press it?
modest kiln
quaint cosmos
That's where the configure button is,what happens when you press it?
it brings me to the empty screenshot from before
quaint cosmos
That's very strange, it should open the configuration menu. We're talking about the button right below "avatar definition", right? Selecting that opens that empty menu?
modest kiln
Yes, i have another avatar that works flawlessly, even tried copying over the skeleton but that didnt work
quaint cosmos
modest kiln
Yes, i have another avatar that works flawlessly, even tried copying over the sk...
I can't say I've seen that behavior so I'm not sure. When you expand the FBX in the hierarchy, is there an armature there? When you move the bones, does the mesh move?
modest kiln
there is an armature and the mesh moves, does every bone need to move something?
quaint cosmos
modest kiln
there is an armature and the mesh moves, does every bone need to move something?
No, I just wanted to make sure that the mesh had an armature and was skinned to it. I'm not really sure what to do, I've never seen the configuration window just not open.
 jolly pike
I had that issue aswell, but never knew how to fix it
 queen sage
Anyone open to rigging an avatar for me? its a runescape model and its not in tpose format. Im not sure how to make it tpose
 ripe compass
my avatar simply improperly rigged for whatever reason

It was from uploading it too, bones are correct and everything
also the camera is messed up.
(it didnt let me change the height on the camera)
ripe compass
queen sage
Anyone open to rigging an avatar for me? its a runescape model and its not in tp...
just use mixamo
its a free website tool by adobe and you can convert your model into a t-posing model. it also auto-rigs.
robust mantle
queen sage
Anyone open to rigging an avatar for me? its a runescape model and its not in tp...
sure i can help you just dm me
pale pumice
modest kiln
it brings me to the empty screenshot from before
Do you have multiple inspector tabs around? I find that doing this it basically chooses one of the inspectors at random, usually not the one I want.
crimson latch
Think I need any triangles/5 pointed stars for this area? Obviously the squares will stretch a bit

(for the leg, not the foot)
brazen island
@crimson latch what. why would you ever need something but quads
crimson latch
Rarely, but never for this model I've managed to not use triangles, but here I wonder if I'll need any 5 point stars
Or just straight rectangles all the way down
crimson latch
Of course
But sometimes you need 5 pointed stars
Such as sharp corners
Keeps quads
Basically how much stretching of the rectangles is acceptable for rig deformation
robust mantle
As mutch as you need quads can stretch as mutch as you want?
Also triangles are okay for some area's but try avoiding the non-manifold
 fallen maple
The audio on my avatar is not loud how do I make it loud (avatar intro music)
quaint cosmos
fallen maple
The audio on my avatar is not loud how do I make it loud (avatar intro music)
Is there a spatial audio source on it? You should be able to adjust the gain there or just increase the levels on the audio file itself.
fallen maple
quaint cosmos
Is there a spatial audio source on it? You should be able to adjust the gain the...
In unity its fine but in game its quite
brazen island
vrc compresses it already by like 20db, adjusting audio file wont do a thing, at least not for good, maybe cutting the bass/brilliance would help tho. avatar sounds are quiet by themselves, so make sure you have some reference from other avi and it is quiet in comparison
fallen maple
So theres no way to make it louder
brazen island
compare. but in general at 100% id say its like twice quieter than the voices
quaint cosmos
Unless VRChat is doing some sort of EQ on their end, the input volume will definitely have an impact but I wouldn't be surprised if there was a limit so people don't use avatar sounds to troll worse than they already can.
brazen island
vrchat using very heavy compression for everything, for that exact reason. bassboosting/heavy limiting on source audiofile will result only on getting average loudness getting even lower.
quaint cosmos
I'm not talking about getting the audio near clipping but at least in worlds, quieter sound files definitely need more gain to be as audible as louder sounds though I can't say I've worked with avatar audio before since that's not enabled for Quest and all my stuff is focused on being cross-compatible.
 pure dome
just checking, someone showed me this picture a while ago but said it was due for a revision, does anyone know if an updated version of this reference pic was made?

 gusty tinsel
Question about rotation Constraints in a rig, working on an avatar who needs to "flex" his muscles using a helper bone rigged to the right muscle groups, but for it to work properly it needs to invert the rotation of the source bones, i.e. invert the rotation of the elbow to trigger the flex of the bicep. In blender the system works great just with rolling the bone 180 degrees without having to set the invert in the constraint. However in Unity that causes the Rotation Constraint to completely flip out jittering around, however setting it to work in the same direction works fine, but doesnt give the motion that Im wanting. Any ideas for how to invert the angle given to the rotation constraint? Thanks
 wooden violet
Getting this problem when importing a model I made. All the required bones exist and are parented correctly. I also copied this rig from another avatar I made. The only differences are that this new one doesn't have toe bones and has a different tail. Nothing seems to fix it, not even the fix model option in CATS
 gusty tinsel
wooden violet
Getting this problem when importing a model I made. All the required bones exist...
gusty tinsel
wooden violet
Getting this problem when importing a model I made. All the required bones exist...
You might double check the bones are coming up correctly in the "configure" menu in unity, sometimes it doesnt pick up the bones and has to be set manually.
wooden violet
I can't even get into the configure menu because of this error
gusty tinsel
Hm, Id try a new project, and double check in blender that the roll on the bones isnt too extreme, and the bones are not zero length
wooden violet
Yeah the roll is 0 and the lengths are right
wooden violet
made a new project and it still doesn't work
 little kindle
Can someone tell me how to rig this? I can't find any helpful videos on YouTube since most of them are for humanoid rigs.

I saw someone have a Mike Wazowski avatar, but I don't know how they rigged it up.
I just want basic arm and leg movement, nothing special. I don't even have fingers on the model.
I spent half of yesterday and so far all of today trying to figure it out to no avail.
I don't want to start VRChat without making one of my own, figured I'd make something simple. That "something simple" turned out to not be so simple.
wooden violet
Add all the required bones, they don't need to affect anything, just make sure they're there and they're right so unity can recognize it as humanoid
little kindle
It's not built like a typical humanoid rig, though. The body serves as the head.
little kindle
PAIN
modest kiln
wooden violet
Getting this problem when importing a model I made. All the required bones exist...
I had the same problem
 grim tinsel
little kindle
It's not built like a typical humanoid rig, though. The body serves as the head.
grim tinsel
little kindle
It's not built like a typical humanoid rig, though. The body serves as the head.
you might need to make your own non humanoid inverse kinematics in unity 
modest kiln
@pale pumice @quaint cosmos thanks, for the help i figured it out. it saying the bone was not detected wasnt because the bone was not there but because it had nothing to move with it. i didnt give weights to the leg bones because i was making something without legs.
pale pumice
oh, yeah that'll do it, but you can easily just set that when setting up the rig in Unity
hmm though I bet that's my issue I was getting at with foot position, I didn't weight anything to the feet, just to the lower leg due to how I want this thing to move, but maybe that's a problem
wooden violet
Oh my fucking god that was the issue. I hate unity
Here's how I fixed it

Added a separate mesh with weights that I'm gonna delete once it's in Unity
little kindle
grim tinsel
you might need to make your own non humanoid inverse kinematics in unity <:vrcSk...
Unity is giving me all sorts of problems. Made my model transparent, can’t see the bones, and I can’t use the SDK for some reason.