#avatar-rigging
1 messages · Page 5 of 1
 digital willow
the one in the screen shot haha
when you select stuff
and then you pick, median, individual etc
for where it should be shown and active
with median it's now at the tip

 cosmic vine
oh
digital willow
but if I select the ball it's in the middle
cosmic vine
so you have it on "active element" ?
cosmic vine
and this is preventing you from making bone heads and tails overlap somehow?
digital willow
no
what
Im saying this is a way to do it
I just cant find the point's value...
I think in previous Blender it was always in the lower left corner
or actually no... I remember it wrong too, it wasn't done in proportion fix. then you just change both bones at the same time
maybe when I was checking the T pose a second time I messed it up T_T
amazing how something so small is so difficult
cosmic vine
just google your very specific blender problem and get results from 2011
digital willow
haha
u think I should use your video then? I can do it, my brain just is so sluggish
cosmic vine
if your magnet tool doesn't make them overlap properly that's a way to do it
there's probably 5 other ways I'm not familiar with too
digital willow
it's just fast and I need to fullscreen
cosmic vine
just don't make it totally straight the whole way out since you're supposed to have that small bend at the elbow
 cosmic vine
it shouldn't matter
digital willow
eeh
cosmic vine
if you have the mirroring working you can do it on either side
digital willow
but
I mean
I clicked on the outer arm
but you on inner
because opposite side
so for my sake, I should match the side youre doing it on
but
it wont work
because
it's the opposite I should do!
aaaaaaaaah!!jfgfnfgfbn
I want it to match the outer arm
cosmic vine
if you want you can send the .blend file to me and I can try just to make sure I'm not misleading somehow by totally missing something in your specific model
digital willow
or
maybe Im..
my head is spinning
now Im forgetting which one was in the original place
no thanks
😔 my brain is just stupid
it's like with math
I have dyscalculia I'm pretty sure
my brain just wont do it
it takes a very long time and I need step by step
cosmic vine
well if nothing else "upgrading" to blender 3.0 probably won't hurt 🤷♂️
digital willow
I need to search in here to see which one I said is the one I should copy from
yeah I wanna do that
on the right
cosmic vine
iirc there's some issue between CATS and the newest blender versions
so maybe don't go to 3.3
digital willow
oh
yeah I would have asked about that
I need to stop but it's hard when I havent finished this
outer arm has moved...
and that is what u did
so... I can follow it
ok I did it, finally orz
thank you TK
I need to check any other points of bones meeting
right, the shoulders
@cosmic vine could it be bad to connect all of them that are that close like this?
cosmic vine
well you don't want to have the finger bones directly on the wrist for example
 cosmic vine
it's fine to overlap usual stuff like the hip to head chain
 fading verge
hey there, what am I doing wrong here?
 cosmic vine
head is a child of "neck_001" ?
fading verge
cosmic vine
head is a child of "neck_001" ?
neck>neck.01>head
But I am using neck as the neck mapping
cosmic vine
having a bone between neck and head is the only thing that looks immediately out of place to me
fading verge
cosmic vine
having a bone between neck and head is the only thing that looks immediately out...
If I remove that other neck bone and curve the neck bone like this. I'm pretty sure it will have the same result. right?
 cosmic vine
I'm not entirely sure what I am looking at here
is neck001 painted to anything or is it just there
fading verge
It is painted
So, I just tried removing neck.01 and put the vertex group on normal neck and It's the same result. Regardless of the extra bone
 cosmic vine
yeah the rig hierarchy was the only thing that looked unusual to me, as for what is going wrong with the model I don't know because I can't make sense of what the model is supposed to be
fading verge
cosmic vine
yeah the rig hierarchy was the only thing that looked unusual to me, as for what...
Sonic Frontiers. Giganto.

Neck is supposed to be pointed out like that
cosmic vine
so what isn't working then? I thought it being stretched out was the broken part
fading verge
cosmic vine
so what isn't working then? I thought it being stretched out *was* the broken pa...
No, the issue is that when he's put into unity and I either load him up in game or in the mapping. His head/neck is pointing upwards towards the sky
cosmic vine
oh
fading verge
It's not maintaining it's same rotation that it was exported from blender with
cosmic vine
did you mess with the muscle settings in the avatar setup?
fading verge
cosmic vine
did you mess with the muscle settings in the avatar setup?
the rigging? Green mapping and shit? Put his neck bone under neck and his chest bone under chest. Made sure it lines up. yes
 fading verge
I have not messed with those, no
cosmic vine
try setting the values so the neck rests at a lower angle would be my guess
fading verge
looks like when I bend the neck all way the down. It looks fine. But it shows up as a red error now
cosmic vine
might just be complaining about the hierarchy
is what with or without having neck001?
fading verge
cosmic vine
is what with or without having neck001?
without
cosmic vine
what red error? not familiar
fading verge
cosmic vine
what red error? not familiar

there is also no option to save the muscle setting changes
 cosmic vine
expand it again and you can set the min/max angle values
fading verge
 cosmic vine
but the right/left sliders stop at 0
fading verge
cosmic vine
but the right/left sliders stop at 0
changes for the neck slider do not save
If I rotate the bone in the bone mapping. It will tell me character is not in T pose
cosmic vine
was a guess, I've only adjusted the muscle values for fingers to get them correctly aligned but their corrected positions don't show up until in vrc
fading verge
So, I found my fix. I just put both my neck and head bones straight up. Put the view point at the end of the head. And reweighted the neck/head area so that even with the head bone being far away from the actual head; the head would rotate properly.
Kinda stupid I had to do it that way, but whatever, beggars can't be choosers
cosmic vine
👌 nothing came to mind that didn't involve repainting some of it but good it worked without being a huge headache @fading verge
 idle meteor
my avatar's arms are weirdly deformed upon entering unity, could this be a rigging issue?


 sleek isle
Normal, annoying, but normal
 terse compass
Can someone do me a favor? I believe it's low effort enough that if you know what you're doing it should be no effort at all, can anyone help?
sleek isle
No
 kind ore
probably now but if youre gonna ask for help dont ask to ask
just say what you need help with
idle meteor
idle meteor
my avatar's arms are weirdly deformed upon entering unity, could this be a riggi...
any ideas?
sleek isle
You have to show more detail like armature hierarchy. Humanoid tab. Any warning in console or SDK panel. Something
 kind mortar
idle meteor
my avatar's arms are weirdly deformed upon entering unity, could this be a riggi...
kind mortar
idle meteor
my avatar's arms are weirdly deformed upon entering unity, could this be a riggi...
Go into blender and do a "Fix avatar" with the CATS plugin and it will fix
I had this same issue recently
idle meteor
ooh, alright, i'll check that out
 rigid summit
Hey guys! im in need of some help here, I am looking to add the Physbones to my hair and ears, As well as adding grabbing and collision on the ears. Though when i try to add in the script, it detects the hair bones, but it cant detect the ear bones, ive checked both unity and blender and there are bones for the ears. Any help would be appreciated!

here is the same model in Blender btw.
 rigid summit
Nevermind! I fixed it
Solution :

Make sure on your Physbone script. use first on " Multi Child Type "
(average works as well)
(though, it might cause your head to become a bobble head, will check it out more
rigid summit
rigid summit
Solution :
update 2: Found an actual solution to this
set both of the ears on the ignore transforms on the head.

instead, create 2 new Phys Bone Scripts, one for each ear.
It might not be the most optimized way. but it does work
 sage patio
@rigid summit don't add the physbone on the head bone, you'll fuck with the IK. instead, have a bone which all the hair chains are parented to, and another bone that both ears are parented to
call them something like HairRoot and EarsRoot
put the physbone scripts on those
rigid summit
sage patio
<@982586677774131241> don't add the physbone on the head bone, you'll fuck with ...
how do i do those? I cant move the bones or else i get this error :
 sage patio
you do it in blender
you don't edit models in Unity, unity is a game engine
blender is where you do any kind of model edit
rigid summit
sage patio
blender is where you do any kind of model edit
ooh alright i get you. though while i know how to make new bones so i can make them a parent to the ears, and another parent to the hair. do i just try to wedge the new bone between the head bone or could i do it on top of the head bone? worried that it might mess up the physics.
 sage patio
position of root bone doesn't matter
terse compass
kind ore
just say what you need help with
Ight so I have a five nights at Freddy's avatar, mangle. Her head is my right arm and I've always wanted to make the illusion that I crawl on walls and ceilings, how hard would it be to make a z plane movement in the quick menu?
rigid summit
sage patio
position of root bone doesn't matter
alright, i hope this does work, re-arranged everything. would take some time to create a new unity instance but its all good
 sage patio
rigid summit
alright, i hope this does work, re-arranged everything. would take some time to ...
sage patio
rigid summit
alright, i hope this does work, re-arranged everything. would take some time to ...
you don't need to create a new unity instance
you can just import the FBX, put it in your scene, and use Pumkin's to copy everything over
cosmic vine
rigid summit
Pumkin's?
https://github.com/rurre/PumkinsAvatarTools
what Sacred said is right, just export the fixed .fbx from blender and drop it in your existing unity project, click the fbx once in the unity files and make sure the avatar is set to humanoid with a configured rig usual then you can copy settings over from the older avatar to the new one with pumkins

GitHub
A toolbox for easily setting up VRChat avatars in Unity. Adds functionality to the editor and automates some of the tedious tasks. - GitHub - rurre/PumkinsAvatarTools: A toolbox for easily setting ...
rigid summit
cosmic vine
https://github.com/rurre/PumkinsAvatarTools
what Sacred said is right, just expo...
ooh, i see! that seems like a really useful tool. i already have like tons of unity projects every attempt. this would make things way more faster
cosmic vine
unless I am making large adjustments I typically use the same unity project for changes/additions to the same avatar and that has felt like a better use of hard drive space too
sage patio
rigid summit
ooh, i see! that seems like a really useful tool. i already have like tons of un...
you don't need to make new projects every time
rigid summit
ooh alright. will just use that then to port things over. i do hope it works
cosmic vine
by the way, be mindful of what you copy over if you've renamed bones between avatar versions when using pumkins
if you have a bone called something like "HairBone" and change it in blender to "Hair Bone" then copy settings from the old avatar to the new one, if you aren't paying attention to which boxes are checked in the copy field it'll add "HairBone" back to the rig hierarchy in addition to "Hair Bone" also being present
it shouldn't hurt anything but it will add unwanted clutter to it
sage patio
might want to disable "Copy gameobjects"
rigid summit
Alright! Though trying to use the copy feature. even if i tried to use the copy feature. when i select the avatar to copy to. it wont copy over the stuff from the old fbx to the new fbx
cosmic vine
once you configure the fbx and drop it into the unity hierarchy so it actually appears in the scene, the thing you have in the hierarchy is what you drag and drop into the copy field not the fbx file
rigid summit
ooh alright, it seems like it did import it.
the materials and whatnot. i guess that has to be done manually
but, its better to do that than to do everything manually
sage patio
rigid summit
the materials and whatnot. i guess that has to be done manually
you can also copy materials by enabling it under the Skinned mesh renderer tab
cosmic vine
yep, stuff like the pipeline ID remain unchecked even if you click the "select all" button so there's a couple you have to manually check off if you want those copied too
rigid summit
oooh alright! well, ive done those too and it seems like it worked!
all i need right now is trial and error. just need to make sure that the ear bones are the correct size
rigid summit
Alright! everything seems to be working correctly! Thanks guys!!
damn, it is quite suprising that things like this take hours to troubleshoot and solve
oh well, so is the life of making VRChat Avatars
cosmic vine
rigid summit
damn, it is quite suprising that things like this take hours to troubleshoot and...
that has been my experience with blender since starting with it last year. you know what you want to do but you don't know the special tool/shortcut to do it quickly so you spend 10x as long looking for an answer
often made worse by the fact google tends to give results of topics from 2015 and older
rigid summit
Yeah, doesnt help me too on that department. whenever i try and find solutions to my problem the videos are always like, 2 - 5 years ago? very weird that not that much people make videos about how to rig anymore
digital willow
is it correct that if I have a tail and a skirt, then those bones should be parented to the hip bone?
sage patio
for the skirt you should have a root bone to parent all the skirt bone chains to, which would then be parented to the hip
so that you can use a single physbone component for the whole skirt
the tail can be parented directly to the hip
digital willow
right, I got that set up. thanks
@sage patio so what about different roll on mirrored bones?
or... I remember talking about this before, my tail do have a root bone just like the "skirt" does as well...
is that bad? is it better to parent the first bone of the tail to the hip?
digital willow
T.T help please
and is it correct for it to be parented to the tail of the root?
I'll make a list of the questions...
cosmic vine
@digital willow tail like this is fine
 digital willow
oh... but is there anything bad with having a root for it?
I know I went over this before, but I dont remember the conclusion...
though I'd rather not have it
kind ore
a root? like just having it there?
digital willow
and connected to the tail
kind ore
by having a root you can easily add a physbone in unity, just one component, not that it matters too much for tails
its a single bone so theres next to nothing that it could do to make things go wrong
digital willow
so... not having a root for it makes it more work?
kind ore
yea its fine
digital willow
what?
kind ore
oh sorry, misread
digital willow
ok
kind ore
digital willow
so... not having a root for it makes it more work?
just a little
but its like an extra second of effort
digital willow
hmm ok well if it doesnt do any harm I'll keep it
kind ore
ye
digital willow
it doesnt like make physics worse or limited?
kind ore
do you have a hair root bone?
kind ore
digital willow
it doesnt like make physics worse or limited?
nah
a hair root bone makes adding physbones super easy for hair, its good that you have that
its great for optimization and a great timesaver
kind ore
ohh interesting
digital willow
and the parenting of the tail/"skirt" should go to the tail of the hip bone?
and legs
kind ore
oh that? im not too sure; rigging is not my strong suit, sorry
digital willow
ok. thanks
3 questions to go
with bones at least, then it's the weird "cat tail" in the hierarchy
 opal acorn
can someone rig an avatar for me? i can class it as a commission i guess lol
digital willow
opal acorn
can someone rig an avatar for me? i can class it as a commission i guess lol
apparently you gotta be careful about scammers here when it comes to that. people usually say you should go to like VRC Traders' server for that I think
opal acorn
i dont have an invite
digital willow
please help with roll on hand bones
sage patio
digital willow
please help with roll on hand bones
why are you still on this? I thought you said that your model looked fine in game
if it ain't broke, don't fix it
leave it be
digital willow
no I wanna optimize and clean up and all that
it might confuse me in the future and maybe it's causing an issue Im not aware of the reason for
and roll should be equal on mirrored bones
is there something you disagree with in that statement? @sage patio
sage patio
I just clear roll on everything and adjust it for certain things if required. there's not much more to it
digital willow
I see. so now Im putting 0 roll on everything except hands and feet
but do u know how I could solve the issue of having different roll on the fingers?
sage patio
just select all those bones and hit alt + R?
digital willow
for example my hand bones are, L -1.9 and R -160
nooo
hands and ankle should have specific roll values I was told
so I shouldnt put them at 0
but they should be the same on each side
sage patio
did you experience any issues when having the roll at 0?
digital willow
I didnt try and dont wanna try that
sage patio
then how do you know it's going to be an issue?
digital willow
I dont
sage patio
the answer is you don't, and you're trying to do too much without testing
digital willow
but isnt it weird for starters?
sage patio
you should really just get the model in game, find issues, note them down, and address them
digital willow
I was told the standard is to have both on the same value
I have plenty of that
I just wanna clean up the bones and Im very close
np if u dont try to help me, but let's not argue about my practice X3
sage patio
your "practice" is wasting your own time and especially other people's time. I've seen you bother people with this non-issue for like 3 days now
digital willow
haha
Im not wasting anyone's time, people choose for themselves
"bother people", the hell?!
Im asking... stop making stuff up
if you're annoyed, that's not my problem. not targeting you haha
really really strange this...
oh and it doesnt matter what roll stuff that uses physbones have
sage patio
it matters if you're setting up angle limits
sage patio
if you're making a skirt with a single physbone component on a root, the angle limit is based on the bone roll
if the angle limit is set to "hinge" type, each bone can only move on one axis (like a hinge), and the direction of the "bend" is based on the roll of the bone
so if you want all of the chains around the skirt to only bend directly outwards, you need to manually set the roll to have the +Z direction be facing directly outwards
digital willow
oh... I do have just one root bone for my "skirt"
so the best way to make skirts is to have more than one root?
I guess this is something I'll come back to later, I dont have dynamic bones on my "skirt" right now
sage patio
no? never said that
you can have a single root for all bone chains, with one physbone component on the root
digital willow
I just have it on hair, tail and ears. maybe the belt too
dont ask me
oh single physbone component
digital willow
I solved the hair root question
but one still remains. there is no way but testing to determine what roll value to put the thumbs at?
they look like this
thumb bones roll value:
L0 -160, L1 -167, L2 -170
R0 -20, R1 -12, R2 -9.8
digital willow
my main bones, anyone who can find anything off or that should be improved?


and could this be a problem?

seems all good, time to export the FBX then I stop for today 
save file 288
fading verge
can anyone help me import an avatar i bought, i don't know how
 quaint cosmos
Not quite sure where to put this since it isn't exactly for an avatar but is it possible to use dynamic bone to create a rigid but poseable object like this desk lamp that can be adjusted but keeps it's position and orientation when you let go? What sort of settings or constraints would I need to set up to do that?

The idea is basically that the player could hold the area surrounding the bulb and move it around and the rest of the mechanism would follow
sage patio
quaint cosmos
The idea is basically that the player could hold the area surrounding the bulb a...
you would need an IK system to do that
not impossible, but more involved
technically, a grabbed physbone chain is an IK chain, and you can set hinge angle limits, so in theory it would work with a physbone for the whole chain. however, for anything more complex, you might need to use FinalIK
quaint cosmos
sage patio
you would need an IK system to do that
Thanks! FinalIK sound kind of complicated and more expensive but also pretty powerful. Do you know if all the necessary components are whitelisted for VRChat?
sage patio
should be. CCD IK for the chain, hinge limits for the joints, should all be whitelisted
either CCD IK or Aim IK would work
or FABRIK IK, or Limb IK should also work
quaint cosmos
The documentation says FinalIK is disabled for Quest avatars which is what I would expect but it doesn't say anything about worlds so I suppose everything should work for Quest as well. 🙏
sage patio
FIK used to be whitelisted on quest for avatars but got removed because it was used for crashers
 karmic cypress
THis might be a dumb question but I'm very lost on it
I have a prop with a bone attached to my hand. I've used a shapekey to shrink it into my body to hide the prop but since the bone is still attached to my hand it follows my hand around, which is obviously a problem ya know
I've tried some simple ideas like turning off the bone in the animation and such. Honestly I might just not know what to look for at the moment and the second someone says the solution it'll look so stupid so I'm sorry
I've realized I'm dumb, but just in case in the next 24 hours someone is as stupid as me: just make the shapekey shrink into the parented bone not the chest >.>
karmic cypress
oh thats gonna be so much easier than remaking all these shapekeys
sleek isle
They scale props in video all the time. You find tiny weapons in the hands of character
 crimson latch
I need a tutorial that goes from the “just modeled and textured the character” to “CATS import ready”
digital willow
got a problem in the rig in Unity, bone length in configuration does not match the position in animation file, left leg, knee and ankle
crimson latch
I know how to rig and weight paint, just not sure how for Unity
digital willow
what do u mean by CATS import ready?
Unity is at least easier than Blender, but I've forgotten a lot and there's new shit now
crimson latch
When I installed CATS in blender, it seems to want to start at the stage where you already have a rigged, weight painted model
crimson latch
digital willow
Unity is at least easier than Blender, but I've forgotten a lot and there's new ...
You can rig in unity?
digital willow
eeh... I donno, I just meant in general with the process of avatars in VRC
digital willow
crimson latch
When I installed CATS in blender, it seems to want to start at the stage where y...
Im still confused, why is that a problem, isnt that what you have?
crimson latch
No I just completed a T posed model and textured it, but I’m not sure what bone layout to add
digital willow
ok but... I think u can just ignore CATS for now then
I've never started from scratch
do u have this?
 crimson latch
That’s problem, I haven’t found any complete “from scratch” tutorials, and while I’ve done the entire pipeline manually, rigging is my weakest link
Yes
digital willow
oke
digital willow
crimson latch
No I just completed a T posed model and textured it, but I’m not sure what bone ...
then what do u mean here?
the picture shows the layout
but I know there's more to it, I dont know much more than that though
I need help with this

I just open Unity and I have 3 new issues already T.T
 brazen island
crimson latch
I need a tutorial that goes from the “just modeled and textured the character” t...
brazen island
crimson latch
I need a tutorial that goes from the “just modeled and textured the character” t...
you need to rig it now, if its not already. for humanoid you can autorig with Accurig or mixamo, but there still will be eyes, "physical" parts and visemes. i dont think theres a single guide to all of it since its a huge work. But thats if youre going for good looking avatar and not a funny bipedal hotdog.
digital willow
no way I could start from scratch. just this avi has taken sooooo much work, and I dont even have anything fancy. orz
 brazen island
@digital willow thats the result of your ocd and doubting everything 🥲. pretty sure your initial model would've worked better than what you have now.
digital willow
what? I dont know you mean. it cant be because of that haha. also I dont doubt everything or many things here...
was hoping you were writing to help me T.T
brazen island
@crimson latch try to autorig it, its probably humanid-enough.
crimson latch
Like with Rigify? Will that import to VRChat correctly?
brazen island
i named tbe tools, at leadt free ones
digital willow
also, I didnt change my leg bone length in a very long time...
brazen island
i did accurig couple times for humans and it worked really nice and ready to go. but it wont do a robot, so theres limitations.
digital willow
this is a new error
crimson latch
brazen island
i did accurig couple times for humans and it worked really nice and ready to go....
Does the free version do everything needed?
I see there's two, and theres a lot of features missing
digital willow
is there a way to remove the bone confiq so I can add it again and could that fix it?
brazen island
@digital willow change rig to generic then back
digital willow
oh... damn, I did "none"
is that bad?
now the chest bone was removed in the mapping
brazen island
@crimson latch idk abut paid festures. free one will give you fully working body.
@digital willow that means your naming or bones order is weird, id recommend to change it in blender so it imports without any need for tweaks. choosing none is ok
digital willow
well, now that I picked none and then did the humanoid the error is gone
thanks
the eyes still need to be fixed though...
does everyone have to fix the eyes when they get in to Unity if they have the bones vertical, or is it just because Im replacing the FBX?
brazen island
@digital willow check eyes in eye look preview. they can look broken outside of it and still work just fine
digital willow
aw man, but I still want them to look correct in Unity so I can work on it etc
but where is eye look preview?
brazen island
disable what
digital willow
under eye look
brazen island
then your eyes will be always looking straight in game
digital willow
yeah but, will it mess up my settings?
like is it an on and off button?
oh no there are more warnings... but I'll look at that later orz
brazen island
idk, it may or may not preserve your settings. Normally you dont disable it since you have rigged eyes.
digital willow
ok. do u have any idea of how I can fix this?
brazen island
fix what
brazen island
it wont alwsys make eyes look straight if you just press enable preview. you need to fiddle with values, like 0 -90 0
digital willow
Im confused, what's the difference between preview and not?
brazen island
preview=ingame, not=just how model made, like tpose, irrelevant
digital willow
relevant if u want it to look normal when not in preview T.T
I wonder why this is even happening. obviously cause I changed the bones but, why doesnt it just correct it from how it is in Blender?
like I asked before, does everyone have this problem?
if they have the best eye bone setup
maybe there's another issue or something I can do in Blender
um, they arent even lined up with each other

I just keep spinning them around and I have no idea how to line them up
please tell me this is fixable and that I dont have to start from scratch again T_T
herp derp

looking straight was at 0 before when it was working
my fine tuning ToT
brazen island
you have moved the bones or what
digital willow
yes
brazen island
do you have backups
 robust crescent
if looking straight need value you done it wrong
digital willow
well nothing makes them look straight. and that's what he said I should change
brazen island
then just copypaste bones coords for these bones from backup
digital willow
when I say I moved them I moved them in Blender
digital willow
I was like aw yeah finally I can add physbones. nope. of course there's a bunch of issues out of nowhere. never expect things to work the first time orz
digital willow
brazen island
im talking about blender
I cant copy from Blender to Unity can I?
brazen island
@digital willow youre using unpacked prefab, its 5 seconds to make a new fbx version in blender and get back to unity
digital willow
...
you're talking about reverting the eye bones in Blender?
I dont wanna do that... they should be pointed up
like in the template, isnt that what most people do? it's there cause that's how it should be
so Unity is just derp because of the change
but the change should work
just dont know how to make it work
brazen island
forst of all, do your eyes move in blender pose mode properly
brazen island
idk what was that
digital willow
your native language is English?
brazen island
ofc not
brazen island
but not spanish either
digital willow
I think they do but lemme check
yeah it looks good in Blender
is there some export setting I can toggle for it to carry over?
or a way to make Unity reimport the settings of the bones, I thought the rerigging in Untiy would do that
 faint dawn
hey quick question for modelling avatars, i'm just done with the topology UV mapping and texturing
brazen island
it should
digital willow
brazen island
it should
which?
faint dawn
what do you guys think its the easier way to make vrc shapekeys, weight painting or just doing it on editing mode
brazen island
@digital willow regenerate rig settings
digital willow
I see... then I need to find out how to make it do it...
brazen island
@faint dawn easier ofc to make it in edit mode by moving verticies. at least if you dont have facial rig already.
since all of the work of rigging face will go in the bin in the end
digital willow
so if the eyes look and work fine in Blender it should work the same in Unity?
it's just that something went wrong because I updated the FBX
I can try by making a new project and import as new and see how it looks...
gather some data...
if I can remember how to do the bare minimum...
oh wait
maybe I should have checked out VCC first
and also... need latest SDK
faint dawn
brazen island
<@105363685974794240> easier ofc to make it in edit mode by moving verticies. at...
i find modeling in blender a bit janky sometimes, when i did retopo i had my sculpted mesh underneath
but i guess you're right
brazen island
@faint dawn you can try to rigify your mesh
brazen island
@digital willow i believe you can still just download it as package
digital willow
you mean import?
but... I wanna do this CC thing
but... I dont understand it. this is the wrong channel for it though
faint dawn
i got something weird happening, my mesh is symmetrical (made with the mirror modifier) but when i try to mirror the eye blink blendshape i get this issue, anyone knows what i'm doing wrong?


 pale basin
so I had an idea for something with my avi, and it kinda requires me to make a script where when someone interacts with part of my avi that parts rigging moves from one bone to another, was curious if anyone knew if a script like that exists that I can use?
sage patio
pale basin
so I had an idea for something with my avi, and it kinda requires me to make a s...
you can't do any scripting on avatars
however, what you're describing is totally doable using contacts and a parent constraint
you can do very complicated logic just by using unity's animation system
pale basin
I'm kinda new to unity, would you mind if I DM'd you and you explained a bit more what you mean?
sage patio
I'm a bit busy but you should watch some of Sippbox's videos about contacts

Avatar Contacts can be used in a variety of ways, including using them to toggle objects by grabbing them off of your avatar. This video will show you how to do exactly that, in the form of grabbing a prop off of an avatars hips.
Toggles Tutorial: https://youtu.be/XqtSg6_W07Y
Join my discord for avatar help and free ...
pale basin
Ok, will do, and thank you ❤️
sage patio
this one goes over contacts and constraints
pale basin
ohh tyty ❤️
pale basin
sage patio
this one goes over contacts and constraints
one question tho, what if I want other people to be able to trigger the contact toggle, does that just require that I check the box sppbox unchecked that said "allow others"?
kind ore
yea
kind ore

faint dawn
sage patio
https://youtu.be/Cp0ysawmizM
Sippbox tutorials are so well explained and simple, they’re really good. Playerbush001 and iconoclass are also amazing
 desert owl
I don't know what happens, but when I rig my own custom models (I use Mixamo because I don't know how.. I'm a beginner!) And anytime it rigs it always has this weird stretching mouth/face problem... anyway to fix this?


I don't know if it has anything to do with the rigging or not..
sleek isle
desert owl
I don't know what happens, but when I rig my own custom models (I use Mixamo bec...
Mixamo is good overall but you always need to edit some area like the neck.
Remove influence of the neck on the head to just have the head.
Look a weight paint/skinning video on YouTube
kind ore
tldr - theres only so much that such things can do, otherwise quite a few of us would be out of a job 💀
 bold talon
Can someone help me with rigging? I dont know how to make joints
 covert schooner
hey guys, I might be over or under thinking this., maybe a simple parenting thing?
I got the weight painting on the cable, clothes, ribbon etc. just fine, but for some reason I can't think of how to get the lights to follow their spot on the cable, without deforming.
 faint dawn
covert schooner
hey guys, I might be over or under thinking this., maybe a simple parenting thin...
faint dawn
covert schooner
hey guys, I might be over or under thinking this., maybe a simple parenting thin...
where exactly is deforming, this seems to be taking areas covered by multiple bones so there's probably gonna be some deformation, my biggest suggestion would be to drag the first two loops and parent it to the hip then the upper part to the chest
desert owl
I plan to make a model of this character into blender, but if I want it vrchat and to rig it, is there a way to make it look normal? There's no legs just a ufo.. so I don't know how to rig things like this..

 hidden haven
you can add a full rigify rig and just not attach the bones to anything
i recommend using vertex groups for the hands
desert owl
hidden haven
you can add a full rigify rig and just not attach the bones to anything
What's rigify? Is it another autorig thing like mixamo?
covert schooner
faint dawn
where exactly is deforming, this seems to be taking areas covered by multiple bo...
i love you thank yoooou
brazen island
@desert owl its built-in rigging tool in blender. I dont think you need to use it for this model.
 nova iris
Hi, I came here after watching Kung's Fullbody Avatar video, hoping to find help.
I have modelled/textured and rigged a fullbody model in blender with the help of a friend, who's in charge of the unity part of things.
Thanks to Kung, I've been able to solve a few problems I have encountered but I am facing something I haven't seen talked upon his video
My trouble is with the hand of the model


That's how the hand behaves in blender

and here's what happen when it's used on a fullbody set up


I have no idea of what I could be missing or doing wrong
if anyone has some insight, I'm all ears.
 odd iris
Does anyone know how to fix the neck bend when you are in fullbody and you are tracking your head and hip?
bold talon
Can I get some help in rigging?
I'm having issues with linking floating fingers and stuff
desert owl
anytime i try to turn on automatic weights it turns my model invisible!! whats up with that!


is it because im using a mixamo rig?
im just trying to weightpaint it so i can fix the mouth..
desert owl
 this stuff is crazy..
 proper cove
I know this is a long shot but, anyone know how to rig a model on android? If it is even possible
desert owl
nevermind oh my god he just gets HUGE is there a way to fix this issue..
 quaint cosmos
proper cove
I know this is a long shot but, anyone know how to rig a model on android? If it...
quaint cosmos
proper cove
I know this is a long shot but, anyone know how to rig a model on android? If it...
Like on a phone? A Chromebook? How are you using android?
quaint cosmos
desert owl
nevermind oh my god he just gets HUGE is there a way to fix this issue..
You can press the S key to scale the model
desert owl
i tried but all his parts are like... broken and weird everywhere and its just.. yikes
 quaint cosmos
desert owl
i tried but all his parts are like... broken and weird everywhere and its just.....
quaint cosmos
desert owl
i tried but all his parts are like... broken and weird everywhere and its just.....
It looks like a bunch of stuff is parented to empties so you might have to unparent it before scaling
desert owl
so i unparent everything before i do the auto weight thing?
 plucky hare
hi I need some help with this avatar it looks odd in game but only when full body is active, ill send some pictures


 quaint cosmos
desert owl
so i unparent everything before i do the auto weight thing?
quaint cosmos
desert owl
so i unparent everything before i do the auto weight thing?
Unparent everything before you scale it. You'd need to rig it before doing any weighting
plucky hare
so if i move the head bone forward it’ll be better?
sleek isle
yes
plucky hare
oki ty!
proper cove
quaint cosmos
Like on a phone? A Chromebook? How are you using android?
Like on my Samsung phone
faint dawn
uh, quick question, i'm still new to blender, how do i assign the vertexes of my eye to the eye bones since they're the same mesh as the head
i have the vertex groups as the same name of the bones but when i parented it the head they didn't get assigned to the eye
sage patio
you assign them to the vertex group with the sanem name as the bone
make sure the mesh the eyes are in has an Armature modifier with the correct armature selected
faint dawn
i'm making it from scratch
i'm setting the mesh to the armature rn, i just parented the head to the head bone
and it has the vertex groups named properly
sage patio
can you screenshot your hierarchy?
faint dawn
 sage patio
your head doesn't have an armature modifier at all
you can see it has no blue wrench icon, aka no modifiers
the armature modifier is how you make a mesh deform with an armature at all
sage patio
gotta do both
crimson latch
Where can I find the Shape Keys (ie blink left) reference for VRChat?
quaint cosmos
crimson latch
Where can I find the Shape Keys (ie blink left) reference for VRChat?
These are how the visemes look. Blink left and blink right are just the left and right eyes closed (I think it's just a single shape key at this point). I'm still not real sure what look up and look down are supposed to be. I assume it refers to what the eyelids do when looking up or down but it doesn't seem to do much in practice. https://developer.oculus.com/documentation/unity/audio-ovrlipsync-viseme-reference/
A complete table of visemes detected by Oculus Lipsync, with reference images.
crimson latch
What blend shapes/shape keys are needed besides the viseme?
sage patio
crimson latch
What blend shapes/shape keys are needed besides the viseme?
the "needed" ones are the visemes and blink
optionally, you can specify looking up/looking down shapes for the eyelids
the eyes themselves use bones, not blendshapes
crimson latch
How do you attach non-skinned meshes to a certain bone, like your head?
sage patio
crimson latch
How do you attach non-skinned meshes to a certain bone, like your head?
I know for a fact you can just parent it to said bone in Unity (or, put it at the avatar root under a "container" gameobject and parent constrain it), but you may be able to parent the mesh to that bone in blender. I'm not sure if that would work though
what's your use case here?
sage patio
that depends
splitting it into multiple meshes means one more draw call per extra mesh, one more per material slot on those
if the eyes are using the same material as the body, keep them joined to the body
crimson latch
Oh shoot, the eyes need to be merged into the mesh?
sage patio
yea?
sage patio
you should probably just join them
the eyes should be weighed to their respective eye bone
for movement
sage patio
doesn't matter
joining it won't cause issues
did you mean weight painting or texturing?
crimson latch
I weight painted the body, and textured both the body and the eyes
Oh wow
It automatically brought it both textures
sage patio
crimson latch
It automatically brought it both textures
yes, because joining meshes just adds up the material slots
crimson latch
Ahhh
Ah perfect, exactly 3 material slots

These tiny, upright ones are the ones the eye is skinned to right?
sage patio
should be yea
you don't need those horizontal ones
unless you're doing something fancy with the eye weights
sage patio
was that tutorial vrchat specific?
sage patio
weird. you only need vertical eye bones
but you can do it differently if you have a reason to do so
sage patio
bold talon
How do I link mesh and other bones to a bone?
question is too vague. how familiar are you with weight painting
bold talon
Not familiar at all but wondering what it is
bold talon
sage patio
question is too vague. how familiar are you with weight painting
Can you explain?
sage patio
the way you get parts of a mesh to move with an armature is by assigning vertices in that mesh to Vertex groups. if a bone shares a name with a vertex group, then moving said bone will have the effect of displacing every vertex in that group, proportional to the weight given to each vertex
weight painting is just the process of mass-assigning vertices to vertex groups using brushes
bold talon
how will that help my situation?
sage patio
well I don't know what your situation is, your question was quite vague so the best I can do is a vague answer
bold talon
I'll explain, with pictures
sage patio
but knowing what vertex groups are and what weight painting is definitely a must
bold talon


Basically, the bones with the straight lines to the middle bone is what i'm trying to link
And the scribble is basically the head mesh I want to add to the bone
Basically I want the arms to move with the head
sage patio
first off, that rig won't work for VRChat. what you're probably asking for though is how to parent bones to one another
which you do in edit mode by selecting two bones and doing ctrl + P
bold talon
sage patio
Whats this?
sage patio
a rig that is well proportioned that you can use as a starting point
bold talon
any way I can do this step by step?
I just need to link the bones and the mesh to that one bone
and the parent offset and connected options are still grey
sage patio
you're either in pose mode or object mode then, not edit mode
bold talon
Nope, definitely in edit
 civic elm
So I forgot to turn on Mirror mode while weight painting. Can I still copy the weight paint data from this one bone to the other mirrored bone without reweight painting
sage patio
civic elm
So I forgot to turn on Mirror mode while weight painting. Can I still copy the w...
yes, turn on weight paint mode, and go over the correct side with a very very low strength blur brush
civic elm
sage patio
yes, turn on weight paint mode, and go over the correct side with a very very lo...
Does not work
sage patio
or sorry, I meant turn on X mirror mode
it should work as long as the mesh is actually symmetrical
and that the vertex groups for the other side exist
 bold talon
Why is my ctrl p option not working?
brazen island
@bold talon elaborate
 quaint cosmos
bold talon
Trying to link the arm bones to the one in the middle
quaint cosmos
bold talon
Trying to link the arm bones to the one in the middle
If you open up the bone tab on the right and go to relations, can you parent it there?
brazen island
@bold talon are they even one armature? dont you need ctrl j them in object mode first
when you ctrl p normally future children look dark orange while parent yellow like on your screen
bold talon
When I'm using ctrl J it screws up the mesh
bold talon
What button do I press for that?
bold talon
Can I just show you the pic of the mesh i'm trying to link alltogether
bold talon
brazen island
rest poses - no idea, everyone uses cats for that
Mind the avatar

Basically
mesh link to bone, bone link to arms
How do?
sage patio
bold talon
from this picture, I can tell you're trying to parent bones that aren't even in the same armature
apply the transforms for each armature first (ctrl + A > All transforms), then join the armatures together (ctrl + J)
brazen island
you click whatever you want to parent. like if you want armo to be child of right shoulder then you select them with ctrl i believe and ctrl p
brazen island
what
bold talon
Each bone to each limb
brazen island
weightpainting
bold talon
How do I weightpaint? I've been pulled into something I dont know how to use
The arms are linked to the bones but the fingers arent
And its not linked to the head
kind ore
bold talon
How do I weightpaint? I've been pulled into something I dont know how to use
thats something you need youtube and proper explanation for
bold talon
So I did all that for fuck all?
brazen island
now you can join armatures. its like 5 min trick compared to weightpainting but still usefull in future
good job
bold talon
brazen island
now you can join armatures. its like 5 min trick compared to weightpainting but ...
In what way should I do that?
I need a kind of basic explination im not good with focus
I just need head and limbs all connected
along with the mesh
brazen island
bold talon
In what way should I do that?
no, i was talking about what you did and achieved. sorry. 🥲
bold talon
Oh
Uhhhh
Now that I did that, I got 2 issues
Fingers mesh detatched from arms and arm bones aint connected to head
quaint cosmos
bold talon
Fingers mesh detatched from arms and arm bones aint connected to head
If the meshes are detached, join them just like you joined the armatures
You're pretty deep into it now but I would just rig using mixamo.com. Then you just need to fix the weight paint a little but it's way easier than weight painting a whole model from scratch and more accurate than automatic weights
 quaint cosmos
Well, they won't move with the armature if they aren't weighted to it, that's the purpose of weight painting
bold talon
How do I weight paint
quaint cosmos
Look up a tutorial on Youtube. That's going to be way easier than us trying to explain it with text
Any of the top tutorials is probably fine
bold talon
well I was hoping someone could provide a visual parent explination
quaint cosmos
Just a single image isn't really gonna do it for this topic, you really need a video or a proper teacher
Weight painting is a whole process, not just something you do by pushing a button
sage patio
no, not at all
quaint cosmos
I just tend to use the website but yeah, it would make it easier. You're still going to need to do some weight painting yourself so you'll still need to watch a video on it but it will do 90% of the job for you
sage patio
in fact it'll complicate things more if you don't know what the basics of weight painting is
quaint cosmos
Agree to disagree
sage patio
since your avatar is too far from normal proportions
bold talon
Fair
kind ore
ill reiterate that youtuve for weight painting is unavoidable at some stage for rigging
sage patio
there would most likely be too much manually fixing required which would make it take longer than if you just did it yourself in the first place
bold talon
sage patio
there would most likely be too much manually fixing required which would make it...
well then you tell me an easier process
quaint cosmos
Mixamo can give you a starting point even with weirdly proportioned models but you'll still have to do a fair amount of fixing. If you do it from scratch you have to start from 0 so I'm not sure how that's easier.
bold talon
Im literally going with whatever I can to complete this as easy as possible
quaint cosmos
I rigged a minion with Mixamo once and it was reasonably successful. By no means ready to go but it was a start.
sage patio
I recommend just creating all the vertex groups on the mesh first, and then just assigning vertices to the correct groups
to do that, select the mesh, shift click the armature, ctrl + P > With empty groups
then to make a part of the mesh move with a bone, select that part of the mesh in edit mode (can hit L to select the entire part), and click Assign with the correct group selected
also
for VRChat, your rig rill not work
there are minimum requirements for bones in order for it to work with VRChat's IK
bold talon
I'll figure that out later
sage patio
the spine should go Hips > Spine > Chest > Neck > Head
failing to do that and your avatar will not be humanoid, and will permanantly T pose
ruining the point of rigging it in the first place
so no, it's not something you should do later lol
it's something you should do now, before doing any weight painting
the arms need to go shoulder > upper arm > lower arm > wrist
bold talon
Right, hold on
Lets start from an easy point
All of my bones are joined into one armature
sage patio
yes, that's good
bold talon
What should I do for that next step
sage patio
create the spine by adding a new bone (shift A) and subdividing it to create 5 bones (right click it and click subdivide, increase amount in the bottom left)
then name the bones correctly
bold talon
So this new bone is a new armature on its own
bold talon
sage patio
you add it while in edit mode for the armature
Wait where am I even gonna add the spine?
sage patio
that is a great question
bold talon
Thats kind of a me issue of how its gonna look around, maybe its a bend in the legs
 sage patio
that whole solid red line is the entire spine, from the hips to the head
bold talon
so should I replace the head bone with that?
sage patio
the dotted lines represent bone parenting
by head bone do you mean the one in the center of the ball?
bold talon
yeah
sage patio
that isn't much of a head honestly
that ball should probably be weighed to the chest bone
bold talon
There isnt a chest
sage patio
what do you mean? you created the 5 bones didn't you?
one of those should be the chest bone
sage patio
the "head" bone can either be parented to the chest bone, or deleted
and then assign that whole part of the mesh to the chest bone
bold talon
which do you recommend?

 hasty hatch
is there a way to add bones to an existing avatar without the risk of the mesh braking?
or will i have to just totally rebuild every time?
brazen island
never unpack your prefabs unless told so by creator's manual in unity and you should be fine
hasty hatch
brazen island
never unpack your prefabs unless told so by creator's manual in unity and you sh...
ohhhh so i can add bones to a packed prefab so long as its still packed?
brazen island
not in unity
hasty hatch
ahh thats the pain hah
brazen island
but adding/moving bones in blender shouldnt break your model after reimporting in unity
if its unpacked
packed*
hasty hatch
wanted to add an extra bone to an allready built up avatar for physbones, wonder why unity doesnt allow that?
brazen island
technically you can do it after unpacking prefab but better do so in blender
hasty hatch
ohh yeah, thats what i meant, to add bones to the FBX in blender then overwrite, but last time i did that was about a year ago and the mesh either broke, or it unlinked all the parented assets
brazen island
most likely it was either unpacked or export scale settings issues
hasty hatch
ahh, would an optimal option be to drag the avatar into the assets as a prefab varient and then overwrite the base avatar FBX?
so it packs the added assets into the prefab?
brazen island
??
idk, i just backup old fbx somehere else (when im not sure where it comes from) and overwrite fbx straight from blender, seems to be the easiest way
hasty hatch

oops lol
ahh yeahh, ill give that a go
i pack it put out of project just as a backup incase something breaks
hasty hatch
hmm thankfully did a backup and fixed it, but seems like adding bones and overwriting just makes the mesh bug out and dissapear
 forest zenith
why isnt fullbody tracking osc workingg
brazen island
hasty hatch
hmm thankfully did a backup and fixed it, but seems like adding bones and overwr...
scaling or selection problem
 hasty hatch
brazen island
scaling or selection problem
hasty hatch
brazen island
scaling or selection problem
i'll try again, but i do alot of mesh edits on my avatars just fine, but when ever i add bones and overwrite it kills it
then it never add said bones to the hiararchy unless i just start the avatar from scratch in unity
my best guess is unity just isnt able to pick up the mesh's new weight to the bones and just errors out
just quick cause i may be explaining stuff wrong
so basically what i wanna do: my avatar ive been using for a good few months i wanted to add an extra bone chain to apply physbones to and really dont wanna have to start from base FBX and re add everything from Square 1
is it at all possible to add new weighted bones to an in use FBX set in a scene cause it seems unity doesn't like it when you add new bones to a hierarchy in use, even when prefabbed
even with the same export settings i use for just editing a mesh, any mod additional bones causes the avatar to simply failload the mesh
 bold talon

How do I link the bones back in normally with the mesh
Whenever I go into edit mode, they pop back in like nothing, but if I go in pose or object, it goes back like this
desert owl
Does anyone still know how to fix this? Context : I have a model I made from scratch, I rigged it with mixamo and put it back in blender as an fbx, any time I try to do the CTRL-P to activate weight painting the model becomes huge and deformed, I don't know what's causing it?


it's driving me crazy! 
Any sort of help would be great though because as a beginner I have no idea what's causing the issue LOL
 ocean lance
Doing rigging in Maya as apart of my game development class and i figured I would ask here, what’s the trick to getting stuff like heads and hands to not warp/transform when moving bones
Also is there a way to select the bones conning off of root part and not the entire bone structure
sage patio
hasty hatch
just quick cause i may be explaining stuff wrong
so basically what i wanna do: ...
let me preface this by saying that you basically never ever need to start from square 1.
in general, never unpack your model, unless you have a good reason to do so. doing so breaks the link to the original FBX, making it harder to do any changes down the road.
when you do mesh edits and replace the FBX, it will still update even when unpacked, because the model still references the same mesh assets.
however, any hierarchy or armature changes will not be reflected, which can cause a lot of issues and can break the existing meshes
now, let's say you didn't unpack (good job!), and you want to say, add a tail or something (new bone chain, mesh, etc). you would do so in blender, and then re-export. when you re-export, you have 2 options; you either replace the FBX in the project, or you export as a new FBX. overriding an FBX using different export settings can cause issues, so I recommend making an export preset in blender. if you don't know what the export settings were for the original model, export as a new FBX. in Unity, you can make an importer preset from the original FBX to quickly configure the import settings for the new model. once done, drag the new model into the scene, and use Pumkin's to copy over every single component from the old model to the new one
if you chose to override the existing model, and you knew the export settings, you'll have to do an extra step if you did rig changes. you'll need to go to the rig config, click Pose > Reset pose, then Pose > Enforce T pose.
quaint cosmos
ocean lance
Doing rigging in Maya as apart of my game development class and i figured I woul...
Proper weight painting. It's likely if your head is warping when you move the head bone, part of the jaw isn't properly weighted to the bone. You select individual bones in edit mode.
ocean lance
quaint cosmos
Proper weight painting. It's likely if your head is warping when you move the he...
I figured, I guess it’s time to watch some tutorials about it
brazen island
@desert owl apply all transforms on both mesh and armature (ctrl a) before parenting. Also try to use cats's apply as rest pose
quaint cosmos
ocean lance
I figured, I guess it’s time to watch some tutorials about it
I recommend just downloading a properly weighted avatar, the readyplayerme ones aren't bad. Then you can see how all of the bones should be weighted. RPM avatars used to have bad topology but they've gotten better recently.
ocean lance
quaint cosmos
I recommend just downloading a properly weighted avatar, the readyplayerme ones ...
I have to use the model included with the tutorial
It’s a 26 videos that are 25 minutes each so I guess you are supposed to do that latter on but we are only watching 1-6 in class
quaint cosmos
ocean lance
I have to use the model included with the tutorial
What I mean is you can bring in the RPM avatar into your project as reference and then go into weight paint mode to look at the weights, you don't have to actually use the model.
desert owl
brazen island
<@320041682404114432> apply all transforms on both mesh and armature (ctrl a) be...
Thanks! I'll try that out :)
hasty hatch
sage patio
let me preface this by saying that you basically never ever need to start from s...
hmm, not sure why but even after following both suggestions, either the mesh breaks, or pumpkin just dumps all of the additional assets as unparented meshes and misses a few of them :/
its 100% a packed prefab too, all i've done is parent asset armatures into it
sage patio
in the Copy components section, you should switch to the Show all tab. from there, you can uncheck/check the stuff you want or don't want copied
sage patio
hasty hatch
its 100% a packed prefab too, all i've done is parent asset armatures into it
can you screenshot your Hierarchy?
hasty hatch
had to recover from an exported prefab, im guessing its not recoverable after this? (armature swapping that is)
 sage patio
hasty hatch
had to recover from an exported prefab, im guessing its not recoverable after th...
sage patio
hasty hatch
had to recover from an exported prefab, im guessing its not recoverable after th...
that is bad
that is not an FBX prefab
that is a model that was turned into a regular prefab
which breaks the link just as unpacking would
hasty hatch
hmmm
sage patio
updating the FBX for that will break it equally
so you have to import as a new FBX and copy over components
hasty hatch
yeaah, i had to make that prefab as a backup
sage patio
never do that on your main model
if you want a backup point, make a duplicate and either unpack that or prefab it
keep your main model intact
hasty hatch
sage patio
so you *have* to import as a new FBX and copy over components
ah
bleh, why unity doesnt allow to fbx repacking is annoying
sage patio
because that would not make sense and is impossible
hasty hatch
weeeeeelp, probably gonna go do the long route as some point >.> about time i reworked my avi anyway lol
pumpkin kinda works, but either misses, or completely unlinks meshes from the avatar root for some reason
even with all selected
sage patio
what kind of meshes?
hasty hatch
like, clothing meshes, some work some fail to link and get dropped in a small list unparented outside the avatar
some dont even make it over
sage patio
why are you adding clothes in unity? that should be done in blender
hasty hatch
caaaaaaause i didnt know how at the time
and was looking for any excuse to avoid the tedious toggle creating proccess i've slowly learned to loath
desert owl
brazen island
<@320041682404114432> apply all transforms on both mesh and armature (ctrl a) be...
i tried and it made it even worse...

did mixamo like just screw my whole thing over
quaint cosmos
All Mixamo does is rig and weight so if you unparent the mesh from the rig and delete the vertex groups, it should have no impact on your model. It generally works alright for humanoids but the further your model is from a human, the more likely you are to run into issues.
bold talon
Hey could I get some help with rigging this model? I had to remake it cause of save issues but everything kept going wrong with the bones and the mesh anyway. Dm me if you can help
 astral ferry
Idk if this is classed as avatar rigging, but I’m having trouble with making my avatars knees bend…….. I’m wondering what to use for it…… I’m using Unity 2019.4.31f1 btw, any help will be appreciated thank you!
quaint cosmos
astral ferry
Idk if this is classed as avatar rigging, but I’m having trouble with making my ...
You need to rig and weight paint the model in a program like Blender, have you done that?
astral ferry
quaint cosmos
You need to rig and weight paint the model in a program like Blender, have you d...
No, but thank you for telling me!
I’ll do that now
 willow knoll
I'm having this same issue with a part of my avatar that has too many overlapping vertex groups.
When I do these changes, the issue is fixed in Unity, but my avatar reverts to the VRChat default when I try to load it in game.
Is there any way to increase the number of skin weights properly?
sage patio
willow knoll
I'm having this same issue with a part of my avatar that has too many overlappin...
no, but there are options in blender to limit each vertex to only the 4 groups of most influence
first, you can do Weights > Clean with a low value, and the Subset set to All groups
then, you can do Weights > Limit total, with a limit of 4
just be aware that if you have other groups which aren't for bones, like groups used for masking, this may cause issues
so probably better to restrict it to selected areas
fading verge
are there any tutorials for making a avatar from bought assets in unity?
willow knoll
The issue isn't something that cleaning or limiting will solve. I have an area where multilple groups need to have a significant influence, like greater than 25%. We're talking hips, tail, 2 butt and 2 thigh fix bones :/
I'll have to figure something else out.
sage patio
2 butt and 2 thigh fix bones?
willow knoll
Yes, the former for physbones and the latter on constraints to fix the buckling.
 final idol
Hi! I made an avatar some time ago and wanted to remake the hands because they looked weird, after successfully modelling hands i'm satisfied with, I implanted them onto my avatar, re-rigged the arms, simmetrized everything, in no way is anything different from one side to the other, yet, once in vrchat, the left hand's fingers are angled abnormally, while the right hand works perfectly fine, does anyone have any idea what the cause may be ? (here's a pretty scuffed screenshot to illustrate)

nevermind it's not the rigging, it's the proxy animations that are weird, thanks anyway
 harsh lantern
final idol
Hi! I made an avatar some time ago and wanted to remake the hands because they l...
harsh lantern
final idol
Hi! I made an avatar some time ago and wanted to remake the hands because they l...
Oof
bold talon
Hey could I get some help with rigging this model? I had to remake it cause of save issues but everything kept going wrong with the bones and the mesh anyway. Dm me if you can help
 torpid burrow
i modelled a random ass armor set for the wickerbeast model and have no idea how to rig it effectively, and i cant seem to select the bones here

 wheat cloak
torpid burrow
i modelled a random ass armor set for the wickerbeast model and have no idea how...
wheat cloak
torpid burrow
i modelled a random ass armor set for the wickerbeast model and have no idea how...
Check dm
quaint cosmos
There's a Youtube for that. This is a real quick overview of the process, from there, just go to any of the top videos on Blender Rigging https://www.youtube.com/watch?v=X590IZeyT1s
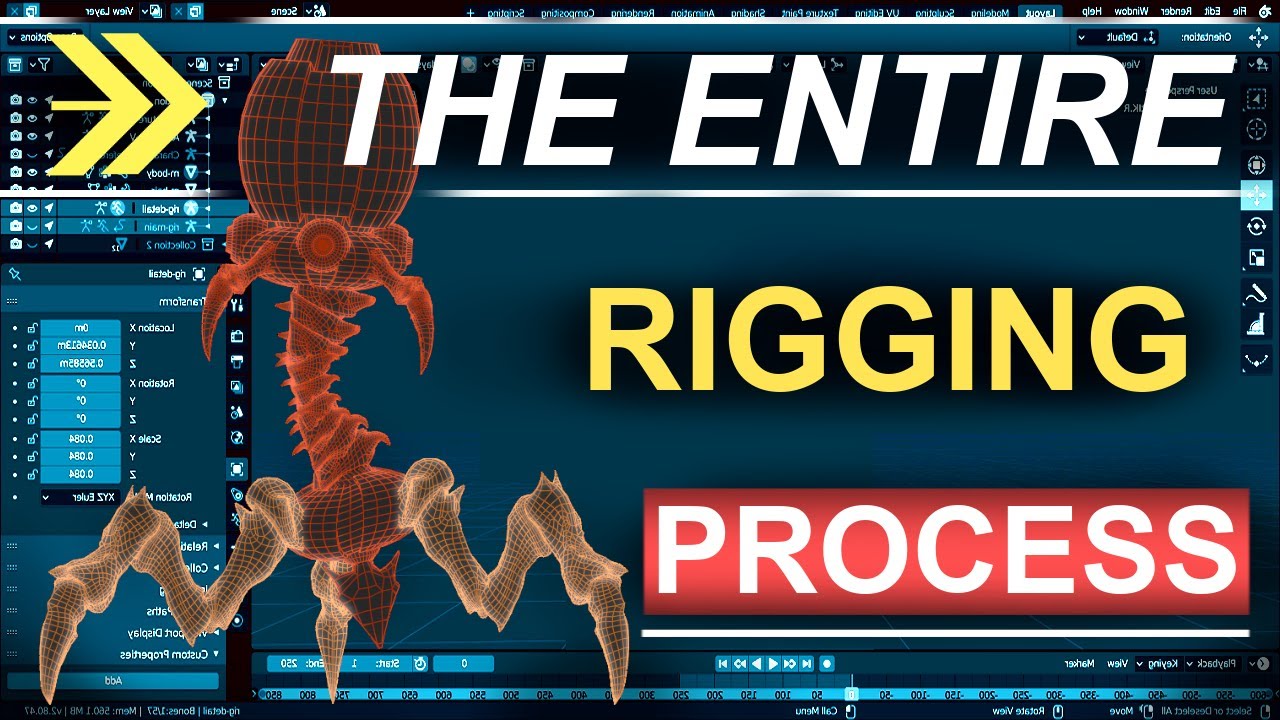
Alright, today I'll show you the ENTIRE rigging process for a game-ready character from scratch to finish, WITH advanced features like IK and custom color coordinated layers in less than 5 minutes-!! Hope it helps :)
If you enjoyed this video, I have a small 1$ Member perk available for anyone who would like to help us save up for better tools ...
About the same as it works for 5 fingers but one less
You assign each of the fingers to one of the finger names, so you figure out which is the middle finger, which is the thumb, etc, and some just aren't assigned so you just won't have any visible functionality with those fingers. You can still use them for gestures, they just have no effect on the rig
 candid marlin
How would I rig an accordion to move with both wrists on an avatar?
For reference this is what I have
 quaint cosmos
candid marlin
For reference this is what I have
quaint cosmos
candid marlin
For reference this is what I have
The rigging of the accordion itself shouldn't be that complicated if the arms are already out and in the right position with the hands on the handle/keys, you just rig one half the one had and the other halve to the other with a bit of blue in the middle but you would need to edit all of the locomotion animations to have the hands in the right position rather than at the avatar's sides like they are in the default locomotion positions
candid marlin
quaint cosmos
The rigging of the accordion itself shouldn't be that complicated if the arms ar...
Does my wrists need to be nearby each other for the rigging to work?
quaint cosmos
candid marlin
Does my wrists need to be nearby each other for the rigging to work?
Not near to each other, they should be near the bone that is controlling them, though.
It's not really a tutorial, it's not something you learn in 5 minutes. It's just designed to give you an overview of how rigging works, then you should use a more in-depth tutorial That menu isn't where you add bone constraints like IK, you add them in pose mode using the bone constraints panel but you don't generally use IK for VRChat avatars anyway, though I think you can for PC avatars. It says at the beginning of the tutorial to not try to follow along, it isn't designed for that.
If you look up Blender rigging, you'll find much longer tutorials, those are actually going to go over all of the steps, that's just a high level overview of the process.
 crimson latch
I made him 2.2m, which is much taller than me, and it helped… shouldn’t it work with my real height though?
 flint crypt
It's either you gotta fix the camera/where you look or gotta fix his armature
 ebon elbow
I'm having something weird happen with my Armature.
when I pose the armature of my character I see some weird shadow that follows the body and things like the glove in the picture actually seems to be weight painted to the shadow thing.
I'm wondering if it's a shader thing or something else but I have no idea
anybody seen this before or know a fix?
 ebon elbow
this picture is with Wireframe Viewport Shading turned on and clearly it is not just a shadow it's actually a part of the body

 pale pumice
ebon elbow
this picture is with Wireframe Viewport Shading turned on and clearly it is not ...
pale pumice
ebon elbow
this picture is with Wireframe Viewport Shading turned on and clearly it is not ...
Looks like some vertices not painted and thus not moving with the bones.
 stable cipher
In the stage of working on shape keys…. Sooo I’m hitting a wall with with mirroring the shape key to the other side. It won’t mirror it and says they’ve failed. So I first tried checking the symmetry but cutting it in half and mirroring it and doing it again. Still a fail. Checked the object location on the axis… still nothing. Is there anything else I could try or fix or is it a start over completely situation? I’m still a bit new to blender since I have been working on it for just a few months now.
 fervent vigil
OK, question. Y'all know how Unity, when detecting humanoid skeletons, doesn't like to detect the chest bone in many cases? I'm starting to think that maybe it's not expecting the neck to be connected to the chest bone and thus not autodetecting it properly. Does anyone know this for sure?
quaint cosmos
Not for sure but the humanoid system is designed for the upper chest to be optional so it would be strange for its detection code to get tripped up by that
 smoky geode
i am losin my shit
ive been trying to figure out what i did wrong here for like 3 hours


someone please help me hhhh
i attached the head to the body using CATS in blender
like, everything LOOKS correct
i cant find the issue
okay i lied, actually i've been at this since 8am yesterday T~T
?
what
🦤
wtf do you want me to do? send a ss of my whole unity model?
tf
that's what i did sweetheart.
it errors when i try to, THAT is the error message.
?
it's very clean
you're just dumb
lmao
it's alr tho
i got nagasakii's help
 little forge
Weight Painting is the devils lettuce
fading verge
hhow do you combinethese

it just
appeared
for some reason
does it even matter if thats there
brazen island
@fading verge should be ok
torpid burrow
anyone know why blender isnt importing vertex groups
fading verge
brazen island
<@456226577798135808> should be ok
are you sure?
looks like this if i
 brazen island
@fading verge pose mode? then parent them
select child then parent with ctrl, I believe, and ctrl p
fading verge
which one should be the parent
well i know its the upper arm
but do i select that one first
and then the lower arm
ddid i do it irghr

tnope i did not
😭
figured it out
brazen island
@fading verge parent - one thats closer to the root/hip
fading verge
yeah i got it figured out
fervent vigil
FBT IK question.
Generally speaking, vrc's IK straightens the spine when you calibrate in FBT. Having the bones not entirely straight will cause the bones to shift in location after calibration (e.g. the common issues of shoulder sagging)
However, I sometimes see avatars, especially chibi avatars, intentionally break these rules to make the avatar 'feel' better in FBT (however, the way it lines up with the body becomes less accurate)
Would these sort of rigging setups be what are described as being 'rig hacks' from the vrc documentation? (I remember the days of upside down spine hip bones, and I know those don't work any more)
Also, what's the advantage of doing this over just exporting the avatar with the spine completely straightened out in pose mode?
 full crystal
Cats
 livid flume
 leaden slate
got a question: Where do I find the info on how I should align my skeleton, kind of related to @fervent vigil 's question, like should I have the fingers completely flat in the T-Pose or is a "loose hand" type pose what you should set it as? Mainly just trying to get the avatar to feel right in full body and such and fix shoulder sagging, stuff like that
should I have the arms completely in line and straight or do I put a bend in the elbow
quaint cosmos
What has worked for me is arms completely straight and fingers completely straight and parallel with the thumb at a 45 degree angle
leaden slate
45 out sideways? does it look good ingame or like the classic stick figure hand you see on most MMD models
quaint cosmos
leaden slate
45 out sideways? does it look good ingame or like the classic stick figure hand ...
I'm not all that familiar with MMD hands but I think it looks quite good. It's the best pose I've found, anyway. Yeah, 45 degrees sideways and basically on the same horizontal plane as the other fingers
leaden slate
gracias
fervent vigil
leaden slate
got a question: Where do I find the info on how I should align my skeleton, kind...
So, in the VRCSDK there is a test robot project with some physbone tests on it. I found that the test robot lined up nearly perfectly in full body and made some tweaks to it to fit my body better. From there, I just used the orientation of the bones on the robot model to infer where I should be placing the bones on my other avatars.
All of the guidelines here apply on how an avatar's rig should be set up: https://docs.vrchat.com/docs/full-body-tracking
VRChat
VRChat supports additional tracking points using Lighthouse ecosystem trackers such as HTC Vive Trackers, Tundra Trackers, or others to permit tracking of these areas on the body: FeetKneesHipChestElbows + Shoulders (a single tracker will be mapped control elbows and shoulders simultaneously. That t...
Personally, I find that fingers straight out works best if your bone roll on all of your fingers is set to 0. If your fingers are slightly curved, your bone roll shouldn't be 0 because otherwise the proxy hand animations will make your fingers curl in odd directions. Generally speaking, however, your bone roll should be 0 on most of your bones.
leaden slate
does "bone roll 0" mean just having the "palm" side of the fingers facing the ground in tpose @fervent vigil
 crisp tendon
fading verge
does the bone just rotate, rotating the eye?
crisp tendon
fading verge
does the bone just rotate, rotating the eye?
Yep
crisp tendon
leaden slate
does "bone roll 0" mean just having the "palm" side of the fingers facing the gr...
Bone roll 0 should be adjusted in edit mode, since we don't want it to affect the actual pose of the model, it's a matter of making sure you're not exporting with a bone roll which unity will then revert to 0 and mess with your rigging.
fading verge
so I know you can't apply mirror when you have blend shapes
I'm creating my visemes and I'm using subdiv
is it going to complain about that
ugh
 crisp tendon
Yes it will, so use this: https://github.com/llealloo/join-modifiers-and-shapes

GitHub
Join blender objects that contain modifiers and shape keys into a single object - GitHub - llealloo/blender-join-modifiers-and-shapes: Join blender objects that contain modifiers and shape keys int...
fading verge
thank
 scarlet venture
Hello!! Im trying to set up a model I got for my birthday and its really cool. I started working with the vrm and converting it to a prefab for VRC but some of the bones when converting change and no longer exist when importing them. Can anyone help me?
I also have a fbx file but it doesnt have the preset expressions and physics (I think)
cosmic vine
scarlet venture
I also have a fbx file but it doesnt have the preset expressions and physics (I ...
expressions you can check for in the shape keys in blender and if you mean physics like physbones you'd set that up in unity
could you give an example of a bone that disappears?
scarlet venture
cosmic vine
could you give an example of a bone that disappears?
sure, The spine and the shoulders have disappeared from the rig. these blend shapes are the ones i have
 cosmic vine
so what does your hierarchy look like now ?
scarlet venture
 cosmic vine
hips - spine - chest looks right to me for order
thought you said the spine went missing?
 fringe kite
Is eyebrow tracking even a thing I need to consider?
sage patio
fringe kite
Is eyebrow tracking even a thing I need to consider?
if using a quest pro, yes
but keep in mind that you also need the VRCFT application + an avatar with the logic set up for face tracking
 tawdry sigil
what would be the best way to add simple lip sinc to this model just having the jaw move up and down and nothing else?
 quaint cosmos
There might be other options but I'd just make an open mouth shape key and a closed mouth shape key and use the open mouth for mouth shapes where the mouth would be more open (ah, oo, ou, ee, etc) and closed for when the mouth would be more closed (mm, nn, pp, ff, etc.)
tawdry sigil
gotcha, thanks. makes sense, i was worried using conventional methods would just stretch the mouth up and everywhere but i didnt think about just making 2 shape keys for it
quaint cosmos
It should look good if you just rotate the jaw back a bit using the right pivot point You could also rig it to a bone and then apply that as a shape key
tawdry sigil
its on a bone already, i havent ported over to unity quite yet. i havent messed with this stuff in a few years so im relearning a lot lol
brazen island
@tawdry sigil theres literaly jaw flap bone mode for lypsync that will rotate bone depending on voice level.
sage patio
even simpler, if you want the jaw to move up and down, there's literally "Jaw flap blendshape"
make a blendshape to open the jaw by literally just moving it down, and use that
that's it
 strange fjord
fringe kite
Is eyebrow tracking even a thing I need to consider?
strange fjord
fringe kite
Is eyebrow tracking even a thing I need to consider?
Yes
 regal trail
Anyone any idea on how to fix this? The weight painting is the same on every finger but the index finger is doing this.

 fringe kite
regal trail
Anyone any idea on how to fix this? The weight painting is the same on every fin...
fringe kite
regal trail
Anyone any idea on how to fix this? The weight painting is the same on every fin...
I was having this problem too, is the finger on the opposite hand lit up? Try erasing (weight 0 brush) then re- painting the finger tip, deleting the vertex group for that bone and re-creating it, and if that doesn't work delete and recreate that bone.
regal trail
fringe kite
I was having this problem too, is the finger on the opposite hand lit up? Try er...
Thanks already found the problem, it was falsely weighted to the head bone...
 restive garnet
Anyone know of a reputable source to find a good creator to make clothing commissions for avis?
quaint cosmos
Good luck with that but you probably don't want to admit to breaking TOS on the official Discord server
 nimble quest
Could someone help me put bones in and rig a large biped robot walker?
fringe kite
nimble quest
Could someone help me put bones in and rig a large biped robot walker?
I'm just learning but I'll help as best I can
 azure fjord
All my bones set wrong weights when using Assign Automatic from Bones in Blender, what coud be causing this?

The other hand did it correctly, is there any way I can mirror it?
 fringe kite
@azure fjord when I had issues with this, selecting the correct bone and then briefly clicking to paint inside the red zone "snapped" the rest of the weight painting to that bone. You could try it.
azure fjord
fringe kite
<@826090131895091240> when I had issues with this, selecting the correct bone an...
That didn't work 😦
azure fjord
Huh?

 fierce grail
azure fjord
Huh?
fierce grail
azure fjord
Huh?
Reset your avatar descriptor.
azure fjord
Thanks!
 gritty basin
What would be the best way to sort out this spine for VRChat since you're only supposed to have Hips, Spine & Chest? I think most of my other bones are fine (Arms & legs etc).
 sage patio
gritty basin
What would be the best way to sort out this spine for VRChat since you're only s...
sage patio
gritty basin
What would be the best way to sort out this spine for VRChat since you're only s...
you can have both a chest and upper chest bone, so that's fine. what is not fine is the pelvis bones
you should merge those to the hip bone