
#metahumans
1 messages · Page 12 of 1
hey @cerulean ice chances are you already know it, but I found this super cool playlist on youtube which is actually more helpful than any UE documentation I found so far^^
https://www.youtube.com/watch?v=KAbL_kczgWY

Here are the GitHub pages referenced in the video:
Let me know if you'd like to see more ...
nice, I didn't know about this. It's for the old DNA Calibration libraries but still pretty helpful because the core methods still apply
yes, as far as I can tell, the commands are pretty much the same so far
hi, it's a bit hard to search for this specific problem so i figured I could ask here. I animate metahumans in Maya to transfer into UE, but ever since a long while back, something seemed to change with metahuman bases where the limbs now bend with a dent in them rather than a clean bend like they used to do. Even worse on the metahuman animation base (that I think I got from a process that extracts from bridge?) Is there any reason for this and perhaps, a fix? The only thing I can think of is using the Manny model to animate in maya for the time being, but its not ideal


Thanks @cerulean ice and @rare swallow these help to know I'm on the right path. I'll post if I can find the exact right methodology. For now going to go down a hacky route and look to adjust a current blendshape. I'm trying to adjust the Uvula inside the mouth, very niche
Question for any MH material wizards. What specific parameter controls the coloring of closed eyelids?

Did anyone encounter a problem with the head disconnecting from the body when ragdolling (enabling physics for the whole mesh)?
Does anyone know how to switch between hair strands and hair cards at runtime? I have the groom setup with strands and cards but aside from the Use Cards boolean on the component which doesn't work at runtime I'm not sure how to make it a setting to switch between
If this is from the metahuman creator in 5.6, there are makeup options that look like this
Yeah thanks. Removing all makeup but it still persists.
does anyone had problems with control rig layer in sequencer, i have a retarget animation for my metahuman and the layerd control rig sometimes doesnt update so only the retargeted animation plays and the keys on the control rig gets ignored. i could find out how to solve it. some guy said it has to deal with the backward solve but the metahuman it self has a pretty complex backward solve build into its control rig so in my mind that couldnt be the problem.
question, have you applied your own textures or is this happening by default? I would open up the textures folder, and open up each of the textures to make sure they are refreshed and dont appear all black. I have seen this happen when applying only a base texture and not updating the blood flow CM maps.
Hey folks, attempting to make use of the conform tools. Wrapped the provided base meshes from Fab onto a custom mesh/scan we have here, and trying to use Mesh Only conform for both head/body, seeing as the pose is slightly different between the scan and the base MH. Figured that'd generate a new set of joints to match the imported topology, but it seems like there is some sort of awkward mismatch going on?
The important thing for us is to maintain the skeleton of our original character, so my hope was to conform this separate MH, and then essentially use the Shape-only blend mode onto our existing character to gain a similar body form. As you can see, trying to blend completely breaks the form.
At the end of the video you can see the pose difference from one mesh to the other. I'm not sure there is really a very good way to manually repose a scanned/sculpted mesh like that without literally manually reposing it in Zbrush/Blender sculpt mode? :/
Any ideas would be welcome!
Also tried saving this guy out as DNA and then bringing him back in through that conform method (with "Whole Rig" disabled) but the same issue persists.
UVs/topology looks fine to me in terms of how it might impact joint placement, so it's like the custom joint placement isn't happening at all?
Thanks
I suggest you try MetaHuman Extra Tools. You can edit your character as a combined mesh, and the plugin will auto fit joints and match MetaHuman pose, generating new DNA that you can import in MH Creator:
https://youtu.be/IjJLoT-2RLk

Join us on Discord to ask anything and stay up to date:
https://discord.gg/39XApVmXZb
You can download MetaHuman Extra Tools from ArtStation or Fab (installation from ArtStation is a bit simpler):
https://www.artstation.com/marketplace/p/pR97n/metahuman-extra-tools
https://www.fab.com/listings/22f90398-c29e-4b74-a80a-9c5b5ae19d47
that video is a bit old, the UI has changed a bit, but the general workflow is the same
It looks great! Sadly I refuse to give Autodesk money 😅
Weird
Hi
I'm thinking of using metahumans for my game but it's too complex.
-
There's so many bones in the metahumans that it makes hard to work with and also increase load especially for a horde zombie game.
-
All the parts of body are separated and I want to make clothes such as uniform or etc for the metahumans, a combined mesh would be easier to work with then import/export would also break the materials
-
Due to 1st problem, animation is also a problem for us.
Does anyone know how can I solve these?
for 2., you can definitely export a combined mesh, its one of the options in the top menu in the Metahuman Creator in 5.6
Hello, I am trying to get started with Meta Human however I keep getting tossed through an endless loop.
So far I have unreal 5.6, I have metahuman and all other metahuman plugins enabled.
When I go into quixel bridge via Unreal, I see the premade humans. I click Start MHC it brings me to the site which says download unreal which I already have? If I click create it just loops back to this. How do I break this loop and make a human.
In the new system, the MHC is built in to UE. So, in a content window right click and choose create Metahuman Character. Then, double click that to open the editor
Oooooooh I was trying to make it work via the bridge. Thank you so much!

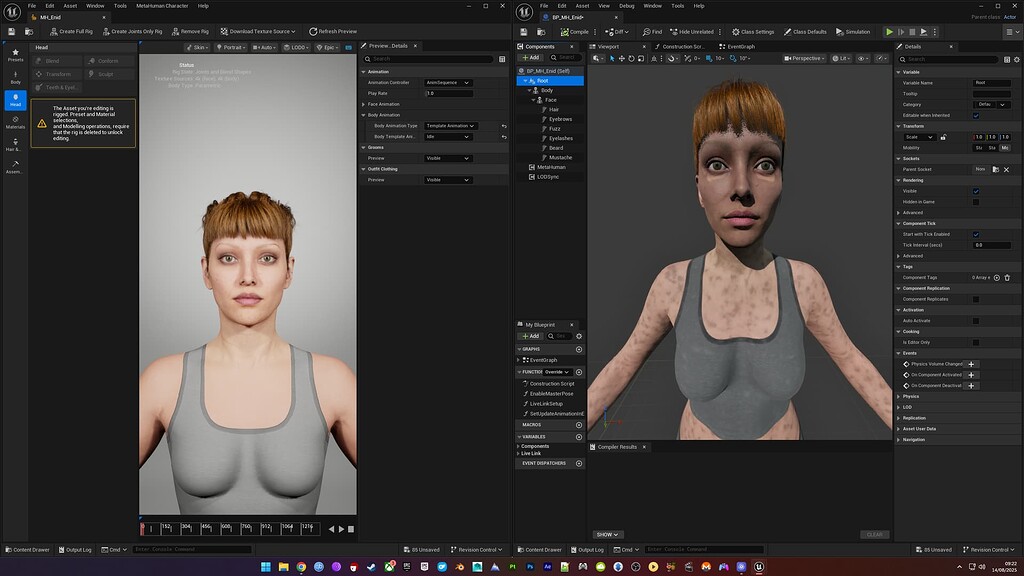
So my assembled metahuman has dark spots on the skin texture (left) but inside the metahuman creator its perfectly normal.
Does anybody had similiar problems?
(I just followed https://www.youtube.com/watch?v=MOIi9mJfhYo )


Hello guys, in this quick and simple video we are going to check out how to create a Metahuman in Unreal Engine 5 and replace the third person mannequin.
↪️Join My Unreal Club & Download Project Files: https://gorkagames.club/
📖Download Free Unreal E-Book: https://bit.ly/Free_Ebook_MasterUnreal_GorkaGames
🔥Discord: https://bit.ly/Gorka...
I found this, but disabling Substrate didnt help.
https://forums.unrealengine.com/t/metahuman-texturing-broken-in-5-6-1/2641400
Also disabling Lumen didnt help either. I guess its a bug of the new version and we need to wait
Epic Developer Community Forums
assembling a new metahuman in 5.6.1 results in broken texturing. i think it’s possibly the uv’s but also it’s blotchy. this worked perfectly fine in 5.6. the metahuman is fine in the creator but broken in the output’d blueprint. in 5.6 i did not have this problem. in 5.6.1 it seems to happen no matter what i do. am i missing some ...
ok how I solved it:
- disabled substrate
- downloaded the 8k textures again inside the meta human creator
(if you get the you are not logged in error, logout everywhere, then click Create Full Rig, then download 8k texture again) - assembled with the cine setting; not optimized-high
@hollow aurora
Yeah I think substrate wouldn’t play nicely yet with metahumans/skeletal meshes
when you use a MH body Skeletal Mesh in UE, it has a Post Process AnimBP that has logic to move the secondary bones that stop the knees/elbows/etc. fomr getting crushed like that. the old Maya Source asset used to fire that logic. I believe if you use the new MetaHuman for Maya plugin and do and Export to DCC, that the MetaHuman Assembler will put the rig logic back in Maya
What parameters of the groom do I need to tweak to avoid this crazy light effect that happens when pathtracing is enabled? It's almost like there's additional subsurf or something, but I can't spot any options in the material that would clearly impact it.


Note that I am using a 120,000 lux directional light, not sure if UE plays nice with ratios or not. I assume it does from testing?
Hey @JonCG ! Where did you get the base mesh for the metahuman from 5.6.1? I'd love to just get the real base mesh for the latest MetaHuman face, body, and combined without going through DNA processes. It should be simple, right? Just provide the topology targets. Unfortunately, I have no idea how you got these meshes for 5.6.1. Its easy for previous versions but obviously Epic made some changes.
On Meta Human Creator. Build the full rig and export!
Just realized you can get way more control over hair cards by tweaking X in Groom assets. Might be obvious to some, but it saved me headaches.
I recommend using MetaHuman Extra Tools, but if for whatever reason you can't/don't want, you can download the base meshes from here:
https://www.fab.com/listings/98f7b49d-f5dc-45c4-b590-52dbb4f951c0

Fab.com
Separate MetaHuman head and body archetype meshes using standard MetaHuman topology and UV layout. Excludes joints, skinweights, blendshapes, and LOD meshes. Topology guide textures are included.These assets can be used to support the conform from template mesh workflow in MetaHuman Creator. This pack enables you to use third-party applications ...
Brilliant! This is what I needed for topology matching! I'll look into MetaHuman Extra Tools. Thanks for your help @cerulean ice !!
Has anyone played around with reducing the stuff assembly does? I want to assemble some permutations and I really just need the fitted clothing exported not anything else
How do I redownload higher body textures for my already assembled mine in 2k
I have signed into epic about 2350 times now
not getting anywhere
Is there any easy to understand examples without spending 34050 hours trying to find a fix and accelerating my own divorce?
Just want the body in 4k nothing extreme
Why do I have to decide whether to use the metahuman control rig or a retargeted animation?
why cant I have the animation play and then edit with the control rig, you know, THE WHOLE POIINT OF THE CONTROL RIG
why are all my facial poses folder non existent??
Try to create/recreate Full Rig on the MetaHuman Character asset, download 2k/4k/8k textures and reassemble
Hey, in the sequencer right click and bake animation to control rig (it will probably not visible at first untick filter then you will able to find it ) when you did this, you will able to modify your existing animation on the control rig.(It will mute the animation line ,you can delete it afterwards, or with the eye icon or disable icon toggle between them)
I just popped by because I wanted to ask, would it be okay to share a tutorial here, or should I post it in the Tutorials section instead?
It’s MetaHuman-related , a really long, detailed tutorial on the full workflow of bringing custom MetaHumans from Unreal into Blender. It covers a lot of topics, including grooms, materials, outfits, ARKit shape keys, animation transfer, and much more.
I just wanted to check first before posting to make sure it’s in the right place and useful for you all.
Thanks in advance for any answer!
Any idea why the default MH physics asset is broken, and how to fix it? The asset curls up even with collision and constraints disabled....

The upper arms are set to free on all angular axes here and collision on all bodies are disabled..
Okay, Angular Motor was enabled; why!?
IMO just go for it. You probably won't get any comment by a mod allowing/disallowing it.
Does anyone have experience using the "conform" tool to mold a methuman character based on a prexisting mesh? I followed this video https://www.youtube.com/watch?v=qxd0eOfaTY4&t=105s and replicated every one of his steps and the process works perfecctly when it comes to heads. I can transfer the original mesh head onto my new metahuman with no issue. When it comes to the body, no matter what i do i get a topology error, despite this not occuring in the video. I cant figure it out
Enroll the UNF Game Development Program here: https://www.unfgames.com/action-game
Looking for Free High Quality Training Resources? https://www.unfgames.com/on-demand-courses
Learn more from Mao here: https://bio.site/megamaomao
Timestamps:
0:00 Intro
0:09 Enabling MetaHuman Plugin
1:04 Creating a MetaHuman Asset
3:28 Creating a MetaHuman I...
I completedd the auto rig methuamn identity and identity solve, so i am unsure whats going on
Make sure you use the exact MetaHuman topology, you can find the head and body here
https://www.fab.com/listings/98f7b49d-f5dc-45c4-b590-52dbb4f951c0
Fab.com
Separate MetaHuman head and body archetype meshes using standard MetaHuman topology and UV layout. Excludes joints, skinweights, blendshapes, and LOD meshes. Topology guide textures are included.These assets can be used to support the conform from template mesh workflow in MetaHuman Creator. This pack enables you to use third-party applications ...
however, for a more streamlined workflow, editing your character as a combined mesh, and better overall results I suggest you use MetaHuman Extra Tools
https://youtu.be/IjJLoT-2RLk
Join us on Discord to ask anything and stay up to date:
https://discord.gg/39XApVmXZb
You can download MetaHuman Extra Tools from ArtStation or Fab (installation from ArtStation is a bit simpler):
https://www.artstation.com/marketplace/p/pR97n/metahuman-extra-tools
https://www.fab.com/listings/22f90398-c29e-4b74-a80a-9c5b5ae19d47
How would i add my mesh to that body from the download, can i just load both in unreal and "set mesh", do i have to do it in a "metahuman identity" or seperatly in blender?
If you want to use a custom body, you will probably have to use something like Faceform Wrap, to wrap the MetaHuman topology around your custom mesh
with MetaHuman Identity, as far as I know, you can only use one of the old 18 body presets
does that work for bodies? my face is working great
if you use the head an body MetaHuman topology, you should be able to use the "Conform from Template" function in MetaHuman Creator
with MetaHuman Extra Tools the whole process is easier, as you only need to worry about editing your character as a combined mesh, and will do a better job when placing the joints than "Conform form Template"
Conform from template only gives you 1 slot place in a mesh, so i would somehow have to apply the downloaded body topology onto my mesh first, then use conform to edit the metahuman character, but i have no idea how to do that
Yeah i just cant afffford metahuman extra tools
you can use conform from template both from the body section and the head section
i know, the head works great, but the mesh i want to conform with has the wrong toplogy so it will always fail when i go to conform from template. So i have to somehow use that download file with the correct toplogy to make it so my custom mesh can be used to conform
yes, you need to edit the downloaded body with correct topology, to match your custom character. Typically this is done with tools like Faceform Wrap
Do you have any tutorials on how to do so?
That worked!! Thank you so much!
for some reason i cant combine the head and body toplogy meshs so that my characters necks don't freak out when imported into metahuman. If i combine the two meshs i get a error
when trying to wrap
I would love to see this!
Hey everyone once again! 😁 I just wanted to share a tutorial I made, it covers pretty much everything you need for a custom MetaHuman workflow. It’s an all in one guide that should help answer a lot of questions. Hope you find it helpful https://youtu.be/I8mF0pjswYA

In this video, I’m going to cover a full, free, all-around workflow on how to get your MetaHuman from Unreal Engine into Blender. This is a 2-hour tutorial packed with many topics, including:
-How to create custom MetaHumans
-How to modify existing MetaHumans
-How to remove, change, or bring back underwear
-How to recreate MetaHuman materi...
saving this, excellent resource
THANK YOU
Is there any text to animation AI that can be used for creating realistic animations for Metahuman?
for face or for body?
Hey folks, has anyone else noticed that in 5.7.0 Preview, the Metahuman Creator blend points are incorrect? Video to show this:
Realistic is a really high bar to hit, I'd wager no. I've tried deep motion text to anim but the results weren't really usable for "unrealistic" things like cartoons etc.
Maybe the tech has gotten a lot better, but even globally there isn't really a solution that will get you final realistic results out of the box, even markered solutions, they all need cleanup and tweaks (but the amount varies of course).
My solution here was to go back to 5.6. It works fine there, and actually you can use 5.7's new body conform feature (which works better for non-MH poses) and save out the .DNA and load that .DNA into 5.6's MHC where blending works normally again
Thanks for sharing your experience Rae, It was really helpful
did you figure this out? also looking. other textures are downloaded in 8K, but not the diffuse for neither head and body
So, not sure exactly where you are in the pipeline, but this is how to do:
- first, export your metahuman to DCC
- In your DCC(mine is Maya) I run the Assemble MetaHuman to bring in my MetaHuman. And here the head and body are separated meshes, right?
- Then I will unbind the meshes and combine the head and body, merge vertices(weld, whatever your DCC calls it)
- Now you can export and import this into ZBrush and sculpt freely. When done, export it back to your DCC and now just split up the head and body again just as it was before. I have this script to do it, otherwise you just select all polygons for the head(preferably in the UV editor as it's easier to get the right polygons).
- With the body and head separated, export it and bring it into MetaHuman Creator and rig it up.
Only one thing to note here. In ZBrush or any other software you're using, do not "reconstruct subdiv" from the level MetaHuman comes in because that will give new id:s to your vertices so they won't match anymore. If you need to simplify the mesh to modify it, be sure to export the original level and transfer the vertex id:s from an original MetaHuman mesh.
I was wondering about the new MetaHuman update, well the 5.6 update as I just updated to 5.6.
I like the new pose, but not sure if this cause issues as I just modeled and sculpted a character in the MetaHuman pose previous to this? Do I have to adjust my pose for 5.6?
The textures looks much, much better and the nails texture is actually inside the topology now. But why does the nails don't have a nail texture?
Does anyone know how the skin pores are setup? I zoomed in and the skin held up very nicely so I'm thinking it uses normal maps with some triplanar projection?
I'm working on my this Cleric character

I have added these thighpads to the metahuman blueprint with an optomized skeleton, it just has root,pelvis, and two joints for the thighpad helpers

I'm using Enable Master Pose to make sure the thighplates move along, and everything works great! even with the optomized skeleton on them

I made this small animation blueprint to add jiggle to the rootbones of each plate so the feel slightly dynamic on the character.

But, as soon as I apply the animation blueprint on the object it overides the Master Pose, and it no longer follows the metahuman, it does jiggle but it now obviously intersects with the costume, how do I add the animation blueprint on top of the follow master pose ??

I believe I deleted the rig I made then made it again which let me redownload the textires
Which overwrote the original lower textures
Not that they looked much different on the body
Thank you! Will try that. So it's a little buggy, good to know 🙂
Btw, do you know anything more about the texturing process done on the new MetaHuman as it looks a lot better than before. If you zoom in you can now see the pores and skin details. I wonder how that is done. Is it a separete tiled texture(maybe triplanar mapping?) and if so, how is that achieved so it blends nicely over the surface like different parts of the body have different pores for instance.
Above my pay grade unfortunately!
With unreal I just point, click and hope for the best
Hehe, ok thanks!
I would find the materials and see what's happening inside
See where the textures are going and what nodes are doing, that's the only thing I can think of to understand what's going on under the bonnet
I will look further, thanks!
Good luck!
Just had a peak and yeah, this micro map is tiled and controlled with a mask where to put it. It's pretty cool.
for instance the head mask. So the black and not white is where to tile the micromap. Usually it is the other way around.

can I talk about modding here? Or is there different server or channel I can talk about this?
because I have questions
wanna ask around
I'm trying to download the textures in 8K, but diffuse maps won't. Normal map "T-Body-N" and "T -Body-SRMF" is in 8K though.
It does say:
Video memory has been exhausted (2466.51 G MB over budget). Expect extremely poor performance.
So is this why?
Modding MetaHumans? I'm sure this is the place. Honestly, it's the only Unreal channel I've found with a dedicated room for MetaHuman.
Yeah, modding metahumans—well it's actually more like Silent Hill F, I'm wondering about that, the skeleton files in the game is on MetaHumans and I can't seems to make it work with my modded mesh.
Usually in other games, they have dedicated skeleton by themself where the engine can call to, and it will works fine. in Stellar Blade for example the face doesn't really have rigging and all I need is import the fbx with morphing to carry on the shape keys.
But Silent Hill F use metahumans and use Face_Archetype_Skeleton rigging and even though I put the files correctly in the project, the face is just static
hm, not sure I follow.
You have a game model that you ripped? And in this game it is a MetaHuman mesh? Basically what you want to do is, modify the shape and then bring it into Unreal Engine for your own project?
I'm not sure exactly how it works or what you can do.
For instance. say you have a MetaHuman character, you export it and sculpt and change proportions adding clothes or armor pieces. How is this going to work if you bring it into the MetaHuman creator to rig it? I would assume you just want to bring in the body, rig it up and then export it again. I'm not familiar what you can do in Unreal yet, but I would bring it back in Maya or other DCC and now create extra joints for armor pieces and skin those, or skin the clothes I've modeled. When done, I would export it to Unreal Engine. Now the only thing is, if you added extra joints how will this rig up if you bring it into MetaHuman creator again. I suppose you can rig in Unreal Engine, but I have no experience. So I would do it all in Maya. I have the skinning and face rig. There are tools to autorig a MetaHuman in Maya and then you can just add what ever controllers you need. You animate and then export to Unreal. But as I said. it would be better if you could have the rig in Unreal to adjust perhaps. I just like animating in Maya as there are good tools and I have my workflow and hotkeys.
This is a long answer, but more a basis for discussion, because I'm curious too. 🙂
I have the player model from Silent Hill F extracted, yes. I'm using Fmodel and I exported it to .psk files which I can import it to Blender.

It came with rigging and bones. Usually when I mod Unreal Engine games, I just Simulate the directories and the file structures of the game with UE
And then I use Data Asset Primary and pack it as .pak for the game to read it
So the skeleton goes to where the skeleton file is placed in the game and all. This works on any other games that create their own skeleton for their characters
but for some reason this one doesn't. And KONAMI use Meta Humans for their games, and I was wondering if there's some cause to it on why it doesn't work
It became static.

Honestly, I was just looking for UE games modding community but this server keeps popping up instead, so might as well join and ask around(?)
Ah ok. What I'm curious about is if the joints are the same for the face as in a MetaHuman exported from MetaHuman creator. Are the face vertices the same, i.e same id:s?
this should definitely be fixable
Guys what have they done with the texture details on the MH's hands? Left one is from the legacy version, right one is baked from 5.6 new editor. They look this bad even in 8k cinematic, am I missing something?

I have experienced the same issue, the 8K textures seem to be very compressed almost to the point that they are not usable
Yeah, the overall compression looks worse too but it seems that they completely removed all the realistic details to the texture. Which sucks for my fps game, I'll have to keep downloading the textures from the legacy system
well, yeah, but the legacy textures looked really bad. Sure they had some photoscans for nails and such, but the nails texture weren't even inside the topology for the nails...
That's fixed now. So I'm actually right now baking down tetures from 3DScanstore to use with the new MetaHuman which now comes with masks and normal micro maps for pores, for ultra closeups.
That's awesome, I didn't know about 3Dscanstore, they actually have a whole section for hands. But 24 pounds it's a bit steep for me after conversion, I'll keep using legacy textures until they release improved ones, if ever. Ty
Hi guys, is there any good resource/tutorial for the SRMF textures for the metahumans, I can't get them to look similar to Substance viewport how hard I try with material parameters. I do not have this problem with other assets I texture in subs and export to unreal using Substance default Unreal templates.I do not care about the F ( Fuzz) but there is a problem with specular and roughness I could not solve,driving me crazy.


I GOT THE SOLUTION, LET'S GO!!!!!!!!!!!!!!
Some nice guy figure it out!

@heavy cipher ah ok. Great!
hey, I have a question. Since the substrate is enabled default in 5.7 preview. Has anyone tried out they're own metahumans in metahuman creator in the preview version before?. Just curious about it. Because I had read on the metahuman 5.7 preview forums saying that "substrate is enabled in the default. But there's a known issue when a few textures for metahuman are not baked correctly and will appear black after assembly". But yeah, I don't know
did anyone have a problem with downloading textures? I've tried multiple times, but my color maps only downloads at 2048 px...
Other maps download at 8K. =/
It complains about my video memory is exhausted "expect really poor perfomance" so I'm guessing because it can't load the high res textures(it's shown it's only using 2048) it will not download higher.
One other question. with the new MetaHuman(starting with 5.6?) the pose has been changed and the flip-flops are now gone(thank God)
But if I would upload a custom MH, based on the 5.5 pose, will I encounter any issue when rigging it up? Thought I'd ask before I try
Hey folks, I haven't posted in a while but I have been working on a new update for the Metawardrobe, here's a small preview.

Hey everyone, anyone know a way to have metahuman use the ue5 manny skeleton?
Hello there.
Any Blender tips to transfer the Metahuman UV head map to a none matching topology stylized head? Or a way to unwrap it to match their map?
Thanks
There's no clean way I know of to do this. I think the much easier move would be to wrap the metahuman topology to your stylized head.
is there a particular reason you want to use this other topology while using metahuman UVs?
In Maya there is "Transfer Attributes". First you need to match the geo so it has a reference to go off of. Then you can transfer the UV:s based on vertices. You will need to cut and edit your UV:s as the polygons will not line up completely.
However if using your own mesh I don't really see the point of this, A better way would be to bake down the textures from the MetaHuman to your own model's UV:s instead.
You would do this in Wrap4D and have a project for anytime you need to bake down a new MetaHuman to your own UV:s.
Personally I'm just using the MetaHuman mesh. Granted, if you want a creature with 4 arms or 4 legs then you would need a custom mesh anyway, but then it wouldn't work with a MH, right?
So to reiterate. If you have sculpted a character using another mesh, I'd just wrap the MetaHuman mesh to this sculpt and use the MetaHuman.
Hello!
I am trying to copy beard, mustache, hair, etc.. into another blueprint in Unreal Engine 5.6 and this is causing a crash.
I have tried disabling beard simulation and RBF Interpolation but to no avail, the crash persists
Hey guys this is my metahuman, I want her hair groom to flow against a wind.. How can i do that? PLeas hellpppppppp

There are a few videos on this - try searching up groom wind Niagara springs vid or smth along those lines
You basically just edit a base engine Niagara system, and put in some animation keyframes to control the intensity of the wind
unfortunately , I was unable to find anything on this, they use wind grrom system that is paid, i don't want that
finally figured it out... If anyone also having trouble with metahuman grromss... then just enable simulation option in metahuman blueprint groom(hair) componenet. And edit the velocity and air drag or gravity options in the quantity of hundreds. minimal change won't affect the groom. 🙂
Did you find a way around this? I'm relying on live retargeting for my player character so everyone can use the same skeleton/animation set
Retarget thousands of animations like a boss
nyet
"Improve the integrate of MetaHuman Creator as part of your pipeline and creative workflow with these new APIs. Script most operations for a MetaHuman Character asset using Python or Blueprints. Operations can now run interactively with the Unreal Editor open, or headless for offline or batch processing."
Is there more information about this to be found anywhere?
Start with official UE Python tutorial.
Look at UE Python API to see if your needs are implemented as methods.
Make script and run
Do they even update the python API with things from the current preview branch?
Sometimes, yes. When 5.3 dropped, early Skeletal Mesh Editing tools became available in UE. These tools were also added to the UE Python API. They update it regularly, but it might never have what you want, depending.
Hi, i have an issue where my metahumans have hair and everything looks good in viewport, but no hair is shown in my renders


yes lol i was so confused on what was happening
preview of a skin addon for metahumans in blender im working on


looks amazing, what exactly is the addon doing?
one click skin shader, with options of skin color, currently 12 different displacement maps, viens, capillaries, makeup, scars etc, all with sliders to contol color, weight, glitter, stuff like that
Are there any metahumans presets in 5.6 that will fit clothes of the "Average/Thin" body type?
They're all based on different bodies than the previous setup, unfortunately. However, I imagine you could use Conform in 5.6 using DNA files from your 5.5 bodies and go from there.
hey guys, is there a simple way to change the skin colour of a metahuman in play? aka a char customisation menu having a slider or list of preset options?
i’ve been looking around and couldn’t find a solid solution, i know that it is doable because i have seen YT demos
currently im resorting to a range of 4 preset options and just manually swapping all the materials stores in a data table
which is quite jarring tbh
and yes this needs to update during runtime
@dull dragon ask here
Okay
Hello, guys.
I am working on UE5.4.4 and using metahuman skd for metahuman lip sync and eye-blink
Currently, lip sync and eye-blink is working using metahuman sdk plugin BP.
But I want to make more frequently eye-blink.
I tried several things like face_post_processing anim blueprint to control the control rig for changing the eye blink but ater that eye-blink is working frequenfly but lip sync is not working because it's overriding.
How can I solve this?

Does anyone know of a guide to add Ik bones (ik_hand / ik_foot) to the metahuman skel? im having a hell of a time figuring it out.
the one video on YT i found for doing it in blender didn't work.
hi there any idea why i only have this white tshirt as garment ? thanks

and alos my metahumans are not appearing

im using ue5.7 but it was the same on 5.6
when i move them i can see what i should see but what a weird bug

hey, folks, wondering if anyone can point me in the right direction here. I'd like to apply this same lattice deformation to each of the metahuman LODs. I've attempted using the deformer graph but found that it was competing with the facial rig. I just want to adjust all of these meshes to look like the severed head one so would love to get thoughts on what the most minimally invasive way to do that might be.

Hey man you mind if i send you a friend request
Is anyone having issues with the metahuman head conform saying its not metahuman compatible topology when you know for a fact that it is
the body works fine for some reason but the head conform is crapping out on me
even just the simple act of import the fbx to houdini and then immediately pump it right back out to a character fbx rop node seems to break it
Nevermind i think i got it. Something to do with the way unreal engine assembled the metahuman in the first place bugged out the fbx material name so it thought it was looking at the wrong part. somehow assigned the teeth material to the skin, some shoddy coding from epic.
But texture overrides are just not working at all for me. I'm guessing its something to do with virtual textures?
the bitch of it is, its not just an issue with the preview. if i try to assemble it, it bakes out the messed up materials too

hi there anyone found to properly dress metahumans ?i want to buy a suit but not sure which to choose ! thanks
I'm trying to export a metahuman from 5.6 to 3ds max but not having any luck, is there a working way to do it?
I'm curious. Why do the metahuman plugins rebuild when you switch between debug/develop even though they are engine plugins?
Does anyone have any feedback on what i can improve on the textures

hi ! what's the workflow to combine assets together in metahuman ? thanks
Hey everyone!
Just like last time, I wanted to drop another tutorial ,this time a quick one 😶🌫️ for anyone interested.
This one covers something that’s always been super annoying (at least for me 😅) the Metahuman head detachment issue.
Unlike a lot of other tutorials out there, this method actually works 100% of the time it’s simple, clean, and follows a bit of an Occam’s Razor approach.
Even if you’re not familiar with Blender, don’t worry you can use any software of your choice for this quick fix.
Hope you all find it helpful! 🙌 https://youtu.be/D9m23SCotKI
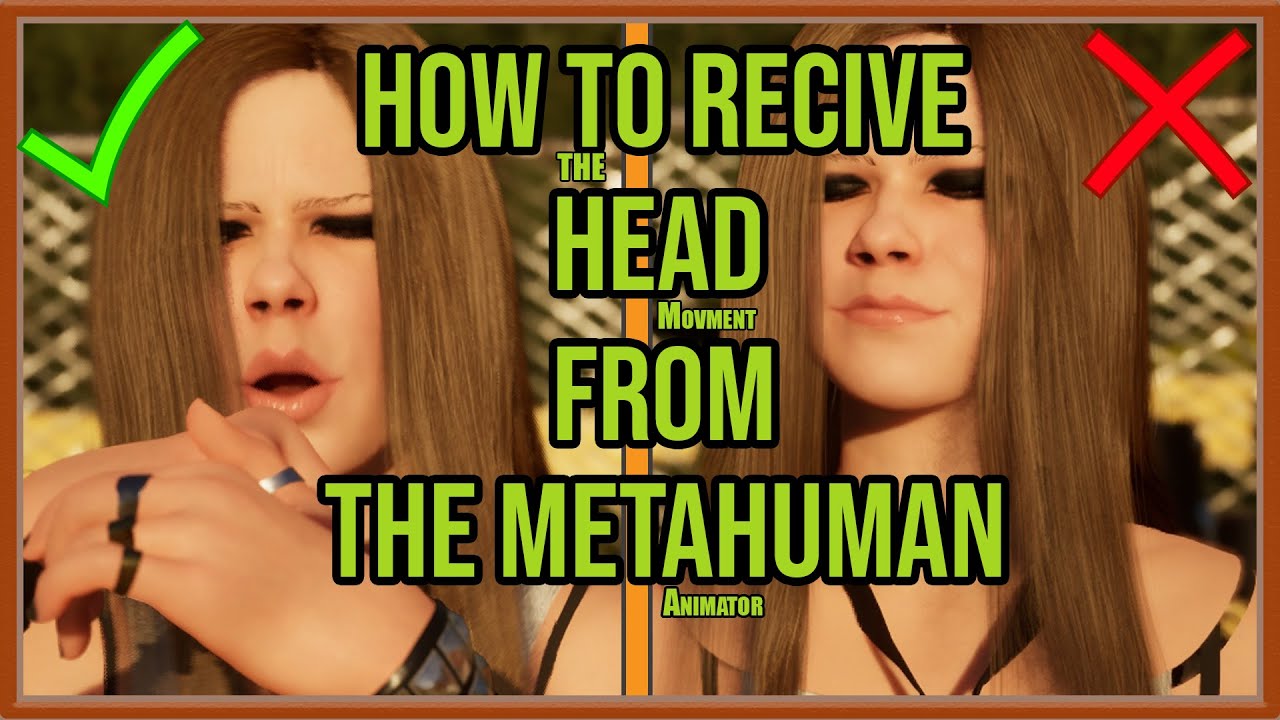
In this video, I will solve the common Metahuman head detachment problem.
Using the only reliable and realistic solution for Metahumans inside Unreal Engine.
This use case applies when you want to combine your Metahuman Animator head performance
(with all the real head and neck movement)
with a completely different body animation — whether re...
Did you open the metahuman and select the LODsync component and make sure that the "forced LOD" setting is at ) and not -1??? This makes sure that hair etc is displayed regardless of camera distance.
I did, but changing render settings to not flush fixed it
Nice. Glad you got it sorted.
So 5.7 metahuman has fundamentally different topology than 5.6 topology apparently
confirmed by trying to import an FBX from 5.7 into 5.6 and conform it. It says "input mesh is not consistent with metahuman topology"
Which might have just fucked me royally
Because 5.7 keeps crashing on me constantly
I wish they wouldn't change the poly order of their meshes from version to version it makes it such a bitch to work with
So... is there anyway I can put clothes on the metahuman I mess with? They also lack the preset animations from the browser version
I exported one from the 5.5 version and changed some things in him but now I don't know how/where I can dress them
the animations are actually supposed to be in there but they don't appear to be working in 5.7. you need to assemble it and then there is an animation tab in the preview details on the right
and yeah there is a way to turn stuff into parametric metahuman clothing but i haven't messed with it yet so i can't tell you
A bit of a shame some things are srambled on the transition from the browser version to the UE version
Those idle animations apparently are also in there but hidden within the files
How is my guy looking now

IK for Metahuman Face
Demo: https://youtube.com/shorts/_Gg3ctt2Neg
Tutorial: https://youtu.be/zVgdsr56nWg
Download: https://faceik.teca3d.com/
FaceIK - Metahuman Face Inverse Kinematics (IK)
Hello everyone: We are launching FaceIK—a Metahuman facial Inverse Kinematics (IK) plugin that enables you to achieve ideal facial expressions simply by dragging handles to target positions. The entire process is fully automated and completed in real-time. You can view the specific effects in the demo. This demo was recorded in the latest Unreal Engine 5.6.1 version without any post-processing.
We offer a fully functional free version for learning and using FaceIK technology. With the free version, you can create animations for Metahuman in Level Sequence, then bake and apply those animations to any other Metahuman character, including your custom characters.


FaceIK is an Inverse Kinematics plugin for Metahuman facial animation in Unreal Engine.
This brief technical demo showcases its powerful and impressive capabilities. We offer a fully functional free version for non-commercial use.
For more details, please visit our website:
https://faceik.teca3d.com/

As an Unreal Engine MetaHuman facial Inverse Kinematics (IK) plugin, FaceIK enables the creation of vivid facial expressions by simply dragging handles on the MetaHuman face. Its operation is straightforward, intuitive, and efficient. We offer a fully functional free version for everyone and invite you to try it and provide valuable feedback.
T...
Make Facial Animation Simple and Easy.
Hi everyone! I'm trying to create a parametric clothing item in UE 5.6, but I have a problem.
I exported the FBX of a cloth from a old projecth with Metahuman(5.5) and re-imported it into my new project(5.6) following the documentation for parametrize the outfit, but its position is completely wrong.
Does the source FBX or Static Mesh need to have mandatory characteristics to work correctly?
i notice this know in skeletal editor

Lmao you mighhhttt want to change the thumbnail text
Nahhh, I do thumbnails like that on purpose from time to time 😄
Sometimes I go with a professional looking thumb, ...and sometimes this kind. 😄
Hey Everyone, just getting started with animating metahumans via control rig and sequencer.
I've done a fair bit of character animation in other software, so I'm used to having IK controls for the hands.
I've watched a couple of hours of youtube now, but for the life of me, I can't find how an easy way add IK controls to the hands xP
Anyone got (yet another) youtube link showing how to "turn it on"
when you have a sequencer open with the metahuman control rig, there should be one control (root?) that has options for ik
keep in mind they can be animated, too, so you might have to delete all keys on those tracks

yes

Guys, why Devs left demand to build Metahuman C++ code with source folder in project? Will it be removed in 5.7?
what do you mean combine assets together
Does anyone know if the metahuman plugin's lip-sync can be used for custom (non-metahuman) characters with mouth shape morph targets, both in-game and in sequencer?
Hello, when using metahuman clothes, I have leader pose component and child ones (C++, same as BP version) and thing is, the meshes gets stretched when going away with camera. Looks like few bones on legs are not updating, or meshes are not updating. Has anyone fixed this? It doesn't matter which clothes it is, it's from Metahuman Wardrobe.
It's super critical :/ Tried lods and everything.
Can Metahumans be used to make other assorted characters in Flux Ai or other Ai platform?
I believe you'd have to name the blend shapes the same and find a way to get it to work with the control rig
At one point i tried to set that up with the 3d scan store multi expression basemesh and decided it was just an easier process to just transfer that to a metahuman
Hello everyone i have a problem with teh sequencer and the rendering. i want to capture all the audio inside the animation i wnat to render but unreal seems to only capture a small part of the audio and also that part is not synced with the video it is like it first captures the video and then it tries to capture the audio after that
Heya guys, a question for you: it's been a while since i've fiddled with Metahumans, they used to have a set of standard clothes (like a hoodie, a tshirt, ecc...)
Now that Metahuman Creator is inside the engine i don't see these clothes anymore, just a very very basic underwear.
Do you know how can i get them?
I would also like to know this
You can still download the old ones using quixel bridge but they don't have the previous clothes
Any chance you know how to convert an non-metahuman body mesh into a metahuman body mesh? The identity tool only allows for converting faces
I tried using the free version of metatailor this weekend.
Sorry to say it's been a deeply unpleasant experience so far :/
Stuffed around for hours to get my clothing going in it, only to find out that you can't export the clothing without the character mesh.
I had to import the skeletal mesh into blender to remove the character, but now of course it's not working properly in unreal
Yeah I wasn't a fan
They have an Unreal plugin in closed beta, but yeah, at this stage unfortunately there's no one click export for UE users.
the plugin is only available in pro
This was far easier and quicker and completely free:
https://www.youtube.com/watch?v=bvhxDVii2Vw

I have tried every method to get Metahuman to behave correctly and this is the easiest, quickest and most bug free way to rig any article of clothing to the metahuman. It requires very little skill as well. Anyone can do it!

As it turns out the metahuman identity is powered by these blobs of neural net data
Probably not going to be able to rig up my own for the body seeing as I don't have 1000 gpus
idk about that, I'm trying the hard path of fitting a shirt, convert it to a sk mesh and create ClothAsset/OutfitAsset/Wardrobe Item for my MH
yeah that's the typical part
I figure if I can retopo a target base mesh to be a metahuman then any clothes that fit that new fraken-metahuman will fit any metahuman with the chaos pipeline
Problem is that I need to do that for the Epic Megajam, I guess im f*cked lol
Is really crazy that Epic just released ONE asset regarding MH clothing
this one: https://fab.com/s/189e540abe35

Fab.com
MetaHuman Techwear Outfit is a parametric outfit asset created for MetaHuman characters. It is capable of resizing with your character in MetaHuman Creator in Unreal Engine. It consists of a Jacket, Pants, and Shoes, but they are all one outfit as opposed to separate pieces. It includes a full set of LODs. It is compatib...
actually if you use the free filter and the metahuman filter there are another three
And its not even a standard thing, I mean, you release only one asset, just go with a normal outfit that could be far more useful
For men?
here you go
just a shirt and jeans would have been great for a lot of people
but nah, lets go with the TECHWEAR thing
yeah
they go through all the work of doing this crazy tool for turning any face into a metahuman face but don't use 5% of that effort to do the body too


Any other footgun settings like these that destroy topology?

just 1 vertice missing left
hi,
I check MEtahumans for the first time on web.. and there, there are a lot of presets for cloting...
In UE5 i turn on Metahuman addon and start new char, but there isn't cloth preset there
How can i have the web present in my local pc? Why there aren't? i must buy it?

Our feeds are flooded with stunning AI outputs. But here's the production-level reality check: a beautiful output you can't create again on demand is just a happy accident. It's a distraction.
Quality and fidelity matters little if the output isn't controllable or replicable.
These results are the product of a system.
These are Jackie and J. Col...
Hey all, I am experimenting with using metahumans in an unreal cell shaded project of mine. I have this material that is supposed to work well with a cell shader and I was trying to override the texture on the head and the body of a metahuman with it but it is being rejected. In this video https://www.youtube.com/watch?v=VS8fkF7sYzw the guy makes a stylized metahuman meant for a cell shader and he mentioned using Substance (I assume that means substance painter) to paint the skin.
Will it always be necessary to use something like substance painter, blender, etc. to change the material of the skin of a metahuman, or is the material that I'm trying to use just in need of some sort of adjustment?
Any pointers or advice would be greatly appreciated 🙏


MORE TIPS AND TRICKS: https://www.youtube.com/watch?v=dWwi3t8qkTI&list=PLSIw3sPs55qAQLNzO14QndD8LPCzXCeoZ&index=21
GET DISCOUNTED @METATAILOR :
https://marketplace.metatailor.app/payment-type-mod?p=price_1OMDzdBOHElGgbDvCP9V1Kx5&c=7nRbsSzN
Want to create a stylized Metahuman for Unreal Engine 5 without getting stuck in the ultra-realistic lo...
It looks like you're trying to assign a material to a texture slot which is why it's not letting you.
i have a question that might sound dumb, but i am trying to use metahumans with multiple uv channels, and everytime i import export, it deletes the channels other than the base one. Is it not meant to be using multiple uv chanels?
i looked at documentation and it doesnt seem to be talking about uvs, so it might just not be meant to be used that way?
any advice or documentation would be greatly apreciated
any idea how to contain the metahuman hair inside the hoodie?

Ohhhh you were totally right. Thank you @hollow robin !
- got it fixed, it was LOD issue


Resizeable metahuman garments are my new favorite feature and i feel like my leather jacket garment turned out great


I wanted to ask if there are any places where people share metahuman identities they created. I'm not happy with the presets offered, and would want an already good looking mesh to tweak.
Wow they finally allowed to remove that ugly ass underwear? was about time lol
Fab is littered with them at the moment (much to my annoyance 😅)
Are metahumans meant to be at a stage where they are a playable characters? for instance (as of 5.6.1) they are missing a lot of basic stuff, like IK
You've always been able to with masks but the part thats annoying is you can't get back the nipples
So if your character is shirtless for some reason they're gonna look like a nippleless freak
Hi! Anyone else getting shadow flickering on Metahumans?
Feels like it’s coming from TSR, but I haven’t managed to fix it yet.
I’m on 5.6, using Lumen and TSR for anti-aliasing and the metahuman is set to High quality.
does anyone know if I can dissolve through multiple metahuman skin materials?
I want to duplicate material with a slight variation and then control dissolve in the sequencer
You can add a dissolve function in the master shader you are using and then control the dissolve amount with a scalar parameter in a MPC. If you modifiy this parameter it will affect all material linked to the MPC
thank you
Does anyone know how to apply post processing animation blueprints to a mutable character? I have only found 2 unreal forum asks about using linked anim graphs but they did not help me figure out how to implement them.
Hi im new to creating metahumans and wondered if it is possible to like have an runtime editor, were players could customize there characters. Just like adjusting clothing or hair from some presets?

after importing a new character into my game and setting a skeleton for it, did it add new sockets for me?
also does this affect performance?
Look into the mutable plugin, it should suit your purpose.
thank you
There is any way to make this custom teeth work? I cant get it perfect
Btw Im looking for someone who understand metahuman rigging to be friends xD
Hey everyone!
I’m trying to attach some accessories to my Metahuman using sockets.
When I attach a mesh to a socket (for example, the ear), it takes the socket’s pivot as a reference, so the mesh ends up in the wrong position.
Does anyone know a way to avoid this issue? Or maybe how to find the correct values directly in Maya to copy them into Unreal and line things up properly?
Doing it all manually inside Unreal doesn’t seem like the best option.
Hope someone can help!
Same issue here :/
Attaching accessories to areas with heavily influenced by bones and morph targets can be challenging. One possible workaround is to attach the accessory to a specific vertex location by creating a proxy mesh (with just 1–2 tris) parented to the main body, and then track its position to update the accessory’s location during animation updates. This would probably require some C++
You're probably going to need to either dive into the metahuman d n a maya pipeline, or utilize a paid tool.
👋 Does anyone know what's causing this haze like artifact on the eyes. Is there any console variable or something I can change to help with this. This is the result of MRQ render where I'm changing eye poses on a per frame basis making them snap around

Retargeting to Metahuman - do the flip flops cause a Z offset these days? I thought it did, but then I just retargeted some animations, and it doesn't appear to be affecting foot placement.
any idea how to make AI chat-bot or assistant in unreal what to use?
Hey everyone,
I’m having a strange issue in Unreal Engine 5.6 with my Metahuman.
I created a custom Metahuman, and it looks fine — but after that, my default Metahuman became distorted.
The character’s body and clothing (especially the vest) are stretching like wings or exploding outward.
It seems to have happened after I retargeted animations or replaced a skeleton.
My custom Metahuman works perfectly, but the original one is broken.
I think the skeleton or physics asset might have been replaced or corrupted.
Has anyone faced this issue before?
How can I restore my default Metahuman without breaking the custom one?
Any help or step-by-step fix would be really appreciated!

hello any one here plz
i need help
If you are using a non-metahuman skeleton
Can someone explain how we are supposed to import our own custom metahumans into metatailor?
I think I am realising that this isn't actually possible? But then if that's the case, what is the point of metatailor?
There is no bridge option, apparently they've closed it
working after created new project same model migrate to old project after not showings issues now tx for reply
Generally the metahumans from the web site creator and imported don't play nicely in 5.6 since the new creator was integrated into the engine.
skel mesh vertices weighted to nothing appear that way
Hello everyone
I am new to unreal engine I want to know can we make metahuman character which we can play also we can use face mocap realtime while playing game using live link hub.
A pouting expression created on Metahuman—imperfect, for practice purposes only.
https://youtu.be/a6ndkUzmmLs

Tutorial on how to create a pouty face.
Download and try FaceIK for free:
https://faceik.teca3d.com/

did someone manage to get rid of the "all groom shadows disappearing out of nowhere on a character"-feature? I noticed that virtual voxel world size has an effect on this, but it seems to be unreliable ._. Sometimes a lower value can make the shadows come back. sometimes a higher value helps.
i think you may have to make it separate after you convert it to skeletal mesh
Are you using conform for this? I've been having issues using the custom eye mesh, doesn't seem to recognize the topology even though its identical.
Dose any one know why my custom mesh eyes are messed up like this? I have spent hours trying to fix it and I have got no where! Worse yet I don't even know how to trouble shoot it because I have no clue what is causing it! I never even seen this bug on any tutorial.

Maybe check the eyeball mesh UVs that you imported and see if they match with the MH ones?
I figured it out I had to down load epics conform mesh from FAB. I was exporting the face into maya and trying to use the eyes from that export and it DID NOT work lol.
Hi everyone, I’m using Unreal Engine 5.7 and have imported a MetaHuman from MetaHuman Creator. While creating it, I noticed two animations I really liked — one for the face (Idle) and one for the body (FaceROM). I’d like to apply these two animations in combination to my MetaHuman in the scene, so that they play automatically in a loop when the level starts. However, I can’t find these specific animations in the content folders after import. Could anyone explain where these animations are located or how to apply them properly to the MetaHuman? Thanks in advance for your help!
Maybe this is what you want:
https://youtu.be/HuRJxfLEraY

This is a UE5.6 operation tutorial demonstrating how to export MetaHuman's range of motion animation and bake it into a controller animation. Everyone can apply the operations from this tutorial to their own work scenarios to validate the correctness of their custom rigs and modify body or facial controller animations. For example, by playing th...
Thank you ❤️
My first time trying to make my metahuman face , made it in Blender from photo as a test. And that in UE5. Need to fix those black spots. 🙂
Anyone know how to fix this when i attach my metahuman to the neck

Helloo, Does anyone know how to skin or bind clothes in Marvelous Designer so they move with the character’s body instead of simulating, similar to how it works in Unreal ?
Might have to export ur clothing to another dcc
Hi, Please help me...How to replace a metahuman (with blueprints, game mechanics) to a new metahuman without affecting whatever has been developed now in terms of blueprints? Thanks
Hey, did it work? I'm having the exact issue. I want to utilize my old metahuman but the vertex order or topology might be messed up. After the big update, my customed metahuman's head' seem to be working, but the body somehow freezes in play mode.
Is there any way that I can revive the outdated version of the character?
Hi, I'm new to using metahuman, what learning material would you recommend to learn how to make custom clothing for the metahuman plugin?
Many thanks in advance
this can be done in MD, theres an animation mode. I haven't done it in ages, but look up Marvelous Designer animation tutorials and you'll find it
the tricky part from what I remember is getting the animations to export and import properly, but again, this was a while back so its probably easier in newer versions haha
can someone tell me what is the easiest way to get some wizardly beard (like gandalf) on a metahuman character ?
i didnt keep track of updates, is there any way to adjust metahuman bodyshapes at runtime and make it work with meta clothes? last time (4-5 months ago) i attempted that but saw that this was still wip. background is that i want to use mh base models in a character editor with the possibility to change the char height/weight later on (and metaclothes together with that), without using different models for different stages. and that was not possible at runtime, which is a shame.
Hey all! I'm wondering if anyone has noticed this fairly unpleasant wrist deformation? This is the default MH from Creator exported and with PP anim BP enabled. Not a huge priority for us to fix it, but figured I'd ask here to see if anyone had a solution? I'm guessing it's probably a case of needing corrective morphs which don't exist by default for the body?

(this is using the provided body ROM from Creator)
I think it depends on the source of the animation and what skeleton proportion you are using. You might have to retarget the body rom from the female medium to whatever proportion you are using. And also if you change the main joints to skeleton in the retargeting options and leave the correctives to animation it should look more natural
Ahh interesting, okay! Thank you for this. I'll take a look and see if that solves it 🙂
It's me again! Attempting in 5.7 to override body albedo, but for some reason it's rendering as white? Any ideas what might be going on here?
Edit: Looks like an engine restart solved it.


Does anyone know how to make a metahuman look at a camera in the scene with head and eyes?
Yes I do
I solved the problem
I was using look at
Correctly
But the post process animation blueprint was blocking only this animation
So I put the lookat node inside the post process animGraph, at the end.
Now it all works
Is here the best place to ask questions about chaos cloth? ^^
Hey guys, I duplicated Metahuman face skeleton, applied that copy to my face skel mesh, added few joints extra, on those joints I added new skeletal mesh and painted weights. NOW when I add both face and my custom skel mesh to the metahuman blueprint, the custom mesh jump up on Z axis. Any idea why ? 🙁
Found this, this is what im trying to do -> https://www.youtube.com/watch?v=RbknlFIsOss
But his solution does not work, and it stay offset as in his case at the beginning. Any ideas ? 🙏

Adding a new Skeletal Mesh (exclusively compatible with UE5) and setting up a couple of parameters, will give us a fully rigged and controlable new body for our Metahumans, through their own Control Rig, no additional steps needed!
Chapters:
00:00:12 Intro UE5 Skeleton
00:01:09 Result
00:02:06 Using the MH Body as an Animation Driver
00:02:25 A...
I'm trying to get the Mutable Plugin to work with my Metahuman character. However, the tshirt clothing does not seem to fit the character.
Both use the metahuman_base_skel as their skeleton and the bones seem to be fine. I also noticed if I directly replace the body mesh in my character blueprint the character shrinks for some reason. What do I need to adjust, so that the tshirt and the character fit together? Do they use a different size of skeleton? But both skeletons are in the Female/Medium/NormalWeight/Body directory.


I managed to solve this, by applying the OutfitAsset which I had to the Metahuman character in the engine editor. Then assembling it and copying the perfectly fitting Skeletalmesh of the Clothing into a separate folder.
Another thing you could do is make your clothing parametric. This will make your clothing autofit any metahuman. There's a couple of tutorials on youtube if it's something you want to have a look at.
Hello. New to this, I have few meta humans I made back in 5.5, and haven't look at it for awhile, and want to import them into 5.7. After doing some looking around, all I see is use quixel to bring them in, but I couldn't find how to get quixel bridge on 5.7. Anyone know how to bring older model into 5.7? Or do I need to jump in 5.6 to make the file work for 5.7?
ok so i just got 5.7 and the metahuman creator, made my character. i have it using the abp_manny. and when he walks he just kinda shimmies his legs. I tried to do the thing with the virtual bones for the root and feet but I may not have done them right and everything I tend to see is from over a year ago.

In this Unreal Engine 5.6 metahuman tutorial for beginners, MizzoFrizzo will show you how to easily set up your metahuman to be a playable third-person character.
Public Discord Server: https://discord.gg/UCfWQ7uKgA
Patreon: https://patreon.com/MizzoFrizzo
Pitchfork has released their first game, Skyblocker. You can support what we do here at ...
Thank you., that worked. funny thing is the only thing i didn't do was retarget the abp and just tried doing the animations. much simplier
Latest work https://www.youtube.com/watch?v=VY1Wtt_tthU
MUCH simpler workflow for Unreal to Marvelous Designer in the latest release of MD by using Metahuman DNA https://youtu.be/9AqiFwsSY00

In this #tutorial #video want to showcase the latest update to my #marvelousdesigner and #metahuman workflow with the release of the latest version of MD which allows for DNA importing.
Also, I will showcase the features of the #ai pose creation tool, which can be fun and handy! And provides some great bloopers.
TIMESTAMPS
00:00 Introductio...
Maybe someone would like to turn these into metahumans:

Free stuff alert. 🚨
I've uploaded my entire library of AI-generated celebrity head meshes. Bradpitt, Bruce, Jackie-- the whole gang is here.
I'm putting these out for the actual craftspeople in the network. It shouldn't be too hard for a legit artist to turn these into gold. The rest of you? Enjoy looking at the wireframes.
Grab 'em while th...
Are there any resources for using the parametric stuff with non-metahumans?
Or resources for making metahumans lower poly?
I love the parametric body / clothing, but the meta humans dont fit my game. I have seen stylized stuff for them using MeshMorpher, but I'm wondering if there is anything more I can do
Hey guys, for specific reasons I exported Metahuman DCC into Maya, imported it there with combined skeleton and now I need that with extra mesh skinned to head joint back to Unreal with working facial rig. But the facial rig DOES NOT work 🙁 Any ideas why that could be ? 🙁 Body works fine. Just the face not 😭
How do we mask the neck on metahumans in 5.6?
Something simple if possible, not connecting 500 different nodes and reroute nodes and basically disarming a bomb
Is it possible?
hello i have rookie question, why I lose the gizmo when I bake the animation into the fk control rig?

its works with ue5 rig but not metahuman
i can use compatible skeletons and bake ue mannequin but it feels like random bandaid fix

for those who experience the same thing in the future : untick filter asset by skeleton and pick metahuman_controlrig

Ask 5.7.1 to make a copy of a 5.6 project. Remove the rig. Re-rig and re-assemble. Drag the new BP onto the level, get this:

happens whether you delete the previous 5.6 BP and sequence for the MH actor, or not. I combed through the BP "hair" simulation , same params as in 5.6.
does anyone know if grooms or wardrobe items all need to be upgraded or compatible with 5.7?
I know this happens in ue 5.5 versions when you update the DNA, the way to fix it is to update the groom binding assets for all the groom components in the MH BP
That makes sense
Select the head mesh then open up each groom binding assets for all and assign it as the source skeletal mesh
Not sure if this will fix it but it works in 5.5 and earlier, helps if you have a copy of the original head mesh in the project
that though is something my groom vendor shoud be doing. I only pull the groom into MH creator. I dont play with grom bindings. They should assemble correctly to the BP, no?
That’s with the default Metahuman grooms not with custom ones
I understand. It's a workaround for me, and all of my grooms are from vendors
Ah I see, well usually thr groom binding asset is the first place I would look, all it needs is to have the head skeletal mesh assigned as the source skeleton
right i think I was through that before. Thanks so much.
Hi everyone! I have trouble getting LiveLink to work on a MacBook (using 5.6 and 5.7, metahumans work fine).
Failed to Launch LiveLinkHub
Could not find the executable. Have you compiled the Live Link Hub app?
What's the solution?
Hello everyone, I hope you are well. I am having a problem related to my Meta Humans. In a certain test, I asked the AI how to reduce the quality so that my project would run on Oculus Quest with Meta Humans. However, I tweaked and tweaked and tweaked, and it still ran slowly. But I can’t revert the settings that the AI made me change. It’s been over two months now. I try, I stop, I give up. I would like help from someone who knows how to revert everything back to the basics. I don’t know.
all my meta humans, when I bring the camera close, their hair starts to disappear and all their hair becomes dotted, just like in the photo I sent.


The hair is a LOD issue you can force lod 0 or 1 did you download the highest quality meta human or a smaller quality version? That would be the first step
I downloaded a new cinematic quality, and when I put it in the scene, the hair is instantly dotted.


Hi Everyone, are you guys experiencing vram issues with Metahumans assembly? I have rtx 5090 with 32 GBs of dedicated VRAM. Cinematic (Complete) assembly dies due to lack of vram. I picked UE Optimized (High), everything else's closed, all resources are available for the sole purpose of metahuman assembly. I run out of vram... In 5.6 I could assemble in Cinematic with no vram issues.
You may want to download a less high quality meta human to start. The cinematic one is superrrrrr heavy
I think it’s like 4-6k textures and all that jazz not meant for optimized just meant for cinematics basically
Hi everyone
when you download textures, are you picking 8k or 4k?
oh also it sounds like 5.6 worked, so I'm assuming you've upgraded to 5.7 and the issue is happening there?
if so, definitely sounds like a bug/memory leak introduced in the latest version, so I would try opening a ticket with support for it
a handy tip would be to open up a new project and compare project settings side-by-side. I've spotted things like that before
yes, exactly, I use the same texture setting as they were in 5.6 for both workloads, and both run out of memory, I'll test if that happens with 1k texture or smth, but does look like a bug, thank you
Interesting, it does seem like there are lots of issues with MHC in 5.7. I haven't upgraded yet, I keep hearing things like this
Hey! I have a rather terrible crash happening when trying to assemble a metahuman I created in 5.6 for 5.7. A message pops up saying "The following MetaHumans were assembled with a previous Unreal Engine version. Any manual changes to their Common assets will be lost: List of my metahumans. I tried pressing OK but after like 20 minutes my engine just crashed. Anyone have the same issue and know how to work around this? Do i need to make my MetaHumans completely new from scratch? Thanks in advance (canceling it shows an error: Cannot write to Common folder)
I've had hella issues with MHC in 5.6, so I'm switching to 5.7 now and I'll see if I run into that issue lol
I could use some help or pointers. I'm using Unreal 5.7 along with Houdini 21 and the Metahuman groom tools and the Houdini Metahuman Groom Template to create the grooms. I'm trying to create custom facial hair - at the moment specifically eyebrows. I have them generated and exported the alembic file. It imports fine with the alembic hair plugin enabled in Unreal.
I've got the eyebrow groom bound (binded?) to the basic head that is provided with the Houdini scene and also to an existing MH model. But I have a couple of problems. First, I was watching Matt Workman's video on using this workflow and once he's imported the groom he cuts the video, says something about "I had to figure a few things out" then drags the groom from the content browser right into the Metahuman Creator interface and drops it into the hair asset area. I cannot find any information on how this is possible. I can only attach the eyebrows to the MH Blueprint.
Through some research I was informed that the only way to be able to drag the groom into the MH Creator is if the groom is a Metahuman Wardrobe Item. Some documentation seems to indicate that the WI should be automatically created where other documentation seems to say that you have to create it yourself. I never saw any wardrobe items created, so I created one myself, but it also will not drag into the Metahuman Creator. Any idea what can be done?
Second issue - so far, nothing I can come up with gives any reasonably decent looking shading/renders on the eyebrows. I have a hair shader assigned, but in the viewport they look sort of pixelated and rough no matter what. The eyebrows also have what appears to be an LOD problem. When I get too close, they disappear - when I move back they pop into existence. Any thoughts on shading & LOD issues?

I've been looking for it for 3 hours
Haha yeah same can't seem to find a solution
I know that the regular BP_Kellan is used but I have no idea how
someone said
Open Epic Games Launcher
Go to Library → Fab Library
Find Game Animation Sample Project
Click the three dots (...)
Click Remove Local Content
After it clears, the button will change to Download or Add to Project
Click it again — it should now pull UE 5.7 instead of 5.6.
Hmm I see I mean I am using the 5.7 version because I have the new slide controls and what not but I can try that
How did you get it? Did you switch to the mover character
I mean I just created the project as normally but with UE 5.7
How did you add it int here it's not letting me add it
You can see here it says Select version of the engine for project


select the second pawn "New" to try the slide

Hey everyone. I'm trying to leverage metahumans in a cell shaded project. Currently, when making a metahuman, I check the box to do a texture override and I put the same jpeg in for the face and body (the whole jpeg is just a single color I made in paint) but the surface of the metahuman still looks "rough" when in the cell shader as seen in the picture. I assume I need to adjust the actual surface of the metahumans skin? Any pointers on how to do that or on what do to instead to make the color bands on the metahuman model more defined would be much appreciated.


I'd 1st try to unrig and re-rig the MH and try to assemble again. But it seems to me that there's a memory leak in MHC when assembling, so it may be that.
I have 128 gig Ram and indeed Assembling fills the ram constantly in 5.7. I opened an empty map and succeeded but it was close, was finished at around 116gig
It really seems to be a bug in 5.7 at the moment
Hello 👋👋👋👋
To me that looks like a skin normal map with pores and whatnot, so you'd need to get rid of that
Hey folks, I've noticed a couple of things regarding Metahuman Animator / Live Link Face...
On Android, I don't think it's possible to do the Metahuman Animator path because it lacks depth and can't process on device (fair), but you also can't record a LiveLinkFace video feed either. Which means you can't use the monocular solve path in UE after the performance to gain a bit more quality over the realtime LiveLinkFace feed.
Equally, iPhone has the Metahuman Animator path, but you can't plug in an external usb camera to get a good headset setup, meaning you have to put the phone on the front of a headset and makes it horrible to use/work with for the performer. But even if you did, the external camera isn't going to provide the depth anyway, so it's back to LiveLinkFace quality I guess?
Am I missing something here? Is there some way to do the best of both? We're hoping to get a live feed on the day (which can be combined in with our Vicon mocap setup in LiveLinkHub) and then have the mono (or preferably depth/stereo) feed being recorded for offline solving later on (when a take is validated/chosen for use).
Just wondering if anyone has managed to record and stream the Android LiveLinkFace feed at the same time to get realtime + monocular solve later? The app just doesn't let you record to device at all which is such a strange choice on their part.
^ I'd like to know this too, as I'm a few steps behind. Keep me informed please if you get an answer anywhere
When I get to that stage I want to copy shape keys /curve data from metahuman face animation to another characters face that has the arkit shapes, is this possible?
any way for the metahuman to look down when the cam looks down?
Anyone exported Alembic hair from Blender 5? I remember it being convoluted in prior versions of Blender, having to check both an "only selected" and "only visible" box but it looks like they removed that "only visible" box so I'm back to not getting Unreal to see the file as hair
Anyone else having their metahuman get distorted when applying the control rig in 5.6/5.7? I have a custom mesh, it looks fine until the control rig is applied, then the arms are shifted. The distortion is different between 5.6/5.7. I haven't seen anything addressing this specific issue, but I assume this must be pretty common.
Is it still like that after you assemble the MH? I do remember I had the same effect but I don‘t know what I did to fix it. For me this was only in the character creator window.
It is. In the Creator window itself there's a small shift but it's just conforming the rig to the default A-pose it seems, so it's not distorting anything. The issue is a significant shift in the control rig. At the moment, the rigger made some adjustment to bind pose to match the metahuman default joint orientation. So it seems that for certain joints, perhaps the offset is whatever the difference in joint orientation was relative to the bind pose adjustment.
I'm having some weird effects when moving my metahumans head, the edge of the hair creates blurry artefacts. Is this a side effect of TSR? Any tipps on how to make it less apparent?
hi! got a... maybe rly weird question, and wanna see if anyone has encountered this.
im making a stylized modular charater based on the metahuman, but wanted to see if, when I do an animation for that face, can that be transfered to another face and work, even tho that second face is different, but the same topology?
sry if im explainig myself wrong. Both faces have the same vert count, but im changing their shape in Zbrush to make them look different. Im recording mocap for the 1st face, but want to see if that same animation would work on the second one, or if I need to record the same animation for every single, individual face i remake in Zbrush, or if one animation might work in all heads... basiclly
sry again for the long rant, but tryed to research and cound t find an answer for this, very specific thing 🙂
Morning everyone, another request for help sorry...
I got a metahuman animated in sequencer and it's all good (ish) except for her hair:

when I scrub the timeline in sequencer, her hair thrashes about violently, and it sticks out like above when she's just standing there.
Can anyone recommend a youtube or webpage that addresses issues like this?
Does anyone know if metahuman LOD0 is just LOD3 subdivided 3 times?
anyone ever has GPU crashes when looking at the metahuman head mesh/groom?
grooms in 5.7 are exploding. Bug is admitted by Epic.https://www.linkedin.com/posts/mattworkman_i-updated-to-unreal-engine-571-and-now-activity-7404877116317515776-Zrib/?utm_source=chatgpt.com#

I updated to Unreal Engine 5.7.1 and now my MetaHuman grooms are exploding. Anyone else have this issue? | 14 comments on LinkedIn

Epic Developer Community Forums
Hey, When I create a MetaHuman in Unreal Engine 5.7.1 the grooms look a bit off in all of the strand groom LODs. I’ve heard this might have something to do with the binding asset, but I didn’t have this issue in UE 5.6. Cheers, Matt
assume it wont be fixed until 5.7.(2?) because its still in 5.7.1. Took my vendor and I days to figure this out until the bug was published YESTERDAY. I dont get this. 5.7 has been in beta for months and months, and no one is testing Methahumans and grooms???
Even the "stock" grooms SHIPPED BY UNREAL in MetaHuman Web Creator have this issue.
Welcome
I really need your help guys, all discords are quiet, documentations DOESNT HELP ME:
- META HUMAN HAIR TURNS GOLD DUE TO FIRE VFX IN THE BACKGROUND, NOT DUE TO LIGHTING – HOW TO FIX IT?
- This happens when I change Material Scalability to anything higher than Medium.
- Earlier I had a strange bug related to MetaHuman hair, which I fixed by disabling RBF Interpolation in the Groom Assets, but I don’t think that’s related.
- LOCODROME IS COMPLETELY GRAY, NOT NEAR THE META HUMAN’S HEAD, AND I CAN’T MOVE IT.
- I don’t know why this happened.
- I don’t know why the locodrome is gray and why I can’t interact with it.
- I need it to be positioned at the MetaHuman’s face and to be selectable in the widget viewer instead of being gray.
- META HUMAN LIVELINK ANIMATION DOES NOT WORK.
- For it to work, I have to add an animation and disable “Disable Post Process Blueprint” on the Face.
- When I do that, the head detaches from the body and there is no way to restore it.
How do I fix this?I would really appreciate the help — I’m having a lot of problems with Unreal Engine.

I'm using the new Game Animation Sample Project 5.7 Mover component, and I'm noticing, when using my custom metahuman, a twitch during a state change (from crouch > stand in this example), this is not as prelavent on the other characters, what could this be caused by?
This issue is NOT present when using the Character Movement Component.
Is it because the metahuman is Cine quality? Maybe it's having a hard time adjusting higher polycount?
This mainly happens when the character stands from crouching vice versa, or subtle elevation shifts.
Hey peeps, having a lil' issue with my metahuman's neck, I added the missing joints on the outfit skeletal for the neck correctives but I can't get the blueprint to read both the body animation and the head animation (total BP noob here), parenting it to the body doesn't take the head correctives into account and vice versa. I could just go and mask out the character's neck via shader but I wanna know if there's another solution first


Hello, is anyone else having an issue on 5.7.1 Metahuman Creator where exported face skeletal meshes are missing the ctrl_expressions curves used by the provided template metahuman expression animations? They work in the Creator as shown below, but trying to use them on the exported skeletal mesh doesn't work and the face doesn't move at all during the animation. From what I can see below I suspect the curves that are being modified aren't present.


I just tried in 5.6.1 and I get the same behaviour actually... am I doing something wrong?
Hey everyone, I wanted to ask if by any chance you know metahumans animated packs or any other software that lets you place realistic humans with animations (alternative to Chaos Anima) in Unreal. I'm using 5.6
Guys any help? Why do I get these weird Meta Human textures? Any help?

So I'm having a problem with the MH to Maya assembler, I don't know if it was something in the DCC export assembly or with the assember plugin with Maya but it seems that the hand joints aren't lining up properly. Has anyone else encountered this?

nvm it seems that something mucked up in the rig creator
seems there might be a bug with the joint placement from legacy characters
OK issue was fixed by hitting the Reset Body Parameters button in the body menu
Anyone know why when I click this nothing happens? im in 5.7

body doesnt work either
https://youtu.be/FU_vGEKmC6o?si=i5Lq3_b0sBufHn2c
Testing my MetaHuman
Lost in Space Cinematic

This Cinematic was made in Unreal Engine 5 using Sequencer.
Astronaut Lost in Space with dark sci-fi ambient atmosphere.
Portfolio - https://www.artstation.com/bakycineworks
Animated in Sequencer
Music - Tineidae Sky Burial
https://www.youtube.com/watch?v=duuA9Gzg46k&list=RDduuA9Gzg46k&start_radio=1
Tento Cinematic som vytvoril v Unreal Engi...
Is there a way to edit the UE5 Metahuman body in Blender then send it back to UE5 Metahuman?
If you’re open to it, I’d be happy to learn more about what you’re building and see whether I can help on the hair side , even if it’s just an initial pass or consultation.
No pressure at all, just thought it was worth connecting.
Hello everyone,
I’m a professional 3D artist specializing in character modeling, assets, and animation for games and interactive projects.
Working with metahumans is a terrifying experience!
Can somebody help a pumpkin on porting a hair groom from MH creator to a different metahuman head mesh? I think the problem is in my groom binding, but I've only managed to get these monstrosities:


I've also tried binding the groom to a headsocket and offsetting the socket's Z, but movement of the socket showed no change.
you have two metahumans in a project and want to switch out the grooms? Are the body skeletons the same proportions?
I think so, but I'll try the other body types!
If they are different body proportions as far as height. Usually you can switch the groom out in the Blueprint and then update the binding asset by assigning it as the target skeletal mesh.
Huzzah! I was using the wrong size body. You the best, tysm ♥️
My girl must have used a bucket of hairspray. Is there an easy way that I can enable hair physics?
Open up the groom asset and go to the physics tab. There are usually two or more solvers for each part of the hair. You can enable the physics for each solver if it isn't enabled already and play with the different settings to fine tune it.
Enable simulation is true in the groom but the hair is stiff as a board and clipping through the clothing.
Is phyics support based on the "quality" of the MHC assembly? I'm using a "medium", but maybe I need a "high"?
ah, so I think the optimized versions use cards. Can you open up the LODs tab in the groom asset and see what the LOD0 and LOD1 settings are? If they are set to strands, they should move.

I am not using the BP output from the metahuman creator. I did copy over the LOD Sync component, but I don't fully understand that component and I wonder if maybe I missed something. I don't trust that I am on LOD 0 or 1.
so the LOD Sync component for the optimized MH will usually have less LODs for the head meshes and grooms. The MetaHuman component will usually have a bunch of things checked off, especially physics.
That was it! I replaced everything with the UE Cine groom & components and she's looking decent.
How expensive is runtime groom simulation? Do you think 30-50 pawns would be viable for most consumer hardware or should I stick with cards?
Not sure if I am the right person to answer that. I haven't used MH on other hardware other than my workstation.
A profling project for another day. Thanks again for your help @simple forge , I don't think I would have figured this out without you.
My pleasure!
can anyone link me any resources on how I can export meta human facial animation from maya to unreal?
Freaking long shot here - but does anyone happen to have any examples/tutorials specifically for 5.7 Metahumans in CustomizableObjects/Mutable? I had this working in 5.6 but 5.7 seems.... different. Specifically if you have multiple heads/bodies tied to switch on enum -> Head and then Head -> Components, you can no longer call the component "Head" in blueprint - it wants the name that came before it "Character4Head" instead. Before I could just call it the "Head" component and call it a day


Figured out a hacky workaround if anyone else ends up needing it - For-Each loop on update, rename the component to match what the CO is expecting - use characternameHair instead of just Hair in the CO


Is there a proper (not too difficult) way to fix spaghetti shoulders with Metahumans (from a retargeted animation)? The look is created by the Post Process Animation Blueprint, which to my understanding adjusts the weightbones of the Metahuman Skeleton using Pose assets. Are there maybe alternative Post Animation Blueprints + Pose assets combinations available somewhere that will create a better result? (This is a 5.6 Metahuman). The effect can be slightly reduced by a larger pitch adjustment of the clavicles. But it still doesn't look good.

Anyone else getting compilation errors on the MetaHuman_ControlRig in 5.7.1?

So there's a more performant version of Metahumans right?
Check this metahuman done


Hi!
Is it possible to get a more round/tubular hair strand in Unreal? I just can't find a solution to this anywhere, and the hair strand always get this flat card shape aspect. I'm looking for something like we can find in Blender.

why is my metahuman throwing up gang signs with this particular anim montage?

has anyone else had the problem with ANY parametric edits to the body causing the neck and head to distort when reopening? it's happening to me literally every single time right now in 5.7. I can't edit a single thing on my existing MetaHuman Creator file... even changing the bicep size for example, it looks great in the viewport, then I close and reopen the editor and the neck will be double the length and the head looks like a little alien head with a teeny tiny chin/jaw area, and a micro nose
what is happening here?

this is all default MH stuff, no custom clothes
happens when I zoom in
forcing lod to 0 results in it staying like that broken position regardless of zoomlevel
i don't know the real reason, but i've had that happen with older MetaHumans like Kellan provided in the GASP sample project... seems like Kellan gets screwed up the moment that I add another MetaHuman to the project and allow the MetaHuman assembly process to overwrite the common metahuman_base_skel file
Going to try reinstalling the core data and downloading the humans again
I have another issue now where I have put custom color paint texture over my metahuman's face now and it looks good, but when I apply a facial pose preset it reverts back to the normal metahuman face texture. I have changed every setting so nothing refers back to the original textures but nothing is working. Any idea how to fix this?
Fixed by cautiously deleting the main baked material with a back up and using duplicates instead
I found that since metahuman creator was added in 5.6, the moment you use it, it breaks the older versions.
yeah they have A LOT of bugs to iron out with MetaHumans and MetaHuman Creator
Does anyone have tips for rendering still images of character with longer hair? It seems like the hair needs time to "settle" or simulate, but the available engine/render warm up frames don't seem to effect grooms.
Does anyone have any idea how to make root motion to work on a metahuman or if it´s even a metahuman related issue? In the first part of the video root motion is enabled and in the last part it is disabled. In the blueprints I play the attack montage and the metahuman Body component is connected to it.

The problem being the capsule does not move with the animation.
Anybody know good workflow for MD skinned mesh to UE5? Current LiveSynch only export fbx and not give me correct bone rotations when animated using existing animation data
You could use a Chaos Cloth asset and just do the TransferSkinningWeights node, no cloth sim nodes
Wow thanks, much easier than I tought
For UE5.7.1 - the patch Epic put out for metahuman cinematic groom bindings getting nuked and MetaHumans turning into Truffula-Tree-Heads, does anyone know if this also fixes the Mutable mangling the bindings issue too? I had hundreds of assembled grooms for a few metahumans get nuked lol. Thought I had figured out all of the rules to avoid the issue but was wrong 🤮
Patch: https://github.com/EpicGames/UnrealEngine/commit/f49c2f80aef0e4960fdb270c64ca6196e0d450ad
is there something obvious I'm missing when retargeting animations for metahumans from mixamo or manny? they always end up either hunched over or their shoulders are dropped too low

ai has run me in circles for hours about this issue claiming it's a "classic problem" and it knows "exactly how to fix it", which it doesn't
I played it really slowly and I noticed what is happening is that for 1 frame it is embedding itself down into the ground by maybe 20cm. I wonder if it could be related to how you've set up the z position of the mesh relative to the capsule bottom
This looks like normal middle aged posture to me
Sorry I can't be of much help. I am about to retarget some anims from mixamo so I will respond if I run into the same error and manage to fix it.
Does anyone have any recommendations or recommended tutorials that show how to mask the head of metahumans? The materials are so confusing now, and the only tutorial online is ancient.
Hey! I'm having some weird effects when moving my metahumans head, the edge of the hair creates blurry artefacts. Is this a side effect of TSR? Any tipps on how to make it less apparent? Thanks a lot in advance!
Hey! I am trying to cook a build with like 500 metahumans and it looks like a bunch of them are missing grooms that should be in the MetaHumans/common folder. I tried grabbing them from a new project but it seems like they only get downloaded into common if you use the specific groom on your metahuman. Is there any way to just grab them all?
Am I the only one who thinks that editing/applying filters to the animation curves for captured metahuman animations is a nightmare? It takes up to an hour to apply filters and most of the time it just crashes. Captured curves often have > 500.000 keys
All I want to do is reduce the key amount and apply some gaussian filtering to get rid if the jittering
1 minute to apply a filter for a single curve with ~1200 keys
My CPU is not the newest, but it should be decent enough (Intel Core i9-9900K)
Trying to use the filter option inside of the animation sequence asset will do this. Also, to adjust the curves for the Jaw, you will want to select the Jaw Y (open) and Jaw X (left/right) not this Jaw Open control.
Is there another place where I can edit the curves and get a better experience?
definitely by using the face control rig with sequencer, have you given that a shot? You can use the same filters, I would use Butterworth to remove some of the jitter and simplify to reduce the key amount. let me know if you want me to link a video that goes over that
Ah so instead of exporting the capture as anim asset, I export it a level sequence?
You could do that too, adjust the curves in the level sequence and then once you are done, bake it to an animation sequence
Thank you. I will test it. Last time I tried to export a capture to a level sequence the exporting took forever 😹
Hi everyone, I need some help!
I can’t figure out how to fix this clipping issue on a MetaHuman between Marvelous Designer and Unreal Engine.
This problem happens only with one specific animation, while all the others work fine. I’m using LiveSync between MD and UE 5.6.
In Marvelous Designer everything looks perfect, but when I send the simulated garment back to Unreal, it doesn’t line up correctly and I get clipping.
I’ve already checked and tested with the Post Process Blueprint both enabled and disabled, and I don’t think that’s the cause.
The animation framerate also seems to match correctly in both MD and UE.
Does anyone have any idea what could be causing this?

You can always add the animation sequence you already have and bake that to control rig.
Maybe start frame problem? some animations not in synch, can one frame slower or faster
Anybody tried to make parametric clothes using ML Deformer? when I have 9 different static meshes for one cloth for parametric, need to train ml deformer for all shapes, and i guess it's need regeneration deformer every time Metahuman assemble, I feel the workflow is so convoluted...
Does anyone know why my outfit with physics works for 1 second after simulating then afterwards detaches itself and folds in on itself?
What's going wrong here? Where do I need to look?
It basically collapses in on itself into a ball at the feet
Clipping is always going to be an issues when using different animations.
For a quick and simple method look into using the mutable plugin.
The other thing you'll want to look at is the skin weights on your clothing asset.
If anyone has the same issue as mine, you need to change the tick settings to post physics in the BP menu on the body of the metahuman
how come these ik targets dont actually perform IK? or at least if I use global_ctrl to rotate the root bone they don't stay in place

The same animation I’m using in Unreal was sent to Marvelous Designer through the MD LiveSync plugin, so there shouldn’t be any frame mismatch issues.
That said, do you have any suggestions on what I could check to verify this?
The animation is the same and shared between Unreal and Marvelous Designer.
My issue is related to the simulation between MD and UE, so I don’t think skin weights are involved in this case.
Hey does anyone know how I can switch between a material within sequencer?
I have two metahuman head materials that I want to switch from on a keyframe
Material switcher doesn't seem to work
Hello. I am trying to set up a metahuman using a webcam (my webcam). I've set up the metahuman in the editor, I want to add my camera to live link hub, but at state I am getting an error (timeout sampling video) and nothing shows on the editor. any help?
Guys, do you use Mutable? i Hve some qestions about perfomance
i have facial animation on a metahuman. when i play the sequence, the face animation doesn't work/play. when the sequence is stopped, when i grab the animation sequence and scrub it back and forth against the playhead you can clearly see the animation is assigned and working. there are no control rigs assigned. Im using results from the Monocular video capture conversion pipe. what am i doing wrong?
Hi, i have question. Is it even possible to do an anime morphology face with the MetaHuman ?
Mesh to MetaHuman precisely.
Because i tried and failed.
Anyone have a way to achieve it, or is it simply impossible ?
Hi,
I have a Rokoko HeadCam and I'm trying to export Face Capture FBX data that I can use on a Metahuman in UE5.6. Looking at the imported preview, the animation plays, but when retargetting to a Metahuman FaceMesh, I see the curves in the animation, but the Metahuman face is not animated.
When comparing the curve naming with animations already in Unreal I see differences, but I not sure what I need to do differently?
I'm using Rokoko Studio version 2.5.1.1 and have tried multiple export options.
Can anyone tell me what would be the correct way to export the FBX and import and retarget the data in Unreal, so that I can animate my Metahuman?
Hi Did you get this fixed? I have this issue...

So I noticed the retargeting option for the face was included in this portion of the 5.7 MH documentation. I have not tried it out. https://dev.epicgames.com/documentation/en-us/metahuman/retarget-metahuman-creator-animation
That is for the MHC animations, however, if you create an IK Retargeter asset like it says, you should be able to tell it which curve names belong to what...not sure

Epic Games Developer
Retarget the template animations provided by MetaHuman Creator for your character.
Has anyone run into the following issue with UE 5.7 and metahumans? I have a project with C++ code. I've enabled the metahuman plugins and created some metahumans. When I try to build the project from my IDE, it forces a recompile of the Metahuman engine plugin binaries.
It seems very odd that it would need to recompile engine plugins
Edit: Nevermind. It appears to be a known issue with 5.7: https://dev.epicgames.com/documentation/en-us/metahuman/known-issues-5-7
Thanks, I will look into that
is it possible to make a metahuman like this? And how would that work?

I guess I can just use substance painter to make the texture black and add some panneling and wiring.
But I think it will look very flat. What if I want actual geometry panneling and depth ?
Skeletal meshes in 5.6 and up allow to be converted to nanite, so you can use a displacement map for subtle paneling.
do you know any specific tutorial that shows this workflow for a metahuman?
Any skeletal mesh nanite workflow you can find will work since a metahuman once created is basically a skeletal mesh (well 2, head and body).
Has anyone had any issues with Metahuman clothing in 5.7 on mobile devices? I am having an issue where many of the clothing verticies appear distorted. This only happens on mobile, the asset looks fine on PC. This happens with any clothing asset. The issue appears to happen when the clothing is assigned as a follower to the body using the Set Leader Pose Component function. If this function is not connected, the mesh looks fine on mobile (but doesn't follow the body). Has anyone else encountered this?

I need some help guys, I’m struggling with getting clothes onto my metahumans that I got from sketchfab do you have any ideas
is nanite being used with metahuman, considering that they have translucent materials?
Can you use CC3 clothes on metahuman?
If you import the metahuman mesh into CC3 so you can fit the clothes to it then should work fine. If you're using the newer metahuman creator I would search youtube for parametric tutorial so you can make clothes that will autofit to any metahuman you make in creator.
Many use it. It's just a natter of finding the translucent materials and replacing with non translucent if you are happy with any compromises that you would need to make. I'm not in unreal at the moment, but from memory I think most of the translucent materials are in the head for the eyes and maybe some in the mouth.
what about cc3 character into metahuman?
I'm not familiar with that workflow so I can't give you the info you need on that one. But generally metahuman workflow is create metahuman on web site or in the new creator in engine, then export to your app of choice CC, marvelous, CLO etc, do your clothes, accessories etc and then import the clothes, accessories back into Unreal.
Although I'm not sure why you would want to try and convert your CC character to metahuman anyway. Metahumans are still a complicated and performance hungry mess.
I have a problem about metahuman clothing too
According to my researchs I did everything in order but my mesh getting corrupted. Probably main issue is transferring weight.
I wrote my problem to niagara tab (I'm trying to make a cloth sim at the end point) if somebody can help, I would be appericiate
I have a lot of clothes fitted for the cc3 character. So if I can use the cc3 character in metahuman, i can create more character variations and still have all the clothe compatible.
Leader pose doesn't really like mobile devices. Try using a copy pose node in the anim blueprint.
Hey everyone, my first time here. I am having an issue with MH long hair only. On the left is the BP created from the locally created MH and the right is my own character class that slots the grooms and head in (Ignore the neck issues for now) ... my biggest issue is the long hair turning into this orange shape. When I use shorter hair, then I don't get this problem so I don't think it's my slotting behaviour but a setting. I copied LODSync settings from the working BP, tried various console commands: r.ForceLOD 0
r.HairStrands.Enable 1
r.HairStrands.Strands 1
r.GroomAsset.Enable 1 .... but no luck. I am using the correct Groom asset paired with the correct Binding asset. I attached an example with shorted hair on my slotting character and it works fine. Been stuck on this for like a week, any suggestions please?


In the groom settings under the Physics tab, in the top section, is there a setting called Force Visible and do you have it checked on?
has anyone here used nanite and displacement on metahumans?
I get very dense amount of polygons, but in lit mode it doesn't look good and the displacement is almost not visible at distance


Is there any way to skin the groom or it’s guide curves ? I need more control over the movement of the groom so it doesn’t penetrate through the costume, espesially considering later there will cap on top
Hi! I'm trying to find resources to unravel and unpack how this quality (Specifically for the character) was achieved using Metahuman.
• How to create a custom metahuman (There are some resources for this)
• How to change or add morphs to the metahuman, so it doesn't look like your everyday/every other metahuman
• basically revamping the metahuman so it's more lifelike, better looking, and with better animations - Because, right now, using an MH Animator, or livelink, or even keyframing, the morphs and wrinkles and etc do not look That believable, and nowhere near this level of detail and quality.
So if anyone could help me, guide me where to look
https://youtu.be/XzB-qdR99mE
https://youtu.be/Bzo7bQK91ZI
https://youtu.be/bghu-UJuG28


Fantasy short piece, made as a teaser for potential series or film.
No AI was used in the making of this piece...
In the heartlands of Elysia, a world on the brink of war, Aja risks all to reach a mysterious source which calls to her. An animated short brought to you by Academy Award Winning Visual Effects Artist, Adam Valdez.
Created with ...

Hideo Kojima is back alongside Jordan Peele with another bizarre trailer, this time for OD (Overdose). It's a game, but also a movie, but also something players have never seen before. Check it out for yourself in this reveal trailer.
#ign #gaming #thegameawards #hideokojima

Check out the creepy new teaser trailer for OD, the upcoming horror game from Kojima Productions. OD stars Sophia Lillis, Hunter Schafer, and Udo Kier, and is being produced in collaboration with Xbox Game Studios.
I assume for OD they did something like this to create a digital double for the actress:
https://www.youtube.com/watch?v=b1CdudsfiE0

SUBSCRIBE for more breakdowns and behind-the-scenes insights.
Follow Image Engine on social media:
⇨ https://twitter.com/ImageEngine
⇨ https://facebook.com/ImageEngine
⇨ https://instagram.com/image.engine.vfx
⇨ https://linkedin.com/company/image-engine-design-inc-
#vfxstudio #visualeffects #vfx #vfxreel
There are a lot of tutorials for manually customizing the MetaHuman mesh/textures... but usually it comes down to the presentation. The lighting, depth of field, framing, on top of good animation... all of that is necessary to make it look good.
Even in MetaHuman Creator right now, if you pick the right studio lighting option and turn on the basic Idle animation, they can look pretty real. The lighting helps a lot.
Hello guys , I am getting a weird issue that when I apply skeleton in metahuman , it stretch up like its mildly inflated. I am exporting from Maya into unreal and also with props like sunglass, in Maya animation is ok but it get intersected in unreal. below is the link of the video of similar issue I am facing. thanks https://www.youtube.com/watch?v=y_UUXsuoZQA
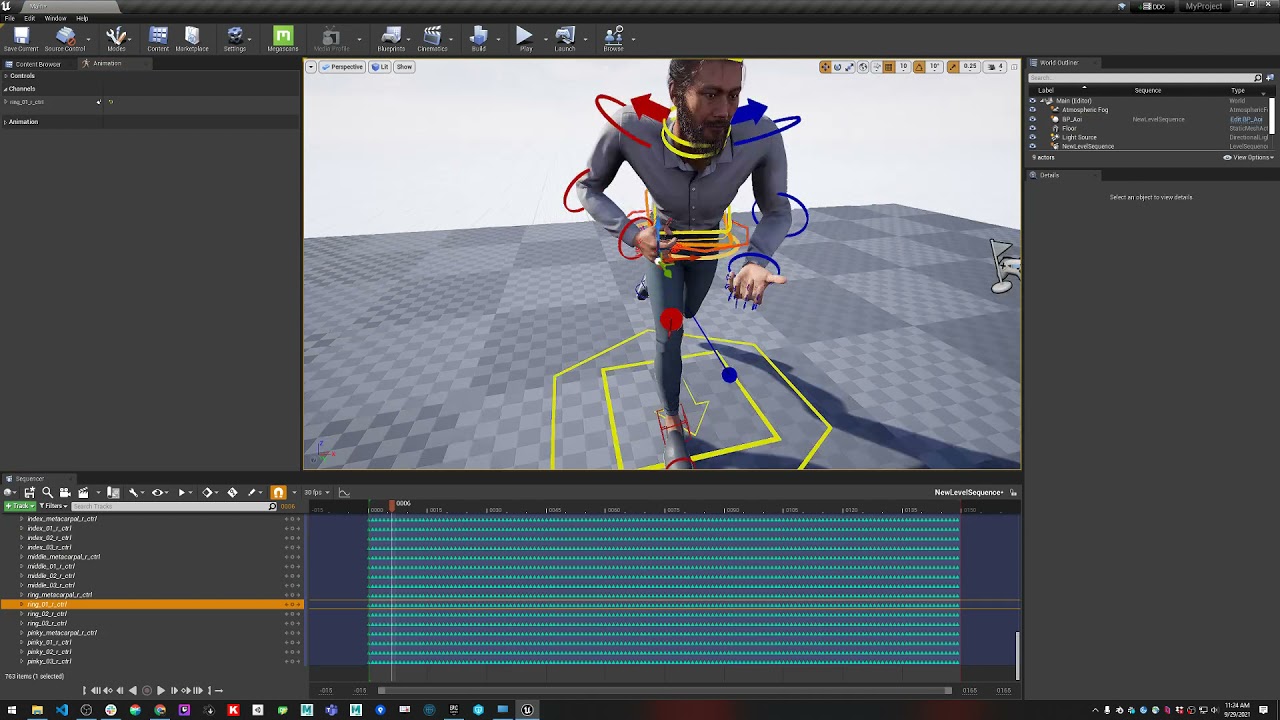
Hey, only seeing this now. It's off, but yes when I check it on it shows the exact issue. Why could it be coming on at Runtime?
is there a console command I can use to turn it off at runtime? @late sequoia
Can anyone tell me if opening an existing Cloth Asset by double clicking on it in the Content Browser should take not 1 minute but upwards of 30 minutes while it slowly goes through "Evaluating Nodes"? I have 128 gigs of ram and an RTX 4070ti super so it can't be a memory or GPU issue. Or is this just normal behavior? The clothing came from Marvelous Designer as a USD asset imported for Chaos Cloth usage.
Ok, I'm now creating a custom metahuman, tweaking the body proportions in the Body>Model tab.
What do I do when i want to change the waist height. I use the inseam slider, but it then moves the whole character so his feet are now below the ground plane. Is there no way to just move the waist up and down with maximum(head) and minimum(feet) staying where they are?
Also I can see there are no sliders for this, but how would I change the height of the knee? I'm making a stylized character. Do I need to tweak these things in another app?
That, I'm not sure of. I've never seen those guides appear at runtime.
hello everybody, I made a metahuman self-portrait, check it out: https://www.artstation.com/artwork/lGwLXa

ArtStation
salut! I'm very excited to show you my first character, a self portrait.
⠀
technical details:
driven by a metahuman rig, mldeformed with volumetric data processed in wrap4d using facs scans from a facial scanning rig I built.
scans generated with reality capture cli and various custom scripts; processed, cleaned up and enhanc...
your feedback is appreciated, thx!
What software do you guys use to make clothes and hairs for metahumans for free
blender
so awesome!
thank you!
Hello all, idk why but my shaows are super grainy , idk if its just the shadows from the methuman hair or what. even the hair cards lok dithered or something. is there a global setting i should change to make the shadows and lighting


Just wanted to say I figured it out. So when using a preset for my character and then adjusting the body, it does not want to play well when it comes to inseam height. It moves the character in the process. So hopefully this will be fixed eventually. I just went ahead and created a body from scratch and exported this to Maya and from Maya to ZBrush for sculpting.
Now though. My character is supposed to wear a tight fitted hood and boots that are much narrower than his feet are so his MetaHuman feet now intersects the boots. How would you approach this? Do I remove his lower legs and ears and most of his head and then how do I rig my character up as a MetaHuman?
Or should I just sculpt the ears flat, the feet tiny etc to hide them inside the new meshes?
Anyone?
how do I fix this?

please dont say it is a bone issue
I am trying to connect the head to a UE5 skeleton body
Hello folks. I hope somebody can answer this... I've created a few metahuman characters before it was possible to choose a body type. So I wonder... would I still be able to use the character I've created with the new bodies or am I supposed to do everything from scratch? I haven't worked with Metahumans in quite a while, way before the major changes happened.
Thanks in advance to whoever's gonna read this and give me any feedback. Cheers!
You can get the DNA file from the previous engine version and import that. There is an option to import DNA in the MHCreator Asset. 5.4 and on will have the DNA in the Source Files folder of the UE project. Older versions, use the Bridge ( the standalone version) to download the source files and get it from there.
Hi I’m on ue5.4 and I have a standard metahuman with the default clothing. Is there a way to add wind effects to the default clothing or do I have to add cloth simulations to this?
Thanks. I'll dive into it this weekend.
Hey everyone! I wonder if someone knows the answer to this one: how can I simulate wind with the groom of metahumans? Afaik the directional wind system doesn't work with it anymore? Do I need to do that instead with Niagara forces? Thanks in advance!
I'm pretty sure you'd have to simulate using something like Chaos Cloth. Or take it into another application like Marvelous Designer

does anyone know how to fix the head/hair of the metahuman? for some reason the hair is like see through and i can see the fuzz and eyebrows and stuff through the hair and head, and if i move everything just dissapears until i stop, and while its dissapeared a black splot/mark takes its place until its reappeared after i stop moving

i have a metahuman from 5.5 and i want it to be on version 5.7, is there a way to update it? i dont really want to restart the character cause it has a specific look, reason i wanna update it is to edit the body a little

having a problem with the Groom assets. For some reason the generated groom assets have lod 0 and 1 WITH geometry, lod 2 is empty, lod 3 has hair, lod 4 is empty and it just keeps alternating after that.
Fixed. I forgot to mention i am using CARDS. The groom asset Cards details only had 2 lod's set up and one of them was emtpy. Pair this with having the groom set for 7 lod's and you get this problem. so i am just creating more card assets for each LOD. Aparently metahuman does not automatically generate ALL the card assets for ALL the lod's
When applying the control rig to my metahuman the forearms get messed up. Any idea what causes this ? UE 5.6

Metahuman lipsync performance is great, love it. I am open for commission to make custom metahuman body/face, clothing and hair btw, can make this in less than 1 week from concept to game asset 🙏 https://fixupx.com/Zhyrvalen/status/2022573182352531801?s=20

Introducing Lylia. Don't misjudge her, she is the village keeper, the guardian #screenshotsaturday #indiegame #UnrealEngine5
**❤️ 10 👁️ 252 **
@atomic field check your DM
Hello
I create 3D game environments, characters, props, assets, weapons, vehicles, terrain, foliage, modular pieces, and models for games, commercials, music videos, and product animations.
DM is open for project discussion


you guys think the metahumans can get past the age verifications governments are trying to implement everywhere..?  They do look a bit choppy, but with some effects to blur the details maybe.. Like hell i will give private info to some random website
Hello,
I'm trying to create a MH that looks similar to Zuckerberg for a short video. I've tried using facebuilder app in Blender and also using 3d sculp of Zuck for MH identity solver, but no matter what I do it doesn't look like him at all. I'm not going for a realistic look or complete match, but at least for a slight resemblance. It worked great for me in the past with a face scan, but for obvious reasons I cannot scan Zuck. Any tips would be appreciated
took me a second to figure out that it MH and not a real person. fantastic job. did you use path tracer for rendering? doesn't look like lumen to me
Good Sunday everyone,
to anyone working with digital humans or 3D, I’d like to ask for two minutes of your time to fill out a short survey. The collected data will be shared, and above all it will remain anonymous.
The goal is to better understand how to improve certain parts of the current industry-standard pipeline.
Thank you

Google Docs
This short survey helps identify the most repetitive, time-consuming, and painful tasks in current MetaHuman wrapping pipeline, aims to analyze real-world MetaHuman production workflows and identify the most time-consuming and repetitive steps, in order to better understand where pipelines can be optimized.
I used metahuman for maya to add braces on my metahuman. I binded them to the skeleton and copied the weights from the teeth. The jaw movement seems to work fine but for some reason when I move the CTRL_C_Mouthshape control on the face rig the braces rotate with them. What do I do?
Interesting that you added braces, very cool. Out of curiosity is that the only controls that seems to be affecting the braces? Wondering if the lip shift controls might also have the same effect. How exactly did you attach/bound them to the skeleton? Or did you attach them to the teeth mesh?
Oh yeah I managed to fix it It was an issue with the weight painting I just flooded the right weight groups and emptied the wrong ones
thats awesome, again, this is very cool seeing braces!
I’ve been doing a lot of experimentation like braces and custom 3D eyelashes!
waaat custom eyelashes? Thats so cool!!!
Yeah I’m trying to make my metahumans look as stylized as possible


Also I know you lol I’m subscribed to your channel
I love your content!!
omg this is the coolest thing ever. I just checked out your channel (subscribed 😉 ), I cannot wait to see how you bring these into your stories. Just so unique and different. Love it!
Thank youuu!! I’m making an animated series with them lol
If you’ve seen my channel it used to be a Roblox series but I have since moved it to UE5
This is the first time I saw your channel and I love it. I have never seen this done with MetaHumans and its going to be amazing to see them being used in such a different way that what you would expect. I am really looking forward to this. I am also just blown away about the braces, talk about attention to detail!
p.s. the hair is freakin awesome!
Thank you so much I really appreciate your kind words ❤️❤️
yeah this is really cool, thanks so much for sharing those photos. you have a new fan!
This is one of the characters in action featuring a VA! https://youtu.be/RlAX49S87UE
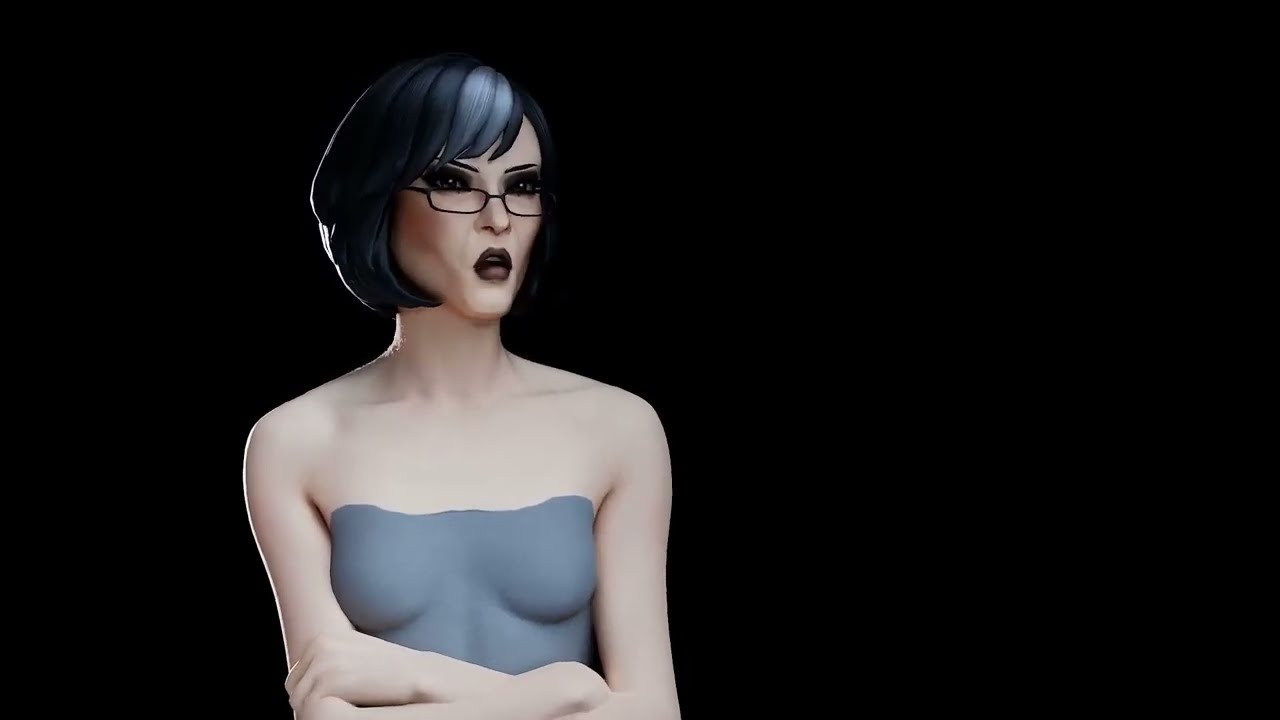
This was done with video to mocap ai so it might not be that smooth but I tried to polish it as much as possible
I’m considering making it low FPS like that Fortnite kill Bill animation that was made on unreal engine for further stylization
My next step is figuring out how to give the hair bone physics
ok, this is...ive used amazing and awesome already! I would watch an animated series with MetaHumans like this. The mocap is perfect by the way.
Thank youu I’m so flattered 🥹🥹❤️
I used marionette which is so so underrated I can’t recommend it enough for indie creators
It had to undergo a LOT of cleaning but it’s pretty decent
absolutely worth it after seeing the results
It’s great to know that the project has anticipation already thank you so much for the compliments!!
I am only one environment artist away from accelerating the production of the first episode
It’s a solo unpaid project but if I manage to find an environment artist willing to collaborate then I could see the first episode releasing by the end of this year
Wish me luck 🥹
hihi, trying to import .mhb files in unreal engine 5.7 metahuman creator but the only option I have to import is DNA files - does anyone have a workaround for this?
Subject: MetaHuman Version Conflict (UE 5.6 to 5.7.1) and DNA Sync Issues
Hello everyone,
I’m currently facing a critical assembly issue after updating my project from Unreal Engine 5.6 to 5.7.1. I would appreciate any insights or support from the community.
The Issue:
After the engine update, attempting to re-assemble or import a MetaHuman creates a conflict within the MetaHumans/Common directory. Specifically, the new assets seem incompatible with existing MetaHumans in the project, causing the older characters' rigs and meshes to break.
Additional Complications:
MetaHuman Creator Loop: When I access the MetaHuman Creator website, I am repeatedly prompted to "Download MetaHuman" despite being logged into the correct Epic Games account (matching the engine credentials).
Quixel Bridge Visibility: My newly created or updated MetaHumans are not appearing in the Bridge interface, making it impossible to manage them directly.
Questions:
What is the best workflow to update MetaHuman DNA files for 5.7.1 without breaking legacy assets?
How can I isolate "Common" folder dependencies so that new MetaHumans do not overwrite or corrupt existing ones?
Any guidance on how to sync these versions properly would be greatly appreciated. Thank you!
I am always redirected to this page :/

thank you! I used arnold in maya for those renders
https://www.youtube.com/watch?v=GuiC1r-sbms hey people I've been working on a pretty cool video going over my workflow to use metahumans in blender hope it's helpful 

This video details my process of creating Malevola, a stylized character, using Metahumans within Blender 3D. We'll go through the steps required to get your Metahuman ready for use in Blender, even if you're not familiar with Unreal Engine.
Project Files
Download the Malevola Blender file for free: https://shateiel3d.gumroad.com/l/Malevola
Not...
Cool video! I'm wondering, it looks like you changed the topology and increased the number of vertices on the body/face. Is that right? If so... can the MetaHuman with custom topology be re-imported to Unreal?
thank you! I actually didn't chance anything its the exact same cinematic metahuman level topology
Got it! Makes sense
Hey hey Everybody, quick question. is it possibly to use the metahuman identifier for scanned bodys? my scanned face it works flawless. but i struggle a bit with the scanned body.
Hi, I’m having an issue with MetaHuman Manager in UE 5.7.
The window opens but it’s completely empty — it doesn’t detect any MetaHumans in the project.
Plugins are enabled (MetaHuman, Identity, Animator, RigLogic, DNA Reader) and MetaHuman Creator Core Data is installed. The MetaHumans folder structure (Common + character folder) is present and the character works fine in the level.
I also tried verifying the engine and testing in a fresh 5.7 project.
Is there something specific required for the Manager to detect a MetaHuman?

how can i retartget animations to metahumans ? I had this video but it's all broken

This tutorial covers how to retarget MoCap Central UE5 mannequin animations to different MetaHuman proportions using Unreal 5.2. It's an update to the original retarget tutorial here https://youtu.be/3STorCH_Pvk.
Purchase MoCap Central Packs:
🛒 MoCap Central Store: https://mocapcentral.com/
🛒 Unreal Marketplace Store: https://www.unrealen...
hello, I have a few questions about hair on metahumans. Basically, it doesn't look good in the light, and since a picture is worth a thousand words, here are two screenshots. The first one is in epic quality of shadows, and as you can see, there is a reflection behind it, even though I obviously don't have any light on that side. The second is in cinematic quality, which is already better, but there are lot of little shiny flecks on the hair. (i'm on UE 5.7) If anyone has any idea why I'm having this problem, I'd love to hear it. Thanks in advance.


Does Metahumans support more then 4 weights per vertex in UE? As far I remember UE had 4 vertex weights for a while but exporting Metahuman meshes shows > 10 weights at some vertices (just exported a Metahuman body from UE)... e.g. close to belly button.


I'm using metahuman cloth material. in substrate some stuff feeds into fuzz color and fuzz amount
Im switching back to use material layers for our game, where does Fuzz color and fuzz amount go to? is it into subsurface color and clear coat?
anyone?
Sorry, just a wild guess. The last time I faced something blocky (that should not be blocky) in UE5 was a DistanceField issue at volumetric fog. If your grooms are dealing with that for some reason ... don't know. It even depends if your screenshot is in game or an Editor preview.
I think bad preview of Chaos Cloth Asset in UE-Editor is the reason why so many metahuman cloth assets on Fab don't care about LOD2 and just do some TransferWeight-from-LOD0 -> dragged into LOD2 (with some poly reducing remesh). This is wrong behavior. The preview in Chaos Cloth Asset looks correct (because it's mixing LOD0-body and LOD2/3-cloth). But the resulting cloth is wrong (chest bends completely different in LOD0/1 to LOD2/3 at spine_05). If the LOD of the metahuman-body works afterwards correct in game then the cloth still bends LOD0-ish at spine_05 rotation (still affected by all the LOD2-deactivated bones) while the body below would not do that any longer now (as almost all the weight is on spine_04 at LOD2 on your chest instead). If you wanna check this in the Chaos Cloth Asset you must forcefully change LODs for the body set in Preview Details as well "r.SkeletalMeshForceLOD 2". So I don't trust those previews-screens too much.
If you would keep the old cloth way then most likely yes. E.g. if you are using the "MakeMaterialAttributes" node then "SubsurfaceColor" is where you would connect your "Fuzzcolor" and "ClearCoat" is your "Cloth" pin (=FuzzValue) but only if your Shading Model is "Cloth". However I'm not sure why not just keep the newer substrate if you need fuzz (Substrate Slab BSDF - Single dragged into Front Material)? 
hey, does anyone know of a good workflow to use metahumans as a base for non-human characters? Sculpt the head into more of a fantasy or sci-fi creature while still be able to use the metahuman animation workflows afterwards.
Yes, wrapping. Sculpt your fantasy head. Export a base metahuman head. Wrap the metahuman topology on your fantasy head without touching the topology at all (non destructive - it must remain the same vertex count and the metahuman topology just the shape may change like elf ears) then import your new looking metahuman head into MetahumanCreator, create rig, export a combined-mesh from the MetahumanCreator, use the combined-mesh as base for your fantasy cloth weight transfers, create cloth with/for it and import the cloth (if you need any) and finally assemble the new fantasy metahuman in the Metahuman creator (you would get a face and body metahuman with a metahuman skeleton in a separate folder structure).
how can i make sure that the fantasy head has the same amount of vertex count? I been experimenting sculpting a head in Zbrush, and i watched a video about plugin Zwrap where you could wrap it to a metahuman head.

to give a better idea
it is not final but shape will be similar
Zwrap is exactly what you need (or Wrap3D if you wanna use the standalone version).
the head i am using could be any detail? will it be able to wrap it to the metahuman?
It would use the topology of the metahuman head afterwards so "any detail" would be increased or decreased to that poly-count. I think your head looks fine. I'm just not sure about the antennae (I think you only have about a few faces at the forehad so you would strech low polys at that part) ... I think I would remove the antennas, wrap it and plug the antenna afterwards "as cloth" (or seperate sekelton mesh based on your if they should animate).
i saw a tutorial where someone sculpted a placeholder on the metahuman head for reference points to wrap
i will try both ways see which one works the best
for start if the conform works thats already a win for me, i can do adjustments afterwards and more experimenting
Yep I think you can do both. Just wrap around it (and take it like it is with lower poly count at the antennae ... do some normal-map painting - should do for LOD1/2/3) and for LOD0 you can plug a more detailed version on it (your LOD0 head might stay without wrapped antennaes maybe).
i shall give it a try, thanks for the help and all the info, will show the results later on 🫡
yeah its in editor preview. like methuman preview.
thanks for the reply 🍻
is there some sort of distance field setting in the groom material i need to disable?
if anywone has any idea it would be veryhelpful
because I can't use substrate with material layers
and im currently using material layers for my cloth material to do blood, wetness masks etc
anyone ?
I'm not an expert but what is your scalability on?
ive tried all settings.
cinematic even
Is this inside the Metahuman creator asset?
it looks like the problem is on the groom asset config itself. try to play around with the LOD, interpolation, RBF interpolation config, etc on the groom asset
Im not sure , i messed around with a bunch of settings in there and nothing helped. only time i got a decent result is increasing the screen reolsution of the viewport to 200
Yes its in the viewer , but looks like this outside too
I dont think you can make it look better in the viewer. It might look chopy in the viewer based on your hardware cause I notice it MHC in engine does use a decent amount of processing power. Outside of the viewer is another story.
I'm currently playing with grooms myself and I was able to "reproduce" blocky hairs. You can try to tinker with those settings:
Not-blocky (at my project):
r.HairStrands.Visibility.ComputeRaster 0
or:
r.HairStrands.Visibility.ComputeRaster.Maxtiles 65536
As soon ComputeRaster is 1 the Maxtiles kick in ... and if they are too low it's blocky.
Blocky (Screenshot with this settings):
r.HairStrands.Visibility.ComputeRaster 1
r.HairStrands.Visibility.ComputeRaster.Maxtiles 512

Hello anyone knows how to create rig in Metahuman without internet locally?
hey guys how do I move a metahuman from one person's PC to mine?
or I guess how do you use the DCC export data to import into the Metahuman creator?
NVM found it I am however having a weird import issue with the skin texture

so i just went ahead and redid the skin but now i'm getting this weird texute thing!?

NVM it kind of just fixed itself
Does anyone know how to enable physics on a Metahuman in 5.7? This worked for me in 5.4, but seems to not work anymore.
The body is melting to the floor.

Hello, I have a question regarding clothing items. We have parametric clothes assets that we can use in MHC. However, if we have multiple body types, is there any way for the clothes item to change at runtime. For example a character picks up an armor piece and it automatically adjusts to the body type.
I'd like to do this without having presets stored per asset per body type.
So 1 item that the player equips in the world and it automatically fits onto the character. Currently we can only do this in the Metahuman Creator.
Anyone using Mutables with MH? I have wierd Lip deformation when using Mutables


Are there any animation packs / fab assets for Metahumans available, apart from the sample animations?
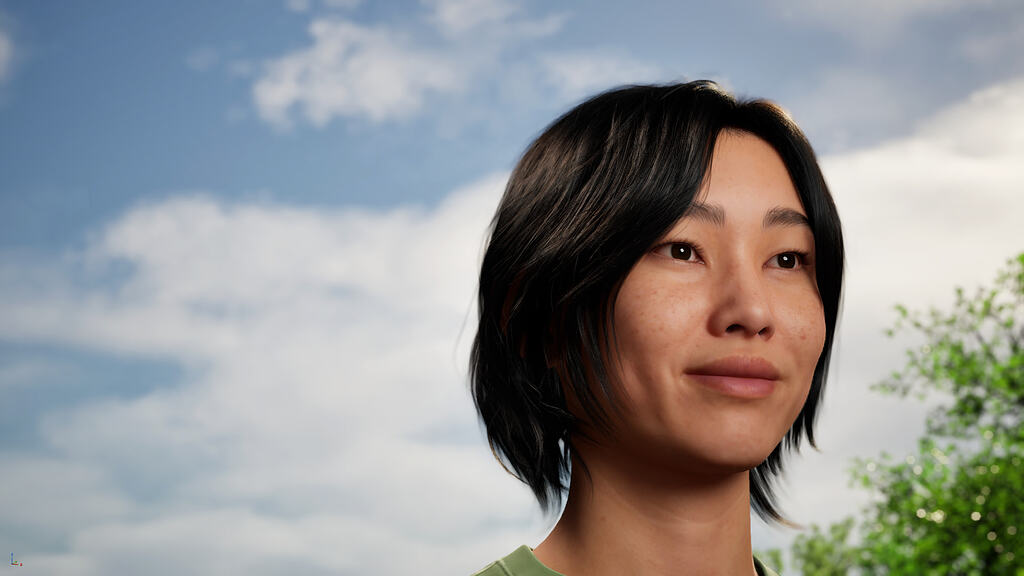
Epic Developer Community Forums
An important update for MetaHuman Creator web application users Now that we have fully integrated MetaHuman creation into Unreal Engine, we’ll soon begin the process of discontinuing the MetaHuman Creator (MHC) web application. This will happen over the course of 2026, giving users plenty of time to migrate their MetaHumans to MHC in Unreal En...
I'm creating a VR game with a Metahuman. However, in my packaged game my Metahuman looks like the left image. While in PIE the Metahuman looks fine, like in the right image. I tried multiple options to fix the issue, but I can't seem to pinpoint why it goes wrong in the packaged build.
Does anyone know why this could happen?


I don't know exactly but I guess: Bone influences. Have you tried with YourPackagedGame.exe -ExecCmds="r.ForceLOD 0"? In my opinion Epics techwear outfit is bugged. They do "TransferSkinWeigths_1" from the LOD0-CombinedMesh (the weight-painting of LOD0 is affected by upper-body helper bones) to the LOD2 cloth (the LOD2-CombinedMesh has most of the upper body weight on spine_04 and not the helper bones). That means: If you are at LOD2 your cloth using LOD0 transfers get affected different than your LOD2 combined-body source. The preview in ChaosCloth is buggy. If you don't force r.SkeletalMeshForceLOD 2 then the metahuman body remains LOD0 (easy visible with the detailed face). So in theory... packaging wipes the influences completely and your mesh remains with weights to nowhere (and everything from there is dragged to root at 0.0). But there are a few flaws in my theory: Your screenshot looks (screen-size) more like an LOD1 shot (so the bones and the source should have weights and LOD0/LOD1 usuall has not that much of a difference) and it should even affect the other parts of your body. I'm even not sure if there are some settings that maybe reduce the bone-influence to the previous standard of 4 bones. Chaos-Cloth seems to use 8 (either in the techwear outfit or if you start one from scratch).


Thanks for the explanation. The weird thing is, I created a demo in October with the same metahuman and same Unreal version and there it worked fine.
I also force the LOD to LOD0, but it keeps distorting the mesh.
Hmm the other step where I faced dragging of cloth was some wrong mixing of Render Mesh + Sim & Render Mesh. If you are using the default Epic techwear outfit then everything should be targeting the RenderMesh and nothing simulated ... so it should not do that. Also i faced "exploding Cloth" (looks different than dragged to 0.0.0) if you try to replace the bodyCombined mesh exported from MetahumanCreator with a bodyCombined that went through FBX import/export (as important data does not survive the export). That's the reason why you wont see a file source in the sceletal mesh asset of the combined mesh (from the techwear Outfit) ... only the skeleton asset itself is custom (less bones then metahuman skeleton in the game engine folder). FBX import/export usually wipe the "Chaos Outfit Asset Body User Data" and more. But I doubt you 've done this as this would already explode in PIE.

No, I haven't done that. I just created the metahuman and used it in my project. Would an option be to combine the outfit with the body?
You can try ... but if the weightpainting is somehow wrong then I'm pretty sure it would not fix that (if this is the reason for the issue). If I would be you then I would export the cloth into Blender (or another DCC where you can easy see the influence per vertex) and check the influences of the body parts that implode for something fishy.
hi guys,
I'm trying to conform a metahuman with 2 static meshes (head and body) in python. I can conform the head using metahuman_subsystem.import_from_template() , but all I found to conform the body is metahuman_subsystem.conform_body(), and this method takes a skeletal mesh, not a static mesh. Am I missing something in how to do this?
Thank you
I don't know the python way but I would use StaticMesh (you can still change the shape of the Metahuman after the "Conform" step ... so what's the purpose for the source-skeleton). You can pick both MeshTypes if you do it manually in MetahumanCreator. Maybe both types work in Python as well?
I've just assembled a preset Metahuman to check (some different) question for my project and picked the techwear outfit. Weights look normalized and fine to me in Blender. I've not found anything fishy. However I remember that I had an issue in the past where I reexported a CombinedBody mesh over an existing SkeletalMesh asset (after changing the shape of the metahuman a bit) and the CombinedBody was bugged. I deleted the existing one, did the same Export in Metahuman creator again and the CombinedBody looked as expected (so the existing SkeletalMeshAsset in the content folder messed up the new export somehow). Such things could happen at packaging too (caching, ...) - so if you don't find anything (and it worked in the past) then probably just wipe your Package folder and package clean and fresh without remnants.

thanks @gloomy flame ! Turns out, despite the function signature (as per the documentation), one can provide a static mesh, the only trick is that instead of passing the actual joint_orientation array (or None, which I tried too), you just pass an empty unreal array. Like so:
joint_rotations = unreal.Array(unreal.Vector)
success = metahuman_subsystem.conform_body(your_metahuman_char, vertices, joint_rotations, repose=True, estimate_joints_from_mesh=False)
Ran into an interesting problem involving metahumans in 5.7.3 and the AI Assistant. I asked the AI assistant to help me because I'm generating an African-American chracter but the lighting in the viewport is too dark and I can't adjust it. When I asked the AI assistant to help me, I was told, "Sorry, I can't assist with your question as it violates Epic's terms of use." I'm sorry, but I do not understand that response.
Epic really needs to work on their AI because it's responses could be interpreted as somewhat racist.
It's answer to my question was that the lighting can't be changed and if I'm working on a dark-skinned character I need to export it to the main viewport as a MH blueprint - there's no way to make it work because the lighting is only setup for fair skinned characters...
Did you try to switch the environment from "Studio" to "Portrait"? Should be more then enough light?
I've just assembled a preset Metahuman
i will have to give this a try, thanks so much for the reply. been a nightmare lol
hi can anyone help 😪😪😪 i cant create metahumans for some reason
would love this translucent material to work on metahuman. How could i go about removing or hiding the mouth cavity?

Facial Mocap + Lighting in MH https://x.com/Zionfragments/status/2018832281830588802

I've been using MetaHumans for the first time
just created ab asic human using one of the presets
I noticed when I drag the BP into the level and play in PIE, the metahuman character kinda looks blurry
any reason for that? doing this within the third person template
Depends... what looks blurry? If the hairs look blurry then you can try r.HairStrands.DOFDepth 0
it was kinda just everything, the skin etc, blurry / fizzling out
setting screen percentage seem to have helped
having trouble with creating metahuman from template...in my case i've used a mesh and checked conform to UV
the body generated well on paper, but when i try retargeting an animation to it from a manny skeleton, it's broken

if anyone has tips please @ me
maybe it would be a better idea to just rig a mesh compatible with the UE5 skeleton
like the topology looks fine (ignore the hip tho i know what caused that)

What das "broken" mean? The gap at the shoulder? Weird bone offsets (retartarget options on skeleton anim instead of skeleton)?
What I can see without watching an animation: The hands are rotated weird and not Metahuman nor Manny A-Posed. Even if he should look like this finally in the game (to be scary) I would create him in a more common like A-Pose as rest pose if you would do some retargeting afterwards without too much tinkering and adjusting later. Should you use UE5 skeleton? Depends. Your topology has less visible feet than Manny (Metahuman has more bones and even toes). The shape is different to usual "humans" so you most likely would not wear any parametric cloth on this one (shared with others). If you would share anims for similar shaped ones or if you would use the face morphs then it might still be a reason to use Metahumans.
do i have to retarget animations etc from manny/quinn for MH or can i just use the animations directly?
I use some animations in ChaosClothAssets from Manny to quick check bending if I have no anims yet. Works but it's a bit off (long neck, ...). I would just retarget. As far I remember the one Metahuman that's used as example in GASP is even just retargetted as all the others (UEFN, Paragon, ...) as well.
I see, yeah I'll retarget, thanks for answering!
Why is the hair doing this? happens on the beard too

If that happens after assemble then it might be too strong decimation (if you exprted optimized and not cinematic).
we are creating a game heavily based on MetaHumans, but the game is still on 5.6 and when I tried to migrate the MH from 5.7 to 5.6 the BP does not shows up there on Unreal
<@&213101288538374145> first time using the channel to ask for help, so pinging you to ensure I am doing it properly
@stiff sail Ask in a single channel, don't cross post
As far I know this is not possible. If the character is finished then you can assemble and export the skeleton mesh as FBX and import it into your 5.6 project. But it's not exactly a metahuman that can still be modified with silders in 5.6 like the others. If I would a 5.7 metahuman that's still open for changes via the MetahumanCreator then I think I would do fbx export, wrapping the 5.6 MH topology to the fbx mesh shape, and build the Metahuman in 5.6 via conform from template.
Does someone know why the clothes distort like this when I attach them to the metahuman body? Created them with MetaTailor, exported as fbx and removed the avatar. Then imported by selecting the metahumans skeletal mesh.
Tried a lot but didn't get anywhere, the MetaTailor Bridge Subscription is too pricy for me.
Thanks for any insights!! :)


Did you remember to add the skeletal mesh in the FBX import settings so clothes "know" what skeleton to follow?
yes I did that

Is it feasible to edit skin weights for a Metahuman clothing asset that is going into a .mhpkg file? From my testing, custom weighting gets overwritten in the OutfitAsset. I tried removing the combined mesh being used in the "SizedOutfitSource" node which preserves the updated weights but the clothing item no longer conforms to Metahuman creator editing (I'm guessing it still needs blendshapes/morphs).
hi guys,
Anyone here have experience with python for unreal? More specifically, I'm trying to export a head_dna of a Metahuman Character. While it's working fine in unreal, it crashes when I launch it from an external process (be it my DCC application, CLI, etc...).
I managed to isolate the culprit:
request_obj = unreal.MetaHumanCharacterAutoRiggingRequestParams()
request_obj.blocking = True
mh_subsystem.request_auto_rigging(my_character, request_obj)
The blocking parameter ensures Unreal holds until everything's ready, to proceed with the auto_rigging request. So exactly what's needed.
However, from outside of unreal, calling this blocking property crashes unreal, probably because of how the async state is handled internally.
Is there a workaround / a way to reproduce the blocking behavior directly in my code? How can I generate a rig and make sure unreal does it only once everything has been built / downloaded?
I'm not really sure what you are trying to do but in my opinion OutfitAsset is the wrong place to deal with weights. Did you check the ChaosClothAsset? Many cloth assets do some "TransferSkinWeights". You can drag a static mesh or a skeletal mesh into TransferSkinWeights (for the mesh shape). But in both cases "TransferSkinWeights" would overwrite the existing weights (even if you source is a skeletal mesh with weights). If you would use your own custom weights for your cloth painted manually for your metahuman then you have to avoid that node (and use a weight painted skeletal mesh as source).
The workflow i use for FBX clothing import is to bring the FBX in as static mesh and untick the skeletal Mesh option. Once it's in the content browser I then convert it to skeletal mesh using the Character that it was created from. This gives you a couple of options if you want to make a clothing asset for physics or for parametric clothing in Creator.
So basically you should be fitting the clothing to an exported avatar of the Metahuman you want to add the clothes to in Blender, marvelous or whatever app you're using. Then it's just a matter of assigning that skeletal mesh to your clothing skeletal mesh in Unreal.
Thank you for the reply! It's funny, I was putting together some images to explain what was going on and I think I accidentally fixed it. What I think "fixed" things was deleting and re-adding the cloth asset and combined mesh being used in the outfit asset a couple times. I'm not sure if something was cached but it looks like it is working now!
This is just a simple tube skirt I wanted to get in to get the process down so there is no cloth dynamics. I started with a static mesh for the cloth asset, exported that with the copied weights then re-imported the mesh with smoothed out weighting around the center of the skirt. I replaced the cloth asset in the outfit asset with the edited weights and it looks like it works correctly. I don't know if there is a simpler way to do this but it looks like the edited weighting successfully worked.

question, exporting metahuman textures doesn't seem to export this wrinkle texture, anyone know where I can find this in the ue files?

also, another question, does there exist a way of getting a masked version of every animated facial change so that i can easily add in my own facial texture skin underneath? I saw a video where a person just replaced all animated color maps with 1 basecolor and thought that was a waste.

Thanks for your answer, mate.
In fact I need the MetaHuman Character asset, since I can bring some new variations to this character, since it is the 2nd more important in the game.
My lead programmer said that next week we are going to update the engine version to UE 5.7, so I'm going to wait his update to avoid losing the sliders config.
I started with manual weight painting for MH cloths a few weeks ago as well and went back to full static meshes as the simulation nodes helps even for render meshes in case of stretching of the cloths fabric if it's not simulated. The transferweights + streching simulation looked surprisingly better than my manual weightpainting at a shirt arms. Also I figured out that the preview in ChaosClothAsset is bugged (if you drag in a metahuman as example source for animation then it always remains in LOD0 with detailed face and fingers even if your cloth switches the LOD-states correctly in the preview). Expecting a metahuman character would use LOD swapping in the game (and not remain at LOD0 the hole time) then this causes some troubles with the weights if you don't separate the LOD weights correctly (especially at LOD2 which is small but still good visible). But I think it affects top-body most (chest part which switches from helper bones around the shoulders to full spine_04 weights for upper body between Metahuman LOD1/LOD2). Used r.SkeletalmeshforceLOD 0, 1, 2, 3 lots afterwards.
Upgrade to 5.7 would be the best solution anyway 🙂
yeah, totally
Having this terrible visual glitch with all MetaHuman presets I've tried. I just load the preset and this happens. UE 5.7.4 on W11 & AMD 9070xt. Installing latest GPU drivers didn't help.
How to fix it?
Looks like some messed up groom UVs. Is it "fixed" if you remove all the hairs (scalp, eyebrow, ...)? I don't think it's a GPU issue. If it happens with the presets maybe more a UE verify file topic. However I saw warnings of non-matching root uvs even with the original presets (without any visual glitches)... so I'm not sure. But I'm sure that I can create something similar if I add the wrong skeletal mesh to a groom binding with wrong root uvs.
Yes, if I remove the hair, the issue goes away.
I saw a couple of posts elsewhere and 'how to fix' videos for this, which seems to boil down to assembling it and then fixing some misconfiguration at actor-component level. But the issue is the ability of being able to author the metahuman in the first place. And this makes it unbearable to work with it.
Does it still occur if you reattach it? If you are dealing with presets then maybe check the preset grooms in the engine folder if they look like this. If not maybe you need to do some verify or redownload of UE 5.7.4. They should be somewhere in Engine/MetaHumanCharacter/Optional/Grooms/Bindings/Hair

Does anyone know why is the MetaHuman face mesh using AnimSingleNodeInstance at runtime instead of its assigned AnimBP, and what could be overriding it?

anyone know of a fix for this or have the same issue? https://forums.unrealengine.com/t/mhc-ddc-export-wrong-texture-maps-resolution/2703076

Epic Developer Community Forums
Summary Despite having 8K texture maps selected in Texture Sources and downloaded before assembly, the DCC Export Assembly option exports the textures only up to 2K resolution. Steps to Reproduce Disable Virtual Textures in Metahuman Creator plugin settings Create a MetaHuman Character asset Set the Face Texture Sources to 8K Download Texture ...
check out the link above, same issue here. seems like a thing thats been going on for a while now?
after searching I found this in a unrelated report

nvm, known issue listed here https://dev.epicgames.com/documentation/en-us/metahuman/known-issues-5-7

Epic Games Developer
Known issues with MetaHumans for Unreal Engine 5.7.
Well, I fixed it by putting my characters into helmets for now...
Preparing a bug report, broke the UE commandments for such into a handy list. - Before you report
-
Take a moment to evaluate whether it is an engine bug or not. Are you using the feature as intended?
-
Yes
-
Do you know the expected result?
-
Yes
-
Have you modified any code that may break the feature?
-
No
-
Are you using any 3rd-party Plugins?
-
No
-
Are you using supported hardware and software?
-
No, wait, it’s a Mac.
-
So, yeah. No.
-
Search the Unreal Engine Issues site to see if the issue is already known and reported.
-
Searched various resources to no avail.
-
Reproduce the issue again. Does it still occur?
-
Yes
-
Do you know the steps?
-
Yes
-
Can you simplify the steps?
-
At the most basic feature set.
-
We think that the groom had a really good time at the party, but has a bit of a head.
-
Can you make it occur on a new project?
-
Yes
-
If you experience a crash, make sure you submit the Crash Report with additional information about what you were doing when the crash occurred.
-
Next time with feeling.
-
Gather all information. What engine version are you using?
-
5.7.4
-
What is your operating system?
-
macOS 26.3
-
What are your system specifications?
-
Late 2021 MacBook Pro, 64GB/2TB
-
Do you have your project logs ({projectname}/Saved/Logs)?
-
Need to copy into this doc.
-
Have you taken screenshots?
-
Yes
-
Please note: If your bug is related to the security of Unreal Engine or a vulnerability you have discovered, instead follow the instructions on this page.
-
Remember: If Epic staff cannot reproduce and experience
I need some help with this metahuman thing, I want to blend /morph aspects of the face in unreal with sliders can anyone help? I tried gpt but I’m not getting anywhere I’ve spend about 2 days trying to come up with smth
I am trying to attach a boot to foot_r, but when walking the boot is not "staying" where I would expect it to. Any ideas how to fix this? In the rest pose it's fine.

Depends on your asset and how you attached it. ChaosClothAsset should not do this if you use the TransferWeights node. I'm bit confused why you wrote "foot_r" (usually you don't attach a boot to foot_r).
I'm not skinning the boot as it should not deform. I just want to attach it to a bone/socket, but not sure what's the correct way.
I'm not sure if this is a good idea for boots but you can add it to your foot_r socket in the CharacterBP. Select your mesh, go to details and search for "Parent Socket". Would work for snapping a hat on the head but I would use SetLeaderPoseComponent for boots ( https://dev.epicgames.com/documentation/en-us/unreal-engine/working-with-modular-characters-in-unreal-engine ).


Epic Games Developer
Create modular characters by combining multiple dynamic skeletal mesh components in Unreal Engine.
Anyone that could help? Still struggling
hey guys i have a issue with my custom mesh and conformed rigged metahuman mesh is not identical its not matching, anyone help me to fix?

Can anyone clarify for me what a Metahuman DNA file actually updates if you upload it into the creator?
It's just geometry right?
Or is it more?
Anybody know why my stupid prick of a MH won't remove any of its outfits?
clicking remove, clicking unprepare, deleting the meshes, they aren't going away
"Remove" or double-click on the cloth should usually do it (shirt icon gone). Unprepare would remove the checkmark.
...but it always takes a while.
Does anyone know of any 3rd party source for high quality grooms you can use on Metahumans?
I tried and tried, I had to delete the actual cloth meshes from the whole project
Very painful and slow
hello. I was wondering if anyone could help me with some advice.
I am learning to create parametric cloth assets for MH and I created a dress.
I was able to go with the whole workflow of converting it to a wardrobe item and everything was fine until i started testing the asset with animation.
The lower end of the dress (mesh) started to wrap around the thighs like a pant and the mesh looked broken.
So the question is,will weight painting solve the problem? I do believe Relax was getting me closer to fixing it but it was still wraping around the thighs very unaturally. Or If i remove the weights for the inter thigh perhaps it might work?
I believe another solution to this is using Chaos Cloth but then that can't be made into a Parametric Wardrobe asset. And the whole idea of learning this is to be able to sell that on FAB as MH Clothing Asset.
And another reason for me asking this question is a skirt or a dress is a very common cloth item so how do you Professionals actually go about this?
And when i try to actually try the edit the weights the mesh starts to break apart (also caz im just not really sure how to find the balance of what weight to adjust and what not to

Depends on the dress. Manual weightpainting would not be necessary. TransferSkinWeights node in ChaosClothAsset is doing this for you anyway (which gives you your parametric weightpainting base automatically if you use a metahuman body as source for the transfer). Afterwards it's deciding how much simulation is worth it and playing with all those Simulation strech/bend/aerodymanics maxdistance in your ChaosClothAsset (red icon) settings and so on. But the base is "TransferSkinWeights" (which is a bit like automatic weights in DCC that sometimes gets even better than manually painting it with the strech nodes) followed by some "what should get simulated" how much painting. I would go fully kinematic with tube like dresses or pants, mixed in mini-dresses and almost fully simulated (with lots of tinkering in the bending and streching) with long and wide dresses. Shirts most likely are most time fine with kinematic (only rendermesh and transferskinweights) ... sometimes they look better if you keep the strech nodes. The above screenshot shows my simulation painting from a double-fabric-layered mini-dress (only a bit of simulation at the border and between the leg where kinematic would bend it not naturally enough).

if it breaks apart it sounds like you need to merge some vertices (islands).
i think it is the same as this tutorial right?
this is what confuses me tho caz the mesh is totally fine as 1 mesh but the moment i add a simple walking animation it falls apart and only in the thigh region.
And thank you @gloomy flame for taking the time to respon. Much appreciated mate. This has been driving me crazy 😛
think im just gonna make some pants and shirts first 🙂
oh wait my bad, this is something totally different caz it is a ChaosClothAsset right. I am trying to make a really basic Parametric Outfit for Metahuman. I think ya for dresses i ll just dig in deper to Chaos Cloth but from what i read i dont think it can be converted to a Parametric Metahuman outfit
My dress is parametric.
ChaosCloth as base is fine.
rgr that, i ll do some more digging then. I gave up on looking further into ChaosCloth caz i thought it was not possible
thanks again @gloomy flame really appreciate the assist. Im kinda of a noob at UE so learning by watching YT and asking around
Is the rigging server down?
About your "breaking apart" thing... I think it would be a lot easeir with the simulation if you just merge the vertices. In Blender this would be edit mode, mark all vertices, merge by distance 0.0001 and the islands are gone. I think it would be hard to paint simulation if the mesh is not combined and some cloth parts can just disconnect.
ahh that makes sense.
any help please 🙁

Works fine here.
done this now, will test to see if this works. cheers!!
and ya i just used the rig like 5 mins back and worked fine.
perhaps internet connection must have dropped?
Thank you, having other issues now
Has anyone used 3dscanstore for high resolution texture maps for their Metahumans? Recommended? Any other suggestions?
https://www.3dscanstore.com/
3d models for download from 3dscanstore. Our 3d models are generated from high quality 3d scans.Use in CG projects,VR / AR, animation, games, 3D projects.
So this was the issue i am facing. Still need to learn how to use chaos cloth but without any weigh paint edits this is what is happening to the mesh, everything else is fine. just the front and the back side.
i tried this tutorial but it kinda made things worse caz of the simulation
https://www.youtube.com/watch?v=y1NgImA4w60&t=254s
You need to weight how many simulation you wanna apply (WeightMap node). There are two different weights. One copied from the metahuman for kinematic (animation driven) and the simulation ones. You can just copy the kinematics via the TransferWeights node but you have to decide afterwards how much of your dress should get simulated or get dragged with your animation. I did not check the full tutorial you mentioned but it seems fine to me. I saw him painting the dress and talking about strech.
Guys i am working on a custom surface shader for blood, sweat and tears,
Only got the blood and tears part, what do you think?
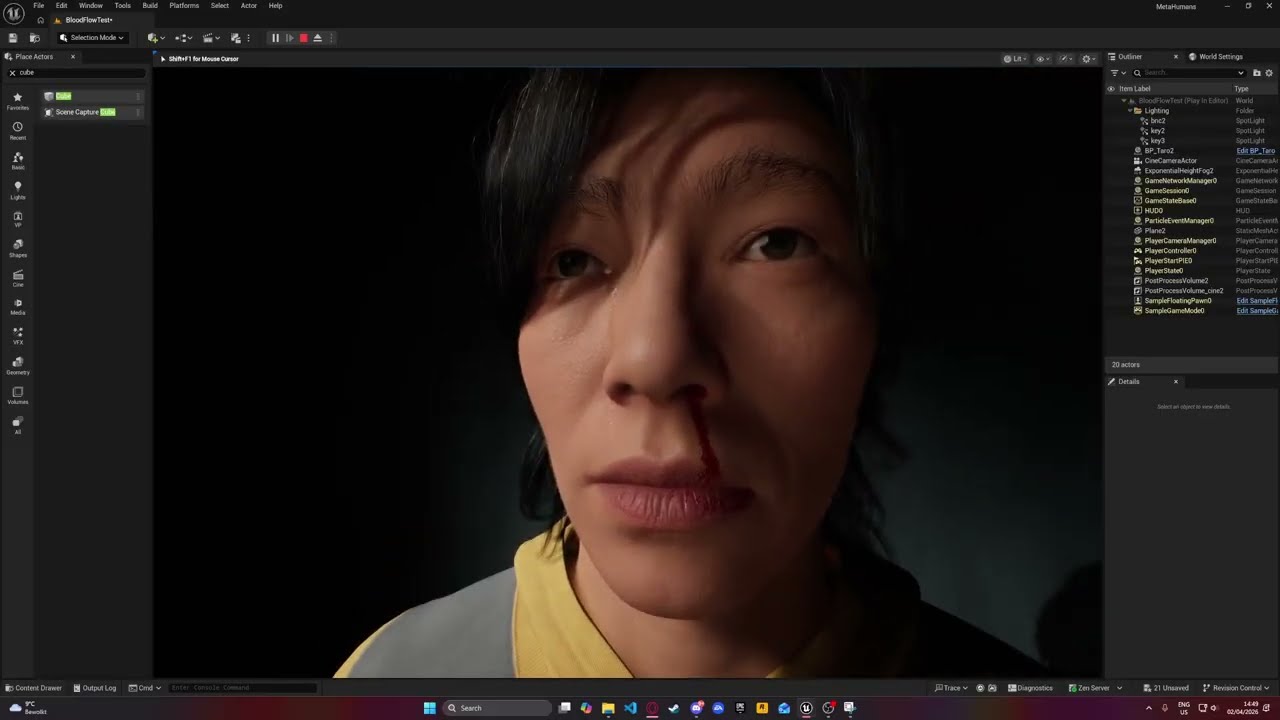
This is an early shader I am working on that allows for realistic looking surface liquid like blood and tears these can be easily activated and are applied on the skin material and are affected by the gravity direction as well, this was made using pseudo math and does not use any Decal.
Has anyone other than Arthur Baum using UDS actually got decent sweat to work on Metahumans? He did this years ago so I wonder if anything new has been accomplished yet?
Just curious, what's UDS?
Ultra Dynamic Sky 🙂
Him and another dev used the wet dripping materials and system to replicate sweat dripping. It looks great, but a bit complex for me right now to achieve
Interesting. You mean like, UDS comes with materials to make things look wet from rain... and they put those on a MetaHuman?
Yeah exactly!
They aren't materials perse, but set ups within the materials that you link the texture maps to
Hiya Good morning. Full disclosure mate, i didnt quite catch that caz of my lack of knowledge about cloth assets but thanks for pointing me in the right direction. I ll do some more digging. Thanks again @gloomy flame. I really do appreciate you taking the time to share you expertise. Cheers!!
Very interesting. I haven't done it myself, but I've seen UE devs talk about Substrate and say it can be used to create a sweat layer on skin. They only mentioned it though, didn't demonstrate it.
Aye! I am excited to try and attempt it. It's a few versions back now though so I am going to assume 100% of everything has changed
You're welcome. I think the tutorial you've found was fine. However one thing to mention, as you wrote you would sell it on Fab, ... the topology of your dress looks way more expensive than required. If you compare this with the techwear outfit from Epic then I think your's got like 100times more triangles. I think you have to do a bit of retopo first, then check the tutorial about the sim weights, streching and so on... paint the lower part of your dress and you're done.


hiya. soo i think i know what the issue is 😛 and it is not really to do with UE but making a tight dress in general.
https://www.youtube.com/watch?v=C7N7BP-j2rY&t=5s
Apparently when the weights are transferred the form a very hard gradient and i have to try to make it into a gradient. Well still stuggling to be honest caz the mesh changes shapes in some areas. But trial and error, i hope to get to the end result. I m doing it now in blender. fingers crossed.
About topology yaa you're 100% right. For now im just trying to make sure i get the basic right. Still havent even set up the folders correctly but ya jsut solving this has taken me days .. ughh. should have started with a basic tshirt and pant 😛
Yes you can paint the kinematics weightpainting part in Blender... if you use a Metahuman as the source below. There's a SkeletalMeshImport node in ChaosCloth. For a short dress like this kinematics without simulation should be enough. But just to mention... there's some smoothing in the TransferWeights node in the ChaosCloth as well (screenshot once "automatic weight with closest" and the other with some smoothing).


oh you mean u can do this within the nodes itself.. definately gonna check this out next. ya in blender doing it manually is kinda of a pain and still havnet had complete luck. this morning i was close to getting a close enough result in ue itself manually relaxing and spreading weights. i know very very little about chaos cloth so definately gonna start looking into this next. (like im just following tutorials blindly on how to create a cloth asset so those dont really dive deep into node set up etc.)
if you dont mind me asking, if you happened to stumble upon a good tutorial that goes through the basic of chaos cloth, may i request you to share that? It is better to just ask the experts rather than having to go by a hit and miss approach
You can do a lot with those nodes. I think it even has some advantage if you stay on static mesh (future updates might have different MH skeleton). But there's that SkeletonMeshImport node as well in ChaosCloth so it's valid to use it as well an you can use your manually painted weights that way. If you do this in Blender just keep in mind that there's al ot of helper and corrective bones from your metahuman that catch some weights (some are tiny bones hidden below those huge painted thigh bones) if you do the DataTransfer from the VertexGroups. But it's just a matter of a few clicks only using the blur brush to strech things out a bit. Just take a look which influences are done on the critical parts via "Item" -> "Vertex Weights" top right while vertex selection mode in Weight-Painting and then switch to Bone Selection for using a bit of blur brush (only).

does anyone know for 5.7 why my metahuman isnt auto rigging and I cant export the combined mesh is it maybe because it thinks Im noit logged in?
Hiya. Good morining. ya man that is exactly it. like i was manually selecting the bones in the data groups rather than the viewport but even after adjusting the weight paint in blender i found that just using relax in UE was giving me a better result. Also because i have to manually weight paint wasnt getting it right. there are so many bones 😛
Also i just stopped when i came across a video that said taht if you do import a skeletal mesh with weight paint in the cloth asset node tree, once u connect it to the cloth terminal all that paint is technically overwritten?
Either ways the temp solution is to just use relax in UE. But now i am quite determined to learn chaos cloth.
The challenge i am having with chaos cloth is either the tutorial is just the basic import static mesh > Simulation nodes > Cloth terminal and asks the viewers to play around with the setting (absolutely no mention of kinematics weightpainting) Or the tutorial are of ue 5.1 or something where things don't look the same.
But guess i ll start from there with the old vids and work my way up. Let the binge watching tutorial challenge begin!!!
Thanks again my friend for taking the time to reply. Have a super awesome day. Cheers!! o7
i thnk i found it
https://www.youtube.com/watch?v=Z57ggNKZDy8&t=341s
i think this one is much better in terms of what you were talking about. time to play around now 🙂
https://www.youtube.com/watch?v=sn7WWhBycnc&t=148s
How much ram do you need for MH creator to run smoothly? I am losing my mind and simply don't have the time for 15 minutes per every click of the mouse
I have a Lenovo LOQ - 24GB RAM & 6GB vram and it usually works fine. But it does crash from time to time. Another thing i noticed when using Metahuman, even tho if it is installed on another drive it will use your main CDrive and u need to atleast 10GB of space otherwise just rigging it, will cause yr machine to crash.
a tip i would suggest is change from Epic to Medium whenever u can and sometime switching from lit to unlit or wireframe etc helps too
I think if you have other things running in the BG close that. Also the part of having space on your hard drive could cause UE to crash. (This one is strange caz I have UE Installed on another drive but atleast 10gb of space on my C Drive also is also required.)
They look both good. 👍
48GB ... but I'm not sure if I would call it "smooth"... and I barely noticed a difference to 32GB as soon as I apply the rig. So I think it's closing background apps either way.
anyone might know why my metahuman isnt showing up in bridge? im logged in both quixel and the creator and ive made multiple edits and assembled it, still not showing up.
I think as you use MHC and keep opening new MetaHumans or assembling them, it keeps using more and more memory. Sometimes it helps to restart UE.
Question for any MH lighting/ material experts.
Lighting is just a single spotlight overhead.
What might be causing the over lit illumination under the nose (circled)?
Its related to RayTraced shadows but unclear what might be causing it.

Looks like it's happening in the mouth around the teeth too. I'm not sure what would be causing it....
Is the viewport set to Cinematic Quality?
Are the Lumen settings baseline? Does the light have more than 1 Samples Per Pixel?
Oh also what is the light source size on the spotlight? And is it super close to her head, like potentially overlapping?
I have 32gb and I honestly can no longer even assemble them because it just runs out of "video" memory
But I'm not running out of video memory
I'm running out of normal ram
Either way it keeps crashing and buying a new computer nowadays is impossible
What can I do?
Ram as we all know is more expensive than a car and 10 months worth of rent from where I'm from 😫
WHY is UE saying I'm running out of Video ram, I'm not!
Can't even assemble my metahuman with 24gb of vram wtf
I just opened a UE project and a MHC asset, and UE is using about 15GB of RAM. 9GB VRAM
Probably enough to assemble on 32GB of RAM, if all other programs are closed.
I'm bordering on 28gb of normal ram when assembling with all other programs closed. I also run a stripped down windows 11 that only used around 3gb of memory
That's what's pushing it to crash but unreal thinks it's video memory. I have like 18gb of vram free
The project settings are set to use as much as possible
Wonder if it's worth buying 128gb of ddr4 to give it enough to chew through
I ain't no expert but if you have multiple MH assembled chars in the same project may be that is slowing it down and if yes, then save them as DNA?
Another RayTracing issue.
What causes my eyelashes to disappear when raytracing is enabled?
ie r.raytracing.enable 1
But ONLY in my renders, not in the viewport!
houdini have project violet playlist what have metahuman content
I thought I had seen everything in terms of weird lighting results.
This is a new one!
I am toggling Cast RayTraced shadows off an on on a Skylight with a built in HDR.
Why am I getting these results?
Happens independent of whether raytracing is enabled.
Seems quite buggy to me.

What are your setting in the project render settings
Lumen Hardware Ray Tracing SM6.
There should be an option to check on ray trace shadows globally in the render settings. Perhaps with skylight that might work. Also do the ray trace shadows work with a skylight and hdri in other engine versions?
Thanks. Going without Skylight HDR as my main source for now.
More pressing problems with MH Creator!
For my Skin Material Textures I need to Enable Texture Override.
Can anyone explain the purpose of the animated textures and how they are created if you only have a single Base Color and single Normal map?
ie
Base Color Animated CM1
Base Color Animated CM2
Base Color Animated CM3
Normal Animated WM1
Normal Animated WM2
Normal Animated WM3
the animated maps contain blood flow and normal wrinkles for different facial poses. Open them up and you will notice that the CM1 have redness in certain areas to mimic bloodflow during expressions. The WM1 have the wrinkles corresponding to those facial expressions.
Thanks! If you don't have any animated maps for your custom MH, can you just use generic ones and modify them?
So unless the actual skin tone is completely different, you can get away with using the existing animated maps. For example if your character has a similar skin tone, you can just leave them, but if they are different, like lets say your project MH has darker skin and you add a fair skin albedo, it will show through when the face starts to animate.
You kinda want the animated maps though. You can export them and blend them in with your custom textures in photoshop so that when the brows raise for example, you get those wrinkle lines on the forehead.
so Im trying to make my metahuman into the thuirdf person char and its nearly sone but it has no rotation does anyone possibly know why Idk whats wrong
My eyelid skin shaders are messed up. Same result with Lumen or PathTracing.
Anyone care to offer a solution?

Looks like something to do with World Normal?

go to the material of the face? maybe i can help

Hmmm that is indeed weird
Did you apply different textures to the MH base? Could be the animated maps coming through. Otherwise you can go to the skin material, go to the LOD Sections and for the face material - recompute tangents and change to green. Not sure if that will help if it’s related to the animated maps though.
Thanks. This is all new to me so appreciate your patience!
One point of confusion. I am simply trying to implement 3dscanTextures and a custom identity file. The tutorial video is 2 years old!
The assets only come with 3 texture maps
Albedo
Normal
Cavity
I've figured out how to apply the texture maps in MH Creator using Texture Map Overrides.
But where do you obtain the correct Normal Wrinkle Maps (which require modification)? Are these from a default MH or?
If I disable 'Use Animated Maps' it solves the issue but does that mean I have no wrinkle maps?
Most likely the issue is incorrect Normal Wrinkle maps but this goes back to my earlier question
Where do you obtain the correct Normal Wrinkle Maps (which require modification)?
You could export the blood flow and wrinkle maps, and in Photoshop mask the bloodflow and wrinkle sections and blend them with the albedo for blood flow and normal for wrinkle maps. Then reimport and reassign
Ok thanks. So first I need to create a generic Metahuman in MH Creator, Assemble and it should generate these maps for me?
so you already have those for the female you are using. Export the +3 blood flow maps and +3 normal wrinkles. In photoshop, "steal" the sections from these maps you can mask those and preserve those sections, then blend each with the scan store albedo maps for the blood flow ones and the 3d scan store normal, with the normal wrinkle maps.
I also think if you email 3d scan store and ask them for advice, they might be able to help since I believe they went through that process for their demos.
Yeah. Thanks.
Emailed support several times. No response yet.
when they first release those textures with the metahumans, I asked in the comments about the animated maps, and its a long shot but somewhere in the comments I think they said they blurred over the existing ones.
I will try again!
Not sure what you mean when you say '...so you already have those for the female you are using'
Is this in reference to another earlier post of mine?
I did download their Free MH identity which is female but don't recall it containing any wrinkle maps. Will download and check again.
So the face you are using for the lighting issue you are having isnt an assembled metahuman?
no the free MH Identity doesnt come with the wrinkle maps.
It is but I am starting with the downloaded identity.
In MH Creator at one point before Assemble you need to download texture maps.
Is that when the normal wrinkle maps should automatically be downloaded?
hmm i dont recall, to be honest I have had my qualms with the metahuman face materials in 5.6 and newer, cause even when you do get it assembled, for some reason the skin looks super dry.
Increase Specular?
Thanks again for the feedback. When I get it working will share my solution
haha here is the thing the way we were able to adjust the materials in the previous version, thats gone
there is a thread about this on the forum https://forums.unrealengine.com/t/5-6-metahuman-character-creator-lacks-roughness-texture-override/2616877/4?u=feeding_wolves

Epic Developer Community Forums
When you assemble your MetaHuman, spec, roughness textures are packed into T_Head_SRMF. It would be possible to export this out as a .png, edit R and G channels to remove nose details (spec, roughness) and then import it back in.
Epic Developer Community Forums
Hey, There are pretty significant changes here from Cloud to UEMHC. A lot of stuff that was a param in the material and subsequently changed via the instance is now exposed in MHC editor and then baked into the textures on assembly as an optimisation step. It is still possible to change the lipstick colour, or access the spec/roughness maps bu...
So some progress. After assembling another time and opening the face material associated with the created BP metahuman, I can see wrinkle maps.
Probably doing something wrong in MH Creator (which creates the associated MH Character file)
Not sure about compression. By default the Normal Wrinkle maps seem to have the incorrect compression applied (attached).
Does this matter in terms of their functionality?

Another point of confusion is whether you need to apply any custom face texture maps in MH Creator (under Texture Override) or should you rather apply them in the final MH BP face material?
I assume the latter since you wouldn't have any Normal Wrinkle maps to use in the Texture Override slots?

I'm using texture override for my custom makeup / skin for the base-color. You can drop your fantasy skin there as well (e.g. after wrapping the MH-topology on your orc-mesh that brings already some scaly orc skin rather than some natural human skin).
Thanks but couldn’t you do the same in the generated MH face material?
If I would replace everything and would never change the shape of the Metahuman then yes. I could ofc assemble and use the generated ones somehow in Substance or MarmosetToolbag and paint on top of it as well. But if I just need the basecolor from some work done already in the past I still can get freckles and makeup modifications from the Creator and merge old with new and I see what I get in the Creator already. I prefer doing the changes before I hit assemble if it's easy possible (which it is with the base color).
Hi everyone, how do I find new goatees and eyebrows to add to metahumans?
What is the best practice for this?
Been screwed over 3 times by freelancers and having to figure out how to make a character myself
There are eyebrows and beard from Epic ... but no goatee last time i checked. There's always a few grooms on Fab (most of them only gives you LOD0 strands tho). If neither matches your need I would create them myself.
Blender workflow:
*) Create MH in Metahuman Creator ... or download the "MetaHuman Groom Starter Kit for Maya".
*) If you use your own MH face then export "Metahuman Character -> Export Face Skeletal Mesh"
*) Export the face mesh (either yours or from starter kit) as fbx from UE.
*) Import the face mesh in Blender
*) If you used your MH face remove all unrequired islands (eyes, tongue) editmode "L" so there are no overlapping UVs
*) Select the face mesh in object mode, hit "Shift A" to add and add Curve -> Empty Hair
*) Select the new created Curves in outliner and switch to "Sculpting" which would open the grooming
*) Place and comb the hairs as you like ("Density Brush" or "Add" brush, ...)
*) If you are done export as abc file. I would recommend the Groom Plugin for that purpose (gives you different groom groups and correct RootUV). You can even export via default exporter (without RootUVs) or convert them to particles before you export (at some point particles got RootUVs).
*) Create binding asset and select your skeletal mesh (the one you exported previously).
*) If you wanna follow Epic open Groom and add LODs:
*) LOD 0-1: Strands for LOD0 and reduced for LOD1 (just reduce in the groom asset by slider)
*) LOD2-4: HairCards for LOD2-4 (Haircard generator plugin from Epic)
*) LOD5+: Create a mesh helmet. You can convert your Blender curves into mesh and in edit mode select all those mesh curves and do "Convex Hull". It must not be perfect for that LOD level anymore but I would seperate the top parted from a ponytail. Afterwards enable HairModellingToolset in UE select your GroomAsset -> RMB -> Create Strands Textures (and select your helmet so it gets the baked strands).
*) Create a wardrobe item and choose "Metahuman Groom Pipeline".
Done.
Has anyone experienced this bug before when working with MH inside of mutable? Once I add 3 meshes the skeleton scales * 100. no matter what the 3rd mesh is
What’s the simplest way to use the face textures from texturing.xyz on your Metahumans?
My understanding is that you need to somehow ‘wrap’ their template mesh around your custom MH head?
Is there an easier way or some plugin that automates this without having to use a Blender or Maya workflow?
is there a channel for importing and exporting characters from other software? clothing is giving me trouble in Daz3D
Wrap3d
It allready have a preset for wrapping texturing.xyz on head mesh just need to import your mh head
Pretty easy
Lets say you've recorded some custom face animation using LiveLink, applied it in Sequencer, but then you need to suppress just the mouth movement.
How would you do this?
You can't convert a animation track to keyframes and you need to delete the original Face Control rig, otherwise your custom animation won't work.

Can anyone explain to me what the CM and WM and Cavity maps are?

WM is wrinkle map maybe?
Crinkle map?
Anyone familiar with Wrap software and wrapping Metahuman Head mesh topology over custom 3rd party or hand sculpted heads?
Following this fairly decent tutorial here
https://youtu.be/ih3FJJGLjHQ
Everything seems find until I try and 'Conform' my wrapped head mesh in MH Creator.
Failed to import Template Mesh: input head mesh is not consistent with Metahuman topology.
Part of the issue may be that I am using the incorrect source MH mesh.
When you export as .obj from Unreal you are left with 3 mesh files
head_lod0_mesh.OBJ
head_lod0_mesh_Internal.OBJ
head_lod0_mesh_UV1.OBJ


🔥 MetaHuman Face Wrapping Tutorial
In this video I’ll show you how to wrap a MetaHuman head using FaceForm.
I’ll also use a FREE 3D head scan from 3D Scan Store as reference.
🧠 Free 3D Scan Head (Download here):
https://www.3dscanstore.com/blog/Free-3D-Head-Model
🛠️ FaceForm Website:
https://faceform.com/
If you find this usef...
FWIW thread on Reddit. Not sure if it presents any useful soliution
https://www.reddit.com/r/UnrealEngine5/comments/1l5bm5p/trying_out_the_new_conform_custom_mesh_for/
I can't seem to find a work around for this on google. All I did was a quick edit on the head as a test. Exporting from Blender to UE. Any…
On another MH related note, how doese everyone organize custom MH assets?
Specifically within your project -Content Browser?
Very quickly becomes a logistical nightmare!
Better to have a separate folder for each custom version of a specific MH?
And any related texture maps?
What makes it challenging is that there are many common elements you might want to keep in their original location in Game/Metahumans.
You need this one as base mesh: https://fab.com/s/881fa600b810
About the folders. I've one folder with my MetahumanSourceCharacters, one for the MetahumanGrooms, one for the MetahumanOutfits and one for Metahumans (that last one is where the assembled MHs are exported and the exporter shares stuff in Common). Managing is a bit tricky as you even might get forced to keep your ancestors if you start blending a testversion into a recent version (as it creates deps).
Fab.com
Separate MetaHuman head and body archetype meshes using standard MetaHuman topology and UV layout. Excludes joints, skinweights, blendshapes, and LOD meshes. Topology guide textures are included.These assets can be used to support the conform from template mesh workflow in MetaHuman Creator. This pack enables you to use third-party applications ...
Thanks! I think the issue I encountered was that Wrap only seems to recognize Obj’s.
So I figured it’s necessary to export the imported head mesh from Unreal as an obj.
And the resulting wrapped mesh from Wrap doesn’t seem to work in MH Creator.
How do you organize any custom texture maps?
Yes, as far I remember I've used obj as well.
That were created by exporting from Unreal, correct?
I put them in my MH-source folder if I create any.
Nope. I use the Conform mesh from Epic:

Well... at least the base. I'm not sure if I exported it to obj for Wrap first.
Yeah I’ll have another look but recall only seeing a fbx in the Conform meshes.
I’m liking Wrap but still trying to figure out best settings.
And optimum placement of location markers.
Finding the mouth tricky and never sure if I need separate points for the inner lips.
Yes I just took a look into the the zip and it only brings fbx - I've created the obj in Blender (and the zip even contain those textures that get handy in Wrap3D to place the markers).
Will try blender
I've used this to keep some of the inner mouth part of the original mesh (SelecPolygons node) as my Source meshes had seperate/different ones that I've removed for wrapping. That way it kept a bit of volume.


Question about texturing.xyz assets.
There are 3 maps that come with purchased assets that I am confused about and how to best implement for custom MHs.
XYZ_dispCalibrated_mid0_raw.1001
XYZ_dispMultiChannel_mid50_lin_srgb.1001
XYZ_utility_lin_srgb.1001
I checked their website but 99% tutorials assume you are using a Mari-Zbrush-Maya workflow👀
2 main questions
How do you implement Roughness , Spec if no maps are supplied?
How do you implement the supplied displacement maps (and which one to use)?
5.7 seems so much slower or is that just me?
I remember a similar tutorial video from Epic using Mari, Zbrush, Substance Designer, ... about adding a scar and tattoos to an old woman MH face. If you would go cinematic, use exactly those displacement maps and purchased them from texturing.xyz then I think their workflow sounds fine. It depends a bit on the quality level you would get. If you create a movie or lots of cinematics then do it. If you create a game and already are in doubt if you use strands for groom or switch to cards already on LOD0 all the way then this might be a bit too much... or maybe there's an easier way to just get a bit of that detail creating normal from displacment map (Substance Designer) and use BlendAngleCorrectedNormal with a low value in the final material or something (did not try this but might work).
It's not fast but 10 minutes sounds way too long. Even adding or removing cloth parts could take a moment (but its more like many seconds and not minutes).
I dont know about the displacement maps, but for the roughness (now im basing this on the way this was set up in pre-5.7 before they messed with the materials) but if you open up the roughness texture in any MH through the face material instance that they are adding the normal as a composite texture like this.

Thanks!! Yes saw this workflow described in one tutorial.
The other challenge is creating the various wrinkle (animated) maps. Very little documentation on this.
Wondering if you can simple 'borrow' wrinkle maps from any other MH since they share the same UV space? And then further customize them in photoshop ( ie layering in Overlay mode)
I'm trying to adopt the simplest possible workflow while still implementing 3rd party custom skin texture maps and meshes ( ie avoiding Zbrush, Mari, Substance Designer.)
there is an unreal fest 2022 demo that gives you an idea of what is involved in creating animated maps but its extensive work. So what exactly are you doing that requires you to need to create new animated maps? As I mentioned they are expression based, so each one of those textures covers a specific set of expressions. I would personally blend the custom textures into the existing ones as opposed to creating new ones if you want to keep things simple.
Thanks. Yes that was my plan. Would you know if the texturing.xyz displacement map(s) can be used as is with the default MH Material? (after re wrapping UVs of course)
I was just creating my first metahuman and I'm facing this memory issue when hit on create full rig..can anyone help?..I'm new to unreal.

How much VRAM do you have?
You might want to try using 2k textures when downloading textures. And or enabling virtual textures in your project.
I've got 8GB VRAM
I just hit yes.. downloaded 2k textures..
it's assembling the Metahuman rn
and it just crashedd
Try enabling virtual texture support in Project Settings and try once more. Dunno...might be 8GB vram not enough
Dealing with crashes is part of the Unreal experience😬
I dont believe so
Some confusion about implementing Roughness. In the Face Material Instance there is a packed texture SRMF.
Does this require customizing the material to create a dedicated Roughness slot or?

honestly I havent really looked into it yet. I did share a link to the forum post where I got a response to my question about the roughness
Thanks will dig deeper and try and share my findings
At the moment only have custom Albedo and Normal textures working😢
So need to figure out exactly how to implement
1 cavity
2 displacement
3 roughness
using the default MH Face material.
Usually I close other apps if I do such things with rigged metahumans.
I asked the Developer Assistant "How to use a roughness map with the Metahuman Face material in 5.7?"
Long reply but started with
"In Unreal Engine 5.7, the MetaHuman framework has transitioned to the Substrate material system as the default..."
Really? Even if you don't have Substrate materials enabled?
I think the Developer Assistant does not tell the truth... I've Subtrate on but Front Material is empty.

It also goes on..."Additionally, 5.7 introduces Material Parameter Collection (MPC) Overrides in Material Instances, which is the preferred method for global or modular adjustments to MetaHuman skin."
Wondering if I create a default MH in 5.6, how different will the materials be?
I think the issue with roughness is... if you wanna use the (performance friendlier) baked option in the final material... there's no easy way to get it into the overrides in Metahuman-Creator. But I'm not sure if you really need it (if you don't create a fantasy figure that has complete different roughness zones). I guess it's putting slightly different roughness at the nose automatically. If I would completely override this then I guess I would just take the roughness map and merge it into the green channel of the SRMF baked texture in a paint-program.
...and hoping that roughness is not used too much different in those cavity microdetails somehow.
Thanks. What about Cavity?
About the cavity... I think this is again something for Zbrush ... use displacement map als scuplt info on the MH-mesh to get real displacement detail on a very high poly mesh and then do some baking (e.g. Marmoset Toolbag from curvature). I don't think you can use a cavity map direct from texture.xyz as it most likely matches the topology/uv as the other maps from the scan and not from the wrapped low-poly metahuman head. Maybe you can raycast the displacment-map without Zbrush in Toolbag but this would give you less control and might get tricky at some zones where the cavity would ruin more than help.
Thanks. Yeah I've re_UV mapped all texturexyz maps using Wrap.
This might not work for high-frequency maps like cavity ... I'm pretty sure Wrap3D would blur and strech this too much (make lines from points) and then the cavity might be useless (or make the final result much worse).
Some loss of detail but still usable I think

I seem to recall being able to add cavity in Texture Overrides in Mh Creator?
...maybe. I mean you can try. Just drag it into the Cavity Override in the Metahuman Creator and check the result.
Going to start again tomorrow to see if I can make further progress.. Thanks for the feedback
Not sure what it is, 5.7 metahuman stuff is crawling
Has anyone had any luck upgrading metas from 5.5 to 5.6 without issue? Every time I do an "import and Migrate" via Quixel I end up with this mess for all LODs from 3 and below. Been chasing AI-recommended fixes but nothing has worked so far.

There where issues from other users that had similar-looking pictures when they packaged the game (did not happen in PIE) where it was some remnant in the project folder. Sometimes it makes a difference if there's already a skeletal mesh with the same name somewhere around (even if it shouldn't). There's a grid below the feet so I guess this even happens in PIE already in your case. If it just happens at few LODs I would check the cloth. LOD0-1 uses small bones for clavicle and so on for the weights (from the MH body) while LOD2+ put most weight on spine_04 for the upper-body (at least in 5.7). If you would fix the sources (like red icon ChaosCloth Asset) then check the TransferSkinWeights node (source mesh still ok?). If you would fix an already assembled Skeletal-Mesh (outfit) then compare the bones in the 5.6 MH body (bone active / greyed out) and in the one from your skeletal mesh cloth at the LOD levels (bone active / greyed out like in body).
So it seems that back in UE5.5 before everything Metahuman related was changed the face material exposed a Roughness map.
Going to see what happens if I make edits and then migrate the UE5.5 MH to 5.7 MH Creator.

And the Normal Map was used to create Roughness

I don't get it. I'm creating a resizable outfit and using the fixed legacy bodies as those body shapes I'm creating the fittings for. Although BodyShapeG exists correctly in the outfit asset (pic 1), the MetaHuman creator thinks BodyShapeH would be a better fit (pic 2), which it definitely isn't (clipping and such). Using the Source Size Override to set it to BodyShapeG gives the expected result on the character.
Any idea what could be the problem?


The cloth asset is correctly using the BodyShapeG assets everywhere, tripple checked that.
[BodyShapeG refers to the Short/Female/Underweight fixed body, BodyShapeH refers to the Short/Female/Normalweight fixed body]
Hello guys! I'm looking for a way to import a custom teeth mesh into metahuman (ue 5.7) Have any of you tried it?
Thank you for the detailed response
So I think I may have found the issue. When you import a 5.5 meta it creates the Blueprint etc like it used to. Delete all assets except the new 5.6 meta and then open it and under Body category convert it to Parametric. Then you can rig, assmble it etc
honestly at this point im probably going to do the same when it comes to working with the metahuman face material. all the customization parameters appear to be gone and the ones that are generated are baked, which makes customizing them more challenging than before
Hello everyone,
My name is Muslim, and I’m currently learning Unreal Engine for animation. I’m facing an issue with MetaHuman — I’m unable to properly add clothing to my character in the latest version.
I also tried using Blueprints, but when it comes to weight painting for the clothes, I’m having difficulty understanding and applying it correctly.
I would really appreciate it if someone could guide me or share any helpful resources or tutorials regarding this.
Thank you!
Hi,
what is the best way to merge Metahumans heads and bodies? I want to use them for a small crowd but i want to save performance by removing the face skeletal.
thanks 😄
Are there any 'gotchas' when purchasing clothing from FAB? How do you know if the garment will fit correctly?
Does the clothing need to specifically state 'parametric'?
Can you assume any MH comatible clothing would work with chaos physics?
Previously I always purchased Marvelous Designer compatible clothing since I was simulating it.
@silver cloud @hollow aurora clothing is usually not that much of an issue. Most of the magic happens in the ChaosCloth (red icon) where TransferSkinWeights is doing "automatic weights" from a metahuman source body to a static mesh cloth part. For cloth that does not require simulation this is enough. If you need simulation... it's always a bit of tradeoff how much and how accurate you would create it (you can create a T-Shirt that is bouncing at the body while walking... and pay the performance bill or you just go full kinematic). The red icon cloth asset would then used in the (yellow icon) outfit asset where you can see "number resizing interpolation points". So even if you just get one metahuman source it is most likely always parametric ... but if the shape differs a lot then the points (in the screenshot it's 1500) might still be a bit inaccurate so more sizes could help. In the worst case... if you have a complete different shape only one source you could usually still easily export the static mesh and do a bit of sculpt drag (Blender, ...) and reimport (no manual weightpainting) to match your metahuman shape and use your CombinedMesh (a matter of a few minutes).


Hey guys, could please give me a hint for a better helmet fitting for MH wardrobe asset (5.7)? I just cant make it fit properly on different body types.
Thanks ❤️
Made CA -> OA -> WI.


There's some tools that merge SM... but it sounds like you would not only merge but get rid of the skeleton (or at least parts). You can do all of this in any DCC (Blender, Maya, ...) after assembling. There's even the possibility to export a combined mesh (body+face) in the metahuman creator (to create outfits) but you have to apply some material. I'm not sure if it's worth the afford - it's a bit working against the system in my opinion. You can assemble the MHs in lower quality and you can save a lot of performance if you simplify the grooms and convert them to cards (Epics haircard plugin) or helmet. With a crowd this alone can easily make a difference of 40fps+. In CitySampleCrowd from Epic all the Metahumans use Cards in grooms not strands (already at LOD0). Switching off the head (even the tick) improves performance, yes... but only switching off the Post-process anim BP (no blink, ...) gives almost same FPS only bit worse (screenshots crowd heads off: ~48fps, only postprocess-anim off: ~46, full heads on + postprocess: ~42 fps).


Seems like you have to add more different base MHs and base meshes sculpted on them (so you need more CAs with different Metahumans) ... or you can try to increase the interpolationpoints in the OA.