#visual-fx
1 messages · Page 25 of 1
Alright then
its easy to visually trace the path of an individual snowflake from a few meters above you till the ground
Can you nit occlude single particles?
But Will players do that?
My terrain is always lit up, even though the directional light I use is under the terrain. How do I fix that?
Under the terrain means light shines through
Seems like it, yeah
You need to deactivate it
@cold sorrel yeah, its so easy to see that it happens automatically even if a player doesn't even want to look at it
Like a proper tod system
TOD?
Alright
Sounds like an impossible task that's never been solved before.
Thats stupid xd
Good luck!
Then what's TOD?
Why would you have sun active if you cant see it at all???
@cold sorrel lol, I'm quite sure its something that has been solved a lot of times already... I'm very surely not the first person to do heavy snow in a big level
Tod is time of day
No you are not
Ah
I have done it, among others
But oh well
I have
Brought me to this: https://wiki.unrealengine.com/Tutorial:_Time_of_Day
Doesn't help me afaik, as I already have something nearly identical to that
@cold sorrel so how have you done it then?
You cant just have an active sun under your landscape...
Very, very true lol
and even if I could spawn snow flakes in front of the player without him noticing, it would be still so that if the player moves quickly somewhere, there would be very few snowflakes in the air until he stays there for a while and it becomes more and more. then if he moves again, density goes down again
that density change would be very noticeable
particle density needs to stay roughly constant
And do you want the snow to not fall through objects?
I do that using the material, that's easy, so that's not related to the particle system
this way, works same with snow: https://forums.unrealengine.com/community/community-content-tools-and-tutorials/42393-updated-for-4-20-1-let-it-rain-but-not-indoors
Unreal Engine Forums
EDIT: This post is outdated. An updated 4.20 version together with download links can be found below (https://forums.unrealengine.com/community/community-content
quite simple magic
The page wont load
Well. We never know
Is tgis a 4.20 dependant feature?
Something new
I know there is some sort of gpu collision thing
So particles auto hit predefined locations
no, worked also in earlier versions. that thread was written back in 4.10 or so originally
@cold sorrel still i don't understand why it changes into a localspace effect
It's just vector math. Check out vector addition on Khan academy.
You are comparing two vectors and show an outcome based on it. Now without removing the actor position, one of them is a few units while the other could be several miles long as it traced back to the original of the world.
It is unlikely that's the comparison you want to make
Why is it still under the landscape xd
And
Your landscape looks broken
Show me whwn the sun is up
@azure idol
@flat sinew Try alternative approaches. eg. Rain shader, as described by Sébastien Lagarde.
Give this to #graphics
Its not ok to handle for me
And tell them that you keep lights on when the sun is under the Landschaft
Landscape
hey guys, trying this question out here:
https://cdn.discordapp.com/attachments/221796616653373441/526053220477304843/Desktop_2018.12.22_-_09.06.36.112.mp4
Does anyone know if there is an option to have the camera's fov scale vertically instead of horizontally?
I created a smoke trail. The color of it appears different on different background. I forgot how to fix that. Anybody knows?
Hey there i want to create a flash/stun effect for a stungrenade. I tried using bloom in the camera settings but it seems a bit buggy because of light adaption and so on. Does anybody know another less buggy method for this?
well obvious but not cheap option is - create a soft "flash" roundish shape particle, add a light function to it and make it blast super bright
that'll do it
i don't think light functions work on consoles tho, but as long as you keep it PC it should be ok
alternative idea is combo your particle system with a blueprint that has a point light
of course that's a non-bloom dynamic light solution as well. again not cheap. if you want it to just fill whole screen with no light costs, make particle translucent and a big flash shape that's really big, then check the box that says "disable depth sorting" - then it'll draw over everything 😛
that's a material settings checkbox
last alternative - use a post process material, this way you can get some post-flash color distortion too
that'll look pretty wicked
that one is more of an optional add-on to the other ideas tho
Postprocess brightness flash combined with the above
https://i.gyazo.com/7df22256369ddc6a205deaa44846e375.gif
goofing off a bit

thanks gif for butchering the frames lol
lol ya i have to follow special workflow for Gyazo gif recordings
step 1 - close down EVERY unreal 4 window except recording area. no cascade, no materials, nothing
step 2 - reduce particle play speed
then i can record. i often record 2 of em. one at slow-mo speeds to show how not-sucky i am. then one at full speed to remind people that fx are fast
i love Gyazo but i wish there was a way to make it less resource dependent
yea I tend to do the same, and while I know there are other tools, this is still the easiest to get something going.

Happy Holidays from the @JangaFX team! Get VectorayGen 20% off from now until Jan 1st 2019. Give yourself the gift of vector fields! The snow + sparks in the...

quick question, how do I make body ghost trails? or whatever its called cause I'm confused as hell
maybe motion blur? i dunno i never did this really well. could have an emitter that emits from skeletal vertices with scene-color multiplied into the particle color
or anim trails
or literally spawn a bunch of character meshes with translucent material via particle system and have them vanish really quickly
go bananas, sometimes there's no tutorial. best bet is find a game that does what you want, then try to figure out how they did it by studying video footage
Can I set what channels I want a particle effect to collide with?
How would I make a straight line up using light?
@azure idol There are ways to fake a conic light using sprites, Iv done this in the past to mimic those club lights that shine into the sky with a decent level of success
if you want to use actual lights something like this might help, though lights tend to be pretty compute heavy ime
I won't need to use actual light, no
Wouldn't make a difference
I've seen that link before but still couldn't figure it out
@solar remnant
gimme a sec I'll see if I can find a sprite that works if not I can make one real quick
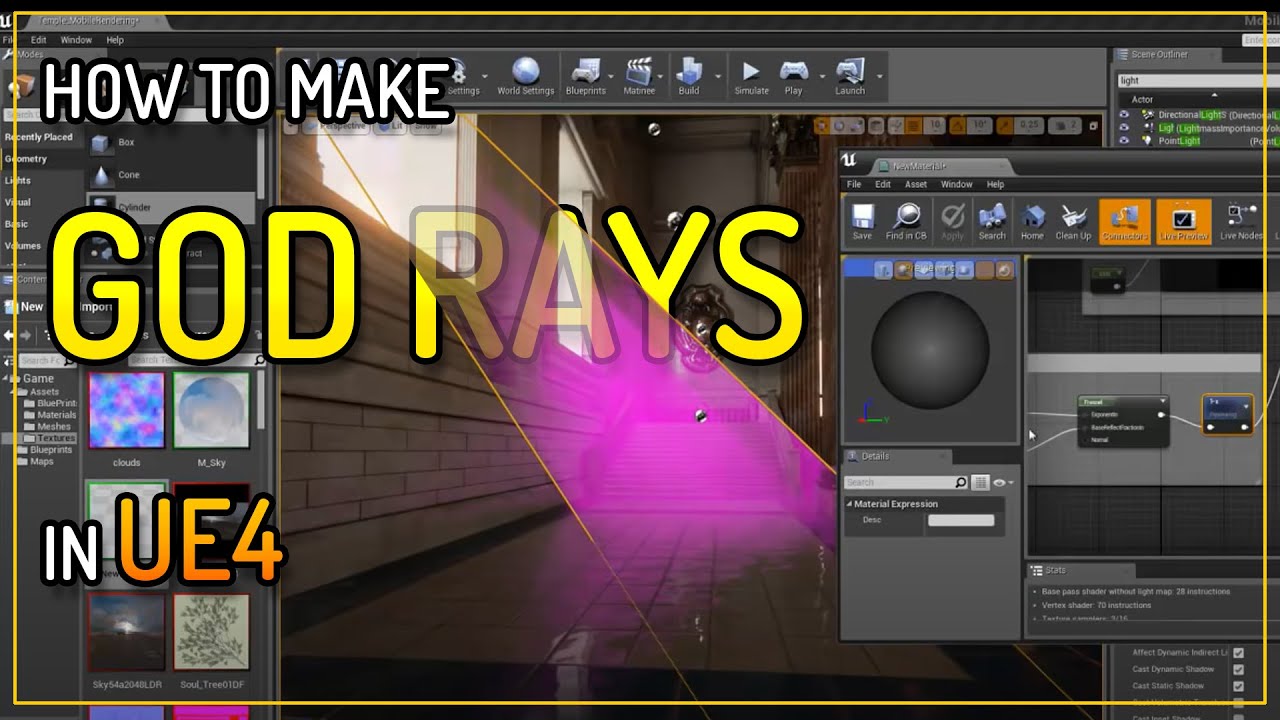
How to create Rays of light that can be positioned how you want in a level and are not view dependant like the option in the directional light. I create a me...
here ya go this is what I used a while back to achieve a similar effect at a low cost

theres another way where you just use a plane and a sprite but I don't have a sheet on me unfortunately, lighting through fog is pretty doable as well but Iv found balancing fog with the god ray is a pretty hard task in terms of getting everything to look right
Surprisingly, fake godrays are still more cozy to use even in the age of volumetrics. For me at least.
theres a pretty simple setup think last time I ended up using a photoshop brush to get a good spotlight sprite, but should give you an idea of a basic approach
I still use crossplane godrays waaay more than dynamic ones that never look quite right
Ok Glad now you're throwing knowledge at me gotta see what that is haha
XD
@cold sorrel do you mean something similiar to grass where you layout a sheet perpendicular to the other sheet?
yup
The what
awwww smaht i need your expierence

http://www.battlefield.com Battlefield 4 will release Fall 2013. The "Fishing in Baku" video is shot entirely in-game and is the first glimpse of the human, ...
Crossplane godrays at the timemarker
Still almost hold up
What, 6 years later?
@azure idol
Oh
How to create Rays of light that can be positioned how you want in a level and are not view dependant like the option in the directional light. I create a me...
Will that video allow me to pretty much use it in multiple ways?
That's such a vague question
I'll check it out and let you know 
theres no such thing as the 'right' way to do it just gotta try multiple ways and get dat exp
Add fresnelfades and a near camera fade. Then you've just built one of the most versitile tools in your toolbox
i'm addicted to half-cones lately for both fire and rays, sometimes with just 2 quads, other times more. i like that "convex" shape that bulges out at me
crosses sometimes do things i don't like
i would never suggest a full cylinder, but half cylinders, half domes, half cones....that's my favorite kinda shape to use
all with camera facing
and sometimes a velocity or axis orientation
I still call an old colleague VAP boy because when he first joined Eurocom a hundred years ago he spent damn near his whole first month placing ViewAlignedPolys throughout all of Dead Space Extraction xD
Or maybe it was Goldeneye..
More VAPs to the people!
haha nice
@azure idol Any program would work I think that the technique I sent you earlier is the easiest to test out though, you just need the stock plane from unreal and that sprite. If you want to do the cone way and need control over the full shape you'd need a 3d app of some sort (I think unreal has some modeling capabilities now but meh) I use Houdini but thats more because its my primary 3d app
I have no clue how to use any of the modeling apps
No time like the present :D, but in all honesty you will probably need to learn some sort of 3d modeling app for vfx as many effects utilize weird aspects of modeling in particular UV space I would recommend checking out Luos on youtube he also pops up around here but he gave me some major appreciation for meshes/uv manipulation for realtime vfx
I'll check it out, thank you
If you're totally new to 3d modeling apps I might recommend just watching someone navigate a viewport for a while doing little projects. They seem very intimidating when you start but that slowly goes away. My path was blender -> Maya -> Houdini -> 3dsMax, but I largely use Houdini as the thought process clicks for me. If you need help feel free to message me though
Hey guys! Not sure if this is where I should post this, but here she goes. How would I go about cutting out my water plane inside the boat? Is there a way I can make a volume that's sets material opacity to 0 when inside? Any suggestions are appreciated, thanks.

A video, produced by the Weather Channel, featuring Mark Elliot, explaining the dangers of flooding in the wake of hurricanes using immersive mixed reality. ...
Anyone know a good way to scale a model through materials? I'v tried world displacement and world position offset but haven't gotten them to work very cleanly, only thing I can think of now is a blueprint scaling system
nvm got it going
world position offset would be the way to go
(worldposition - actorposition) * scale factor, if I remember right, plug that into WPO
Is there a way to create lighting like this in UE4? I'm asking anywhere and can't seem to get an answer. Almost no info on the internet either :c
Here's the example: https://www.youtube.com/watch?v=Z4uijn3M4VQ

This is a shadowcasting implementation that uses arbitrary sub-cell positioning and "shades" cells depending on how much of them is visible to create an anti...
@unborn fern its very doable, the second game I made was actually built on that premise where you control a light in the game to reveal the world, I ended up adding some shader trickery to improve the gameplay portion, but its very doable
anyone expierenced with pivot painter 2.0? just need to clear up a couple learning curves if someone has a moment
@solar remnant would you be able to provide some insight on how to exactly achieve this effect?
@unborn fern We just used a point light and took away all other lights
Ohhhh I see what you mean had to open the video in another tab
you may be able to reach a similar effect by removing AA on your lighting alone tbh
Ok, that would probably give me small pixels. That's already good but what I'm trying to achieve is lighting up a tile map (paper 2d) in such fashion
Every tile has uniform light intensity within it
But it varies between tiles
Like in old Minecraft lighting
@solar remnant
@unborn fern So one way I think might could do it is you could sample a gradient and then drive it through emission on the surface, you could take it a step further for the squares by making your mask blocky

Pintable effect in unreal engine 4 material using world position offest and procedural generation.With this effect we are able to make a living floor that wi...
its a similar idea to this tutorial for the gradient setup being controlled by the player, so it follows the player you would just need to use a different shader based on emissive and a square mask
Hmmm... That could really come in handy
How do I add shadows to it tho?
Because that would take care of the lighting
But I wouldn't have the sharp shadows
Actually all I would need is to somehow enable light blocking by the tiles with collision
you would need to mask those areas out
which would have to be done in a similar fashion to how you locate the player in that tut, but instead you would use it on all objects in the scene and then subtract areas based on the location of other things in scene location
thats the vfxy way but I feel like you could possibly degrade unreals built in light Anti aliasing to the point the lighting does it normally
Thanks @analog onyx i ended up using custom stencil depth to set visibility of the material.
I'll try to mess around with that
I really hoped there would be way for tiles to cast a natural shadow onto other tiles
Thanks a lot
for sure wish you luck lots of ways to do something that used to be the only way tis funny
anyone got idea how to do motion blur/ghosting in postprocess?
in context, I need all glowing red objects to leave a trail on screen
UE comes with motion blur, but i'm not sure how customizable it is
this might be of some use: https://youtu.be/DQvBeC16Bxk?list=PL_JssrhwTN3shEX2Wxf4DV7WmYlwxA2-8

Nesse vídeo mostrei como fazer o efeito Ghost Trails, aquele efeito de fantasma do personagem, e como aplicar ela em uma animação, tipo Dash, Corrida e outro...
it's in Portuguese, but all the blueprint info is there
usually ghost trails are just mesh pose copies
a post process might be more expensive in the long run
especially a custom motion blur
true, since it does needs at least 1 frame buffer to work with
not to mention the cost in ms for translucency
well not really, since I only want R channel data
I just don't know about how to capture it
@solar remnant hah, I made that weather channel flood wave. It was done mostly through a morph + some kind of gerstner waves, but I also had a version where I did vertex position offsets. Used various gradient masks to vary the offsets.
oh, yeah you got it. offsets are neato.
@elfin belfry I got a full version going by end of day just made a mesh and displacement texture, just need a better shader now for the water. I had figured you used some sort distance field for the foam so thats been my next target
yeah, distance field for foam mask + some custom stuff. Tried using distance from surface and cross from distancefieldgradient and up vector, but got too much distortions. Never got around to doing that properly since our already short deadline was suddenly reduced with 3 days. :/ Hmm. Should have another look at that stuff.
Now that you mention the up vector I think I'll just go with gradients controlled through power think that should give me a similiar base as if I had been using distance fields
good work too its been something Iv aimed to replicate for a while but had to get the previs side going first
well, the good thing about distance fields is that it's a dynamic system. So you can move assets around and have the foam updating. And you can also have a verison of the mask with bigger range and use that as a depth mask.
hi guys. I have some problems with creating a beam. To be exact, the beam has a material animated with the FB node, but it does not animated the way I want it to.
what I want
what I get
so, obviously, the animation runs along the beam rather then animated every tile separately. Anyone knows how to fix this?
@worn nacelle beams are really wonky in regards to "what you're allowed to control via materials"
all dynamic parameters - nope
i've found that the only way to really control this stuff is through Particle Color
you can keyframe your particle color and have various color channels controlling different things, such as UV animation or operating a flipbook
i assume what you've done is try to use the SubUV module in Cascade
or you've used a Dynamic Parameter, both of which - nope
just use a Color over Lifetime module, and use one channel from that to operate a flipbook
use others to operate anything else you want to operate
@indigo jolt thanks man! I will take a look at that. Basically I just applied an animated material to the beam and hoped that it would be enough
nope, beams is weird man
i dunno why they have those limitations
but they do
the workarounds aren't so bad tho
also if you're trying to shoot a missile and you want it to just be ONE, you can add a second texture that just masks stuff and have that one set to tile once and animate. it's totally possible to just make it look like you're shooting ONE object from Point A to Point B
well, it is suppose to be a constant beam that animates.
ah ok good
and it does, just with every tile animating at its own pace
so you get the wave effect : (
I want ever tile in the chain to play the same frame at the same time.
If I wanted to rotate objects through their uvs my only choice would be pivot painter right? there isnt some hacky way I can do it through vertex colors or something?
Why would a particle effect disappear or occlude when I'm not looking at it's origin. Is there some way to set a bounding box on it?
Yes¨
Thank you @cold sorrel
Hey guys, trying to slow down my particles with custom time dilation in a trigger sphere but they just ignore it and keep going! Any ideas?
Slow down works for everything else btw.
@indigo jolt I managed to fix the problem. My solution was to spawn a separate actor that then spawns the beam with a dynamic material and changes the texture of the material with a timeline.
For anyone with experience with different engines, I have to wonder: how do Ue4 compare to other engines? I seem to cluttered and counter intuitive in the way it work and is set up. Usually I can experiment and get a good result with things in the engine, but the particle system is like a black hole: My efforts going in an nothing coming out.
Unity works, but good luck hooking anything up yourself
@worn nacelle Cascade is very simplistic compared to many other engines. Very easy to get most stuff done, but it has a lot of hard limits other engines let you bypass.
hope by timeline you mean either particle color or dynamic parameter, the biggest difference in unreal for me was how interconnected your materials are with your particle system.
Gotta agree with Glad, that cascade and niagara is quite intuitive to work with and have a pleasant UI. As an example from the other engines, we do not even have a GUI for particle editor 😃 Likewise, it is also true that some stuff, that should be accessible for tweaking, is either hardcoded or not implemented. Overall, cascade never seemed cluttered to me like it did for you. @worn nacelle
It's probably been asked and answered a thousand times, but I can't seem to find the answer. I'm trying to get alpha over life make a particle fade in/out. I made a float constant (auto) curve with 3 points that goes 0->1->0 over the timeline of the particle, but it still pops in and out. What's going on?
and where is the problem? if pops in and out, everything is okay? Oo
Would anyone have a tutorial/point in the right direction for a floating particles material that i can create for backgrounds in widgets
@spare hare The problem is that it's supposed to gradually fade in and out not just suddenly appear/disappear. I think maybe a materials setting (surface, additive, translucent)?
is your material set to masked? masked only knows 1 or 0, nothing in-between
@mental stump The UE youtube has a cascade tutorial playlist, that might help?
i have actually taken cascade but thats particles...
not a material
can you use particles in UMG?
lol
@spare hare Blend mode is Additive if that's what you meant.
@mental stump I did a post process shader that displaced particles that were further from the camera. I used an "outline post process" tutorial as a guide. I could find it for you if interested.
@spiral wharf show us the opacity part of the material, and the cascade opacity settings.
@fossil swan I didn't connect the material to opacity (simply radial gradient->emissiveColor) I tried connecting particleColor to opacity, but when I do it disappears completely. I haven't seen cascade opacity settings other than setting Scale Color over lifetime and then setting the alpha curve to 0->1->0 (outVal) over the timeline (inVal).
need to use the opacity slot + particle color alpha
(at the very least)
also, gyazo would have gotten you two screenshots in the time it took to write less than half of that hehe
I didn't realize, I watched your tutorial too."WTF is.. Cascade's Color over Life Module" You used a premade material "M_Basic_Dots". I can't seem to find this one.
custom made
generally hook up the radial gradient multiplied with alpha from part. color to opacity
@fossil swan What do you have for the material: Material Domain, Blend Mode, Shading Model, does it match Surface, Additive, Unlit? Any special Translucency settings?

It's only those settings and radialGradient -> Emissive. Any time I try ParticalColor.alpha -> opacity, the particles disappear. I haven't screenshotted it because I've got two machines and I don't do discord yet on my Unreal machine.
then im out, sorry
Meaning there's no way to help me without seeing the material or your out of ideas because it sounds like it should work with the described settings? I can make a short video of all of the settings.
two screenshots should be enough
unless you messed up the curve, didnt hook up particle color, or used innitial color instead of color over life i cant think of what could be wrong.
lol.
I wouldnt make snow like that., cant go into detail because imma afk soon, but use gpu particles, regular translucent is enough.
multiply the radial gradient output with the particle color alpha.
Thanks for the warning. GPU particles, thanks for the tip. Radial gradient * Particle alpha -> Opacity (or emissive) don't work.
@fossil swan Remaking the Color Over Life node fixed it, thanks for the help and pointing me in the right direction.
I think Luos was pointing you to installing an app, capable of quickly capturing an image of your screen. @spiral wharf
@analog onyx Haha, I have one on this machine.
what do you guys recommend for masking fire effects? I was getting the best results with translucent but still would like more of the detail I get from opaque
for reference Im using a grayscale flipbook that is colored by the blackbody node
Translucent unless you're going cartoon style for fire
more like, translucent, though masked can look great when doing stylized.
then again, a far-away flame a player cant get close to could also be masked. it all depends on the how, what, where, when, why, etc
can i use gifs to make like aura or do i have to have photo frame?
you probably want to convert your gif to a flipboox/ atlas and use subUV functions in your particle
ok thx
Can also do some crazy auras by uv mapping a circle into a line then panning a 2d image across it, makes it move out of the circle radially
thanks for the help too think it'll be translucent just sucks I lose so much detail
I figured out a lil hack for my grayscale maps! I just ran a power to it and now Im getting all the details i lost
anyone know why im getting this line at the top?
I think my flipbook is having its very bottom being rendered but it shouldnt be
it is
ohhh thank you!
no png is not a bad formant. just a clumsy one
I use it heavily for testing cause its quick forget the lil issues
that fixed it
Anyone know of a way to broadly define physics materials to things? Or could recommend some sort of method to doing it to an entire project with lots of stuff from Marketplace? Is the answer right now to literally run over every material and assign?
Also, as far as like triggering particle effects on trace, physics material / surface type is the best place to define that right?
start early and start often on assigning material types
it's a 2 click operation in most cases
you can always go back and change again later with no real consequences
but don't leave everything "default"
that'll suck later
@quartz kindle there is an awesome asset batch editor plugin for ue4, which allows you to batch-add physicals to materials. a time and life-saver
saved me hundreds of hours by now
Hey guys, sup? I have a problem with importing TGA files with multiple layers. In photoshop(cs6) I made a image with multiple layers, transparent alpha channel and I added some things like shadows,etc. When I export to TGA and import it to unreal, the shadows doesn't appear inside the editor. Any tips on how to fix it?
TGA does not store layers
yes that - ummm if you open the TGA again just in Photoshop does it look different than the PSD?
targas are good
both TGA and PNG will allow alpha
so doesn't matter
i like the control level of being able to pack the alpha channel in a Targa as a black and white image rather than trying to make it relate to the actual image
photoshop alpha gets messed up in ue4 when using png.
thanks @fossil swan i'm so glad that exists. I was worried i'd have to make something like it haha
I have a particle effect that I've modified from wraith's teleport ability, and I can't seem to get it to last longer than ~2s. I've checked the lifetime, time till inactive, size/color by life, and emitter duration, and they're all set to still be visible >5s. Any ideas?
anyone have a good resource for blood effects? Struggling to wrap my head around the approach I have smoke and blood sprites made I just need something to look at so I can start planning a tactic
@solar remnant https://vimeo.com/257195158
Appreciate it!
Is there a way to use a sphere for a decal component's collision instead of the default box? What I'm trying to achieve is how in Paragon it looks like Epic used an animating decal on the floor of Dekker's slow bubble. The bubble was a sphere and seemed to project this decal on whatever surfaces were in it. The nice outline around where the sphere collides with other meshes would be the next step 😅 My first thought is if I can simply swap the collision box on decal components with a collision sphere, that should do the trick.
they just used depth fade node on the sphere material
then they set it to be like a distance of 20
and used it in a LERP - where A gets one thing and B gets another
you can use just one depth fade node to do that, or if you're feeling fancy you can use more than one and have things "soft fade" THEN go hot, then go back to normal
what happens is, wherever sphere gets close to non-translucent materials, this triggers the depth fade node to glow. that's why you can see it failing in the water
water is translucent so glow is happening beneath water surface 😛
@indigo jolt Hey thank you for your response! I'm still digesting what you wrote as materials are not my strength. Are you saying the depth fade node gets fed into the LERP or the LERP into the depth fade node? I've never used the depth fade node before so this is pretty cool 😃
either invert depthfade output with oneminus, or plug it into a lerp.
I guess the question is what am I lerping between? Is the depth fade the alpha on the lerp?
Lerp between "the normal sphere material" and "super hot glow color" - (super hot glow color probably like a vector color of 0.5, 0, 1 multiplied by 100 or so....so a blueish purple at high values)
@indigo jolt Still confused about what plugs in where. That just changed the sphere color to super hot glow color 😅
you're on right track there. just don't plug anything into that opacity input on the depth fade
leave it at 1.0
and switch the A and the B if it's all hot
A > B
^ ^
0 > 1
That's a spicy ring around it! Was there something else that I'm missing to apply the texture to the ground inside the sphere?
@vague karma Use WorldPositionBehindTranslucency to project texture on anything within the hemisphere.
@analog onyx Oh never heard of that node before! Let me google that before I ask how it works 😅
@analog onyx I've seen a couple samples from Ryan Brucks where he subtracts the ActorPosition from the WorldPositionBehindTranslucency, does some stuff, MaskRG, feeds that into a TextureSampler which goes somewhere. Any help on filling in the blanks would be much appreciated!
@vague karma Just experiment a bit. Material function gives you world position of the solid surface underneath.
I think this wizardry is a bit beyond my novice magical capabilities at the moment. The "superhotglowcolor" ring along the bottom edge alone is a huge help to players to see the bubble's depth/extents. I'm more than thrilled with how it looks with that addition. Thanks for the help @indigo jolt , @fossil swan , and @analog onyx ! 😃
Hey there, I'ming hoping someone can figure out what I'm doing wrong. I followed a tutorial on creating localised fog using a particle emitter - cylinder (radius 500,height 1) , exponential height fog, a material and a couple of textures. It worked. It worked great. Then I changed something, I don't know what or when or how, but now I get... a mess. I've restarted the tutorial from scratch twice now and I'm obviously now blind to my own mistake. Hopefully someone can help. It's driving me nuts. I've spent the past 5 hours trying to figure it out, playing with settings in the hope one of them resets it all. This what I'm getting:

And the tutorial I was using is this one:

Seems that not many people know that UE4 supports not only global but also local volumetric Fog. So I am showing in this tutorial video 1 of 3 how to create ...
I’ve followed the same one awhile back. Where are you stuck on?
Sorry was grabbing something to eat. Not sure if it's a midnight snack or early breakfast.
I'm just down the first part of the three.
done*
It just look like you offset the ideal emitter to radius ratio
okay, certainly sounds like something lol where the hell does that live?
Match to this: Spawn - 500, Lifetime - 5 (min/max), Init Size - 300,0,0, Init Velocity - 0,0,0.1, Cylinder Radius - 200
okay, 2 tics
Hmm. That only helped hide the problem. Just before I read that I had set the Spawn to 1, and it seems to be spawning the emitter at random points within a set radius. which is causing the apparently wibblywobblyness.
I'll make a v.quick vid of what I mean.

I don't know what I've done to set it to spawn in that way.
Change your spawn rate distribution to Float Constant
It already is.
Alright, I'm going to pm you screenshots of mine setup.
Earlier I had it working fine, had it looking like in the tutorial. I added a panner to the textures and it looked great. Then I tried running the r.volumetricfogpixel command thing. It didn't seem to do anything, but it was just after that things started to get funky.
to create the illusion of the fog changing density. So when looking through the fog, what's getting obscured by the fog ,changes. Used a Constant Vector 2, convert it to a parameter and plug it into the panners speed. Using the red and green channels for controlling the x or y axis . I was a rather nice effect.
It worked so well, I was going to use it for my own volumetric clouds 😃
But now I've done something stupid, and I have no idea what 😦
But, yes, screenshots will certainly be appreciated.
I'm wondering if I've changed something elsewhere thats over riding the spawn settings. But I decided to check something. I set the cylinder radius to 1. the results... https://youtu.be/yFmt0xXyy_g

high quality 👌
lol, it's just being weird, it's still spawning at different locations, damn thing just won't stay still.. 😩
The particle emitter BP gets the spawn location from those events, which intern get them from the actual world location of the BP?
by those, I mean the appropriate events in the BP - sorry wasn't clear.
I know my material instance is right. https://imgur.com/MukWOpT
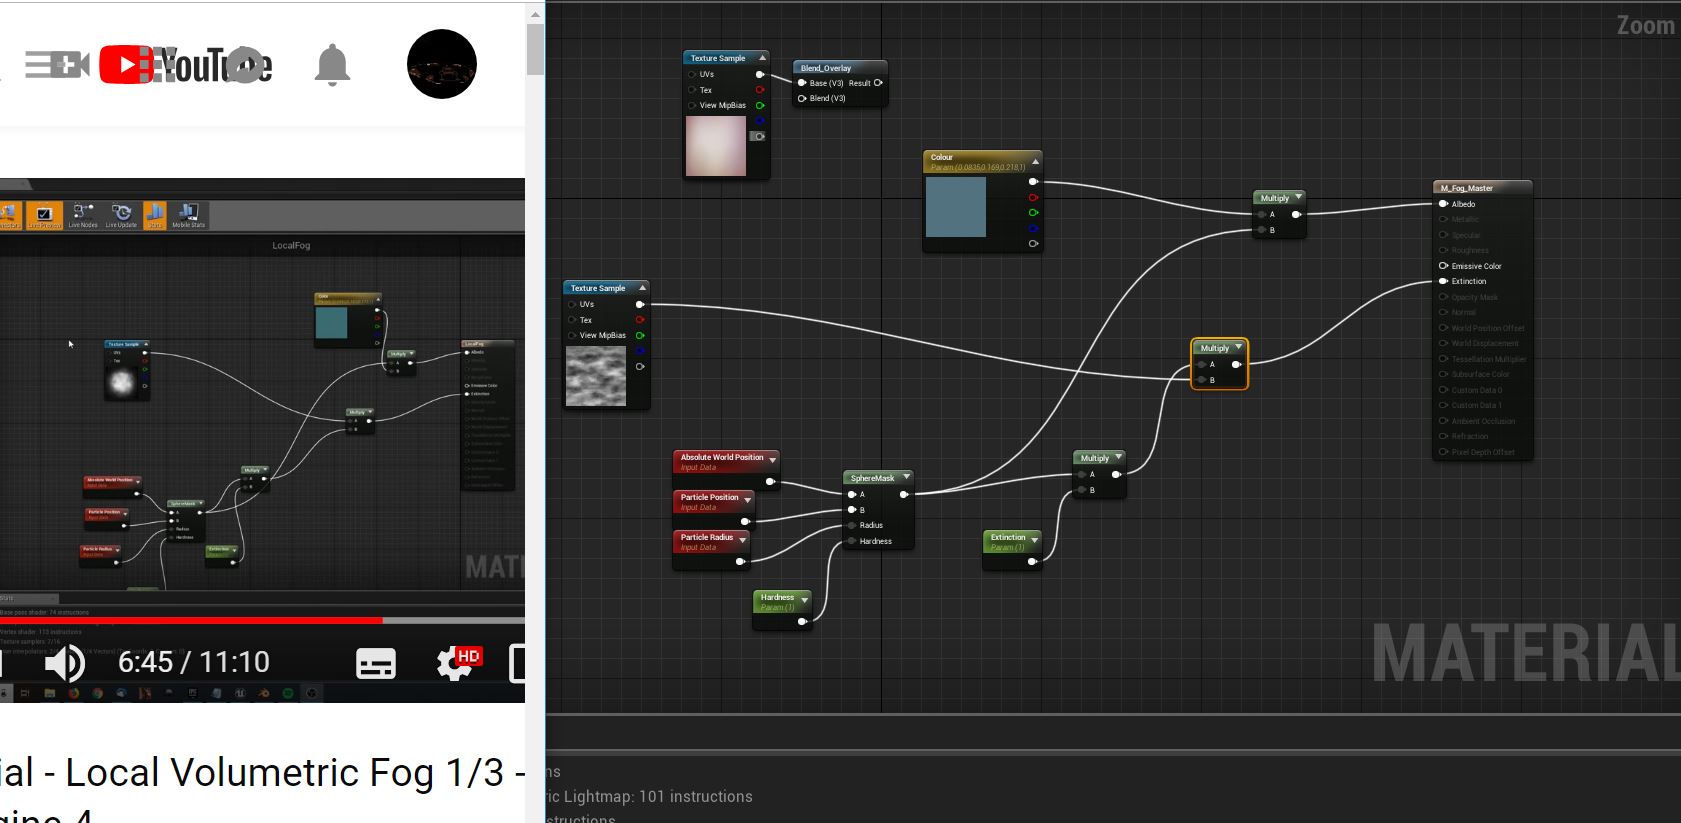
Well, my Fog still refuses to sit still. If I set it's extinction and hardness to see any change, it looks hideous. As if the texture is being projected from the cameras POV and distorted. When I add a cylinder and increase the radius above one, it spawns the emitter at random locations within that radius.
I went to the extent of uninstalling 4.21 then reinstalling it. I am one confused noobie.
Here is a short video of my settings and what's happening in level. https://youtu.be/QnPXBonb87w

Hey guys, just a quick question, is there a way to use Custom Depth for more than one effect? I currently use it to toggle cell shading to characters only, and I'd like to make an outline material to some props, using Custom Depth as well.
EDIT if anyone interested, I figured out I can use custom depth stencil value to mask meshes, still need to experiment though!
With my settings at the tutorial settings I have created this monster. It looks cool, but it's not what should be happening. :https://youtu.be/H5u8bbnXctk

Please disregard, user error and sleep deprivation.
weve all been there
Is this normal, it looks like the images are being projected based on the camera position? https://youtu.be/TuRGUhqp-Pk

camera facing sprites
Hi there again folks. Just wanted to say I figured out what was incorrect in the end. Initial velocity needed to be 0 not 1. D'oh. Thanks very much to all who spent their time helping out.
dumb question time: If I have a trail particle emitter attached to an actor and then I call "destroy actor" on that object, how I prevent the trail particle emitter from getting destroyed before it completes its trail?
you gotta check the little "kill on completed" checkbox in your emitters then tell your actor to "disable emitter" BEFORE you destroy actor
maybe a delay too
between "disable emitter" and destroy actor
i forget the specifics but that's the general gist of it
if you do that right your trail will nicely suck into the impact point as desired rather than just "vanishing"


give it some velocity
ribbons dislike stationary behavior
they are a lot like Slinky coils...that never figured out how to "coil"
so they just compress into nasty and insane birds-nest tangles
even a simple constant acceleration will help
Been a bit into dithered masked VFX lately, and what actually interests me, if anyone bothers outputting per-pixel velocities for correct reprojection ? Like is it done in any known engine/title or it is totally not worth it ?
im trying to make an xray vision shader that will hide pixels that are behind a screen. Im trying to do it with the custom depth pass but im having some issues. I would like for the object that writes to the depth pass to be either a transparent of invisible object which doesn't seem to work. It seems that it needs to be either opaque or masked and i cant set the opacity mask to 0 since it wont write to the custom depth pass either.
The second thing is that i would like the material that checks the custom depth pass to be a masked shader so that it simply can discard the pixels but that doesn't seem to be allowed, is there any trickery for this?
I'd look up "post process outline" check out the Tom looman stuff. If you can wrap your head around that stuff, next steps should be easier
Much of it is available for free download
So plug in and tinker
Anyone know how I can (or if it's possible to) warp a texture so that the top stretches and the bottom shrinks
Almost like a trapezium shape warp doing top to bottom
Probably by adding a gradient to the UV in one area and subtracting a gradient from another area
Just to U or V though
Right... I'll see if I can work out how to do that haha
I'm a programmer, not normally a tech artist but alas
I was originally starting out with a cosine (with input of masked texcoord of 1,1)
Shall do, cheers
Yeah, I've managed to make.... something hahaha
Produces some cool UVs, although not quite what I'm after, time to play around a little
ya just remember you're trying to "add to one part" and "subtract from another part" - that means you'll need to make sure that the thing you add doesn't affect the area you're trying to subtract
many thanks
Anyone know if there's a way to set up a macro UV for a particle system sort of like a cube map so that it doesn't follow the camera? Alternatively, any suggestions on making it pan against camera movement so it at least appears static?
@indigo jolt i did, i got that stuff working and i know how it works on just graphics level, just don't know the unreal specifics
Any tips on smoke tendrils for an explosion? Last idea is ribbons which is chill just wondering if that’s the right direction
Ribbons mixed with sprites is usually a good first stab at it
Is there a relatively simple way to mix in the sprites? I messed with an inverse velocity setup where I scale down particles as they move up but that was looking a lil goofy
So make the sprite a similar shape to the ribbon rather than placing sprites where the ribbon would be?
Well still placing the sprite where the ribbon is but just using a sprite with the ribbon rather than multiple
Leading particle drops both ribbon segment and a sprite. What happens after that, is up to you
Thanks! Gives me something to work towards
hi, anyone know how to get particle cutouts working without a subuv texture node, im using a standard texture node with scaled uvs to make a nXn grid so i have randomized particles but the alpha is the same of each of them, the particle is set to in one case 4x4 grid but the particle cutout of the alpha just goes whack, sometimes even cutting the sprite in half
what tools within ue4 are best to use for troubleshooting/optimising an inefficient particle emitter?
for example, see at 36 seconds in this video: https://youtu.be/12hCImEyYwU?list=PL93B757F55346172A&t=36
Things take a darker turn for the worse here when you find out what's being cooked up in the R&D department of Mr Boom's firework factory. Can you salvage th...
the smoke emitter is supposed to fill the entire screen temporarily like that, its designed to obscure player vision like a smoke grenade. however it is not performant when it draws the clouds, and seems to adversely effect the fps for some time after its gone. i think its related to the lifetime and number of spawned particles.
its based on the lit steam one from the starter content
use the shader complexity view mode for one, second it seems there are too many particles spawned so most likely overdraw issues
also you dont want transparency stacking over the entire screen, that just kills the performance
i suppose it doesnt need to be transparent, as its aim is to obscure vision?
perhaps a better approach is a smaller gas cloud, combined with a post-processing effect that temporarily givies a green haze and blurred vision @celest birch ?
or just have a plane in front of camera, attached to it, that has a foggy effect to it. read up a little, we discused some smoke grenade things last night
only few dense particles should do the trick if you want to obscure things. No need to spawn 100 particles just to cover up seomthign
unless you are trump, there arent enough particles to cover up his ff-ups :p
btw, while you're here, any idea on the particle cutouts with standard texture nodes
posted above
need moar info
just above brain
just use the same texture for cutouts
cant
the cutouts do not care for uvs
I think he is tiling the texture a few times, in that case a small 32x32 or so texture with a mask can be used instead
lets say i have a cloud and that clod works fine if its just the cloud bit in a grid it doesnt
you can also play around with which channel you use of a texture, and its treshhold
generally lower values than what it standard is set to work better
yeah, tried it but didnt get very far
had multiple versions of cutouts but they didnt work with tiled uvs
again, make a very small texture, add masks.
so if you have 8x8, make a texture with 8x8 masks.
can be fairly small
ye i mean i tried it that way too but failed also
always had a border cut out for some reason just enough to see a hard edge
Nobody cared who I was before I added these masks
@cold sorrel please tell me your new years resolutions where more puns, because you are quite the pun-isher as of late
Nah, I'm just letting you guys suffer them as much as the people around me.
So we can all feel closer!
@celest birch Particle cutout has no idea what is happening in your material. Whatever you do, you need to reflect the changes in the texture, that is supplied as a cutout mask.
yes but the problem is i have to set the subuv in the required field to a 4x4 and random blend with a subimage index so it selects a random image from the tiled texture, that also starts tiling the cutout
Then do not use a cutout and implement it manually in vertex shader by using mesh particles or domain shader and tess.
basically im doing this
thats so big it can hardly be cut out though
the idea was to fake a subuv animation but with randomized looks
so i can select a sector randomly for each sprite
basically does this
meh should have gone for a gif
As Luos said, there is nothing to cut out in that flipbook. It uses like all the space.
in this case, just bake out or whatever the same texture /shader its opacity, and use that as the cutout
ok will try
heres that gif instead of picture
alright baking out worked at values of .01 for cutouts
thanks
eh i mean 0.005, guess it means at least this part of cascade goes below .05
I've just realised another way to word the question I was proposing yesterday that might end up in more replies:
In a material, I'm currently trying to distort UVs so that the I'm shearing from both sides, ending up with a pinched trapezoid (pinched at the bottom).
I've successfully sheared the entire UV set (U in image below) using a custom node that returns
x-(0.2*y)
Obviously I need to ensure that as x approaches 0.5 it retains it's original input value, and starts to shear the other way (to get a value < 1 on the mirror side to where the total black is). Anyone got any hints? I'm currently working on other tasks but will be coming back to this shortly
Thinking I need ((x*2)-1) to map the whole thing into a -1 to 1 space, and then use that multiplier as a way of creating almost a mirror (so rather than - to x, it becomes a +, probably used as a nultiplier on the 0.2 value)
Just typing that all out to get my thoughts down actually helped - so I've now go what looks like the image pinching towards the bottom, but the whole thing is now stretched too wide - time for a little bit of math tweaking
Done it.
for anyone who is interested:
float1 xRanged = ((x*2)-1);
return x+ ((ShearStrength*xRanged)*y);
This is with a strength of 0.5
And then the material nodes, just with a texcoord (1,1) and component masks. Then append the masked G component onto the result
Just added a Pow 2 for that G mask, looks even better for my usage
Hey, so i just joined this group when the bible failed to prove me with answers. I have a particle emitter using Cascade, and it's emitting particles that hover in the air when the player unleashes a Psi power. I spawn the particles via a Blueprint and when the player releases their power, I want all particles that are already spawned from the emitter to rapidly accelerate and fall to the ground. So I spawn particles, they hover, and after time x I want to change the Acceleration parameter on the particles. But problem is, when I change the Acceleration parameter, it only applies my change to particles it's spawning, not spawned particles. I tried with Set Vector Parameter, and Get Instance Parameters and adding my new particlesys parameter to it, is there a way to influence the velocity of particles that are already spawned by a blueprint spawned emitter?
hmmm i think there's some ways to do this in Cascade
however, that being said...you could make these particles local space, then use Blueprint to animate making the Particle System fall
via timeline or other method - like attach to a projectile movement component and give it gravity/impulse etc
this way you could start the movement downward at any point in process
other methods would be more like fakery - spawn one set of particles that move to those locations, then spawn a burst of other particles that are roughly in same locations that then spawn and fall right as the first set die
Hmm, lol, I suppose enabling gravity on the actual emitter would work but...
I want the particles to colide with the ground x3
Unless local space also works for the emitter's scale and... I actually scale the emitter in the z axis...still fakey and won't work for uneven terrain tho
Oh wait but if the collision freezes the particles, then moving the emitter shouldn't affect them
Decided to try something different for a bit!
I am going to overhaul an already awesome #vfx effect, in this case one made by @CelinedeWijs which she made for the @realtimevfx Sketch#19
Part 1: The spikes.
@fresh furnace you tried velocity over life?
Yes, but that makes them always fall down, Idealy, I could make the emitter start with a 0 velocity over life, and then a blueprint increases that velocity over life
That works, but only for particles spawned after the blueprint changes the value, not for particles that are still alive but spawned before the value change
@celest birch i managed to optimise the toxic gas cloud particle effect, i reduced the lifetime of the particles, made it 100x less particles, because of the design it only really needs two to create an interference pattern
i also ticked the 'kill emitter when done' checkbox, so it doesnt linger about when its not doing anything, covering the screen in an alpha=0 material
i might still do the postprocessing effect though, because it would be cool :)
are you using ray tracing?
like rtx?
sorry i meant line tracing
ribbons
its based off the content examples just was trying to rebuild it into another system
im fairly new so i dont think i can help sorry..
no worries m8
hope you solve the problam :)
nvm apparently turning off spawn doesnt actually turn it off lmao
@solar remnant that effect youre having is similar to one i'd need later. my next crate type in my game will be like tracer rounds.
I'm spawning an emitter at location (GPU) and am changing the vector parameter of Initial Size directly after the creation. The size doesn't ever change tho. What's the problem?
For the moment I've resorted to using the Emitter Scale
@candid flint emitter scale doesnt scale things like velocity, and innitial size should only change the size on birth of particle, not over its life.
@fossil swan But isn't this at birth? Where can I change it on birth? I'm not having problems with emitter scale because I need single dots in different sizes. The only downside right now is the performance loss :I
(Because I spawn thousands of emitters with 1 particle)
I know particle size for GPU can't be changed at birth, so I need to do it via Initial Size somehow.
@spice ridge the unreal content examples have a good base for this system in effects that’s all I used for this because I needed it that day
how do I make a particle system that is just like a whiteish smoke that comes out the back of a moving object?
@solar remnant you might have some of your projectiles set to "collide with other projectiles"
that MIGHT be the issue
if a bunch are locking up together
I solved it just had to set spawn rate to zero cause turning off spawn doesn't turn it off
@rapid badger the starter material has a litsmoke particle effect that does exactly that
Alternatively the paragon particle effects which are free on the asset store have a horizontal steam jet that looks even cooler
Steam_lit is the effect iirc
Is there a good place for reference on what an acceptable particle system would be for the ps4? (In terms of particle count, textures allowed, etc) Iv been using other ps4 titles to get an idea but I don’t want to just copy someone else’s limitations
No it depends on the state of the rest of the game
Negotiate your budget with the TAD
Thanks! Its for a test so I'll wing it for now and make it easy to turn down or up
https://i.gyazo.com/061df8c20cd7bb98affa1bcef1ed45e0.gif
Original effect by Celine, atm overhauling it (spike and crack work, both wip)

Looking forward too part 2 😄 plan on watching part 1 after I get through my current batch of projects
@solar remnant Did you figure out what was causing the trails issue? I know what it is if not
its not easy fix, and will continue to be a bug, but you are reduce the number of times it happens
Ya haha just had to set my spawn rate to zero as turning it off doesn't turn it off
right on the trail. I find it will still spawn 1 more particle that jumps back to origin
and the trail will make that some times
I need help from you guys to help me find out how i can make the same material used in the galaxy skin from fortnite
https://www.youtube.com/watch?v=KKEGdfg_Ce8
any idea how I can make something like this?

Unreal Engine UE4 Cascade ParticleSystem Game Effect
checking
this is difficult @_@
1 mesh like a pizza pan. 2 textures shaped like maple leaves. use Dynamic Parameter to Add to the UV's of both at different rates over time to cause slight panning.
there's probably more to it than that
but that's enough to do 90%
colorize one blue, colorize one gold. pan each one with a different parameter and different speed, then have your particle color boost intensity during part of a curve
Nah, not more to it. Add some rotation to the mesh as well as the pan and it's done.
Simple
Oldschool
ya what i meant by more to it is - maybe use 2 meshes, one disc, one rim if more dimensionality is desired
kinda worth thinking about if it's like first person or something i dunno
Just crank up the bloom and show it in a dark room like the video and you don't have to think of practicalities like that
btw i finally had to record your pluralsight tutorial on Houdini there Glad, i paid for it first, but dang if i don't end up rewinding like 50 times for all the little details lol. i wish you had a book
ya please do, i'm trying to combo what you presented there, with this stuff https://realtimevfx.com/t/estampes-sketch-15-wip/5388/17

Real Time VFX
After seeing the awesome post by @Mederic I thought I wanted to try it for myself because those were some nice smoke puffs! I’m pretty much using his shader straight up so props to him! Here’s some results: Here’s the shader: I had no idea there was an Atmospheri...
Hehe, I hired that guy
i want to figure out a more elegant shader setup tho and maybe 6 point lighting
Pluralsight doesn't want it
yup
Hey guys, not sure if this is the right channel. When using particles for example a shower of sparks, is it possible to have the player detect each little spark (and then take damage based on the amount of sparks physically hitting them) ?
@leaden prairie Possible for CPU particles, impossible for GPU particles, not practicable in any case.
cool, where/ how would I set the 'hitting' part, if it's simple enough to do at least. Just learning the basics of how things interact with each other. The above example in and of itself isn't important, but understanding how things interact or rather 'can' interact is important.
is there a on hit by particle [probably by name or class] node on the player? or would I have it on the particle itself, and send the info to [whatever other BP needs it] ?
Don't do it
in the non practical side of things, as I said it's merely an exercise in interactivity. I'm not planning on utilising it - as I know it would generate a buckload of performace hits.
several buckets, for each particle really. But that's not the point.. lol
I know how to fake it, I was just curious to how actually do it. It intrigues me.
Thank you very much, I've spent the past hour or so looking, I obviously was wording it incorrectly.

Looks incredible
Holy shit

Going to do a semi-full overhaul of an effect someone else made. In this case the effect was made by a vfx artist that just started out a year ago. It will b...
anybody know if event recievers are broken during play/preview in 4.21 ? (cascade)
i know they work in editor as i was just doing that
but was with a distortion thingy i couldn't see in cascade....
will double check

they mess up for me
totes fubars the location of whatever it spawns
and disabling the module doesnt do anything, they stay active.
and no use reporting it, because well.. cascade
Ah, you mean it's a perfect example of a misfiring emitter.
How would I use a PP material to "highlight" part of a landscape?
oh ya that's like way off
i've got one that's working real good but it just spawns 1 particle off of 1 event (ghost particle shoots down, collides with ground - then spawns shockwave particle just above ground surface)
i could screenshot some of the settings to see if that's one of the variables that's off
my only problem is i feel like the whole thing is taking way too long to activate and i'm inclined to just scrap it in favor of a BP solution with a raytrace
err line trace or whatever
my suspicion is that your thing might be using Local Space, or "use PSys Location" or something else
this setup is working for me for now https://i.gyazo.com/e4adde1a5044aa2af41769923ccdb7ad.png

if you can replicate that with a single particle then expand upon it in your current system the difference should hopefully pop out
it's definitely in 4.21
@indigo jolt if I use the psyslocation it takes the original 0/0/0 location of the emitter, and not where the particles are spawning
ya, i've never used that, just looking at what i have "unchecked" that might be bad to have checked
no idea man, just know i got an unbroken deal, there's gotta be an answer in here somewhere
or the horrifying alternative answer - your 4.21 is different than my 4.21
but lets not go there
nothing different tbh, and ive set em up a gazillion times, its just that they keep messing up and always have been :p
its so random
is yours triggered by collision by any chance?
just on spawn
trust me, with events ive been stumped many times
ya i used to have one where it would work in cascade, but not in editor due to max collision distance not being high enough....
i only needed 12 spawnlocs, so I just changed the locations in innitial location
but your deal is pretty hard to pin down it appears
it's a cool effect and idea tho - i get it, you want the explodey bits to correspond to the spikes
you could just do it the nightmare way and add in all 12 with varying levels of delay on each in a gradient....
that's what you meant right?
though perhaps it messes up because innitial location changes over time, I woulnt know cant read source code if i wanted hehe
yea, I actually did that hehe
ugh, that's so hard to edit later
yea, i'll probably copy all but the events to a new emitter, see if it works there on a later date
i kept a copy of that emitter anyway
the horror
the programmery solution would be to isolate it all down to single clusters then make a row out of blueprint-designated paths etc...but then you'd be spawning a ton of particle systems which is not really efficient
ouch that hurts to look at
for now this works, its for personal usage
ya should work assuming you nail timing 😛
you can save some drawcalls doing a mesh emitter that needs to emit at multiple locations
instead of duplicating the emitter and offsetting location

hmmm ya i like that idea
honestly i like that more just because things look ugly when i have 20 horizontal emitters listed out
oh god yea
i wish there was some fissure chunks of the terrain popping up on that thing
i found a really fun way of doing that recently btw - use mesh shape that spawns along ground, but have it sample "scene color" multiplied up a bit for brightness
makes it so it looks like you're pushing up a chunk of the stuff below it
color-matched and all

oooo tasty
celine made it, I did ask her to give me a version where the broken bits have a different vert color
very cool stuff
i barely touch sims, so its fun to have one
i normally don't either...but it nags at my ego so i'm trying to get into Houdini
last time I did sims was four years ago I think for the water spells
they're not much needed when things get all magicky
Tweaked the animations, feels smoother now.
but magicky games aren't really the bulk of what exist 😦
true, though when possible I rather take up those jobs
that's pretty
thats all vert anim hehe
oh nice - was that with the "static mesh morph" target thingy?
cant even remember, but mostly hand animated along a spline.. so bad hehe
ah brutal
i should see if I can dig them up, I was working on a rock spell but suddenly job hehe

ooo that's fun
is it possible to get a particle to collide only with its center point and not bounding box
I have mesh particles that are rotated hitting a flat surface that emit antoher particle on collision but the mesh particle collides at different Z planes
I want the spawned particles to spawn on the same Z plane
oh, in Mesh Data "Collisions consider Particle Size"
bleh, that was it
no it wasn't actually
now Im confused
if you press spacebar after clicking a checkbox it unchecks itself again
<_<
make sure that isnt the issue hehe
ya, spacebar is like the universal "click" button on a keyboard
yea, its annoying
anyways, my point being you might have unchecked it when testing if it was the solution
hmm
nah, I added a fix to push the spawned particle down
and when I tought I fixed it
I deleted those
and it was unfixed
there doesn't seem to be a way to only collide with the particle's pivot
it's colliding with the bounding box
but I fixed it, added a box collision that collides destructible
and the spawned particle tha's locked to face up accelerates down until it collides with the box
but the initial particles still collide way high
least the spawned ones aren't floating anymore
Hi, if anyone knows more about shaders (material functions/material usage), could you please check out my post in #blueprint
https://i.gyazo.com/f99bd161ba0d5bad6da9b825e5fa9ee2.gif
more debris, new spikes, and a base animtrail for now.
feeling crunchier now in good way
I want to add a smoke puff where a bullet hits, how can i do that (i dont get particles)
I also want to have a particle trail along the bullet path -
at the moment i have a spawn emitter at location
its sort of working but it does a trail of smoke rathet than a small puff and it keeps going
I wouldnt use a particle trail, that would become quite expensive, especially if you can shoot semi/full automatic.
for a tracer I'd just use a long thin and bright mesh that spawns in front of the barrel and moves away
for the smoke, just have a collision or other way to activate it trough blueprint.
also, there are tutorials online for these sort of things 😃
Depends on if you have ballistics or not. Then you need to go the ribbon route
ok, "generally people who havent done much vfx talking about their projectiles."
For something that has simple motion(all accelerations are spawn time constants), you can calculate position on the trajectory for any time, and thus can use relative time and quadstrip mesh, animating vertices to follow the path.
(I've never used something like this and never will, just in case someone spends too much time trying heh)
I ma having an issue on my map where there is some light coming from somewhere causing some kind of reflection I made a new map and the reflection is gone but I lose my automation
is there some setting thats causing this?
I lose all my automation on my map if I copy and paste so I want to find a better solution then start all over also learn the engine more
your lighting isnt built on either example so stability is non existant try unreal chat though you may find help there
if you click the build button that will build your lighting
@fossil swan Wow that looks REALLY good! Nice job!
@analog onyx the problem with that approach is a dynamic world. Calculate the trajectory without any obstacles, then a plane flies straight through the path. I expect this to cause snapping or other issues.
And you won't be able to make the smoketrail drift away in the wind.
Makes me wonder what the cost of controlling the movement of particle system through blueprints is. Iv setup some systems where I move the emitter based on a blueprint and have it spawn particles as it moves, but those were mainly for niagara tests
Thought it was time to get back into Niagara to see what its really about and holy cow the level of control over particle motion is kind of insane. This is j...
like is this more expensive because I am moving the emitter?
does anybody know the term for making a particle system like smoke to follow a mesh outline?
and how i will be able to achieve this?
@cold sorrel Yeah. To get the trail to persist after generating particle death on collision, you'd need to pass particle death time to trail, which instantly makes it bulkier and cuts off fire and forget approach. I doubt any practical applications for this approach could exist, unless for some reason you'd need ungodly amount of trails multiplied by their huge lifetime, rendering you unable to keep adequate history. So it is pure theory crafting.
Hey, has anyone tried adding material parameters on skeletal meshes in the experimental Blueprint Actor Sequences and gotten it to work ?
Hey, could someone help me out here?
I'm not really experienced with making post processing materials, but I'm trying to make the edges of my screen glow? To simulate an alarm going off, could someone point me in the right direction please? Cheers!

WIP of a sequence I'm working on, just testing general timing/feel. Next series of breakdowns will focus on a lot of cool mesh based techniques. Coming soonish. #UE4 #realtimevfx #vfx #gamedev #indiedev https://t.co/s0fBeJ8Lhe
Retweets
312
Likes
1919
I hope a tutorial will follow
Could just follow Luos thats where I learned mesh based techniques
im not very good with particles/emitters, but is it possible to have things loop when they have an infinite lifespan? im running in to all sorts of trouble with this <_<
depends on what kind of loop you are needing
well im trying to make a school off fish that follow the emitter, but not using the local space thing cuz then they look too.... connected. im trying to use the different attractors, looping strength from low to high and also having it move around a bit so they look like theyre... flocking? bird term but... i dunno what ud call it for fish
i can only see the movement part, not sure how to visualize the strength of the attractor. it does it once, back and forth then stops
school of fish/shoaling/schooling
anyways, once the first attractor has done its job, its overwritten by the second.
you might want to look into orbit
Unreal Engine Forums
Building something cool? Tell us about it!
or that
orbit is kind of weird too. i think my issue is velocity in general. locking the axis doesnt seem to help much, they end up spiraling around. i do have a weak orbit just to have it kind of wiggle though
ya i saw that a long while back. im not very good at reverse engineering stuff and learning from it. also might be too much for my goals. i have a bp spline that spawns the particle system and moves it along the spline.
is there a way to attract and repel particles at the same time?
be aware that orbit doesn't work same for GPU particles vs non-GPU particles
GPU ones work weirdly/glitchy
im using meshes for the fish, i dont think ive used gpu particles before
again my terms are probably really dumb
but ya you can attract and repel sorta. like you can use Velocity over life and reverse the velocity flow
so stuff can change directions all over the placee
they dont have a lifespan though so i think that gets messed up
well, its like i want the fish to follow an attractor of some sort, but they always end up overshooting it and going bonkers into the distance
worst case, give them an insane long lifetime so you still have access to the "over life" stuff
and i have a volume attached to the particle system for eventual fishing, so they kinda gotta stay in that volume
hmmmm, i dunno what everyone else has to say, but i'd give them like ya a long 20+ second duration then "shrink them out" and spawn new ones that grow real nice and steady
i did a 20-24 second lifespan and faded them in/out. started them low, raised them up, then back down to fade out
the other issue is the PSA_Velocity. it kind of... snaps. not smooth at all
you don't exactly need to have 1:1 hook-hits-exact-fish simulation for 99% of fish do you? i mean if you're spear-fishing or something i'd understand, but then particles would be extraordinarily incorrect method
for the mesh facing thing
oh no its more like... a generic sphere around the particle system
ya theyre all facing kinda weird right now
if i use local space theyre too rigid, world space they end up going way past the attractor
velocity aligned particles should work fine for the fish, maybe don't use as much "up-down"...
that was one mistake i made with fish particles early...fish can swim up, but you can save a lot of grief by keeping them swimming in just 2 axis
they'll clip through sea floor or come out of water entirely
ya thats why im not a fan of the velocity thing in general
if i place my spline at the surface or close to it, the fish should be below it. velocity seems unpredictable
plus if u change anything... it changes that too. adjust velocity by lifespan means some life longer and have more velocity so they go higher
when i was doing particle fish, i didn't use an attractor at all, i just had a random uniform start velocity in a big area, then like 15 key frames of a uniform curve for various direction changes so they kinda went one way, then moved another, then another etc, keep the lifespans similar
but have the start velocity ranges and start area real broad
it's ok for some fish to go REALLY slow and others to go "regular". but super speedy fish are weird
that sounds more of like a... generic ambient fish visual. this thing is about like.. a hot spot.
ya you might want 2 different systems
it will have some gameplay relevancy
one for a hot spot, one for generic ambient fish
ya, the other one im less worried about for now
if you offset the pivot of the fish (either random, in your 3d program of choice, in shader, etc) you can make them look like they are swimming in circles.
ooo that's a good idea
then just move the pivot in a bigger circle
schools of fish do tend to swim in big donut circle shapes too
well these are more directional, following the spline
btw im not trying to argue or anything, just trying to be clear with my explaining of things. some fish will probably be the swarmy ball like piranhas, but others are probably more uniform following the river/spline
ya i just pulled that up the other day thinking about foliage/trees in the distance. havent gotten into that yet but looks interesting.
currently im using a low poly static mesh (placeholder) with vertex color for the tail movement in the material

@klemen_lozar Reminds me of these floppy fish particles I made long ago in Unreal 3 for Singularity. This is the scaled back version. In the original they would flip over occasionally and rotate on the Z. https://t.co/Oay1dWcXbg
well i dont have water yet so ya thats fair

Took my grandson Christian down to local river to see the annual return of some Atlantic salmon. He loved it and found it very exciting to see right up close...
was thinking something like this, after he figures out the glare... like a general direction but they do move around a bit
so i was thinking about a particle attractor that goes side to side with varying strength.
problem is they either dont get attracted by it enough and fall behind or they zoom past it and loop around and its all very sharp movement. any way to make it more like a suggestion and not a direct point theyre going to?
might sound stupid but is Velocity/Life like a multiplier of the initial velocity? not adding velocity
ya it multiplies, not add
so if you have 1, 1, 1. then multiply it by 1, 1, -1 you'll go from forward and up to forward and down
this also means if you have a uniform 0 to 1, for initial velocity, you'll be multiplying against nearly zero values potentially
My approach: spawn the fish off of a square (maybe sphere?) use pivot painter or vertex color for the fish wiggle then control location through velocity over life
@solar remnant super delayed sorry, but i may not understand. i need the fish to stay within the particle systems area. i have a spline to control the path i want them to follow, but i cant seem to get the particles/fish to look natural. using local space and just having them move along with the whole thing looks a bit robotic, especially on turns
and im not sure how id be able to accurately control the fish particles along the path of a river -and- keep them together in a bunch along with the volume attached to the system itself
Hey, like a week ago Luos posted a link to a tutorial he made on VFX basic principles or something of the sort. Anyone remember what the title of the vid was?
@normal forge Honestly for something like this I would start with one fish get the movement down for that fish, then add another fish and so on. Its going to be very difficult to not look robotic if you are spawning multiple fish off one emitter, because you are seeing multiple things move exactly the same way. However, if you have multiple cycles then its easier to get distracted and not locked down as much.
another potential option would be vector fields though I have not used them for something like fish they have been great for getting chaotic movement
If after all that you still are finding you aren't getting the movement you'd like then really your best bet is going to be branching out to niagara or popcornfx as those were created for the purpose of giving more control over the particle effect
hmm... ya i dont think itll come to that. a lot of my problem is velocity being a bit of a foreign thing to me, i wish i could give it a more exact location to move to
also kind of wish i could at least get them to point at the attractor without actually moving to it
Well make sure you aren't overthinking it 😄 velocity in engine is meant to replicate real world velocity same for acceleration attraction forces etc, things like where the fish is pointing can also be manipulated through your material and depending on how you set it up could then be controlled with the particle system. or rotation but I love me some material editor
eh im a bit stuck in the material part too. i got the tails moving in the material but they all line up. i want to do something with ParticleSpeed so it adjusts based on how fast the particle is moving but it doesnt seem to play the way i want it to
In this #vfx overhaul video I am adding some smoke.
#ue4 #unrealengine #realtimevfx
@fossil swan do you happen to have udemy training course or youtube channel full of tutorials about mixing mesh effects with particles in UE4 (using Blender for mesh stuff) ?
nopes
Practice?
You can usually get close by googling what you want to make
🤦
https://www.youtube.com/watch?v=TK7-SwWKFsw reasons why I am annoyingly still with 3dsmax

PolyDetail is a 3dsMax plugin that helps you to quickly draw nice ornamnets with a mouse brush. Ornaments are one of the most time consuming things in 3d mod...
*stupid reasons
All, my windows break in a very "GLOBAL" way...
https://gyazo.com/9e5c2557698b92854acbc343c09e9feb
How can I achieve an effect closer to this?
https://www.youtube.com/watch?v=LasUdeDRvzU
Update version 1.1 -Possibility to hide glass or windows on any modules -Destructible glass and frame meshes -Open/Close animation for windows https://www.un...
Funny part is, I have that pack, but when I try these windows I get the same thing...
so I am unsure if this is related to different UE4 versions or settings that I might have missed
@fossil swan never apologize for sticking with 3d max. Legit layer system + dem spline tools with auto UV + per-vertex numerical snapping, movement, etc for easy creation of mathematically perfect thingies.
i used to be all Maya
I’m a Houdini fanboy but I still use max. Some things just have to go through max same with blender
Anyone know how to take a beam, and have the target location modify the size of the beam? Start at an initial size of say, 25x,0y,0z at the source and end at 0xyz at the target?

how is this lightning bolts effect is made ?
(and I assume as he puts his hands farther away, lighting bolts "stretch" without distorting)
@gusty cliff look under the beam module for "width ". Change that from a float to a curve. 0 is start, 0,5 is middle and 1.0 is end. You can taper it wherever but make sure it tessellates some
It's very easy
@pseudo skiff you can make beam settings "tile over distance " for textures using UV 0 then no tile for another texture (like a mask) for another texture in same beam material
@indigo jolt and the texture would be a flipbook texture? (animated bolt of lightning)
Um ya you could do that. I think beams are weird about that. You might have to use flip book node for that
Beams don't play nice with externally controlled material inputs for some reason. Dynamics parameters are a firm No. particle color = yes , particle lifetime = maybe I forget
Play around tho I might be wrong and Sub UV might be fine
Just a warning
Lightning of that look is gunna be super hard to get right with beams you’re gunna want to use flipbooks, if you already have an animation you might consider using vertex textures though as that’s how Iv made my best lightning
ya one trick that's fun - make a really long single lightning texture, then use a flipbook set to like 1x8 or something so it just "jumps" from one part of your texture to another
lazier method than actually putting together a bunch of unique shapes
one squiggle
Flipbook of meshes in the context is a set of elements within one mesh, where individual element represents a frame of animation and those are distinguished with either UV or vertex color data. In the shader, all submeshes but one is hidden.

Quick breakdown of stylized electricity, I cycle between meshes based on their assigned vertex color values, it's like a "mesh flipbook". This is a very flexible technique, 3D results and drawing efficiency. #screenshotsaturday #gamedev #indiedev #UnrealEngine https://t.co...
Retweets
1686
Likes
6450
Guess that one can be rigged as needed to achieve the reference posted earlier.
Exactly, and you can make strands wider to allow for some shader uv distortion play as well.
hey @cold sorrel , if you're around i got a quick Houdini question since Think Procedural is apparently a dead zone
i make a Pyro FX explosion using "Explosion" instead of Billowy Smoke...and i set key frames from 1 to 164
for some reason explosion looks great from 1 to frame 70 or so
where it dies off nicely
but then it starts up another explosion from like 70 to 164
and i haven't set up cache looping or anything
so i'm like "uh why i got 2 explosions in a row?"
i honestly just wanted a good solid 1-164 for this test. or really any range, 0-64 would also be ok, but having this other thing intrude on tail end is really bothersome
this is me scrubbing from frame 50 to frame 75
@indigo jolt The Explosion preset never shuts off the emission. YOu have to do that yourself
You can just key the activation of the source off after the first blast
Here's the default fuel curve where you are scrubbing in the clip above:
So either kill the activation or flatten the curve after the first spike
oh my
activation is the villain!
thanks a million!
flattening curve sounds nice, i'll probably try that 2nd
i do like having finely controlled curves
yup that fixed it
btw, billowy smoke vs "explosion" - they're both pyro sims with similar components to begin with, but one has some firey bits to start. is that basically it? i mean is a Billowy smoke just a few nodes from being a "Explosion" and is an "Explosion" just a few nodes from being "Billowy Smoke"?
i'm not sure how far down the node rabbit hole i should go on that topic just yet
There's a bit more to it.
The explosion uses a combustion model while the billowy smoke just emits density with bouyancy
Combustion needs fuel and heat to react and cause the simulation
i love the billowy cloud shapes, but i also kinda crave some "jagged debris spikes" at start
That'd be a particle sim as a source
it may be that i shouldn't be asking for so much in one image sequence though
i like that whole thing you do in that tutorial with the "create fire in middle of smoke and eat away at edges" deal, i've gotten addicted to that sort of thing
do you just bake in the firey parts into textures now?
ish
right like a black and white part that's baked in that you animate with shader
Haven't eleased anything using the new techniques yet so I can't go into detail
Gimme a couple of years and I'll do a GDC thing about it 😃
yeah seriously the tutorials out there on even some of the basic stuff is really bad right now
yup
i've found a few freebies and sometimes it's like a trap
this campfire thing for instance https://www.youtube.com/watch?v=QjKQ_NQVIMk

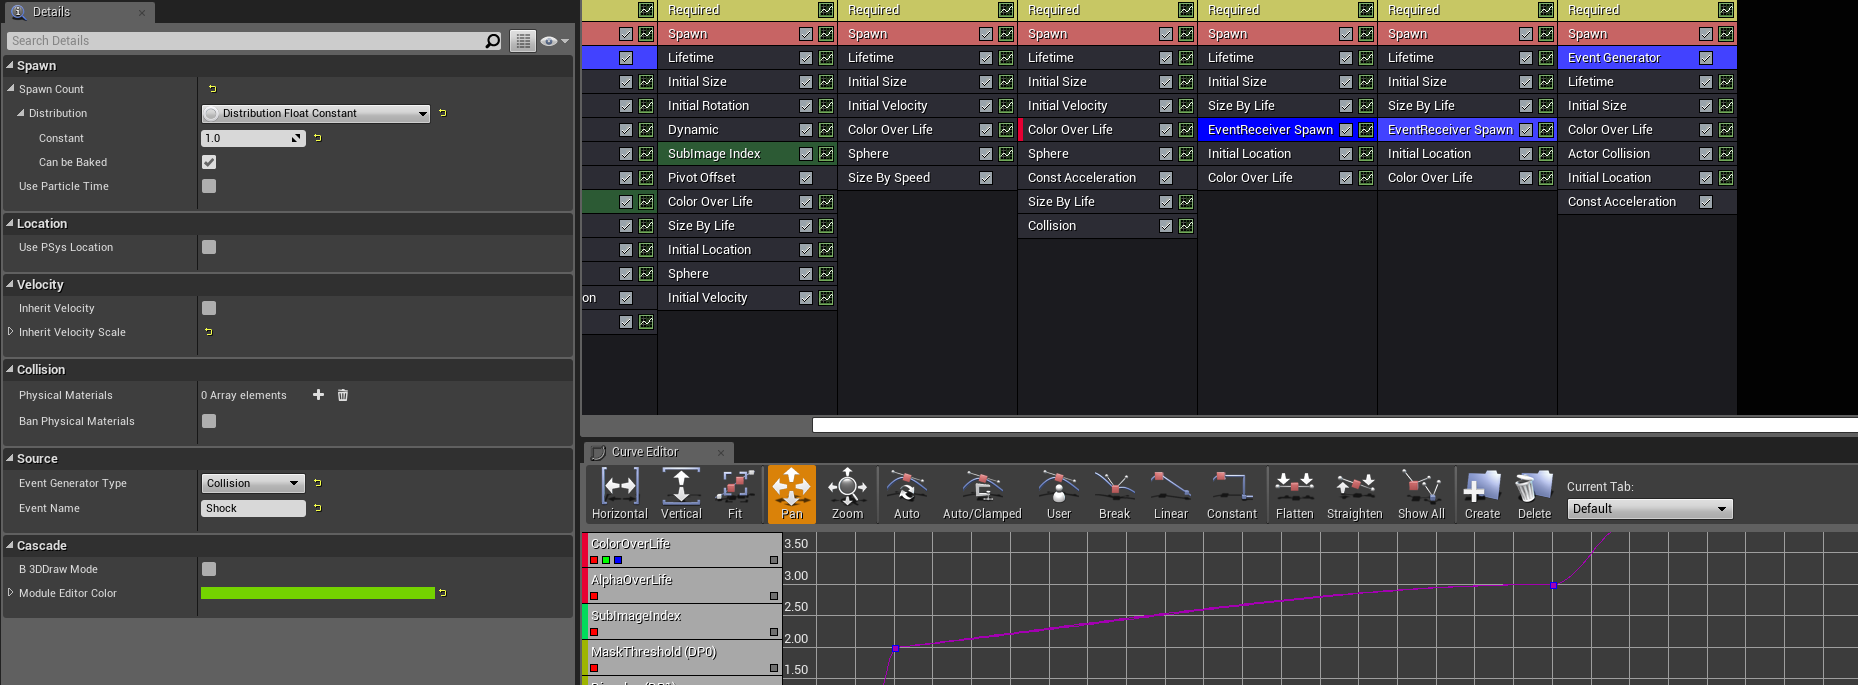
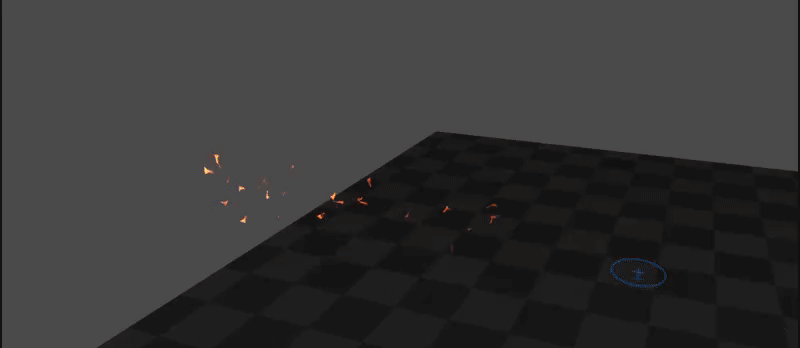
1:45 minutes. totally legit basics, i'm not angry there, but skip to end and it's like "uh this fire sucks" - why???
If you are doing pyro, Knipping is the way to go

Applied Houdini
Houdini video tutorial training focused on creating production quality VFX, taught by Senior ILM Technical Director Steven Knipping.
The golden standard
oooo
He knows what he is doing
I'm quite pleased I ended up next to him on the Houdini Experts page xD
ooo ya that's good company
i want to be houdini expert in like 3 days if possible so this should help
Yeah that's about as long as it takes...
lol i feel like that's how long Substance Painter took
anyway it's starting to make more sense. oh btw before i just waste your keyboard time
how come whenever i drag from a node i cannot right-click and make a new node off the the mouse drag?
Give it a version or so. Tab works as it traditionally was only tab. The rightclick thing is still new
i see you do it in your tutorial and i drag and it's like this https://i.gyazo.com/2d86d859dac1f1af4f8ea6e4111c4056.png

tab
any idea on how to make the trail loop? it only plays for 1 animation
no, i'd either use a ribbon with a persistent looping instead....or do it the pro way and build in a custom mesh that animates along the shape you desire and have that built as a particle that loops
either of those 2 options should work. Anim Trails are pretty sweet but they're not all that versatile
it seems like a bug, if i copy Paragon Shinbi's dash animation trail and paste it to my char then change the sockets to my character's it works and loops
@cold sorrel when you're around - Houdini question: If I need to make a change to just the Camera location - does this require doing a new "save to disk" render from the Output part of the pyro_sim if I already have a Cache setup?
or should could I just render out the images and skip that?
Cache is just the volume data. It's the equivalent of a static mesh at that point
It couldn't care less what you do with your camera
how about with lights?
could i conceivably disable 2 of my lights and enable another 2 and just "render" or would i need to "save to disk" again
alright cool - Houdini is working really wonky for me, i think because i'm hitting the limits of my memory or something so the cache bar is not filling the timeline
you could send it to me, I import it into maya and render with a camera obscura if we want
The bar on the timeline is a temporary cache
To save it you need to save to disk and read it back in
ya for some reason it's getting angry at me and parts of it were vanishing after i went below 0.07 division
0.03 pissed it off bad. so i'm at 0.05
Simulate to a SSD.
A regular HDD isn't fast enough to swap
and you'll fill your ram with that res
The temporary cache is all ram
ah i do have an SSD but i need to free up space to do it there
that's why it starts disappearing when it's full
ya i'm in a bad state hardware-wise for this lol
So only use that for preview.
Save to disk before you start tinkering with camera or shading
a saved out cache is always ok. A temporry one is always just a crash away from bringing sadness
yes i've done that, i'm saving a lot
i'm real close to joy but for some reason the last time i rendered out one of the camera key frames wasn't zoomed out far enough for my crop-zone in After Effects
Hehe
i gotta render out 512 to get around that watermark
feeling pretty good in general just need to stop "saving to disk" so often apparently
cameras + lights = not part of cache tho, this is good to know
Yeah, you only want to do that if you change something in the simulation
If change is in the DOPnet. Cache. Else, No
i remember FumeFX was sorta good this way too - allowed changes to lighting without re-sim, just wasn't sure here
alright good. i'm a sim-newbie in general