#cinematics
1 messages · Page 22 of 1
Replace it with the same mesh but without any AI.
are there any "guidelines" or settings for a basic manual exposure setup? not sure if my sun is way too low... but everything is alomost black when using manual exposure...
@sour wagon i'm not 100% sure it's what you're after but in this video the guy goes over controlling the camera exposore, turning it on and off, and settling various manual caps to it.
this is just general How To Operate 101 stuff tho, so it might not address your issue.
Thx i will look into it. What I am basically looking for is a correct initial setup so that manual exposure with shutter/iso/aperture behaves like in real world. Used to do that a lot with 3dsmax/vray but UE seems to be a bit special about that... :)
oh, then that is certainly not what that video is going over. it's largely just telling you why it's autoexposuring and how to control it when you're laying out your inital lighting so exposure doesn't mess with things, no tinkering.
no idea on that one sadly, still learning this stuff
Just be aware that in Unreal, camera aperture doesn't affect exposure. It controls DOF only.
Is there a way for sequencer to not "duplicate" assets in a level when playing it?
Hey ya'll! Is it possible within a compiled Unreal app, to create a cinematic with movie render que and save the result to disk / export?
It's been possible since 4.25
@barren prairie thought so too, but I found out that there are actually two aperture values and the "current aperture" affects the exposure
How to disable game setting in render
If you use Sequencer's movie render, enable Cinematic Engine Scalability.
still the same
Cinematic scalability isn't that drastic of a change from in-game Epic scalability anyway.


I'd like to learn more about this.
In this video:
https://www.youtube.com/watch?v=Q1xi8NwpIqA
They talk about using the Aperture setting in a post-process volume (and no camera) to change the exposure of a game scene.
On this page:
Dealing with Cinematic DOF, the Unreal docs say:
Normally when you would adjust the Aperture settings of a real camera, you'd have to also adjust the Exposure settings at the same time to maintain same light intensity received by the filmback/image sensor. However, in UE4, this is not a real camera, so adjusting the F-stop and Diaphragm does not control the light intensity.
The Current Aperture variable is listed, but it doesn't mention controlling the exposure:
Current Aperture
Sets the current aperture size based on an f-stop number. Note that this setting only accepts values that are within the Min FStop and Max FStop range.
Can you show me an example of the Current Aperture setting of a CinemaCameraActor altering the exposure of the scene?
Thanks.

In this Unreal Tips and Tricks video, we dive into Unreal Engine's exposure controls and look at how their settings can be adjusted to mimic those of real-world cameras. Learn how to tweak advanced settings for greater control, how to adjust the range of luminosity, and which values reproduce interior home, office, or exterior sunny day exposure...
The following depth of field methods provides a cinematic look that closely resembles photography and film for desktop and console platforms using the Deferred rendering path.
If Movie Render Queue fails you, I don't know what else.
do you have the same problem ?
Nope. Never had that kind of problem with both methods.
Although I want to ask this:
Do you use post process volume and still have finite bounds?
finite bounds ?

Okay, in either your cine camera or post FX volume, set the exposure's metering mode to Manual, and adjust the exposure with the ISO value.
Setting the metering mode to Manual will make the exposure dependant on the ISO value (and maybe other values that Mike talked about #cinematics message)
i fixed it thanks
Does anyone have experience with using Niagara-driven audio visualizers in a sequence and rendering it out? I've got a sequence that looks great in engine, but in the rendered video, the audio vis is always running at a different tick rate so it appears out of sync with the audio.
I ended up figuring this out with a lot of trial and error. Basically: to get a 24fps render with the Niagara audio vis properly synced, I needed to set the sequence to 60fps in Unreal, export with Movie Render Queue in .mxf format, and set the fps to 24 in my video editor before the final render from there.
Every other method I tried ended up with visuals that were out of sync in the render. Phew! I might have to write a blog post about this.
Doesn't converting from 60fps to 24fps leave you with motion artifacts? This used to be a conversion problem back in the day when digital video couldn't shoot in 24p.
Hey, I received a reply on the Adobe forums, there is a built in setting for it after all, under preferences > media. I knew adobe had to have a solution for this. cheers

Ah you legend mate, thanks a million.
Yeah that might prove to be an issue, but until we can come up with a better solution, this is the best we've got. We're doing previs right now so it's better than nothing.
I've done audio vis on previous projects, but it was baked analysis with Synesethesia. That's easier to get a consistent result because you can feed the sequence time into the ConstantQ function, and that keeps them synced up.
I haven't found a way to do the same with the Niagara audio spectrum interface.
Did you try your recipe with 48fps or 96fps? Both can be frame-dropped down to 24fps with no artifacts.
I didn't, thanks for the tip. I'll give those a shot and see what the results look like.
does anyone know how to convert a mesh that has a "spawned" checkbox animation track and convert it to a persistent mesh in a level? I've tried deleting the track but the mesh just dissapears
fixed my issue, right click the object in the sequencer and convert to possessable, command makes no F'n sense but thats the fix!
Hi all, is it possible to bake a rigid body simulation to keyframes in UE4?
The culprit seems to be 'Cinematic Mode' checked on, but surely I would want that on to keep the settings? or is this not how it works?

Adding more than one media track to a sequence completely kills the performance. Does anyone know what might be the issue? (Using 4.26.2)
Hey, don't know if this is the right place but - none of my Quixel surfaces are having any sort of displacement or tessellation at all. I've enabled Displacement in the mixer settings before importing my surfaces and I'm using the most up to date clients for bridge and UE4, yet I'm getting no displacement at all.

could anyone tell me why my level sequencer is rendering out old/non existent cameras that are no longer in the camera cut please?
I don't know why, but when I've seen that, deleting the old cameras is the only thing that helped.
thanks for your reply - forgot to say i actually managed to solve it, that did work initially but i had backup sequencers on the project and when i deleted those it fixed everything 🙂
is it possible to lock a keyframe in sequencer? when I need to adjust some camera keyframes or add some in between, I find I have to right click > select all keyframes > then press 4 then 1 to reset the auto cubic curves so they arent all over the place. But I lose my const keyframes I've set. Is this what everyone else does to fix bad curves?
Hi all, when exporting a FBX camera from Maya 2019 to UE 4.26.2, I find that the aspect ratio does not match once in Unreal.
I managed to make it match by setting Unreal camera's film back to 16:9 DSLR, but that messes up the height value of the sensor in Unreal, and I can't think this could be an acceptable workflow in VFX, despite the result being visually functional.
Have you encountered this before? Any pointers?

Hello, hope you are all doing well. I was wondering if someone could help me out with exporting virtual camera sequences.
Sometime ago I recorded some sequences with virtual camera through unreal remote 2. This was with the old virtual camera system and I have a lot of recordings saved up.
However, after going back into the project and trying to export them out, it just shows as an empty camera in the render window.
Right before I click render, the camera sequence/subscene plays through in my main sequence fine, but after I try to export, the render window shows camera misplaced with no movement and without proper FOV. Then the viewport also shows misplaced camera. After I cancel the render out, then the main sequence also shows the camera sequence/subscene showing wrong.
If I close the main sequence with the characters animation and then open it again, then the camera looks proper again.
Any ideas what is causing this?
Only one camera sequence I have found manages to export properly. I have tried to go into the camera sequence recording from the virtual camera recording and replacing subscene sequences with others but it’s still weird.
Also, when I start to render out the video and the camera gets misplaced, I also notice that a camera and a few objects get created on the right panel and the text is highlighted yellow, like cinecamera. After the render finishes or if I cancel out the render, then those objects disappear.
I get the impression it’s making some fake cameras related to the original virtual camera recording and that is what is causing this but don’t now how to resolve it.
Does anyone have any tips regarding this?
Also, with the new virtual camera 2.0 and vcam 2 UI, I can record and export with no issue.
But all those other recordings I did previously seem lost, except for one camera recording, might be a few more, but most don’t work when I export them. I have had a lot of recordings so would be shame to lose them all.
Using 4.26.2
Does anyone know why my displacment is causing these weird artifacts on my terrain..?

The appearing and disappearing cameras can sometime be the result of using default camera names like CinemaCameraActor1. Sometimes renaming the camera with unique non-default names fixes it.
Anyone know why particles don't show up when I render in movie render queue?
nvm just needed warm up
Thank you very much Mike, this has been amazing, I have now been able to output my saved material! Just wow!!! Such a simple fix! Thank you! 😁👍
Hey Mike, I just noticed that with other subscenes this isn’t quite working as well as in others.
I have renamed all the cameras that appear on the world outliner panel and that worked with some shots I could not render before, but now I notice that some other shots once I start rendering out, it automatically recreates this default camera with a number on it like CineCamera47 and this stays on the world outliner list.
I keep renaming the new cameras it keeps creating but it doesn’t seem to do much with these subscenes. Is there any way of stopping the system from creating these new cameras?
Edit: On these subscenes, the camera position is at the right place but the focal length, aspect ratio and such is not the proper one.
Sorry, I don't have any more information except that renaming cameras sometimes fixes this. I also find that sometimes when UE4 starts acting crazy, if I reload the level and the sequence, things will straighten out for a while.
how do I set the rotation direction in a sequence? it's doing the shortest path but I want the longest
When using Movie Render Queue, how do you stop a render prematurely?
I tried closing the render preview, but the editor is still locked up as if it's still rendering.
Escape Key. Kills the render, and deletes any partial files. If you're rendering to ProRes, it won't write a file at all.
Have you tried setting an intermediate keyframe? You might be able to convince UE4 that it is the shortest path.
I've worked around it by setting values above 360 to "continue" the curve if that makes sense
wonder if there's an euler unwinder filter or something though
Hello, guys and girls! I hope somebody can help me as I spent another sleepless night trying to understand how to blend between gameplay and sequencer animations. I need to create seem less transitions between third person gameplay and cutscenes. My game is story driven and it is esencial for me to get it work smoothly.
I don’t know : how to blend between the camera which is attached to my character in game, and the cinematic camera that I use in sequencer for the cutscenes. My character steps into the trigger and when sequence starts there is always a little snapping, no matter how identically I try to put the position of the cinematic camera to the capsule character camera.
Other issue is when the animation ends, I need to smoothly fly with cinematic camera and blend it behind the back with the character camera . But I can never guess the exact position, and there is also a snapping. Is there a documentation anywhere or tutorial about that? The only thing I found is how to blend the in and out animation between the gameplay and sequencer, but nothing about cameras.
If somebody knows how to solve this please help!!! 🙏🏻🙏🏻🙏🏻
Don't be too exact with it, and don't be afraid to fake it.
You can fake the "seamless transition" in the last camera cut in your cutscene. So the moment your cutscene is about to jump cut for the last time, get out of the cine camera, possess a normal camera placed near your character, and interpolate it to where your character camera is supposed to be.
Once the fake-out camera is in the same place with the player camera, switch to the player camera right away.
Of course, assuming that you want to have camera cuts in your cutscene. If you want to have oner cutscenes like God of War 2018, that's a slightly different can of worm.
Taking example from Grand Theft Auto V, these are my three steps on creating "seamless" cutscene:
- Execute the initial shot of the cutscene while still using the gameplay camera, with a small amount of manipulation.
- Jump cut to the main shot with all the directed cine cameras
- Once the main shot reached its final camera cut, possess a game/standard camera while getting it into position.
- Switch into gameplay camera and give control back.
If you want to have skippable cutscene, you could just fade and reach the final frame of the cutscene right away.
I see, oh well, worth a try, thanks again for the tips, at least I got a few sequences back 😄
Does anyone have any tips on how to improve virtual camera latency with vcam2 UI? On the old virtual camera system I feel there was less lag. I’m running on a wifi router with 5 ghz. I don’t know what to do. I have reduced resolution as much as possible and it improves a bit but it’s still slow and recordings reflect the lag.
@quick portal thank you so much for your advice! But this is the problem, if I possess the camera through the level blueprint, how can I transform the position of that camera to fly over my character? How can I put the standard game camera on the sequence?
(If I understand correctly , to start the sequence and to end the sequence with the standard camera I need to be able to have a transform track for it.
I don't use Level BP at all. I just spawn a new camera BP to set active via the Sequencer, move it to the character camera position, and switch to the character camera
Hi everyone! I am having an animation with fx and i want to render the performing of them as a video file. However it only play if i hit simulate so when i come to cinematic sequence it is just a still image? How can i active and render it. Thanks
Alvaro is doing exactly that in this clip for CRETE https://m.youtube.com/watch?v=aNd3t6n4s_E
Perhaps if you contact him he’ll share, or at least let you know how difficult it is to achieve.

Join the CRETE discord: https://discord.gg/fTHMHJN29H
I'm a natural sceptical. And I confess, I thought Metahumans were going to be great for VFX and Film, but gamedev was something out of the initial scope.
I was wrong. In just a month of hard work, we are closer to that wild idea of merging cinematographic stories and gameplay in CRETE protot...
@toxic gyro yes, I asked him. He says that he uses normal camera (the game play camera that is attached to the character), I tried that but. Maybe you know, because I ran into two problems.
- When I add transform@track, I can only move camera but not rotate. When I uncheck in the details tab the yaw and roll, it works, but then when the sequence finishes, the camera is not behaving the same in the gameplay (and I have no idea how to do it from the BP).
- The gameplay standard camera doesn’t have same parameters as cine camera, like focus and lengths, and aperture.
Maybe there is a way to change the camera attached to the character to a cinematic one for the sequence? Or how to solve this , please if you have any idea?
Hey, my name is ben and I render out actors with looped animations to create animated tokens for my pen & paper game. So i have different cameras placed in seperate level sequences and render everything out with the render movie queue. So far so good. I have two questions:
- When I change the skeletal mesh and render out the the same sequence with the camera aiming at the mesh It still shows the old model even though its not there anymore. Is there any way to "update" every sequence without going in and change something and save it.... or something?
- Do you have a hint how I define the Last Frame of several sequencers with a central variable so I can change the length of several level_Sequences comfortable without open every single one and set it up manually? I dont need a solution, just a hint i can chew on. -> Use case is that I film/render out different animations (With cine actors/Render queue) that have different animation lenghts
Sorry if that's a noob question but I'm googling for days and can't find a promising aproach
Hey folks, does anyone know how I would change my Cinecamera from a 16:9 to a 21:9 aspect ratio..?
In the details panel of the camera, under Current Camera Settings>Filmback. The filmback affects the DOF, so if you want your 21:9 aspect to look like a particular camera, research the sensor size and plug it in the Filmback settings.
Hey all, does anyone know much about GPU Utilization when using Movie Render Queue? In particular, does anything need to be set for using a multi gpu set up? And is the majority of frame render time GPU bound or is there a role to play for CPU with the new offline rendering features?
Thanks in advance for any info!
Have you seen these videos by Will Faucher? They may hold some of the answers.
https://www.youtube.com/watch?v=FxvF3zncClA
https://www.youtube.com/watch?v=2U1wP8sJgfU
https://www.youtube.com/watch?v=osHpBZ47ZfU

We're going to take a dive into the latest and greatest Movie Render Queue, made production-ready in Unreal Engine 4.26. This is a must-know tool for VFX Artists and CG Artists alike.
Relevant links:
Cryptomatte/Object ID Tutorial: https://youtu.be/Ry4-Q8mBjdg
Render Comparison Images Download Links
Render Comparison A: https://imgur.com/a/He...

Welcome to Part 2 of the Movie Render Queue Tutorial!
In this video we will be taking a look at a few limitations the Movie Render Queue has, as well as a few nice features that can really save you a lot of time.
Relevant links:
Part 1 of this video: https://youtu.be/FxvF3zncClA
Cryptomatte/Object ID Tutorial: https://youtu.be/Ry4-Q8mBjdg...

Welcome back everyone! Today we'll be taking a look at how to fix the terrible Depth of Field that comes by default in UE4. With a simple console command we can improve the quality of our renders as well. Enjoy!
NEW INSTAGRAM: https://www.instagram.com/williamfaucher.vfx/
Render Comparisons: https://imgur.com/a/XHUPFVm
Timestamps:
00:00 - U...
Hello everyone, How can I record gameplay in-game realtime. Not sequencer and take recorder. I just want to record gameplay from a cinecamera actor viewpoint while I play my game. (Sequencer didnt work because all characters are spawned dynamically ingame and when they cast Niagara effects after that I couldnt find any way to record all of that)
OBS Studio?
https://obsproject.com/
OBS (Open Broadcaster Software) is free and open source software for video recording and live streaming. Stream to Twitch, YouTube and many other providers or record your own videos with high quality H264 / AAC encoding.
@hot sun No I have to use an in-game camera to be able to visualize from different camera angles. What's more , I will have to code that later on. Obs is not an option. I just want to take from a camera view and record that to a movie.
Actually, back in Matinee days, you could do this kind of thing.
Unfortunately Matinee was clunky to use and discontinued in favour of Sequencer, so your best bet is Sequencer and Take Recorder. You could also "fake" the Niagara spawning, by enabling the emitter in time.
Although if you're too picky about Sequencer, you could assemble your own replay system (or use one premade in Marketplace) and record it that way. Replay system relies on replication instead, so it's your best bet for non-sequencer gameplay recording.
@quick portal Thanks for the help, I really appreciate. I really tried take recorder workflow but it cannot capture everything. I have player spawned characters and they spawn other effects like Niagara, material exp mesh etc. And I have to make it fully automatic by coding to enable end user as little intervention as possible. It is so weird that such a simple thing is missing. Maybe I will have to dive dark realms of directx just for this.
You don't have to go that low level because view culling exist. It would be futile to pop in Renderdoc just to get another angle.
Consider setting up in-game replay system because UE's replay system make use of multiplayer replication. That means anything replicated can be played back. Again, it's the alternative if you're too picky about the Sequencer.
@quick portal ok I will go dig into replay system. I really appreciate your help.🙏
Is there a way to hide the item counter in Sequencer's track panel? It blocks the clicks that meant to interact with the thing it obscures.

Does anyone know a way to disable light emitting from a skydome, while still keeping it visible? I like the look of my point lighting better.


Figured it out. Just had to change my skylight mode


Is there a way to force a character to be pre-rendered before the camera gets to him? atm I have a character in a cage, but the first frame he should be visible, he's not, then blinks a couple of times. Any idea how to force to have him not do so?
Is there a way to blend between cameras within sequencer. I have a few sequences where I want to blend between cameras to get a desired effect. Is this normally done with an event track and Set View Target with Blend or is there a better way to do this within the sequencer workflow?
Did you mean in-between camera interpolation, or straight up screen transition?
Cam to cam interp
So cam A moving to where cam B located?
and then back to A where A is a variable locaiton
Check this out for camera cut blending: https://mobile.twitter.com/highlyspammable/status/1258293601835970565?lang=en
A nice feature to sneak into 4.25 is Camera Cut blending in Sequencer. You can now tell two camera tracks to run a nice blend between them so that the camera moves from one location to another without manual key frames. Even includes the camera variables like FOV! #UE4 #UETips https://t.co/oJaAIjh5AB
Likes
211
Amazing!
When coming out of a level sequence what determines what camera is used on exit of the sequence?
Hi! I need help with my project, what happens is that I import a sequencer to another project and it appears is read only, how can I edit it?

Should be the camera prior to entering Sequencer
Click the padlock on the top right of the Sequencer window
thank you very much!
Does the sequencer director have any default events for stuff like starting or ending the level sequence or do I need to add those in an event track myself?
Yeah, in the Sequence Director BP, right click and look for Variables->Cinematics->Get Player. From that, you can pull off Play/SetPlaybackPosition/Stop, etc.
I have a cinematic sequence set up, but when i capture the video for it to render its not rendering the cine camera and it shows the hud for some reason

its capturing that

but should be capturing this
test
I have an issue where I have a camera sequence, that I want to render as an .AVI.
I have the sequence setup, and click to render, but it is not taking the camera as the source of the footage -- How do I make the camera the actor to record from?

Add a camera cut track and assign your camera to it.
@quick portal your a star thank you!
Hey Guys, I'm currently making a cinematic but I have a problem, my viewport looks quite different to my sequenced render. The colors are different, there is depth of field in the render but there is no depth of field in the viewport. I have all the settings turned up in the viewport so im not sure why this is the case. Please let me know if you know why this could be happening
Thanks
Highlight your camera cut track in the sequencer and click on the little camera icon. That will give you a cinematic viewer in the viewport, looking through your assigned camera. If you have streaming textures or Niagara effects, click on Play>Simulate to see their effect in the viewport.
Yeah ive done all of that
let me send you a screenshot to show the difference
So this is in the viewport:

And this is rendered:
Check the pull-down menu in the viewport marked "Perspective." It should have "Cinematic" marked and the name of your camera. Sometimes you have to toggle it off and on to get it to take the setting.
Yes it does
Rendered:

See there is no Depth of Field in the viewport and the colors are different
Do you have a post-process volume set for runtime only?
You might try turning off your PPV and seeing if that changes your render.
Also, is your camera a CineCameraActor?
Yes it is
Rendering in Movie Render Queue ?
no
Ah. You might try it and see if you get different results.
But that still doesn't explain why there is no depth of field in the viewport
Its a problem with the viewport not the rendered result because i get the same results as the render when I hit play
Its just when im editing and not playing it looks different
When that happens to me, it usually means the viewport has lost track of the cinematic view. I sometimes have to toggle it off and on a few times until it wakes up and shows the right image. YMMV.
I disabled post process and it didn't change
Because the depth of field is on the camera
Sounds like something is runtime only like a PPV. Have you tried Play>Simulate in the viewport?
let me try
doing simulate played the animation but it looks the exact same
as the viewport
no depth of field
and different colors
Those are my best ideas. Sorry I can't help more. Good luck with it.
Out of curiousity: Is that Clint's render challenge? 👀
Yes it is
Do you have any suggestions for my problem?
I assume the scalability in your editor is lower?
no its on cinematic
All of the settings are turned all the way up
its weird because earlier today depth of field was working in the viewport
I have a camera that has blueprint functionality behind it. Can I take that same camera and use it to render out footage in the Sequencer? I want it to access all the functionality behind that blueprint camera while it renders things out
The Sequencer's Camera Cut track can get all camera components spawned in the scene, even those contained in Blueprints.
Does anyone know how to hide the item counter in Sequencer editor? That thing blocked any click that's meant to interact with something it obscured.

Hide hude in camera settings
Does anyone know if you can create similar scene transitions in Unreal like ones seen in this video?
https://www.youtube.com/watch?v=CE9VOZivb3I

Transitions in Unity are easy to learn - let's have a look!
Get up to 91% OFF yearly plans using the code "BRACKEYS": https://www.hostinger.com/brackeys
● This video was inspired by: https://youtu.be/a0OQvWAPeuo
● Loading screen in Unity: https://youtu.be/YMj2qPq9CP8
● More about singletons: https://youtu.be/ptkxRn0HCJc
● Check out the website...
If you want a simple camera fade, Unreal's camera actor has the parameter to fade in to/out from a solid colour.
Otherwise, if you want screen wipes, you can either use post process materials or using UMG.
Whats UMG?
Unreal Motion Graphic
aka UE4's UI framework
Not to be confused with Universal Music Group
Lmfao, thank you, I'll look up the later since I'm making a Pokemon game and I feel like the latter will be more useful
I have another question. I wanna make a camera that rotates at the start of a scene when the character loads in, similar to this
https://youtu.be/1pDI8Scph44?t=36
Would there be a way to do that?
I want to have a functionality that a gamer can replay and export a video on a packaged ,released game. How can I record game play from a camera in the scene at runtime. Can you point me to a right direction.
I think you can call Movie Render Queue functions in Runtime.
The caveat is that the tool can't export in-game audio, but most machinima creators adding the audio in post anyway.
@quick portal Thank you but that needs a pre-made sequencer right?
Is there a way to get the level visibility track to keep state?

how to add video clip to particular 3d shape .can anyone suggest a tutorial.

Hi, when I edit a shot that's part of master sequence, and change its length, the length doesn't change in the master:

Instead, there's grayed out section of it separated by red line.
I have no clue how to reset the the shot to the new length in the master sequence, without doing it the ridiculous manual way of zooming far in the master sequence, clipping it on the exact frame, and then zooming back out.
Only solution is to flat out delete the shot, and re-add it, but that's also clunky.
What's the proper way to just refresh it with the new length?
Hey all, does anyone have any info about the "Render Remote" option in Movie Render Queue? The docs on it seem to be fairly sparse, has anyone here successfully managed to render across multiple machines?
Ah yeah I had already seen these, he's an amazing source of knowledge! Unfortunately I was looking for some more info on how it's actually using the hardware behind the scenes. Thanks though!
Hello I am currently trying to render out a sequence I build with the sequencer in a level based on the collab viewer template. My first problem is that it shows the HUD of the Collab Viewer Template which I am sure I can disable somewhere in the level blueprint.
My biggest problem is that everything runs smooth when I watch the sequence inside unreal but once exported either as a video sequence or an image sequence (which I then combine and export in divinci resolve) it looks really laggy, parts where I just rotated the camera from left to right look extremely laggy. Any suggestion what could cause such a behavior ?
Okay I fixed it but it makes no sense to me tbh. I just ticked "use compression" on 75%. Exported Video looks much better than before and does not lag anymore. Can anyone explain that to me? Also why does it lag when I exported it from unreal as image sequence, import that sequence to davinci resolve and then render it as an mp4 without changing anything. I am pretty new to sequence and video editing in general. Thanks for any tips or hints
hi everyone i am facing a issue in lighting bulid
the error is this
12:10:03 PM: Starting up SwarmAgent ...
12:10:03 PM: ... registering SwarmAgent with remoting service
12:10:03 PM: ... registering SwarmAgent network channels
12:10:03 PM: ... initializing SwarmAgent
12:10:03 PM: ......... certificate check has failed
12:10:03 PM: ...... initializing cache
12:10:03 PM: ......... using cache folder 'C:/Users/Sakib/AppData/Local/UnrealEngine/4.25/Saved/Swarm\SwarmCache'
12:10:03 PM: ......... recreating SwarmAgent cache staging area
12:10:03 PM: ...... initializing connection to SwarmCoordinator
12:10:03 PM: ......... using SwarmCoordinator on RENDER-01
12:10:06 PM: ......... SwarmCoordinator failed to be initialized
12:10:06 PM: ...... initializing local performance monitoring subsystem
12:10:10 PM: ... initialization successful, SwarmAgent now running
12:10:10 PM: [Interface:TryOpenConnection] Local connection established
12:10:10 PM: [Interface:OpenJob] Error: Invalid class
please if you know how to fix this pls tell me
this is issue i ma facing plz help i am new in unreal
To get rid of the CollabViewer HUD you could override the game mode so that it isn't using the Collabviewer character. That is of course if you don't need it present in your render
try 100 on compression. and make sure ur fps match in both programs. otherwise not sure what the problem is.
Thank you for the tip will try that although 75% compression did the job just fine without any loss in quality. Still not sure how this can occur while exporting as image set and exporting it via DaVinci Resolve 🧐
Will take a look at it thank you 👍
Is that red line the end of your working area in the sequencer? if it is, just navigate past it with the time indicator and then click the Set End Point button in the transport controls to move it.
Right click on the shot and Edit->Auto Size
The more Data the video has, the more resource it will take it to play it and movement scenes are kinda complex to display.. its just like a game.. if your pc is too slow, its lagging in fps 😄
Looking for someone who has some experience with cinematic cameras. We've got a replay system in our indie MOBA (records match, plays it back) and our editor is request essentially a camera rail where he puts the camera in 1 spot, hits lock, puts the camera in another spot, hits log, and then on replay the camera follows a spline/rail path to that spot (and then maybe even spot 3 and 4). The weird part here is this isn't in editor, it's in a packaged game, so we have to allow the player to place these spots
We have a general idea of how to do this, but would love any help or if anyone has done it before. I will pay for help if needed on an hourly basis
When setting this up for a cinematic, I have a mesh cube attached to the spline, and the camera is attached to the cube. That isolates the transformation along the spline from the camera's motion. It makes it more flexible in controlling the camera. Also, if you want something to track along with the camera like UI or even a mesh, you can attach them to the cube as well. HTH
Cool that helps a lot. So we have a cube with a camera attached and a spline. We'd hit a button, the transform for the camera in that position is stored, a spline point in that world location is made, and then when finished have the cube move to each spline point that was created in order, interpolating the camera transform between each spot, right? Would there by any benefit in using a camera rig rail with a cinecamera over that/is it even possible to modify that during runtime?
The camera rig rail is buggy, especially as you make it longer and less straight. Same thing with splines. Somehow, putting the spline in a blueprint changes the way Unreal Engine evaluates it, and it behaves better.
hi ,i am having issue with sequencer..not able to get live preview while i edit stuff in sequencer.how to fix tht..
i found the solution of it..now im having trouble in previewing live dmx lights and animation setup..

Got it. Thanks a lot!
Hey all; when I'm importing my baked camera from Maya to Unreal, it's importing with the track sideways rather than being level with the ground. This doesn't change whether I export with Z-up or not from Maya. Any solutions? Can't find anything on google

The weird thing is when I export my environment to Maya, everything is oriented correctly; the camera pans around my character who's feet are grounded where they should be in Unreal, but when importing the camera to Unreal it just doesn't maintain its orientation relative to the character or environment and instead is flipped.
Edit: Nevermind, just created an empty actor, parented my imported camera to it, then rotated it 90 degrees
Alright, next stupid question, how do I get the render export to render the movie from my specific camera? I have it active, have no other cameras in the scene, and it wants to render from a camera that doesn't exist.
If you're rendering from the Sequencer, you need to add a Camera Cut track and assign it to your camera. You also need to make sure that the little camera icon in the cut track is on (white). Make sure the camera cut track stretches all the way across your sequencer work area, or else it will jumpcut back to the observer camera. Also, it's a good idea to make the cut track extend a few frames beyond your working area; there's a bug in Movie Render Queue that screws up the head frame otherwise. After you've set up the Camera Cut track, render using the Movie Render Queue. I recommend Will Faucher's videos on YouTube to get the most out of Movie Render Queue .

YouTube
Welcome to my channel! I've been working in the entertainment industry for the past 11 years. Some of my work includes VFX/CGI shots in Marvel's Black Panther, and HBO's Watchmen. I'm using this space to share as much information as I can about the industry and techniques to improve your art. Enjoy!
Unreal Engine, CGI, Photography, Digital Art.
Yep I figured it out prior to this 😅 forgot to come back and say that. I had just deleted my sequencer object in the level which made my sequence not inherit my camera, just had to create a new level sequence and slap the camera and such in it!
hi there,
i need a small help on adding spatial 3d audio in VR from cinematics sequencer
is there any way to do that pls help!
has anyone experienced this error with movie render queue? I cannot find any relevant entries in docs for this

I had to change my ticks to suit 25fps, but trying to render with temporal aa samples is problematic now
daft question but should I be building my lighting if ray tracing is enabled..? will I be getting better results?
If you're using raytraced lighting, no need for building it.
It depends how you mean "enabled" and "better." You can turn on raytracing at the engine level and still have lights that are not raytraced. This is deliberate, because some games are designed for systems that can only handle a little raytracing before they slow down. For those kinds of projects, designers raytrace the hero items close to the camera, and then bake everything else. (Some designers bake anything that isn't moving or interactive just for optimization.) For cinematics, "better" could mean "more realistic." In that case, turn on raytracing for every light and don't rebuild lighting. But keep in the back of your mind that you can always go back to baking some of your lights if your system is groaning under the weight of the raytracing.
Have you compared the default settings of the projects? Like exposure in the cameras or exposure and bloom in the PPV?
And both of the cameras are identical? It might also be lightmass settings -- Will Faucher has a short video about this:

In this weeks Two-Minute Tuesday tutorial, we take a look at how to bake emissive textures, meshes/models as a light source. With the help of Unreal Engine 4's GPU and CPU Lightmass, any emissive texture, or material, can be used to emit light. Baking a mesh light is a simple process that only involves 1-2 settings.
Keep in mind this only works...
Im having an issue where i am recording an item in the take recorder, but when i put it on the time line it is significantly shorter than the recording, i am attempting to sync dialog. I have a 4:30 piece of dialog and when i roll it in via live link and record it in the take recorder it is about 2 minutes.
i am doing everything at 24 frames
i have been doing this for a year or so and havent everrun into this issue
ive also noticed that when i finish the recording it is the correct length but when its done processing it is shorter, WHAT AM I MISSING? please help
Hello everyone! I am trying to animate something in sequencer. However, I have two camera actors, one of which I am trying to delete. However, it keeps popping up each time I change something in the sequencer. How do I get around this issue?
By deleting, do you mean getting rid of it entirely or despawning it in one point?
As in, I dont want it anymore. Like. Delete it entirely.
Delete the track from Sequencer first, then delete the object from the map. Afterwards, save both.
I'm setting up some renders with Movie Render Queue, but when I render my shots my characters aren't rendered.
I selected the right level for all my shots, and can see my character correctly in the viewport.
How do I fix this? >_<
Hi guys. When creating your Cut Scenes there are 2 ways to add your cameras.
- Add them to your Scene first and then add them to your Shot Sequence
or - Add them directly from your Shot Sequence using the 'Creat a new Camera ...' icon
Which approach do you use and why?
I like to bring them into my scene first so I can rename them easily in the world outliner.
I name my cameras like this:
CAM_SHOT_001
CAM_SHOT_002
CAM_SHOT_003
...
So that when it comes to making individual shots I can keep things super organized for future me.
Makes sense. Thanks!!
Another question. Am trying to follow along a tutorial but in my Sequencer my camera is missing all of its parameters. I can manually add a Transform track to the camera but what about Current Focal length, Focus Distance and Aperture?
The attached should make this clear.


They are already there.
Right above the transform track.
You can animate them as well with keyframes.
It's actually very important to rename your cameras. There's some kind of bug in UE4 and it gets screwy if you just leave the default name like CineCameraActor7. It starts making new cameras and getting confused about existing cameras. Custom naming the cameras avoids this.
FWIW, you can also rename cameras in the Sequencer, and those name changes will be reflected in the World Outliner.
Awesome Mike, thanks for the tip!
How do you guys deal with the ugly DOF artifacts that are always present, especially in FG objects?
Anyway to "lock" an actor in the world outliner so I can't accidentally select it in the viewport? I have a bunch of fog cards in my level and it's giving a little bit of grief.
hit "T" so you can't select Translucent objects.
I set up my motion blur + shutter speed values on my post process volume, and I see desired motion blur in viewport. But when render it with movie render queue the motion blur is not there. Why is this and how do I get motion blur in movie render queue?
Thanks!
Will Faucher has a good video about using console commands to improve DOF:
Welcome back everyone! Today we'll be taking a look at how to fix the terrible Depth of Field that comes by default in UE4. With a simple console command we can improve the quality of our renders as well. Enjoy!
NEW INSTAGRAM: https://www.instagram.com/williamfaucher.vfx/
Render Comparisons: https://imgur.com/a/XHUPFVm
Timestamps:
00:00 - U...
Yeah I'm aware of all that stuff. It's not a Temporal AA Upsampling issue.
just lookin uggggly
How are you rendering that?
Movie Render Queue. all the HQ Cvars. Screen % 200. 16 samples. everything possible thrown at it..
What format are you rendering to?
EXR
Have you tried rendering at standard quality to PNG to see if the DOF looks different? If it does, you can isolate variables to find the culprit.
yeah ,none of the quality settings change anything regarding the DOF
looks the same in viewport as well
i'm guessing it's an Engine limitation, but i'm hoping I'm wrong because it looks awful
I'm looking into it...
Look at this render:
Do you see the same artifacts? For this render, I used a CineCamera Actor, and I created the DOF using the camera, rather than a PPV. Big aperture and keyframed the focal plane. I used MRQ to render to ProRes, then converted to MP4 using AME.

0 downloads
it tends to happen with thin objects
how thin are the objects in your shot?
Are you on 4.25 or .26?
I was having a similar issue, except when I was trying to use a low motion blur value in my PPV, my render would show way, way more motion blur. What fixed this was enabling the "camera" node in the Movie Render Queue and setting the shutter angle to what I desired.
I figured it out, I had two post process volumes in my level and i was adjusting the wrong one. Though I don't know why it was showing in the viewport ... How do I know which post process volume the renderer will use if i have multiple?
I'm trying to render out a movie via movie render queue, but the result looks completely different from my viewport. Namely, all the fog volumes are not rendered.
I've turned off game settings in the viewport so I can visualize exactly what should be rendered. But it's still not outputting the correct images! Very frustrating!
Any idea how to pause a frame for a few seconds, just so it doesnt continue to the next sequence
hey, I've got a number of meshes that I want to move with some lights throughout my landscape all at the same rate. Is there anyway to group them together and have a parent object and just move that..?
If someone knows of a better way feel free to correct me, but you could just parent them all to an empty actor.
Or attach them in the Sequencer. I just use a cube mesh and set it to invisible and not appearing in game.
Sorry yeah I figured it out, I parented to an empty actor, but was having problems, realised I needed to make my objects moveable 🙂
^^^ If Sequencer is what you’re doing them yup.
If you want them to all follow a path, make a blueprint and add a spline (not a spline mesh). Then add the cube in Sequencer and attach it using the Path command in sequencer. The cube will trace the path smoothly, and you can attach all the other meshes, lights and cameras to the Mover cube.
hey guys can someone help me with filming a short vid in the sequence
Can you please be more specific? Are you trying to create a cinematic, or trying to record game play?
I wanna record whatever happens after clicking the play button
so I guess it's gameplay
Overview of the Sequence Recorder tool and recording options to capture gameplay.
hey, does anyone know why my depth of field has so many artefacts..?

How are you generating your DOF? Camera/PPV/MRQ?
Using the camera settings

Here is a better look at another render
Have you tried adjusting DOF in PPV?
I'll give it a go
How should I go about setting my camera up..? Should I just set up a higher aperture?
As a first step, leave the camera as is, and adjust the PPV. See if that helps.
yeah unfortunately no difference here
Are the objects translucent? There's a DOF bug with translucency.
If I'm running a persistent level with multiple lighting scenarios, how do I get the renderer to render video from a specific persistent level? I'm trying to render a scene in my night scenario but it keeps trying to render it in the day scenario
It's not even rendering from the correct camera
Has anyone here used “actor sequencer” successfully?
Curious how you setup the event and call it, so far I can find no example of what to actually do. I do have it working on auto play.. 😅
It would really be perfect for a current project which is a mix of cinematic and interactive. Love the idea of keeping the sequencer takes for the face recordings in the character bp because of how easy it is to align and sync audio or set in and out points, and that the actor sequencer has no real dependencies.
That 100% looks like the translucency bug to me. In the project settings search for "Separate Translucency" and tick the box off.
Also tick off "Temporal Upsampling" in the project settings.
hmm, yeah unfortunately having the same issue after making the changes you suggested 😦

^If anyone has any solutions to this problem, would be hugely appriciated but I get that this one is a bit tricky to solve 🙂

I am creating a flyby in level to play, setting up the track when I move the camera forward and look with camera and and set key frame it sets it up when I go to play the clip it moves forwards but then does a crazy 360 spin around before settling on the correct angle.. anyone else have this issue and is there an easy fix?
Try "Use Quaternion Interpolation" in the camera's track.
@scenic orchid I haven't seen the full thread of your issue so forgive me if someone recommended this already, I know William Faucher has a couple tutorials on different types of depth of field methods, maybe something in there could help!
When I have two objects in front of my camera that I want to be in focus, I typically set the focus distance exactly between the two objects, then adjust my aperture until both objects are in focus. Am I doing this correctly?
IIRC, Unreal has a special auto focus mode on cine cameras (not generic gameplay cameras) that allows your camera to stay focused on one particular object.
You could programmatically have an invisible actor set its own transform lerping between two other actor.
I'm getting the issue of object stopped being spawned by sequencer. It just stays greyed out:

Any ideas what causes it?
Hey there, anyone else experiencing the movie render queue shutting down before the render is finished?
I´m guessing I´ve been stressing my ancient GPU a bit too much with grooms etc, or maybe its the ram building up.
I had to render it out in chunks, checking how much had rendered, then rendering again with new frame count etc.
Just wondering if there is maybe a log file somewhere, so I could get an idea what happend.
You could programmatically have an invisible actor set its own transform lerping between two other actor.
How could I go about doing this?
Actually nvm, I get what you’re saying.
Fix there is to switch the actor back from Spawnable to Possessable and back.
Yeah the spawnable/possesable stuff can bug out sometimes.
Hi! I'm wanting to create a turntable animation by rotating the camera 360deg around an empty actor placed in the middle of the scene. I've attached the cine camera actor to the empty actor and placed a key frame on the actor at the start with 0deg yaw and then another key frame at the end with 360 yaw. The preview works fine, but as soon as a click to render the video the camera detaches from the empty. Can anyone help me? 🙂
here's a screenshot before i click render

and here's a screenshot after i click render

Looking for general advice in creating realistic crowds in UE.
Goal is photorealism with random motion.
Should I be creating alembic sequences and importing them or using code blueprints to drive random behaviour for each rigged character instance?
Any tutorials to get me started? Any feedback appreciated!
Use an Attach track in the Sequencer. Click the TRACK+ button on the camera actor in the Sequencer, and add an attach track, and choose the empty actor. Then Save the Sequence.
IIRC, best results come from using DCCs with crowd functions like Houdini or Maya with Golaem or Massive and then importing to UE4.
There is also a tutorial in the Unreal Learning Center about retargeting animations and assigning them to a crowd.
@hot sun Thanks. Total novice with crowds. Could you summarize the pros cons of this workflow vs using Niagara+VAT inside Unreal? There is also this plugin which allows the animation baking all inside UE.
https://www.unrealengine.com/marketplace/en-US/product/vertex-anim-toolset/reviews#
I'm guessing I will be importing MOCAP data at some point to use on individual characters.
Pretty deep subject so appreciate your feedback.

Unreal Engine
Plugin for baking skeletal mesh animation into textures
Perfect, thanks a lot! 🙂
I don't have the flight hours on the crowd alternatives to give you a good answer. I do know that the crowd engines in Houdini, Golaem and Massive are very powerful and sophisticated. IIRC, there's a pretty powerful crowd plugin that has a discount or a free open beta and they did a class with unreal a few months ago. Let me see if I can dig it up.
Some things I've found:
https://link.medium.com/m34U2RfpEdb
https://www.youtube.com/watch?v=CqXKSyAPWZY
https://www.youtube.com/watch?v=QCA4ZQzFZ9s

Medium
Making use of instanced static meshes in UE4 to render animated characters.

Displaying thousands of characters on-screen in real-time has always been a challenge - until now. Unreal Engine's Niagara visual effects system opens up doors to go far beyond what was previously thought possible and this presentation by Epic's Joseph Azzam showcases how you can utilize the power and versatility of Niagara to create massive cro...
Join our Filmstorm Motion Library: https://www.patreon.com/filmstorm
Join us on Youtube Gaming and click join next to the like button:
https://gaming.youtube.com/watch?v=QCA4ZQzFZ9s
Unreal Marketplace Link - https://unrealengine.com/marketplace/open-world-animset
Get the Open World Animset today: https://gum.co/openwas
Learn how to setup a R...
I'm curious if there is anything else that can be done for these artifacts I'm seeing with the DOF

I've got every high quality cvar and setting that I'm aware of set.


Did you ever try turning off all the cvars & game overrides and rendering to PNG?
Did you render to PNG, or are you making an assumption?
ATOMS is the plugin I was trying to remember. Have a look:
https://www.youtube.com/results?search_query=Unreal+Engine++crowds+atoms&sp=EgIIBA%253D%253D
hey guys, I've just spent the last couple of hours, dredging the internet trying to find info on using root motion animations in sequencer, after getting that working my final issue is that its not actually moving the character actual transform/capsule, so when the game starts my blueprints spit errors because the character is not where its supposed to be even tho the model is , if anyone has any insight that would great

is it still possible to get a tilt shift look? for some reason if i watch older tutorials about that they show depth of field options they doesnt exist anymore...
The old, ugly painterly Bokeh DOF method is pretty much killed, in favour of the better, more accurate and natural Cinematic / Circle DOF method - since 4.20
is this a yes or no?
Depends on how you want to improvise it for the new method.
idk how to answer... i just want this tilt shift effect
The new cinematic DOF is based on the working of real camera, so you should be able to apply all the values you'd adjust in real camera to achieve many kind of photography techniques.
but how?
In your post process volume or generic camera settings, these values I checked drives the new Circle DOF method.

Cine Cameras also have extended settings:

i dont see how to get exactly this kind of effect with these settings
Do anyone know how control Substance Graph Instance in cinematics?
My Master sequence is always crashing
Did anyone faced issue like this? I am using 4.26.2

not sure this is the place to ask but I will try. I am working with high poly count mesh in unreal. Basicly imported the FBX and it is extremly slow. Even just selecting one of the geometry childrens in the hierarcy of the mesh takes about 30 seconds. Anyone mind helping out ? could DM to not spam to much I guess.
Usually dont work with this high poly meshes UE, and got something to help out with.
How many polygon is that?
Wasn’t the bokehDOF method the one that mimicked an anamorphic lens?
Cause if so, I’d strongly, strongly disagree with labeling it old and ugly 😄
It’s an incredibly sought after look in cinema 😉
Perhaps this will point you in the right direction?

WATCH PART 2 HERE: https://youtu.be/sCIYFOBGu0Q
Here is the much-awaited Anamorphic Depth of Field tutorial that you have all been asking me about. I apologize in advance for the long introduction, but I really had to clarify a few things beforehand.
Hope this helps you out!
This video is NOT sponsored. Some product links are ...
Will Faucher mentions an architectual plugin in that video that you can use for tilt shift IIRC..
^^^ Correct!
Quick question (hopefully). What's a good way to have text in a Sequence? I just need some text appearing/disappearing throughout the Sequence, but it's not linked to audio like a Subtitle would be.
Anyone have any issues with instanced meshes being missing in Movie Render Queue?
Movie Render queue frame missing foliage

Sequencer frame with everything where it should be

Look at this course in Unreal Learning. It does an appearing/disappearing opening title that's rendered in-engine.
https://www.unrealengine.com/en-US/onlinelearning-courses/independent-filmmaking-with-unreal-engine

Unreal Engine
Learn how to use Unreal Engine for virtual production and post-production, bringing together all the pieces of your workflow into a unified environment to create a short film.
I had a similar problem with MegaScans geo, which was caused by flipped normals. Don't know if this would apply to your problem.
@hot sun I tried double sided and it didn't change. I'm just going to use Sequencer for now since everything shows up in those renders. Thanks
Makes sense. Just remember that the Sequencer Renderer is already deprecated and will be removed in a future version of UE4.
Shoot, okay. Well, I better hurry to either finish my project or find a solution. I just tried a handful of material settings, LOD changes, and command line functions but nothing changed.
pay 20 doller for a simple effect.. disappointing
I know, pretty unfortunate 😕 I'm still perplexed as to why they removed bokehDOF, but this is the second best thing we've got.
Hi guys am learning unreal sequencer can I know where is the best place to learn I have completed beginner with it but learn in depth
The two best places to visit are the official UE videos on YouTube covering sequencer and the courses available on the UE website. That content as well as the official documentation will give you the best foundation for learning the functionality of sequencer.
This is how I wish I started 🙂 I would’ve gotten as far as I am a lot sooner!
@barren lagoon tq you for the help I have gone through and learned many and created a trailer for a game but need to go deep
This was the trailer I made
By using sequencer
But now planning to do a sample short movie
Gotcha. Once you understand how sequencer works, the next step is learning cinematography! Anything you learn regarding cinematography can be applied to sequencer. Composition, all that jazz.
So, improving your cinematics in terms of visuals is something very, very broad 😉
Ya thanks alot my friend
Will see what all we got
You are intermediate or expert in sequencer
I’d say I’m intermediate for the most part. I know everything that I need to know in order to output quality renders, but I’ve still got lots to learn in terms of more “advanced” features of sequencer. More importantly, I want to improve my cinematography (color, lighting, composition).
Oooo that's good so where are you referring for learning
At the moment I’m eating up anything and everything about lighting in UE4. Lots of YouTube tutorials out there I’ve found.
I’ve started watching movies more as well for ideas/inspiration.
If you haven't read it already, this is one of the best books for learning how to shoot a film:
https://amzn.to/34aazZ3
Film Directing: Shot by Shot: Visualizing from Concept to Screen (Michael Wiese Productions) - Kindle edition by Katz, Steven. Download it once and read it on your Kindle device, PC, phones or tablets. Use features like bookmarks, note taking and highlighting while reading Film Directing: Shot by Shot: Visualizing from Concept to Screen (Michael...
guys how do I seperate cuts in the sequencer?
In addiiton to learning Sequencer, you should also learn about the Movie Render Queue. This is how you render out your movies from Unreal. In addition to Epic's courses, check out Will Faucher's YouTube channel. He has a couple of good videos about the MRQ.
If I try moving the scenes it just makines one of them longer to fill the gap
Have you tried dragging the shots downward so they create new tracks?
Also, here is Epic's guide:
https://docs.unrealengine.com/en-US/AnimatingObjects/Sequencer/HowTo/TracksCameraCut/index.html
Demonstrates how you can use multiple cameras with the Camera Cuts Track.
whats the correct way to make a cinamatic camera trigger a trigger box collision when the camera moves through the zone?
I don't think the doc covers it, do I need to create a second camera cut track because dragging seem to seperate the cuts
hmm I think my issue is I'm not using the master sequence to compose the level sequences so I'll try that
@barren stone new level sequence you can use the same camera or a new one
is it possible have a trigger in the level that when the cinecamera passes through it it activates a particle effect?
How do I render mp4 not AVI?
Hi there, hope this is the right channel.
Doing some work in the sequencer. I have this project that is 2250 frames long (It's for a school project, teacher said project has to be that long).
I am trying to use the sequencer to set up some choreography of sorts where a blueprint camera goes through the scene. Teacher says I have to set up a series of event triggers within the sequencer where it will capture an image every 10 frames per second.
It seems a little ridiculous to have to set up multiple event triggers every 10 frames in the sequencer, is there a way I can set up one 'Master' event trigger and have it control the image capturing? I would prefer to not have to put in 200+different triggers, just to get the results that I want.

Unfortunately MP4 isn't an option. I would always recommend rendering in PNG unless you simply don't have enough space.
Hi guys. For mattes and AOVs any reason why you might still use Sequencer? Or is MovieRenderQueue always the preferred option?
You could create FFmpeg plugin for the engine, but it won't worth the hassle anyway.
Is your teacher really requires you to do it in Blueprint? Because you could've just use the PNG outputs of the Sequencer export and get the important frames out of them.
how do you switch between totally different lighting scenarios? do you store every scenario in a map?
With Precomputed Lighting Scenarios you can have multiple lighting setups for a single level using the same geometry.
yeah hes requiring me to do it in blueprint
so, question. I found this tutorial on how to use sequencer and stuff but I'm trying to do a cinematic that is bound to my player controller so it runs every time they respawn. anybody able to give me a hand or point me in the right direction?
can u not use use character controllers in sequencer ?
That's very odd kind of assignment.
You could technically do it, but requires C++ code to get it done procedurally, and probing through the engine source code aren't easy.
when i render a movie with the sequencer, i dont get the perspective of the camera but of the player
how can i get the perspective of the camera?
Make sure your camera is assigned in the Camera Cuts track
He mentioned that I could set something up with event keyframes and use some of those nodes within the blueprint function to script it. I have no idea how to use it though and trying to figure this out is a nightmare
i have keyframes set up for every 10 frames in the composition now
Says that Target needs a connection but idk what to link it back to

"Make sure to include appropriate extension in your file path! Use .bmp, .png, or .jpg" (I specified the filepath and put .jpg)
i have a really bad quality, aliased output with sequencer.. what is the best anti aliasing method? im using msaa right now.. or is there a bad default setting of the sequencer?
The best quality is to use "none" and set samples, depending if you need motion blur or not, but 6x6 or 8x8 is a good start !
i dont need motion blur
so use 16 24 or 32 samples
no anti aliasing?
yes no antialiad

if you don't need motion blur, use no temporal sample count and crank up the spacial ones
cool thank you i try this now
@tough narwhal where can i find the render settings?
i disabled anti aliasing now in the whole project
can i do it only for the rendering?
no no
it's in the movie render queue
you need to enable the plugin
juste use google and "UE4 movie render queue"
you can render a still fram if needed
ok i found it. are these the right settings @tough narwhal


i have an rtx3090 and 64gb of ram
with the sequencer i can render the scene, not with the movie render queue
is there something i can do?

@tough narwhal @plucky goblet The official documentation for MRQ states that it’s recommended you set the AA to “none” once you go above 8 temporal sample counts. 8 or less you should continue using TAA. I had issues in my renders with having no AA and 8 sample counts.
no you missunderstood
Also @plucky goblet check this video out.

If you've ever had your renders crashing, here are a bunch of solutions to that problem! This is an issue we've all struggled with at some point, and here I discuss a few things you can tweak to get your frames out when you need them.
Timestamps:
00:00 - Intro
00:40 - Let's begin!
05:14 - Useful Tip
06:09 - Recap
you just can't use TAA and temporal sample
but just leave what you put 8x1 is good for fixed images
is it possible that the rendering takes only lod0 for the meshes?
and don't use the "sequencer render" use render queue of course
yes use the game settings

for your crashes i don't know, it can depend of so many parameters
I’m just going off what’s stated here 🙂

Reference guide for High-Quality Media Export UI and settings.
I’ve personally had issues with no AA and 8 sample counts so I guess your mileage may vary.
The render won’t automatically do that unless you tell it to. I recommend checking out the video I linked you. Could solve your issue!
cool i enabled texture streaming and disabled useLODZero
now it works!
thank you!
its the sad truth 😦 was happening to me a lot, now it's not, definitely try and update things, if you run display stuff, like BenQ displaypilot for example, make sure that stuff is closed in the background
it works now with virtual streaming and lodZero disabled
but another question: why is the output only jpeg and not avi?
do i have to stitch the images together?
oh I didn't read your context, that crash can happen outside of sequencer as well.
the best way to get renders out of unreal, is to render to PNG and stitch them together in a video editor of some kind
I use the adobe creative cloud (very worth it especially when the yearly sub goes on sale) but you can do the same thing with blenders video editor
IIRC (take with grain of salt) I think you can't render to avi with movie render queue, render to AVI has a history of not working the best
UE4 doesn't render directly to MP4. so you're going to have to convert. If you don't like wrangling a huge folder of PNGs, use Movie Render Queue to render to Apple ProRes and then use the free version of DaVinci Resolve to convert to MP4.
Sorry if this has already been asked here, but..
Using Movie Render Queue, how can I render out ONLY a stencil layer (which is the only one I want, it outputs my alpha channel), and not have to deal with the double output of the full view without the alpha?
Have you looked at this video from Will Faucher?

Stencil Layers are a fantastic addition and a worthy competitor/replacement for Object IDs/Cryptomatte (at least in its current state).
Links:
New Instagram:
https://www.instagram.com/williamfaucher.vfx/
Twitch Stream where Epic states their render layers will never be perfect:
https://www.twitch.tv/videos/882486232
(see 02:38:21 mark specific...
Awesome, thanks man!
on my camera everything works except aperture. I think the background should be blurry when i have sth like an aperture of 1.2
but its all sharp, also in the background
someone knows what could be the problem?
Make sure you're piloting your cinematic camera actor through the viewport, and change the Manual Focus Distance to a very small number to focus on something close to the camera. The MFD defaults to something like 100k. Try setting it to 75. Not 75k, just 75.
@hot sun really appreciate you buddy helping alot
Hey folks, i have troubles with USD format import. It looses the normals from some areas on the mesh (becomes complete black).
Does any one faced the same problem? Any clues on how to fix this?

Have you tried setting the black materials to double-sided?
There's no black materials assigned on the model. There' no normals on thouse black shaded faces

Same model imported with USD and FBX format.

hi there, i gonna pack my GAme. But i have 2 Videos, they work in the Game... how much fps can they have? i have them set to 25
My sequence keeps rendering to 30s instead of 15s and I get spammed with Time Dilation was used but output format does not use relative time, forcing relative numbers. in the message log. I rendered a 30s sequence in this project previously using a particular level; I copied that level & replaced the old 30s sequence with a new 15s sequence. Here's the sequencer panel & my render settings. Anyone know what's up?

(sorry that was the wrong picture, this is the sequencer panel with render settings)

What program can I use for putting an image sequence together?
Sony vegas isn't really working out for me with this
If you have Adobe CC, After Effects is very good at this. DaVinciResolve is a good free solution.
Kdenlive also worked, but super wonky.
The images won't go on the timeline
it will freeze up when I drag to it then after about 10 minutes it unfreezes and nothing happens
about 4 minutes of video

You need to import the image sequence as a clip. You use the import command and find the PNG numbered 000 and when you click once on it, the import dialogue will show you a bunch of options. You import As Footage and tick the box marked "Make Composition" then import. It will import all the PNGs in the sequence as single clip, and create a comp containing the clip. You should check in the project panel to make sure the PNG clip is set at the correct frames per second. If it isn't, you need to click once on the clip and use Interpret Footage to set the correct FPS. You will also need to make a new comp with the correct FPS.
for davinci right?
No After Effects -- I misunderstood. Sorry.
In Resolve, you need to go to the Media Page, navigate to the folder containing your PNGs and resolve should turn them into a single clip automatically. You might have to wait a bit for it to import into the Media page because your clip is really long. Mostly image sequences are only a few seconds long.
The images just kind of import in to there all as separate images instead of a single clip
but will try again
these are just some of the frames but yeah it's not being imported as a single clip
oh nevermind I got it
For some reason the sequence seems to be in slow motion in the video editor
and now the duration is this

I'm not sure what program you're using, but in Premiere, the default FPS after import is lower than what I need it to be, so I need to interpret it and set it to the FPS I rendered it out as in the engine.
It's all good I got it all fixed up
Nice.
Thanks
hi experts,
I'm new to unreal and currently creating this environment for a cinematic render.
I'm not sure what happened but i was getting pretty sweet GI before, and now I'm not getting it anymore even though skylight is turned on and the GI samples /bounces are all high.
my direction light is set to movable. earlier it was static (i was getting light leaks when it was static)

I'd really appreciate some help on what steps i could possible take to make the light similar to the earlier render
Use Screen Space GI, and since it's an outdoor scene, use Light Propagation Volume as well.
thank you, i will check these.
Anyone outputting AOVS from UE using MovieRenderQueue?
Other than William Faucher's video can't seem to find more in depth info.
https://youtu.be/ova8s1H-mUI
For instance other than AO, Motion Vectors, Depth, Normals I can't seem to find the appropriate post process materials for all the other default passes.

In this video I'll be showing you guys how to render out all the render passes available in Sequencer, but this time in the Movie Render Queue. It is not an intuitive way of adding them, it's not obvious, and you really have to know how. Here's how.
For those of you looking for how to render AOV's look no further!
Relevant links:
My previous v...
Evening! Does anyone know if there's a way to move a objects base position in a sequence and let unreal calculate the offset to all the keys?
Basically i had camera at position 1, made a whole cinematic. Stuff in the level changed so i need to move the whole thing to another location but the same relative changes inside the sequence.
Hello! Can anyone here help our project involving a sequencer and a big tiled map of landscape? Would really appreciate it!
Why is it literally impossible to disable ai perception within a level sequencer?
Have you tried disabling the component using events triggered in the sequencer track?

You could try attaching the camera to an invisible mesh (like a cube) with all your keyframes intact, then move the location of the cube.
Please describe the nature of your problem more specifically. It makes it easier to tell how to help.
my foliage is glowing under shade when using raytracing GI.
both skylight and directional light are movable so nothing is baked. grass looks fine when I turn off GI.
is there any way to fix this issue in raytracing? I have increase the samples per pixel to 32. Tried both brute force and FG. still the same issue.
Indirect lighting intensity: 1.5
Type: FG
Max bounces: 3
Samples per pixel: 32

turning off raytraced GI

I'd appreciate help from you awesome folks. This is the last fix and then i can finally render this 🙂
Hello guys, does anyone know how to activate multigpu use in the editor. I assumed it was a new feature for 4.26, but the only place ive seen possible access to it is through console variables, but when i try to activate it there, i get a message saying its "read only" . Please can someone advise me on the best way to go about this.

Not yet, though I did find a work around using a blocking volume.
Still, I think it’s pretty stupid that you can’t just easily disable it. :/
anyone who knows how to fix camera popping under ground when rendering?
Have you had a look at your curves?
if it's during a render only I highly doubt it has to do with that @stable bloom
take a look at this @left yarrow https://www.youtube.com/watch?v=lXcerW59onA

This issue has been plaguing me for literally years. Fix that weird first frame in Sequencer/Movie Render Queue with a fix so easy it's ridiculous.
Thank you so much for watching!
Timestamps:
00:00 - Intro
00:50 - What exactly the issue is, and how to fix
04:04 - Outro and Thanks
is there a way to add movement to a stationary camera? I have a camera that came from an asset pack and i'd like to add movement to it so i can walk around the scene
I'm thinking maybe something like this, then just using the camera from my asset pack: https://docs.unrealengine.com/en-US/InteractiveExperiences/HowTo/CharacterMovement/index.html
A How To Guide for Setting Up a Character with Character Movement in Unreal Engine 4.
Hey guys, this has probably been asked a lot but here we go. Is it possible to bake out a camera animation with a rail rig? I want to be able to export it from unreal to maya but I want the camera animation baked with the rail rig. thanks for your help 😀
I would like to generate a vr video for the quest2. Does someone have the link of a tutorial?
Hi Alfred, I have the same issue. Couldn't find an answer anywhere and ended up here. Did you find an answer to this problem?
Hey everyone, I have an issue with the sequencer where I try to capture a video of a 35km landscape I exported from world machine into unreal using world composition. When I record the video from far away the landscape tiles don’t appear although they do appear in the editor. Don’t know what to do I tried everything. If someone can help I’m willing to pay for it. Thanks
Hey friendos.
I set up a Level Blueprint that spawns a few objects, materials and animations. It's fine as an interactive scene when I play the level.
But I also make a sequencer, add an animated camera and render that out as a prerender sequence.
How can I add the Level Blueprint spawned objects to my sequencer? Currently I add and delete objects depending on whether I'm prerendering or not, mediocre!
Consider using a dummy character that moves along with the camera, and make sure you have the landscape LOD setup.
(And no, Simplygon is no longer required since 4.22)
thanks 🙂
When spawnable actors are attached together and the detach themselves after the sequence is played, Whats the best way to attach spwanable actors?
Sequence "keep state" is not working, any help?
When I’m using UnRemote on my iOS device, i can see the viewer on its screen, it controls the virtual camera but it’s super laggy and jumps frames. Anyone know what could be causing it?
Hii guys..I am having some issue with Rendering the movie itself.
I made sequences, the camerawork works fine. but when i render the sequence.
i only see an image of camera placed during the first shot.
please help! 🙂 🙂
You may have to change the output setting
I did.well some of them.. output format to Avi.. and now, my cine camera is falling off the landscape..like whaat
Check your camera animation then
Or render it out with frames on jpeg output setting
its a fairly long render.. :/
animations work just fine in the sequencer too
Try checking your frames in output setting?
yes sir!
😅
I am no sir 🤣
just in case anyone else faces this issue, I solved it by using FXAA antialiasing and high temporal samples instead of TXAA.
and using final gather for GI.
in sequencer when dragging in a control rig it seems to hide all other tracks:

clear shows everything again; my question is how do you normally hide other tracks like that? what is that thing called, a filter or something?
seems decoupled from search tracks box
ah it is coming from filters, when you add in a control rig it filters to control rigs only in general

Movie render queue won't render all shots from the master seuqencer. I need help

Matinee was deprecated as of 4.24. You should use Sequencer. If you have existing matinees, you can convert them to Sequencer.
https://www.artstation.com/artwork/lxvWxo hi guys can anyone tell me how to do a timelapse camera like he did or can show me yt tutorial? (scroll to the bottom)

ArtStation
Here's a Megascans assembly pack that I built and set dressed the environment for the new 'Mega Assembly' workflow. I built and optimized the pipeline to be game ready and drag and drop ready into your game. With this method, you can easily build an environment like this in literal minutes.
For this pack I specifically built the pipeline, creat...
Got it thanks mate @manic oxide
Hey guys I have this problem with an artifact in the sky, does anyone know what it can be? 😭


It only happens when I render
If it's the first or last frame, and your rendering in MRQ from the Sequencer, just stretch your camera cut track beyond the in and out points of your work area. it's a known bug.
This issue has been plaguing me for literally years. Fix that weird first frame in Sequencer/Movie Render Queue with a fix so easy it's ridiculous.
Thank you so much for watching!
Timestamps:
00:00 - Intro
00:50 - What exactly the issue is, and how to fix
04:04 - Outro and Thanks
OHHHHHHHHHHHHHH THXS MIKE
I was already thinking that it was such a specific error that surely no one would know what is going on
Well now I am using MRQ, in the preview it seems that there are no artifacts ... but I get this error and only 1 frame is rendered

Check your output settings in Movie Render Queue . You might have deleted your frame number variable. That would result in each frame having the same name and overwriting the previous frame.
yeah, I just rendered it with the default name that puts unreal and it was solved
Although it looks with a lot of motion blur, can I remove it?
It should be something like {sequence_name}.{frame_number}
There are several ways to change motion blur. You should check the Unreal docs.
motion blur is going to be controlled by your post process volume or the motion blur value in your camera. if you’re on 4.25 then you need to enable the “camera” node inside of the MRQ in order to set the shutter angle, which will affect motion blur.
How can I make cinematics WITHOUT the sequencer? So basically what I want is for each character to talk, and when they start talking, the camera moves to look at them in a specific angle, do I need more then one camera, or will just one do?
set view target with blend
depending on what you are looking for, you could also lerp between the current position and a provided offset. you could combine this with "get float value" (using curves) to achieve smoother movement. good for straight movements. (blueprint timeline would give you good control over speed...)
General lighting question. Has anyone had to light a stadium environment interior? How did you approach it?ie what types of lights/lighting, was a combination of baked and realtime raytracing used, etc? Any references in the marketplace i could check out?
in my cine camera actor i have the option to constrain to aspect ratio but no option to set an aspect ratio, ive seen that option online

anyone know whats up with that?
@errant pendant It's in the section above those controls.

Shadow in unreal looks awesome

But in post its screwd up, any idea why ?

I tried the following - render with AO, on of -not working, textures streaming o/ off - not working,
Turning off the cinematic scalability in sequncer render settings helped....thank you!
How does making cinematics in unreal compare to others like blender?
IMHO, using real-time rendering is a game-changer. Being able to experiment and iterate immediately without waiting to render or using preview/approximate renders makes an amazing difference. Unreal 5 takes it to an entirely different level.
After using blender for a while I wanted to try a game engine for cinematics cause of my pc limitations and I have to use render farms. Is there like a run down of what you can do in unreal?
In terms of cinematics production
Also can unreal 5 as of right now be able to make cinematics? Cause I really want to use it for one of my projects!
I am working on a cinematic in Unreal 5, Will post it soon
I didnt post full screen shot so that i dont give away anything!
@elder current @hot sun Its literally my next topic of my video, i think u will like it!
personally, i have had lots of issues with strange artifacts and whatnot when setting my temporal sample count to anything higher than 8 and setting my AA to “none” in the MRQ, though i am on 4.25 which could be the cause. perhaps this could lead you on the right track?
ideally, you’re gonna want to use cinematic scalability. i’d avoid not using it if possible.
I got a temporray solution which was turning off the cinematc scalibilty and fixing some issues in post, but it comes up again when the scene is moving
and yes i am using ue5
ah ue5? man that’s a separate beast entirely, not sure how i can help you there 😅
just bear in mind that 5 isn’t production ready, so you’re bound to run into some issues here and there 🙂
hahah, the beast is OP, but kind of unknown in some places...but soon we will hunt those down too
^^^
UE5 is far from production ready atleast 2 years i think, but if u know what ur doing, u can take those risks!
You can do just about anything in Unreal, because in addition to having a broad set of tools, you can also import FBX and Alembic. Many pro shops (including Epic) animate in Maya and do VFX in Houdini and then just use Unreal as a staging area and a real-time rendering engine. Re UE5, it seems capable of everything you'd need for cinematics, but it is inherently unstable. Epic has said explicitly that it is expected to eat your projects. It is not ready for production. It's like shooting a music video on a construction site that's built halfway over a cliff. Looks cool, but not reliable.
There are folks inside of Epic that have been using UE5 for production, but it's dicey. They are saying next spring it will be production ready. Of course, there will still be little kinks in the system.
FWIW, I've had very good luck with basic vanilla temporal and AA settings, but rendering in Movie Render Queue to PNGs 4x resolution. (1920:1080 x 4 = 7680:4320) Then I take the PNG sequence into After Effects and downsample them back to 1920:1080. Adobe's downsampling algs are much better than Unreal's. The results are super clean, and it kills all the noise and AA chatter.
Thanks for the help!
I'll check it out! Whats the channel name?
@elder current @hot sun Just Done with the upload - Here is the reddit link - https://www.reddit.com/r/unrealengine/comments/np4or7/the_unreal_blender_a_cinematic_ad_made_in_unreal

reddit
0 votes and 0 comments so far on Reddit
Youtube link - https://www.youtube.com/watch?v=mZK_RfJQFp4

A Cinematic ad rendered in real-time in Unreal Engine 5!
A weekend project!
Blender helped in re-modeling, optimizing, and texturing the source model which was acquired for free from the internet.
CC and Text was done in After effects
Thank you all!
It was really nice! Lumen glass and nanite blades were a nice touch lol
hehe thnx
Did Nanite finally support translucency?
Nope, Translucent materials are not yet supported for Lumen Reflections. + I am not using Nanite here.
Guys I need help fast. Im using an animation blueprint in sequencer to render with movie render queue. This was working fine up until today where movie render queue is no longer playing the animation blueprint and now it is just using the frame that sequencer was last set to in the editor. please help.
To be morepreicse my animation blueprint slot node is working in the editor but when i go to render with either sequencer or movie render queue the slot node does not do anything and it just uses the last sequencer frame that was in the editor
I'm a newb in UE. Can someone tell me how to render a scene? When I try to render this UE5 demo sequence I made It always renders a camera I didn't use in the sequence at all. Any idea why?

what
you are real ultimate immersion
I am your fanboy i love your resourcepack 😄
sorry for fanboying here
Hi. Is there an option to animate the toggle visibility of a mesh through sequencer through keyframes throughout the timeline?
I right-clicked a track and clicked "Convert to spawnable". It works super cool, but I CANNOT SAVE MY SEQUENCER if I do that.
It says:
"
Can't save ../../../../../3D CSGO/ForUE5Port 5.0/Content/Inferno-1-awpSeq.uasset: Graph is linked to object SceneComponent /Game/Inferno.Inferno:PersistentLevel.Actor_0.DefaultSceneRoot (AttachParent) in external map
"
Graph is linked to object in external map? What does it mean? It only occurs when I convert a track to spawnable.
lol I never thought I could find anyone here that knows what I do. Appreciate it man!
Hi everyone! I want to synchronize a recorded video file (with included timecode track) with other recorded data (e.g. fbx file with timecoded events like livelink capture for camera movement) to replay a recorded scenario in sequencer, without manually moving the video track to the frame-correct start position. Has anyone done that before? Or is there a way to simulate/replay aja/blackmagic input from file? I'd appreciate any hints, ideas, thoughts 🙂
(Disclaimer: I have also posted this in virtual-production, as I don't know where this belongs best)
Additional info: I have skimmed through UE doc and various youtube videos, all I can find is using live input sources. Another thought: would it be suitable to derive a mediaplayer which is also a timecode provider? Or would it be suitable to write a sequencer import format to position the video or a trigger on a track according to embedded TC? Any thoughts on this?
Thanks a lot in advance, people! 🙂
Hey all - does anyone know why this section in the cineCamera is gone if placed inside a BP? It's there if placed inside the world directly.

Have you made sure that the camera icon in your camera cut track is highlighted? Are you using Movie Render Queue to render?
Which one do you mean?
If This camera icon isn't highlighted, your render will turn out wrong.

When I play a level sequence ingame, is it possible to see the currently played sequence and time in the Sequence Window?
can anyone help me with this? I got the problem with Level Sequence nested in another. Camera Cuts unlinked themselves somehow.

This is the original Level Sequence

You might want to look for Shots instead.
@quick portal The first screenshot is when I went inside the Shots (double-click the Shots)
all Camera Cuts are unlinked/unbinded I don't know, it seems happen to me when I update to 4.26
Hi there, I have a big problem when exporting my audio out of the sequencer. It crackles and pops a lot, like if it has some audio drops. Any fix for that?
You can hear it at the beginning and at the end
Found it! I had an audio track, the dark background ambiance, that was way too high, it had a volume of 5. It caused the levels to clamp and caused this crackling sound when exporting.
Also typically people added the audio in post, not from in-engine.
well, I don't like that option. X)
Sound cues, attenuation, sound occlusion, and runtime procedural sounds are so simple and flexible to use. I can build some reusable systems in blueprint, and use it for multiple projects. I can use anim notifiers and duplicate the anim without thinking about redoing the sound again. I see that epic cares about the sound, they always tried to improve their audio engine and the audio workflow in general in Unreal. So I believe it will eventually get more stable for exporting.
Or, you can replay the sequence and record whatever's going on with software like Audacity. Unless you want to implement Rockstar Editor like runtime exporter. (Of which many GTA 5 machinima creators use extensions that disable the audio exports anyway)
does anyone know if its possible to exlude objects/materials from exposure and tonemapping?
If the update caused this, try reconnecting using the Advanced menu under the wrench/spanner icon at the top of the sequencer. There's a menu item that's called "Fix Actor References" that might fix that.
Hi guys! Can anyone tell me how can i make my characters execute events inside them while recording a sequence with a cinecamera ? I mean my characters have some events that i want them to execute while i use the sequencer but for some reason my characters are frozen and they don't even execute any events inside them
Have you tried using an event track in the sequencer to trigger them?
No but how do i trigger the events inside the character_BP?
Hey guys, I'm having an issue with blending back into my gameplay camera from my cinematics. Blending generally seems to work okay, I've even gotten blending to work on dynamically positioned stuff through childing cameras. However I've noticed I get a VERY choppy blend to a dynamically positioned gameplay camera if I position it by setting it's position via tick. How might I get around something like this?

hey @hot sun, can you think of any reasons why the sequencer doesn’t simply always auto size the shot track with the camera cut track inside it? like, why would i ever want the two tracks to be different lengths? having to right click and auto size my shot track every single time i fiddle with the camera cut track within it is just a hassle.
No idea. You should definitely go to the Epic site and give them some feedback. That's how they know what to fix.
Finally I made a first render https://www.youtube.com/watch?v=SPc1GPb1wjY

Is it possible to make camera slide with constant speed from start to finish? Not like default where it has a slight acceleration at start and slight decay at the end.
In the curve editor, set the key interpolation to linear, you won't get an ease-in/ease-out effect that way.
Anybody know if it's possible to set key frames during playback? As in, I hit play, I move a cube around, and as I do, key frames get set on each frame? Like a puppeteering functionality
Linear interpolation will do the job on a straight move. If you want to have constant speed on a curved camera move, drop a spline into a blueprint, make the path for the camera using the spline, and then link the camera to the spline using a path track in the sequencer. The path track moves the camera down the spline with constant speed. If you want to do fancier moves, there's a slightly more advanced way to configure this -- I'll be happy to explain if it's of interest.
Anybody know if it's possible to set key frames during playback?
Have you tried using the autokey in the sequencer for this?
I have, it doesn't seem to set key frames during playback
Ah, found what I was looking for, Take Recording or Sequence Recording :)
Sorry for the newbie question but as I play a sequence, none of the morph targets tracked work, unless I go and click Play Level. Is this normal behavior or there is actually a way to avoid playing the level and just have the sequencer command morph targets on its own? Thanks
what the heck is the trick to adding a value in between these keyframes and changing it and having the transition adjust accordingly.

Is it a rotator?
Its just the Z axis on my camera. I ended up redoing it all lol
Did you look at the Curve editor? Sometimes the curves go a little whacky when you add a value between two keys.
thanks for the heads up that'll be useful next time 😄
first time building a scene and creating a short movie, any tips would be appreciated. i know about the books being misplaced lol
Anyone able to go over playing .mp4's for cut scenes while exporting the projects to PS4/xbox/pc/switch? Like what formats do we need, or is there settings within unreal to have one or multiple formats? Thanks in advance
is there a way to smoothly rotate the camera in the viewport when you're piloting it?
anytime i rotate it, it's very snappy (very obvious with high focal lengths)
I highly recommend the 3dConnexion Space Mouse It's about $150 at Amazon, and it gives you amazing control over the viewport.

SpaceMouse Wireless offers you the functionality to navigate efficiently in 3D applications anywhere. Shop safely on our UK online store.

A 3D Connexion SpaceMouse 3D mouse can provide more control over your camera while 3D modeling. While it's not something I use actively while modeling, I love using it to explore my model and find perspectives not easily obtained using a traditional mouse.
If you're interested in purchasing one, the SpaceMouse Compact is an updated version of ...
hefty price tag! i'll uh... look into it 😅
quick question, you wouldn't happen to know of a simple way to disable camera shakes would you?
anytime i try rotating the camera, the camera shake in sequencer screws with the rotation
so i have to right click, deactivate all the time
bit of a pain
I'm tracking about a dozen metahumans (all forced set to LOD7 though) and giving them animations in sequencer. Without playing the sequence i get arnd 40FPS but playing the sequence i get an average of 10. Anyone know how to play sequence smoothly? Specs RTX 3090, 5950X
I usually do all the camera blocking without camera shake and then add it last. (FWIW, I only do cinematics; no game design.)
haha yep, same here mate. and yeah, i think i’m gonna start doing that in the future.
Hi guys
Those of you who switched to ue sequencer from maya sequencer workflows, is there any training you would recommend to learn it as fast as possible?
Watch "Your First Hour In Sequencer" in the Unreal Learning Center. There are couple other videos about sequencer that are pretty good as well, but the "1st Hour" gives you a good overview. After that, go to Will Faucher's YouTube channel and watch his videos about Sequencer and Movie Render Queue.
thanks Mike
yeah, literally all you need for a fundamental understanding of sequencer is the official videos in the learning hub and on youtube
imo, sequencer is pretty easy, what's difficult is being a great cinematic producer
Hey everyone, A looping animation asset in my scene stops in the sequence render!
What can I do?
And it seems they only stop in hq renders with AA. I know it sounds weird but yeah
Set the offending skelmesh animation mode to custom mode, and play the anim sequence in Sequencer instead.
Interesting
I'm not sure if this is the best place to post this (may be more appropriate for cpp), but...
I've been trying to find a way to record/render/capture videos of the level, at runtime.
I've ended up at UMovieSceneCapture, which sounds promising but I've been unable to actually capture anything.
The documentation essentially amounts to a list of variables and functions, with very little explanation as to what they do, how to use them, or in what order.
Am I correct in thinking that UMovieSceneCapture can be used to create videos (or, at least, a sequence of images) at runtime (I've fallen for this trap before, with the Take Recorder)?
If not, is there another (ideally simpler) alternative, that would achieve the same goal?
Baring in mind that it needs to be executable in runtime, so just clicking the clapperboard icon in the Sequencer and then Capture Movie isn't an option, although if anyone knows a way to essentially do this in runtime, perhaps from a blueprint, that'd be great.
If I am correct about the intended function of UMovieSceneCapture, would anybody be able to direct me to a more comprehensive guide/tutorial on how to use it properly?
Thanks
I haven't tested things for it, but do want to implement such feature in the future.
I heard Movie Render Queue has an option to render out videos in runtime, though I don't know exactly the details.
Yeah, I tried the Render Queue previously, but I couldn't get the runtime implementation to run without crashing.
The tutorial for that one is a little better (in that there is one), but it still skips several crucial details
Can someone tell me how can i blend animation from only one bone to the rest of the animation in sequencer?
I basically want to use animation from body and separated animation
Hi guys. Feel like a noob sometimes with lighting.
I need my Skyight to be able to alter ambient lighting in an interior scene at runtime. Using fully baked lighting and my actors are all Static. My Skylight is Stationary.
After baking my lightmaps when I adjust either the Intensity or Indirect Lighting Intensity on my Skylight nothing happens.
What am I missing?
Movie render Queue --- When I choose a level sequence to render out some layers (first time trying this) the camera animation does not come along with it. Has anyone else experienced this problem?
This will explain the movie render queue to you - https://www.youtube.com/watch?v=QUyznLlnchA
Stencil Layers are a fantastic addition and a worthy competitor/replacement for Object IDs/Cryptomatte (at least in its current state).
Links:
New Instagram:
https://www.instagram.com/williamfaucher.vfx/
Twitch Stream where Epic states their render layers will never be perfect:
https://www.twitch.tv/videos/882486232
(see 02:38:21 mark specific...
Uhh, okay? I already do things with Movie Render Queue in editor, and watched Will Faucher's videos, but uh, thanks?
Oh sorry I just skimmed that comment I mistakenly thought you were asking for help with that.
Hi all, new to Sequencer here. Just wondering is it possible to change values in the Level Sequence at Runtime? Thanks!
I want to ask everyone something about sequencer in ue4.
How do i activate this event inside the third person character blueprint from the sequencer? I mean i want this to activate from the sequencer but i dont know how to do it

Have you tried adding an Event Track to the character in the Sequencer?
This lesson in the Dynamic Audio course is the only Unreal Learning course I know of that explains using the Event Track in Sequencer:
https://learn.unrealengine.com/course/3551793/module/7240850
Yes
Thanks Mike I was also looking for something to explain the Event track.
holy shit Mike thank you. i was shocked to see that there is literally zero documentation for the event track. gonna watch that ASAP.
You're welcome. The video makes it pretty clear how to use the Event Track, even though there are a few steps to make it work.
Hi everyone. I'm trying to render using the Movie Render Queue. I have a scene with some water jet particles (found the particles randomly, not sure how they are created), and when rendering with the MRQ, it is not rendering the particles.


Top is screenshot of the viewport, bottom is render
Do the particles show up in Sequencer Preview, or do you have to press the Play button to see them?
How would I add a camera shake to a cine camera actor like in this video? https://www.youtube.com/watch?v=ooT-kb12s18&lc=UgyeHXmLxmqRb16hToZ4AaABAg.9O8YT4Bu_E39O8c2qYRPyr&ab_channel=MelhemSfeirMelhemSfeir

Tech demo showing billions of triangles at zero cost, with Nanite and Lumen, on RTX 3070, in UE5.
Using the Nordic Coastal assets from Megascans, with gravity simulation for some rocks.
Follow me on Instagram: https://www.instagram.com/parall.peak/
Either use the camera shake track in the Sequencer, or buy the realistic camera shake plugin in the marketplace.
could of course also set up a virtual camera if you have the equipment
personally i'm just using cubic keyframes + camera shake BPs
i did purchase the realistic cam shake plugin from the marketplace however, gonna get around to using it at some point
Why do I get seams like that after Rendering with multiple samples in Movie Render Queue?

Do you have auto exposure enabled?
@quick portal its disabled in project settings, Post Process Volume is disabled, In CineCamera settings it's set to manual
It's hard to tell from the blurry image, but what about your screen percentage?
@quick portal not sure where to find the current settings. Now i've set r.screenpercentage to 100 and checked the box in CineCamera and left it at 100. Still having same seams
What about your scalability settings in the editor?
all set to cinematic
If I render with only 1 sample there are no seams, but the resulting image is pretty bad
Quick question: in the level sequencer, is it possible to see the timeline in motion when playing in editor?
Is there a simple way to align an object to it's movement direction in the sequencer? E.g. if im moving from 0.0.0 to 0.0.10 rotate it by x- degrees upwards?
Hi, I'm trying to export my sequencer camera to maya so I can track a null in After Effects. My problem is that my camera in unreal is using Look at function, and those rotations don't get baked on export automatically so that makes it impossible to track an object in my case, does anybody know a way around this?
What is your tile count set to under the high resolution render movie queue settings?

I rendered without it, then tried with 10 tiles
same result
always have some tearing
tried with 4-8 tiles, nothing helps. Its not really visible, but if u zoom in you can see it
but we need it for AI training, so artifacts are not acceptable
And you said when you put the temporal sample count to 1, they were gone but the image was obviously bad.
the one aboth temporal count too
whenever i have more than 1 sample i get this
rendering in 1920x1080
tried super sampling
I don't know if this will help in your case, but I found some problems are solved by using default render settings, using Movie Render Queue rendering to PNG at 4x size ( 7680 x 4200) then take it into Adobe After Effects and render down to MP4 at 25% size. Some artifacts don't show up at 4x, and Adobe's subsampling is much better than Unreal's internal system. YMMV.
Does anyone know, why character in sequencer has proper rotation but when I render out a video hes rotated 180 degrees and runs backwards? I used sequence recorder to capture data.
Been trying to fix it all day.
something to bear in mind is that when the sequencer/MRQ renders, the engine is essentially going into PIE. perhaps you have something weird set up with your spawns when you go into PIE? something to look into maybe, hopefully someone here has a more in-depth solution :/ @agile hornet
@barren lagoon i ended up rotating character inside blueprint, which is a hacky fix, but the only thing i could think of
😦
Hi all.
Anyone in here doing cinematic in UE5 up? I always wanted to make cinematic movies in unreal, and I'm looking for some advice on if i'm starting out the correct way.
Hello everybody. I'm trying hard to find any tutorial to help me creating a dynamic Crime Investigative and action story based Third Person game of in which the camera follows the player like seen in some TV Crime series where the cop is followed by another one whose bodycam becomes the point of view of the game in a sort documentary style but capable of switching view depending on the events, the scene and the situations, which can make the action more realistic and immersive. I've tried using the Third Person Story asset given for free this month but I didn't feel at my ease with that to do what I had in mind so I'm trying to achieve that o my own. Sorry for the long message. I hope somebody can give me any hint, like a suggested tutorial or even asset I should look at. Thanks in advance.
I forgot... the most important thing I was trying to figure out, at this point, is if I should stick with the normal Camera or if I should rather go for a Cine Camera component.
That sounds like similar to games made by Supermassive (Until Dawn / Dark Pictures Anthology) or Quantic Dream.
Perhaps you can check out those games to get a reference on how you would achieve it.
@quick portal I know only Quantic Dream from playing the old cult "Omicron - The Nomad Soul" 15 years ago . Anyway I just have my own idea based on the lots of crime movies and series I've seen in almost 40years, didn't mention all the details... the game itself is an hybrid between "Pink Panther", "The Party" and the "Columbo" series all mixed with most recent titles like "The Rookie". My issue is rather more from a technical point of view, since I'm rather new with the engine and gaming development in general, so I'm looking for anything that can help me to turn into reality my ideas. from that point of view.
What I've tried so far is using two Cine Cameras... placing one far from the player for a pure 3rd person large view and one placed closer to the player, like a second cop was right behind, for a 3rd person closer view but for some teason I got stuck in a 1st person view which is something I personally hate in games because causes headache and even nausea in me after a few minutes.
Hello, everybody, I'm working on an anim sequence using sequencer.
I spawn an actor in this sequence and play an animation on it.
However, the actor always flashes for a frame at the place where it gets spawned before its animation starts. (the animation is this actor walking toward its spawn location)
Has anyone else seen this issue before and if there's a fix to it? Thanks!
Have you checked the position of the skeleton on frame one? You might be able to drag it into position to fix it.
Hi, Has anyone been able to figure out ho to do lens distortion please?
Can someone point me to a tutorial that shows how to blend from one camera to another on sequencer?
Hello, anyone familiar with sequencer can tell me if there's a shortcut to show only tracks with keyframes on them? Similar how U works on After Effects.
Is there any way to record a sequencer take while playing the game?
@ripe swan Yeah i think this is possible! This might require some basic multiplayer setup if i remember correctly? You should find plenty of resource regarding gameplay capture with sequencer
So is it normal that the engine crashes if I try to cache a pose in the anim bp that plays a sequence animation in an animation slot before the cache happens?
I get this Crash reading:
Unhandled Exception: EXCEPTION_ACCESS_VIOLATION reading address 0xffffffffffffffff

Hmm interesting, I’ve had trouble finding any resources regarding this. I am trying to get it to work during play and in VR. Seems to be nothing for that.
Cant get keep state to work on a sequence. Thoughts?

The spawnalbe actor just disappears at the end of the sequence.
Anyone else have this issue before?
hi, can anyone help me with Sequencer? I made a camera sequence around a small level segment (testmap) and I exported then imported the camera sequence (only the camera flying route) to the main map (which also has that area from the testmap), but seems like there is no way to change position of the whole recorded camera sequence. It appears on the main level maybe 50meters away from the place I want it to be. I might be doing something wrong, but seems like I can not select the whole recorded sequence, just the individual keynotes. I hope there is s a way to select the whole camera sequence, and move it to the proper position
Hey! I wanted to create a fractured mesh in Houdini and then import it into UE4. Is the way to do that to export as a bunch of smaller meshes and then use the APEX destructible mesh plugin and then trigger through collision or is there another way to have more control? I am just looking at my options. I'd like to make a cinematic with a particle system destroying a building.
Hope this is the right section for this - Can you scale a camera shake that is currently playing between values?
Did anyone ever had this issue before: you record yourselfp laying with sequence recorder but and when you play it back - it's fine. But when you render out a video - rotations are not being output at all. Character completely ignores them and just runs backwards.
all the keyframes are there, they're just not being played at all
Hello there, i have 3 mp4 vids and i need to add them as intro, outro and middle cutscene in my level, does anyone would be able to help me with this one? im pretty new to unreal  🆘
🆘
Hey, i have a character where i want to record his facial animation truth livelink with the ue app. how can i record it? anyone has an idea or tutorial?
Try looking here:
https://tinyurl.com/UElivelink
DuckDuckGo. Privacy, Simplified.
Why is sequencer and Take Recorder so damn hard to work with? I record something in game and none of the properties carry over like when you spawn something or trigger a niagara effect in game it doesn't work in the Sequence you recorded....
There must be a better way to do this
is there a way to trigger an event in niagara through sequencer?
Yea, but I'd rather not do it manually... there is a lot of stuff I already do in code to trigger it and then face it in the right direction
Why would I want to do that all over again for a scene
I wish there was a better just record what I did and put it into a nice sequence for me
Matinee used to have gameplay recorder (and it's a reliable one).
Is that completely deprecated now?
We need an Epic dev in here to straighten some of this stuff out
lol i posted that without reading your previous message
well i want to be able to do it manually lol
but i guess setting up a blueprint for my prop probably would have been smarter
Well if take recorder worked worth a damn you could record it and modify it in sequencer
yeah it do be kinda busted tho
though i do like that you can add tracks for things modularly
Yea it has “some” upsides but generally pointless for existing gameplay recording
You can tell they haven’t put many resources into it
I don't think Take Recorder was intended to record gameplay in the first place 
But it does just that? What else is it for?
It converts your character bone movements into an animation to be played back and captures spawned things as well
It just doesnt track anything on those spawned actors properly. Niagara systems and material instance changes are extremely important and arent recorded
Its only bare bones
For starters: Take Recorder is categorised under Virtual Production, and has following description:
A suite of tools and interfaces designed for recording, reviewing, and playing back takes in a virtual production environment.
It was for virtual production, where a mocap actor could record themselves doing something and have the results printed into Sequencer.
Having the ability to record "gameplay" is a by-product of that intended virtual production use case, more than actually meant for recording gameplay.
Well it may not be advertised as such but there are features included into take recorder specifically for capturing real time gameplay spawning of actors and gameplay playback in general.
It’s just half way there. It’s like the features they offer let you capture certain changes but not others
BTW spawning actors also not limited to gameplay. One could spawn a cue marker or similar stuff in the recorded take.
I don’t think I’m understanding your point. Take recorder is meant for recording what happens when you press the play button
Call it gameplay or not that’s literally what it does
It’s meant to replace sequence recorder and it has the right start it’s just feature incomplete and buggy. I thought unreal would have an easier solution for creating cinematics from gameplay
If only Matt Hoffman were still here to answer 😦
I made a camera sequence around a small scene area (on a different level) and I exported then imported the camera sequence (without meshes, only the camera flying route) to the main map (which also has that area), but seems like there is no way to change position of the whole recorded camera sequence.
It appears on the main level maybe 50meters away from the place I want it to be. I might be doing something wrong, but seems like I can not select the whole recorded sequence, just the individual keynotes. Is there a way to select the whole camera sequence, and move it to the proper position?
@hidden osprey I belive you can attach the camera to a dummy and place it where you need. The position/rotation/scale will be relocated to the dummy position instead of world 0 so take that into account.
Is there a way to see the whole frame from the preview when rendering a movie? I only see a cropped part and it might be useful to monitor the whole thing in case of errors etc.
I'm troubleshooting lighting. After deleting all your lightmaps with
Force No Precomputed Lighting
and doing another bake you still have lighting contribution from your Volumetric Lightmap.
Is there a way to toggle this on and off, perhaps thru the command line?
Hello! I am new to Unreal Engine. I am an animation student working on a short animation in Unreal. I'm just having troubles rendering on Movie Render Queue.. I would like to render with a burn in but my issues are: if outputting with png it will only render 1/10th of the master sequence... when I try exr it renders all frames but without the burn in (even tho I have it enabled). Does anyone know what could be happening? I'm just trying to render so that I can work on an animatic in Davinci Resolve.
im trying to use pre and post infinity on a skeletal animation track in sequencer but it doesn't seem to do anything. Anyone have a solution?
just keeps joing back to rest pose
or does this only work with transforms and such?
Using 4.27 to render out several shots (680 frames) from Movie Render Queue.
Part way thru the rendering completely stops and either hangs the editor or the entire desktop forcing a reboot of my machine.
I have Task Manager open to monitor vram usage but that doesn't seem to be the issue. I see a Status of 'Not responding' for the editor with only 4% CPU utilization.
How can I troubleshoot this?
When rendering hangs in this fashion is there an error log somewhere?
Anyone know if it's possible to loop Sequence Camera Shakes? Trying to use one for subtle idle head movement for the players camera.
Have you tried rendering the burn-in on ProRes output? Resolve can read ProRes.
heya, does anyone know of strategies to select media files on my computer at runtime? ideally id be looking for resources on selecting the files in a file explorer, but id also appreciate ideas on doing it by replacing the files in content/movies
Hi, has anyone tried using take recorder to record Metahumans during gameplay? When I replay the sequence it looks completely deformed as if the origins or transforms were all off.
Hello All, I'm having an issue with the root motion in cutscenes, it look like it's not looping if I strech out one animation. I can fix it by creating few animations one after the other, but it's not the best solution. I must be doing something wrong
Looks like your animation is looping. What you probably want is for it to loop in place.
If you got open that animation there is a value called "Force Root Lock". If you tick this on the animation should loop in place. Then you can animate the transform in sequencer.

Yeah, but the idea was to use a rootmotion + loop to have it correctly.
It works if I paste the same clip few times, but it's not ideal
and forcing root look remove the root motion
would anyone happen to know of some method/hardware that would allow me to control the translation of a camera and its focal length simultaneously?
AFAIK, Unreal won't let you auto-loop root motion. The solution I was taught is to manually repeat the animations in the sequencer and offset the skeletons to match so the mesh switches skeletons without a blip. I found that if you take time with the first copy and get the root motion offset of the skeleton as perfect as possible, the subsequent copy of that animation will be in perfect registration as soon as you duplicate it in the sequencer.
https://cdn.discordapp.com/attachments/754088749700349984/835972582766936124/RootMotionSolved.gif

Thanks, this is what I ended up doing. But it feels kind of "hacky" 😄
Welcome to the Unreal Engine. 😆
in UE4.26, they mentionned the nonlinear animation, And I thought they fixed it
https://portal.productboard.com/epicgames/1-unreal-engine-public-roadmap/c/225-nonlinear-animation-using-sequencer-beta?utm_medium=social&utm_source=portal_share

A new toolset within Sequencer enables you to create, modify, join, and blend animation assets in order to quickly create new cinematic animations for virtual productions and games.
Features Include:
-
Blending root motion of skeletal animation sequences
-
Joint matching for better blending and placement
-
Skeleton animation preview for ...
Yes, but AFAIK, you still have to manually offset the root motion for the transitions.
Hi all, I'm having an issue in UE4.26. I'm very new to the program, so stick with me. I'm using the movie render queue to try and generate an acceptable video, but in my tests it looks like the center of my frame is somehow overexposed, just generally brighter at some times. It kind of looks like a yellow bokeh/smudging. Based on the settings I'm using, I really can't figure out the cause. I'll post my video and screenshots of what I believe would be the only relevant settings.


I started by following a youtube tutorial for high quality video output, then removed a lot of settings (see the grayed out console variables) when it took WAY too long to render.
Even if you can't solve my specific problem, I'd really appreciate some advice on how I can make my render look a bit better
Side note this is my first Unreal project in general lmao, so if you see anything that looks like crap let me know!
Do you have lens flare or lens dirt mask turned on in a PPV? If it's not either of those, you could try rendering with PPVs off, and try turning off all but one light. You can narrow it down that way until you find the culprit.
It doesn't look like I have any post processing options enabled. This is the area you're talking about, right?
https://i.gyazo.com/5e440c66287a923e24b10fcac2f6eb84.png

This is in the "details" tab of the camera I'm recording from
I don't have any options enabled in the post process tab at all
in the PPV, try ticking the lens flare intensity box and setting it to zero. hopefully this solves your issue. @gusty heath
perhaps try doing the same thing to bloom if that doesn’t work
I'll report back with results once I can try it out! I appreciate the suggestion
Not really sure where else to ask this since there isn't directly a "Video" channel. I'm wondering if anyone in here has any experience with the Media Player. In packaged, some users are experiencing issues with h246 encoded MP4 files not playing.
I'd use either Bink or image sequence.
It's more versatile than MP4 codec, IMO
does anyone know of a way to make it so when i let go of right click when piloting a camera, i don't click on an actor within my scene?
it's incredibly annoying when i accidentally click on something in my world that's also in my sequencer, cause i have to scroll back to where i was in the sequencer
it's just really finicky
Best answer - buy a Space Mouse. Second best answer - when you select something by accident just hit the ESC key and it deselects.
Amazon.com: 3Dconnexion 3DX-700066 Spacemouse Wireless (With Carry Case And Universal Receiver): Computers & Accessories
you're really gonna convince me to buy it aren't you 😅
truth be told i may be getting an ipad at some point, i've had enough of keyframing
I love my Space Mouse. Once you get it configured to the way you like to work, it's super intuitive. You just think of where you want to go, and it takes you there.
anyone know how to remove the red lines around my character mesh? im trying to get cinematics for my game but these red lines arent doing it

Set to hidden
Select the collision capsule in the details screen and then search for Visible and uncheck it


Any idea what's happening to the grass between these two frames and how I can try to fix it?
For reference, it gets black as the camera approaches the ground
If you used the foliage tool to place the grass and your project is set to use ray tracing, the cause could be the foliage instances shadow is being culled.
The command line to disable this type of shadow culling is: r.RayTracing.Geometry.InstancedStaticMeshes.Culling 0
Hi all.
Can anyone tell me if this models with the grey materials on it look high poly enough for a cinematic in UE? https://www.fox3dmodels.com/wip/EnvironmentRenders/KeyholeScene.jpg

Hello people! I am having a problem with sequencer, I have a bunch of lights animated trhoughout the sequence. Some of them have animations for them to turn on and off in different shots, everything seems on time and good when I play realtime but when I render the lights take 4-5 frames more to change.. like if there was an offset on them while rendering, this doesnt show on the preview before rendering. Any idea what can be causing this? frame range issue?
Hi, if I use theMovie Render Queue, pngs are empty (fully transparent). Is this a Bug? Any workaround? Jpgs work.Thx
not really
What would i need to do to make it look better?
add a little more dynamic to the texture
so maybe some roughness, but if i were you id use a wood mat. for the cabinet and for the door, make it a different color, or make so it actually looks like a door instead of a white rectangle with a hole in it. if you need more help dm me
I have not add any texture to the models yet. it was just a test render.
There is an issue where if i export from the built in sequencer, the rendered output is 4 times faster than its supposed to be no matter which FPS i use, how do i solve this?
its probably the playback speed of what ever you are using to view the file
I'm still working on the UV's for my models. I have a new more props to model to import into UE so i have not had time to make the UV's yet.
I'm trying to find out if the mesh is model correctly for the UE to make use of it.
The PNG renders with an alpha channel. Sometimes, Unreal will generate an alpha that is partially or completely transparent. Some media players will show the frame as empty. The solution is to change the setting in the playback app to ignore the alpha.
Are you using Movie Render Queue ? Sequencer output has been deprecated and will be removed soon. Have you checked the playback on more than one app? It might be an interpretation problem from the playback app.
yup, i'd wager it's an interpretation issue you're having with Premiere/Vegas/etc. be sure your import is interpreted at the same FPS as what you rendered at. @shut gazelle
O.k,thx.I wondered why the default sequencer renders without alpha,but rq renders with alpha.
I just took a look at the pngs in Photoshop - there is no alpha channel all. The pngs are completly empty.
Can anyone cinematic artist in here give me some pointers in creating props for UE? I'm new to all of this, and not sure what I'm doing, or if the models i create are high poly enough for the scene.
Hello! I have a quick question about sequencer: I created a sequence and a CineCameraActor. When I play the level, the player starts at wherever I have my camera in the editor. How can I "possess" the cinecamera?
level blueprint
so just set the camera as the view target then?
because when I do that, the camera jumps
wdym the camera jumps?
I just tried it again and it seems the camera isn't the issue, it works like this
thanks
@barren lagoon @hot sun I am using the sequencer export because i get a black screen when exporting composure using the movie render quene and yes my playback app is at the right framerate
Hi everyone, wanted to share the recent sequence from the cinematic . . "Simulation" Indie Sci-Fi FPS Game https://www.artstation.com/artwork/oAk1GJ lost some files as they dissappear when it crashes on the restart anyone else experiencing this? On I7 RTX 2080

ArtStation
Finally, I can share what I have been working on in my free time & weekends for my passion personal project "Simulation". Since the first day, I've downloaded UE5 early access, I've been studying the animation tools and the sequencer. The project is entirely created with Unreal 5 and I did the color grading and compositing in After Effects. I di...
How did I do this and how do i get rid of it?

It burns into my sequence
I’m sure I just hit a key…
How can I orbit the camera so it rotates around the object?
Hi, is there a way to keyframe the rotation of a Rig Rail.? Atm the set keys get ignored.
Hi!
I've created a cut scene with sequencer and rendered it out but the audio file is empty.. is there anything I need to do to capture?
I started the editor with -audioMixer (I can see that applied in inherited command line arguments)
I also enabled the sound utilities plugin
Hello! Can someone help me please. I am having a problem with sequencer, I have a bunch of lights animated trhoughout the sequence. Some of them have animations for them to turn on and off in different shots, everything seems on time and good when I play realtime but when I render the lights take 4-5 frames more to change.. like if there was an offset on them while rendering, this doesnt show on the preview before rendering. Any idea what can be causing this? frame range issue?
I think I'm adding to a growing list of questions here, but I am curious...

In the viewport, I have AO visible

However, upon rendering, the AO is all but gone
Am I missing an option?
Now that I look closer... It may not be an AO issue. It almost looks like the shadows are somehow just boosted way up, removing contrast from the image
You can do it in the Sequencer, but be aware that the Rig Rail is kind of broken in Sequencer. Sometimes it just goes a little loco. Best practice is to use a spline embedded in a blueprint with a simple mesh attached to use as a dolly/mover.
IIRC, audio is broken. I think you need to render the high quality image pass, and then render the audio separately and combine them in an editing app like Resolve.
Is the viewport showing you the Sequencer Preview, or are you pushing the Play button and seeing it in game mode? There are often things that will not display in the Sequencer Preview that will appear in the render. Rendering activates game playback.
@hot sun do you know what I did above 👆 with the baked in overlay?
It’s burning into my clips
Nope, sorry. Best guess is that you activated one of the data display modes and you need to turn it off. If it happened to me, I'd search YouTube.
@hot sun yeah I’ve been through the shortcut sheets, YouTube tutorials, so far no luck. Thanks for answering
Did you look at Show Stats?
https://docs.unrealengine.com/4.26/en-US/BuildingWorlds/LevelEditor/Viewports/ViewportOptions/
Explanations of the various options available within the editor viewports.
Hello cinematic friends. . . So,
When Rendering my shots out of Sequencer, 80% of the time, I get that GPU render crash panel after a few frames of process.
I'm rendering 'HDR passes' out of Sequencer, 1920x1080, w/ Rec. 2020 compression. CineCam settings: Ray Trace GI, 64 samp., Brute Force. No RT reflection, AO and DOF enabled. And a 'warm up frame count' of 5.
I also have 'Virtual Texture Support' enabled in my project settings which helped for some shots.
Some make it through, but not most. I have tried what I can to optimize shots to no avail. . .
Seq has been my plan B'. . .
I've tried the 'Movie Render Que'. Although giving higher rez images, it creates many artifacts. Like stretch blurs in images between CiniCam cuts, double exposure frames from Anti-aliasing and dropped effects I keyed in Sequencer. . .
Any other suggestions or solutions from your experiences or from UE would be greatly appreciated.
Hello again, hope you guys can help me, I have this scene that I am rendering through sequencer, I have lights and atmospheric fog that I needed to change from shot to shot to to suit my lighting needs. I am having a problem where I would preview my sequence on the viewport and then everything would be just fine, timing is fine, everything seems alright, but when I render everytime there is a cut to the next shot we are able to see the lights changing, like if the lights were offseted in the timeline, I was making sure I keyframe right before the cut and after to avoid any changes. I am unable to find a solution, I am learning lighting on unreal engine and all I want is to find answer to this but havent had success. When I run the sequence on the viewport it seems to be running at the correct FPS. Any idea, suggestion recommendation would be appreciated.
@coral oasis - Sounds like your lights moving between key frames in sequencer. You need to make sure and key each light's position at the beginning and end of each cut, or shot. That way your lights are in the right position for each camera shot you have set up.
I see. I did that and stitched it together with lightworks but the image quality suffers horribly
yep, it is keyframed like that, we can see the result on the viewport and it works fine, I dont know why it doesnt on my render 😦
I'll try with Resolve tomorrow.
Anyone know if audio is fixed in the sequencer on ue5?
@coral oasis - Okay. Also check your curves in and out of the establishing keys. They may have a bend in them, instead of flat, or linear. At the top of the sequencer panel, you'll see a curve graph icon. Click that and you'll get a separate display of the light or keys you have selected and you can adjust them there. Hope that solves you lights issue. . .
Is there a way to set my fire and smoke to play near the middle of their sequence instead of the very beggining? https://gyazo.com/794699a4bc1e160519087f73e71f1d84

this is the start of my shot
Thanks for the tip! Just checked.. they are all linear curves. Once I change from shot to shot it jumps to the desired value but there is no curve between the change. I dont know if this could be a frame rate issue.. like if I was keyfraiming in a different frame rate or something. No idea. @gloomy garnet
So very strange, as I said my render its displaying the animation offseted.. 7 frames. If I go and move my keyframes 7 frames before it does the right thing on the render, no idea why, and it still looks correct on the viewport
is there any hotkey to grab all keyframes and move them frame by frame? so that I can offset everything.
@coral oasis - Ok, cool. After the new light position for each shot, is the out path flat or is there motion to the end of that shot? If the value is the same, your curve should be flat. If that all checks out, it could be light source from an effect or environment light. . .?
I am also trying to see if there is any lights that are not properly animated, but I just saw that if I offset my keyframes 7 frames before, the lights do the right thing on the render and in the viewport too... this is weird because keyframes were visually well placed in the timeline during the cuts... now they are offseted 7 frames earlier, and it still looks right on the preview.
is there any way to offset all my frames by x amoun on sequencer? I did the test on just 2 lights. @gloomy garnet
I would like to understand why this happened though, no idea.
@coral oasis - There is a delay or warm up settings in the Sequencer output. you could check there. If your in the Movie Render Que, there are similar setting in the output setting as well. But honestly, it shouldn't effect positions of lights by that many frames. . . Sorry, if I couldn't be of any more help.
No worries it was very helpful, where can I find the warm up settings? I am going to check that too @gloomy garnet
do you personally use PIE to get an accurate look at what your renders will look like?
I really should more often, but I forget like everyone else. I don't know why the Sequencer Preview is a different mode - I think it should represent what we're going to get from the Movie Render Queue.
@hot sun yeah I did, it seems to be related to the sequence cameras, but I will give it another look.
@final acorn you can add a keyframe fir your fire either an activate or ab show hide depending on the effect you’re using just drag the fire into the sequence, hit the plus sign and poke around a bit
ahh ok, ty for the tip
@coral oasis - At the top of Sequencer, ya see a 'clack or take board' icon, to the right of camera icon. That's your render settings panel. At the bottom under the Animation tab, you'll see the warm up and delay settings. Check documentation to understand them fully. Although some help image quality, they may affect any other post lighting or triggered effects . .
Oh man.. How do you guys handle sound? I have run a second pass on my sequence and captured it with Audacity and then put it together with blender but it comes out asynchronously.. The timing is slightly off. With other tools like Resolve the resulting quality is just horrendous.
It should be possible to render out the sound too, no?
Haven't used it myself but in the Movie Render Queue settings there is a .wav output. It is marked as experimental so you mileage may vary. The audio will need to the sequence for best results.
If you are hoping to capture ambient audio outside of the sequence it may be better to do it in post-production.
@snow hamlet I've tried that feature but can't get it to work. At best I got an empty wav file.
@supple summit Do you have an audio track in your sequence?
What do you mean exactly? Yes, there's sound
For example, if you had music or a sound effect you want to play at set point in the sequence, you would use an audio track.

oh ok, that's what you mean
no.. I don't have that. I just have a couple of sound effects on my actors
@snow hamlet I think my problem is that I don't always hit exactly 60fps when I play it back later to capture the sound. So then the timing is off
I have a problem with fire and smoke in my scene. when i render it out, the fire and smoke dosent loop through. Only plays a bit then completly stops as if its at the end of the sequence.

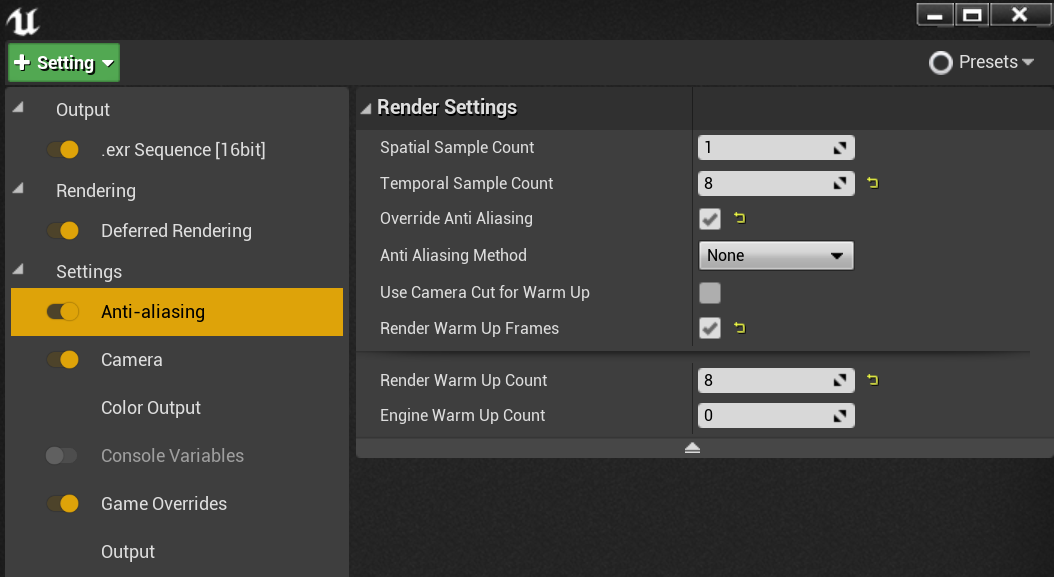
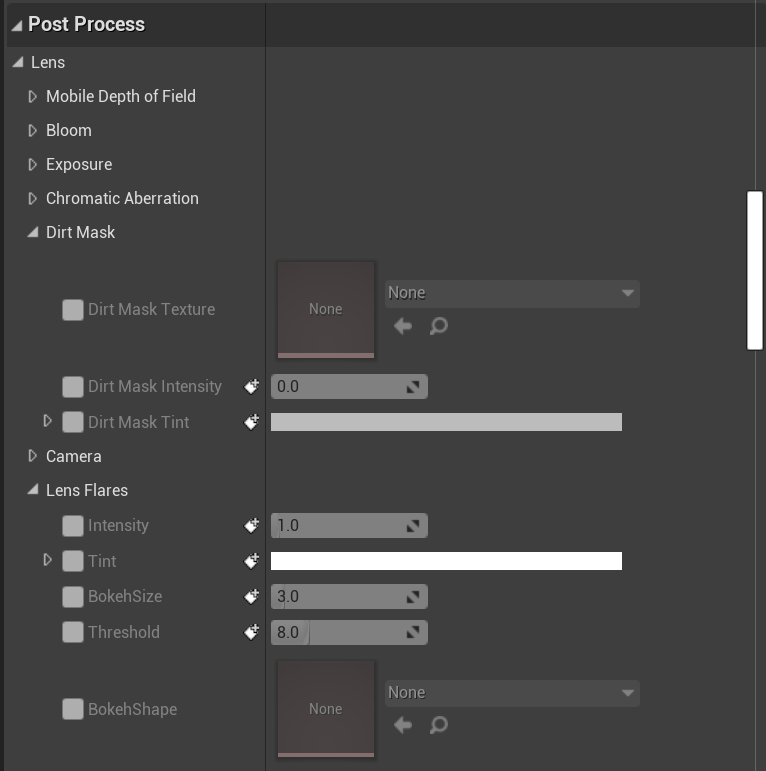
thanks!! this solved the issue on the fog, it needed time to calculate.
Anyone knows why lights would flicker in the render? is this mainly a low antialising sample issue?
your fire is a niagra effect right?
bc if it then you have to enable it to loop
yea they are
right now it stops on frame 76 and my sequence is a 24fps
Do they have to be in my sequencer?

they all have loop ticked
go into your sequencer
select the nigara component and add it to your sequecene if it is not alredy in it
then once you do that right click to get the options like transform and stuff like that.
there is an option that lets you loop your effect. I cant remember the exact name of it right now, but select that and you should be good
ok wait i originally thought niagara effects and emitters were the same. the fire is a regular emitter
it should still work
the emitter is in my sequencer but dont see a looping option. i right clicked for the options and also searched in the track section
huh
thats wierd
i was able to do that in an old project
lemme pull it up and see whats going on
im also in ue 4 currently. rebuilt this project after trying it in ue5 last week
@peak currentHey i fixed it with some tweaking. theres a setting i found in the particles settings "Seconds before inactive" that i had to set to 0. default was 1 so after 1 second it would stop emitting i guess. but ty for the help

only issue now is the render is super grainy

Look for a way to remove noise
I literally have no knowledge of unreal but I think there should be a way to remove the noise
What a great time to increase your knowledge! 😀 Try going to the unreal Documentation and search for "noise reduction." You can also try searching on YouTube for "Unreal Engine noise reduction."
Hello, I am trying to follow this tutorial https://www.youtube.com/watch?v=zZQu9f6U8zw I am only asking about the last part of the video where he exports it, when i export, the rendered video, if it is a avi or image sequence is 4 times faster than it should actually be

Can you use an iPhone to track your live-action camera within Unreal Engine? This is a step-by-step experimental guide to getting it to work. The setup works to some degree, but still needs some tweaking and experimenting to make it viable for production.
Some tutorials that I learned from to make this.
FattyBull's Composure tutorial
https://...
Hello! Anyone has any idea why a light would flicker on a render? It looks good when I play my sequence on the viewport but not on my render. I have high antialiasing samples. Don't know what else could it be.
@coral oasis - On your lights, is the intensity animated too? Check those curve settings as well. Also, are there any objects animated in your scene that pass through the lights view. . . . ? If you are using ray trace, that may change the quality of your spot or directional lights as well.
There's is no animation on that spotlight in the shot where it flickers. No animated objects passing by I'm either... no ray trace. Not sure what it could be. I'll double check it there is animated objects nearby. @gloomy garnet
Have you tried rendering without the high AA?
how do i just set the view port as a camera actor for a main menu
Does ANti-aliasing in movie render queue basically kill volumetric materials?
because my volumetric particles don't show up on the render, but they do in the viewport
I tried with a lower AA to test another thing and that light keep flickering at the same amount. :/
hi, if you are using the medieval forest project, then go into the postprocessvolume and at the end of it, there are 2 materials , 1 is grain noise...disable that, it should fix it.
Hey there! Does anyone know how to bake a control rig to animation on the body as well as baking another control rig to the face at the same time? It seems that I have to pick one over the other. If I bake a control rig to a facial animation then I no longer can edit the control rig on the body animation. I just want to be able to adjust both so I don't have to create a new animation sequence each time.
Really random question, although it does pertain to cinematics... what's the best free software out there to convert the movie render queue image sequence into a video, add music, and add other video clips?
Hello, any reason why movable lights would not cast shadows? is there any setting that I need to enable or soemthing?
Davinci Resolve. Up to 4k for free. $299 for bigger (plus other features.) If you buy a Black Magic Design Speed Editor controller for $299, you get a seat of Davinci Resolve Studio free.
Shotcut is also a decent free option.
@coral oasis moveable lights have lots of rules they can only have 4 overlap, and they are expensive… the subject you are shooting may not have cast shadow turned on
thanks you., I thought that rule was only for stationary lights
the movable light overlap can also somehow make the light flicker on the render? @regal urchin
Isn't that for stationary lights?
Stationary lights: "Stationary Lights are limited to a maximum of 4 being able to overlap at one time. Once you have 5 or more Stationary Lights overlapping, the one with the smallest radius will start casting dynamic shadows, which have a higher performance cost. "
I've seen flickering shadows due to directional light pointing upward, and also flickering lights due to a weird issue with reflection captures
and movable lights are not limited to 4 just stationary
something on my to-do is improving the amount of streaming texture pop in when changing the View Target. I know I can disable texture streaming on the fly for a mesh ahead of switching, but have I missed a way to do it without disabling texture streaming?
not strictly cinematics (not using sequencer) but thought folks here might have more experience
hey guys,
does anyone know how to get rid of these lines showing up ive tried increasing every settings i can find with ray tracing
im using render queue, ray tracing, unreal 4.26


anyone know of some other good servers that focus on cinematic creation? feel free to DM me any invites in case posting them here violates rule 8 🙂
If you get any replies, DM me please. I'd like to know as well.
(I know Matt Workman has a VIrtual Production Facebook group -- is there one for Cinematics?)
Guys I did this little cutscene, but when I press play or try to render it just freezes, what am I doing wrong?