#animation
1 messages · Page 171 of 1
can i use procreate on my ipad pro?
i dont get why you waited this long to ask
sounds like you already have a direction set, go with it
i just use it for school so i didn't immediately think of it i also never used procreate
so if i want an animation i need to draw the character a couple times each time a bit different but i will make the character look different each time how do i manage that
By making flipbook texture.
not literal flipbooks, but it is what it's called
Sometimes referred to as sprite sheets
Just watch some 2d game tutorials in unity3d or godot engine, should give u a good overview of the process.
man do i know you?
idk you seem familiar
nope 😄
but thx
is it possible to llop an animation a certain number of times?
I think Play Montage has a functionality to loop certain times.
yeah but if I want to loop the part 4 times and then 2 times?
Notifystates could work
did anyone have an issue with root motion animations using rigify in Blender? My root somehow isn't recognized in Unreal which resulted something like this without the red line indicator and toggle "EnableRootMotion" doesn't do anything, the bear keeps moving back to the original position.


Hi everyone, I had a question about Blendspaces
I went through some of the tutorials on movement and was implementing movement with them. But when looking through the Valley of the Ancients demo I noticed that Echo doesn't use any Blendspaces. Are they not the normal way of doing things anymore?

Support game on patreon https://www.patreon.com/CreaturesRPG
Creatures and Magic: Sparks of the source its a role-playing game with a beautiful world, a good story, leveling up your character, the ability to tame animals, and control them, including playing for them :)
A large number of unique skills, abilities and spells. You can combine them ...
What's the issue?
can you explain how? please
What kind of animation is it? Is splitting them into multiple sequence not an option?
I'll try to explain
i have a revolver reload animation separated in 3 parts:
- the opening with the reload of one bullet
- the reload of another bullet
- closing the revolver
I want to, when the player reloads, play the 1, and if needed the 2 (that's the one that i want to loop according to the number of bullets he needs to reload -1) and then 3
Here's how I would approach this:
- Opening the chamber is a separate sequence.
- Filling the bullets from 1 to 6 is a separate continuous animation sequence, with starting point determined by the remaining bullets.
- Closing the chamber is a separate anim sequence.
I did a similar thing for a Mauser C96, and it works for me.
Yeah this scenario doesnt seem to need a notify state. ^ Sounds like the way to go
If you want to go the Treyarch route, just run an off screen reloading animation sequence a few times lmao
Hello, is it possible to change an animation in a blendspace from a character blueprint?
No.
Though depending on what you're trying to achieve, there could be better ways.
I would like to change my npcs idle animations so they don't all have the same one while keeping the animation blueprint they have. The idle animation comes from a blendspace
Why do you use blendspace for the idle animation?
If it's for looking around, either use additive aim offset or outright using IK solution
I don't know, I didn't make it. The blendspace has idle, walking and running and there are different types e.g. unarmed or with weapons. I guess I could make a new anim blueprint for those static npcs who just stand around?
One thing I know is that using blendspace for idle anim is odd to me. You could do the same with layered anims and slots.
Hey there
I'd like to reimport a rigged mesh. Can I do that without having to reattach all animations and states in the animation blend blueprint every time?
I'll try those, thanks 🙂
but how do I define at what starting point the animation should play?
Is it possible to export a single animation from the action editor instead of every animation?
when you export disable all NLA strips and and all actions
in the export settings
Ohhhh, interesting
Okay so then if I wanted to export a specific anim, then I would select the action I wish to export THEN on export uncheck NLA strips? Also All Actions?

yeah exactly
Awesome, perfect, thanks!
How do I delete the second frame on this animation? It's just going to be used for a Pose, it only needs frame 0

anyone here using or familiar with animating in Maya?
jo qick question before i go mad
i have this woven basket and i need a simple animation for that that i cant achive with the inbuild unreal tools
and if been searching for hours now
but all that i find on unreal animation has to do with bones
but i dont want to import skeletons for everything cause there has to be static mesh animations

anione ever importet something like that?
how to mix root motion with character movement?
Yes, the only proper way to import "animation" is through skeletal mesh. Don't worry about it being static mesh, you will do better with skeletal mesh. just one or two bone to add.
You could also try doing the animation with "blend shapes". search for the term.
Also you can get any mesh animated by using a technique called, "Vertex Animations", animations saved in textures, played by materials. Of course, this is an advanced topic.
sad to hear that but thanks
I've got a retargeting question: If I have several different versions of the same character, each with their own unique bones for things like anim dynamics, is there a way to set this up so that I'm not putting all of these bones on the main skeleton asset, but also so that I dont have to retarget and duplicate for every skeleton?
Hey all, Has anyone had any issues previously with timings not being correct when rendering a Level Sequence? If I play the LS in game, it's totally fine, but when I render & simulate, the events are happening too fast and I'm going loopy trying to figure out why
You can use montages for the actions and bind to the OnComplete / Cancelled / BlendOut delegates in c++
Right click any anim sequence -> Create -> Create AnimMontage. For the purpose of telling game code when an animation has finished, those delegates are usually what you want to hook into

Hello everyone I have set my speed attirbutes and blend space but for some reason character only playing the run animation
I am in the unreal hangout voice channel
any idea for the reason why when I import an animation from blender the foot gets messed up?
only one foot, it point up for some reason
checked in blender and its fine, and ther rest of the animation is fine too
yea
good idea, thx
hey guys, not sure if this is the channel to ask. I am new to Unreal
Is there a way of rigging I have to adhere to when rigging in Maya in order to ensure there are no issues when exporting animation into Unreal?
Or are there any best practices to follow?
Will there be any differences if say I use, Maya's HIK, Advanced Skeleton or Unreal's ART to rig a character in Maya?
Thanks
Hey Maurice,
Unreal works with skeleton data first off. There is the UE4 mannquin some template projects for example and that can be a starting point for your rig work since you can export the bones/mesh. If you make your own, then you are a little more on your own, but you're free to import any kind of custom made skeletons you make.
I wouldn't recommend HIK, but your free to try it - again, if you want your own skeletons then it might be fine enough. Unreals ART rig lines up with the bones of the UE4 Mannequin
as for exporting, dont export controls, just joints. Its a bit of a learning process. For animation specifically, you need to make sure the animation data is on the joints and not just the controls since those dont import. Therefore, bake simulation is usually a good way to handle it before exporting.
Thanks Conrad
just ask here when you run into particular problems
May i know how does the ART lining up with the bones of the UE4 Mannequin help?
if say i am going to use my own character mesh and all that
using the ue4 rig either by art or by importing from engine means you can use a lot of other assets that use it
lots of marketplace animations as well as starter anims use the rig
ah i see, so its easier to implement marketplace stuff if its rigged using ART
you can always retarget somewhat different rigs though
believe so, havent used ART extensively
i went the route of taking the rig and making my own controls
as in the UE4 Mannequin ?
and there you align the bones to your own mesh in maya?
you could or model to it. it might take a bit to get familiar with the bones, but yeah you can adjust the bone positions for male/female or exaggerated proportions
you could also just make your own rig and ensure the skeleton hierarchy is similar enough
got it
understand
what about facial rigging? Is there any tool to rig it in a similar fashion to Unreal's Metahumans?
Currently I see a lot of tutorials trying to apply the metahuman controls and joints to a custom head mesh,
but they all seem to be tedious to do and does not seem to be able to export back to UE
not sure on face rig
I have kind of a weird situation, I have an animation blueprint in my project but its not attached or associated with any actor. Just a fresh anim blueprint. When I add this simple log to the event graph, it runs regardless of wether its in the scene or not. Is this expected behavior? Seems like a potential performance issue lol

you sure its not hooked up to one of your actors?
yea I deleted it and made it again
it uses the skeletal mesh of a gun that is also not in the scene
it is a child of a weapon base class, but the child with the skeletal mesh is not in the level
🤔
im gonna reboot lol, its UE5
Reboot did nothing. That’s so strange
I wonder if all my anim blueprints do this
Wow they do
I’m gonna try in UE4 on a fresh one
weird, maybe they just do it...
Seems like a massive performance issue. But maybe Blueprint Update Animation is one global call?
i dunno, feel like it might not do it in standalone or something else is going on
Yea. Testing in 4.27 now
Wow, yea same thing
I know if some of my code is invalid, even if it’s not used in game - I can’t compile and run.
So maybe everything is included on some level
Bugs to look out for later I guess when casting isn’t working.
yeah, looks to be doing the same when i try it
I guess as long as I do all my casting in BeginPlay and then do validated gets in Update Animation I’ll have no problems
just only keep the anim bps you use 🙂
you can without building
Oh dope I didn’t know that
I haven’t built anything yet, switched over from Unity about 6 months ago
lol you should build as well, each method of testing is its own
oh you should build lol
🤤 mmmm building
best face the music
You can also handle the events once in the anim BP, not sure if that's a fucking terrible idea. I'm doing it so probably is 🤠
dont want to fix all build errors at the end
I just started this project, I’ve been mostly learning and scrapping projects. A lot of cinematics stuff too
alright do whatever the hell you want 😛
But yea build errors are a bitch. I’m a software dev so I’m well aware lol
I build vst plugins in C++ and apps in React Native and they all have the their own list of build issues
This is hobby tho, server apps are my main
crazy, cool
Guys can you help with a problem , i have a blender python script that will send current keyframe using UDP and I want to recieve it in unreal using live link.How to setup this live link in unreal ?
Is that an animation issue?
Would be more of a #automation or #plugin-dev kind of thing 🤔
i think its a blender issue
Somebody told me in programming section to ask here
Ok
Hello! I have issues exporting and importing the rig from Maya to unreal engine 4. I show the video below about the issues, so when I Import the rig in unreal engine 4 some parts of the textures keeps glitching like it's overlapping with each other, and when I tried to export the animation using "game export", it doesn't play the animation and the character on the ground for no reason. if you know how to fix it, please do tell me, thank you.
Hey whats your workflow when rigging multiples characters for Unreal exacto like mannequin skeleton i use Blender Uefy Script and It works well but its very slow process for making multiples humanoid Rigs cz you have to Make a new rig for the character then pose the metarig exactly like the Other change all the nanes import ue mannequin and export but then you can't create animations on Blender with this skeleton cz you lose the rig
ehm i usually use the blender orientation and retarget UE4 anims to that skel (this is with automatic bone orientation and manual fix of the tip bones)
you could also use the UE4 skel and a constraint rig to animate
I think under skeleton you need to select one before importing
Ooooooh, I press export all which might be the reason why it causes these issues
is there a way to retarget an animation with an extra weapon bone to a skeleton that doesnt have that weapon bone. or do i need to open the skeleton in blender and add the bone to the skeleton?
even if you export all you need to select the skeleton that you want to apply the aniamtion to in Unreal
Alright I'll check it if it works soon, thank you
Does anyone know of any resouces on using control rig for procedural first person aim offset? Currently i have something that works (take camera forward vector, use that with aim nodes in control right to rotate a few bones), except I can't get it to work nicely with the camera (and it will full 180 rotate instead of cap at 90)
the anim bp might be running as part of the preview. Check the debug actor dropdown to see if it's empty, or stop simulating
Does anyone know how to use a bone(position) as the effector transform input of a FABRIK node? or any IK node for that matter?
So here, i am creating my Anchor mesh, which I place under my motion controller, since I cannot use a physics constraint to a component. I then create the corresponding skeletal meshes, and physics constraints. There are ill exposed in BP so I set the parameters there.


I set my constraints, and they work just the same settings in other blueprints. However in this character, the skeletal mesh hands will not move. I have them set to simulate physics, they have a physics body
they are ignoring the pawns capsule as well
they stay stuck in place and moving the components does not move the physics constrained skeletal meshes at all


this is a bp setup that works just fine
Could you post a video to demo the issue? Not sure i fully understand the problem here
I thought you just wire it? You are talking abt control rig nodes right?
No I am not using a control rig here I am inside an animation blueprint

I got these effector location inputs and I want that vector to be a target bone location. But I don't understand how to get the bone location vector inside an animation blueprint
You can batch-create anim montages by selecting all of your sequences and following those steps.
@ashen junco sorry for the ping, you're the guy who helped me last time, the anim montage won't play
i have the montage with the continuous animation sequence but after i play theopening sequence, the montage wont play
Hello. Im trying to work on a robot arm's IK with CCDIK, but its breaking out.
How can i lock 2 axises and limit the third one?

I might have misunderstood your original question. It sounded like you were using the animnotifies to tell game code when your animation was finished. If that's the case, you can bypass the animnotifies altogether by using montages and binding to their delegates
Hi all, I'm not familiar at all with animation, but I do have iClone and have recently purchased a model from the marketplace that I didn't realize wasn't rigged to the UE skeleton and also doens't have IK bones. I'm not sure what to type or look up to get some direction on how to rig this fellah to be compatible with UE, is there a resource you can pass along to me to help me get started? Thank you a ton for the help and direction!!
I also checked the pinned comments on here incase there was anything, but I didn't see anything, so I apologize if this is a frequent question.
There are a few different resources that can help with this depending on what modeling package you're working with. I use a plugin for blender called Auto Rig Pro. I think it costs around $30 but it also does about 90% of the work of rigging to UE mannequin
Well that's a great resource, thank you a ton for that! Let me look into it and see what I can make happen on my end. Really appreciate that, thank youu!
You could also export the UE mannequin from unreal and bind the mesh manually. If you're not planning on adding any animation yourself that would probably work fine
Mm, okay that is another option to, okay okay, I've got some things I can work with here. Thank you so much!! I just had no idea how to research this lol, I was only getting IK videos on google and youtube.
I'm probably gonna do both of your suggestions lol, cause the blender addon is a QOL for my pipeline down the road anywhoo. Brilliant!
Yah, honestly it's a decent price for how well that tool works
Thank you I’ll check this out later
is it possible to migrate anim blendspaces? I keep trying to export them but them come out as a .T3D file which is not possible to import into ue5.
Yeah animnotifies can be problematic for that, mostly because there's no guarantee they will be fired even if the animation starts playing. This is one of the things montages we're designed for
Question, when walking up stairs, my anim loop gets stuck on Jump Start. Any tips on how to not have it be stuck?

Anyone know a method to limit the distance between bones?
I got a jacket that uses bones to control the cloth but these bone chains are able to move apart from each other

I want to limit or lock the distance between the bones that the red arrows point to
Is there any way to make this node rotate another bone instead of root one?

Like spine
hey does anyone know were to get alot of different animations?
im looking for melee weapons more specifically
Hello. I followed this tutorial online last night to successfully get my model retargeted to the UE4 mannequin so it could use the animations and poses from it. I had to edit the model and when I followed the same process I cannot seem to recreate the retargeted skeleton mesh animations to the new model. Please see attached. it is the model I have retargeted on the idle third person on my model on the left and the mannequin third person idle on the right. https://docs.unrealengine.com/4.27/en-US/AnimatingObjects/SkeletalMeshAnimation/AnimHowTo/Retargeting/


Examples of how to set up and use Retargeted Animations for multiple characters.
How is the "mesh to component" rotator pin used in the RotateRootBone node?
I'm following a tutorial and their version doesn't have this pin
https://docs.unrealengine.com/4.27/en-US/AnimatingObjects/SkeletalMeshAnimation/NodeReference/SkeletalControls/TransformBone/ use this instead
Describes the Transform Modify Bone control which can be used to modify the transform of a specified bone.
Hello. I need to limit my Y rotation at between -180 and 90 degrees, but after the Y rot reaching -90 and 90 degrees, it goes back, and X,Z get a +-180 value. Y is the only axis which has this problem. What can be solution for this? This little video shows the problem.
Hi, I'm interested what might be this optimization that is causing my meshes to animate weirdly like this when I look at them from a distance?
https://www.loom.com/share/77eb2b2859f046ffa4f8be4013207602

Working in blender. Is it worth building my own custom character rig? I'm reading its difficult if it doesn't follow unreal's humanoid rig
The default mannequin skeleton is pretty bad and shouldn't be used as a guide. If you are aiming for your own custom animations and stuff it is always better to make your own bespoke rig.
An off the cuff guess is that it could be related to LODs. Either that the LOD variant is not skinning properly or the skeleton's bones are reduced incorrectly at a distance.
hmm thanks, the first one isn't it because I have skinned them and I can check for that in Maya, how would I go about checking the bone reduction at a distance in UE5?
It is not something Ive had to deal with yet so I can't say. But I'm fairly certain I have seen settings for it in the animation tools.
or rather the skeletal mesh itself
thanks, I'll try digging around
Ok I'll make my own rig. To make it work in unreal i think retargetting is what im looking for?
You can make your own skeleton and retarget manny animations to it, yes. Will take some tweaking but can be good enough for temporary use while you make your own.


Thankyou for the advice!
Does anyone know how to export anim blendspaces? Every time I export anim blendspaces the file turns into a .T3D file type which is not possible to import into another project.
Migrate it, don't export it.
Greetings.
Who's familiar with Morphs and curves?

Hello. In Control Rig how can clamp my bones rotation at Y axis, if the limit is not in -90 +90 range? Everytime the rotation reach this 2 value the X,Y axises get a -+180 value and the Y start to back to 0.
perphaps do it with nodes, it is still difficult since transforms in control rig are all based on quaternions....maybe some clever setup using different euler/quaternion conversion nodes can help, I am not sure.
with a bunch of if and select float node mb, i hoped there is some other method.
Hi, how do I add noise to the curve?

what's a good way to stop all animations from the animation blueprint? do I just make a state that has no Output pose?
As in force T-pose and assert dominance?
Hmm... well we have an idle animation and the character moves slightly while "breathing", I guess I would need an idle animation that doesn't move at all
without resorting to a T-psoe
pose
You make the animations? Then it's going to be the matter of having the one frame idle anim and mix with additive breathing animation
no I don't know much about animations
I don't make them, and the ALS animation blueprint is way beyond my skills
but we have a person on our team that does animations, although I don't know if they know about animation blueprints
additive anim is a built in thing, not strictly ALS thing (as there's no C++ involved)
yeah I have a scarce understanding of what additive animations are
okay so apparently it is as you said, there's a breathing one and an actual idle one
Having a Control Rig issue...definitely my fault, I just can't figure it out. FBX imported from Blender 2.93. Using UE4.27. When setting up a basic IK chain using the foot control as effector, the lower and upper leg bones scale up 50 times. What am I doing wrong?
Make sure Unit Scale is set to 0.01 and scale up your model to compensate for it

or use one of the Blender to UE addons, there is one that epic provides that will handle exporting your skeleton with the correct scale. Blender default gives you 100:1 scale for bones iirc https://www.unrealengine.com/en-US/blog/download-our-new-blender-addons
I've done that. Scale is normal X,Y and Z all 1.00 until I apply the Basic IK... Then the second and third bone in the IK chain scale up x50 in the global transform. The effector bone stays 1,1,1.
I've tried that. Will try again. Animations on this rig transfer fine, and the skeletal mesh transfers fine... this only happens when I am in Control Rig and setup a Basic IK chain.
That has the same issue. So my local transforms appear normal, but the global transforms are all scaled up x50.
Dumb question : Is there 'Air Drag' for ragdolls in ue4? e.g. I want to control how much air drag a ragdoll pony tail has when a character moves.
or a Wind Coefficient like cloth?
ur controls scale is 1?
The contol widget?
the foot control's scale
No, I have to scale it down to about .005 in each direction so it fits the foot.
Scale back to 1, and lower u can scale the gizmo, make that smaller
Btw, if u scale up everything in Blender to 100 (after u change the units to 0.01 cm) and u apply the scale (Ctrl+A Scale), then ur sizes wont be so small in ue, still the bone scales will be 1
That's what I did.
So if my character is 2 meters tall... I should set the units to .01 m and then scale him to 200 cm (2m)? or scale him to 200m?
if u changed the units to CM in blender, to match with ue's unit, and u found ur charachter too small in UE, but u want the bone scale to be 1, then yeah, scale in blender to 200 and apply scale
but this wont help this scale problem what u talked about
I may have figured this out... maybe. At least there is progress.
Thanks.
there are the control's transform, and control's gizmo transform, they are different transforms, make sure you only scale the gizmo transform
Yep. I've checked that. I think I was importing the character with bad scale into UE4. Had to redo, rescale, reapply, re-export and I might have it working now. Thanks!
awesome
(im very new) how do I scale this gun when its parented to the hands, when I try to scale it normaly or move it I cant (im using fps template)

Look up on how to setup IK (Inverse Kinematics) to align the hands.
so i was trying to rig my character in blender, following a tutorial, and in the tutorial his works fine, with mine, this weird shit happens, WHY??
I have float variable on my animation blueprint, but changing the values of it doesn't seem to do anything at runtime
looks like bad skinning
any idea how to fix it?
someone said weight painting and it's beyond me how to fix it
yeah, weight painting is how you skin
check out videos on it then
you assign influences of each bone to each vertex of an amount from 0-100%
i thought you had your character already in game? i remember it animating without this problem
yeah, i was using mixamo for those animations, and i want to swap out for my own animations
the problem i'm facing is i can't select individual bones to choose how they influence, and i still don't entirely understand weight painting and how it works
most of the videos i'm watching are making it look so simple, but when i do what they do it doesn't work
skinning is an intricate process, never done it in blender, but id assume its just as tedious when i do it in maya
my brain can't comprehend this, there was an automatic weighting tool, but it didn't work
more than likely, or i can just try and figure out if i can animate the mixamo rig
that's probably easier actually
Heya guys, sorry if the text gets pretty long, i'll try to explain the best i can: i was trying to create a character (using a metahuman as a base) and put him in a static pose for trial (specifically a sitting one that i got from mixamo), before i would attempt to animate him. Everything went smoothly util i tried to put some clothes on him. The robe, a skeletal mesh i got from "ROG Modular Medieval Accessories" in the epic games store, wasn't animating with him, even when i used it as a torso skeletal mesh. I also tried to apply the pose to the robe separately in the sequencer, but it only accepts the animation sequences that originally came with it. Anyone got any idea of a way to animate the robe with the metahuman?
I'm sorry if the question is stupid, i'm pretty new to animating and UE5 in general
I tried to get everything i talked about in one image:

btw, my primary language isn't english as you can see in the print, so if you have any questions about what is written, i would gladly answer
I have a question 😮 If anyone could help
My crowd controls play their animations on the enemy and all - but the crowded controlled character doesn't rotate towards the one comboing


For example - The second image is a back attack knockdown crowd control. But the test dummy didn't rotate properly
yoo, any idea how to stretch the duration of this default section?

my shooting montage didnt fully played, I assume its because of that default thing on my screenshot
this is how the animation suppose to play
this is the function I use for playing the montage

and the animgraph looks like this

sorry for flooding the chat 🙂
you can't stretch the section name (default). that default marks the beginning of that section, not the duration. maybe the animation length has change since you set it up? try deletting the animation, and dragging it into the montage again
the montage preview shows the complete animation, while in game it kinda trimmed as u can see on my recording
nvm I found the solution, just decreasing this value

shoukd i delete the chat or just leave it there?
Guys, Which is better suited for realistic animation, realistic combat system, and so on. Full procedural Animation or use motion Matching?
Depends on your budget, because motion matching dance card is tedious to make by hand.
I have a single bush object made of several quads, I am animating the UVs inside the material with a simple sin(time) function, how can I add a different offset to each quad
?
It is interesting to do this without buying a studio for mocap, I think procedural Animation or AI animations are better suited for this, there are a lot of ready-made animations, in the latter case they can be made to order. That's why I want to know what's best for creating realistic animations, whether it's walking or a combat system, like in rdr2.
What for today, is better suited for such purposes.
Hello. On first picture is base transform of Axis4B and the 2nd picture shows his transform after i rotated with a control 30 degrees around Z axis. For aim math i only need the Z rotation, but i cant work with that, because other axises rotating too. The third picture shows what i try to do with aim. Some has any idea to solve this?


Anyone dealing with control rig not working correctly in UE5? Inside of the editor I try to move my controls for my Ik arms and the controls move but the bones dont follow
Heres whats happeniing
Okay the issue was me having "Initial" checked in the get control nodes. I dont understand why so If someone who knows can explain it that would be helpful
@ashen junco
This?
Procedural anims are not your magic bullet, but it can enhance existing animations by huge margin.
Is there option in UE4 to have something like playmontage, but with anim graph (to make character use custom animgraph specified with param) ? for example I have in game many minigames, and for every minigame I have separate animations for player (like chess minigame I have set of aniamtion for playing chess, for puzzle minigame I have another set of animations), I don't want to add them to character animgraph, because I don't want to load all of these animations only animations currently used in some minigame.
Sounds like you can use animation blueprint linking for this
Question about rig setup. Has anyone gotten a finger curl set up properly and can share code. right now I have it working but 2 things wrong. when I rotate the base of the finger the finger curls properly but the controls for the other sections of the fingers dont follow the bones. And if I try to combat that by running a project to parent to snap the controls back to the fingers I can no longer adjust each section separately.
Anyone know if the Control Rig Mannequin on the marketplace is usable in 4.27 or 5.0? My project is 5.0 and I'd like to create anims for it. Could I make the animations in a 4.26 project and migrate?
Hi guys, I would like to know if "Sphere Trace" in UE4.27 works well ? because I've no problem with UE5, but no Hit with UE4.27
( UE4.27 )

( UE5 )

How did you guys fix the crash where if you ctrl z while editing a control location the engine crashes?
Ctrl Rig?
Never had that issue before, but if that happens, just don't undo lmao
It might just be a UE5 bug because I opened up the control rig example project and it works fine
5.0 branch?
im using the launcher version. I should probably get the source version but that disk space
Yeah, Early Access suffers lot of regression
I have a revolver and when I want to have the cylinder drop out for bullet reload and want the cylinder to sping for a second. whats a good way to do that. from BP the Animbp
Uh.. what?
You mean spinning the chamber for a while before flicking it shut?
They do it in saints and sinners vr. when you eject the bullet cylinder it animations open, Which I have done. But then it spins for a second or 2
i THOUGHT ABOUT AACTIVATING A ROTATIONG COMPONENT AND PASSING IT TOP ANIM BP
I don't play VR games, so i don't know.
But I'm going to assume it's one of those revolver reload animation cliches.
I suppose I could make it all an animation but then that would have to be done on every revolver type
yes
Is your project a VR game? Because making animations for every weapon type in non-VR FPS game is kind of a must anyway.
Then I can't help. I don't work with VR.
thanks anyway
It's just a shame that my body can't take VR for prolonged amount of time, but oh well.
Trying to set up a rig with constraints. One that constrains the left hand to the right hand and another that constrains the weapon to the right hand. when moving the controls they follow fine but when playing the anim keys I get this odd behavior
This is kind of cool. Web based app that lets you do mocap with your web cam: https://plask.ai/
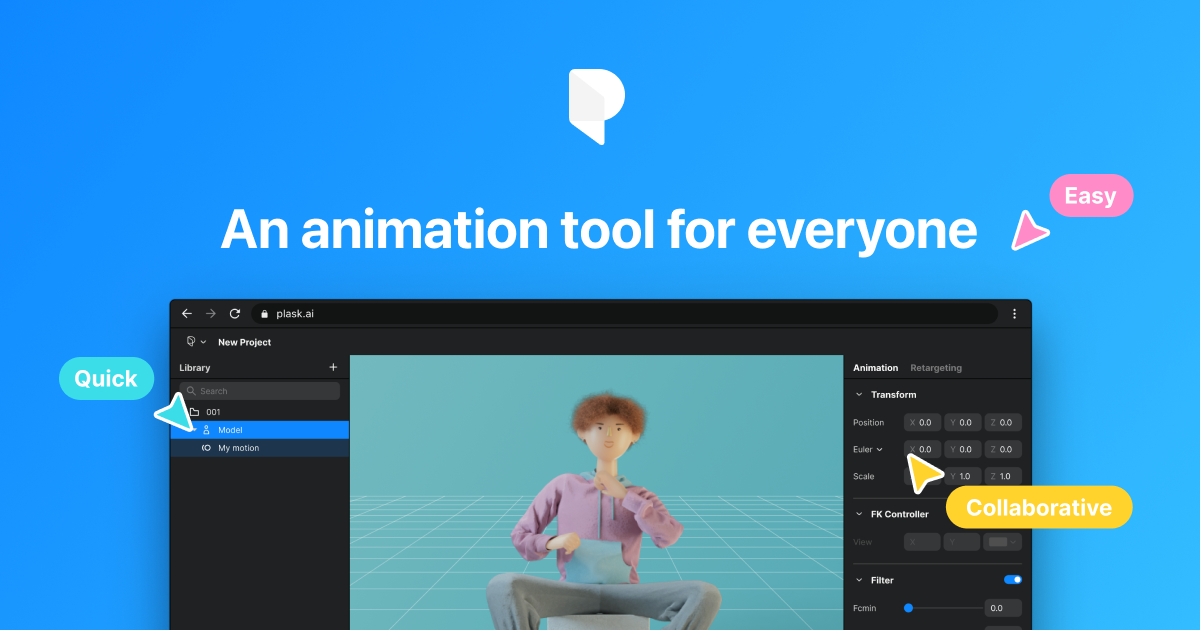
Plask is a browser-based AI motion capture tool and animation editor. With any camera, creators can digitize their movements, automate animation work, collaborate with colleagues, and export them all on one platform.
good to know👍
sphere trace appears to have gotten a upgrade in 5. In 4.27 it appears to be quite broken. At least the code is different.
initial is like the reading from the rest pose of the rig. Which does not change. When you move the control you are changing its “current” transform. One thing special about controls is the fact that initial transform of a control is equivalent to the offset transform of the control
hi animation experts. I have an IK setup for my true fps gun for both arms (using default skeleton). CCDIK goes from clavicle -> hand. however, i find that I need to lock the palm in the grip of the gun, what would be the best way to go about doing it? right now, I am having both arms IK to fixed hand sockets, but that breaks down when the hand bone needs to be somewhere else for the palm to be holding the grips of the gun


the sockets are tuned for the first position, while when sprinting, I have the gun in another position, bot the sockets for the hands are no longer correct
Is it possible to override the C++ base class of control rig. That way I can create functions that will be present in all my rigs by default. I want to set up a procedural rigging system in code.
where can I find the most up to date maya to UE / UE to maya animation tutorials? I've been doing scott pagano's realtime motion graphics on linkedin learning but it's using matinee, which I can translate to sequencer, but the camera just doesnt import into UE with same settings as in maya... he rotates the camera 90 degrees in maya and creates a new camera which he bakes the animation into then exports to UE, I get the camera imported to my sequence but the field of view is totally wrong, theres unnecessary rotations in every axis etc and zeroed out depth of field
https://docs.unrealengine.com/4.27/en-US/AnimatingObjects/Sequencer/Overview/ImportExport/ I checked out this and in the video he exports a sequence to maya which includes meshes and all, I export my sequence to maya, I only get the camera
Describes how you can export FBX files from Sequencer and import FBX files to Sequencer.
Then I also tried exporting whole scene to maya from UE using 'export all' - all static meshes come through but not skeletal meshes
now I got it to work, blows my mind that paid platforms wont bother to update their courses, no rotations were necessary and had to click embed media to get it right...
he specifically states in the linkedin learning video that you have to do this or it doesnt work otherwise 😵💫
Thanks for this information @merry loom , if you have more, I take it 🙂
After looking at the code I dont believe this is possible. The class that has all the functions is a pointer in the control rig base class and there doesn't seem to be any virtual functions to override the values either.. Hopefully when 5 is fully released they make these things alteration friendly
Hey all! Completely new here (hehe), I need help with something in regards to an animation I'm importing into UE4 from Blender.
So my issue is that I have the eyeballs as a separate mesh from the rest of the character model I'm trying to import, I've made sure that the eyes are paired to the armature correctly, and when I import the character in their REF pose (T-pose) it imports properly with the eyes where they're supposed to be, but when I then add in the animation for that character model the eyes stay in the same location (origin point as they were during the REF pose) but they don't follow the character model at all, they just stay static as if the REF pose was still in effect.
The thing is that in Blender, the eyes follow the rig and have animation on them to look in specific places so I don't know what's going on here or how to fix it and was wondering if anyone here would know what I could do to fix that?
-- was told it'd be more relevant in this channel, so I'm putting this here 😅
You need to set in character construction your master pose as character mesh and eyes as slave
How can i increase the Rate Scale of a Character animation through blueprint can anyone suggest me some idea or the method to do that
You could always create a new cpp rig node easily. It is a bit different to extend control rig by design I believe.😆 just look up how existing rig nodes are created. They are called rigunits in code
You might be able to yoink the code from 5 and put it in 4.27. It might just work right out of the box. It should be in rigunit_worldcollision.cpp.
better it's to create animations in a blender or control rig?, for the trailer
The former is still a better way to go, because Control Rig lacks constraints
At least not without some float var and predetermined Backward Solve logic
so Control Rig will be better?
I tried in a blender and control rig
in control rig these animations don't look natural
my english is poor 😄 write what you would choose: Blender / Control Rig 😅
for making trailers animations
Hi guys! I have a question, maybe someone here already did something similar, So im working on a prototype of a figthing game similar to smash, in this case, i have a rig with different heads ( the characters are more cartoon, so the faces can't be animated with blendshapes, because sometimes there are new meshes, like fangs, or expressions that are way to different to the base mesh), what wouldl be the best way to "Change" or "Swap" heads during the animation, how would that work?
hello! is this an okay place to ask about timelines and the curve float asset?
BP timelines goes to #blueprint
thank you
I might be mistaken but wasnt there an option to reset transforms on selected controls in control rig. did they move that because I cannot find it for the life of me. lol and my muscle memory keeps ctrl-z'n everytime and I crash everytime
in sequencer, is there no way to select all the keys on a frame? no shortcut?
ah, if I collapse the tracklist, I can
I tried to import animations from mixamo (I imported my own fbx in the website) then selected some animations and downloaded them, then imported them in UE4 but for some reason my character is so small but the animation is working, how to solve the issue please ?
you can see that my character is so small and half in the ground

scale up in import options

put 100x and reimport
or 10x
But did the scale matter or is it just to see it visually at the right scale in the Anim BP ?
then how do I make sure the scale is the right scale compare to the player scale
try 10x or 100x
this is 100x

with 10x it gives me the same size as the screenshot above
nevermind
this is 10x

nevermind this is 100x

the first one was 500x
sometimes it can be how you export it from blender/maya
the mesh is just originally small
can use the move tool to move it above the ground ?
in belender he's above the ground


for me it's this

yea its wrong
Something weird happening. In the control rig blueprint everything is superb! When in the editor trying to do some animations controls are doing some weird things.


Ctrl G and shift ctrl g?
bruh!! thank you lol
How to convert world space rotation to bone space rotation?

I have an object in world space, but it have world rotation
The transform modify bone have bone space rotation
I still have my character being half in the floor, can I just move it above the ground or will it mess some stuff ? also using a scale of 1 makes the character still small but a scale of 10 is good so that's weird.
how to ignore rotation of basic ik node?
I Was able to get a solid control rig built today. Has FK IK switch with snapping, finger controls, Left hand parent constraint to the right hand, as well as a weapon control that is parent constrained to the right hand as well.. Took a long ass time to get things working right and had to deal with stupid UE5 bugs (like hard crash every time i hit ctrl z to undo a move i made on a control. Animating has some bugs too. The level sequence is a soft reference and even though its there somehow the asset validation fails and it causes the rig to break in the editor.. Cant wait until this feature is refined its so good even with all the issues.
I got the question: since the fish can turn around rapidly in the world, how do I implement the interpolation to prevent it moves to fast.

so it can work like how the blue line indicates

I am not sure but maybe you can produce something interesting using verlet node in control rig.
Hello! I am trying to play a montage on my character but it is not actually animating. I suspect it's a problem with the anim graph that I edited in the past. Can someone help me diagnose?
For testing I trigger the montage here:

What could cause an anim graph to suppress my animation?
Hello. I have a rig (for a model I can't show, it's for a game I work for) and we're a little stumped. We're trying to retarget the animations for it, but for some reason, the pelvis lost its location data.
So the pelvis is locked into place.
Things like the model crouching or walking don't work properly.
Both models have the exact same skeleton, it's just that one of them has smaller arms/legs closer together.
I feel like technically everything should be working, considering they're the exact same, but maybe I'm missing a step?
something about root motion
What do I do with it?
how can i align the last axis to the ground plane 🥺

@merry loom It works whithout change, I answer to myself here : https://forums.unrealengine.com/t/sphere-trace-in-control-rig-version-4-27/272150
Just doesn't works in the Control Rig Preview, but in a level, works like a charm 🙂

Unreal Engine Forums
Hello, I would like to know if “Sphere Trace” in UE4.27 works fine ? Because I’ve no problem with UE5, but no Hit with UE4.27, even on a simple graph UE4.27 UE5

how it look
The control rig cannot be found with "bake to control rig". I have already created control rig.
Does anyone know?

I'm not good at English, so I'm sorry if I'm wrong
My personnal notes :
A Control Rig can only be "detected" by a bake in a sequence when:
- It contains at least 1 Controler
- It contains 1 "Backwards" node
- It is declared in the "Default Animation Rig" of the Mesh
- It does not conflict with the name of another skeleton / mesh / Control Rig
( this is THE RUUUULE 🙂 )
thanks so much!
The problem was "It contains 1" Backwards "node"
appreciate!
I want to attach my camera to my first person skeleton so that I can have control over the camera animation. How does one do this? I’ve tried it but the arms always seem to lag behind the camera. I’d like to have the same movement that you get when the arms are attached to the camera.
you're welcome, it takes me couple of days to understand these simples 4 points without clear documentation
Bump. Need help with this still, hoping someone here can help.
Hello, does anyone know of an asset pack that has a "fist over heart" style roman salute animation in it? (Like this: https://gyazo.com/d4c9629b4f7e21df0e0c0b7e70088ac0)
Searching for salute has very few results and I've been looking through animation packs but looking for one specific animation in packs that sometimes contains dozens or even hundreds is a bit less than fruitful so thought I'd ask and see if anyone had come across one and knew what pack(s) to look at lol
Thanks
Is there any way to get skinned meshes to ue4 without any of the -90 rotation? Does anyone have the ultimate Blender -> UE4 export settings?
I'm using UE5 early access. Tried to create a simple root motion layer in the animation, but the root motion doesn't play in montage created from the animation.
use official unreal blender addon
hey i am trying to attach the gun to my characters skeleton and was wondering 2 things:
- i am wanting to have multiple different guns so how would i do this?
- the way i am trying to do it right now is directly placing the gun in the skeletons hand (if i had multiple guns would this be the wrong way to do it) and im wondering if i am allowed to move the arms around or if i should keep it t posing
I don quite remember but at least it deals with the scale and axis problem. I can imagine extra bones getting generated during the process if you are talking about leaf bones. My guess is that it is mainly due to blender using a bone system(bone length is a property of each bone) while other software including unreal uses joints. (Bone length are implictly defined by a pair of joints). Well the addon is not perfect but my argument is that the more people use it the more likely the addon will be improved.
would that be in a blueprint? I'm somewhat new to unreal when it comes to adding animation (I've dabbled with level design), so I'm not sure where Character construction is 😅
EDIT: btw this isn't for a playable character, I'm doing this for a cutscene animation
Add me on disc and I can assist later on
done, cheers Fresqo!


Hi has anyone encountered this white snapshot glitch when using save cache pose after a ragdoll? On a different simpler setup I do not encounter this. Thank you
does anyone know how to fix this?
Whenever I export a mesh with armature into unreal the end bones are always missing. Any way to fix this? Leaf bones have already been turned off. Help
Guys I need help
I import a car with bones and rig
but my wheels dont get physics capsules
any ideas?
Hey can any1 help - I messed with the skeleton of a bp ai (dumb) it was in a modkit)and now none of the animations will play only t pose only I’m not experienced. It was like an already made bp so idrk 😞
Hello, this time I'm trying to get the Mannequin to sit on a cube all in a Control Rig Blueprint, and I'm having some difficulty, I think I'm close, but the pelvis_ctrl is moving the opposite of my cube's position.
(basically the higher my cube, the more my pelvis_ctrl goes down and vice versa)


Can anyone answer a couple of questions for me? I import my character from blender to Unreal, then import again with the animations. The scale of my animations is extremely small but my character is to the correct scale...is there a something I'm doing wrong or does it even matter if my animations are not coming into the engine with the correct scale?
Hey, I'm trying to implement Simplygon to generate Skeletal mesh LODs, does anyone know if it's possible to specify in the LODRecipe which bones to remove? Currently it's doing it inconsistently which is my problem.

Came on here looking for these, but decided to google it myself. Hope it helps others too. https://www.lumpapps.com/printable-sequencer-cheat-sheet-unreal-engine/
how do i stop my wheels on the car from collapsing when simulating in physics tab?
instead of using the offset use -offset?you could set variable values in control rig to test things out first. Also you are setting the pelvis control local transform, maybe try global?
Hi, i try to retarget tp animation to fps arms. Is this possible or will it break?
use official unreal blender addon
In unreal things are joints, so you wont see the end point of your bones unless you add leaf bones. The import is working as expected i believe. If you rotate your joints, they should deform ur mesh as expected
Hello, if I am using the dedicated left, and right hand skeletal meshes, is there way to get them to have their own instance of the same AnimBP?
right now its looking like they can draw from the same animinstance class but i would need to make a dedicated animbp for each hand
When i import my weapon skeleton and set scale to 1, UE4 set its to 100....
Anyone knows why?
Is there a way to have the control rig make a motion path display to help change my arcs better?
Is there a decent way to replicate turn in place animations?
Do one turn, then in the sequencer select the keys for transform (make sure you are only seeing the row of transform) Then go to the next frame and paste. It should paste the keys. The thing you may have to change is the rotational curve. because if it goes from 0-360, then the pasted rotation will be 0-360 again, possibly creating a motion blur and snapping render issues. Take the rotational curve of the spin and pull it down so that it is starting at 360 rather than 0. Hope that helps.
Finally, I used the location output of the Sphere Trace and not only the Z Location, and works fine. I don't know really why ...
Do you have an idea to how debug variables in a Control Rig BP with UE4.27 ?
For example : I would like to move my cube and check some positions variables in the Control Rig BP, possible ?
you might be able to, in your graph add set transform node of a new control by getting the value from the variable. That way you could tell the value of the variable by looking at the position of the control in sequencer.
is it possible to animate your character in a cinematic without importing new animations?
Use control rig!
sweet thank you very much!
Imported from blender?
Is there a way in blender I can attach the pistol to the hand but then use the pistol's movement to key the arm? I tried parenting the hand to the pistol, but the keys end up exclusive to the pistol and I need them on the arm for when I import them into unreal

Constraints.
How can i reverse this animation?

Hello! So I'm a little more used to characters in Unity than Unreal. I was wondering if there was an easy way to change blendshapes of an FBX model, or an easy way to turn off and on parts of a model that consists of one skeleton, but multiple meshes.
In engine
Because I'm not sure if I imported it wrong, but I can't see a list of blendshapes, nor can I see a hierarchy of meshes, only bones.
is there a way to only apply an animation on the upper body-
If my animation is a montage that i call through the third person character blueprint?

i'm having a "draw sword" animation
and it happens so rarely that i felt like it'd be a waste to send a bunch of variables over to the animation blueprint and over to the animation graph and do it there...
oh so i don't have to go through the anim graph or the anim bp montages 
neat
wait, there's a difference between BP montages and ABP montages tho
well there's these two in the anim blueprint

and then there's these 2 in the third person character blueprint

for some reason 
I had gotten a mesh and animations from Mixamo and made a working character. animation blueprint and such. I thought maybe i can use the same stuff and just use a different mesh. i assign it the same animation blueprint, it works in the preview but when I go into the game it doesn't do anything but stand idle. Am I missing a step?
Yes, i found a fix already. Gotta make it 0.01 scale then apply scale and then import it with 100 scale again.
Does anybody know how to change the default pose my skeleton asset is in? How to permanently make modifications to the transforms of the bones in my skeleton asset, to be more precise.
oh- i always thought the animation blueprint & the character blueprint ran on different threads or something and one overwrote the other
i see
alright... thanks for the help! 
I have long quitting Unity, but I'm getting that you're talking about modular meshes, as in interchangeable parts, correct?
I won't be surprised if the Unity parallel in question is something completely different than modular characters
Hello everybody 🙂
New project: trying to animate inside Unreal 5 (via sequencer) only.
Coming from MotionBuilder, I lack some basic animation tools, I'm not sure are available in Unreal/sequencer, main one being being able to PIN CONTROLLERS in WORLD TRANSFORM (that is e.g. root can be adjusted but certain controllers stay put).
- Is it possible?
- If not, can I at least get controller world transform coordinates when selected? (so that I can copy - paste to a later key)?
- If not even that, can I get gizmo world transform coordinates on selected (as it should be the same as controller)?
Thanks for your time and advices.
Is there a way to play an anim sequence from a variable in the anim bp in the anim graph?
I want my weapon data assets to specify the pose for character's arms while equipped
I think i found the answer if someone needs in the future:
https://forums.unrealengine.com/t/use-animations-stored-in-variables-in-anim-blueprint/138136/4

Unreal Engine Forums
I found the solution to this! Toss any animation asset into blueprint. Click on that playable animation asset within the anim bp, and look in the ‘Settings’ tab. The first option is ‘Sequence’ where it shows you which animation is going to be played. To the far right of this option is an ‘expose’ checkbox. Check it. Now you can plug your anim...
With my limited knowledge, I'd suggest looking at control rig
Yes, the question is about animating with UE's control rig implemented.
does anyone know if the "use normalized root motion scale" thing actually does anything in practice?
a rough search in the ue5 main code base seems to indicate something is in the works, cant tell how complete the feature is tho, this is in ue5-main/Engine/Plugins/Animation/ControlRig/Source/ControlRigEditor/Public/ControlRigSequencerEditorLibrary.h

Correct me if I'm wrong but this seems to be the basic keying function (within parent/child relative space)?
quick question... I want to add a suffix to all of the bones in my control rig (UE5). Is there an easy way to do that...and will it break the rig? I have no animations attached.
not sure I understand but it looks like the input space here can be any space, so basically at any point in the timeline you can change the space of a control to not be its original parent(hopefully world space for example), which looks like what you want?
are you talking about imported bones? Or new bones created in control rig? I don think you can even change the name of imported bones
It was letting me, although with the caveat that it would break any animations I had, but this guy doesn't have any yet. I just went back into Blender and batch renamed the bones, then reimported. Safer that way, methinks.
yeah probably
Exactly, that would the desired outcome.
But I'm afraid the naming of the parameter is a bit misleading. Seems like what is called "space" here is actually just a value of a transform key you're trying to write (as it only checks whether the same value already exists → If it does, don't make a key; if it doesn't make a key. Probably related to the functionality in the picture below).
It doesn't really care how the transform values were calculated. The documentation of the function even presumes the key is in what they call Control Rig Space, that is a local space of a bone relative to its parent. 😕

that function references this function, where you can see a potential value of spacekey can be a world space thingy and later in the func there is mentioning of switch to parent, this is from ue5-main/Engine/Plugins/Animation/ControlRig/Source/ControlRigEditor/Private/Sequencer/ControlRigSpaceChannelEditors.cpp


Oh, I see! Do you know if there's a simple/quick way in the editor to do the switch?
Sry I don't have a build locally with me, hence can only show you what is in github. You probably need to build the engine from ue5-main source. Though I do wonder if it will even build without errors.
No worries and thanks for your time. I thought I was overlooking something but the possible space switch is still better news than nothing.
I'm trying to use control rig on a rig I import from blender. Whenever I import a rig that I made in blender by parenting the mesh to the bones with automatic weights, and then exporting it to unreal, the meshes don't follow the bones when I move then with control rig. And this bone

Instead of staying at the same place, moves down here

This is my process
Please help I have been stuck here for a long time
Here's what I did to move the bone but the meshes didn't follow
i dont see you actually moving the bones in blender, so i have to wonder if the model is skinned?

okay, lol, just gotta ask, just in case - I've not worked with control rig, but you said that the mesh doesn't move when you move a bone in unreal no?
sounds like an export problem then
i saw that you exported with some settings for fbx, but i couldnt see all, so maybe double check
okay hold on
for example: deformed models and skins to be checked on
deform bones?
i dunno what its called in blender, i use a different software, but stuff that has to do with skins
its the bone thing
whats Armature FBX?
its set to null
and the last thing in that list is Bake Animation? nothing below that?
fair enough
This is more of your bone's issue.
How do i solve it
thanks hoodie guy, you know Blender 🙂
Like what the hell is RightLeg_2 supposed to represent?
idk all the names got messed up
i dont really care about the names now
because i constantly need to change the bone and then the names change it i dont like to change them back
The names are important tho, because the hierarchy got messed up like that, and causing the IK to not work
I haven't even put any ik
I just made the bone things
I want to do the ik thing with control rig in unreal if that's how control rig works
Yes, I see very clearly that you're attempting to put Basic IK node in the rig graph
Adjacent bones in the same level won't interfere the IK, but skipping more than one level isn't going to cut it.
the model does not move skinned parts like it does in blender, thats what ive narrowed it down to, hence it can deform in blender but not in unreal
what does that mean
In short, your bones used in the node skipped a level of hierarchy.
okay
The IK goes from thigh bone to ankle bone

I think this is more of Control Rig issue, with how the IK node is setup
if you say so, afaik the mesh doesnt deform in unreal, before getting to control rig, but i wouldn't doubt there are problems there too

If the mesh don't deform in UE, might as well test it with anims premade in Blender.
not sure i follow what you mean, i would assume its an export/import setting problem since it can deform in blender
uh the mesh is moving now but it's not following the bone

Well, it did deform.
that it does!
Wrong axis in the IK node, perhaps?
help man tf is it doing
UE5 Control Rig... am I missing a switch, a button, a setting. It's not working like UE4.
How do you set them up in the first place?
Does anyone know if you can have local variables in UE5 control rig functions?
Your bone names has spaces in them. In skeletal mesh it replaces them with - but in control rig they become _. Just dont use spaces in names
Looks like control rig local var is supported in the ue5main branch, looking at github
@merry loom Ah thank you!
Weird. Okay thanks.
Someone here faced problem with rotation of Mixamo Character?
I've used mixamo converter plugin to add RootBone to the Character and to the animations and actually it seemed good to work. However i'm using MotionSymphony Plugin and i faced the problem, that the trajectory of my Character is somehow wrong calculated. I think that it can be because of wrong initial rotation of Mixamo Character, with Z Forward Axis and -Y Up Axis (not like by UE4-Mannequin).
I'm trying to change the Character rotation in Blender, but if i change it to 0, then my Character in UE4 is laying on the ground. How can I change the rotation of mixamo Character correctly?
Any ideas would be very helpful.
roxanne wolf

One more control rig question... in UE5. I can replace the mannequin with a custom mesh and he controls great, but he has to stretch to fit the rig. Is there a tutorial on adjusting the rig size by bone? Can that be adjusted?
Even when following a YouTube Tutorial on doing it, i cannot repose and remap Paragon Twinblast to a Mannequins Animation ...
Is there any good hint on what may be wrong, too ?

i would say the wrist rotation doesn't match enough, but it's a new topic for me as a programmer...

don't know what i want to do, and trying it now for about 5 days ...
ah !
finally ^^
better !

Revenant still is a case ...
Hey all, I'm having an issue with the unreal skeleton. I imported the unreal skeleton into blender, weighted my model to it, then imported back into unreal. When i retarget or replace the mesh of the basic UE4 manniquin with my own its all twisted and contorted. the closest i have gotten is crumpled fingers and a weird stomach. will attach picture.


The A pose is wrong for retargetting from Manny, and because it's Blender, chances are it's the wrong bone axis.
#work-in-progress
would this mean I need to adjust the Manny pose, or I need to adjust my mesh? additionally what is the preferred bone axis?
Preferrably the other way around. That means adjusting the rest pose of your model to match Manny's A pose.
As for bone axis, it can be explained by importing SK_Mannequin to Blender without auto bone orientation
Thank you, ill give this a shot and see if that resolves the issue
i got revenant working - yeah
Looking for a tutorial about rigging faces in UE5 control rig. Custom character. Blender's Auto Rig Pro (paid plugin) actually made the import to UE5 and retargeting pretty easy if anyone is interested.
Or UE4 for that matter.
You can look into MetaHumans on how they did face CR, but tbh rigging realistic faces with bones is batshit difficult to begin with anyway.
This character is cartoonish... hoping I can get some decent results. I don't need all the tools MetaHumans use, but a simple subset might be nice. He is already rigged and his main joints are setup in Control Rig, I just need to Control Rig his face.

Then it doesn't matter, you can still have methum as reference for the setup
Assuming you use bones for the face as opposed to morph targets
Hey hope everyone is good
any idea how can I play a dead animation montage and keep my character at that montage
like not returning to the animBP
look how the worm dies and then it returns to the idle

thats what I got
how did you make the wires go so straight and diagonal
woah
Either:
- Run the death animations entirely in state machine/anim graph
- Run the death animation montage and toggle a boolean variable (e.g.
IsDead) looked up by the anim BP to transition the state to dead idle
So I'm finally at the part where I'm going to learn to make custom animations using Blender. I have no prior experience at all in animations or Blender.
I want to get the UE Mannequin from UE, get it into Blender, make some simple animations, export as FBX, and then import it to UE.
The first step is to get the UE Mannequin to Blender. I've read the easiest way to do that is to download and install the Mr Mannequins plugin for Blender.
I'm just wondering but why doesn't simply exporting the UE Mannequin from UE and then importing that into Blender work?
I'm reading a post 3 years ago:
If you export the skeleton as FBX it will be skinned but not rigged.
Why wouldn't it be rigged?
Why going through Mr Mannequin Tools? Because not only it is compliant with UE Mannequin, you have animation ready rig with all the controls for your convenience. Once you're done, you can export just the deform bones and baking the animations in the process, and call it a day.
But if you, for whatever lunatic reasons, wanted to painstakingly animate by rotating per joints, then by all means, import the SK_Mannequin to Blender as is.
Hm, yeah I will definitely try to use Mr Mannequin over exporting manually
I was just wondering what the manual exporting would miss out
I am newbie in animation/Blender so I don't really know much about this
But from what I read: for example, exporting a model (that doesn't use the mannequin skeleton) from UE to Blender means it will not be rigged
Is that basically right?
Incorrect.
For clarity, when you export a skelmesh from UE4 to FBX, it'll carry the skeleton with the bones that it uses.
Hm, so then you could export any 3d model from UE to Blender, and make custom animations for it and reimport it to UE
But Mr Mannequin simply provides extra functionalities to make it easier?
Correct.
I see, I think I understand
Thanks
With control rig you can just animate in Unreal and leave Blender alone
But you have to attach the controls in unreal to make that work
Hm, what's the benefits of using control rig vs doing animation sequences?
i would assume that using control rig is all within the engine vs using a separate software
importing from software can be annoying sometimes
Nah, animating with Control Rig is serviceable for basic anims, but sucks with anims that rely on constraints, like character holding something.
Sure, you can say "just attach the mesh lmao", and it's fine for gameplay third person anims, but for cinematic anims and first person anims, constraints provide much better solution for holding object anims.
Just because Control Rig allows for animating in engine, doesn't mean animating in Blender or Maya is irrelevant.
And don't get me started with less intuitive tweening, UE's odd curve interps, unweighted curves by default, dealing with gimbal lock issues, chance of crashes mid work... just to name a few
Just to clarify, I'm not shitting on Control Rig. Don't get me wrong, it's a cool system, especially used in gameplay, but its in-engine animating tool is by no means full replacement with proper animating in DCC tool.
I've worked in Maya for about 20 years as an animator. Unweighted curve are my default way of working with animation. If you need the curve to be longer, just add another key. I've been animating with control rig, and I find it to be very similar to Maya. Certainly a lot better than something like Aftereffects animation solutions. If you run into gimbol locking you can try using the Euler filter in Unreal (Or Maya) I haven't tried constraining anything yet so I can't speak for that in UE
Exactly what I was thinking. Sometimes it is easier (if you don't know how to animate) to learn how to animate in the program you want to be using in the end. If you want to know how to make a control rig for your imported FBX, check this out. https://youtu.be/Xgwuoia_3G8
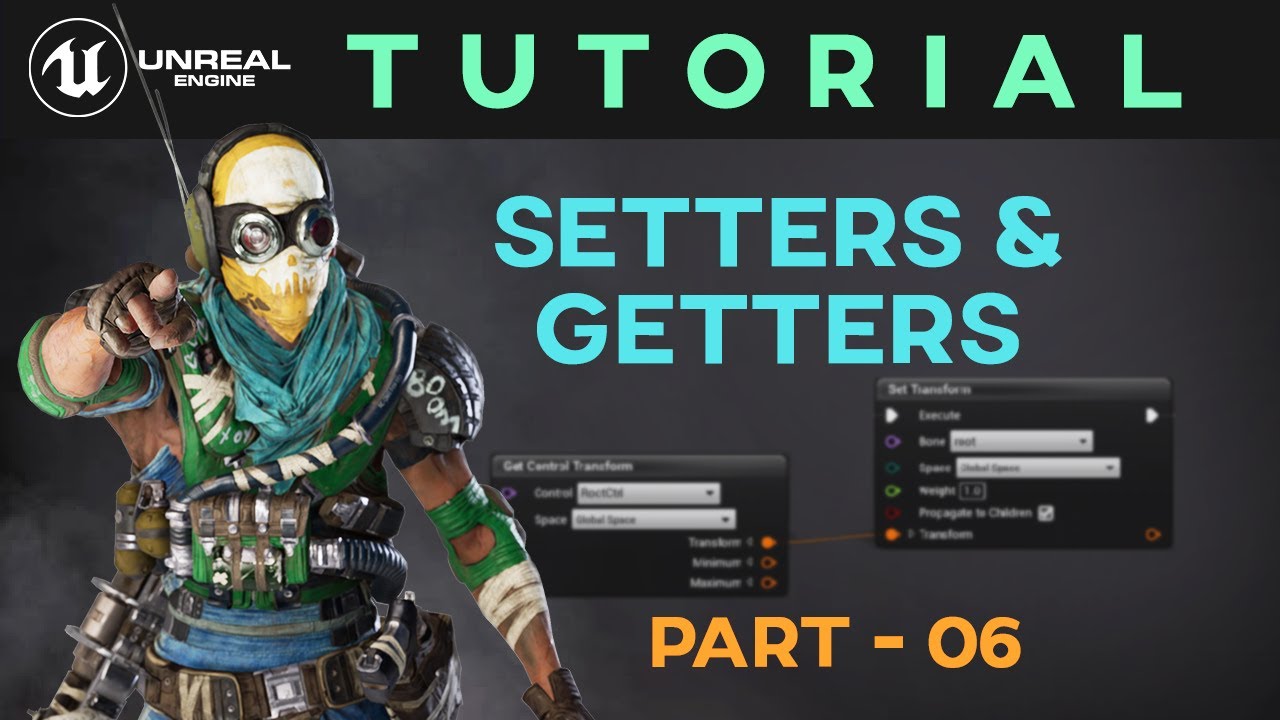
In this video, we'll start creating the Control Rig for our custom character Drongo by creating some basic Controls & Spaces. Later we'll learn how to make them functional using basic Setter and Getter nodes.
Thanks to Amaresh Beuria (https://bit.ly/3hPFkbe) for helping me with this series.
Don't Forget to give this video a BIG THUMBS UP! as i...
How can i prevent animation from affecting other?
hey folks, so i have a bit of a problem
i have a bunch of anim packs i bought for ue4 and am trying to get into ue5. when i migrate the anims from ue4 projects (they cant be imported into ue5 natively) i have to retarget them
when I do this they all break and the character is stuck in an a pose
the additive anim setting for these anims is 'no additive' and when i change to mesh or world space, the animation comes back
BUT if i build blend spaces with assets that are anything but 'no additive' when the animBP utilizing said blendspace is applied to the skeletal mesh in my pawn, it disappears
i'm in a real pickle!
haven't used ue5, but it think its a different rig, Manny 2.0 or something
as far as i can see its the same manny, it's even called ue4_mannequin still
ok weird so if i export all the anims first as fbx then reimport them and choose the same skeleton i was targeting to, they work
i'm sure it'll get fixed up when it comes out of EA
Hello everyone! Somebody can help me...
I found animation, create animmontage from it, and set-up custom anim slot. In animation blueprint I add this slot. And in blueprint class I call "play animation montage", but in game, when I press 1 it doesn't work. Somebody know, what I do not right? May be I forgot about something?
Why does my character lift a bit off the ground when punching?
I have a problem with rigging, is this the right channel?
Ask away first.
I imported a character component(headgear) that is already rigged to epic skeleton in blender, modelled another headgear and copied weights from the rigged headgear and then parented it to the skeleton. After importing it back to ue4, it does not work as expected.
- It throws some skeleton error (Missing bones)
- When I use the master pose in Character BP, for some reason it flips 180 on the z axis, and -90 on the x axis.
-
Check in Blender if there's a bone that is in the wrong hierarchy level. You can have a skelmesh add new bones, not using some bones, but not having a bone in a different level in the hierarchy.
-
Check your bone axis in the export settings.
this is the component I am copying weighs from

this is the component I am copying to (Skeleton is the same)

what do I exactly do?
i have a question regarding exporting and importing skeletal mesh, 🤔 maybe its wrong place but i cant find the correct place for it..
anyways i have a skeletal mesh in UE4, when I export it into .FBX, open in 3D viewer, the legs are missing - same thing when I import to Blender -- what could be the cause?
the legs are obviously there in the skeletalmesh, i can see them
it imports the bones though
-nvm found problem. If someone has similar issue just delete everything under -> Window -> Clothing
Hello is there a way to do this without keeping track of a bool maually thanks

not sure what you're doing, but i just have that blend weight as 1 and if a montage with upperBody slot plays, it will override the current animations because the blend weight is at 1, otherwise the rest of the animations are from the cache
Well that would be great if it did that, but when no montage play in slot Upper Body, it just freezes over the upper body
Im guessing I could get some other settings to do it otherwise?

No matter what I put in Curve Blend Option does not change anything tho
maybe the blend depth? that means it only affects that bone no?
i think 0 will do all bones in hierarchy
you are inputting the cache into base pose right?
Yeah the base pose is basically BasePose default slot
0 bone depth does not seem to change anything either :/
not sure then, that's basically my setup


As you can see she's doing nothing with her arms


i mean i have a state machine, but i guess thats the idea
So even this way
the character upper body is frozen
If I unplug Blend Pose 0, I get a T shaped upper body
well i mean, the poses are different - the ones plugged into layered blend per bone
Are you setting AttackSlot on every animation?
but the picture i posted is what works
no, default is all the locomotion animations like running and jumping
attack slot is for montages that fire as a one-off
same as what you have, but the bone is pelvis because i override the entire body, bone depth 0, blend weight 1
Do you get a T shape if you unplug Blend Poses 0 ?
no because my locomotion animations dont use that slot
Mine dont either
if i unplug it and fire one of the montages that uses attack slot it will T-pose
Then I dont understand we dont have the same engine lol
Even something as simple as that just give me a T Pose


CC-Block doesn't use a slot right?

yeah i guess not
My theory is that layered Blend per bone are exclusively overwriting each other and that they dont "pile up"
So you can essentially only use it once
oh you are using another one somewhere else?
Yeah
i guess so, you'd need to pipe them all into the same one
Basically I have
- hit animation
- eat animation
- upper body animation
if they each target different bones then yeah, you're handling different bones lol, so you need the base and three blend pose inputs
i think they can all be at 1 weight, but it only gets tricky of you are overriding the same bones with different slots
not sure blend pose 0 takes priority over blend pose 1 for example
No they dont but basically if I pipe base -> eat -> upper body, having a eating animation, but not upper body animation will cancel the eat animation
Which is kinda stupid because it should just not touch it
then that's where controlling the weight comes in i guess
Combining them doesnt help actually because they dont chain either way
THey only want the state machine animation or theirs
they just overwrite all other pins

you have multiple state machines?
See here I have pose 0 for the upper body and pose 1 for eating (yes its called block sorry ahah )
that doesnt look right
If eating has 0 as blend weight, then it will remove the animation from upper body that is currently playing and output the base pose
on its bones
(Eating plays only on one arm, so it removes the animation from that arm)
maybe dont do it this way lol
How else can I achieve this ?
well are you able to get one slot working even?
Yeah yeah if I have only one its fine
then see if you can find out how to mix more than one i guess
or else just work with the one slot and have your animations created in accordance
in other words, only one action can happen at a time instead of multiple
Well the issue is that I need at least 2 to separate upper body and full body motions

But this is removing the upper body animation part of each full body animations (default slot)
maybe you can do full body here at this level, and then for upper body, add layered blend per bone nodes in your state machine to override at that level. That would mean full body would always override because the other layering is done within the state machine (cached pose) while the full body overrides after that
Then the problem would be reversed: empty full body would just remove all upperBody animations
I think I found something though
It seems that upperbody is not empty by default, but output the result of the state machine
i mean its not, thats why you are caching

I created an empty state machine and now the upper body of the model just T pose
Basically it always play even if there are no animation no matter the settings
But it does it on top of the state machine (hence why you have no issues)
base pose gets overridedn by the blend pose yes
well i guess if boolean works to control it, then keep going with it
Well it does work but it's overly complicated and causes a lot of bugs
Because you lose track of it pretty easily
Honestly I would just need a simple method "isSlotEmpty" but cant find anything
OK I found a kind-of-solution-maybe by adding both slot to ffull body animations
hello guys!
Can you please help, why my imported animation is super tiny?
i've found the issue when renaming armature from blender works, but it doesn't for me
any advice on that?
sounds like a scaling issue, but i dont use blender
maybe exporting with the wrong scale factor
ive heard that the default armature name can cause problems so renaming it is a good idea afaik
yeah, i've renamed that, scaling is default and the mesh imports just fine, but something's wring with animation
How would I go about fixing the idle stance for my assault rifle? The hand doesn't grip it properly and it semi clips through the body: https://gyazo.com/fd3ae24394096b7a0a33ffd4ecdef07b Is it recommended to use a fabrik node?

Anyone dealing with the annoying control rig bug where you save your sequence and your level and your bones just teleport to another position even though you have them keyed in a specific position?
What does it stem from?
Okay I found the issue. I was doing something completely wrong in my control rig blueprint. If anyone is running into this give me a ping
Do you add grooms to your control rigged character? I feel like I should apply them to the skeletal mesh and then see them, but it's not working. I can add grooms to the control rigged character, but they aren't binding...and adding sockets caused a crash in UE5
Okay, so this worked for me: Drag the control rig into the scene. Then drag the groom in to the scene. Line it up on the rigged character, right click and choose "Attach to", then select the control rig and the bone where it should attach (head for hair)... I also did eyebrows. We'll see how it animates, but it sticks to the character.
Geez, all those UE5 (possibly EA2) specific questions, and I'm still sticking with UE4.
Hello My friends I'm relatively new to unreal and I have encountered a problem with the animations I have imported from mixamo. The animations play correctly in mixamo but when I import them to unreal they don't move the same way for example I got a dodge animation and it worked fine then I got it in engine and now all the animation does is this weird bend over thing while staying vertical . Any tips or fixes?
Because Mixamo rig is unorthodox to Unreal Engine's standard convention for biped rig.
For starters Mixamo don't have dedicated root bone, and uses pelvis (named Hips) as the root bone. Hence the weird bend over thing that I can picture in my mind.
is there a free alternative with better rigs?
Free characters and all that?
No im doing this just to learn unreal so if i can apply it to the unreal mannequin that would be ideal
Then you can look into the marketplace. Epic put dozens of Paragon characters there for free.
Do you have any good resources for doing that? i watched a tutorial and followed it but every time i tried to retarget unreal creashed
Im trying to watch tutorials on how to do animation for wheels. Almost every single one uses an animation blueprint called vehicle anim instance but that does not show up for me as well as other things like wheel blueprints. Im using unreal engine 5. Is it not included in 5?
Control rig functions cant have more than one return path?
Hey guys. I've imported fps character to tps project to have arms assets but after retargeting the whole skeleton for all animations I cannot see model of arms in animation blueprint and for player animations are not working

nope it cant do that yet
goodmorning, just wanted to ask, do anyone have links to any videos or resources for gun reloading/animation tutorials ?
Basically reload anims boils down to use of constraints, so some videos on constraints
https://youtu.be/U8JXO39aAqY
https://youtu.be/jXCq8CncEeA
https://youtu.be/aZt07wyasnU

Today I'm showing you different methods of connecting objects to your characters, from the easiest to the most advanced and foolproof!
My Amazon Recommendations for Artists: https://www.amazon.com/shop/sirwadefx
Project Files Available Here: https://www.patreon.com/SirWade
This tutorial is longer than usual, but it's a full animation lesson a...
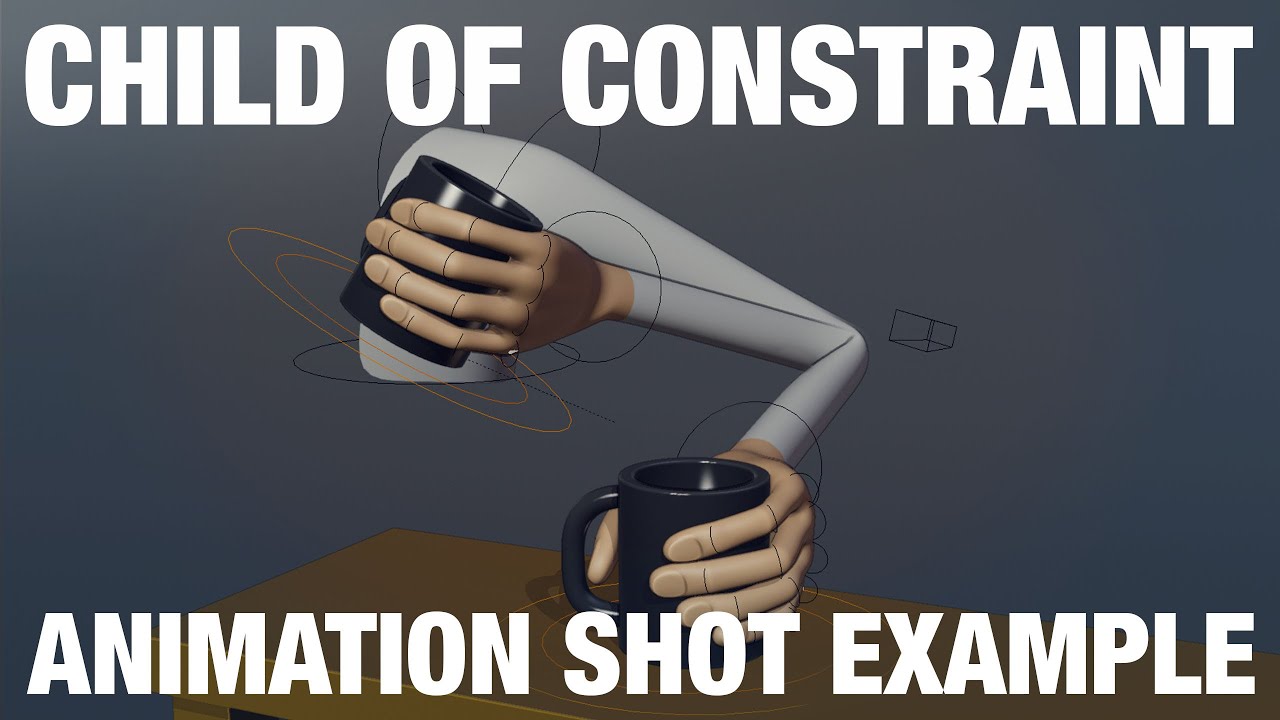
This example reviews how to use the Child Of Constraint in a simple shot.
Download these files here: https://gum.co/pZtWA
This example is something that is fairly common in shots, picking something up and putting it back down.
There are other ways to do this, this example is simply showing how to achieve this with the child of constraint.
...

Animation Constraints is a hot topic that I have been getting questions here on the channel, how to best use them. Here's how I used them in a professional environment. It might surprise you how simple it can be and how little you need to use to get objects or limbs to play ball.
Sponsored by @Autodesk
🔴 My Patreon: https://www.patreon.com/h...
Incredible
I’ll try it out !
Take a look
anyone know ho to fix the animation that wukong is currently playing?

its supposed to be hit reaction but
it became something weird
What's the issue here?
What is the intended result? How do you setup the hit reaction logic?
hey all
any idea why this is always returning 0, even if the character is clearly accelerating ?

i cant get "is accelerating" runing
You might have failed that cast node
hey man
what do you mean ?
the others work fine
im getting the speed and direction
but acceleration is always 0
#blueprint it is then
hi !
**Problem in animation**
-my animation jumps like 1 meter straight with an cougar claw attack in the air.
Thats actually no question?
- yes it is ! when i apply the attack in the blueprint i have to set-up how much distance he has to make a smooth transaction between begin place and end place...
So whats you're question?
*- Wel... how can i see in the animation how much distance my character / sk_mesh is leaping forward? *
**Anwser ? **
Thanks !
change it in the animation BP, search like how to apply speed and direction in animation BP on google or yt and you will find your answer
By measuring with Unreal's default cube, which is 1 m³
Or alternatively apply root motion if there's any.
thanks !
Hello,
I previously imported and animated a character in my unreal project. I have now updated the character with new mesh and abit more advanced skeleton. The Skeleton hierarchy is the same, - but some joints are added.
How can I use the old animation assets with my new rig, what are my options?
hmmmm

shall i apply a lod ystem on each rock or shall i make it one big mesh or shal i make 3 different meshes with good lod system ?
the animation well according to my brain (its probably not right) its because it went through base pose animation twice im guessing
300x700 m
the logic is based off here
Hello, I've a problem with the Transform (Modify) Bone node. For some reason it's not modifying the rotation or translation (if playing), even though it shows the correct modification in the Animation BP view. Modifying the scale works when playing.

Thanks. I thought I was trippin because a lot of my functions weren’t firing! They should add print string to debug the flow
You should be able to tell which nodes are running by looking at the brightness of the wires
Can someone please help me. I am trying to learn this but it's difficult to find any help. When I import from blender to unreal using the addon my hair is unattached, when I attach the hair using a socket I can't add physics simulation to make the hair move. If I use manual import (importing character then reimport for anims) my animations are scaled wrong. I tried retargeting but it gives me errors too. Any help will be greatly appreciated.
how do i choose my character to male in mixamo
Not relevant. Any mixamo characters can be applied with all animations, including (fe)male anims on non human biped characters
oke
why i get Mesh contains the root bone in the description, but animation does not contain that bone track. The animation data should contain at least root bone track.
import from mixamo
Mixamo rig is trash, unorthodox. That's why.
Their rig don't have dedicated root bone, as UE expected, but instead have the pelvis/hips bone as the root bone
so its a no go?
Personally I distance away from Mixamo.
But granted I can make my own animations.
Mike shows you how to import Mixamo animations and rigs into unreal engine (UE5) to create games, cinematics and animations!
Superhero UE5 rig: https://rendercrate.com/objects/RenderCrate-Male_Superhero
How to use PRE-MADE RIG! https://www.youtube.com/watch?v=LLmEndL4Fdg
------Video Content------
0:00 - Intro/Prep
2:12 - Importing Model and An...
this guy import fromt mixamo
and it works
Ah yeah, hype youtubers cashing in on UE5 hype. YouTube is such a wild west of stuff like those

Also just to clarify, I'm shitting on Mixamo, because Adobe effectively abandoned it. When it work properly, it served good enough.
Back then (before 2017), Mixamo used to support Unreal Engine standard, but because they deemed it "not popular" compared to Unity (their words, not mine), they dropped the support for UE rig conventions
actually this tutorial is pretty good
i think i might get some animations from the store
If it works for you, then by all means.
But you can get anims that are better suited for UE in the marketplace. I know, kinda sucks because Mixamo is free in comparison, but it's unfortunate that Adobe screw up the whole service.
Anyway, tangent's over.
In short: use Mixamo at your own risk.
are you jp?
@cinder pollen What about your animBP's event graph?


So you're trying to cast to the Rampage Player Character class?
Do you use a different class for NPCs?
I am just messing around in this project so I just imported the character, did a few things, and then tried to make it an AI I haven't done anything else
And then you try to get pawn owner again and again, instead of storing it as reference in initialize event. 🤔
You should try playing the game while having the animBP editor debugs the one in your level as opposed to the preview actor (change the Debug Filter in the toolbar above)

? which one do I select

Whichever corresponds to the AI in question in the level
there was only no player or the rampage character
Geez, I'm blaming the BP class naming first.
okay well my problem is still here and idk how to fix it
The one I want to know if Try Get Pawn Owner actually returns valid or not. I think often times this is invalid after init
did anyone here ever made "aim offset"?
https://docs.unrealengine.com/4.27/en-US/AnimatingObjects/SkeletalMeshAnimation/AnimHowTo/AimOffset/
Using an Aim Offset, a character aims a weapon in the direction of your mouse or controller.
Yes.
It's almost similar to blend space.
hey there
i tried to follow it
my "problem" began at:
"In the Content/AnimStarterPack/UE4_Mannequin/Mesh folder, Right-click on the UE4_Mannequin and select Create Aim Offset."
the pose looks like that after i droped the different poses:

and i dont know why or what this is causing
Hehe, it looks like one of those silly dances in Yakuza series
How do you setup the animations in the aim offset?
1:1 like in the tutorial
i created each one based from "Aim_Space_Hip", like chopping it into pieces
i think i found the solution, can i show it to you so you can "confirm" it?
😄
i think the weird poses is a result of mixing the "idle state" with the newly generated "UE4_Mannequin_Skeleton_AimOffset2D"
but i dont know if that is correct
Mixing idle state? 🤔
So your Aim Offset has the idle anim for one point in the grid?

Well ngl that was kinda anticlimactic, thought the asset itself is problematic

So I have a bone parented to my hand in my rig ( WeaponAttachBone ) I have a control that is supposed to transform this bone but for some reason it doesnt. I've tried a couple of things where I take that bone and project it to the ik_hand_gun bone then transform the ik_hand_gun bone with the control. That doesn't work. Basically what I want is the ability to control my weapon bone so I dont have to use sockets for weapon attachments. Which can get super tedious
When retargeting Mannequin Humanoid Animation to Paragon Revenant, how would i avoid this shaby shoulderpads or the cape falling through my leg ?


i don't know any hint to solve this ...
Was it physically simulated?
how would i find that out ?
it's an animation mapped to mannequin.
the other one is paragon revenant.
sorry, i am a programmer, doing this for my bachelor project.
Nah, my mind keep thinking about Doom's Revenant
i understand
But yeah, I haven't checked all of the Paragon characters. I only checked on the girls and some beasts
So I don't know the oddities specific to that character
i got it working on kwang, wraith, sunwukong and twinblast,
but this guy is a bit tricky with his clothes
the others don't have cape or shouldpad though ...
with characters with tight clothes, it's quite easy
but that things look shaby
Hiya, is there a way to make this a dynamic value I can change at runtime?

No. The FSM is pretty much read only.
Dang. Any ideas on making a blend editable at runtime?
Just in case you might have any idea. Thanks though otherwise
For revolver reload anims, I suggest going through montages and anim notifies
Its for the aiming transition from Idle to aim. I have 2 animations, An idle breathing and an Aim Breathing. Having a "Begin Aim" and "End Aim" creates issues for sights on my guns. So I was hoping to make the speed of the "idle -> aim" a variable that could be increased with a skill level
Ah, I'd recommend going for additive animations instead, as opposed to hard states.
Additives eh. ill see what I can conjur I guess.. Thanks!
can you select and cutout a certain element and then edit it further? like in the middle it looks like human from the back

...not sure how this relates to animation in UE
idk where to post
hello does anyone know how to set animation mode to anim blueprint immediatley after an animation playing
Just a curious question but hair and cloth physics for characters are handled in UE, and not in Blender right?
Like in Blender the hair and clothes are static with no physics
Then you import it to UE, then add hair and physics in UE
Is that right?
Hi everone,
I'm having issues exporting and re-importing a skeletal mesh using 3dsMax.
For some reason 3dsMax creates a new root bone with the original mesh name as well as a secondary bone structure with one bone.
Would love to hear if anyone else has had this issue.

Unless it's for a specific cutscene animation, let Unreal do the realtime physics / anim dynamics.
This bone is not visible before export and only shows up in editor after import
Okay gotcha
Yeah I just saw Blender had this Cloth Simulator feature that basically transforms things to cloth that looks really nice
So I was wondering if it was possible to somehow use that in UE when you import the character, but I guess not
Thanks
hello does anyone know how to set animation mode to anim blueprint immediatley after an animation playing
Also, don't expect full per vertex cloth simulation entirely in UE, or you're asking for trouble
Nevermind, found the issue
???
How can I set the end frame?

HI there, anyone know or sell Animations for getting in ,staying and leaving a closet?
how do i make a preview asset on a socket show ingame?
hello does anyone know how to set animation mode to anim blueprint immediatley after an animation playing

Why is my animation invisible?
hi, got a question
I wanna make a soulslike game and I wanna handle melee with two state machines in an animation blueprint, one that's always active that handles movement when not attacking, and another that gets switched depending on which weapon the player has equipped, done using animation blueprint linking
Would it be possible to sync the state of both of these state machines in multiplayer? if not, what other possible options are there to achieve the same result?
How would I go about doing a revolver animation (I already have the animation) and playing another montage at the same time?
As in one skelmesh multiple montages?
You can get away with slots, but I'd recommend anim notify tricks in the reload anims
so i dont know how it happened but this is a thing. its only like this in the animation blueprint and in the game. Do i have to redo the entire blueprint?

That's some spooky finger 💀
Okay :) So to be clear, I do it in the anim bp?
ya.. i dont know what is happening. im guessing i have to redo it
No, you can do it in actor BP.
Weird question, but I want to make it so the player in my FPS game can fall over; this means moving the camera around which I have accomplished with timelines and lerps, but its very robotic feeling and I want more control, is there a way to animate objects like cameras? I was thinking of sequencers but I'm not sure you can do the local movements I need
You can have relative transforms in Sequencer with Transform Origin Actor.
https://docs.unrealengine.com/4.27/en-US/AnimatingObjects/Sequencer/HowTo/DynamicTransforms/
Describes how to create Level Sequences with Actors that have dynamic world transforms that can be changed at run time.
I need a little help, I'm trying to get my characters moving on a CCTV camera. As this is an Oculus Quest game, I have the framerate capturing every few milliseconds to cap the framerate for performance's sake
However, the character's animations are not showing on the camera

Here's how it looks in the map

here's the CCTV
strangely enough, letting it capture every frame lets the animation play out normally on the cameras
but i don't want to have it do that due to frames
somehow i fixed it, nevermind, sorry
im probably being very dumb here, but my character is in an animation state, and i just want to override where the character is facing when it is playing said animation, how would i do this? is it just root motion?
i just want the character to rotate against the face of this object, and to face forward based on what direction they landed in

good evening everyone, so me and my friends are working on a short low poly FPS and I wanted to ask is there any advice on making the gun fit better in the players hand

guys
how do i set animation mode to anim bp IMMEDIETLEY after an animation playing
heres what i used

You may get some mileage with IK.
Hi. Are there any difference using IK bones vs VB, or info on when to use them over the other ? there are some procedural setup for FPS nowadays some use IK some use VB. THanks
thnx ill try it
eyy naruto fan
lol
Any control rig gurus free to hop in chat with me and debug my control rig. I feel like I have everything right but the rig is just not working as intended and I really don’t want to go back to blender lol.
Is there a way to fix this (Example: Animation offset or animation matching).
how do you export animation, model from blender into unreal? when I try to export as fbx it just exports default box
Head to https://squarespace.com/badnormals to save 10% off your first purchase of a website or domain using code BADNORMALS
This is how to get faster simulations in Blender. No need for Mantaflow - just do the math yourself and the result looks pretty good.
Cool stuff on Patreon:
https://www.patreon.com/badnormals
Equally cool on Discord:
htt...
using this project file
it just shows default box in project file and nothing like in the video, need to enable something?
Custom Gizmos for Control Rig... I have the static meshes made...how do I add them to the list?
create a control rig gizmo library asset. And point ur control rig bp to it in the class settings
@misty dagger looks like he makes most of it in material editor
didnt fully watch it, looks like an interesting something tho
when I open it it's just cube
in blender?
when i render it as animation it shows tornado kind of, even tho pretty grainy quality
idk what you mean
beginner in blender
where can you change it?
mayB do a google search so i dont have to open blender 😛