#animation
1 messages · Page 157 of 1


wait, are you sure bidirectional doesn't just mean that if A enters B then B can enter A too?
I was under the impression that's what it meant too, but then I started thinking about the transition logic, and steam started coming out of my ears.
this is supported afaik, its common practice, almost as common as single direction transitions
what doesn't make sense in your head? Maybe I can try and clear it out
What would make sense is... "if true transition into the node, when the flag turns false, leave the node"
If my transition condition is something like: "state == run"
you'd immediately exit once you entered the node because the exit condition is already met.
this isn't the case afaik

the nature of the state machine is for it to persist in its current state
And, every frame, for every transition in current state, to state X: if transition rule is true, move to state X, break
Therefore what you'd do is set up another transition rule (using bidirectional transitions) where to enter the run state, state must == equal run, and the second transition to exit the run state is state != run

oh, now you've confused me
my knowledge in state machines is really limited, I wouldn't trust my own advice

with the flag checked
notice that there's not another transition logic pin
so is it the same logic both ways?
right yeah, disregard everything I just said, I have no idea 😅
hahaha I'm so perplexed
okay, I could see one potential setup.
Potential use: event fires, sets flag, transitions in, consumes flag (keeping execution in the state), then when the flag is set again, it would exit the state and consume again.
I'm lost, but well done!
would be cool if you could use branches in the transition logic
Is there any way to move the transition pins to different animation clips without re-creating them??
you can use shared transitions
your graph will get really colorful 🙂


Is that what you're referring to?
I just mean put it on another animation clip, but I guess you can just open up the pose and change the animation in it
Oh I see.
just annoying to have to re-create an animation transition rule
the equivalent of control dragging a pin in a BP, yeah?
aye
not that I'm aware of, unfortunately.
Didn't know about the rule sharing though, thank you

Turns out this was because I created the animation layer interface asset files by duplicating them (and then changing each one separately), deleting them and recreating them with standard right click > new layer interface worked
they let anim BPs that implement layer interfaces basically link into your main graph and change the anim graph flow
my usecase is to give each weapon its own body animation style, so a rifle would have my character use a certain rifle posture / locomotino setup, a pistol would have a different hold type, etc
I originally wanted to use state machines but they aren't cut out for that kind of stuff apparently, they cater different usecases
oh dope
sorry if this is a completely asinine question but I'm new and I'm trying to follow the 'realtime compositing basics' course and can't manage to get my animations into unreal from mixamo. I uplaoded the UE4 mannequin to mixamo, downloaded my animations as fbx then imported them. But once I import I get an error saying its "failed to merge bones"
and then it fails to merge the bones
ok I just used a "Mixamo Converter" app but I'd still like to know what I did wrong...
My guess is that your skeleton has a different skeleton from Mixamo
Make an empty project, import a mixamo character in it
But i am not a pro so i could be wrong
How do i get rid of the sequencer animations on the character and skysphere

Or do i need to ?
Sounds right.. i’ll give it a shot and see if i can get it to behave
Hi, do you know of any detailed documentation that covers the topic of per vertex joints/bones influence count in skeletal meshes? From what I managed to understand is that the mem allocation for per vertex influences goes in steps, for example there's no difference between 6 and 8 influences, as the memory gets allocated either for 4 or 8. What I didn't find is whether there's a GPU performance hit or some other details I don't even know about.
played around with it a bit. The montage seem to effectively overwrite the animation for whatever i have playing currently, which is not really what im after. Since i have an animation on the upperbody i basically want to only get applied the additive part from the standing pose. So im after a solution where i can apply additive only for the upperbody.. could be im thickheaded, but slot/blend per bone (spine_01) does not seem to achieve this.
I ended up with a somewhat different approach. I take my baseanimation as BasePose and layer blend per bone (Spine_01) that with an Additive that use the same baseanimation + the additive. Seems to do the trick.

Any efficient way to get rid of this arm twitching thing?
I had previously thought if there is any way to disable a certain bone in animation completely
Hi, is there a way to get the name of the animation sequence that's current playing from the ThirdPerson_AnimBP (or any anim BP I guess)?
there are sometimes 2 or more animations playing, during transitions or blends
Hmm... good point.
Would that preclude the engine from being able to list the sequences currently in play at all then? (Sorry, anim is not my strong suit!)
Hi guys, newbie question: spell casting animations with particles. How do you do them? I mean like movement animation in software like blender and then mix particles in unreal? Or both in blender? What should I google for?
I think animnotify remains my best option 👍
Hi - How do I move a keyframe/Control Rig character animation in a Level Sequence to a completely different project? I've tried the FBX export, but the export fails with all kinds of bone errors. Is there a simpler way to do this?
SOLVED: I baked an animation sequence from the Sequencer, and moved the resulting Animation Sequence into the other project.
Hi everyone!
I'm looking for someone to work on 3D Animation and VFX.
Just joined a team working on a indie game project, and im trying to help them find someone who can help in those areas.
We already have sound designers,programmers,a 3d artist.. but to make a prototype we would need an animator.
Thank you in advance!
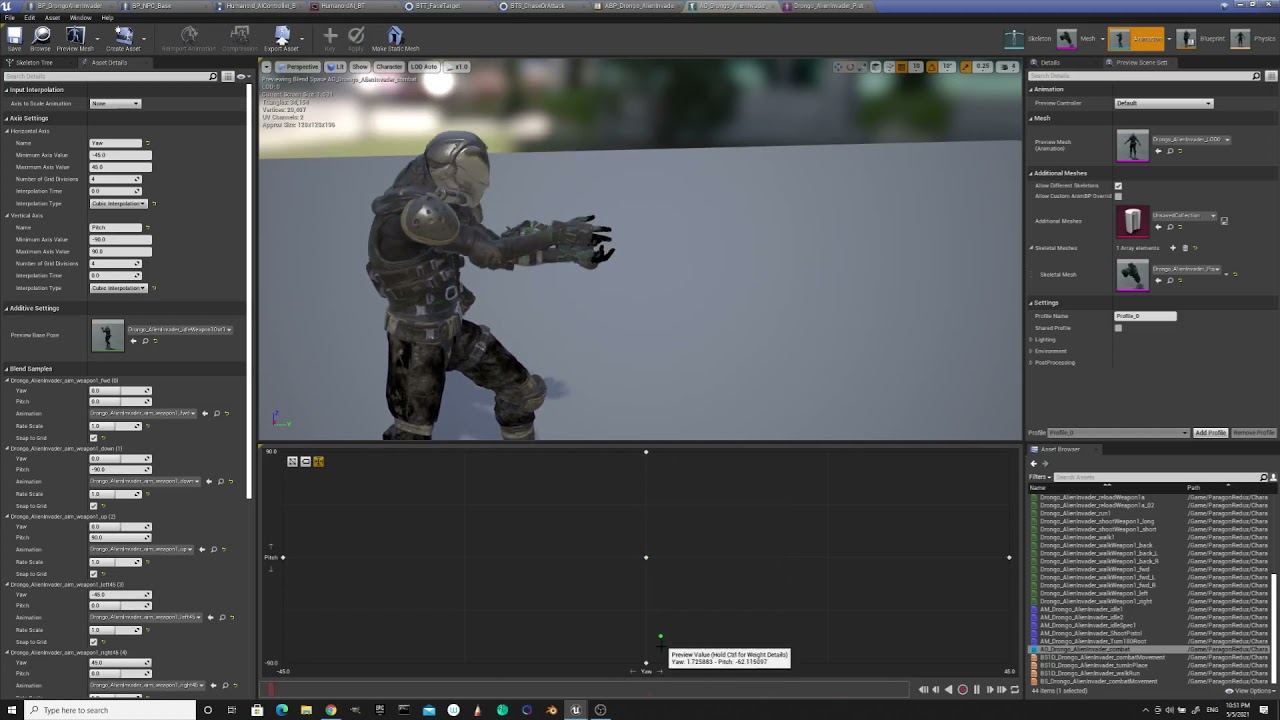
i have this weird issue in a blendspace where the animation either seem to pop or restart under certain conditions... anyone ever seen such a thing? im on 4.26

for some odd reason the issue only seem to appear on that corner and only when i pass the diagonal near the corner
because they have different lengths, probably
why isn't the animation working, it just moves from idle to T Pose and not the animation I stated

Hi, I'm learning about control rig by looking at the Control Rig Mannequin project. There is a thing I don't understand... how control rig assets get associated with actors. The two mannequins are skeletal mesh actors, and they don't seem to have any references to a control rig asset on themselves. Okay, I thought maybe the level sequence is where they are bound to one because they have control rig tracks there. What's strange though, is if I add another skeletal mesh actor by dragging the mannequin mesh onto the scene, and then add it to the level sequence, it automatically adds the control rig track and the controls appear. How does it know which rig to use - or is that normal sequencer behavior to search for a compatible control rig and create a track for it? I guess that would be ok... but it kind of bothers me that I can't see which exact control rig asset that the track is using or change it. (I was experimenting with creating a control rig, so there technically were two compatible rigs for that skel mesh...)
Does anyone have like, a really nice setup for implementing different animations for different weapons that they can share? Because I've struggled with coming up with a scalable, straight forward system that allows for fast iterations for weeks now
As in - have the character perform different animations for different weapons they are holding
doesn't really make sense, since the flicker seem to be dependant on the swap between poses if you look closely at the video. I just checked, and they all have 34 frames, but i did actually notice one thing... most them have 30fps, while a few of them have 29,xx fps for some reason. I wonder if that could be part of the reason?
Is there a way to blend animations together in an anim montage like Sequencer can?
You can make a blendspace asset and put that in the montage
oh? i assumed blendspaces were just for animBPs 😄
Oh - yeah, you're right
then I'm out of ideas, sorry. typically, if there is no sync markers used, it will just blend by anim length scaled, i believe
Any idea how I can fix my Twist bone rotators in a control rig?
The initial rotation looks like this

What I get after moving the twist bone (to match the limb bone):

I'm using vector math to move it's translation, it might be the wrong approach since I have to calculate the correct rotator too but I'm super lost on how to just flap it around in relative space
Oh.. sync markers you say? What are those? I saw some markers in there, which may be what is causing the trouble. Im not at the pc now, but will look into it tomorrow. Thx for the pointer
The markers i saw, was similar to the anim notifies but with another color and in its own track
yes, those things. the blendspace will try to blend according to the markers, so if the markers are somehow misplaced there will be problems
hi, when i play my animation, my character actually moves forwards
like when im walking and I play a walk animation, it moves faster then the actually camera
You're looking at root motion
Question: How do I fix transition rules in my anim graph to be threadsafe? I have made my entire BP thread safe, but there's still a bunch of warnings popping up when using multithreaded animation, because I'm still using blueprint. But I have no idea how I can replace the "Time remaining" node with a thread-safe version 🤔

So how do I fix it?

and what happens if you click "enable" ?
it works
How can I make animations like overwrite
So I have a walk end
And if it plays and I walk it doesn’t play the walk animation
So how do I like cancel the end and play the walk animation?
Would I use conduits?
Is there a way to set/modify the intensity of an animation with an ABP or some other method at runtime?
you can use the blend functions (with the alpha of 0 - 1 being no intensity / full intensity)
Maybe be a duh question but can you make an fbx animation for the mannequin in the control rig?
I don't know how well it works but you can bake a control rig animation in sequencer into an animation sequence asset and then export that to FBX
Hey everyone, bit of a different question.
I've got a character doing a walking animation in my Sequencer cinematic. The animation sequence itself lasts only a second, so in my cinematic, I have the character simply looping the animation.
Here's my issue though. I want there to be a point where the character turns his head to the right, and the head stays looking towards the right for the rest of the shot. Sure, I can edit the animation sequence to have the head turn, but it'll just constantly loop the action of turning the head.
Anyone know of a possible solution to my issue?
I think you want to do something like this:

So that the twist bone keeps the relative transform to its parent
Is there any reason to use Transform instead of using Euler Transform for spine controls?
I'm frustrated with how gimbal lock issue manifested throughout my control rig controls, even spine controls which now converted to Euler Transform
hey guys, i have this triggervolume that is supposed to trigger an animation for crushing the character, but my character is being stopped by the volume, how can i make it so the character can walk in the trigger and play its crushing animation ?

what I do for that is setting the transition boolean with a notify
Noah Zuo's Blog
This article simply tells you how to implement automatic rule based transition for a back-playing animation, which is used in a state machine in UE4.
Maybe change the collision mode of the volume to only cause overlap evebts
@ashen junco the CR template uses the rotator to avoid gimbal
Isn't the Rotator struct caused gimbal lock interps in the first place?
rotator can go over 360

Of course dragging that up manually is too cumbersome and can cause inaccuracies with the posing.
yeatemplate is setup a bit weird
Again, Euler Transform type treatd the rotation value as Quaternion, not Rotator. So I can make anims with CR in viewport without having gimbal lock interp issues.
i think its the editor manipulator that gimps it
i have a problem.
I've retargeted an animation from mixamo - and mixamo has provided the animation cut into 2 parts for some reason.
Now, because of inaccuracies - the hip bone (the one that moves the entire skeleton) is on slightly different positions in both animations.
Which causes a small jitter
Now i could go into blender, try and fix it - but blenders .fbx import/export is notoriously bad
Can i, in unreal engine, select a bone - and change up keyframes? Then i'd just copy the location from the second animation to the first one and do the edit in engine 🤔
You can.
Although I'm only aware of editing animation with CR, never did one in the persona viewer.
i just hate editing animations in blender <=> unreal so much
i tried - and once again - the axes are screwed again 
so i gotta fix them manually in unreal and then retarget
https://streamable.com/klktl5

Awesome tips! Thanks a ton 😄
couldn't you just specify rotation in import dialog?
yeah, i did that now...
after like 5 tries i finally got the right one

why must blender fbx be so scuffed
you can just rotate the root in preview and once it's correct you have your rotation. in your case it's x90° i suppose


damn you xD I've been trying for months to get one, but my payment always gets returned ; - ; and I have to wait another month to it to be refunded
well xD I'm pursuing a huion, I meant a graphic tablet in general, wacom is to expensive for my latin american ass
When creating a skeletal mesh in Blender am I supposed to add a root bone to 0,0,0 and connect it to whatever my parent bone is?
yes, is not enterely necessary to create a skeletal mesh, but it comes in handy if you want to animate in it and do something like root motion or something
I guess my next question would be how do I attach the tip of a new bone to the base of my old root bone before parenting? When I try eyeballing it the old bone hierarchy shifts in position when parenting the new root bone.
you don't need to connect them if that's what you're trying to do, just set your skeleton in the default pose (select all bones in pose mode, and hit alt+r and alt+g in whatever order to clear the rotation and location) go to edit mode, make sure your skeleton is somewhat in the center (you can also go into object mode and see if the origin point is in the center) then add a new bone in 0,0,0 select your parent bone, then the root bone you just created hit ctrl+p for parent and select keep offset
Dod gammit, mixamo animations dont want to import in my project
is anyone able to import mixamo anims ?
Mixamo setups are kinda wonky anyway - tried importing few, but quitted.
Everybody uses Mixamo animations. There are countless tutorials @fleet marlin
I still create animations from scratch. (Literally from rough sketches into animations)
Admittedly it's okay-ish for prototyping or getting started but not wanting to buy a pack from Marketplace, but for production it's a hit or miss, with miss most of the time.
my animations aren't that good while transitioning, I was trying to use "Stop Camera Shake" but I couldn't understand how it works
Is there a control rig template with finger control built in that I can download? Feeling lazy 😅
What I meant is they definitely work and people are using them every day (mixamo anims)
I have one query. I want to play one animation from all state (idle, run, etc...). But, don't want to create transactions from all state. In Unity, there is one state called "AnyState" which can do this work, so what is alternative of this AnyState in Unreal engine?
Is it possible to decouple bones from IK? For example I have a animation where the character has his hands on his lap. When I turn the Torso using IK the hands dont stay on the lap
I guess I have to get the bones position from the pose before IK was applied
if you wanna do a one time animation, like an attack, jump, etc. you're looking for montages
my animations aren't that good while transitioning, I was trying to use "Stop Camera Shake" but I couldn't understand how it works
Yup. That what I am looking for. Thanks.
What's with Unreal's default anim tangent weight being so small?
Is it possible to set a variable inside a state machine?
As in, it requires "X" to move to a jumping state then sets "X" to false after?
no. but you can make an event "state enter"
in state properties, there are 3 events enter, exit and another one

enter a name and it makes a custom event for you
enter a name, cecompile bp, go to event graph and you have custom event with the same name that can be used
Alright I found it thanks
Suppose this is basically what I was trying to do :>
many thanks
variables cannot be set because anim graph and event graph are executed on different threads,
also anim graph is multithreaded
I know, I just expected they could set a variable only used inside the graph
A boolean aswell
What's the correct way to play an animation in an input event, i tried using a bool that is set true when clicked
Is there a better way?
my animations aren't that good while transitioning, I was trying to use "Stop Camera Shake" but I couldn't understand how it works
Anyone know how I can eliminate the jitters I'm getting when IKing my arm towards my hand? https://gfycat.com/ShadowyFlashyDiscus

Currently using CCDIK nodes, I tried increasing max iterations and lowering error tolerance, but the jitters persist
I'm using basic IK and no jitters
It totally worked, didn't know such node existed! It saves a LOT of headache 🙂 Thanks
@static falcon Can you download 1 animation and see if it will do an error when you add it to you project?
Don't know if it needs to be here, in Graphics or even Visual FX:
I have a custom character BP and a new oceanbody (i know experimental 4.26 feature).
Walking on land is working correctly.
Walking on water: it seems like i'm sliding on ice. Friction is superlow.
Is there a way to shut off that the engine looks at what underground your walking on?
Or is there a way to tell the engine that it doesn't matter on what underground you're walking?
Or is there a way to change the friction of the water?
i've looked for all three solutions but can seem to find any. Not on the character, not on the waterbody, not in world settings.
it it possible to share some of my animations here? its not made in unreal, its done in maya, but im rather proud of them!
I think #work-in-progress is the channel for that 🙂
awesome ty : )
Any guides on how to make animations faster/stronger with different levels? specifically how to change the speed of the animation depending on a given variable
For a montage just use the "play rate" variable in the node
For an anim in an animBP you can expose the play rate param and drive the speed with it by ticking the corresponding variable

Hello
Anybody give me advice on how to animate first person arms
to get animations for actions
must be a way
I know how to animate in blender
what do you mean by this?
so like I have arms

id like to create to animations for them
new*
can I make animations in UE4
ive never tried
any recommended methods
like say id like to open a cupboard and have animations to match it or open a can of food
use blender, build your animations in a modular fashion - and put each animation inside a blender action
exporting with the selected armature and action will create a FBX file that puts your animation as is in UE4 once imported
so id have to export my skeletal mesh from ue4 to blender?
yeah ive exported animations into ue4 from blender before
yeah, you need your skeletal mesh inside UE4
but my skeletal mesh is not from blender
if I export it will it keep its skeleton?
or bone structure?
to use in blender?
or can I export the ue4 mannequin arms and use that bone structure?
exporting an animation file will create a skeleton inside UE4 if you don't select a similar skeleton (with the same hierarchy) during import
sure but that is from blender to ue4
I dont have skeleton set up in blender
only arm skeletal meshes I have start in ue4
do you want the default UE4 mannequin skeleton?
but must be away to make animations for those without having to model and bone my own
sure
if so use Mr Mannequins Tools
cause I can retarget whatever else to it
is it on marketplace?
Oic
ill check this out ty
its free from the github?
cause I dled it but it doesnt work. I might need a newer version of blender
Nice thanks so much for the response and help @vapid ibex
Does anyone have any tips or tutorials for animating punching or kicking that make them look like a super attack in like my hero or naruto
It’s for a turn based game
Can anyone help im trying to make this tongue animation but it doesn't seem to look that great, i dont really know how to fix it
This kind of feeling relies on several parts : vfx, animation, camera shake, a few freeze frames etc...
I'd recommend looking at what you want to reproduce in slow mo and try breaking the feeling down into several components
If I have mixamo animations without a root bone on my character skeleton can I add it and do root motion or do I have to actual add every animation individually with the root bone added?
What's the correct way to play an animation in an input event, i tried using a bool that is set true when clicked in c++
Is there a better way?
i use terribilis converter to add root to anims, works great and is simple and im a brand new to everything ue4 related, just download it, download your anims into its initial folder, press the button then import the new anims from the completed folder
You may want to use a montage for that if that's an anim that needs to be played once
Basically hook up the input to a playmontage function
hey anyone know how to create blend profiles? the docs page is pretty vague
@proven sigil so i export my current animations from unreal into the initial folder and press the button and reimport them?
hey I'm trying to use the paragon character: twin blast on the advanced locomotion system, on the animation looks fine


but when I apply it to the character it deforms
does everyone here recommend I convert my current skeleton that is basically mixamo to an unreal skeleton?
im not an animator, I am a coder. So i need some advice. I have a character model that I like and I want to use mixamo animations but it seems as though everyone uses the unreal skeleton. Am I wrong about that?
Are there any best practices for using anim notifies? Eg. let's say I have a pickup animation where I need to attach an actor into the hand at a certain point, so I'd notify the attach point, and then notify the end of the animation as well. This would need to trigger logic in the character - but I'm not sure if I'm a fan of adding extra functions into it just for sake of calling them from my AnimBP when the notifies happen
Any thoughts?
Does anyone have an idea how I can use rigged skeletal meshes with animations without using 0.01 scaling? If I don't scale the assets, they end up being enormous, but if I do, a standalone skeletal mesh without animations is ridiculously small, and the thumbnails / assets editors are kind of useless.
This is with Blender / UE4 to Rigify + Send to UE4 addons
I'm using a custom model I just spun up to test things, made it work with Epic skeleton and using the stock animations.
Generally, you're going to want to change your export settings.
So you don't have the wrong units.
My guess is, in Blender, you have it set to cm and not m.
Or the opposite.
Yeah, opposite.
So change the unit scale and re-export them.
Usually I just set my blender units to meters and scale them so they have real human scale on the dimensions tab, and usually without having to scale up or down they go to unreal with a normal size

When I import the mesh it's alright, but once I apply the animation blueprint (default from third person template) they become gigantic; the only way to fix that so far has been to scale the asset way down, which makes it very tiny without the animation blueprint
I think it has something to do with using the original mannequin skeleton, not sure what to do this point... at least I got the custom import working
mine is also reportedly the 1.8 meters, doesn't really do much though
I assume the animations aren't properly retargeted.
Has anyone had this issue, where when importing a skeletal mesh, some parts (in this case one part) of the skeletal mesh get weird "normals", but it isn't mesh normals, and it looks fine on other iterations of the character using the same exact material?

For reference, this is how it looks on a static mesh version of a different pose

The fresnel in my clothing material is washing out the entire glove, but only in this specific skeletal mesh (even without the animation blueprint) - it has nothing to do with the shader/material.


GitHub
Blender addon for converting mixamo animations to Unreal 4 rootmotion - enziop/mixamo_converter
Hi Guys, does anyone know when the AnimDistanceMatching plugin will be released?
or any alternative to this.
animations will be related to the skeleton, so if you change your outfit, as long as it is also using the same skeleton, the animation will work 🙂
wouldn't that be a skinning issue?
yeah you should not put on sauron's shoulder plates and raise your fists up in the air 😛
I would just try and see how the animation will look on a different outfit in unreal, the only other way would be to animate your character with all outfits at once in your animation software and switch them on/off to see
you need to animate the skeleton, the mesh you see in your anim software is just like a preview. the skeletal meshes like outfits are affected by the skeleton depending on their skin weighting
for example you can animate a naked character, then skin all the outfits to his body and they will move with it
Hello everyone!
hi
I actually have a question, too, guys 😄
I'm having trouble with montages: They keep getting interrupted (maybe by other montages, I am using the advanced locomotion system)
Why and how are montages being interrupted in general? Can I do anything to prevent that? 😬
I have a newb maya animation question that I am hoping somebody has a quick answer to, is it possible to export just a single frame of animation from maya? I have a maya file with a 30 frame animation and I want to just export some of the keyframes as poses but I can't find a way to do it
you could maybe use bake animation in export dialog and specify the keyframe you want to export. or you could export the whole then add separate frames to your pose asset im ue4
Thanks I actually ended up deleting all other key frames and then exported it as normal which seemed to have worked
i would try and get the anims straight from source like miximo if you can, if not, put anims from ue 4 into the initial folder, delete the originals if you can then reimport. You might be ok just reimporting over old ones but the cleaner the import the better i think
I have set up a simple armature for a robotic arm in blender for import. It doesn't appear to work properly unless I set "force root lock." That is fine I guess, but is it a hack?
force root lock = set root bone track to zero
I am not following exactly. FWIW, the mesh was invisible (or moved?) until I selected this. Is set root bone track to zero just telling UE how to line up the root of the armature to the mesh?
it means you have some keys in the root track, maybe it was moved somewere or rotated or scaled. when you click "force root lock" it forces root always to be at 0 location rotation and scale 1
Ah, ok. That makes sense. Thank you. So theoretically, I could manually remove those keframes, reimport and uncheck that?
Well, I actually don't have keyframes on the first bone.
you still need at least one keyframe otherwise ue4 complains that there is no root track. you can set the key to 0 in blender
probably the export makes one
i don't know blender
What is the root track exactly? From a data standpoint?
in ue4 it's the top most bone in your skeleton
i mean that's the root bone, the track is the animation for this bone
Got it. I will need to sync up whether the importer is adding keys to the root bone track, because there aren't any there.
"Key all bones" is selected by default, I wonder if that is it. And just to be clear, for animations in unreal that I want to just stick in the scene and am not worried about root motion, I should be able to not sweat that checkbox.
you can just check the force root lock then, i think
Ok. If that is fine I can do that. I was trying to see if I could pull it in directly and not change anything between blender and UE4, but that must not be the case. At least for an animation where only the children of a root are animated.
While I am here, I had a process question. For general animation development, for one object, can I have multiple animations inside one fbx file and then in unreal call which one I need? Or should they generally all be one file per animation?
Scratch that last question, reading up.
Very doable, but blender slightly lacking in the UI department for that.
what do you mean ?
In Blender you can add several anims to the same file using the NLA editor or the action editor. If you're using sendtou4e you need to push all your anims to NLA strips and then they'll be sent directly in a single pass
I am reading up on that now, but using separate actions. Is that the same thing?
1st bone one the chain
it often gets replaced by actor movement
it has all other bones connected too it
Yes
Hi. I am currently using a first person character that uses a separate FPP for the arms and third person mesh for body awareness/shadows. The setup blends the upper and lower body animations. I am currently using FPP animations for some weapons and it works. However, there are FPP animations like very long weapons/rifle that causes this weird stretching. I assume that this is because the character has a neutral idle stance, compared to some shooter templates that the body is moved sideways when shooting guns. Hoping to find a fix for this. I was thinking of manually rotating the body in the anim BP? Thank you
Sup yall, I'm going pretty crazy trying to figure out why the bones in my rig are importing in seemingly random places. Any clues?


The bones seem in the right place but the skin looks wrong... Or am I not understanding
Bones are wrong, as you can see for example the arm/clavicle bones are being shot off
do someone knows how to rig into epic skeleton, if someone knows contact me dm
My LookAt AnimNode is behaving strange: I have an IK setup to grab the character and pose it. As long as I am not grabbing my character, the LookAt Node works fine and the char is looking straight at the camera. As soon as I grab the characters head the eye rotations are way off. I have the LookAt node after my IK setup in the anim node chain
$100 says there are folders/groups in your joint heirarchy. Was having this same issue last week and the solution, since removing the groups wasn't an option, was to restart the rig entirely and ensure there were no folders/groups or nulls in the heirarchy (nulls SHOULD be fine but as a precaution you might avoid them). Tested the new rig last night and everything works perfectly.
Thats a big oof man, I definitely don't have time to restart the rig from scratch right now

Your rig is super small, you might be able to get away with reparenting the root. Can you post a screenshot opening the "motion system" folder?
You can have the rig nested within a group - did you freeze transforms on your rig?
You might also try setting the preferred angle of each joint while in the A-pose and re-exporting from there
That looks like you used Advanced Skeleton to rig - did you make sure to have the Game option checked while rigging?
Motion system folder is packed with sub-folders, but here is also an error I get when I export it straight up as an fbx and not through the game exporter.

Yep advanced skeleton with game checked
Ohhh
So give me a sec
Go into your Outliner and uncheck DAG objects only, then search "Bind" and delete all bind poses. Then select your root node and paste the following into the MEL script box:
dagPose -bp -s;
Then re-export and let me know if that works
If things are still being shot out, try importing with T0 as Default Pose (in Unreal import settings)
I think there may be a button somewhere in Advanced Skeleton to clean up the DagPose but this is just the manual way
Me watching this unfold
https://c.tenor.com/Lqf7r6FZti8AAAAM/popcorn-watching-tv.gif

Also, are you using the default FBX export or the FBX Export option within Advanced Skeleton?
Hopefully you can get it working before checking T0, since T0 isn't ideal if you want to use multiple animations for the same character asset.
Glad I could help!!
I literally went through this last week so I feel your pain 😂
Except my issue couldn't be fixed due to folders in the joint heirarchy (original rig was made by hand, by a cinematic TA who didn't know that folders are a no no for games)
I'm impressed.
Rigging is a pain man, seriously. This has been just one problem after another just to be make a little idle animation to present my character hahah
Does this need to be done on most Advanced Skeleton rigs?
Hahaha, well good luck. Definitely share it when you finish 😄 I'll be doing an idle, maybe a couple other animations on my own character here over the next day or two 🙂
I'll shoot you the final product for sure 😉 thanks again man ❤️
@static falcon Advanced Skeleton has an option to clean up the DagPose so theoretically no, but if you did that and it's still not finding the bindpose you've gotta do it the manual way
But the manual way is normal in most rigging where you don't use an auto-rigger or rigging assistant
Just a result of binding different pieces at different periods of time
What's more amazing is after all these years Maya doesn't have a one click button to do that
Would it happen if you used the same pose to bind all the pieces?
BindPose just refers to the node created when you bind a mesh piece to a skeleton, doesn't actually have anything to do with the character pose
Yeah, you can create a button from that MEL script I posted above, I'm just lazy
Maybe I'll do it. I'm learning Python and need use cases
My question got buried... Anyone have any ideas for setting up a turn in place animation? I have an animation set with right turns and 180 turns but don't know how best to use em. Looking at lots of tutorials but they are using different types of animations.
I think I saw a video where they just removed the turn from a 180 animation and played it back interactively or something like that
what version of blender are you running?
2.8
what version of blender are you using?
any tips on how to get achieve this movement up the rope while playing the animation?
I managed to fix the character export issue I had with Blender. Turns out I have to assign scene unit scale 0.01 before importing the mannequin skeleton, and not just before export. I had previously just set the .fbx import (to blender) set at 0.01 scale, but I don't think that worked with the Skeleton, or something. Just happy it works.
I'd still like to know how I could export LODs with the character in a single file but I guess that's for another day
@midnight thorn root motion maybe?
I think for static meshes you can just use the _LOD# suffix, not sure about skeleton meshes though (at least if you use the Epic Blender tools)
I have a question!
I want to make a teacup with tea item, and I want the tea inside to slush around with the animation. How could I do this?
I'm unsure if an animation or some kind of code / simulation would be better, and if an animation, i'm unsure how I can animate such a thing for it to work in ue4
If the interaction with the teacup is limited to fixed animation montages (like in GTA V where the characters having a drink) you can have the water pre-simulated as an Alembic data.
Otherwise, if you want the player to carry around the teacup, you could do material tricks to fake the liquid movement.
more like the former, I don't know what Alembic data is but i'll look into it!
Can someone help me? I have a character idle animation that works perfectly. But when i put it into AnimBlendspace 1D or 2D it starts to shake insanely
i dont use blender, i use teribilis converter
Does UE skip animations if they are too short?
im a noob but i suspect they may essentially play and end quicker than the can show in game, especially if you have blends and curves or something, at left side of anims theres a blend in and out usually set to .25, maybe changing that might help or if your anim has curves so its blending different anims together, like the upper body of a punch anim, but the lower running anim together, maybe youve set it so the anim you want to show is being blended over, take what i say as false until someone with more than one braincell confirms
no chance you would know how set a counter for spawn actors, once two actors are spawned, and you spawn again, it destroys the previous two? i have all the spawning stuff done and i tried to add the counter but aint working
#cpp or #blueprint ?
bp, also with your anim maybe try setting it to a very low number so it still has some kind of blend if it looks janky
Ok, I'll write in bp
im trying to find a way to screenshot my bp so you can see my spawn bp because i wouldnt know how to incorporate it tbh
winkey print screen isnt working
Do windows + shift + s
hey guys
I have some questions regarding Blender, and exporting the mesh and armature for UE4
can I ask here?
or is there another channel I need to use
Hey everyone. I'm currently trying the Control Rig.
I do have a Model from Mixamo. But I think the axis are not correct.
Am I correct?
Do I have to correct the axis by importing it to blender and export it with other settings?

How would I go about making a cinematic attack? Ideally animating camera movement in Blender and then importing it to UE4
Think of like a super attack in a fighting game, but for a 3D game
As seen in Final Fantasy VII Remake, right?
You could do it programmatically by spawning predefined points relative to the character and have a Timeline node to interp between the points, or try using Sequencer and trigger all the damage and the relative camera movement in the timeline.
That sounds kinda hard, isn't it possible to attach a camera to a bone in Blender and then import it over?
Or attach a camera in UE4 to a socket based on a camera bone in blender
That would work too.
Oh cool, I'll try it that way then
Quick question...
When I import an alembic animation, the uvs seem to be missing, if I import as geometrical cache.
If I import as skeletal mesh, uvs are there.
generally askin...is it better if I export/import each element of a complex character animation separately, or if I export/import everything at once?
Hello. I am trying to pass a percentage of bone rotation to another bone, while removing it from the bone that is passing it. I can easily make another bone rotate a percentage of another bone, but what i cannot figure out how to do is remove the percent i passed from the original bone. I am hoping this is even possible in the confine of UE4. Otherwise, i am just 'adding' rotation which will make the whole thing be in the incorrect position. Examples: pelvis to hip, or thigh bone to thigh twist bone. Thank you
hello i have a question. is it possible to mirror or copy the animation of the right side of the mannequin so the left side of the body moves like the right. this animation was original mad to hold a sword but i am trying to make it so the run animation is more neutral. i have been trying to change it with ue4 and blender but with no success

I found Inugame's really useful https://www.youtube.com/watch?v=jfYZymr1svs

Just a little intro crash course to help start using control rig in ue4. Explains how to make one and some basic concepts about it. Part two: https://www.youtube.com/watch?v=GTOs4XwzcME
Hey does anyone know if you have a bunch of root motion animations with no inplace versions, and want to use it that way, is setting the root-lock checkbox enough, or might there be side-effects. I have the source files but seems a bit of a pain to convert...
oh yeah, no download, sorry. Think PowerIK has a downloadable rig
also the merkat thing is super advanced
but sequencer yeah
Hmm, yeah I havent doven into that part that much yet, sorry
But are you sure you need to? I'd start over and go through the inugames one, lots of drag&drop stuff they changed I think
I agree though, Control Rig makes me feel like when I talk to network technicians
Weird that packs bother having separate in-place animations in that case...
This girl also has some great basic control rig tutorials https://www.youtube.com/c/SonaliSingh/videos

YouTube
Hi! I'm Sonali Singh.
I've loved Disney movies and its animations since childhood but never knew I'd end up as an Animator until I got an Internship at a game studio 3 years back. So I dropped out of an Animation college to work as a fulltime Gameplay Animator there for 2 and half yrs, and now I'm a fulltime Freelance Game Animator. It's been a...
Read the source 🙂
I need help with my animation. I have imported a character that is significantly shorter from the ue4 man, and it seems for most animations her arms are stretched out strangely, especially around the shoulders
I do not know how to fix the shoulders,other than manually editing all the animations I have...
Is there a way to view the bones while in the animation editor?
Usually you change the retargeting options for the skeleton bones between animation and skeleton, skeleton usually fixes it. But you have to had the same reference pose set or things might be messed up
Hello, I have a question. How to use video reference for animation in unreal engine?
What's retargeting?
I set reference pose to t0
I think the anims were intended for the different skeleton, making it jacked up
what are you trying to achieve?
this seems to work
not sure i understand, i just used "add mapped skeletal mesh" in begin play and it seems to work
there is a video they talk about it https://www.youtube.com/watch?v=y2WzNvJZk0E

Until recently, creating character motion was the domain of expensive third party DCC apps. With the release of 4.26, Unreal Engine introduces further refinements to Control Rig: our suite of in editor rigging and animation tools. Whether you are authoring traditional style animation assets via keyframes or driving characters procedurally at run...
which part? i'm not doing anything fancy, but just rotating the head in CR working for me. it doesn't work for you?
you want to use CR in animBP?
i actually didn't watch the video, but you already have the working rig ?
and if you put it in a cr component and you call "add mapped skeletal mesh" it doesn't work?
bah
maybe you have some other problem. if you make the same little thing with the head I did above do it work?
i never used cr component, always used cr node in animbp, but i just tried now and it seems to work too. I would try something really simple, like some bone rotating, no controls or inputs

In this 2014 GDC session, indie developer David Rosen explains how to use simple procedural techniques to achieve interactive and fluid animations using very few key frames, with examples from indie games like Overgrowth, Receiver and Black Shades.
GDC talks cover a range of developmental topics including game design, programming, audio, visual...
Anybody got any tips to do something like this?
13:40
There is a marketplace asset that was free some month that does something similar
trying to find the name but goddammit does the launcher need some options to filter or categorize all this junk
advanced locomotion system
shows it's still free for me so it may be part of the permanent collection
It is indeed. I didn't realise it had that feature.
I will have to look into it then thank you.
Anyone have any idea why the animation state custom blueprint event would fire twice for Left State Event?
The animation only plays once and it correctly exits the state so I have no idea what's going on, the event just gets triggered twice for some reason
all the state does is play an animation and that's it
it seems to fire twice if I have it in the Start Transition Event as well which suggests it is actually exiting twice from the same state which makes no sense to me
the transition rule for it just uses a Time Remaining < 0.1 check so nothing complicated there either
actually I might have a bug in the logic that enables the transition to go into the animation state that's exhibiting this weird behavior, must've broken at some point because I don't remember it doing this before
Hey guys, any of you know why Mixamo animations dont import anymore ? For me the FBX just fails when i try to get it into UE4
I'll figure it out myself m..
What's the error message?
Second Re-ask: Hello. I am trying to pass a percentage of bone rotation to another bone, while removing it from the bone that is passing it. I can easily make another bone rotate a percentage of another bone, but what i cannot figure out how to do is remove the percent i passed from the original bone. I am hoping this is even possible in the confine of UE4. Otherwise, i am just 'adding' rotation which will make the whole thing be in the incorrect position. Examples: pelvis to hip, or thigh bone to thigh twist bone. Thank you
TLDR: How to Add 50% of bone rotation to another bone. Also remove that 50% from original bone. Thank you
Hi,all
I need your help
I'm using shared skeleton for several skeletal meshes
but when it comes to animation, one of meshes has distortion issue like the picture
Changing retargeting option didn't solve issue
How to fix it?

Perhaps your skeletal mesh have the correct bone hierarchy but incorrect bone orientation.
you mean, mesh's transform is incorrect?
what should I do to fix it?
What DCC software are you using?
Blender
I finally figured out my AI anims for both non-combat and combat mode, and I combined usage of anim montage for torso and aim offset. However, I am now in a pickle - anims are out of whack(sync?) when I plug in aim offset: https://www.youtube.com/watch?v=2kPf2JGWCSU What am I doing wrong and how can I fix this?
So the thing with Blender is that you have to match the bone head's orientations with the skeleton that the animation sequence is based from.
Hmm, but default rest pose is almost same to based model...

Are there some solution in UE4? like retargeting option(but it won't work)
Just to be safe, check if none of your bone orientation screwed up by Blender, either in the scene or upon exporting.
You can't just go with naive assumption with bone orientation that kind of stuff.
Maybe this is root of issue?

Yeah, that doesn't seem right.
okay so I need to rotate it....
Idk know how to rotate it with fixing root of bone....😂

I should go to Blender discord...
Anyway, Thanks Hoodie guy!

i don't know if it's possible, but if you can add bones there is a simple workaround that can maybe help
If you want to have laid back general chat, please do so in #lounge
The other channels are focused on using Unreal and not for general chat.
Well, i mean, the bones are already in place. For example, angling a shoulder up looks much better if i can angle the clavicle with it, but due to the animation, the information for the rotation is only defined for the shoulder bone itself. hence the desire to remove 50% of the rotation from the shoulder, and add it to the clavicle instead. But, yes, it is a custom skeleton so i could add bones as needed. Could you explain what you are thinking along those lines? Thanks
Actually, i don't know about clavicle. I was thinking about twist bones, like shoulder twist or upper arm twist. For example in ue4 default mannequin there is upperarm and its child upperarm_twist bones. Shoulder area is skinned to the twist bone and the arm to the upperarm. If you twist the upper arm and you don't want the shoulder rotate you can add a negative percentage to the twist
you can use that as a postprocess
Need some help with aim offset making anims out of sync https://forums.unrealengine.com/t/aim-offset-and-animation-out-of-sync-how-do-i-fix/227999

Unreal Engine Forums
I finally figured out my AI anims for both non-combat and combat mode, and I combined usage of anim montage for torso and aim offset. However, I am now in a pickle - anims are out of whack(sync?) when I plug in aim offset: UE4 aim offset anims syncing issues - YouTube What am I doing wrong and how can I fix this (UE 4.26.2) ? Thanks
control rig
I see. Ok, you gave me and idea that i have to test now. Thanks a bunch!
is is possible control only skeleton without mesh or get info about current bones transforms?
Hello,
I'm trying to perform IK on some spider leg bones. The issue I am having is this:
- In the bone structure, the bone for the foot starts at the beginning of the foot. This is due to the way bones are set up in Blender.
- Therefore when I do IK for that bone, the beginning of the foot follows the IK Target, instead of the tip of the foot.

Here, the black arrow points to the beginning of the foot
The IK target can be seen as the gizmo
I want the tip of the foot to follow that IK target, instead of the beginning of the foot.
guys do you know good attacking animations with a sword?
Hey guys, I'm fairly new to animation and I have a question regarding character mechanics. Is it possible to apply the same animations that were included in a one character asset pack with characters from another asset pack that have completely different skeletal makeups?
basically I have characters that have certain functionality and I want to replicate that functionality in another character that doesnt share similar skeletal meshes and components
I dont know if thats a stupid question but thought I would ask just in case
Hey guys I was wondering if anyone can help me setup some locomotion for some characters and zombies I have the animations I just suck at the locomotions and all that I'll pay if needed :)
Not really because the different bone rolls between the skeletons usually messes up any attempt to use the Retarget Animation Tool and makes the resulting animations all warped.
Skyrim and Witcher 3 have good attacking animations
No I mean good attacking animations that I can use in my game
You need to google harder my friend. Try this https://www.youtube.com/watch?v=4uomQr2giS0&t=2s
In the second episode of the animation series we begin animating our character with the use of an animation blueprint, the state machine, and a blend space to achieve natural and smooth animation of movement.
Support me on Patreon and get access to videos early, join our developer community on Discord, get exclusive behind the scenes videos on ...
There are many on the marketplace. Good is subjective isnt it?
Yeah true and also do you know an attack animation that you can keep spamming without having to wait until the character returns to idle?
That kind of thing is dependent on the animation blueprint logic , your state machine logic, animation montage construction and animation sequences. Its not just all down to how good an animation sequence is. You could turn an ok attack animation into something nice with the unreal editor and several hours of watching tutorials and reading documentation.
Ok thx and one final question,do you know a good guide that covers ue4
Youtube is my favourite source but I also recommend the Online Learning section of the Unreal Engine website.
I think the Control Rig will give this possibility but I've never used it before.
Anim BP could do the same tho
Yes I see the node Get Bone Rotation By Name
It seems like UE4 had a hard time baking animation sequence from Control Rig without enabling the transform.
Anyone know any good walking animations? The default one is very janker
There's a lot of them in Marketplace, either free or paid.
You'd typically want to find something along the line of movement or locomotion
There's also few in Mixamo, but the setup isn't as straightforward as the ones from marketplace.
Alright I'll look into some from the marketplace. I was considering mixamo but it would take a while to get them to work lol
can any1 help me with some animation stuff?
i'm new so i'm just using the starter character from the third person template
so i went into the epic games marketplace and downloaded the extra basic animations (like crouching) but idk how to implement it to the character so it moves accordingly
(i'm passed the re-target thing)
Hi I am using the 'Play Slot Animation As Dynamic Montage' Node to dynamically change the pose to another animation asset. Currently I am only able use one slot at a time: The 'DefaultSlot'-Slot. What If I want to use multiple Slots? For example one slot for Body pose and one slot for facial animations? How Do I create more Slots?


I only can add the default slot:

Ah found it
In the details section of the slot node 🙂

Well it seems that there can only be one slot playing at a time :/
Guess I have to somehow use multiple anim montages?
You need to google harder my friend. Try this https://www.youtube.com/watch?v=4uomQr2giS0&t=2s
In the second episode of the animation series we begin animating our character with the use of an animation blueprint, the state machine, and a blend space to achieve natural and smooth animation of movement.
Support me on Patreon and get access to videos early, join our developer community on Discord, get exclusive behind the scenes videos on ...
and anim notifies and blends on your AnimGraph.
Unreal Engine Forums
I finally figured out my AI anims for both non-combat and combat mode, and I combined usage of anim montage for torso and aim offset. However, I am now in a pickle - anims are out of whack(sync?) when I plug in aim offset: UE4 aim offset anims syncing issues - YouTube What am I doing wrong and how can I fix this (UE 4.26.2) ? Thanks
Can anyone please help me with this aim offset issue?
The character is modular, if that makes difference (character and gun are animated together, but exported as separate models)
global space in CR is always relative to the root bone, it's "root bone space". you can use fromWorld/toWorld nodes to have real world space (relative to level origin)
i believe you cant
you can show it in cr preview pane https://youtu.be/UyCziUcnqxM?t=5291

Let's explore the latest animation features available in Control Rig for Unreal Engine 4.26! The team will cover updates to the Control Rig Mannequin Sample that's available on the Marketplace, rig sharing with Control Rig Components and Setup Graphs, attaching multiple Control Rigs for animation authoring, Slope Warping breakdown with post-proc...
i know. i believe they said it will work in the future
Are there any ways to re-enable/add dual quaternion(volume preservation) to unreal engine?
I've been finding that method often looks better and simplifies models but unreal engine dropped support for it suddenly some time ago.
regarding my aim offset issue, it worth noting that pistol and character are animated together, but exported as separate FBX files. In UE4 I use Set Master Pose BP node to combine character and gun skeletal meshes. Both character and the gun use the same Animation Blueprint. Everything looks in sync until I add aim offset into the equation.
there is a mod on github
it replaces CL with DQ
Has anyone ran into this engine bug in 4.26 where certain animation curves are missing when URO is enabled?
Thank you very very much. Google did not reveal this, work might end up being saved.
I almost considered switching to lumberyard for this support. Almost.
Hey there, I'm new(ish) to Unreal and have been really trying to learn by focusing a lot on just a few small systems and moving out form there.
My first focus has been on character movement and control with animations and the like for like a 3rd person arpg style game.
I have two fairly general questions:
-
I'm currently working through understanding how best to transition between an attack animation (held in a montage) back to character movement. The attack animation has root movement, but I don't necessarily need to use it. What I'm experiencing is there is a long "wind-down" to the attack animation, that if it plays fully, feels super frustrating. I've played a bit bith the montage blend settings, but am wondering if anyone has any tips/pointers/links to dive into really how to make this sharp. Ideally, I'd like to figure out some of the better ways to handle controlling a character throughout an attack animation as well, more specifically during combos.
-
Speaking of movement, I have a passable understanding of basic blendspaces for movement, focusing primarly on 4 or 8 way strafing-style movement, but what I am noticing is that more recently games have been adjusting away from that strafing approach and more towards a rotation of the character's head and upper body to face the camera but a continued movement forwards, or a backpedal. Is this done through blueprints of blendspaces, or both?
(apologies if this belongs more in a #programming channel)
@dry sedge #work-in-progress Was the correct channel. Don't cross post the same thing in multiple channels
When creating a game where the char can use multiple weapon types, is it recommended to have multiple blendspaces one for each weapon type when the weapon is equipped?
One blendspace for no weapon equipped, another for when only a one handed melee weapon is equipped, another for when a bow is equipped etc
Listen dawg: I want to make it so that when i press 2 controller buttons, an animation blendspace plays
How can I transition out of flying ? Because I'm just frozen

did you put a transition rule?
I'm not sure

oh
And its suppose to fly once i hit e not straight away

i think you need to assign another action mapping, to leave the flying mode
then in your character bp, you must assign it to a variable
Oh. I'll do that later since I need a break
then in your animation bp, set the transtion rule to be if the button to leave flying mode is pressed, it returns back to walking mode
take your time
@haughty warren

Does anyone know why exporting the default skeleton is so scuffed? or is there something I did wrong in the export?

Regarding preserve volume / dual quat with blender to unreal,
if I bake my animations and don't plan on using directly manipulating my bones in unreal, would that preserve the effect of preserve volume into the animation?
@normal rapids depends on how preserve volume works, does it use scaling or does it change the mapping of bone transform to weight vertex motion?
Because it was the latter, no it won't translate to Unreal engine
Has anyone playing with Control Rig found that you're unable to make edits to the transforms of Spaces? I know it's supposed to be possible cause the team that built Meta Humans Control Rig made ample use of spaces to create their awesome little rig panel, but no edits I make to spaces in Meta Humans Sample Project or any other Control Rig stick around. They're all erased / reset as soon as I make them
Dual quaternion Skinning was the phrase I believe.
Iirc the math correctly, it simulates coordinates in pairs to perform deforming.
Unreal Engine stopped official support before(Daz dudes cried), I wanted to know if it was possible to possible bake the positions of the vertices/animation itself to retain the volume distribution.
I tried using Alienrenderer's unreal branch, but the renderer broke all imported models.
I'd really prefer to safely model with this method instead of needing to fight between blender and unreal because it simplifies so much.
It looks like the devs stopped supporting it though breaking makehuman, daz, reallusion mechanics internally.
Even Lumberyard supports it. And lumberyard is easily the worst engine I've ever touched.
What recommendations do people have to help ease the transition between a montage attack animation (with a wind-down) back to player character movement so that it doesn't just look like garbage?
If you're in 4.25+, you can try inertial transitions in the anim BP.
Thanks I'll look into it.
do you still need help?
@ashen junco Seems like Mixamo animations now require a Mixamo character (or a mixamo skeleton)
Follow up question: I'd love to get some help into what I'm calling "modern" 3rd person movement.
A good example is God of War:
Kratos turns his legs in the direction of movement, but his upper body towards your target (to an extent), and there are only real two "directions" when it comes to animation, forward and backward.
Are people using blendspaces for this, or is this best achieved through the animgraph, or otherwise?
Blend Spaces often do the job.
Gotcha, so the animation for left/right/diagonal movement is really just the running animation, with an aim offset applied as well?
or are the left/right animations just a run animation with the like, spine3 roated?
It's the former, synced up with the direction of the movement.
Rotating spine3 bone is so oldskool though, like the stiff GTA 3 animations.
yeah, that is what I Was worried about
Hi.. I hope i am writing to the right place... I try to add an emote system to my als based project, but unfortunately it seems some clipping is occurring while playing the animation. My method was to add a new state called emote in the als_animBP


it only playing an animation which it got from a variable
i created a widget blueprint with a few buttons and in the character Blueprint i added the create widget and add to viewport node to the j key pressed event.

than in the widget blueprint, on the button clicked event i added these nodes ...
Could you provide a screen recording of the issue?

in the end result if i click on one emote the animation does some weird clipping which i cant figure out what could cause it...
heres a video about the issue... i wonder if anybody has some tipp or maybe a solution what could cause this...

So it's about the leg clipping?
unfortunately not just the legs let me send an other video.. now i am using groom hair on my character and its even worst now...
Maybe try playing animation montage, overriding the anim instance. It's not that IK foot placement is remotely important when doing emotes.
here it is i also used slowmo where the error even more visible
theres no foot ik in the anim bp thats just the idle animation playing
i tried to change a few value in the state machine transition rule blends settings , but things just got worst..
So are animations easier to make for third person or first? In general I mean.
I don't think there is a in general for that.
Context matters there.
Hey for any folks that use blender im pretty confused by this
im trying to use the composter to denoise a render but theres nothing inside the composter and when I try to add nodes they're all grayed out
what do?
Having some trouble importing animations to unreal, with a ue2rigify setup when importing, I'm not sure if I messed something up on the export that I'm trying to do manually, but the animations don't move and the mesh is twisted up, please @ me

I was hoping for something like this,
Lmao,

I sent this, but from a slightly different angle

My export settings look like this,

Final note I suppose, its a direct export from UE4, the normal in the box animations work fine, making me think its something about the export process of the animations I have created ?
The animations otherwise work in blender, see example sorry about the music wasn't expecting to post this here
Mr hoodie I am very hope you will bless me with knowledge 🙂✨
I don't even recommend you to use Rigify. People shunned on it now due to many complications it came with. My project stalled for 1 months just to have futile attempt on working around those issues.
I would recommend you to use the new v1.4 of Mr Mannequin Tools addon instead, if you want to animate Manny in Blender. It came with its own rigging, which arguably more robust than Rigify.
Rigify is recommended, for use in the ue2rigify unreal original addon, but good to know
Many of the Rigify issues have left unfixed to this very day, so I no longer able to recommend Rigify anymore.
blender pls fix
But do my export settings look correct? @ashen junco
You should not use Leaf Bones and use Only Deform Bones.
Ah yes the leaf bones is not it I turn it off every time just keeps going back on but good spot there
It also just doesn't move at all, and I would expect if it was just the rotations being off they would at least move a little randomly
This.
Imagine took me 1 months of trial and error and cross project testing to figure this out
you're trying to scale 0 rotation
i didn't even know you can assign values to quat in details, probably it's not working correctly
you can use from euler or from rotator
for vectors there is always a little expand so you can enter 3 values, but not for quats. but I think it's kinda makes sense
because unless you wan to type 4 numbers of the quat (that are not really meaningful)
you better to use from euler with order, so you don't have gimbal lock anymore
that's working for me

so specifying the rotator in details is working...
it will make "from rotator" i suppose
what does _IP and _RM stand for?

i think accumulate time doesn't work in preview
and if i click "add visual debug" it works. It's a bug in CR
working

guys can some pls point me to resources where i can learn control rig in detail.
i ve seen the official ones. And i don't know japanese
i don't see option for english subtitles in UE4 jp videos
ok i got it
yeah. but can you tell me how i can simulate bones up the chain?
yeah but for simulation?

i ve made this. but the only time the simulation responds is when i make changes to the graph and not when i move the root bone
what is CR?
ok sry
yeah because for verlet to work you need the bone local space
ig
but the bone collapses right if it's in the root/world space
is it possible to get the axis value from inside an animation blueprint?

You can make a variable in the character class and then access in the animation blueprint
so does it work like this?

my bones collapse for some reason if i have it globalspace
(i am very new to animations) this looks scuffed...are there any online resources that could help me learn more about creating fluid and smooth animation blends?
i see. i am using a blend space so i assumed blend was the right term 🤷♂️
right now direction is based on an axis value, which goes from -1 to 1, not sure lerping it would make it any smoother
do you use root motion?
i am using in place animations since i dont really know how root motion works 🙂
problem with cats is that they don't turn in place.
but anyway if you want to smooth your blendspace there are some parameters
like "target weight interpolation"
do i need IK to rotate a character head/body based on camera rotation?
Hello!
I have a simple animation montage that is refusing to play and I don't know why :/
The skeleton is set up correctly, I am using the default slot on it and I hooked in the default slot in the animation blueprint.
A different montage similarly set up works perfectly fine.
How can I start debugging this?
(It also plays correctly in the preview window and everything)
The anim montage


Wait I am even more confused now.
I added a anim notify in the montage and a print string inside notify received and it prints out actually.
It's just not visibly playing the animation 😮
i suppose it's the free april cat. it looks like so with rm. btw, anims are pretty bad
is that root motion?
yes
but how does it look in game? how do you trigger such animations?
in game it looks the same
of course
you just take the root motion animations for walk and run and make a blendspace like in the video
i'd expect root motion to be for 1 time animations like attacks, maybe spells.. not movement? i am not experienced in this topic thought
you can use it for anything but your movement will be animation driven, so it depends a lot on that. like how fast you turn etc.
whats driving the blendspace? speed and direction?
yes, exactly
would the "calculate direction" node suffice?
i didn't know there is such node. basically you take the last input vector in world space, transform it in cat space then take the yaw, that gives you the rotation. and for the speed it depends how you do it, you can take input vector length for example
yeah it takes in a rotator parameter and a vector and it spits out a float, pretty neat. for the velocity i could go from the character movement component ->get velocity and vector length

Hi, I'm trying to learn Control Rig so I can animate in-engine instead of going back and fourth between Blender and UE4, and I'm having the problem shown in the image. I'm assuming I need to add some constraints to his shoulders, but the options available in the PowerIK node have 0 effect on the bones. I tried to reach out through the PowerIK discord a couple of days ago, but it seems to be pretty much dead there... I'm hoping for some more luck here?
Also, is there really no good tutorials for absolute beginners to learn how to put together a rig for a quadruped? I've been searching for a few days now :(

umm i just made a new mesh as my character and was wondering how to animaate it?
Have you rigged the character?
dont think so
Then rig your character first, with whatever DCC software you're using (Blender, Maya, 3ds Max, whatever)
ah
So how do you exactly use Control Rig's Distribute Rotation node? I want to use it for controlling the fingers.

Does anyone here have experience with livelink? Every time I launch the editor I have to go into the livelink plugin and set it up again for the input. If I bake and release the project, how does that work?
Are bone names case sensitive when it comes to enabling root motion?
I bought the longsword pro pack on the marketplace... I retargeted the animations to the default mannequin skeleton that comes with the third person project template, and the root motion does not work
The only thing I can see that sticks out is the original animation has the root bone as "Root" and the template skeleton is simply "root"
Anyone knows how to fix animations when playing multiplayer?
Maybe the error is this but idk

Do you even know how to google my friend? https://www.youtube.com/watch?v=z7DI17JAGQM 🙂

Hey guys, this time we will:
- replicate animations to clients and server
As always leave a comment if anything is unclear
Stay tuned on Facebook:
https://www.facebook.com/PyroDev/
Or stay tuned on Twitter:
https://twitter.com/PyroStudios
Reboot computer or start from scratch ina fresh project
Does anyone else encounter this problem that when moving animation assets together (like skeleton and anim sequences), after moving the anim sequences don't seem to update their reference to their skeleton.
Oh, it seems to happen specifically when migrating plugin Content to a project Content folder
And I guess that's because Migrate just copies the files from one project to another without touching contents, so makes sense that references break having been moved into a different package.
Im having an issue with blending a location based animation with it's appropriate blend shape.
Im not entirely sure im using the right workflow either.
To explain, I am rolling up a carpet. In Blender I have animated the object to be modified by a curve and the roll up is kind of ok in Blender (it's outside-in rather than inside-out but I can live with it for now).
The problem arised when I export. I cannot export animated morph targets properly. It just blends the morph target directly into the other shape without taking into consideration what the animation is doing. There is no correlation at all. I can show some examples if anyone can offer some advice. 1 min.
This is the blender animation with morph target (shape keys)
this is my broken one in UE4.
Have you tried doing it purely with an armature (skeletal mesh)?
I could do that but I wanted to avoid using a skeleton with enough bones to make it cloth-like. Im currently doing some tests with baking it to vertex animation but if you know a better way I'd be more than willing to try it. This thing has cost me the last 7 hours in just trying things out.
It probably wouldn't need a lot of bones, just a lot of vertices to make it look like it has a smooth silhouette. The bones can probably be one single line of bones, like a human spine. Each bone's influence on its surrounding vertices can be manually painted then smoothed out using Blur or Average tool in Blender as well to help ensure the smooth bendy look when the bones are being rotated. I don't have much experience with morph targets but I thought it should have worked. I've managed to export morph targets to UE4 before a long time ago. I dont know why it didnt work for you.
the morph targets export fine. it's just not synced with the animation. It's lerping directly from no morph to full morph as if it had no relevant animation. I tried adding the morph as a curve with the animation asset but it did the same thing. I'll try with an armature and see if it looks ok with a median set of nicely weighted bones. I may as well. I tried almost everything else 🙂 Thanks for the reply. Appreciate it.
Have you played with the morph target slider in the mesh editor? Does it react as expected?
no it's doing the same thing. Just a direct morph without any of the curve deformation
I also made sure I did the Add Shape Key from the modifier and not with the + sign
Perhaps the curve needs to be removed from the equation. If there is a way to bake the animation before or during export that might fix it.
I'd probably have to go the alembic route for that. So I may as well do vertex anim either way
What is this all for?
An advert?
no its for in-game as a rolling bed mat
I see. have fun!
ty I will try 😄
Okay, I finally get Distribute Rotation to work at all, but how does the ratio thingy work? I tried adjusting the value but it doesn't seem to affect anything.

Does Unreal have anything like Unity's Dynamic Bone which is quick and easy to set up, or do I need to use animDynamics if I want to make certain bones dynamic?
Anim Dynamics or Kawaii Physics often do the job for faked bone physics.
I'll have to look into Kawaii
Hey anyone here good with 3ds max?
I just downloaded, the rotate commands seem very dumb.
https://gyazo.com/aa8d6d67f743ca71aa1bf4f6d2e2f225
Holding Alt+Middle Mouse Wheel and rotating left and right. It's like it's not rotating from the origin/center. It's rotating on like the Y axis I think?
If you ever used Maya. I'd much prefer the control settings in their engine. Much better, I want to rotate all around this model instead of flipping it on it's side if that makes sense.

Any ideas?
What's the best way to have multiple meshes using the same Character blueprint? They are all rigged to UE4 skeleton and need exactly the same anims, it's just a mesh swap.
Re-asking my earlier question, are there any actual tutorials on how to rig a quadruped using Control Rig? I’m using an armature from Blender and have been trying for going on 4 days to set up a control rig. I really need help
Put the main skel mesh into the BP and have all the other skeletal mesh component as the child of that skelmesh.
Once you done that, you can either:
a. Use Set Master Pose Component on the child skelmesh for the Construction Script or event where you want to change outfit. Any anim dynamics used in the anim post process will be overridden.
b. Create a new AnimBP for the child skelmeshes, and simply put Copy Pose From Mesh node in the anim graph.
Nevermind this.
The distribute rotation node (or any attempt at additive transform calculation) ended up accumulating the transfom. I'll just go with manual fisting.
Hi, I can't figure out how to properly export a rig animation from Blender to Ue4.. someone can help me ?
I've tried export with the bones parenting and not, but when it's parenting UE4 doesn't like and when it's not parenting i can't find how to get make it works..


I have these three object but none of them move

When making modular characters, do I need to export parts with the same skeleton and complete hierarchy or just main "body" needs to have full skeleton and the rest of the "body" parts only root and the bones meshes are skinned to ?
There's no problem having the smallest part the full skeleton. You may need to strip away any unnecessary physics and facial bones, though.
so master pose would merge partial skeletons with full skeleton without any issues ?
As long as you keep the bone hierarchy not moving around, yes.
nice, thanks @ashen junco
@brisk storm Is the mesh bound to the skeleton?
i don't know if i understand your question but yes if I parent my bones to the mesh in Blender it works perfectly
whats the difference between a normal animation curve and a metadata curve?
@brisk storm look up skin binding. Binding and parenting are not the same. You need to bind the skin for unreal engine.
Is there a way to control variants in sequencer? As an example trigger a variant on by frame?
Hey, I imported an animated character as alembic. using geometric cache, everything works smoothly.
But I´m not able to bind the groom to the mesh.
So I reimported it with skeletal option.
But now the mesh keeps disappearing if I get closer to it with the camera.
Any idea how to fix this?
How do I add my Animation Blueprint (containing physics) to the sequencer?

as pp maybe?
A what now?
If anyone need to know in the future, apparently my mesh had 001 at the end and it was failing to find that mesh / skeleton combo, ensure your mesh and skeleton have the same name as in blender, check this because send to ue2rigify the partner addon actually changed the name by default...
post process anim blueprint
All I'm finding is that I need to start my animGraph with a sub-graph input, but that seems to no longer exist
Anim Post Process.
Sub-graph input is now called Input Pose
Alright, well I tried Input Pose and nothing worked 😐
It's the animation blueprint that needs to be placed into the level and then into the sequencer right?
It's using the animation blueprint with my physics, but that animation won't play if I have my animation running through the blueprint; if I use an input pose and then assign the animation to the sequencer under the object, it doesn't seem to want to play in the sequencer.

Actually no.
Anim post process is set up in the skeletal mesh itself. And you can disable them non-destructively with the skelmesh BP you're using (useful if you want to bake Control Rig anims)

Awesome!! Got it working, thanks so much! 😄
I swear to god Unreal is 90% finding the right checkbox/menu
For people here using the Kawaii Physics plugin, do you make a single data asset collision profile and assign this to all the bone chains or do you make several ones based on proximity ? I'm not sure if it has significant impact on performance
In Idolmaster Million Live Theater Days models, the physics are applied starting from a weightless bones, that has all the physics bones parented to it. I used the same technique, which allows the physics to propagate across modular characters with a single bone/node.
Thanks, you're referring to that vid right ? https://www.nicovideo.jp/watch/1306301817
This is how it applied in the anim BP.

Cheers, that makes sense. Do you have a collision profile shared by all of these ?
Or for example for a ponytail you just place the head volume ?
I copy pasted all the colliders from one node into another, and I don't see any performance issues with it.
Cool, I know that Koei uses basic volumes parented to specific bones to get some rough collision profile and then the latter are used by all the bone chains and cloth sims. So that sounds quite similar
Btw are you aware of the data asset collision profile ? Would avoid you the copy pasting
Not that I'm aware of, is this one?

I'll check it later on.
Basically you just define several volumes in that data asset like you'd do for a single node
And then you can put it directly on several ones
Alright, that seems to do the trick 👀
The experimental name kinda scares me a bit ngl
I think he just put it as experimental in case they were bugs at first and probably forgot to remove it, it's been around for a year or so iirc
Can you animate a static mesh in UE4? You can in Unity
Using World Position Offset or Morph Targets
Hi people.
I have been playing around Paragon Twinblast asset, but I could only find plain ultimate animation without gun fire.. I tried all the curves to enable gun, but no luck..
Have anyone succeeded in unlocking it's ultimate animation??
Thanks
Hey there, following up on my previous question about alembic as skeletal mesh...
I´ve done some more testing, reducing the number of frames imported and the number of meshes exported, and the visibility issue disappeared.
Gonna have to gradually try and increase the count of objects to see if its caused by a specific one, or just the polycount or framecount...
Actually... I might go down a different route alltogether.
I do have the base skinned character mesh, I could just import that as fbx and hide it in the editor.
This way I can use the hipoly, skinwrapped alembic for rendering and the underlying skinned mesh for groom binds etc.
Hm, that doesn´t work either. The groom bind asset just won´t attach to the skeletal mesh.
Ok, figured it out.
- Make sure you rotate the groom asset correctly on import. In my case I had just rotated it in the editor to fit the skeletal mesh.
- In the skeletal mesh Details panel, under "Skin Cache Usage", pick "Enabled" from the drop down menu:

Hm. Not quite there yet.
I fI hide the skeletal mesh, the groom is still visible, but the animation stops playing...
YES! Got it:

Hi folks, is it possible to set some variable in AnimClass of Character before spawn, i need this to spawn character in some specific pose, with offset from root.
I want to avoid to spawn character somewhere too far in idle and after enter in pose to relocate character.
Is it possible?
"Set Anim Instance Class"
@ashen junco i need reference for that class sometings like get anim instance class and set enum in that class, something like StartPose
Oh wait, sorry, I misread that.
You can use Get Anim Instance Class and then cast it as your animBP.
ok tnx i will check
So I'm following Inu Games' tutorial for using Quadrupeds in control rig and my dragon thinks he's a snake now, and I also can't figure out how he bound the controllers to his character.... Any chance I could get some help figuring out what went wrong? I'm so close

cubes are where foot should go? seems too close to each other. if you just disconnect the ik, how does it look? without any offsets (on flat floor) they should be where the feet are
I put all my shapekeys into a "properties" bone
I didn't make controller rigs for those properties, I keyframed the actual properties

works fine in blender
but when I import into UE4, with morph targets on, they don't work

This is his rest pose at the moment
I wanted to use Powerik originally, but his shoulders and thighs end up incredibly stiff and I can't find a way to fix it :/ So I went for Inu Games' tutorial instead and ended up with tonight's result
ah okay it's like that. then try to just disconnect the fbik node
basically you need to see if the stuff you're feeding to fbik is correct
in this case it should be the rest pose again
i regret i didn't use the controls for that, would be easier to debug
The controls are from when I was trying power ik lmao, I saw the guy I followed tonight using controls on his character's feet, so figured I should keep them. Ideally, I was wanting controls for the feet, head, jaw, eyes, and tail so I could have full control over the most important parts when I animate
Uhm, so how should I start troubleshooting this? He went over constraints and changing some values at the bottom of FBIK, but didn't go over any possible issues or how one might fix them
hi guys i need a little help, im doing a turntable for my characters and i already placed some objects around and rotated it, now i wanna make sure they have the same position while their rotation is 0, is there a way i can do that?

what you need to see is that the inputs that you give to the fbik corresponds to where the feet etc should be. you can start by making another fbik node and start to add one effector at a time until something is wrong
I'll start working on that then, thank you 🙏 I've been trying to get this set up for days now, never thought it'd be so complicated to animate in-engine
i never tried to animate in engine myself, only using that at runtime in the animbp
I did a small animation in Blender a while back, but people showing off what you can do with control rig had me thinking animating in-engine would be the best option
Hmm, could the issue be in the metarig itself? Adding the neck bone to the effector causes him to instantly lose front gravity
And this is before I add the temporary bone's transform
I got them working... bunch of importing and reimporting
if you don't add a transform it will be trying to put it at 0, so you need to add actual place where you want the neck to be
also, start by adding the pelvis maybe
The pelvis is in 2 bones, so do I do an effector for each side? Everywhere I've looked people have it set as a single bone, but Blender's basic armature* has it as 2 :/
one where the thigh are attached to
Ok, thank you. That one works fine, so now I'm guessing I should just go in the same order I did previously
It definitely starts with his neck, and it looks like the temporary bone doesn't change his position, is there a way to mess with that one's transforms to see if that's the issue?
you want to use that rig in sequencer?
because the tutorial is for runtime ik
not for animating in sequencer
I'd like to, yes. I can't find another way to use just an armature without already having some animations set
Oh, ugh of course it is
no but it's easier if you want to animate in sequencer
you don't need all those traces and temp bones
you just create some controls for feet and pelvis and neck and then you move those and you give the controls location to the fbik
probably that's what you tried to do before
Is there a way to couple it with the powerik solver so it pulls more than just one joint?
That's the whole reason I chose ue4 over blender >.< Blender likes to generate really complicated rigs, but I've seen people using control rig to control the whole body through just a few chains of bones
with fbik it's pretty simple, you just give all the effectors (feet, pelvis, head etc) and it tries to move the body so the bones match the effectors. probably powerik is he same
but without a fullbody solver you need a lot of 2 boneik and stuff like that,
I'll give it a go and see if this finally solves my troubles, thank you
hi guys, I'm new to UE4, I searched on Google but couldn't find any info on this matter... there is a way to associate a morph target to a bone rotation? So that, for example, when I bend my character arm a specific morph target (done to make the bone deform gracefully) will be set to 1? Thanks for any help
bone driven controller animbp node, or pose driver
just noticed the name 🙂 hey, you will put your pretty animals on ue4 market?
@wide hearth yes indeed, I'm in the process of studying how to do it 😄
yup
cool x2!
with alembic fur?
i think cr is still pretty buggy. the other day i had and issue when i changed some parameter and it was modifying the size of debug point in another node. like, there was an interp node and a ik node, when i changed the interp speed the polevector debug display was changing size.
Hey guys, need some help with Animation Blueprints here
How can I track a variable from one blueprint and if it's true, set a variable in anim. blueprint to true AND only then it's back to false set it to false?
For example, here is my fella

If Shooting variable in this character's BP is true, it gets to branch
And now I need to set variable in anim. BP back to false only when BP variable is false
Have a look at template third person BP this is done in there
I have a first person project 😦
Open another window :)
Figured it out, thanks!
is it possible to get an animation intended relative socket transform? so ignoring the real transform of a socket, I'd like to know what a specific animation would do to a socket (ignoring any IK or other processing)
read it before ik
that would work on 1st frame, but on the 2nd frame the IK of the 1st frame would be applied falsing the original transform.
I'm trying to see whether this can be retrieved as data (animation curve or other).
where you need it, in anim bp?
well, i don't know about sockets, but if you need a bone transform after all anims but before ik you could put a virtual bone from root to that bone and read it in post eval event. virtual bones are only modified by anims but not by ik or other proc stuff (unless you force it with modify bone or such)
or you can use control rig, insert it somewhere in between your abp and read the position of your bone there
and btw the pose is reevaluated from scratch every frame, so there is no need to worry about 1st/2nd frame influences
https://cdn.discordapp.com/attachments/545292237559431198/841644776977989642/unknown.png I think we imported the fbx wrong to get all these duplicates on the MH rig. Has anyone seen this?

ok thank you.
Aside from constraints on the FBIK node, what can I use to allow specific limbs on my model to rotate on certain axes? I'm playing around with the constraints, but there's no change to how stiff his arms and shoulders are
Hey everyone! I'm playing around with Control Rig and when I plug my model's leg into a Basic IK node, the leg parts get offset by 90 degrees like this:

Here's the relevant bone hierarchy and the node setup as well:


Any idea what could be causing this? I made the model using Blender 2.92, I don't think there should be any unapplied transforms and it seems to work as it should with a CCDIK or Basic FABRIK node
This is actually a well known issue with making rig in Blender to be game engine compliant. Long story short, Blender bones put into consideration the head and the tail, when game engines only consider the bone head.
The only way to solve this is to actually rotate the bone yourself by 90 degress in Blender, and not using connected bones.
Weeeeeeell... frick
Thanks for the explanation! I figured it was something wonky with Blender's treatment of bones. I'll look into it 😄
Turns out what was actually wrong with it is I had the primary and secondary axes set wrong in Blender 🤦♂️ It works correctly now 🙂
Hey, i am trying to import a Mixamo animation to my character mesh, but when i try to import to my character skeleton i get this.
Can someone guide me to fixing this
I am using this character btw ( https://www.unrealengine.com/marketplace/en-US/product/fantasy-girl )
Mixamo's bone hierarchy is vastly different from UE standard bone hierarchy. Consider using Mixamo's own character first, import it along with the animations, and then retarget it to UE standard/marketplace characters accordingly.
and if I do that will the marketplace anims still work with it?
since i would be using mixamos bones?
Retargeting means "translating" the animation data from one skeleton hierarchy into another. You retarget the mixamo animation that uses its own bone hierarchy, to the marketplace character that adhere to UE standard skeleton
So I tried a multieffector FABRik on its own and with the FBik and in both attempts the legs rotate too much/fold into each other when I try to lift them on the z axis, which looks pretty bad. I also still can't find a way to manually control rotations on limbs/chains.

200 pawns, ~ 1600 skeletal meshes with animation sharing and master pose component set up. Fortnite has about this many so I wonder what I'm doing wrong here? I should be getting higher numbers.

guess I'll try adding in animation budgeting?
either I'm not using something from anim sharing since the numbers don't change with it turned off or it comes purely from the number of draw calls
well, I'll ignore modular characters for now since that's in spec for VR

async load some skeletal mesh refs for random skins and still in spec

wish unreal had a way to emulate lower hardware so I can guestimate what it would be on min spec
fullscreen and we're at about 120 fps. Nooooot bad at all

how about 400 dudes? oh yeah definitely playable

Now make a Hitman clone out if it. 😁
aiming for stonehearth, but VR
or maybe like a kingdom for keflings
what would be even neater is if I make it open world since the voxel terrain is procedural
Is there anyone who knows how I can set up controls for his tail, and a proper control for his jaw? Fullbodyik pops it out of place and I can't seem to pole vector it back in place. I just want to be able to rotate and move it on the Z axis. I also feel like I need rotation controls for his paws, elbows, back knees, and midsection.
Here's a screenshot to show the jaw issue

does anyone know why i cant play animations from the animstarterpack,but can play litterally anything else
something about it refusing to accept any otherpreview mesh
Hello
hihi all.
I can change axis in BP for skeletal mesh ?
Axis of what exactly?
bones
I need remap mocap rig on any rig.
But all bones mocap rig don't have axis local coordinate
for example

classic rig with local coordinate

classic rig with global
and shit rig

have only global axis
put your rig in exactly the same A pose as normal rig, define that pose as your retarget pose, retarget anims
ah okay then
Looking into a VR-based mocap solution. Anyone played with Live Link Face enough to know if there is any way to get it to work if your eyes are covered? Obviously just capturing mouth movement. I'm going to try printing out a picture of the upper face, but I have a feeling the iPhone camera depth information won't be fooled by this.
And because of the depth added by the Index headset, even if I could 3D print an upper face for the depth info, it would be almost an entire head forward, so I'm sure that will also mess things up (if that did trick the camera, which is unlikely)
I have a weird problem: I have a switch (skeletal mesh). When I play the first montage, it works fine. When I play the second montage, it replays the first one!
So I'm curious about a second opinion on this, does the FPS when exporting an animation to unreal actually matter because unreal converts it into a timeline either way?
(Assuming you take the frames and FPS into account to get the timing correct)
The reason I'm asking is I want to set blender to 50 FPS so its easy to get the frames timing correct
What's really interesting is I'm doing the same thing for the character mesh, and it works fine!
Do I have to have an animBP in order to play montages?
@light river A lack of an anim blueprint would not cause the same montage to play again, sounds like your some how playing the wrong montage on the second time try printing its display name and see if its actually the montage you want to play, depending on how you set it up perhaps your holding the wrong montage reference?
(But that's honestly quite a hard problem to diagnose without seeing your code, I recommend pasting screen shots)
@runic sundialI created a flip-flop to make sure I am calling different montages for each.
I'm doing it in a Gameplay Ability, if that matters.
But I was hoping there was a well known "gotcha" that you could tell me.
Could be possible, your calling the code that calls the flip flop twice and therefor going from A -> B and back to A
Add print strings to see the order the code is being called
"Playing A" and "Playing B"
Then you will be able to see if that's the case
I did... and they have the correct names. I've even disabled root motion incase it's rotating the switch...
Root motion "rotating" your flip flop node?
I assumed I was doing something stupid last night (late night programming) but this morning it all checks out. I'll try another interaction object to see if maybe it's related to the mesh...
@runic sundialIt's a switch, so the off looks like the on if you rotated it 180. It was a long shot...
Montages, don't keep playing the same animation without purpose
Do I have to end the montage explictly?
No
They will just switch to any new montage you play
So that's why its likely your starting B and then A after accidentally,
Paste your code to call the montages, and add the print strings so that people may better be able to help you
I have to run to work. If I don't figure it out I'll be back after work.
I might not be around but if you paste your code someone else may be able to point out an issue, often you can't see the problem without a fresh set of eyes
cuya
On another note c:
@runic sundialThank you!
Just tried printing out a picture of my face, and I can't obviously see the results very easily while covering my eyes, but I think it might actually work if positioned well enough!
Hey, I am using a character with epic skeleton and using animations with epic skeleton but when I use my character mesh i cant use the anims
@light river is the ability getting created as a new instance with each execution? Also this is a gameplay abilities channel question I would think
No...I'm keeping the same... I'll try that.