#animation
1 messages · Page 151 of 1

Here's a list of 2020 games that had amazing animation!
---- (More Below)
Support New Frame Plus on Patreon!
http://www.patreon.com/newframeplus
Written and produced by Daniel Floyd
Special thanks to:
-Carrie Floyd
-Eric Luhta
-Soraya Een Hajji
Follow me on Twitter (@DanFloydPlus): https://twitter.com/DanFloydPlus
For mor...
so i have to ask is the control rig just the animation IK system plus?
there doesnt seem to be much reason to use a control for ik over the ik nodes in the animation graph?
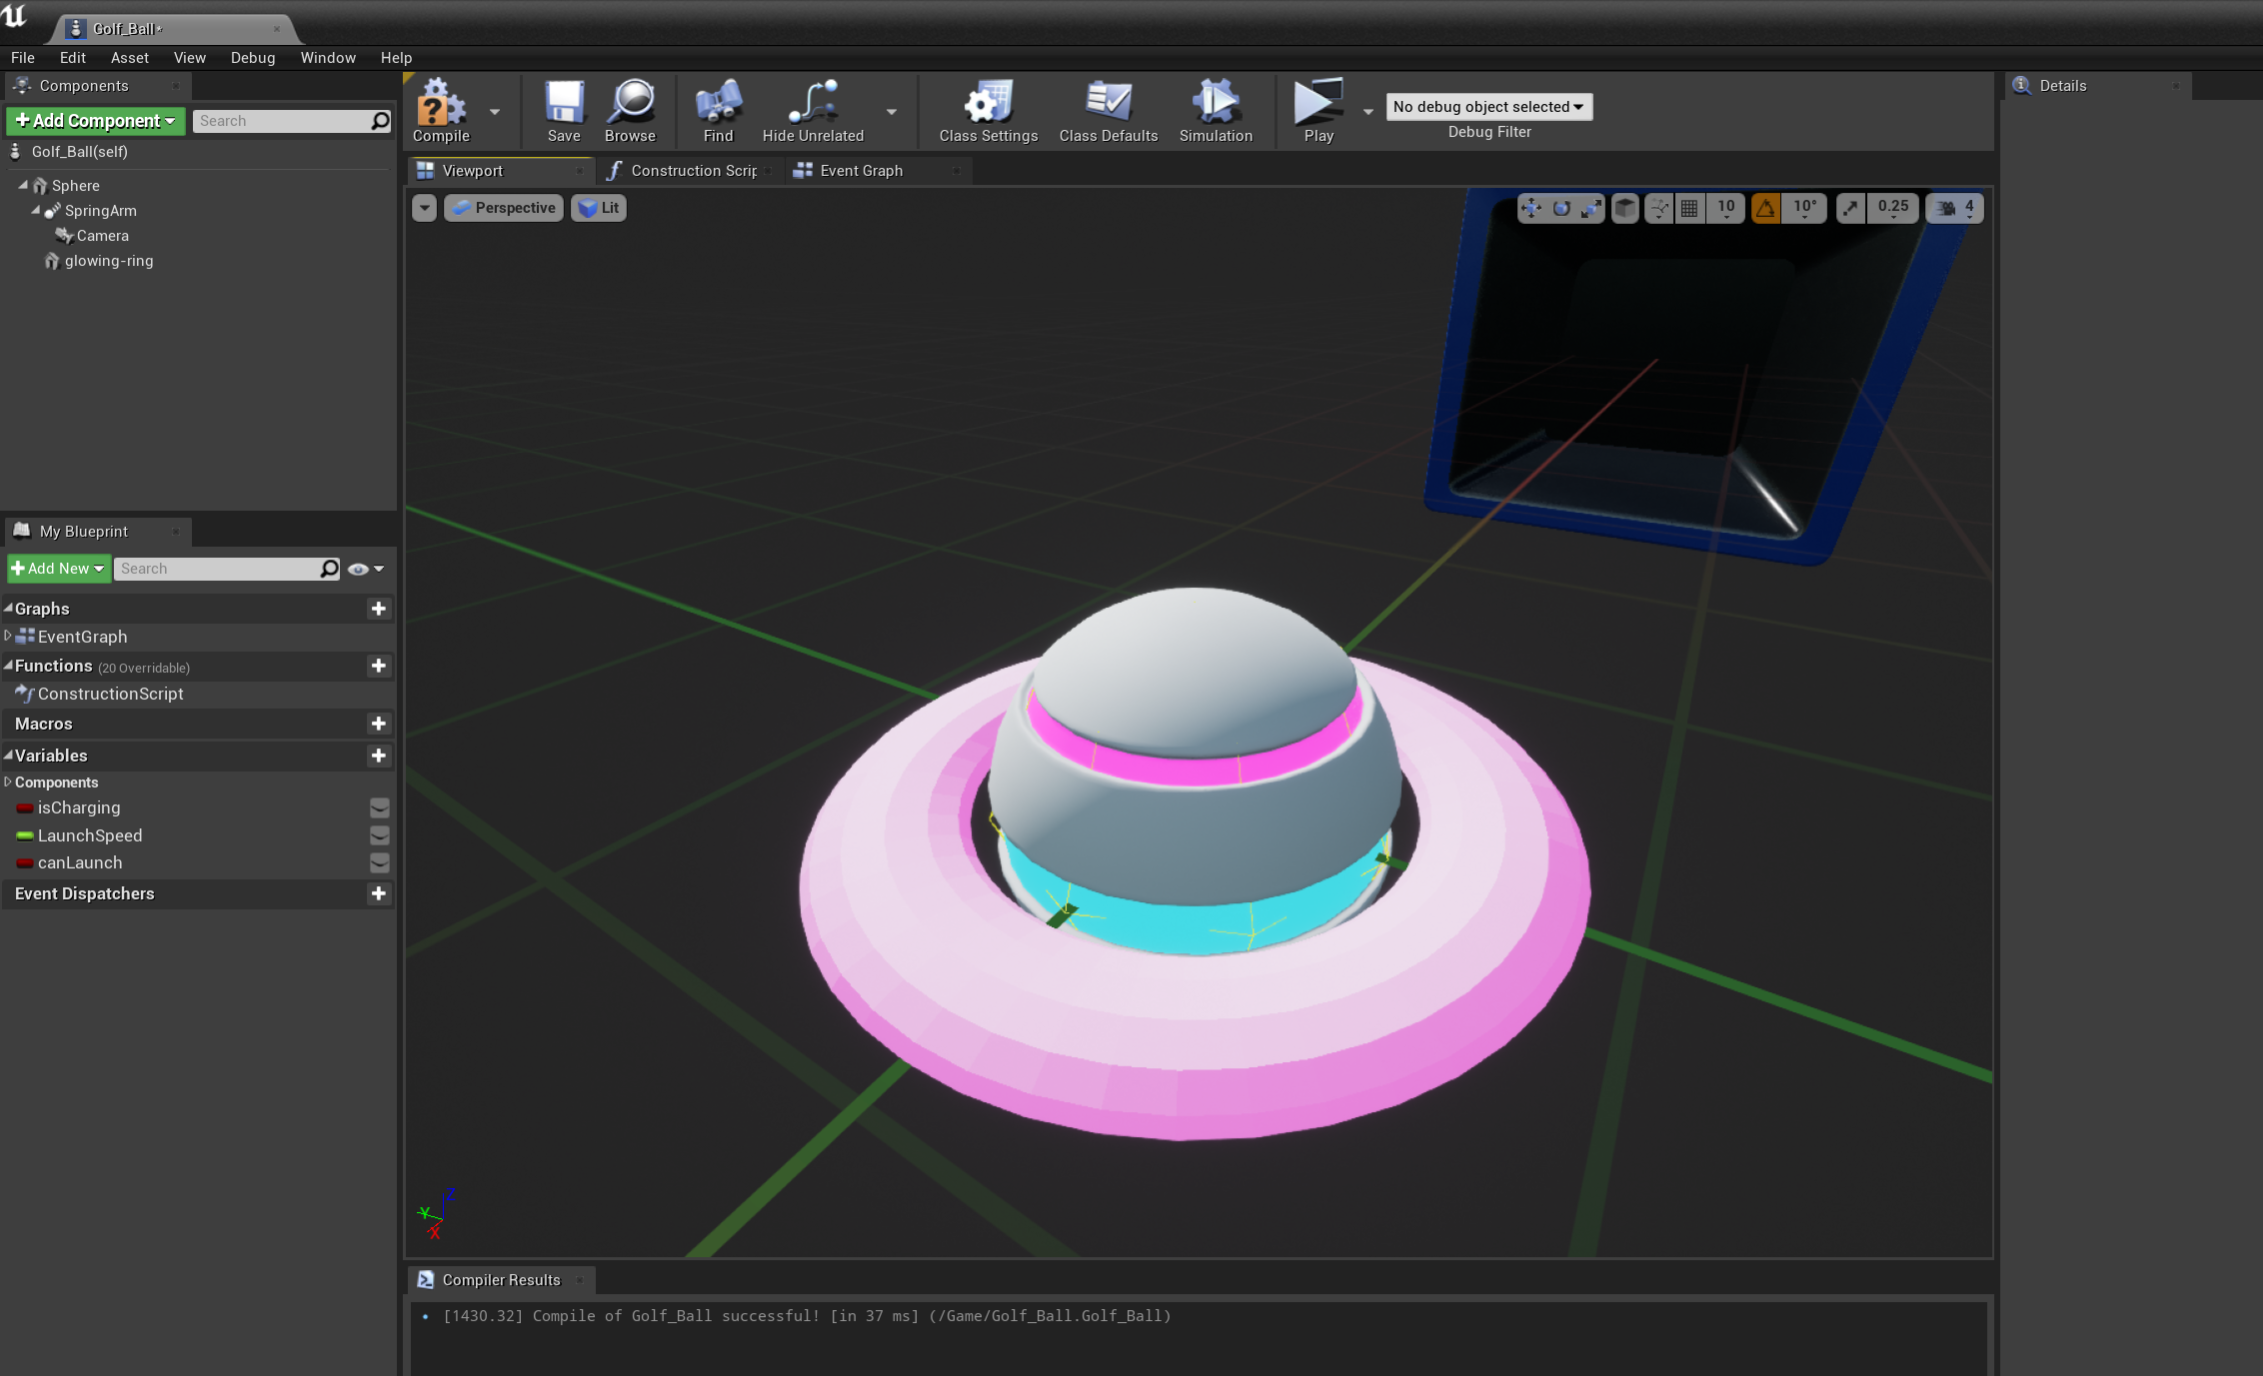
I want to animate this ring to move up and down. How would I accomplish this? Matinee? I could do it programaticly, I just want to make sure there isn't some easy way to do it by setting keyframes or something
How could I set up my first person character's arms to follow each separate weapon's unique recoil and reload animations, without having to have a separate pair of arms linked to each weapon?
Hi, Animation question. I have an animation of a kick I got off the internet. I want to make it play at double speed. I can achieve this by going into the kick and setting the Rate Scale to 2.0. However, I have another part of the game that retrieves the Play Length of an animation and it is returning the original length and not the halved version.
Is there a better way to make the animation faster? I am willing to duplicate it and edit the duplicate.
Ratescale is not available as a blueprint node, sadly.
I am looking at Montage Notifies. It seems like they're mainly meant for stuff like sounds and particles? But I'd like to trigger a blueprint effect when a particular notify is hit. Is there an example of how to do this?
Specifically, a montage playing in the AnimBlueprint
Or do I need to play the montage from blueprint to get this effect?
Not sure if that helps, but if you add a notify to an anim sequence, then you will have a notify event in your animbp when the anim plays at that time.
Hi all, anyone knows how i can add input to animation layer like this? Can't find any way to add input pose.
In the layer > inputs click on the plus 3 times, you will have 3 input poses
@wide hearth Thank you, i was try to add input once node were added to graph, Once i removed it, added input and re-added it worked!
Anyone know where good freelance animators hide?
Hey guys, so I have a problem, in the Animation i was trying to make the curve like a curve, not straight line, but it didn't work and i don't know why is it happening (it's rotation curving for walkingstart)
hi guys i followed a tutorial on youtube on getting a mixamo character into ue4 and now im trying to add a jumping animation which the tutorial didnt cover. im following another tutorial now for the jumping but the blueprints are different to what i have in the animation bp file. ive set up everything in the character state section picture included.
but in the event graph everything he has is different to what i have
my question is
what are my next steps to get my jump anim working properly, here is my event graph
Hey guys I was wondering how I could modify an animation in the engine. I want my character's gun to be aiming a bit more upwards
I know there is a way but the changes I have done never save
Uncheck "extract root motion" maybe? I mean "extract rm" will mute it, no?
Also, unrelated but last index should be num frames -1, loop is from first index to last index inclusive
Hi, I want to predict if an attack will hit in my animations. I get the transform of the hand of a later frame (the frame an enemy should be hit) and use this to add a hit box component at that transform that checks for collision. But somehow the transform I get isn't correct (I think it's not relative to the mesh but neither in world space). Are there any ideas for alternatives or solutions? Thanks in advance 😄
Yeah, the unchecking root motion doesnt do anything, but what should i do with the last index? Didn't understand sorry 😦
frames starts with 0, last frame is num frames-1, for loop is from start to end index INCLUSIVE
I still don't get it, sorry if im retarded, i've done it through this tut, and i am 100% sure that i have the animmodifier good. https://www.youtube.com/watch?v=JB5CQCj0gAs&list=PLSCf9vYpqk3PZkUK69F85AuBOpM-64f68&index=2

Patreon ▶ https://www.patreon.com/UE4tuts
Facebook ▶ https://www.facebook.com/UE4Tuts
Contact ▶ ue4tuts4you@gmail.com
In this new tutorial series we'll setup character Locomotion System from completely Scratch. That will include Walking|Running|Jumping and Also Crouching. We'll use RotationMatching|DistanceMatching for proper location system...
btw, I've just made an anim modifier myself and I had to add "finalize animation" after for it to work
for the loop, probably it's not a problem, but if you have 3 frames anim, it will be frame indexes 0,1,2 and lenght =3 . So the "for loop" node should have 0 as start and 2 as end, yours has 3 as end. In other words, just put "num frames -1" in the last index
so does no one know how to do modify the animation in the engine. ?
I just want my gun to aim higher during the animations
Maybe I'm wrong, but can't you edit the transform of the bones in an anim sequence/montage?
hey guys, real quick question. it's probably user preference, but is it better for me to first create animations for the player/NPCs in blender and then importing them into UE? or should i just import the assets and create the animations in the game engine itself using the anim blueprint/editor?
You should definitely create your animations in Blender; animating in UE4 isn't that easy. I think it's possible with the control rig plugin, but I would recommend doing them in Blender
Like that?
And like that? It still gives me a straight line :/
sounds good, thanks!
How do I get the Transform of a bone relative to the root component?
@tropic drift well I just want my gun to aim a bit higher when I'm aiming the gun
when I'm running*
lemme make a gif to show you
I know the camera looks bad I just put it like that so I could see where my bullets are comming from
but yeah basically the gun is looking down a bit and I want to put it up
some help would be much apreciated haha
I use Mixamo animations and I converted them with the Blender tool "Mixamo converter" to support Root motions for UE4.
Most of the Animations are working fine, but some doesn't. Their very jaggy. Here is a video for one of those jaggy animations.
Top Right corner -> Raw Mixamo Animation without the Blender converter
Bottom Right corner -> Raw Mixamo Animation retarget to the Mannequin.
Left Side First Half -> Raw Mixamo Animation retarget to the Blender converted Mixamo base skeleton. (Wrong axis?)
Left Side Second Half -> Mixamo converted Animation on the Blender converted Mixamo base skeleton. (Jaggy motion)
How can I fix this Jaggy motion or that the raw animation goes into the right Axis (like the mannequin does)?
I did it after it's all done, in the completed pin. Btw, stupid question, is your root bone animated?
I mean, i use animations from Kubold, like he does in the video, so it should be 😄
Still in the completed pin, gives me straight line, idk..
idk too then...
np, but thanks dude!
from where? in bp "getsockettransform" with component space should work i think
Oh I need it for a specific frame in my animation
GetBoneTransform() in c++ returns it in local space I think, but that doesn't work
if it's for a specific frame, could you use Getboneposeforframe?
Well the problem is: I want to get the transform of a future frame in an attack animation. I use this transform to add a hit box component to predict if the attack will hit something. But the transform returned for hand_r is always the same in the animation (although I can see it moving). So my guess is that the transform is in "bone space" (?)
And I think GetBonePoseForFrame will return the transform in the exact same space, you know?
Yes, it will return it in the same space, but you can calculate the transform relative to the root if you combine all transforms from hand to root.
Combine like in CombineTransform
Oh thanks!
But I don't understand from where you are calling all this? Is this supposed to be calculated at runtime? Or in anim modifier? Because "get pose for frame" is made for anim modifiers
I use an AnimNotifyState for Hitboxes. If the type is "proximity" I'll get the transform with a c++ function
You can get those functions in c++, too I think
I didn't use an Anim modifier because you can't apply them for montages, can you?
Well then what I said will not work probably. I think anim modifiers will only work for sequences, and they are for precalculating things, not for runtime. I'm pretty sure there should be a function like you need in c++, but I mostly use bps so I don't know
Hm. Well precalculation would be fine by me
That's how I calculate bone pose relative to root in my anim mods
Okay that should be possible in an AnimNotify State. Thanks a bunch, I'll try this out 😄
@wide hearth Hi IG, i was able to get input node connected like this..
however inside node i cant find input parms
How would i receive inputs inside node?
it's "input pose" node or something like that
inside your blending layer i mean
for me they appear when I click on the plus
@wide hearth plus, where?
in the inputs tab of the layer graph
This is how i added
@wide hearth Is there any precondition for them to appear? I am on macos do you this its bug?
i don't know. Try to remove and readd them maybe?
Did it 😌
weird
Any ideas how to synchronize two animations?
I have a data race
in c++ are some kind of features like std::mutex etc. ,but is in animation graph something like this?
is it safe to assume that adding sockets to a skeleton doesnt greatly affect proformacne?
Yes
woot, cuz I need A LOT of them
Well I don't know your dimensions. If you add a huge amount of sockets, that can hurt the performance I guess
Could could profile your project when adding the sockets
Could you show me how this is implemented (how the return value is used). Because for me, it still doesn't work
Guys can sb. help me?
I have an attack anim montage (a long combo animation) with root motion enabled and I would like to use notifies to rotate my player between every single attack of the long combo. I would really appreciate it also it would be nice if this could be done in BP
Basically I want the player to be able to correct the direction of his or her attack in case the target is moving/running around
I just call it with an anim sequence, bone name and frame number and it returns the transform of this bone in the root bone space
hi, i'm in unreal and i'm trying to import animations, but i cant see the pop-up box to import because its half off my screen and cant pull it back into view, also when i right click on a animation file in my contents i only get a small menu, it opens towards the top of the screen and i cant access the "Create" or re-target animation option towards the top of the menu, any ideas what i could change to fix this?
i use a 4k LG tv as a monitor
Is there a recommended way to make or edit placeholder animations?
hey folks! just asked this question over on the Blender discord and they said ya'll would have a better answer for me (which is pretty good cause I'm developing my game in UE anyway). I'm making a jump animation for my NPCs where they start on a default mesh such as this and then switch over to...
this mesh/texture during the actual jump itself before going back to the original mesh/texture pre-jump. So, how exactly do I go about doing that? I can't find any tutorials on youtube about changing a pawn's mesh/texture during an animation.
Anyone have suggestions for an in depth animation series of tutorials ?
You can try Udemy. If you're not familiar with it, it's a paid professional learning site that offers a wide variety of courses. I have done several courses and it's an incredible place to learn. https://www.udemy.com/courses/search/?q=animation is a link to all of their listed courses for animation.

Udemy
Udemy is the world's largest destination for online courses. Discover an online course on Udemy.com and start learning a new skill today.
Thanks! I'll check it out.
You're welcome. I forgot to add that when you enroll in a course you can contact and discuss things directly with the instructor as well as other students.
Does anyone now why I cannot modify the transforms of "control spaces" in the control rig?
also I've seen a Youtube video where they right click to get a gizmo for the control space transform. This was probably from a 4.26 preview or even 4.25, however I can't find how to do that in 4.26
also I can't change the transform of these spaces in the details panel
did you found why it wasn't working? i was thinkg, you have addcurve in the beginning but if the curve already exists could that make an error? check the output log maybe? i'm also making some modifiers now so i'm interested to know more about this stuff:)
sure, today i will watch for it 🙂
Hey guys how's it going? I just wondering, what's the best way to apply high heels on characters animations and poses, with the option of toggling it on and off, maybe use a slider to set the height of it. I guess it would be an additive anim layer or something similar in the Anim BP or graph. Thanks
@eager raft dynamic material instance
you also might wunna set the pivot at the feet
how to animate lips with song using Maya
khoti k bachy:
tell me about lip sync with sounds in maya
using blendshapes
anybody knows where I can find the Physics Asset Tool Properties? The documentation says its in the details pane when no bones/contraints are selected. But mine just stays empty
I am trying to follow along this tutorial: https://docs.unrealengine.com/en-US/InteractiveExperiences/Physics/PhysicsAssetEditor/HowTo/KinematicWithSimulatedParents/index.html
This how-to covers setting up kinematic physics bodies with simulated parents.
anyone? 😦
Still didn't find out, the dude that did the tutorial didn't respond yet. So i think, i'll wait.
If I attach my component to the mesh and set the relative transform of the component to the returned transform, it still isn't correct :/
@wide hearth okay dude, im so fuckin retarded, i just used InPlace animations instead of RootMotion, but thanks for your patience 😄
haha, no prob
I use Mixamo animations and I converted them with the Blender tool "Mixamo converter" to support Root motions for UE4.
Most of the Animations are working fine, but some doesn't. Their very jaggy. Here is a video for one of those jaggy animations.
Top Right corner -> Raw Mixamo Animation without the Blender converter
Bottom Right corner -> Raw Mixamo Animation retarget to the Mannequin.
Left Side First Half -> Raw Mixamo Animation retarget to the Blender converted Mixamo base skeleton. (Wrong axis?)
Left Side Second Half -> Mixamo converted Animation on the Blender converted Mixamo base skeleton. (Jaggy motion)
How can I fix this Jaggy motion or that the raw animation goes into the right Axis (like the mannequin does)?
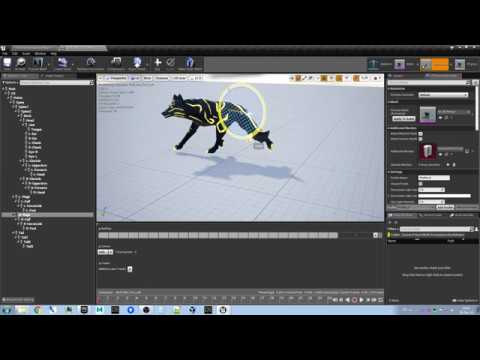
Hey yall does anyone know how to make a skeleton stick to a mesh in blender?
Basically what im trying to do is get a premade fox skeleton and apply it to a cat model i made
I thought i did it correctly but when i retarget the anims in ue4, the bones move but the mesh doesnt
Anyone know how to make the bones stick to the mesh?
It's called skinning
So I have a skeletal mesh, in this case a bee with a stinger which is my 'worker bee'. All the animations work fine, I am exporting from Blender to UE4. However I want another type of bee, my 'drone bee' which is identical except I removed the stinger from the model. In Blender there is no noticeable difference in how the animations affect the mesh, it's a very minor change. Of course I could just copy paste the whole mesh + animations and double the memory usage but for such a minor change it seems like a big waste. I'm struggling with telling UE4 to import my 'drone' type bee but to use the 'worker' animations + skeleton and getting 'FAILED TO MERGE BONES' errors (I wondered if this might be because I am adding verts to make my drone bee which are not weighted, so I tried again purely destructively (so all the verts of my 'drone' bee ought to correspond to a vert in my 'worker' bee) - still no luck). What is the correct way to approach this?
@misty dagger Could ya show us the skeleton, looking at the hierarchy may help.
Also this may help.

Here we go through the import process for several different Skeletal Meshes and show when we can and cannot share Skeleton assets. We also show how we can share animations between two Skeletal Meshes that are sharing the same Skeleton asset. We also take a quick look at setting up Skeleton Retargeting for various sizes of Skeletal Meshes.
(00:05...
Is blender a decent program to do some animation editing on? I've used it for modelling but never animations. I need to tweak the default third person animation set to make the head not bob (trying to make a true 3d controller), and I'm hoping I can do that in it.
It is great for animating stuff.
There is a bug when importing animations. But it has a known workaround. Just might throw you if you don't know about it @upbeat forum
@misty dagger I mean.... do you think there could be something special about how it needs to be set up? It's most likely a case of me not knowing enough
The skeleton is the same between both mesh types.
Do popular 3d games use root motion?
Hi guys, I want to ask, How can I connect AnimationBluePrint (ABP) to ActorBluePrint (ActorBP), I added SkeletalMesh to my ActorBP but I noticed ABP look for Pawn Owner and ActorBP is not a Pawn and my ActorBP is something as simple as Fishing Rod, how can I use ABP in such situation, anyone has experience in such situation?
@misty dagger yeah, id say root motion is more common among big studios and AAA games
it looks and behaves better, but can be harder to create
of course it depends a lot on genre and gameplay
@misty dagger for example most third person cinematic games like TLOU and God of war will use root motion, iirc TLOU uses a lot of procedural animation too
Thanks
I'm also interested in this question, but I cannot find any info about TLOU or GOW using root motion, do you have a link maybe?
GetOwningComponent -> GetOwner gives you the actor
@wide hearth Sweet! thanks a lot 🙏
I was pulling my hair just now
So I did what you say and in order to get the Character, I get the Instigator from it and cast it to my character, it works perfectly
just I'm not sure how efficient it is
cause the problem i face is that my character holding fishing rod but he is kinda rotated side way, and it's not pointing camera forward vector and it's facing it own forward vector
so i though to get the character and get the bone rotation and adjust the rotation
it's efficient and you don't need to do it all the time, just on anim initialize
yeah, i got that, now my fishing rod follow it own animation without any problem
just that it attached to hand right
so it's rotation doesn't match camera rotation
but thanks for the help it solved my problem
I cannot find any info about TLOU or GOW using root motion
of couse not, root motion is a UE4 term, it just means moving the player with the animation, most third person AAA games are 90% mocap, and extracting animation motion to move the player is just logical
anyway, thats all just guesswork
I think it's totally general term, not ue4 only, but well whatever you call it, I don't find anything about it in those games. I mean, I like root motion but I would like to have a confirmation that let's say tlou or uncharted use it.
I will ask on twitter
Also, the question is super vague. I think all games use some RM, for special actions and stuff. But how much RM they use? Like are there aaa games with RM locomotion?
I think all games use some RM,
Like are there aaa games with RM locomotion?
do you mean without?
or you mean that just locomotion uses 100% rm?
I mean with 🙂 Fornite doesn't use rm locomotion, that's for sure
yeah, obviously
as i said, thats highly dependent on gameplay
and theres 0 chance that uncharted doesnt use it, theres ragdolling everywhere, a lot of animation blending, physics based animation
without root motion how would the locomotion be driven?
theres no way to express the animations otherwise
fast paced games, like DMC, i would guess they dont use RM at all
would take the players control out
I'm trying to create a blendspace 1d but when I try to add another node, it says "Animation should be additive". What do?
ragdols and physics have nothing to do with it. RM is when your char moves according to the root bone animation track. There is a lot of techniques to make good looking movement without RM. Something like ALS looks pretty good for example
and your root bone wont move when ragdolling? lol
welp if you want to discuss without any kind of decent argument i will just let you talk to youself
I don't really want to discuss anything, I just want an example of AAA games using RM for locomotion. I'm making RM based anim bps and they look pretty good, I wan to know if there are AAA games making the same. Physics based movement is not using animation anyway, otherwise it won't be physics based. You have either "simulated (physics driven)" either "kinematic (animation driven)", or you can even blend both, but "physics" part of will just use simulated rigid bodies and constraints
dis·cuss verb Talk about (something) with another person or group of people.
any it seems tlou2 uses motion matching which is kinda the other way around https://www.vg247.com/2019/09/30/the-last-of-us-part-2-motion-matching-fluid-animation-without-sacrificing-realism/
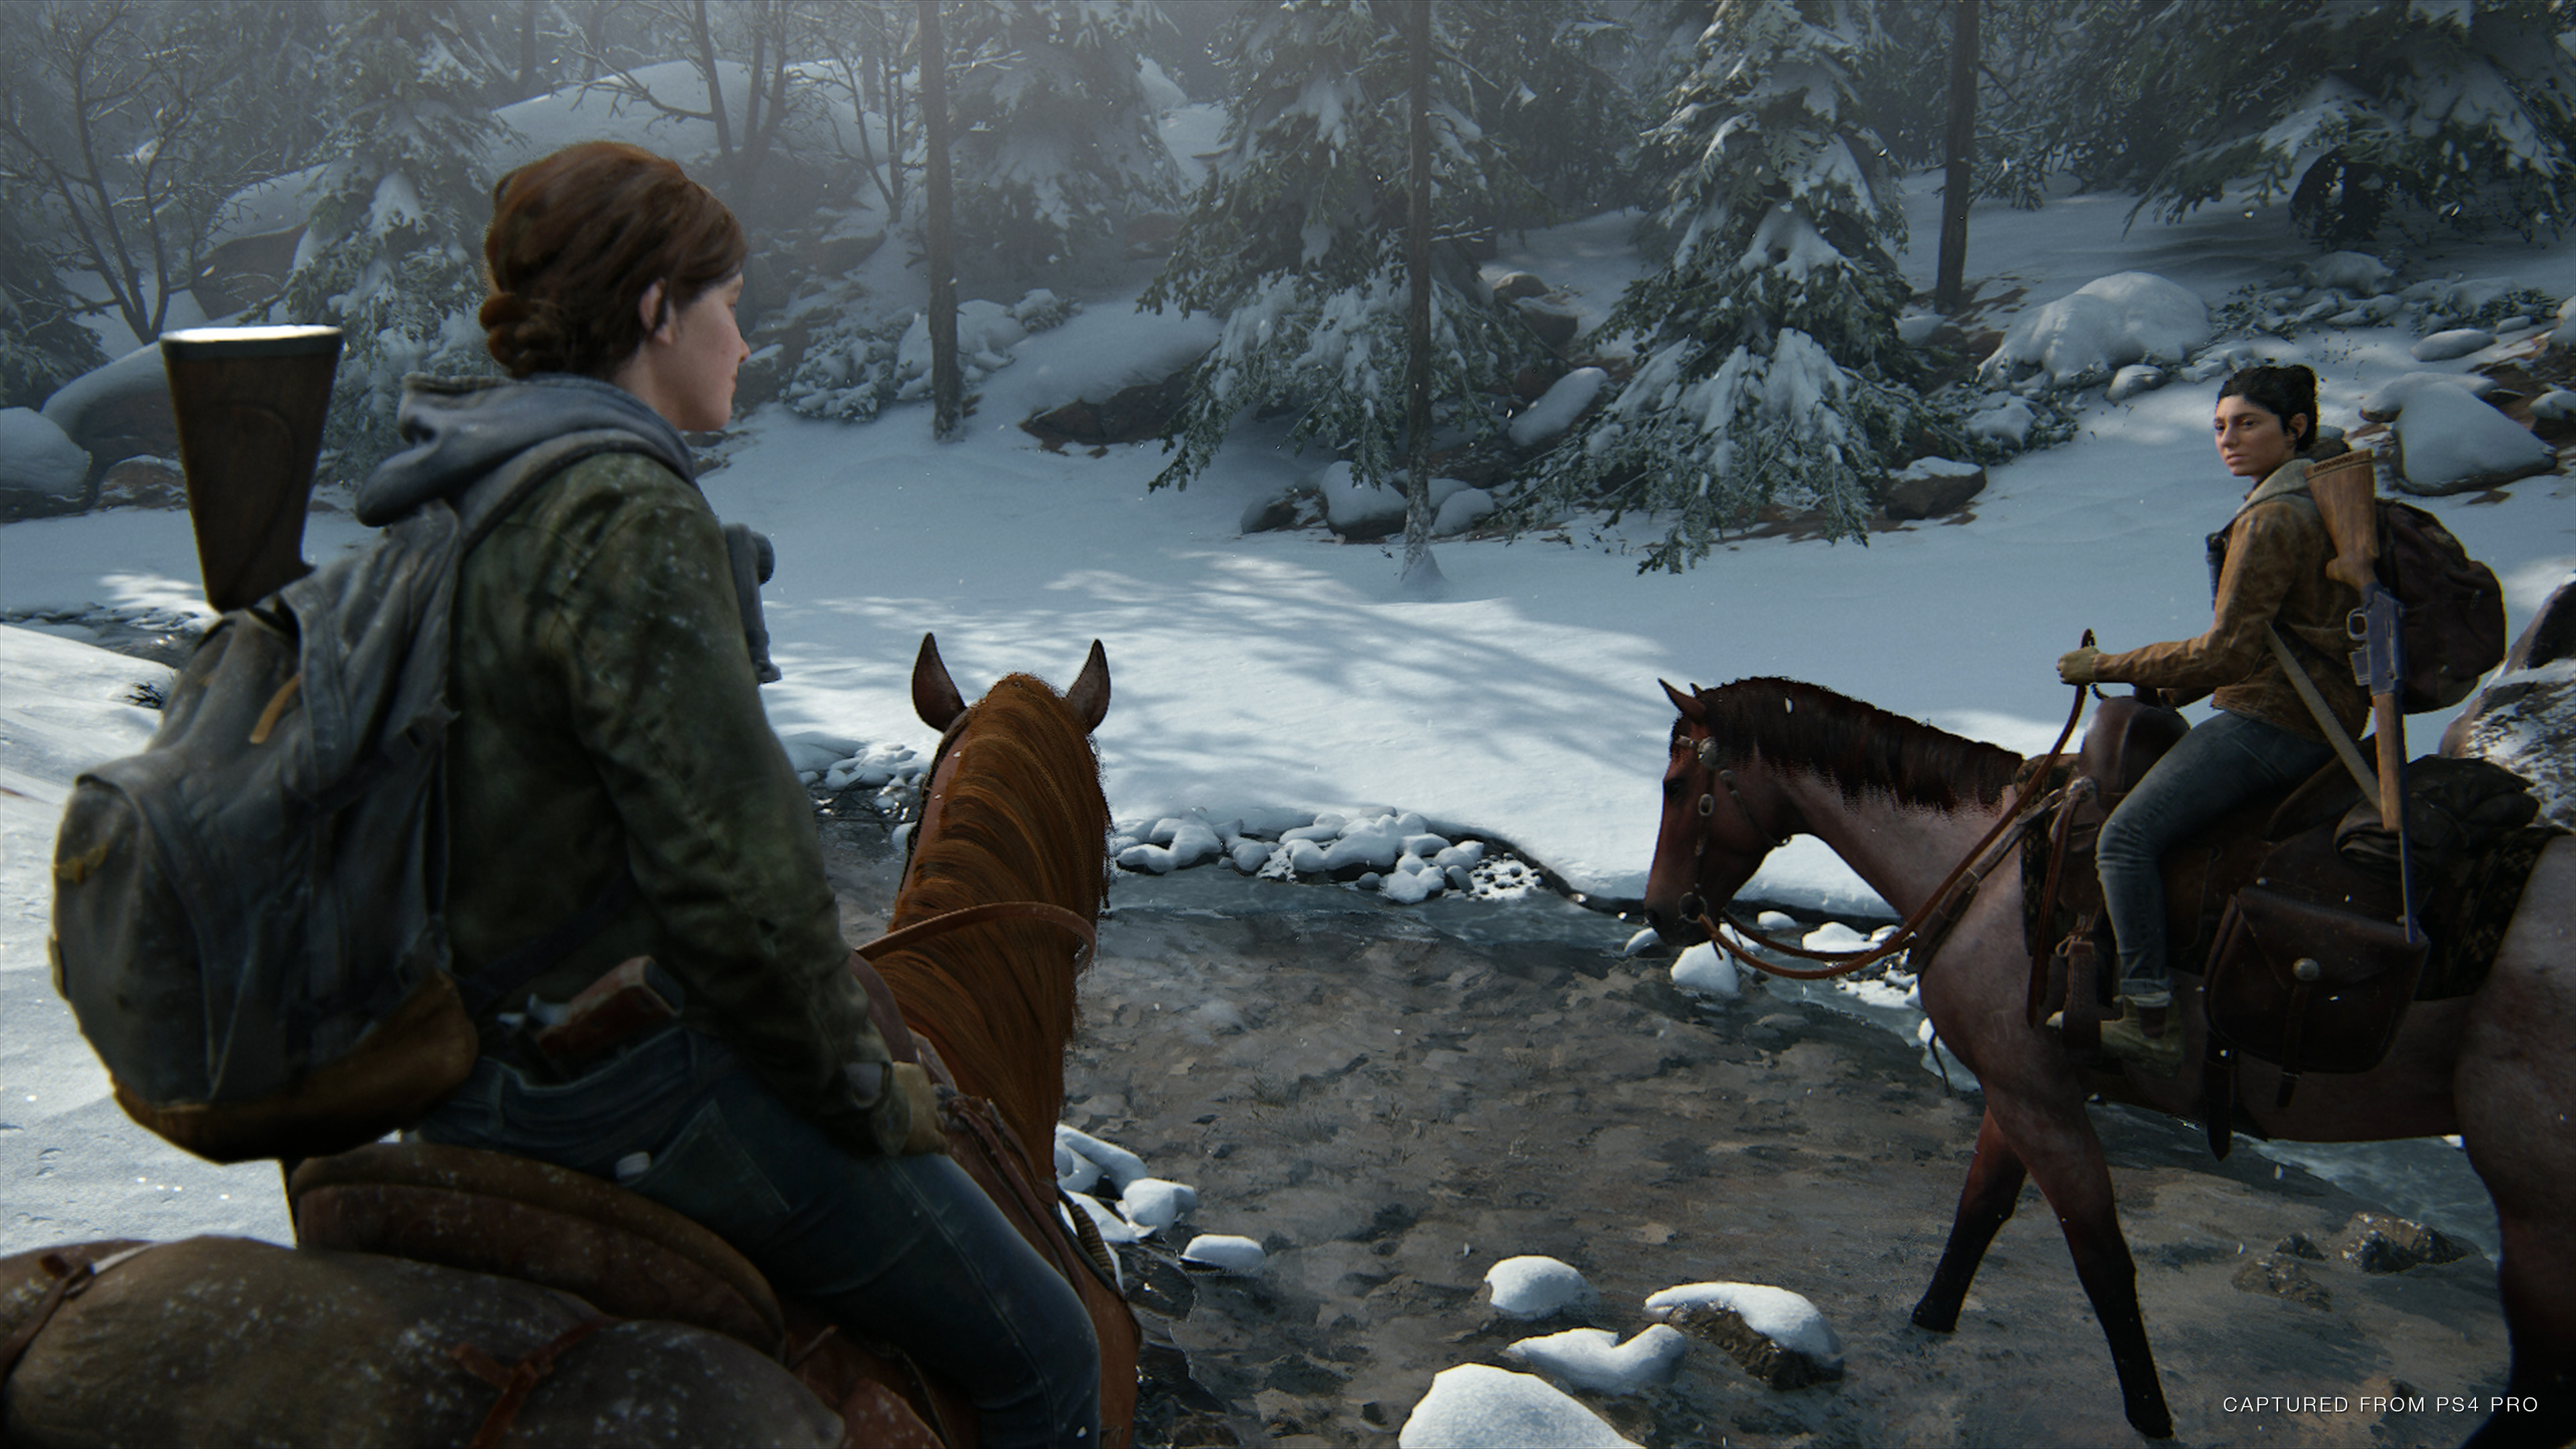
With The Last of Us: Part 2, developer Naughty Dog is debuting a new technology in the game's animations.
motion matching is the technice of blending many motions at the same time,
no
guess how they know where the player is moving when its blending between 5 animations?
yeap root motion
motion matching is explained in the article: they have a bunch of different animations, then if looks which animation match the current movement the best and play it. but the movement is driven by the code, not by the animation
thats why i said TLOU uses a lot of procedural animation
no game has 1 system
they are not doing pong
it's not procedural, procedural is something like IK, here they have a lot of mocap and they play exactly this, but they let the motion matching algo to find which anim to play, based on the player current and past movement. They then have procedural on top of it
k
here a picture: https://www.researchgate.net/figure/Motion-Matching-animation-node_fig25_337228005 you put a ton of mocap in a database then it will index it and on runtime you give it the player input and it will find the matching part of the mocap and play it.
How can I modify the preview mesh and rotate it? it's not giving me a transform at all
Anybody had success using UE4 IK Solvers in a double jointed leg?
Upperleg -> Knee -> Lowerleg -> Foot, the Leg IK node just bends the knee wrongly, the FABRIK does the same thing, is there any other way?
Hi! I'm trying to set up Face Live Link in UE 4.26 and have connected my iPhone 12 Pro to the AR Sample project and it works just fine. However, when I try to add rotation it doesn't work. The reason why seems to be because the "Evaluate Live Link Frame" node's output from the phone doesn't seem to respond to any properties with the names specified in the documentation for face live link (headYaw, headRoll and headPitch). Is the documentation just out of date or have I missed something important?
tldr: evaluate live link frame node does not output any value for pitch/yaw/roll. Why?
I did something like this once, but never used it, so I don't really know if it works well
Nevermind I hadn't enabled "head rotation" in the app settings on the phone
Blender to UE4 Import Error: "Imported bone transform is different from original..." can someone help me??
I'm trying to extend an animation graph. how do I pass the final pose up to the parent?
Getting this error:
LogBlueprint: Error: [AssetLog] F:\domination\Content\_blueprints\units\Quad\BPA_Quad.uasset: [Compiler] Cannot order parameters InPose in function AnimGraph.
LogBlueprint: Error: [AssetLog] F:\domination\Content\_blueprints\units\Quad\BPA_Quad.uasset: [Compiler] Cannot override '::AnimGraph' at  Output Pose  which was declared in a parent with a different signature
LogUObjectHash: Compacting FUObjectHashTables data took   3.30ms
if i want my player character to have an animated backpack when running, how would i go about doing that?
or is it easier to let the physics engine handle backpack movement?
I would go with cloth simulation
hey guys, looking for some sequencer help. When I render out the scene, the character BP I'm using is lower than how he appears in the editor window when I preview it. Not sure what's going on here.
Hello. I have a question that I hope someone can help me with. It is a question that many people seem to have, and despite watching many videos and reading articles, I just don't get it. Slots in animation montages - my question is, what are they used for. In all of the videos I have seen, people select the slot they made (with a Use Slot node), then they use a blend based on a bone name. I can recreate all examples I have seen, without the slot thing - I can simply blend animations anyway, despite not using slots. I must be missing something important, so if anyone can explain it to me, I would really appreciate it.
Hey guys, I'm struggling to hook up my animation BP to my character BP. Could anyone help me figure out what I'm doing wrong?
Any way to interp Layered blend per bone?
https://imgur.com/euyjTri
Does anybody know why my gun is so stuttery and jumpy. My hand animation is smoother than butter. The gun is what looks all messed up?

Did you come right? If not let me know and I can help, I have sent you a DM.
Why is my curve clamped by 0.5... should be 1.
is there any way for animation notify to call certain function in certain blueprint?
Is it a bug that Control Rig nodes don't show output pins in AnimBP? I see input pins but no output pins.
So i'm using the reload animation from the starter pack via a PlayMontage. The animation happens, but the arms don't fully extend like they should. I've tried to layer different bones but I can't find the problem.
Any Idea ?
Found the fix, FABRIK was overriding the animation
I'm not sure, but I think you cannot have outputs in an animbp. There is no animbp nodes with outputs (Correct me if I'm wrong please :))
So I just use curves to output something from cr
idk, but maybe because idlerun has it at 0, and it's a blend, so it's (1+0)/2=0.5 ?
Hey. So, I use slots to organize my animations.
After trying to retarget animation i didn t get a good result i change several option and the result doesn t change.
Any idea?
Below screen pic
Before
after
Any facial animation experts here? I have a bunch of facial curves for different expressions and wanted to know if I need to make separate timelines for each one or if there is a more efficient way to maybe use a pool instead?
Does someone know a trick to prevent "snapping" when using IK (FABRIK/Two Bone IK)?
Hmm, you're right, I haven't seen any nodes with outputs either.
How do you use curves in CR? I tried to use external curves in Evaluate Curve nodes but the editor crashed every time.
Anyone have experience with using Anim Notify to drive gameplay actions like hitbox activation? I am being told that it should only be cosmetic.
In my case I want to bake gameplay timing directly into the montage.
recently unreal added the fancy new property access system in 4.26, should I even bother with adding a custom FAnimInstanceProxy? I am in the process of converting our entire animation BP to c++
I don't really have any heavy work to do on the anim worker thread other than just copying from the AnimInstance or the owning actor
I have a silly question. I have a character (deer) and it has a state Run and RunningAttack (where he moves his head).
I managed to blend run and Attack so it looks decent, but when the state switches from Run -> RunningAttack, the run animation resets to 0 and does not continue from the Run state, so he "glitches" when attack is pressed.
Any idea how to continue animation from previous state?
I am getting so frustrated if someone wouldn't mind helping me understand what is going on. I am new. I am importing the epic mannequin into blender and trying to create additional animations. When I am moving bones, the bones are coming out of the mesh and not actually moving the mesh. I have searched and have found nothing that fixes this. Anyone mind helping out?
@sleek tree Are you moving them in edit mode?
Yes. I am. But I guess it's not as simple as just importing and animating.. was looking things up like weights but assumed the rigs were all set up and ready to just plop in and go
Have you animated in Blender before?
No but I felt I had an idea.. guess it's more complicated than that.
I have but not 3D animating. premiere, UE sequences, etc
I suggest making some simple animations first, to learn how to and then work on the mannequin. I recommend Grant Abbitt's animation course on youtube.
Figured I would have to. Learning UE4 but then realized I wanted to focus on small mechanics and animations before anything else.. decided to pick up Blender and assumed it wouldn't be that hard to use but looks like i'll dual learn em
So much time goes into such small things making games. My god. I've spent more time in UE4 docs than actually designing.. guess I'll go do the same with Blender. Thanks for the replies
Blender is pretty easy
It will take you around a day to learn how to animate
Getting good will take a lot llonger.
Right
But you can make simple stuff like a waving hand by the end on today.
I guess learning Blender a bit more will be my next task before just diving in and assuming I know what I'm doing lol
I am majorly being halted by pipeline problems otherwise Blender works great.
not familiar with the term pipeline.. what stage is that
If you are only doing Animations only learn animating
oh ok
Exporting and Importing stuff
Got it
Thanks for the recommendations. Truly appreciate any and all information anyone is willing to share.
I recommend you practice some of the common beginner stuff, like a bouncing ball, or a walk cycle
You think some of that will help in the bigger picture of animating the epic skeleton?
It helps with learning the 12 principles
The 12 principles of animation
1 Squash and stretch
2 Anticipation
3 Staging
4 Straight ahead action and pose to pose
5 Follow through and overlapping action
6 Slow in and slow out
7 Arc
8 Secondary action
9 Timing
10 Exaggeration
11 Solid drawing
12 Appeal
Going to SS and save
I am a beginner too, so hit me up any time ya run into a problem. Two heads banging against a wall break it faster than one.
If I set root motion for everything in AnimBP, in multiplayer the owning client sees the animation a little faster.
SetCurveValue/GetCurveValue I believe (I don't have ue open now) You can use them in CR and in animbp
I would use sync markers and sync group maybe
Wonder if someone can help, is it possible to do this?
That is, selecting all key frames within a frame. And also, is it possible to add frames in between keyframes instead of having to shift everything forward one by one?
And by selecting each keyframe I don't mean manually, I'm wondering if there's a shortcut.
hi why my animation speed is not constant ?
Need some animation help... Working on a blocking animation and I have all of it bar the standing and turning blocking sorted. You can see the issue here in this vid:
https://www.youtube.com/watch?v=-VJtOG2RZBM&feature=youtu.be&ab_channel=IrishEmerald
Feel free to @ me if you have any idea on how to fix this. I'm currently using a montage for my blocking animation
use a layer blend
though it seems like you are already, when does your montage play in the graph?
It triggers a key press and I have 2 slots: upper and lower, that come in and overwrite the locomotion logic
hey @wide hearth May i speak with you in DMs?
Hi guys, I've been trying to prepare some animations on blender to bring into unreal, my problem is: when I bring them to unreal some bones act in a very ugly way getting weird deformations: (the first two photos are the errors of the exported animations on unreal, and the third one is how the hand is on blender), I'm actually using rigify to animate, did someone get this error too or is someone willing to help me solve it 🥺 🙏
Anyone else is experiencing this bug in Blendspaces? When I move animation point anywhere else other than the grid. That "move" is ignored and it is still using the last position on grid.
For example here, even though the preview is halfway between the two points, it is saying 91% Walk, 9% Run
Hello guys, I want to dynamically add event notifies on an animation sequence track, I can do it with the Animation Modifier class, that's great...
However, I don't get how I am supposed to create callbacks from them in order to trigger the proper functions, do you have any idea?
Oh well, I think what I need is a skeleton notify, instead of an anim one
Can anybody enlighten me with this?
Anim Notifies are triggered when an animation reaches the point they are put on. But if you wanted to feed your Anim Notify with data, I would store them in variables and set the variables of your notify class at another point.
You can create an AnimNotify class by inheriting from the basic AnimNotify
Callbacks like notify events in the animbp? I'm pretty sure you can't add named notifies using anim modifiers (which is super annoying), so yes create a class seems to be the solution
you can try 🙂
Ok thanks for your replies, so I should just create a custom AnimNotify, then from there, cast the anim instance of my mesh and just call the proper function instead of overriding skeleton notifies directly from the animation blueprint?
But I can't even give a name to my notifier, so how I am supposed to identify one from another?
Could you just say what you are trying to achieve?
There is a method in the class, it will be called like the named event
Yes, I have several attack animations and I want my designers to be able to quickly update the time at which the weapon hitbox will turn on and then off. I figured out to do it with animation modifier to dynamically place notifiers along my attack animations
Why not make an AnimNotifyState?
Your designers could go into your animations and place it wherever they seem fit
At least that's how I do it
That's the problem, doing it manually is too redundant, we want it to be efficiently adjustable with percentage values
@wide hearth thank you for your reply, but the problem is that I can't name the notify events that I am creating from my AnimationModifier and that's why I would like to do in order to identify them
make different classes then?
Yeah, I thought about it but it sounds very redundant, don't you think haha?
I agree, it's not redundant to make another class
Yeah but that's not very clear as a way of working for me, especially considering the fact that it's only about a "toggle mode" switching from ON and OFF
That's what I need but how do I add them?
you add a variable, click on the eye to make it public, you have it in the details
and you have method "getnotfyname" to change the name on the timeline
Thank you my dear
you should try to make a notify or notifystate bp and try yourself, would be faster
Yes I tried in fact, sorry to ask such assistance but I thought parameters were supposed to be added to the "Received Notify" node, my bad
Thanks a lot!
Oh ok, but where do I create these curves? In the curve container in CR or somewhere else? Because I already got a curve called "Pose_0" in the curve container and I have no clue where it comes from.
you create curves in the animbp for example, use curves tab, "add curve" button. Then you have to add them in the CR too, like import for example.
in the curve container
Oh, I didn't know I can import curves! Thanks a lot!
you can just create them too, important is that the name in CR and in animbp stays the same
Got it
So, to expose a value from CR, I set the curve value inside CR and get the curve value in AnimBP, is that correct?
yes
Thanks again!
When I try to add a curve via an anim modifier it says the curve doesn't exist on the skeleton. But I added it to the skeleton in the curve tab🤔
Does anyone know what I'm doing wrong?
How would you orient a bone along two points? For example: I have a target to shoot at. The gun barrel is rigged to a single bone. I want the gun/barrel to be on line with the projectiles line of flight.
The answer I was looking for: LookAt AnimGraph node
does anyone know what is happening here? why does blender suddenly duplicate a new mesh?
is the dress simulated?
Hi,
Do anyone know if there is a way to convert a non complete ue skeleton animation to full ue skeleton.
In the source the skeleton start at upperarms so how to use this in a retargeted animation?
Do slot names matter if I'm not planning to add IK?
One animation. One skeleton. Two meshes.
Can I scale bones based on what mesh is applied, per instance?
I need my female mesh to have daintier hips, hands, and shoulders.
google "retargeting same skeleton ue4"
the mesh came in two parts and i joined them together
i dont think its simulated
Hi there, does anybody know why I get these deformations? I am using UE4 locomotion system and want to retarget a different rig to it... however, as you can see the ankles are crooked and that goes the same for her behind, shoulders and wrists...
Is it possible to apply different animations to different parts of a skeleton in UE? I am making an FPS character and would like the hands animated independently of the rest of the body. It's one mesh, i could split the mesh in two, but it would be hard to get good looking animation and allignment, even tho it could probably be done, but it's work. I could also just make one handen, double handed, run, walk, etc but that would be a little too messy for my liking. I would like to do it in BPs. Is there an easy way to do this?
Tldr: I want to apply different animations to hands and the rest of the body on my skeleton and im wondering if there is an easy way to do that.
Ah, it's called animation merging >.> good to know, took too many googling
Does anyone know good/common practices for rigging handheld props? Namely, should you give prop rigs a root joint, and where on the prop should that joint be? Should it be at the bottom of the prop, or should it be at the point where the character grabs onto it, like the middle of a handle, for example?
anyone knows why anim dynamics break my mesh?
Thought I share a tip from using ARKit for facial tracking:
https://twitter.com/_enter_reality_/status/1347702568961634304?s=21

#LiveLink Tip: you can get the name of the LiveLinkFace iPhone using the code shown in the video...so what you do with that?
If you need to send a packaged @UnrealEngine demo to a customer, this sets the name of the iPhone in the AnimBP, so it can be tested on the fly. https://t.co/uAvJ67RsDp
Alright, I need help for what I think is a simple and common issue.
All I need is to get someone's forward velocity. Large float when going forward quickly, small or zero when going left or standing still, negative when going backwards.
Really thought it was as simple as this:
Thoughts?
Hi all
I need help
How can I make vertical rotate animation without aim offset?
I use anim montage to play animation
and here is my anim BP
I would try dot(velocity, actor forward vector)
Bingo. It worked like a charm.
Thanks a ton.
Are Animation Blueprint graphs guaranteed to tick only after the graph of the Blueprint actor they are on has ticked? My rudimentary testing seems to confirm this but I'm not sure I can rely on it in terms of order of execution of my logic.
Is it possible to enable ragdoll collision without physics? I just want stuff to collide with my character but I dont need any responses on my characters side
"stuff" is like "simulated stuff"? try to disable physics body response on the capsule and enable phys.collision+ phys body response on the mesh
i have imported an animation that uses the normal mannequin skeleton with some extra sockets. my existing character just uses the standard skeleton. i would like to play that animation on that character. i know i could retarget, but that would mean i would end up having the same animation multiple times. isnt there a way i can "merge" the extra sockets onto the original standard skeleton, change the animation to use that, and then delete the extra skeleton?
Guyz how i can add root bone to mixamo character please help
Hi everyone, I'm wondering if anyone could help me. I'm trying to move the head independently from the body using the controller rotation. The issue i'm having though is that as I look up (pitch), the left and right motion (yaw) starts to turn into roll. I know its something to do with the axis on the head bone on the skeletal mesh but I can't figure out how to compensate for it. can anyone point me in the right direction?
got a question, when retargeting in unreal what is happening? like i am working with the daz character model
and am trying to replace it with the UE4 manequin skeleton but to no avail. is it possible to replace the daz skeleton with the UE4 skeleton?
R mouse ur daz skel asset, not skel mesh asset, create rig
now use that rig to retarget the stuff
should work, havent done that myself
Anyone tried working with Omniverse to create motion capture with Webcam?
Hello everyone, why my preview asset doesn't work ? I can use whatever I want, it's still not showing on screen...
Empty...
You should move other bones too (spine) so it's smooth

In this tutorial series we will design a game like assassins creed in UE4. In this video we will adding a root bone to our character.
Mixamo Converter Plugin: https://github.com/enziop/mixamo_converter/tree/blender28
Blender link: https://download.blender.org/release/Blender2.80/
Subscribe: https://www.youtube.com/channel/UCpneKOUKQeN7idt1r67v...
Thanks a lot <3
Anyone got any videos I could follow for porting a blender rig into Unreal
Hi, someone has a fix for the ThirdPersonCharacter AnimBP, in the Jog Blendspace, from right (90°) between backwards transition ?
hey guys is anyone using rigify from blender to export to Unreal Engine?
See pontypants youtube channel.
I don't do that.
- rigify rigs have a lot of layers so it could be a problem
- technically it is still a rig so should be done the normal way itself.
I think you will have to do it via a software like blender.
Ok thanks
hey might be a dumb question, but how do I have a pawn's mesh and texture change during an "animation"? since I'm making a cartoony 3D game, the pawns use a static mesh instead of a skeleton mesh, so when the NPCs jump, I just want them to switch to a new static mesh/texture I have of them jumping
@eager raft how do you get your new staticc mesh without a skeleton ?
with a basic skeleton, you could just ccreate a new pose, and have that as your animation
here lemme show some screenshots to help out what I'm saying
this for example is the pawn/NPC's default mesh and texture
but when it jumps, I want it to switch to this mesh and texture before then returning to the default one
I tried rigging a skeleton to it, but it just warps the texture entirely, so all I want to do is a simple mesh/texture switch during the pawn's jump "animation"
Im not 100% sure but I think your workflow would be faster and easier if you had a skeletal mesh instead of just a static mesh, Im also a newbie and learning. But Im 100% sure you can do what you are saying, you just need a little digging
there's the Set Static Mesh node you can use in your ThirdPersonCharacter BP, that might do the trick ?
it's possible, might as well try it
pontypants o7
Hi guys! im new here, and fairly new to unreal, im having a question. i want my player to be a floating camera, and i want to add some kind of advanced motion and movement to it because now it feels emotionless
wonder if anybody could guide me 🙂
my imported character's hair was not parented to the head bone
how can i fix this in unreal without exporting to blender first?
can i get a refreall to someone to speak with or tutorials that would help, im trying to get complete rpg system v2 and Advanced locomotion v4 to play nice together
is there a Newbie discord channel i should look into for help on stuff?
Where can I find single handed pistol animatino?
You will probably have to make them in blender/maya.
Try this.
Add a socket to the head bone in thirdpersoncharacter BP.
And then parent/attach it to that socket.
@frigid karma
https://youtu.be/nY4Q8cYBLP8

💥 Wishlist my game on STEAM 🥊 👉https://store.steampowered.com/app/1512590/Punch_A_Bunch/
Many of you asked me to make a video about my Blender to Unreal Engine 4 workflow. You ask, I make! Here it is!
In this video I explain how I set up my characters with materials in Blender. I take you through the entire export process and bring it all into...
I can help you @eager raft you will have to rig it and keyframe the textures via mix RGB node.
Or you might have to use shapekeys
I have a curve on my animation that goes from 0 to 90 in 1 second smoothly. However, when I get the curve value during the 1 second that the animation plays, it is incorrect towards the end. Starts off at zero, ends up at 70, and drops back down to zero. I am completely baffled as to why this happens. It should go from 0 to 90. Does anyone know why this may be happening?
You are watching different animations?
I am trying to prepare a destruction system for my game. I can use Houdini, Maya and Niagara, but I have some questions about the technique used here.
I think the system works like this. When a certain number of shells hit the box, the pieces of wood are thrown as vfx and a break animation is running on the box. When more bullets are hit, the pre-prepared fragmentation animation is activated and the box is destroyed.
So i've made the retargetting and stuff of the original skeleton, and this is happening
how can I fix his shoulder ?
this is the skeleton
everytime I retarget skeletons it does the same
Ok fixed it, skeleton bones weren't exactly on the same letters
Hey all,
I have a couple of mixamo animations (jump and grab ledge and hanging from ledge) but the hanging animation position is offset from the end position of the grab animation so the character glitches backwards when swapping between them once the ledge has been grabbed.
Relatively new to UE4 and was wondering if this something I need to learn Blender to fix or is whether there something I can do in UE4 to make them align properly when switching between them.
Thanks.
try moving the arm
@coral frost Fixed it already but thanks !
This is how idle anim from third person template really looks. In other words it has those wrong translations on the arms. Normally it's hidden because retargeting options are set to "skeleton" for everything but root and pelvis, which means ue will ignore translation keys in the anim. But if you set the option to "animation" you have this
Your analysis could be spot on.
hi, is there a way to listen for all animation notify events ?
Hey, is there any way to smoothly blend to a conduit?
Example: I want to end the jump and smoothly transition to idle or walk or another state. But there are no blend settings
Sure I could set the blend in time for the others but that would mess with the transitions in general; which I don’t want
but you can specify blend time on a transition from the conduit to the next state, no?
Like conduit to idle?
yes
Yeah but that would mess with everything else
Like if I go from crouch to idle
That would also be slow
why? I don't understand.
So u are saying that I should make a long transition time for the highlighted node right? (My base is idle/walk)
The problem is - that leaning and crouch also go through the conduit and go way too smooth. I just want the jump end smooth
okay, i see. you use the same conduit for everything. then yes, that would be a problem
i don't know how your state machine is working, but I would always return to base from different places maybe
Why would I need a conduit then?
i don't know 🙂 looks like it's not really needed
Hihi - tbh - I don’t fully get the idea of conduits. Seems like they make more of a mess than ease things
it's not very clear for me either, but I think it's just for separate conditions in different stages or something like that
it's just a way to write a complex condition, but the conduit itself is never executed, only states are executed (like if you look in the profiler there are only states, never conduits)
for example, i use conduit "Stop", from "move" state to "stop left foot" and "stop right foot" states. The transition from the "move" to "stop" is "!moving" and then from the conduit to the next state "is left foot grounded" or "is right foot grounded"
I also could make 2 transitions from "move" to different stops, but I would need to have more complex conditions for each
My problem:
I have some sets of double doors in my level (From the free MedievalDungeon pack on the marketplace).
I want them to swing open when triggered, and the player to automatically walk inside. (Sort of a cutscene)
- I could use a level sequence for this, but the problem is I would have to create several sequences, one for each set of doors. When I add more doors, I will have to create more sequences.
- I could import them to Blender and animate them there. The same animation can be used on all sets of doors. Downside is animation is not my strong point, and I have had some problems with animations from blender in the past.
- I could animate them using Blueprint. Can resue script on all sets of doors. No Blender animation needed. Downside is I will need to keep track of the state of the doors animation, and visualy this could end up like an ugly pile of spagetti?
What would you do?

Become a Sponsor Here - https://www.youtube.com/channel/UCeyM_17hziy7rAvGIFe3HIg/join
Use code 'ConorGamingzHD in the Item Shop. :)'
Join my Discord! - https://discord.gg/AQxmHmy
Check out the Epic Games Store - https://www.epicgames.com/store/en-US/?epic_affiliate=conorgamingzhd
1 FREE GAME EVERY 2 WEEKS!
►Follow me!
• Facebook - ht...
who is the original author? he says in the beginning but I couldn't really understood the name
Can somebody help me with face morph remap? I have face animation i made with facelink sometimes ago, but i changed my head model to another one with almost some face morphs, but different names.
Im almost sure there is some remap option inside animation blueprint
But cant remember where
@primal schooner its and override on the animblueprint
Is the Mannequin rig up anywhere that I can download it and put it in blender. I can't find it and Auto Rig Pro isn't working
you can try Mr Mannnequin tool, not sure its what you need tho
Hi guys, I have an issue with an animation - I downloaded one of the Great Sword Slash anims from Mixamo, and have an issue where my player's capsule collider is not moving with the animation. I have enabled root motion and also set root motion from everything in the anim bp, but I still get the bouncing effect when the anim ends. Any ideas? Animations found here: https://www.mixamo.com/#/?page=1&query=great+sword and I can provide a video of the issue if anyone is curious
it's ok.
https://www.youtube.com/watch?v=50Ax7tGg7hA&feature=youtu.be&ab_channel=ViceVersaStudios This seems to be the answer

Unreal Engine 4- Melee Weapon Tutorial Part5 - how to import a root motion animation from mixamo to Blender, add a root bone, and retarget that root motion animation to your character.
Need help with your game? Hire me on Upwork! https://www.upwork.com/o/profiles/users/_~0124b100cf9df20438/
If you find these videos helpful, please consider...
Any idead on how to export Morph targets from UE4 to an external application or older UE4 versions? I tick the checkbox for Exporting Morph targets but even when I reimport the file to UE the morph targets are missing
hey guys. I have a big problem with exporting animation from Maya to UE. I have a character holding a prop in his hands. character is exported and imported with no problem, but the prop is really wrong. it is imported with different frame rate (30 instead 25) and animation is not working at all. Prop is parent-constrained to the character. I tried to bake everything before export and exported separately, but the problem is the same. But FBX works perfectly in Maya, blender and fbx review. I expored imported fbx and put it in UE, ant that way it works. but this solution is not pipeline friendly. do you maybe have any ideas what i am doing wrong? Thanks in advance!
Hello, is there a way to get, through BPs a list of the bones that do have a effect on each skeletal mesh. I want this because I have several meshes that are sharing the same skeleton, and i would like to reference these depending on the bone that I hit in Linetrace
Is there a way to import a simple animation from Maya to UE4 without skinning the object? It looks like most animations are skinned, but that seems like a waste if I just need to animate one mesh moving without any deformation. Am I missing something or are all animations imported with a skeleton?
I think Brett or something
why my rig is coming as very small object
everytime i export a object with rigged on it it messes up the scale
if i dont use rig then it doesnot mess up the scale
mind You i am also using blender Bridge that lets me export from blender>ue4
without rig it comes with proper scale
wait a minute
Usually this is where the bug should have been in my exp.
are these the dimensions you want? x=29.4 m seems quite large...
Okay then try exporting as fbx.
it works without rig like i said
if i export with as fbx with the rig it messes up
send me the blend File I will export the fbx. and tell you the settings of unreal while you import
sure thing
wait
also thank u for taking ur time on helping me @hidden hemlock 🙂
may i know what did u do?
@hidden hemlock
Wow this works nicely
what did u do
i really want to know so next time i dont need to disturb someone again
haha
Just watch a video on how to export fbx for ue4..
Hi all, any ideas how I can fix the bone structure of my animation? I would like to change the pose a little but if I change the bone structure it does not change the animation where the legs are still in the same position.. (I just want to rotate 2 bones to keep the legs less wide and save it somehow so the animation uses the updated bone structure)
okay was able to fix
is this what happens when you dont use NLE strips?
no like why do i get 2 of them instead of a whole
Never faced that issue tbh maybe you pressed make a new action button in blender. @analog pollen
@vestal prawn Last one's physics is messed up actually from what I saw in the screenshot.. try this.
And let me know if it worked.
how did u fix the physics?
https://www.youtube.com/watch?v=5-y8b1Yzi1U
A lot of ik stuff for people who dont want to edit animations and alter them on the go 🙂

In this update, I've added a lot of quality of life extras as well as First Person Perspective improvements.
Content:
0:00 Intro
1:31 New Variables
2:07 Injured FIX
2:59 Leaning
3:48 Showcase
5:13 FPP blends
7:01 Closing note and outro
Like my work? Want to support me? You can buy me a coffee :)
https://www.buymeacoffee...
hello, when I import my skeleton It seams to delete the last bone in the chain and rename bones to the bone that is in front of it. It is very strange, the bone that should be second to last in the chain has the name as the last bone, and the last bone isn't there. Its even stranger because the misplaced bones effect the vert group of the bone it is named after. I am using blender and imported from blender to UE4 Using the FBX format. Has anyone else encountered this issue? Am I making a simple mistake?
Ive watched and read tons of guides on how to import from blender to UE4 but I still get this issue.
i think that works as intended, the mannequin has the same right?
i dont know
can I interact with a bone itself and not from the parent or is this just one of those things I have to get used to
you dont animate in that window
yea but it works the same way while trying to make a control rig
u set the controll point on the wrist not forarm
how do i set the control point
sorry for being so clueless ive used UE4 for less than 100 hours
i havent used CR in 4.26 yet
hmm
prolly best to check the controll rig docs or something its more than i can explain
ok thank you for your time tho
Does anyone know how to get rid of a pop when I use Pose Snapshot from a ragdoll? When I set the pose snapshot by name, it pops for a split second somewhere else?
Does anyone know how to playback the animbp states? Meaning, when i play through a sequence, and backtrack my event logic within the AnimBP?
@indigo verge can you send ss?
ss?
you know like in a video, you can play the game normally, and then pause at a certain time and scrub backwards
Anyone know how to create a master animation blueprint for different skeletons? I've been reading that it's not possible, but I'm wondering if there are work arounds, or anything more recent that allows this?
Not that I'm aware of - one anim bp's are based on the skeletons to which they're assigned
Here, as you can see, I'm blending between my default slot and base locomotion cached pose
I need to have my character use an animation montage that I DON'T want blended like you see here... it's a full body root motion anim.
How do I... make that happen and select between the layered blender per bone pose I have here and then simply using the locomotion base?

In this episode, I show you how to set up a complete animation system with AGR components using the Kubold Mocap Pro animation pack (Pistol for this example). It works the same for all animation packs from the Unreal Engine 4 marketplace. Full setup with multiple poses, crouching, and turn in place - takes only 1 hour.
Table of content:
0:00 In...
I use Mixamo animations and I converted them with the Blender tool "Mixamo converter" to support Root motions for UE4.
Most of the Animations are working fine, but some doesn't. Their very jaggy. Here is a video for one of those jaggy animations.
Left Side: Non converted mixamo animation (which doesn't support RootMotion well enough).
Right Side: Converted mixamo animation
Someone got an Idea why this is so jaggy?
Does anyone know if it's possible for a pawn/character to know when it's being controlled by the Sequencer (without calling an event in the sequencer each time)?
Why do you want do that? @random sparrow
I think you r looking for animation preview editor.
I'm using sequencer to play none root motion full body animations but still wanted to use foot IK. My foot IK system uses the root bone for the line trace
Aren't we supposed to just use the pre-made animations in sequencer?
Well you can play the animation on a 'slot' which injects it into the animation blueprint, pretty cool
But I don't think this is going to work!
Hi, anyone has an idea why my FABRIK ik is weirdly offset from the target i am giving it?
I am just transforming it to bone space, but no matter what bone space i transform it to it behaves the same
bone space takes target bone locaiton and then adds effector transform to it. if you want to fabric in example right hand 20 units down - use bone space, target same bone - right hand, then add transform 0,0,-20 ; 0,0,0

A quick showcase of multiplayer behavior for the previous tutorial.
Didn't require any adjustments although I added a weapon for more dramatic effect ;)
Like my work? Want to support me? You can buy me a coffee :)
https://www.buymeacoffee.com/Angeiv
Free advanced game ready components:
https://dev.azure.com/SuperSeriou...
Animation exported from Blender via Mr. mannequin doesn't play the animation, does anyone know of this problem
hey all ltns 🙂 trying to get up to speed on how AI/Animation work together in the modern day Unreal.. The person who put together my Anim Blueprint tied in a couple of custom event triggers, which work real nice inside the blueprint viewer... but.. how do i access them from somewhere? specifically, a Behavior Tree ?
so how does Animation work in UE4?
You have an AnimInstance which is like a parent or something?
Then you have an AnimBP which then holds the actual animations together and allows them to transition from one to the other
You have a Blend Space which is like the starting point of which all animations can start and end at
and then Animation Sequence in which shows the different positions of bones in keyframes and blends them together to make a whole animation and then can be connected to a Blend Space within an AnimBP?
has anyone in here had a go at creating or using a plugin for distance/motiong matching?
hey
i have a question
i dont have money for any addons
do you know a way i can quickly implement the skeleton of the ue4 third person character in blender for my model?
What's the difference between a morph target and a vertex animation?
vertex animation is done in the shader
Hey I need to do a "rest" pose
do you think it natural? easy for being on this position for a long time (confortable)? thanks!
maybe something wrong with her right hand?
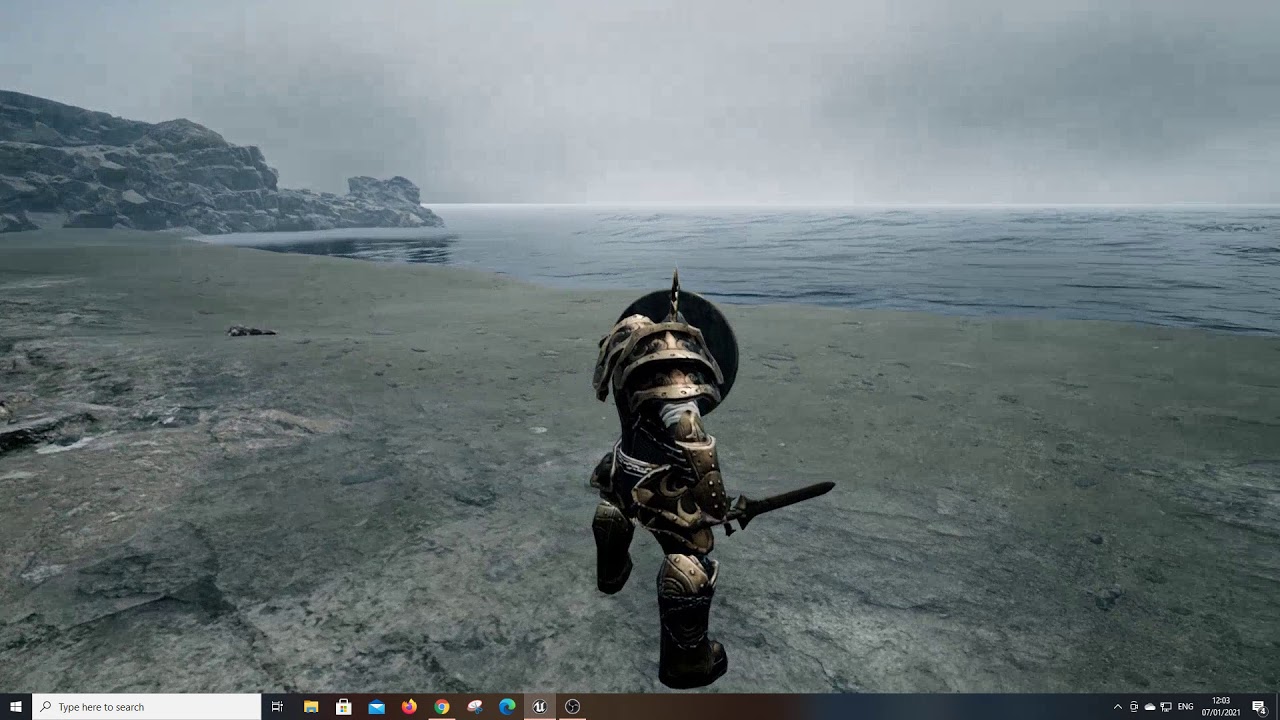
Hi all, i have a problem with my character, i've imported a free2use player mesh and converted it in mixamo, the animations etc. is good and all but its on its side and i cant get it to stand normal on 2 feet (see picture) Pls dm me or ping me in this server if u can help tnx ❤️
Can someone explain to me why today for some reason I cannot click and select directly on the bones of the character in an Anim Sequence ?
hi guys, I am looking for this node, but can't find it in any bp in the editor or in c++, it can't find the animbp header file. is there a replacement function for it or something?(I'd like to find bone transforms for a given animsequence)
https://docs.unrealengine.com/en-US/BlueprintAPI/AnimationBlueprintLibrary/Pose/GetBonePosesforFrame/index.html
Get Bone Poses for Frame
It's in "Animation Blueprint Library", you have access to that from an anim modifier for example
Can I use it in a "plain bp"?
i think it's an edito-only thing, so you can only use it from editor-only bps, like anim modifiers or utility widgets, this kind of stuff
I am trying to do it this way now
I'd like to get the transforms of bones from an animsequence from the first frame
void MyCoolLibrary::GetBoneTransformsFromAnimSequence(UAnimSequence* AnimSequence,bool PrintDebug,TMap<FName, FTransform> & Results)
{TArray<FName> bonetree=AnimSequence->GetAnimationTrackNames(); TArray<FName> bonenames=TArray<FName>(); TArray<FTransform> bonetransforms=TArray<FTransform>(); Results=TMap<FName,FTransform>(); for (auto bonename : bonetree) { FTransform bonetransform; bonenames.Add(bonename); AnimSequence->ExtractBoneTransform(UAnimationBlueprintLibrary::GetRawAnimationTrackByName(AnimSequence, bonename), bonetransform, 0); if(PrintDebug) GEngine->AddOnScreenDebugMessage(-1,15,FColor::White,bonename.ToString()); GEngine->AddOnScreenDebugMessage(-1,15,FColor::White,bonetransform.ToString()); Results.Add(bonename,bonetransform); }}
The code compiles and gives back transform, but they not good. I tried adding them to T pose GetSocketTransforms, but they still bad... Not sure if ExtractBoneTransform is the right function tho...
anyone know why when moving my rig, a grey area is showing?
idk, i use it in bp and it works. but it gives local transform, relative to the parent bone.
Hello
So I have all these different animation packs
how come they all only work with there individual skeleton they came with
isnt it technically all the same. Like they are all for the ue4 mannequin
Im sure im missing something that can fix this
I have a character rig with gun constrained to its hand
i exported the animation using game exporter in maya
but the gun disappears in unreal engine
everything looks fine when i import same file in maya
can anyone help plz
Hi friends
can someone explain me (or a link to read or watch) what is the difference between Local Space and Mesh Space?
what bp u use it in? it does not come up in my editor
anim modifier bp. it also works in editor utility bps
could you drop me a screenshot of the context pls
you make an animation modifier bp then you have it (Content browser->right click->new blueprint->All classes-> search for "Animation Modifier")
Pls somebody dm me if u know things about rigged mesh imports
Hello, somebody know iClone here? I have some problem for exporting animation with the "Reach Target" active
Any idea why my Edit Reach Target from iClone doesn't work Ue4?
I ''fixed'' the hands of my character on his thighs with the Edit Reach Target & exported the animation to Ue4 but it doesn't exported this "Edit Reach Target" thing because the hands just float and are not fixed like iClone viewport.. and because of this, it doesn't looks good at all...
in iClone:
In UE4:
youre doing animation composition .ther eis no blend between those.. n owonder it looks like this. use animation montage.
Starting with the FPS sample, I'd like to have a different animation for when a player is "flying" - at the moment, even if I set my player movement to the flying state, he still uses the default run animation
anyone know why when exporting mesh/rig from blender, the animation I created is not exported?
exporting all actions
Exporting mesh + armature?
yep
Try exporting JUST the mesh, and see if it brings in animation
gotcha. will try
nope
this is just odd
all of a sudden it wants to import but with error message🙃
Imported bone transform is different from original. Please check Output Log to see detail of error.
mmmmm
er.. throwing stuff out there
set your scale to 1.1.1 via blender before exporting?
yeah looks like it has something to do with mesh/bones having separate transform.. hm
So I exported the ThirdPersonIdle as a .fbx file, but the exported file is messed up.
This is what the export looks like.
@misty dagger ive seen tutorials and stuff where they also have dislocated shoulder, no idea whats causing it but seems alot of ppl have had this happen to them
anyone know how i can set a fix initial location to a control in ctrl rig?
if i check initial here, it wont let me move the ctrl anymore
How does root motion work? Like is it the vector movement of a root bone in blender?
and then, when you export it out, UE knows the parent bone 'Root' is where the location and rotation comes from?
in root motion the character actually moves forward in world space
pretty sure u saw those " in place animation"
thats one way to do it
the other way is to also move the character a certain distance forward
and then repead the distance
mm yeah. I think it's me not understanding how UE knows something is a root bone. Like plain animations are fine, it's just not animating at all when I select 'rootmotion'
well
as a beginner u should stay away from rootmotion i think
you should try to work with in place animation for now, i think.
its very easy to set up
but you have to do it a few times so u understand it
i think i rebuild the 3. person starter scene like 3-4 times just to understand the basics
root motion works like that: without rm the char motion component will calculate the movmenent by using the inputs you give to it. With rm enabled, ue will read the anim track of the root bone (top bone in the skel) and move the char with it, overriding any calculations of the movement comp. You need to enable root motion on the anim and on the anim bp, then you need to give correct input to the anim bp so it plays the right anim.
There is a lot of tutorials on rm, I made one too in the past https://www.youtube.com/watch?v=gCs3Shc3iD4
Super beginner friendly tutorial which explains haw to make a playable character and an AI NPC follower from a set of root motion anims composed of idle and walk/run/sprint animations. Uses the same character and anim bp for both player and npc. For project files check: https://inugames.artstation.com/store
you need to export both meshes separately..
Is there a way to change the maximum number of bones allowed in a mesh
Is there a way to copy over additive layer tracks from one animation to another?
Nvm, you can't, but there is a workaround.
Cheers. My issue, I think, stems from Blender to UE, and UE not caring about the RootMotion (and by extension, I suppose, root bone)
Doing a little research, seems like Montages might be too much of a pain w/ multi
yep yep
I have a strange little issue on my blendspace that I have created, it only ever plays 50% of the blendspace. I can't drag the scrubber past 50%, but if I tell it to play on loop it works okay. When I also use this blendspace in an animblueprint, it only ever plays 50%. 🤔 Any ideas?
probably you have anims of different lengths, bs scrubber has problems in this case
I had considered that, I thought they all had the same length but I'll double check I guess.
I can confirm they all have the same sequence length of 0.5 and key length of 16.
Any tutorials on how to use curves and other things to create locomotion very similar to root motion locomotion?
Do you need to manually transfer movement to the root bone in your dcc or can UE4 take it from the hips?
Can you elaborate on what you're trying to achieve
This is a problem with the mesh that they didn't fix it properly, rather patching it in UE4. Pretty lazy of them. Basically needs a weight painting fix.
Well I created locomotion system (player movements) using root motion anims. They look really nice but they don't work in multiplayer. So I heard you can use anim curves to produce similar results.
Constraints are software specific and not transferrable. You need to either attach the gun in ue4 in blueprint or rig the gun like the skin in Maya
Okay. I don't know in truth but I will venture a wild guess. Make a custom curve such as "roothack" with the movement you want on it, in your anim BP add the position value of the "roothack" to the position of your object. And lerp to the new position.
I've seen utilities that extract root motion I think as well. Take this idea with a bag of salt though. Just speculating.
@ripe yew you can't use Montages?
I tried but creating locomotion with montages. IDK
Any docs or tutorials on creating locomotion using montages?
When you hold key W to walk, then you repeat the montages. It's movement doesn't blend well.
I see thanks, so would it work if I fix up the weight painting in Blender?
Thanks a lot!!
and now I have another problem, like you can see in Ue4:
You can see that the object character "rotate"
please someone can help me? MP me and I can send you the mocap file... thanks a lot 😓
Does anyone have experience with camera based turning? and how to make it so the player does not turn directly on its axsis, example, now it will almost spin directly were its at with the camera moving. I need to use camera based turning because there is a lot of swimming in the game
i always have this problem, i assumed it's because of anim length but then it's something else. anyways, it doesn't seem to affect anything, just the player scrubber. probably just a bug
Hi friends
can someone explain me (or a link to read or watch) what is the difference between Local Space and Mesh Space?
hello
need some ideas here : if the statemachine flows through the blue arrows, it will be able to transition to "MovementStop" and enter "FullbodyIdle" successfully... but if it goes through "Navigation->TurnOnSpot->MovementStop", it gets stuck in "MovementStop" and does not transit back to Idle.. any ideas?
probably depends on what you have inside stop state
it always gets stuck in this state
What should I do if my hands are not in a straight line after two hands animation redirection
same, depends on from_turnonspot contents. you didn't make this animbp, did you?
I fixed part of the issues. The issues I had in my anim blueprint were due to anim notifies, but yes, the scrubber is still broken. Moving on now!
Hello, i just turned on Physical Animation on my character. But when i got low FPS, the physical animation goes bad, like bounce off and goes back to their body, and a lot of clumsy things. How do we fix that?
did the animation budget debug view ever make into launcher engine versions?
im hitting here "a.budget.debug.display 1" and i dont see anything at all (plugin is also enabled)
Looking for some professional animators. Hit me up in DMs
Can someone help me ?
My state machine is not running, what can be wrong ?
@proven pagoda have you debugged the character animation BP that is currently running? U can see what state they are in
Does anyone know how to lock a foot to the floor until it is raised off the floor in the animation? So the foot doesn't slide? I know that you have to use anim curves, but after that I'm not sure how to affect the foot bone to lock in place and then blend after it has been raised.
How @nova kettle ?
@proven pagoda run the game in the editor, then go to the animation blueprint window. On the top bar there is a drop down which object/character you want to debug. Click the dropdown and select the right character. If you only have one character in the level then it's easier to find it
I’ll try it tomorrow, thanks @nova kettle
Anyone have any ideas on why there would be a weird "hitch" when using CCDIK when moving between states?
basically I have an anim bp state where a pickup animation is played which uses CCDIK to move the arm. When the animation ends and the state machine goes into some other state after, there's a weird hitch or spasm in the animation where the subsequent pose is weird for a frame or so
This only occurs when using IK, if I just play the pickup animation without the CCDIK in there it doesn't spaz out
Not sure how the hitch looks (gif?), but I've had similar crazyness happen because of rotation differences between the exported anim and something IK. They looked the same, but I had by accident rotated the arm around. Not my field though 😛
lemme see if I can get a clip of it... it seems like the IK settings hold for one frame, and then it snaps to the actual pose, or at least that'd be my guess (but I have no idea what I'm doing)
you can see once the pickup animation finishes, the character snaps a bit weirdly to the side from the pelvis (the pelvis also happens to be the root of the CCDIK)
Hmm. Not very savvy on the animation front I'm afraid
Hello sorry for the noob question but do you know how to export animation to Unreal engine the best way please?
I need 1 character in UE4 with multiple animation (loop animation) thanks!
Thanks will check, also I'm wondering if there any iClone user here?
I'm struggling with animation loops glitches in Unreal 😢
Anyone have a good tutorial on foot Locking so that blended animations and transitions don't have sliding feet?
is there any way to modify/multiply the root motion distance at runtime? say 1.5x a dash attack using root motion

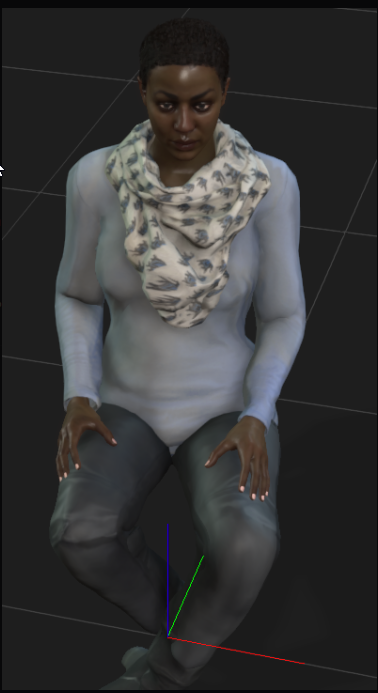
Hello, I am a high school student who sadly has no experience in coding what so ever. I'm finding it very difficult to do anything involving blueprints, animations, and other simple things. I have watched about 100 videos by now, went to the unreal engine web page, and even looked up examples. Yet none of these helped. Is there anyone willing to sit down and help me out with making this game? If not, I understand.
I think ask your question, what do you want to achieve? ^^
I'm trying to add an animation to my third person character, but instead of doing the animation, it does the zero pose
your animation is from what soft?
If by soft you mean software, then I'm using unreal engine
I just started Unreal maybe someone else can help you better ahah, I have also an animation problem with my iClone animation in Ue4, it rotating because each mocap are not the same orientation lol
You made your animation in which software?
Oh you can animate in UE4 ok 😮
didn't knew that
Right now, since this is just a smaller version of the game, it is animation from epic games
Should I wait for a response, or send another message in the morning (Central timezone)
Question on Animation State Machine usage.
If my animation state machine transitions between 4 states each state having 1 animation.
When I create my character in game.
While the game is running is every animation that's used in the animation blueprint loaded right away?
If so that seems not so efficient.
is there any way to create a "function" which takes a Name as input and has an Pose as output? i want to evaluate different overlays by name reference to blend them later. however the normal animation layer also add an pose input if i add any inputs!? should i just ignore it?
xD (not mine)
Regarding my earlier issue with the animation "snapping" strangely as it transitions from a state using CCDIK - I set the Blend duration on the transition to 0 which appears to have fixed it
is there some way to inverse "blend per bone"
i have to undo a specific bone blend for a child actor (which shouldn't inherit it from its parent)
You should post on another servers if no response, also on forum 😉
undo the whole node? maybe make a variable for alpha and set it to 0 in child?
negative alpha doesn't work
the child actor actually gets the output pose from the parent actor
so i have to do undo it in the animation bp of the child
maybe i don't undestand , but if you can cancel the blend in parent, you will not need to undo it in child?
i dont really understand, sorry, but it seems like difficult problem
actually by child you mean attach child? i was thinkin about child blueprint. could you just blend with base pose in your boots, to cancel whatever the parent did?
yea the boots get attached as component to the main character
so the main character runs it animations BP with walking and such. after that the main actor blends in the pose which fixes the foot angle. for the final render pose
the boots then copy that pose for rendering, but the boots already are meshed with that fix
but i now made an inverse pose for the boots, so they can undo that rotation (which seems to work in theory) but i'm not there yet 😄
but if you undo the rotation, you will return to the base pose? why not to "blend by bone" between parent pose and base pose (local space ref pose it's called i think)
that's what im doing
ah okay
blending the fix on top of the output pose of the character
so i should have any footrotation/legrotation from movement but without the added fix
well now this is unexpected
i exported the boots again, but with its own rig where the pose is correct for the boots, and it seems like unreal actually fixes it by itself oO
Any anim friendly peoples happen to know why i'm confused on the following: When I export an animation from Maya from 0 to 29 frames, it imports into UE4 as .97 seconds, but if I do 0 to 30 Frames it imports as 1 second
What confuses me is... isn't 0-29 30 frames = 1 second?
i would think 0 to 30 frames is 31 frames
yea 30 frames should be one second, are you sure that all frames got exported/imported correct? (check the start/stop frame in the animation sequence viewer in unreal)
this might a little bit be a maya question then, because that much i do figure 30f = 1s
what does maya consider 0-29 frames i guess?
that 0-30 will show up in UE4 as 1 second
but rly that should be 31 frames if you include 0 : /
Are you exporting the entire frame range, including the zero? Check the fbx out settings. I would just start the animation on frame 1 in Maya, easy fix. It sounds like frame 0 is just being ignored, makes sense in a way.
that might make sense to Lua coders 😄
do you export as ascii or binary fbx? if the first, you might just check out whats in the FBX
or reimport the fbx in maya, to see what it does with it
@crisp palm I feel for you man... it was confusing as hell for me starting out. I'd like to help you but I don't really see the benefit in, nor have time to do it for you. I think first step is follow along with this series... https://www.youtube.com/watch?v=hRO82u1phyw&list=PLP_9zBjrt9BE1ZgQxIN0-ZV0aZcDRtlE4&index=1 You've said you watched a lot, but this one is really good and I feel like if you can recreate the character in this you should be able to do the basics after.
not sure where to look
lag,
can you even view frames in the anim asset timeline?
tick where it says bake animation, and set it from frame 1 to 30
ok i ticked it @static falcon and then reimported and it still says 1 second
even though it's 1 frame less : /
makes no sense
right, because you baked 1-30 right?
is it possible to see how many frames are in an anim asset?
I think so... let me boot it up
thnx ya, it's silly i never really dug into this but i can't find it lol
there is this
but still can't see frames
it says 2 frames down at the bottom
is that the right asset selected?
ya
maybe my ue4 import settings are rong
wrong* maybe animation length needs to be other than exported time?
nope, weird. even when i set it to define a frame import range
still being weird
I'm taking a look here... you definitely working in 30fps in MayA?
yup
something may have been a bit bugged in my maya project file, i dunno. I just tried a fresh maya scene and i got different results on ue4 import. still strange though
maya:
when I mouse-over the asset in UE4 I get a lot of useful information
ue4
0-29 from maya shows up as 0-28 in ue4 when animation length import setting is at Exported Time
maybe that's correct?
0.97
I would try just starting the animation at frame 1 in Maya instead of 0, UE4 may be making assumptions
That is the default...
as a rule of thumb it seems to be good to adopt the workflow of the program you're using
Like I use Y up in Maya instead of Z up, and default units, typically
If you have important animation on frame 0 in Maya, just offset the entire animation, then try re-exporting frame 1-30 and see if it comes in correctly
that's very weird
That's what im saying! i feel like you or anyone could run this test rly easy
If you mouseover the asset in the browser, what does the framerate say in UE4
just make one joint hehe
even says 30 keys whatever that means.. the baking probably put 1 key on each frame
but look at the sequence length
it isn't 1s
I'd say it's probably fine, but I can't explain that...
I doubt it will cause issues
i desperately need precision on this because i am converting play rates based on music bpm later
You can try dragging it into an Anim Sequence and seeing if the length looks more or less exact
so i need to run precise math on the anim play rates
that's why i need to rly understand this frames vs time confusion im in right now
sure one sec
you sent it above right?
well i have a new one here you can check out or i can send u the maya file, but here is the last fbx
i think it might be just the joints though lol
that one has the meshes i believe
it's a light fixture
so that is an export 1-30 baked
im having issues with sockets, I want this to be attached to my foot, however when I play the effect and line trace I fire off of it seems to appear at the center of my character
there are my debug line traces
are you getting the world space of the socket not the local/bone space
im not sure
I use the Get Socket Location Node
maybe the Root Component is the problem?
its get automatically created when I drag from my Cast to Character to this node.
aaaaaa
yes that was the issue
I changed the target to mesh and now it works
hmm well done 😛
So i've downloaded characters from Mixamo, done the retargeting, seems fine. But i'm having this that only shows in the char BP, not the AnimBP
any idea ?
"having this" having what?
the bad texture?
check the material on the mesh in the BP, revert it to the default one if you need to @dense tree
Hello somebody know iClone here?
@static falcon Yeah the bad texture. I've tried reverting but doesn't change nothing
the strange thing is that it happens only inside the CharBP, no in a single other place
can someone explain to me (preferably in low level terms) how to set up an animation
seems to be in the texture too
In stead of the animation being played, It does the zero pose
Hi! Unreal is automatically setting the pose weight of my animation asset to 0. Any idea why?
@dense tree can you just re-build the material yourself to test using the textures that came with it
@crisp palm I may be wrong but I think if you want to play animations from regular Blueprint you need to use an animmontage
Or you can set a variable in BP / pass it to the Anim BP / then play the animation there
@static falcon Just did as you said, still having the same problem
But I just realised its the texture itself
Is there something specific to do to make sure the texture is well imported ?
Oh the texture is embedded in the fbx
The texture seems fine from the 3d screen from windows
1 sec
Okay so that character has Two materials on him
So you need to in UE4 make sure the right one is applied to the right slot on him
maybe you have them backwards
there's a map called "ch30_1001_Diffuse.png" for the torso and head
Did that fix it?
totally
yay
you're welcome!
Simple question
for making a rig in blender to be used in Unreal, what orientation should the "root" bone be in?
and what other rigging tips should I keep in mind for Unreal specifically
I'm working on blender rigging tutorials and I want to make sure I don't teach people things that make exporting to Unreal a pain lol
Howdy there I had a question about updating an enum from an animation blueprint I cannot find a good way to cast to either my animation controller or my behavior tree. Any help would be appreciated 🙂
how do you apply (or see?) the result from animation compression inside the anim editor? i've tried different values but can't tell that anything is different
Hey guys sorry I'm bothering you again with that ahah
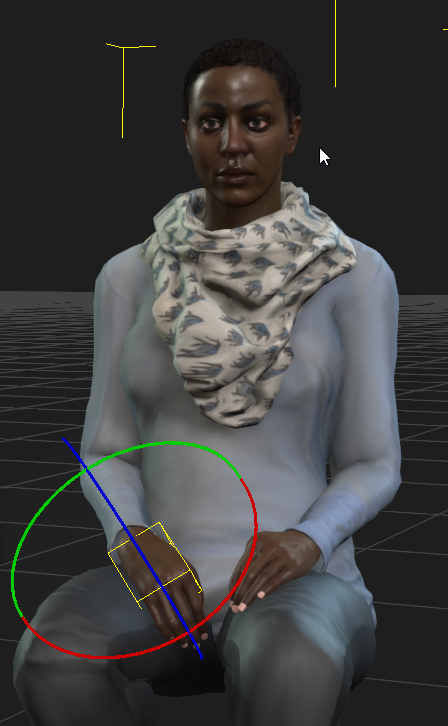
^ do you think for a rest pose, the hands should be symmetrical or asymmetrical?, because this is the first frame and last frame of all my animations so this pose will been seen a lot by the viewer/player
hmm from a purely aesthetic point of view asymmetry is usually more natural!
Yes.. same thought, I was wondering for animation
when she put his hands exactly the same way.. maybe it's strange!
How do I use an FPoseSnapshot in an animinstance? It can only reference pose snapshots by name to link to an output pose it seems?
Or if not, how do I take its transforms and copy it over in the Anim Instance?
What's the correct way to A) play one-time animations on a Skeletal Mesh directly from C++, and B) call a random animation in the same fashion? Calling a single AnimSequence via Mesh()->PlayAnimation causes the Anim BP to break. And playing a montage for absolutely ever animation just seems like the wrong way to go about it.
Evening all. I know there are tricks like duplicating the blend poses node, but is there any way to re-trigger a particular pose without switching to a new pose, say with blend by enum, int or bool etc etc?
so for example, with blend by int, if i continually send 1 and want to restart the anim at that pose pin
has anyone worked with this yet?
i was wondering how i can bake down additive layer tracks into a baked animation in unreal
there's a parameter in pose snapshot node, it's hidden by default
Hi guys, unreal noobie here, is it normal to have a really messy animation graph state machine? Mine is already cluttered and im just getting started...
Do you guys know any way to mirror animation without spending 50-60$ on the marketplace ?
Hello, can someone point me to a documentation for tell me how the Aim node in the Control Rig work?
I am super confused in term of what is "primary target', secondary target or axis pole normal??
I just want one bone to look at a vector, very simple but it has been super confusing using this node.
I'm searching a good stone mining animation for unreal mannequin, do any of you have one to share?
there is a free plugin doing the same, on github
GitHub
Pose Mirroring AnimNode for UE4. Contribute to mamemame360/AnimMirroring development by creating an account on GitHub.
aim node will rotate a bone to point at something. so you have a bone you want to aim, primary target is the place at which you want to aim, so it's really the target of your gun for example. primary axis is which axis of your bone you want to point to this place, typically the axis your gun if firing. Secondary is the same but for another axis of your choice. You can set the weight of any of those to 0 if you don't need it
and btw, I made a super simple tutorial on cr, there is aomething about aim node too https://www.youtube.com/watch?v=jfYZymr1svs

Just a little intro crash course to help start using control rig in ue4. Explains how to make one and some basic concepts about it. Part two: https://www.youtube.com/watch?v=GTOs4XwzcME
Thank you, I will have another go.
Also I am sorry if this sounds really basic but I want to lock the rotation to one axis.
@wide hearth I'm checking thanks !
Anywhere I can define this axis?
do you mean you only want to rotate around Z for example?
which axis you want to point at target and which axis you want to stay fix?
I guess I have to make a dummy control and put the secondary rotation to point to it?
Yeah, for now just lock rotation to Z is ok for me. But I might need actual axis/plane with normal later.
Like if a turret is not rotating on a x y z plane then I need to define an axis.
then you make z your secondary axis and you point it at some fixed target or direction, then x or y is primary pointing to real target, i think that will work
Thanks a lot, I will try that out.
Ey everyone, I am trying to use the anim budget allocator but It does not seem to work . I have enabled it in plugins, and I cannot get the debug to show using console commands. Anyone is using this and can give me a hand?
Hi guys, is there any way in animation blueprint to fire some event when some animation state finished (blendspace) ?
something like this but with execution pin ? this is in transition rule
i have blendspace which use root motion for turn and step in given direction but after that i need to move pawn with MoveTo (BT).
Problem is because in one frame my velocity was zero, and that cousing wired blend from rm turn blendspace to non-rm walk/jog/sprint animation
there are "enter" and "exit" events in states and transitions
Why does using a float variable, instead of calling the "get movement component > get max speed" every time, fail in the animation blueprint? If I switch it back to using the unlinked get max speed, it works perfect again....
When packaging, I also get divided by 0 warnings for those division nodes, which is why I added the variable, thinking if it has a default value not set to 0, then it would get rid of the warnings. However, warnings still persist and now it fails to get out of idle. So odd, this should definitely work.
anyone want to make some quick cash helping me out with a few character rigs today? DM me if so, I have 3 characters to bring into unreal
i would put a print after the set and check the value
Shouldn't matter though... It has a default value. So even if that set node never calls, it has a value to use....
Makes no sense I can swap it out with the "get max speed" node and have no problems.
i mean somebody puts a 0 there, if it's the only "set" you have then it must be this one
Those divided by 0 warnings even persist when the "get max speed" node is hooked up. Also no way for this "max speed" variable to be set to 0. Default is 600 and that is the only set node. I'll just ignore it for now and go back to how I had it, but this makes absolutely no sense why it won't work with a variable instead.
I'm gonna try hard-coding the numbers into the division nodes, haha
if they persists then it means get max speed returns 0 sometimes. would explain why the variable is 0 too. do you set max speed in character ?
I think you misunderstood the warning part. That is a "packaging" warning, not runtime warning.
Somehow when packaging it thinks it can be 0, but during runtime, it is never 0.
it executes it during packaging?
My thoughts exactly, how does it even know there could be a problem there, lol.
Packaging spams like 1000 of those warnings, haha.
Doesn't seem to break the packaged game though, so I'm guessing I can ignore them.
weird
Oddly enough, hard-coding the number in works....
Why the hell can it not read from the variable, lol.
Not really a big deal, just thought I could get rid of the annoying packaging warnings, heh.
I know how to blend per bone for montages, thing is this is a 3 animations sequences, so I don't see a way to do it
hey guys! anyone here who could help me getting Maya Livelink working? I have a problem with flicked axis...
Would be happy to send a tip on paypal
This is the idle walking animation
This is the walking attacking blended animation from spine_01
The character is rotated on the side, when he should be facing forward. Would an IK or an aimffset fix this ? Or is there a more simple way
anyone know some nice free or cheap idle animations or poses for the ue4 skeleton?
How would you constraint rotation of a bone or control in Control Rig?
So I am new to animating within Unreal Engine, I have my mesh and skeleton set up. What I am wondering is how I would be able to input a rotation or location coordinate and have the skeleton go from the original pose and animate to the new pose. Basically looking to have a camera that can rotate based on a players input.
sup. i added some clothing data so that my character's toga will use cloth physics, but it looks like the toga isn't respecting the physics data. any ideas on what this could be?
Is there a way to have an animation playing in the viewport of Char BP ?
About to pass out so might follow up tomorrow, but weirdest thing. Does anyone know why my 30 frame animations have fast path but the four at the bottom which are 1 frame animations do not?
same thing w Local Space Ref Pose no fast path
guys i am having an issue importing a fbx model that is rigged with the unreal skeleton into blender
it shows up with some bones messed up
has any one faced this issue before, i am not the artist so my experience with this kind of stuff is very minimal
https://forums.unrealengine.com/development-discussion/animation/1852484-using-animation-blueprint-linking-leads-to-huge-lag-in-editor-mode Hi. Has anyone around here experienced the same issue?
Unreal Engine Forums
Hi. I've set up Unreal's Animation Blueprint Linking as shown in the official documentation to enable dynamic switching between an AnimBP for locomotion and an AnimBP for the execution of abilities like range attacks. As shown in the video, the unlinking process leads to a huge lag in editor mode.
@nova mantle Check automatic bone orientation and see if that helps
I make sure to keep the original fbx mesh, as going from ue4 to blender will usually cause issues
If your goal is animating the character, I would look into Auto Rig Pro, or similar software that supports the epic mannequin
Any DOS and DONTS when considering Blendspace animation for large open world Multiplayer?
Thinking ahead: I'm trying to put together a blendspace with 8 animations for 8 directions. Does anybody have a method to keep the waist direction from snapping around when I transition from a sidle to a backwards walk?
I've only built 3 of the animations so far, but I feel like this is a wall I'm about to hit.
@misty dagger to make it really smooth you'll have to have a transition in the graph probably. The blend space is really only good for steady state. By definition, there's a discontinuity when you switch to backpedaling
If it's wasd, do the switch at the 22.5 degree mark so it's only crossed in transition and you're never near it in steady state. I just use a blend space and it looks fine.
So if back right is backpedaled and right isn't, you only look weird for a split second when going past back-right-right
Thanks for responding. Hiding the switch between two of the directions is snazzy but I do intend to use joystick controls.
~~I'm wondering if I should blend between two blendspaces where one orients the front of the pelvis towards the walk direction and the other orients back of the pelvis towards walk direction. ~~Nvm, the more I think about it the worse it sounds.
I'm going to try making two animations for the sidle to transition by alternating foot forward/ foot backward; think cross-over running drills.
and hopefully i can sync the transition somehow to keep the feet from clipping through eachother
My mannequin animation plan does not trigger the jum with the character variable is pressed jump
BlueprintUE
an ideas
I have a skeleton where the root and spine bones aren't identity. So when I do some procedural rotations to them, they don't rotate in the right way. Is there a way to "repair" the skeleton in UE4? For context, I'm trying to use the animation starter pack on teh Synty characters. I've done the retargeting, which plays the animations fine. But skeleton isn't correct for proc animation stuff.
Hello i was wondering if robots need a idle Animation and breathing Animation because some people tend to animate robots like humans was wondering if there is need for it i mean if they are supposed to be right Killer robots for example they would be the perfect Hunter if they arent moving 🤔 but maybe its Something Players would expect same for a breathing Animation
it would somehow not be right if he stood completely rigid in a game, it would look somehow unfinished or inferior in quality, right?
Are you talking about for the player? or some sort of enemy?
@fiery gust
i mean robots dont need to really have an idle animation. Just stand i suppose. I think it would be weird if they were moving while not engaged as they arent human so dont have the quirks we do. Shifting uncomfortably, itching, scratching, etc