#animation
1 messages · Page 97 of 1
let me draw
suppose i have a bone (blue) inside the eye, if i rotate the bone the eye will rotate around it
now if the eye moved up (shape keys for example)
the eye will dettach from the face, because of the offset from the bone and the mesh
i need to correct the bone, both position and length, after applying a shape key
@vast trellis
other places affected are legs, arms, hands and lips
hmm yeah I don't know, that is going to change the eye's pivot point
it might make sense to leave the eye out of the shape key and then translate the bone to move the eye into place
you can rotate a bone around a different pivot (which involves translating and rotating), but if it is part of a chain like an arm or a leg and not a standalone thing like an eye I don't know
does a shape key apply before bone deformations or after? I guess there would be some order dependency too
(some combinations of transforms are associative not commutative)
tested, shape keys before then deformations later
thx for the help
(didnt fix yet if anyone got an idea)
Just imported the default mannequin into Blender. Is the skeleton supposed to look like this..?
blender doesn't do fbx well
That's not purely a .fbx problem, Blender only allows one axis down the bones so anything that uses a different method will look bad in Blender.
Then again it's good it looks like that so newbies don't start animating with a rig without controls. 😛
There's UE4Tools if you need a mannequin style rig, then just retarget.
I just tried retargetting from Makehuman """""UE4-compatible""""" rig to UE4 rig
Compatible my ass
And what does a script that's supposed to fix all that do?
Makehuman is not compatible, the orientations are off.
Maybe the bone names are correct, but that doesn't help much. 😛
Fixed the default pose so it's a bit better now, but the lack of twist bones still breaks everything
At least the bone names being correct means it's better than the rigify thing promoted on the blender livestreams.
Okay, I can;t paste this image, hold on
Tbh all options for any character creator -> Unreal are equally... Sub-par, let's say.
Yes, but you can use the rig that comes with the character creator to put the character in the mannequin pose (= equal to UE4Tools pose), then replace the rig with that. If the rig didn't have twist bones you would have to weight paint that but other than that it should work fine.
So you would move the bones in pose mode until it fits the rig (just compare the bones orientations), then apply the armature modifier.
So, it means a slog of having to weight-paint all the bones?
No, only the bones that didn't have vertex groups from the start.
I think the manuel bastioni addon will have retargeting inside Blender in the next version at least (or maybe already).
so, basically:
- Import Makehuman FBX
- Create UE4 Tools rig
- Parent Makehuman model to the new rig
- Paint missing twist bones
?
Yeah.
Well 2.5 move the bones to the right locations, apply the armature modifier. 😛
And 2.8 scale the UE4Tools bones (the whole hierarchy per bone so orientations don't get screwed up) if they don't fit.
When i import my animaten as a ftb 2 of the bones dont have there animaten imported, what would be coursing this? (im using blender
I have walking blendspace and idle animation, when my character stops he flicks and then starts idling
how do I get the "active" time in a transition, as shown here? https://puu.sh/ymv7i/1bc730ab53.png
I just want to enter a transition after X seconds elapsed

I'm using explicit time nodes, and checking current time or time remaining etc seems to be based on that value.
I've got a problem getting foot ik to work with my mesh, I'm using the advanced locomotion system and Blender. I've added ik bones to my rig but I think I'm missing a step, if I enable foot ik the joints twist up. The forum mentions "click on the correct IK_Foot joint, then add a point and orient constraint" Can anyone help? I'm unsure about this point and orient constraint bit, before I go back to it does anyone know anything about doing this stuff in Blender?
I'm not even sure what it should point and orient to..... the foot bone?
how do i stop unreal adding inbetweens to my 24fps animatchen?
is it possible to place an actor relative to two socket position?.
I placed the weapon on hand.. But on different animations the weapon get rotated , I asked it in ue4 answers https://answers.unrealengine.com/questions/726305/attach-an-actor-to-two-sockets.html
I've setup a post process animbp using a sub graph input, but with PIE running I'm not getting any flow out of it and the primary animbp stops working and character is stuck in ref pose, any ideas what I'm missing?
final animation pose was disconnected.... 🤕
Does anyone know if anim notifies can be missed when using Montage_JumpToSection if the time between the section line and the anim notify isn't large enough? I didn't think there was blending while using JumpToSection, so I wouldn't expect that to be an issue. But I'm running into a hard to reproduce bug that seems like it might be.
is there a way to simply make a montage take priority over another? so that if one starts playing after another is still playing, the old one doesn't blend out?
@Runetass#7939 this is a matter of your AnimBlueprint
you can put a Slot Node into another Slot Node
and/or blend them on different Bones
Hey guys I'm actually having a similar problem. I feel like I'm doing something obviously wrong haha. I want to just trigerr this effect when his foot hits the ground. (dirt cloud) I would really appreciate it if you guys could point me in the right direction. Thank you!
nevermind I got it haha. I was using a notify state, not a notify.
kinda new to 3d modeling. is 3d coat or substance painter preferred for ue4?
Not really the best channel for that topic, but I do know that Substance has a plugin for UE4 so you can make changes in editor with that
hey im kind of a newbie here, just making sure: maya animation is compatible with unreal engine only if its single hierarchy right?
@tawny lance Most studios have been using substance designer and painter for a significant amount of their work. At least the one I have been in touch with.
ones*
Hi all, in the bpanimation docs it says "You can also send animation directly to a specific bone in the Skeleton and all of its children. For instance, you can start with an animation in which the character is running, but then selectively apply a waving animation just to the right arm. The final result will be the character running and waving." would you accomplsh this using the "Layered blend per bone" node?
Ive got quite a complex animated rig inside of maya but when i try export as fbx with baked animation and import into Unreal it just turns into a ball with pretty much all the bones at zero, i think the problem is all the complex things effecting the rig i just need to get the skeleton animation from maya anyone else had this problem?
I believe so
Is there a workaround how I can use BBones from Blender in Unreal? I think I might need to replace them with actual bones, but is there a tool for that? ❤
It's not possible and I don't think there's a tool to replace them either. However you could probably make a similar system to BBones using normal bones and constraints in Blender.
well, the cool s<3t comes with using StretchTo
And if you are using 10 segments with a bone that is using StretchTo, you would need 30 bones to set that up
I didn't say it would be easy. 😛
There's also spline IK, you could check that out.
I didn't assume it would be easy, I was hoping for an addon, since the technology for bbones is known and someone with python knowledge... could do my work? ;P
Actually never used SplineIK, but it looks painful to get a smooth result
Will check it out!
nvm, it actually has volume preservation
I'm using a Transform (Modify) Bone where it replaces the translation with 0,0,0 in component space, and then converts that back to local space.
This seems to work for robo recall (where I learned it/stole the assets from)
And it used to work in this project, but now it's causing my hand to be quite offset from 0,0,0 when used as a skeletal mesh
The Skeletal Mesh is zero'd out like the other components there, I have no idea what's going on 😦
Even the old code/animation blueprints that I didn't touch are broken now. What on earth.
My Character Pawn has an Actor Component which I want to use in my AnimBP of the Character Mesh.
However, I get an access None when I try to access the Component in Initialize Animation....
@dusk dove picture of BP?
anyone use the desktop version (1.3) of Fuse still? I.e. pre-adobe?
I can export OBJ and get it imported fine into UE4 but i'm obviously missing the skelenton... how can I address this?
nb: the desktop version of fuse no longer syncs with mixamo.. and the adobe version that DOES sync with mixamo no longer contains the mesh parts I'm using
.obj doesn't support animation.
sure.. but you can export to FBX once the OBJ is imported by turning it into a static mesh and the exporting
assuming there may be a way to swap meshes with the existing TPS char or some nice hack
you'd still need to rig the geo to an skeleton inside an 3dpackage. you cant just use an static mesh.
if i use expression editor in maya to drive controllers and then send rig to someone using maya LT will the rig still work
anyone here can help me understand how to play an animation and drive it using a curve?
https://docs.unrealengine.com/latest/INT/Engine/Animation/AnimPose/index.html
https://docs.unrealengine.com/latest/INT/Engine/Animation/AnimPose/PoseBlenderNode/index.html
Pretty sure this is what you're looking for
Describes the Animation Pose Asset which can be used to drive animation through weighted curve data.
Describes how to play back a Pose Asset with the Pose Blender node.
anybody in here knows how to put the current animation time into a variable?
okay nevermind I found it
Anyone here used the AnimDynamics node?
anyone here using maya LT? message me?
hello, guys. Is there any short answer why Mannequin's skeleton is facing Y rather than X in ref pose ?
My weapon when viewed as a skeleton is fine
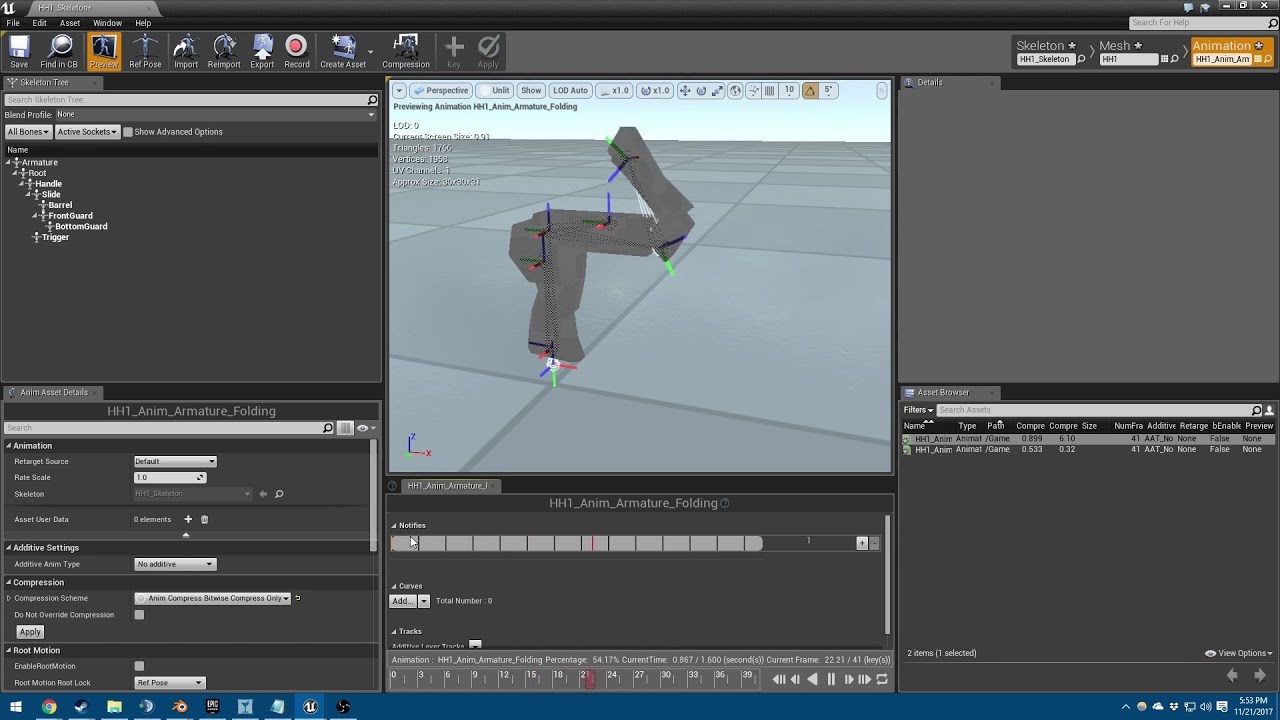
When I 'record' and save a blank animation and open it up,
It's dismantled like this
Why is that?
It is linked to the correct skeleton, etc.
root animation removal during recording ?
For some reason I'm getting a bunch of random rotation in UE4 despite keyframing EVERY SINGLE FRAME to make sure that doesn't happen..
does anyone know how to fix this?
when importing my animation from blender to UE4, i'm getting a bunch of random rotations
i've gone through and keyframed every single frame in blender to try and prevent it, but that doesn't seem to have fixed it.
is there like a "rotate to shortest path" for animation keyframes in UE4?
any1 here?
I have an animation that lasts approx. 0.7 seconds
It looks fine inside the animation sequence itself
When I try to play the animation in-game
Only one bone is animated and it plays at half the speed or slower
It's as if the animation is cut short
I don't see the beginning of it play out at all
anybody encountered this yet? https://gyazo.com/f3d7dc2574688f2f4ec57a5a0162396e

@peak thunder tried messing with the curves? even if there is a keyframe at 0º and the next is 0º, if the curve is telling it to rotate it will rotate 360º when imported on UE4
its hard to see on the video but it looks like it rotates on that curve
@frigid drum i'm guessing it might be that one going from positive to negative? that's the barrel of the gun which is really weird.. it's not even rotating..
X_X
wait no, that's location Y for the barrel.. hmm
what is W Quaternion Rotation?
ah, quaternions, hard to explain :p
they all together make a rotation we would call X, Y and Z
Y quaternion rotation is not a rotation on Y axis
that would be Y euler rotation
i think i found the issue, or at least i can now replicate something similar to what i'm seeing in ue4 kind of.
cool
those 3 keyframes there were in the negative, but bringing them to positive makes it wonky
scratches head
yeah you cant know whats gonna happen when you move a quaternion
tbh i dont even know how they work exactly so i generally avoid changing curves
but i know that can happen: blender thinks you wanted to rotate to one side instead of another, and as UE4 interpolates the keyframes, it will interpolate as a full curve to the other side
now gotta lunch
cya
alright thanks for your help.
np
hey
can we change bone hierarchy at runtime? need to set add a skeletal mesh on top of the caracter, but i cant know beforehand what bone will be the parent, so i cant use master pose component
what exactly are you trying to do @frigid drum
@ebon portal i have weapons with limbs, custom animations, etc. and they can be both on left or right hand, so i cant just parent to the left hand for example
so you want to be able to have the weapon in the left or the right hand depending on the situation? @frigid drum
yep
normally you'd use sockets for that
you create the character model with all the bones for the skeleton
and have a seperate skeletal mesh imported, which will be your weapon with all the bones on the weapon
then you create a socket on each hand of the character and place the weapon in the desired hand by code or blueprinting
you can move and rotate the sockets too if necessary
@frigid drum
im doing that with static meshes, now im thinking on why did i think it wouldnt work with skeletal meshes 🤔
gonna try rn
Still having a problem with animations not playing fully, being slowed down, or playing partially the beginning or end
In one example, I have a shotgun that reloads by inserting 5 shells into its slot before cocking
In-game, it inserts 2 shells, third one is half-assed and then it cocks slower than it needs to. It skips 2 shells and the play rate is all messed up
Anyone know what might be happening?
Some animations, the short ones, don't play in-game at all
@frigid drum No, they are just regular animation sequences. I trigger them in BP manually. I also tried placing the animation sequences in my level and seeing how they play on Beginplay, but they are still all messed up.
How can the engine ignore certain bones and mess with my animation on some existing bones that do play? For example, the shotgun shells are all equal each time they are inserted
Yet the third one that is inserted only comes out halfway and goes back in
So the curve itself is messed up
Then the shotgun cocks early
It's like the engine isn't reading all of the animation and the parts that it does read, it plays incorrectly
When viewed in the animation editor itself, it plays perfectly
got an animated machine, if i have geo in the machine parented under a bone, can i still export to UE?
or do i need to bind eg piece of geo to the joint
with bind skin
I don't think it'll work if it isn't skinned to your rig
When you import the animation, it'll use the bone data and that's it
So what you may have to do is re-parent it inside of UE4 to that bone
Same process
hmm
Hello, when does the Event Blueprint Post Evaluate Animation Fire exactly?
Uhm I have a jumping attack - yet the middle animation might loop depending on "jump duration" - I guess composites cannot handle that looping and I have to do AnimMontage for that?
@gaunt hemlock I think so. I think it would handle similar to a melee combo.
So if something is triggered in that given time set within the montage it will make it go into the next one.
what's the name for the subtle slo-mo effect after hitting?
hit lag, hit delay, or something else?
can't seem to find any tutorials with those keywords
hmmm
Hey guys, does anyone know, if I have a Rigidbody node in my animation, is there a way for me to reset the simulation?
I have a situation where a character launches forward and their ponytail goes out of control. I can blend out of the physics at that time with the alpha, but when I blend back in it blends to the crazy flailing around until it settles down.
I need a way to actually disable the simulation.
setSimulatePhysics on the corresponding bodies wont do it?
I didn't try specific bodies, but I never turned on simulate physics on them in the first place since they're controlled by the RigidBody animation node.
Is there a limit for animation curves? Somehow 1 of my curves is not working while playing, but it does work in every Viewport.
how much should I pay someone to figure out how to correctly enable root motion on a skeleton?
I ripped a skeleton with animations from a game, but the root motion is all messed up, when I enable it the character rotates in a weird way
Skeleton has a root bone at 0, 0, 0?
yes
Animation plays fine in your 3d package?
When you preview the animation in UE4 and select the root bone, does the Local Rotation change?
The animation plays fine in UE4 preview as well right?
it plays fine
about the rotation change im gonna open it to seee
the root bone must be at 0,0,0 on the first frame only right?
That's probably the problem
every frame
Does it change in your 3D package as well?
I say "probably the problem" but I haven't seen the issue so can't say for sure
yes also changes
Try zeroing out all the rotation and reimport into UE. Unless your root motion needs the animation
Anyway, gotta sleep. Good luck!
@cinder ocean how did you rip animations?
i strongly recommend to not posting/chatting anything related to ripping copyrighted work on this server. I'm positive the <@&213101288538374145> agree with me on this point hehe
Yeah, rather stay quiet about that. I don't care if you have ripped assets in your work in progress project (and take them out before you release), however talking about "how to rip assets" doesn't belong here.
ok but anyway ifve good a question about maya and unreal engine 4. I noticed that there is a tool named ART but i dont know if this plugin would fit with maya 2018. Hopefully get an answer soon
@lofty marlin
anyone worked with the anims from https://mocaponline.com before? can you recommend? mixed reviews regarding additional bones etc. and i'm looking at picking up the pro mobility pack during the sale?
MoCap Online
3D motion capture character animations for download. Game assets for UE4, UNITY & CRY Game Engine ~ FBX (Maya) & BIP (3ds Max) formats available.
hi all, is it possible to constrain a single axis in animation? eg I have a front flip anim that is throwing my character forward, but I just want the flip motion instead of it moving the model along the Y axis.
Hey all, I'm new to animation, and I keep getting this error when trying to import a skeletal mesh with a run animation:
FBXImport:Error: Error Mesh contains SM_Cloak_004 bone as root but animation doesn't contain the root track.
Import failed.
Anyone know what it means? I've found several different answers from several different sources talking about several different versions of UE4, but none of them have been the fix I'm needing.
Importing from blender*
I have a file with a skeleton with some animations, but when I enable root motion on UE4 the character rotates weirdly, and it doesnt happen on 3DS Max. And when I reset rotation on all frames to 0,0,0 it doesnt work, because only one frame can have its rotation to 0,0,0 , the other ones change... How can I solve this problem?
hey folks. I've started trying out UE4's updated cloth sim stuff for the first time. I've come across something I don't quite understand though. The cloth appears to be hitting some kind of 'floor'
if anyone has any thoughts on why there is is an arbitary cloth floor, I would be super grateful!
thats not for #animation
ah, okay, sorry if it's misplaced, which topic would you recommend?
#blueprint and #legacy-physics would be the most appropriate
okay. I must, confess, I saw them under 'programming' and thought that wasn't quite right. I guess managing static mesh properties isn't really a good fit for any catagory. Thanks 😃
yeah, clothing doesnt really fall into a specific section, but those would be best
Hey animators, im looking for an animator for my game, im not that deep in animating and i dont know where i can find them in the WWW. Is there a special website you guys hang around, beside discord and UE Forums. Hopefully that wasnt to much offtopic.
I need some help, my swat character is meant to use animations for walking left and backwards, but instead he just turns around
This is the blend space that shows he can do these anims
is it a button in the character blueprint? He's supposed to do animations for walking to the side and backwards, but instead he just turns in that direction and does the forward walking animation
guys, please
In older version in order to change the bone translation on a skeletal mesh, I had to rightclick on the bone name and set something so the translation will have effect
how can I change translation in newer version
in the animation
nevermind
I got it
I still need help 😦

i imported a max set of bones, for some reason this bone has no joint on the end? never seen that in max but i can't delete the bone...
@left kiln it must be in how the parameters are being set then right
in the animbp make sure blend space node is running at desired time, then next thing to check is value of parameters feeding into that blend space when character is meant to be wlaking sideways
I’ll use the snipping tool, but I’ll do it later cause I’m going out
What part of the AnimBP do you want to me to take a pic of? The state machine and all its components?
do you understand how the animbp integrates with the blendspace?
like you need to see that blendspace node light up for it to be running
in the animgraph (in a state machine or w/e)
and then you need to affect the parameters that go into the blendspace probably using the animbp
Is it possible to have a random animation in one part of the blendspace? or to parameterize it?
I want various idle anims, but same blendspace
in my idleToRun blend
hmm I see I can just have a select with a random int. I'll just have to duplicate the blend spaces and switch anims
apparently select is depreciated...
edit: use blend poses by int
Just add an animation blueprint with event tick and some values with branches so that it makes a random value and it gives a random animation
Ex: i have 10 idle animation
I make an integer ( maybe float i don't remember ) that sets the integer to a random number between 0-10 and add a DO ONCE when it finishes the animation it reset the DO ONCE.
There's also a Random Sequence Player node. I'm not sure how capable it is (just remember it's there), but you can adjust shuffle between a set selection of animations
I exported the UE4 Manequinn as FBX and i openned it in Blender and the bones are messed up ! , Please go easy on the explanation i am No Artist , Just a programmer 😃
That's blender for you,
Better off using maya for animation related things
That's funny because Maya is the reason those bones look off in the first place, Blender doesn't allow orientations other than Z down the bone globally (meaning Z is the roll by default).
Anyway there's no point in having a mannequin rig in Blender like that anyway because you've got no control bones to animate with anyway.
If you just want to attach it to a character you can use that rig, it should still work. But for animating it's better to get a real rig like UE4Tools and retarget later (or replace the default mannequin skeleton).
I realised that my swat character moves the same as the third person character because I used that and changed the skeletal mesh. Is there anything in the third person character that makes it turn the direction that it is moving?
Protip: I use Add Movement Input with the Actor Forward Actor and interpolate the Actor Rotation towards the direction I want to go. A more "realistic" feel if you ask me.
@tawny lance I already turned that off and for some reason it didn't work. He just did the same
but he has a side walking animation which is displayed in the blend space and it's not being used when i go left. Instead, he just does the forward walking animation but going to the right.
This is just to show he can do different animations
what you want is strafing
you don't want to orient towards the way he moves
is your Blendspace correctly used in your AnimGraph?
make sure to use the Velocity of your Pawn. Unrotate the Velocity with the "UnrotateVector" node (use your pawn Rotation for this) and plug it into your blendspace
Do I connect it from "Get Velocity?"
I'm not on it right now, this is from memory
I'm trying to imagine
I'll do it tomorrow
Hello, I know an experimented artist with 3ds max who want to move to maya, to animation purpose especially for the game industry (root bones,etc..) or maya tools more generally (facial rig, squash and strech).
Someone know a good courses ? She's using Maya 2018. Thanks in advance 😄

is there any way to use composite animation as montage? or create montage animation from composite?
oh, there I can add composite inside montage
hey guys, im trying to learn unreal engine but im stucked at animation things. Tutorials on youtube about animations are simple. They are just about idle walk run. Is anyone know good examples about complicated animations? Tutorials, example content etc.
what sort of complicated animations do you want to know about?
Hey guys, I made an animation with ART v1 and while in Maya it seems to loop fine, there's a jitter between loops in engine. Any tips on how to diagnose the problem?
@orchid kestrel I have a lot of animations. Like pistol walk run idle, rifle walk run idle, aim offsets, strafe animations etc @orchid kestrel but never seen any tutorials about it. maybe my bad but i havent seen
if you haven;t checked out it already, the ue4 documentation has everything you need;
https://docs.unrealengine.com/latest/INT/Engine/Animation/AnimHowTo/AimOffset/index.html
Using an Aim Offset, a character aims a weapon in the direction of your mouse or controller.
and @nocturne crown https://www.youtube.com/watch?v=Dtewkn8qIE0 for dealing with multiple weapons

I will show you how you can use different animations for different modes (e.g weapons, friendly,...)
Is it possible to retarget common animations to a character with digitigrade legs? Or is there any extra work required other than just configuring the skeleton in the Retargeting Manager?
Can't see why not, results may not be top notch, but until you want to create a digitigrade skeleton and animations, it'll probably do for now
cool, I'll check! Thanks
This has probably been asked 1000 times, but importing from mixamo results in my skeleton only animating in place. Seems to be locked at the pelvis
Is it possible to do any animation in the editor or does it have to 100% come from external imports?
hello, can I get some help?
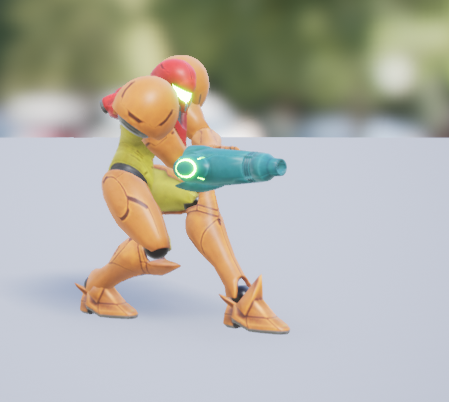
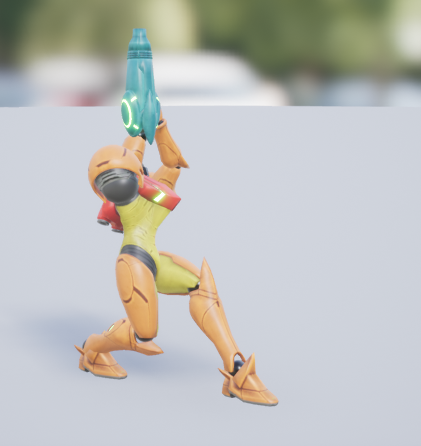
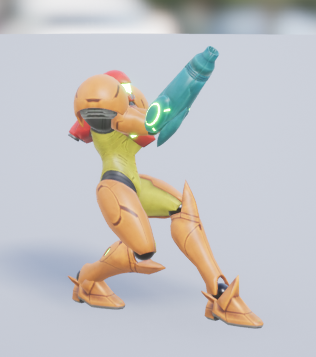
I'm making a small Metroid level and I want my character to shoot energy-like bullets from her gun
what I want is the flash animation when she shoots, then the bullet that travels in a straight line, hits wall or opponents, and flashes on hit
can someone help me out?
I'm totally new on this part
please ping if reply
I have the firing animation ready btw
and not sure if this goes in any other channel but I will appreciate as much help as I can get
@empty crypt you can get the flash by creating a particle system thats fired by anim notifiers inside your animation. for the bullet you have to make a projectile with tracing
How do I increase the length of this animation montage? Appending frames at the end does nothing :S
@karmic marsh hello, can you teach me how, please?
I literally don't know how to start
I'm using a notifie for the first time to play a sound to animate to
But when I click play, it plays it and doesn't stop playing it no matter what I do
Until it finishes
It's going to be impossible to go through and animate based on the audio if I have to pause every time and wait for it to finish
What am I doing wrong?
@misty marlin Montage is a combination of animation assets so it's not likely you can increase the length of it by appending frames. Instead you'll need to append frames to the animation that you want to hang around longer in that montage
Thanks, I just copied the asset and replaced the animations with what I needed.
I remember watching a tutorial on that a while ago.
I should have just not been lazy and gone back to be honest.
But thanks!! 😃
@wicked belfry First, make sure you're using an notify (which plays the asset once) and not a notify state (which plays an asset on each tick over a set period). And if you ARE using a notify, know that they're designed to play the set asset in its entirety. That's just how it works
"It's going to be impossible to go through and animate based on the audio if I have to pause every time and wait for it to finish" Not sure what you mean by this. Shouldn't you set your animations and then use sound notifies based on what your animations are doing?
Not an animator so I could be wrong on that last part
@empty crypt Here's the documentation on animation notifies
https://docs.unrealengine.com/latest/INT/Engine/Animation/Sequences/Notifies/index.html
Notifies are a system for setting up and receiving events in Animation Sequences to perform external actions.
That'll show you how to use them for your animations. If you're looking for help on actually making the particles...well that's a whole different thing 😛
@tawny lance I don't even know how to use that for what I want. Like I said, I'm starting from zero here.
Let me rephrase my question better.
What I want is my character to shoot energy beams from her cannon by pressing a key. I already have the animation for when she's shooting, now I need an energy sphere to spawn from the muzzle, and travel in a straight line until it hits something.
The weapon is not a separate object, it's already attached to the character mesh
Preferably, I'd also want the muzzle to shoot some sparks or a flash right when the energy sphere shoots out, and when the bullet hits something it creates another spark, like a ripple if it hits a wall
Can someone help me out? How to work with purchased characters? I got a character from a marketplace, it says rigged to Epic skeleton. After importing the chatacter, existing animations of cause are not accessible as skeleton files are not the same, eventhough the structure is. So, is retargeting animation blueprint is the only option? It will create a new set of animations and a new anim bp, but how to handle it if I need to change animation blueprint (add a new functionality), I will need to do that for all charaters's animation blueprints.
Is there any option to have a bunch of characters with the same animation BP and the same set of animations?
@empty crypt here are some guides that should get you going
anim notifiers in general
https://docs.unrealengine.com/latest/INT/Engine/Animation/Sequences/Notifies/
anim notifiers in use for example with trails
https://www.youtube.com/watch?v=5HkghxEIXiU
projectile
https://www.youtube.com/watch?v=IYbGEkMTT1U
Notifies are a system for setting up and receiving events in Animation Sequences to perform external actions.

AnimTrails are sheets of polygons driven by particles, which are emitted from the Sockets (or bones) of a Skeletal Mesh. (00:04) - Intro and Persona (01:57) ...

In part 3 we tackle firing projectiles and take a quick dip into the material editor! PS I briefly uploaded a previous version of this with an editing error ...
Thanks, will check it out
I followed a tutorial for a megaman buster-like effect, which is what I'm looking for, but now the camera is all messed up and it's not shooting
Can you help me find how to fix this? I'll show you what I got
so I have this character with a component called Projectile Spawn Location, located at the tip of her cannon (I need to figure out a way how to stick it to the tip because the animation moves a lot, maybe using a socket), this character has a socket on the tip of her cannon but I don't know how to use it yet
I already have a particle system and a bullet set like this, so particle wise it's fine
I also have a camera shake BP which I use when she charges her beam, it shakes the screen to show how strong her beam is
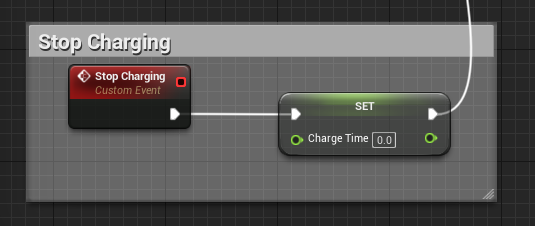
now as for the BP of my character:
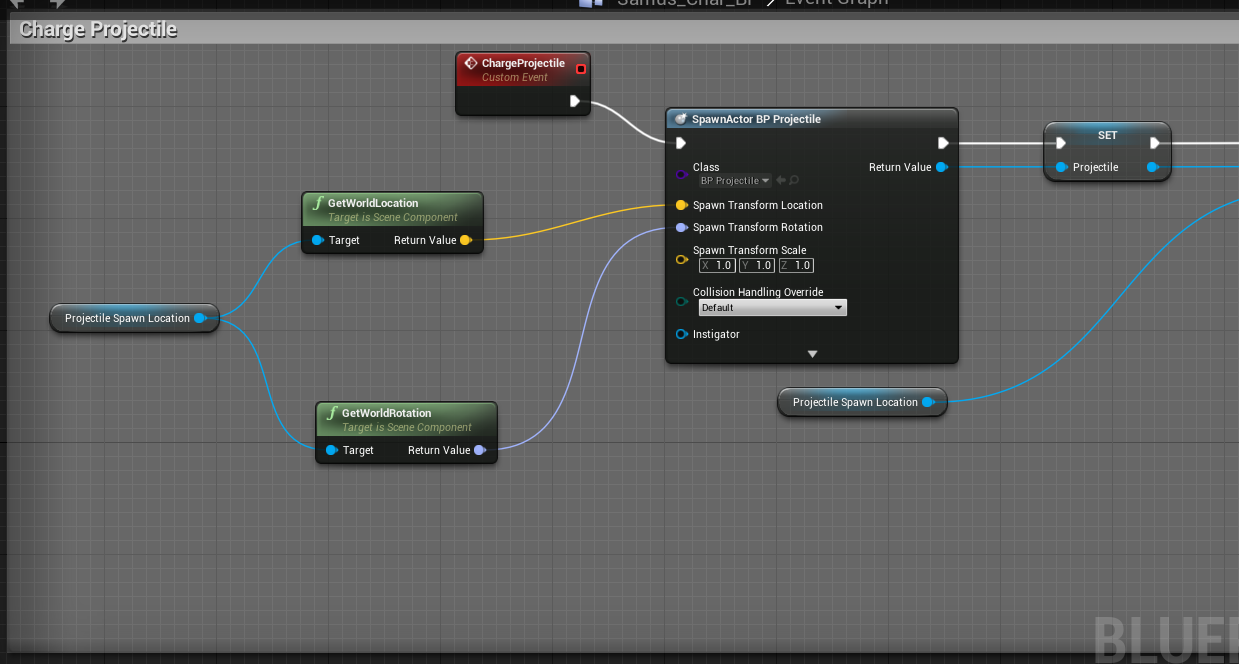
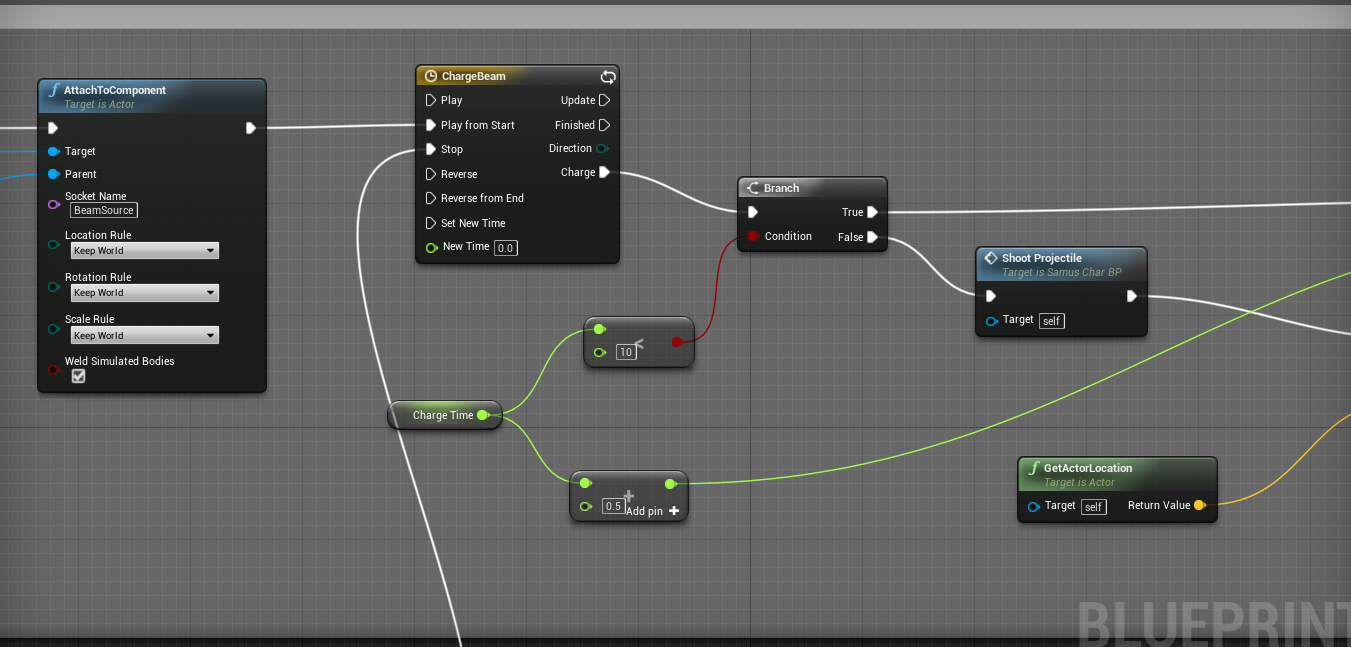
the charge beam one goes to this direction ^
and this one
@karmic marsh that's how my BP is structured, but it doesn't work as expected
I followed this tutorial https://www.youtube.com/watch?v=L3CoWUHS5TE
Hey everyone! Welcome to Let's Create! In this Let's Create we'll be looking at Megaman and his ability to charge shots using his Mega Buster. I hope you enj...
my level is a side scroller type but when I use this BP the player is now a camera that moves around very fast in first person
for the attachment go for "attachtocomponent" node and in there u can declare a socket name, then ur object will be fit to that socket in animations
yes, I have it set with the socket I created
the name of it is BeamSource, and it's attached to the tip of her gun
ok looks really good for now, can you tell me exactly what doesnt work? that helps to narrow down the problem
yes
my level is a side scroller one, and my character is supposed to spawn in one of these platforms, she's already animated and used to work before:
https://i.imgur.com/YHvQIzb.png
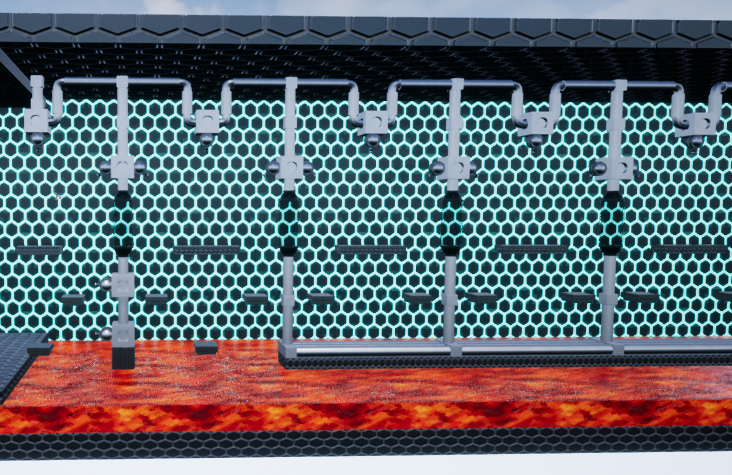
so she's supposed to move around and shoot the particle to be the beam (I haven't set the state machine for her shooting animation yet but that's another point)
so when I set this BP structure, it no longer spawns my character in side scroller, but instead spawns a camera in first person mode right where my character is supposed to be
my guess is that it's actually spawning the "ProjectileSpawnLocation" component instead of her
because of this
but I'm not sure
if it is a spawning problem check if you have more than 1 player start, or that it is positioned and set up correctly, also check your gamemode override settings
maybe you have a different character pawn set
ok one min
this is how my game mode looks like
one thing I noticed is that I cannot set my character mesh as the starting point, but instead I use the capsule called "NetworkPlayerStart" and that's where my player starts
I just copy and pasted the original game mode from SideScrollerCharacter and edited it to fit my character
that one spawns where you set the character mesh, but this one doesn't show the mesh, just the spawning point
it spawned my character properly before though
this is where my character is supposed to spawn
there should also be a normal player start with out the network
are you also starting the correct play mode? because there is one that starts from ur current viewort camera. or do you mean that when u start it sets you into a first person camera from your character?
the latter
it starts where my network player start is in a first person view
I found the player start without the network, how should I set it to have my character in it?
and also set as the new player start location
it automatically takes the pawn that you have set in gamemode, just place it in your level where you want to start
if that doesnt work:
check in your world settings if you have override stuff enabled
or
select your player pawn and enable autposess
ok, it seems to work now
I can spawn on my level, just gotta fix my particle system with the correct axis
the player start capsule reads Bad Size though
but it spawns all right
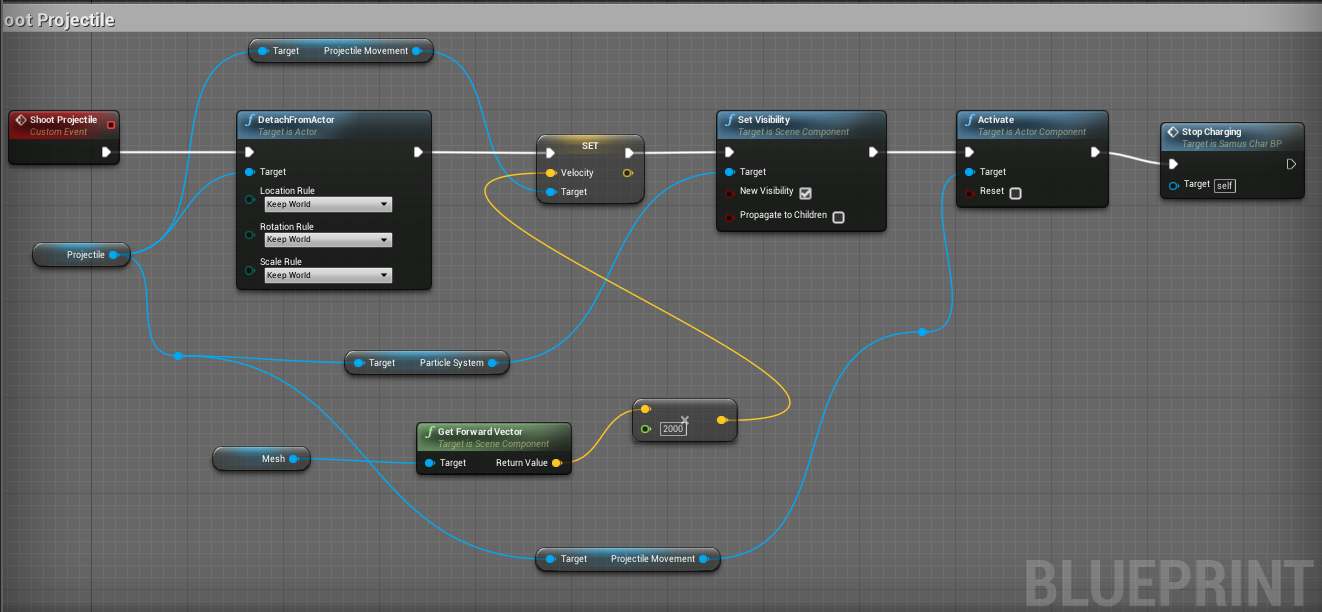
so how can I fix the projectile direction?
it shoots on the X axis but is supposed to shoot on Y (back and front)
can you show me a screenshot from where/how u shoot your projectile?
one min
yes
@karmic marsh it's supposed to shoot on the Y axis (green arrows), but it's shooting on the X axis (yellow arrow)
also, I still can't figure out how to set my character show in the player start capsule (before playing the level)
I can only see the capsule
i meant inside the blueprint sorry 😄 a screenshot of the function you made
probably there is some roatation or vector you have to set
https://i.imgur.com/VA93G9q.png this one
as a note, the mesh reference down below was SideViewCamera before editing
but it still does the same
just swap the forward vetor for the right vector
if u want to change direction by 180degrees then just negate the vector
ok
yeah it works now
now how can I make it so my character mesh appears in this capsule?
such as the default side scroller character does
I noticed now my level blueprint is empty
aren't I supposed to have a get player controller or something in it?
I don't really know how that works
if you dont want to do anything special i think its best to just place your player blueprint/pawn inside the level and enable autposess
where's the autopossess option?
@karmic marsh hello, you still around?
sorry mate, im also working, give me one minute
yeah don't worry, take your time
apologies for interrupting your work
ok so yours is a VR Pawn, but mine is not VR; is it supposed to be a Side Scroller Pawn and if so, where to find it?
the settings i circled are standard pawn settings, shouldnt matter if sidescroll, 3rd person or vr
select ur pawn in the level and youll find it
I found it now, thanks let me test it
ok it works now, and also fixed the beam spawn position, just had to change a reference to mesh and add the socket name to it
can you help me out on setting state machines for the shooting animations, please?
https://i.imgur.com/7VE9twv.png
I have an animation for Shooting Front which should play when I press the X key, but I don't know how to set the conditions
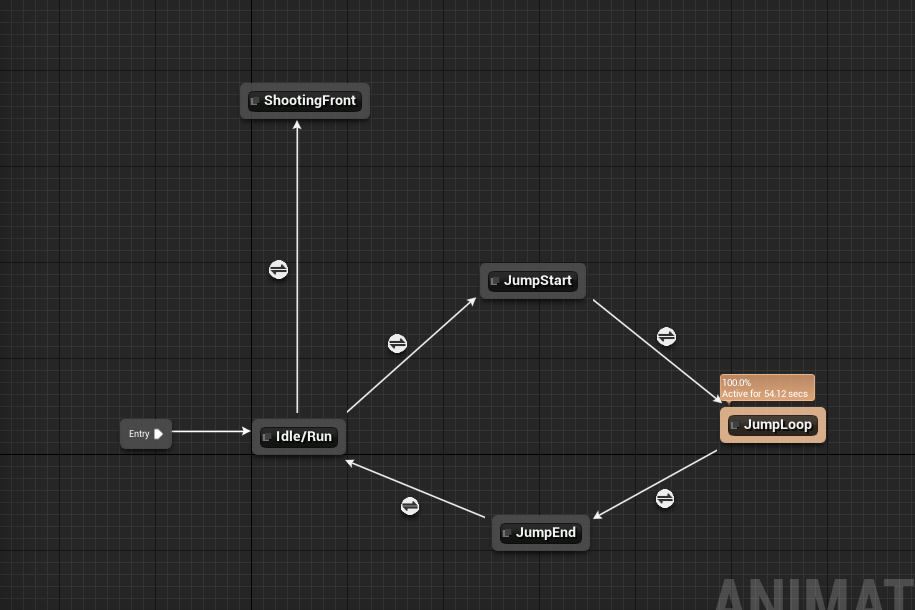
I also have Shooting Up and Shooting Diagonal, and those should be activated with X + W and X + W + D, respectively
these ones
additionally, she's supposed to freeze in position when she's shooting
and can move again when you press a directional key
@karmic marsh sorry for the ping, are you still available?
sorry mate i dont have much time at the moment.
for state machines there are a lot of tutorials out there
for the dependencies u have to figure out yourself
okay, thanks
Any must have tutorials for rigging and animating 3rd person characters in Maya for UE4? Have found this one for animating: https://www.thegnomonworkshop.com/tutorials/creating-game-ready-animations-for-production , but rigging seems pretty hard to find. Lots of cartoon characters but not many pro ones other than a James Taylor tutorial.

How do I animate morph targets in sequencer?
Seems like something that'd be obvious
but I can't find any info about it online
I animated the morph targets in an external program then imported them
but it only keeps track of skeletal animation
the morph targets are ignored
I can do some very basic maya animation
but I need a lot of practice
what do you need?
@misty dagger
hi i'm trying to set up some characters. i need different meshes for all 4 but i need the same animations redirected or something other all 4, i have the work flow im working with attached. if any one can spear some time to tell what to do? i did look online but every thing just distorts the mesh
How do you blend aim off set with firing montage? Currently I have two slots. default and upper. Montage is set on upper and on montage play it ignores the aimoffset.
ok this cache method is working fine http://prntscr.com/hh8czn

I have to ask, have there been changes made that would effect the way skeletal meshes are imported?
On the latest unreal engine version, when I try to reimport older skeletal meshes I have made, they all break.
Being way smaller then they should be and being rotated 90*
I used blender to create these assets
hey guys
im in the retargeting manager
and i cant find any skeletal assets
why is that?
Anyone else having your mesh turn giant and weird when you apply an additive animation?
Nvm. Refreshing all the things fixed it.
@manic patrol If I'm understanding you correctly, when retargeting by default only compatible skeletons (ie, sharing the same rig) will appear as options for retargeting. There's an option (I think it's called Show Only Compatible Skeletons) that you can disable and it should show all the skeletons. Be warned that you may not get the desired result though if they're not compatible
Retargeting animations for use between different skeletons.
is there an animation node that mirrors my animation or do I have to mirror my animation in my 3D software and change them manually in the animations graph?
I need help on setting a state machine and blend space for shooting animations triggered by multiple keys, can someone help me please?
please ping
Hi guys, How do I Trully desactivate the twist on TwoBoneIK?
I tried to uncheck AllowTwist checkbox, but it still want to twist.
I want to do that because I want to place my character's hand on a table. As the hand is flat on the table and doesn't rotate, the twist shouldn't take place.
can't you only filter for yaw rotation instead of any rotation?
Not sure if this is the proper channel, but im trying to convert some animations from the ShooterGame first person mesh to the default FirstPerson mesh in the example project, and the animation is not playing even if I uncheck remap reference assets and convert spaces to new skeleton.
i have the humanoid rigs on both the skeletons, but it's still using it's t pose when the animation is playing, is there a certain setting i have to click on the shootergame's first person mesh?
hi... i cannot seem to consistently import animations from blender into UE4... it's a combination of blender's and unreal's discrepancy with regards to scale/units, the FBX export settings in blender (i think)
i have the following process in place (that sometimes works, sometimes doesn't)... can anyone comment?
1 - Set scene units to metric and 0.01 scale
2 - Model and rig (including weight-painting)
3 - Scale rig up by 100 in object mode (only need to scale the rig, the mesh will follow if the mesh is correctly parented to the rig)
4 - Apply transform (CTRL + A) on location, rotation and scale
5 - Change scene units to 1(?)
6 - Create animation actions (with Active Keying Set: LocRotScale)
7 - Scale rig down (by 100)
8 - Apply transform (as step 4)
9 - Export FBX
normal meshes... no problem... but, anything with animations (specifically armatures/bones/rigging)... it's just one problem after another...
can anyone help?
not sure if this might help but when I import animations from Maya, I don't include the character mesh in the exported file
when importing character+rig, select the mesh+skeleton, then export
when import only animations from the same character, only select the skeleton and export
it will ask you which skeleton do you want to attach the animation to, then you select the appropiate skeleton for your character
left arm
I've retargeted the longsword animations from the marketplace onto the free character from infinity blade. the problem you can see above is that the left arm doesn't hold the end of the sword. do you have pointers for me on what I need to do differently?
@steel lotus hi, have you added a socket for the sword?
1Does anybody know anything about motion capture animation? I want to scout out peoples' rates.
@empty crypt hey, the image was made in persona with an added slot for the weapon. I've added the sword as a preview
is the slot in the left hand joint? did you relocate the weapon so it fits in the hand?
how does it look in skeleton view?
in default skeleton which comes with the pack there is only the right hand joint
I've added the soket at the same bone
but added a rotation of +90 deg because the weapon pointed in the wrong direction. otherwise everything seemed to be fine
I think I misunderstood your question then, I thought you meant the character was supposed to hold the sword with the right hand but it's actually the right, and the left is used to grab the tip
yes exactly
hmm maybe my retarget pose wasn't the same... I think I'll try to re-retarget it 😄
is this the animation from the mannequin?
I think so, at least it works with the epic skeleton
I never had this issue since the animations I import I make them from Maya so I know how to make it hold something;
maybe try to readjust the right_arm and right_hand joints?
just need to rotate them a few degress, not sure if will work because I never tried
I'll try it out. Thanks 😃
np, lemme know if it worked
@empty crypt thanks, i'll try that
np, lemme know if it worked
@empty crypt will do!
@sharp carbon You only need steps 1-4, then 6 and 9.
And that's only if you started with some model that was built in the wrong scale.
If you're modeling/rigging from the beginning starting in scene unit scale 0.01 metric you don't need to do anything special, just export at 1 scale like usual.
@winged valley i got it to work... although, i did it slightly different this time...
i did the modeling, rigging, weight-painting and animating in scene unit scale 1 metric
and just before exporting, i selected the root bone in pose mode and scaled by 100
that gave me the desired result in unreal engine... the mesh was the right size
the animations were the right size... it all worked!
It's a weird workaround though, better to just work in 0.01 metric all of the time.
Also you could check the physics asset if it looks right.
What was the new "anim dynamics" node called since 4.15 (?) ?
nvm found - it is called RigidBody
anyone here motion builder?
Just wondering if there's a way to prevent the root node from rotating 90 degrees when merging an animation via FBX.
it was working fine, it would keep my root stationary regardless of what I imported, then suddenly it started jumping 90 degrees on import.
Hi guys.
I used FABRIK to align hand of the character to weapon. On moving to some specific locations on the map, vertical offset is produced..

here is the question I've asked yesterday about. I haven't got any answers..
hoping somebody can help
Anyone here had a fun error where a montage gets corrupted for the editor but plays nicely in-game still?
Just trying to open it up locks everything up
Anyone know how to get root motion by manually moving the root bone?
I have root motion mode set to "Root Motion from Everything". But when I use the Transform (Modify) Bone node in the anim BP, and I manually move the root bone, this does not produce root motion.
Instead I see the entire character skeleton move around. But the capsule remains in place
So it appears that root motion from everything doesn't actually mean everything
RootMotion can only be extracted from single Animations, not an AnimGraph
Hello.. I'm being given two skeletal meshes with animations, both have a head and face with eyes and lips, and the second is just the face (same as the first) but with different animations/blendshapes. I'm trying to take the animations from the second face and apply it to the face in the first mesh. I was going to try making montages of the face, but I can't really retarget the face to the mesh with the body and the face. Is there a different way to do this, or any suggestions? Thanks
Copy Pose from Mesh.
so you'dhttps://gyazo.com/6a1aaa3d1b3c3bdbb515c322c3df962e have something collecting the

sorry not sure what that text was in buffer, ièm wondering how to drive the ankle here in Maya LT from 2 points
normally in maya ièd use expression editor but dont have in Maya LT
I'm trying to spawn a ragdoll with the same position of the main character so that the player can continue to play and respawn while there's still a body on the floor, but spawning this new mesh results in him being in T pose when he ragdolls, is there a way to set all the bones to be the same as another skeletal?
If I were to, say, offer cheap motion capture services, who would be interested?
I need to know what prices people want
I've seen as low as $200 for 4 seconds, or $500 + 15/second
And to me, that's really high for someobody who's a hobbyist or indie developer.
200 for 4 seconds is cheap? 🤔
How do I make animations blend without using animation blueprint?
Hey, anyone here know how to retarget an animation from Mixamo to the UE4_Mannequin
I have been at it all day, but no luck. I used https://github.com/enziop/mixamo_converter to create the root node, but then I cant seem to be able to retarget correctly, everything is in order hierachy wise and name wise but
GitHub
mixamo_converter - Blender addon for converting mixamo animations to Unreal 4 rootmotion
When i imported an animated character into UE4 yesterday and tried to play the animation in the editor, everything seemed to be fine exept the mesh for the character didnt show. Anyone know why
Well I sort of fixed it by applying root motion, but now only parts, if anything, of the animation show, like the characters hands moving but not their bodys
Alright so I downloaded some animations from Mixamo and imported them into Unreal. They worked perfectly fine. I imported the same animations into Blender to edit them a little bit (I just rotated one of the bones a little - an arm), and imported them back into UE4. Now they're sideways. https://gyazo.com/fa68f7fc785fed40dcfe2c2dcc0a12aa

I tried changing the import rotation when I imported it, but it didn't make any difference.
if its a little thing, you can edit the animation per socket within UE
Afraid it isn't :\
You probably need to export it from UE4 instead into Blender.
Is there any way to adjust a bone's rotation in an animation in UE4?
So basically if I want to use an animation but just rotate an arm to raise it a little bit across the entire animation or something
I mean, I see that you can do that in the preview if you open up the animation asset, but can you save it like that?
NVM, apparently you can just hit the Apply button. Awesome
..and suddenly the Apply button is greyed out? Okay
NVM, just had to add a keyframe. Topkek.
anyone in here good with maya?
Hi, i'm wanting to implement rag doll on a character that takes advantage of the newer immediate mode physics as shown here: https://youtu.be/FwDT2b-8x9c?t=16m42s
In broad terms what would I need to setup in the animation blueprint to do this properly? Do I also need to do somethings to the character such as disable it's collision capsule?
Would your PC or console game be more fun if you could fling about huge groups of ragdoll-simulated characters? (The answer is probably yes.) In this video, ...
Woo, i found this great video tutorial series From @vital sun that I think will answer all my questions! (thanks Jonas!) https://www.youtube.com/watch?v=dAOZi7rVuFA&ab_channel=JonasMølgaard

Like what you see? Consider donating to support the channel: https://www.paypal.com/cgi-bin/webscr?cmd=_donations&business=JUVNAEQP4W8UQ&lc=DK&item_name=Awso...
@valid trout hehe you're most welcome mate
buut, actually i didn't use that technique as they showed in the 4.16 video, since it wasn't available at the time i made my videos
yeah but I think it answers most of what I needed to fill in the gaps
i will cross my fingers for ya... how are things going btw? cooking up some good stuff?
i took a bit of a break for a few months (got hooked on playing Everquest for some nostalgia) but I'm back full force now 😃
Q: will this work? export the ue4 manequin to blender and then merge the rig with my .obj imported character mesh. weight paint the skin and then export the whole thing back into UE4. apply marketplace animations
..or easier just manually rig it in blender (suggested rig?) and import to UE4 and retarget?
I would think that would work.
If I wasn't so awful at vertex weight painting I would try it myself
hah.. yea, as long as a relationship is created between the verts and the bones then all should be good i reckon
@midnight crater exporting the UE4 mannequin to blender and scaling your model to fit that is the best course of action
Trying to make a custom Vive motion controller model and animation. The hand and Vive model have to be one mesh. Can anyone tell me how I stop the finger movements deforming the vive controller part of the mesh?
@lofty bear I'm more of a programmer dabbling in animation but don't you just have to make sure that you paint all the "controller" verticies' weights to have zero influence by any bone but the root (or one up from root) and that bone should have be fully weighted against all verticies that make up the controller.
@valid trout I'm dabbling in everything so have no idea 😃 I will look into what you've suggested though, so cheers
@lofty bear when I made a flail type weapon I seem to remember in maya you had to disable some auto weight balancing feature so that I could weigh each sub mesh (just simple cylinders in my case) to exactly one bone. https://i.imgur.com/wg5yXxW.jpg
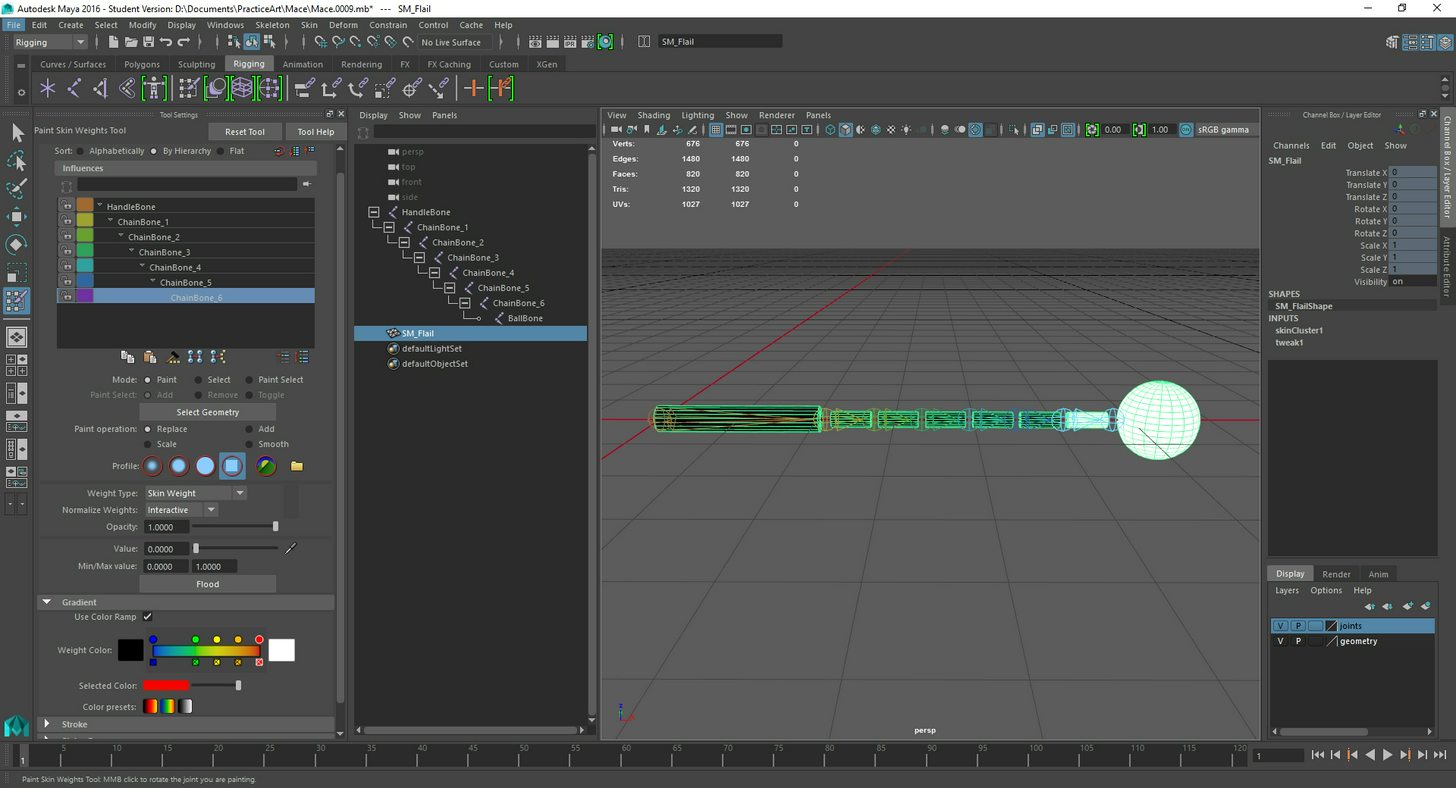
@valid trout I've just thrown in a couple more bones down the controller part of the mesh and its seemed to have worked. I'll probably re-rig the hand properly at some point
@sudden sedge thanks for the confirmation.. about to try now. strangely, the first video i've come across for this is from epic (livestream) showing blender and rigify as the workflow. msg me if you have any other tips! thanks
Can anyone tell me where this is located: https://answers.unrealengine.com/storage/attachments/190230-notanim.jpg

They say it's in the skeletal mesh component but i can't find it
Disregard my question, it has been solved
man i swear to god, ue4 is constantly importing my meshes as bones and its annoying af
So when I assign a skeletal mesh to a new skeleton, the virtual bones ive added to the skeleton do not transfer to the new mesh, but are still showing within the mesh's skeleton view window. Obviously I need the virtual bones from the skeleton to be present in all meshes using it, any idea how to get them to transfer?
Nevermind I had to restart the editor for them to update apparently
@urban spear does that option just ensure animation is playing even if the mesh is culled due to being offscreen?
yes
@valid trout I needed to enable it due to the bones not updating on the server (dedicated)
Hey guys, does anyone know how to make this work how i want? When i put this animation in the aim offset, it looks different. Animation: https://gyazo.com/5a9cb39efb1ed6c0933efebaa44032f1, Aim Offset: https://gyazo.com/f010ef06e6ac94366102a16b5e781a96

This is how i position the hands for different guns without having to reanimate all animations. Give me a heads up if you have a better idea of how to do this also 😃
@urban spear You can add some nodes in your animbp that will place your characters hands at specific spots (e.g. holding a gun) and it automatically animates your character's arms using IK to accomidate where his hands are. Would that help you? https://docs.unrealengine.com/latest/INT/Engine/Animation/NodeReference/SkeletalControls/HandIKRetargeting/index.html
Describes the Hand IK Retargeting control which can be used to handle retargeting of IK bones.
the talk about it a bit in this video https://www.youtube.com/watch?v=vZW8mxlQJEk&t=968s&ab_channel=UnrealEngine

Senior Gameplay Programmer Laurent Delayen explores animation retargeting and what it can do for improving your animation workflow.

A new test where I record the facial animation data from the iPhone X and import it into maya to animate the same character from our game Bebylon. This is sh...
@valid trout, i plan to do that, although, for example when the player is running, would i be able to incorporate movement in his hands using this method or would they be static?
Is there a way i can do ik add to existing?
Okay, i ahve looked long and hard and still have no clear answer on this
Lets say i want to have 5 different types of idle animation
each for a different state, do i create 5 idle states that link t the rest of the animation state options?
do i use a montage to accomplish this?
what is the best method for choosing when to use what version of the idle?
You at least don't do it in 5 states, either use random sequence player or blend poses by int or something.
well it cant be random
when i hold 1 hand item i dont wnat a 2 hand idle
or vis versa
what if i am tired, and i have a different animation for tired in all those states?
this is where i get lost 😛 complexity
the simple stuff is, indeed, simple
anyone see this happen before?
UE4 manequin t-pose imported to blender.. attempting to skin a replacement mesh to it
as i weight paint i get a weird rotation occuring
you might want to turn all bones off till you finish weight painting
Hello together,
I'm programmer, but no 3d artist myself. I'm currently reading a bit about animation retargeting and wondering if retargeting is really a good choice to get great results. Or if its always the better choice to create the model based on the same skeleton as the animations? Because if I understood correctly, there will be always some slight difference between the original models movement/animation and the one of the retargeted model. Or am I wrong?
Would be happy about some hints to get more on the ideal path regarding that :)
Thanks in advance
If you have an actual animator, it's best to create a unique skeleton for the model with all your needs
then make animations accordingly
if it's something common like a human, you can make most of your humans share the same skeleton
retargetting usually requires cleanup, but it's great if you have really tall or really short characters and want to reuse animations
fps animations aren't too insanely hard to make though
functional ones anyways
@limpid basin
Thanks for your reply @sudden sedge
do you maybe have a link with tutorials on retargeting cleanup for me? So I can have a look at it 👌
alright, found something! thanks anyways for your immediate answer 👍
It's a lot of manual tweaking either in unreal, or a modelling package
Creating an anim can get very confusing, the one shown is very basic one that I put together, but it will grow over time, when I add other states, I dont suppose there is an option where you can collapse ceratin areas to simply things, like a function in normal blueprints
@harsh grotto You can create a State Machine within a State, if that can help.
For your Prone2Crouch and vice versa etc.. you could reduce that to a single state using a Blend Pose By Bool and have the 2 opposite anims connected to that and the bool would be your IsProne
@nocturne vapor yeah will mess around with the blend pose by bool, but you can only have a true or false pose, if I remember right
correct, which would work for your case. if you want to blend between more anims you can use Blend by Enum or something similar
anyonw know why my sequencer wont render my cinematic camera and keeps making a new camera everytime i try to render
Thats true @nocturne vapor
Hey Guys I have made a robotic arm and used a joint based movement in Maya and I want to import it in Unreal. Are there any extra steps i need to take ? Also I tried to export it using Export to Unreal menu but it just takes ages to import 😦 There are many tutorials but they are kind of like for organic objects rather than mechanical one.
Could anyone please slightly help me out with anim blueprint?
I'm trying to set up my character so it uses blend space for walking (lower body) but different aiming animation for upper body. I need that to stabilize my gun while walking.
If I'm aiming (ironsights in true fps view) I want to split my animation so I can get rid of gun offset when walking left and right and when I'm not aiming then Just use default walk animation.
Here's what I set up
And here's layered blend setup
Thank you for any help
Hi guys, I've got all my animations for my wildlife. I'm wondering if there any tutorials on how to make the animals roam / be aware of surroundings with sound etc
@molten stump that question would fit perfectly in #gameplay-ai 👍
true lol woops
hey gents have an issue when i try to retarget my character to the ue4 mannequin. my character ends up being stretched but when i try to increase size the character blows way out of proportions
is there something im missing
hey everyone, I tried to create "fake leap hands" for other clients which I animate with the values of the original leap motion, transferred over the network. So I created an animation blueprint with the skeleton of the hands as base and applied my logic there. But now the original leap motion hands are completely broken. It's like my new animation blueprint is now being used by the leap motion, is that possible?
ye seems like I have overriden the original one... I just want to have another instance of it that a placed actor in the scene does use with MY logic
Anyone here using maya for animation?
If so how did you get the Artv1 tools working in maya?
I haven't used it but you need to copy a script from UE\Engine\Extras\Maya_AnimationRiggingTools to maya's script folder
I have it working now thanks.
Hey Guys, I'm going to start learning Animations in UE4 (using Blender) can any1 suggest me a good up to date tutorial that I can follow ?!
Hey guys, I'm trying to create a newspaper that you can flip pages with by grabbing the end, in VR.
I am just not sure what the best approach would be to do something like this..
I was thinking just to use a plane and add a bone to it and then possibly use the physx cloth thingy to make it wiggle around, but is that just a noob talking or am I on to something here?
Any input would be awesome 😃
I don't have much idea but you can use unreals cloth physics and make it a bit stiff that might do the trick
Just provide some steps to reproduce the issue
have you guys seen problems where your character model rotates 360 degrees to get from animation A to animation B? Is the only way to fix that to rotate the character model outside of Unreal?
I just figured it would take the shortest path rotation with an absolute value rotation, but it has to spin all the way around to blend sometimes
I had something similar a while back. If you're using Maya, go into the Graph Editor, select your keys and do Curves>Euler Filter. That might work
@misty dagger Was that to me? I'm using Blender. I'm also a total animation noob, but I'll give that a Google.
Yeah woops forgot to tag you. Dunno the equivalent in blender
thanks, appreciate the response
I bought the animations. I've only been modifying them in Blender when they're off-center or rotated the wrong way by X degrees
What would be a good place to buy basic animations? I know about the starter pack on the ue4 marketplace but I was wondering if anyone here knew of some good sites.
I just found out that if you're using blender to bring Animations to UE4, you might run into Scale issues where your skeletal mesh is ok but animations are way too small. Instead of messing with Unit Scales and etc, Just rename "Armature" to something else and then All the Anims will import with correct scale to UE4.
And you will have a screwed up skeleton which doesn't have root motion on the root bone.
Changing unit scale to 0.01 metric is the proper way to fix this and will allow animating root motion in pose mode.
And even more important it will allow you to share skeletons between different meshes if you want to do that.
Also when using Copy Pose to Mesh for attaching rigs to different bones in your rig like armor, hair and so on.
Animation showoff: https://imgur.com/gallery/Ex2NC
Hi, could someone explain me how should I prepare the wheels of the vehicle for animation in UE4. I want to build a completely arcade game with no simulation (not using Epic's vehicle setup BP), so the wheel rotation should be influenced by the accelerator and brake buttons only. The idea is to have a single bone per wheel, multiply its rotation by the accelerator input, but I cannot find the right nodes or techniques in UE4.
The UE4 camera's are frustrating to deal with.
If I rotate one too much it does a 360 in the other direction.
hello, I'm new to the community I have a question about le physique or skin, which is the most recommended for animations, I'm using the mixamo beep with its tranformation tool in 3ds max
Maybe the best animation i ever saw! Made my day FFS
https://www.youtube.com/watch?v=V5zsln8Mba8
1 Bullet is in hahahahahaha
omfg
😄
hah, clever
hey animation peeps
I have a general question with regards to animation workflow (using blender)
which is: do you generally start by 'blocking out' the poses throughout the entire timeline
and only then messing with animation curves?
like, is it very very important to have the general poses throughout the whole animation before messing with curves?
hey guys ive got a serious problem: Ive buyed two packs the dynamic combat system and the oriental sword animation set both are good now ive tried to implement my oriental animations to my combat system the problem is everytime when i try to retarget my montage the combat skeleton wont show up in the skeleton picker tab anyone has expierenced this before?
@merry rampart Yes, messing with curves is for polish only.
But with the master build there's a new f-curve smoothing (aka interpolation) that makes things look smooth anyway.
@winged valley have you expierenced my bug?
No.
Did you set up a preview asset? You open the skeletal mesh and there's a thing to the top right.
no i havent i think
Would it fix it when i have a third skeleton so like i add the two packages and then i would implement them into my third character? @winged valley
?
Wait, it doesn't show up in the list at all?
Then it's just not set as a humanoid rig in the retarget manager.
ok that will be the issue thanks!
btw how can i create a humanoid rig?
@winged valley
Retargeting animations for use between different skeletons.
No because if they did they would show up in the list.
Well maybe they are but yours isn't.
Ok
@winged valley now some bone got messed up
I'm sure this is a dumb question, but it's my first time working with montages. I've got a montage set up and playing, but the animation doesn't look quite right, like it's been damped or something. Any idea what might be causing it?
The animation looks fine if I don't play it as a montage.
Nevermind, I figured it out: the montage was really short and the default blend time was long enough that it never fully blended it.
Guys, so I’ve been using Blender for a while to make characters, objects, etc, but recently I’ve been interested in Cinema 4D, and I’m wondering if I should try out Cinema 4D. Should I?
If u want to make animation you should try Maya.
what do you feel is lacking in Blender?
Well its not used in production i think
yes it is 🤔
Guys
I tried to retarget the sequence's Trooper
But somewhy this is the result
Already checked multiple times, and the retarget rigs look fine (xpect the IK)
any ideas?
So if I try to manually rotate he arm, spine etc, then its fine
The retarget poses are the same
If i have multi slot groups say on a tank or something, i cna control each slot group seperately right?
anyone around i need some advice
Is there anyone here who rigs with Maya and is familiar with the Node Editor? I am looking for a way to control the Show/Hide function of custom attributes in the Node Editor. But I can't find a way to access attributes of attributes in the Node Editor. Is that even possible?
erm im not sure
what ver are u on?
if i remember correctly there is two advance view modes for nodes and attributes
its been awhile tho
i'm on Maya 2018
hmm fuck i cant remember
im sure theres like two advance graph sorta views
for stuff like that
but im sure u can expose custom attributes
but not sure if u can carry it to node editor
I need some help.. xD I'd really like for the hand rotation to not be connected to the ik. I made sure that I constrained my control just to the joint but it still seems to be effecting the ik. Something may be wrong with my ik.. I have it parented underneath my hand control. Something a tutorial I watched had me do. Is that wrong? I think that may be my problem. Any help is appreciated ❤ in the mean time I'll be attempting to figure it out on my own haha (:

nvm I figured it out! ^_^
Guys is there a way to know which AnimState is running?
So I've got a Blendspace set up, how do I determine the direction in the anim BP?
@pastel spindle Sorry that you have to ask everywhere but I don't think there's a way to do that I'm afraid
Notifies are magic! 😄
@fading yacht You need to get the values from the owner actor, so set it up in the Event Graph in the AnimBP. You'll need to do some communication between the AnimBP and the actor BP.
https://docs.unrealengine.com/latest/INT/Engine/Animation/AnimHowTo/BlendSpace/index.html
This gives some ideas on how to do that
Example of a Blend Space used to blend a character's animations from walking and jogging.

Added aimOffset animations today. Going to make for some very cool stuff! #gamedev #gameart #screenshotsaturday #ue4 #indiedev #3D #Animations https://t.co/q7t3EkRfxU
I love UE4!!! ❤
Anyone got a good understanding of islating areas / animation layers
So I posted this in the forums yesterday, but I'm gonna post this here too to get some extra input.
I'm having some issues trying to import one of the characters' animations into the game, but I'm having some strange troubles with it for some reason. When I import just the normal model, and it's skeletal mesh, it's fine. It's at the right angle and size. But when I go to import the animations for this model, using the exact same skeletal mesh, not only does it appear at a weird angle, but the model is super small for some reason. So small, that I actually thought it flat out wasn't there at first. XD What could I be doing wrong?
https://www.youtube.com/watch?v=0WmxPskyqQM
Video of the issue.

@modern kite there's multiple reasons, but the animations are not the correct scale..
one simple fix is to re-import the animations and set the scale in the import dialog
but really you should investigate and fix this upon export
The static model/skeleton and the animations are the same size though.
How's the unanimated model fine, but the animation isn't?
from where/how do you export the mesh and animations ?

could be apply transform that's causing this
applying on the mesh but not the animations or something
if you scaled the mesh/armature in anyway that could be causing issues to .. ctrl+a and apply scale
try a fresh file, make a cone, export with defaults from blender.. check how that imports to unreal, add a couple of bones, animate and export with defaults and see if there's any difference
Yeah, that's really your best bet. When it comes to animations and skeletons. You need to import and check it with every step of the way to learn what breaks it
every program is different
That's alot of steps just to fix one thing. 😛
Especially when I know the same animation and model works normally in Unity.
yeah but blender and fbx is weird sometimes
that's why animators are hard to find, and those who know what they're doing don't typically answer this group! It's honestly just one pain in the ass at all times
I've had to rip open my rigs a few hundred times when I was first learning just to get things to import
oh, i thought that was just me having a hard time 😃
nope. I use Maya, and I've been animating since UT2k4
it's always been a pain
don't get me wrong, I'm not an expert or a great animator by any means. But I've figured most systems out with enough persistence. Animations is not something I've ever felt comfortable dealing with still, there is just so many htings that go wrong
like I was saying in Lounge, for Maya if you use Component Mode to rotate your joint orientation you break it, if you rotate the joint itself, you break it. You have to use the specific Joint Orientation attribute to get it to work
adding constraints breaks it
I'm gonna try the scaling method. How do I do that?
i blender you do ctrl+a to apply transform to an object
but when you import an fbx to unreal you have the option to scale / translate / rotate
Can I scale a mesh in unreal editor and save it as for example scaled bigger?
you just need to figure the right rotation and scale for the animation fbx
or do i have to put it to blender first
I found it. Okay, looks like scaling it doesn't screw up the animation any, which is good.
Just gotta mess around with the numbers a bit.

SUCCESS
Only other problem, is he's not doing the facial expressions I animated.
@misty dagger You can scale whatever you need in the editor withouting needing to transfer it to Blender
all components have a scale setting if nothing else
orly?
no i mean can i save it as a mesh
that is big
or fbx
that keeps the scale
you can either change the import settings to scale it upon import, or create a blueprint and scale the component, you can scale the specific actor VIA properties menu, you can scale a static mesh and export it from your scene via the File -> Export Selected button
ty
I just want to scale it in editor and save it
unreal engine editor
but i guess i have to export

@modern kite You're using the wrong unit scale in Blender for UE4, it needs to be set at 0.01 metric, then apply transforms (and rescale the animations too). Technically it's a UE4 bug but they use Maya and stuff internally so it probably won't get fixed.
@winged valley I'm pretty sure I found a work around, but you mind walking me through how to do the method you explained? 😛
Sure (millionth time) first you set the unit scale to 0.01 metric.
Everything will turn really small, so you fix clipping settings if needed, then scale the rig up 100 times. Then apply object transform selecting scale (ctrl+a maybe? with default keys) for the rig and the mesh.
Then you need to scale up the animations too because all location keyframes will be 100 times too small, to do that go to the graph editor, click the magnifying glass and type "location", then select all curves and scale by 100, press Y to constrain to the y axis (meaning scaling only vertically) and confirm.
Then do that for every animation, kind of a pain I guess.
That will allow you to export at 1 scale and import at 1 scale so no weird workarounds.
Anyone tried building their own mocap suit usinig arduino/raspberry with for example MPU-9250 or used suits like Rokoko? 😛
Mike Erwin (previously Blender Foundation, now at Epic) started working on a GLTF importer so hopefully in the future we can just use that instead with Blender default settings and have everything work fine.
You scale the rig and the mesh will get scaled too if it's parented to the rig (which it should be).
Right.
I guess you can select both now but in previous Blender versions you could end up scaling the mesh double, that's probably fixed now but I'm still used to this way. 😛
Sorry, I'm still kinda a noob at this. XD How do I know when I've scaled it up to 100?
You can press N to open the N panel in the 3d view if it's not open already, then in Transform you should see 100/100/100 in Scale.
But you can just type 100 and it will get scaled by 100.
😛
make sure to 'ctrl+a > apply scale' after you scale an object
You should have 0/0/0 in location, 0/0/0 in rotation and 1/1/1 in scale.
(after everything's done)
Would I have to do this for each frame of animation though?
Since it saves that sorta thing as well?
on a premade animation i guess you need to correct it
but if you start animating from this point out you'll be fine
No just whole animations at a time.
I don't know what happens if you have scale keyframes, but you could just delete those if you want to have 1 scale anyway.
And yeah you would only have to fix animations you had already done in the wrong scale, from now on it's normal after you fixed the scale stuff.
Also it's a good idea to save a scene with 0.01 metric as your startup .blend so you don't forget to change it.
Okay, well, I got the scaling up part done atleast. Everything's looking normal so far. 😛
https://gyazo.com/1134c64375dafcdcfd9cc54ed2c8886c
So now I'm on this.

If you only keyed rotation you don't need to do it, rotation doesn't change after changing scene scale.
You only need to rescale animations using IK targets and stuff when you're actually keying location.
Ahh. Okay.
Alright. So I set unit scale to 0.1.
I scaled the whole rig to 100.
I applied scale using Ctrl+A.
You set unit scale to 0.01. 😛
That too. 😛
It matches up with the screenshot you showed, so I assume I did it right. 😛
So? Now do I export the animation?
You export everything, probably need to update the skeleton too.
Aight. I'll check back here in a few minutes for the results. 😛
Awesome! That seemed to do the trick! Thanks guys. 😃
Now I have a sort of second part to my question. How come the facial expressions don't animate in UE4?
Because you screwed up somehow. 😛
Gee. Thanks. 😛
Do you mean morph targets?
(shape keys)
That. 😛
You need to tick Import Morph Targets or whatever when importing the skeletal mesh, then make sure they don't have any weird characters like dots or whatever in the names.
Blend shapes/Morph Targets don't play automatically.
Oh yeah, you need to export the mesh too when exporting the animation.
Becaue the morph target animation is really on the mesh, doesn't have anything to do with the rig.
if you animated it traditionally, using bones/skeletons/joints and it's apart of the rig, then somthing broke
For sure, if you're using drivers it should work automatically.
but you have to import each blend shape separately, one at a time I believe, inside the Skeletal Mesh editor of that specific mesh, and then apply the blend shapes VIA an AnimBlueprint I think
Not really, they will just get imported as curves in the animation sequence.

And you can move them around and see the effect on your mesh?
Hmmm....No. Nothing's happening when I move the slider.
Even when you double click the mesh and move the morph targets there?
And do you have any curves for the morph target in your animation?
Well double clicking the mesh just starts selecting random bones in him.
I mean just opening it, you can click the Mesh tab in Persona too.
You should have Morph Targets in the top right.
I.....Sorry. I literally just picked this engine back up yesterday, so I'm not sure what's what yet. XD
How do I open the thing in Persona?
Persona is the mesh/skeleton viewer thing, it should have Skeleton, Mesh, Animation etc tabs in the top right.
Yup! I see those.
And in the Mesh tab, I should be seeing my morph targets to the right?
I didn't even see that option.
Like, at all.
And I've reimported this exact same model and animation quite a few times. 😛
https://gyazo.com/ee07a0560e74871acba7b2911c8ea343
THIS is interesting though. They even appear in this little graph in the animation tab.

Yeah that looks right, you just don't have the morph targets on your mesh for some reason.
How odd....
You need to click the arrows to expand the options when importing the mesh.

noice
Could you guys help out, if you don't mind?
I'm trying to blend my upper body interaction animation with locomotion
But I can't quite figure out how to only take the upper body animation to blend with the locomotion
Like, I assume there's some sort of "blend under hierarchy" or something?
nvm, figured it out!
If I have some SkeletalMesh "FPS Arms" and it animates differently depending on which weapon is equipped
what is the typical way of doing that?
different AnimBP's? different state machines driving by some variable?
1 state machine with different animations selected based on something?
change the animation BP depending on which weapon is equipped?
Anyone know if you can and if so any tut information. How to record your players movement with sequencer and make something that can be played back.
For instance, if say I wanted an animating asset of how to jump up on boxes. And it would just loop it in a level
Guys
I tried to retarget the Anim Start Pack to Unreal_Mannequin
But somewhy the mesh is splitting up
Could I maybe get some help? I'm trying to export an animation from Blender then import it into UE4 but somewhere along the line the scaling fucks up and when I import the animation it's really small
you can change scale when you import the mesh and animations
that's the easy fix
probably off by a factor of 100 or 10.. if your not doing stuff in inches 😃
.. my workflow with blender is to leave everything of default
i dont change working units to cm or m.. just leave it to default blender units
1unit = 1m
I'm using metric, and I've tried scaling it up by 100 and 10, and it still didn't work
with default export setting it imports correctly
When exporting*
there's also a apply transformations and a scale factor in the fbx settings when you export
play with that
That's what I've been using to scale
it also matters when you change to metric.. if you already have a mesh and change the units to metric if messes up your scale
best to change units on a blank file
I always start out changing the units to 0.01 and setting it as metric
The mesh is already in 0.01 and metric, so that shouldnt be the issue
sometimes you have to apply transforms to the mesh (ctrl+a)
What do transforms do?
if you press n to pull out the side pannel
there's position, rotation, scale
if you scale your object x2 the scale will read 2.0
after you apply it the scale will be 1.0
ooooh so the export scale should be the exact same as the scale on the N menu?
no
bellow the besic transforms in the N side pannel, you have also dimensions
check that to see if you model is correct size in blender
x=52.6cm
i'm guessing your scale export setting should be 100
yeah, set it to 100.0 when you export the mesh
Ok
i'm guessing here.. since i just use default blender units which is the same as setting it to metric meters
do a new file.. the default cube is 2m.. export it and check if it's 200cm in unreal
dont change units..
then do file/append and add your model to this new file
scale it in relation to default cube, export and check
if you open the mesh inside the unreals mesh editor (just double click in content browser)
you should se it's size
looks right but just to be sure
have you tried appending your model to the new file ?
No, but I can try it give me one sec
file / append .. navigate to your original .blend
go into objects folder, select your mesh
after scaling ? or after ctrl+a?
After scaling
press , on keypad to focus
might be inside the default cube
or send me the .blend file and i'll check
@BattleHawk Did you solve it?
Anyone else not able to delete virtual bones without the editor crashing?
Been an issue of mine since 4.14
When should one use a StateMachine and when should someone use an Anim Montage??
@terse bone StateMachines are good for blending between many different animation states within a pretty nice and intuitive graph system, where-as Animation Montages are animations that are able to be played on the skeletal mesh when you call any of the 'Play Anim Montage', 'Montage Play' 'Play Slot Animation' or 'Play Slot Animation as Dynamic Montage' nodes, which are more-so used for animation-type events like reloads, melees, opening doors, etc. Note that you can play any animation sequence as a montage (See 'Play Slot Animation as Dynamic Montage'). When you play an animation montage, it plays inside something called a 'Slot'. You have to place a slot node in your animation blueprint to specify where in your graph the montage will play. For instance, if your player is running around, and he wants to reload, you wouldn't want the reload animation to play completely over everything else, so you'd want to make the reload montage play only on the player's upper body while the legs are still running around. You'd for instance have a slot called 'UpperBody', and use a 'Layered Blend Per-Bone' node to blend your upper body slot and the rest of your animation blueprint together somewhere along the spine. That way you'd see your movement animations playing on your player's legs, and your montage (when you call it) play only on his upper body
@late kiln awesome info thanks. Helped clarify when it is best to use each.
@terse bone No problem, good luck!
I guess the use is kind of in the name... State Machine being useful for blending between persistent "States"
Montages for one off things
the "one off" things often have to blend with the other stuff
like State of Running
but you're reloading at same time with upper body
I'm more of a cpp guy...Animation setups is a new realm for me to learn
@terse bone Yeah people tend to struggle with montages at first simply due to the fact that the name 'Montage' is misleading from what its most commonly used for haha. While you can mash up multiple animations into a single montage and play them back by specifying which 'section' the animation is attached to inside the montage, that purpose is secondary to its primary use for being able to quickly/easily force animations to play within your animation blueprints from other blueprints in my opinion