#animation
1 messages · Page 90 of 1
Where?
I moved shoulders a bit forward....
In what program? 😛
Blender
Did you reimport the mesh/skeleton?
I even changed position of the shoulders in UE4
but that didnt work
I used old mesh, new mesh , new skeleton , old skeleton
s a m e t h i n g , s a m e e r r o r
I'm spending literally 2nd day on this.
You could try and force it maybe? When you're keying, key as whole character and push down as an NLA action, rename it and import it
It'll most likrely duplicate anims with a bigger name but you could give it a shot
What's wrong though? Can't really see it.
You're aware of the FOV difference between Blender and UE4?
The shoulder do not match the version of Blender.
Coverop animated the shoulders a bit forward but in UE4 the changes dont seem to reflect what has been animated
New skeleton , new mesh , old skeleton , old mesh... NOTHING works
Did you reimport the animation?
It never works right? Always works for me...
Can you try importing it into a new project for now?
Ahh so my issue maybe isnt with the blendspace but somehow the character is not getting the reference to its speed?
huh
How are you doing that then?
lol
Every, single, 3D program doesnt like me.
Maya , 3DSmax , Blender , SFM , UE4 , Unity
all hates me
Then you're not successfully reimporting the mesh/skeleton/animation.
It's the same skeleton/rig I'm using.
I'm gonna check the settings I used for the new project.... in old project
Ah i see what my problem is @winged valley haha it has nothing to do with speeds or blendspaces. I was casting in animupdate to the wrong BP... derp
OK. I figured it out.
The rig that I've been using for long time.... I have messed up the bones retargetting properties (I did that so animations from Mannequin could somehow match the mesh)
Any1 here?
Pretty sure everyone ignores messages like those. 😛 ... oops.
I'm trying to interpolate between two blendspace modes
It doesn't really work
What did I do wrong?
You need to put the Get of Transition Float into Current.
Also that node is supposed to run on tick or something so you should probably use a timer for that.
Update Animation is basically tick.
Ohh
Didn't see that green pin
One sec.
Hmm
Weird glitchy stuff happens
Not a smooth transition
I watched a tutorial on FInterps but my situation is... unique haha
I'm trying to cheat
Hmm same old question from me - should I derive animation notify events from UAnimationInstance or UAnimationNotify whem extending out in C++ ?
i just started rigging, painting weights etc.
and i feel like there should be a reddit or gallery for first time rigging, animating
fucking hilarious results
some of these are begging me to delete them
i am using ue4 and im trying to use the given skeletal mesh of the third person character to create animations but when i export them out of blender and back into ue4, for some reason only rotations are animating and not any relocations. if i create a new skeleton when i import it does let me create a new skeleton which does work but i want to use the original one
show me @ruby swallow
Do AnimNotify run on some kind of tick or animation or something to that effect?
it seems to fire when I move my character around a little bit. If just move one step it doesn't fire but when I move alot it does.
@cinder ocean texture stuff isn't really a question for #animation, try #graphics
How do I export only the animation of a character from 3ds max? this is the tree of the model:
Hello if i import the ue4 manequin into blender will it be all ready to go to make custom anims using ue4 skeleton ?
No, you will get a Maya mess. Use a custom rig like UE4Tools instead and retarget to whatever your skeleton is in UE4.
@broken geyser It's better to use a rig made for Blender instead so you get IK bones and rig controls. Also pretty sure the bones are supposed to be connected so any location transforms are ignored. If you retarget a custom rig animation to the UE4 mannequin it's the same thing as using the original one.
The main benefit of the ART Maya plugin is for fast rigging and a nice interface when animating, correct? Are there any essential reasons to use it for UE4 characters vs a custom rig (no facial controls just body movement)? Maya LT still doesn't support python and the full version of Maya costs way too much.
Yes, it's for rigging. It's just a normal rig really.
I want to create slide animation, but I don´t know how to change character position in animation (If I dont change it my character will fly.). Please help me. Thanks.
How do I setup IK for vehicle suspension in UE4? (I simply want to move my vehicle actor from A to B over the terrain and have vehicle react to the terrain in a more or less believable manner) Vehicle actor is just a BP actor with skeletal mesh (vehicle).
Hey guys - anyone around?
I've run into this issue that I ran into once before - I'll change random things in my game and all of my sudden my player animations will stop working correctly - as in the walk animation will be twitchy? I think it has to do with animation blending. But like I said I have no clue why it's happened when I litterally didn't modify the animation class. It feels as if it's a bug.
Dope. Reloaded my project and now it's not happening.... I'm so confused.. Is this a known bug?
@winged valley can I ask you a few questions in I regarding the rig?
Sure.
can i create an animation based on the base mannequin provided by ue4, change the bones or w/e, and then retarget it to the ue4 mannequin?
@winged valley (just in case you need to be alerted to see my message)
Why would you change the bones?
good question, my idle animation was me just lowering the arms and chest up and down lol
If you want to retarget to the UE4 mannequin your rig should look like that too.
couldnt figure out how to do idle with just rotations
Did you try UE4Tools?
no im not sure what that is, ill google that

It's the best rig for Blender at the moment.
You can use it to make animations for the mannequin skeleton (or just use the rig directly), it has IK controls so it's easy to use too.
so if i animate using this rig how do i stick that onto my existing mannequin (sorry if its an obvious answer i just started doing this two weeks ago)
Have you used retargeting before?
i have only tried it on animations and it has never populated anything in the skeletons field so i assume iv been doing it wrong
Probably. 😛
But it's pretty easy, especially with that rig.
First you need to name the rig in Blender "armature", that way UE4 will discard the extra root bone.
Also you should set up your scene units to use metric 0.01 unit scale before doing anything else.
Here.
Did you install the addon?
oh cool the scene units is already set in the ue4 template given
yup just got it working and found it in the menu
Okay, then rename it "armature" and make some simple animation.
ok, do i rename the HeroTPP_Character armature or ? because he has a thing in him called armature
You rename the rig object.
Also the UE4 Tools rig by default has a bone called "Bone" you need to remove, you can enter pose mode and it should be in the elbow, a tiny bone.
Then enter edit mode and delete it.
You can delete it from the template later and save the file so it never happens again. 😛
ok i found bone at the botton of the bones list under elbow, deleted!
still not sure how to rename the rig object (because i dont know exactly what you mean by rig object yet lol sorry)
Then after you made some animation you can export with Face smoothing, in Armatures disable Add Leaf Bones and enable Only Deform Bones.
thank you so much for the help so far by the way, you rule
In the n-panel under Item there's the object name.
in the n panel i see "item" with the name in it, is that it?
oh thats what oyu just said lol great
😛
Then you can make a simple animation, doesn't really matter what it is. Just insert some keyframes in pose mode.
how do i show the bone manipulation thingies with those weird pyramids?
o_O
By default the rig is set to IK mode, just grab one of the red ones and move/rotate them.
or do i just have to select stuff in the scene menu
Or the pelvis.
ok
Yes, you'll have to select in the viewport.
They have custom bone shapes so they should be easy to select anyway.
also is it better to do whole character keyframes so i dont have to select the whole guy every time i insert one or just do the frame for the thing i want specifically and reselect the whole guy
Just selecting a single thing should work, but it can be good to set a pose on all bones at the same time if you're new to animating, that way you can easily change timing later.
ok, i used locrotscale and im going to export this thing, you said the only changes i have to make to the default export is disable add leaf and enable deform bones
Yeah.
ok import menu on ue4, anything i need to do here or just leave as defualt?
Make sure import animations is enabled. And the skeleton should say None.
Then in UE4 open the mesh and go to the skeleton tab and go to Preview Scene Settings, there you need to Apply Preview Mesh.
ok preview mesh applied
Next click Retarget Manager to the top left.
In Set up Rig you press the None next to Select Rig and do Select Humanoid Rig.
It should auto detect all of the bones and set them up for you.
oh baby
Then you can do the same thing for the mannequin skeleton, no idea if you need to do that though, maybe it's set up by default.
after the auto detect do i need to do anything with the new rig? save it or something?
After you've done that you can right click your animation and choose Retarget Anim Assets.
Maybe save.
😛
In the retarget dialog choose the mannequin skeleton and press Retarget, that should do it.
nothing in the select skeleton so i probably need to do it for the default skeleton
Yeah, but it's the same thing so it should be easy.
👍
AND it has ik
you are a fucking god my friend
i shall burn an effigy in your honor
genius
How do I export only the animation of a character on 3ds max?
hey all. when you create rigs for first person games, do you add an extra "weapon Attach" bone?
@misty dagger No, the weapon attachment is done through Sockets on the skeleton in UE4
ive run into an issue with socket attachment points where the weapon doesnt orient properly.is there a way to either set the rotation in BP, or freeze rotation on a certain axis?
You have to zero-out the values on the Z,X,Y axis on the weapon, in the viewport
it is already
the socket is following the rotation of the hand bone
i had to rotate the hand a bit when i animated it, to get a proper grip
check if the gun rotation is correct on the Preview asset on the gun socket
yepp. all good
like i said, its following the hand bone
you can see what i mean with it at an angle
i guess what im asking for is a way to control the rotation of the weapon or the attach point
like its working properly, technically speaking its just... wrong i guess lol
You can rotate the socket itself.
ooh how do i do that?
i figured id set the rotation value in my weapon class, so it changes based on the weapon
Just rotate the socket itself in Persona.
yeah but is there a way to set it in code?
just rotating it and leaving it may cause issues with rotation for other weapons
You can just make a socket for each weapon.
😛
Why be smart when you can be lazy?
You can do it in BP/code too probably, just type socket and see what you can do.
theres only a GetSocketRotation. doesnt seem like i can set it
i guess ill have to cheat and do it with the weapon itself
You can also use a virtual bone if you really need to modify it at runtime.
(using modify bone)
so do i make the Virtual Bone in my character rig inside UE, then in my weapon class, make a character reference, then use modify bone to change the rotation?
i attached a Virtual bone to my character's hand.r bone. does this mean it replaced the bone, or is it just following it?
PlayMontage() is broken
i want to turn the blendspace jog that comes with the anim pack from a rifle jog to holding a melee weapon jog, is there an easy way to do this or do i need to change the 4 direction animations independently and work them into a new blendspace
when i enable root motion on an animation, the character rotates a bit on the Pitch, how to fix that?
Fix your animation? @cinder ocean
@misty dagger It follows it. But the socket method is way easier. Virtual bones are usually used for IK.
@misty dagger I don't see why the C++ version wouldn't work when the BP version does.
@cyaoeu#1358 neither work for me
@misty dagger Can you show your setup?
uhm
all i do is call "PlayMontage" and give it the montage into the bp node
then in my animbp
i have a slot
with the one i use on the montage
thats it
Where are you calling Play Montage?
ive tried calling it from a custom event on my anim bp
and also tried doing
Mesh->GetAAnimInstance->PlayMontage
I tested it now and it works.
if it works
thenm its not obvious
which means its badly designed
if u have to read/watch more than 1 article/tutorial on how to get a single function to work
then i would say its poorly designed
That's all you need to do.
Most times I heard people saying montages aren't working they were triggering the montage node on tick, which means playing the first frame of the montage every frame.
Did you get it working? 😛
hi there
Just try it some other time then. 😛
xd

@winged valley basically i want the montage to play at the same time as the sound
on the network
the second image is from my ai controller
yea
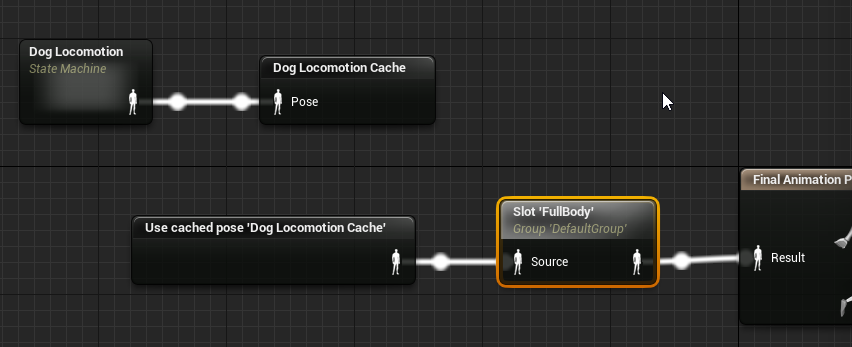
What happens if you remove the cached pose from the input to the slot node?
In the anim graph you have Use Cached Pose hooked into the Slot node, try removing that temporarily.
It should play the montage still, if you trigger it.
You should at least test that and see if it works or not.
hm
ok
so just
put the slot
and nothing else
no default pose? @winged valley
Nothing else.
ok
Just see if the montage works at all.
Then it's not getting triggered correctly. What BP are you calling Play Montage from?
@winged valley AI Controller
Does it have a skeletal mesh?
How are you getting the skeletal mesh reference?
GetControlledPawn()->CastTo<ACharacter>()->GetMesh()
like that basically
but in blueprints
Okay, should work I guess.
Did you try putting Play Montage at begin play or something?
uh
no
interesting thing is
if i put my attack animation (not a montage, just the anim clip) at my state machine
and set it as the entry default
it plays
The animation or the montage?
Try moving Play Montage into the actual character BP on Begin Play.
Because maybe it's not getting called correctly from the controller.
"Why?" is not a good question to ask when troubleshooting, just do stuff until it works. 😛
Not necessarily. I mean playing an animation from the player controller sounds pretty weird.
but i mean
im just calling the function
from the AI Controller
im not Playing it
lol
All I know is that it's working for me but not working for you.
So you can at least try stuff you think are weird anyway. 😛
@winged valley .-.
No luck?
o_O
@winged valley yeah im just at work and got meetings
sadly :l
i wish my game made enough money
so i didnt need to work
join the club 😐
How would i go about animating a door to violently shake, when triggered by a blueprint? Any help is appreciated 😃
The blueprint being a part of the door itself
Is it possible to blend animations? Currently i can reload and jump, but my legs doesnt move when i reload and i want the leg portion to be use with the jump animation when playing reload and jump
Yeah, you can play a montage only on the upper body for example.
@winged valley i want to turn the blendspace jog that comes with the anim pack from a rifle jog to holding a melee weapon jog, is there an easy way to do this or do i need to change the 4 direction animations independently and work them into a new blendspace
Demonstrates how to blend animations together, in this case, a character that can move and fire a weapon at the same time.
Uh, don't know really.
ok, ill try changing the animations and see where that takes me
though i cant for the life of me manage to copy Jog animations onto the mannequin in blender
You could probably do the same thing, replace the upper body animation and keep the lower body animation.
It's possible to get UE4 animations into Blender, you can retarget the mannequin animation to your rig first, then open the retargeted animation and export using preview asset.
i tried that but im ight have messed something up a long the way
Then you can import the animation and bake it to your control rig.
ill give it another try and write the steps im following down
I've got a script for the retargeting part, you could try it out. It's not very tested though.
im down but i want to try it out first and let you know what steps i did, you might know exactly what my issue is
Sure.
ok heres how i do it, using all default values
- find animations initial skeleton (ISK)
- make sure it has rig setup as humanoid
- have new awesome skeleton (NSK) ready with its preview applied and rig setup
- retarget animation from ISK to NSK
- export animation as fbx
- import animation fbx into blender
Instead of 5. you could open the animation and export using the preview mesh.
ok
How do the bones look with your method?
at which stage?
6
at the end they look like the old school ones i had before i used the new mannequin you showed me, a series of pyramids, ill take a ss
You won't get the control bones back from UE4 so that's normal.
That's why I made a script so you could get the UE4 animation onto your control rig again.
Not sure how useful it is though, personally I don't have a use for modifying the UE4 animations, I just make my own anyway. 😛
id love to make my own but i am a crap and running animations are hard
i moved it a bit away from the other one so you can see it
oh fuck it worked like magic when i did the preview mesh
there he is runnin along
wait i might be getting ahead of myself, i think its the same thing just now it has the mesh
Ah, okay.
The benefit of exporting the preview mesh animation is that you get the results after retargeting, for example if you decided to set some bones to Skeleton when retargeting.
not exactly sure what that means yet lol but anyway, now how do i take this guys animation and put it on my guy?
he seems to have a similar rig to the original mannequin, he doesnt have the circles and red grabbers
Yeah, all that stuff gets removed when importing into UE4.
is there a way to reattach all those thingies? is that what your script does?
Yeah, it bakes the animation from the bones to the IK controls and other bones like the spine bones.
Here is animation data vs preview mesh btw, the right side is the preview mesh version. The animation was screwed up from the beginning (in UE4), jog_fwd_rifle. Setting the upperarm twist bone to skeleton fixes it. And is exported with preview mesh.
any chance i can get you on voice? some of this stuff is going a bit over my head lol
Honestly it doesn't matter. The preview mesh is a better alternative most of the time when exporting animations from UE4.
And my script assumes you exported with the preview mesh. 😛
But you can test my script if you want.
sure
It's not guaranteed to work. 😛
im sure i messed something up and it wont work because of it lol

You need to make sure the control rig has the name armature and the imported animation should have the name root.
After pasting that into the text editor, select the imported animation and click Run Script.
Then you probably need to fix the pole targets (red balls) because you're using the IK control rig after running the script.
Here's an example of the script and the pole targets. As you can see he looks a bit comical because of the angle of the knees being wider than the original animation.
mine looks like a murder victim, hes in pieces, gonna start this from a fresh mannequin lol
Also there's some glitches on the feet, I don't really know the cause, maybe because the FPS is different when exporting from UE4 (kinda weird, maybe a bug).
If you tell me what animation you're trying to retarget in Blender I could try it myself. 😛
eh anyone watched my vid ?
Yeah, but no idea what the cause is.
right now im doing the 4 jog rifle animations so i can turn them into melee jog animations for a melee jog blendspace
so i have the nce mannequin renamed as armature and the imported preview mesh, now im gonna open up text editor, paste your script and run
having root selectted, hitting run script
After running the script you can remove the imported animation/rig. Assuming it worked. 😛
ok so it looks a lot better than last try lol
hey @winged valley i managed to create a "hack" to fix my weapon's alignment. basically setting its rotation when the weapon's equipped
Setting the weapon rotation?
like compensating for the improper alignment by rotating it in code.
Okay, interesting. Personally I would just make 20 sockets which have the right rotation from the beginning. 😛
the marketplace inventory system im using only uses one attachment for weapons.
it worked cyaoeu, you are a god my friend
@broken geyser You can check if the feet are messed up on any frame, if they are you can rotate them back into place and insert new keyframes.
yeah i was wondering if theres an easy way to adjust them without doing it frame by frame
if i do it on just like locrot with the feet selected would that fix my issue?
And for the CS_ball bone you can set the X Y rotation to 0 and they should be pretty good.
Yeah.
Actually doing that on the feet fixed them too. 😛
But if they were facing some other direction you can just nudge them and they should snap back into place, except the CS_ball bone I mentioned.
i made the adjustments and with both CS_balls and CS_foot selected i created a keyframe at 1 of locrot but then it just snapped back to the way it was
its not a big deal though
it only looks bad on the first frame
alright now i just gotta change where the arms are, thanks homie!
Shouldn't snap back though. o_O
You might want to delete the keyframes on the IK hand bones before starting so they don't snap back all the time when animating.
And you could use the Pose Library to save your poses.
i think i figured it out
i wasnt selected the correct element when i was locrot keyframing
now im going frame by frame to find all the other weird bone things
can i delete a row of keyframes from the dopesheet? like can i just delete the ik hand keyframes so i can make my own ones?
@dusk dove yeah, how? it works normally when root motion is not enabled
@broken geyser Yeah, just filter for IK and delete them.
i just did it manually with border selector
actually while i have you here i wanted to ask you something
can i take just the legs from this guy and make them a separate thing or even add them to another one?
i want to have a kicking animation that is independent of this body, i want the kicks to come from the camera
You can remove the legs from your character and have another skeletal mesh (legs) that does some other animation.
Or just add more legs. 😛
the way my horribly designed character works is that he has both a mannequin and just arms, the arms are attached to the camera so you can aim up and down with them
can i attach a pair of legs to the arms so when you kick they come out of the camera?
I guess. But just try it and see if it works or not.
can i copy the pose data for just a few objects not the whole thing?
Yep.
sweet how do i do it
Or you can select the bones to paste to I think.
these google searches never go anywhere for me lol
You need 2.79 to actually only create keyframes for the selected bones in the pose.
oh dang that just came out, aight
If you want to use 2.79 you can press a button "Import previous settings" or something in the splash screen, then you'll have the same settings you had before.
the screen with the robot dude on it?
Robot dude? 😛
oh he was a robot in 2.78, now its some cartoon guy, i saw the thing, thanks
alright got my stuff up to 2.79, gonna try to figure out how to do the poses
How do I make a root motion animation InPlace? so it stays in place
Hey, I'm looking to interpolate a hand through multiple gestures (potentially up to a dozen). The way I understand blendspaces, it would force me to go through multiple of those gestures before getting to the right one (unless I can do something like 5 dimensional blendspaces). Any idea what's the best course of action in this case?
Probably a pose asset.
That being said driving poses this way using pose assets is not super easy.
You could also use a montage and put each pose in its own section.
Hi Unreal peeps, I have a quick and easy question. How do I open the Blend Space UI, instead of continously opening my Blend Space file from a folder?
@winged valley Unfamiliar with either concepts, but I'll look in that direction, thanks 😃
@knotty sandal not sure what you are asking, i open blendspace ui either from folder or from my graph
@broken geyser How do I open it from the graph?
in this case i would click on bs aiming walk to open that one up
to have it in there to begin with you can either find it in the asset browser and stick it in or just search it in right click menu
Ahhh, I found a way haha. What I usually did was like a 5 step process where I would go through my folders just to click the BlendSpace file. But I noticed that I could click the blendspace file directly from the list of animations.
Thanks!
how do I make a root motion animation NOT move the character out of place?
I'm not an animator, but I need to whitebox a basic move set. If I have, for example, walk / jog / run animations is it best practice to create a blend space for each of those (idle->walk, walk->jog, jog->run) and blend between spaces. Or do you put all of them in a single blend space and go from idle->walk->jog->run?
Hello there.
please can someone here share with us the archive for "Maya Auto-Control Rig Script" from mixamo?
the plugin are not still avalaible on their website
we want to quickly create control rig for our charcters with mixamo rig structure, in order to speedup the production for our game prototype
@cinder ocean Disable "Enable Root Motion" in the animation.
@clear zodiac Don't know the best practice but Epic put them all in one.
hi there
How can I make smooth animation with find look rotation node
?
the character turning to target but he doing suddenly
Use an interpolation node and put the tick or a timer into the delta.
I'm going insane trying to just make a simple hand gesture in the editor. I used a duplicate of an animation sequence from the VRTemplate, but everytime I place the fingers how I want them, it somehow crated keys everywhere on the timeline. I can't just delete those keys as that snaps the bone back into place. Any idea what I'm doing wrong/how to fix it?
it's a completely static gesture mind you
Well I really need a few hand gestures, it is pretty painful but if I knew how it worked I'd take me an hour at most
Can I just get rid of the tracks altogether?
It's a pain to navigate and I don't need actual animation, I'll just blend between gestures in a blueprint
Alright, I fixed that misunderstanding. I'm still wondering how to transition between multiple (static) animation sequences. Say I have 10 gestures and want to change from one to the other, are blendspaces still appropriate? If they are, how do I make it work since I'm limited to 2 dimensions?
so, let's say I rigged, animated and exported my character into UE4... Then I made a dozen more characters with the same rig. How do I use anims from the first character with any other character I bring into the project ?
You set any other characters to use the same skeleton when importing, or change the skeleton later.
@worldly ibex You could use Blend Poses by Int and set an int variable that drives that.
Or put all of the animations in a montage, each with a different section, and play a montage followed by jump to section.
I see, thanks
@devout dagger If you need to change any existing character to use a different skeleton you can right click the skeletal mesh and do Assign Skeleton.
what would the circumstances for switching skeleton?
@winged valley Right! Blend poses by int, I think that's what I'm looking for, thanks
@devout dagger If you imported the first character with skeleton1 with a bunch of animations, then imported the second character with skeleton None creating a new skeleton2 without animations. Now even if the skeletons hierarchy/orientations etc are the same you still can't play skeleton1 animations on skeleton2. To fix it you can change the skeleton for character2 to skeleton1, that way you can play the animations again.
gotcha, thanks
@winged valley it doesnt work, because the animation is root motion by default
@cinder ocean It does work if you enable root lock below enable root motion.
Force root lock I mean.
true, thanks
why is it that when I check root motion, the character stays in place and rotates 90 degrees?
and when not checked, he reproduces the animation, getting out of place, but the capsule stays in place
Is this the proper channel to discuss Sequencer?
ummm
need help lol
on my skeleton the weapon looks fine its in the right spot and what not but
in game
its off on the side
nvm fixed it
lol
moize opel tutorial
quick little question how do i stop my player movement while attacking like i want it so when i attak even if im clicking forward for my character to stand still and attack
Try setting MovementMode to MOVE_None maybe
Or turn on root motion extraction, thatd a bit of a hack though
I think it's just DisableMovement in blueprint if I recall correctly
@cinder ocean is your root nulled out?
@light atlas how do I do it?
Well usually when you do root motion you wanna make sure the objects transform is nulled out, meaning transforms and rotations are 0 and scales are 1. You can check in blender when you press n.
Not sure if thats a cause but its worth checking I suppose
nulling out inside the engine or on the 3D software before exporting?
@cinder ocean are you doing any RETARGETTING to the Epic skeleton with this asset?
no
then you're safe to ZERO OUT the root & all bones on its T Pose.... but you must ensure that your animations are all working correctly afterwards. if you zero it out - and the animations had initial rotation values in them from the OLD SKELETON (if it had rotations in the firs tplace...) then you'll have to redo animations
the reason I asked about the RETARGETING - is the EpicSkeleton (GOD BLESS WHOEVER FUCKIN DID THIS) has a 90 degree X & Z rotation
making the damn characters DIP between animations blending..... only with retargetted animations that arent 90 in these axes in teh first place
this is all just informaiton overload for you - in case you find your character DIPPING between animations... you'll now know why
its not pertinent to what your doing now
and for clarification - sorry.... do the zerioing out in Blender - then export & reimport to engine.
sorry yes, zeroing out was the term I was looking for, my bad c:
I zeroed out the character and ALL bones in 3ds max and the mesh imported succesfully
but the animations ^
as i just said....
the animations previously had rotation values
you'll need to redo animations on the NEWLY ZEROED out skeleton
if you know how to retarget (in maya this is) properly - then you'll have no problems
i'm unsure of Blenders capabilities when it comes to animation retargetting
Maya & MotionBuilder are 2 great resources for this
I didnt do the animations nor the model, they were ripped from a game
yeah
yeah the characters have that final fantasy style
so if you're needing the SAME animations it had... you'll have to retarget them in a DCC
otherwise - apply/make new animations tot he NEW skeleton
Or just don't rip Mesh and Anims :D
You are not allowed to use them in a released game anyway
honestly - there is nothing that the epic skeleton CANT do when it comes to prototyping
i dont even use custom mesh anymore for prototypes
how do i get a montage played for a character to work on a different character?
different skeletons i tried retarget but all that does is just make a new anim sequence for that skeleton
i need to play one montage and somehow it will play for both skeleton and retarget somehow ????
any way to see my sockets in ue4 for some previewing?>
Anyone use the UE4 live stream mannequin and have this happen on open? I can't figure out how to fix mesh placement in object mode.
Maybe you're not allowing python scripts?
But I recommend you don't use that rig and use the UE4Tools instead.
how do I remove animation movement on 3ds max?
thanks @winged valley
@cinder ocean filter by keytype and just delete them

do i really have to make a new animBP and a complete set of new anims just to change the mesh of a character.... ??
AHHHH fuk it im just going to reskin the dam mesh raw so i can reuse these anims....
@cinder ocean late reply, I use the curve editor and just delete the keys I want to delete
Hey guys, imma copypaste something here
Did anyone encounter the following anim bp issue?
I needed a state machine for both character's hands with shared logic, but different input
so I made a separate animbp and included a sub anim instance in my character bp for each hand
surprisingly it didn't work out, compiler detectes an infinit loop for no apparent reason


So what I did is created yet another anim bp that just wraps around the original hand bp
and that actually does compile and work fine

So the question is, am doing it the non-intended way, i.e., there's another way to share logic with different inputs
or is it just a random editor bug?
so, how does one set up IK for legs for example ? (in UE4, not in 3D rigging/anim app)
by using a Two-Bone IK node and applying any logic you like to move its effector transforms
How do you make that fancy background for the text? 😛
Also it could be a good idea to enable Deform for the pole targets/other IK stuff and export them along in your skeleton.
test
Nice. 😛
o_O
yeah, triple backticks at the start and at the end
Does it keep formatting from pasted text?
it should probably keep tabs
Shouldn't morph targets on Additional Meshes get triggered from curves? Like I export facial animation, the body is the main mesh, my head is an additional preview mesh, curves don't affect the head's morph targets. 🤔
(sharing the same skeleton)
Is this a bug? 🤔
below on the track
you have to select the move gizmo then follow the rightclick menu in the GIF
where you scrub the timeline
ye
Guys had anyone made a character in blender?
Yes.
I am struggling to make a simple low poly human man
Plus the rigging is too confusing so can u do any help in that ?
Oh in the user preferences right?
Okay
After that do, while importing it to the engine will I need to retarget the model?
You will need to retarget mannequin/marketplace animations to the UE4Tools skeleton, but because they match perfectly it's easy.
Yeah
You'll need to make an own rig for that.
Well in my First attempt I made one but it turns out to not be "joined" with the main structure and is separate...
I asked this question already, but still having problems. My character's attack animation moves him out of place, but the capsule component doesn't follow the movement, so I was supposed to enable root motion. But when I do, the character permanently changes his rotation, adding more degrees to that rotation every time it's executed. I've tried zeroing out the root bone on 3ds max and importing again, but doesn't work. How could I make the capsule component follow the animation movement?
Which direction does the character move?
!?

like the first one, the character moves out of place
Can you upload an .fbx somewhere of just the rig so I can take a look at the animation?
😮
It would be nice if you could extract the single animation, 229MB would probably take some time to upload too.
with the single animation its 82MB, because the character has 220 bones
Ok, seems kind of overkill but whatever. 😛
well thats why theres over 7 billion different animations here
which one is the animation your having trouble with? theres over 6000 frames here!
🤔
try with 3ds max if you have
I don't. 😛
The last time I used 3ds Max was in high school when my teacher told us to go pirate it. 😛
lol
Anyway Blender hasn't crashed or anything, just seems like FBX import is really slow. Can't really blame it when it's reverse engineered.
the export is slow as well, took 2 minutes to export
Is there a reason you have all the animations in one timeline?
I ripped the model with the animations from a game, and it came like that
Fair enough. 😛
right so the problem here is that the char does not reset back to default position
because he takes 2 steps forward on the attack
The problem is that the root motion is spinning crazy instead of just moving the root forward.
ye
im guessing maybe too many bones having movement keys might be messing with root motion
Only the root bone should affect root motion.
have you scrubbed all movement keys from all bones except root?
he does go back to his initial position
the first animation is without root motion and the second is with
he only goes back because of the interpolation from his idle animation or rather the blending between the two
well try removing the movement keys from all bones except root bone
filter by current transform?
ye
just select all bones except the root bone
select the move gizmo then filter by current transform
then delete all the keys they should be red
did it, now i will import into ue4
do i have to zero out the root bone translation?
@misty dagger look what happens now https://gyazo.com/8de42af3ab3b9712b694c4502f6eaf11

Constraint node (4.18) set to only constrain rotation. Video by Lina Halper.
Actually maybe it's in 4.17 too? o_O
I have a looping Run Animation and I have some Anim Montages that should blend to different frames in the Running Animation.
How Can I do that?
You can put notifies in the running animation and trigger montages from that and blend in the anim graph.
@winged valley is that related to my issue?
oh ok
I couldn't even open your animation.
You can try to trim it for real so I can open it, then I can take a look.
Just make a copy of the file and remove everything but the frames you need, then move them to the start.
alright
@winged valley there, 2.8MB: https://drive.google.com/file/d/0BwRE48sXXie8UWIxbGEzaC1pWTA/view
Google Docs
That didn't even load the animation for me. 😛 But I can see why the root motion is messed up, the root bone is in the middle of the character, rotated 90 degrees, and the character is rotated 90 degrees too.
And the rig is scaled 2.54 times, probably max inches stuff.
Honestly no idea how to fix that, it would probably break all animations.
You could try fixing the rig by rotating the root bone back to normal (pointing up from 0,0,0), freeze character transforms, then retarget the animations to the fixed character.
what do you mean by retarget?
Retargeting animations for use between different skeletons.
Making sure location/rotation is 0 on export.
i had done that already, and the character moves downwards instead of going forward
its weird
aanyone know how to get anim notifies to work mine wont fire ?
nevermind for some reason the animation is never getting to the end so it never hits the notify
When I am using a Blendspace(1D) my Anim Notifies get played twice with some delay. Anyone knows a solution for this?
Nevermind, deleting the BS and recreating it solved it
@winged valley got a question for you
i have an animation wherein the character takes a step forward but i didnt want to actually step him forward in blender because im assuming thats just gonna move his mesh not his whole character
so i just have him appear to move and not actually move
now im trying to make him move in unreal but im not really sure what the best way to go about this is
i need him to move for about 10 frames in the middle of the animation
right now the only thing i can think of is putting notifies at each of the movement frames and push him forward just a hint but that might be a stupid way to do it
i cant figure out how to use a timeline here
Is it a player character or AI?
If you have a Character type BP it also has a character movement component which handles the movement of the capsule.
it is an ai but he also have a movement component
has*
how do i engage this with the proper timing
oh i got it, ill have the notify happen and the beginning and end of the animation and set a bool, then in the update animation event which i believe runs every tick i can move the character forward
Yeah, or use a state machine.
I want to create crouch animation. I have created Crouch BlendSpace and Walk BlendSpace. I have found with Debugger that all veriables are set up correctly, but the animation doesn´t work Please help me. Thank you.
Your setup with the bools is kind of strange, you should probably Set it to true when pressed and false when released.
If you want it to be a toggle you could use a flip flop node.
You should probably show the inside of some state too.
(kind of hard to see what's not working now)
And the anim graph. 😛
@dim charm
@winged valley what would be the best function to use to move my character forward? i tried addinglocaloffset and MoveUpdatedComponent but both move him in the wrong direction sometimes
You need to set the forward vector as the direction.
this is called every frame for about 17 frames during the animation
the timing works fine, its just that sometimes the guy doing move forward even though im using forward vector, i tried forward vector from mesh and capsule, and getactorforwardvector
ill see if i can make a gif of him movent
moving
You could also try MoveToLocation (if you've got a location). 😛
i can find the location a step a head of him, would i use a lerp to smooth it out?
but i wouldnt have a curve in there, hmm
cant get these darn gifs to work lol
If you use MoveToLocation it should orient itself if you set it up to do that.

i see simple move to location
You need to disable "Use Controller Rotation Yaw".
for the moveto or for what i was doing at first?
For Move To Location.
For the real Move To Location it seems like the target is AIController.
So you would Get AIController.
There's also AI Move To.
ah i see it
ok this works wayyyyy better
saved my ass again
now i just gotta figure out what to do when hes right on top me of swinging like a mad man with no where to step to lol
😛
ok if i set the radius to something reasonable then it looks ok when hes not moving in place
You could also have a collision radius around the enemy character, if it overlaps the player you could set it to stop moving.
Er, collision box.
Trigger volume. Something. 😛
the acceptance radius on the move to works perfect actually
i just call the move to when it hits the right frame and let the radius sort it it out
i can even move him back with the same principle
is there an easy way to ragdoll an enemy?
@winged valley know of a good way to ragdoll an enemy?
When it dies or when it takes damage?
from a special ragdoll attack
it can also ragdoll when it dies but in that case i dont need it to come back
i wanna kick these dudes and have it ragdoll
i got the hitbox and animation of the kick i just dont know how to force em to ragdoll and push em back
Physical animation maybe?
whats that?
Maybe overkill for what you want to do though. You can check the content examples for animation/physics examples.
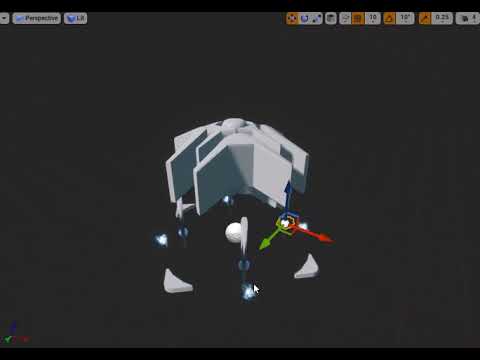
i wanna make the character move like it does when simulate the physics asset
Or if you want to try physical animation which is a bit crazy there's a stream: https://www.youtube.com/watch?v=N1tDjbFXeOo

Announce Post: https://forums.unrealengine.com/showthread.php?121376 The "Physical Animation Component" is a new feature in UE4 with a lot of applications. I...
then ill just create an impulse force push
Set All Bodies Simulate Physics and Set All Bodies Below Physics Blend Weight for simulation stuff.
ok ill give that a try
Actually Set All Bodies Below Simulate Physics.
the bone im assuming should be root?
You can try a bunch of different bones.
k
root doesnt seem to do it, ill try pelvis
ok i got the simulating part working
you rock homie!
woah weird his capsule component doesnt come with him
ok ill just bring the capsule with them manually
now how do i turn off the ragdoll and bring them back to life lol
Animation Pose Snapshots can capture a runtime Skeletal Mesh Pose inside a Blueprint and can be used for blending in or out of additional poses within an Animation Blueprint.
why cant i use the same animBP for a different skeleton character? it has proper retarget and i can use one skeletons anims on the other... but not animBP ????
They are skeleton specific. They need to share the same skeleton if you want to use the same anim BP.
You could try retargeting the anim BP itself though.
that just makes a whole new anim bp and a thousand new animations linked to new skeleton
Yes. 😛
so i need what 10 of the same exact animbp and 10x10000 of the same exact animation just because my characters have different skeletons ???
But if they need to share the same anim BP they should have the same skeleton. You can reassign it by right clicking it.
the anim retargets work just fine i dont understand why i need so many different files..
You could just create a new anim BP and copy paste all of the node/logic.
seems very tedius to maintain
You could try Create Child Blueprint Cass.
No idea if that is still skeleton specific though.
thats what i tried its still skeleton specific
Then you're screwed. 😛
The copy paste method is probably the least painful if you need the same logic without retargeting all of the animations.
The FBX file format cannot represent the transformation of some nodes in the scene due to the limitation of FBX SDK. To avoid this, adjust Bone binding matrices of the problematic Skins.
what does that even mean?
https://youtu.be/zWL68GvXMLo does anyone know how I can make child components inherit parent transform updates in animation?
Might be a bug or oversight from epic, but when I set my mesh to simulate physics Copy Pose From Mesh stops working and his armour no longer follows
Anybody ever seperated head and arms from the body? I tried to do that in 3DS Max. I just cut the head, then imported the mesh back. Everything works if the animation is not playing. As soon as the animation starts the character starts to deform strangely. Any idea what can cause this?
top picture is 3DS max. Character head is cut clean. Middle picture is when animation is not playing. Everything looks fine. Bottom picture shows deformation. All the scales seems to be right
Here is the running animation from side view
If i look closely, i can see some polygons from this side. Those are the ones that deforms the mesh. They are normal however if the animation is not playing
@smoky shell Your armor needs to be a child of the main skeletal mesh.
HI there. I am working on a 2d game here on Unreal Engine with paper 2d. I've done most of the animation of my character but there is one thing that i litteraly can't do. The Run animation. My character is 64*64..anyone have some tips? videos? something? Thank you ❤
Hi guys I have a character that needs to prone on uneven surfaces e.g. a slanted hill I have the collision sorted but now I just need to use ik to adjust leg positions for animations etc depending on the variance of the slope. So his legs follow the hill rather than sticking out straight .Anyone know how to go about this or where I can find tutorials or reference material . I'm using the ue4 manequin thanks
whats the best way to have a bunch of running animations with the same leg motions but different upper bodies?
like i want the guy to run with one handed weapons and two handed weapons but i dont want to reanimate the run for each type
Layered Blend Per Bone.
Animation nodes that blend multiple animations together based on a set of criteria.
do i need to then have a "base" running animation where the bones i want to animate are in the rest pose or does that not matter?
Hey Guys, I have been working on a multiplayer game and have set up a skeletal mesh with Animation blueprint that changes animations based on player speed. It is a walk run animation blend. However when I play the game in multiplayer, the mesh doesn't show any animation. What could be the problem. Can anyone help?
@broken geyser It shouldn't really matter, you can just have an upper body pose. You're blending the upper part anyway.
ok cool
@winged valley That doesn't solve it, the mesh is lying on the ground and his armour is floating in the air, looks like some joint rotation is trying to follow along but nothing else
what are the pros and cons between using anims with root motion and on-the-spot anims (and moving character via code) ?
root motion is generally smoother looking animations, but less responsive to controls and I think harder to set up in UE4
not sure if it's still the case, but there at least used to be networking issues with root motion too
@sacred spire have you had a look at some tutorials? A quick search came up with this: https://www.youtube.com/watch?v=_irS13Bn30I

I outline the process of creating a side scroller character in Unreal Engine 4 using the Paper 2D toolkit. This video was created as part of my teaching degr...
thanks @dim cloak
@motorsep#8292 As @dim cloak mentioned, Rootmotion only works partly in a networked game.
Afaik Rootmotion is only networked, if you set the Root Motion Type to "Montages only" (not sure here atm).
Root Motion has the advantage that you can move your characters precisely with your animation
I have a 3dsmax animation imported that heavily relies on rotation and subtle changes in that rotation.
for some reason when I import it into ue4 it removes all these subtleties. the smoothing of curves is totally gone.
does anybody know how I can get these subtleties properly in ue4?
its like all the curves of the animation are set to linear the moment I export
Try baking the keyframes.
thanks but I tried all that stuff
What is the FPS set to?
60
And Use Default Sample Rate is not ticked?
yea, though I also tried it ticked, and set the animation to 30 fps in max
but the rotation speed stays linear instead of the subtle curves I created
You could try ticking Preserve Local Transforms. But I don't really know what's wrong, I don't use Max.
normally I bake my animations down into a vertex animation but since I need to use multiple meshes for this effect I dont want to waste space and only make the animation once.
I opened a whole can of worms with that because either ue4 or max 2017 are fubarring it
<_< saved it as another fbx version (2013) and it works
well that was 1.5 hour wasted
thats been a clusterf.. for vertex colors so I dont even touch it anymore
instead of being nice and applying alpha-vert color the way I painted it, it randomly assigns an alpha value to random verts
^ that joke cost me a day to find out
thanks for the help btw @winged valley
https://i.gyazo.com/87a8abff826620d990e9bb6a729b90e1.gif low fps gif not being the best way to show it.. but meh
FBX is a mess in general. 😛
fo sho
is there a way to make the ue4 mannequin partially invisible either in blender or in ue4?
i want to use the mannequin just for the arms and legs but its hard to work around the torso and head being in the camera
@winged valley
You can just delete the parts you don't need.
Or move the mesh to another layer and just watch the rig.
i cant figure out how to do either of those from these dang videos lol, ill keep looking for some better tutorials
i dont think im selecting the correct parts of the mannequin or something
You can select a bunch of vertices in edit mode, do Select Linked All, then delete the vertices.
working so far, ill report back with my results after i render it, thanks homie
hmm after i deleted the torso i think it deleted all the bones or something because now i cant manipulate anything in pose mode
Deleting something in the mesh shouldn't affect the rig.
You don't even need a mesh for a rig, it's just helpful that you can see it. You will need both a rig and a mesh for a skeletal mesh though.
ok
i think i just accidentally deleted the bones the first time, this time i kept em
its still showing the torso area when i import it into unreal, do i need to change anything in the export/import settings or something?
Probably need to reimport the skeletal mesh itself.
yeah i imported the whole thing, skeletal mesh, skeleton, physics asset, with and without textures
Try opening the skeletal mesh and pressing Reimport at the top.
says failed to reimport
o_O
If you imported the first time with a mesh and rig you'll need to export the same thing in order for the reimport to work.
not sure what you mean
If it's a skeletal mesh you need to make sure both the mesh and rig are in the new .fbx.
Failed to reimport usually means you only exported the rig, or only exported the mesh.
gotcha
i exported it with the default settings in blender, all the parts checked, and it still says failed to reimport
man what a pain just to make something invisible lol
i can screen share this if you want, maybe im doing this wrong?
I tested it and it worked for me so no idea why it doesn't work for you.
Try going to Editor Preferences and then Miscellaneous, under Import tick Show Import Dialog at Reimport and try importing everything again.
While you're there you can enable Blueprint Break on Exceptions in Experimental, usually a good idea to see BP errors as they happen.
oops
ok gonna try importing, im using blenders default export settings and these import settings
now when i try to reimport it pops up that same box, and with nothing different, it failed to reimport
multiple roots are found in the bone hierarchy
In the UE4 Tools rig the IK controls for the hands and the pole targets for the legs and arms are not parented to the root bone, not sure if that's a good design.
yeah i noticed that when i tried selecting everything under root
also when i tried reimporting it says failed to merge bones, probably something i messed up, one sec
i managed to merge it into the just arms and legs version, wonder if this works!
seems to work!
I think those bones should really be parented to the root bone though, no real benefit to having them outside of the root. Especially when converting in place animations to root motion animations.
If they are outside of the root the rig will get messed up when you move the root bone when instead everything else should just move with the root bone.
But it's an old addon, probably made before you could remove the extra root bone by naming the rig "armature". So you wouldn't get an error even with deform only ticked (because of the extra root bone).
i still have the blender files so if it doesnt change the way it looks i can reimport them after parenting
No idea actually, you could try it out.
ill give it a go, lets figure out how to parent stuff
In the bone panel (bone icon) there's Relations, you can set the parent under Parent:
(in edit mode)
when in edit mode, what part of the hierarchy do i need to actually select, because when i go to Armature -> Pose -> CS_ik_hand_l it goes to pose mode again
Click Armature instead.
ok in Armature -> Armature -> CS hand, i am under Bone -> Relations and i see parent but its grayed out and says Disabled: this property is for internal use only and cant be edited
anything i need to tick or something?
woops...
gonna see what it does to the old animations
The template is in AppData\Roaming\Blender Foundation\Blender\2.79\scripts\addons
UE4_Mannequinn_Template.blend
I don't think it will do anything to the old animations except if you animated the root bone.
So is movement lock for montauges only if its a root motion animation?
Did any body by chance save the Mixamo Control Rig script before they shut it down ? If you have it backed up can you send it to me?
nevermind found it in a youtube video description - in case any body else wants to help back this up forever --- https://www.dropbox.com/sh/0050we75xa4wepk/AABHhcSxISH6e3RbJUcs3sgwa?dl=0

Does anyone know how to make montage blend times scale with play rate?
I am wanting to speed up attack animations as attack speed goes up, but blend times remain static
Gets to a point where blend time is longer than animation itself lol
I see FAnimMontageInstance has "DefaultBlendTimeMultiplier", but it seems to get applied to blend in time before I can modify it on the instance created by UAnimInstance::Montage_Play()
I guess UAnimInstance::PlaySlotAnimationAsDynamicMontage would work, but means I would have to use a raw animation rather than a montage which isn't ideal
does anyone know how to properly transition once a WHOLE animation in the state is completed? I understand how unreal does it in the templates, however sometimes the animation goes back to the start and jitters. The only way to fix this is transitioning when the time remaining fraction is like half, meaning i lose half the animation
best way to move my characters camera for a sec while he slides? iv seen the Camera Animation component in there but i have no idea how to use this thing
what do you mean, what effect are you looking for?
@broken geyser if you're looking to change the camera while he slides or something, look into set view target with blend
ok ill look into that, thanks
im trying to lower the camera near the ground and then back up so he looks like hes sliding
ooh
i tried using a timeline and setting the cameras location but it just snapped it around strangely
like a cinematic angle from foot height
yeah exactly
actually no more like bring the camera down
because i have the mesh attached to the camera
if you use blend
and use a timeline that drives the alpha value (0-1)
maybe it will save some headaches if you can find the 2 vector locations
so my timeline goes from 64 to -32 as a float and i feed that into my z, but instead of moving it slowly it just snaps to 32
in relation to the cameras parent capsule component, the vectors are 0, 0, 64 for up and 0, 0, -32 for down
whats the function i should be calling for the blend?
looks about right
and its 'ease', it blends between A and B depending on the 'alpha' (0-1)
right
in timeline make a curve go from 0 to 1 to 0
then drive the alpha in ease
An alpha of 0 will yield (0,0,64), an alpha of 0.5 will yield (0,0,48) and an alpha of 1 will yield (0,0,32)
hope that works man
sweet!
now i just gotta push my guy forward and lock his movement down and im all set
😃 sounds great man
Are the default PlaySound Notifies in animations audible by pawn sensing?
Anyone know why my characters bones have rotation on them even though I zero them out when exporting from maya?
Yes, you selected another bone in UE4 (the one with the selection outline).
okay, here one sec I'll post an updated
Actually no I didn't it colors the previous bone orange, but if you look closely you can see the test says "Left Arm" Which is the same bone as the Maya selected one
UE4 just decides to color the previous bone orange
Oh yeah, I thought they fixed that bug. 😛
So any ideas why it's making up it's own bone transforms?
What does the bone to the right say?
I went through and freeze transform on all bones in maya. All the rotations should say zero
That is closer to 0 at least.
Not in the "Y" channel it's 24
I mean, 0 in the pose only means that it's reset.
It would still have some other rotation.
Otherwise it wouldn't point in the right direcion.
I see
The only way to have a 0 0 0 rotation would be to have a bone that isn't connected to anything.
For example the root bone should probably have 0 0 0.
okay that makes more sense
What's the point of a Slot Group?
Does it make a difference if I put every Slot into the DefaultGroup or in different Groups?
It's for splitting the body into different parts, so you could play something on only one slot for example. You could do the same thing with layered blend by bone though.
If it's a full body animation it doesn't really matter.
I'm talking about Groups, not Slots
What does the thing say where you select the "group"?
The main thing is that you can only play one montage at a time per group.
But "group" is a pretty bad name, that if anything should have been called "slots" (because it's a slot for a montage), and the "slot" should have been called "section" or something.
what would be the best way to limit all of the players button inputs during an animation?
while keeping camera control
should i just do bool checks if im in the animation for all the moves i want to restrict?
What is a benefit to using an aimoffset vs blendspace?