
#animation
1 messages · Page 78 of 1
Could you show your animation and how it looks in-game?
Let me see if I can get a video. I see the character move forward, feet move (no T-Pose), but nothing upper boddy animates at all.
Attack animation not playing in GASP
You haven't shown the animation you want to play.
You can use Win+Shift+R and upload .mp4s directly here instead of YT.
And what's the montage settings? Blend times, assigned slot?
Could you screenshot the whole window?

Alright, the setup seems to be correct.
From the video you've posted it looks like the animation is playing, but it just applies the root motion, which affects the character's trajectory and motion matching reacts to that.
Is it maybe the post process Anim BP? I tried disconnecting that output pose, but didn't change anything. I've gone back and forth with Claude all day trying all kinds of stuff and nothing changes that result. 🙁 Every tutorial I've seen has this work just fine from the start so there's no changes talked about other than the Layered Blend per bone node
Does your custom character uses same AnimBP?
I'm using the GASP character, just added stuff to it. It's a hidden version of that skel mesh under my character's parts that are animating
If you change your montage slot to DefaultSlot, would it play this way?
Don't think so, but let me try. I've tried so many other things, not sure that was one 🙂
Same result
So traversals do not work as well, right?
That's a good question. I don't think the map made it over when I migrated and I'm not sure how to set that up in my own level
Could you show how your character is assembled?

These additional meshes, are those just static meshes attached to joints?
Could you show the details of the main mesh component?

This is the same screenshot.
Those are skeletal mesh components under the main mesh. All organized in Scene components

These skeletal meshes are setup using Leader Pose component?
I don't know what that is. They are just added under the main Mesh component hierarchically
Wait, so each mesh has ABP assigned?
yes, looks like it... all the same one
Which means you have a ton of anim instances, each mesh run its own.
This is incorrect setup, please refer to that page on how to work with modular characters:
https://dev.epicgames.com/documentation/unreal-engine/working-with-modular-characters-in-unreal-engine
Epic Games Developer
Create modular characters by combining multiple dynamic skeletal mesh components in Unreal Engine.
Long story short, for all the meshes you need to call "Set Leader Pose Component" and connect your main mesh as Leader.
Ok, I'll look into that... but why does everything from the GASP project work fine with that setup but not the added animations?
So what happens right now is that you play the montage on your main mesh correctly, but all the body parts on top run their own anim instances and not aware of any montages playing.
Because Motion Matching is already part of the Anim Graph.
Montages are injected during runtime to the specified anim instance.
Yup, just unhid the base mesh in-game and I see it working
holy crap, thank you. Did this setup work with the old way of doing anim BPs? I used the Synty character modular parts like this before and montages played fine. I just assumed it was all working fine since the locomotion stuff was working, but this sort of makes sense.
Thanks for walking through all of that with me. That would have taken me forever to figure out
What's really weird is the legs and arms are doing something that looks like it's animated, but not at all the right thing. It's like he's wearing an Edgar puppet 🙂
I haven't seen your other setup, so it's hard to tell.
Anim Graphs behave the same way since UE4.
Well, I just looked and they all were set to use an anim graph, but didn't have one set so maybe that was the difference. I'll play around with it, but definitely need to go through that documentation and set it up properly. Thanks again
Looks like my previous setup was using Leader Pose so at least I have a good example to follow. Explains why I didn't need to set the anim BP on each piece.
Or rather it isn’t working. Probably blackboard.
hey so i think thisll be the right place to ask this but im incredibly new to unreal engine and currently just learning about basic animations, ive implemented crouching with a blendspace sequence but when my character uncrouches they kinda spring back up and their hands do a thing, ive tried searching everywhere for any info or help, i have no idea what to do lol
Could you show your implementation?
ii did have someone talk to me about the animgraph and i nticed im missing a few things from there so im currently working on that and hopefully it fixes it
okay so everything is where it should be and set up but the animations just dont play i fear ive just missed something


I don't see where you set the "Crouched?" variable in your CharBP, if that's the issue.
wdym exactly
And why you need a custom variable for crouching if the Character class already have built-in one
im following a tutorial and thats just what it said i dont fully understand it yet but im just trying to get the animations to work, cause the crouch is registering but no animation
so ive missed something somewhere
Where do you set this variable?

It looks like a custom variable that you've added manually, which means that you need to control it manually as well.
It is redundant, as Character class already has "IsCrouched" boolean that's automatically being set to true when you call Crouch function.
ok so i think thts from my previous setup that didnt work so im trying something else but i cant add the custom variable i made and idk why
also now my character goes into a falling animation whenever i press the crouch button lmao this is funny its just getting worse
Depends on your implementation.
You haven't shown your transition rules which are important, but I guess that's just checking the AnimBP's "IsCrouched" variable, right?
wdym by animsbp exactly im a little lost
How do you transition to and out of the Crouch state?
i know im being an idiot here but do you mean keybind idk what else that means
You have a State Machine that handles the anim states.
Between the states you have a transition rules.
they should be corrent ive double checked them and theyre the same as the tutorial im following
the tutorial isnt too old so im just a bit confused why its not working
Let's start from the beginning - what's not working?
okay so i have all the animations set up on the animgraph, both idling, leaning , crouching and jumping. the idle animation works and so does the leaning but both the jump and crouch animations dont do anything, i can still jump its just not animation and crouching wokrs casue i have the collision marker circle thingy and i see it shrink, there just no animation
How do you update the information in your AnimBP about if the character has jumped or crouched?
through the event graph or the animgraph?
Anim Graph is not mainly responsible for pulling the character data, so Event Graph.
As you said that you have all the animations set up in your Anim Graph, I assume that the setup there is correct.
yeah it should be
i am a little confused with the event graph i dont think i have it set up correctly
also i dont have anything about jumping in the event graph i dont think

Alright, so AnimBP doesn't know currently if the character has crouched or not.
so how do i hook that up
From your Character reference you get IsCrouched boolean.
And connect it to your ABP's IsCrouched variable.
like this?

Yes.
okay now if i crouch it just puts me into a falling animation
this is my land state is it cause i have the is crouched variable there, what should be there


And if you single-click on "To Land" state alias, what's inside the Details tab to the right?
this?

Alright, so the Land state could be triggered only from the active Jump state.
Where else you use that "IsCrouched" variable?
what should this be set to casue if i put it as auto rule its doenst make me do the falling animation it just makes me crouch but doesnt activate the crouch walking i just slide around whilst crouched

How is the falling related to the crouching?
As you're working with AnimBP from ThirdPerson template, originally there's IsFalling check.

i had to manually add a falling variable i didnt have one by default
So you're building AnimBP from scratch?
i think so- is that bad lmao
Absolutely not.
im assuming its more difficult
or something
but i think i just created new animation bluprint and then added it to my character
If the tutorial you're following makes you confusing, the tutorial might be not that good.
In any case, again, where else do you use that "IsCrouched" variable?
i did switch tutorial after i origianally had the weird snapping crouch thing i sent the video about first
in the animgraph?
Yes.

the red cricles are is crouched and the circle with lines through is theres not crouched
What's inside your states related to the crouching?


the crouch idle animation works but the crouch walk doesnt
wait i think its the stand to crouch and the crouch to stand work
but the crouch walking doesnt worj
and the jumping dosnt work but i havent gotten to redo jumping from the last tutorial that wasnt very good so i probably just have it set up wrong but the crouch walking idk why its not working
this looks okay maybe


Could you record the issue you're having with the landing anim playing on crouch?
Win+Shift+R for screen recording.
like this?
i tihkni fixed the weird falling loop playing on crouch when i added is falling so thats some progress
so now the only thing not working with the crouch is the crouch walk
You have a theory why it is not working?
im assuming something to to with the crouch walk animation isnt connected properly, or something is overiding it
Not sure why but the enemy ai isnt playing the anims while moving they still stop then attack the player. so im assuming blackboard takes priority. However when they do attack their feet move. Like they slide around a bit.
Blackboard is just a collection of parameters.
i always get confused on the bb or animation tree thing
How did you set the layered blending?

And the node settings

Logic seems correct.
If the issue still relevant, could you show your transition rule here?

i think it is playing the idle animation on the bottom half and the attack on the top. But never attack on top and running on the bottom.
I dont know how to fix that
Could you show how it looks?
Provide any possible context, if you want to acquire the help efficiently.
Logic works correctly, you have a foot sliding in general.
foot sliding goes away if i just go locomotion - slot default slot- output pose
I see the foot sliding directly in the BlendSpace.
the part i want to be working is the enemies attacking as the player is close enough
without stopping the running anim so they can attack while he passes by
That depends on the timing when you start the montage.
here is a pic of the behavior tree. its a mess i know

Have you debugged it?
Like, you sure this part gets called during the movement?

I should do that yeah
this seems to be the issue. Normally it is set to something but wouldnt work no matter what was placed here.

the blackboard based condition in dark blue
outlined in red
I was about to ask where you update your ShouldMove boolean, but if the anim logic works now after restart, that’s good.
Lower the value here.

Well, the “slam” you’re probably talking about, as I assume, relates to the additive landing animation playing as soon as the character lands.
Am I understanding you correctly?
You can change the play rate of the player node.
Alpha value of Apply Additive node controls how much of the animation you want to apply.
If you click on MM_Land node, there would be settings of this node in the details tab to the right.
There you can tweak a play rate.
The value I’ve mentioned before relates to the weight of the animation.
To be honest, looks fine to me.
The transition to standing is off, but that's a different topic.
I just told you how to adjust the additive landing animation.
Setting up Sync Groups for standing and crouching movement sequence players might help.
https://dev.epicgames.com/documentation/unreal-engine/animation-sync-groups-in-unreal-engine
Epic Games Developer
Synchronize the cycles of animations with different lengths using Sync Groups.
You mean limit the actual capsule movement? No, this is only about the visuals.
You'd have to change the Max Walk Speed in your Character Movememt Component reference.
How and where are you going to do it is up to you.
One of the solutions would be to use Skeleton Anim Notifies - you add a notify to your anim sequence, then it becomes available in your AnimBP's Event Graph as the event you can add, there you can write your logic there.


There are other advanced ways, this would be the easiest for the beginning.
Yes.
Provide any possible context, if you want to acquire the help efficiently.
How would you define if the character sprinting or not?
What do you usually do to turn the lights on?
I mean, in real life.
Can we describe the sprinting state as a switch?
Yes, but in case of sprinting you have to manually create the "IsSprinting" variable and set it to true when character sprints and back to false when it's not.
Can't?
Character Blueprint and Anim Blueprint do not share the variables.
Where would you set your sprinting state to true?
How?
So you have this variable in your Character BP
And if you drag out the pin from your Character ref in AnimBP, the search doesn’t show it?
Yeah, logical. Your variable doesn’t reference your actual blueprint.
Its type is just Character.
Which is a base class of your player blueprint.
As I said, Character class has built in IsCrouching variable.
It’s in the code originally.
Your player blueprint is child of Character class.
Yes.
So in order to pull that custom stuff, engine needs to know where to pull it from.
So your character reference variable type should be assigned to your blueprint class.
If you look at your variables list, there’s two columns - name and type.
Here you go.
Try it.
Could you show me how you set that Character ref in your Event Graph?
Do you set your character ref in your character blueprint?

Yet you have it and it's working.
Anim Graph has nothing to do with what I'm talking about.
In order to make your AnimBP know if the character is sprinting or not, you have to pull that data from your custom Character class, the blueprint where you set the core logic.
Yes, you can update your variables like this - by casting to your BP on each update.

Usually, it is more efficient and convenient to store the reference to your character as a variable and pull the data from this reference.


In order to switch between the inputs based on a boolean, you can use Blend By Bool node

Looping turned on where?
What's here?

And what's the transition rule to the Sprinting Locomotion?
I'd suggest doing a debugging by starting the game, then pressing Shift+F1, opening up your AnimBP, then selecting your blueprint instance here.
That way you can switch back to your game and see how the Anim Graph updates in real time.

I'm not getting the logic here - you have a transition state with the start sprint animation that then transitions to the sub state machine that has it's own idle, start sprint again, sprint loop etc.
That's nice to know that you're making good progress 🙂
That was my goal, yeah.
What kind of limit you're talking about?
You can try increasing a Braking Friction or Deceleration Speed in your Character Movement Component settings.

That explains, yeah.
As usual, requesting a clip
Check Ground Friction in CMC as well.
So you set all the friction parameters back to default values, right?
Could you search for "deceleration" keyword and see if anything changed there as well.
Now show the search result with "friction" keyword.
Turn off separate braking friction and set the friction factor to 2.
Hm, do you change anything for the sprint except Max Walk Speed?
Do you change anything else besides Max Walk Speed with notifies, if you doing it?
Alright, nothing problematic. I see that the character eventually stops at 0:10.
Like you can make it stop.
Is this function used? If so, what it does?

And what Start and Stop Sprinting functions do?
Why you set Walk Speed two times?
Leave only one speed change.
I mean, you change the walk speed to 600 in sub-function, then set it to 800 afterwards
Stamina system has nothing to do with, there's just no point in this code here as you're already doing it in the sub-functions

did anyone find a solution to the linked anim sequences using the start and end frame instead of there own start and end
What’s the issue here?
The linked anim sequence is controlled by the level sequence asset, so it is logical to have time range synchronized.
yea but you would have multible skeletal assets in there

if you create a linked anim sequence for a skeletal mesh i would assume it to have its own start and end frame
I don’t think this is correct workflow, at least that probably wasn’t planned to use it this way by design.
Each animation sequence has its own level sequence.
If you have multiple anim clips, they should be baked down to their own animation sequences.
Looks like the bottom right attack nod isn’t firing.
Hi, can anyone describe a situation where a Warp Point Anim Provider should be used?
Are you talking about Motion Warping notify settings or something specific?
Yes, that's it
It's just an additional way to describe how the warp point function for the motion warping notify.
By default, it set to none, and it's up to you to define a name of the point and call the function during runtime to add transform data for this point to character's motion warping component.
Static mode means that you can "hard-code" the warp point transform, relative to the mesh component.
It's hard for me to come up with the use case, maybe it might be useful for modifying the animation, like additional offset to the dash animation.
Bone mode means that the root bone warp would happen relative to the character's joint.
The example of usage would be GASP traversal animations, where character would be aligned relative to "attach" joint that represents the edge of the climbable object.

Thanks for the detailed answer, Dan 😁 . I'm not familiar with how GASP traversal animation work, but if my understanding is correct, the attach joint would need to be updated at runtime to match the transform of a climbable's object ledge, is that right?
So I made these animation with the ue5 model and I cant test it since my laptop cant run unreal, I was wondering if someone can help my test to see if these animations works in-engine.
You mean procedurally? Not exactly.
I actually just figured that the Anim Provider means a different thing.
It basically describes a pivot point for root bone transformation.
By default, Motion Warping would manipulate the root bone itself and warp it to the defined warp point.
So if you provide a static transform or joint name, it’d warp those transforms and position the root accordingly.
In case of GASP traversals, this joint was specifically “animated” (constrained to the point in space where the climbable object’s edge would be ) to be as a guide for animation systems - game would find the actual edge and, based on a context, would motion match the fitting animation by comparing the hit trace result with the “attach” joint from all of the animations in the database.
While the traversal animation plays, the character will align to the physical edge by its attach joint.
I hope I explained it understandably 🙂
Yeah, you can drop the files.
But why would you want to look at the animations specifically in Unreal?
well I used the unreal engine mannequin so it seems right
As you wish 🙂
Send me a DM.
Do I need to play or something? My AnimBP isn't going through it's nodes.

Is the issue still relevant?
5.8 has Montage Trait, but Control Rig Trait is still broken though differently (variables are not exposed at all).
@velvet jasper i tried it but didn work have you ?
Last time I've tried it on main branch source build a couple of months ago and it worked, haven't actually tested in 5.8.
@velvet jasper I've been playing with it since yesterday to get a feel for it. I probably did something stupid, but thanks for the heads-up
Works in 5.8.

ah great!

Thank you so much. So this is basically an offset from the root bone's transform, right? If we didn't use a bone anim provider for climb animation I guess the warping would be based on the root bone rather than the attach joint and we would need to take into account that offset when warp target transform is set.
Yup.
What typically is better for performance? Using behavior trees or setting up the logic in character bps?
I don’t think that’s animation related question.
#gameplay-ai might be better fit.
Yeah, it still isn't playing anything. Even when I just hooked the walk in directly.

The skeleton and mesh are both correct.
The anim asset is correct, right?
Yes.
Hey all. This might be a super noob-ish question.
I've imported a new skeletal mesh that fits on Manny, but when I swap to that new mesh his root isn't locked and he walks away from where the character actually is.
After searching for a fix online the advice is usually to "lock root node" on the animation -but these meshes are all using the same animations.
Is there something super basic I am missing or have I overlooked something on importing the SKM FBX?
Thanks for any help!
Alright, so you plug your animation to the result input, press compile and character keeps playing some specific animation, correct?
Could you show the hierarchy of that new mesh?
the blueprint or the bones?
Bones

BTW I am loving your game🔥
I have to step out, but thanks! I will post back if I figure it out 🙂
Yeah, the first bone should not be there, the root motion is broken now for this skeleton.
The animation blueprint doesn't seem to play at all.
Hm, this is very weird behavior.
Does that happen only with this specific mesh?
I haven't tried another mesh yet with the same skeleton.
Out of interest, could you show your skeleton hierarchy as well?

You can see this animation plays fine too

Also in fact here is that same animation I showed in my animBP that should be showing, playing just fine on the same mesh.

Alright, could you make a short video where you create a fresh AnimBP, add your animation to the Anim Graph and compile that blueprint?
Win+Shift+R, if that's needed.
Could you DM me the FBXs, if it's possible for you?
Yes. For the animation?
Took me a while to get home but it worked! Thank you so much. Stupid Maya put it in a group which I was re exporting out (I mean, maybe it was me but I'm going to blame Maya)

Thanks again!🍻
I am having issues with my muzzle flash particle effect not staying aligned with the muzzle socket that I have it attached to, especailly when I aim down sights.

Are you using First Person rendering?
It’s not Maya. When you export the meshes from Unreal, it packs both mesh and the skeleton to a dummy node.
Don’t know why, but it is what it is.
Hello is there anyone who can help me with converting fbx control rig to p3d file for Arma, I tried all I know including installing the Arma toolbox on blender to convert
FBX Control Rig?
To be honest, that question feels out of scope of this channel.
Arma modding community might be a better fit.
Ok thanks so much
I am not too sure what you mean. I am basically using the old first person template from Unreal with some arms and animations added.
FP template where the legs could be seen or just the arms?
Just the arms. So spring arm, camera, arms.

If the issue still relevant, could you check if that happens when you attach some mesh to the pistol or only with emitters?
It seems to persist with or without the pistol. I don
t know if it is the animation the arms make when aiming down sights or what
What’s the difference between BP_Pistol and SK_Pistol in your code?
I see that you play the animation on the former.
But attach the emitter to the latter.
BP_Pistol is my pistol BP actor that I created. I was trying to make it so the character has firing logic, but I think I got crossed up somewhere. currently the firing logic you see is in the character BP but am thinking I may need to set up a proper weapon logic
So, logically you need to attach your muzzle flash to that BP, right?
In Blender I’m making FPS rig and using bone constraint called “child of” on character hand bones to hold weapon but the animation of weapon won’t match with arms in UE since the arms don’t get their own animation that belonged with the guns
animation.
What I’m tryna ask is how do I turn the constraint movement in the arms into an animation for the FPS arms so they are in sync.
For example idle animation where gun sways up/down and hands follow in blender due to constraints but what happens on export is no hand bones have constraint so arms don’t have the idle animation (sense all that was animated was just the gun and I let that decide hand movement but that isn’t a animation that is keyed)
If I need to provide more information or a better explanation let me know.
Attaching it in my BP did nothing unfortunately. Basically the muzzle flash stays in the location of the pistol when it is using hip fire. I can't figure it out
Are you trying to attach to BP directly or you getting the mesh reference first?
If you get the socket transform and draw a debug point at acquired location, where will it be?
If I understand your question correctly,
usual in-game implementation would look like this:
Character mesh, contains a weapon joint.
->lowerarm_r
—>hand_r
—->weapon_r
Weapon mesh, approximate hierarchy:
->Root
-->Clip
-->Slide
-->Trigger
In DCC, the weapon’s root joint gets parent constrained to hands weapon joint, this joint is used for weapon posing and animation relative to the hand.
Then the animations gets exported both for the character and the weapon.
In Unreal we repeat the same setup where we attach the weapon mesh to the character's weapon joint.
heyo quick question, how long can a model load into ue5 after blender export?
A couple of seconds, DCC doesn’t play a big role here.
okay i am waiting since minutes now. only when i use chars from blender that are a bit more complex- if i use mixamo stuff for testing it opens instant
Depends on what you export out, like what’s inside your result FBX.
Check your Output Log in Unreal, there could be some information related to the import process.
okay thank you
why can be this happening?
Do you play the animation on the weapon or is the mesh just attached to the hands?
im not really sure its my first time trying to set up animation in ue
i was following a tutorial but ig i messed up somewhere a little
Needs more context on what’s happening here then.
Because there’s at least two possible issues I could assume.
do u speak russian? just saw a RU flag in ur desc
we can move to dms
just dont want to flood in russian in here
Oh my bro the tutorial I follow made me make hands follow gun and not gun follow hands it was hurting my head so much lol  . So just to make sure I understand, what your saying is in blender I animate the hands and attach guns with “child of” constraint to hand then I animate hands so I can do stuff like idle Anim and junk then in ue5 I add socket and align gun as close as possible to area it was at in blender when attached to hand?
When you animate, it would be logical for the animation rig to make hands follow the gun. But on the low level, the gun should follow the single hand.
You won't need a socket as you'd have a joint to attach directly.
Ok I’m new to this kind of stuff so I’m sorry if these questions are silly, but in that case when I’m animating the gun(and hands follow gun), for example for a idle animation, how will the arms know what animation to play since they only follow gun by constraint and have no animation.
The gun has the idle animation but the arms won’t since they have never been keyed and only follow the gun in blender due to the Child of constraint
Well, when you export the animation, it gets baked down to the joints and as a result you get Animation Sequences in the engine.
Oh it’s just an automatic process on export, so It just generates the sequences in the engine ?
Engine just imports what it sees in FBX. The animation highly likely would get baked down to your meshes skeleton.
Alright thanks, I’ll export a generic animation I make eventually just so I can understand and see the process actually in affect. Apparently I was just worrying over nothing lol
If an fbx has 2 animations, how do I find the 2nd in Unreal?
Unreal usually automatically imports all the animations found in FBX, so they would be at same place.
So i'd like to ask
What do i do for my game???
I have 1,700 animations for my AI, but idk what to do when it comes to animations.
You implement what you need for your game design.
I know, but i mean what may i need?
Like an ABP or Motion Matching?
Or something else?
I don’t know what kind of animations you have and what’s your skill set.
Its really just Rifle and Pistol animations similar to the GASP
Similar or the same animations with the pose applied?
Similar, though i can send the video of the animations if you'd like?
I found it on YT and thought it looked good for my game
If that are the ones from FAB, then no need.
Those are just animations from GASP.
To be honest, I have no idea why those exist and what to do with them.
Other than replacing the animations databases in GASP or practicing Motion Matching setup.
Alright.
I'm wanting to make an fps character where the lower body has the walks/runs then the upper body has the gun aiming and reloading/whatever other gestures. Is there a good guide for setting up that kind of system?
One of the things I'm having issues with is getting the hands to align
Won’t be able to provide the guide, but can answer the questions.
Ah, the issue is what I have is a bit nebulous since I haven't really attempted a super deep implementation. So I wouldn't really be able to ask specific questions
But generally when blending the upper body with the lower body, I try to have the lower animations still influence the spine. But the issue with that is it causes the hands to misalign
I was trying to use IK, but I don't have a way to get the animation pre-subtraction
Do you use mesh space blending?
You can cache your pose first, then blend the caches and acquire needed information from these caches.
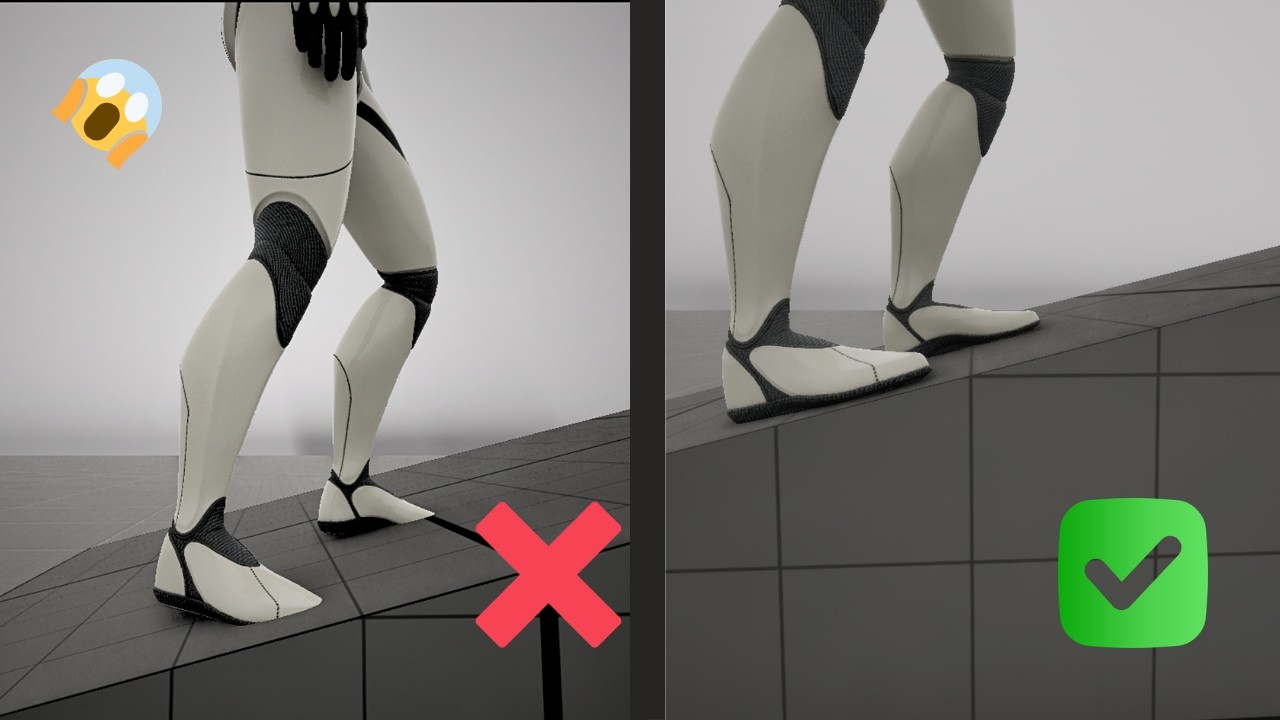
Hey guys, What is the best method to prevent the character to dip below the surface of a object like a road laying on terrain/mesh? Is this due to the IK of the legs and how would I best avoid this behaviour?
Is there a way to say if the collision distance is so small (like a road on terrain) that it ignores it? And only does when its like 20-30cm distances instead?


Mesh Collision and collision responses.
Thanks for the response, can you elaborate a bit on the subject? Is there a way to force the IK to keep to the first collision it finds with collision responses?
There’s no forcing, it’s a line/sphere trace. Whatever it hits based on the function settings would be the first hit result.
What’s your Feet IK setup and does your road mesh has collision?
The IK setup is the default manny one and yes the road mesh has collision. Though I do notice differences between the mesh by itself and the mesh following a spline.
(Image 1) The mesh works fine even when the mesh is pritty close to the ground.
(Image 2) The splined mesh reacts easier to the ground being close to it. But when its further away the collision works as intended.


When raising the spline further off the ground and thus creating a larger gap between the splined mesh and the ground surface, everthing works properly again. (as seen in the image)

In that case, check the resulted collision of the generated spline mesh.
This is the collision settings of the mesh and this is the splined mesh one. Its a plugin I bought ages ago, Not entirely sure how to see the channels specifically.


If you type “show collision” in console during PIE, how do the meshes look?
They both show the same type of collision on the road surface (Its a simple box collision I added while trying to figure out the issue)

I think
I do notice when using player collision view, the spline looks like it should only block visibility. But the shape is only due to the box collision I added, its not even being respected by the pawn.

Wait, I see something. On the spline. The character does not respect the border, using the IK feet. The right foot is clipping through the stones.
While on the mesh it does.


Inside the spline, i notice it adds the collision type.. But not the channels. Should I add the channels after the Set Collision Enabled?

Adding the channels and setting it to block all fixes the edges for the FootIK.

Eureka, its indeed because the spline does not fill in the information for the channels at all. Now the spline works as intended, i think. Will test it further with some other meshes
Thank you very much @velvet jasper for the push in the right direction.

You could also eject from the player, select the spline actor, pick the mesh component in the component list and see what’s going on with it.
i'll have a look at that tomorrow.
You could also debug this in the control rig itself. You can spawn debug spheres / shapes where the collision hits / check its trace channel. But glad you were able to find the solution!
I only say this because I have no doubt control rig will be an issue in the future and its good to get familiar with it 
I want to add different jump while he is running I am so confused what to do
What is confusing for you?
like when my character is ideal he can jump but while running he should have different jump animation so I'm struggling to implement that second jump aniimation
@velvet jasper
But what exactly is a main struggle here?
Core condition logic or technical setup inside the BP?
Because in a nutshell, it'd look like this - character has jumped, AnimBP checks is the character moving or not and based on that picks the animation.
setting the logic in BP
I put a montage for ideal jump in character blueprint
but I dont know how to bring another jump animation
"ideal"? You mean "Idle"?
idle
Check the player's speed, use a condition if the value above the threshold.
You can either use Branch execution node or Select node for the Play Montage node's anim asset.
hey man can we have voice chat
Unfortunately, I can't voice chat.
I have so much to show and ask so yea when can we do that session then
.
I prefer to stick to text messages.
If you have questions, but you don't want to flood the main channel - create a sub-thread here.
ok
Hi, I have a normal UE4 Physics Asset. This character mesh uses the UE4 Skeleton, and animations run fine on it. But as soon as it goes into physics/ragdoll, the head gets sucked in and the shoulders raise up strongly.

Does it use Phys Asset custom for this specific mesh?
HI iam not sure what you mean, so i use the normal ue4 PhysAsset and i use it as an overwrite in the Character BP
If the PhysAsset has been authored for a character with different skeletal proportions, the physics setup might not work correctly.
There's no thing such as "normal".
The Phys Asset by itself contains nothing, it should be filled in with the data and can't exist without the context.
Additionally, the shrinking phys bodies is a usual symptom of bone scaling issue.
Have you changed the import scale of your mesh? Could you check the root bone scale in Skeleton Tree?
yes i will recheck of the things you mentioned


i import them as basic as possible, and i use a target skeletin inthe setting UE4 MAnnequin

i jsy foudn that when i hit antohter preview mesh on the physasset i use the collsision wander off

in the noral ue4 mannequin all fine

Are your custom meshes same in proportions?
some are atheletic tall males, others are smalelr fat ones
skinny womens
ect all a bit different
Each “body type” would need its own Phys Asset.
yea i was hoping i can get around that
PhysAssets could be shared only if the bones are same.
If they’re not, things would break.
A quick follow up, i tried to copy the basic physics asset, and used the custom mesh of the overweight Dude. I dragged the physics bodies to the visual right place of the Skeletal Mesh, including constraints. Using the Asset on the mesh i set it for… but exactly the same, shoulders up head sucked in. Is modifying the PhyAs not able to simply drag bodies and constraints into positions? What i oversee?
I'm not sure that I understand your text correctly.
Just copy-pasting PhysBodies is not enough as it doesn't solve the constraint relationship issue.
Each constraint has Parent and Child transforms - if some of these settings are too off, you get the broken relationship.
Select all constraints with Ctrl+Shift+A, right-click at one of the constraints, select "Snap" -> "Snap All Transforms".
If that doesn't help, try "Reset" option as well.
ok when I did this my entire idle jump animation got replaced with running jump and then my character is zoning out of thin air and coming back
Could you share a clip and your logic, please?


Well, the warnings are self-explanatory.
Regarding a condition, why do you use some BPC Stamina?
Do you understand what these nodes do?

yea I should add the second landing animation for running one but I cant find that in mixamo
I'm not sure how's that related.
Can you describe the logic at the screenshot above?
And can you describe the condition here?

so I'm using Bpc actor component blueprint to store 3 movement speeds of my character:
- Jog speed 200 2. Run speed 400 3. Standard Run speed 600
now the condition I used is like if my character is running higher than 400 (which is St Run) is true then running jump animation should occur if not then normal one
ohh I see the mistake
running one should be there all time while idle one when not running so ho write that logic
🤔
I suggest looking into how your AnimBP detects if the character is moving.
ok
the first one is for idle jump 2nd one is for running jump
I thought to make 2 separate event triggers for each jump anim
to see if it works
There's an issue with your jump animation trigger condition.
There's an issue with the animation node setup in your "Land" animation state.
so what should I have done here then just put only "falling to landing" animation then as an additive to loco cache and so am I supposed to make one jump condition then?
and add running jump as a separate additive then but how would I do that did not find right tutorial in youtube yet or did not get the right way to put it
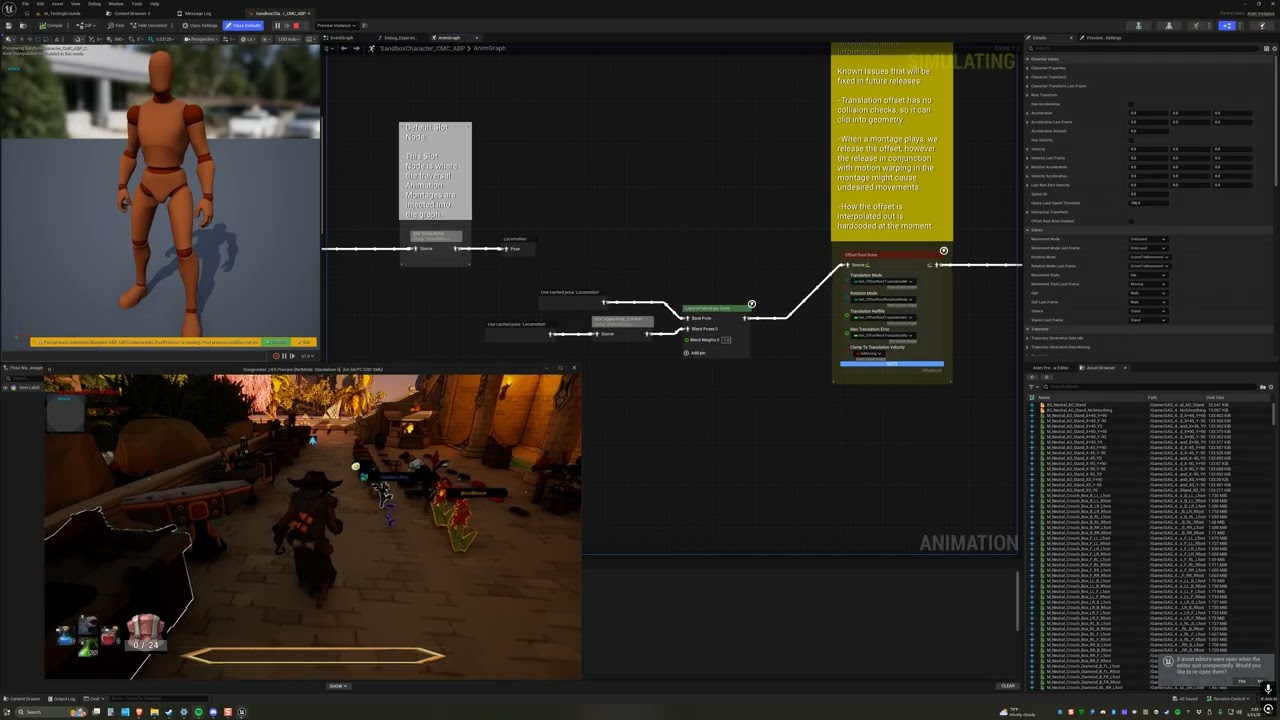
So Dan what do you know about optimizing animations?
Do you understand what the additive animation is?
And what kind of logic is happening in your setup?
Depends on what you trying to ask exactly.
Unreal documentation has some pages related to Animation Optimization:
https://dev.epicgames.com/documentation/unreal-engine/animation-optimization-in-unreal-engine
Epic Games Developer
Use a variety of methods and techniques to optimize Animation Blueprint's performance and stability in Unreal Engine.

Epic Games Developer
Peformance tips and tricks for Skeletal Mesh and Animation Blueprint
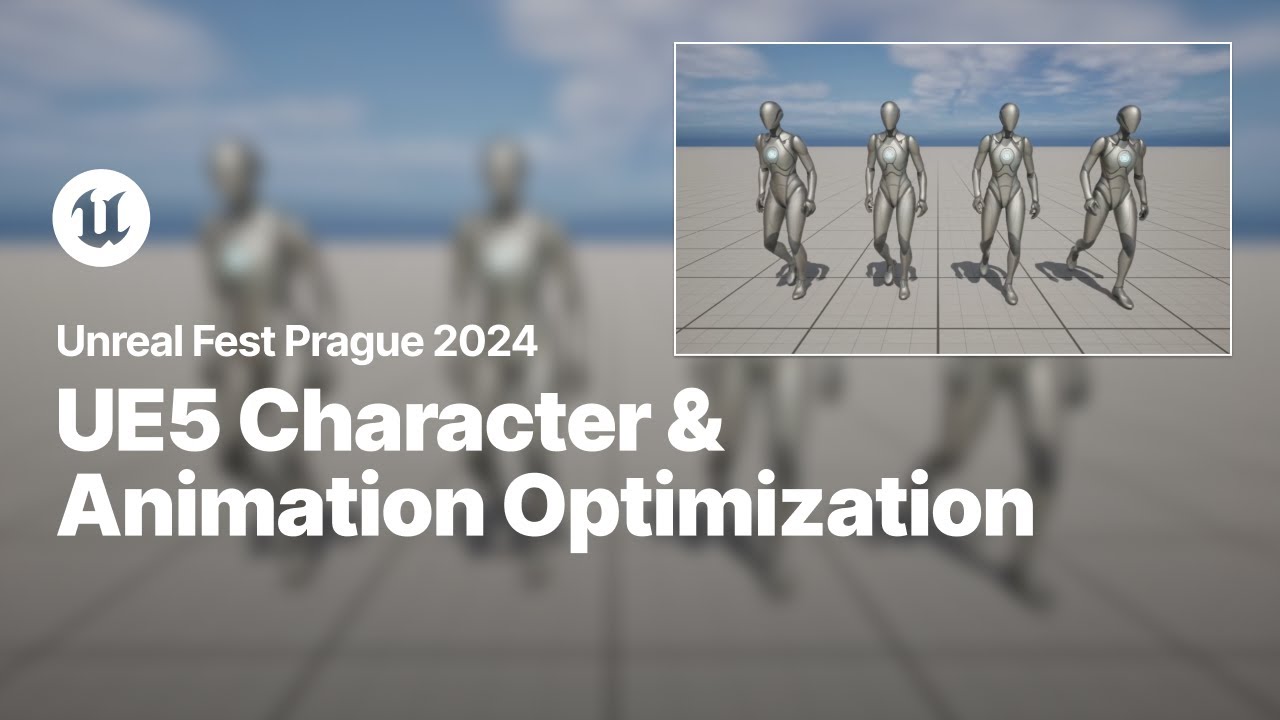
Dive into the many character and animation optimizations that you should be applying to your Unreal Engine 5 projects to ensure you are delivering a fluid 60 frames per second on consoles.
This talk will examine building from the fundamentals through to advanced methods, as we explore optimizations of animations, skeletal meshes, animation gra...
it means to add one animation to one already existing one that is already happening

Epic Games Developer
An in depth look at the Animation Sequence Editor in Unreal Engine.
👍
ok thank you
Yes that is helping! Thanks Dan
Does anyone know why 1 of my animations goes whacky?
Depends on how this animation was done.
All made in blender. It works in blender:
Yeah, but technically what is involved besides bone rotation and translation?
Bone Scaling? Blendshapes?
Try importing the FBX into blender to check if any export settings are causing it 🤔
When I import the FBX it is also deformed. So the problem is not Blender >to Unreal.

Oh good! That narrows down the suspects then 🙏
Hi quick question, how do you rotate actor in Contextual Anim Scene without changing the pivot direction? Any way to rotate root 180 on Z in Anim Montage or Anim Seq, or do I have to reimport?
nvm simplest solution as always, reimported it 😄
if anyone here is good at ue4 animation trees i've posted a job in the freelance channel
Man I give up I did not find right solution to jumping and landing problem
ok here's the thing my running jump animation seems to move forward here right so how can I make it such a way that when my character jumps while running the camera also moves with the jump instead of just character jumping forward while the camera remains static
like here
sorry dont mind landing animation right now I messed it up I did not set it to no additive so it looks a bit wonky
man I only get problem when I try to apply running jump wtf
Ummmmmm.... Why is her tail doing that in the Anim Montage????? I have it keyframed properly in the animation file, why is it... different in the montage?🫠


-
Your Jump action condition (where you decide which anim to play) won't work, as you're working with the static number.
Your AnimBP has an example how to acquire the needed values to define if the character is moving or not. -
Your jumping animation has the character moving in the scene, but the root bone is not moving.
The easiest way for you would be to redownload the animation from Mixamo with "In-Place" option. -
Your landing animation breaks because you're trying to apply the additive animation logic to non-additive animations.
If the Sequence Player node is red, it is a standard animation. If it's green - additive.
Logically, your base always would be your locomotion, and the additive input would be the animation you want to apply on top.
If you haven't planned to use the additives - get rid of these nodes.
Does that happen in-game as well?
Yep! In game, in montages, in the BSD/ABP but the anim files look fine?
If you select your tail joints in the skeleton tree, how do they look when the animation is deformed?
I see you have Retarget Source assigned - do you have multiple characters assigned to a single skeleton asset?
The x rotation changes in the montage of the base bone, from 160' to -18 (the same as the reference rotation 🤔 )


Not for this character, she has a unique skeleton
So, "cc_base_pelvis" is correct there?
Yeah it has unchanged rotation from the original file
I haven't changed the retargeting options either, it's set to Animation

Damn that's pretty cool thanks I should check again
Well, to be honest, I don't have a clear idea what's going on in your case.
If you import your anim FBX back to your DCC, does the tail joints have keys?
Yeah that worked! I had to export it first since it was originally retargeted, thankfully there's only a handful of animations to do this for. Thank you Dan!🌟
Hi!!! i have a problem with my character rotation head settings in my event graph ... I want to use live link and have the head rotating too. I did this but the rotation is mixed up , when i look up it turns left... when i look down it turns etc... here is my event graph and anim graph , anybody knows how to help fixing this? 😢


Which space are you using in the bone transform nodes?
The rotations are connected weirdly.
For example, Head Yaw curve is connected to head’s roll rotation.
Instead of each node having its own rotation variable, you can use a single rotation variable but normalize the weight between the transform nodes.
1/3 gives us approximately 0.33, this is what you can set as an Alpha value for all of them. Alternatively, you can use your multiplication values.
Hello ! Sorry to bother, but me and my workgroup are currently encountering an issue with setting up physics on an animation blueprint : we have made a physical asset and created bones in the hair to apply physics to, and by itself the hair moves fine ! physics work with no issues. the problem is that when put inside of the animation blueprint for our character, the hair physics stop working. The hair is set as a child of the body it is attached to, simulate physics is on, collisions have been done, and we also tried to use the physics asset of the hair to override the one of the body, to no avail, the hair stays in place without movement. If anyone had an idea of what is causing issues, we'd love to hear your thoughts ! We are a bit of at a loss and have been pulling our hairs (lol) over it for over a day now...


How do you implement it? RigidBody node?
If so, have you set the physics bodies to Simulated mode?
Epic Games Developer
Describes the RigidBody node and how it can be used as a lightweight physics simulation inside Animation Blueprints.
yes they have, i checked and like in the documentation all the other bones are sets to kinematics (1st pic) and the hair bones (2nd pic) are set to simulated, and it's not working :/


So, if you add a RigidBody node to your Anim Graph, does it move?
Can you see the phys bodies when the node is selected?
it doesn't move inside the AB we made for it either no, we added the rigibody node but we can't select the hair inside the preview to test it when simulating, and it also doesn't move in the general viewport. The physics only seem to be able to function in the physical asset 

You're not supposed to select them there, they are only for the preview.
What's the simulation space set in the node settings?
It's set to "component space"
Try "World Space".
Make sure the mesh component in your blueprint has no physics simulation options enabled.
Ok i think i found the problem (not sure tho) but in world space in my physics assets they are simulated but in my world they were frozen? so i just changed it everywhere to "simulated" and it seems to work!
thanks so much for the help!
Also, when you turn on the physics simulation for the mesh component itself, make sure it has correct collision settings.
You can just set the "PhysicsActor" or "Ragdoll" collision profile.
The correct setup for phys assets going through a rigid body anim node is setting simulated bodies to “Simulated” and static bodies to “Kinematic” . Then you switch the solver type in the phys asset from “World” to “RBAN” (which stands for Rigid Body Animation Node 😊 )
And I tend to use “Base Bone Space” set to the Root bone instead of Component/World
Oh but if you need world collisions then yeah… I think it needs to be set to WorldSpace. Check the logs, I think UE yells at you if the proper space isnt being used
i'm not sure i understand, i followed this tutorial and i got confuse indeed when she started putting them not in the same connections but turned out fine with her tho... i watched this https://youtu.be/L8RckB9ZRJE?si=vbWgTrNrK3_Dj4Wd&t=653 , i changed the alpha in the anim graph but i don't understand how to have just one variable; i mean then how to connect to the variable of upperneck rotation or head rotation ? i must be asking dumbed question sorry ...
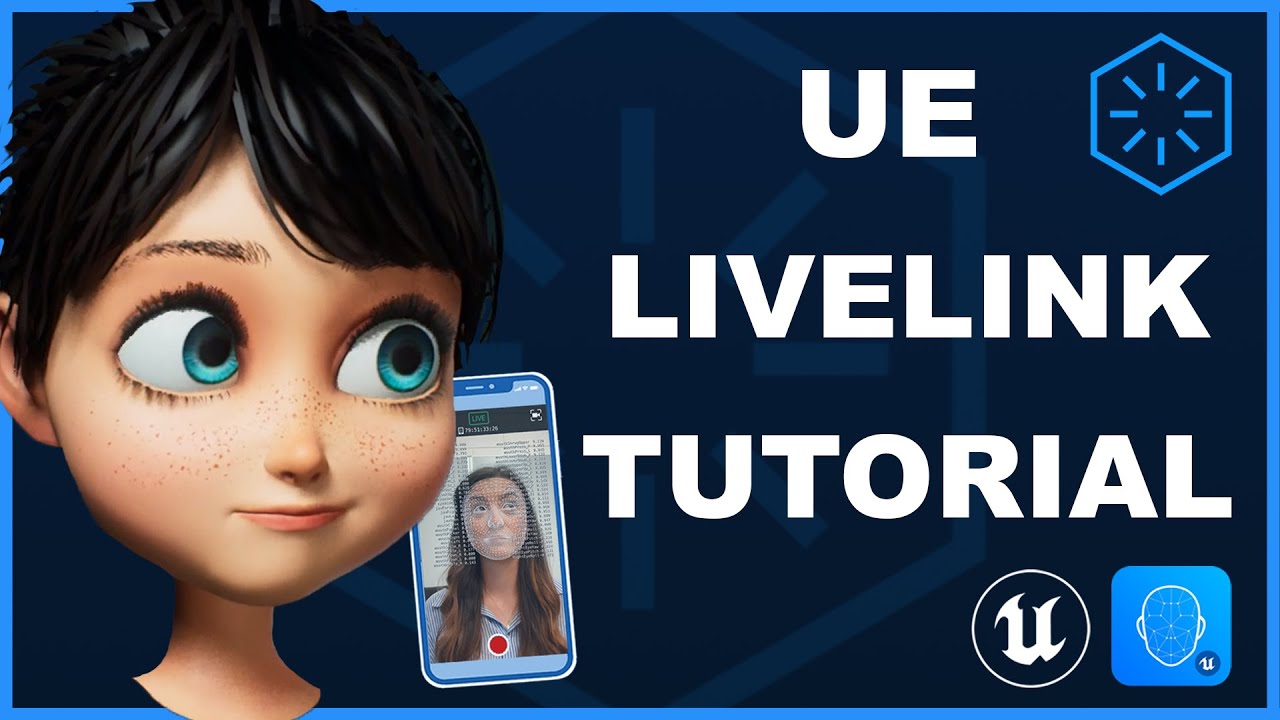
Start today with Facial Motion Capture using Live Link in Unreal Engine!
This tutorial is for beginners.
Using Polywink's FREE sample model, we show you how to make use of the 52 ARKit blendshapes for facial mocap. Our sample model has been rigged thanks to the Animation for iPhone X service with Polywink technology.
You can also use Bella...
Quick setup I did without looking at the tutorial, using Mannequin mesh.
Pitch and Roll are misplaced when transforming the joints, so I had to swap the values.
Changing the Rotation Space from Component to World space did nothing, though in theory it should have.
In order to get a 1-to-1 rotation I had to flip the Roll value, then flip the whole rotation.
Hello, i have been trying for a while, but still can't seem to find any info on how to blend alembic cache animations. Each one is imported as a skeletal mesh, skeleton and animation sequence. I have a few cloth simulations and i would like to use them for a third person character meaning i need them to loop smoothly and transition smoothly form one to another. ( i also can't figure out how to manualy change the lenght of the animation sequence). If anyone knows something or has some tutorial please help out.
In theory, if you merge all of your simulations into one Alembic, then import it as a Skeletal Mesh, you'll have a master anim sequence that you would be able to work with, like trimming etc.
For editing, you can use Sequencer.
Edit the animation section as needed, then bake the result to a separate asset.
That way you'll have a bunch of sequences that you would be able to use for your locomotion logic.
Thanks. That should work, but there is still the problem of blending smoothly between alembics in real time
Could you show what you mean?
Blending obviously might look off if the poses change drastically, as the engine blends the blendshape curves, not the joints.
how do I make this... actually work? jump usually slowly blends to the fall animation, but if you jump onto a rope it should use the 2nd much quicker transition, but it doesnt even though I set it to higher priority

Could you show the settings for both rules?


I mean, the priority settings.
just 1 and 2?
The ones that you're asking about.
Swap the numbers.
In the Transition Rules, lower number means higher priority.

🤦♂️ oh man how could I even miss that, thanks I never would have even guessed that
oh
nothing changed
I imagine they also cant be interrupted if they already started?
Hm, does the default transition kicks in immediately after the jump?
Hacky way might be to create a custom Blend Logic and manipulate with alpha value directly.

well quarter of the way through the animation so its pretty quick
hmm I guess that could work
As I understand, the moment you land on a rope happens much later than the default transition logic.
yeah pretty much, I guess what I should have said is it kinda needs to interrupt the other blend
then come to think of it I suppose I could put the rope anims in both if it doesnt cause any extra issues
ok yeah that did it lol
but thanks for the help, Im pretty slow today so I wouldnt have thought of it without this
Alternatively, Jump animation could be triggered through the Anim Montage instead that you can manipulate freely.
so im using the defualt first person unreal proejct and im looking into their animation blueprint and i've noticed it doesn't have any locomotion by default. So how is it possible that the FP template provides walking, jumping, and runninganimations but doesn't have any locomotion?

Take a closer look at the character's blueprint.
Its components, to be specific.
I'm not actually sure how to look at the components of a blueprint. I know if you search in its blueprint you see all of the properties in all the components of the actor.
List where the capsule, the mesh, the camera etc.
This is all components.
sorry i'm having trouble finding what you're hinting at
i see the components though
What do you see there?
im looking at the meshes and i see a lot of different properties:

The animiaton tab just references the abp i sent eariler so im assuming thats not what you were talking about
Yeah, but what happens before.
It copies the bones from somewhere?
From somewhere? What would be your guess?
Is it here? The mesh?

Go back to component list.
ok
The answer is in the hierarchy.
And the settings of Copy Pose anim node.
Got it, thanks
i am totally mf confused by aim offsets and making the weapon mesh point properly in both an fps and a tps project, and trying to copy all the stuff from another BP is tedious and hard to do, and doesnt teach me as well. i have a lerp and such to blend poses from idle to aim but i cannot figure out how to get meshes in truefps or TPS to face forward. using sockets on both of these frameworks i have, but they are barebones so im not overloaded. i would layer in the ABP of another if i knew how to begin doing that.
when it comes to ADS ill be lerping to a camera socket on the gun, but getting the gun mesh and arms to point properly seems another matter
you can effectively compose abps together with linked anim layers if that helps
I’d suggest to tackle one thing at the time.
Out of all the issues you mentioned, what would be the base one that you’d want to resolve?
5.7 GASP metahuman hand bug-Anyone else happen to notice this bug and know a fix?
Hands are stuck down and not animating and twist with camera
Is that clear, non-modified project?
Yea went as far as unistalling epic games launcher and unreal, brand new GASP 5.7 and still happening. I got 5.6 and it works fine there 😧
Can't reproduce on my side for now.
oh is it fine for you? hands are good? that at least gives me some clue that it might be something i did somewhere
Works fine for me.
thanks for letting me know, ill keep looking into whats happening
Honestly just merging the abps somehow
And or getting the gun mesh to point to crosshair. Lol.
What kind of ABPs you want to merge and why?
Could you give a bit more context about what do you work with?
Sorry, yeah. Different third person player blueprints and their ABPs, but they've got different states and enums and all that so idek where I would begin or where to like layer stuff for poses. One also utilizes blend spaces while the other does sequences and montages so that may complicate it
Sounds like overengineering to me.
Could you show what's currently not working in your existing setup?
let me see what i can do. im a bit lost. honestly if i can just get the gun mesh to align w crosshair for now ill be happy.
and I get this D:

trying to line it up so i can lerp to a camera socket on there after
Without Aim Offset the hands are placed correctly, right?
Do they go off when you look up/down?
This is just when aim is held down the other is a random to the side idle anim that works okay until I aim. I am not sure how to mess with aim offset is where I am kinda stuck. I thought I could like trace muzzle socket to crosshair or something but im lost
Are the hands placed correctly in the original aiming animation?
They look to be
But maybe thats my screw up? Idk. I retargeted the anims to be on the safe side too but. Idk.
Do you mean placed when I preview the anim? Cause yes. There is no original aiming animation for this gun in the framework though so I had to try importing a couple
For the reference, could you show it?

Do you have any additional processing in your Anim Graph after this pose?
just returning to normal idle from the overlay
Could you show your Anim Graph?
its rather...large, i had some help with the initial groundwork which is why im a doofus now.

possibly in the aim setup, or the fact that there are two FP cameras and idk which is for what.
yeah, and some ALS stuff i think for mantling
That would be hard to evaluate as this is a complex setup.
So, this whole setup is not been made by you and you have little idea how it works, correct?
not LITTLE, but im also having issues aligning weapon meshes/crosshair in even simpler setups with new animations as well. this framework i do have the author to talk to but theyve been away and i wanted to just learn myself as much as i could
this is the overlay state i did for the pistol that has the results i showed

Do you apply it with Layered Blending in the main graph?
If so, what's the node settings?

What's the settings of the Layered Blend node.
on the layered blend per bone node? or do you mean one of those purple layer blend nodes cause i dont have one
I'm asking about the nodes that could see in the screeshots.
all seem to use this general setup w different bone names for the differnet blend nodes

Could you try enabling Mesh Space Rotation blend and see how that affects the pose
yeah thank you 🙂 let me see here
oh wow. i need to change FOV and try to line up muzzle better but that is awesome

two god damn check boxes are you KIDDING ME lol
thank you so much, thats a lot of progress already
do i need to lower the camera to fix the vertical FOV and such?
thanks again, i wont bug you much after this lol
I'm not sure how camera position is related to the field of view.
i mean like, the arms being low and such i guess in relation to camera. so idk if i should lower the camera socket or not
These animations were not authored for the first person view so it's up to you how to make them work.
Technically, if you have IK setup for your hands, by tweaking "ik_hand_gun" joint you'll be able to add an offset to the weapon position.
It's a rare case when you can just grab the 3P animations and they would work with 1P view out-of-the-box.
for sure. idk where to find 1P animations that work with the 3p skeleton but yeah, im on the right track now, thank you. need to keep arms from colliding with body but thats another matter
Is there a way to do a FABRIK node that has a bool or like a condition. like how can i make it only allow the node to work if something is true in the animbp
You can change the alpha type of the node to bool type.
Even if im using a finterp?
I’m not sure how’s that related.
The Finterp is part of the alpha

This is related only for Float type alpha. Bool type would have it's own blend settings.
so if i switch it to bool, it will still have the finterp?
It would have blend settings, where you define the curve and the time.
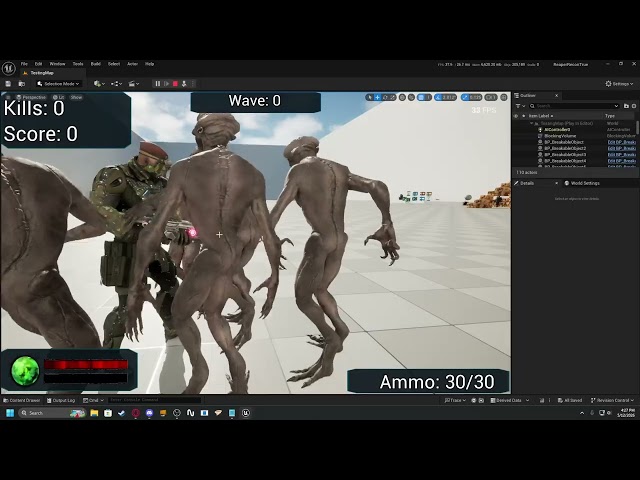
Hi, sorry for my bad English, but I need some help. I'm making a zombie game inspired by Call of Duty Zombies, but my animations are not working correctly. Everything looks fine in the editor, but in-game the gun is outside the character's hand.
but the socket is on correct position
Hard to tell what's going on without seeing the issue.
Win+Shift+R, if needed.
Are you modifying the First Person template?
Yes, I’m watching a series of tutorials from a channel. https://www.youtube.com/watch?v=2U6jupF46Fw&list=PLCiHxNy70he05QBxYddlAb0uPFIVjE4Jf
𝗣𝗥𝗢𝗝𝗘𝗖𝗧 𝗙𝗜𝗟𝗘𝗦 𝗮𝘃𝗮𝗶𝗹𝗮𝗯𝗹𝗲 𝗼𝗻 𝗣𝗔𝗧𝗥𝗘𝗢𝗡
Want to bring the thrill of Call of Duty Zombies into your own game? In this Unreal Engine 5 tutorial, I’ll show you how to create a full COD Zombies experience complete with AI zombie behavior,...
Please read the documentation on First Person rendering. This is what FP template utilizes.
https://dev.epicgames.com/documentation/unreal-engine/first-person-rendering
Epic Games Developer
An overview of the native first-person rendering system.
There was nothing about animation in that documentation. Is there any way I can check what’s going wrong?
Your issue is not related to animation.
I have a FABRIK node to get the left hand to attach to the grip of the weapon. how am i able to move that left elbow down? if possible

Transform the shoulder bone? Looks like it's too far for IK to reach the target.
what node should i do. and before or after the fabrik?
There's a node for modifying the bones.
As for the node order, do you have a guess yourself?
id say before right?
Try it.
im trying to think if it should be add to existing or replace. let me test some thigns out
I'm considering using the Motion Warping plugin. I noticed it's marked as experimental though. Does anyone know how stable/usable it is in practice? Just want to do a sanity check in case it's totally janky and everyone with experience knows that.
Does anyone know how to make premade animations interact with the landscape? doing some googling only vaguely mentioned Inverse Kinematics. I need it functioning just a a cinematic, not play.
For context, I want feet to conform to a landscape for a 3 second shot
IK would definitely do that! I think a good setup is actually in the Game Animation Sample Project, they use some newer nodes for nice foot angle calculations
Sounds nice! Do you know of some tutorials that could help me set this up?
So there's a couple ways to approach this:
-- I'm not sure if there's a tutorial on the GASP setup specifically, but I would look at the animBP and find the nodes in the AnimGraph that deal w/ foot placement.
-- Could just use the default IK control rig that comes w/ the Third Person Character content. This setup doesn't give you good foot angular alignment but will snap to terrain. I think there's a ton of tutorials out there that work with this default control rig.
ill dig through my ue tutorials in a bit 
Sounds good, thanks! Not to pressure- But I've got to get this done by the end of the day tommorow- Its one of my exam deadlines
Motion Warping is being used actively in production since early versions of UE5, it’s pretty stable.
https://youtu.be/lV8O6Isu2oA?si=857ZKNid8eCwjJP0 Try this. It actually shows the downsides to the default control rig method and uses those GASP nodes i mentioned instead 
Hello everyone, hope you all doing great i am back with something cool tutorial.
In this video, we will add FOOT PLACEMENT and LEG IK to our locomotion of character.
This tutorial can be followed by someone new who is not following previous videos!!!
Timeline:
Intro: 00:00 / 00:30
Tutorial: 00:31 / 18:00
Final Result: 17:00 / 18:13
#devlog ...
Hello, I am running into trouble doing IK for a character than can extend its neck to attack and bite (It's an Eel). Does anybody know what IK solution I could use to make this work?
CCDIK might be useful here.
I've been playing around with CCDIK and FABRIK, both are perfect for reaching a target at a fixed length. The problem comes if the target is any further/closer to the animated overall neck chain translation

Apparently neither CCDIK nor FABRIK allow for stretching and try to maintain bone lengths internally, so it just won't do it unfortunately
I am currently trying with spline IK, but I don't have a lot of experience with it
I’ll have to do some research on that topic on my side, I’ll get back to you when I got some results.
Cheers mate, any help is welcome
Is there a way to get the distance from a bone to another bone from the animation? (Prior to IK modifications)
Get location of the joints, get the distance between vectors.
In Control Rig, if such logic nodes are placed before IK nodes, you'll get the actual information at the node execution moment.
So I think I can use a FABRIK or CCDIK but prior to it's application I need to calculate the distance between the animated chain and the distance to the IK target
Then I can scale the translation of each bone in the chain in parent space by a Stretch Factor calculated off those 2 distances
Then IK
That might do
Question:
I currently have some animations that begin left-foot-up (LU) that end in a desired idle-pose. I need to build some animations that start in the mirrored position (right-foot-up) and end in the non-mirrored position
Example: I have a walkingLU_stop animation, and I need to build the walkingRU_stop animation that starts with right-foot-up (opposite of the original) and ends on the same position as the original LU animation.
I have already built a Manny_Mirror_Data_Table so that I can do a bilateral swap of the animation.
What would be the UE5-sequencer-idiomatic workflow for authoring the desired animations? I imagine it would be something along these lines:
In the sequencer:
1 Create a new sequence
2 Import the animation
3 Add an output_animation track
4 Key the final position into the output_animation track
5 Use a mirror table to mirror the animation
6 Key in the beginning to get the reversed beginning
7 From there? Would I bake the reversed animation to the control rig, and then manipulate the control right and key it in until I get a natural flow into the correct destination?
Is that the best approach, is there more efficient or UE5-idiomatic method to obtain the desired output?
You would need to edit the animation in any case.
Mirror the animation, then using Sequencer either edit the resulted mirrored animation using Control Rig by applying the correct idle pose at the end or simply blend two animation sequences together, that also might work.
Thank you, I greatly appreciate the advice
It kinda works, though the translations need to be flattened to avoid the over-curvyness. I think from here it's just vector math
Thanks for the help btw, appreciate it 💯
Hi!
Maybe someone here has encountered a similar problem before?
I have the default Unreal engine 5 mannequin and its control rig in my project. I have one run animation, in which I tweaked finger position by selecting the run animation sequence, then baked it into the control rig, edited it with the control rig, sequencer and then saved the animation. As far as I understand this is the correct way to tweak animations?
The run animation is working fine in the animation sequence preview window and also in the Blend Space preview window of the character. But in game it looks like the characters' feet IK's are stuck at 0.0.0 and don't move.
I also tried opening another run animation with the control rig, but even just opening and saving run animation with the control rig, seems to then break it the same way.

Was it a custom Control Rig?
no, it's the default one that Epic has made
Weird. Your animation sequence is missing animation on the feet IK joints.
Technically, default Animation Control Rig should have covered that.
Well, ideally, the Animation Control Rig asset needs fixing.
One of the ways to fix this issue is to apply Copy Bones Animation Modifier to your AnimSequence and bake the movement from FK to IK joints.
Under “default” you mean the assets that’s provided in Third Person template? Which UE version you use?
Yeah completely default, I have not touched the control rigs nodes at all. I use 5.7, but I think the control rig is originally from 5.6.
I also downloaded the Epic games Control Rig Samples pack and compared the nodes in the rigs, but did not notice difference. (This one: https://www.fab.com/listings/2ce3fe44-9ee6-4fa7-99fc-b9424a402386?lang=en )
I'll look into how to do that Copying of Bones Animation Modifier 👍
What makes this hard to figure out is that in the preview windows the animation works fine and all its settings seem to be identical to the unmodified original run animation. Gif shows how it looks in preview window

You have to check the actual joints in the Skeleton Tree.
Looks like some of the icons have changed in the edited run animation. Not sure what that means though

maybe keyframes did not exsist on some of those bones and in the edited version there are now?
In your Preview Scene settings tab check which mesh is used.
This is not related to the animation directly.
I can change what ever mesh to them, that is skinned to their skeleton. Both original and edited versions use same skeleton
Yeah, but you see which mesh is being used for preview?
SKM_Manny
For both animation assets?
yeah
Because what you're showing in the left part of the screenshot is not SKM_Manny.
I have been changing those preview meshes during that screen, but like I said, I can change same preview mesh to both and they work as the skeleton is the same
That's correct.
Just by looking at the mesh you won't see the problem.
Try selecting the IK joints or toggle on showing the whole skeleton hierarchy

Just checked CR_Mannequin_Body asset - yeah, it breaks the IK joints animation because the Control Rig hierarchy has these joints removed for some reason.
aha, interesting. So the control rig would have to be edited then?
For future edits - yes.
damn.. okay
Have you fixed the animation on your side?
I mean yeah, it was a small thing to edit finger rotations. I wanted to test if this is something I can do for more animations in future too
I mean, have you fixed the IK joints?
Do you mean in the skeleton tree or in the Control rigs node system? But nope, I have not.
I'll have to watch some videos on the Control rig node system/ hierarchy as I have never used it before. I have only done some shader code in in UE5 before
As I said, another way is to apply Anim Modifier in post.
yeah. Thanks for your help! I know at least more now where the problems are
Recent animation work 👇
Focused on clean motion, readability, and game-ready implementation. I enjoy working on animations that feel polished in-engine and fit the gameplay/style of a project rather than just looking good in isolation.
Open to helping with animation work for characters, gameplay interactions, stylized motion, loops, and project-specific ideas. Feel free to reach out if you’re building something and need an extra hand 🚀
Hey everyone, I’m new here 😊🦉
This is one of my works, hope you like it!
And if you’ve got any ideas or suggestions to help me improve, I’d really love to hear them — feel free to message me ✨
Hey all, we recently put together a demo of how we took animation made with lattices in Maya into Unreal Engine for render. We couldn't find much information about this online, so hopefully this helps someone who encounters a similar problem: https://youtu.be/A-nv1qQLjrY

We recently spent time evaluating our Maya-to-Unreal Engine workflow, focusing specifically on how to transfer geometry deformed by lattices into Unreal Engine efficiently.
We break down:
Lattice deformation workflows in Maya
Exporting deformed eye rigs to Unreal Engine
Geometry cache workflows and their limitations
Data footprint and performa...
Thanks for sharing!
Thought to drop solution for this here in case someone else has the problem too. I followed this video and got things fixed for the UE5 control rig.
https://youtu.be/KdDY4cpsLAE?si=GJMsL4IETKPG7jju
In this video, I go over an issue I've experienced where animation created using the control rig breaks the foot IK used by the animation blueprint. I cover how to fix already created animations and what you can do so the animations work out the gate.
Want to continue the discussion? Why not join my discord.
Discord: discord.gg/CyUZjNMhcr
If ...
You know how sometimes your animations trigger an ensure for bPlayingBackwards? I PR'd the engine bug fix. If you're using orientation warping you'll want it. Bit pointless because Epic's animation team generally do not review PRs. Traction does help though, so react/comment if its important to you.
https://github.com/EpicGames/UnrealEngine/pull/14834
anyone ever have a problem with ue5 skeleton fingers not following ue4 fingers?
Could you give more context?
Yeah so for example if a hand has a certain pose, the fingers in the metahuman or ue5 skeleton won't rotate to match it
Like a grapple pose would look like a default hand pose
Still need more info about the animation processing.
How, where, why?
So like in this animation
When I convert use a retargeter to convert it to ue5, the hands don't grab the gun
Like there's no grabbing pose
Well, I don't see that the character in your clip holds the gun either 🙂
There's a finger pose at the first frame, I guess, but the rest is mismatched.
And this is doesn't look like the UE4 Mannequin - is it actually rigged to UE4 skeleton?
Because if the skeleton is uncommon, the auto-retargeter might not work correctly, like it might not find and map the finger joints.
Like there's no grabbing pose
Ah I see
Would inset those manually?
Could you rephrase the question?
Yeah one sec
Hello! Does anyone have any thoughts on using Motion Matching and the CMC in production?
What’s so special about it?
Hello. I have "head look at" set up as on the screenshot. So basically I use this "Look At" node but I blend it by bool when there's actually something to look at (which is not always). It works, but for a few couple of frames when something to look at appears, characters heads first bend down (as if look at location was at local 0,0,0 for a couple of frames) and only after that characters start looking at actual locations. Is there any way to fix this ugly side effect without actually having "Look At" node to run constantly and until specific location is set - just look at wherever the head currently is facing (I guess I can't just use forward vector because I also have basic 1-d aim offset for looking up-down for upper body) ?

Do you reset your look at vector variable?
Sounds like it might be set to zero value which then interpolates to the correct one frames later.
So it would be logical to have it always set to some proper default value unless there’s a need to look at something and define the blend logic differently.
- Can i export the animation with this rig selected? 2) Should i push the NLA down? 3) SHould i delete the other nla layer below it since i have already baked animation?

Do you reset your look at vector variable?
I do, and it is also FVector::ZeroVector by default. I will try to set it to some default value and change blending logic to bool "bHasLookAtTarget", but idk... as I am programming it right now - it already looks ugly code-wise 🙈
What it's the best way to switch between unarmed animations to rifle, pistol, etc?
Idk if made a base locomotion and then switch only upperbody or make different fullbody for each gun
https://gyazo.com/23f7b2c2643484d93106e09c1b403fc0
hey guys i need some tips!, this is a idle animation that just loops for a npc, but since the end is so different from the start it really snapps back, any tips on how to blend it or something ?=

Can't answer your last two questions, but regarding the first one - only deform joints must be exported, no control shapes. Other than that - yes, you can export animations.
Everyone would have their own "best" way.
Fullbody or upperbody blending depends on your animation - if the poses do not change drastically between weapon types, go with the upperbody layering.
You can create a custom enumerator and utilize Blend by Enum node to control the nodes.
First
Hi can someone help me make my animation montage to play once the object is hit by the first person projectile. I have set the Montage up, I just need to know what I should do to implement it.
You mean when they take damage from the projectile?
You could catch the Damage event in the Blueprint, check the damage type and then just call Play Montage
^ fairly straight forward, OnReceiveDamage/OnHit or something -> play montage
I believe specifically, you get the pawn that you hit, find it's AnimInstance and call AnimInstance->PlayMontage(MontageReference)
Depends on whether you're doing it from the Projectile or from the Pawn
I'm really new at this so excuse my dumb questions. I have a made my Animation Montage actor. I then place it in the world.
Next I add to the FirstPersonProjectile BP ?
Or do I make a BP Class for the skeletal mesh and add EventHit --> Montageplay
You don't place a Montage in the world. You set up an AnimBlueprint and assign that to your Pawn class
Then you call PlayMontage in Blueprint from the Pawn.
E.g. you have a player that has all kinds of animations, then you should use an animation blueprint, in there you could just play a specific animation that is properly blended. It can even be automated without having to call blueprints.
Yep, use an animationBP
Can we do it in baby steps.. First select the animation Montage I created and add it to the level ? Yes or No
what KIND of actor are you hitting first off?
is it a player/pawn? Is it a practice target? A can of beans?
is a skeletal mesh of a car, it explodes (I animated the explosion in maya)
new BP for the skeletal mesh? not the AnimMontage?
yes
well
Create New Blueprint > Parent Class = Actor
so you'd be creating basically a blank blueprint, and adding the skeletal mesh as a new component to it
So I dragged the SKcar onto the level and then went BluePrints/ConvertSelectedActor to BP class
that should work
if you go into the Event Graph of that blueprint, you should be able to go to the functions section and hit "Add New -> Override Function -> Hit"
this will give you a new hit event
Ok I see the Event Hit node
okay, you should be able to see the components tab which shows your car skeletal mesh in the list. Probably called SkeletalMeshComponent
you should be able to drag that out onto the event graph
ok
it'll create a variable for that skeletal mesh, drag out that blue pin and find Play Anim
play anim or play montage?
mmm, let me see one second
I think you want Play Animation
it should connect the Skeletal Mesh pin to the Target, you have a drop down box below that to select the montage (which should highlight purple), and it should have a bool to ask if it should loop
you can then connect the Event Hit exec to the Play Animation. And whenever the blueprint actor receives a hit, it'll play that montage
to double check things work, I would suggest dragging off of the Event Hit and typing "Print String" and give yourself a quick debug message so you know for sure it's receiving the hit
Haha!! That works.
But.. the animation once it plays reverses back into its starting position.
Its probably something to do with the way I set my animation montage up
probably what's happening is it's resetting the skeletal mesh back to "no animation" after it finishes
Either set another animation up with the destroyed idle, or just let the last frame loop
Isn't there a "use last frame" like timelines have?
yeah I think if you call Stop() or StopAnimation() it'll just pause the animation in place.
does anyone here have experience with animation setups for Sequencer (New Matinee system) ?
The Stop just stop just the montage from playing
running into a few workflow roadblocks - undefined by any docs i can find online.... and looking for some experience if there is some..... i know its a new system & all
Theres literally no delay jettam, you're stopping the animation as soon as it starts
do should I put a delay between the Play animation and Stop?
get the animation length
and stop it just short of the finishe animatino
Get Play Length
@timber perch - what exactly are you trying to accomplish? I read up in the history and dont see your goal here with your animation
The easy way... look up how long the animation is and add a delay that is just slightly shorter.
@dapper trench @dense bough I intend to add FX and Sound to this animMontage. So I am concerned that if I add any kind of stop to it it will pause the overall effect
they might if you add them to the AnimMontage itself, never tried that.
The proper way, get animation lenght - minus 0.1sec - plug into delay
My intent is to use the animMontage to hold all my FX and sound once the mesh is hit
why are you requiring to STOP the animmontage?
well what RuneStorm is saying is the right way to go about it. That 0.1 delay won't be noticed
why not let it play the full length?
you could also use that delay, and then turn the car into physics mode by ActivateAllRigidBodies or something and then physics handle it too for some fun
Thus the stop
as long as you have collision setup
@ walldiv Because thanks to IrishKilter I was able to make the animMontage play but as soon as the object exploded it would reverse
unless this actor is ONLY going to be doing 1-2 animations - i'd learn how to setup an Animation Blueprint for it.....
you will get MUCH BETTER proceduralization out of your animation states
I just made a BP for the skMesh
IF THIS HAPPENS -> Fire This Animation this is basically an AnimBP's functionality
he's only setting up 1 single animation when it receives a hit event
This calls the animMontage when hit by the projectile.
how is it playing in reverse then?
so an animation BP isn't really needed
it's not playing reverse, it's ending the animation and going back to the default state of "no animation" which makes it reset to the default position
My animMontage looks like this
we're trying to get him to stop the animation just a microsecond prematurely so it stays always in the last frame of his animation
so.... take and duplicate the animation
get the last keyframe & delete everything else
when the EXPLODE anim is done (using the above methods to Get Playtime -> Delay)....
fire off this new animation
which will be 1 frame
could, but then you're technically using up unneeded memory/processing constantly playing a single frame for all of eternity
Its pretty straight forward, for you guys I would imagine. Just not sure why the car reverses its animation after it explodes. It doesnt loop
didn't I suggest that already, set a new animation with the end state and make that play afterwards
have a state for IsExploded
you did
same difference as "using memory to play a 1 frame animation continuously" .... because in the end - thats what needs to happen
you'd have like 3 states - Idle -> Hit -> EndHitIdle
Well we need 2 states (1 frame anims) and a normal animation (the explosion) to do it properly
Ay
as far as using up memory - dont even consider this
it'll be sooooooo minescule
wont even factor anything....
Yep, memory footprint is almost non existant for that. But it wouldn't matter in any case
in reality, it's really not important. But I've always taken the general approach of making sure to always eliminate overhead when can. It's the only reason I mention it, as it's, to me, a "cleaner" approach. But in reality, it's really not going to impact anything
It works both ways, idle , explosion , idle2 or just idle , explosion
In this case the anim is so stupidly simple, there's not really any room for optimization xP
Yeah, and the important part right now is just getting your stuff to work for oyu and understanding how everything works. Eventually you'll find a way you like to do it the best
Since I cant share my screen with you can I share with you my Car explode .fbx its only 685k
if i had any actor that required any animation to be played other than 1 animation (i cant think of anything that would only use 1 animation unless it was a static mesh that had a continous looping anim) - i would setup an AnimBP
I added just the last few frames to the montage
Can you set custom ticks on anim bps btw, I know you can with ordinary bps
because simply stated - anything that requires anymore than 1 STATE - is an AnimBP by nature
an Anim BP is ran every tick, so I'm not sure what you mean.
what are you still having issues with jettam?
Setting up idle2 I assume
the simplest way is to keep with the soluition we already came up for you, and just add that delay
Still trying to resolve why the animation reverses after it explodes
I know, bps are ran every tick too.... UNLESS.... you set a custom tick rate
add a new variable of type Anim Montage -> Reference
like runestorm suggested earlier - if you dont want the overhead of doing an AnimBP.... duplicate the animation , then remove all keyframes except the last one. when the EXPLODE is finished, run the post-idle anim (1 frame)
will the delay effect the particle explosion FX I intend to add to the animMontage asset
you could handle it WITHOUT a delay by simply doing a timer event as well.... same difference
No, the delay only delays the execution of the stop node, it doesn't delay anything else.... yet
The delay I added to the end of the PlayAnimation. A delay of 2 seconds. But it still reverses. Have I implemented it wrong?
If you add something to the end of the stop node then that will also be called after the delay, do circumvent that, use a sequence node and plug the delay-stop node into the first one and everything else into the other
oops, didnt plug in the Get Length function
Wah wah xP
@timber perch there's your solution on how it should look
when you add the new anim montage variable, hit the compile button and then look at the defaults tab and you can set your animation in there. Without compiling it won't show up
@dapper trench what screencap software you using?
printscreen
ah nice - discord takes in pasted screenshots
Prnt - ctrl v work in discord, if you want to be fancy, use shareX
shareX same as puush ?
I have dual monitors, so I have to crop all my screen caps

I would argue its better
@dapper trench how did you add the animMontage varible to the BP
same way you added the Hit Event
green button on the left (by default) that says "Add New"
Add new -> Variable
then in the properties panel, you'll see a drop down for Variable Type. Click it, type in Anim Montage hover over it, and click Reference
and name it exactly the same name as the AnimMontage in my case its called CarExlode
name it whatever you want that makes sense
@dapper trench try puush or shareX, has some great features, selection of capture region, webm capture support, instant upload to a host if you want to( and putting the link in your clipboard of course) text upload, you can even upload blueprints if you want
the variable name doesn't matter, that's just for organization
once you create the variable, hit the compile button up top. And in the properties panel you'll see a new drop down box with the same name as whatever you called your variable, clicking it you can select your montage and that's how it knows which to play
It's 7 AM and I haven't slept yet, what is wrong with me....
and I'll have to check it out, thanks. I get tired of loading up Photoshop to screenshot something and crop it
it's 1AM for me so as soon as you got your montage stopping correctly I'm finding my bed
I tried programming AND watching Discord. Was not productive at all
@dapper trench yah screencap web based accounts like puush ❤
I am having trouble turning the tyoe to reference. its Boolean

Click on it, and type anim
Sharex does the same with added support for files, text and all that. I have it integrated in my context menu, if I want to upload a file I just right click and select upload via sharex and Boom, link in my clipboard
@dapper trench getting closer but the BP is telling me to connect something to the target input in the StopAnim node
In your example you didnt have anything connected to that pin
Mesh Goes there
yeah, I used the wrong Stop function in mine
grab the Skeletal Mesh pin and drag it, and type in "Stop" and use that function instead
it should stop all animations playing on Skeletal Mesh when it runs
Yep
the worse is going from C++ to blueprints. I did a lot of this when I setup FPS weapon/arm animations that were all called from C++
don't usually use the blueprint graph much
@dapper trench
made WORLDS difference learning C++ - made it soooo much easier to understand
Still not letting me connect to it
Started off with C++, used some Blueprints... Ported them back to C++
yeah, get rid of that function jettam.
There are multiple functions labeled the same thing
and are you coding in the Level blueprint or the actor's BP ?
he created a special blueprint actor off of the skeletal mesh
ok then it should be as simple as this:

this is from a ACharacter parent class
depending on what your parent class is - will depend the nodes setup
simply right click the blank area - start typing PLay Animation
it should fill in for you
@dapper trench I think I have wired it up like you showed me . Now when I shot it, it doesnt explode anymore
Jettam, the one you have in your bp is calling the wrong target, you want the one you get by dragging off the skeletal mesh component and then that stop node
click on your Car Explode variable
yeah, what he said
Its currently unassigned and thus plays no animation
Ok the car explod varible is now pointing to the carExplode Montage. But it still plays in reverse
FBX of carExplode fiel I am using.
Guess you guys can handle that? I have an urgent date with my bed.
I'll just jump on your bed if I need you
sleep well Runestorm
Your efforts are hugely appreciated. I have been trying to figure this out all day. Its much harder trying to learn by myself.
Ay, good night/day everyone o7
@dapper trench What I have discovered is I need to put a value of .5 into the float-float
so
This will stop the animation from reversing.
I'm getting the same issue as you
and the reason being is that it's the montage
I haven't used montages a whole lot yet, so I could be wrong, or this could be common knowledge. But a montage is used to blend animations together firstly and has its own set of states and rules you can modify to create any kind of animation you want using various animations and combining them
But if I shoot the car again it explodes again. Is there a way to tell it to not reset
by playing the montage, your car is exploding and then it's "blending" between your last frame (frame 36) and frame 0 at the start. So it LOOKS like it's reversing back because it's trying to blend with the next state
so you don't actually need the montage, you could just play the animation you imported
I changed the Car Explode variable from Anim Montage to Anim Sequence, got rid of all the delays and stopping stuff we added
and just used Play Animation and it stops at the end automatically
Acording to some FX guys I chatted to on a forum. The animMOntage tool is great for building events. Like Car explodes, then you can add FX and Sound etc
while that istrue
you can add sounds and FX to normal animations too
if you open up your Animation (not the montage) and right click the timeline where it says Notifiers you can see there are Add Sound and Add effect buttons
Interesting... Let me try that.
to get your animation to only play once, you'll have to do some more blueprinting/coding type stuff. You'll have to create a bool, call it bExploded or something. Then use a branch node to check to see if it's true
if it's not, play the animation and set bExploded to true
that way next time it goes to play, it'll be true and it won't do anything
You have been a huge help too me IrishKilter. I'ld buy you a beer if I could. Thank you. You should go to bed, and I will keep trying to solve this.
sounds good bud, good luck! I'm off! night.
So I'm getting into rigging, and I'm wondering what an ideal humanoid heat map looks like? I'm having troubles figuring out what I'm doing wrong with some of the volume collapse/quad stretching/quad deforming issues I am getting
does any one used faceFX in UE4?
@calm pelican i cant say what a ideal humanoid heat map looks like - it depends on your software your using to rig in (I use Maya) and the bind/skin method (I use Closest in Hierarchy/ClassicLinear)..... this allows for weight painting - which is the most conventionally used method for maya & film/game assetts that i know of (at least all the study i've done)
Max has a BonesPro software - and many other plugins... that assist in skin weighting
@scenic imp - i just watched that video and there was a software that was a facial MOCAP solution that was bougth out about a year ago.. and hasnt been back on the market since that did just this. I'm surprised this plugin even exists - as its a non-commercial free to use product.... anyways - it looks to be the same kind of setup.... wave file based setup for a rigged facial setup. .... i definitely like this software from the looks of it!
What sort of questions/problems you having?
yeah in our project i want to find facial animation solution For UE4, do you have a proper solution?
what about the MOCAP solution?
@scenic imp the face mocap software i WAS talkin about was FaceShift: http://www.faceshift.com/
faceshift
faceshift software analyzes the face motions of an actor, and describes them as a mixture of basic expressions, plus head orientation and gaze. This description is then used to animate virtual characters for use in movie or game production
currently has a plugin for Maya, MotionBuilder + Unity
with maya - you would bake out the skeletal information to use in UE4
does it well supported UE4?
no plugin
again =- this is raw animation using MOCAP
there is no need for a plugin
sorry as isaid - it was taken DOWN over a year ago when it was baught out
however lookin gback at this
(i have to thank you by the way!!!) it looks as though its back in useage rights!
so i'll be downloading this and puttijng it to good use!
how much is it?
click the link - investigate yourself sir
as i said - you prompted me to look back into this - and i thank you much.... because i would have NEVER found out that this was available again
hha