#animation
1 messages · Page 70 of 1
It has a function to Import it . In unreal engine. But I can't open the window in Maya to actually export the data . Maybe I'm missing a step and I have to do something with the rig in Maya I don't know
not sure, it's pretty new so there's not much in the way of documentation
Yeah unfortunately... But if there is another way than mgear I'd try that 😄
you could just make the rig in the engine, the mannequin control rig is a good example for a simple biped. then all the accessories can either be given controls but more likely what would be easier is to have dynamics to drive things like the cape etc
if you do it this way you can remove maya from your workflow which seems ideal in your case
Thanks for the answer, yeah that might be the issue. I will try to export it from Blender again and check if the scale is off on some parts. 🙂
you can check in the engine if your root bone has a scale other than 1.0
Oh that's a good idea, I will do that
By the way, do you know if it's viable to just rig the whole thing inside Unreal?
yes, i dont see why not. the rigging and animation tools are getting better and better and IMO if it means you can avoid the blender export process, which is fraught with potential issues, then i think it's a much better option
Yeah I love modelling in Blender, but the rigging and exporting process can be a real pain. 😄
I will learn how to rig in Unreal directly and just create the models in Blender.
Thanks for the help battz 🙂
@viscid willowthanks for ur answer!
@viscid willowCan you help me out with this? All animations work just fine. But for some reason the start jump is bugged
Does control rig backwards solve work with ik setups?
how can I use sockets in control rigs?

Can anyone tell me how to implement a rotate in place animation, or at least link me to a tutorial that still works, because most of the ones I have seen are very old. The vid is a reference to what I'm talking about
I would also like the camera to move back to being behind the character instead of the character moving to match the camera. That can be a problem for another day though lmao
therer a way to manually set a state machine transititon to happen in an event graph?
hard to explain what i mean
yes, the effector target would follow the transform of the end of the two bone chain, and the Pole vector can be calculated.
i dont believe so, you'd want to have a variable which sets some kind of transition rule to true.
it does sound like what you probably want is to play a montage, especially if you're wanting to play a fire and forget animation
can paper2d sprites use montages?
i'm using those
that I don't know 😅 are the states playing an image sequence? not a typical animation sequence asset like you would have for a skeletal animation
Yes, I think.
Can I ping you about this later? It's late where I am and I need sleep.
@viscid willow ok so here's the problem. My character won't move even though I have an AI Moveto node with a nav mesh. That's the first thing I want my character to do. Then I want it to play an animation and walk back to where it started
I wouldn't even know what to provide visually, but when i equip an item that has no collision - suddenly my feetIK react to my camera ...or... something? there's nothing showing up in the visualisers, and i've nothing with the ability to be stepped up on nor with collision being spawned ... help?
i dont know a whole lot about the issues you're mentioning, I would suggest this channel though: https://www.youtube.com/@CobraCode/videos
rather than input are you trying to make something point and click?

YouTube
I'm an Authorized Unreal Engine Instructor and Game Developer, providing Tutorials and Devlogs!
My main focus is on teaching you how to make awesome 2D and 2D/3D Hybrid games through Unreal's Paper 2D and PaperZD system.
GameDev definitely isn't easy and Unreal can be pretty intimidating if you don't know where to start, so I'm here to make the...
i'm making a menu for a turn based combat system and the attack command isn't doing anything when i press it
so this is what you mean when you say you want to control an animation state from the event graph.
yeah
Im stuck. how do i store params from an anim layer interface on another anim BP?


You would get the parameters from the Main ABP or potentially calculate them in the event graph of your animation layers. The lyra examples get the information from the main abp
Hey people.. havign a real issue here with Collision in my Unreal sequencer. I am using UE5.6,Guitar is a Skelton Mesh. Do I need to create a Physics asset for it..That is the only thing I can think of I am missing.. Maybe a dumb question😅
Sorry here is the issue

does anyone have any idea how the new motion matching interaction works?
Hello Guy, I had a query regard to custom skeleton,
I am looking for resource and guidance on how to make a custom skeleton with given measurement.
What I want to to measure a person shoulder distance, arm length, leg length and create a skeleton with the same measurement. As I want to do it at runtime( or on go) I would like to know code on how to handle it (Not 3d Modeling Software).
Is there a way to do it?
im just going to look at the lyra example
@velvet jasper sorry to tag you brother but I just wanted to know if these two characters can use the same rig or skeleton? Ignore the axe, I want to reuse the animations on different characters(without retargeting) having the same dimensions. My rigger says this is not right. It needs to be more accurate. What can i do here?


we can ignore the head
Proportions looks same but the base pose differs.
The original skeleton would have to be fine tuned for this guy to match the geometry.
Keeping the same hierarchy would make them compatible for sure and kinda simplifies the retargeting a bit as you could just import the new mesh using original skeleton asset and the engine would play all of your animations on that mesh.
Might need to tweak Translation Retargeting settings in the Skeleton asset but only if needed.
If that won’t give you a needed result, advanced offline retargeting might be an option. As long as you provide a matching retarget pose for this retargeting method, it should be fine.
you mean there's no need to alter the green model(its the new one)
I can get away by making it compatible for the original skeleton?
yeah I kept reiterating to the modeller to keep the same proportions but still it varied in the end.
I think it would be better it make the same base pose same?
What I want is that the animations work in the same way in both characters. The range of hitboxes in the animation etc. Like how Brawlhalla works
They have the same animations on all characters for unarmed and is deterministic because they produce hitboxes at the same position for all the characters. I want a system like that
What would you suggest?
Hi! I want to scale a sphere mesh with an animation. Is it easy to do? How can I do it?
Thank you!
Idk where to post this, but basically I'm trying to create an animation blueprint, I connected jumping and running (I'm going for strafe movement). But I'm having this problem where the run animation only plays after jumping, falling and when I just start the game. This is my event graph in animation blueprint.

and blendspace, if it's relevant

Have the art done with the similar proportions, with similar reference pose and same skeletal structure.
With that you’d totally able to have a shareable animation setup.
I seee! From my reference you said the character has similar proportions but a different pose. So i would need to get the base pose changed from the modeller? Sorry to bother you but I need to get very clear with my artist and rigger to make it clear. I tried to be clear from day 1 about what I require but it still happened 🥲
The modeller said he can adjust the skeleton according to new one
Is that possible?
If your models have a similar pose, that would mean less work for rigger to fine tune the bone orientation, just the bone positions would need to be adjusted.
Even better, if the model would follow the reference model completely, so you wouldn’t need to adjust the skeleton at all.
I am trying to make a slide mechanic. It works but I want to make such that the character cannot slide when he is walking, falling, jumping, or going back. He should only be able to slide when he is running and sprinting forward. How can I do this?
I have attached a photo of the sliding mechanic and a video that shows the errors

This feels like it should be simple, but I am having the worst time trying to read the volume of an audio clip in sequencer so I can attach the volume to an animation key.
Guys I need help because I am fucked up. When I am ianimating weapons in level sequence I am using attach track to attach my gun root to he hand. Because of using attach track the root is alwayis in zero transform (I attached the gun do the socket in player blueprint when pincking up). Everything works. But I have also animations Where the plazer tosses the weapon from right hand to left hand and then back to the right hand. With these I need to use Parent Constraints because in some point the gun is in the air between the hands and It cannot be attached to the right hand becasue the hand is still moving. When I bake this animation so the root is in the world position, not zeroed out. When I play the animation via play montage so the animation doesn't fit at all. When I tried enable root motion the gun sapped back to the hand but it is still totally off. I absolutely don't know how to fix this.
Okay. I think i should completely have the same pose for the new model. There would still be minor differences between the two models but yeah I’ll make sure they have the same pose
By looking at these two models. Do you think it needs some other work other than changing the base pose for the new character?
I’m not an artist, can’t give you any other notes on that.
You can grab the Character Movement Component and pull the data from there, e.g. current movement mode enum.
I think that’s more a material/tech art question - animation has nothing to do with such task.
Sphere mesh? Like you have an animated ball or something?
What’s wrong with just scaling it as usual?
Nothing wrong, the problem is that I've never do it before. So, I'm looking for an example, tutorial, etc. to know how to do it.
Have you tried setting a bool for sprinting while you sprint and adding that to check you do before sliding?
And for the moving forward part you could use the last input vector function
In that case, tutorial on basic object manipulation in Unreal might be your best bet.
Thanks. I know how to manipulate an object: scale, move and rotate.I want to learn how to create animations.
What kind of specific animations you want to do with the sphere and why does it need scaling?
what do you mean? I’m not sure I understand. I’m very new to UE
Is there a video that shows how to do this? Like how exactly can I “check” the sprinting?
I’d also greatly appreciate if you could help on vc. it’d make it easier for me to learn
If you want to to be able to slide only at a certain speed(running/sprinting not at standstill)
you can get the size of the velocity(XY) and compare it to the max movement speed of the character's movement component, or assign a threshold for the velocity's size
I was looking something like this:

Rebuilding some animation stuff from Lyra, running into an issue. I've got animation layers working, as well as a shooting montage. However, the additive pose doesn't appear to be working on the montage. In this video you can see the montage playing out when stationary because the base pose is similar, but when moving you can barely see the montage whatsoever.
Does anyone know what might be going on? https://cdn.discordapp.com/attachments/1057713750490234931/1415011859873927229/2025-09-09_11-31-22.mp4?ex=68ef23bd&is=68edd23d&hm=4feb8b6f67dba6f03d22c270b03f72bdff9a6f31443ec47a1c3d33fd4c0330f0&
Add vector track to the timeline, use “Set Relative Scale 3D”.
Actually, you can convert the float for the vector as well, that would give you one number to control all the axes.
basicly in you you playercharcter/Controller create a bool bIsSprinting? that you set on the triggered and unset on the completed of the input action
I broke my jump anim i think

i need the character to still play the jump anim while walking backward
oh oh, okay so i figured out if jumping when reversed it automatically runs Completed on IA_Jump. i uh.. i don't know why though
nvm that isn't the issue, does that while animation still plays to
I GOT IIIITTT YAAAAAAAASSSSSSSSSSS
Im pretty new to animations in ue5 but is there a specific reason why the control rig points arent popping up when i view a skeltale mesh in sequencer
Hello Guys!!! Anyone know why this behavior?
Control Rig controls would show up only when your mesh has the control rig added to its binding and you’re in Animation mode (top left corner - mode selection).
Usually it automatically goes into animation mode when you click on the control rig track.
Hard to say as there’s no logic graph to see.
I’d guess that you define your movement start direction from velocity or acceleration but don’t take the actor rotation into account, as the vector should be unrotated with the rotation.
@velvet jasper I was doing a new project with GAS. All was working perfect, animation and blueprints. Right now i am changing the previous character i had with a metahuman one


@velvet jasperThanks for aswering, BTW.
Quick question, is it okay to import 60fps animation for gaming? does have any perfomance issue if I am using 60 fps animation instead of 30fps?

IIRC there's a weird behavior in UE4 when importing animation that isn't 30 FPS from external software where the framerate inflates to thousands of FPS. Not fully sure if it still happens in UE5
alright, sound like it is better stick in 30fps animation..
For some reason my attack is not actually happen when I press the button, the 1st photo is a bp component btw, forgot to include that into the photo.


Also whenever I add a reference of the as bp third person character before is attacking, it says my get movement component's reference before the set direction to as bp TPC gets invalidated?
It’s perfectly fine to import 60 fps animation into the engine. It’s just the data fidelity.
If you want to be 100% sure that Unreal correctly understands the file as 60 fps animation, you can manually define the target frame rate during import.
For any animation that’s supposed to be triggered, that defines as the character’s action, it’s better to use the Anim Montage workflow.
Not the question I asked, it's resolved anyway
ok thank you so much.
To be honest, it’s hard to say what’s going on, based on these screenshots. Motion Matching works based on the trajectory and queries it gets from the pawn’s information, a complex workflow, not beginner friendly solution.
The main direction I’d point you is to use the debugging tools and see where it “breaks” on your side.
You can switch to your anim blueprint during PIE, at the upper middle toolbar select your player’s pawn and see what kind of values you get.
There’s a console commands that turns on the Motion Matching related debug options that might give you an overview what MM does.
Rewind Debugger tool would allow you to record your playthrough and go through the values that way, you’d also able to see how MM does its queries.
Thanks, a lot. I ll give it a shot
The Swizzler has struck again.
Hi, is anyone looking for a team to join for Epic Mega Jam? 🙌 If so please send me a DM.
We have 2 programmers, an artist and a designer at the moment most of us have around 5 years of experience in industry. ✨
not sure what I'm missing here but when retargeting my ik_foot_root, ik_foot _l _r and hand ik don't move with the animations. Everything looks fine in the IK rig and it imported as 100% match to the fortnite rig

does this also require setting up solvers for each ik in the rig? kind of thought the 'auto create rig' did that but seems it only effects deform bones
Is it possible/ok to trigger VFX spawners inside of an animation sequence?
Yeah, that's fine. What kind of concerns you have regarding that?
IK goals is related to the IK Rig's goals itself.
For the skeleton joints, you need to use Pin Bones solver.
You don't need to copy animation from the source IK joints, as there's no need for that.
You just make them follow the FK joints of your target skeleton.
The same thing that you would do in DCC, if you would make a rig there.
Perfect, thanks. Just found the info for pinning bones. I only ever used blender for deform rigs so this was a bit of a mystery.
what would be the best way, to keep a ladder climb animation in sync with the position? Espeically so that it works in multiplayer?
Could I use distance matching for it, or is there something better? (Also is distance matching outdated, since it was released some time ago and is still in beta?)
What would be even better, if the movement can be driven by root motion, but the distance keeps the animation in sync.
Or do I motion warp every ladder rung
Haven’t tried this myself but it seems using ik foot and hand targets might work? Ie positioning the targets to each rung then matching the bones to them.
An idea from top of the head - play the climbing animation through the sequence evaluator, remap and wrap the character’s position relative to the ladder’s origin with modulo function to the current animation time.
E.g. the animation length is 1 second, character climbs 150 units up.
If we feed in the correct character’s position we would get that every 150 units up we would have a looping number between 0 and 1 seconds that would control our animation playhead.
anyone know why my leg is mutating with this control rig? (trying to use a pole vector for the first time)


reg 1 = thigh, reg 2 = knee, r_ankle = foot
Yea I was thinking something similar, I think this would be the distance matching approach, but then it's not driven by root motion.
Currently I'm trying to go the motion warping path 😅
Do I have to mach it by hand or is there a tool/plugion to lock the character with a ik into place?
I have a series of SKMs in my game that are ticked as 'tick pose when rendered' and are all 'hidden in game' out of sight until used by a sequence. However, when I check UEinsights it looks to me like every one of these SKMs is still ticking every frame even when hidden - anyone know what I am missing here?

Might be the component tick itself.
Is that something that can be disabled? I don't see a tick for the component itself
Search for Tick in the default values, you should see a bool "should tick at start" or something similar
Hi guys, sorry for a kind of noob question... I've run into an issue while adding my vfxs to Anim montage that the animation in it is rotated about 180*. I've tried rotating its root in both Anim sequence and Anim montage and even changed the scale to -1, but none of it is saved. Once I reopen the asset it's rotated again. Ive seen the asterisk by the file name didn't pop after those changes so Ive added a notify justfor it to happen and then saved byt it didn't help either.
Is there any other option?
Hey guys i just bought an animset package and when i try to set the 8 way direction blendspace the animations doesnt work propperly
Turn on “Force root lock” in the used anim sequences.
inside each animation?
Yes.
Your animations have root motion. To make them in-place, you need to lock the root bone.
Hard to understand from the text what’s the issue. Could you share a clip?
Does anyone know of any good automatic animating plugins for audio to morph target mouth shapes in UE 5.6 that can handle custom (non-metahuman) characters, and work for in-game and sequencer animations?
anyone know?
Are you sure that your primary axis is correct?
it probably isn't, how do i give it the right value?
Primary Axis represents the forward vector of your leg bones.
For example, you can select your thigh bone in the Skeleton tree and see which gizmo axis is pointing forward.
If the axis arrow is turned around, it means the value should be negative.
which of these values do i pick for the thigh?

and should it be the thigh, knee, or ankle that i use?
Can you show your preview viewport when the thigh bone is selected?
sure, i can in a few minutes as i just left home

Pick Translation tool
This is an example from Manny mesh - thigh bone's orientation is pointing X axis backwards, which means that the correct value for Primary axis would be -1, 0, 0

From your gizmo it looks like that your forward axis would be Y axis. But I can't say if it would be negative or positive value.
hm

So it's 0, -1, 0
it doesnt have seemed to change anything

What would happen If you set the secondary axis weight to 0?
does this

basically just flings it back

but it breaks it less.
I mean, the experimental way would be just try all the axes and see which would work for you.
Uh what do you mean? sorry, i have no clue how to use control rigs and the axis
Try different numbers.
1, 0, 0; 0, 1, 0; 0, 0, 1; -1, 0 .0... and etc.
Basically switch between which axis would be primary
hm ok
this doesn't do anything.
i'm lost and none of these trash ue5 tutorials explain how to do pole vectors correctly.
the basic ik is my only blueprint in this entire graph (minus the pull vector creation node), incase i have to add something before
Could you share your mesh? I’d take a look today what’s wrong with it.
I wanted to try distance matching but it says Out of Date, what would be a replacement for it?
Trying to use if snapping to ladder rungs (also open to other suggestions here 😅)

gotta try that out, not sure though how to use the sequence evaluator to geht that done
Harshly say, evaluator node allows you to scrub through animation frames instead of playing it, like you manually control the playhead in DAW.
Evaluator could be easily become the player by following this formula:
CurrentTime += DeltaTime % AnimSeqLength
Your character’s animation could be “scrubbed” with the character’s current height relative to ladder origin.
Example bit from my previous work - I’ve utilized Sequence Evaluator for steering anim implementation for the player.
The animation is authored that way that originally it’s a linear sweep from hard turn left to hard turn right.
30 frames in total, so 1 second.
I have a range [0;1] that could be mapped to [-90;90]. If the player turns left, we interpolate to 0 second, if no input provided - we go to 0.5 seconds of the animation, which is a steer straight pose.
https://youtube.com/clip/Ugkx5D-BlO4Cd_HldMNQYWEDMtvRtHQKAVRY?si=Y2Ty2kaUu8U83h0d
YouTube
23 seconds · Clipped by Daniil Brilliantov · Original video "Daniil Brilliantov | Showreel 2024 - GRAVEN, Phantom Fury" by Daniil Brilliantov
Ahh ok that sound really good, so I would link it to the height relative to the ladder right?
That’s what I said, yes.
Awesome I'll try that, thanks a lot! 🙂
Btw appears to work like a charm, thanks again!
Hello, I'm trying to retarget animations from a skeleton that has a very different naming convenstion and bone count compared to what I have.
I'm following this docs https://dev.epicgames.com/documentation/en-us/unreal-engine/retargeting-bipeds-with-ik-rig-in-unreal-engine to get it done. It's telling me to create retarget chains for major pieces like spine, legs, arms etc, but if I select shoulder, uppter/lower arm, hand and fingers, it asks me to create a chain from shoulder down to thumb 03 (it's called Left_ThumbDistal), and then it asks me to create more chains for index finger, middle finger, ring and pinky, effectively creating multiple chains for the entire arm.
How should I go about it? I need the left arm chain to contains everything from the shoulder down, including all fingers


nvm looking at the Lyra IK rigs I realised that fingers are separated into their own chains, weird that documentation doesn't mention that
Did you find any conclusion
MotionMaker is primary for "walkcycles" as in fixed animations. Afaik it can only walk/run and jump on a path (i haven't personally tried it tho)
Cascadeur requires lots of manual work and is pretty much keyframed animation with some nice stuff (e.g keeping the body balanced on the center of mass, not sure if the player would even notice a difference)
for what i want they are both too stupid, as they have no issues with penetrating bones while interpolating
im having a hard time understanding what inertialization is
i got the "why you should use it" or "when to use it" but i would like to understand HOW it works
for example, im using "Set Sequence with Inertial Blending" with a chooser table to select what anim sequence to play, and without the "intertialization" node after the Sequence Node it wouldnt blend, and withy the node it blends and shows in the Rewind Debugger
inertialization

yeah thats where the i got the "why you should use it" or "when to use it" comes from
not the HOW
only info is "it drops previous anim"
why do your bones penetrate
the video showing inert is a bit confusing
im also very suprised you cant dynamically change the transition duration

for now i made multiple transtions between state A and B with different durations and enter conditions
e.g. an animation where the character sits, with the knee's up, and the right arm grabs something from the left on the ground
the arm would go through the legs
i don't need a fancy walkcycle generator, i need a usable tool which can make animations which don't exist...
without keyframing the shit out of it
you know cascadeur generates "inbetweens" right?
its AI assisted
and it goes through bones (at least what i've tested)
i think the ai assistant works on limbs, how they would move to reach a certain goal, while ignoring everything else
or i've used it wrong
Hi, i have a series of skeletal rigs that all use the same global joints but have extra joints for character specific animation (addons like different gear setup), is there a way to import all the models under 1 skeleton so i can still use the global animations i have or do i need to ik between the skeletons
so to make it a bit clearer, they all use the exact same base skeleton but some of the alter versions of the character have extra joints
when i try import them into unreal it gives me an error about merging skeletons but when i try that it always fails
i tried merging all the skeletons into 1 master skeleton but when trying to import the models on to that is still get the error about merging bones
Hi i have this skeletal mesh unit, i exporeted it and put it on blender and chopped it abit, then reimported but now all animations with root motion dosent work
i can force to root the mesh
what am i missing ?
i dont know what your original skelatal setup was but when exporting from blender it will add a extra root bone
i personally use this custom fbx import/exporter as its removes this:
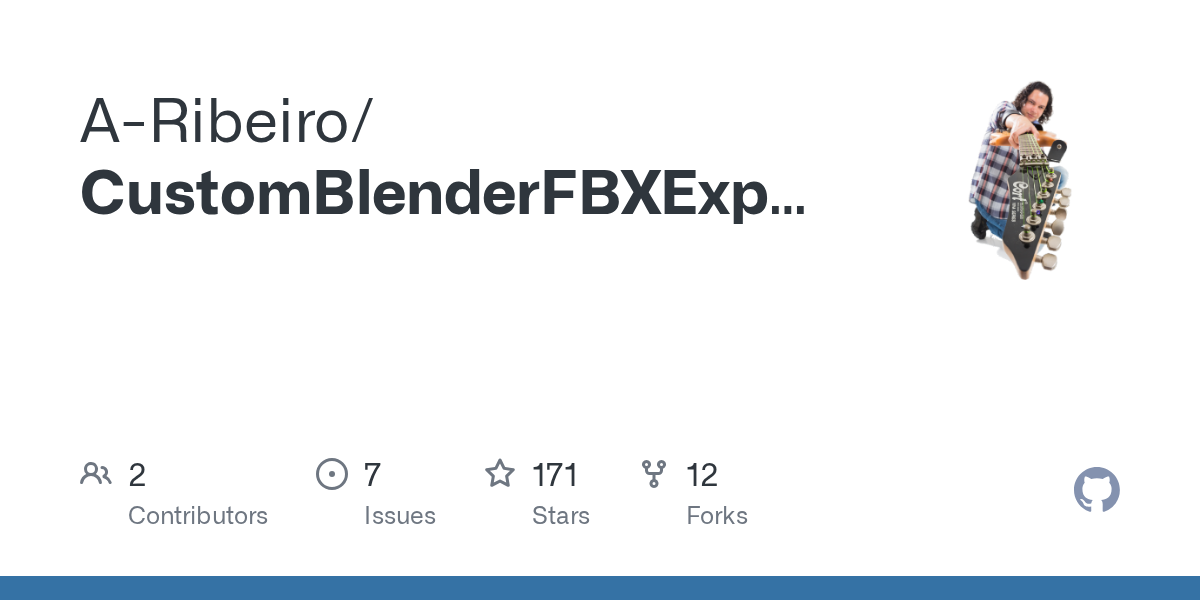
GitHub
Contribute to A-Ribeiro/CustomBlenderFBXExporter development by creating an account on GitHub.
oh, i cant remove the extra root bone or ?
oh this removes it ?
yes
it has a option to remove it which is set by default
hm im on blender 4.0 it dosent have any v for that >.>
time to upgrade
i upgraded to 4.3 just fo that
quick animation test, hair still jitters a little. Full facial and body mocap ready with over 200 expresion blendshapes, hair and boob physics without actual physics at all, just lightweight armature bone behaviour, all for less than 20 mb

Yes, you can have a shared skeleton between each mesh.
The main requirement is that the core skeleton should be the same and all the additional stuff should not destructively change the hierarchy.
What I mean is that you can’t have one character that has 3 spine joints and other with 5.
Or one with 3 joint legs and other with 4.
Any additional stuff should added as a children joints, like twistbones, accessories, weapon anchors etc.
If you actually meet this requirement, then it’s something with the export - try to open your resulted FBXs back in your DCC and see what’s the difference between them.
i dont get it i cant get the addon installed... im on 4.3
When you export from Blender, your armature node needs to be named “Armature”.
UE would filter it out during import then.

where is the armature node :/ ?
im new in blender just trying to solve my issue really

thanks!
What's a good workflow approach for a game with multiple playable characters (different proportions, potentially different skeletons)? Is it possible to make one anim BP and one anim per action that they all share or does each anim BP and anim need to be made per character? Focused more so on first person.
How to tweak the pose. My character was brought into the scene with just a pose. I changed the pose here below... But, it is NOT applying in the scene?

In general terms you would want to have base anim BP to handle the general locomotion states then child or link layer animations to handle more specific changes. Different skeletons will prevent reusing animations without something like compatible skeletons (less success here) or retargeting which I really like in the 5.5 / 5.6. My personal approach would be to have a main anim BP then child ones where needed for different characters. You can try using procedural bone changes in the child bps to reposition things where needed.
Using child anim bps is always nice if you want to change animation sets for different characters
Hello friends, I am making a 1st person RPG and I'm looking to work with some animators that can do 1st and 3rd person anims. If you're interested please reach out and I'll show you my project!
If you’re looking for animation sharing, your main key is compatible skeletons across meshes.
Different proportions, same base pose. Same A-pose for the arms, same fingers curl, same legs spread etc.
Any interaction with the world/props would be corrected with IK afterwards, if needed.
Are you trying to apply changes to the existing animation sequence?
If you’re looking for a very basic way - open your animation sequence, change needed bone transforms, press “Key” button at the upper toolbar.
anyone here able to re target first person anims arms from UE4 manneuin to UE5 mannequin arms?
I think the issue is their default poses are different and hence the arms don;t line up in the result

Pose match needed to be done for sure.
Though the Hand IK targets set to Match Source should give a good result in terms of preserving the original palm placement, the fingers definitely would need a pose match, as they are curled differently.
Might worth playing around with rotation retargeting options for the fingers chains.
Hi people
Do you know how to see debug skeleton on retargetted anim bp? I mean using Pose Watch does not work on the anim bp for retargetted character
You mean, you have the mesh that has a runtime retargeting running and you want to use Pose Watch?
Yes.
Does any one know how to solve this?
I'm facing sth strange here with MetaHumans and Retargetting
In the Video look at his left hand slowly sliding for itself when camera moves. On weird angles the hand completely detaches from the IK!
I checked with my source animation on UEFN and it was OK.
It comes from RetargetIKGoals on Left Arm on RTG_UEFN_human_nrw.
I can't grab the weapon without IK Goals and when I do I'm with this issue.
I don't know what to do!

Do you have any Aim Offset running on top?
I was thinking about this too. Yes. I have. it’s on lower layers.
Despite that It is not the issue since I disconnected that and the issue persists. Actually removed everything except the base Motion Matching setup and issue persists
How do you attach your hand to the weapon?
Character's IK target snapped to the socket at the weapon mesh or?
I have created a grab_r bone and weapon is attached to it on the UEFN character.
the grab_r is child of hand_r
Okay, and how do you attach the left arm?
via virtual bones
like this

and also using IK ofcourse
I just noticed something stranger too right now.
When I rotate the camera the left arm is rotating!
Look at the red line on the video

If you apply the animation asset to your character instead of using anim blueprint, would the arm still move?
Let me check
I checked
The arm is not moving since camera controls and lower layers are not available
Alright, so it's not the post-process ABP or even broken material (might be some weird WPO shenanigans).
So, something's going on with either your source or target graph.
Yes. I tested and when I turn off the Retarget IK Goals (and specifically the LeftArm) on the RTG_UEFN_to_Metahuman_nrw the issue disappears
but this is not the solution because I need the retargetted hand to snap to the source hand location
Hello, can anyone give me an advice how to fix a problem with ABP "Look at" node? I'm trying to make my character to be able to look at stuff, but no matter what I do the head is always rolled like 90 degrees along the forward axis. I've got this character from FAB, but AFAIU with a head bone oriented like this my Look at axis should be (0, -1, 0) and my look up axis should be (1, 0, 0), so i tried these (and many other axis combinations) not the head is always twisted in some weird way no matter where I put debug location. However, "look up" part of the "look at" seems to be working. How can I fix this?


Try disabling Local Space.
It would work in the override mode instead of additive. Not the ideal solution but might give you a solid result.
Anyone have a maya 2024 rig for the UE4 mannequin ?
I am using a mixamo character in my project and when i try to separate the animations by upper body and lower body it doesnt work. does anyone know why?

in the layered blend per bone node im using "Hips"
Best way to play an animation montage in reverse? I am currently trying to get this to work, but this "play montage" node is literally doing nothing when it is executed

Hey, I need some help
I'm doing a walk cycle blend space that features the character walking while the torso faces the same direction at all times However the diagonal movements look clunky with the feet moving poorly
The feet movements are synched on all anims, landing with the same foot at the same frame
But ”Hips” bone is the parent of both legs and spine, right?
If you want to play the animations on the upper body, you would need a first spine joint, so the animation would spread from there.
I’m not sure that you can reverse the montages, though logic you have seems to be right.
Have you checked that all the input values are correct?
Could you show your setup and the result you’re having?
The issue is less about the setup and more on the anims I feel. 1 moment
Don't think I can show atm but, all anims have the same length and framerate on top of what I mentioned
4 anims with a blendspace blending them based on direction and speed
@velvet jasper ok I can show you. Are you ok with a quick stream?
A short video clip would be fine, I’m not available for any voice chat.
Plus it might help others having the same issue if we stay here
Well while waiting I talked with the animator a bit a found the issue... The anim that was meant to be for strafe left / right actually emulated moving backwards as well so it created a lot of sliding
@velvet jasper I do have one logic question though, assuming the upper body faces always in the same direction how do you make an anim for strafe and back walk that blend properly? Would not blending a toe-first contact with a heel-first contact cause visual artifacts?
I don't think you can reverse a montage this way, i think i tried before and ended up exporting to Maya and reversing there
The blending supposed to work fine if all the animations have the same pacing.
If you have no access to the sources and you need to change the starting point of the animation, you can record it to the new anim asset and trim the frames as needed.
If you need "in-betweens" and have limited number of assets, like only 4-way directional anims, you can try "Lyra" approach and use switching between the directional anims + Orientation Warping on top. But that's a kinda complex solution.
Hello!
I'm using "Layered Blend per pose" in my project to separate the upper body from the lower body.
The UpperBody begins with a bone called "main". The issue I have with this, is I would like this bone, "main", to be controlled on the X and Y axis by the upper body animations, but the Z axis by the lower body animations.
Is there a way to copy the lower body axis rotation value from the lower pose and replace the one from the upper pose with it ?
Thank you very much for reading me.
Yes I have :/
I asked this over in programming and just realized it might be better asked over here
What's the best practise for adding basic movement to an object (i.e, do I need bones? Can I just parent the parts of the object to an empty then animate independently?) Just wanna add some rotation and bobbing too add some stylised movement to my scene but when I tried exporting an object where I'd animated the parts as separate objects then imported as one Unreal only imported the animation data for one so I'm guessing I need to be doing something differently, just not sure what the best way to do this is.
Welp, just re-animated my object by parenting each object to a bone in an armature and unreal only recognises one of the bones and it's animations despite there being 4 bones in that armature and the objects being properly parented to those bones. I don't know what this software wants me to do here 🤷♂️
For basic movement, you can set the components transforms directly in your actor’s logic.
If you animate the actual objects in your DCC, that wouldn’t work unless you export your objects as Alembic.
Otherwise, you would need to create a skeleton, rebake the movement to the joints and skin your objects to these joints.
Assembling the objects into an actor and then animating them using logic might not be a bad move at this point though I'm not sure if that would have more performance overheard than animating directly.
What's confusing me is I've made an armature, parented the objects to that armature then parented them to individual bones in that armature, and that has worked for me for character animation in the past, but for some reason it doesn't seem to be working for this.
Only thing I can think is not all of the bones are parented to one another (but were created under the same armature). That shouldn't be the problem though cause the one bone unreal is recognising isn't even the root bone (which I've named root for convenience)
(Edit I realise now I've not mentioned yet that the DCC I'm using is Blender but I imagine the workflow for exporting animation shouldn't differ drastically from other 3D modelling software)
Under "parenting" you mean applying the skin weights? Because just making the object to be the child of the bone won't work.
Oh, and yes, you can't have multiple independent joints - there could be only one hierarchy root joint and rest would be the children.
Assuming you've renamed Armature node to something else, that artificially makes the root joint for you that way.
Fair enough, thanks for your time and help. I'm gonna try either animating each piece independently and assembling it under a common actor in UE or animating it as a skeleton with a heirarchy (though I'm less optimistic about the latter as I need some parts to move independently).
Either create it's own skeleton for each desired mesh or create animations for each piece as it's own anim sequences, then assemble everything together with, for example, "Layered blend per bone".
Hi everyone! I'm pretty new to animation and wonder what is the proper way to do branching in ABP. In our game we have different interactions, and we use IK Rig to adjust hands positions to interaction point. Currently I've implemented it with caching current pose and blending it by bool with itself with applied IK rig (see pic, same thing for left hand). It works, but is there any more idiomatic/efficient way to implement it?

If it works for you, it's fine.
Though you can simply change the alpha value of the IK node to turn it on/off.
Alpha could be set to Bool type and have separate blend in/out times.
Oh, thats definitely more clean approach, thanks!
Could you say what actually you want to achieve with this?
Kinda hard to visualize what supposed to be the result here.
yo can anyone help me rq rn?
why does my animation stretch? imported into unreal from blender

Is it the joints that are stretched or the skin weights are screwed?
no idea
how would I check that
it imports fine but its when I play an anim in the engine that it fucks up, meaning the animation exported wrong somehow
Open Skeleton Tree and click through your joints.
Additionally, try to reimport your mesh with "Use T0 as ref pose" option.
what would this do
You'll see the location of the joints, if they are at the right place.
I have no idea why the its only the left side

I did mirror the skeleton but I thought it just applied
That's the question to your Blender rig.

You have multiple hierarchical root bones, which UE won't understand.
Create an additional joint and make it to be the parent of both L_Forearm and R_Forearm.
This actually lead me to the solution to my problem as well so double thank you Dan 😅
Guys, I need help with Animation Retargeting
When preview, it looks good, but after exporting, the animation is bad and slightly different from the original

And how different are the results from the preview?
It's a fighting animation. In the preview, his head and body lower properly. But when the animation is exported, his head and body don't lower properly.
See the difference in the two pictures


Yeah, something is not correct with the upper body for some reason.
Is that 5.6?
Yes 5.6
But the animation source project is old, from version 4.27 or lower.
Well, the source's age shouldn't mean much, this is mostly about the processing.
I'd suggest to try exporting the generated retarget assets first, see if they're okay and try to do retargeting with these assets instead of auto-mode.
Okay, I generated retarget assets. But what should I check to make sure it's working properly?
Open the retargeting asset and try to pick the UE5's Mannequin as Target, see if you have same result.
Same result, looks good on preview but bad on export
This animation I'm trying to retarget, you can test it if you want
All good on my end.

Does your source anim sequences have any additive settings enabled?
Hi,
I have created a metahuman and added body and face animations. I also use Animation Blueprints for both, with state machines so I can trigger the different animations. However, I'm struggling with playing and syncing audio in my packaged game. In my Metahuman Blueprint, I bind to events and set the booleans for the state machine and also Spawn Sound on Location. I already set the Loading Behavior for the sounds to Retain On Load, but that doesn't seem to help.
A Notify in the Face animation is also not an option, because you cannot stop the audio when triggering another face animation, which will play them both.
Would this be a correct way of implementation? Or is there a better way to play audio in sync with the Face animations?
Am I understand you correctly that your facial animation is being triggered through State Machine?
Yes, that is correct. I have an animation Blueprint for both my Body and Face animations
I'd suggest to trigger the animation with Anim Montage.
In your logic, you would have following events: Play Montage --> Play Sound At Location (or Attached).
No, I use the default settings.
Are you sure the animation you exported is correct and the upper body appears correct like this image?

Ah wait
Well, Auto-Retargeter doesn't give a good result here.
Manual tweaking of the retargeting options is required.
From the top of my head - you could add Scale Source to the top of the op stack to match the height between the characters, turn on IK rig and set the arm IKs to "Blend To Source" if you need like 1-to-1 motion.
I'm not a retargeting expert.
Can you please edit the retargeting options and export them for me?
I'm happy to help finding the answers to your questions but I'd prefer to stay away from any extra work, as I have my own 🙂
Well I did it, but I couldn't find the arm IKs

If you click on Retarget IK Goals, in the Details tab you would see the IK chains.
By clicking on them, you'd see their settings.
Ok I did it, still same problem, not matching after export
Yeah, interesting, it does differ from the retargeting preview.
Hard for me to say what currently breaks there.
is there a less heavy way to get information from the player into the ABP without having to cast? I need to update the cursor location data per frame to adjust the player's spine bones to allow for shooting at elevations above or below the player. I might try to only do this while using ADS if I have to cast to try and save on perf but there has to be a less bad way that I'm not seeing

Store the cast result as a variable during Initialization event, that way you'll have a direct pointer access to your blueprint.
Ty mate
Thanks! Because I never actually used montages before, it took some figuring out (especially adding the default slot to the animation Blueprint). But it is a lot cleaner with the montages.
Hi everyone, when retargetting, the target is shot in the air like the image. Has anyone seen it before?

interfaces?
I find myself wishing time and time again that it was possible to have an animation notify state that had an anim notify contained inside of it that you could move along it like a slider, that was all cleanly contained within a single object (as opposed to having an anim notify state and a separate anim notify and having to get the two to talk to each other)
this is a silly little mockup of what it would look like in my head, but I don't have anywhere near the slate knowledge to bring something like it into existence. I'm wondering if this is by any chance a common enough desire/usecase that people know of a plugin or a way to simulate this functionality?

Could you check the scale of root bone on both source and target?
If it’s bigger than 1, there’s an export problem.
What would be the use case for that?
various things, one example would be switching from one effect to another seamlessly
but there's also other stuff like a single state with different logic before/after the "hit" moment of the animation, or before/after a branching point in the animation
Well, it's still achievable already by making a custom anim notify state class and writing a custom logic with the percentage threshold in mind.
There won't be a fancy UI representation but it would work.
yeah, I just think without the UI representation it would be kind of miserable to visualize and tune
Any guidance on how to actually use 'Layered Blend Per Bone'?
From the documentation i can understand that
CachedPose -> BlendPose -> Output
CachedPose -> DefaultSlot -> BlendPose 0 -> Output
The only difference being if a montage is playing played on that slot, but what if i want a pose to act as a constant and not a montage?
What's the general consensus on ALS these days?
I grabbed a community version off GitHub and did some retargeting to get it working on UE5.6, but there have been some weird bugs and it's generally feeling difficult to add new anim features to the system.
Are there better frameworks i should be looking at?
theres multiple ways of blending bones! id ask chat gpt about the different methods of blending in different spaces, additives, etc. there is so many options on how to blend and its hard to explain without knowing what you trying to get out of it. its a whole book.
Caching!, the most frequently used once you would cache, ASC, Movement Comp
Whatever you feed into the second input would be layered on top of the first input, based on the node settings you made.
Either you specify a hierarchical start bone (e.g. by providing "spine_01", the node would apply the animation only to this joint and it's children) or a blend mask.
So it's not limited only to use with the montages.
Blend Mask would be today's preferable way as they are multi-usable and give you more granular control over per-bone weighting.
I would, but its source of truth is usually terrible, it takes content from those terrible YT tutorials and i feel like learning from them is a mistake every time.
Tearing down apart the Lyra project seems like a good start since my project and lyra are aiming for TPS, although its quite complicated with their anim-layering system
the concepts are nothing new and not trivial, gpt would do fine on that
So Blend Pose 0 is layered on top Blend Pose, seems like Blend Mask is the smarter option from the two examples I've seen(one being the Lyra project), I'll dig further thanks!
I'll give it a shot, thanks
Blend Masks are great btw, think of it as prefabs, you can use throughout your anim bp without configuring it each time, be considerate with usage of blend nodes aswell, these are one of the engines most expensive animation nodes and can tank performance, so use wisely and coordinated
I've seen an amount of videos heavily using blend per bool, makes sense.
ALS layering system is one example of bad practice and over usage if you curious
Hi! I'm working on a mobile basketball game with analog stick movement. When I trigger a crossover animation (via button press), it plays correctly, but once the animation ends, there's a short pause or freeze before the analog input kicks in again. I want the character to blend directly into movement (e.g., if I'm holding right, they should smoothly continue moving right after the crossover).
How can I make the transition from the animation montage (crossover) to analog-driven movement seamless, without that frame delay?
Does your transition anim sequence contains root motion?
I'm trying to replace some models and have some stretching in the spine that I'm having trouble correcting. Left image is how it plays in the ik retargeter, right image is how it plays in the blue print.
the stretching in the spine is the issue, I have it set to unlit to make the model easier to see in the image on the right.


Thank you for the tip on that, but for some reason I can't blend the pose in on a toggle

Anyone else unable to add functions to the Anim Graph using "Call Function from Anim Graph". ie in ALS-Refactored, I am unable to Add any "Refresh" nodes. Is this an issue with 5.6.1?


This is a vague question.
What you’re trying to do and what’s the current result?
Does that happen only in character's BP or also in the actual animsequences?
hello, i have a question regarding animation in general.
I currently have a weapon with multiple animation and a skeleton ( reload, fire, walk etc.. )
I would like to modify the mesh in blender to remove some part of it ( only some details ). Can I just re import it into unreal, and select my skeleton without issue ? What process should I follow if I want to modify a mesh that is already animated ?
The best would be to create duplicate of your project and also blender file then try reimport there and see if anything breaks, you will be safe if anything occurs of not destroying your whole character and animation system
On a completely blank project, there is this TutorialTPP_Skeleton, is this the same as the manny skeleton, or the same as the standard third person player character, just without the character blueprint, animation blueprint, etc?

Why do AnimBlueprints use Sequences for locomotion instead of Montages?
there's not much reason to use a montage for something the anim graph already has players and states for
it's a bit arbitrary but montages are just a named slot in the anim graph
I ask because I discovered that AnimNotify_GameplayCue is restricted to montages only, for a reason I don't understand.
probably because montages can be ticked in situations where normal sequence players are not evaluated
for example when a skeletal mesh is not rendered you can shoose to only tick montages
which is good because even though the bones aren't evaluated events still fire
My current use case is using a cue for footstep sounds.
I suppose there's no real reason you could not make them a montage
idk if you can just play a linked montage right on the anim graph or not though... I would assume there's no issue there
https://github.com/Vaei/LocoTips/wiki/Anim-Notifies also read this
anim notifies are fickle
I am inexperienced with AnimBP so I am not sure what is advisable vs absurd.
Crud...
imo something like a footstep being missed once or twice is probably not the end of the world
but something like "start damage" and "end damage" etc would be scary
Let me read the article. My current system doesn't put the logic in the notify itself, but the notify does hold the timing data.
that's fine
but it will have to account for when the playback speed changes and when the current played anim changes
you may also need to consider the ticking order of your timer to be frame-perfect vs an anim notify but you may not care
anim notifies are just stored in the asset
also keep in mind anim notifies are instanced PER ASSET
when you respond to one it is the asset itself as the object. (well, in a sense) You cannot store per-mesh data in the anim notify instance
so you must use the passed-in context to do stuff
Yes. Thankfully I have that covered already. Per-mesh data is stored on a component on the actor and the Notify looks it up,.
yeah just in case because that is a common pitfall
One time I tried giving each notify a TMap of skeletal mesh to data but I was advised against it.
honestly there are cases of the engine doing something similar but
it's not really that hard to just make a component
So what would the consequences be if I duplicated AnimNotify_GameplayCue and put it on a sequence instead of a montage?
For the montage, the animations have root motion enabled. But the locomotion movement are just using the standard non-root motion @velvet jasper
Hi! I'm working on a mobile basketball game with analog stick movement. When I trigger a crossover animation (via button press), it plays correctly, but once the animation ends, there's a short pause or freeze before the analog input kicks in again. I want the character to blend directly into movement (e.g., if I'm holding right, they should smoothly continue moving right after the crossover).
How can I make the transition from the animation montage (crossover) to analog-driven movement seamless, without that frame delay?
relying on the sequence player actually playing to resolve the notifies I guess
the ability to only tick montages when not in view exists for a reason
nothing stopping you from manually triggering gamepaly cues from... anything
Hi all, ive been following the Unreal Engine 5 - Lyra Locomotion System | Thread Safe & Animation layers | Tutorial series on YouTube (https://youtu.be/TYI_X4ibt_s?si=7Z2iO4Zf9lLiEr0p). Ive noticed that it uses Root motion. I want to use in place animations that I have instead, I want to know since I have in-place animations, are there any Variables or Functions I need to change/adjust to have it work better? Or should the tutorial cover in place as well?
I am asking in here since it is based off Lyra locomotion system so hopefully someone can answer 🙂
In this tutorial, we'll explore using Lyra Animation and the basic implementation of Locomotion using threaded safe update animations and animation layers.
Lyra uses the Blueprint Thread Safe Update Animation function and the Anim Node function to achieve a thread-safe implementation.
Please share your comments and what you think about it.
Th...
Does anyone have any suggestions for a retargeted animation that plays fine in the preview window but the actual exported animation flies around the map
It's something to do with the root bone but I haven't got a clue how to fix it, I've tried so many settings and of course, nothing is really working
It is ue5 Manny anim being retargeted to a very similar but slightly different skeleton
Most of it plays fine but for some reason the root bone of the custom skeleton isn't called root
Anyone know a way to get camera animation sequence to loop in a camera shake base?
The root motion is used for things like distance matching and orientation warping so if you want to use those features you will need it. You can see the root motion thresholds in those 2 nodes
On another topic. This seems a bit of a cheese but on my left jog stop state the leg was kicking out too much so clamped the speed for the stride warping. Not sure if there's a better way to control this. Alpha of 1 here is fine since it helps with the stops in genereal

Thanks for your response and advice 🤝


Can anyone explain why my **hand_IK_control **rotation **changes values for all three axis **when the goal is to only adjusting pitch rotation? 🤔 I am on an additive control rig layer. In local space. And the gizmo points into the right direction. Same problem happens with yaw rotation. Roll rotation works on the single axis it is supposed to work with.
Hey does anyone know the trick to getting root motion to bake from sequencer to an animation sequence?
I have an animation that I want to be root motion. So I baked it onto a control rig, added a root control to the actual root bone and keyframed it. The character still won't actually move the root when playing as a montage in the level.

How much work is to rig a human character from scratch? Does anyone know how much would cost?
dm
Hi, I'm having an issue with my character mesh's bounds. Animating my character leads to weird persistent shadows sometimes. I learned that this is probably because of the mesh's bounds being too small, resulting in the virtual textures not updating properly. When looking at my characters bounds, it seems to me that they are not updating based on the skeleton somehow. Does anyone know what might be the problem here?
Hello Sourcers... I have the well known issue with the retargeter in 5.6 and 5.7 {I'm experimenting with 5.7 right now} which I suspect is causing my scrashig issue with landing after jumping {when the character disappears and, in worst scenarios, crashes the editor}: "IK Retargeter bone chain, Root, was unable to be normalized. Chain too short."
I was following a guide and there was no mention of this specific condition comparing my 5.6 skeleton to the 5.7 skeleton as in the two screenshots down below {5.6 in black, 5.7 in white}. What am I supposed to do to fix that? A solution or a direction to the most appropriate guide would, after days of struggles, save my day {and my mind!}. Hoping things like this will be solved in the official release!
Thanks, in advance, as always.


Hey thanks! Yeah I though so, I actually found a way to do it myself
On a different note, is there a painless way to retarget the full pipeline all at once or are we supposed to do it by hand?
I mean Animation blueprint / Blendspaces / Anim Sequences
I made my first lowpoly model and i used the standard mannekin sceleton, but i noticed the legs clip throuhg the clothes, is there a way i can limit movement for the base sceleton?
I know i can lock them in blender but will that be enough to keep them from moving to far after porting to UE5?
Second question. If i make changes to blender, do I just export it again and re-import it? I tried that and somehow broke the sceleton so every time i click the sceleton it crashes ue5, i made a new project since
I've seen some posts floating around in the forums that the IKRetargeter is bugged in 5.6 (and still in 5.7preview)
If you have 5.5/5.4 installed you can try there
Epic broke animation retargeter in 5.6 it seems
It now expects you to manually select animations from a list instead of content browser
For a lot of projects this is simply workflow breaking
👎

I think this is what happened to me
any fix for this?
Nope
any way to avoid it happening again? i started a new project this time, but it happened when i re-imported a model. all i did was swap some planes around that was facing the wrong way, but i later need to adjust some bones too
I have no idea what you're talking about
I'm new here and I'd like to share with you the video game project I'm currently working on.😊 May I?
Bumping
is this just a maya thing that the manny skelly shoows y as forward

Hello everyone! I develop Nkurunziza, an adventure game inspired by African culture, where a brave man seeks to free his wife and end the slave trade.
Here is the link to the WhatsApp channel if you want to follow the news and the backstage of the development 👇
🔗 [Link to your WhatsApp channel]Voici une invitation à suivre la chaîne NKURUNZIZA sur WhatsApp : https://whatsapp.com/channel/0029VbBWfnj6buMQZlTd8v0p
can we get this kind of effect exported for unreal?

Sword Smear Rig
En este proyecto, hemos aprendido en Trazos junto a Eduardo Ramírez Gracia a crear rig de una espada, en el que hemos trabajado con varios deformadores: blend, flare y squash.
He añadido una cadena FK, tres puntos de pivote, y lo más importante: el smear. El smear tiene dos atributos principales:
- Smear Effect: genera un de...
Also, does Unreal accept deforms like Blendshapes , shrinkwrap, wrap, lattice etc ?
@velvet jasper sorry to tag you again brother but i was getting the plane rigged for swoosh effects.
seems like something you could do pretty easily in niagara by sampling the mesh. shape keys / morph targets yes as these are deforms. other modifiers would need to be applied on export
yes we can but these need to be deterministic because it will decide the hitboxes. In multiplayer it's hard to track the particle effects. So attacks need to have these effects as a part of the animation
interesting, well you could also have the main sword and a couple of 'smear' meshes exported as 1 mesh with 2 or 3 material slots. then when needed enable collision on the smear ones and put the smear effect on the other materials. Seems like one longer collider would do the same job and replicate but I guess it depends how you're using it
that sounds like a way definitely. I think i can avoid having smears for now and just use the swoosh effect to give a wider range for attacks
the swoosh thing just needs a 3d plane to be rigged properly
I still think you can keep the visual totally separate from the actual weapon collider. Even if the sword is just a single sword the collider could be longer behind it. Then you can handle the visual with whatever material / effect you want
You mentioned it how to do it with materials. I am still not very clear with it
but i definitely dont want it to be done with niagara or something
https://youtu.be/ZWG39txvJKc?si=mI-BHNY2f3_W6y30
just a basic concept using a material
Hope you enjoy it!
Project Download : https://www.patreon.com/posts/79730059
Patreon : https://www.patreon.com/A1exHuang
My Products in Unreal Marketplace : https://www.unrealengine.com/marketplace/en-US/profile/AlexHuang?count=20&sortBy=effecti...
instead of noise you would want to capture your sword and use somekind of opacity curve
yeppp, basically this is saying to have a sword like texture and use it as a material?
on the other material slots?
yeah it might even just all fit on one slot. There's ways to sample the mesh directly without a texture I'm sure.
however you choose to attack it
nice tricks but I need to learn more about it
thanksss
need to check how to sample a mesh
Does anyone know why when I attach my metahuman head to a different skeletal mesh inside a blueprint the neck of the metahuman elongates?
Because it's most likely not made for the skeletal mesh you're trying to add it to.
If the target skeletal mesh is an exact copy of the same skeletal mesh the head came from then you should be able to switch heads. The mutable plugin might also be an avenue to look at.
Thank you, all I'm trying to do is have a metahuman that has custom clothes and is retargeted to ue4/5 mannequin animations.
Alas it is impossible
I fixed the neck but it kills live link
It's probably easier to retarget UE4 and 5 anims to your metahuman to be honest. Look for some tutorials on Mutable. It's designed for customization of skeletal meshes, clothing etc. And there's also a demo project you can check out from Epic on FAB.
Thank you, I have literally just this second managed to retarget it now. The hand was broken before.
Live retargeting could also be an option. Takes a bit more work to set up, but if you need extra characters to switch between, it works reasonably well between different sized characters.
Actually I think I made an error there. If you're retargeting UE4/5 anims then you're already targeting the Metahuman lol
trying to make a arm-out pose. whats the best way of doing it? should i export and use blender or can i do it within ue5? it'll be blended afterwards with the normal 1st person running anim
Hello everyone I need some help with setting up an animation
While the player is holding a button, Im playing an animation montage, but when I release a button i need to play said animation in reverse. simple enough but I need the animation to start playing in reverse from the exact moment the button is released without any weird blending, how can I do that?
i have an anim related question, maybe someone in this chat has some ideas
foot placemant
Can anyone help me figure out why my chaos cloth falls apart at the material groups during playback in the sequencer, but is intact when I preview the simulation in the chaos cloth asset editor? :(

Hi, I am currently optimizing my AnimBPs. Instead of setting variables/bools inside of the AnimBP, in the state transitions I am now using the reference to my character with a binding to the bool in my character BP. This works for Bool=true, but how do I check if a bool is not true with a binding? In the screenshot you can see the old way, with a dedicated bool, on the left. The new binding is on the right, but it only checks if the bool is true and I have found no way to negate the check

Hey guys, we are working on a project based on GASP, and we've implemented first person camera (attached to head socket). It moves too much with all the animations, which looks awful. We are currently thinking of using Transform (modify) bone node to stabilize all bones from pelvis up to the head. It'll probably work with enough time spend on adjusting values, however, are where any better approaches? Or is this the way to go?

you can still property access the bool you are wanting to check, and rather than binding, pass it through the NOT.
the binding directly to the node isn't making the abp more or less optimised. getting the variable via property access is a more performant way to get those values. which is done when you bind, like you have done, or use the property access node to get your information
Thanks! I'll look into setting up property access for my vars
the binding you have applied is already performing a property access call, you can just as easily use the property access node to get the same information and the same result

Ah I thought I had to define property access nodes in a safe thread function beforehand. I just started getting into properly using AnimBPs this evening. Thanks for your help, works flawlessly!
the nice thing about property access is that you dont necessarily need to do much in the ABP you can access values from your character BP so long as you establish a reference
Do you know if it is possible to use these property access nodes in the preview tools? There I can see the variables that I have set inside the AnimBP, and can toggle them to troubleshoot in runtime. But the property access I cannot find

typically for a first person game you wouldnt attach the camera to the head bone, for exactly the reason you described. First person is typically handled as floating limbs for the first person anims, or if you want to also see the legs, floating arms and legs.
As a quick solution, you could add the camera to the character bp, just as a separate component, and position it where the head should be. Then hide the head using something like a Hide Bone node
no, the property access read values directly from the bp they are accessing, they do not appear in the preview panel, you would need to set up variables in the abp to be able to adjust these preview values
You could use a bypass variable perhaps
PropertyAcess(IsMoving) -> Set bIsMoving -> Usage

There are many games that use full body animations in first person (like KCD for instance). What approach do they usually use? Or do they use special animations with first person already in mind (like no head movement relative to root bone)?
Someone here experienced with animations and especially retargeting who could help me out real quick? Running into an issue and my game releases in 5 hours 😅
For context, the issue im running into is that when retargeting the pelvis of my target mesh seems stuck in place and all bones rotate around it, rather than the pelvis moving around
As if the pelvis is seen as the root, even though it's not set to be the root
Willing to pay a small amount for a fix
Hey,
anyone know how to correctly retarget from UE 4 skeleton to UE 5 skeleton. All IK Bones are messed up with the retarget. The rest of the animations do more or less work.

My first car animation — the Batmobile on the road. Modeled in Blender and rendered with Cycles (CPU render on a low-end PC 💻🔥
.
.
.
#blender #carreels #caranimation #carenthusiast #batmobile #dccomics #cgi

Often a first person game, especially one which is multiplayer will have a first person mesh, with first person animation, and a third person mesh with third person animation.
The first person character is floating limbs and a camera component which is not attached to a bone, rather it is controlled by the player and sometimes animated in sync with certain actions like reloads.
The third person character is a full body mesh which would be visible to other players but not visible to the active player. Even outside of multiplayer this mesh is needed for things like shadow casting and reflections.
Bro pls stop ur work
everything you're doing
You shouldn't be allowed near a computer
or anything electronic for that matter
Ik you're seeing this u cave dweller
I think it's more optimal tbh
yeah, I don't think I've been baited this hard before lol
Did you set the retargeting options for the bones on your skeleton? That might help. Which version of UE5 are you on? The more recent versions are pretty good about automatically mapping animations between UE4 and UE5 skeletons
have you shipped a game as an animator before? genuine question
like a first person game with both third and first person characters
https://youtu.be/7t0hLZd_8Z4 - this is from the original overwatch but this technique is still used in games 🙂
In this 2017 GDC talk, Blizzard's Matthew Boehm dives into the artistic and technical challenges of creating personality in first person animation for the robust and varied cast of Overwatch.
GDC talks cover a range of developmental topics including game design, programming, audio, visual arts, business management, production, online games, an...
I'm learning a little about motion matching, but I can't figure out where these animation curves are used. Could someone clarify this for me?

Through animModifiers
How do you deal with contact shadows between 1p and 3p meshes?
Since 1p is rotated following camera direction, in case you have a gun in front of you, and you look down, the gun would be pointing down, and effectively the gun/arms will be inside 3p pelvis. 3p usually bends their spine leaning in/out to look down/up respectively, but in 1p, to have a better feeling/camera control, you only rotate the camera, no spine/neck, so effectively you're orbiting your hands around your head with no positional offset
Anyone know how to smooth out aim offsets? Im using them for aiming on my AI and i dont like how they snap when using focus target on ai controller
I'm trying to implement ik hand placement with simulate physics enabled for the character, however this requires me to spam click to get the ik hand to move towards the target. Any idea why?
I'm using a virtual bone for the IK with the root as the parent and hand_r as the target


<@&213101288538374145>
Hi, the duration of the transition from the Ready to Aiming state in my AnimBP affects the timing of the bowstring pull animation. I’d like to have different aiming timings and curve settings for different types of bows. Is there a way to expose the Duration and Curve variables from the Blend Settings as class variables accessible in the AnimBP, or is there some way to modify those parameters through code? Is this even possible, or do I need to change my approach?

UE 5.6 bitbthentemplaete there no longer come with the retargeter templates. So they are from 5.4
Im dealing with clavicle related problem and I managed to bump into this:
https://forums.unrealengine.com/t/clavicle-bone-location-does-not-change-when-baking-animation/2598802
does anyone know why this is a problem? I have exact same bone hierarchy setup, however the clavicle offsets do not change at all. Makes no sense to me
Epic Developer Community Forums
I am making some animations and I needed to move the left clavicle forward to make the animation look right. When I bake the animation, the clavicle returns to being square in the animation. I tested this by changing the location to a ridiculous degree, but the animation returns the clavicle and keeps the arm animation as is. I am using the engi...
You can adjust the smoothing time in the axis settings to have the value be smoothed over time.


I love you and I would give both of my kidneys to you
i was about to override some cpp stuff

i shall honor you in my git commits
You could have the transition first go to a conduit from there you could have multiple transitions based on the the type of bow you have equipped.
I'd suggest a conduit because your initial transition out can be generic, probably with no blend, and then each bow variant can be a unique transition. You could also nest the conduit and transitions into a separate state to keep it tidier.
Didn't we talk about this last night, i thought we agreed you'd never try giving advice again
Could it be that the retarget options on the skeleton are set to "Skeleton", meaning that those bones will only accept rotation values and any translation will be set to bind pose?


Epic Games Developer
Describes how retargeted animations can be used with multiple Skeletal Meshes, allowing you to share animations.
OMFG!!!! I was searching for this like 3 days lol. Thanks a lot man!

I was trying to release the elbows from the socket because i have mixed FPS/TPS anims (something like in dying light) and this definitely was one of the most frustrating things that i was trying to solve. Super cool now I can go full bonkers with the anims. Thanks you very much 🙂

I have custom Clothing rigged for MetaHumans. Are there animations available to stress test a MetaHuman or Mannequin Body?
I'm not sure about something like a RoM animation that you could simply plug in. But the Game Animation Sample Project has a lot of free animation assets, and if you're able to import your skeletal meshes to that project you could certainly test out the clothing in those conditions.
RoM animation?
Range of Motion animation, good for rig testing and validation. Probably unlikely to find one on the marketplace.
Where does a Rigger get those normally? Or do they just create on RoM animation themselves?
In my experience someone on the animation team will put one together for the rigging team. Doesn't have to be particularly polished, just has to put the rig through its paces and some extreme poses
okay, thanks
hi guys, i have setup an ik rig and set the goal in the Anim BP - It works fine in idle pose but when i move the hand does not stay still. I tried to fiddle with the Limb Solver and full body Ik solvers settings and bone stiffness, but nothing seems to work.
Does anyone have an idea what might help? Maybe a different approach? my target is fixed to the character so maybe there is a more direct way to do it?
thats my animbp setup, all values are set to defaults and alpha is set to 1

using the walk animation in the ik rig editor seems to correctly stiffen the hand onto the ik goal
Tbh i doubt your "experience" is a good feat, i have been passionate about this stuff for only a few months and yet know more than u
@viscid willow how much $ and u stop trying to be "helpful"
In your animation blueprint node, have you set the space for the goals? https://dev.epicgames.com/documentation/en-us/unreal-engine/ik-rig-in-animation-blueprints-in-unreal-engine


Epic Games Developer
Use IK Rig in Animation Blueprints to create procedural IK adjustment of your character in gameplay.
I have an animation montage set to use a new Slot named UpperBody, that is then fed into a Layered Blend Per bone using a branch filter on the spine bone. This works, but requires caching the initial pose to duplicate it twice.
I assume that there is a much better way to do this, any recommendations to do this in a more efficient or cleaner way?

I messed around doing the upper body animation as an additive animation instead, but this seems to not be a good use case for this. If what I have above isn't terrible practice, then I suppose it's fine. It just seems like there should be a much better way.
This is a standard setup, and certainly acceptable. The pose is cached once and reused in multiple places.
The third person example template, while it doesnt do any layering, utilises pose caching to simplify the state machine, and example projects like ALS use this approach heavily.
Hmm ok, makes sense thanks
Sad that I can't even hide this ugly code within a function or macro :(
I hate it a bit less now that I've moved around the nodes a bit and put it into a comment box xD
If you really want to collapse or encapsulate parts of the ABP you can use animation layers to contain parts of your animation blueprint. These are typically used for layer swapping to exchange parts of the ABP, the lyra project is a good example of this, but they can tidy up the anim graph if you really want to.
Thanks for the hint! Yes i think i did, however i managed to solve it using a control rig, which seems to give better results (using the stretch boolean)
Hello fellow developers. I'm experiencing a very strange issue that is driving me mad. For some reason when playing an animation montage with blend in set to 0 (I want it to play instant without interpolation or blending) it works on everything EXCEPT when the server character plays the montage it still appears with a blend in / interpolation on other clients. I have unplugged literally everything and only plugged in the montage default slot into the anim bluperint and event then with just the slot and playing the montages it happens? WTF is happening here?
So basically when clients request the montage to play it plays instantly on both the clients and server. But when the server plays the montage (this is all done using multicast) it plays instant on the server but smoothed (with blend in) on the clients (even when the montage has blend in set to 0)
Which doesn't make any sense to me because how the hell can there be blend in when the montage has both blend in and blend out set to 0?
Where is the blend coming from?
And this is literally my testing / debugging animation blueprint

So there is absolutely NOTHING that can cause a blend
it's just the montage slot without anything else

And yet, with all this there is still blend in on the clients
Why? 
found the issue, it was a setting that was enabled. Disabling this fixes the issue
hello good day
im trying to retarget ana animation but the weapon is a bone on the source animation and my target animation dont have that bone please whats the best way to go about it
The ideal thing to do would be to add that bone to your target skeleton either in a DCC tool or the Skeleton Editor in the engine. In your source animation is the bone animated to manipulate the weapon?
Yes sir the bond is animated to manipulate the weapon
And I really want that weapon animation it’s very cool
Fair. In that case, getting that animation to come through will require having a target bone that you can retarget the animation to from your source asset.
The simplest way to add the bone would be directly in the engine with the Skeleton Editor tools.
I did that and for some reason it dosent work I only added the weapon Bone doe but the weapon bone has two other weapon bones beneath it weapon one and 2
I dint add those once just the root weapon bone
Are they IK bones? similar to the epic IK bone chain which has a weapon bone and then a bone for each hand?
No just normal bones
On the source skeleton doe
Okay, and how are you retargeting your animation? IK retargeter?
Yes sir
have you added chains in your IK rigs for your weapon bones?
Yes sir I did that even created a bone 🦴 with same name and changed them weapon animation dint work but character animation works
And you mapped the chains together in the IK retargeter?
anybody here need 3d animation in cheap rate
Is it possible to play one-off blendspace like montage?
There's not a blend space that behaves this way. You can however add a Blendspace node to the anim graph to which you can add samples, each containing their own anim graph. Meaning you can populate the different samples with montage slots.
If you fire all those montage slots with the same montage asset, they can be blended in this Blendspace.


hello, i am followjng a tutorial and im in UE5.4, the tutorial says to make a setup event, but this doesnt exist


Is it this tutorial you are following? https://youtu.be/vKiqs_h1WXM
The event you're looking for is the one you have there, the Construction Event.
Full length course on control rig: https://www.udemy.com/course/controlrig/?couponCode=1CCDFE3154082418819E
Discord server centred around procedural animation: https://discord.gg/YaEQ8DZWuv
Free download of the spider model: https://twitter.com/LincolnMargison
More coming soon, subscribe, follow, all that jazz.
thank you :)
That kind of procedural walking isn't exactly rocket surgery. I dread even looking at sequencer or animation stuff, but I was still able to follow that tutorial a while back no problem.
Speaking of, any resources out there that are good 'starting from nothing' introductions to animation and sequencer and whatnot in Unreal that are up to date with all the additions made in recent versions for doing stuff in Unreal instead of in external tools?
Obviously I could look at older breakdowns, then move on to individual tutorials on new features, but it'd be nice to see something that just goes through with all the options in mind and no detours into stuff that's pointless or not best practices now.
The videos from Fredrik Nilsson always have good information on authoring content in the engine.
https://www.youtube.com/watch?v=i-_ikewib7s
https://www.youtube.com/live/JIDiw1f-9bk?si=9VzH8I_wr2c_POB7

Watch this session recorded at Unreal Fest Orlando 2025 for a look at the current state of Unreal Engine's animation tools.
We explore what Epic Games has done up to this point, what's new in UE5.6, and where we're headed for the future. The session highlights various talks, learning resources, and educational resources, and discusses how Epic'...

Today we'll be going over some of the latest and greatest with the recent release of 5.5! Sit back, relax, and enjoy a demo where we walk through a few of th...
Watch this recorded session from Unreal Fest Seattle 2024 that explores the benefits of animating everything in Unreal Engine to avoid round tripping for quicker iteration and testing.
You’ll get a look at the process of creating a piece of animated linear content entirely in Unreal Engine from start to finish. And we also dive into some of ...

With Unreal Engine 5.0, rigging and animating in-engine became a real possibility. UE 5.1 has taken another step forward, so artists don't have to hop back and forth between various DCCs. Learn about the recent changes to the Control Rigs and animation tools via real-life examples.
Learn more about recommended Hotkeys & Preferences: https://dev...
bro u a beginner you don know what u talkin bout
Anyone who is a technical animator and has some experience with combat and stuff?
Hi, I am currently adding a new unit with a different skeleton to my project. What is the smartest way to go about it? I have some logic in my AnimBP that I'D hate to duplicate for each new skeleton. Is there a way to share logic/state machines between skeletons?
If you have different skeletons that you want to share animation blueprint logic for, you can do that with Animation Blueprint Templates. Templates are skeleton agnostic meaning you cant make direct references to animation assets so these need to be promoted to variables which you can then set in the child ABP for your specific skeleton.
Thanks! After scouring the UE docs I landed on going with ABP templates. So far it's working great, just what I needed. Appreciate your help 🙂
Bruh
Do you guys recommend animating in Blender or Unreal? 👀
I know that's been asked before, but Unreal has come a ways since 👀
Depends where you're most comfortable animating. If there are workflows in blender that you use to improve your speed and quality, there's a lot of benefit to that. Where you're comfortable is where you stay efficient.
The only thing about Blender to Unreal is that there are a lot of pitfalls when it comes to getting a clean export into the Engine. In reality those pitfalls are usually a one time thing, because once you've got the nuances worked out you can save those export preferences and use them again and again.
That said, learning about control rig and sequencer for animating content is very beneficial if you're working in the engine. Things like backwards solve make animation a non-destructive process, and like you said the tools have come a long way. The new gizmos are much better and the graph editor is a lot more user friendly. The biggest advantage is not needing to deal with exports, so you're able to work in a "what you see is what you get" scenario.
It's a bit of an non-answer because it's really up to your preference. If you haven't animated in the engine, I'd suggest giving it a try and see what you think.
I've got a bit more comfortable with Blender but it's still feels clunky compared to Unreal, so I shall give Unreal a try 👀 I've animated before but not in either tbh :x
Is there a way to change the character walk speed on a thread safe manner on the animBP?
Do you mean getting the walk speed from the Character BP in a thread safe way? or changing the play rate of the walk animation?
Hi,
How to fix this. Please help. Thank you.
Used metatailor to fix the dress and exported in blender.
Can I use state trees instead of an animation blueprint?
I meant like this. Making this function threadsafe produces errors

This wont be threadsafe because you're accessing an object reference, in your case it's the Character Movement Component.
A function like this would likely be better handled on the Character BP to set the values, the ABP can then read the values by property accessing the character movement component.
Thanks, I figured that would be the best bet. Side note, Does anyone know why an attached character to another actor creates this sort of jitter when the parent actor moves?https://streamable.com/vwwvfn

I had a similar issue with attached actor to actor using either physical animation or physics control components. Haven't figured it out yet, but I just used a hidden skeletal mesh in the driving position and when my enter car montage finishes I swap the hidden in game status of each and vice versa when exiting.
Since a good part of the player character relies on the physical animation component I figured it was a good compromise.
That’s helpful. Thanks. Mine has physical control components as well.
Hey, in Motion Matching (AnimBlueprint) is there a way to get the duration of the last selected animation please ?
Hello, I am trying to create a combo system using animation montages
I have been taking each attack in that combo and creating a montage for each individual attack because I wanted to have the attacks be more flexible incase I decide to allow having a combo sequence attack be played/activated outside the combo or in another combo
Is creating a montage for each individual attack/action the proper way to proceed with this?
Apparently it might be a bug in 5.6
I set my brush to 0 falloff and it seems to be a lot more reliable now
I have some mocap data that comes with rootmotion that I want to use on a metahuman. The movement of the feet is determined by a mixture of the foot_ik and the rootmotion that comes from the body_offset_control. Since two curves are influencing the position of the feet at the same time I find it difficult to clean them up to a proper floor contact. Das anyone know a way to be able to work on the feet as if those two sources of movement were combined to single animation curves? Like it would be if the animation didn't have rootmotion.
Hey all! Quick question. How can I export a single frame of my character's animation out of sequencer to a static mesh?
The easiest way would probably be to save out your sequencer animation to an animation sequence asset, then you can us the Make Static Mesh option in the animation sequence editor.

okay, so I've actually been able to get that to work but i've run into a little hiccup with it.
In the animation Sequnce, when i change the "Preview mesh" it falls to the ground. It animates correctly but is flopping on the ground.
My Skelteal mesh is a horse with reins, saddle and a rider. I got the horse, reins & rider all working no problem. But the saddle is the one that falls down. 🙁
I'm not sure where to uncheck it's simulate physics at to keep it from doing this. 🙁
That will be somewhere in the physics asset. Alternatively, does the preview window have a banner in the bottom right which says there is a post process anim instance running?
bottom right of the preview window? no it does not
should look like this, but if it's not there nvm. In that case look for any physics assets that you can turn off simulation for.
Okay good to know, thanks man! I looked through the "Physics Asset" and couldn't find any setting pertaining to turning off "Simulate Physics". But I did disable Gravity on each collision object and that worked. So all good! haha
thanks for the advice! Going to keep diving into it all to figure everything out.
why can't I scale down the capsules any more than a certain size in my physics asset?

Hey, do someone know where i can find a tutorial to make a facial control rig from scratch and not damn MH
Anyone can give me recommendation for animation templete for mainstream action for first person perspective like ladder climbing etc on fab.com? Im considering to buy 1 pack but cant find anything useful. Here looking for input from personal experience
Hey everyone, I'm trying to start implementing a turn in place character animation, but I noticed that when I rotate the root bone, my character does not rotate correctly.
Does anyone know what may be going wrong?

Good afternoon, I'm looking for a bit of help with implementing animations in a scalable manner. I'm working on an FPS with a dozen and potentially more guns later and I'm trying to figure out the best way to implement the animations. Each weapon has a data asset with a few variables for the montages (like shoot or reload) but I'm not sure how to handle the Idle/moving animations that are usually set in a blendspace and use an animation blueprint. I've been looking for some methods and I've found these three "solutions":
- The first is using animation layers but I don't really want to make a animation blueprint for every weapon that just doesn't seem right.
- The second is using one main animation blueprint with a blend by integer and swapping between state machines.
- The third is making a list of variables or an instanced UObject that holds all the animation sequences I need on my data asset and just changing variables in one main Animation Blueprint.
Not sure if this is the best place for this question, any help would really be appreciated!
I am stumped
These weighted vertices when deleted from one layer teleport to another
I even exported this into blender, fixed it there, exported it back and the same thing started happening again in the same place?
Could someone toss me a video of taking an unreal engine for skeletal rig and upgrading it to unreal five? I have a bunch of animations, but they need to be retargeted from 4 to 5 and then I need to again retarget to a different skeletal mesh.
probably easier to export them as an fbx if they aren't importing easily
you do not need a video to right click and export an fbx unless I am forgetting that being in the context menu
Hello, Is it possible to defined a socket position on each frame of an animation?
To the future generations: I fixed this by making sure those vertices were properly weighted on the layers they were meant to be
Hello everybody ! I've imported a skeletal mesh that was said to be "rigged" from sketchfab (and when I open it I see the skeleton) but when importing to UE and switching it to the new skeletal mesh, when trying to play an animation with it, it does nothing, just moves weirdly the mesh on the side. Does anybody has an idea ? Thanks in advance !
It always stays in T-Pose even if I have the skeleton... Does anybody knows why ?


how are you playing an animation with it? is it weight painted? can you see the weight paints in the editor?
I simply imported an animation in the same folder and tried playing it, although it seems like it detected the skeleton, it's doing this
I don't know much about animations sorry
I don't know if I'm doing this wrong or not
I used an anim from Mixamo if that helps
I assume then the skeleton used by your mesh here must be compatible with the mixamo skeleton or retargeted to it
well in the animation I selected the DK skeleton and hit update, but nothing changed
being compatible means they have the same set of bones
or a retarget created between them etc
the two skeletons I mean here
I don't quite understand, sorry..
Up there in that animation window, click Character -> Bones -> All Hierarchy.
That should make all bones visible. Are they actually there, and are they moving?
I tried moving almost all bones and it worked well

What is local orientation of your root bone? You can select the root bone in the skeleton editor to find out.
It looks as though the axis is not correct, in your case it looks as though Z is forward and Y is up, and the rotate root bone node will rotate around Z.
If it is Y up you should be able to input your rotation into the pitch pin and that will rotate correctly.

Interesting that they didn't include roll
what is the logic behind this

"bleld poses 0" is affected by bone filter from "blend poses 1" while only "blend poses 0" is active, i do not get it, i thought these work independently
if i change bone name from "spine_1" to some invalid value then blend pose with "root" works as expected
otherwise root gets filtered and anything that is covered by spine_1 does not work
hey, i am facing an issue regarding animation and transitionning between states in my anim BP.
On the video I am switching between the aiming , and not aiming state. I have distinct idle/walk animations for when aiming or not. On the video you can see that when the transition between the 2 idle animations happens, the hand is like floating and it looks weird. Is there any way to fix this kind of issue ? The arms and weapon is a separate skeleton
does anyone know why i would be missing "blend samples" tab when i create blend space
in template anim bp how do you create montage slot for anything other than default group?
Is there a way to fix this first person animation mismatch?
I'm using the default first person multiplayer project. The green actor is attached to a socket on the hand, and I set the anim graph to LayeredBlendPerBone the hand animation with branch filter set to upperarm_r

I think what is happening is that the green actor is in the correct place but on the invisible third person mesh, and the first person mesh is warped away from it
Hey any animation wizards on here? I was wondering if using a locomotion angle/orient warping approach to player ANimb BPS is outdated for 5.7? shoudl i be looking into motiuon matching more or somethign I am missing?
Has anyone gotten orientation warping to work on anything besides the epic games manny/quinn?
I'm currently doing it on a custom rig! using this series https://www.youtube.com/watch?v=6ezp4R1l8j0&list=PL8-kndpxmv9gBoGznFqJoAMQYV7-Yo27_&index=7

Get the UUS Locomotion Animset on the Marketplace: https://www.unrealengine.com/marketplace/en-US/product/uus-animation-set
Join the Outcast DevSchool Discord: https://discord.gg/m5N2f7Bzb6
In this video, I set up a system to track the characters direction and switch between cycling animations.
Chapters:
00:00 - Intro
00:43 - Creating a Gait ...
It's all good
My skeleton had some quantum ik bones that exist in the skeleton but disappear in game
So the orientation warping node was failing before it even spit out debug info
Or logs
Hey @wintry narwhal Sorry to ping you
https://forums.unrealengine.com/t/propagating-sync-groups-to-linked-anim-graphs/617800
Did you answer this question?

Epic Developer Community Forums
I was debugging an issue where, after moving a Blend Space Graph (Blend Spaces in Animation Blueprints in Unreal Engine | Unreal Engine 5.0 Documentation) to a Linked Anim Graph, so I can make it re-usable, I noticed that Sync Groups do not propagate from the Main Anim Instance to the linked Anim Graph. I’ve tried various things, but looking ...
Does anyone have any animation packs for shooting and reloading a bolt action rifle?
Would this be difficult for a beginner to DIY keyframe the animation from modern rifle reload?
For a specific example, I'm looking for a unreal skeleton character that can reload a rifle clip, and fire the rifle then cycle the chamber by pulling the bolt.
Potentially stupid question - in the new 5.7 third person template the character has really aggressive IK on slopes when moving, to the point that they violently bob up and down. Where/how can I tune that to be way less aggressive?
Any experienced animators out there that love golf? I'm in need of some help and can compensate you for your time. Send me a PM
I've not found a different IK setup to the older third person ones.  Probably it's only more visible in the new map? The IK is still done via ControlRig used in the AnimGraph of the APB_Unarmed anim BP. If you wanna change the way it does this then you can do it in the CR_Mannequin_FootIK (e.g. play with ZOffset_Pelvis value). You can even just change the "IsFalling" to some "IsMoving" if you would disable it complete while moving in the AnimBP itself or use the experimental nodes from Game Animation Sample project ("Foot Placement" and "Leg IK" nodes).

hello guys, i have problem with animation, is there any best way to adjust hanging animation to be exaclty on edge?
hi, has someone experience with kawaii physics? 👀
I got question about animation blending and camera aiming. Since I'm not good at animating characters I tough about simple solution to my problem.
Use Epic Skeleton, Use TPP animations for movement, use FPP animations for weapons but on the same model with "True FPS Camera". Before I get a pack I wanted I concluded little test, before committing i just need to confirm few things.
- For turning body (so actual arms are following camera movement) in pitch and yaw I gotta use Aim Offset instead of doing rotation by transforming bones in anim graph?
- Will importing FPP animations to TPP model always work if both are for skeletons rigged to Epic?
- In case of Camera to reduce it clipping trough body parts should I adjust animations or I can turn off visibility for bones.
- I linked direct animation for blending the pose, but I'm getting lost in which way should I add Poses for arms only to reflect every state of character. Any tips how to visualize this?

So now its separated into Lower Body, Upper Body, Arm L, Arm R.
Hi! I’m making a cinematic in UE 5.5 using a MetaHuman with a Mixamo “driving” animation.
My issue: the hand doesn’t stay fixed on the steering wheel — it moves slightly because of the torso motion in the Mixamo animation.
I’m trying to pin/lock the hand to the wheel using Control Rig in Sequencer or constraints, but I can’t get a stable result.
Does anyone know the proper workflow to keep a MetaHuman’s hand firmly attached to an object (like a steering wheel) on top of an imported animation?
Any tips or updated UE 5.5 tutorials would be super helpful. Thanks!
Hi all! Has anyone had this issue when using Slots? I have a reload slot and on transition in and out it spins 360. 🙁 Thanks!
I'm trying to create an aim offset and for some reason it just isn't changing anything. Anyone know what's up?
First is for upper body locomotion, second is for the upper body idle, third is the anim graph and fourth is the top layer state machine


tried the alpha at 0,0.5 and 1 and it doesn't seem to make any difference
How can I Parents à static mesh or à BP to my Control Rig (especially Hand) ?
Hey all I was wondering I got a animation pack called Basic Survival Animations and in it is about 600 animations I am pretty new to setting up creating animations thinking buys a pack would be a better way for me starting to learn also didn't want to try to learn both learning to animate and
My question is in the pack their is a combat idle and a non combat idle and I am not sure which one to use or if I can use them both ??? Sorry just trying to learn animation in unreal and wasn't sure if I make two separate blend spaces or how to use them thanks in advance for any help I appreciate it
Hey, im curious if anyone has ever created a revolver? Im trying to have the cylinder of the revolver spin 60 degrees each shot. Currently im using a montage and the rotation of the cylinder bone is on an additive layer track. Ive tried making the fire anim an additive anim to the base pose of the weapon, and ive tried rotating the bone directly in the anim track rather than as an additive layer track and the same result persists where the rotation just goes back to 0 the next time the montage plays.
My goal is to get it to just spin the 60 degrees as an additive to its current rotation each time rather than its current behavior and was hoping i could achieve this by just playing animations without having to rotate the bone through code or something unconventional.
If anyone has a solution that would be great 🙂
Instead of animating from zero value to 60 degrees, just do the opposite - from -60 to 0.
That way by the end of the animation, the cylinder would just go back to the original position and blend out properly.
It's not important in your case to actually rotate the cylinder, rather just have a feel that it's moving.
true, thats a great idea, thank you
Wondering if anyone here is good with motion matching who I could ask a few questions to! Here’s a wip of what I have so far :))
I duplicated ABP_Manny and pointed the BP_Character to the new one but now there are no animations and I don't get why. The ABPs are identical.
Ok the references in the ABP needed to be updated, i.e after cast to character, you should "set" the character and movement component again
When working with motion matching and choosers, I noticed that my forward walking animation is fine, but my bwd and left/right stutter. Is there something I need to make sure I'm doing when making the animation? Like feet plant timings needing to be the same?
https://vimeo.com/1053943298 How does my demo reel look?

how bad will it be, if i already do have base locomotion and for equipping guns, i just blend the upper body?
Hi all.
Can anyone please recommend a really good walking, running, crouching, jumping Animation pack from the UE Marketplace ?
Easy to use would be nice. (I'm new in this topic)
It should be compatible with UE 4.27.
Hi guys, i'm wondering if it would be possible to have a Curve that starts with a specific variation on one axis, and then continue in the same way for the next of the frames. I tried with all post-infinity configuration, but as you can see, at some point the value restarts from the beginning, but i would like to keep going instead. Is it possible in some way?

Do you need to use exactly single curve asset? I'd just split that into two curves - start curve and loop curve that would follow and repeat afterwards.
Alternatively, such motion could be done with the sin() function instead with additional logic for the first evaluation.
How would you add an additive blend with a static pose asset like this?
I've tried just about every blend, layer or additive option there is in the ABP.
Most tutorials seem to use a 1 frame animation rather than a static pose...is that really necessary?

Pose Assets could not be used directly in the Anim Graph.
Their main purpose is to store the collection of poses, grabbed from existing anim sequence, for external evaluation, mostly for post-processing correction purposes.
If you have an animation that you want to use the pose from and you don't want to create a new anim sequence, you can use Sequence Evaluator node and specify the frame you want to grab the pose from.
Correction - you can use Pose Assets in the Anim Graph.
if you add Evaluate Pose node to your graph, pick the Pose Asset and then right-click at the node, there would be the option "Convert to Pose by Name".
After that, you will be able to specify the name of the pose.
Does anyone know if there is a way to catch rapid changes of variables (in my character bp) into my anim bp?
for some reason the change gets skipped in my anim bp
Thanks for the reply, yea you can drag the pose into the graph and set it to by name, that far I've gotten, it's just not doing anything
I did set the pose asset to additive, with or without a ref pose. But I made the pose asset from the skeletal mesh, ie T or A pose, when picking a ref pose you can only pick animation sequences or animations..but I don't want the pose to work for only a specific animation. Basically the idea is, when holding a flashlight he'll hold it up next to his head like so, in any situation


In that case, additive animation won’t work.
I’d suggest to apply layered blend per bone with the blend mask with the desired range of bones defined.
Mesh Space rotation could be enabled to keep the pose orientation.
Additionally, you can use IK target that’s patented to your chest and apply IK solver to your hand.
Ideally, the pose should be done from your main idle pose.
hello guys i was exploring foot placement and leg ik for dynamic foot placement but after this setting and my charter's foots are not moving as you can see where i was doing mistakes can someone guid me through this


Seems like your animations doesn't have the IK joints animation.
Check your AnimSequences, if the IK joints are moving if you select them in the Skeleton Tree tab.
ohk
i check that and you were right my animation don't have that
😖
is there way to add that on my own or something
Use Animation Modifier.
There's a CopyBoneModifier that would copy the keys from source to target joints. In your case, you would copy the movement from FK feet to IK feet.
You can batch apply the modifiers to the selected assets in the Content Browser.
yoo thank you man 🫡
ohk
in bone pose space what should i choose world or local space
World. You need the absolute transform of the joints.
ohhk 🫡
Hiya, quick question that's got me stumped: I want to play anims in an SK based on a BP, but Play Anim Montage doesn't work, and Play Animation doesn't have options to continue with the graph only when the anim completed. Am I misunderstanding something?

any ideas why my animation curve is giving me incorrect values ?
on post evaluation in the ABP i am using Get Curve Value and printing it each frame
for some reason the value goes from 0 to 200+, while if i check all my anim sequences the value is always between 0 and 1

Do you have the slot node in your anim graph?
Could you give a bit more details about your setup?
uh, when testing with the preview instance and hardcoding the anim it works.
i guess somethign at runtime is fucking up

Not using an animgraph, just want to play and on / off anime via BP
Montages only works with ABP iirc
The montages require to use the anim graph.
They use a slot node that they would occupy and play the animation from there.
im migrating stuff from the Echo template, which uses some curves to drive a smooth character rotation
one of the functions reads a curve to know how much to blend (0 to 1)
issue is i rotate WAY to much (i spin the second i try to go a little bit on the side)
when printing the curve values in game, the curve valeus are incorrect


how tf am i getting those values
Yeah, I see. Hard to say from top of my head what might be the issue.
Ideally, it should work just fine.
Although I’m not sure about the post evaluation but that shouldn’t interfere much.
Was that how it setup in Echo as well?
Out of all the UE projects, I’ve missed the Echo one so I’m not familiar with its anim setup.
Could you try to move the logic to just the update event?
Any news on update for the GAS Project, maybe showcase of integration with Mover C++ and trajectory collision prediction would be very cool!
yeah, i spent the past hour copy pasting and adjusting the states anbd code
mover is still very experimental, especially with multiplayer
lets try
yeah, I’ve seen but is been more than a year in development so maybe some news
same values (didnt changed the code in post eval, just printing on update)
works well at runtime on start
so i think my issue is how ive done the state machine, or the transitions

Is that the output during PIE?
yup
Do you have the layered blend node in your graph?
no
Do you have any additives?
Alright, thanks for the help
if I'm using a Anim Layer Interface, do i need to add every variable from the parent ABP I want to access in the linked layer, as input in the Anim Layer interface for the InputPose?
There is no way of accessing the ABP variables right?

you can create aproperty access node (using a cast)
and access variables from main-animbp
Hi everyone! I'm a little confused on Anim Choosers and Animation Blueprint Linking with Anim Layer Interface. They seem to be solving much of the same problems.
Are Choosers a replacement for Linking? Or should they be used together? I'll be honest, I haven't done much research beyond some googling and reading some code in Content examples and Lyra. I haven't tried to solve any problems with them.
UE docs on Animation Blueprint Linking
UE docs on Chooser
Any insights are much appreciated!

Epic Games Developer
Illustrates how you can dynamically switch between subsections of an Animation Graph.

Epic Games Developer
Use Choosers Tables and Proxy Assets to dynamically select Assets such as Animations at runtime in Unreal Engine.
I had this same question literally couple of days ago
I was using ALI/Link Layers, found them very limiting
Example, Sync groups does not work across link layers
From Lyra

oh ok thanks. How did you end up solving the problem? Did choosers help?
Yep, I trashed all ABPs. I have it on choosers right now
which are very nice implementation wise
but my size map is blowing up
I'm still supposed to solve that, but i will tackle that later on
I saw that chooser can have soft refs for size maps. So you've completely dropped linking for choosers? Would there be a reason to use both in the same project?
Just off the top of your head, not a super deep question
You can for sure use it
Like each ALI for a weapon
and then choosers for different start anims etc.
but I'd rather stick to just choosers
ALIs are confusing anyways
At a glance it looks like ALI is like the "strategy pattern" whereas choosers is data-driven solution. I can see one would be confusing.
design patterns 😭
Thanks for your insights! This kinda confirms what I was thinking. I saw ALI in Lyra and older content example projects. But in newer 5.3+ content examples I didn't see anything about ALI. Additionally, choosers looks like it would solve more problems.
Yeah, I dont like how Lyra solves this problem
They just switch states in the state machine when ALI is switched
at runtime
f'n design patterns. I think it helps to read them that way. It at least helps me conceptualize something and figure it out quicker.
true, unreal is filled with it
just not a lot on animation side though I think
GAS is just design patterns galore 
On top of code pilling on top of code. GAS has generational trauma.
Hi everyone, new here and new to Unreal Engine 5 or any sort of game development! So of course I decide to start making a racing kart simulator from scratch as my first project. I'm currently stuck on trying to animate the last part of the motion in a kart's steering system. I believe this would involve Two Bone IK but I have no idea how to implement it and have been quite stuck trying to find a workaround. Would greatly appreciate any form of help.


The goal is to keep the circle in green as is while having the red circles stick with each other, i also provided a video of how the steering looks at the moment if of any help
Hi, I am looking for a full, in depth understanding and explanation on animation montages (and using said area). Can I get some recommendations to teach me how to use said tool professionally?
I was just in one of the animation levels from the content examples project. In it, there was a guy driving a "car" across a bumpy surface. IIRC the steering wheel was turning. I don't know if it was done with bones or vertex animation or a control rig or code or if it works at all. I wasn't paying much attention to it; I was there for other stuff. Alternatively, check if the city sample's vehicle steering works.
I don't fully understand what you're asking. It kinda sounds like you want to make montages for a living.
I would recommend 2 things.
1, look at the qualifications and responsibilities of some job postings. That will give you something to aim for and you can work backwards from there.
2, check out the Unreal Engine Career Resource Guide
I'm not looking for a job. I'm looking into the tool / editor that unreal offers. It plays through a timeline (through a premade animation) to add notifies that act as functions to call upon. I just want to expand upon this. https://dev.epicgames.com/documentation/en-us/unreal-engine/animation-montage-editor-in-unreal-engine
What unreal provides feels very bare bones.

Epic Games Developer
Outlines how you can edit and use Animation Montage assets.
I won't give you the full in-depth explanation about the montages but some basic info that I personally think should be understandable.
Think about the Animation Montages as the containers for Animation Sequences/Composites.
You can specify the blending rules and also add it's own unique curves and notifies.
Montages work only if your anim graph exist and contains the slot node. Montage would "inject" the animation data into that node.
Same as Animation Composites, you can add **multiple **Sequences to the Anim Track.
Sections could be added and used to loop, hold or jump to specific animation clip. Anim Instance class has some useful functionality related to sections.
Your skeleton asset contains the information about Montage Slots.
Montage Slot Groups could be treated as independent layers and contain it's own animation data.
Multiple Slots under single group could be used to have multiple anim tracks in the Montage asset (e.g. Pistol Fire Montage would trigger both Hip Fire anim and ADS fire anim).
If you trigger two montages with the same Montage Slot Group assigned, the new one would **interrupt **the previous active montage.
They are really useful for triggering gameplay animation, anything related to character's actions.
ok, I got confused when you said professional. I may be able to point you in the right direction.
Give me a few things that you're trying to accomplish, like I have an animation that is a full jump cycle and I need a jump start, jump loop, and jump land anim. Or I need to adjust a holster weapon montage to better line up with the holster location. Or My additive reload montage looks crazy. Something about anim notifies, slots, etc. Like what's tripping you up?
Choosers are amazing, ESPECIALLY when you're on a new project and just want to get something up and running.
i disagree, choosers are more complex to setup than something regular
they are great, but not beginner friendly
I should probably ask this here too:
Has anyone who uses first person ever done away with the first person mesh and just used the third person? A lot of tutorials seem to do this, but it feels like it might cause issues down the line 👀 I suppose im trying to figure out how to go about it in a multiplayer context

What I've noticed, when I add a property to the Interface and then bind the property.
If in the ABP implementing the interface, there is a property with the same name and type, it is bound.
Is this expected behavior or what you mean?
Do you think anyone needs 3D Anim Blendspace?
I was doing it using link layers
@barren fiber
But thats how its supposed to be right? That I just have the variables in the linked layer blue print and they are set by the parent ABP right?
made one already
it appears to be a bit implicit but thats finie as long as it works ^^
Yeah, only if they worked
its not public! so feel free to do one!
Yea it worked 🙂
No, i mean, certain features don't work
But do i have to define them as inputs in the linked layer interface as well or are the taken from the parent ABP?
Like sync groups
ohh ok
I can't promise anything, but I'll consider it.
What lyra does is when the link layer switch happens, they change the state machine state
I'm glad there's someone who's interested.
quick click
which is very hacky
you got it 😄
Better option is Dynamic Asset selection
Yea thats kind crazy but it did not fully look at it
.
So shuld i look into choosers? 😅
whats the motivation?
maybe man, whatever floats your boat
Which means someone has already done it. Its pity.
but thanks for hinting it ! 🙂
I found it out the hard way
Just be a cool guy.
I mean i know chooser tables from Motion Matching, but does it also work to select animation layers?
Yes technically, but I would consider it a replacement for layers
Gimme a sec, i'll show you the issue
im not the first, not sure how often this has being done but public sources lead me to CryEngine developers being the first
thats a bad motive 😄
yea nice, would be interesting how to use them to switch btween layers

Issue, you see, the link layers dont work with sync groups
Both anim sets work fine by themselves
ohh ok
https://streamable.com/rb0ubi
With choosers

ezpz
Which one do you think is good?
id still do it tho, if it interests you, if you think resolving an existing issue or encountering limitations
well not that one
Well, first of all, I suppose we have to bypass the standard Blendspace toolkit and make our own system, and then nodes.
yes sir
The UBlendSpace code clearly does not have the ability to expand.
also create a persona module to make the asset editable
always, but id seperate
thats how i approached it.
problem is going to be visualization if you expand it
it uses the 2d graph, where youd want to visualize 3 axes now without making it hard to control
if you was quick enough the linkedin post could kinda inspire ideas
Custom World?
Like in video
Well, let's just say I don't see a problem with it. At least not on the Slate side. As for the Transient World binding, I haven't worked with it yet.
yea similar to how sequencer approaches it
Although, I think, a good half can be licked from Blendspace. Still, there is quite a lot of what. It's just that, alas, it will take a decent amount of time (2 month work exclisive or more), and if this task has already been solved by someone, then it does not cause me to be eager to solve it again. Perhaps later, sometime, when this thing becomes necessary and I finish with other public projects.
Out of curiosity, If I do have some locomotion animations, how hard would it be to create some "weapon" animations out of them?
What would be the approach for it? I'm thinking I would have to create a control rig for the hands and maybe the upper body, and then just position the hands/arms and rotate the upper body.
Is this something that is doable or is this something that might be a huge project?
Good luck to you.
i mean you could still do that if you feel like it, for me this is put cold, no real time to keep at it
I'd say its doable
Do you have any ideas what the approach there should/could be? Also do you think I have to adjust all locomotion animations for it?
What I did was overlay on runtime and use take recorder
to get the complete set
I'm using weapon masters anims
You can also use animation layers in sequencer (with control rig)
and make an additive pose
you mean you created a overlay and then with it the animations?
Yes, overlay a sequence
Ok I think I might have to look into that, I just watched a video, or at least skimmed through it, where he create a 1 frame animation and is blending this.
And you say that on top of that you then just record the animations in sequencer, because you might have mor control over it right?
I mean it might be quite some work, for all the locomotion in all directions crouch and not and everything but yea
If you have like 500 unarmed anims
Then yeah you are cooked
I got most of my anims from other fab assets
So the issue is two fold, I've a nice unarmed locomotion set, with also some additional animations.
I kind of want to keep that locomotion so that it has the same character to it (not sure how noticeable it would be but yea).
The other thing is, that there are not to many good third person weapon animations on fab, especially with all locomotion, most I've seen so far have some jitter to them.
So my thinking was that maybe just aligning the arms might not be to hard? But maybe I'm also completely underestimating it. 😅
I’d suggest go the simple route
Just do a runtime weapon overlay
Or buy an asset you like, which covers all the anims
Yea that sadly does not exists
Yea I might have to look into overlaying and how it differs from blending
I'm making a control rig with Full Body IK controlling the right hand. How do I make it prefer to bend the elbow rather than the back?

why does montage slide backwards? when it has no root motion in the Animation seq?
if by some chance i switched it off in the Anim Seq after i made the original montage.. would i also need to recreate it?
nm the ai's right.. something about the way the retarget selects the bone to retarget
if you play a sequence and it doesnt have rootmotion and cause this behavior
your pelvis bone is probably not inplace causing sort of a pelvis motion in the roots space
does that make sense
yeah kind of except that ik retargeter is generated on the fly
id advise you retarget animation assets properly keep rootmotion in it, but set the settings in the details panel up to stay locked in place
yea i found a kind of compromise.. i imported the Anim, then enabled root motion, then retargeted it... then in the retargeted anim, disabled root motion and forced root lock, which kind of turns it into a from stationary fly kick
but if i use the enable root motion it makes it look weird
ok it is kind of working it does still look some what strange so i will just try and find a different flying kick i think
ah figured it of course you create the RTG your self from the selection menu which auto generates also
Oh waiit seriously
so the root motion repair was made into a asset
and then the blender convertor where obseleted when blender 5.x comes out
this constantly making every bit of bug ware into pay for asset is just insanity when comes to unreal
just makes every thing difficult to understand fundamentally where its wrong, and lengthy to find actually appliable / practical solutions, and land minded to high hell with out of date/in accurate information
this one guy (of all the people) absolutely no offence to him .. but yep his solution seems viable but of course its like some one out there is deliberately fowling the waters

Adding a root bone to Mixamo Characters and Animations can take quite a long time if done manually. Luckily there is a free Blender Addon we can use to perform the conversion in seconds.
Blender Mixamo Converter Addon: https://github.com/enziop/mixamo_converter
To follow along with this tutorial, visit https://www.mixamo.com/ and download the ...
this may of solved it 😄

just verifying its not some weird fluke.. and yeah then retarget it after that has Hips set to Pelvis
ok granted i think the AI ST needs its rotation to compensate for the fact its going to do a fly kick but yep we can put that on the ⛵ / back 🔥 for now - also that is like the exact opposite of a stand in place combat attack
because with those you only force root lock
all i read is that: https://youtube.com/shorts/89OAv5NEEiU?si=TZCQlex4XXGS8Vx9

Business Email: 3dcraftss1243@gmail.com
Tik Tok: 4D_Buildss
Instagram: 4d_buidss
Twitter: 4D_buildss
ALL OF MY LINKS: https://linktr.ee/4d_buildss
3D Models I Used: https://docs.google.com/document/d/1egk5oOwqkUzZs4_ACHqC8aecVc-L9uStchTU1A7XDN4/edit?usp=sharing
Audio Credit: https://www.tiktok.com/@little.monkey.45
────────...
i dont know what you trying to do
whats this
a puzzle for me to solve
ah thing is the AI State Tree does have some say in root bone
so now it looks right but some times the anims slightly out of rotation there NPC's after all
what is it saying to the root bone?
just move where the navigation tells it rotate toward player etc
normally you'd want to have root motion for attacks, so id go ahead and retarget them probably using the retargeters new opstack
then you would want a task that does solve warping
motion warping plugin does the trick
whenever an attack is happening you would want to align it with the attacked character
ok that does sounds very interesting
I guess need the plugin for motion warping and then we can go from there and add see about integrating it with the combat variants ST?
also when you say opstack?
might just need a simple state like rotate for fly kick
im not sure how documented all of my mentions are, but there is implementations of the above in the Gameplay Animation Sample Project
not for the retargeting but there should be a video about that!
if not i don't know
basically 100% of that is in combat variant
the interactables / weapon system can just be bolted on from there on out following prity much any youtube guide
yoooo is there no Manny IK Rig by default?
Or is it only in the third person template
you can generate one if you made a animation fbx out side of unreal
any idea why setting the rotation of a methuman bone directly isn't seeming to apply? I'm not noticing a difference in engine. This is the head's custom animation blueprint, this is the last node in the graph

I've set it up to replace existing for rotation and I'm using component space
trying to have the eye track a position
MH eyes are controlled by Morph Targets IIRC.
Is this ABP used by the Face mesh or the Body mesh? Facial ABP might override your changes if they come from the Body's ABP.
hey just thought i would share how i fixed my issue quiet usefull in general...
C:\Users\Ncoredump\Downloads\Terribilis_studio_Launcher\TerribilisLauncher\mixamo_converter\IncomingFbx>MixamoToUE.exe
Usage: MixamoToUE.exe <FBX file name>

This FBX processor expects a standardized FBX animation
from Mixamo.com, obtained by following the steps below.
1)  pick a stock character, an auto-rigged character, or one
    of the seven UE4/UE5 mannequins (Mixamo-ready versions):
   * _SK_Mannequin.FBX - UE4 default (buff male)
   * _SK_Mannequin_Female.FBX - UE4 slim female
   * _SK_FemaleMannequin.FBX - UE4 stout female
   * _SKM_Manny/_SKM_Manny_Simple.FBX - UE5 male
   * _SKM_Quinn/_SKM_Quinn_Simple.FBX - UE5 female
2)  assign any animation and optimize sliders if needed
3)  download animation in FBX format (recommended settings
    are "Without Skin", 30 fps and no keyframe reduction)
why wont this let me add the mm_attack_03 to the fullbody slot or am i doing some thing wrong?

well it wont let me put it at the time/frame slot it needs to be
Does it show an error?
Can you add other clips?
If so, could you try a random clip and then change to the desired one in the details tab?
yeah i can dig the logs and make a little vid if needed
but to to make my question more clear also its not allowing it to be in the mele03 section
i also did try and delte the anim from mele03 but it just shrank the entire timeline
and also when you switch the montages to the ABP slot it t-poses why? is this a bug?
it depends what you want to do really i would of thought
for the third person
i dont see how unreal hasnt provided every thing
and yeah blend space for panets games terrible
nothing in the log, and nothing making a little clip now
Use motion matching only for Base locomotion combined with Overlays + State machine/montages for the rest
thanks, I'll look into the morph targets. This is the face ABP, but I'm wondering if the body ABP is overriding it
Anyone know of a good marketplace item with 8-direction knockdown and recovery anims for UE mannequin?
ok that is weird, i fixed my montage issue but kind of strange.. because all i did was leave the original montage as is... then i put the Fullbody slot as slot 0 and the Upperbody as slot 1, then assigned the Melee01 and 02 section into slot 1 and left Melee03 in slot 0.
anyone know how to fix this issue? the bones are retargeted correctly

What's the issue?
The error message below, retargeting won’t work correctly
i think that error is eminating from the IK stuff
Yeah not sure how to fix it
i think you need to find the IK Rig
then you can possibly correct what evers wrong with the autogen buttons it has
^lol y


why is Blend Pose By Enum some how upsetting the slots?

and yep putting the slot on the input side of the blend pose also doesnt help
ah nm .. its just the damn ADS animation

when you imported it did you import only the animations
when you import with the skeleton you get the autogenerated IK stuff
the skeleton is the UE4 mannequin
kind of untill you retarget it
you still need the original asset skeleton is what this comes down to i think
certainly if you imported it
I could kind of demonstrate this with the importing of the mixamo flykick which will go wrong in all kinds of ways if you where to just try and import the animations
in my motion matching anim blueprint my anim montage was not playing so here i also put them in PSD ??
Animation Montages require a Montage Slot node in your animation graph.
i have that