#animation
1 messages · Page 66 of 1
Do you trigger a further play montage somehwere that stops the first one?

not at the moment I purpously unhooked any of the AI logic so hes basically just sititng there looping his idle. No other animations are being called because theres no other inputs
the montage playing his attack animation is the only one being called right now
did you link it to release button? Or do you fire that start montage multiple times while you push your button?
its linked to pressed, but he also does this with something as simple as an overlap. Where the player touches his hit box zone, which should just do it once, but he still does the twitching thing
Do ou use the PlayMontage node? If yes then you could add some print to "On Interrupted" or "On Completed" ... and check if it's happen to early.
I'll try that, but whats weird is its producing the line trace that comes from a notify near the end of the montage
well acording to the print strings comming off the play montage node, Unreal thinks the montage is compleating
Did you check your montage if you skip some montage sections (like it's heading to the end)?
What do you mean? It looks normal in the animation viewer, im not familiar with montages skipping sections

If you just rightclick a single anim sequence and create a montage does it play the hole sequence?
I belive so, I didnt edit the montage other than adding in the notify. I just imported the actual animation sequence and hit create montage. And in the editing window it plays normally

Looks ok. If the sequence is short it could be blend times but it looks the sequence of you is long enough with default values. If your sequence immediately stop when you start it I think you trigger somewhere a further montage that stops it. DefaultSlot is always used in your anim graph (no blend by something that bypasses it maybe)?
Im not sure thats the problem. I did the exact same debugging set up (the button press to trigger a montage) on 2 other enemies and they actually play their montages as expected. And all of these guys come from the same parent class. So it has to be something with this montage or the animation blueprint of this character
I've just never seen it where the montage starts to play, suddenly stops, yet triggers the notifies in it, that part just compleatly confuses me
Does anyone know how I can copy-paste these keyframes from right leg to the left leg? (Blender, not Unreal)
Copy your key frames, then ctrl+shift+v to copy them flipped.
question for you all - What would you say is the best example on the fab store, or small, as a small-character, with a good face rig, that also is rigged to the UE5/mixamo standard?
im using camera anaimtion sequence for camera animation during montage(Ultimate move)
but my camera current position are getting added to it
any possible solution foir it>?
i have an animation with some wrist stretching, is there any way i can manually move some bones without the rig in the sequence?
Is a aim offset blend space better to use versus procedurally moving spine bones?
Hi guys. I got a question, not sure how to aproach it.
so when I do animation between 2 characters, me and another. But "the other" option could be a extremely tall character, other one that is shorter, one skinny, etc. It could be any type of composition.
would it be posible to make 1 animation that works with all of them? like If the animation is grabbing by the torso and then move them or somethimg. But always by grabbing on the torso (so probably one of the bones on the spine, they all have the same skeleton).
is this possible? I dont really know how. Because I will have many animations that will have the same problem and I feel making a "different" animation for each case would be unnecessary.
Really curious as to who decided it was a good idea to make not importing a skeletal mesh's morph targets the default
Like. Why wouldn't I want them? They're there for a reason
Hello. How would one go about making an animation where two characters do something together, like a duo attack. I know I can animate two skeletal meshes in one animation, but how would I go about like "assigning" my characters to their respective parts?
Hey so I've been experimenting with animation curves for animating materials (in this case controlling a character's face textures) but I've found that I can't find a way to stop the values from interpolating in between frames. The way the material works is that it takes a variable and uses it as a coordinate to know which face to display, so ideally I'd just instantly set the values using the animation curve system from one key frame to the next. However, instead of jumping from one value to the other it interpolates between the two, even when I'm using the "Constant" curve type, as you can see in the video.
Is this feature broken or am I doing something wrong?

Hi all
When I'm using BlendSpace with Rootmotion, my diagonals (blended) are slower, does anyone know a way to fix this please?
Can anyone help me with how to keep the feet/ shoes from clipping through the floor? Or a way to shift the character up a little somehow?
Hey can anyone help me rig a small lizard character, its for a school project and i'm a 3D modeler, but could not find a rigger. if you are able to rig, please hmu
You can retarget with some offset, or (if you are using CR_Mannequin_BasicFootIK for IK) you can add some offset after the trace was done. Or if you use the FootPlacement/Leg IK nodes in anim bp you can do some Transform (Modify) Bone on either ik_foot_root or the legs.

For starters you can just raise the relative location of the skeletal mesh a bit but you might want foot ik for ramps and the like
Does not work... if IK still pushes you down afterwards.
yeah, this is assuming they don't have Ik already
if they do then the IK node needs to be offset a bit to change the math to result in a raised foot
or it could even be starting from the wrong bone
your example is much better than me saying "use foot ik lol"
thanks
I did some imports recently using SK_Mannequin as skeleton and most did not 100% match after IK (neither control rig nor the footplacment/leg-ik method). The offsets in the footplacement feel a bit too ... interpolated or something (did not like it).
Thank you! Got my character creator working now!
In an Animation Notify State, there's a Tick function available. Is there a way to stop or disable the Tick once a certain condition becomes true?
I'm trying to prevent further processing after my condition is met, but the Tick keeps running as long as the notify is active. Any clean way to handle this?

This might not be the right place to ask but I am using UE 5.5.4 and when I tried to import an animation, changing values in import rotation does not seem to work?

hello everyone! im here to request help regarding root motion animations Blender->UE5.5 OR just a shallow grave to bury myself in!
I read that naming the skeleton "armature" enables you to use root motion because UE does not create a new bone in higher hierarchy. HOWEVER, when named anything other than armature all things except root motion translate beautifully, but as soon as i try to name it armature, the result is something straight out of Davy Jones' locker... the mesh gets enlarged, moved upwards and rotated by 90 degrees while the bones just levitate. Any help please?
firstimage is the horror show i meant


To anyone having similar issues, make sure that your "crab" faces the correct axis and set those in export as well (also apply rotation on all keyframes)
Hey. I'm having a bit of a weird Blender importing issue. I'm trying out a new method of doing 2D mouths for a little just for fun project I'm working on, so that it's easier to translate into Unreal, but I'm running into a really odd issue where Unreal puts a big noticeable gap/hole inside the mouth that isn't there in Blender. I'm not really sure why this is happening. All the normals are facing the right direction and everything, and changing the mouth material to a two-sided material doesn't fix it either. Anyone able to give me some direction here? I'd preferably would like to get this resolved before diving head first into making a bunch of animations for the character so that I don't have to go back later and redo a bunch of stuff.

does anyone know how to destroy a particle effect created with a timed anim notify at the end of the notify? i cannot seem to deactivate or destroy niagara particle systems created durring them
Hi folks, I'm experimenting with creating animation sequences with Control Rig and Sequencer in UE5.5, and I've run into what is probably a noob issue. So far I've been getting good results using a pose-to-pose workflow by manually setting rotations for FK bones using the CR_Mannequin_Body rig, but I have a portion of my animation where I need one of the hands to move in a straight line. Doing this by setting FK rotations for the arm seems hard/impractical, so I wanted to try turning on the IK switch for the arm and animate that portion using IK for the arm. But, at the keyframe where I switch from FK to IK, the bones look slightly distorted compared to FK and it seems like no matter where I put the ik bones, I can't recreate the transformation of the previous frame that was using FK.
I'm not doing anything weird with the FK bones (just setting rotations on the upper arm, lower arm, clavicle FK bones), so I'd expect it to be possible. If it's not, how would animators usually go about animating a hand moving in a linear motion? Think about a sword thrusting straight forward, for example.
It honestly looks like clipping if the black part is extruded. UE has a different clipping distance than blender. --> try moving the mouth further from the face.
If its not that, these things could help debug your issue:
- Are you using seperate materials for red and black? - if yes, check if the black material also has a hole on that part.
- Are the vertecies of the red rim connected to the black part? - if not, it could be nanite.
Here's the geometry of the mouth. Ignore the square verticies at the top and bottom. Those are the teeth, which aren't visible in the other screenshot.
It's definitely not a clipping issue, as when I switch it to a Two-Sided material, the same hole appears on the back of the mouth as well if I flip the camera around.
This is using Unreal Engine 4, so it's definitely not a Nanite thing. 😛 The mouth does use two different materials, but I'm not sure how I'd go about checking if the hole appears in the same spot on the outline material, as the mouth is closed by default. I got the above screenshot by pausing an animation where the mouth is open.

You can export a pose as animation
Clipping is when 2 meshes intersect, 2 sided materials dont play a role in that
I have a feeling anyway that it's probably not the outline material, because wouldn't I see it even in that freeze frame? The inner mouth is just one single polygon in the center that I filled by highliting the surrounding edges and then hitting F to fill.
Hi, I have a simple animation that moves the hand from A to B and keeps it in B until its end
I have a second animation that moves a different hand left to right and the whole body (including the hand from the first anim) until it ends
I want to play the first animation, lock the hand position from it , then play the second so it doesnt move the locked hand.
I tried making a pose from the first anim and blend it with the second animation but I dont know whats going on

did you try moving the inner mouth away from the face?
Yes I have. That was the first thing I tried.
export the mouth on its own
Yeh, I'm doing that now. Actually, I'm gonna take it a step further and export it without the outline, just to check if that's really what's causing it.
in general its always god to triangulate things before export or at least make ngons into quads. its probably not a problem but it can lead to other ones
Nope. It's still there even without the outline.
perhaps it doesnt have any weight on your bones
wait that would show in blender
easiest solution would probably be creating a new object
Like remodeling the mouth you mean? Or separating the inner mouth from the outline?
If you mean create a new object as in remaking the mouth, that won't be as easy as it sounds, because the mouth expressions are controlled using shape keys, which I would also have to completely remake. 😛
In a first person multiplayer game, does it make sense to put better animations on the proxies/npcs?
Hi all! I am trying to put my attack animation in my project using enhanced Input system but for some reason when the animation plays, the collider turns towards left. Any ideas on how to solve this?

If I uncheck the root motion, the collider stays but the animation still goes left.
I tried reimporting it with offsets as well but no luck!
does your animation have rotation on the root?
No rotation on the root
I animated it in Maya in the same axis as the idle animation
It's got the transform though
the collider, is that the capsule component?
Yes
Currently driven by root
I also tried offsetting it in Maya and then exported again to see some change but same results
can you show the skeleton of your character? is the root on the floor?

yeah that's your issue, your character root being at the pelvis is going to rotate your character whenever you rotate the hips. The root should be a separate bone at the origin of your rig scene which you can animate independently.
This is so the root can drive how the character collision should move, while the rest of your character can move independently.
So should I reroot it/ create a virtual bone as root and then retarget it?
a virtual bone needs a target so that probably wont work. you will need a new bone that is a parent of the current root bone you have.
FYI this is a heirarchy change so it will break your existing animation assets. IMO you would be best to republish this from maya and then republish your anim assets
aah okay, I'll try that. Thanks a million battz, you're a savior!!🙌
you're welcome
hi guys, i just switched form UE 4.27.2 to ue 5.4.4 but for some reason only one animation won't play anymore something about the animations changed in UE 5?

@lone hornet Got an update on the 2D mouth situation from yesterday. Someone in another server suggested I look at the mouth in wireframe mode, and it turns out, the hole in the mouth is a missing piece of geometry that Unreal isn't importing correctly for some reason.

could be the shapekeys doing magic. either the verts are missing or they are in the wrong position, exactly overlapping.
Let me see if it looks the same in Blender. I'm just so confused why it's only having this effect in Unreal specifically, but not in Blender.
It does not. Very weird.

The same guy suggested trying to triangulate the mouth mesh? I've never done that before, so I dunno what exactly that would entail, but could that be a possible solution?
@lone hornet Turns out the answer is yes. Triangulating the mouth fixed it! 😄

I see, nice!
meshes are basically always triangulated in engine. so if you dont do it, the engine does it and it might break anything related to deformation.
Ahhh. That might be why it was importing all weird. Because the inner mouth was just a single vertice before.
If I want to implement minor twitches of the hit area, so hits that don't warrant a full flinch or stagger animation aren't completely lacking in impact, what are some ways to go about that?
Anyone ever had the problem where upon importing a Blender animation into UE5, some of the bones are jiggling? I don't have any capture software, but this is my exact problem: https://www.reddit.com/r/unrealengine/comments/c1jrkt/exporting_this_animation_makes_it_shake_or_jiggle/
my guess is it's related to the bone transforms like roll or position? it doesn't do it in Blender when I scrub, though. And no values change. I'm a little stumped. Right now I'm trying to clear out the rolls of the bones, but I have a feeling that's going to mess the whole thing up.
Reddit
Explore this post and more from the unrealengine community
Special note: I'm taking a course and not using my own assets. I downloaded the files the instructor provided and used those instead of creating my own.
okay well two hours later, i figured it out. in blender, i had to reset all of the bone rolls, make sure all the IK was unchecked as Deform, and I added a pole sub target to both toes. now they don't jiggle. that was aggravating
so i noticed I missed a setting the instructor told us to adjust after import, so I redownloaded the default files and tried them again with the "Preserve Local Transform" checked... still didn't work. went into edit mode and cleared the roll for all the IK, then reimported and now it's working correctly. LONG STORY SHORT: jittery animations in UE5 but not in Blender probably means the roll on your IK needs to be zeroed
Glad you found a solution. It's still a bit strange. In the video you had no IK bones in the skeleton of your UE5 skeleton.
Has anyone found a fix to animation curves not evaluating when the animation with the curve is passed in as a pose into a layered blend node ?
depending on what the Curve Blend Option is set to will determine what the output curve value will be. Do multiple animation assets being passed through the layered blend contain curve values?
I set it to do not overwrite and it seems to be working correctly. Thanks
glad it works for you. you can find details for all the options here: https://dev.epicgames.com/documentation/en-us/unreal-engine/animation-blueprint-blend-nodes-in-unreal-engine#layeredblendperbone

Epic Games Developer
Animation nodes that blend multiple animations together based on a set of criteria.
so i have this simple setup where im blending the full body slot and the uppperbody slot (upperbody taking action starting at spine_01
this works fine if (for example) i play a punch animation using the upperbody slot (the lowerbody would still move using the locomotion animations)
but, if i set the punch animation to FullBody, only the lowerbody is playing the animation (the upperbody is playing the locomotion animation)

so im wondering why playing a anim montage thats using the fullbody slot isnt overriding the full body ?
that video wasn't actually mine, but it was the same problem I had. I guess the instructor forgot to tweak a few things before he uploaded the files
It is working like expected. If you would a fullbody slot then place it before you create your global cache.The way you've placed it in your screenshot would drop your fullbody montage into the lowerbody branch. It would play your fullbody montage ... but the Layered blend per bone is just interested in the lower body because that's where you merge it together.
thanks for your insights!
Hi folks, when working with Additive sections or layers in Sequencer, is it possible to copy keyframes from a non-additive layer to an additive layer in such a way that it only copies the difference, rather than the absolute value?
can i see the curves/keyframes of a imported animation ?
by default nothing shows unless you do some additive keyframes
i'm trying to use alembics as skeletal meshes to allow for more complex character animations, but i haven't found a way to import more than one animation at a time. does anyone have a solution?
Good morning, if anyone has any general advice for a practical way to proceed when making animations for Combos for melee characters.
If I have a character that has a 5 hit combo chain but, I need it to function such that.
- A player can execute the combo by just clicking through it as would be expected BUT
- A player can also "Charge" each attack animation at their leisure.
Most attacks have a mix of moving the character very slightly forward or Backward (at most) in a step (When executed without charge)
But when "charged" basically two things are changing.
The wind up/anticipation is lengthened and the directional vector increases with the duration the LMB is held down.
So being new to animation in general and not completely aware of the complete tools available in Unreal:
-
The Combo Anim: Should I animate each attack as separate sequences? Or!
Should I animate the entire chain as 1 complete animation and more or less dynamically play back certain parts of it for each attack? -
This wind up mechanic. I am not entirely sure if there is such a case where I'd need create a separate wind up animations for each of the attacks in the combo?
Could/can this be as simple as recycling the anticipation over more frames?
Or can I change the playback speed of the animation dynamically?
I'm not entirely sure of what I can and cant do here and what is practical and wont put me in a place to fight with the engine? I know there are many ways to skin a cat but I also don't want to be in the weeds in Unreal.
If anyone would like to share their own approaches in their own projects or just in general I'm all ears.
Also I'm not completely averse to more procedural approaches. In terms of what I'm aiming for by volume I have a min of 135 abilities I need to animate.
In USA, KY, Lexington EST. I work 5 days a week and I am usually up late rather than early midnight - 7am. So if I don't reply right away I'll get back.
Thanks!
ive never done what you are trying to do but from what i know i would probably go with separated animations, as for the charge up, i think you can mess with animation speed and possibly blend times to make 1 unique animation that would fit the charge up for all the atacks but you would probably have to try it to see if it fits
Anyone help with this please
I have my montage and in my BP Logic I run the following


yet for some reason the player seems to snap
okay so I think I sorted the snapping issue
but still doesn't seem perfect
Appreciate the reply.
" make 1 unique animation that would fit the charge up for all the atacks"
What do you mean by this?
I am taking it as if I can mess with blend times and playback I could basically apply this effect to any given attack animation (Well for the auto chains) and make those wind up anims if a player chooses to.
the way i am imagining things is you have all those atack animations and 1 animation for the charge up which you can do before all the attacks, im not sure if this is what you have in mind, you could then mess around with those settings that i mentioned to make the charge animation fit
what you are trying to achieve is probably not gonna be easy
Anyone able to help please
I have got my anim into engine and set it with root motion enabled and then have the montage with the motion warping stuff however my character doesn't seem to be doing what would be expected when the montage is played
any ideas at all ?
Ah I see, no that's not exactly what I'm thinking. It's more like:
Class A: Atk1 > Atk2 > Atk3 > Atk4 > Atk5 (Repeat)
And lets say these 5 attacks are all unique.
A player can execute this by pressing LMB for each attack.
It's just a single combo chain for a given class. Each class will have their own Combo.
However each of those attacks can be turned more or less into a "lunge" or "Advance"
The chain stays the same but a player can at will chose to Charge (C) any attack.
Class A: C.Atk1 > Atk2 > Atk3 > Atk4 > C.Atk5 or;
Class A: Atk1 > C.Atk2 > Atk3 > C.Atk4 > Atk5 or;
Class A: C.Atk1 > C.Atk2 > C.Atk3 > C.Atk4 > C.Atk5
So for example the animation I'm working on now.
The Character uses a Scythe (held traditionally).
Atk1: Sort of a reverse paddle board motion into an upward swing
Atk2: Overhead downward chop.
Atk3: (Big) Pivot Rowing motion.
Atk4: Lateral Whip (Right)
Atk5: Big orbiting Swing (left)
Reset in idle.
The anticipation for each of these is wildly different. So for the charge up / wind up it's for each of these uniquely.
And this was my secondary question. For Atk1 Imagine the motion of rowing (With the intent of traveling backwards)
Instead of lifting the paddle in front dipping it into the water and pulling it towards you. You'd lift it behind you dip it into the water and then "push" it in front of you. If I want to make this wind up/charge up motion is there a case where I'd need to animate that individually
or can I handle that in a programmatic/dynamic way still using the original animation?
that would be up to you i think, you could possibily change the animation speed in code and use that as charge, or even freeze the animation to represent the charge.
You are probably gonna need some sort of input buffer too so that the controls feel good
anyone have any ideas on my issue at all please ?
your question is way too vague, you need to add more detail, what is it suposed to be doing? whats the original animation like? what are you doing in code?
So thats what should be happening
and from what I can see I can only get the montage to work right if I set the player character to have no collision and also the movement mode to flying
like is it normal that you have to have character movement mode to flying when doing the full body montage ?
i am not sure, i dont work with animations much, the collision makes sense, the movement mode i dont know.
Your animation is going back to idle because thats what you have in your animation blueprint probably
montages are suposed to be one time things that run and then go back to the regular animBP state
it's the montage Motion warping bit which is a bit of an issue at moment
why is my ai's animation translitions like that?
all of the animations are in place and all rigged also i think there's no problem with blendspace nor ABP


I have this problem too on occasion, except mine likes too deform and slosh about like jello when it does it. I'm not really sure what causes it honestly. For me it seems to happen the most consistently whenever I try to scale a bone, but even then it happens rarely. Maybe see if the world rotation of that bone is getting outta wack? That's the only thing I can think to try.
Also what in the what? This is unrelated to your question, but you can change the blueprint background?
well yes lol its in editor preferances i always change my bp background
btw do u have any solution for my problem lol
I've used Unreal for years and had absolutely no idea you could do that. 😛
And I do not I'm afraid. I'm not even entirely sure what the problem actually is. Is he just cutting between animations?
well its actually not facing to the direction where the character goes and yes its cutting between animations
The direction thing sounds more like an issue with your AI's blueprint rather than the animation blueprint. The cutting between animations might just be that you didn't set up your state machine right, but I don't know what your state machine looks like, so I dunno.
It's the thing you used to link up your animation transitions.
btw i think there's no turning animation for the ai could it be the problem?
there's only 3 animations for the zombie idle walk and run
when it change it's direction there's no animation to play
I don't think so. I don't have any turning animations for any of my characters, and I've never had that problem.

Are you only using a blendspace right now?


The state machine is this thing.

Ahh yes, that.
Okay actually, I think I see the problem. His animations are actually working fine, but he's snapping to face a direction instead of actually turning towards it. You should go into his character blueprint and increase his turn rate so he actually rotates more smoothly.
@void torrent
Yeah. Go to his character BP, type in "Base Turn Rate" in the search bar, and then fiddle with that value a little bit until he starts turning the way you want him to.
well

there's no such thing as base turn rate
is there a chance that it has another name or smth
Don't click his character movement component. Click the very VERY top of the hierachy that shows the actual name of your character, THEN type it in the search.


Well butts. Maybe they got rid of that in UE5...
It is a character BP you're using, right? It's not a different type of blueprint you started with?
well i searched rotation at the BP_Zombie and disabled yaw setting

then i moved to the character movement and enabled the orient rotation to movement

the root_control in the rig is suposed to move the root bone right?
Ahh, okay.
i think so
And it looks like you can adjust the turn rate with that. So they did change it to be called something else basically. Thanks Unreal. 😛
I fixed it by correcting some problems with the mesh provided by the instructor. Not sure which one was causing it, but here’s what I did:
-
his root bone was set to deform. I unchecked it.
-
One of his IK bones was also set to deform. I unchecked this as well
-
I reset the roll of all ik bones
-
applied all transforms to the mesh/skeleton. I dont think this did anything.
Once i did all of those, it stopped wobbling. On a couple of the animations id already imported and didnt feel like fixing in blender, i just edited the animation at the frames the wobble started
hahahah lol
thanks for the help mate i appreciate it
@void torrent No problem. 😄
@solid gulch I'm willing to bet it might've been #3 that was causing it. Possibly even #2, but #3 makes the most sense to me.
It's possible that when the IKs was set to deform, Unreal was getting confused on which bone should be moving that part of the body, since technically multiple bones were doing so at the same time.
I got a running animation that moves forward in space, i want it to stay in place but i dont have root motion at all, is there any way to do that?
Go into the animation properties and try enabling “root lock”
Or enable root lock or something. I know it says root lock
doesnt work because i dont have motion on the root bone
and i cant figure out how to animate it inside unreal
Is this a premade asset or is it something that you did yourself? Do you have 3d modeling software? And you’re saying you have no root bone right?
Anyone here recommend any educational courses on motion matching? I've done the introductory level ones, but I'm looking for a more indepth educational course.
i figured out a solution just after asking, i do have a root bone it just wasnt moving, so i just imported the animation into blender and deleted the data on the axis that was making it move forward
Aight, I have a good one for y'all. So I have a blend space set up and one of my animations is playing weird within the blend space. Here's the animation itself playing in Unreal:
Here it is within the blend space:
And here it is within game:
Anyone seen anything like this? Specifically, the Walk_Left_Fwd_45 animation is skipping or something. I can't even tell what it's doing, so it's hard to diagnose. I checked the settings on all the other animations and everything matches. The animation runs until I put it in game. Any ideas?
hmm, looks like the forwards walk animation.
it's for sure the walk left fwd 45 tho. u know what? now i'm doubting. let me double check
replace it with something super obvious
bc if its not, its just a blend tree problem

times like these i wish I had a silly dance or something
okay so it DOES display in the blend space, but it does so in between the two values. instead of playing at 1, -.5 like it should, it's playing at 1, -7.5 when I hold W + A
Ah, ok that explains why its the legs are kinda almost crossing. Good job!
according to some random person on the internet, they need to be similar enough to blend. i noticed my "walk left fwd 45" animation leads with his left and my "walk left fwd" leads with the right leg. I assume that's causing the problem so I'll try redoing one to lead with the other foot and see if that works
Yup. That got it. Little snappy, but hey for 7 months doing this crap i'll call it a win
Do you use any sync markers (when left and right foot touches the bottom)? If those anims are not similar enough those sync markers help a lot (telling the blendspace when he should blend smooth).
nah they're completely blank. I think the two animations were just too different to blend effectively
i dont even know what a sync marker is yet, lol
This would most likely fix your problem.
those were straight from blender to unreal with a few tweaks, like enabling root motion etc
well flipping the animation so the other foot was forward only took a few seconds so i'm happy with it for now. in the future though, i'll learn sync markers. got a lot to learn. thank you for the input!
Think of interpolating a slow moving walk and a fast moving run. The leg in the run is 45° forwards. The slow walk is probably 45° back. The interpolated result is 0° ... which is wrong and would look like he is not moving. Smooth but wrong. Sync markers would wait until the run 45° forward and 45° walk gets close and blends at that point. More or less.
...and it's even worse with 2d blend spaces, especially if you mix different anim sets.

hi! really sry if this is not the correct place to post this, but I got a weird question about my animation. I have a character with a modular head, and it seems to work ok AS LONG as the clothing physics is turned off. As soon as the simulation starts, the head and body desync in a very glitchy way. Does anyone know why the clothing physics breaks the animation and puts it out of sync with the other parts of the mesh?
i haven't gotten to that part of my animation yet, but from an amateur's perspective it looks like the engine thinks her head is cloth
Is there a way to stop an animation notify tick when a condition is true?

going to ask one more time:
i have a player character that uses complex animation that can't be exported as an fbx (requires use of shrinkwrapping). i used alembic to sidestep the issue, but it appears that only one alembic animation is supported per mesh. this is a huge blocker, and if i can't get this working i'll have to scrap several parts of the model and rig. i really hope it doesn't come to that, so does anyone have an idea for getting multiple alembic or other vertex deformation animations on one mesh?
notes:
- i'm using skeletal alembic imports instead of geometry cache, as the mesh doesn't change vertex count and needs overlay materials
- i considered the possibility of making the alembic parts into particles, but i need full control over the animation timing, blending, and such
My guess is the frame rate doesn't match
but.... how would the clothing physics affect the frame rate?
do they change the frame rate of a particular mesh after they are applied?
the head does contain clothing physics... but just turning them on desyncs the animation.
Can the clothing simulation just destabalized modular pieces to the point they come with delay?
Thought you meant simulated, baked and imported
I made an advanced skeleton rig in maya, made a pose and exported it. Whn I now import it in unreal 5.4, the pose seems to be broken, there is weird noise deformation around the lips of my character for no apparent reason. What could be causing this
do you have scale applied to any of the bones in this pose?
There appears to be some. That would be the cause?
scale, especially non-uniform scale can result in some odd behaviour. one thing to try is enabling preserve local transform in the animation import options
I changed the bones to have a scale of 1 and it did not chnage the outcome. Presevre local transform didnt affect it either
it's very werid, never had that issue before
I think it is because we exceed the 8 bones per vertex limit somehow
is there an easy way to fix this or do we have to redo the skin
anyone familiar with using control rig to rotate bones. i have an issue
im rotating spine_02 to make sure the punch always aims at the head, whenever the punch animation triggers in the video. but whenever i activate the dodge overlay, he either over rotates his spine or under rotates his spine, depending on what side of the opponent his standing by.
Hello folk how to animate no vertices bone
anyone hazard a guess why one of these uses property access, and the other just uses self? They both I believe reference the same thing, is there any reason /not/ to use the property access node here?

I posted this on reddit, but it suggested here for maybe a better response... I am sure this should be more obvious than it appears - I have a mech walker, where the top half is basically a turret with guns/rockets/etc, the bottom half is the traditional humanoid type legs
To save effort I wanted to basically split the humanoid animation part out from one of the manequin anims, and then to augment that. I could obviously do all the animation inside Blender or similar, but I am not going to ever make a good run/walk/jump anim for the legs myself
I know I could use a per bone blend to merge two different animations, is the the only/right way?
The mech is something like this

Can anyone suggest a tutorial for character movement from scratch in unreal engine? Like in blank project. And how to create blendspace animations.
Hey, does anyone know what is causing this issue?
I'm trying to use the retarget pose from mesh animation node, however I'm getting a different result compared to the IK retarget preview, and even when I conver the anim sequence, I get it match the preview that is showing when you are editing the IK retargeter.
The first screen shot is from the IK retargeter editor/preview, compared to the in game result that I can during play


something else I should mention is that I have limb IK for each of the finger, and if I disable then enable this during play by editing the IK retargeter asset, it fixes the weird finger issue

but it comes back after I stop and play again
Anybody using liveretarget and is happy with the results? The difference from UE5 and UE4 characters that I've in my game already make things a bit complicated. It seem 95% of the anims are fine... but that's not enough. Without liveretarget this 5% could be fixed quick. But now any change in the retarget pose modifies all anims... and changing the source anim might mess it up for other characters that where fine already. I'm not really sure anymore if I would save that much time that way. 🤔
Hi, anybody know how better setup blend animation with animation chooser (for example when you stopping, it go from movement to choose stop animation)
My anim notifies to play context effects arent saving when i restart the editor. They work fine before i restart editor, but once i restart the editor they lose their data and end up as a greyed out thingy with the same name as my context effect. Does anyone know how to fix this issue? Thanks!
Hey everyone, I am working on a playable character in UE. I 'am facing a sliding issue when the character is turning
Any Mixamo experts? I have what seems to be a simple root motion issues
Using a UE4 Skeletal Mesh uploaded as fbx for my character to Mixamo does the auto rigging for me.
In Mixamo the jumping animation looks correct.
However after downloading and importing to Unreal the hip seems to be the root and doesn't move.
How to correct this?
Is there a way to get the transform of a bone directly in the animation blueprint itself? I’m trying to get the position of a bone in a cached pose so I can use it to drive IK in a later pose

Uhh ahem homies when I import a skeletal mesh from blender fbx into my ue5 and make a control rig out of it, the gizmos on the skeleton don't really show up and all I can see are the control shapes. Does anyone have any tips? (I know I'm like the fifth guy in line for help lol
Did you hit the "G" button (game mode eventually)?
Can you be more specific?
Please
More specific then hitting "g" on keyboard?
No gizmos:

press "g" on keyboard - gizmos:

This is a blender character as well.
Why isn't my jump animation playing? Walk and run are great, jump is not. I attempted a jump blendspace but that didn't work either


Is that eventgraph in the screenshot your hole eventgraph? If yes then you don't set your "IsJumping?" anywhere but just speed. You have to set the "IsJumping?" variable somewhere. E.g. if your character is not on ground anymore. Similar like this:

I didn't realize I needed that, thank you so much
Unsolicited advice, but I wanted to mention that you can avoid casting on tick to the character class if you first perform the cast when the animation initialises, and then store the output of the cast to a variable.
You can then use that variable when and where you need it without needing to cast on tick (expensive)

the cast is not expensive here as much as just being another bp node
casting is not free but the actual work required internally will instantly be dwarfed by any bp node evaluation
the advice still stands 100% but casting is not slow because it casts. it is slow because it is a bp node (and it creates a hard reference to the other bp asset if its a bp asset you cast to which is an actual reason to avoid it, but not exactly runtime perf related)
do not be afraid to use bp in your animation code though, just be mindful and profile things to figure out what you need to make fast later
anim bps tend to be self contained and simple in terms of just gathering gamelplay data
thorough explanation, and agreed, it's preferable if the abp can primarily read data, rather than do any calculations of it's own
there can of course be anim only things like for example smoothing out shakier data
there's no hard and fast rule but it's just a ~good practice~ (vibes based advice) to prefer to have them present game state and not create it
This happened after I imported a mixamo animation after converting it for ue5. Any ideea on what happened?

Hey guys, I have some attack animations with a forward motion in them. The issue I'm experiencing is, that if I'm already close the the enemy, and the animation still has the forward motion, it "glide" past the enemy.
I know I could lock it with motion warping, I even tried that, but it does not really feel natural, since the character is then really locked onto that enemy. Also if both the enemy and attacker are doing it it results in weird things.
So I was wondering if there might be a way to just disable the forward motion from a given notify or something?
or do you guys have any other suggestions?
I'm not sure if it matches your animation type but you can probably disable root motion after you reached some distance check. Like this:

Looks like you've tried to use the animation for a different type of skeleton.
Whats the correct setup for exporting skeletal meshes and animations from blender to unreal? The root bone keeps getting scaled for me
Hi, I work in blender and can't comprehend why only the right hand is refusing to be imported correctly. Its the SK_mannequin skeleton and I did make working animations already, its just this hand for some reason


oh no wait the left one is wrong too... I'll be back tomorrow for this, appreciate any tips : *
Hello everyone. I've done a decent bit in UE on the environment building side but specifically with animations I'm very new and have a couple questions.
I want to tweak the right arm position for every animation in the motion matching set of anims UE provides. I don't exactly understand how motion matching works so I was curious about a couple things. Are there core animations i should focus on that then the motion matching selection will blend between those as I change direction while moving? Or do I need to go into all 500 animations and keyframe each one individually for the arm position I want in that specific moment? I'm fine with either solution. Just thought I'd come here first and see if I could save myself some time if there's an easier way.
I'm using this settings (one for the mesh, one for the anim) since UE 4.7 / Blender 2.79 and never had scaling issues.


yeah I finally managed to figure it out. I had the armature named wrong which was mssing up scale too, and I had to retarget all my anims in blender to fix the scale after I changed the skeleton scale
How do I replace animations in blendspace?
If you retarget them again with the same name there's usually no need. However you can just select those dots, delete them and drag and drop your new anims as well if you like.
nvm found it 😅
The only issues that remains at retargeting if you retarget to the same skeleton where you already have some blendspaces, apbs and montages are the aimoffsets (where usually the source skeleton gets inserted in the adaptive preview pose instead the target one which most likely would create a monster).
ohh interesting, thank you! 🙂
Hello! Morph Target Control Rig Question for you all.
I cannot bake my pre existing anims to my CR_UE Morph Rig.
Any idea how to get it to appear?
Steps:
- Duplicated functioning UE5 Premade Control Rig, with my Mesh inserted in place of Manny and the Morph Targets loaded.
- Removed Controllers and Blueprints for bones, added Morph Target Controls and Blueprints for Morph Value
- CR_UEMorph works when I drag it into the viewport, creating a functioning Sequencer for animation.
It just doesn't appear for baking purposes.
Maybe I need a single bone control in here, in order to have SOMETHING to bake to?

Looks like the answer is that there has to be some sort of Bone Controller to actually bake to for it to appear 😦
I don't like it, but I wound up just adding all my Morph Target Controllers to the Bone Control Rig. I don't like how much data and processes it carries now, but baking it to a a single bone removed the pre-made anim, which I think just have to add with the Anim + Track anyway. Just need to figure out how I can make these additive Face anims without exporting the bones tracks now.
One stop shop for Face and Body anims, for anyone in the future :3

Lol, this is how you separate your Morph Anims and Body Anims (if desired for making additive anims).
Just Bake to Anim Sequence Twice, and pick which pieces you want at which time.

Hi, I wanted to use the ALS animations with motion matching (the run animations) so I added an additive layer track and just added 2 keys, 0 at the start and speed * total play time at the end of the anim sequence, however enabling root motion in the asset settings, makes the mesh move twice as far

so it looks like the root motion is getting applied but the additive layer track is getting applied again as well. I can get it to work by exporting the anim sequence but is there another fix for this? I'd rather not have to export each individual animation
Do any of you guys know any good ue4 manny rig for animation?
This was the solution, idk why, I didn't have to do it for my other anims 🤷🏻♂️
I'm trying to adapt CR_Mannequin_BasicFootIK (from the third person character template) to another skeletal mesh. If I use the left screenshot then I get no IK at all, if I use the right with LeftFootIK/RightFootIK, then I do get some IK but the foot do not "walk" (they stay close together)


Are there any ik bones in your skeleton and are they animated? If yes then you have to pick them in the FootTrace node, ModifyTransform nodes and finally the Get Transform Bone nodes you showed.
If not then you can either add some ik_foot_root, ik_foot_l, ik_foot_r bones to your skeleton retarget your animations with the pin option (like it is already setup for the RTG_UE4Manny_UE5Manny IK retargeter).
..or if you wanna skip adding bones to the skeleton and wanna skip the pinning via retargeting you can even do everything in the control rig. Add some new controls (e.g. ik_foot_l_ctrl, ik_foot_r_ctrl). Use the controls at all the nodes where IK_foot_L and IK_foot_R are used in the original mannequin control rig and add a manual new "pin" option in the control rig (it would copy the current foot bone transform to your controls).


...that said. If you would ever switch to the FootPlacement/LegIK method like it is done in the game animation sample you would most likely go the add ik bones / regarget with pin animation path.
I see the LeftFootIK/RightFootIK in the control rig like this
Here it's not said what they're attached too, but in the IK Rig which was automatically created they're attached to "ToeBase".


For the animations I'm using the retargeted UE mannequin animations
Looks like your are using helpers and no real bones. So you most likely have to pin it in your control rig. You have to tell the control rig from where it should make the trace. If you foot_bone_name is at pos 5,5,0 in the animation your control rig does not know from where it should trace downwards. So you have to copy (pin) the transform of your real bone name to the control bones.
I'm using the default control rig BasicFootIK, and I switched the virtual bone names:
I added the virtual bones as shown here:


Does your control rig graph start with something like this? If not then add it:

and choose your control names.
This does exactly what the postsetting pin does in the UE42UE5 retargeter (lots of old anims did not animate the IK bones properly).
No it starts at Step 1: why is this Step 0 needed for my skeletal mesh but not the UE mannequin? thanks I'm going to try to add it

Because the UE mannequin has ik_foot_l and ik_foot_r AND it is animated in the new UE5 basic animations. Open a animation, click on character and make all bones visible and you would see.
Ok thanks I will try. How does the control rig know about LeftFootIK/RightFootIK? Does the control rig know about the IK rig? I don't see any reference to it
This controls are just added as part of the controlrig. They are no parts of your skeleton.
Oh so they're not the same as the ones in the IK rig?
You can even add further ones if you rightlick in the control rig bp:

But the real bones are white... and that's the ones that are animated via your animation.
So if your animation moved the foot_name_l to 10,10,0 then you have to tell your control righ somehow where it is. In the default mannequin control rig there is no need because even ik_foot_l and ik_foot_r are at the exact same location (10,10,0 in the example). If you don't have that bones... then you have to somehow tell your controlrig from where it should make the traces or it would remain some 0,0,0 and not moving the feet at all.
Awesome! Some tutorials were adding virtual bones, but I guess I don't need that, I just have to use the controls in the control rig correctly

Anyway... that control rig even has some weakness as it does not really cover the foot rotation. Works fine for stairs but looks wrong at a hill where you don't have a 90° placement. This is done better via the new experimental footplacement/leg ik node of the GameAnimstionSample project from EpicGames.

Thanks a lot for the help! ❤️ I'll look it up
Hey all, stuck with a simple problem but can't refactor. Can I get some insight please!
- Objective: Fix 'Forward Head Posture' Dynamically for humanoid anims
- Method: Calculate If character has a "Forward Head Posture" (Bone Locations, Forward Vector etc.), apply dynamic additive during runtime
- Prototype Status: Successful
- Correctly calculating posture and outputting requested correction alpha (0 -> 1)
- Applying 6 Modify Bone transforms using this alpha at end of Anim Graph
- Success!
- Refactor Stats: Stuck
- Attempting to make an additive pose with the corrections baked-in, can't get it to apply
Ideally I would like 1 function in the AnimBP (calculating this) and 1 node in the AnimGraph applying this to make it neat and modular. What is the best approach?


I've finally got this to work, is this correct? Or is there a better / another approach? Feels like I'm evaluating against two things and doing more AnimGraph work than required?

what would be the easiest way, to assign a different skeleton to a mesh?
I have added some weapon sockets to manny skeleton, now I've another mesh that is also based on the ue5 skeleton, but just assign skeleton, won't give me the new sockets on the mesh.
Do I really have to add all the sockets to the skeleton or is there a easier way?
also I'm wondering how common it is, to retarget animations to different skeletons, because I've noticed that there is quite a lot of different skeletons, should I just try to only have ue5 skeletons or just retarget everything?
About the sockets... if you add a socket to SK_Mannequin then it is a normal socket with white color at first. If only one mesh is using the skeleton then this is enough. If more meshes are using the same skeleton (e.g. Manny and Quinn) and the mesh anatomy requires a different offset from the body then you can override it via mesh sockets (red color) afterwards. That means SK_Mannequin has a basic socket but Manny, Quinn and your SKM_new that is using SK_Mannequin can all have different mesh sockets. If you finally do some attachement in the character BP for example and use your socket_name then you would get the mesh socket transform instead of the skeleton socket transform.

Sorry I'm stupid, I didn't mean socket, I meant I added bones to the mesh, with the skeleton edit tool.
And I would like the meshes to share my new skeleton with the weapon bones
That's a good question. If you take a look to the "Game Animation Sample" project then it seems you can just keep all those different skeletons and cover them all using live retargeting. But I found myself more than one time polishing retargeted animations. Easy locomotions usually work fine for all meshes. But there are those few more difficlut ones where a hand is clipping into the body at one of your meshes because the arm is longer than at the others or something and you probably wanna adjust. Easy with some adaptive track if you did some retarget and change the one anim. But using that Liveretarget it should most likely cover all characters and those fixes are not possible. Currently I'm using UE5 meshes (migrated including weight painting from UE4 ones) but I still have some others (UE4 or UE4 named) that work already (I've a map that covers all anims and APB_templates) and I'm not sure if it would be faster for me to replace the skeleton for all those remaining characters and make them UE5 or tinker and workaround those few tricky animations (maybe some IK effectors that avoid that cliping) and keep the UE4 skeketons and do Liveretarget.
How would you place them, in blender/maya only right?
Because if I have a ability using a montage for example or even just the montage.
If I have differen skeletons I have them for every skeleton, so I would have to manage each montage so it will have the same setup also then manage that the appropriate montage is choosen.
But besides that, I'm really wondering, I have the manny skeleton, where I added the weapon bones, but I have bought another character, that is also based on the ue5 skeleton, but the issue is, that this does not have the appropriate weapon bones.
But just assigning it doe snot help 😦
hope my issue makes sense
I'm using Blender and the Game Rig Tool plugin. Works well. But also consumes some time if you wanna get everything in good shape (if you start with UE4 weight paints you most likely change the weights too).
But the skeletons for me now have the same base even.
it's just some weapon bones added, that do not affect the mesh at all
Does the bought one use SK_mannequin as skeleton or is it just compatible? I've imported meshes using the SK_mannequin as skeleton (so many characters that are using only that skeleton) but I brougth new bones for mouth and eyes. Now those bones are avaialabe at all SK_mannequins but not every mesh uses it (has wight on it).
Do I have to import the mesh?
jaw is no original bone from SK_Mannequin but since one of my custom meshes had this I've now that bone at the skeleton tree of SK_mannequin because they all share that skeleton:

yea but they are grayed out for you, so the can'tbe used for that mesh right?
Ofc I can use it
mine uses skmannequin, but it is the mannequin skeleton that it was shipped if

not sure how i get it to work with my skeleton

but how do i get the bought skeleton to use my extended skeleton?
I added it in Blender. As long as you add new bones everything is fine. You just may not remove bones.

I've added the bones with the skeletal mesh editing plugin, but do i now jus assign the new skeleton to the other mesh?
This might not work if there's no weightpainting on it or if it does not match. Adding helper bones (e.g. some IK_whatever) or sockets are one thing. Deform bones are different. I think you can even weightpaint in UE already if I'm not wrong but I usually use Blender for that.
I don't get how i get the two meshes to use the same skeleton?
It's the same skeleton asset, sharing the same bone architecture. But it is not 100% the same skeleton. Even Manny and Quinn differ (same bones, but a bit different anatomy). After exporting my meshes in Blender I choose SK_mannequin as skeleton when importing in UE5 which brings a third anatomy to the same bone architecture of SK_mannequin and probably a few more additional bones that does not exist already on original SK_Mannequin. I can use the animations from manny and quin afterwards without retargeting (and if I retarget some animation to SK_mannequin all of them can use it) but not every animation looks ok (like using male animations on female shape without some adaptions). Even the APB_PostProcess just works fine (I'm only using it for untwist).


So basically I'll just export the mesh and reimport it with my skeleton?
Because the issue is, that when I assign my skeleton, the animations work, beside the weapon bones, I'm getting the error in the image.
Even though the bones are not altering the mesh at all.

Depends. It's not always that easy. UE4 characters got different vertex groups than UE5 ones for example so the weights does not match (while the bone names exist). There is no spine_05 in UE4 for example. But there is one in UE5 characters. There's no weight on spine_05 but spine 01, 02, 03, 04 has weight now so you must migrate the weight.
Is there a way of just adding them with the skeletal mesh editing tool, I just need them at the same position same parent.
Seems like you can weightpaint in UE5 now as well. I'm just a bit unsure in your case because you mentioned some weapon bone. You don't need weight on the weapon_bone if the weapon-mesh is not part of your character mesh. There's even no weight on the ik_foot_l, ... bones or other helper bones or sockets.


- Yea as I said, I've added the bones via Manny to the skeleton.
- The other mesh also uses the ue5 skeleton, but not the same asset, since ofc it is imported.
- I can assign my manny skeleton to the mesh, but then I get the issue with. "This bone exists only on the skeleton, but not on the current mesh"
- Basically I just need a way, to also add the bone to that mesh, it's not weighted or nothing.
- But it appears, that the skeletal mesh editing too, has no feature like, "add skeleton bone to mesh", they won't even show up, maybe I'm missing something?
If the bone does not exist on the mesh, the bone is just positioned ad origin, so the sword is just at 0,0,0
You can add bones. If the bone is positioned afterwards even depends on your animation.

But how do I get the bone onto the mesh? 😅

Both meshes are using the SK_Mannequin skeleton?
yes


I've added the jaw bone (from one of own meshes) to a further mesh that uses the SK_mannequin. In this case SKM_Manny.
I manually added it.
I mean it's pointless as Manny has no mouth but now it's there.
Yea, but there is no way of saying, take the point from the skeleton right?
you can copy location and rotation if that's what you mean.
I basically just want to right click the bone and say add to skeleton
because it's 18 bones I have to add to each mesh then, where i have to copy position and rotation and name
You can copy at one mesh and paste at another but if the result is good depends how similar those meshes are. I think there's no fire and forget method in that case. This one are copy/paste from my custom mesh. But mannys anatomy differs to much.


i mean i can copy the whole bone, but still tedious and error prone but maybe there is no way around that?
both are just the manny skeleton
I don't think there's a way around it. If you're 1.80 and copy it to a 1.60 person it differs for sure.
Hmm but both use the same mesh 😅
A 1.80 humand and a 0.9m squirrel could both use SK_mannequin.
If both are 100% identical copy/paste should work just fine I guess.
idk but I guess I just wanted a definitive answer, before I start copying hunderts of bones 😂
Just copy your 18 bones and paste it to your other mesh and you would see. Problably it's just adjusting the offset of the first bone in the chain of bones you copy.
the copy thing is fine, it's just the copy thing by itself, since I have to do it for every mesh ^^
But I get what you are saying, it also took me some time, since I'm using a mesh that is not using the ue5 skeleton, but the animations worked for it, but the character had a really stretched neck and I couldn't figure out why.
But this might be subject to the "Live retargeting" that you mentioned
About that live retargeting. If you can change the pose in the IK_retargeting asset once for all animations it's fine. I had no issue with the animations from the Game Anim Sample project. But it misses a lot of animations besides base run/walk/vault anims. As soon as I start dragging arms for weapons, equipping or touching the floor there are usually a few anims that need manual adjustment -after- retarget. But with the live retargeting method I see no -after- at retarget as it's done live and if I change the retarget pose it messes up the already fine other anims. That's why I'm not really sure if I wanna use it.

But what would be the alternative, to just retarget the animations?
Yes. Like it was done before. Liveretarget comes with a bit an overhead anyway (50 chars -10fps or something) not much but still there's a bit. If it would make my live a lot easier I would probybly buy that fps cost. But it's still not fire and forget for me (good but not perfect). I've a ABP_template that uses a map for all anim sets for all equipments. So I don't have to change the anim-bp logic if I add something new. But ofc it means I've to retarget the anims for all different skeletons (in my case UE5 and UE4). So I think... if I switch the UE4 skeletons to UE5 and just use normal retarget and assign the anims in my anim_set maps I'm faster than using liveretarget. 🤔 Also I had some issues how that 2 skeletons where used in GAS (physical asset/collisions from the source, ...).
Yea I guess I have to think that one through, since it would mean retargeting all animations, which takes up more disk space, which might be the least problematic thing. But then for GAS abilities using an animation, I have to think of a system, that chooses the appropriate montage and also I have to setup montages for each skeleton.
maybe have to think that through, but thank you very much for your insights, really appriciate it! 🙂
Coincidentally I have the same issue. I have 100+ modular equipment meshes I need to manually open in Blender and add weapon attachment bones to... (they have to be bones so that they can be animated) I wish for bones that didn't have any vertices assigned to them Unreal just used the offsets in the base skeleton for the bone if it wasn't present in the mesh :(
Hello Sourcers! I'm going crazy on this... I need to avoid casting to a predetermined AnimationBP in order to get more flexibility using variables instead, so that I can switch from to an AnimationBP to another depending on which character I have riding the horse. I'm struggling to find the way of doing it... any hint please? Thanks in advance!

You can either have your ABP implement an interface and then send a message to it (will just do nothing if it doesn't implement the interface), or if you look at ABP_Manny's event graph you can see that they read the variables they need like falling / velocity from the owning character. If you have 1 character base class that has all the information you need and many anim BPs, you can cast to that character base class, or just use interfaces/messages again
aha... I'm using mesh merge for the modular parts, and if I merge just one mesh that has the weapon attachment bones I need, they get transferred onto the merged mesh. I might be able to import my weapon bones via some dummy mesh with effectively no geometry, add it into the merge list, and then not have to edit any of my modular meshes

Hello, anyone know why this weird pinching is happening when I rotate my model? Doesn't happen in Blender...
What is the "good" behavior you see in Blender? I don't think you could ever avoid pinching like that when rotating a bone 180
Give me a sec...
Pinching does happen but definitely not as much as in UE5 and it still keeps a relatively good shape...
The weird pinching makes stuff like this. Annoying asf ngl...

Are you importing as a new skeleton or trying to map it to an existing one that might be out of sync in some way? Also could have something to do with triangulation or some other import/export setting
What do you mean? Like retargetting or?
When you are importing, you get the option to reuse an existing Skeleton. If you have this set to None, then it will create one, but otherwise it will try to map to an existing one

Does the pinching happen just with the animation or also if you open the skeletal mesh and rotate the bones manually?
everything
I rotate bone in skeletal mesh, pinch
I rotate bone in animation, pinch
I can unpinch it by rotating it the Other Way but it also makes animation not the same as Blender...
Okay, so it's not related to animations then. Did you also have an existing base skeleton you used when you imported the mesh? Or did you let the importer create the skeleton when importing the character mesh?
From Blender, rigify.
All in one. Mesh and Skeleton. Physics created in UE automatically.
Other thing to try: if you re-import the fbx into a new Blender window, is it still fine or does it now have the same problem?
This can go 2 ways, either I can reimport the FBX file from Blender, meaning the original export I used in UE, or I can export the UE file into an fbx if that's possible and import it to Blender.
Nuts ok... it happens also...
The former (Fbx exported from Blender) is more useful (goal is to narrow down if it's the FBX that was broken on export somehow or if it was something Unreal broke on import)
So the FBX is busted then before it ever gets to Unreal?
original export... Why tho??? 💔 💔 💔
I just imported the fbx I used for the UE, tried rotating, pinches.
oof. I'm not that familiar with Blender to know why that's happening, but the Blender Discord/forums might know since this is happening at the export from Blender level before you ever get to Unreal
True... I wonder now if I can import the animation to see if it is bad in Blender or not...
if the mesh is busted then the animations you try to play on the same mesh will exhibit the same problem, but once you fix the mesh you can try testing with the animations on the fixed mesh to see if they're fine or also need fixing
Prolly but I do want a bit of extra testing even if Ik the final result would be the same...
also, just something to check: did you apply everything from rigify before exporting? Maybe it had some modifiers that were not yet applied during export
or unapplied transform / something like that
Scale and Modifiers yeah, but constraints no.
And yes, before you ask, it is the correct size, metric .01 (or something like that).
I'm sure i'm overlooking something super obvious, but does anyone know where the /debug/ implementation is on GASP? (not the state machine debug items, but the debug as attached in screenshot) -- I've dug all over the character blueprint/animation blueprint, and I'm not seeing it

Thanks. I have used interfaces already so far but just with characters' blueprints, animation blueprints are a kinda different beast to me, most of my hassles with UE are all related to them, specially when references are involved. I kept on googling for an example of what you suggested but haven't been lucky yet.
You can add interfaces to the AnimBP for the EventGraph exactly the same way as you do for other BPs. It's not different. It's just different if you would override AnimationLayers for the AnimGraph. About the hint. Looking at your screenshot you can play montages (PlayDismount) from your character BP as well using PlayMontage (which even gives you branches for interrupt or notifies). No need to do this in the AnimBP. Most likely you would need some interaction with your animBP as well somewhere so interfaces are just fine. I would create an ABP_template without skeleton that contains all the logic (AnimGraph, and EventGraph) and reduce the AnimBP EventGraph to things that really have to be done (toggle UseMultiThreadedAnimationUpdate and WarnAboutBluePrintUsage) in AnimBP template. Create child AnimBP classes for all your skeletons (they should be almost empty because your logic is in the template). If you really need to override some AnimGraph parts (e.g. some character has a spine with 3 and another one with 5 and you would do some blending for an arm) then you can override the animgraph parts via AnimationLayerInterface on the mesh. But I don't see this for you based on your screenshot yet.
That's why there are twist bones usually. Human body has no broomstick bone at lower arm. There are two bones that differs a bit when you turn your hand 180°. You can fix this in the animation (turning a twist bone rotation) or dynamic all the time via some postproces ABP. Manny and Quinn are using that (screenshot disabled/enabled postprocess ABP).
But I think you've another issue as well if your animation differs from Blender/UE5. Blender and UE differ a bit if it comes to weights. How many bones are pulling at vertices. Are all weights normalized (sum of all bones that drag at one vertex is 1.0)? Also UE would put missing weights usually to root. While Blender seems more to fill up the missing weight to the bone with the most weight. So if you have for example just 0.7 weight on lowerarm and 0.1 on hand and miss 0.2 weight in total to get 1.0 then UE would put the missing 0.2 to the root bone and blender would give it to lowerarm (or split to the ones that already got it I'm not sure ... but it's different). Also if you have some weight-paint-dirt somewhere (like painting just a bit to body parts that should not be affected) this usually turns out quickly very bad in UE while it does not look that much of a problem i Blender.


Alright, I don't know what you just said but it seems there's a lot more stuff I need to learn about in Unreal especially regarding bones and post process. I'll look them up but right now I'm also dealing with just some weight painting issues. Thanks for the input.
Like this. As you can see in Blender Vertex wights (right) there's bone.001 with 0.1 weight and bone.002 with 0.5 weight. This is too less. It's not normalized. There's 0.4 weight missing. If you hit the normalize button then the weights are fine.


Ah, that I'm fine with (As far as I'm aware of), all of the bones are normalized...
Yea, if the bones are on the mesh why not just be able to say "use them" without being attached to vertices 😅

why arent control rig node outputs behaving like outputs?

It's no output. It's an input. If you try to add some foot rotation (using that normals) you can do this in the control rig itself https://www.youtube.com/watch?v=g8OV0oTmq-c
However ... in my opinion the FootPlacement / LegIK solution (which is used in Epics Game Animation Sample project) works much smoother than the BasicFootIK rig solution:

Unreal Engine 5 tutorial for adding foot rotation to your character's leg IK control rig.
Full Leg IK Tutorial Found Here : https://youtu.be/NAHRl7fMjK8
Cheers!
Tele
hello if a skeleton has no vertex bone and that bone has animation so when i was retargeting that animation in ue5.5 auto retarget the other skeleton which was UEFN was and i add bone in rot with the same in the bone and still it was not that bone animation like it was taking it's rotation and not taking its location any suggetion
I'll follow your suggestions as soon as I work on that project again. Thanks!
Heya, Did someone tested the control rig asset pack in UE 5.6? I'm missing the switch functions for the Mannequin CR, I was wondering if you had this issue also?
I've just tested the CR_GroundControl rig with 5.6 preview from Control Rig Samples Pack. I was not impressed (brings some foot rotation but has nasty issues as well). I'm not sure what you mean with switch function. The "switch" node could be added just fine as far I tried, also switched Manny with Quinn (worked) 🤔.
Thanks, you can find them in Animation Mode, in the Anim Outliner, they are use to switch between IK and FK and also change the spaces
Hello everyone! can i ask help for State Machine here?
Im about to do so , so you might as well
Hey there how can i use a branch in the state machine since there is no event to power it?

I'm not sure what you are trying to do but you would probably move that > node into the eventgraph, do all ifs and else in the EventGraph and finally reduce it to a single bool or simple get value that drives something. You can do > checks even in the Animgraph but already that (simple) logic removes FastPath (that lightning bolt icon).
That said about branching. Everything in the animgraph should be around the anim. "Blend by ... " is to blend (or switch blended) the right anim sequences and/or blend-spaces, linked layers, ... together.

Where is this icon? Also where on the docs can I read more about this to not constantly return to discord ?
well there's seperate checkboxes for input and output pins in the control rig details, whats the difference between them then?
I was following that tutorial you linked but It didnt work with my rig, secondary input was being flagged as invalid for some reason. Not really sure how its supposed to work either since the AimMath was using the same vector for both targets, maybe its very bone rotation specific which is why I was having trouble?
Im going to look into the footplacement solution, but basic IK seems to be looking good for my needs, just couldnt get foot rotation working in control rig. Right now im just doing another trace in the event graph for it, which works but is an extra trace
Fellas
Where do i find transform in animation sequence
Import transform
Pretty sure it used to be right here but oh well
i have a run animation that i made in ue5 that i then export to blender so that i can delete some keys to make it run in place, the issue is, its not looping properly, there is always a pop in the Z axis, does any 1 have any idea what could cause this?
If CR works best for you then you can take a look at CR_GroundAllignment from the Control Rig Samples Pack - at least for the foot rotation part. It's using AimMath as well (a bit different than in the tutorial) - works ok even if you run (you would not align the foot to the ground if it's currently in the air) but you most likely have to pause it after some ilde time in the AnimBP otherwise it could lead to that jittery (probably some if last-trace was almost same pos keep old pos would do as well) (https://cdn.discordapp.com/attachments/221798806713401345/1376915459458334892/2025-05-27_15-13-08.mp4?ex=68370ff3&is=6835be73&hm=d12f33e0c654c06ca770b7e0f38a1fcd835f8d67a7437ef10cb113c8046becd9&)
would retargeting animations be viable if i wanna retarget X Bot animations to a metahuman skeleton?
I've never tried retargeting from XBot but I'm pretty sure it works. You can retarget XBot to UE5-Mannequin and UE5-Mannequin to MetaHuman. So I don't see a reason why it should not work.
So i've dabbled with retargetting, I've used the auto and then tinkered with manual tweaking a few things.
two questions:
- Let's say I retargetted some animations, and then I make a tweak to the retarget, is there anyway to get the existing animations to update based on the new retargetting, or do I just need to replace them with the updated animation set from the new retargetted target?
- with dynamic(runtime?) retargetting, is it required to 'retarget' the animations, or does it just happen automagically? I guess I should probably read up on this, but haven't yet!
Thanks, I'll try that
the X Bot skeleton is very primitive so I was skeptical
would love to help, but as you see, im in the same boat :p
ha, just catching up with the convo.
Yeah, I'm digging around a bit. Ultimately I need to sort what the most efficient usage is, what the best dev-workflow is, for multiple characters with possibly different skeletons (although, I think I'd like to standardize them, and I imagine we will, for dev prototyping that isn't super practical for me anyway)
I would guess dynamic/runtime retargetting is not super efficient, or the least desireable performance wise
yea it doesn't sound very efficient
But I'm in a situation where, I retargetted a group of animations, loaded up some choosers, and now I need to make a tweak, however subtle, and it's going to require me to update all the choosers again, which is a bummer; so before doing that, I'm just trying to figure out a good workflow.
I would think there is a way to tie animations to a IK Retargeter not a specific skeletal mesh, but I have a feeling I'm just overall very confused :o)
if doing animation logic at runtime is bad, then retargeting would be really bad
and as far as i know, animation logic during runtime is usually avoided as much as possible
multi-threaded* makes it a little better; but yeah, its probably not ideal, but for development maybe it is acceptable, as things are so fluid; I'm just not sure what the norm is, but need to educate myself on specifically how animations, IK retargeters, pose asset, and skeletal meshes all work together, and that's proving to be elusive far me so far.
https://www.youtube.com/watch?v=oz4TJp_z9IE perhaps this might help

Hey Everyone, Welcome. Today I'll be teaching you how to retarget your animation in unreal engine as well as way to fix up any issues that may arise.
Per usual please like and subscribe!
Check out my Discord here! https://discord.gg/x8fWVaevs3
Complete Beginner Guide: https://youtu.be/BGsFLoYp1V8
Jungle Lagoon Beginner Tutorial: https://www....
It's not about learning how to retarget in your case, but noting down good practices
❤️ thanks for recommendation, i'll check it out!
About 1: You can replace the existing one. Works even if you used them already in AnimBPs and montages. AimOffsets usually gets messed up (bug) because it's using the source and not the target anims (for the for base pose) for whatever reason. Sequences with sync markers loose there sync markers (left, right foot placement). Everything else should be fine. If you already retargeted a hole anim set and just tweak one or two of that anims there's no need to retarget all.
About 2: LiveRetarget is done at runtime. You don't create hundreds of new animation files for each different skeleton. You just have one skeleton that owns all the animations and different skeketons that has one IK Retarget asset (just the same as you would use for normal retarget). In your character BP you've 2 skeketons. One invisible dummy that runs your animation and a full animBP, one visbile character that runs a very thin retarget animBP. Works with a bit of overhead (as there's some math to do) but still fast enough for most gametypes. Works if all retargetted anims works. If one of 100 anims looks ugly you can't just change the one anim like you did with non-runtime retarget. However I've just recently figured out that you can change the retarget-asset by pin... so probably you can create a map with a few different retarget assets for different skeletons for different problem-anims. I've not tried it that way... yet but I've a map for different anim sets already anyway so...


Hey Neutronux! Thanks for reply! sorry in advance if asking too much 🙏 feel free to ignore 😅
-
for 1, I'm probably doing something wrong, but when I tried to replace the animations (by retargetting and overwriting), my choosers lost the animations I had selected, so assumed it wasn't possible. It seems you might be suggesting it should work - I seen documentation on UE saying that Retargetter window use to have an Update references, but new window doesn't seem 2 have that. Must do it automatically now? (minus choosers, perhaps? bug?)
-
for 2, sounds very promising! Aim isn't photo realism, so I have some overhead I'm sure. At very least, probably makes sense for prototyping so I'm not fiddling w/ animations so much! A few follow ups here.
-
By using one set of animations/one skeleton that owns the animations; outside of additional computation mapping IK retarget, is this actually more efficient memory-wise, as it's only loading a single set of animations? In my context, I'm doing motion matching, so I'm trying to be mindful of efficiency; not sure how well dynamic retargetting will work with MM, but seen it presented byepic person w/ MM & it seemed fine.
-
For "invisible dummy", I read that I should, optimization wise, use a SKM with no triangles. Does that mean just rigging data is there? I'm not sure what was meant
-
the invisible dummy has the anim blueprint which has the full swath of animations that should be usable or is it possible that it can act as a 'base/abstract' class, in that, it has all the 'shared' animations, and you can extend the 'visible' mesh with additional animations; and as a follow up on that, the retarget asset by pin, that would occur in the "visible" mesh anim blueprint, i'm guessing? or should 'visible mesh' stay super thin?

Does any 1 know how to make a run animation in sequencer but make it stay in place? without rootmotion
for the invisible dummy question re: optimization/skm with no triangles, I can dig into lyra project for that, feel free to disregard that question 💪
I'm not using MM so I'm not sure if anims in choosers should be replaced as it happens everywhere else. I did not run any benchmarks about memory usage but there's a video of a guy that did some benchmark comparison (25, 50, 100 chars): https://www.youtube.com/watch?v=jdFXPCCxfLU&t=700s
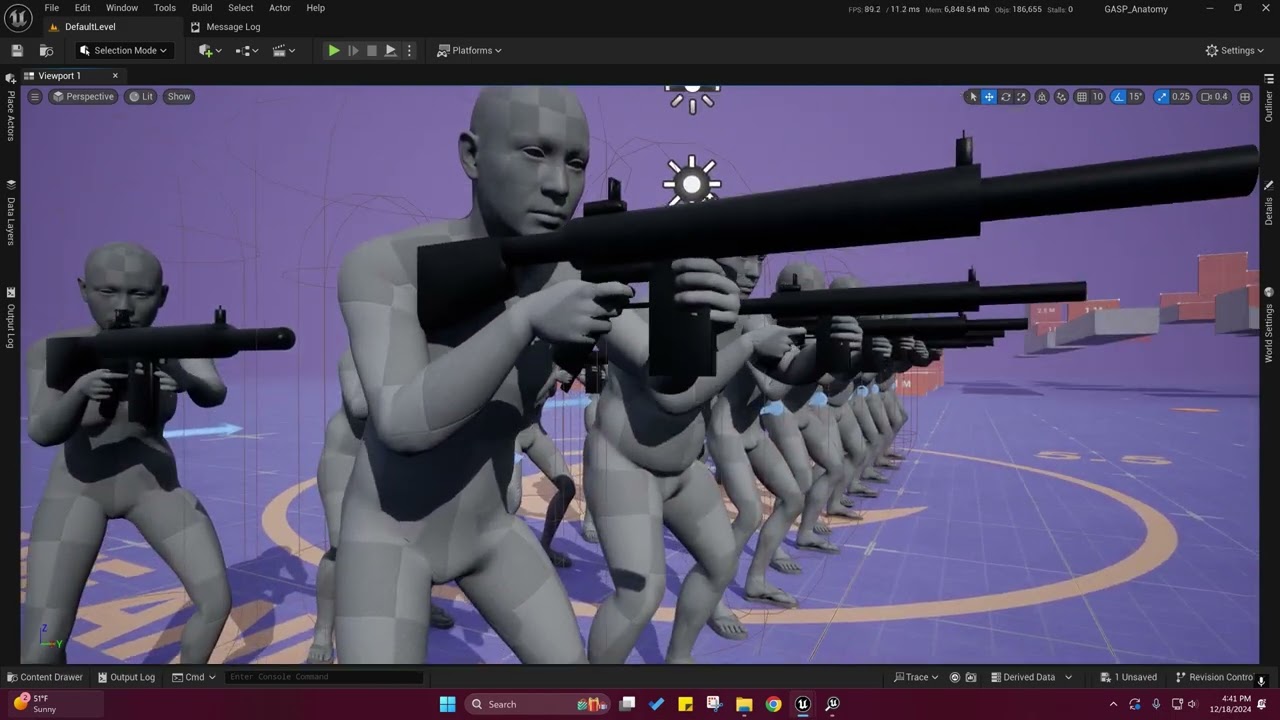
In this video I'll discuss the problems associated with Retargeting as well as some solutions to avoiding the Live Retargeting solution I used in my GASP-DAO Project. I will then show the difference in performance between the two across several different tests for 25/50/100 characters.
BuyMeACoffee: https://buymeacoffee.com/j0hnc0nn0r
00:00 In...
thanks !! I'll check it out! ❤️
that's a nice breakdown, thanks @delicate crane.
Hey everyone! I’m working on a basketball game in Unreal Engine and I’ve already set up the passing mechanic and passing animation, which works fine.
Now I’m trying to implement a receiving animation for the teammate. I’m using a montage for the receiving animation, but I’m not sure how to sync the catch moment (like when the ball reaches the player) with the exact frame in the montage when the catch should visually happen.
🔹 How can I time or trigger the animation so it perfectly matches the ball arrival?
🔹 Is there a recommended way to sync ball physics with animation frames in this kind of setup?
Thanks a lot!
Hello! i'm new to Unreal Engine 5 and i'm trying to create a State Machine, but i don't know how to do it in a good way..
My blueprint character is setup to walk and run with LeftShift key. I also have another key to Draw/Sheathe a sword.
In the State Machine i want to go from Idle to Walk (with Start, Loop, End animations) and the same for the Run (Start, Loop, End animations)
And since i have the Draw/Sheathe thing, i would like to switch between them with an animation in each mode:
Idle > IdleCombat
Walk > WalkCombat
Run > RunCombat
My brain is burning right now ahah so if someone know how to do that in the best way i'll be glad to know thanks! 😄
Any way to scrape a green screen animation and import it into UE? Like taken from this for example. Please don’t say rotoscope
Original by 3D Animation Land https://www.youtube.com/watch?v=RxcSGDjDDRk
10HoursLoop has received permission from the original owner, music label, Game studio, content creator to use, edit and reupload the content on this channel.
This is a permission I require for each and every upload.
One simple example. Brackets are the state, parenthesis are the logic connecting it:
[Idle]
-> (WantsToDrawSword)
-> [DrawSwordAnimation State]
** you have a couple options here**
-> (Time Remaining in Draw Animation = 0)
Or
-> (CanDrawSword cooldown == 0)
Other possibilities here, whatever works best for your setup
**
-> [IdleCombat]
For things like walking while drawing/sheathing you could use Layered Blend Per Bone

Hey everyone! Today we're looking at the Layer Blend Per Bone function inside the Anim Graph. This cool little thing allows us to play animations only on certain parts of the body whilst leaving other parts unchanged. This is extremely useful for separating animations between the top and bottom half of your characters so they can do things while...
Control rig. Trace for the ball location. Move/rotate bones to reach for the ball.
Depending on your needs this is a quick dirty way to achieve layered blend https://youtu.be/abpqQpm3qX4?si=w6f1838U66-hXvIa
but you’ll find as you expand your ABP and need different types of blending this can get more complicated

Want to create smooth animation blending in Unreal Engine 5? In this tutorial, I'll show you how to use Layer Blend Per Bone to play animations while maintaining character movement. Whether you're making a fighting game or enhancing character interactions, this method will improve fluidity and realism. Watch until the end to see how to apply thi...
The draw/sheet could be done by a animmontage (you don't need a further state for it). When you grab the weapon then make a notify (in the montage) and when it triggers then set some bool to blend between your non-combat/combat-states. If you just have those two anim sets (combat/non-combat) that's it.
I need some help with my project using anim notify, is anyone available to vc sometime?
or i might just start over because something is just being too inconsistent
Okay i think i got it 😄 Thanks for the reply! i'll try to do that ^^
Thanks! i'll try to do it that way too!
i have a problem with the water plugin of UE5 and the sequencer, i want buoancy in the animation im makeing, for more information, dm me
Hello there, is there a node to stop all character movement when an animation is playing and continue it afterwards? Because I have an enemy and I want him to execute a root motion animation when he has to turn around steep angles sometimes and I don't want him to be moving toward my player as well as using the RM animation
Hello lads, Im having a bit of trouble with this, I got the movement BS that plays idle/walk/run anim and I want to play a montage affecting only upper body.
I'll be honest I havent worked with this so Im blind 😅
I somehow figured it out lol


Hello, how can I simply blend 3 blend spaces and a state machine in anim graph?
Does anyone know how to retarget motion capture to metahumans?
sweet, thaks!
Hi I have an issue where im not able to import my animation to Unreal Engine from blender

these are the settings which I exported my animation with

But I tried different variations for this
Does anyone know where to find an implosion animation pack with respect to the Oceangate submersible 3D model for Unreal Engine?
Hi i have a quick question about anim BP state machines.. i want a quite primitive state machine.. wich has a iddle loop.. and 2 states both has to played once than return to iddle.. i did this before but only in UE 4 is something changed ever since?
i have this state machine

on enter there is 2 boolean controlling

left and right paddle.. i got a paddle with 2 collision box on the end.. so i know if the right or left one is collidiong with the water.. i set these 2 bools according
that part is working fine..
but than it imidiately jumps back to iddle befor the anim sequence finishes..
in UE 4 what i did there was this node get relevant anim time remaining node which supposed to give back the remaining time from the anim sequence this doesnt seems to work anymore.. this never turn to true and i dont know why..

That sounds like some offline physics you’d need to do yourself in a simulation program
Should still work with UE5. Did you change anything in your SequencePlayer in LeftPaddle. Loop, -1 playrate or something? In many cases you can use "Automatic Rule Based on Sequence Player" for the transitions instead of that Get Relevant Time Remaining nodes. That "Get Relevant ..." nodes does not work with fastpath . You would get warnings if you enable "Warn About Blueprint Usage" in the anim BP class settings.

forgive me if this isnt the right chat for this, i had a question about my rig. it seems that when i imported my blender model into unreal, it kept all the meshes as seperate on the model, which is desired, but any bone with weight painting got combined into the bones and is no longer considered a unique part of the model, these parts need the weight painting on them for animation things, but i need to be able to hide them as theyre customisations. is there a better way to do this or a setting i can change? having like 5 different chest armor things contantly overlapping looks really bad lol
You can export the pieces from Blender individually but all with the same skeleton. In UE you import the skeleton just once and at all other imports you always choose the skeleton you imported first time. In your character BP you can then combine all those loose parts together to a full character.

hey guys I'm importing a human skeleton and then with animation but I'm not seeing the character animate in the animation sequence....would anyone mind helping me here? I'll be more than happy to share screen and talk about it....I'm new to doing animation imports
So with Live Retargetting, works great for creating a base animation set. I'm curious how folks extend from here?
For example, if I make a live retargetted character, what is the practice for extending the character further from there?
I guess /all/ animation logic would need to be in the parent (base) animation blueprint?
Neutronux mentioned you can tweak things via a map for specific different animations/models, but more generally, I'm curious if there is a cleaner way to separate logic beyond the base / shared animation set (both anim and character blueprints?) -- from digging around, seems like that's not a thing presently
hrm. I suppose you could use anim blueprint interfaces in some way or fashion, maybe
if I want an animation to trigger when I press a button, is it best to make the animation in unreal, blender, or something else?
I imagine that depends on the workflow you're comfortable with, but in my very limited experience, I'd say in UE.
Anyone else notice on the game animation sample, when comparing the side by side characters, the UE5 mannequins, have some glitchy animation? Notice after the second turn (more obvious there) the outter leg pops from one location to the next. It happens on the UE4 skeleton too, but less noticeable.
I hadn't actually noticed this til just now 🤔
I'm using live retarget and it works fine for me (tried with melee, pistol and rifle and different interact montages). I think from an extending point of view there's no big difference, except you have to check if everything runs smooth with your retarget characters (sockets, lefthandIK, ...). I'm using the same AnimBP template with the same interfaces that I had before as base (and I can still decide at the end to finally retarget all my characters manually). Overall I think it would save time... but it even consumes some time to adapt.
Yep, i'm 100% with you there! I was just trying to pick folks brains and see generally what the accepted practice is.
For example, maybe a specific character has a set of animations no other character has, I was curious if there was a way to extend A -> B and somehow still blend all that together, but I think what you're saying is, for how you've done it, you have a single animation blueprint and just deviate logic based on the retarget or other (arbitrary or not) variables
As far I remember GAS has "Enable Knee Twist Correction" enabled in the Leg IK node. I don't like it. In my opinion this flag is more made for a spider that drops on an orange but not for a human knee (It tends to make O or X legs). If you run on the hill in the GAS template you would see the knee is bending towards the hill normal instead trying to keep straight.

oh? is that enabled by default perhaps/maybe causing my trouble?
(fyi, appreciate your response/time/assistance, you've helped me now x3 times 😹 )
So i'll go see if it's using (or not using) the enable knee twist correction; I don't recall seeing that anywhere in my deep dive, but sounds like even if it fixes the current problem, it may make another problem
oh, wait you're saying it is probably enabled, i just must've missed it, lemme go dig around!
By default it's enabled at GAS. I'm not sure if it's enabled in Lyra.
yeah, i'm working with the game animation sample project, so hopefully that's the case and I can disable it and maybe it .. fixes?
Problem is, I don't recall seeing it anywhere on the anim blueprint 😹
It is in the animBP of the UEFN character... don't recall the name.
yeah, if I'm thinking right, that's the one where all the logic is for motion matching, the ABP_SandboxCharacter (the only other one i'm aware of is the Post Process ABP)
Yes I think it's in the SandBoxCharacter
but in the ABP_SandboxCharacter, the only blend poses by bool I'm aware of is the AimOffset -- but maybe they've tweaked it on the current version or I'm just silly and over lookin git.

nevertheless, i'll dig around and see if i can find something about it!
nah ... the blend poses by bool is from my animBP. I'm using a different one. It's just the LegIK node that matters.
Oh. I see, d'oh. I'm slow, pardon!
lots of little options around there, sounds like a setting on LegIK I can tweak around with, so with that, I appreciate you pointing me a direction to debug ^_^
sure enough, they have it enabled. Let's see what happens.
It's enabled for both legs in that node.
For my animset this setting is complete garbage. I have to turn it off ... and I even did not like it with the GAS animset.
yeah, I just turned them off, sadly it didn't remediate the problem, but I bet the fix is probably going to be some mixture of setting son the LegIK node, so I believe you've likely pointed me in the right direction!
The LegIK node is tricky anyway. I had some non-mannequin-skeletons retargeded and everything was fine with the ControlRigIK ... using the LegIK node was fine with UE5 skeleton characters that I used but broke the knee in a weird direction after switching to LegIK with others. The KneeTwist flag did not fix it or made it worse but I tried what it does and I did not like the result.
Yeah I'm surprised to see it happening with the default UE5 mannequins, but I guess they did say a lot of this stuff is early on/unpolished.
I haven't done much (anything, really) work with Control Rigs, so looks like I've got some educating to do.
Overall I prefer the FootPlacement/LegIK behaviour. The ControlRig IK node that comes with any Thirdperson template project for Manny/Quinn has no foot rotation and does not work that great on hills. There are some other controlrig templates in the Control Rig Samples Pack.
Yeah i've seen a few things; I even seen someone who recreated locomotion entirely from control rigs, so you could control every facet, but man that seems involved heh
I think i'll just try to tinker around and figure out what I need to do to fix this "pop" on the knee, and then move along; I was just about to implement female locomotion on the motion matching choosers when I ran into this 😅 best not to build upon something buggy, so 🤞 i can figure it out, will report back if i do !
Out of curiousity Neutronux, I'm guessing on your retarget characters you're not seeing that knee pop? The retarget IK looks fine, the animation looks fine when playing, I wonder if it is indeed just somehting with this leg IK/feet IK (making assumptions on the feetIK).
I doubt it's anything related to motion matching specifically, so I think it's gotta be something tied to the way the IK logic is behaving with the source/target IK 🤔
lol i removed the IK and Feet nodes entirely and still getting the behavior, that's what I get for making assumptions 😹
hum.
I wonder if the problem is the IK retarget is on the complex, rather than simple, UE5 mannequin, which has more nodes/data. I'll try to retarget the simple mannequin and see if it helps at all!
Hrm. I must be tripping, but after messing with it all day, I simply turned off "IK" on the IK retarget and it fixed it? I truly don't understand enough about FK/IK.

So far the only thing I can tell it messes up is on the GASP hill, the feet sink a little into the ground, but still map to the slope.. huh. I wonder why it's making them sink.
otherwise, the strange leg popping situation is remediated, at least; so I have an idea of where to look one way or the other 😹


Strangely, going /down/ the slope seems to map fine, but going up they sink a bit into the floor.
So if turning off IK on the IK Retarget "fixes" the problem (despite introducing the new problem of feet sinking into the ground 😅 ), the fix probably isn't to turn off IK, but it is to properly configure whatever is misconfigured in the IK. If anyone has any good recommendations on educational material here, would appreciate!
Hmm. I seem to have fixed the knee pop in WITH IK still enabled; only problem left is on the very initial movement, there is a very slight "pop" while IK is enabled. I'm betting it's going to be some setting in here; but if anyone else were to run into the same problem, tweaking Iterations, sub iterations, mass multiplier, root behavior seemed to remediate the knee "pop" entirely. So now just the very slight pop while initiating movement!

I take that back, so a little "glitch" at the very beginning of animation, and the character seems to, eh... almost imperceptively has a bit of a "wobble" feeling every so often. 🤔
OK, so to fix that, I went and turned off "Use preferred angles" which were enabled on UE5 mannequins IK Full Body Solvers. This fixed the glitch at the beginning of animation (atleast, there is a bit on quinn for some reason, not sure if it's cause she has longer legs or what -- but it isn't noticeable unless going very slow, and looking really hard, within tolerance I think.)
Finally the "wobble" / instability in motion was fixed by lowering the "Soft Percent Length" from .99 to .95. .96 was almost non existent, but was still slightly there.
I'm not sure if these are the "proper" fixes, but atleast it has solved my conundrum for the day 😹
I keep IK enabled in the IK-Retargeter otherwise I get troubles with my weapons and LeftHandIK. I'm using some OffsetTranslation anyway but without IK its too far off. It's a bit tricky anyways as I would not attach my weapon to the dummy character running the anim but to my visible one. I'm even using the AnimBP for visible characters (UE5 skeleton) that does not need retargeting so I have to check in my equip/uneqip in the characterBP which skeleton gets the AttatchToComponent.
I tried to get a quick look in Lyra how they did it but did not figure it out in time (before I already found a solution myself). Anyway there are tons of other anims and AnimBPs for different equipments in Lyra so I guess if you wanna know how to continue from basic locomotion you can take a look there.
If you disable IK in the IK-Retargeter and use the GAS anims you would most likely get issues with the 2.5 vaulting animation (grabbing at a too high spot) as well. I'm not using the GAS anim pack.
It's more visible running in circle around the hill (left disabled, right enabled). Its making both, O-legs and X-legs if it's enabled.


If you pull the foot upwards and the knee is still pointing forwards in plauisble translations then it's fine if you keep it off.
Im starting to define conventions for my creature skeletons. Do ya'll agree with the epics own dragon example when it comes to bone orientations?
The root bone aligns with unreal characters. Y forward, Z up.
The spine bones are X forward, which is consistent with static meshes and humanoid skeletons. but the Y up instead of Z is confusing me

@delicate crane yep, I ended up with IK back enabled (as I knew that wasn't the right solution; but finding out that IK was responsible for the issues helped find a path) -- So everything is fine with the preferred angles, everything works -- atleast as far as I can tell. Going up hill, down hill (foot pointing up towards knee, down away from knee, all /seems/ ok). The only problem I have left is there is a slight uhm, I want to say "glitch" or "hitch" when moving the retargeted models. It's barely noticeable, and maybe only something I can see cause I'm looking for it, but it's there.
I was able to remediate that glitch, by reducing the "Soft Percent Length" (from .99 to .95) slightly, which makes the characters legs extend a little less, but I don't feel this is an actual solution.. Feels hacky, and it has the unwanted side effect of my characters feet being slightly off the floor -- which I dont' like at all. But the actual solution has escaped me thus far, and isn't immediately obvious as to how to fix.
(and as always, appreciate your feedback, thoughts and advice!)


You should be able to fix the foot offset by enable Affect IK Vertical and a bit of Translation offset in your IK-Retarget asset.

Ah! I'll have to check that out! You ever dabble with the "soft percent length" fix on the IK leg node? Am I being silly for thinking of that as a "hacky" solution?
This even works for foot offset (works as well if you don't use live-retarget):

oho. Got'cha.
As far I remember 0.95 is the default value if you create a new retargeting asset anyway. So I'm not sure why this had a higher value in GAS for manny.
My live retarget characters seem to have this.. subtle little wobble (glitch? I dont' know how to explain what it is). Very not noticeable, but it's there.
the tooltip says 0.97 is the average, but yeah, I didn't check what the default was! so that would be cool if so, maybe I'm overthinking it!
I noticed when reviewing the "wobble" or "glitch" that it seems to be during the full leg extension during animations and worse with Quinn, whose legs are longer, which led me to this "fix", I just was not confident it was the right remediation path, but I tend to over think things, as you've probably noticed from my rambling yesterday 😹
over or under think things, as it were.
Does it work better if you don't use retarget? In my opinion the hole Foot Placement / Leg IK system is a bit more "wobbling" anyway (compared to control rig) but overall it's still working better.
When I retargeted the animations, rather than used live retargetting, I didn't notice any of these problems, smooth as butter.
but as you noted, even if I do that, it would be a slog during prototyping/development, so ideally, I'd like to use the live retargetting tooling
The above point (retargeted animations working vs live retargetting having a little 'wobble' or whatever) led me to think it's the process of mapping the skeletons from A<>B, specifically the IK chains, but I know next to nothing about how all that works, so it's quiet an education digging in ^_^
but, considering the "Soft Percent Length" does clean it up in large part, if not entirely, perhaps I should try the offset you mentioned and leave well enough alone lol
It's lots of trial and error. I've found out that aim-offset worked a lot better if I scaled my dummy to the same size as my visible character. Like 1.1 dummy 0.925 retarget. But I think this would not change anything in case of the knees
Oh! I did think about trying that, making the skeleton the same height as the UEFN skeleton, but it escaped my mind
I didn't even know if it was easily possible to scale, but in considering, surely it is. Maybe I should give that a try, anyway.
Although the idea of not having different height characters isn't, I guess, uh, truly a good fix lol, wouldn't be a bad idea to see what happens, anyway.
You're not wrong re: trial and error, especially when you have a very limited exposure to any of these concepts. I've probably tinkered with a good bit of the options, having very little idea of what they do until I tinkered with them, and then possibly even less of an idea after tinkering with them 😹
Easiest way to use scaling at those 2 skeletons is to move the target skeleton to scene root for a moment (so it keeps 1.0 scale) change scaling of your dummy skeleton and move the target skeleton back. Then it has the same size it had bevor (as the parent is scaled bigger but the editor automatically makes the target smaller so it remains the previous size).
yep, that makes sense. So just change it inside of the character blue print viewport, i'll give that a go!
The bone orientation for the dragon is consistent for what you will also see on the Mannequin skeleton. The root is world aligned, the X axis points down the joint, and it's not so much that Y is up for the spine, it's that the Z axis is parallel to the primary rotation axis. You will see this on the limbs of the mannequin, the Z axis is the axis around which the limb will bend.
This may be a silly question, but can a modular rig be used in an anim blueprint? I created a modular rig, connected my state machine to my control rig node (with my modular rig assigned to said control rig node's Control Rig Class), and connect the control rig node to the OutputPose, but the character is stuck in a T-pose. If I connect directly from my state machine to the OutputPose, he animates like expected
is blend by bone considered lazy animation?
like by industry standards?
or is it more common than i think?
the state machine needs to be connected anyway, control rig doesn't return the necessary outputs for outputpose
you can use it in an animation blueprint
but without overriding the state machine
Input pose enabled: True
Transfer input pose to rig: True
the control rig on its own doesn't return anything that can be translated to an animation
so make sure active modules are instantiated correctly in the CR class, copy the input, and apply to bones
i have to say though, it's not very practical
unless you're doing realtime animation or procedural skeleton control or something
which is also performance-intensive as shit but that's not something im very experienced with so I can't comment
Yes got it.
Hello everyone, I am new in Unreal and have encountered an issue that I have been unable to resolve for approximately five hours, so I decided to seek assistance in the chat. I am attempting to transfer animation from Unity to Unreal Engine 5, but the result is distorted. What could be the issue?

You've imported your skeletal mesh as fbx and afterwards your fbx anims using the same skeleton? Did you get any warnings or something?
Would work for horror game
Yes I added separately fbx mesh and separately fbx anims using this mesh in unity everything works but in Unreal it... no errors.
Unity/Unreal


Looks like everything is rotated 90° somehow. Did you check the Unity2Unreal docu on epics hp? I've no tried if it changes something but I would give it a shot: https://dev.epicgames.com/documentation/en-us/unreal-engine/migrating-assets-from-unity-to-unreal-engine#rotation

Epic Games Developer
Import, Migrate, and Convert game assets from Unity to Unreal Engine.
Thanks, it's better now. He's still a little drunk, but I'll try to fix him some more. I watched a guide on YouTube, and there was a different export FBX format, which caused everything to break.

Hey folks! I really enjoyed the UE5.6 presentations today.
I keep hearing them mention the "new animation framework" and also "Mover" (2.0?) -- curious if there is any docs for this?
I grabbed the mover example content plugin, and am digging around, but was hoping to actually read something 😹
Also was wondering about that, in the release notes it says https://dev.epicgames.com/documentation/en-us/unreal-engine/unreal-engine-5-6-release-notes#character-and-animation
In collaboration with the new Unreal Animation Framework
But then there's no section about the "new Unreal Animation Framework"
Looking through the plugins I'm guessing it's the AnimNext plugin? But there's not much in the release notes about AnimNext
Yeah maybe someone can educate us ! 🙏
oh haha I was trying to enable the anim next plugin but I couldn't find it
its cos the display name for it is Unreal Animation Framework (UAF)
only 2 references to UAF in the notes, guess they changed the name recently
I have a socket and a bone with the same parent and transform.
When I attach a Mesh within the game to the socket, it's fine, but when I attach it to the bone, it's transform is messed up (like +180 degree on yaw rotation).
Does anyone know why?

Hello, Im running into a problem that I cant quite understand. Im trying to get this root motion animation to work, but it keeps failing and rubberbanding me back. I feel like its an issue with bone hierarchy, but Im wondering if there is another way to go about it besides having to reanimate my current progress.


Anyone know of a good guide to a more advanced motion matching setup? I'm attempting to blend in weapon poses by using the chooser table to read what weapon is equipped via the state of the enum but it doesn't seem to switch animations like I expect it to. Additionally, the enum for controlling stance isn't controlling stance like it should. The intent is that the crouch poses will only be used by the chooser table while crouching, but instead it seems to blend towards the crouched animations whenever I move below a certain speed.
Any assistance is welcome!

^ table setup
There's a docu but there's not that much to read yet: https://dev.epicgames.com/documentation/en-us/unreal-engine/mover-in-unreal-engine

Epic Games Developer
Create movement with rollback networking support in Unreal Engine.
this is in Maya but, does anyone know why the mesh is warping when I rotate some of the joints?
mesh and skeleton are both Zero'd and deleted history


Thanks homie!
That visible "rubberbands" looks like some issue with the weightpainting (like some non-normalized vertices that gets mapped to root bone). Did you try to make all bones visible while previewing the anim? Is rootmotion enabled in your anim-sequence?

i think the problem was just the skin weighting, for some reason it distorts the mesh before I manually paint weights
yeah, i should have every root motion setting turned on, but yeah I think it may just be a skeletal structure issue. my friend used mGear, I also tried specifically selecting where the bone chain starts in Maya, but still brings in all this extra bone stuff

This extra bones does not look good. You should get rid of them. Usually character rigs start with "root". This one starts with "ODY_ALL".
yeah, i tried having the root chain start first but it seems to break a lot of the meshes
its weird, since this is how im exporting as

What's up folks. I'm trying to find an animation asset for Manny that's a falling idle but I'm looking to find one that is tumbling and unconscious, like someone falling out of a plane after getting knocked out. I'm wondering if I should attempt to animate this or just ragdoll and procedurally rotate the character. Or maybe something else I haven't thought of. Any suggestions?
Ooof. the documentation on Mover stuff is very sparse, as noted, Neutronux,. The examples afford some usage ideas, but yeesh.
I'll try my hand at implementing basic motion matching with mover and see what I make of it. A bit disappointed to hear they won't update GASP until 5.7, so if I want to get some education on the direction they're moving, probably going to have to tinker around myself.
Fortunately, /basic/ motion matching isn't super hard to implement, so educating on the mover examples and then trying to do that /shouldn't/ be too crazy.
2D hand drawn animation trailers me and my partner did for other game companies. (open my profile for more info)
Not a fan of 5.6 adding this as a suffix to the morph targets, now they no longer match with my animation exports

Any one know why in Game animation sample pack when i add custom character and want to play it animation montage in abp_generic Blueprint after all the checks for root motion it still didin't taking aroot animation any suggestion
They updated GASP already. I had to adapt my retarget ABP (some nodes got deprecated compared to 5.5 GASP). But just a few changes and nothing about Mover. I found the side by side sheet on the docu page interesting tho - But changing my project from CharacterMovementComponent to Mover would be a bigger task anyway as I use CMC a lot.
PLease share a good tutorial on making "taking sit in car" technical animation.
Ragdoll works great if he's stunned or dead but I would not use it to animate some falling without parachute anim.
Yeah my experiments to this point have not worked well. I'm not a good animator but it looks like I'll have to suck it up and try. 😉
Learning by doing. You can always take a look at fab or projects like GAS or Lyra to get some kickstart. But I think this is an easy one so you can just make it yourself.
You can have a physical animation component to blend the ragdoll with the falling anim
Good point. I may try this. Thanks
@delicate crane bet, yeah I seen they had it updated for 5.6, but no mover! I seen a talk by the Mover guy at Epic saying he had a local version of GASP working with mover, and they said they used it on W4, so I'm going to try and educate myself on Mover by doing /basic/ motion matching (not moving gasp over, but implementing the bare minimum MM with mover) as a foray into Mover and further education on MM.
What I don't want to do is build upon things that, while will be around a long time, are not the latest and greatest (CMC). As I'm a baby in UE (about 4 months deep into education), I haven't started anything other than tech demos and educational resources.
i must admit though, from the way they talk about UAF, I am a bit nervous about that XD
I was a bit smiling reading about monolith at CMC... this usually means the source base is not so great. But overall CMC worked without troubles so far. While I had a crash already again in UE-Editor today because I was so optimistic that I can just rename a folder. How could I dare.  This was messed up 10 years ago and it still is. About Mover. I don't really need an actor agnostic movement component yet in my game (I've only characters). Client Side Corrections and Networked Physics are nice - but do I really need them now? Nope. I've stopped tinkering with Mover after I've found no easy self explaining way to add crouching (probably somewhere inside walking state but stopped digging there). And the real problem for my project is that I've to recreate characters from scratch as I would not run an actor with Mover Component and CharacterMovementComponent. Overall it's the same as with MotionMatching. It slows me down and does not make me faster without giving me anything I need now to finish. LiveRetargeting seems fine but even brings some unexpected issues that consumes time.
Ha! I deal alot with waterfall/monolith in career, the last decade has been much better with service-based/k8s, so I took the guys word for it and was sold, was even ready to get the pitchforks! ( 😹 ) but honestly, re: mover, key thing for me is the predictive trajectory (seemingly going hand and hand with MM) and ease of 'nixing networking all together (i have no idea how easy/hard this would be in CMC!).
I don't have much if any desire to build networked games, maybe in the future, but as this doesn't preclude that, I thought since i'm brand new, mightest well learn the new stuff!
I suppose in my little lizard brain, as I am brand new, I'd like to utilize the the MM (I've built an entire state driven locomotion and was not happy about it), but as with everything, lots of give/take to everything, so I can totally get behind your reasoning as well!
I have BRIEFLY looked at the mover examples and they're not super complex, but not as /clear/ feeling as CMC, so crouching sounds about right!
Starting today I'm going to be breaking down the mover example in an empty project and recreating the basics of moving, then sometime by this weekend, i'd like to get the fundamental MM in place with mover, 🤞 !
Sounds like a plan. 👍 I usually spend a weekend day to discover new stuff and I would tinker with Mover again for sure. That said I know waterfall/monolith as well 😁 ...and yep that does not saves time. Fortunately that monolith is not mine to maintain. Now it's agile modular services all over around. After working with these for a while I've found some weaknesses in these concepts as well. 😄 - But independent from the used system perfectionism is the biggest enemy of perfection. So I only keep what saves my time and helps me reach my goal.
Haha, yeah no doubt, give and take in everything! My team of 4 maintain about 100 services for a small sized enterprise, and while the service architecture definitely lends to alot less chaos, it introduces headaches in other areas! 😹 Cool to see your familiarity with that!
And yeah, re: mover/cmc, aint that the truth, it doesn't hurt that CMC is very battle tested either. Perhaps i'm just a glutton for punishment hehe
Question: Im doing a simple transition in an Animation blueprint state machine between two poses that are close but not perfectly aligned
But when its set to have a blend time in that transition the blend takes this weird jarring detour instead of just lerping directly to the new pose. Anyone got any ideas how i can avoid this?
https://i.imgur.com/Rft551Y.mp4
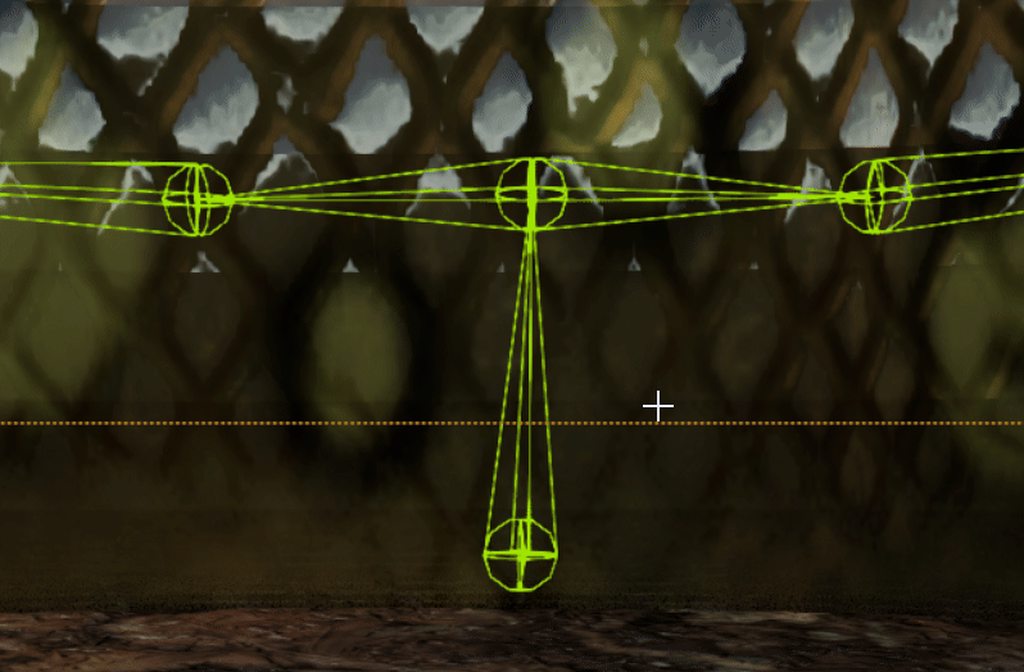
Oh I may have rubber ducked the issue. I was messing with the root bone in one of the poses
Haha, I love those solutions; usually when you talk it out, you find an answer!!
hello all, i was trying to import animations so its one less thing to learn and worry about but im not sure how to address this window

hey guys unreal engine enthusiast here im looking for a very very knowledgable aniamtion course for unreal like not making animation but putting them together in game through blend spaces etc
Is it possible to have a root motion animation but still be able to input keys?
Basically I want the root motion to be applied additive to the actual moving logic of my character
is there a way to completely reset a duplicated animation sequence - I know how to remove they keys, but not the poses
or do I just have to start from a level sequence
Is there a way to change the preview mesh to a custom one
Hey guys, I upgraded my project from 5.3.2 to 5.5.4 and now I get an issue where all my enemies freeze when I spawn another enemy during gameplay.
I was just wondering if you guys have any debugging tips.
I tried using the ShowDebug Animation command, and so far I noticed that my blend space seems to get stuck? The play time seems to freeze whenever the new enemy is spawned, so instead of ticking up it stopped at 0.831 in this case. It was continously increasing up until the moment the new enemy spawned in.

I managed to find that this is the node that freezes the animation. Anyone know what this node does?

Could anyone point me to some resources on retargeting anims from the ue4 to ue5 mannequin, specifically focused on getting the hands as accurate as possible? I've tried the standard retarget, the MCO retargeters and fiddling around with some settings, but I just can't get it right, and I'd really like to be able to use these hand seal anims. I'm guessing I can just edit the retargeted anims, but I'd love a more scalable method.


Hrm. I'm using UE5.6 (not sure if that's the cause or I just missed it prior) and I'm getting the attached error with default mannequin to retarget to ue5.5 default UE5 mannequin from an asset store; I was able to "fix" the warning by setting the Root chain to root > pelvis in both source/target, but I don't understand why and if this is the most appropriate fix? The skeletons, IK and chains are identical

the skeleton is still WIP and I'm planning to do the animations entirely from scratch [not using any default ones or the default skeletons], but is there anything absolutely critical I should know with exporting and importing this setup

I already know to use gltf and how the rotation needs to be adjusted for imports, but the skeleton should stay intact as it is, right
Has anyone attempted to integrate the new version of mover into motion matching? Anything I should be aware of before migrating?
The guy who works as lead on mover mentions that he had a local version of it working, and i've seen a short youtube video of it being demonstrated, but that's about it. They mentioned it would be coming to GASP sometime in future.
Personally, I'm still just trying to get Mover to work properly and learn the ins and outs; that said, should be doable based on the above info!
I had it working in 5.5 with replication but I had to write a copy of the pose search functions to be compatible with mover (by default they search for data on the CMC)
They added this new TrajectoryPredictor object sometime in 5.4 or 5.5 but I couldn't get it to work which drove me to the other method I mentioned above. Looks like they've updated it but there aren't any examples.
Ha! I am a newbie, so sadly I won't be able to help much, but I thought I'd share what I had heard.
If you don't mind, out of curiousity, (if you're bizzy no worries!) I'm pretty sure this is the case, but since you've had it working in 5.5, Mover currently requires C++, right? I know the more advanced usecases do, but I mean, even the bare minimum does, in your experience? I've been playing with the Mover example pack, and they seem to do a lot of lifting in the base Character C++ class, so I've been sort of replicating what they have 1:1 to educate.
is dual quaternion skinning supported at all in 5.2?
Yea from what I’ve experienced it requires C++ and it will be that way for a while until they come up with a clean way of handling custom data structs. But if you’ve ever wrote movement code for the CMC it’s almost 1:1 just gotta find the matching function in their movement util libraries
Ha, when I mean newbie, I mean real newbie. <4mo, but I appreciate that confirmation. I thought maybe I was being silly. The documentation is very light!
No worries. There is nothing out there yet doc wise I wanted to make a tutorial series but it’s changing rapidly to where info would be instantly outdated(like 5.5->5.6 was) hopefully it picks up now that CDPR is using it internally. Epic is also using it they just added ChaosMover which is what they used for LEGO Fortnite physics islands.
Yeah I seen that! Apparantly UAF is going to keep things pretty fluid for a while too.. That's even less documented, if it could be, I can't find anything on that hehe -- I do see an extension for mover/uaf, but haven't even thought about trying it. I enjoyed Epic's UE talks though.
Yea root motion support built in as a priority is really important for the type of games I want to make. I want to deep dive into UAF soon and see how clunky it is to work with. I usually write my Anim Instances in C++ so if it’s anything like that I might be able to use it early.
That sounds promising for you, hopefully it is a smooth transition!
Correction: smoother transition XD
I'm having a super weird issue with the Metahuman control rigs. In the sequencer, I don't see any of this stretching, but once I bake the animation, at frame 0, it always has this weird stretching. Even when I make no edits and just bake the animation to the control rig and export the animation it does the same thing. Any ideas?

Okay, this CAN'T be the solution...I retargeted the new baked animation to manny and then retargetted it BACK to my metahuman and the stretching is gone...That honestly can't be the solution...Is there a better one that someone knows about?
This is only when I have a previous animation I am trying to fix. If I create a new animation from scratch it's totally fine and no stretching
any idea how to fix this?


Which format is best for exporting just animations from Blender to UE5
Is there a way to profile an ABP Anim Graph nodes like the control rig profiler, without using animation insight?
Hello. Whenever I attach an actor to a spline in sequencer and use "Path" it would not follow the spline path after setting keyframes. I also set both objects to moveable and still nothing is happening. Followed the tutorials exactly and somehow it still does not work. Version 5.4.3
You can fix that twist with twist bones. You should see some yellow PostProcess is visible in the viewport from Manny with a button to disable it. ABP_PostProcess from Manny does the untwist in case of Manny. You can even do it manually in all your anims bit I think in UE5 the PostProcess ABP is the way to go.
Manny has a post process control rig that helps with that deformation but it also has some extra bones and weight painting
How well do anims carry over in .gltf files when imported with the skeleton and mesh
The format worked fine for the mesh and skeleton, but I haven’t been able to import anims properly either with .gltf or .fbx
Thinking I’ll have to re-import everything together
Hey ya'll. Got a quick question. Hopefully this is the right spot. Im working on a FPS project using Game Animation Sample Project. I have successfully been able to setup a simple camera for First Person without removing the gameplay camera system (because I want to use it for other things). When moving it works just fine, it orients to movement. BUT when I am idle and try to look left or right, the camera is able to spin 360 degrees and never triggers the turn in place animations/movement. Anyone have some ideas where to look for this?
It acts as if it is completely independent of the animation system. Clamping in both AnimBP and CharBP input does not change anything.
If anyone else is having a similar problem - for one the skeleton had been slightly edited which somehow slipped my mind, but I ended up having to export the mesh and skeleton as an .fbx first, then the anim separately with the same format
Now it’s just a matter of brute-forcing the correct primary and secondary bone axes
this?

oh man that thing is complicated!
any tutorials that I could watch do digest that?
If you're using SK_Mannequin as skeleton for your mesh then you can just use the one from Manny.
Anyone know why scale would suddenly be inconsistent if that and the import format haven’t changed
When I’m switching to the new version of my character mesh, the third person camera is suddenly 100x its normal size
is your root 100x probably?
everything's 1x
what's frustrating is that I don't remember the original import settings exactly, but I know I didn't mess with the scale
If you export from Blender use 0.01 as metrics
If your root is 1x then it's most likely the mesh
I've been trying different settings this time but it's always the same problem
everything's applied - checked several times
even with the mesh at the proper scale in the viewport, UE seems to think that something's either 100x larger or 100x smaller
and none of the settings actually fix the issue


...okay now I have more questions than answers
scaled up both the mesh and skeleton in Blender by 100x and applied it, exported that way with all other scale settings at 1, re-imported to UE at scale 1, and it's working fine now
no other combination worked properly
I can't find anything online about the new scaled proportion retargeting tool in 5.6. Is there a button for it or something or is it just automatic?
Does anyone know if you can change constraint profiles on a RigidBody node / phys asset in an animgraph? I feel like it should be possible but i've got no way to communicate w/ that node...
so i had a bit of a no brainer idea; i had a plan to remake my live SW event as a animated film. I heard that you can use fortnite models in UE5, but if I wanted to use say the Death Star interior and any of the npcs from the event, could that work?
Any suggestions on how to get the club face to sit where the sphere is (i update that sphere on every tick to ensure it's position relative to player behind the ball)?

An idea is to create a proxy bone (virtual or one in control rig) that aligns itself with the club face. Then use that bone to drive an IK set up for the hands. Then when swinging at the ball you can pass the location of the sphere into the control rig and use that to set the location of that club face bone.
To dynamically get the location of the club face you will probably need to make a socket and pass the location of that socket to the control rig so it can set the initial position of the bone that is driving everything.
Seems pretty complex but to simplify you need only a few things :
- A control rig with an IK set up for the arms (Or you can use an IK rig asset both will work) parented to the driver bone that will be dynamically placed where the club face is.
- The location of the club face
- The sphere location
It will need some tweaking for sure but this should point you into the right direction
Ooo this is way better than the mess that chat-gpt ran me through that ended up going nowhere 😂
I've already got a socket where the face of the club is so i'll try carry on with that. Thank you!
No problem, good luck!
Hi does anyone know of any suggestions to handle the rope situation for this character enemy in my game or na? I’m gonna keep apron as unreal cloth physics but the rope and meat hook I was not sure about. I could just add it to custom anim only. Any ideas? Thanks!


if you rig them you can use the rigid body anim node I think. Its supposed to be pretty cheap. I forget what it is called and I think there are a few of the physics type nodes in the anim graph
Hello 😄
I'm using Local Chain Dynamics in Control Rig for some floppy fox ears in UE5.5.
Both sides use the same setup, but one ear flips or explodes unpredictably while the other works fine... any ideas?


Check the bones on that side. During the rigging process they might have been mirrored by scale instead of by rotation which I think can cause this.
Finally got a hold of deformers for inflating an object but you cant bake it into an animation ? has any one ran into that problem ?
Am I moron? How come I don't see her skeleton? I just want to get a feel for the skeleton already on the model for a simple pose to render a still image like in SFM

Hello! I was wondering if anyone has ever had issues with montages not looping? I have an anim montage, it's set to loop, I play it with the Play Montage node. It plays, gets to the end, then freezes. No idea what else I can do, and sadly there seems to be no results I can find searching online. Any suggestions are welcome. Thanks!
anybody know how to make an 8D movement blendspace only take into account direction of the movement buttons im pressing? In the video you can see that the animations get messed up when i am going in diagonals AND i start moving my mouse which ofc also impacts my movement direction, i want what the mouse does to be irrelevant when it comes to the movement animations


also i dont understand why the animation jerks when animation transitions from left to middle
On the new 5.6 first person template, this is the animation blueprint for the first person character. Whats up with the mesh?

Looks like it is not a one click process yet

Epic Developer Community Forums
Oh man that was it. that’s awesome! I have deformations working on my animation rig now and can then author animations by hand and baking them to an animation sequence successfully keeps the deformations. I get that you are all still working on this, but to have it working is still really awesome. I was just starting to feel like it wasn’t g...
anybody else have an issue where rewind debugger just.. doesn't record? this happened to me once before and I solved it by disabling the animation insights plugin, restarting, re-enabling it, then re-starting again... but that little trick didn't work this time. I've found several people on the internet who have posted similar stories but zero replies.
Hi! Was hoping some geniuses here might be able to help me. I'm a noob and I'm trying to get a custom character working with GASP but for some reason the character is broken in the Anim BP but yet the retargeted animations look okay. Any ideas or suggestions would be much appreciated!

Hey I am trying to move my Character ABP to thread safe but im getting null reference on the movement component
I think this is when trying to access the GetVelocity property


I found a different approach, where you can make a function that returns the movement component and make it thread safe, then use that reference for the property acess and it fixed the issue
top left of the viewport, Show > Bones, all hierachy?
Is there any easy way to get an animation to work with the basic foot IK? for example i'm making little golf game to learn ue5 and I have basic foot IK working for "idle" where the legs will place nicely on uneven surfaces but once i play the swing animation the feet are teleporting to what I presume is some relative 0,0,0 x,y,z or whatever as that's the origin of the animation
Hey everyone, I’m having trouble exporting my Blender armature (named “Rain”) into UE5.5 and preserving root motion correctly—any help would be awesome. Here’s the full situation:
I started with a Mixamo rig in Blender and edited/stitched together multiple Mixamo animations to create new clips. In Blender, I renamed the Mixamo hip bone (which is the true root in the Mixamo rig) to “Root” and made sure all other bones are children of it. However, when I export to FBX and import into Unreal, the Armature object “Rain” still appears above “Root” in the Skeleton Tree, so Unreal treats “Rain” as the top‐level bone. I’ve tried setting the Armature FBXNode Type to both “Null” and “Node” and toggling “Only Deform Bones” on/“Add Leaf Bones” off, but “Rain” remains as a fake root.
Because root motion wasn’t translating on my own rig, I retargeted my stitched-together animations from Rain to Unreal’s default mannequin. The retargeting itself works fine, but when I enable root motion and set the root to zero, the translation still doesn’t apply (whereas native Unreal rig animations behave correctly). It turns out the animation curves themselves reference “Rain” for translation, so simply renaming or retargeting hasn’t fixed it.
I also tried two additional approaches in Blender, but neither solved the issue:
Renaming the Mixamo hip bone directly to “Root” (so the original hip is now called “Root”), then exporting/importing/retargeting again.
Creating a brand-new bone named “Root,” parenting the original Mixamo hip to that new “Root,” and transferring all location X/Y/Z data from the hip to the new bone, then exporting/importing/retargeting once more.
In both cases, Unreal still shows “Rain” as the top-level bone, and root motion remains broken because the animation data still drives translation on the “Rain” node. Has anyone else run into this exact issue—or found a reliable way to strip out the “Rain” node so that “Root” is the actual top-level bone without breaking the animation curves? Or is there another workflow that preserves root motion correctly when using a Mixamo-derived Blender rig? Thanks
Woah ty !!! Time to set this up
I'm having a bit of trouble. I have an existing animation BP. I have an actor with a skeletal mesh component using that animation BP. The pawn mesh needs something VERY simple just a "sit down" and "stand up" upon toggling the structure.
I can do this easily using Play Animation nodes, but there is an abrupt switch between the animations with no blending. (in-game)
I thought I could get around this by using Play Slot Animation as Dynamic Montage, plugging in the same Animation Sequences and then just picking a slot from the Animation graph to play it from, but its not working. Any idea what I could be doing wrong here?

Hey me and my friend are trying to build dynamic transitions for our game dependent on the characters last state/stance such as going from crouch to prone and prone to crouch. How can we do that?
Pose snap shot. Its a built in node on the anim instance (anim bp) and has some handy blueprint callable functions that you can call to trigger a snapshot capture
Has anyone had the chance to implement this in 5.5 or greater ? Any gotchas I should be aware of?
I have almost never been into animating but soon I might need to do some. How complex and slow/quick is it to animate in unreal engine? Not very complex animations
Hey guys
Am making use of the matahuman creator in UE5.6
And I saw 2 options for Rig
"Create Joints Only Rig" And "Create Full Rig"
I don't want full rig since I want the game to be fast in performance but I do want IK for the foot and hands cause I will be using for animation
If I select the "Create Joints Only Rig"
Will I have the IK ??
Hi team,
I'm using the new Locomotor node in UE5.6 and I want to expose some floats so I can change the movement style in sequencer, but I can't seem to get the values to show, neither via control rig or the AnimBlueprint. Anyone experimented with this?
any idea what it could mean, when a character just gets invisible while playing a animation?
Since Unreal has markerless motion cap now can you do animations with it in engine? I know you can do keyframes etc..
Scaling issue?
Hi is there anyone who was expert in UE5 with Blueprint, just need an small help.
thank you!
please help. I used the "motorica ai" plugin, created animations through it, then added animations to the "database" through "pose search", and used the "trajectory movement" blueprint, and as a result I have such a jagged fast animation, the character is shaking. what should I do? please help!
I've been trying to fix this bug for two days now. Please, if anyone knows, help me.
Hello guys 🙂 I have a single character actor whose purpose is to be spawned with a character data asset to morph into a specific character, play an animation, and clear/delete itself after. For that I want to use playMontage rather than playAnimation, because my animations are montages. But when I use playMontage. it just default to the T pose. I assume because there is no abp assigned, which is neccessary tho as I dont want to use abps for this. Is there still a way I can use playMontage?

where is the apply key?

Has anyone here had luck with getting the "Snapshot Pose" node to work when testing as a client?
I'm seeing that as Standalone or server it writes the proper values, but as a client, even for the owning player character, the saved pose is just the bind pose.

Usually a metahuman needs virtual bones to make the feet work, but in 5.6 it's the arms 😬
idk why this is happening but my attack animation plays as soon as my character is seen
Hello there, i have a model im bringing into UE. I am trying to rig and animate a basic movement on it, i just simply want the rings to come up from the floor and then return. I tried having a root bone and then 5 bones from the rootbone for each ring, however that only lets them rotate not move up and down. Whats the best method for achieving this?


I saw something similar when I tried to play the same anim sequence twice without switching states first.
Curious why you're using skeletal mesh instead of an actor with multiple instances of static mesh rings. You could do a SetRelativeLocation and change the z-axis value. Is there a reason why this needs to be a skeletal mesh?
No there is not, this is sort of what im asking, is a traditional animation better, or simply handle it in engine?
One benefit to having a traditional anim would be driving VFX from anim notifys but thats about it
I don't know about better...that depends on what you're using it for. Personally I would go with an actor and static meshes. I've done axis movement with bones, but it's been a minute. IIRC it's not as straightforward as one would hope. I thought I had my old project to take a look at what I did to get that working, but I don't have it anymore.
Technically you could also make this work in Niagara.
Here's an example of meshes moving vertically that I setup in Niagara awhile back.
Now thats a good idea
Its a loadout / inventory station
Player will step onto it, rings come up, bright flash & VFX, then back down
Sounds like the Save Game platforms from Super Metroid.
I like it. 🙂
@cyan coral Can you just do movement to a fixed position in Niagra?
Ah, I'm sorry, I'm not terribly knowledgeable with animation, do you mean states as in the state machine, or something else?
Any idea what could be the issue, that the character is just flickering and also why the shadows are scuffed like that, I'm just playing a montage.
Is it an issue with the animation blueprint?


The invisibility of the character could be scaling (like the anim scales root +100x or -100x and you just don't see the character anymore. The shadow artifacts can occur if you don't have a physical asset for the mesh.
 I think I would add both (feet and arms).
Anyone know how to remap the animation from Metahuman to Arkit. I have a custom character with arkit blendshapes and i like to add the animations from metahuman animator or keyframe animation to it. If anyone know how to do it or any similar tutorial link would be helpful. ThankYou
You can do with both. Skeletal or move static meshes. I usually prefer skeletal because you can easier do some latency (e.g. I made a door where the final close went a lot slower than the start for some locking mechanism). But you can even do with static. This is a very quick example that I've created in blender with bones:
I did think it would be easier too
Is there a particular config needed on the bones?
I had a root and then 5 bones off the root
Nope
Where did you animate them?
Which tool did you use for animation? Blender? UE? Maya?
I would do it in UE probably in Sequencer
Just to be clear, i did not even attempt to animate it yet
because i could only rotate the bones in blender not move them
Ahh... I think you did not disconnect the bones right?
You have to ALT-P the bone. Like this:


welcome xD
Is there some simple way to make an animation work with basic foot IK? I have a golf swing animation that lifts the right heel, twists ankles as you'd expect, but since the player isn't always on a flat surface it can create issues of the feet floating in the air during the animation. If I let the basic foot IK work during the animation then the heel won't lift etc. cause foot IK overwrites the animation 😕
Do you know why when i import my animation, it messes up the smoothing of my mesh that i already imported?
Is there a specific way to just export an animation without affecting the mesh? I was exporting Aramature with Animations ticked
Heloo guys, i just took the crouch animation from the mocap animations and it looks like this, the problem i have is that my head is clipping to all the objects, how can i fix that? i couldnt find any explenation, i tried blocking all dynamic collision within the head mesh but it didnt work out

I'm using 2 export settings. One for meshes one for the animations.


Lovely thank you I'll give that a try
If it rants about tangent space you have to triangulate all faces. I'm not sure if this is necessary anymore (UE5). I kept my settings from UE4.
Yeah I usually have the triangulate as a modifier so I can check the shading before exporting @delicate crane
But what would be scaling, if i run the montage and look at the preview it looks totally fine
How does it look like if you just drag and drop the animation into the map (without any character BP)?
It also works fine, it's also kind of random when/how it flickers.
Sometimes it even flickers just in the idle pose
But then other times it's completely fine
5.6 changed how retargeting works. "Use op profiles?"

it's supposed to be chaned to "Get Chain Settings from Retarget Profile" but that node doesn't show up
Yes it changed. You can check Game Animation Sample Project about the changes. I just copy/pasted the UpdateRetargetProfile function and upated my ABP_Base_Retarget.

Probably to clarify a bit... the Get Op Controller from Retarget Profile takes the name string from the Retarget Op from the retarget asset. Like "Retarget IK Goals" for IK ... but you can even get the parameters from the other rules via that node (if you use the other names like "Stride Warp IK Goals", ...).

@delicate crane I tried your settings

Very strange i still get this
On the left is importing skeletal mesh with aramture
You have to increase the capsule radius while crouched. Easy but not perfect (you character may refuse to walk crouched through narrow passages that work uncrouched). Or just increase the radius in both conditions (crouch/uncrouch) and prepare your map that you character may pass every path depending on your capsule size. You can even do some linetrace and respond with some rotation to spine bone or an alternative animation (like switching to relaxed from ADS if you use some rifle). But I think it's usually some tradeoff between performance and perfectionism and how much time you would invest for that. I still play games that does not even provide feet IK. 🙂
on the right is static mesh
Looks like it's not shaded flat on the skeletal mesh import?
I think it does not. Probably the import default settings differ?
HI - I’m working on a photorealistic fashion try-on platform im new to all of this so im looking to hire someone to help build the pipeline from CLO3D to Unreal Engine and simulate garments on avatars. (thinking using meta human to generate the avatars from a still pitcture) Would love to connect to anyone that has experince if you’re open to freelance
I don't really see a difference at mine. Tried with skeletal and static mesh (shaded flat)


There's a https://discord.com/channels/187217643009212416/831953010900336712 channel. There are some that post cloths from time tot time as well.
Thanks for the reply, i resolved the problem, i didnt want to wrap my head around it, i tried the thing with the sphere and everything, anyways the character wont be shown to the player, its a FP game, the character will only be visible in cinematics, so i came up with this 🤣

I've seemed to get rid of the face smoothing problem (somehow? Not entirely sure how). However when i import the animation, the animation makes the mesh VERY small
Im sure its a scale issue but not sure how to check it, my units are set to CM and 1.000. Armature has a scale of 1, so does the mesh

The bones also have 1.0 scale
I'm using 0.01 unit scale in Blender and you have to apply all scaling before export. It's the same with characters (note that "apply all transform" does not automatically do it for armature and mesh parts in Blender).

Is your Units in Meters or Centimeters?
and thanks for your help i appreciate it
Meters
I'm using that settings since UE 4.7 and Blender 2.7. Still works fine. I saw some videos that tinker around with armature and stuff and other scaling for issues I never faced.
yeah ive never had this before either
Ive not done lots of animations but maybe 10 or so but never had this
urgh maybe i just scale it up in engine
Its a scale issue but only on the animation, i can scale the anim up in engine by 100 and its fine
That solution for the head clipping is hilarious; but if it works it works! Nice job 😹
hello, anyone knows how to get instanced skinned mesh component to work??
there is like no document on how it works, did some attempts but it doesn't work as intended.
Its working just fine 😂
HELP ME, i installed flight animation pack but its a .uasset and when i import it to ue5, the skeletal mesh is a ue4 mesh and the skeleton is broken so i assigned the mesh to the skeleton and it worked but since the skeleton was broken the animations also were broken,anyway when i assign the animations to the skeleton the engine crashes T_T WHAT SHOULD I DO
Hey guys! Is it always considered a good practice to animate the IK bones to their correct locations, even if I'm not going to use an IK setup (for example IK feet placement)?
Is there any reason to use a AimOffset versus using a Transform Bone node and rotating spine bones? Or vice versa.
help pls

I'm not sure what you've done or why the skeleton should be broken (UE5 can use UE4 assets just fine usually) but you can't just assign UE5 mannequin skeleton to UE4 mannequin. They differ. UE4 spine has 3 bones, neck 1 bone, UE5 spine 5 bones and neck 2 bones. It also depends how you would use the animations. You would most likely not use it with the UE4 mannequin itself but some other character. You would most likely retarget the animations to whatever skeleton type you might use (if you don't share the same skeleton).
You only need to animate them if you need them. I would add it because the IK for feet is a nice and easy feature. But usually it's no big issue to add the IK bone animations at any point in time because you can easy retarget from your mesh (without animated IK bones) to the same mesh and pin the IK bones to the right FK bones while doing that. With this step your previous not animated IK bones are animated afterwards (or you can even pin it in the anim BP via some transform bone).
This is very helpful thank you so much!
You can easy drive the AimOffset with some Pitch/Yaw float and it also works well with some additive animation sequence like playing some idle animation while holding and aiming with a rifle. AimOffset works just fine but you can use transform bone as well if you have any reason (like animating a tank or something).
As far as using it for a FPS is one preferred over the other?
You would most likely need TP even if you create a FP game (except you don't use any other players/npcs that are able to aim). You can take a look from a fresh first person template project (arena variant) to get a clue. The ABP_FP_Weapon is using CopyPoseFromMesh node with "Use Attach Parent" as parameter. That means the child mesh component (FP mesh) is using the anim pose from the parent mesh component (TP mesh). Because the parent of the first person mesh in the BP_FirstPersonCharacter is the third person mesh. The third person mesh anim BP is doing the aiming via aimoffset. But the first person mesh anim BP is adjusting the aiming with a control rig afterwards (so the weapon does not clip/shoot through a close wall).


So in a nutshell: I think you would use some AimOffset either way (TP/FP).
everyone told me to retarget the animations but look at the image i sent it says couldnt find skeleton, bc the imported skeleton has some issues (i will show u how it looks), but i fixed the issues with the imported skeleton, and when i choose it for the animations bc it tells me to choose "new skeleton" the engine crashes :D AND I SCREAM T_T
Just "Add To Project" from Epic Games Launcher to a clean UE5 project. If this does not work for some reason (should work usually) create a UE4 project "Add To Project" and afterwards from there export the animations as FBX and import into UE5 project afterwards or just update engine version (usually should also work).
hi! i need help I'm quite new and hope it's not too dumb of a question but i'm trying to do this in unreal and would like to know what's the most eficient way to do it?
Question I still can’t figure out lol. If I’m modeling a weapon with interchangeable parts, like a pistol grip, charge handle, barrel cover, etc. how does animation work with the different pcs? There are different positions so would I have to do animations for every different part on different rigs? Or am I over complicating this? I’m so confused on how to set this up properly. I know in unreal it’s just a socket thing but I worry the hands from the animations won’t position properly due to the different pieces. If anyone has an idea on how this works I would be forever in your debt.
You'll give the weapon a master root bone, and then various bones with that for the interchangeable parts - you can move the entire weapon by moving the master bone, and then animate parts from that.
hello, is it normal that people cast here? Sounds expensive getting the character every time animation updates, is there a better, more elegant way to press E to switch to another state to play anim montage once and go back to idle?

I think I would try with some deformer graph but it depends what you would do with it in game afterwards. Probably check some of the possibilities in the content examples from Epic Games to check what matches best for you https://www.fab.com/listings/4d251261-d98c-48e2-baee-8f4e47c67091

Fab.com
Check out the Unreal Motion Graphics UI and Skin Rendering/Subsurface Materials examples in versions 4.6 and later! The Content Examples project has been built to help you quickly get up to speed with a variety of different techniques and artistic applications for building your own games. Along the walls of each room, you will find any number of...
okay thank you!
You can set a character variable at init and use it in the update animation event. The cast would not scare me too much about performance tho. If this few more ifs matters you are lost anyway. But I really dislike casting to non-engine-basic classes as this would cause some super annoying hardwiring and requires most likely a knife sometimes later. I'm using interfaces if I need to communicate with my AnimBP from the character BP. But you don't even need them for montages. You can just call a "Play Montage" node from the character BP. I would only put really necessary logic into the anim-bp as they are often bound to a special skeleton (even if it is better now since we can create anim BP templates).


Thanks, appreciate the info! Ill look into interfaces for this, just having problems understanding them for 10 years so far, I do understand what they do but Im always stuck in each situation figuring out who should implement that interface and which functions should it have. Its like getting the gist of quantum mechanics but actually still not being able to explain it to someone else, a mystery.
Honestly I just want to press a mouse button and another animation blends in, this is my Nth-attempt at animation, import and animbp setup, and Im always stuck at the same things, passing variables around. I think there is such a thing as "being too dumb for something", Ill try interfaces....once more xD
I can vaguely remember making this kind of effect through a material, using the... "v" axis, I think? Worth knowing it's a possibility, in any case.
Has anyone had issues with jumping animations in motion matching with choosers? When I jump straight up it seems to be totally fine, but when I am moving forward and jumping at the same time, the jumping animations while my character is in the air stutter like crazy. Almost as if it's trying to switch between my normal locomotion animations and my jumping animations even though i have all my locomotion animations set to false during if the character "is falling"
Seems to only be when I have a "Fall_Land", "Start" and "Jump_Apex" enabled. If I only have a "Fall_Loop" and a "Start_Loop" animation, it's totally fine
I wanted to adjust the position of my view model when aiming, I was wondering if there's a way to preview a frame of animation from inside the character BP?
Nevermind, just figured it out.
Do you know how to remap the face animation from Metahuman to Arkit. I have a custom character with arkit blendshapes and i like to add the animations from metahuman animator or keyframe animation to it. If anyone know how to do it or any similar tutorial link would be helpful. ThankYou
Anyone know why a pawn goes into the floor when playing animation?
Do you use some IK solving (Control Rig or Foot Placement node)? If yes are your Foot IK bones animated correct (if you make all bones visibile)? Older UE4 animation often did not animate the IK bones or worse rotated them very strange (like the default template anims from older 4.x versions). If you use IK and the bones are rotated or placed weird it can cause lots of strange issues like causing the character to dive into the floor. If anims are ok but just the feet are slightly above or below the ground you can fix it with some minor offset (depending on which nodes you are using).
Maybe this could help you? https://www.youtube.com/watch?v=Rg2AhbGG_VY ... if you need something more about metahumans there's a channel just for that https://discord.com/channels/187217643009212416/831953010900336712 - There are even docs for those topics on the Epic site (like how to setup ARkit, ...).

In this video I will show you how to use the metahuman face board/ animator animation in any characte you like :)
Make the board work with head control and follow the character:
https://youtu.be/-j3FMKeD-jo
Blendshapes Names:
https://dev.epicgames.com/documentation/en-us/metahuman/mh-standards-docs/mha_index%3Fapplication_version%3D1.0?applicat...
How would I go about animating locomotion and mouse-look for a mech character in UE where bottom half responds to locomotion inputs, while top half follows the mouse cursor? At the moment, I'm thinking about treating them like two separate meshes -- does anyone have experience with this scenario?
It would be similar to a tank turret vs its hull.
Hi everyone, I recently bought this (https://www.fab.com/listings/f1fed29a-d0bd-41a2-8569-edd2106ee953) to animate with. I'm still kind of new to UE5 so when I put it in, I was surprised to see that it wasn't one skeletal mesh for everything but a modular character with all the different body parts as their own skeletal mesh. I'm wondering if there is a way to combine these parts into one skeletal mesh and then use the default control rig to animate it. Or if there is a simpler way that would be great, I just want to animate the character whole in unreal.

Fab.com
🔥Features⭐ LowPoly⭐ Fully modular armor⭐ Helmet glass replacement transparent/opaque⭐ Additional 3 armor color variations⭐ Character Weapons: Rifle (2 color variations), Pistol⭐ EpicSkeleton rig⭐ 33 animations📋 Polycount | The Character does not have LOD system🈯️ Faces 26809 ❎ Tris 53618 ✳️ Verts 28577⚙️ RigThe...
You can do some LayeredBlendPerBone and split into upperbody and lower body. If you would do the animation of the upperbody via animBP or some other graph depends on the mech I guess (if there is some delay before the upper body turns to reach the mouse pos or if it is following pinned).
Thank you, I will look into that.
In ue5.6 version, I select subject from live link hub but subject does not appear in metahuman character, does anyone have this problem?
If you would merge the mesh into a single asset then you can export the parts merge them in a 3rd party app like Blender or Maya and reimport using the already existing skeleton. If you would just soft-merge them in a character BP there are different methods. https://dev.epicgames.com/documentation/en-us/unreal-engine/working-with-modular-characters-in-unreal-engine#skeletalmeshmerge

Epic Games Developer
Create modular characters by combining multiple dynamic skeletal mesh components in Unreal Engine.
New tutorial on creating custom clothes for metahumans in 5.6 https://youtu.be/dAaIvyG2tE8
Livesync from CLO SET - https://connect.clo-set.com/livesync
Comment what you want to know in a video next!
TIMESTAMPS
00:00 - Intro
00:20 - Creating Metahuman Character
01:52 - Setting up LiveSync
03:12 - Using Livesync
04:54 - Creating shirt in MD
06:19 - Sending shirt to UE
07:09 - Creating skeletal mesh for shirt
08:04 - Adding shirt to...
I want to prevent my weapon from clipping into walls through a procedural animation that pulls the weapon back, which works already, but sometimes the arm doesn't know what to do and spasms upwards. Is there a way to reliably prevent this, like limit the angle of the shoulder bone or something?

Anyone know why Rewind Debugger can't start recording?

They button shows recording started, but there's no data recorded.
Hi guys,
I'm having trouble getting root motion to work with my custom skeleton after retargeting animations from the UE5 mannequin.
Whenever I play a root motion animation (like a roll or dash), my character snaps back to the original position. It seems like the root motion isn’t being applied.
I noticed the original root bone on my skeleton was named something like "root_x3", so I renamed it to "root" to match the UE mannequin.
I’ve attached a GIF showing both skeletons during a root motion animation. On the mannequin, the root moves forward with the animation as expected. On my custom mesh, the root stays in place, the character move forward though
Any ideas on what I might be missing?
I tried setting the enable root and force root lock
Thanks in advance!
Can anyone help with this


Hey Guys
Im having a Problem with a simple idle animaion in unreal
The feet start moving once i import the animation in ue5.5. But in Blender everythings fine. It also works when i export the animation out of ue and import it back into blender. Any Ideas on what may be the cause?
How do people deal with animations on dedicated server? My friend cant do collision checm
I imported an animation form maya into unreal, and weirdly the animation is offset by exactly 24 frames (exactly 1 second), the rest of my animations from the same scene, with the same export and import parameters are improting ok. The only difference is the rig used. What could be causing this 1 second offset
Thanks @delicate crane. It kinda works for me even it's not what i was expecting. Thanks again.
Everything that's not replicated by default must be done via ServerEvent->MultiCastEvent or triggered via some RepNotify. I'm not really sure what you mean with "can't collision".
can't do collision check*,
ye but he told me that servers can't play animations 🤔
servers can animate skeletons?
I keep clicking the wrong things, specially when working with the face rig, is there any way to make things unselectable?
He told you wrong. Servers play skeletal mesh animations.
Novice animation rig question. When manually adjusting your pose whether FK or IK and your character is obviously wrong, are there any shortcuts to at least eliminate the distortions? Perhaps a 'revert to defaults' or something similar?
Or is it simply a matter of laboriously and manually tweaking each joint until you get something correct?

Also am open to any suggestions for good introductory tutorials on using the new control rig, creating specific poses, shortcuts etc.!
Under resources theres a bunch of stuff regarding ues animation and rigging system
https://www.artstation.com/challenges/ue-animation-challenge/categories/194/briefing
Thanks
Dedicate server absolutely can refresh bone transforms, it depends on what the VisibilityBasedAnimTickOption on USkeletalMeshComponent you use. Maybe what you need is OnlyTickMontagesAndRefreshBonesWhenPlayingMontages, which can refresh bones (run ABP) during playing montages.
How does one generate character trajectory for motion matching in 5.5? All of these youtube tutorials are suggesting the need for a "CharacterTrajectory" component on the Character.
I'm not able to find any such a component.
It's not needed anymore. You can look into GameAnimationSample for more details.
You can use PoseSearchTrajetoryLibrary instead.
That's helpful, thank you.
Oh boy, this sample project is so many levels over my head! I stole some trajectory functions and managed to get a basic dude running about.
Is it possible to layered blend pose with motion matching? Otherwise how would I go about triggering montage animations?
For example: My game's state machine setup is using locomotion states for the bottom half of my mesh and then blending the upper-half of montages.
Setting up blendspaces is a pain in the ass, so my plan was to use motion matching for the locomotion, but use montages for gameplay logic / upper body stuff.
I guess long question short: Do montages play nice with motion matching?
Of course it does, since the pose search database doesn't include feature channels related to the upper body.
In GASP, it also plays montages using pose search, i.e. the traversal actions.
Good morning, I'm trying to use the default mannequin control rig on a different skeletal mesh but it deforms the mesh for some reason. Anyone know why this is and/or how to fix it?
Hi, I'm trying to implement a way to handle an animation by joystick :
joystick to the right : the animation progress forward frame by frame
joystick to the left: the animation progress backward frame by frame
joystick neutral position : the animation is paused
And when I get to the end of the animation, an event trigger to go to the next step
I kind of figured I could use play rates to controle this but I can't figure really how
Hmm, what's a good practice way of authoring an object toss animation (juggling, weapon flair...), if the object is a static mesh, or you just don't want to sync paired animation sequences?
anything wrong with animating that off a virtual bone?
hi, I cant figure out why this is happening
I exported an NLA strip from blender, there are no duplicates or anything, yet for some reason I have 3x animation import in unreal. I redid the animations and keyframed (in blender) only the bones I manually moved (control bones), aka cleaned up blenders side. Mesh was exported separately with armature but without animation bake, that is my skeleton in UE. Then I exported just the armature with the unmuted and selected NLA strip as animation only for unreal. Appreciate any help !


Fixed it myself by updating the IK Retargeter settings. Inside ik Retargeter,Select root chain and change the Translation Mode to 'Globally Scaled'. After that, I re-retarget the animation and root motion worked as expected.
Guys, do u know wh can i find goods pistol animations? Because anim starter pack only have ads pistol animations and don't have land pistol animation, crouch pistol animations, etc
Hello! I'm having an issue with skeletal mesh sockets. Not sure why but the actor I attach to the socket of the character does not move with the rest of the animation. I think maybe the socket is not moving during this animation? I have a montage that plays when the actor gets attached but I'm also using Layered blend per bone for upper/lower body split. Below is an example of the issue. Any ideas would be helpful thanks!

Where would you attach it? Holster? Hand? Did you adjust the socket with the preview mesh enabled in the skeleton asset?
Well this is a little embarrassing! After a "rubber duck" session of explaining my logic to someone else, I just realised that the socket I was attaching to was in fact the ik hand socket and not the actual socket I made. 😅 thanks for the help either way
Hello!
Could someone tell me why the animation for a model I'm exporting from blender isn't importing to Unreal Engine with the rig? I've been trying for days at this point, but I can't seem to find out why not. These are my export settings:

Also, the import settings for Unreal Engine are the same as the default, except that I unchecked import only animations.
And this is the blend file if it helps: (Ignore the goofy animation, it's just for testing.)
Hey folks, anyone here have started to look into UAF/Anim Next
Im currently looking at it rn but how tf to do even start
Rn i just attach AnimNext comp to my Character and set the module
Then when opening the animgraph, there literally no info on what to do,how to access/set variable
Currently only enable UAF and UAF AnimGraph
Maybe need to enable state tree too since from UEFest presentation, said something that state tree is replacing state machine?
Hey all . I’m looking to get into movie animation and would like to know where to start regarding educational resources that are specifically geared towards making movies with unreal . I’m aware there’s free resources a-plenty on the site , but I’d benefit from a step by step course or even online classroom environments. Willing to pay for decent course but obviously would welcome free ones . I’m Currently working through an intro to Unreal course on Coursera . Any help would be appreciated . Cheers 🍻
hey guys good evening
i dont know if i add a bone to my skeletal mesh it breaks the whole animations set why?
virual bones dont rotate when i retarget it
any safer options ?
Hello when you play an animation montage. You control the character movement with a timeline during the montage? or there is a better way to control the movement of the animation?
tick selected objects and select both the mesh and the armature in the viewport
Unfortunately this didn't work
ah sorry, i read it wrong, its just the animation.
you can:
- have the animation open in the timeline
- or select NLA Strips and add the animation to an NLA Strip
you can also send a screenshot of your blender window if you need more help
Neither of these worked sadly, have you tried importing the model and animation from the file to see if you are able to import it properly?
What it's better, implement turn in place with montages or in state machine?
have anyone here look into how UAF works?
im trying to understand the flow of it
im currently looking at how the piecies works
so animnext comp is attached to the pawn and we set the UAF Module
the we need to make a workspace for it, which is the main place to be
there we can put our module and add UAF Anim Graph
but is the point of module is similiar to ABP event graph where we set the value there?
and StateTree is the new State Machine right
also how do we access information from the AnimNext owner then? to get something like CMC/Mover or other values
from what ive tried, you have to use get mainobject and cast it and the output we specify the data we want?
and from my understanding, we're architechhing using trait stack?
im so confuse where is the entry point
solved by checking how many rootbones under Armature are, and I had the wrists separate from the root, which unreal interpreted as separate rootbones = extra animations. Just sharing for search visibility. Phew, hell is over, the next one can line up now xD
I'm using it in my state machine. But you can even do via montages. If you use montages you have to do some checks about your character movement and interrupt the montage. The reason why I did in the state machine is that I can have different transition checks. If nothing happens it just finishes and heads back to idle with some blending value, if I'm moving I can interrupt with another blending value, if I'm crouching, ...
I've only tried a bit with Mover but stopped trying to figure out the crouching as the docu is thin and it would consume too much time for playing with experimental for me. I think the change of the StateTree would be a good move. Currently I've to duplicate the states from character to animBP from time to time. I'm not sure how much remains in the AnimGraph in AnimNext anyway. It changes already a lot with MotionMatching. The new first person templates even moved a lot of logic into the control rig. I took a look at MotionMatching and refused to use it either as it takes a lot of time for me to adapt and create new matching anims and give me way too less back for my current game. Also I'm doing something similar already anyway with maps that stores the animsets. But I've found out that the vaulting checks and so on are mainly using it to lookup (triggered from the character BP not from the anim BP). If there are some more new templates or test projects from Epic I would take a look into it for sure but until that point in time I would only keep it with low prio on my radar.
my project is also with mover but i just started it a month ago. currently its from the old third person template one..my animbp is similiar to the old animbp of third person template but with mover properties
can you show me how you start it? or if youre willing to, maybe make a video on it.
ive tried on my end to even play a simple anim sequence but it wont play.. all i did i make a workspace and module and drag the module into it. and make an animgraph with sequence player trait and just set the anim manually and set the result to the output of animgraph
then just set the module to animnext comp
so far no anim
what i understand is module is similiar to event graph with where we get/set the value and animgraph is where we set it
and state tree is the state machine with the state function we just call the animgraph
tbh im still confuse on what is what
and also how do i access properties from my pawn like in abp event graph
ive tried owning object but you cant really cast it
there a cast not but you kinda have to set the wildcard to what you have but i dont think thats the way
i have motion matching running well with mover on my side in my walk/run state
ive spend the last 3 days figure this out and no result yet
how to use Parametric clothe for metahumans in 5.6 https://youtu.be/InknBH1e_i0

Learn how to use the new Parametric Clothing System in Unreal Engine 5.6! In this tutorial, I’ll walk you through importing a Marvelous Designer cloth asset into UE5, simplifying the mesh, and retargeting it to a MetaHuman.
You’ll also learn how to make your garment parametric, so it can be applied to any MetaHuman — no rework needed. Thi...
if I had a bunch of animations, and different animations would play when you pressed different combinations of keys, how many animations can I have in an Unreal project before it starts lagging?
assuming having more animations in a project even creates lag in the first place
it would be unlikely to cause a big issue to store many animations in memory unless you went really really crazy
a single decently detailed art asset will instantly dwarf the size of a compressed anim sequence in most cases
loading them main threaded in place would be costly I guess but generally speaking they will have been loaded already by the animation graph referencing them
the cost of blending animations is there I guess if that's what you mean, which is not free but is also generally on another thread so it is not goint to affect the critical path much
So when my goblin dies, I ragdoll it.
After a 2 second delay, I call a func that deactivates and disables tick on various actor components.
I observe a sometimes none, sometimes slight, sometimes extreme jitter/blur as soon as I deactivate tick on the the goblin's skeletal mesh.
I can't tell if it is model or material.
encountering issue where imported skeleton is significantly smaller than the skeletal mesh itself. I've checked to make sure all the scales are correctly applied, have the blender units set to 0.01 instead of default 1 and exported, but somehow get that mishap.


i am also using unreal 5.5
Does anyone know the right way of animating the mech from the unreal engine content sample for this content control rig sample pack? If I drag the body control i can get it so that all the legs move forward with it but then it looks locked out like a frog. Is that the right way to begin animating it, and then move one leg manually and keyframe it one by one? What's the procedural part then ? I'm likely thinking and doing the wrong thing.
ok i guess new issue. Setting uniform scale to any value gets ignored on import
Hi everyone! Not sure if it should go to animation or multiplayer section, but could somebody suggest please, whether you encountered the following problem:
I have an animation that plays on both server and client. It has AnimNotifyState which I use to enable damage window for some collision component.
In my code I have something like:
void UAnimNotifyState_DamageWindow::NotifyBegin(USkeletalMeshComponent* MeshComp, UAnimSequenceBase* Animation, float TotalDuration)
{
    // cast the owner to the attacker interface
    if (ICombatAttacker* AttackerInterface = Cast<ICombatAttacker>(MeshComp->GetOwner()))
    {
        // Check if has authority to start the damage window
        if (MeshComp->GetOwner()->HasAuthority())
        {
            // Start the damage window with the specified attack part
            AttackerInterface->StartDamageWindow(AttackPart);
        }
    }
}

void UCombatComponent::StartDamageWindow()
{
    if (GetOwner()->GetLocalRole() == ROLE_Authority)
    {
        HitActors.Empty();
    }
}
The problem that I'm running into, is that when I play as a server and play this animation, everything is fine, AnimNotify gets triggered only once. But when I play as a client, AnimNotify is triggered multiple times (it seems to be random - sometimes 2 or 3 times), and everytime when it's called, it passes the Authority check! I've been trying to debug it, but I just have no idea how it works. If I run animation only on the client, the check never passes at all. Are notifies always executed only on the server? Any help will be appreciated 🙏
Hi there , I started looking into UAF a few days ago and I managed to get it to produce a result where it switches between a movement and idle anim based on velocity however I cannot figure out how to actually blend data the whole structure as you said is very confusing plus it’s very crashy. The main things you need to do, the skel mesh needs to have the disable animation flag set to true if not UAF will not set the output pose.
Inside UAF Module you need to use three nodes ( 1. get reference pose 2. run graph 3. write pose )
On the run graph function you set your UAF graph ( this one resembles the ABP workflow but nodes are not unique anymore but rather everything is called simply trait, you add that and with right click you can add a sequence player trait and so on, the idea is to stack functionality but I cannot get this to work it crashes.
To send data to UAF at least the only way I found the AnimNext Component has a BP function called SetVariable this is how I got the velocity to switch between idle and walk.
This is all from initial observation I will share more once I can figure out the blending and other functionality my goal is to make a Motion Matching Setup with UAF.
thank you for that insight. my goal is also to make it work with motion matching and mover. i have MM and mover working just not UAF.
so if i get this right, in my workspace, in module, on initialize/execute/pre or post physics, getreference pose which get the skeletalmesh if i remember correctly, run the animgraph and write pose, which im assuming it telling the skeletalmeshcomp to animate?
then in animnext comp, i dont understand when you said using sevariable.. what you mean when you said you use velocity there? do you have any videos or screenshots? right now, im also confuse on how to pass data like in eventgraph you set the data(movercomp, velocity etc from movercomp and use that data in animgraph
all i want to start right now is like you said to get sequenceoplayer trait to play then i can figure out more from there
You got that right at PrePhysics in your module you use the get pose , run graph and then write pose so it appears on your Skeletal Mesh
To pass your data into UAF inside your character blueprint event graph get a ref to your AnimNext Component then use the function SetVariable to send data over to your UAF Module such as velocity, health and so on.
I will document everything soon just want to figure out the blending then i have enough info to use it properly.
noted thank you, i'll also update you if i also found anything
Jittery at ragdoll often occurs if you don't give 2 collision primitives a chance to escape. It's a good idea to skip 1 primitive or more at collision setup of your physical asset. In the attached screenshot the selected primitive of the upper-arm would only collide with the purple ones. You can take a look at mannequin physical asset how it's done there. If clavicle or lower-arm would collide as well (and overlap like it is the case here) it would most likely jitter. But your jittery seems rarely noticeable. So I'm not really sure.

Did you try to remove the anim class instead of disabling tick? As far I remember I tried the deactivate as well but ended with disabling the animbp.

i am trying to integrate an asset with the unreal's game animation blueprint, i tried it with the basemesh and it worked, but now i want to integrate it with the blueprint that came with the asset, it can generate random clothings and have cloth sim
is there a way to do this?


Hi, does anyone have a good video or blog explaining what Retargeting Sources are in the Skeletal Retargeting Manager?

I have a simple hand pose system that works from an enum value and I was updating a few things and noticed this message. I read this https://dev.epicgames.com/documentation/en-us/unreal-engine/animation-blueprint-node-functions-in-unreal-engine but most of it when straight over my head . is this change something that would improve anything here.


Epic Games Developer
Using Animation Blueprint Node Functions in Unreal Engine.
I did try this but no luck. It looks like my specific issue might be related to a network smoothing comp that I slapped on the owner.
No, that wasn't it. I ended up slapping a 0.2 delay before deactivating the comp tick and that feels to be working.
has anyone integrated the locomotor in control rig into an animation blueprint?
does anyone know why the two bone IK is just straightening my arm completely while playing a pickup animation? I still need it to play the animation normally just have the hand go towards the item and get as close as it can without stretching the character. I've attached the animation blurpint and what its doing


this is the normal animation playing without two bone IK

the animation in first time goes in weird direction, and in game it goes in that direction too how to fix that :(
hello again, so i just tested this again and i managed to get it animating an idle animation using sequence trait.. now i was wondering you said you managed to get it to play movement and idle, i think you go from idle to movement (assuming this is a blendspace) using velocity.. how do you do that? assuming you use blend space player where it need x and y thingy, is that where you supply the velocity? i tried in my on receive controller changed, i set the variable name velocity same as in animgraph and the value i get it from ym cmc velocity but it does nothing..unless i set the x and y value manually then it will play


its playing the idle animation from the blendspace
also assuming state tree is our new state machine? how do we use that with UAF?
i saw a state tree blendspace but its not the base one anyways
do in the state tree module, do we make idle->walk/run and the task in each is just run each animgraph for idle and blenspace
i think we need each animgraph for each idle, walk/run/jump etc state
like each graph is responsible for one thing
and the state tree is responsible to go into the graph
and the conditions like in state machine
because i remember in witcher demo, they have shit tons of graph that do small things
and also, the in SkeletalMeshComp, the Enable Animation bool, you have to disable otherwise it will default to ABP instead of UAF