#animation
1 messages · Page 65 of 1
i tried modifying the bone in the abp instead but that definitely wasn't it
why does animations deform mesh so bad, but in blender its fine.


would my layering have anything to do with it? causes no issues while player controlled

not sure why you need to layer blend your aim offset. the layer blend seems redundant in this case and you could pass the output of your locomotion cache into the aim offset instead, then go through the montage into the final output
i did start setting the pitch from the player BP, it works i spose
Hi, if I buy a character from fab and they say it's been rigged to simple quinn. I'm using the third person template. Do I just switch out the mesh or do I have to assign the sk_manaquin to it?
Thanks
you should just be able to swap out the skeletal mesh in that case. provided you assign the skeletal mesh to the Mannequin Skeleton asset during the import process
Thanks bud, but I never actually imported them, I just added to project. Should I still manually assign it to the sk_maniquin? Or, just swap the mesh?
if it's added to the project it should be assigned to the mannequin skeleton already, so if you open the third person character and try to replace the skeletal mesh it should automatically appear in the list of compatible skeletal meshes
you can check this if you open the skeletal mesh asset and then select the skeleton tab in the top right. if its assigned correctly it should open the mannequin skeleton asset. the skeletal mesh should also be compatible with all the animation assets too.
Thank you so much. That is actually immensely helpful. I was getting confused because someone told me I should always reassign my skeleton.
So basically the only time I would to retargt or set up ik rigs, is if I have a ue4 character or somthing from miximo, blender ect?
No problem. If the skeleton is incompatible, meaning it has a different hierarchy to the mannequin or whichever skeleton you're trying to use, only then would you need to go through the retarget process.
When a skeletal mesh is created with the same hierarchy and names as the mannequin it will automatically be able to use the animation assets that are assigned to that skeleton.
It's important to understand that the Skeleton Asset is really just a container of bone names and the hierarchical relationship those bones have. The skeletal mesh is just the visual mesh with the skinning information which uses that hierarchy. This is why in production it's often very important to nail down the base hierarchy of your skeleton early, and for humanoid bipeds this has become a pretty unified standard, and the mannequin skeleton is a good example of that. You can still have very different characters which use that skeleton, but the core of it remains the same.
Got you! Totally understand everything you said and makes a whole load of sense.
If you wouldn't mind helping me with a follow up question I would be most grateful.
I bought two parkour packs on fab and one said its rigged to work with simple quinn. The second pack says the skeleton is assigned to the default UE5 skeleton.
I'm assuming the default sm_skeleton covers the same bone hierarchy structure for quinn, simple quinn, manny and simple manny?
Thanks
Yes they should all work on the same skeleton. The important thing is that the hierarchy from root down the spine, down each limb is the same.
Like i mentioned before, the Manny and Quinn skeletal meshes all share the same skeleton asset. The thing that is different in the "simple" skeletal meshes is that they dont have the procedural fixup bones that you see around the joints which help with deformation. These bones while being part of the skeleton do not necessarily influence the base hierarchy because they are "leaf" bones. Just like leaves on a tree these bones sit on the main hierarchy but do not interrupt it.
If however you had a new spine bone you would be in a bit of trouble.
O I see. So if this asset: Natively compatible with the standard UE4 Male skeleton and the UE5 Lyra Female/Quinn Simple skeleton.
It would have the same root bones, but if i want deformation, which i defo do (ragdoll and motages) should I assign it the sk_skeleton or do I need to retargt in this case?
If it's compatible, i dont see a reason not to assign it to the mannequin skeleton. IIRC the UE4 and UE5 mannequins use different assets
Yep perfect. I did do that and it seemed to be ok. It was hard to tell if somthing was off. But now I know what to look for. Basically don't want them leaf bones in my use case.
Man, been stuck trying get my head around this for a few days! Really glad I asked here instead of watching some mad retargating videos!
Thanks man. Really
no problem
hello, I want to lower the pistol on all of the pistol specific lyra animations I have. I tried to lower the bones, but the model morphed in a pretty ugly way, and i also for some reason wasn't able to save that anyway, not to mention doing that for every single pistol animation seems cumbersome. What's the right way to do this?
Layered control rig to manually change all animations one at a time. Or procedural IK control rig to change the hand positions at runtime.
Has anyone found a solution to the curve editor values not matching the control? For example if I’m editing a rotation curve for the Z (yaw) I’m expecting the position to change about the yaw but instead it does something funky in between the Z & Y. Really annoying for cleaning up curves. This pretty much happens in every animation software I’ve used except maya I think.
thank you for your videos btw 🙂
Hard to say but my guess is some kind of gimbal issue
how do you rig character and make animations? I trying top make character rig and animation in blender using rigify but got a problem. I wonder how others do this stuff (maybe in unreal, blender).May be you know good articles or videos for this topic.
Hi people. Im exporting my animated character from Blender to UE5.5 using GLB. The first import is perfect, but once I add new animation actions or edit the existing ones, reimporting with new file in UE does not add the new animations nor update the existing ones. Any ideas?
I would recommend this video on getting a skeletal mesh from Blender to Unreal https://youtu.be/YbWfoyf4MqI?si=Sm2WDJtt6Ta7MH44
This would also apply to rigify. One thing to bear in mind is that if you're building a rigify rig you may have a hard time trying to re-orient the bones like this video demonstrates. Fortunately this is not required as you can specify the joint orients when exporting.


In this video I will show you how to correctly export a character from Blender to Unreal Engine 5.
Common mistakes include issues with the scale of the root, joint orientations and differences between bones and joints. In this video I will talk about everything you need to know to correctly export rigged characters that follow Unreal Engine sta...
Can't say I've worked with GLB files in unreal before. In my experience it's common to export the skeletal mesh and animation assets separately so that when you're wanting to export/import/update something like an animation you can just deal with that one file rather than importing a larger group of assets.
Am i correct in saying that when you're working with these files you're exporting a whole scene?
just to double check you have import animations enabled in your import options?
Hi bros, what can cause one frame lag when using Transform(Modify)Bone node? There is no complex calculations, i just take a point world transform and apply to a bone in a world space. I also tried to comvert this to component and a bone space, but without any effect. I use this node earlier and later at the graph many times, but only in one place it cause frame lag.
In fact, i just take character eyes view point and try to move a bone at this location.
what could be a reason for this animation jitter? I am using an aim offset blendspace with single frame forward/down/up/left/right looking animations. This is also fairly new project and i haven't done too much to the Thirdperson and Anim BP so maybe there is a known thing that needs to be done that i just dont know about
in this image is how i blend leg animations with upper body and in the 2nd is where the aim offset is plugged in (beginning of animgraph)


So you positioned the Transdorm(Modify) Bone node at a different point in the graph and you didnt get the one frame lag? do you have a screenshot of where it works in the graph and where it doesnt
anyone skilled in animations dm me need something doing will obvs pay
Anyone here being using Physical animation (physicsControl) and run into issues with 5.4.4? Seems that blueprints with phsical animation in them cant be spawned, only possesable.
I have a animation that just rotates the characters body 90 degrees. When it does it, the entire body moves up a little bit. When the camera is attached to the head, this gets shown through the camera. Is it possible to not have that movement on the upper body/camera?
I feel like since the camera is attached to the head, it will move no matter what if the bone moves it. I think the only fix would be a new animation that doesn't move the character up, or remove the camera from the head and have it be a child of the capsule.
Does anyone happen to know if there's any tutorials or reasonable docs out there for the "Contextual Animation Scene Plugin" . This seems really useful but this is the only thing I've been able to find about it
https://vorixo.github.io/devtricks/contextual-anim/
and it's kinda sparse. In playing around with it I'm getting sort of odd results. I'm wondering if anyone has worked with this before and had a good result?
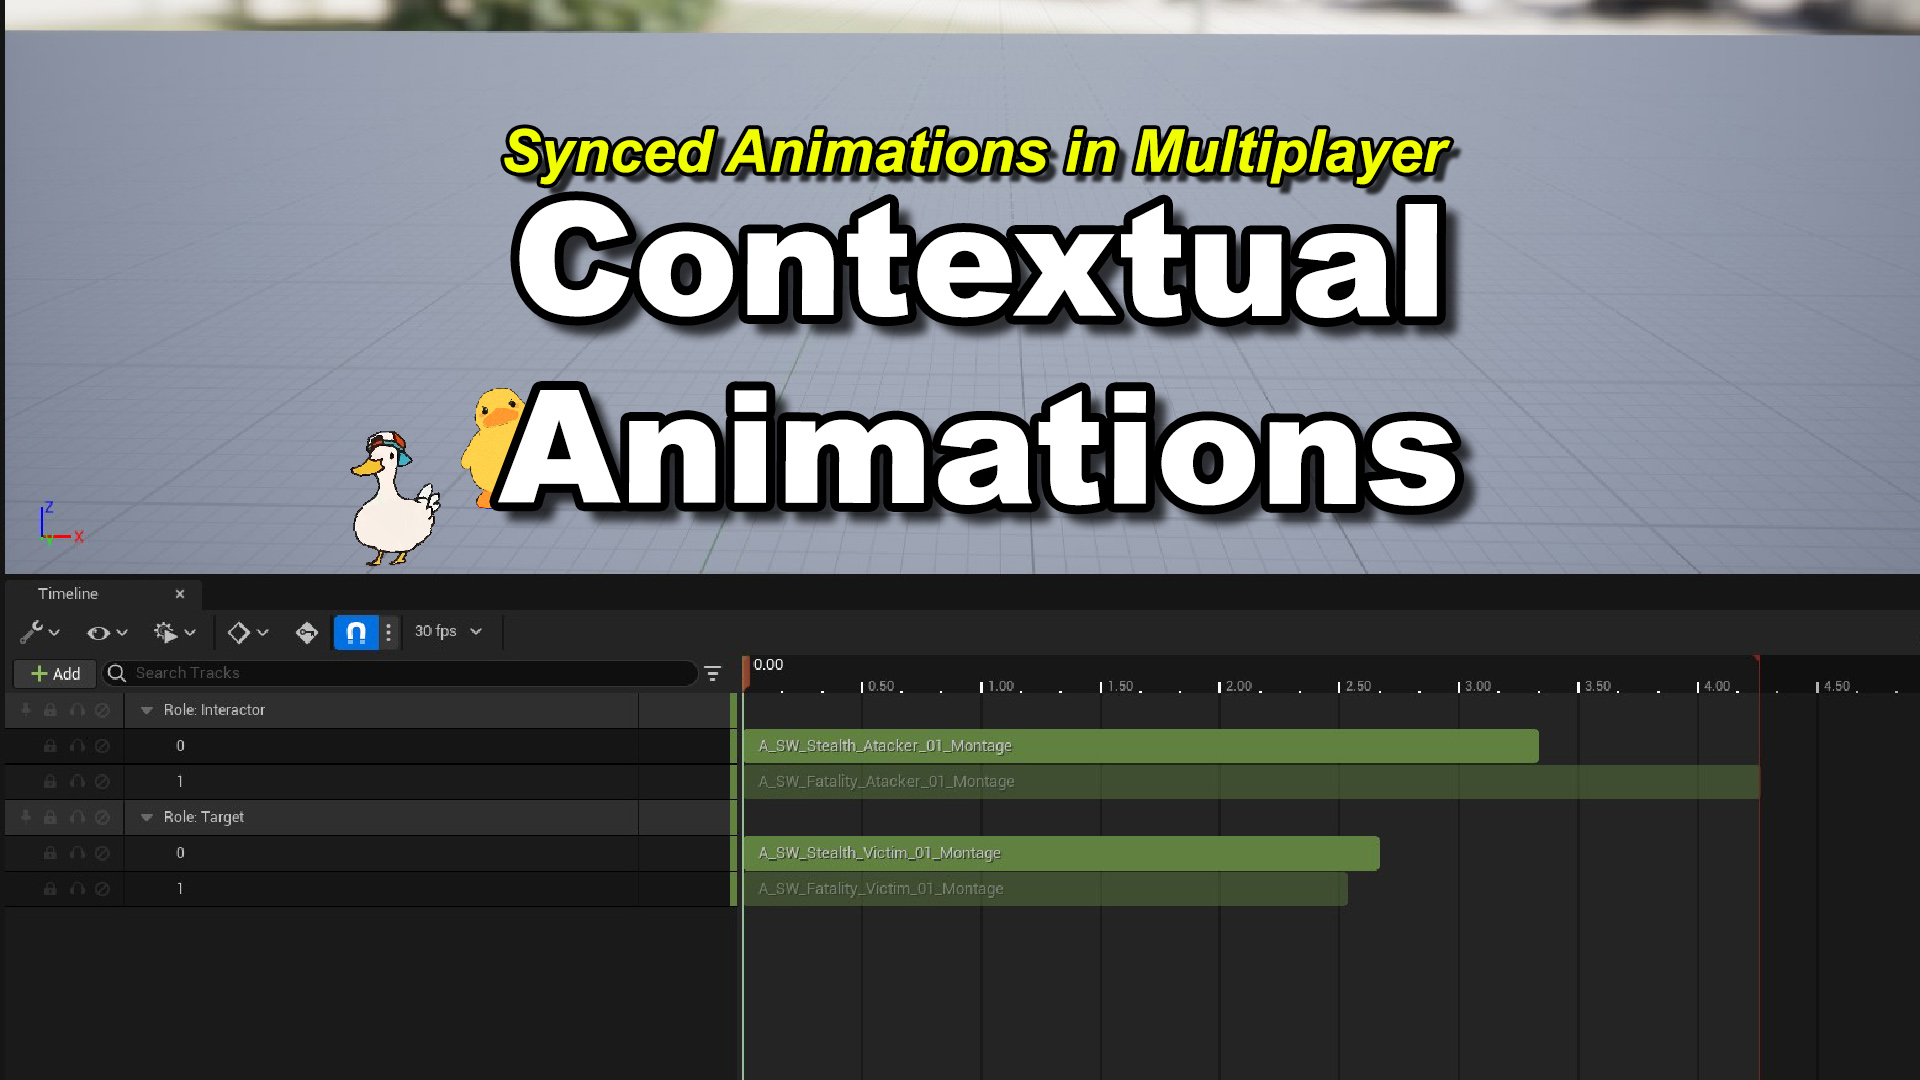
Devtricks
In this post we’ll learn how to use the Contextual Animation Plugin.
I use Transform bone node to snap a bone to character viewpoint, defined by head socket location and a pawn control rotation (i owerride it on the c++).


I use this node earlier in anim bp many times, for aim offsets, foot IK etc, and use it later for snapping hands to the gun mesh.
And it works here


I tried to experiment with spaces, convert it to component and a bone space, and also tried to do that in ControlRig, but it still lags anyway.
If you think it should work with setup like on screenshot, let me know, so i try to find the issue somewhere else
did you apply all transforms in Blender before export?
Hi, I am using animations with root motion enabled for my turn in place system but because they're using root motion the player is completely 'frozen' while the animation is playing.. how can I stop this from happening? I don't want the player to be stuck at all but i need the root motion enabled so the character is oriented correctly when turning?
does someone know why i dont have "retarget component" when im looking for it ?

Hello all. How do you guys go about transitioning from 1 animation to another once the 1st one if finished. I have tried the 'time remaining'/'get current time remaining' but i always get inconsistent results. Thank you
After Testing, I have found 'time remaining ratio' is the one to use if it helps anyone else
What's the best practice pipeline/plugin for going from Blender to UE4 for a FPS Game?
I had paid for the MrMannequin plugin for blender years ago and can reinstall if needed just wondering if anything better had come along for dealing with the UE Mannequin/importing weapon meshes quickly.
Hi Animators, I'm trying to import some ripped models to serve as a basis for learning asset integration. While I've been able to properly import the skeletal meshes with the correct orientation and scale (via the fbx import settings in UE), I have been unable to achieve the same thing with the animations . The animations import at 10x scale to the needed model scale, and thus turn the SM / Skeleton to giant size when run on it.
TLDR: is there a way to scale down an imported FBX animation?
Thanks.
Does anyone know how I can add a projectile vfx to an npc animation in UE5? I want to add a downloaded arrow shooting animation from Fab and apply it to my archer npc, but I can't figure it out
Idk if this is the right place to ask this, but I’m having issues with UI animation. I have a text widget that acts as a message in a text chat, I want it to fade out after some time after it is first sent, then when the player opens the chat it should instantly go back to its default visible state. I’m using an animation to fade the content color and opacity alpha of a border that is the parent of all text on the widget, this works great until I try and revert it back to its original state. It just won’t? I’ve tried calling stop animation and using the return to starting state flag but nothing works. Any ideas?
This post refers to the issue, but offers no working solution:
https://forums.unrealengine.com/t/umg-widget-play-animation-restore-state-broken-in-5-1-1/807745

Epic Developer Community Forums
Hi, I migrated my project from UE4 to UE5 and the “Restore State” boolean on the “Play Animation” node for UMG Widgets is now not working properly, while it was working properly in UE4. To reproduce is pretty simple. Start from 3rd person template project Create a new widget with a canvas and an element in it, like an image or a butt...
i have lion mesh with his hair in card type and i'm doing weight paint in ue but it was not simulating good any suggestion
#help
I just packaged my project and there is a slight issue that my chooser table for motion matching is working in the editor but it doesnt work when I package the project

Epic Developer Community Forums
Had the same issue, it stemed from copying the animator used in the motion matching package, as in the Update_motionMatching function inside the animator, you will see it calls something called the evaluate chooser function, taking a reference to the original animator class, which for some reason doesnt come up as an error when duplicating. This...
this forum has some solutions but I'm unable to understand if anyone can help break it down what I need to do that would be really helpful
Perhaps make two animation timelines, one for appear and one for disappear, call them as needed
override the bone >> montage as needed with idle or another montage? Or look at the montage and modify it itself? You can also dabble with camera controls in the default window of your character bp to set control guardrails
I used a UE5 bone structure in blender to rig my model so i could retarget it easily but it does not appear to have worked. I have no idea what this issue means or how I'm solving this.

Hi all, just recently started learning how to animate in unreal engine 5. Could somebody point me in the direction of some good learning resources? I've mostly just been following ask a dev gameplay animation videos on youtube. Thanks!
Hi dudes. I made some stuff and that works but looks kinda weird. Any suggestiong how to optimize it or clean up?

Hey, I have an animation with root motion where the character chases the player and at some point during this animation attacks the player. How can I stop the chase animation but blend/additively apply the attack on the upper body over it without it snapping back to the world origin? Can I use the layered blend per bone node and set the explicit evaluation time of the chase animation for the lower part somehow or am I overthinking this and should just play/stop montages?
Is it possible for a animation blueprint to control two different meshes of the same skeleton?
Anyone know why my gun snaps like this when playing a new animation? I have an animation offset and blend space for this, and it only seems to work when I have Root Motion on, but then the actual gun shaking when firing animation doesn't play

have the same problem, any solution?
I don't remember what the issue was that time but it mostly works, you can try changing the preview rig and double check that the value is not part of a disconnected graph
thanks, will try
Hi, does anyone know how to call this in blueprint?

In the animation blueprint, is there a way to know the name of the mesh that's driving it?
Is it too late to go back and add IK bones to my skeleton? I'm balls deep in my project and went to enable foot Ik... and uh.. i forgot to add that stuff to my skelly.
I'm creating animations using a control rig in the sequencer, pretty new to using the sequencer in the first place, and I'd like to start the animation from a frame of an already baked animation. I figured out how to get the baked animation on to the sequencer tracks section, but that's about as far as I can get. The control rig is FK only, and I have a sneaking suspicion I will have to add backwards kinematics or something in order to first convert a baked animation to a sequence of keys. I'm hoping there's an easier way to do this. If anyone has experience doing things like this, I'd really appreciate a guiding hand. (I put this in #sequencer and #control-rig as well, feel like it might apply there but I'm not sure.)
hey guys, i have this linked anim graph in my main anim bp, and even if it is unlinked, it seems that it is still ticking all nested anim graphs within this linked anim graph. is that the expected behaviour? is unreal by default ticking all linked anim bps, regardless of whether they are active or not?

Hey guys, does anybody know how to play animation for when player turns left or right (in-place) in AnimBP? I'm building a tank control classic horror game similar to RE2 on PSOne. I can't seem to get animBP to work with character BP and play the animation. Any suggessions?


So far character does turn left and right but doesn't change from idle animation to turn left/right animation
Hey guys! Is there a way to get animation's rootmotion data without actually applying the rootmotion?
Do choosers really store all enums as ints vs strings? Noticed an issue where we had a BP enum that updated but it broke our choosers that use it (and not things like GAS that also made reference)
Hello Dudes and Dudettes, I need your help. I am using a first person template. I want to replace the default rifle with my own. I created a low poly proxy rifle in blender / blockbench. I replaced the old one with my own, and when shooting it works fine, but when I walk either forward, backwards, left or right, the character ONLY walks to the LEFT side. It does not matter what key I press (up, down, left or right), the character only moves to the left. I tried with other 3d guns online and it works fine, but my low poly model doesn't . I assume there is something I am not doing right when exporting to UE. I know that blender, and blockbench have a different axis orientationn, also I make sure the pivot point is at the trigger area so when importing into UE, the trigger is at the origin( 0,0,0) . I have done several tests but nothing works. So my question is: Is there a special treatment that needs to be done before exporting and after importing the model into UE? I hope someone can enlighten me! Many thanks 


can someone explain what i gotta further do to have this dudes cloths with the same exact rig moves along with it, at first i thought it was broken, but ive done things like reimport meshes into the face making sure the face rig was right and i even remember doing something that shows that the face stuff works and isnt just broken, but when i do a cinimatic level sequence it doesnt seem to work, idk what my problem here is or how to fix it

Hey, everyone! Is there a way to create an animation asset from animation montage?
Hey anim folks, I'm thinking about releasing a plugin consisting of tools I've been building and using internally with my animation team in UE5.
The goal is to cut down on repetitive setup work and help keep animation assets clean and consistent. It’s been in daily use on our project for over a year and has saved a lot of time for the animators.
Here’s what it currently does:
Data Validation for naming and folders by Asset Type
You can define rules based on asset type. For example:
- Assets need a specific prefix and/or suffix
- Assets need to be in particular folders
It’s flexible and helps catch mistakes early so things stay organized
Animation Modifiers - Includes:
- A modifier for adding notifies and notify states in a structured, repeatable way
- A modifier that places footsync markers more reliably and efficiently than the one provided in UE5
These help eliminate tedious manual setup, reduce human error, and keep animation data consistent across large sets of assets.
Animation Sequence Setup templates. You can define presets that:
- Automatically apply animation sequence property settings
- Specify a list of anim modifiers to be added and applied
- Automatically create an Anim Montage using the Sequence
This is an Asset Action that makes importing large sets of animations faster, cleaner, and more consistent
Would this be useful in your workflow?
Would you consider paying for something like this if it saved you and your team time and helped keep things clean?
Happy to hear any thoughts, feedback, or ideas. Just trying to gauge if this is something other teams would find helpful.
Hey guys, I'm looking for some advice... turns out I made a dialogue system, and it's pretty big. For the animations when the text plays, I added a facial animation variable. But I'm starting to think that creating animation after animation for each text is going to be a bit stressful, and I'll need thousands of animations.
Can you advise me on what I should do? Perhaps a voice system that adjusts the morph target based on the audio being played? Thanks.
Lipsync plugin or/and a few basic gesture animations
i see a ynnk lipsync plugin, thanks.
Hello everyone. Extreme beginner here, going from modding unreal games to working on a project in Unreal Engine 5 using free/cheap assets.
I got the Phase character from the Paragon collection up and running in a project based on the Game Animation Sample. That was really easy to do.
However, her hair isn't animating, nor are the other various bits of cloth and string, etc. I don't have the same issue with the Twinblast character (also from the Paragon collection).
I noticed she doesn't have any cloth sim data on the mesh (whereas Twinblast does), but my knowledge of UE5 animation is pretty limited, and what I do know is based in UE4.
Can anyone point me in the right direction? At this point I'd be happy to just know what the problem is, haha.
Thanks!
Getting hair and clothes to animate is kind of advanced.
Well, like I said. I'm not really looking for a step-by-step solution so much as a sense of what might be wrong, as I gotta figure a lot of people have worked with these Paragon models.
Doing some sleuthing, I've noticed that neither Phase nor Gadget have Apex assets listed. Neither of their cloth seems to work- but it does work for Twinblast, who has Apex assets listed in all of his various skins.
hello friends, is setting the anim instance class inside blueprint for a pawn's mesh a bad idea for performance? i plan on changing the pawn's anim instance class whenever the player switches between first and third person
Hello, does anyone know why OnBecomeRelevant and OnUpdate might not be called at all at a running Sequence Player in an ABP?
I have this sequence player that's being used to animate the character, but after I moved it from my main ABP to a layer, it's not called anymore. I tried re-creating it, and re-assigning the functions manually to make sure that there's nothing wrong with that, but it didn't help.
The way I understand that it's not being called is by opening the function, and checking whether there's anything being executed on runtime, and obviously by seeing that Update is not changing the values for certain actions in the final game

I also tried checking in this setting on the sequence, but it didn't help

Also putting the OnUpdate on any animation node in the entire animation layer doesn't call it every frame. It only calls it once when the layer is added, but that's it

Apparently I had to set Sync Method to anything besides None to fix it
I just watched this GDC talk on procedural animation:
https://youtu.be/LNidsMesxSE?si=Z_BxFsgydiQpDQSf
And I had the idea to create linear animations between 2 or more key frames with 1 second length and then use timelines to control the playback of said animations and get the poses per current frame for each concurrent animation (like walking and crouching) and then blend those poses together somehow programmatically.
Is this a good approach and is there a good way to blend multiple poses together?

In this 2014 GDC session, indie developer David Rosen explains how to use simple procedural techniques to achieve interactive and fluid animations using very few key frames, with examples from indie games like Overgrowth, Receiver and Black Shades.
GDC talks cover a range of developmental topics including game design, programming, audio, visual...
Unfortunately not. I am a bit baffled by where I might make the mistake. I can read, searching the web, that other people have a hard time getting the left hand IK to work through CR. But it should be possible, right?


I have an issue in which the server player cannot see the animation that the client does, and neither the client cannot see the animation that the server does, why is that happening?
But they can see eachother walking by, why is this happening?
I am doing this on C++, in the ss you will find the code part which gets called
I am trying to replicate an animation sequence

I managed to get the worst lag out of the way by referencing my weapon in the ABP of my Hero, rather than property accessing it in the ABP from my BP_Hero. The left hand is still catching up slightly to the right though, when I move the mouse wildly.
Hello, does anyone know why a linked layer might not get the blueprint threadsafe update animation called at all?
And another problem I have. I'm trying to finish my turn in place, I'm doing what Lyra does, and the problem appears around the UpdateRootBone. I set the root bone yaw to the one the character should be facing, and it does work, however the mesh doesn't seem to follow it instantly or something. It's also visible if I attach a hat on the character. In case I do that as a separate actor rather than a component in the character that's directly attach to the mesh component, it'll have this weird lag. It looks like the hat is updating its position quicker compared to the cosmetics body.
I do the same thing Lyra does in this case as well. I have an invisible body to update the animations, and then all the modular parts that simply copy the pose of that invisible mesh, so that I can easily separate the character and its animations off the cosmetics
Can anyone guide me on how to key every frame of the root bone from the start of the animation to the end like shown in this image, I need it for root motion

More like transfer pelvis motion to root bone
If I have a lot of additive track edits to an animation, is it good practice to bake this down into a new anim sequence with the changes? For performance reasons if I'm doing these edits on all anims in a locomotion set for example?

There is no Z translation data on a jump attack animation is there anyway I can use these animations
add Z translation
the hip translates though the hip goes up but the root stays andbecause of that I'm unable to use the root motion and the entire animation becomes useless

when exporting models from blender to unreal engine, why does the model certain parts are not placed correctly?

Hi folks, I'm experimenting with baking procedural animation as a way to create or modify anim sequences for specific needs. I'm fairly new to using the Sequencer in UE5. Does anyone know if it's possible to bake an animation sequence from an actor with a skeletal mesh component?
As an example, let's say I had a character actor set up with IK and wanted to bake a walk cycle out to an anim sequence, with the IK baked in. My thinking is that I can configure the actor to walk the desired speed/distance, tweak its behaviour, and then somehow use Sequencer to bake out its skeleton as anim sequence. So far I can't figure out how to do this.
Another option is to write a component that extracts the skeletal mesh transforms and saves them to a sequence, and not use the Sequencer at all
I’m facing a similar issue, I have the pelvis bone with movement and not the root bone, I want the root bone to move for rootmotion
I can't figure out how to play an animation using an animation blueprint without using a state machine.
Is there any way to achive this?
im trying to essentialy blend the dual sword state in my gasp animation blueprint with gasp itself but i keep running into problems, i got the leaning and aim offset with the climbing working damn near perfectly, but i cannot for the life of me get the proper turn in place or turn while moving animations to work, the player just sorta snaps to the appropriate direction hes supposed to face when moving forward while camera is facing a seperate direction than the mesh, and for some reason every time i end a climb or traversal that gasp has, if my dual swords variable is true, it always re enters dual sword state which is good, except it always plays the entry animation which is my unsheath swords anim, is there a way to get all this fixed easily? i would also like to blend the dual sword state more with the gasp running animations because currently just the lean and aim offset are applied and the sword animations im using are kinda floaty and i absolutely do not feel like making a complete new set

I'm completely a beginner BTW, besides some fundamentals
hi, is there a way of making an animation clip be compatible with all skeleton types? (UE4 Skeleton, Metahuman, UEFN, UE5 Manny, Mixamo, CC4)
I am not talking about retargeting the animation clip and therefore creating a duplicate of it for each of those skeletons, but rather getting the same animation clip to work on all those skeleton types so that in theory my game can have character models coming from different sources and skeleton types but all of them using the same set of animations I already have in the project.
an animation basically maps bone names to transforms at a particular time.
keyword being “bone names” so unfortunately that wouldn’t work since the skeletons won’t have the same bone names or structure
unless you can come up with a way to make it work, that would be genius
in Unity it does work, Unity does automatic retargeting regardless of the bone names. If bobe names are the only issue, perhaps there is a way to make a one time “Name Remapping” file between those common skeleton types?
You'll need to check your origins and transformations on each object when exporting from blender
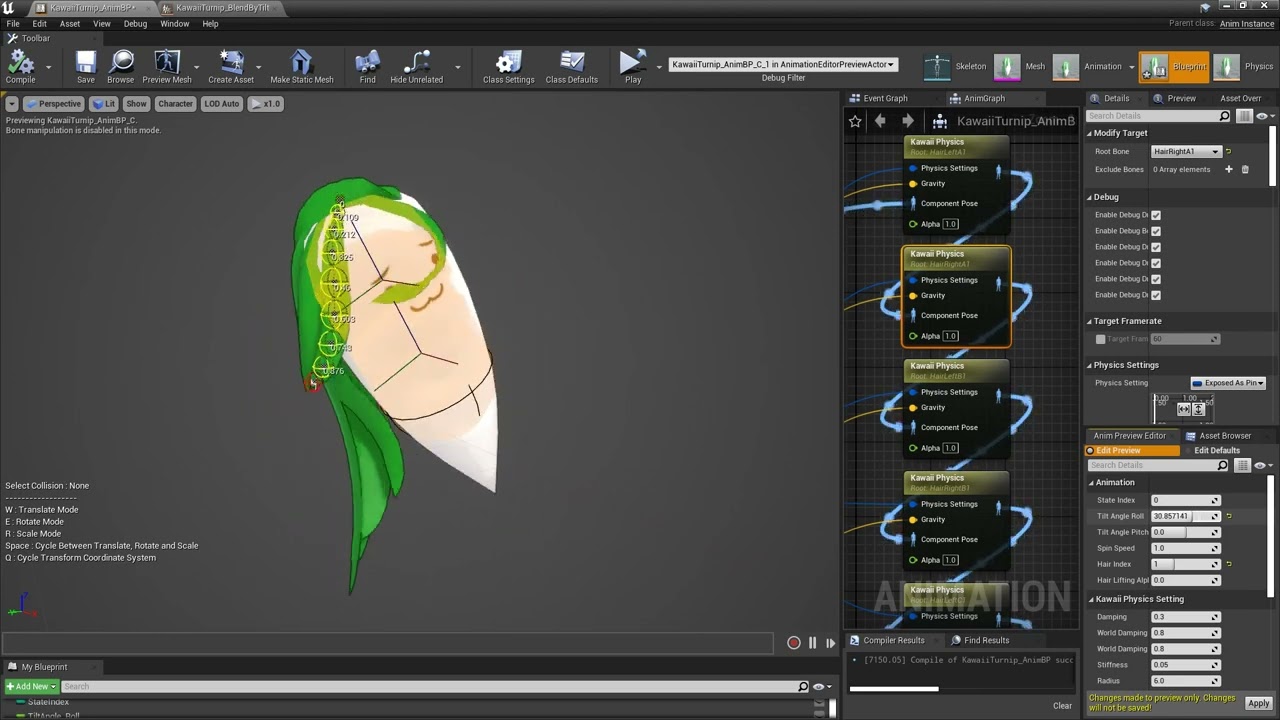
Strand parts with Kawaii Physics are jerky when I set gravity not equal to 0.
How do I make them smoother ?
Is it better in later versions of Unreal Engine ?
Strand parts with Kawaii Physics are jerky when I set gravity not equal to 0.
How do I make them smoother ?
Is it better in later versions of Unreal Engine ?
Still looking for a solution. Here I got a better visualization in slomo
nvm, found the solution
https://forums.unrealengine.com/t/copy-pose-from-mesh-1-frame-lag/486877
Epic Developer Community Forums
I’m using the “Copy Pose From Mesh” node for my character’s cloths and it lags behind the parent pose by one frame so it’s unusable. Any idea how to fix? I read it can be fixed if you let the parent component tick once beforehand but nothing I do to achieve this works. Even making a new actor after a delay then using that didn’t work.
yeah but i thought you said without retargeting. Retargeting still follows the same concept, the bone is mapped to the original bone then to the transform…
it can’t magically figure it out… you can do this at runtime or use a database(or asset) that does that…
also do take into consideration the bone orientation in the rest pose…
For anyone interested, it looks like this can be done via the Take Recorder, which I've just learned about for the first time
Hey, I'm using a 2 Way Blend node and I'm wondering when Animation B starts playing. Is it when the blend value reaches 1 or when it starts increasing from 0? I'm trying to blend between two animations, BalloonGroundLift and BalloonGround, and I want Animation B to start playing as soon as the blend value starts increasing from 0, not just when it reaches 1.
Also, I'm not using character animation, but rather a blendspace for other purposes. However, using a blendspace means all animations in the graph will loop, which isn't what I want. I want the BalloonGroundLift and BalloonGround animations to hold their last frame and not loop.
To confirm, does a StateMachine blend animations or just switch between them? I've been using it, but it seems to only switch animations and not blend. Can someone clarify this for me?
i have created a state now and i can setup all the switching rule but the main question now is the
blending rule ??

Do any of you cuties have experience working with Game Animation Sample? I'm trying to add some additional features like blendspaces for dashing and aiming a pistol, etc., but this animbp is way more advanced than anything I've worked with before. Just trying to figure out what my starting point should be.
There is a problem that I've been facing for a long time now. To create some basic animations. I use level sequencer, select my character, add an animation normally just the idle one as the base and then add a control rig to edit that animation but most of the time when I add the control rig. My character resets to the T pose and doesn't move with the animation even if I move the time line. Normally after retrying it for like 4-5 times. It sometimes works but I am sick of this problem, does anyone know if I am doing something wrong please help me.
I have a little bit of experience with it
We've updated our current playable character 3D model and there are some animations that no matter the retargeting option, mess up the face mesh. We want to avoid re-animating all these animation clips (because of "things" the original maya files are lost), what should we do in this case? Is there a way to delete the face keyframes of certain animations in UE?
Its not much different then a regular abp, just gotta do whatever extra stuff with all the GASP stufff as the base pose for whatever blend method you go with (Layered blend per bone where you can separate the upperbody for example)

How do I trim frames? I right click on the frame bar in an Animation Sequence where I want to trim, and select the open frame 6 to end... but nothing happens?

Thanks for this. I have a couple of quick follow-ups. Do you mind if I DM you?
Hey guys, having some issues with using root motion on AI characters. Ive got a turn animation where the character turns around to face the player. Animation wise all its doing is spinning the root bone (and by extension the rest of the character) 180 degrees.
and it works but for some reason he snaps back to his original position as soon as the animation finishes. Is there a setting im missing or something I need to tell the AI to do so it respects that new rotation?
Ive already tried enabling "allow physics rotation during anim root motion" but that didnt do anything to fix it
The other major issue I ran into was that in the 5.5 version of the project, they do all of the variable updating in thread safe function. So even when I had an idea for how to work with their abp, I couldn't implement it because the typical way I'd do it wasn't thread safe. Does your video cover that or do you know where I can chase down some info on it?
funny enough I just learned thread safe methods, ill find the video in a sec
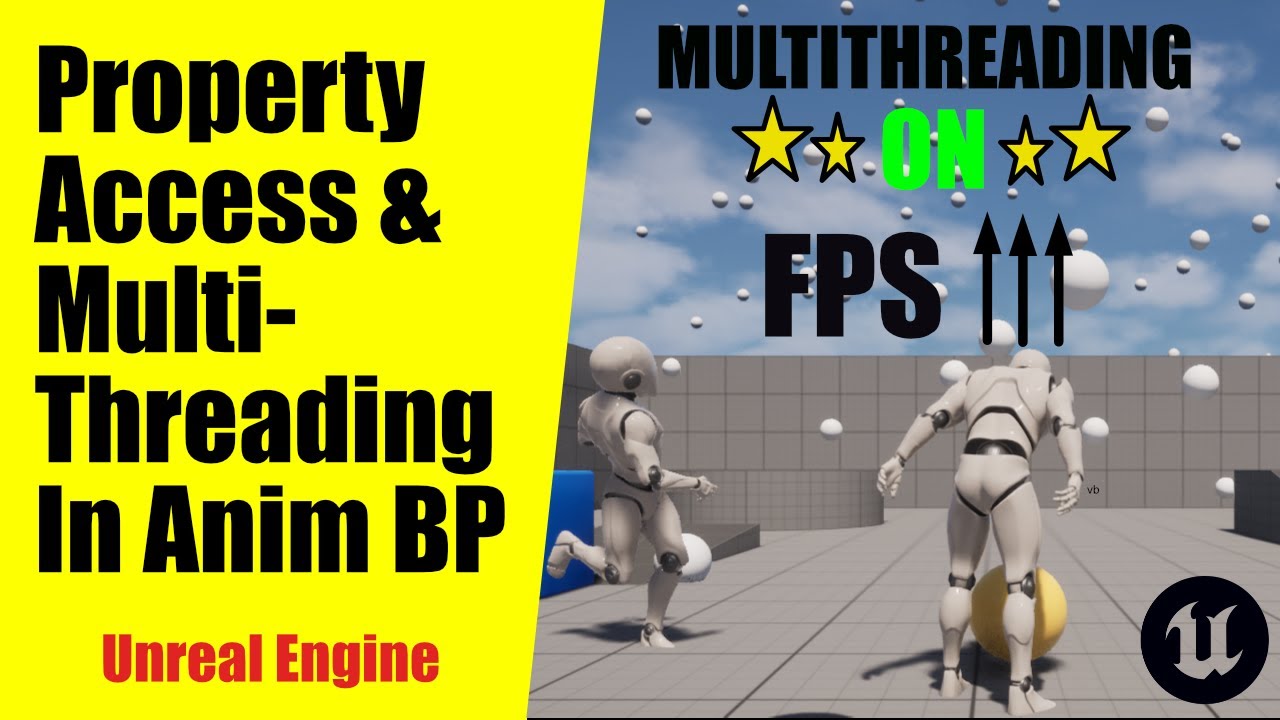
In this Unreal Engine 5 tutorial, we unlock the power of multithreading in Animation Blueprints using the built-in Property Access System and Blueprint Thread-Safe Update Functions.
We’ll demonstrate how simple optimizations can significantly boost performance, ensuring smooth and scalable animations for your game.
Key topics covered:
✅ Pr...
Fantastic video on it
root motion is enabled in the animation right?
yes I have enable root motion checked but no other root motion seeting checked
this action also ends the tree currently so there shouldn't be anything else overriding it for example
double check your enemies ABP and see the root motion mode. Looks like by default its set to ignore rootmotion. Could always visualize collisions to see if its actually moving with it. Id assume its the capsule isnt rotating with it currently cause the ABP
Awesome, thank you.
No probs, goodluck with your project!
its set to use root motion from montages, which is what the turn is. Unless this is handled slightly differently for AI characters

outside my curiousity on if the other none ignore methods do now, im at a loss here. I havent had rootmotion issues with my ai and couldnt see why itd be any different
I did run into a similar problem on the player character where character movment was seemingly fighting the root motion causing snapping issues.
I worked around that by disabling input durring root motion animations. Is there something similar I could do for the AI? like prevent it from trying to navigate or send an "input" while that animation is playing?
might be worth looking into animation notifies to call code during animations/montages, for an example workaround disable the root motion on the animation and then add a notify to the montage and lerp the rotation instead via said notify. Notifies are also how you can alternatively add extras like vfx, audio etc.
Ya im familiar with notifies im using quite a few of them in my project currently.
Its also how I did the whole pausing player input thing for the duration of the root motion.
I just figured using root motion for the ai turning would be better to make it a lot more controlled
Is there anyway I can for example tell the AI to stop whatever it's currently doing when the animation starts? Cause I'm wondering if maybe it's trying to finish or continue it's pathfinding and thats breaking it
probably a better question for #gameplay-ai then.
I’m having an issue where I’m mapping gameplay tags to properties in my AnimBP (like in lyra) and one tag works fine, another just doesn’t work. I’ve checked that the tag is applied on my characters end, but the anim BP doesn’t recognize the tag. Both tags are applied the same, but if i make a custom interface to read the value of the tag from the character, the anim BP does finally acknowledge it, but the binding just doesnt work
If I print string in the anim BP, it comes back false for having the tag, but my character is true.
This is PIE standalone, not even client
There's no way to import animation splines from blender to UE is there?
Spline path yes u can
But animation have not thought of that yet
I created a plugin that allows you to easily export ur spline from blender to unreal
But works only on the level editor and not inside the blueprint actor
Hey guys, I'm trying to create a system that scrubs through an animation timeline in real-time using an input value. For example, if the animation is 10 seconds, I want to use a float or integer value to update the current frame of the animation in real-time without playing the animation.
I've tried using an Animation Blueprint, where I converted the animation position to an input and set the play rate to 0. This approach works when I compile the animation blueprint, but it doesn't work at runtime.
Is there a way to make this work, or is there a better approach to achieve this?
I'd follow this man's voice into hell itself.
Okay, so I got this basically working, but ran into a weird quirk: Because of the way the GASP ABP is written, it's not actually changing blendspaces (it doesn't actually seem to use them at all?), so my BS can't reset like it normally would when the ABP switches to another state/blendspace. The result is my character does the correct animation once, then plays the rest of the animation in bits and pieces until the animation itself loops. Is there a hack to get around this?

how come when i import uasset files, specifically anims into ue5 5.5.4, with their respective file paths staying the same, the anims lose their skeleton and the mesh and skeleton lose their data and the skeleton attatched, resulting in me creating a new skeleton to replace it, which removes all anim data
Hello, I'm currently having an issue with leaning in my game. I'm wanting to add a lean mechanic and I thought it would've been as easy as rotating the spine_02 bone on the skeleton (which it is). But I'm current having an issue with the IK, the IK of the weapon isn't actually parented to anything under the spine_02 bone, so when I lean my character the weapon bone stays where it is, and the IK hands stay attached to the weapon.
I was wondering, does anybody have any solutions to an issue like this? Somehow 'parent' the ik bone underneath the spine bone or something so the gun bone moves along with the rest of the rig?


I had this exact same issue when I added accelerative lean to my character animations. AFAIK there's no way around it other than finding a way to inherit the rotation at the weapon bone.
I use a blend space for the leaning and added rotation to the weapon bone
if you want to do it entire procedurally you can probably do it with control rig
Im using an asset pack for my animations, the walk is a little short stepped, when making the walk/run blendspace i liked a blend between the walk and the jog and wanted to know if there was a way to take a point between 2 animations and get the result as its own animation
i have a pose asset that when set to 1 it puts my character into a t pose - how do i add that pose asset to an animBP and set it to 1?
Hi folks. I have some anim sequences of walk cycles with some foot slipping that I want to correct (the foot slipping is in the anims, not resulting from anim / move speed mismatch). Are the anim & IK tools in UE5 mature enough to try to do that in UE5, or should I kick these out to Blender and fix them there? I'm just wondering whether the UE5 tools are worth trying out as I know Epic have been working on them in recent years.
I've been doing something similar to this recently, you can bake new anim sequences using the Sequencer. If you need runtime behaviour you can also use the Take Recorder to capture changes to the skeleton in-game, then bake that to an anim sequence via Sequencer
(there might be a simpler way)
Damn... that's a shame. I'm not too familiar with control rigs - but I assume I'd have to do something along the lines of getting the transformation from a bone parented under spine_02 then set the transform of the ik_hand_gun bone?
Because if that's the case, I've tried that before and the transformations have all been off
Well it sounds like your IK is working correctly, but you need to apply the lean transform to the weapon bone as well as the spine. It's been a minute since I touched control rig but I do believe you can do this. You can create "spaces" in control rig, parent controls to that space, and then copy the transform of the controls to the bones you want to influence. It's basically like setting up a proxy parent-child relationship that doesn't exist in your normal skeleton
Unless your Ik bone is the thing giving issues
Blend space works very well for lean as well, probably a lot easier to set up too
But for a blendspace, wouldn't I need to make leaning left and right poses manually?
Yes but it's pretty simple
I've only ever used blendspaces for manually made animations before, so if you can procedurally manipulate bones in a blendspace, that's pretty damn cool...
Ah okay
you can't procedurally control the bones in the blend space, but you can set the blend space up where input 0 = no lean, input 1 = max lean
and you calculate your alpha in animbp, based on acceleration or whatever you want
I can show you a screenshot of what I mean if you want
Yeah okay, I'll give the control rig method a try first - and if that doesn't work then I'll resort to the blendspace. It'll just be a bit of a pain in the ass making leaning animations for each weapon 😅
oh you shouldn't need to make them for each weapon
are you applying the lean additively?
Do you mean right now?
nvm forgot you said you're setting the transform yourself
I'm rotating the Y axis of the spine_02 bone based on the lean angle I give it on an input, not sure if that's an additive animation or not?
if you apply the lean blend space additively it will be just one blend space for all animations
gotcha
Ahh okay
Yeah it's actually a perfect use case for additive blending
I'll give it a shot then, thank you so much for your help 🙂
np, you can dm me if its a headache, I can send screenshots of a similar setup
Haha no worries, I'll definitely be taking you up on that offer if I get stuck haha. Thank you again 🙂
Hello, I've got a question using 3ds max and import the result to UE
I've purchased an asset of blooming rose but it only provides .max file but I have no knowledge how to correctly export it as fbx and import it
When I tried to export it as fbx and preview the result, the starting frame looks different from that of viewport in max
I've already went through the unreal doc but still I could not figure things out
How should I deal with this? Thanks for help in advance!


Hi everyone, I’m currently struggling a bit with an animation development problem and wanted to see if folks here have deeper tribal knowledge in some of these systems than I do.
My problem is relatively straightforward; I want to rotate a character using a Root Motion enabled animation, but I want the rotation to match an angle value I provide. Say I have a 90 degree turn animation but I need to turn 110 degrees instead, I want this to essentially “modify” the root motion values so it matches the expected degree amount and the animation looks clean.
I’ve been looking through examples in Lyra and Valley of the Ancients, but Lyra uses exact 90-degree rotation through root motion without modification, and Valley of the Ancients modifies a curve on an animation but forcefully sets the character’s actor rotation within its ABP. Both of those are approaches I would like to avoid if at all possible. Additionally, I attempted to use motion warping with rotation values changing only, but it seems motion warping cannot be triggered on animation sequences within an ABP the same way it is triggered on montages, hence my hangup.
Any help would be much appreciated!
Hello everyone. I'm relatively new to UE and recently tried to add a few characters to GASP, to test some edge cases. One character with inhuman, but still humanoid proportions isn't behaving well while grasping the ledges (the rest of the animations work surprisingly well). Where can be the issue? Any hint would be appreciated. Thanks!
I have some animations that involve lying down and getting up that I retargeted from mixamo. They are all over the place when I place them in a contextual anim scene and I think this is because it is trying to keep the root directly below the hip (relative rotation). I set the horizontal scale translation to 0 in an IKRetargeter and this kind of fixes the issue but it still has two problems:
- The feet are sliding slightly
- When selected in the contextual anim scene, the feet are locked to the root and are not where they should be
The second issue is the main one as I am not too worried about foot sliding at this stage but if there is any easy fix I am missing, that would be great.

Hi folks, I'm attempting to edit an anim sequence using the control rig, and I'm new to this workflow. I'm trying to correct some foot sliding in the animation, and the control rig allows me to move the foot to where I want it on a frame-by-frame basis, with IK handling the upper leg bones. What I'd ideally like to do is select a frame and lock the foot bone in position and then clear the lock after N frames, which would save me from having to do the manual correction for every frame. Is this possible, and if so how do I do it? Thanks!
Hey I’m using the motion matching and choosers with the new 500 animations. I’m trying to use it on the ue5 manny but I have a problem with the running and walking PSD database. When I try to do a pivot it doesn’t use the pivot animations since the chooser state goes to the walking database. The only difference between running and walking database is velocity. How does the chooser state stay using the running database when someone pivots quickly?
Anyone know a quick fix to stop this from snapping to the animation and make it blend?
I found a Root motion generator under post settings that solved the sliding issue but I am still unsure on how to prevent the feet locking to the floor at the root
ABP inheritance:
I'm about to start making a bunch of animals and was wondering whether everyone of them would need a seperate ABP or if there's a way of them sharing one, although they might have different skeletons?
duplicating ABPs seems a bit against UEs otherwise inheritance workflow, so I was wondering whether there's another solution.
When I shoot my gun I play a montage and that montage causes my animation state tree to bug out and play from the idle and then it takes a bit to transition back to aiming, what can I do to fix this
so i'll be aiming and when I fire by montage puts my tree back to idle and then it reads the bool and transitions back to aiming but this is whack
hey guys, im looking for an easy way to bind the ue4 manequin skeleton to a custom character, does any 1 know how to do this? or do i really have to go through blender and do all that time consuming stuff?
after im trying to retarget animations from the GameAnimationSample my engine crashes. Im trying to retarget the animation to the skeletal mesh of the metahuman
am i doing something wrong?

hi guys. why abp can stop working when enemy is patrolling?
Hello, I'm trying to use aim offset for my pistol aiming, but the ik_hand_gun gets offset in the aim offset asset, and so it does in the final blend.
First screenshot is the aim forward, the second one idle, and the third one is forward from AO. The additive settings I'm using is AdditiveAnimType MeshSpace, and BasePoseType is SelectedAnimationFrame, and it's referencing the frame 1 from idle pistol.
Does anyone know why it might offset the bone that much in the AO?


How do I add an animation component in my Character blueprint. Because in my project, I have a basketball player character that has its own animation, and I also have an independent ball animation. How do I stack the animation to it or do a sync animations?
I have this dragon animation in blender and it’s working fine in it
but when i try to export this animation in unreal the root motion path is correct but the mesh is going somewhere else
some solution i saw before but not worked yet
some import thing i have scale x as -1 in blender (i can’t use apply transform)
and export as forward as -z and up as Y
It turns out that I had some problem with AO. Recreating it from scratch fixed the bone location when it's not interpolating between different animations, but now the interpolation is the problem. How do people usually fix it?
Anyone know how I can turn my anim blueprint into a anim sequence?

Hello animators (and fello struggle bus riders). Does anyone know if there's a way to resolve this uncanny vulture neck problem that Twinblast has after being migrated to and setup in the GASP-ALS project?

You can actually hit the red record button on the anim BP, set how much time you want to record for, and it will turn it into an anim sequence
Has anyone had a problem where they can't add any other animation in a blend space after adding the first animation? It only does that for certain animations and I can't figure out why
Figured it out, the animation pack I was got the animations from had Additive Animation settings enabled, had to set it to "No additive" and I can now add all of them into the blendspace
hey does anyone have a good source for making a player sit in ue? i’ve looked up a lot of youtube videos but none of them seem like a good workflow, seems like they are all jimmyrigging it to work
HI Physics asset , all areas work fine just the elbow spagettify, any tips?

Can someone help please, I've been stuck on this bug for 24 hrs 😢 It will only let me do one, either charge spell or shoot spell
HELLO! please help me, I have a problem, why does this error happen?

all the anims have right skeleton
I'm trying to import a flashlight model that I made in 3ds max. It's been a long time since I've messed with 3ds max and custom models - I can't' seem to get it to import as a skeletal mesh. It keeps importing it as three separate static meshes. Any idea on what I am doing wrong?

Or the best I've gotten so far is that it is one static mesh
I've even tried to check "Force as type: Skeletal Mesh"
I have added a key and edited an animation sequence but in the montage it get's reset what can I do for it to take effect in montage as well


On simulated bones is there an obvious option to have the bone react to the players velocity?
Like if I move to the right, ears will drag to the left
bleh, seems like it was just the linear damping, i'm all good
Hello, I had a question about the performance of animation curves in an animation sequence: Specifically, does Unreal automatically ignore curves that have no change in data at runtime, or will it evaluate all the curves no matter what?
For example, I'm running a metahuman on a mobile device. My metahuman head animation clip has around 4000 curves in it. Is it worth the effort to go in and manually delete all the curves that sit at 0, or does UE just ignore those curves anyways?
Thanks!
When you import a mesh through fbx, does unreal engine treat everything as a separate mesh if there is a disconnect in verticies, even if in 3ds max the mesh is one object?
If it's one object in 3DS Max, it should come in as one mesh when imported via FBX.
There is some flexibility if you export an FBX with multiple objects. In that case, there is a 'Combine Meshes' checkbox in the import settings where you can say if you want the fbx to be imported as one mesh or as separate meshes
Hello again animation chads. I'm working on a project based on GASP-ALS (thus it has a trillion squintillion locomotion anims with a giga tetra poketrillion foley events).
Is there a way, however hack-y, to use those existing foley events to drive noise-making for an AI stealth/detection system? Or am I doomed to go into all of those animations and manually place a ton of my own footstep animnotifies?
I figured out my problem was just not knowing how to deal with the way substance painter was modifying the mesh's uvs
I turned off the auto-unwrap and the process went as I remembered doing it last time. I do have a new issue, however. This is a new thing I am trying. I am trying to make the lens mostly transparent and then stick a light behind it. The issue is, the opacity doesn't seem to be doing anything and the light is not shining through it. Does anyone have any suggestions?
Oops, this is in animation still. I'll go ask it in the graphics channel.
Hi guys
I followed a tutorial to make my character rotate a car's steering wheel
and I used IK to attach the hands to the wheel
but once the car accelerates, the hands start lagging/falling behind and do not stick with on the wheel
this happens in 5.5
does anyone know how to fix that?
I hope someone can help cos Im stuck for hours
wild assumption your car is physics based and ik location is calculated on tick, so they are calculated at different times
so you have to change the timing of the tick that calculates the IK location to post-physics
I tried all of the tick settings and it's the same
you mean the tick of the skeletal mesh right?
no the code that actually calculates the IK transform
this is what I have, not sure what to do as I'm not very advanced with this

right- and left arm location variables, what ever calculates those
or alternatively if you can't change the tick timing, add velocity*deltatime to their location to get rought estimate where the hands should be
could you please show an example of how that would look?
you should read about tick groups yourself https://dev.epicgames.com/documentation/en-us/unreal-engine/actor-ticking-in-unreal-engine

Epic Games Developer
Explanation of the ticking system used to update Actors each frame.
and I'm fairly sure animations have their own tick group too
but this is important stuff to know
I will do now, just animation is not my area and Im doing a one time task, so I'm not sure what exactly I need to do
your IK data is "old" thus it lags behind the vehicle, you just have to find out where to get the latest info
there are several ways to fix it depending how your project is set up so I can't give you one right answer
Does someone know if it is possible to use 'Update Rate Optimization' without it smoothing out step interpolations?
I have animations with constant/step interpolations. Those should teleport from one point to another. In the animation asset this is happening as desired and it is also happening in game when the setting on the skeletal mesh for ‘Update Rate Optimization’ is off. However when Update Rate Optimization is on, it seems to be smoothing out the step interpolation frames, so that there is visible movement between the keyframes. It is not only this cube, but complex animations with lots of bones, so we would like to use Update Rate Optimizations for performance. The animation asset is also set to Step Interpolation.
So I am wondering if it is it possible to have update rate optimization without the smoothing out of Step Interpolation frames? I appreciate any insights on this.
First video is without Update Rate Optimization and looks as expected. Second video is with update rate optimization, messing up the step interpolations.


for the car I'm using the base UE vehicle template. And for the driver I just used a tutorial to set up the IK and the steering wheel
can you suggest any tutorial that would help me with that?
Hello guys, for a few days I am trying to fix my character BlendSpace 8-directional movement locomotion system, but I'm out of ideas on how to fix it and how other people deal with it. The problem is that Blend Space automatically syncs position of the feet when transitioning between animations which leads to this clipping issue between legs. If anyone knows, please tell me how to deal with this problem. It would seem that this problem should arise for a huge number of developers, but I could only find two threads on unreal forum about that when no one answered authors.
hey there - i retargeted the manny walk animation for my character.
the animation looks fine but in actual gameplay it looks... disturbing
i have root motion turned off in the animation asset but that doesn't seem to apply in the abp

Looks like you are running mannequin animation instead of one which you made by retargeting.
thats what i thought too but double checking it appears the same
at least when i drag that one in
maybe since it has the same name it's swapping
yeah its the retargeted one :/
Is it work correctly in animation blueprint?
let me try w just that animation in the abp
oddly it seems to work fine when its not transitioning
but when its in the state machine it messes up

standard state machine setup aside from what the "idle" is
the "idle" state is a combo of vr and mocap

but even if i unplug this stuff ^ from the output animation pose it does the same thing
the other weird thing is if i retarget a mixamo walking animation it works almost as intended aside from an odd leg thing from a poor retarget i imagine
Well, on your video animation itself work fine, so I don't think something wrong with animation.
correct something about the state machine seems to be causing this while not affecting other animations
Hello, my skeletal mesh imported from the .glb format is not working with animation montages played from blueprint. Does anyone know why this could be happening? They just set my skeletal mesh back to the default pose
HI guys, can anyone help me with this? I'm really stuck for 2 days and Im sure you are experts and know how to fix it in a minute 😦
Hi all, can anyone advise on a way to exaggerate facial animations using animation blueprints? I have a face rig based on metahuman and I’d like to take all the bones for the face or parts of the face like the eyebrows and amp them up by 50-75%. I could export to Houdini and do it there but there’s 10+ long takes and I’d love to avoid a round trip if possible and stay in engine 🙏
when i try to import my animations i keep getting this error:
LogInterchangeEngine: [Pending] Importing - Operation completed.
LogInterchangeEngine: Error: [Failure] Import Failed```is there a way to make ik bones to a custom character similar to manny's in unreal engine or would they need to be added in something like maya?

or would i be able to just make sockets that do the same thing?
like would i be able to make sockets of the root and use those as the ik readers for foot placement?
Why did someone think it would be a good idea to make animation mode not let you move around the scene with the LMB? Like, what was the thought process there? It's so annoying.
So I have to fight the scene just to get the angle I want
is there a way I can offset hands to not go through a dress?
I know I could do it somewhat programmatically with traces but is there a built in way to do it?

2 Options add them in Unreals Skm Editor or use virtual bones, id go with the first👌🏼
Additive animations
@barren fiber is there any documentation on those? I heard of it but never found anything about it.
Good day. I am trying to play a sound only while a bone rotates (turret) and stop when not rotating. Could anyone please assist by pointing me in the direction of a video or tutorial I could follow for this. Thanks in advance.
Hello.
Can I call an event withing an animation BP when a particular animation / state has finished playing?
I want the ABP to do something when SomeAnimation has finished playing.


im not sure check youtube!!
otherwise a google could also unveil if there is cause if i google this now, and its not hard to find 😂
😂

@barren fiber thanks. I was asking in ase there was a compendium or something. A lot of online stuff is just jibber jabber 😦
additive animations are not that complex, so jibber jabber is enough to understand it
Has anyone ever done anything for the left hand on a gun where they dynamically get the offest of the left hand based on the right hand using a given pose, then apply that offset on the actual pose from the animgraph? I'm not sure if thats possible given the way the Transform Bone and Copy Bone work right now, but the idea was to have a single frame pose for the default hand positions on a gun, rather than having hard coded offset values.
I'm trying to make it possible to use a locomotion anim set for the rifle that doesn't always keep the left hand perfectly attached to the gun, and also to be able to accomodate various different guns that would require different left hand positions, without needing to re-animate the locomotion set for each one.
that would be called left hand ik
sure, I already use a control rig for left hand ik, but the issue is actually getting that left hand transform
if I have a static pose that has the left hand in the correct position/rotation in comparison to the right hand, then I need to somehow get the delta of the left hand from the space of the right hand, then take that delta, apply it to the actual animated pose's left hand in right hand space, then I can use IK to fix it up
I could probably just figure out the value,hard code it for each weapon and transform the bone correctly using that, but I was hoping to be able to just figure it out on the fly given an input pose and the animated pose
you can once the weapon has being attached get your socket and get the desired offset to your left hand update that one and adjust your right hand based on that
I have an animation i made using motion capture, however the feet keep floating, is there a guide on how to make the feet respect the ground?
tell it respect the ground
I don't think it can understand words
will try that! thanks
then you would have to adjust your pelvis???
in any software or even inside unreal?
and then maybe to fully make them respect the ground use foot ik?
Inside unreal
I did not setup an IK RIG, i should prob do that, thank you
you dont have to check youtube for simple foot ik
hey guys just a question but im getting started with animation after programming for quite a while in unreal
i was wondering is it worth to learn animation on blender or use unreal control rig?
How can I make a camera shake in unreal engine from an fbx camera animation file (made in blender) Video: https://www.veed.io/view/90dc2335-5068-4fa1-8b31-bb32db7ed526?panel=share
Project: https://drive.google.com/file/d/1v7Yr-CpQIBogH-pQ_suwj9lY7I9tu2DR/view?usp=sharing

If you're looking for a compendium, the official documentation would be the place to go: https://dev.epicgames.com/documentation/en-us/unreal-engine/unreal-engine-5-5-documentation?application_version=5.5


Epic Games Developer
Complete resources for learning to use Unreal Engine 5
I have a question, so I would be happy if someone could answer it for me. I want to make a boomer shooter. Now I am creating some weapons. If I had a gun with a magazine, is it better for the magazine to be as an separate asset or not? I want do so animation for reloading, firing,... I want to have empty magazine If I run out of ammo and grap a full one. This raises another question. Is it also better to have bullet as a separate asset like the magazines or I can have all these things as one asset with separated objects?
from this graph my chars run was deforming and i don't know how to fix it

i don't why this was happening
Hi folks, I'm trying to fix some issues with my animation blend spaces where some animations don't blend well together. I believe the issue is that I'm blending locomotion animations with inconsistent phase (that is, they don't all start and end on the same foot). I want to change my anim sequences to follow a standard (e.g. starting with left foot forwards), but I can't see an easy way to make this change to my anim sequences in editor. I know I can do it by shifting keyframes around in the Sequencer, but this will be time consuming for many sequences. Is there an easy way to set an anim playback offset in the anim blueprint or blend space?
deciding between blender and ue id go with Unreal, if you opting for free softwares, if money is a no brainer id go with either Cascadeur or Maya where maya is harder to master but allows for more creative freedom and industry standard toolsets which even can be enriched using third party plugins which is highly suggested
check your animation settings, but i think it has to do with something related to additive you apply?
im not 100 % sure but is there a setting inside the sequence player which allows you to change that?
there is not
you could do so as pleased, but seperating the meshes after rigging the assets would be way easier to handle you would spawn and unspawn objects during runtime, if you choose to go the otherway atleast seperate the bullets.
if not so, you could also scale the bullets, but i think first method is way easier to handle
Hello everyone.
I have a skeletal Mesh with 2 movements, two different Animation sequences going on at the same time. Its a 12th century block windmill. It turns into Wind direction with a joint at the bottom, and at the same time, the "Rotor" is cycling with the Speed of the Wind at an upper Joint.
How would you go about this?
I tried a 2d blendspace but couldnt make it work yet. I have a Wind Speed and a Wind direction as input Parameters for the state machine.
Any hints on that?
Or should i only look at the event graph in the Animation blueprint? Or do i need to bring two one dimensional blendspaces together with a Montage? Sorry i am not very familiar yet. Thanks a lot for your hints.
Sorry was it a noon Question?
I could Not find the answer in Animation blueprint Tutorials on YouTube but perhaps i was looking for the wrong Keywords?
made some motion capture with move.ai from a video of me punching.
when i retarget onto the ue5 Manny or the UEFN... everything looks great but the hands are.... like this. please let me know if you know how to just manually make the hands into fists.
the hands doing real bad lol

thats cool. If you make a fighting game, maybe find a budo black belt or boxer,
i think angle and acceleration is different for martial artists than for "us normal mortals"
(i am a humble white belt hahaha)
any cascadeur pros here? i'm trying to make an animation for a cinematic but the scene i exported from unreal is way out of the origin, but it also where it should be in the unreal scene so there won't be an issue with the animation after exporting it. i'm i thinking right? if so can i change the ground position in cascadeur for fulcrum points etc?

Why would I need a black belt? I like the animation, I’m just saying the hands are really messed up after targeting the animation to the UEFN mannequin
I just need help making the fists normal.
You use a layerd blend node and have them seperate you dont want them to be in a blendspace, do 2 seperate blendspaces 1d is fine, for your direction you apply that first then set the layered blend node to where your wind speed rotation is happening rotor joint and blend the other blendspace there
You could select all these meshes and just place them where you need them to
Auto generate the rtg asset and polish the result to get better results
how do i add the clamps and map stuff to the set curve value node?

I have a couple static meshes I found online that I want to use as characters, but they didn't come with a skeleton. When converting to a skeletal mesh, how would I go about making one skeleton I can use with all my characters? I've never really built a skeletal mesh from scratch before so Idk what else I would need, or even if there's a way I should make the skeleton
How can I animate unreal engines first person arms like you can with the 3rd person model?\
I think you're probably going to want to find a Blender community or tutorial series on Youtube for that one. I'm not a modeler myself, but I'm pretty confident you've got some work to do in blender before you can even bring it into UE5.
https://www.youtube.com/watch?v=6ATprCYty-Y&list=PLY2663dNRL_jFiYskUboWxAP1TgkgXZTd Rizzo Frizzo covers that both here and in his multiplayer FPS tutorial series.

The Military Weapons Dark and Military Weapons Silver asset packs are not available on Fab due to being long-abandoned by their creator. I have zipped a blank project with both weapons packs and uploaded it to Drive for use with my tutorials. Download it via the link below, extract the project and open it, select both weapons pack folders and ri...
And speaking of being completely out of ones depth with animation stuff. I've run into this issue when retargeting my character for the GASP-ALS project. I know "fingers look broken after retargeting" is a common topic, but I'm really just trying to get to a point where the characters' hands are where they're supposed to be on the weapons they're holding. Can anyone point me in the right direction?


Hi, is anyone here sorta well versed with the Animation Sharing plugin? Trying to figure out how "blending" between states is supposed to work.
It doesn't work at all the way the docs have you set it up to.
Still snaps. Did some troubleshooting and the Sharing Transition Instance is activated but it always lingers on the ToComponent->Copy Pose From Mesh (plugged into the False Pose pin) for the chosen Blend Time (set in the AnimationSharingSetup), without actually blending between the 2 poses for that duration.
Just seems like it's not ticking
this is a long shot but this is the rig I have for a horse model my friend made, but I can't find tutorials for animating with bones in unreal engine... if that's even possible that is? I'm starting to give up on blender because all the tutorials I find are for autorig or set up bones themselves (and they look drastically different)

I have a question, Why doesn't the transform option appear? like this

bwt
I enabled the 'Import Only Animation' option when importing files to Unreal
You have an option, reimport and reimport with …. Click o the reimport with …. And you select there de transformation
The transform in the anim isnt anymore in 5.5
And double check if you need to select the skeleton mesh again
Reimport with details is the thing i think
And make sure you enable root motion there
Otherwise the anim will be bugged
thx man
Np
Hi guys I need help


I tried everything so far, watched tutorials, done IK Rigs, etc
what is going wrong with my character?
Either it doesn't work properly in the retargeter, or if it does, the exported animation asset is gigantic (last image)
please someone help me as Im stuck
Is a Aim Offset more performant than modifying individual bones?
Just wanted to share incase anyone was looking to do something like this and needed a quick start
Patreon - https://www.patreon.com/WildOxStudios
Integration of my Ready Player me SDK tool, web helper + Advanced Locomotion System integration!
5.1 full instructions video - https://youtu.be/tQE72-iJCWc
Visual Studio Instructions - https://www.youtube.com/watch?v=I3UtEk601XI
Discord - https://discord.gg/ZGxrJCMJwg
Join this channel to get acce...
Happy Developing!
is it possible to use animation layering on animation sequences and not just montages? like if I got a gun holding sequence, could I layer that onto the arms while also playing a walking blendspace?
yes it is, for anyone in the future who want sto know how to blend animations and blendspaces on top of one another this is the code

that layered blend per bone is filtering the arms
You guys ever run into this issue? Getting this in a brand new 5.5 project.
Control Rig - Hierarchy discrepancy for bone 'pelvis' - different parents on Control Rig vs SkeletalMesh.
Control Rig - Hierarchy discrepancy for bone 'ik_foot_root' - different parents on Control Rig vs SkeletalMesh.
Control Rig - Hierarchy discrepancy for bone 'ik_hand_root' - different parents on Control Rig vs SkeletalMesh.
Control Rig - Hierarchy discrepancy for bone 'interaction' - different parents on Control Rig vs SkeletalMesh.
Control Rig - Hierarchy discrepancy for bone 'center_of_mass' - different parents on Control Rig vs SkeletalMesh.
Transition Jump to Fall Loop is using an automatic transition rule but the source Sequence Player 'MM_Jump' is set as looping. Please clear the 'Loop Animation' flag
Fix seems pretty self explanatory, mostly just curious if it's something I did or not
Screaming into the void here, but does anyone know why my pose asset doesn't take on the transforms from the animation I create it from?
_ _
https://gyazo.com/6ce742debcf695d8a9466e2ccc8c09cc

Hi. Has anyone faced the following situation (bug, maybe)?
You have two montages and the second one is bound to OnBlendout event of the first one. The first montage has blendTime=0.0f. In game after the first montage has been played and before the second one begins there is 1 frame of "default" pose?
I found a thread on forum where isomebody from 2022 says it's a bug to be fixed, but still..
https://forums.unrealengine.com/t/montage-blends-out-from-the-next-setion/549987/3
something like this
Hey anyone knows 3d animation? I need editor
i have a question about animations, particularly how i should make one. I use anim montages to play my attack animations since my game is local and it was the best way (at the time as I was pretty new to animation) to play them, but thats just context to my question. All my attack anims right now are in place, so the player model doesn't move from 0,0 in Blender. I want to add a spear type weapon with one of the attacks being a charge (running charge not charged attack) would I animate it in place and try to alter my damage logic to account for the movement, or would I animate it how it would play out?
Hey y'all, i think i set up my ABP wrong. Or maybe my character BP - but i believe it's animation related.
When i'm holding walk right but am looking to the left side of the screen (2.5D platformer) the player basically begins moonwalking.
Is there an easy way to get them to backpeddle instead (already have animation) or am i gonna have to start foolin' and Boolin' ?


I have a character where the Two Bone IK node for foot IK is resulting in the knee bending backwards. Indeed, in the IK Rig editor I could see the knee bend backwards by default-- but I was able to fix that by inverting the Preferred Angle on that bone. I'm not certain how to perform a similar fix for the Two Bone IK node -- how would I do that (in engine)?
hi all - is there a way to set an animations rotation baed on the child's rotation and not the parent / roots rotation?
I have a few ideas for how to solve it without understanding why it happened, but in the interest of understanding wtf...
...why would a retargetted animation look perfect, show the correct amount of movement from its starting place with the little red line without rootmotion being extracted, but send the mesh rocketing over the horizon as it moves around 100x what it should with rootmotion extracted?
hello - I imported a female character to my game rigged to the UE4 mannequin, and I used the existing Epic Games animation retarget ABP since all of my animations are for the UE5 mannequin. everything seems to work fine except weapon movement is off resulting in things like this photo. despite the female being rigged to the UE4 mannequin, it does have all of the IK bones. whats the best fix for this?

Nvm figured it out
Hey. I'm moving a SK with sequencer. Very basic movement up on the Z axis. Works fine in sequencer. But when i bake the sequence nothing happens with the SK. Any common tips on why?
I swear - this is like the longest running help request I've ever done 😅 (I don't animate much)
I reread our entire conversation and your original post. And we're at the phase of actually animating stuff now.
In DCC - when doing the weapon animation, we should be animating the ik_gun_hand? So the gun is actually attached to the ik_gun_hand inside of the DCC as well. And it is kind of acting like our socket. Or should the weapon still be a child of the hand and animate the hand like normal. But because we're animating the hand and the ik_gun_hand it carries that over to the animation. But the weapon socket itself should be on the ik_gun_hand in-engine.
Do whatever makes it easier to animate in the DCC.
But when you export to Unreal, make sure that the ik_gun_hand is in the right place.
Relative for that specific weapon
@nimble torrent Do you typically add an offset to your weapon socket inside of UE? Because right now, that seems like what needs to happen.
Generally I try to make the pivots match as well as possible so I don't have to do that.
Yeah, that's what I want to do as well. But with the setup, as I understand it, we're running into some issues in how it translates to in-engine.
This may be related to the shift in orientation between your DCC and Unreal. You should check the various pivot axis in your DCC, the FBX, and Unreal.
Because the ik_gun_hand is constrained to the hand, we can't move it at all.
It's probably export settings on the object mesh, if I had to guess.
You almost certainly do not want that.
You want the ik_gun_hand to follow the gun.
That's the whole point.
So the ik_gun_hand is pretty much the socket representation
Or... no wait.
ik_gun
-> ik_gun_hand_left
-> ik_gun_hand_right
So 'ik_gun' or 'ik_weapon' follows the gun.
And it's children follow the hands.
So this means the gun should be a child of the hand. Then the ik_gun is constrained to the gun. But the ik_gun_hand is constrained to their respective hands. The UE socket goes on the ik_gun though because that is the dcc's representation of the socket.
How you set it up in the DCC for animation purposes doesn't matter.
What matters is the hierarchy you export to unreal.
And the animation of the bones in that hierarchy.
You need to export the ik_gun bone in the position and orientation of the gun.
And it's children should be in the position and rotation of the hands.
Yeah - right. I'm just talking in Blender terms. The main point is that the ik_gun is serving as the socket in Blender.
Sure, and I'm saying - from the perspective of Unreal, how you set it up in Blender does not matter at all.
Only the contents of the fbx matter.
Yeah, UE don't give a care
So really, what all this boils down to is - build a bone hierarchy that matches how you want your sockets to animate in-engine
Hello guys, I need some help and I'm describing current situation: elephant model, two animations: a walking animation and a shaking the head animation. I'd like to merge the animations so that 'shake head' animation only refers to the base pose, so that basically the elephant walks and shakes the head. I cannot blend those in cinematics because the 'shake head' animation is just doing only that, i.e. the rest of the body and the legs aren't 'walking'. I hope I could explain this...
If I'm not mistaken, you need layered blend per bone/slots/etc, right? Head and maybe neck is one animation, rest of the model is playing another animation?
https://www.youtube.com/watch?v=ja-C9VcNyKw
Though I'm not familiar with whatever nuance using it in cinematics might add to things, since that's not been a high priority for me yet

Hey everyone! Today we're looking at the Layer Blend Per Bone function inside the Anim Graph. This cool little thing allows us to play animations only on certain parts of the body whilst leaving other parts unchanged. This is extremely useful for separating animations between the top and bottom half of your characters so they can do things while...
thats a normal thing to do!!!!!
ik bones are always constraint when animating!!!!, ik bones sole purpose is to allow for procedual code adjustments, it doesnt matter where they are, you adjust these positions in code, could be ctrl rig or better yet anim node! ik gun bone is your weapon space, ik hand r and l is to is to properly constrain your ik positions in weaponspace to then apply those to your skinned hand bones!
now in the end it comes down to you how you want to work these bones, you can also animate them if you want but that would destroy the purpose of said bones
Thanks it looks like it’s what I need.
Not in the structure that we are talking about. Different uses.
Hello, has anyone ever had issues with LinkAnimClassLayers not being applied?
I'm doing that on BeginPlay, but none of the animations that it's supposed to link are there. If I add a little delay, it works.
However, at some point in the past it was working. I don't recall what was changed since then though
Is there a way to disable anim notifies on a particular skeletal mesh?
Hey y'all, i think i set up my ABP wrong. Or maybe my character BP - but i believe it's animation related.
When i'm holding walk right but am looking to the left side of the screen (2.5D platformer) the player basically begins moonwalking.
Is there an easy way to get them to backpeddle instead (already have animation) or am i gonna have to start foolin' and Boolin' ?


any ideas whats causing this issue?
single frame animation looks good on Manny mesh but hands are too close together on the GASP Manny
Shot in the dark here...anyone out there manage to get lefhand IK (for guns) working on a retargeted character in GASP-ALS? I'll give actual, literal pizza for a link to a guide on how to tackle that.

I was trying to create this in Control Rig when I realized it was a built-in function!
Join Our Discord For More Information: Check Information Page For Discord Link.
not sure if this one gonna help but this guy does a lot of ik with GASP
as well as this guy, Polygon Hive https://www.youtube.com/watch?v=RFU-FteVTuc&list=PLs9e0eJQMI2aaulgKJzC8feN1UEwDkEnq
Unreal GASP ALS Tutorial showing how to Add new Overlay States.
Unreal GASP ALS Project : https://github.com/PolygonHive/GASP-ALS
Wishlist my Game on Steam 🙏 https://bit.ly/wardens-will-steam
Social Media:
Twitter: https://twitter.com/anas_tronaut
LinkedIn: https://linkedin.com/in/anas-el-ferachi
Support my work:
https://buymeacoffee.com...
got it to play in game
the issue was that Manny Mesh Is Child Of UEFN Mesh....sooo i cannot use an Anim Montage if i want the hands and fingers to look right(animations were created for Manny, so i would have to make the animations again but for UEFN... which i really dont want to do..)
solution was to use Play Animation node instead of Anim Montage node. because Play Animation node lets me plug in a mesh where as Anim Montage will only let me plug in a Character Object ref.
the only bone which should be animated which is not skinned are the bones constraint to the hand, weapon_r for ex. this would be the one where ultimately you would attach your weapon, this one should be used in animation
Is there a way to get an animation montage to just stay in the montage node and not keep going to completed?
I'm looping the animation in the montage and only want it to exit the montage node on interrupt
@scenic sigil What's the issue if you already loop the animation in the montage?
if you haven't then use Montage section
i have the anim looped but it is exiting the montage node still. I’ll post some pics when I get home
use montage section to loop parts of the animation. It will not exit the montage, I do this all the time.

I thought having looped checkmark would do the trick?
Is there another thing I'm missing?
Yeah. You are using montage as you say. Please look into montage section as mentioned.
As in Google it and find out what montage section is and how to use it.
Cool I got the hint dude, no need to go tell me to google lol. 😉 Thanks anyways.
is there anyway to blend anim montages to the animations played through the ABP? I have different attack animations for my character that get set when the weapons picked up, but as I want attacks that do something like a charge or jump in the air and slam away from 0,0 making me move the root, the anim montages sort of just stop the looped anims rather than blending from the looped to the montage, if that makes sense. ill attach a video too. you can see how the slash attack that doesnt move the root is fine and movement isnt halted, but with the other attack all momentum is killed and it feels like it just stops the player.
i dont know where to look as im a newbie with animation in ue5, and from everything i can find on UE forums, montages are better for single play animations that dont loop whilst the anim bp is better for looped anims like idle, walk, etc
you will need to tweak the animation
thanks... like i didnt know i needed to tweak the animation
Hey guys, im fed up with blender and im trying to switch to unreal for rigging and skinning, is it ok if i delete the IK bones when im rigging and skining or is that gonna cause issues with animations later?
Maybe someone here can give some insight. Team just recently updated to Unreal 5.5.4, and ever since when importing anims it will
a) add a new Anim suffix, and
b) create an extra AN file that plays nothing
Just wondering what the point of both of those additions are and if there is a way to turn it off.

they(unreal) will do what they want
???
Hi all, any chance anyone can point me to why my retargetting of an animation is failing to copy over the root motion? I have set Translation Mode to "Globally Scaled" in the retargetter. The yellow mannequin is the original animation asset. The silver mannequin is the post-retargetting animation asset.


My exact reaction.
check your retargetting asset
Isn't that the retargetter? Which is in the first screenshot? Sorry, I'm very new to this
Hello! Does anyone know if there is a way to use modular control rig, specifically the chain module, with dynamics and prevent intersection? Thanks.
Anyone know what could cause feet sliding on proxies when in multiplayer? If I play with 2 character, the controlled character can turn without issue. But if the other character (proxy) turns, the feet move a little before animation plays.
hi all - i want to make a tts setup where a creatures jaw moves based on tts audio - non metahuman. i imagine you could rotate a bone when audio is playing via a bool, but would it be possible to rotate that bone based on individual words?
How easy/hard would it be, to get meshes base on the ue4 skeleton to use the ue5 skeleton?
just imported a model from sketchfab and this has happened? Any idea how to fix this?

I made a sitting animation in 2 segments. How do I make it so you can jump from anywhere and in the air move to a chair and then land on it in ue5?
or what do I have to google for that?
aight can someone let me know where the animation import settings are in the asset details panel?
what i used to do if i had to resize all my animations was to bulk edit them in the property matrix and change the import scale, then right click > reimport on all of them
now i can't do that
i have to open each of them up, hit "reimport animation with dialog", and enter the import scale there; rinse and repeat for hundreds of animations
this wasn't an issue in 5.4 and now i'm on 5.5 and pissed
aight i've found a solution: enable "Show Import Dialog at Reimport" in the editor settings
Not an animator/rigger. Only a programmer, but doing a project and need this specific character to work
So I have the FBX, but not a skeleton. I imported it and unreal 5's manny skeletal mesh into maya
and then duplicated the skeleton into a group with the mesh like manny is
Is there an easier workflow and am I even doing this right?
Goal is to just use manny walk animation and a bend over animation

hi
i think i can handle that
i did something like that in one of my project
because i know about programming
have you tried doing it in unreal? im using unreal for skinning and i find it intuitive, im still having issues tho
Not yet
my characters hand is out of position, does any 1 have any idea what could cause this?

i found the issue i just dont know how to solve it, it seems the twist bone is pulling the arm back

the thing is, the twist bone has no influence, i removed it to see if it would fix the issue and the changes are not taking effect

Does anyone know where I can get a first person animation? I would like to see how it is different from a normal/third person animation.
By divine decree, heed these sacred words, animator of the unreal:
In the celestial forges of Unreal Engine, unite your flight and descent into one hallowed Montage, its root motion imbued with the breath of life. Summon the Motion Warping plugin—let its power shine in your project’s hall of plugins—and anoint your champion’s soul with a MotionWarpingComponent.
When your hero ascends on wings of animation, invoke the transform of the sacred Seat as your Warp Target, thus binding heaven and earth. As the “Approach” section unfolds, call forth a Request Warp: watch in awe as root motion becomes your guiding light, steering each step with divine precision.
Tweak the holy parameters—warp tolerance and divine duration—until your pawn’s landing is ordained by the gods themselves. So shall your champion alight upon any throne, guided evermore by sacred root motion.
!!!Keywords to Seek in the Celestial Archive!!!!!!
“UE5 Motion Warping root motion”
“Animation Montage warp to target UE5”
“Root Motion Warping Unreal Engine”

Hello, Has anyone gotten a modular control rig to work with dynamics insids an animation blueprint? The rest of the rig is working for me in the ABP but the dynamic chain is not.
Yo! in the physics assets, when you click simulate.. you can drag the capsules around.. using cltr+right click..
but in one of my asset, that shortcut seems broken.. i don't get it.. anyone can help?
Nice, thx for the help!
Next I want to make the controller invisible when not sitting. Its of the same object but in this menu it can be selected separately (possibly because of its trim sheet). Any Idea if its possible to toggle its visibility?

Heyo anyone know how to get an event to see when an animation in the Animation BP is interrupted? There's no option here:

You might be looking for the Transition Interrupt events which are on the transition, rather than the state: https://dev.epicgames.com/documentation/en-us/unreal-engine/transition-rules-in-unreal-engine#transitioninterrupt

Epic Games Developer
Blend between states in your State Machine using Transitions in Unreal Engine.
What seems to be the issue?
Is there a way to force an animation to play completly before it transitions to the next?
On another note ...my Animation Blueprint is potentially a mess, would someone possibly be able to guide me a bit?
You can do something like that with zero blend, or if it's a montage I believe you can change the Blend Out Trigger Time to be >=0 to only blend out at the end.

Hi guys, i'm dealing with a small issue in my project:
In the first video (the one with 3 transform nodes applied) you can notice that the hands/wrists of the skeletal mesh are translated up and down a little, when I aim up/down. But if I try to use just 2 transform nodes (2nd video), as you can see, the issue disappear. This happens with any bones combination. No other nodes are applied either before or after the nodes in the videos.
Since I need that the rotation is evenly distributed along the whole spine, I need more than two transform nodes to achieve that.
Do you know what can cause the issue? I'm using the default skeleton of Epic
when root motion is enabled animation plays on the same location, what am i doing wrong here?
hey guys
how does one edit a character bone in the animation sequence? for ue5.3 that is
nvrmind found it
Hello, I'm doing basketball animations specifically the dribblings. I have dribbling animation but with no ball anims, and I'm doing it manually through Animation Editor.
I'm putting the ball mesh in the BallSocket, but I found out that it's not possible to add KeyFrame to a socket.
Any alternatives to this?
look for somthing like constraint where u can attach it to a bone or a body while still able to move it around and i think there is something that might help u i once saw on youtube let me get you the link

💪 Struggling to implement constraints in your sequencer animation workflow? Don’t worry, Popeye’s got your back! 🥬 Grab a can of spinach and follow along to discover the best solutions! 🚀
🧤Our courses :
https://www.projprod.com/courses-1
🎁 Support my caffeine addiction fund and ensure I stay awake enough to keep creating co...
check this bc hi simulated the catching movement and them throwing it, it might be a good fit for basketball animation
hello, so i have made a takedown animation that have the player , the enemy ,the camera and a weapon it is fully done on a sequencer but now i found myself not knowing how i can do it best idk if i should spawn the sequencer on where the player is and so it feel like it switched from the player to the camera of the player but if this is the case i find it hard to implement so for example idk how to spawn it or start it at the exact location and i belive since it is a sequencer i will need to dispawn some stuff and it just feel messy and the other idea is to bake the animations for both the player and the enemy and then use motion warping but the idk how to take the camera from the sequencer and use it for the player and the weapon is static mesh so it doesnt have animation to bake it just a transform

rather than trying to rig your tiny character to the epic skeleton, it would be simpler to do your own rig then retarget in unreal
you can use mixamo to automatically rig your character for free, then do the retargeting there
or just use some of mixamo's animations
Can you stop a root motion animation in the middle of it?
does pausing the animation player not also pause the root motion?
Well I was thinking to cancel it completely. So if the root animation was doing something like a hand wave but then the character wants to move, I want to cancel the wave and let the character start moving
Any ideas? 🙏
root motion drives the capsule component.
you should open console and type show collision to visualize the collision.
I can think of 2 possible reason why when root motion enabled, your character doesn't sit on the chair.
- The root motion stays in place, it does not have keyframe that offset the root from it's original position.
- There is root motion but something is blocking the capsule. e.g the chair collision.
whats the problem? first looks good, second does look like collision is preventing seating
I'm going crazy over this one.. somehow my physics asset won't let me grab the capsules while simulating.
another asset works fine so i'm trying to compare both but there are hundreds of settings and they seem identical wtfff
This is a live retarget showing both obviously. Im using this to debug a problem with the bow being out of position while drawing. The metahuman is shorter than Quinn. Whats the best way to remedy this? I adjusted the retargeter the best it could be considering my meta is like 4-6 inches shorter. but because of the arm lengh , messing with the retarget pose just doesnt help

so i'm trying to import my fbx model's animations into UE but the arms dont sync right
the errors are:
animations aren't looping (the idle primarily)
the arms/forearms arent working whereas the rest of the anim works fine
some parts didnt import properly
the error seems like it should be simple to fix so i'm willing to send the project file/model itself
animation's supposed to look like this (left) but it's coming out like this (right)

Hello! Why there's a discrepancy of a few units between the location shown by Get Socket Transform (ParentBoneSpace) and the Details panel?
The rotation and scale are exactly the same and this issue only seems to occur with the Weighted Bone, while the Virtual Bones and IK Bones are perfectly aligned.
Any insights on this?

Sup guys! I ran into a problem with the Metahuman face blend mask. I need to filter out some bones from mocap animations, but no matter what mask I apply to the Metahuman face skeleton, it either applies everything or nothing. Has anyone experienced something like this? How did you deal with it?
https://cdn.discordapp.com/attachments/1356553460467630120/1366333182529503293/2025-04-28_18-38-26.mp4?ex=6810906f&is=680f3eef&hm=1e3a0daa0f60f8604cb7c5e0d1a55a2f28868ea0c44d0ce39b77a3db82b31487&
does anyone have any idea why this might be happening when i import my anims? i already checked if the negative scales have any effect and they dont seem to change it.
Hello guys. I'm trying to make a ctrl rig animation during runtime, but sometimes it generates some stretching issues, especially when I pause the game.
I've tried to block the behavior if the delta time is higher than the tick rate, but didn't work.
May anybody help me solve this? I'm kind of stuck.
Btw, I'm using verlet and spring interpolate nodes
Should i always use "Blueprint Thread Safe Update Animation" ? Since this function is both safe and high-performance, why doesn’t the official documentation make it the default option?
Hey guys, was wondering if any of yous could help me claryfying some doubts I have regarding an animation I made, it's 32 frames, 31 for the cycle without the initial frame at 32, but no matter what I do, it looks choppy in when the loop restarts. Thanks!
can anyone help me with GASP? ive tried adding a custom run animation but it only plays a few frames of the animation making my run look weird

What is in your transform space of the socket transform node
Not sure if this is the best place but I am really stuck trying to get live link to work with my character. The debugger is showing values actively changing, my character has blend shapes with the proper naming convention, I'm not getting any errors in the animation blue print, but still no animation. I'm at a loss for the next steps to debug. Any help would be massively appreciated
im amazed you got it going!!!! big time💪
thanks!
any idea why the head get's streched so weird?
is the issue that the animations are not retargeted to the female skeleton?

This it what it looks like for for manny

ur trying to use a rig that has its rig controls out of place for that character so so it will stretch the body parts to patch the control placement
or at least i think thats whats happening
i solved that by making a modular rig
is it maybe because echo is using the ue4 skeleton but the animations are for 5?
I tried it in a 5.4 project and had no issues. Can anyone confirm they are able to use live link in 5.5.4? I don't want to go through the trouble of a fresh install if I don't have to
😆 looking very 😍
It looks like 5.5 doesn't automatically create curves for morph targets, has anyone had luck getting around this? Other than importing to 5.4 and then migrating to 5.5?
Anyone know if there is a way to extend a frame to exaggerate a pose?

Is there a quick fix for this that im missing?
I just have 2 animations, one of them needs to aim the weapon. The other needs the weapon slightly rotated so to be carried on the chest.
RTS_ParentBoneSpace
Is it possible to retarget animation assets (sequences, blendspaces, aim offsets) in-place instead of duplicating retargeted versions to a specified folder? Also is it safe and sane to simply reassign a skeleton on those anim assets if the skeletons are 99.9% the same?
I've got an animation pack that has a lot of anim sequences and blendspaces in multiple folders with multiple hierarchy level. This pack comes with its own version of default UE5's mannequin (skeleton and skeletal mesh) which is only different from the default one in 1 bone that doesn't affect the mesh itself (specific weapon bone). So now I need to use those animations in my primary ABP, but I can't use those new animations in the ABP because they are assigned to different skeleton despite those skeletons being 99.9% the same. So I have to either tediously retarget all assets folder by folder, which I don't really want to spend time on, or retarget them all at once but lose the folder structure, which I also don't want, so is there a better and faster way to get the result I need?
Hello! I also have a retargeting question. I'm transferring a female animation onto a male. the bones are the same, just different proportions. I use the auto retargeter, all looks good except weapon_r bone, child to hand. I made a new fk chain in source and target, witch just the weapon bone, now the rotation looks good, but it's offset compared to the original animation. Is there a way to get the correct translation also onto the weapon_R bone?
Edit: So, now I found that I can enable translation, globally scaled or absolute. They do move the weapon_r bone, but it's not really correct compared to the original.
Anybody experience this before: I'm building a multiplayer game based on Lyra, and before everything was working fine, but now the bot walking animations are broken -- but only on the server. All other animations work perfectly fine, and walking animations DO work for any clients connected to the server, but for the host, the bots are just gliding around. Has this happened to anyone else and how might I be able to fix it?
I watched this tutorial not long ago, I think it might be this:
https://youtu.be/vqVA4lvpVWQ?si=ziYMMi336yJOOjuo&t=31

Here's the easiest way to quickly give your character a FULL UE5 Golden Standard Control rig for the Unreal-Marketplace-!!
If you enjoyed this video, please consider becoming a Member :)
https://www.youtube.com/@TheRoyalSkies/join
Or joining the Patreon Squad directly:
https://www.patreon.com/RoyalSkies
It makes a huge difference, and really hel...
I'm using Paragon model/animation, any idea how to remove that rock that shoots in the air? (not the one that drops on the player)
this looks amazing 😄
an approach i use is hide bone by name, its pretty effect at getting rid of parts of your skeleton:


Oh wow, thats super useful! itll sure come in handy. For now I changed the material as its parented to the hand bone.
My next challenge is to bring this thing into unreal. It uses scale to blend the arms. In unreal it looks like the scale gets multiplied by 100. Not sure whats going on there.
Maybe theres a way to fix it. Or if not how are bone drivers called in UE5?
I might be able to rig the arm mechanism in unreal.
you can make the skeletons compatible to eachother. then you can share animations between those two skeletons.
thanks, it works. do you know by any chance, does it affect performance when I do it for multiple skeletons from different animation packs?
Anyone know what I'm doing wrong here

according to the unreal docs I need a slot just before output pose for when I use the skeletal mesh in a cinematic to allow blending to happen
and I need the control rig there for obvs if I do control rig stuff however with control rig in there it seems to mess up and none of the animations being piped into the control seem to remain after the control rig
How do I get a RandomSequencePlayer to play any ONEanimation and stop? I don't want looping, I don't want them all to play. I have mulitple death animations for a character and I want any 1 of them to play and then stop.

hm I haven't read anything about it being a problem. That said, I have not used in proper game situation, only for testing.
It is fast to retarget animations, when it works at least. Can be batched.
I finally managed to get the relative direction calculation right for my enemy, but even though the correct direction variable values are being updated and print correctly, my turning animations are still not playing, making the character snap from one direction to the next and only using forward animations. Is there anything else I might be missing? Can turn while walking/running animations be implemented via a 2D blendspace, or do I just need to set them up in a separate state machine node? I can only find turn in-place resources online, none of which I found much helpful
I have a Received Notify Tick in my animation, but I want it to stop running once a certain condition becomes true. Is there a way to stop the notify tick from continuing? I don’t want it to keep tracing or triggering repeatedly after the condition has been met.

hello. I have a skeletal mesh with which I'm only using the rig to make the model soft like it appears in the Physics Asset. But in my world, it's rigid. How do I enable the soft sim stuff?
Are you meaning you want the skeletal mesh to simulate physics? In that case you might be looking for this node:

probably.. is it the same as this?

i'm doing most physics stuff with physics control but it often makes thigns more complicated than they should be
also i'm attaching the root bone of this thing to another thing.. I think for this to work the physics asset root body needs to be locked or something
funny how visually the lock icon on the body doesn,t update in the editor until you re open the asset..
doesn't help the learning curve
pretty much, although the set body simulate physics allows you to determine which bone should simulate

hmm but clicking the option in the BP didn't seem to work
this breaks the attach component constraint tho
you can simulate without locking the root, but it will detach from the capsule as it simulates
oh wait.. checking the simulate physics somehow works now.. not sure what i did differently
oh gross
i've been trying to have the lowerarm as a limb like this for a while now.. this is great
i think if the physics asset keeps the bone a bit more rigid it might work
nice, you will need a physics asset for sure, but i do think the physics control setup can help in conjunction to give you better control
Could you have a branch before your trace and the condition is on that branch? so when the condition is false it fires the trace, when it is true the execution ends.
getting there
gross, i love it
🙂
Turning locomotion can absolutely be implemented in a 2D blendspace. It would be a matter of your speed being on the vertical axis and direction being on the horizontal axis, and then feeding those values into the blendspace.
Similar in principle to this setup https://www.youtube.com/watch?v=sUAYmvZjJW8 except in your case you have everything in one blend space rather than a separate additive blendspace

Adding leans to your character locomotion is relatively easy and effortless, and will considerably improve your fidelity and gameplay. Let's check one possible implementation together.
#unrealengine #unreal #ue5 #blueprints #blendspaces #animblueprints #leans #additive #procedural #animationblueprints #animgraphs #gameanimation #gameplayanimat...
what you described is indeed the setup I've been attempting with Speed and Direction as vertical and horizontal axes respectively. I think my issue has something to do with the way calculations are done and/or with how the engine is interpreting them.. The "default" approach of getting character rotation and calculating by plugging in the velocity has not been working for me, always outputting a direction of 0.. I then changed my calculation nodes a whole bunch and ended on something that gave me the absolute direction which was interacting with my ABP but not in the correct way, as animations were playing towards the wrong directions and my enemy character was just moonwalking all over the place.. Finally I landed on a new approach separating the yaw and calculating the yaw difference continuously, which does give me the correct relative direction output (at least in the print string) but again it's not updating my character movement according to what's supposed to be happening in my blendspace. I've checked every step multiple times, and even tweaked the rotation parameters on the enemy blueprint as to try and get different results, but to no avail.
I will check out the resource you linked for new useful info as soon as I can though, thanks a lot!
Is your capsule also rotating to the input direction?
Rather than using a random sequence player, you might be better off randomly picking the sequence to play using the AnimNode Functions. The random sequence player doesn't really have the functionality you need.
If you have a sequence player you can set it to Not Loop, so it will just hold the last frame. You will also just need to ensure you have set the Sequence Asset input to be a dynamic value.
In the function itself you can either make an array or promote it to a variable so you can change it easily from the ABP details.


I've had this happen before. What kind of work is your control rig doing in this setup?
does the root of your character have a scale value of 100? If so that would be the first thing to fix. There's a tutorial on that here: https://youtu.be/YbWfoyf4MqI?si=S8XVr8Q-jAFxnxTG
In this video I will show you how to correctly export a character from Blender to Unreal Engine 5.
Common mistakes include issues with the scale of the root, joint orientations and differences between bones and joints. In this video I will talk about everything you need to know to correctly export rigged characters that follow Unreal Engine sta...
I've tested both with and without "orient rotation to movement" flagged, and I couldn't notice a difference if that is what you're asking. I've also tried a couple other toggles, like "use controller desired location" and "use controller rotation yaw", I'm pretty sure a certain combination of these made the character not turn at all. I'm not sure if it's relevant but a lot of videos and posts I've seen so far were about player character specifically, but my issue is with an AI enemy character, so inputs and camera stuff for instance does not apply (at least as far as I know..).
question, how do i incorporate morph targets into my animation sequences?
i made my blendshapes in blender and successfully got them imported in as morph targets

In this episode I'll show you how to add keyframes for morph targets with Unreal Engine's animation tools. In this example I'm using an animation I've imported from Daz Studio earlier, and my character has been exported with morphs enabled.
Watch the full series here: https://www.youtube.com/watch?v=bIfMFawYtwU&list=PLPcx_LSSGfZf3aoIf4Z99OOGBHQ...
i tried this but at that point in the vid, my morph target wasn't on the curve list
Hi,
I'm doing a Maya to Unreal workflow utilizing alembics, but I can't seem to get the motion blur to look proper.
My sequence is on 24 FPS and motion blur settings in my cine cam are set to 0.5 to achieve the 180 degree shutter look. However, the motion blur seems to just turn into a constant "linear blur", if you will, while this character is walking. I think the camera movement (which is essentially tracking her in terms of movement, not rotation) on top of the alembic moving may be causing issues?
I've tried toying with every motion blur setting as well as various CVars. Normal objects work as intended with the motion blur, it's just the alembic causing issues. I've tried all 3 of the motion vector import options as well.
Increasing temporal samples did not help.
Any other ideas?

At the minute FK only
Which is prob why km getting the isseu
What an elegant solution! This works perfectly for my need. Thank you for the clear instructions!
Hello, all. I'm mostly a programmer who occasionally does rigging and animation, so "beyond beginner but definitely not expert" in this topic, and need some general guidance. (Not asking anyone to solve the problem, just help me understand how the engine does this.)
The situation is, I have multiple bipedal characters created by an artist using a commercial tool that forces its own rather nonstandard skeleton. I know how to retarget animations, including with Motion Matching, and have been quite successful with this, but looking forward I want to re-rig these characters on either the UE5 Mannequin skeleton or the Metahuman skeleton (preferably the Mannequin). I'm comfortable with bone hierarchy, weight painting, etc., in Blender and am learning UE Skeleton Editor, so getting the skeletal mesh rigged and skinned I can do.
The part I don't understand is what to do about facial morphs (blendshapes). I've got an extensive set of those from the third-party tool. In Blender these are vertex animations, not skeletal. Is that also the case in Unreal? Can I somehow bring the facial morphs from the third-party rig into the new UE-based rig? Alternatively, can I apply Metahuman or UE5 premade morphs/blendshapes to the newly-rigged skeletal mesh without having to round-trip the mesh through Blender?
Thanks for any general guidelines. I'm quite happy to RTFM but am not sure which "FM" to "R". 🙂
BTW, the reason I'm doing this and not the artist is that she retired, and while I can certainly reach out to her, I'd really like to have these models Just Work with the rest of UE.
Made a walk though of sending animations to Marvelous Designer from Unreal Engine with the Livesync plug in, just found out this exists - saves a lot of extra exporting and importing alembics and fbx's - https://youtu.be/tEShT0YyUJY

Link to LiveSync documentation - https://support-connect.clo-set.com/hc/en-us/categories/8924150294415-LiveSync
Link to LiveSync for Unreal Engine plug in download - https://support-connect.clo-set.com/hc/en-us/articles/9803777473295-LiveSync-version-archive
TIMESTAMPS
00:00 Introduction
01:00 Setting up Livesync in Unreal Engine
03:22 Creati...
Thought I bring up my question again. How do I integrate morph targets into animation sequences?
glad it worked for you
did you ensure "import morph targets" was set to true on your import?
yes, the morph targets are present on the skeletal mesh
and i can even do the sliders with it
so is the issue that your animation is not importing the curves when you key it in blender?
oh ok so that's how it works
i thought i was supposed to animate with blendshapes in-engine
so in blender then do i just key in the shape keys for the animation and throw in the animation to unreal that way?
that's the typical workflow, yes.
you could animate them in engine in an animation sequence, you would just need to make a curve on your anim sequence with the same name as your morph target I believe.
but this is kinda double handling where you're animating in two locations. often better to have it all done in one place
you would just need to make a curve on your anim sequence with the same name as your morph target I believe.
Oh ok, that probably answers my questions earlier i had about why i couldn't find my morph target curve
right. it is a little strange that your morph target curve wasn't in the list. If it's saved to the skeleton, I would think the curve in question would be accessible from the create curve menu
it is to the skeletal mesh, dough unsure on the skeleton itself
that would make sense since the skel mesh is what contains the geo, and each skel mesh could have different morph targets
unfortunately, I don't believe the engine currently offers a way to create morph targets in the engine, or copy morph targets from one skeletal mesh to another.
there seem to be some plug-ins which may achieve what you're looking for
https://forums.unrealengine.com/t/morph-tools-plugin/127979
https://www.fab.com/listings/25470bbe-3a94-4f9d-8605-ba0ab3f3585c
otherwise you should be able to bring your morph targets onto your new skeleton. I think with blender you can do all of your armature setup and re-rigging and the shape keys should still be applied to your mesh since they're different data to your weight painting vertex groups
Epic Developer Community Forums
Bake Morph Targets, Combine Morph Targets and Copy Morph Targets. All without leaving the editor. Marketplace link: https://www.unrealengine.com/marketp…90c524bafd847f Example Project: https://www.dropbox.com/s/v8p151s6zs…ample.zip?dl=0 Feature List Editor Bake and remove morph targets from skeletal meshes Create morph presets Custom ...

Fab.com
This plugin contains a set of BPNodes that manipulate skeletal mesh's morph targets at runtimeCopyMorphs:https://youtu.be/UCcsfwwJxWk
Hello guys, I'm trying to create a template ABP for characters with different skeleton meshes and I'm having trouble selecting the blendmask as the list wont populate, because the ABP has no skeletal mesh attached.
Is there a way around it? (For example exposing it as a variable I can set in the Child ABP?)
Also I found away around it but involves copying from another ABP but it will work for the skeletal mesh I copied from but it won't work for the other skelMeshes even if the blendmask name is the same.
Thanks in advance!

Hey all, does anyone know of any good complete course on unreal engine game animation , something that covers from basic to advance on the context of animation Blueprints, motion matching and ALS ? Thanks
Thanks for the detailed reply. I don't need to do this at runtime, so the second plugin is probably overkill. I'll first follow your suggestion of looking at doing this in Blender, since I'm already familiar with skeletal animation there. (I've done a little bit of vertex anim in Blender, but it was years ago.) OTOH, from the description it sounds as if those "runtime" BP nodes in the second plugin could probably be exploited as a BP or C++ API to make a custom editor script for the same purpose. Let's face it, most things that can be done at runtime can also be done at edit time.
@viscid willow I also realized that when I asked the question I conflated morph targets with the animations that use the morph variables/sliders. I didn't mean to conflate the face rigging step with the pose and animation step(s).
A channel that comes to mind is this one, they have some pretty in depth playlists covering a lot of what you've mentioned: https://www.youtube.com/@OutcastDevSchool/featured

YouTube
What is the best way to retarget animation from UE4 Mannequin to UE5 mannequin without having feet standing above ground ?
EDIT: https://www.youtube.com/watch?v=WwLHfl_XHsE
How would I go about importing key-d animation from blender to Unreal? Since its mesh keyframes and not a rig, I'm a bit confused on how to go about it since it technically doesn't have a "skeleton" right?

Thank you so much this is very helpful
I had a similar issue with my ABP template for different skeletons with "Layered blend per bone" and some other nodes - especially where bones must named and there's only a string field (no expose to pin option). I ended up creating an "Animation Layer Interface" implementing stubs into the animgraph in my template and creating one casual anim bp and one override anim bp for all different skeletons (where I override those layered blend per bone nodes).
alembic?or there is something called vertex animation texture
Anyone got a line on some good docs/blogs/articles/videos going over the blendstack anim node in ue5?
Did it
I wanted to make a separate rig for UE5 but I got it to work without. So heres Jimmy the Cube.
Easy way to make left hand ik gun?
question is it better practice to have a unified animation blueprint if they will have similar functions but different skeletons (like completely different structure)?
hello, i've retargeted an animations, there is something very strange, some of them have all sorts of crazy frame rates, like 200+ fps, the source fps is 60, i've tried to find something to not adjust the fps during retargeting, i am sure there must be a magic tick box somewhere, can someone point me in the right direction
In my opinion it is if they are same type. If you would add something new or fix something broken or experiment with new nodes it is a pain to multiply the time by your skeletons.
hey is there anyone who can make me a scene with animated elements or static horror type in the form of materials or VFX? I need it for a subject at university and I would be very grateful for any help, I totally don't know this program it is new to me. Elements to pay attention to are: lighting, composition, materials, colors. if it is a static scene a high resolution screenshot will be enough, however if it contains animated elements or VFX it will be enough to render without camera animation.
In maya I have an animation where the root bone (its controller) is scaled so the character becomes smaller. When I import it into unreal, the scale isn't applied in this particular animation. When doing tests it even appears like the scale animation is transformed into a tranbslate animation which makes no sense to me. Why could that be?
yeah i figured
for me I'm trying to figure out how to use anim instances with kawaii sprites so that's why i was hesitant
I have this character with a BlendSpace setup for movement, as it gets faster it should get closer to the ground. It works fine on acceleration by setting the acceleration speed to lower than the max speed to give it time to lerp into it. However, when it reaches the destination it automatically goes to 0 movement and very quickly jumps from the low run animation to idle. This looks pretty janky and I've tried to adjust braking speed and other values but it's a hard stop every time. Is there a better way to blend out on stop as it does currently blend in on start?


Thank you so much for your reply. I feared that was the case. I never used these Animation Layer Interfaces, guess I have some reading to do. I've created a question in the Unreal forums, in case you wanna bump the issue there too.
https://forums.unrealengine.com/t/abp-templates-unable-set-blendmasks-as-inputs-variables-on-child-abp/2490427
@frozen breach Anim Layer Interfaces are similar to normal interfaces and you can place those linked layer nodes in your template. But you can't override them in a child anim BP of your template which is a bit odd in my opinion. There is not even a button for it in the child ABP. So I ended up creating the ABP_template (implemente the interface with stubs), a ABP_child (based on template) and a ABP_Override (normal ABP which implement the interface as well). Works but feels like a workaround (placed in the child BP):

Oh I think I understand. Yeah I can really feel the tool is just incomplete, that they didn't cover all bases when building the templates, you can't override the control rig variable either, so I'm guessing its coming in a future update, just hope it isnt on Unreal Engine 7 lol. Thanks again!
@frozen breach I've placed the Control Rig into one of those Anim BP interface function layers (at first). Works ... but then I've switched to Foot Placement/Leg IK as done in the Game Anim Sample Project (which makes my traces in the character BP for foot rotation obsolete and works better while running down or upwards). I'm using those overrides always when I've a different requirement like a LayerBendPerBone that blends depth 3 with 5-spine or less with 3-spine.

Dude thank you so much for these, i need to dig deeper to fully get it but these little snippets are super useful to know what to expect
If I can help you with any questions later let me know
can you drive a anim bp from another anim bp?
yeah... linked anim bps, followers, etc
depends on what you actually want though
hi, I have a chase anim with root motion, I want to play the attack anim at the position the chase anim is at. How can I do this correctly because I tried layerered blend but actually just need to play the attack anim at the right location
What it's the best way to implement left hand ik gun? I used pic config to do it andthe hand follows good but have a gap


I'm using FABRIK for that. I'm getting the transform at the point in time when equipment finished (or reloading) the weapon (and keep updating it a few secs afterwards in Event Graph of ABP as there's usually some blending). CharacterBoneName is hand_r


I'm using this func to get the transform

Yes that is doing the same.
Posted already. I'm just using that what you have as effector transform and feed it FABRIK.


This it's like looks now


Is there some kind of scaling? I would just ask if the socket is correct but it seems fine.
Are you setting your effector transform at tick or how often do you update. I had the issue at my equipment that it was blending out ... so even if it already fired the event that equipment was done and I gathered the effector transform the socket-offset was still not good (as it was still not the final grab pose).
I keep polling the value 2 secs after equipment is done... (as I expect no blending would last longer).
In my EventGraph.
You can test it if you put your set effector transform to tick. If it's fixed you can try a way to reduce the amount by checking the times where the grabbing of the weapon is still ongoing.
The reason why I set it more than once is that I equip the weapon either with some pickup montage or some equip from holster montage (both have some blendings but both look better if the left hand starts following at some point in time already). So I do my "getweapon"-montage ... get some montage event that says me now it's time to start with left hand but don't stop at that point because usually the pickupanim+idle-aim-anim are both blending (if I would keep the effector transform in that point in time the left hand would stuck at a not finished pose).
If only the idle-aim-anim is playing I stop updating the effector value as it's fine at that point in time.
Set effector to tick works
Yep... I expected this. 🙂
But usually you can reduce it. If you equipped your weapon, no blending is ongoing anymore from anywhere (wait a second or so) and stop SetEffectorValue afterwards it should even work without doing that in tick.
Now i have this problem, when i look down it's like no interp
I didn't understand, sorry my english it's not too good
Set the effector transform just a few times (not always in tick).
Yes for example. But don't set it too soon. EquipWeaponAlmostDone - SetEffectorTransform - EquipWeaponDone - SetEffectorTransform - EquipWeaponDone+1-Sec (sure no blending is happen) - NoMoreSet
If equip-montage is fully done you can stop.
You can start setting it mid equip montage (depends on the montage) if you need... if you pick up a heavy gun you would help with your left hand already a bit before you start aiming.
I have problem with making player model shoot animations, I wanted to do it via transitions but this would not work beceause I can't repeat animation until transition is not completed to the "base" state. Is there anoither approach to do it correctly?
Just use some anim montage?
ok thank you it should fix the problem
any idea why it happens to shoulders? on shooting anim they're not moving
does it have physics constraints or anything like that? Looks like a pushback from firing the gun.
no
is there someone who can help me? i have that error

what does it mean?
i have oreder an animation on fiverr (done with blender)
after i have imported the animation
drop into the scene just to see
and there is that error
I'm using control rig to animate the face. But when I bake it to animation sequences and attempt to play the animation, It doesn't seems to work. I'm using CC4 as a character + autosetup + livelink, so basically its a metahuman. The animation sequences itself however works perfectly. Its just when i put into the sequencer it became a problem. I've disabled body animation + control rig, I've disable face control rig and even delete it after, I've tried changing a few additive setting, none works. I've been stuck at this for days, can anyone help me out TT


thank you for the reply. Im trying to spawn in a modular body part using the retargeted anim bp from the animation sample, it wont work unless the uefn skeletal mesh is in the bp etc... so Im just trying to drive another bp by the retargeted
no one know what does it means?
set the collision to Physics and Query
inside the skeletal mesh?
Select the skeletal mesh, and look in the details panel for the collision profile/settings. Set collision enabled.. either physics only or query and physics
inside the skeletal mesh there is no collision settings
is it in a bp or dropped in the level?
ok open the bp, and select the skeletal mesh
no i mean i'm not inside a blueprint directly i'm inside the Skeletal Mesh
yeah thats not where it is
i see the collision data on the character into the level

so i have enable it with like you (custom, query and physic)

but the error is still there
it's an animation placed on the world
so it's a skeletalMeshActor
can you hop in a voice channel and share screen? I have some time

yes
which one?
Begin Playground
i don't have that one
Hi there I have 4 animation where my character rotates on place with root motion and I made an anim blend space of it but I learnt the hard way that the anim blend space dont support root motion, does anyone know how I could make it work ?
Is orientation warping and stride warping used in production?
I bought an asset character from FAB. Is there a way to import the character to just include all animations? Or do i seriously have to add them all individually?
Depens what "add" means. If you would use the ABP_Manny animation blueprint from the ThirdPerson project and your FAB character has "Rigged to Epic skeleton: Yes" then you can just rightclick the mesh -> skeleton -> assign skeleton and choose the sk_mannequin. If you would use the anims from a different skeleton you can retarget. You can even retarget a compete AnimationBlueprint (where you have assigned the anims into graphs)... or use live retaretting like it is done in the GameAnimationSample project (using the UEFN anims that drives anims for different characters like from Paragon, Fortnite, UE4, UE5, Metahuman).
Here is the issue. The animations are locked to the skeleton, not the skeleton mesh. So it looks like I have to individually put every animation onto the mesh
And I cannot retarget to the mesh either. it ONLY goes on skeletons, not skeleton mesh
I have been doing some research, and it looks like the FAB did not have an Animation Sequence. Only Physics, Skeleton, and the Mesh. How can I fix?
@Tails You bought a character without a skeleton? If your fab character has a skeleton then you even can either assign, retarget, ... If you bought a character that only contains an unrigged fbx you can export to some 3D tool (e.g. Blender) rig it (preferred to UE5 skeleton) and you have a skeleton and all animations.
Hi folks. I'm working with an animation pack from fab that uses the UE4 skeleton, and I've had to retarget the anim sequences to the UE5 skeleton, but I've found that specifically the ik_hand_gun bone isn't retargeting correctly (otherwise it works fine). Before I go down a rabbit hole I wanted to ask the channel if this is a known issue with retargeting ik bones, and if there's a known method for correctly retargeting the ik bones.
Usually this should work just fine. Did you use the default RTG_UE4Manny_UE5Manny to retarget? There is a pin option that is usually on by default. It pins the IK bones to the FK bones that are responsible. You could even fix old animations that just did ignore the IK bones (like the old idle/walk/run from UE4 mannequin) that way:

The only issue that could happen from UE42UE5 mannequin I'm aware of is that you miss the twist bone rotations (if there are any on the old animation) - which are easy visibile in any rifle animation. Because untwisting is now done dynamic in the ABP_PostProcess. If you don't use that then you would instant see twisted hands. So you can either add ABP_PostProcessing for your own mesh like it is done for the UE5 characters or you add a few rules to catch the untwist rotations from the anim set if it does it that way.
state machine transistions are just additive blends right
not additive, they interpolate from one pose to another. the interpolation has a few methods and types, outlined here: https://dev.epicgames.com/documentation/en-us/unreal-engine/transition-rules-in-unreal-engine#transitionblendtypes
Epic Games Developer
Blend between states in your State Machine using Transitions in Unreal Engine.
Hello I'm stuck! hoping someone can help me! I have a motion trail following the nose of my character and I have set it to always visible but every time I click on the head ctrl it starts calculating for that. is there anyway to just have it showing on one ctrl not everything I select!?
One thing I am always worried about is performance. I have heard ALS is poorly optimized. How is the animation in Lyra? Using stride warping and orientation warping. Curious how much difference it would be from something even more basic like a 8 way directional blend space?
is this picture outdated? i can't seem to find a generic normal blend node

standard blend is the most commonly used transition blend mode

yea im just trying to blend 2 animations like how the state machine does it when it transitions, without the state machine... but that generic "Blend" node seems to not exist (or i can't find it) so i guess i'd use a layered blend with a mask that includes all the bones?
this?

how strange

is it possibly called two way blend?
right, I think that's new as of the latest GAS update
but i believe it behaves the same, with some extra functionality
@viscid willow do you do freelance work?
How can I make a motion trail only follow one control and not recalculate when I select other controls?
Thanks for the info. Actually the UE4 skeleton in the animation pack is slightly modified, it's a two-handed spear animation set and they added a Spear_Mesh bone with ik_hand_gun as its parent. This means I've just selected their anims and used Retarget Animations which I think generates default IK Rig etc. I've also tried exporting the IK rig from there and using it with RTG_UE4Manny_to_UE5Manny, but I get the same results. I don't think the Spear_Mesh bone is causing any issues, as it doesn't have any animation, it's just used to display a demo spear mesh (which they've placed in the skeleton instead of attaching via a socket)
This is what I'm seeing. In their UE4 anims the ik_hand_gun bone is offset about 50cm below the hand, but after retargeting it has snapped back to the hand position


Sounds like you should just untick the pin for the ik_hand_gun in that case (else if would override the anim from the spear anim) ... or pin it to the spear bone instead. It would not work with the normal pin as this would just put glue on the hands.
If that anim-set animated IK_gun different and you would copy the anims from ik_hand_gun instead pinning it you need a further rule in the IK_Rig.
hi, i tried to enable the root motion but it doesn't seem to work, i tried on the skeleton before retargetting but no results at all, does anyone know why ?


Anyone help with this ?

bassically I'm trying to have the player motion warp inside a vent
at the moment I'm having issue where either the player ends up on top of the vent or partially through the floor of the vent
thats one issue I seem to get

that is what the logic is which is done from the notify which is lined up with where the motion warping starts

thats what I get if I remove the logic to disable actor collision

so that

something off is happening with the collision cause it seem when that node is involded the player end up on top of the vent and not within it
so this time I've got it now it is putting player in the vent ish but still seems odd in terms of where the capusle ends up

Anyone able to outline the steps when doing motion warping so order of what I need to call and when cause at minute I can't work out what's wrong apart from it either seems player end up on top of the vent or partially under the vent.
Also I can't understand why player mesh is under the capsule even when they aren't normally
Thanks again. I've experimented a bit more with this, it is indeed the post-process pinning that's fixing it to the hand, so I've turned that off. That made me realize though that without the post phase, the ik bones aren't animated at all. They seem to be ignored by the retargeter. I'm fairly new to using UE's retargeting tools so maybe there's an obvious reason for that.
theres a pretty good deep dive into ALS performance vs motion matching which might point you in the right direction: https://youtu.be/8ryrzavNx3Q?si=U-ie1QirxnvfPwrv
a simple blend space would be more performant, but ofcourse is much more limited in what kinds of movement can be facilitated. IMO locomotion in general needs to be tailored to your game

So in my last video a lot of viewers made some great points that would indicate my test wasn't entirely balanced. So I decided to redo it with Live Insights Profiling.
Join our Discord: https://discord.gg/38ceaJ67Eu
It would be nice if he compared it to a simple blend space as well.
Some old UE4 thirdperson template anims (I think the screenshot is from UE 4.7 template) had weird IK bone placement in the animations. If you use those animations with new Foot Placement / Leg IK nodes then your characters would dive/rotate under the ground. There might be other anim sets from the past that missed the IK animation or did it wrong. That pinning would fix all anim sets that ignored the IK-bones. But in your case... if the animation brings a correct IK animation you can deactivate the pinning or just use it at the bones you need. If you would just copy the animations then create a similar rule in the IK rig like it is done for head, ...

Probably it's enough to change the pinning to this:

Yeah I think I tried that, it prevents the ik_hand_gun bone from fixing to the hand, but it just gets put in a static offset position and doesn't animate. This is the hierarchy in the source UE4 asset, the ik bones aren't assigned a Retarget Chain. Is that the root problem here?

Could you create a rule for that Spear_Mesh bone?
Possibly, although the Spear_Mesh bone itself doesn't do any animation relative to the ik_hand_gun bone, the animation should all be in ik_hand_gun
Is there something special about the IK bones that would explain why they're not being retargeted, or is it just down to the IK solve that's done according to the rules in the IK rig? I find it very suspicious that my retargeted IK bones aren't just wrong, they aren't animated at all when I turn off the post phase.
I think the postprocessing is fine for most cases. Before I figured out that there's now that pinning in the retargeting (which fixes all my old anims) I had something like this in my ABP that did that pinning all the time in the anim-graph and placed the ik bone to the foot bones. Works but could be avoided if it's done once already in the retargetting. I think even the gun IK usually correct... as you most liekly hold a gun that way. That said... I've bought some spear anims at the spring sale (did not check it yet) probably I've to take a look at these 🤔 

Yeah... unfortunately I have a special use case for the animations where I need it resolved in the animation sequence itself. I suppose I can write a tool that automates the process and bakes out the sequences post-retargeting
this is the pack in question btw, just in case you bought the same one https://www.fab.com/listings/4830cec0-ddba-4f34-a493-6e6f9594cbc1
Although I think it's common to use ik_hand_gun with two-handed weapons so this might be an issue for any two-handed weapons needing retargeting
Anyone here a expert in importing animations into unreal? I am having the same issue in two different cases, one is models i exported from "Anarchy online model viewer", which is a unity based model/animation viewer for a game i love. Animations work great in blender (skkelleton is a llittle janky so i may Mixamo rig them) but when i export to unreal i have animation files named after the correct animations but no data and no chacacter movement The other scenario is the same thing, but animations/models' exported from a old gamecube game. In blender everything is perfect, but when exported to unreal the animations and the collisions break (character can't walk through imported scene)
Anyone have any ideas why this is happening
I can't work out what's going wrong, I feel it's cause the target location for the warp is level with the bottom of the vent so it's trying to put the player there but cants
I've a different one ( https://www.fab.com/listings/02b4b496-4591-4cee-8970-e28c08026eae ). It's also using a new bone "Weapon_Actor_R" attached to hand_r (not IK). I can pin it to my already existing weapon_r bone and it seems to work fine.


Fab.com
VIDEO PREVIEWDEMOUE5 E-Mail : 9cg.animations@gmail.comDiscord : https://discord.gg/HvDdE3rtg4================================================This package includes essential animations for a character with Spear combat style . Recommended for an action RPG game.Animation list :Idle - Idle-Idle CombatAttack - Parry counter attacks- Run attacks- Da...
I'm not sure. Are you using motion warp like done here: https://dev.epicgames.com/documentation/en-us/unreal-engine/motion-warping-in-unreal-engine ... if yes I think it really matters what your target transform looks like (you've not posted anything about that). So far I see no reason why you switched to flying movement mode (could make sense but without context it is done without purpose).

Epic Games Developer
An in depth look at Motion Warping for animations in Unreal Engine.
So from what I believe you switch to flying so gravity can't affect when the motion warping is happening and they movement is set back to walking after the motion warp
Cool, good to know. I might pick that one up at some point as well.
I'm using the flying movement for AI nav link proxy if they wanna jump down or upwards following the player (there it makes sense to fly as the "jump" is a calculated arc and no real "Jump") but I dont see why you need it yet.
So the vent is way waist height
So the motion into the vent is kknd of a upward sloped from where the player is when they start the motion warping
But from what I'm gathering I shouldn't need the movement mode
What about the actor collision ? Would it be better
To not have it, I can share more tommorow with images
I'm not sure ... if you think collision is messing up your movement you can try to vent at an empty scene without those meshes and check if it works. You currently turn off collision and additonally reduce the capsule height.
I've even that one: https://www.fab.com/listings/863dc07b-856a-444c-a551-c47a3dc3df5c ... Never used it yet. I've checked it now and it is not using a bone. Weapon is just attached to common weapon_rSocket at hand_r at that set.

Fab.com
This is a set of 160+ animations for Female_SpearPreview01:https://youtu.be/5p3bogtyUFgPreview02:https://youtu.be/pQJwdJBbZTMFB:https://www.facebook.com/WeaponMaster-Animset-354729528310358/wmanimset@gmail.comThe package inculdes 160+ combat animations for Female_Spear ,not just basic, including all the de...
I guess if it's one handed it doesn't need an IK bone
Yes that might be the reason.
I am starting to dig into animation. I want to have a good understanding of what is expensive and what is cheap. Is there any documents that talk about frame rate stuff
having an issue where after I do the jump animation, I land, but it does the walking animation, instead of idle animation
Can anyone recommend an underwater combat animation pack(s)?
Looking at adding kicking, punching, 2h spear thrusts,stabs, slashes, 1h knife stabs, slashes and 1h or 2h speargun attacks
While character is treading water
And possibly on forward movement
Hi folks, does anyone have experience with autorig pro for blender? I've followed this tutorial to get a base mesh set up for use with the UE5 mannequin skeleton but my results are... Less than ideal. https://www.youtube.com/watch?v=P9jE1m5gCaQ&t=275s
Auto-Rig Pro 🐺 https://blendermarket.com/products/auto-rig-pro?ref=1626
Patreon 🐺 https://www.patreon.com/werewolven (thank you!)
Discord 🐺 https://discord.gg/Daj7nuANMv


Hi I'm new here and this message was a while ago but I'm facing the same exact issue that you're having, has anyone ever told you how to fix it or have you figured it out since??
There's a few things I would recommend if you're keen to get a handle on optimised animation + skeletal mesh setups.
The first would be this page on animation optimisation and looking at all the things that can be done to have your ABP run efficiently: https://dev.epicgames.com/documentation/en-us/unreal-engine/animation-optimization-in-unreal-engine
The animation budget allocator is a plugin which will optimise the computation of your animation dynamically. https://dev.epicgames.com/documentation/en-us/unreal-engine/animation-budget-allocator-in-unreal-engine
If you wanted to be more manual in the optimisation approach there is a free plugin which exposes a lot of the optimisation features to blueprint, described here: https://youtu.be/zyOjCvT7AHU?si=TIvKzlY9sZG2k7Uo
Carrying on from that, the developer of that plugin is an excellent resource and I would highly recommend this video: https://youtu.be/N_suMyUuork?si=lHBd5tVw6RHaPsml

Epic Games Developer
Use a variety of methods and techniques to optimize Animation Blueprint's performance and stability in Unreal Engine.

Epic Games Developer
System for constraining the time taken for animation data by dynamically throttling Skeletal Mesh Component ticking in Unreal Engine.

A walkthrough breakdown of the Update Rate Optimisation Blueprint Node plugin.
Plugin - https://www.unrealengine.com/marketplace/en-US/product/update-rate-optimisation-blueprint-nodes
Book Technical Animation In Video Games - https://www.routledge.com/Technical-Animation-in-Video-Games/Lake/p/book/9781032203270
Tech Anim Corner Discord - https:...
Dive into the many character and animation optimizations that you should be applying to your Unreal Engine 5 projects to ensure you are delivering a fluid 60 frames per second on consoles.
This talk will examine building from the fundamentals through to advanced methods, as we explore optimizations of animations, skeletal meshes, animation gra...
Gonna guess and say this is a scale issue. Does the root bone have a scale of 100?
ooh i'll che4ck thankyou
That seemed to fix that issue, got some more issues now but I can work though them. Thankyou!
So this is the idea

the player would montage + Motion warp inside the vent
i have my montage where the root moves to where needed

Thank you for this information.
so thats what I'm trying to do

the pink is where it sees the player before the montage starts, blue the target montion warp
but for some reason the montage seems to kind of play
but not how I would think
could anyone help me with this export from blender? The function of the thumb bones are already tested with other animations, but for this one the animation plays just fine in blender but as soon as i import it to unreal, the thumb goes to another dimension (i had previously had the thumb to close along with the rest of the fingers and it did something similar, i straightened it for debugging)
Anyone help me here please
I'm trying to get this montage with motion warping to work and so far I seem to have an issue where something isn't working right when it comes to the montage
thats what my Anim BP looks like for the player


thats what the motion warping settings are

also why is it the player mesh ends up under the capsule

anyone able to help me with whats going on here cause I don't understand it
What I don't understand here is the anim montage shows the correct animation yet when I try implementing it just doesn't see to be right
like even the animation I've made in blender I would say I've done correctly
the root moves to the key points
so progress I now have it where it's doing what I expect
the issue now is it doesn't seem to actually get to the target warp point which is the following

also other issue is if I leave capusle at the size it's at well player will clip through vent and will have collision issues
Yes, I tried yesterday but the results are just mediocre (screenshot below). I'm not happy with the weights. Heat or voxel are both not perfect. Especially the face is bad. Mouth does not open, eyes are slimy. My old rig had bones for the head already and worked perfect. The knee bending is not that great either. Anyway the output (ignoring the face) looks way better than it looks in your screenshot (could be fixed with a day of weight-painting I think). Probably you miss some bones in the skeleton? Did you use the UE5 template rig in the AutoRig-Pro settings. It names the spine with 6 bones including pelvis. If you use that you can import into UE5 using the UE5 "SK_Mannequin" as skeleton. I think he used the old UE4 "SK_Mannequin_Skeleton" in the video (worked as well with my test but same issues). There is a template for UE5. You have to pick the right one when creating the rig and use the AutoRig fbx export not the normal Blender one (otherwise the bone names are completely different). I've a old rig already and tried AutoRigPro-QuickRig as well but this messes up the bone hierachy from the SK_Mannequin and I have no idea why because AutoRig pro is sorting/using it's own skeleton structure before you hit the export button. My meshes already got some weights so I'm switching back to my old workflow using the Blender addon "Game Rig Tools" instead ( https://www.youtube.com/watch?v=U23WyAd8o_8&t=1403s ). It's not fire and forget either but I can perfectly merge my face bones with the template skeleton of Game Rig Tools and my old UE4 painting could be changed to UE5 (pelvis weights -> spine02, ...).

IMPORTANT LINKS:
❖Game Rig Tools
https://toshicg.gumroad.com/l/game_rig_tools?a=477128051
Blender Market: https://superhivemarket.com/products/game-rig-tools-blender-addon-game-rigs/?ref=356
----------------------------------------------------...
Anyone have any ideas at all please
woudl be really helpful
now it's not working again
I just don't understand whats going wrong the collisions etc are all as they should be yet when I try warping the player into the vent for them to then traverse the vent I just can't get it to work right at all
About the first video... did you turn off Leg-IK solving while doing the vents?
don't have anything like that on it
How does your montage look like if you place it into the world without any BP (just the animation). Is it doing that weird offset as well?
thats what the monatge does
obvs the animation has Enable root motion ticked so it'll move in place but that montage looks how I would expect
that's not root motion yet
I have that ticked on the animation asset

on the mantage thats what I see so it must be working

@delicate crane any ideas what I need to do then if thats not root motion yet cause I'm pretty sure I've followed the flow for what you'd do
Did you have anything like this in your BP?

I did not
my BP is above somewhere in terms of what I'm doing when the monatge is played
Has anyone seen anything like this before with motion matching and going prone transitions? The only transitions playing are the ones where he's getting up, but whenever he needs to go down he starts twitching like so. You can see everything in the chooser table is firing up as needed and all the transitional animations and databases are set up in the exact same way so there's no differences between them. (I originally had one database for all the transition but it kept choosing the wrong ones that's why they've all been separated). Can anyone help me on this please I've looked everywhere for answers
lol sorry about the mkv link above i recorded it on obs here's a better one
Hi folks. When editing a control rig in Sequencer, is there any way to attach a preview asset to one of the bones/sockets as you can when previewing skeletons and animations elsewhere?
By preview asset, I just mean a static mesh
If I attach one in the skeleton asset itself, it shows up when previewing anims that use that skeleton, but not in sequencer
Never mind, I figured it out. If I parent the mesh to the actor in the sequencer level, then edit the actor in the Sequencer it's manipulated by the control rig.
Hi, im using the ABP_Manny anim BP which is hooked up to SK_Mannequin skeleton, my characters are metahumans but i have them retargeted to SK_Mannequin and also just in case i have added the metahuman skeleton to the compatible skeleton's list for SK_Mannequin... now the problem i am having is that when i have been creating a couple anims using sequencer and control rig, when i export them to an animation sequence its making the skeleton the metahuman one, this isn't an issue for playing the animations themselves which work just fine however the problem is that the custom slots I have created inside the anim bp from Window > Anim Slot Manager (which are effectively on the SK_Mannequin skeleton) cant be accessed when i create an animation montage from the animations ive made, because those slots aren't on the metahuman skeleton their on SK_Manny
Is their any way i can access the slots that are on the SK_Mannequin skele without retargeting the animation to it cause its breaking some shit with the anim if i do that?
I actually managed to fix all my issues. I didn't have the scene metrics in blender set up right and it was throwing everything off.
Are weights ok in your export? I'm not happy with mine.
does anyone know why I'm getting spammed with these warnings sometimes in the editor? I've been messing with my animation blueprint and that's what it's referring to there (hence posting in this channel). C_44 and C_45... are those instances of the blueprint?

If you access a None MovementComponent (which is mandatory for character BP) it sounds like you do already something on it (anim BP without IsValid or CastSuccessful check?) when it is not really initialized or you try to do something with it if the character already passed (e.g. death?).
Hmmmm that's a great place to start looking, thanks!
In my head I wonder how the ABP exists trying to do anything if the player/movementcomponent doesn't, ABP's can't just exist on their own right? But I also don't think I have very many isvalid checks within it
Oh, curious! The only time I get that error is when I save the blueprint
adding an isvalid check to these footstep line traces threw about half of the errors away
If you add a few more they most likely are gone.
I'm guessing there is something with the ABP running in preview mode that's trying to pull a movement component
Init would do some things parallel so even if your ABP is assigned in the character BP it might be faster than the movementcomponent which is initialized in the same character BP.
Ah yeah I'll check in init as well (and construction). Thanks very much! 🙏
hard to say exactly, one thing to try is when you import your animation asset, try enable Preserve Local Transfrom in the import dialogue
thank you for answering! turns out it was the stretching mesh setting from blender, i disabled that and it fixed the jerking. However, now i no longer have the benefit to animation impact from stretching
i guess i would need to create the animation from scratch with the setting enabled
ah nice. yeah non-uniform stretching is a bit unpredictable. The preserve local transform setting i mentioned before does help with stretching bones, otherwise there are ways to counteract the undesirable stretching by forcing bones at the end of a stretchy chain to maintain a scale of 1.0 so they dont deform weirdly
cool! ill try preserve local transform and see if it has any effect on it
thank you for the info battz
you're welcome
just to clarify

Does anyone know why layered control rig stopped working correctly in 5.5? I tried using it the other day with fk control rig and after key framing something it snaps back to the animation and ignores and movement you’ve created.
Hello, can someone explain to me when it is right to use the main threaded event graph, and when it is right to use thread safe update animation function ?
Has anyone made the "Orient Rotation to Movement" setting work with the new Game Animation Sample?
Take a read of this document to understand the difference between the Event Graph and Thread Safe Animation Update, it's explained in the first few paragraphs: https://dev.epicgames.com/documentation/en-us/unreal-engine/animation-optimization-in-unreal-engine
I would say as a general rule, if you can put something into the Thread Safe Function, you should.
Epic Games Developer
Use a variety of methods and techniques to optimize Animation Blueprint's performance and stability in Unreal Engine.
Is that not one of the movement modes available in the sample? If you're using a gamepad i believe this is toggled by clicking in the right stick
Oh yeah, thanks. I don't have a gamepad but clicking the wheel made it work, thanks!
I just didn't see the options anywhere else lol
some info here https://dev.epicgames.com/documentation/en-us/unreal-engine/game-animation-sample-project-in-unreal-engine#playercontrols

Epic Games Developer
The Game Animation Sample project is an example project that you can use to observe and learn about high quality and responsive animation systems in Unr...
damn I'm such a noob, thanks
Thank you very much!
I need some advice. I have an animation montage I want to play when a player runs, however the legs get locked up.
I thought I could do a layered blend per bones and use an Upper body slot for this set to the spine_01 and it works great for that.
But the problem is the rest of my other animations.
I thought the easy solution would be add another blend pose. Set those to the default slot. Have them work with Pelvis and up. But it seems adding that extra blend pose negates the first one completely.
Anyone know work arounds for this? I can't find much googling around.

your layer blend will be adding all the poses you have layered together. so if your first layer is from the spine up and your next layer is from the pelvis, the one which blends from the pelvis will override everything, because the pelvis is the parent of the spine and all the other bones.
what is the desired result you want to achieve?
Two separate groups. Really I have one singular motion that is just drinking a potion that I want to blend with movement.
And the rest of the stuff was fine before when I didn't use layered blend per bone.
So my ideal outcome would be. I just have the potion drink blend with other animations and have the rest of my defaultslot act as it was before
in that case if you had two poses going into your layer blend, one of those being the upper body slot like you currently have, then have your default slot after the layer blend node and before the output pose. im assuming your other animations are full body anims
Yes the others are full body animations. They're performed generally when the player is stationary
right, so the default slot can be after your layer blend, and it will override everything when an animation is played through it. but the locomotion will all be before the layer blend so you can blend locomotion and upper body anims
is there a particular node or setup to accomplish that? I'm guesing with regards to that I'd remove the locomotion default slot and add it into the output pose somewhere else
like I described before, your default slot can sit between your layer blend and output pose nodes. and you can remove the BlendPoses1 pin from your layer blend
Yeah that did it. Don't know why I was so hellbent on having it be part of the blend pose. Unfamiliarity with it I suppose. Thank you
you're welcome
Hi, I have some turn in place animations that have root motion enabled, they work in game no problem and when I open the animation sequence you can see it turns the player and isn't playing in-place.. however when i try to attach it to my character actor inside a level sequencer it doesn't rotate the character and plays the animation in-place, any ideas why this is?
Guys does anyone know why on ABP it's without smearing but the actual asset has?
Morph targets seems to be working only on asset
On your ABP go to Class Defaults then change Root Motion Mode to Root Motion from Everything. I think that might work
I’ve searched the internet trying to fix this issue with my characters wrist. I’m pretty new to learning UE. His wrist is twisted during some play animations and I don’t know if there is an easy way to fix this. Does anyone here happen to know how to fix the twisted wrist? Thank you

Untwist is now done in ABP_PostProcess. If your character is using SK_mannequin you can just add the PostProcess from Manny or Quinn to your mesh and it should work.
PostProcess disabled/enabled (Quinn)


Thank you, I will look into that!
Hey all..really struggling. Trying to get the source mesh or saved pose to another ABP.. this possible?

Hello. So I found out that, chaos cloth panel assets don't render with pathtracer. Someone mentioned, I could record the cloth animation of a dancing character inside unreal and than render that with the pathtracer, as a skeletal mesh. But any ideas how?
I know where the record tool is, but when I hit it a) my dance animation is thrown out of the sequencer b) it seems to only record the translation of my whole cloth asset. I only found tutorials for people who recorded character animations...
do you also have force root lock enabled?
Not exactly sure, do you need to flag those particular curves as morph target curves in the curves window of the skeleton?
Hey, i've got a question.
- For object interaction animation is root motion important or can I do without it?
Depends on the object and the type of interaction. If you do some pickup it's most likely inplace. If you do some vaulting then it's most likely root motion.
I am making my character shit on the chair, what would you suggest in this situtation?
Both would do for a sit down anim. But I would use root motion in that case.
does anyone have any base settings to use for breasts and buttocks for KawaiiPhysics?
I'm not using just a normal spring controller for that. Works well.
For some reason when i do my animation without root motion, it works fine. Till i enable root motion, then the animation plays where he stands, rather than towards the chair.

ah yeah, I know about that one, I was looking more into the KP ones as they have better clipping control
it's just that by default, the bewbs fly
does your character collide with the chair? if so the capsule wouldn't be able to overlap the chair when root motion is enabled.
leaving root motion off in this case is probably simpler so the character can animate their way out of the capsule
iirc the spring controller doesn't allow you to limit translation which can result in unpredictable motion, particularly if the framerate is low
you don't have any local changes?
Those are already on the morph target window of the skeleton
Odd issue. I wonder if you can print out the value of your morph target curves while they're being played back in the ABP to confirm they're setting some value.
It was an issue with the IK foot placement of the knees. I don’t understand why my ones didn’t work but everyone else’s did
gotta love git
Thank you for guiding me into the right direction. I still wasn't able to find a lot about this ABP_PostProcess. I found one video of a guy fixing the issue, but it seems that his character's wrist is already deformed from his mesh before animation's. I'm using the one from Manny, that you recommended. Manny's character doesn't show the deformed wrist twist during animation, but once I use my character is when the wrist deforms. I was wondering if you had any other ideas or if I was clearly doing something wrong (Which I probably am). I'm still trying to learn all of this and search things online. Thank you


I got it to work! Thank you, again for pointing me into the right direction!
anyone know what to do here? I'm trying to pose a character, so I made a Pose Asset of the skeleton, which is being used in a Blueprint (pawn) on the right. But i don't know how to get the Blueprint character to use the pose.
how can I get the Pose Asset to work with the BP? also the BP is set up with XGen groom hair + eyes attached to it (idk if it'll move automatically)


I've got this animation proof of concept but I'm not sure the best way to import it into the engine
Hi! I’m working on a basketball game and I need help implementing a procedural dunk system.
I have dunk animations that don’t use root motion, and I want to manually control how the character moves through the air toward the ring. I need the character to:
Jump toward the ring using a specific arc
Reach the exact position so that the dunking hand aligns perfectly with the rim
Blend smoothly from the jump to the dunk animation without relying on root motion
I’d like to know how systems like NBA 2K or NBA 2K Playgrounds do this kind of motion syncing.
Can someone please help me replace an AI animation in the game? It's from UE4, version 4.11. The name of the game is Days Gone. This is a paid request🙏
you’ll want to look into motion warping. to be honest, it does help to have root motion as a foundation because you can manipulate the root motion as needed, and having a starting point based on an ideal trajectory will help with that modification at runtime. especially because the arc of the jump will be important for the feel of the dunk
Does motion warping just refuse to work for anyone else? I'm calling a warp on the animation the exact same way with the correct name as another animation, but for this one the character just quickly moves to position and doesnt animate at all

and it complains about an invalid warp target name, despite it having one
it did the same thing when i made another variant for the other mantle animation, and started to work when i just duplicated the earlier montage and edited that
nevermind, user error 
i had the wrong slot
You can use a transform node and tell it how long you want the transition to take. If you put a delay node before it, you can control at what point of the animation it starts to move.
You'll need to make the hoop a blueprint and set any object, to where you want the player to move to. The way I made something similar before is by animating the Z axis of the jump and transforming x and y to the hidden object on the ground.
Idk how readable this is, lmk if I shall load up the project and take a better screenshot.
Ignore the lower part of the purple node tree, thats just for when you are out of range.
The red nodes and branches are also just for not playing the animation twice.
Most upper branch, ignoring reds:
Disable collision -> Play Montage -> Wait until .6 seconds into the montage -> Get chair and move to desired object.
After that its just the take out controller script via the material.

This does come with the porblem though, if you have more than 1 object to move to. Didn't need it for my case but it should be easy to fix by making separate prefabs for each team.
Hello, does anyone know why unreal doesn't support multiple branching point anim notifies on the same frame?
dude this motion mathcing is driving me crazy. anyone willing to help me with some settings i probably have set up wrong?
i made these fighter stance animations using cascadeur and some things just arent working right. i have the animations looping on as well as root motion and root lock enabled, but some animations are not playing in full and stuttering at points.
also when moving forward, the motion matching system tries to pick from the forward left or the forward right before transitioning to the regular forward.
then finally, when the character comes to a stop, the character will t pose
Anyone come across issues with blend stacks failing to play non-looping animations?
I’m using “force blend update on next update” but when entering the stack in a state node, but it’s getting stuck at 0 and not progressing.
Hi, I've got this set up in my Anim BP however I've having a weird issue with the Blend Poses by Bool that takes IsAiming as its Active Value.. when the player does a specific sequence which is aiming, then while aiming turn which triggers a TIP animation and then while that TIP animation is playing they stop aiming.. this in and of itself works fine but then after doing this sequence, aiming again and then turning in place it causes a weird jolt in my animation when the turn in place starts and I believe its because the False Pose of that Blend Poses by Bool (with IsAiming plugged in) is very briefly firing before it fires the True Pose despite IsAiming being true the whole time.. I am getting IsAiming from my character on BlueprintUpdateAnimation and im printing it out so i can see that its true at the time that the False Pose pin is called.. anyone have any idea how that's possible? lol

That False Pose only (incorrectly) gets called 1 time, every other TIP after that is fine only calling the True Pose pin and it only happens after the player stops aiming while a turn in place animation is being played like I described before.. other than that it doesn't do it
Hi
I was trying to setup a pure root motion setup using mixamo char and animation.
I have t he right strafe walk and the right strafe(run) not displacing the character in the right axis.

the problem I am getting is that the character does not have right locomotion while these two cycles play
Thats how it looks does any one know any fix to this?

Check the variables and compare them with the min/max values of your blendspace.
Pll, regarding blender, any idea on how can I fix the scaled down actions after renaming an armature?
I was going to try out my own root motion animations for the first time, made the mistake of doing a hell lot of animations, but my armature wasn't named armature so unreal created it as a bone and by renaming it back everything is broken and burning into ashes
Can someone help me to troubleshoot this issue I am having with attaching using the sequencer?
I am using "attach current" to attach a gun to my character's hand and it just pops it to another seemingly random position
Is this an issue on 5.5.4?
Does anyone know what might cut off an anim montage early? Right now for testing reasons I have a button set up to just play a montage for the big bug character. But when I push it you can see he starts for a split second and even draws a trace that is from a notify on the montage but he snaps back to idle instantly. Im not sure why it wouldnt just play the full montage
also for this ^ I did some more testing seems like its ONLY happening on this guy so im not sure what setting I might have checked to cause only him to not work