#animation
1 messages · Page 50 of 1
Only the dynamic retargeter looks identical, but it has performance overhead
So i cant use it
OK, and did you setup an IK rig, and tweak the settings, and all that?
Ofc it wont work without IK Rig
The new retargeter by default requires ik rig
Hey, I'm trying to use IK to move a model's hand (torso -> upper arm -> lower arm -> hand) to a position relative to the upper arm origin location.
What I've been doing is:
-
doing all of my maths to calculate the vector that would translate from the upper arm origin (shoulder joint) to the desired hand position (relative to the upper arm origin) ->
shoulderToHandVector -
getting the translation (in bone space) from the skeleton root/component position to the upper arm origin (right shoulder possition) ->
translationToShoulderVector -
setting the goal position to : (
shoulderToHandVector+translationToShoulderVector)
and, well... for some reason, it seems that target vector suddenly seems to... point the wrong way? as if the shoulderToHandVector was rotated 90 degrees about the vertical axis, as far as I can tell.
What confounds me is... why the rotation? If I draw the vectors relative to the shoulder using debug lines, they seem to point the right way
I tried rotating the vectors by various right angles at various points in the math process and i cant seem to get them to point the right way
i understand that this is probably super vague and impossible for you to debug or reason about...
so i guess the question is
How would you approach the problem? Feel free to ask for more info obviously
for more context, I'm trying to build a chivalry/mordhau style directional combat system (i promise I'm not trying to rip off those games! trying to add something new to the genre), where the weapon swing animations are procedurally generated via IK.
The problem as I see it is from an animation perspective is:
- generate a "starting position" for the player hand at the start of the swing
- generate an "ending position" for the player hand at the end of the swing
- lerp between those positions
Am i thinking about this correctly?
for context, if it aint obvious, I'm pretty much a noob to animating, I've never done something with IK, only basic skeletal mesh FK stuff
any ideas for blueprint nodes that might be useful? 😬
Is this a bad question? Sorry, i'm really lost here, have spent ages on this problem now
the third picture is in the state mainstate and then inside locomotion could someone tell me what i did wrong


it’s not a bad question but i think it’s quite a complex one! are you doing everything fully procedurally, so no base animation at all, just IK?
Hey Guys! Is it possible to use the animation samples of the new UE5.4 AnimationSampleProject in a Blendspace in my current one? Because there are root motions activated in every animation und i cannot use it in my blendspace now^^
How can i prevent stopping an animation so abruptly? I mean, I have a blend space with idle->walk->run, but when using AI Move to, the stop point is so abrupt.
So, forgive me if I'm explaining this incorrectly, but I've got an FK run cycle blend underneath; I want to control the arms with IK only, though, if that's possible. Is this a bad idea?
I am trying to make a melee FPP game with a realistic First Person, therefore the character body will be visible and the animations off camera will be well made and realistic. This because today we are getting closer to realistic lighting and reflections therefore when you see your char shadow or reflection in FP and is not well made (Cyberpunk is a good ref about it) It breaks the immersion.
But now, my char will be holding a katana in the HIP, but a problem is that in FP he would only see the katana equipped if he looks down to his hip, others games do the rendering of the first person arms in “another plane” above the char body and overral world, commonly used to avoid clipping when close to a wall.
I could just do that like everyone but my problem with this techinique is that when you get closer to obstacles the proportions seems really odd, feels like for each distance closer the world gets bigger and the char smaller do this another plane of rendering, breaking immersion.
Does anybody knows how i can get the best of both worlds? Or knows a game that’ve done this well? Any reference? Anything...
Heres how other games do it

Stuck on a new issue. After I merged mesh by distance, everything was intact. Then I selected everything and applied the automatic weights, now some accessories are not sticking to my mesh. Does anyone know how to fix this?

I didn't think I'd find a tutorial on it but I think I figured it out, now. Had to go into edit mode and separate mesh by loose parts and it looked like that some how fixed it.
I would like to use the Animation Sharing Plugin for the bodies of 10 metahumans. This works. The problem is that when i want to use a LiveLink animation for the face (individual animations for each character) - LiveLink does not work any more. Someone knows what I can do?

Yeah, you're not actually setting the IsInAir value.
That seems likely to cause a problem.
That's seems like an odd thing to do. Why use the Animation Sharing plugin? Is it an optimization thing?
Yes.. the idle animation on one metahuman takes 50% cpu
and I only need the same idle animation on all of my metahumans
so this is why I thought the animation sharing plugin would be a good idea
Any time you try to have a full body character always visible and active in a first person game - you're going to have a fight on your hands for your whole development. It is an enormous cost to do this for almost no benefit, and you will need to use a lot of complicated trickery to conceal the many necessary abstractions you're going to have to use to make the game not really unpleasant to play.
but the plugin disables all livelink face animations that i have individually for every metahuman
I strongly recommend reconsidering this design choice, but if you really REALLY want to do it, and are willing to expend the considerable resources necessary to make it work - you could do worse than checking out the GDC talk by the Dying Light developers.
Good heavens. That seems... shockingly high.
Are you doing anything really odd with that?
Is your computer really bad? Are you aiming at old smartphones as your platform?
Then something highly anomalous is going on, as a single character playing an idle animation should not consume 50% of your processing speed.
That is really really weird.
And not something that should normally occur.
ok.. i thought it is a metahuman issue
I don't think so. Metahumans aren't cheap by any means, but they're not that expensive.
I recommend checking out 'Unreal Insights' to profile what is consuming all of that processing time.
Epic Developer Community
Profile your project with Unreal Insights.
that is good to know.. so maybe something is wrong with the animation i guess
It seems unlikely, the animation would have to be spectacularly bizarre to consume that much processing power.
it should not be bizarre, its only standing and moving a bit
thank you i will look into it now!
this could get tricky. even with animations controlling your upper body additively you can run the risk of arms looking or feeling stiff, but it’s definitely doable
Here we go again! Another problem resurfaces after solving the last. What is happening?
Why do my animations show correctly in the retargeter and worse here? Why is the camera not moving with the character?
Hello again, Squishy. I'm re-opening this question. To summarize: I am trying to give myself the ability to control the play rate of different parts of a montage. My initial attempt was splitting the montage into two subsequences running at different rates, but doing so causes unusual root motion. Attached is video of what I'm describing.
You can see the boss slides backwards after the animation is over
OK, does the animation work without the sliding if you're not controlling the time?
Like - if you play them at 1.0 play rate... does it work?
Both sections at 1.0? Let me check.
Seems like if both sections have the same playrate I don't get the sliding issue.
That's interesting.
Umm... I mean - the obvious simple fix is to modify the animations to have the same play rate then, right?
Like - you could try to figure out which part of the character movement component and the montage playback, and the animation play rate systems are interacting in an undesirable way... or you could just change the animation.
Also re-opening this question. I'm completely lost on how to rig a cape. I tried following this tutorial as my mesh's cape is both weighted to bones and has cloth physics, but the cape is all of a sudden now stiff in motion. When I try doing it without the backstop maps, it becomes rather jittery.

Epic Developer Community
This example will demonstrate the proxy simulation mesh workflow for Chaos Cloth as well as show how to use the cloth backstop in UE5. We’ll be creating...
This is the result following the tutorial as is.
This is the result without the backstop maps.
I don't have the capacity to change the animation at this time. It's from an asset pack.
Seems like the reason is due to some unusuall interaction with the Blend out to the root pose.
Regardless, @nimble torrent is there a way to control the play rate of a montage dynamically? If so, I could try doing it through a curve. Is there a way to do it through AnimBP? I'm very new to ABP.
Err, you can use 'Montage Set Play Rate', but you need to hold onto the montage instance that you get from Play Montage, and then modify that per tick.
So you can, it's just a bit fussy.
This definitely looks like you don't have enough geometry on the cape. It looks very rigid.
It sounds like it would be worth the investment. Can I get the currently playing montage from a slot?
I don't think think so? I definitely remember this as an issue people have raised before.
I think you can get the most active montage - but not montages from specific slots.
Which is very silly.
This is the geometry for the cape. The one on the right is the proxy mesh, should I have added more geometry to it or make it bigger?


Yeah, it's this one:
Epic Developer Community
Get Current Active Montage
Even the docs mention that it's limited and strange.
Hmm, the proxy mesh probably needs to be more dense than the display mesh.
By dense, do you mean more subdivisions?
I do, the issue is that the example cape is used in normal locomotion, but your animation requires a much more complex relationship with the body than fluttering in the wind.
For this cinematic (I hope it's a cinematic) you might be better off using an external simulation of some kind (like Marvelous or Houdini or Blender) and caching it?
Chaos cloth is pretty good for runtime cloth - but runtime cloth is generally pretty simple, buggy, and prone to failure.
Looks like this sequence is never being hit. Any idea why? I am using a character with this anim blueprint assigned.

Okay! I have it working for live. Is there a way to make it work in the preview as well?
Probably not 😦

Note to self and others: Breakpoints do not work in anim blueprints
I'm still getting some of the rubberbanding issues, but I think that's due to blending issues with the root ability.
When I play out the animation in by looking at the asset or running it in-engine, it works fine (as in it works in tandem with the wind directional source I have). It's only when trying to render out the animation that it does not seem to work properly.
Uhh... I mean, it depends on what you have linked to the Character variable?
Oh it's specifically in sequencer that it borks? That's interesting.
I use Movie Render Queue for rendering my animations, which is where it goes wrong.
In the scene, I have the wind directional source move around to control where the cape billows.
Turns outnis because breakpoijts dont work in animbp
That hasn't been my experience, but I haven't used the new thread-safe stuff.
Blueprint breakpoints arent working for me
Prints show its functioning as expected, at least
Seems like you are far from alone in having trouble with thiis.

Reddit
Explore this post and more from the unrealengine community
This thread is one of like half a dozen that popped up with 'cloth physics not working in Unreal Movie Render Queue"
sorry for the super late response, I went to bed...
Do you have any ideas on how to approach this problem? I'm really all ears and happy for any advice in this respect, I don't know what I don't know...
I'm not too fussed on it looking mechanical/weird (it would largely fit the theme of the game + probably be easier for the player to read) at this point, I'd be happy even with a placeholder system while I work out other aspects of the prototype
I think I may have solved my rotation issue;
My skeleton mesh is rotated relative to the character actor (bad import settings, lol) - so I just needed to rotate the vectors by the inverse of the actor->skeleton rotation while they were relative to the world origin (e.g. before translating them to the shoulder joint)

On an IK rig node in an AnimGraph, in the goal settings what does the "bone" option do?

cant seem to find any documentation for this, annoying 😦
https://dev.epicgames.com/documentation/en-us/unreal-engine/ik-rig-in-animation-blueprints-in-unreal-engine?application_version=5.3 NVM, found it. Oddly difficult
Epic Developer Community
Use IK Rig in Animation Blueprints to create procedural IK adjustment of your character in gameplay.
omg guys, im stuck here forever😵💫 , how to attach the weapon how to make animations for them, so hard when don't exist any tutorial or something about this in internet🥲 , by attaching weapon to virtual bones have the same problem like simple socket, is attached to right hand and cant make Bolt Reload for example🥲

i hate to make animations 😵💫
anyone know how to retarget animations with ik and virtual bones? i tried with auto retargeting of ue 5.4 but virtual ik bones are not retargeting correctly ((

with the ue5.4 auto retargeter it sets the root at the wrong location, it should be at the feet. this results in my characters being pushed down when playing the animations

is there a way to fix this?
the skeletal mesh of my character has its root at its feet as well
🤷 🥲


as you can see the pelvis of my own character gets mapped to the root of the default mannequin, even though both of their retarget roots are set to pelvis

Has anyone had an issue when getting the animations for your character, the "land" animation makes your character fall over?
This might not be the best place to ask but, when in animation mode in 5.4, is there a reason the controls more moving around the scene are different than how you would move around the scene in other modes and in previous engine versions?
It driving me nuts as left mouse + drag just does a marquee selection instead of moving the camera.
This is typically a result of an animation having an odd rotation on the root node.
Unreal will try to compensate for odd rotations in the sequence viewer, but when blended they result in the character rotating into the floor.
Which animation mode?
This one. I think it might be using orthographic camera controls. (didn't know it was a thing)

Oooh. Interesting!
I'm guessing it's because it's now possible to animate in Unreal using the Sequencer.
So they created a mode for interacting with specifically the sequencer and characters - and they probably made it work more like Maya or Blender in terms of camera movement.
And picking behavior.
Because you often have to select multiple parts of a character to animate them.
I get that but when you're switching from the normal 'selection' mode its not nice to work with haha. But yea, it looks like it's using the orthagraphic controls used when in the front/side etc views. :/
I'm hoping there's a toggle somewhere for it.
What did you set the retarget root too?
Yeah, it's definitely going to take some acclimatization.
You don't technically need to use the mode though, if you're more comfortable in another one.
How do you modify bones/IK in the sequencer without being in animation mode as it automatically puts you in it. Also, there's no move forward or back in the orthographic controls so seems weird to me.
OK, sorry - you got me. I haven't tried using other modes.
As for why there isn't a forward and backward in orthographic controls - that's because orthographic cameras don't have the concept of forward and backward.
That's what orthographic cameras do - they turn the camera frustrum into a square, they remove perspective. All objects are considered the same distance away, therefore there is no concept of 'in and out'.
I thought putting it in the wrong blendspace was an issue, but my character still moves too crazy around the camera. Is there a fix for this?
This is caused by not retargeting the root properly.
In the original animation BP you're using - the character and the root moved together, in your retarget, your character walks away from their own root.
But animation mode is still perspective so trying to move around what you're trying animate is very difficult.

I think i've checked every setting at this point haha.
Why call them 'orthographic' views at this point?
Because that's the controls it's using to move around. (for the most part) Left mouse does the selection marquee, right mouse rotates the camera, right mouse + middle mouse + pan moves left and right.
But yea, I'm just trying to get the controls to move the same as you would in the other modes.
I wouldn't necessarily call that orthographic myself, but yeah - that's how most animation packages work.
I understand it's a bit weird for you, but for animators it would be comforting and familiar.
So how would I move forward and back?
Try the scroll wheel on the mouse.
That zooms in and out.
When your camera is orbiting something, that is a similar behavior.
I'm not sure what you mean.
If your camera is rotating around an object, then 'forward and backwards' are relative to that object.
So 'zooming in' and 'zooming out' are similar to 'forward and backward' because your frame of reference is the object.
To observe a different object, you have to change your orbital target.
Zooming happens in step intervals so is normally too close (overshooting) or to far away. :/
Followed a tutorial regarding the issue, but when I check root motion and to lock it, it still moves crazy. Do I have to do something with my armature in IK?
Also, i can focus on whats selected with 'F' but rotating doesn't orbit around what is selected.
What does it rotate around instead?
I would assume where the viewport cam is located.
Your problem is that you don't have the root moving.
This is a retargeting problem. If you open one of the walk animations, you should see your character walk away from their own root.
But if you open the same animation in your source animations, you should see the root move with the character when they walk.
This is the source of the problem, your character is walking away from their pawn.
And then, at the end of the animation, a new one starts where they are again inside their pawn, which they then walk away from again.
Are the controls the same for you in 5.4 while in animation mode? It might be something thats bugged on my end for all I know haha.
I'll check. It'll take ten minutes.
What does 'Alt + Right Mouse Button' do?
A smoother zoom.
Good.
I believe thats the same as the default selection mode.
Fixed it by disabling the root motion in retargeter. Animations are a bit wonky but should be fixable
Not sure I'd do that, personally.
I'd probably try to make sure that my animations did have the root motion in them properly.
But if it works - that's the important part.
Ahh ok, Alt + Left mouse orbits whats been focused. I should be able to make it work with that. Still annoying there's no toggle for the controls though as I can see it throwing a lot of people that haven't done much animating before.
@nimble torrent thanks for your help. 🙂
Good luck!
I didn't feel right disabling it either, but atleast the root is now moving with my character. It doesn't line up with the source animation, but with minor rotating it will look normal lol
Pelvis
Try setting it as your root.
since im all desperate due to the retargeter bug, i created a post on the forums, hope more people can shine more light on it :/ https://forums.unrealengine.com/t/ik-retargeter-offline-vs-online-retargeting-is-inconsistent/1912780

Epic Developer Community Forums
Hi, I have recently encountered an issue which still persists in 5.4 while retargeting using IK Rig and IK Retargeter is that the preview does not match the offline (right click and retarget anim sequences) mode, but the online mode (Retarget Pose From Mesh animbp node) match the retargeter editor perfectly. Is this the intended behaviour or is...
right now i have to edit/touch up all (quite large amount) of animations in the sequencer 1 by 1 which is quite time consuming 😦
I was finally able to get a quick sitting pose sorted out (now I can move without selecting everything haha) 🙂 I do like being able to use the ctrlrig to animate directly in the editor.

It is very cool.
Also, nice pose!
Thanks. 🙂
Does anyone know why after saving and then reloading a project the sequence player nodes that are connected to the output pose would disappear from my animation BP? I'm using ue 5.4 if that helps.
Can motion matching be used with normal state machines?
Hey guys, I am in the process of implementing a basic animation system in my game so I can have the logic all squared away, then I will get a professional to actually create the animations.
When the turtle enters his shell I am manually setting the capsule half height to match. Of course this isn't ideal, but if it worked fine I would keep it. My problem is when the character is jumping from the shell the collision floats above the actual shell itself. I am not entirely sure how to solve this issue. Prior to implementing these animations the "inshell" was just represented by the character running faster and a material change, so I haven't really dealt with collision changes. I apologize for my lack of experience here if this is something obvious, we all have to start somewhere.
Thanks

A couple of things come to mind. What does your "in shell" animation look like in the animation editor.
The other thing to check is whether the half height is maintained while jumping. Its hard to see but looks a bit like the half height is reset when jumping.
You could certainly run a state machine in tandem with motion matching. Motion matching will spit out a pose which you can then layer or manipulate in the anim graph.
This is what it looks like in the animation graph.
As for motion matching, I am not familiar with the animation side of unreal in the slightest yet. This is my first venture into it. Do you have any specific resources I should look into on Motion Matching so I can solve this problem?
Cool. Well, my reply about motion matching was to the other user Nikolaaa. I would recommend jumping into that level of complexity if you're still getting to grips with the animation systems in unreal.
How I missed that you replied to him is surprising haha. My apologies!
How about your capsule half height, can you confirm that it is being maintained while jumping?
I can confirm. Just put print on tick for it and it maintained
Oh so it is, I'm on my phone and couldn't see the image well.
Hmm that's odd. If I had me it looks as if the animation is positioning the shell below the capsule.
This issue isn't present when on the ground?
It only happens when moving, but you may have just hit it on the head. I am going to look into something
So I believe you were correct on the issue here, so I made a quick animation where the Z doesn't change instead and he just goes into his shell. Now its doing something a bit more strange. But I believe you have given me enough information where I can figure this out tomorrow by myself if need be. Thank you!
Honestly I find the UI for interacting with control rig and sequencer to be horrendous. I feel the same way about level design and moving, rotating, and scaling actors.
Hey everyone, so I am trying to import a mechanical rig that i made in blender to unreal, but I'm having various issues. I cant import my entire rigged model in as a single object, and combine objects only is present for static meshes. Am I missing something? Is there a way to like rig it in unreal or something?
How can I change the mesh used in the animation sequence?
I've already set the mesh in the "Retarget Source" but it's still not showing.

is there any way for me to get an animation sequence dynamically by variable ?

my ideal is that the equipped weapon holds the info for what the anim instance is for that weapon like whilst it's equipped
at the minute though not show how I would do that ?
I have this variable obvs but it would be something that can go into an anim sequence

so i've got something roughly working but somehow I need to set the anim instance on the weapon for the anims that the player can play
how do i go about attaching a gun to my character? right hand socket & left hand ik for attaching and gripping gun & right hand for gripping gun?
i ask this cus with the right hand socket approach seems to me like the hand is not gonna be placed properly ever on all guns


is it possible to use unreal engine on a tablet?
anyone know a good up to date tutorial on IK hands and weapons ?
If it's a windows or linux tablet, yes.
If it's anything else, not so much.
You can play unreal games on Android and IOS, but not develop on there.
This is going to depend on your character, and will likely require some degree of custom animation per weapon.
A typical way of animating a gun is to have a 'weapon bone' attached to your characters hand that can be animated by your animators to place the gun in the correct location in each animation.
Sometimes the weapon bone will be child of the hand, but it's not unusual for it to be child of the spine, or child of the root sometimes. Sometimes projects will have multiple weapon bones, and swap between them depending on game state.
Not that I've seen. They're mostly very basic, about pressing buttons.
Any ideas how to sort that the foot being super rotated wierd ?

so changed a setting but is their a way to limit the foot rotation or something ?

looks a bit harsh, I'm using as well the foot Placement thing from the animation warping and LegIK thing
why are animations so complicated lol
Spite?
so i shouldnt use sockets to attach the gun to the right hand?
spite?
That's a hard question to answer. It depends on what your project is, your resources are, what you're working on right now, and where you're aiming to go.
Using a socket is fine, but it will often create clipping, as you've seen. Do you care about clipping? Are you at a position in your project where polish matters at all? Are you going to have more resources later?
The frustrating thing about game development is that there is almost never a 'correct' way of doing anything. There are often incorrect ways, but there isn't one solution for anything.
well i am aiming for no clipping, i want it to be solid and to work with multiple guns
but i dont have an animator nor will i have one in the future
Sure. You could measure the angle of the foot to the calf, and then rotate the knee join out to create a more naturalistic pose.
There is no pre-canned solution for this though I don't think. You would have to do the measurement yourself.
Unless you are at the polish stage of your project, and this is your only task - probably not worth the complexity.
It's going to be very difficult to ship a 3D game, with 3D animations, without an animator.
You can probably do it - but you will have a rough time.
how does an animator adding a bone rather then a socket makes it easier?
like i obviously assume having an animator is way better to create good animations
from animation quality to compatibility
but how does it make the process easier to connect it all?
They can place each gun in the right position, and they can adapt the hand pose for each gun so that the handle is held correctly.
wouldnt that create tons of different animtions?
They can put the finger on the trigger accurately, for example.
It will yeah. That's how games do.
like a holding animation for every position (croutch walking running proning) for every gun
Not that many. You can splice parts of animations into other animations.
So you can say 'take only the hand positions from this animation, but use this other body animation'.
That kind of thing.
but would a standing animation hand position be accurate enough to reuse in other positions?
For the most part, yeah.
and its the animators job to make sure that it does anyway
Or to make a new animation if it doesn't.
cus right now i feel like i keep losing my mind over these little things not matching up
i have to create a control rig for every little thing
and its not like im very good at it anyhow
Do you though? Like, it seems like you're pretty early in your project. There's probably a ton of other things you could be working on. Is animation polish the right place to put your effort right now?
well yes, i have a prototype already made with everything i need
map ready, mechanics generally ready, ui has a very solid base
right now im taking what was there and perfecting it part by part
in the old one i only held the gun with one hand, it was that bad
after im done animating the character, im just gonna need to basically fit the old mechanics back
All right. Good luck then!
You can take a sequence node and bind the Sequence setting to a variable like this:

back to the topic though, if i had a bone, and an animator, hed just make sure that when the gun is equipped on the bone, any animation made for it will fit perfectly, since he knows where the gun is supposed to be located at all time?
Look for the 'Preview Scene' tab. It should have a 'Preview Mesh' slot that you can change.

how difficult would it be to include this what you explained there in what I've already got which is currently using Foot Placement and Leg IK
Depends on the animator, but yeah that would be their job.
gotcha, thanks lol
arr yeah I discovered the sequence player so used the pin being expose to pass in a specific animation so thats all working as I want
its a part of my job, im a solo dev working on this as a company project, im learning it as i go and thats valuable information on why the result is what it is
I would say moderately complex, but you can get really deep into it and make it super complicated if you want.
The thing is though - IK feet on angles like that is such a rare occurrence in a game that there's very little benefit in spending much time on it. Like, yeah - the result you have might look a little wonky for one second, but then the character will move and it will be fine.
Players are kinda used to IK jank like that anyway.
Like - have you seen what From Soft gets away with?
It's wild!
Nobody cares!
When you say 'a mechanical rig' do you mean 'I have added a skeleton to a complex mechanical object and I'm trying to import this mechanical object into unreal', or do you mean 'I have created a complex mechanical rig of a non mechanical object, with a lot of constraints and dynamics and I would like to import these dynamics and constraints into unreal'?
I created a not very complex rig of a mechanical object 🥲 I just meant like non biological object if that makes any sense. I used like the inverse kinematics modifiers in blender and a couple constraints but nothing much, its like my first ever rig
im guessing the isseu has to do with my setup in blender
like the parenting
OK! Cool!
So, unfortunately - you're not going to be able to import any of the constraints or dynamics from blender into unreal. The two pieces of software do not agree about anything, and especially not constraints.
oh ok
thanks
is there any other way of doing something similar?
do i like have to bake the animation
It depends on how you want to work, and what you're doing.
You could create a skeleton for the character (which is an armature without constraints) and import that, and then you could create a Control Rig in unreal and animate in Unreal.
Or, you could create that skeleton and constrain it to your existing rig in Blender, and then bake onto that skeleton, and then export FBX animations from Blender to Unreal.
Those are your two main options.
its the opening mechanism for one of those old large format film cameras, its not like I need the real time simulation, i just need an open and close animation, I just thought it would be easier like this
so its probably better to just rig in blender and bake
Almost all animations in Unreal are baked, so yeah. That's the traditional way of doing it.
ok, thank you so much, that explains why I couldnt much on the topic online
is it about the specs?
No, it's the operating systems.
The Unreal Engine (the development platform) works on Windows, MacOS (not IOS), and Linux.
then can i use some kind of simulator to open it?
I don't think so, sorry.
then is there anything else i can use?
A computer with Windows, MacOS or Linux?
Yeah, tablet operating systems are limited.
Like - you might be able to find a way of jailbreaking your tablet and loading Ubuntu onto or something.
But that is well beyond the scope of my ability to explain.
is that an app or something?
Samsung tab s9+
Well, yeah. Sorry. There just aren't many game development tools for Android.
damn
Tried remote control if you have a pc? That you then control from the tablet
Needs to be running
For you to be able to connect as far as I know
Yeah, it does.
what if its running other tasks
You mean shutdown or that it needs to be powered on all the time?
😅
The pc or the tablet?
the pc
The computer needs to be on, and logged in, and have an internet connection.
Yeah
Won’t matter
As long as your pc can handle it
I run bunch of things with UE at the same time 😅
My pc is new so it has the power for most
But how you see it up might need a tutorial for it
acer cori7 can handle that?
It’s a laptop or pc?
I can't wait until I upgrade my PC. Metasound and Control Rig graphs can get laggy when I use them.
laptop
Could work but might get overheated or battery might get to shit depending on how long run it
i see ththanks
Or if you don’t care about the battery then just keep it plugged in
That what I have to do on my potato laptop 😅
well i can't do that it's not mine
School or work laptop?
That I figured 🙏
One option is to find a place like a library or a Internet cafe as we call them; if they have their pc plugged in and on always😅 and configure it to run UE in the background then I’m out of solutions
thanks mate
Another option is to find a friend with a good enough computer to run it for you and depending on what you create you can split to profit with him/her for the trouble 😅
Such mates can be hard to find in todays world
I'm just trying to learn the skill for now there won't be any profit so i won't feel good using my mate stuff for free
And it may get damged
I’m using a shitty laptop when I work at my gf, it works but not at the same rate as my pc
Life is quite hard nowadays
I hope you succeed on your project
That one has a long way to go 😅
What bothers me is that I have to re configure stuff each time I move the project between computers 😆
Still learning as well, only 6 months in but don’t spend all the time on the project. Got to many friends to play with (other games) and a girlfriend satisfy with being around 🤣 and ofc 8h work
How long do i need to create an animation video of 1 minute?
I have no prior experience
Might not take you long as long as you follow some tutorials
I don’t do animation videos so got no honest clue to it (someone else more experienced here might now)
And keep copies
In case shit happens
Are YouTube tutorials useful?
Yeah plenty good ones, just need to find one that works for you or the version of the engine you have
I wouldn’t have been able to make half of the stuff without tutorials
Complete noobie when it comes to programming/developing and animating 🤣
But I’m a quick learner and a good listener
Sometimes people explain like shit tbh
Or leave stuff out
I can guarantee that there is at least 10 persons here who can point you in the right direction for most of the stuff
Hi everyone! I'm fairly new to blender modelling and animation, and while I have been following tutorials on youtube, they don't all follow the same workflow and don't have all of the information I'm looking for, which is making a stylized character (the entire thing, not just the face or just the body) for a first person shooter (so I should be able to just grab the arms off of the mesh easily for the first person side of things, but I also don't want to just make arms, since it'll be for a multiplayer game). While I have been able to make some progress, usually my models have some sort of issue, like one time I messed up with the hands and had to start over, and another time my entire rig was messed up.
Are there any tips or tutorials that I can follow that won't end up in frustration? I know 3D modelling is supposed to take time, but it feels like I'm missing details that would really make my 3D models actually work.
So, one of the most unfortunate things I've learned in my own process of learning art is that there kind of aren't any shortcuts.
Teachers are useful, as are resources like books and tutorials - but ultimately it's going to come down to me, and my pen, and my work.
Even a tutorial that perfectly walked you through the process of creating one character isn't going to teach you how to make the next one. Art is a holistic skill made up of lots of little skills. Even bad tutorials have things to teach you (often how not to do things).
One thing I would suggest is not giving up on something if you mess it up. Chances are - you're going to mess up a lot of things. Everyone does. If you mess up the hands - keep the good parts and fix the hands.

Here we show a small example of what V3 will be packed with. You can now adjust the left hand allowing you to have two held objects and still be able to control each hand individually.
The V3 is almost complete! if you want to get the current version before the price is increased you can find it here!
https://www.unrealengine.com/marketplace/...
hey everyone, I'm struggling with my physics animation. is there anything i'm missing. I want the animation to drive the physics and movement of my spring based character here. but it seems like the physics bodies arent following the animation. and I can't figure out how to make it follow the animation.
https://gyazo.com/1d090cac087d60f9080c1e2c223d09ae

does anyone in here have experience with getting dynamic material instances or looping geometry caches behave when using the take recorder?
geometry caches do not want to start animating in the generated sequence and dynamic material instances generated within the blueprint during capture do not carry through for me either
Is there a way to make it so Simulate physics only works from the waist up?
I have a character that dies and doesnt blend out from anim montage and then the physics simulate. I only want them to simulate from the waist up and keep the legs in the anim state.
if you search for partial ragdoll there are a bunch of good tuts on this
thanks
Epic Developer Community Forums
So I’m trying to do first person PoV game that has this feature. When you kill a player, I want his arms to ragdoll, but only his arms. How should go about this?
Thank you, this was really insightful!
How does motion matching compare to als 4?
It's from the same creator I believe, or well he was involved, but I want to know if it's less buggy and easier to trouble shoot
https://www.youtube.com/watch?v=mhVp_cC9MLc
recommend giving this a watch!
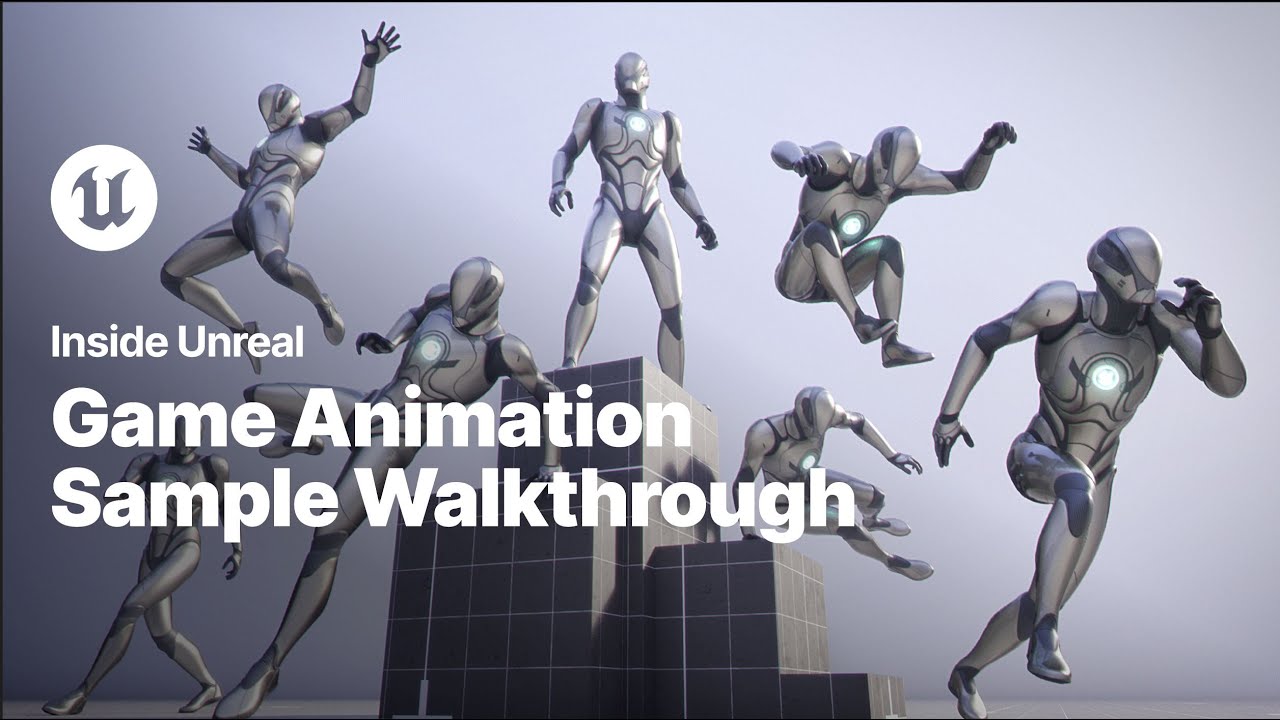
Unreal Engine has been advancing in a lot of ways, but some of the most recent key strides have been in regards to animation. To get a better handle on some of these new systems & learn how to master these movements, we’ve recently released the Game Animation Sample project - where you can not only improve your skills, but also get your hands on...

ive FULLY rigged and modeled this by my self in like
an hour and a half
its for my game, first enemy type
??
?
i think since i have the project done with als so far, ill just stick to it
but thank you for the cool video!
Hi, I'm stuck on animating my full body first person character. I can't get the arms to move down in sync with the camera. Any tips on where the problem lies would be appreciated. Here is a video showing what's happening. The camera is attached the head, so the camera moves up and down with the head first, then once it reaches its max upper or lower limit, the arms begin to move with continued movement of the mouse up or down. How do I merge moving head + arms instead of it happening one after another?
https://youtu.be/GKLUIibB6fw


Hi there guys, im having some issue with the control rig setup for my character. Basically I have a bone (leg_stretch_dupli_001_r) that is not taken when I use my Basic IK. What am I doing wrong please?


Good model without texturing? btw this is like my third model i've done

Anyone able to help on this, when this is running it's causes offset to my mesh as in the screenshot above


where as if I say enable is falling which bypasses the foot IK stuff well it seems the mesh is back to normal where stuff is correct

I think it's the hips so any ideas at all ?
i've checked the animations and their fine
so managed to narrow it down to that the animations be applied onto has some rotation in them which was adding to rotation the underlining animation had
so when it was layering the weapon armed anim on the walking etc thats where the offset stuff was coming from
is there a way to control morph targets via modular control rig? or otherwise expose them in sequencer for a modular control rig actor?
I am working with the modular control rig for the first time.
I noticed the "Spine" control doesn't include any "hip" controls. I found this surprising, the Mannequin characters have good hip controls. Did anyone else notice this? Is there a fix for this or am I just using the spine control wrong?
Thank you so much for the help, i can understand how demanding this might be, i could say that i would think about it but....urgh i just don't like when i can't see my character in First Person, specially when i'm aiming for immersion like in RE VII......but well a man can dream
RE VII doesn't have the full character all the time though.
They spawn legs only on stairs I think?
But if you look down, you don't see your chest.
Yes, and i didn't like it when i looked down
All right! Good luck!
Yes thank you, can you help me with another question?
If I can, sure.
So, i made a metahuman wich will serve as a placeholder fo my character, now i want to animate it, i've seen videos of how to import a metahuman to blender but is messy as hell and can't animate the facial controllers, but UE animation tools doesn't seem very appealing to me since i've saw some juicyer things on blender that saves some juicy time, specially on constraints.
Do you know anyway to animate metahumans in blender but i dunno.... in a clean way? Can i like, create a rig on rigfy, animate that rig and retarget it to metahuman? I wonder if it would work because i've download the Mr mannequin addon wich uses UE4 manequim, when i've placed the animation on UE5 manim arms the hands were stretched out and i've got the differente bones sizes error on output log
Here are the comparision, i feel like ive posted here already but i dont remember


Yeah, if you animate with different characters they're not going to be able to directly share animations like that.
You're going to have to import your animations onto the skeleton you animated it for, then use the retargeting tools to use them on another character.
As for specifically animating in blender for metahumans - I don't really know. I think however you do it - it's going to be at least a little messy.
so no one know how to retarget animations here?
Well, back to the puzzle then
Thank you!
What are they doing instead of retargeting correctly?
It's a bit hard to tell in your picture.
There are no modules in the modular control rig to control morph targets, so I don't think so - unless you wanted to create your own module.
Based on the video on this page, I believe the spine module is supposed to create a pelvis bone. So I suspect something has gone awry with your modular control rig:

Epic Developer Community
Learn how to rig a character using Modular Control Rig.
This is an intro to the Modular Control Rig editor and will show you the basics of building a c...
It's very unclear what's going on here. When you say 'offset to my mesh' what do you mean? Offset from where? What kind of offset?
so it seemed that animation for the upper half of body had some yaw rotation
A BasicIK setup expects three bones, a 'shoulder', a 'forelimb' and a 'hand or foot'. Based on your image, it looks like your lizard character has an additional joint in their skeleton causing the problem.
and when that was layered over the walking and standing which has some yaw offset as well it was causing to be off rotation
I managed to sort it by making sure the upper half animations for holding weapons etc are 0 Yaw rotation
Cool!
That's a very odd effect! I would 100% recommend not trying to do full body awareness for a first person game. It always creates considerable complexity, weird bugs, and provides very little of value. In this case, we don't have enough information on how your 'pitch' value is used to have any idea what could be causing the disconnect though.
thanks mate, so to fix that I need to delete that bone?
Well, no. Not necessarily.
If you do that, you'll probably break your mesh and any animations you have.
So - I don't think so.
You might consider using one of the other IK solver algorithms like FABRIK.
the ik bones are attached to right hand instead of staying at his original position, so when i attach weapon to ik hand gun, with old animation all is ok i can reload the rifle with right hand, but after retargeting to manny skeleton, the weapon attached to same ik hand gun bone, when reloat the gun is attached with right hand hand
like this


OK, when you created your IK rig for your character - did you create a Transform constraint for those bones?
i didnt created anything, this was retargeted with auto retarget from ue 5.4
OK, well - it looks like maybe your retarget didn't work, and you might have to use an IK Rig and the other retargeting system.
i already have the ik rig and ik retargeter what was auto created when i retargeted these animations

OK, cool. Well you probably need to add Transform constraints to that IK rig.
For those bones.
That should do it.
omg, im noob in this section😅
Thankfully, Epic should have you covered:
Epic Developer Community
Create your custom IK Rig using goals, solvers, and settings.
You're looking for a "Set Transform Solver"
ok thanks,will try do to something, another question, i made a procedural aim offset, how can i replicate it? i tried a lot of methods but when move mouse up and down in multilpayer mode, my hands are stuttering
Wish I could help you there, but I haven't done much with multiplayer at all. You'll probably need to ask down in #multiplayer.
oki many thanks!
Thank you for the video. I don't see the hip control in the video, in the modular rig everything seems to start from the spine up.
This picture is the control I'm looking for. With the standard "Epic Rig" you can get this control with the control rig without needing to create new bones.

Ah, you mean hip swivel controls. Doesn't look like the modular rigs have a module for that.
They're very limited and finnicky right now.
That's disappointing. I'd consider this a "must have" control.
Can we edit control rigs made using the modular system?
many thanks for your help, it seems ok when I plug in but when I move the hand still is deformed despite listing all bones), am I missing something else?

No, you can create your own modules, but they are black boxes.
They either work or they don't. There's very little customization.
Here's a little more. But yeah I'm sad I worked on animations and scripting for a while on this character but have to start over since it's too complicated for me. I wish I had started with simpler arms + camera, but live and learn

Thank you for the info. That is disapinting. I'm hoping they update it.
Hmm - that's very odd behavior. It's hard to say why that's happening, but it sounds like, based on the names of your bones, that you have a lot of them called things like 'dupli' and 'stretch' so I wouldn't be surprised if this skeleton you're working with was designed to have a bunch of dynamic bones to improve deformation.
That's cool - but those bones often are not intended to be animated OR used with IK solvers.
I'm guessing you bought this character and didn't model it yourself or work with the person who made it?
OK, by 'rigged' do you mean someone else made the skeleton for you?
Or was there a control rig in blender/maya/whatever?
yea sorry
I always get confused with that sorry. I know control rig in UE5 but not in blender. Basically the guy created the skeleton in Blender and also rigged (i think he used autorig pro or some addon) that had some controllers
This also does not tell much of the story. You are storing the Pitch value, but it doesn't really show what is done with this. Based on your animation graph you linked earlier, hypothetically the pitch value should add to the rotation of the spine, but I don't know why the arms would be delayed like they are. That is a very odd effect.
OK, I suspect that you might have imported a version of the skeleton with those controllers attached - those are likely cluttering your skeleton and possibly messing with your attempts to build a control rig for it.
you are completely right sir. In fact, the whole mesh was wrongly imported and it gave me a nightmare because all animations I designed are not working anymore xD
so I should go back to blender and make sure that bone is removed/not imported right?
Yeah... probably!
Like, that sucks I get it, but you really don't want extra unnecessary bones in your skeleton.
Hmmm... hypothetically, if the arms are controlled elsewhere with a Layered Blend, it's possible that the spine is using pitch for one thing, and an aim control is using it for something else?
I'm having some bigtime issues getting my UE4 skelly to UE5 manny with animations working properly... has anyone here done this succesfully? If so, did you use the 'Manny Simple' to retarget to? It looks like the character's missing a bone in his spine and the armor just looks horrendous :/ I right clicked my UE4 skeleton's anim BP, Retarget Animations and this is the result.
Based on the back it seems like the retargeting has gone awry...?
come on guys, anyone can help me with this aim offset?
people from animation are sending me to multiplayer, and people from multiplayer are sending me to animation?😂
Things that fall in between the two are often very difficult to debug. What do the numbers tell you about your... what are they called - the network controlled version of the character.
Are they just not getting updated values? Are they getting the wrong values?
You've looked into that, right?
i tried with locally controlled, now is fixed for controlled character, but when watch from second player, is a little notable the stuttering but not like before, it should be like that is ok?
You're the game maker, you decide whether it's OK.
Why retarget onto Manny?
Why not just keep using your old animations?
yes but im beginner in multiplayer section, so i don't know if is possible to make it 100% good or it should be fine like how it is now
Again - you're the one who makes that choice.
Can you live with it?
If yes, move on.
You, I am sure, have other things you need to do.
I'm using Polyphoria's assets for player's armor and I intend to buy more of their packs to allow more customization for players. However, their newer packs dont support the UE4 skeleton, which is the only reason I'm doing this
thaaaanks😅
In that case, aren't you going to have to reskin your assets onto the new skeleton rather than retarget?
I figured if I retargeted all my animations to the UE5 skeleton that that would do the trick - I updated the old Polyphoria UE4 skeleton assets to the UE5 ones so everything's setup for the UE5 version. What do you mean with reskin?
I... ok, hypothetically you might be able to get away with having a live retargeting of another skeleton where the Manny character drives your character and uses your animations and then sometimes swaps out to other meshes that use other skeletons.
It is hypothetically possible to build a project that way.
I would never do so, because of the complexity and inevitable frustrations that having multiple skeletons running like that will cause.
Oh I intended for everything to be using the UE5 skeleton. That does sound very complex indeed!
Frustrations? Check. 😆
OK, so you're not keeping your meshes, only your animations?
Exactly
In that case yeah, you need to get the retarget working.
But - wait - where did the mesh we're looking at in your videos come from?
Here's the case though.
The animations have retargeted fine, as far as I can see. It's when I equip the various armors that it really shows that it didn't 😅
Well, there's slight differences between the UE4 and UE5 versions actually 🤔
That mesh is a UE5 version of the Polyphoria armor I'm using
So my process for retargeting was Right Click anim BP, Retarget Animations, I chose the 'Simple Manny' as my Target Skeletal Mesh and retargeted all 2k animations in my project. Took 8h to save the whole thing lol. Am I going about it wrong?
Hi, I am new here so please direct me to the correct channel if this isn't it.
I am trying to add crouch to the Epic Animation Sample and am running into an issue with the Motion Matching Database Chooser and is there anyone here who is familiar with this and can answer some questions?
Hi Narria! I wish I could help but I don't know anything about the motion matching system. Sorry! This is the right place though, I'm just not the right person.
Did you create your own IK Rig to do the retarget or did you use one that was automatically generated?
Also, the armors are new right? They are skinned to the UE5 skeleton and are not your old meshes?
hi, when I tried to import some animations from blender to unreal, it seems that the weapon bone doesn't move properly. im fairly certain it's not an export issue, as it's fine when i reimport to blender. is there something im missing?
Hmm - have you checked the frame where you change direction?
Is it the same in both packages?
Question, I'm using the Two Bone IK node in control rig for leg IK. I tried putting the IK pole controls as children of their corresponding feet, like so:

Does this cause a tick ordering issue somehow (e.g the IK node resolves the feet transform based on the old IK pole transform, which in turn moves the pole which affects the next frame)?
Or does the IK node somehow resolve this automagically? 
sorry im not really sure what you're asking
So what I see happening is that there's either a desync between the movement of the gun bone and the hand, or maybe there's a placement problem with the gun - hard to say.
So what I would look at is the exact frame that the gun bone changes direction, it seems to hit the change in direction pretty hard.
And I'd look at that both in unreal and in blender.
To see if it's the same frame as the change in direction of the hands.
Is it on frame 11 for the hand and 13 for the gun bone - but only in Unreal?
Are the hands fast?
That's where I'd look first.
I think this would expect this to cause issues.
You do have a lot of control over bone placement and ordering of events in Control Rig, but unless you're setting the position of those pole nodes in the event graph - they will follow normal hierarchy rules.
ah i think i figured it out. i guess the bone compression settings screwed with its motion somehow. thanks for your help
Aha! Yeah, they can definitely do that. Nice catch!
So I wanted to try creating a Control Rig with the 5.4 update (had issues when I tried with earlier versions) but I am still getting this problem. When I go to build it I add the Spine Module (pic 1) and it's ok. But once I add the Leg module in, the ankle/foot part disconnects (pic 2).
Does this have something to do with the asset I am using? And if I have no idea what I am doing, will it be hard to find something online to walk me through haha.


Correct and yes, I used the auto ‘Retarget Animations’ option.
Unfortunately, the modular control rigs have some fairly specific requirements for how the limbs work.
Specifically how many joints, which orientation they are, naming conventions, etc.
It's not clear why they fail, but they appear to fail more often than they succeed.
The asset says it's on the UE skeleton but for some reason this one seems to be the only one I ever have a problem with haha
OK, so the automatically generated retarget ik rig is not always perfectly setup.
But when I look at your results - I don't see a huge error animation error in your video. Instead, it looks like the armor isn't particularly well rigged.
If you open the armor mesh file, and you rotate one of the bones independent of an animation (just grab it and rotate it) - my bet would be, you'll still see the stretching and errors you're seeing.
I think the armor meshes just aren't skinned very well.
I would expect, if it were on the Unreal skeleton, that it would work.
I’ll give that a shot this evening, thanks for your assistance!
can anyone help me with this error?
Blueprint Runtime Error: "Attempted to access TRASH_Attachment_GrenadeLauncher_0 via property Attachment, but TRASH_Attachment_GrenadeLauncher_0 is not valid (pending kill or garbage)". Node: Transform (Modify) Bone - Bone: upper_gear Graph: AnimGraph Function: Execute Ubergraph ABP Attachment Blueprint: ABP_Attachment
How can I get the valid Check here?

im doing here yet i get Access None error

why my animation was deforming any suggestion
@nimble torrent that site not helped me with retargeting ik bones ((
i added bones here but still not retargeting them ((

here i set the left hand ik i know i deforms the animations but in the guns animation i dont know what to do
i can't set the ik_hand_gun to right position, i tried to add this PinBone but still nothing

guys its possible to add a Preview Mesh inside IK Retargeter Window?, because i can't understand how to edit the bone to make my weapon stay in correct position after retargeting animation
@heavy trout have you interp the proxies animations? Did it work?
no man, this is for animation retargeting from ue4 to ue5 which is not retargeting the ik hand gun bone
No I know it's got nothing to do, I was asking if the problem you have 9 hours ago is fixed
aim offse yes fixed
do you know how to retarget ik hand gun?
Other than matching the ik bone in the retargeter, not really
but not working ((
I've no clue, sorry
🥲
lets goooooo baby, finally fixed the ik_hand_gun🥰 😂


heya, I can't get per poly collision for skeletal meshes to work at all, can anyone confirm it working in 5.4.2?
Nice! What did you end up having to do to make it work?
switched translation mode😅


Aha!
now im trying from my idle pose, to take hands position and to copy on all retargeted animations omgggg, a lot of work😵💫
Couldn't you just do that at runtime with a Layered Blend Per Bone?
these are my idle position hands and retargeted animation😅


You can use 'Blend Pose By Bool' to only evaluate part of the graph after a test - but in this case, you're probably better off storing the Turn Angle in a variable on the animation BP in your Update Animation tick in the evaluation graph. That way you always have a float value to use, rather than relying on a variable on another object.
i don't know, i just need the begin hand position and end hand position after reload animation ends, so i don't know how to blend that, if is possible to blend them
so im trying to copy hands keys from my idle animation and to paste them in all animations ad the begin and at the end
OK! Good luck!
exist another way to make it faster?
Possibly. You can paste the hand position from one animation over top of another at runtime using Layered Blend Per Bone. If the hands have to be placed relative to an object like a gun, if you have ik_hand bones (which I think you have) you can blend those ik_hand bones in as well, then apply an IK onto the arms to recover the relative hand pose.
But I don't entirely understand your scenario, so that technique may not work in your case.
do you know some video on youtube about these types of animations?
with ik hand gun
I haven't! Sorry.
im noob🥲


copied the hands on begin and end of animation, but the middle of animation?😂
omgggggg its impossible maaan😵💫

It's not! Trust me.
i don't know how to do it
is x5 harder when using weapon attached to ik hand gun and not to right hand socket
I'm still quite confused about your setup, about how the hands and guns are supposed to relate to each other, about how your retarget went, and why if your retarget 'worked' it's still not placing the hands correctly.
So it's hard to give you advice on how to proceed.
You need to use IK to get the hands into position.
Do you know how to do that?
if i use original retargeted anims is working fine, but hands and fingers at the begin and end of animation are wrong
nope
OK, look up the 'two bone IK' node.
i spent all the day to search for some tutorial but nothing what i need
and what bones to assign?
And use the ik hand bones that are the child of the ik_gun bone as your targets.
That will probably move the arms into the correct position relative to the gun.
arms yes but fingers?😅
That's what you use the Layered Blend Per Bone for.
You blend in only the hands and/or fingers.
i use these bones for blend per bone node

That's only going to blend the IK bones into the animation.
Which, unless you're using Ik, will not do anything.
what if i will use snipers attached to Left hand and reload with Right hand, and Rifles attached to Right hand to make reload with Left hand by default?
I have no idea.
Do Additive Layer Tracks require more performance at runtime or should i bake that track into a new animation

do you know how to open animation in Sequencer with correct bones?, again problem with ik_hand_gun omgggg😵💫
Are you currently experiencing a runtime bottleneck?
If no - it doesn't matter.
No just curious if they do
The answer is 'probably yes', but it's comparable to a blend, so you're probably going to have several dozen to several hundred of those running at once anyway.
So it's not really relevant except in the most unusual edge cases.
Alright thanks
@nimble torrent for weapon animation montages, do i need to create an AnimBP for every weapon?
and to add Default Slot to make montage work?
or i can call montages in blueprint without making infinite anim bp?
You can call montages from a blueprint without making infinite animation bps.
i use this node but nothing happens, montages not working

only with anim bp works
Wait - are you trying to play animations on the weapons themselves, or are you trying to play animations on the character who then manipulates the weapons?
How do I go about animating a MH control rig to a chaos vehicle( snowmobile)
I have tried a lot with AnimBPs and getting socket locations and then attaching control points to those sockets, but I can't seem to find a way to have both AnimBP and sequencer animation working in tandem
i have 2 animations, 1 character weapon reload, and second is only the weapon reloading
So you're trying to play the animation on the weapon itself?
so after callint play montage to character mesh i have to call again for weapon too
Sequencer animations are intended to be used for cinematics and level animations - or for creating animations offline using a control rig.
If you want to use the control rig for a character in gameplay, you can use a control rig node within an animation BP.
Then either you can use an animation BP per weapon - or you can use the "Play Animation" node on the weapon.
I would probably create the animation BP per weapon myself, but you could try the "Play Animation" method and see if it works for you.
i need to play montage not animation
Are you sure?
Play Montage requires an animation blueprint and a slot node.
Play Animation does not.
So if you want to use montages, you need an animation BP per weapon.
omg man, is so annoying this ue5.4, crashes every time if im not saving the file after edit
ok thanks
Well this is a fun one, because it is for a cinematic, but the vehicle is physics based animation using AI controlled chaos vehicle
So I can have accurate physics of the vehicle traversing a terrain without having to hand animate it, its following a spline
I'm wondering if someone might know how to fix this as i haven't found a way, i've tried to retarget some of the animations on the Infinity Blade enemies, while doing so, the root of the mesh moves. Any idea how i could fix that?

In that case, you might need a custom animation blueprint just for this scenario?
It depends on how your character is normally setup for your game.
That's probably an issue with your IKRig goal setup. Did you create that automatically or did you do it by hand?
Setup the goals manually as there weren't any on the original ones
OK, well that seems like probably a place to start looking. If the root is moving like that, you probably have the retarget settings slightly off for that one.
Yeah thats what I am trying to get done but its proving hard. Its all cinematics, so just standard MH control rigs.
whenever I try using the full MH blueprint, things don't work, but if I drop a skeletal mesh and assign it to the control rig and animation BP, it works for that mesh. So at least thats something. but I believe that won't give me enough control in the long run, to be able to detach a hand and have it wave etc
I also am afraid that attaching all of the skeletal meshes one by one will leave me with problems when it comes to the head
Consider using the 'Copy Pose From Mesh' tool to copy the skeletal pose from a primary mesh onto your secondary meshes (like hands and clothing)
would that be done in the AnimBP or my main ChaosVehicleBP where the skeletal mesh would live ? \
When you say 'The skeletal mesh' do you mean 'the characters body mesh' or do you mean 'the skeletal mesh of the vehicle'?
characters body
You could reference that mesh in the animation BP's for your clothing and body meshes.
You would need to reach out into the scene and get access to the vehicle instance, grab the skeletal mesh component and plug that into the 'copy pose from mesh' node.
But yes, you could do it.
interesting avenue, i will give it a shot right now
Or you could add them as children of the vehicle along with the body mesh, so they're all one BP, and if the hands and clothing meshes are children of the primary animation mesh, you don't even need to plug anything in.
so I would make two AnimBPs, one for the skeletal mesh, and one for the metahuman, and then grab pose from skeletal mesh inside of my chaosBP
Copy Pose From Mesh defaults to attempting to copy the pose of the parent component.
You could do it that way, yes.
You could also add the metahuman meshes to the vehicle BP.
Entirely up to you.
I tried dropping the main MH BP inside of the vehicle BP, but for some reason, the AnimBP (with the constrains set up that I know work on a skeletal mesh component) do not affect it all
Unsure if its because it becomes a child actor class or something, (i do have the animBP and correct control rig selected in the MH BP)
Thanks Squishy, that helped a bunch
The 'Child Actor' component is always messy to use.
Hurray!
Is there a way to actually bring MH BP without it being a child ?>
When you say 'bring MH BP' do you mean the whole blueprint or just the animation blueprint?
the whole blueprint
Then no.
understood
@nimble torrent Do you know if I am able to draw a debug sphere of where the control point is (i.e hand_r_ik_ctrl) ? I can't seem to find the correct way to pull rig controls in any blueprint. Reason being there is some weird offsets that I need to fix
or any way for me to display the control rig that is being used in the AnimBP?
Hmm - I don't believe so. I've never done it, if it is possible. You don't generally use Rig Controls inside an animation blueprint.

Typically, the flow of data goes from the animation blueprint into the control rig, and what you get out is a bone pose.
Like that!
This is my animBP animgraph
but there is some offsets that are messing things up - ( the axis controller is where the "seat" is that is being fed into the Body Ctrl

OK, but is that in global space, local space, etc?
Control Rig transform data is relative to the control rig's skeletal mesh component.
So a local space transform from an animation BP will only work in a Control Rig without modification if your control rig's skeletal mesh component has no offset itself.
I've tried World Position and this set up, both are offset in different ways

Like - it's transform is the same as the BP that holds it.
so this transform is relative to the vehicle location
By 'the vehicle' do you mean 'the blueprint that contains the vehicle' or do you mean 'the vehicles mesh'?
the vehicle mesh inside of the blueprint that contains the vehicle
OK, so that likely won't work.
If I were in your position I would try:
- get the offset of the place I want to assign relative to the blueprint
- set the bipedal characters skeletal mesh component to Identity (which means no translation or rotation)
Then I would check to see if it worked.
Because then, hypothetically, those two spaces should be the same.

How can I animate a static mesh from this actor? It is a base blueprint that many other objects inherit from, and I want all to be animated the same way.
I just want an animation to loop going up and down, while rotating horizontally.

You probably wouldn't use animation for that, you'd probably use code.
If you ask down in #blueprint they can probably point you in the right direction.
Why I shouldn't use an animation? I think I straight up can't though, I don't see any option to assign an animation blueprint to play.
Apologies, I come from other engines and I'm trying to understand the workflows in Unreal.
In unreal, animations are not accessible on all objects like they are in godot or unity.
Unreal is pretty strict about what can and can't play an animation.

@nimble torrent if i connect my animation direct to Output Pose, all is ok with ik hand gun, but if i connect through UpperBody Slot, i have to use Copy Bone Node to keep the ik hand gun in the right position, but when playing some animation monages, the weapon is moving away from the correct point, so Copy Bone Node have some bugs?
It does not have bugs, and you probably don't need to use Copy Bone Node if you're assembling your graph correctly.


so without copy bone the gun is not in correct positions because of Lower Body Animations blended
OK, I have no idea what 'correct' would look like, but I would use a Layered Blend of the bone node rather than Copy Bone, personally.
this is the setup of blend per bone where in base pose is Lower Body animations and in pose 0 is upper body slot

🤷


Have you guys got this error before?


Found more than one function with the same name OnCompleted_144EE1C9418C06BA7401B7ABCAB11836; second occurance at Play Montage
Fixed it by adding another node
That's definitely a weird one!
Hi, I am having a problem with the motion matching stuff where it cant get the trajectory from the Character Trajectory component for some reason. My ABP is correct and should work, but it doesn't. I have tried setting the trajectory as a variable in the character bp and getting that from the abp but it doesnt work either. I have also set the right abp in the Skeletal mesh as well.
Error: Blueprint Runtime Error: "Accessed None trying to read property As BP Third Person Character". Node: Set MyTrajectory Graph: EventGraph Function: Execute Ubergraph ABP Mouse Blueprint: ABP_Mouse


Basically I am not getting a referance to the trajectory
Here is a clip as well, i do not know what is going on
I looked at the pose search database, seems like there is no trajectory coming from the animations?
i haven't had a chance to look at the motionmatching stuff yet, but from your video it looks like your animations aren't using root motion correctly?
I know that you need root motion enabled to use motion matching, and i am using the animations from the mm sample project, which i retargeted to my own mesh using ik retargeting
if you look at your retargeted animations, is the root retargeted correctly?
I am looking at one of the anims, it is walking around, shouldnt it be walking in place if root motion is on?
in the animation if you select your root bone you should see it
sorry give me a sec to open unreal and i'll send a screenshot of what i mean!

Hi, I need to make a dropship landing animation with a character getting out of the dropship, and I can think of two ways to do it:
- Animate it inside the DCC (Cascadeur in this instance)
- Animate it inside Unreal
How is this kind of problem usually handled?
ahh yeah root should follow and you should see a red line following the anim instead if it's working correctly

Hey guys, in today's video I'm going to be showing you how to use the new animation retargeting system in Unreal Engine 5. This is using the IK rigs and retargeting. The example in this video is using a Mixamo character and animation, however this will work for any character, skeleton, and animation you want to use.
Mixamo To UE5: https://youtu...
i found this video quite helpful when i was learning how to retarget anims!
In the retargeter, it seems that the root is being transferred to the animation

I think i might have found a fix, gtg see if this works
I gave up on integrating in unreal, went with the easiest solution of take recorder, export chaos vehicle and animate the metahumans in motionbuilder
That'll do it!
Sometimes the tunnel vision of "just do it in unreal" can be a real pain lol
Up until very recently, the only way of doing it was animating it in a DCC and importing it into Unreal.
Unreal now has control rig, which gives us the ability to animate inside it - but it's not mandatory. Either way will work.
It really can!
Okay, so basically the standard way of animating such things is in the DCC
That is the traditional way of doing it, yeah.
Alright, much appreciated
Actually a few more questions:
- Are there any circumstances under which one of these methods is better than the other?
- Is it easy to add a control rig to a static mesh?
A static mesh cannot have a control rig, and wouldn't benefit from one if it could have one because a control rig manipulates bones and static meshes do not have those.
Alright, thanks
As for question 1, the answer is mostly expertise. If you have someone who is a maya expert - get them to animate in Maya, the advantages of working in Unreal will not be worth the efficiency loss of learning a new program.
The only place where I would say working in Unreal is specifically an advantage where it might be worth some extra effort are in cinematics. When you're working on facial animations in particular, being able to work in the real lighting environment can be a significant benefit.
Being able to see what your character is really going to look like can be great for that last little bit of polish.
Oh, the question is relating just to vehicles really, but that's good to know as well
Hello! I'm trying to set up a simple IK rig for this Skeletal Mesh that was exported from CharacterCreator4, but one I try plugging it in, the bones seem to leap out of position very strangely
I've tried setting up a simpler FK rig before this too, but it also seems to move them all around
was there an import error, or am I overlooking something?
I'm kind of unsure what is happening here. So previous character wasn't working so I brought in this new free one and retargeted my previous animation stuff. It is functioning fine but for some reason randomly these black marks appear while moving around. Most of the time they come from under the foot as the character stops but sometimes they appear like the picture. I can't seem to recreate them popping up and the disappear after like a second. Anyone have any idea what this could be?

is this happening if you swap between different view modes in your viewport?
No it just seems to happen on the regular normal aha
I also tried with selected viewport, new editor window, and different sizes but it didn't seem to effect anything.

Do you have a physics asset assigned to the skeletal mesh
That pretty much fixed it! The asset did not but after right click->create->physics asset the problem seems to be fixed. Now how come that happens, what is happening with the spots?
Im not 100% sure, just a guess is that it doesnt know when its colliding so causes shadow issues or something
will try this, Thanks!
anyone knows why my fabrik ik'd bones move like jelly? lol
this is how it looks without the ik
it happens because the FABRIK Nodes
but idk why
is it because im using the same finger that im moving to get the reference position?
though the index finger doesnt use its own location as reference and it still does that issue
it uses a socket on the gun as a reference


Hi everyone. I am a beginner in unreal engine, I want to learn about animation and using the control rig in unreal. Could you recommend a course or other useful resources? Thanks a lot!
Is there a bug currently with 5.4 that makes animation sequences wobble around like this? The same sequence works fine in 5.3
Im updating the rotation of bone in animgraph and also playing the montage animation when shooting but whenever i play the animation, the bone's rotation doesnt get updated and when i dont it works as expected. I tried layered blend per bone node but it doesnt show any results

anyone?
What does this little red bone on my skeletal mesh preview mean?

hello, anyone know why a character might not fall mid animation, despite being explicitly set in falling character movement mode?
root motion is turned off at that point, so that shouldn't be holding it up
the character should continue falling, but i can't seem to figure out what it could possibly be
figured that RM being off and character movement mode set to falling was all that was needed (it's brief, but you can see the character just hanging in the air)?
I've been trying out the new motion matching, setting something up based on the Game Animation Sample, and I've run into an issue where my Chooser Tables become uneditable after restarting. If I try to open the Chooser Table I get a little popup saying "Unable to Edit Assets".
This is only happening with some of my choosers, not all, and I'm not sure what's different between them. Is there any known workaround, or way to avoid this error occurring in the first place (IE you can't use an "Enum" based condition or something)?
It seems to be the same issue as this person encountered. https://www.reddit.com/r/UnrealEngine5/comments/1d4m3cw/chooser_table_becomes_invalid_after_restart_ue541/
Reddit
Explore this post and more from the UnrealEngine5 community
Just answered my own question, at least in part. I can right click -> Asset Actions -> Reload on the Chooser Table and it'll work temporarily. So now I just have to figure out if I can track down the cause of it breaking in the first place.
Interesting... something about referencing the chooser table causes it to break. If I point motion matching at a second chooser table, save and restart, the second chooser table breaks but the first still works.
Ah, I think that the node is being referenced before the Chooser plugin has loaded, and that breaks all associated assets or something like that.
LogProperty: Error: FStructProperty::Serialize Loading: Property 'StructProperty /Game/Main/Motion/ABP_Mannequin.ABP_Mannequin_C:MotionMatchingOnUpdate:CallFunc_MakeChooserEvaluationContext_ReturnValue'. Unknown structure.
LogLinker: Warning: [AssetLog] .\Content\Main\Motion\ABP_Mannequin.uasset: VerifyImport: Failed to find script package for import object 'Package /Script/ChooserUncooked'```Alright, found a similar issue -- updating the "Chooser" plugin's load phase to "PreDefault" seems to have solved the load order problem. No clue if it's safe, just like the OP, but it's working! https://forums.unrealengine.com/t/orientation-warping-node-not-saving/604489/3

Epic Developer Community Forums
LogLinker: Warning: VerifyImport: Failed to find script package for import object 'Package /Script/AnimationLocomotionLibraryRuntime' LogLinker: Warning: VerifyImport: Failed to find script package for import object 'Package /Script/AnimationWarpingEditor' LogLinker: Warning: VerifyImport: Failed to find script package for import object 'Package...
Hello there, I have an animation montage that no matter if I enable or disable the root motion, the animation sends me back, like root motion was disabled
can you check the animation sequence and see if it actually has root motion?
I'm doing that, is weird, is just that one, is for sit to stand and stand to sit, the sit to start has that behavior, not sure if the root starts in a different coordinate of something
can you see something like this happening in the animation?

yes, but like I'm saying I already enabled root motion, I tried all the possible root lock combinations, I know that not having root motion enabled but the animation moving that bone causes that behavior
gotcha
but it is enabled, oh and actually no, the animation is just moving the pelvis, I tried to add root motion ir order to debug, and it actually moves my character like root motion should, but I still have that little tug

too weird, seems to be the pelvis, but with root motion ebaled it has no sense that I have to move it backward
I'm having a hell of a time rigging/weighting this character to the UE4 mannequin. All the joints get all out of wak and I don't understand why. Anyone know know a rigger who can help or maybe even I can pay?
you get rubber band when you are not using root motion. What root motion does is it drives the root.
I don't see the red line like nat showed, if you don't see that then you don't really have root motion.
How do you make a low poly proxy skeletal mesh for a high poly mesh?
hey guys, how do i play root motion inside the editor dragging in a sequence or montage?
theres an option in the details panel "enable root motion"

im aware of that
but it wont play them inside the editors viewport
i implemented the system fully instead wanted to take a break but just balled it
u have to play the game ig, u can start the game in simulation mode too
ik for me its just always in place
so it wont really matter
i think my engine is bugged
hey guys, im having some issues with my rig for motion matching, IK, control, rig etc so I was just wondering which of these three rigs you think would better work in your opinion(specially the root - which is what is causing the issues)?


Anyone?
hi all, I have a simple question that I can't seem to find the answer to. I want the ability to play an "animation" on a BP object. The object is comprised of a bunch of static meshes, so "animation" here really just means simultaneously changing a handful of positions, rotations, scales, etc over time.
I'm trying to figure out what the cleanest way to do this is. I see some approaches using the Timeline node, but this seems like it would get messy with lots of different values changing alongside each other. Trying to figure out how to animate static meshes led me to Level Sequences, which has the convenience of getting to edit all the values alongside each other and even preview the result, but it seems like that's intended to be used to play cutscenes or animations in the level rather than define animation sequences for dynamically spawned instances of a BP class.
If I remember correctly, there's some kind of system for defining animations for WBPs which you can then start and stop, I'm wondering if the same sort of thing exists for a more generic actor BP class.

🚀 Motion Matched Environment Interactions!!!!! 🚀
I’m excited to showcase the latest implementation of my Motion Matching system: sitting animations! With…
Does your player capsule follow the character during the RM animation?
i found what the issue was in the end, something was keeping the movement state in flying that i wasn't aware of 😂
So far for part of controlling a character model, I've been using leap motion, and a BodyStateAnimationInstance thing they have built off the Animation Blueprint base class.
I've mostly used this as it sets up a lot of the complications of rigging each individual finger for you, and it saves a lot of work doing this in control rig; however, I guess now I'm kind of wondering if I should start to consider using control rig.
Can control rig prevent objects clipping through each other, like in the case of the fingers on this mouse and keyboard here? Can control rig also be used to stop stuff like hands/IK travelling through a characters own body?
I think last time I tried to setup control rig I quickly ended up over constraining my model, and it became quite a pain to work with. I'm also going to have "fun" exporting every finger location, and rotation, and feeding into control rig as a "suggested" bone location, but I feel like I know more now than I did then, and I'm wondering if it's time. Is control rig more optimal and worth learning, and can it actually do the things I want, or will it be a lot of effort for kind of just an "okay" result?

Hi Everyone, is there a chance u know a good sources for tutorials going in detail with how to work with new Modular control rig in Unreal 5.4?
An initial setup question: Is it imperative that your custom skeleton faces X+ forward in unreal? I've just been trying to set up the environment between Maya and unreal and with Y-up Maya you end up with imported skeletons in Unreal facing Y+. I've read that even in epic projects they just rotate the skeleton 90 in the character blueprint. Does anybody have any thoughts on best practices for this?

what is up with the retargetting ue4 maniqueen animation to ue5 manny?
the fingers don't work correctly
I just simply used RTG_UE4Manny_UE5Manny
I look at Manny and how he's setup and avoid anything that differs from this like the plague. It feels like most things are built to work/tested with that skeleton... and the moment you differ from that you have no guarantees
that makes sense, thanks. And to confirm Manny faces Unreal Y+ (solved)
Maya settings:
-y-up +Z forward
-export fbx : up axis Y
IIRC I think because of the way that openGL standards are one handedness and directX conventions are another handedness, I know in blender at least you can't get one of the bone axis to line up (I think it is the Y axis)
So in that case I match the X and Z axis to whatever Unreal does and let the Y axis point the opposite direction.
FBX Export: When exporting as FBX, you can choose the "Up Axis" and "Front Axis" in the export settings. By setting "Up Axis" to Y and "Front Axis" to -Z, you can effectively convert the coordinate system to match Unreal Engine's left-handed system during export. This can save you the trouble of manually adjusting axes later.
Hold on don't quote me on that because my brain hurts...
Okay so I think in maya you want the defaults
and then export you want?
Up Axis: Z-axis
Front Axis: -Y (negative Y-axis)
But I've confused myself so hard at this point I'd double check that or maybe find a second opinion 😱
Anyone know why the URO debug is showing up twice for a Root Motion based ABP? Only happens for LODs above 0 :/

also seems like it's switching between green and yellow
Dude, i just realized this world would be much better if blendspaces have input variables, and we don't have to use Lyra linked anim layer and cringe math anymore.
Am i right?
any solutions?
try mess around with fk ik in those detailed panel
maybe use default rtg if you can't figure it out
also, i think you are binding multiple bone to one bone
I followed the same orientation as Manny, which works for me. I think that's the best advice:)
unchecked the Ik setting and it fixed it
cool
Hello guys, how to retarget mixamo animations from X Bot to SK_Manny ? Or do you have some website to download animations for ue5 ?
i am playing this recoil montage on the player, but the recoil is going in right direction but the hands only move in up direction.


hi. do you guys know why character mesh scales up during certain animations?
sometimes x,y,z for each thing gonna be different. z can be right left
someone know how to do turn in place animations with blend space? i cant find a video
do research on taking character's rotation with root yaw offset and speed=0
I'm noodling around with Control rig and I noticed rotation and translations don't match in the Control Rig VM and sequencer. rotation example (Note: nothing is keyframed in the control rig in sequencer. I've deleted and readded it to the SM ):

That's interesting. I've never seen that before. Do the local values still look the same?
This is usually caused by an export issue from Blender. Blender and Unreal disagree about what a unit is. Check the root's scale on the animations that go weird.
I don't know if I'd do turn in place animations with a blendspace. Any particular reason you want to do it that way?
You can import mixamo animations into unreal onto the mixamo skeleton, then use Unreal's retargeting tools to transfer the data. Careful about the hips though, the mixamo skeletons don't have a root bone, so you often need to set that up specially.
Where did you get this?
From the ue4 manny file in 3rd peraon
So far, I haven't seen any. They're all < 10 minutes long and just show how to drag the modules onto the character. Ryan Laley's is OK for a basic overview:

NOTE: This feature is still in development and has some bugs still in it.
SUPPORT ME
Patreon I https://www.patreon.com/ryanlaley
Buy Me a Coffee I buymeacoffee.com/RyanLaley
Donations I paypal.me/ryanlaley
PRIVATE 1-2-1 SESSIONS
Email me at support@ryanlaley.com for more information and rates, or visit http://www.ryanlaley.com/sessions
JOIN T...
Interesting! So you didn't create the IK rig or anything yourself, it was in the assets with the 3rd person template files?
Yes, in 3rd person template
Control Rig doesn't really have integrated physics, so any attempt to prevent movements or intersections will have to be implemented using constraints. You can do it, but it would not be easy and there aren't prepackaged solutions.
What is interesting about it?
Generally speaking, after a very small amount of complexity - you're probably best creating a dummy skeletal mesh for this. Unreal's animation tools outside of skeletal meshes are exceedingly limited and awkward to use.
Well, I've certainly seen people successfully retarget between those skeletons. Give me a moment to look something up.
How can i Replicate animation graph un ue5. Becouse i made an anim offset but i need to replicate it?
You mean over the internet?
Like - networking replication?
Yhea sorry. Steam netwroking
anyone know what im doing wrong? im importing from blenders auto rig pro to unreal, and its stuck on preparring skinned mesh 100 percent


ive google in youtube and they said to reassign the vertices to the bones, but idk what that even means
Auto rig creates a bunch of additional objects - many of those objects aren't supported by unreal.
Typically if you're using an elaborate rig in a package like Blender or Maya, you'll do your animation work on the complex rig, and then export only the relevant skinned bones.
huh i see
even with the ue4 manniquin skeleton version of arp?
Yes. Typically an animation rig does not transfer directly into a game engine. Typically there is an export step or subselection. Often, in game projects, there are custom written exporters, to create the kinds of files that the engine can properly digest.
makes sense
I know that autorig has an unreal preset - it might be worth googling around for a tutorial on exactly how to use that.

Mmhmm
and i made sure to select the ue4 preset
ik this sounds totally noobish lol, i havent imported a character to unreal in a while
I think you'll have more luck over in #multiplayer .
Okay thanks
Sure, but I think that simply generates a compatible rig, and does not ensure that the whole scene can be directly imported into unreal.
I would be shocked if a blender plugin could make that work.
I can't replicate your bug. This is retargeting the jog animation for the UE4 mannequin onto UE5's Manny character.

The wrist is a bit weird, but it was weird in the original animation as well.
But the fingers are fine.
That makes sense.
Could you show the hierarchy in your blender scene? It's possible they did something clever with the armature layouts.
What package are you working in? Blender? Maya?
for sure

Hmm - consider trying to export only the mesh and the 'cs' armature.
Using the 'export selection' option in the FBX exporter.
I think they separated the rig components and the skeleton.
Possibly.
If they did that - you want the skeleton, not the rig.
This indicator means that you have a mismatch between your skinning data and your geometry data. It might explain why your skinning is so weird.
Probably! That could easily be a cycle of some kind.
That's probably a compression issue. Try changing your compression settings:
Epic Games Developer
Use Animation Compression to reduce the memory impact of your project's animation data in Unreal Engine.
This is probably an axis problem. They really need to provide between visual feedback of what is going on inside the IK Nodes, but I think your characters legs are setup pointing in different directions than unreal's default IK thinks they should be. Also - your pole vector is set to 'direction' rather than 'position' which is probably not helping. I think it's your primary axis that might be flipped. Try setting the value to -1.
What is the best way to play animations consecutively?
I have three animations: 1, 2, and 3.
They are perfectly sequential.
I play them with Play Montage.
But there is a flicker (like one frame) that happens in between transitions of 1 -> 2, and 2 -> 3.
I don't think I want to put the 3 sequences into one montage. I want to keep it separate for flexibility.
I've tried multiple variations of Blend In/Out without success.

Ohh gotcha, I'll look into it, thank you so much!
You could use an animation notify just before the end of the montage to trigger the next animation.
You could put them into a state machine and trigger the state machine set to automatically transition between states.
You could use 'Get Play Length' on the montage, and a delay node, to trigger the next one at the correct time (not sure I'd use this myself, feels fragile, but it would technically work).
Hmm yeah I did see some people use this
But that means I have to put AnimNotify for every animation sequence in a combo, right?
Also state machine.. is that used for montages? I thought animation state machines are more used for locomotion and jumping

State machines are not for montages, no - but they can be used for more than locomotion.
Yes, you would have to add an anim notify for every sequence.
Hmm.. okay and the animation notify method would look something like this, right?

It would, yeah.
Okay, I think I'll use this then... Thank you for the input.
Ah.. if only there wasn't that one frame flicker then I wouldn't need to use this
'One frame flicker' is, unfortunately, a constant companion when it comes to animation.
They show up all over the place, and you never truly manage to eliminate them entirely.
I see, that's good to know
I was starting to feel doubt considering playing some consecutive montages must be one of the most basic things you can do, yet feels like I'm the only one experiencing this issue
Hey folks - Im trying to profile the CPU and noticed that animations in the project are taking significant amount of time. Tried animation budget allocator plugin but Im worried that it might not work as I have all of the animation as root motion from everything. Do you have any tips on how to approach that? Optimizing anim and event graph?
What kind of game are you making?
that makes me feel like I'm probably not any better off in there, BUT I guess the fact that it supports constraints at all is maybe a good start...
Currently I do a lot of position calculations in my actual BP... and then pass these variables to my animation BP....
So maybe I'm already trying to mimic control rig functionality but worse 😱
There's a lot of overlap in terms of what they can do. Control rig is quite good at constraints, and at organizing when events should happen inside a frame (so it solves a lot of dependency issues). It's also easier to visualize things, as you can see and play around with controllers in a way that you can't in an animation BP.
But ultimately, they're similar in capabilities.
Hmm - OK, well the obvious one is in your general settings make sure you have 'Allow Multi Threaded Animation Update' on.

And from there, optimization is a process of Doing Less.
Is this character on screen? If not - don't update their animations. Is this character far away? Turn the tick rate down to every three frames, or every five frames.
Is this character not in focus? Deactivate their IK and their post processing blueprints.
Oh! And make sure you're LOD-ing your meshes properly. At higher LODs, remove twist bones, and fingers.
Purely Unreal, they have rigging and weighting in Unreal natively now (via the Skeletal Mesh Modeling Tools plugin)
They do, but they're very new and untested.
I bought this model, and it's rigged... but to it's own skeleton. I need it using the UE4 mannequin https://www.renderhub.com/khaloui/naked-realistic-female-game-ready-model

RenderHub
Before you buy, please read full description.you can find casc file ready in the mega link with unreal skeletonjust make your animation and export it into unreal .character in unreal is ready with height quality shader and blendshape.Introducing the perfect addition to your 3D asset collectiona stunning, fully rigged 3D model. This high-quality ...
I am not surprised you're encountering issues.
Can I ask why you need it on the UE4 mannequin? Couldn't you retarget the mannequin animations onto this character?
Because all my animations and ABPs for all my games characters use the mannequin. I'd have to have a duplicate of everything just to support a new skeleton
And I'd have to recrate the ABP with all the complex logic for weapons and things, and you can't create child ABPs from different skeletons... so it's trying to avoid massive amounts of duplicates
OK, so you already have things up and running on the UE4 skeleton.
So... I would do this in a DCC. Unreal's rigging tools are too new and untested for me to mess around with if they don't work instantly.
So I'm more of a programmer than character artist.... what's DCC?
And in Max or Blender, you can get most of the skinning work done for you automatically by transferring skinning data from another mesh.
I have blender, suck at it. Can't afford 3DSMax/Maya
That sucks.
I did rigging/weight painting in blender awhile back (for different character), but it wasn't compatible with the ue4 mannequin. I'm wondering if all I need is to exact match the bone hierarchy to do that?
Yeah, bone names and orientations - you might also have trouble with the import/export because blender and unreal disagree strongly about directions and scale.
Yeah, bone orientations are a bitch. I remember getting fustrated on that
Do you think this would be able to rig to UE4 mannequin? https://blendermarket.com/products/auto-rig-pro

Possibly, but not without some complexity.
We someone in here earlier who was having trouble importing after using that plugin.
How about Mr Mannequins Tools?
I don't know those myself.

Gumroad
Mr Mannequin has raised his standards! Don’t believe me? Check the video! Watch that in 2k or 4k though as Blender footage gets murdered by YouTubes downscaling.Mr Mannequins Tools is a Blender add-on that exports animations and weighted meshes that are directly compatible with the third person mannequin in Unreal Engine, without re-targeting an...
You don't actually need any of those though.
If your goal is to just transfer a character from one skeleton to another.
You just import the mannequin from unreal and your character from wherever you got it from into the same file.
Yes, and have it so all the existing animations work and look mostly ok
Then you delete your characters old skeleton and vertex data and reattach the character to the new skeleton.
Yeah that's what I'm trying and it looks all... off
You can can translate and rotate the bones of the ue4 skeleton to better match the geometry of your new character.
Unreal has live retargeting, which means they can share animations without issue.
Hi. Squishy. It turns out that character mesh scales up when i move my mouse. that is wierd lol.
Extremely!
yes and scales are at 1. and they are from marketplace i used them but this time is wierd idk
It is using the skeleton though by assigning it?
It certainly seems strange.
No I think that will probably break everything.
When I talked about 'real time retargeting' - you still need to skin the character to the new skeleton.
But you can modify the proportions of that skeleton, and it will still work.
Yeah I do that with the plugin?
In the way that many games often have multiple characters of the different sizes and heights on the same skeleton.
No, the process of skinning the character to the new skeleton would normally be done in a DCC.
We've been talking about that process for about half an hour.
That still needs to happen.
I don't know which plugin you're talking about.
Epic Games Developer
Create and Edit Skeleton Assets using the Skeleton Editing tools in Unreal Engine.
Right, but like I said - that one is very new and untested and unlikely to be particularly robust.
Right right, I was just providing reference
You could also hypothetically try the 'Retarget Pose From Mesh' node. This uses a retargeting IKRig to dynamically retarget one mesh to another.
You could assemble a character blueprint that had an invisible version of the UE4 mannequin in it, that has your normal animation blueprint, and then use the 'Retarget Pose From Mesh' to target that UE4 mesh on your new character.
This would be more expensive then doing the skin replacement offline.
But would avoid that step.
OOOooooo interesting. This? https://stefanperales.com/blog/dynamic-ik-retargeting-in-ue5/
Devops, programming and gaming
Yes.
I'll try this, or my hand at blender.... or hire a real artist maybe. Thanks for your help @nimble torrent
Good luck!
i thought it can be easier with blend space there is a easy way to do it?
If there is one, I haven't found it. Turn in place animations tend to be messy for player characters because we can't know the players intent when we start the animation.
So... you tend to get a lot of awkward starts and stops.
so what you suggest?
Depends on the kind of game. Is this first person? Third person?
its a first person game
Then I'd just play a little shuffle animation whenever they did it.
Nobody looks down in first person games.
You could just not do anything and almost no players would notice.
yes ok thanks
You might think I'm joking, but Alien Isolation did this.
If you look down, you have feet, but they don't move when you rotate the camera.
You can spin 180 degrees and they don't move.
Nobody cared!
yes never saw that 😀
Look down in Resident Evil 7 and you don't see your feet!