#animation
1 messages · Page 26 of 1
It means that the IK bones are not going to follow the FK bones in the animations, so if you attempt to apply IK over those animations, the IK will pull the limbs to their world space locations which will look awful
This is easily resolved by making a blueprint animation modifier extending the CopyBonesModifier and adding the IK bones to the array, it will snap the IK bones to the FK bones for any animation you apply it to


yea, absolutley. i am just pointing out that that pose looks more natural.
No need for them to explain, you can simply compare:
- Old system was simpler and easier to use
- New system enables runtime retargeting so you no longer need to have multiple copies of your animation setup and animations for characters where a retarget can be obtained
- New system uses IK rig to retarget otherwise incompatible characters with vastly greater control over the end result
It doesn't look more natural
He is leaning too far backwards and in a slightly squatted position and the bend in the arm is too extreme
If you are using inertialization then you need a.AnimNode.Inertialization.IgnoreDeficit 1 and likely will get improved results if you modify the engine class AnimNode_Inertialization.cpp::INERTIALIZATION_MAX_POSE_SNAPSHOTS to something like 8 instead of 2. This of course requires source engine. Epic is aware of these issues and are going to expose both properties for 5.4.
It is in the animation layer functionality, not in the core graph
This isn't going to be terribly simple if you're a new dev
But its actually pretty easy in theory
Iterate over the bones in both the source pose and the player's pose and compare the rotations between the bones
You will need to get this information to a central point for comparison
If it were me, I would make a custom anim graph node that feeds it to a custom FAnimInstanceProxy which during post evaluate, feeds it to an actor component (where this goes depends on how your game is setup), then that component would have both the source and player's pose (which is a TArray<FTransform> where the index is the bone index)
Hello, I'm not sure if this is a bug in 5.3 or intended behavior but I figured out a work around and thought people might be interested. I noticed that when setting up controls in control rig, no matter what I set the inital transforms to when compliled they would always snap back to the transform they had when they were created. If you however turn of AutoCompile in the Control Rig interface then compile it sets the transform correctly. You can then turn AutoCompile back on.
The animations are going through but it's not playing the animation in the view port. Any idea why that might be?

In 5.1 I have to make my changes -> close the control rig -> re-open the control rig -> compile to get it to update properly, until I figured that out I was getting pretty frustrated
Disconnect one thing at a time until it works, then you know the thing you just disconnected is likely the culprit
It works when I test it, but it doesnt work in the viewport
Same answer
Yeah I think that has been "fixed". As long as turn of auto compile and compile it seems to work.
Maybe by 5.10 I'll finally want to stop beating my head into the wall when working with it 🙂
This seems like the best place for my question. So I have made a hood in blender and set it up on my character, I have checked the weight paints many times and I still have this issue of the back left shoulder area not moving with my character very well. I tried to make a different hood and same thing happened. I am not sure if its an issue in blender or unreal engine. or where to fix it. been trying to fix it for hours now lol. (dont mind captain underpants, he is a work in progress)
Hey! Super ue5 beginner.
I bought a character off of the Marketplace and these are the following technical details:
Rigged: Yes
Rigged to Epic skeleton: No
Animated: Yes
Number of Animations: 10
Animation types: In-place
I'm using the default third person template.
- Just replacing the mesh on my BP_ThirdPersonCharacter obviously doesn't work.
- The character comes with animations, but should I just use Mixamo stuff instead if I want?
- I read something about being able to just retarget bones but I'm not sure what that means?
Basically, I want to be able to use all prebuilt input and movement that comes with the ThirdPersonCharacter, but I want it to be this new character I bought. My new character isn't a standard human. But it's bipedal, with a head/chest, 2 feet, 2 hands
https://www.youtube.com/watch?v=xvHOamXuZDI @winter haven this is a video I used recently to learn retargeting, and it worked great. you got this!

Check out my Multiplayer Survival Game Course:
https://smartpoly.teachable.com
Hello guys welcome back to another video. In this tutorial I will be showing you how to take any animations from any character model, and how to retarget those animations for any other character model you might have. Retargeting animations allows you to re-use the sa...
Thank you so much! I wasn't even really sure what word to look up.
thanks great explenation!
Okay so, the first little bit of the video says that retargeting animations is just using animations from another character into my own. Is this what I even want? Lol
I guess I'm just a little lost lol
Like, I'm okay either using the animations it comes with, or something else like Mixamo. I guess my dream is that I can have this character set up so that I can use all these free animations that are meant for the Epic Skeleton.
Thank you. I wish I would have found a good explanation of it before.
from your explanation, I think this is what you want yeah
I am very new to retargeting too, so I couldnt tell ya all the ins and outs really
Amazing. Thank you again
@winter havenLike they say in Police Force: If anyone can do it, so can Frank Drevin!
I mean, so can you!
Wow. Now that I've done it a couple of times with a checklist, It's not that bad. I have my character animations retargeting... except for my shoulders that look reversed...
So when I add my Basic IK nodes for my character's arm it move's the joint(ball) from the socket. Making an FK chain doesn't have the issue but Basic IK does.

The Axis and secondary axis are set properly but once the basic IK comes in it moves it.
Any ideas how to handle?
hopefully quick question, when assigning a preview asset (i.e a weapon in the hand) to an animation blueprint or skeletal mesh, is there a way to assign a different preview asset for each mesh / anim blueprint? At the moment it seems to apply only to the skeleton which then applies that preview asset to all skeletal meshs / anim blueprints that use that skeleton
Hey, since UE 5 I can no longer change the sceletal of a animation. If I do so, the Animation is simly A Pose. I need to export the animation and reimport with tne different skeleton. Is there a fix for this bug?
Hello! Has anyone encountered this problem after making modifications to a skeleton mesh using the 'Skeleton Mesh Editing Tools' plugin? Whenever I attempt to access animations or the IK rig, control rig, or try to edit animations with the control rig, the editor crashes. I even created new IK and control rigs after deleting and re-adding bones, but the issue persists.
Hello, I was wondering about Metahuman animation poses. For each metahuman downloaded it creates a folder called (for example): Metahumans/Common/Male/Medium/NormalWeight/Poses with all poses contained. At the moment these poses are taking a long time to load, so I'm replacing all existing poses with one set of poses for all Metahumans. I think it's going to work, but I'm not 100% sure. Does anyone have any knowledge on the purpose of these pose assets (I know they're used in the post-process animation blueprint) and if they're interchangeable for different Metahuman skeletal meshes? ...
Hello everyone! I am asking for tips and directions for something I want to implement. I am building a project and I have a true FPS setup, using Lyra animation system. I don't quite get it honoestly, but I was wondering, is there a way to use animations made for "standard first person characters" (so, just the arms and hands), and adapt them to a full body character? Thank you for your time!
in the animation scene like god of war, when player has to interact with button to avoid being hit, etc. Is there any reference to do that in unreal? I want to create some interactive game like that, but full animation (similar to GoW but entire game built to do that). I forget if there's any similar example on the same genre? Usually I only saw interactive but with movie
I know you can make a mirror table and mirror animations in the AnimBP. But what if I want to use the mirrored animation in a sequence or blendspace? Is there a method or plugin to create mirror animation sequences?
I’m planning to start implementing control rig into our pipeline. We use stylized characters and I wanted to see if anyone knew of some stylized rigs I could start testing with to see if it’s going to be viable and get our animators comfortable with. Then start developing our rig based on what we can learn from that. I have Bungee Man from Epic but curious if anyone knew of other tutorials or marketplace assets?
@smoky shell thanks for that and being new it is a bit confusing. I will look into it.
I bought an animation pack from the Epic Marketplace and started the retargeting process. When I finished retargeting and exported it, I noticed that the animation made my character stretch a little bit. I connected the correct bones, etc. It looks PERFECT in the Retargeter Preview but the exported result isn't. The first gif is the preview and the second gif is the exported animation compared to my other animations using a blend space.


I am new to hand key animating in unreal and had a couple of questions, i am doing a simple walk cycle animation
How do i lock a channel so that i cant edit it
The rig im using is bungee man because its super basic, his legs are stretchy by default and I would like to turn this off, do i need to go into the blue print editor to do that or is there a way to turn that off
I had an animation in this level that i was working on, yet when i open up the level the controls disappear and the animation is gone how do i get it to stay when i leave the level and come back.
Hi again 😁
This might help you get some more insight into the whole Animating in unreal 5
https://www.youtube.com/watch?v=FgJ1stTScxI

With Unreal Engine 5.0, rigging and animating in-engine became a real possibility. UE 5.1 has taken another step forward, so artists don't have to hop back and forth between various DCCs. Learn about the recent changes to the Control Rigs and animation tools via real-life examples.
Learn more about recommended Hotkeys & Preferences: https://dev...
yea i watched that video, it had some useful tips and pointed me in the right direction but i think my issues are more along the lines of using the software properly, thank you tho!
You can Lock a layer with right click in sequencer > Lock.
For the Bungee man rig, it seems you want a "Normal" Control rig, i've just finished mine and it doesnt stretch, i Used this tutorial: https://www.youtube.com/watch?v=VXlBqRqFwc4
It looks long, but it's mostley a lot of the same steps, and this guy explains it very well and its good to follow along.
If your controls dissapear you might wanna check if you are in the viewport, just clikk on it and press "G". hopefully this helps a bit 🙂
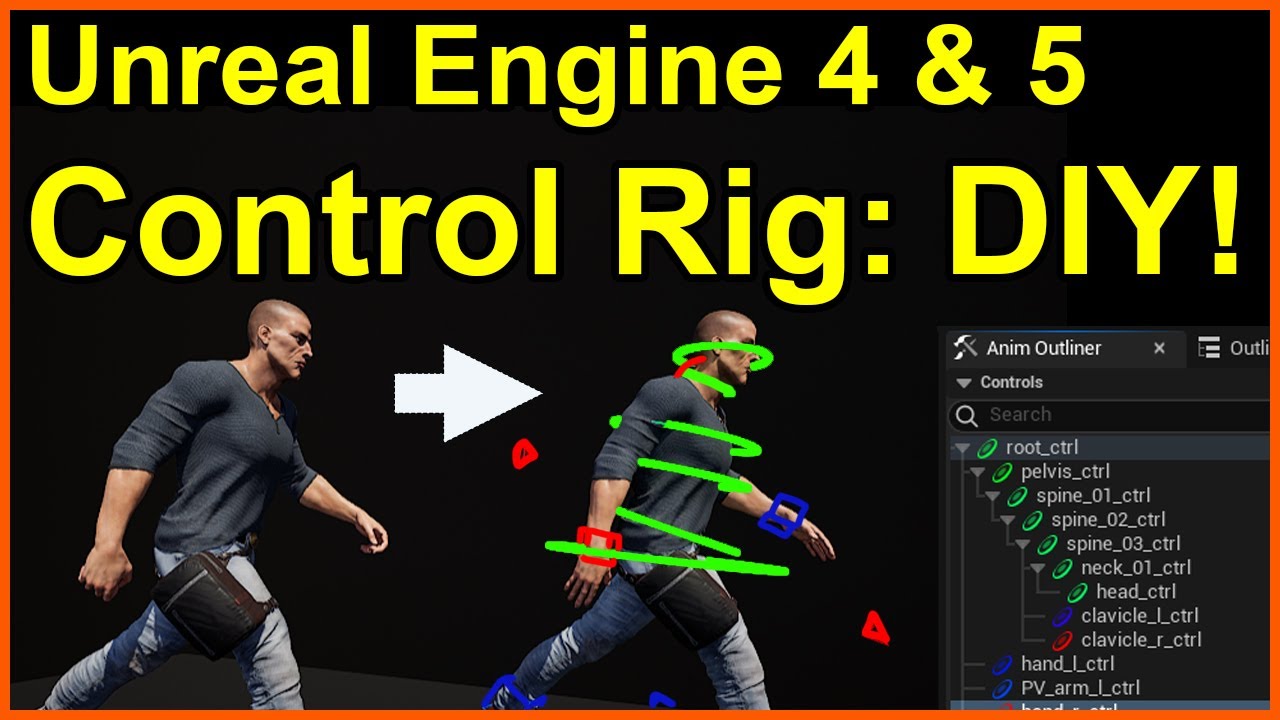
Starting from a simple, freely available skeletal mesh from the Epic Games Marketplace, this tutorial will take you step by step on how to build a Control Rig, and demonstrate why it is a great skill to have!
(NOTE - for UE4, you'll need to enable the Control Rig plugin)
Once you understand the basics from this video, you'll be able to expand ...
Cool!
You're not in the wrong channel, but I don't think you'll find the people who are familiar with that node in here, maybe #ue5-general , maybe even people in #chaos-physics will use it a lot more often (though they might think its off-topic...)
I thought its related to animations not physics, this is why posted in here, but yes maybe people in suggested channels know about this
Its pretty grey; an animation node designed for a specific physics application 😄 But those channels have much more experienced devs and this tends to focus on characters (not as a rule, just does)
Ok 😄
is there a right way to reimport a skeletal mesh with some changed bone names without screwing everything up, or do I just have to live with my mistakes forever?
noticed a tiny mistake where I used a . instead of an underscore on two finger bones meaning I cant use mirror in blender, but if I rename and import back in itll mess it all up
also, anyone know of good retargetting tutorials? like if I wanted to import a skeletal mesh thats the same as an existing one but just slightly moved around or parts added to it
is there a way i can make these two spheres jiggle?

Is there a way to open an animation, copy all the bone transforms and then go to my control rig/sequencer and paste all those transforms to start my animation? I see I can do each one individually but that would take forever and it won't let me bake the animation to control rig for some reason.
Is it possible to create a procedural animation logic using a control rig, independent of the skeleton, using only bone names? I have many models that will do the same thing but have different skeletal meshes. I don't want to write the same code over and over for all of these.
hey there
I have a root bone set up in blender but unreal created another bone with the skeleton's name and uses that as the root bone
did I miss something while importing/exporting?


that link is 404 bro
it's 404 because you need to join epic games organization on github
the code is in the EquipmentList
there the BP is spawned and attached
thank you bro, i have been looking for this a while
that is standard behavior. i believe unreal uses the armature as the root.
that seems counterproductive the moment you need to use root motion
I renamed the skeleton to "Armature" together with the Pose root and now it's using my root bone as the actual root but the scaling is fucked
i am using the new animation budget system and it seems like i need to everytime i restart the editor enter the console command : a.Budget.Enabled 1
Where can i set the cvar in the default config file?
anyone know where can i get some free medieval weapon animation, so i can use them as a placeholder?
just want to use them to test code logic
Hey, does anyone know a bug in ue5.3 which causes anim curves to return invalid values on simulated proxies?
just upgrading from ue5.2 to ue5.3 seems to cause the issue, where my animation curves sometimes returns very different values
Does anyone know how to make an animation montage not restore the previous state, but leave as it as it?
👋🏽 I have a Motorbike that rides around, and I put a SK_Mesh (Rider) under the Bike Mesh in the BP Hierarchy.
How do I animate the Rider on the bike with a Blendspace?, I want the rider to lean when the bike goes left etc. 🤔
Do I have to make a Blueprint(rider) in a Blueprint(Bike)?
If the rider and the bike are two different skeletons, you need two different animation blueprints. Then you just add the blendspace to the animation graph in the rider animation blueprint as usual.
Alright thanks, i already have the AnimBP for the Bike (steering and Rotating Wheels).
I'll finish the AnimBP for the Character and then look into how to combine the blendspaces 🤔
Currently struggling with motion warping, on the X and Y axes it is fine, but I have a purely Z root motion jump animation that is scripted that is snapping to the position at the very last frame. It gets to the position I want, but it always snaps and doesn't look smooth at all. I have the setting "Ignore Z Translation" set to false, and I can confirm setting this to true doesn't move me on the Z. I'm just wondering why the Z motion can potentially be so snappy. I have the anim notify across the entirety of my animation track and it only ever snaps to the point at the end. The horizontal animations do not have this issue and in fact Z motion warp properly
update: this is really weird. This motion warps properly ONLY when the point I'm warping has some slight X or Y translation to it.
but the whole point is I want it to be purely root motion, and only on the Z/
is motion warping primarily used for X / Y and Z is just a secondary consideration? It's really weird that it doesn't affect the Z in the same way and will only affect the Z if there is X or Y root motion
I created a Animation Blueprint for my Character, but i'm doing something wrong i think.
I'm following a "normal" tutorial for walkign and jumping, and in there they create a Speed Variable. But i think i need the speed from my Bike, instead of from my Character? Because it doesnt seem to move in relation to the bike since it is attatched to the bike. Srry im having trouble explaining.


So Basicly i think i need to get the speed of the bike, to trigger the different States inside the Blendspace, is that correct?
You can get the characters mesh component velocity
The character is not moving in the movement component so that’ll always be 0

Do you guys know how to fix this bug pls someone help me about it
this is my metahuman which is on queen mesh idk what is problem but it cant show my animation montages, if you guys know smth about it please let me know
Is there a way to setup a card geometry pre modeled in maya as a groom asset and have it simulate with the animation?
No idea if anyone will run into the same issue, but upgrading from ue5.2 to 5.3 seems to enable Update Rate Optimizations in my character skel mesh comp, so turning that off fixed my curve issue
Does anyone know how to have Update Rate Optimization not affect the animation curve values?
Anyone recommend any tutorial or documentation on creating a correct FP character? All videos just attach camera to head socket.
do you mean 2 separate meshes for 3rd person and 1st person?
I don't think there's many tutorials for it since it's pretty straight forward except for having to deal with duplicate weapon/item meshes. what are you having issues with?
Well I haven't started yet. I just like to watch/read up on how its done first and get some ideas
a tip I can give for the animation side of things is, just have FPS animations instead of 2 sets of animations (separate 1st and 3rd person anims) and then use ik/virtual bones to apply the animations to the third person mesh
I did this mostly cause I was using weapon animations from the marketplace asset, so most of them don't even have 3rd person anims, so I have a generic rifle third person anim from the Rifle Pro Mocap Pack, then I use virtual bones to copy the first person ik_hands and ik_hand_gun bones relative to the head, and then apply the hands (fingers/wrist only) from the first person onto the third person anim, and then ik to the virtual bones
This is for aiming down sight https://www.youtube.com/watch?v=Y2oKnX6PtFw but you can use the same virtual bones on your third person mesh

Check out my Patreon: https://www.patreon.com/user?u=60713904 Become a member: https://www.youtube.com/channel/UCFjBMoGhlEum8jRgPvmWpJg/join
Join the {GDR}; Discord server and download my free project files: https://discord.gg/dUm3ZtYDuV
Buy me a coffee: https://ko-fi.com/bluntstuffy
Follow me on Twitter: https://twitter.com/BluntZombie
Create ...
I do want to have free look so they would see lower body
that ones easy, just have a 3rd person, set the scale of spine_5/arms to be 0, then use leader pose component to copy your third person mesh
the good thing with that is that your shadows will match
If I set scale to 0 the shadows are removed.
no, sorry I meant a 3rd mesh
not the 3rd person mesh, just a completely separate mesh for the legs only
so 1 mesh for legs, 1 mesh for arms, and 1 mesh for full body?
yeah
for FP, hide the full body but cast hidden shadows, for the arms and legs, just set owner only see
ok, how do you handle the camera (eyes) position? Like im thinking if the person jumps, the full body head will move around. but for the FP camera it will always be fixed. So if the full mesh did a jump and the head raised up it could be in sight of the enemy whereas on your first person you might not see
animations are in-place, so they won't move up and down, you will move the capsule and the animation will flail the legs around
there will be some small movement but unless you are making an ultra competitive shooter, you shouldn't need to worry about it
you could always add a spring component, and set the location of that to the head bone, or just calculate the head bone offset from the default eye height and just -+ the delta when the head bone moves in the z axis, but it's just a waste of time
guys hello do you know how to make more realistic jumps or do you know what is causing the animation to start after the jump
This video kinda shows what I was thinking. You can see the camera will be in a fixed place for the first person. then as he moves and stuff the full mesh will be in a different place. So like when he jumps is showing it good. https://youtu.be/A0McowP7-4k?t=38
You can do it that way if you prefer, maybe other like it but I hate random camera movement, animations shouldn't control your camera except for maybe when you are interacting with something
unless you want to have the camera movement, the easiest way is to have an animation with as little movement as possible
ok
Any tips for getting iks to work properly? Made a rig in blender and imported it (painfully) and I know that FBX doesn't really hold actual connections, just parenting, and trying to set up iks in unreal are getting funky with legs stretching apart.
I need some blender help if anyone is privy. I have two armatures, both animated. One for the arms and one for the gun. I'm trying to prep this for Unreal Engine. Does anyone know the workflow if you're using two armatures?

Hi everyone 👋 I'm trying to use "Look at" in animation blueprint to have a character look at the player. For some reason it works weird; the head is always facing 90 degrees left (as if the character's right ear is looking at the player 😂 ). Is there a way to offset the character head by 90 degrees so that it actually faces the player when tracking it?
Question- is it better to make an IK bone or make an IK control?
Show your code that calculates what you're providing the node
Its probably because you're factoring the mesh which is offset -90, but show the code instead of trying to fix it, it might be intrinsically incorrect
This is the right way:
BaseAimRotation = Character->GetBaseAimRotation();
WorldRotation = Character->GetActorRotation();
LookAtDelta = (BaseAimRotation - WorldRotation).GetNormalized();
AimOffsetYaw = LookAtDelta.Yaw;
AimOffsetPitch = LookAtDelta.Pitch;
Do not use GetControlRotation(), its a common mistake due to people making tutorials the wrong way and spreading it, the PlayerController actually replicates the pitch for you but only GetBaseAimRotation() gives you replicated pitch whereas GetControlRotation() doesn't.
However, they compress it to a byte which can cause stuttering on simulated proxies due to over-compression, so make sure you use interpolation for sim proxies to resolve this:
// Sim proxies jitter a bit due to byte compression, so we add some interp
bSimulatedProxy = Character->GetLocalRole() == ROLE_SimulatedProxy;
if (bSimulatedProxy)
{
    AimOffsetYaw = FMath::FInterpConstantTo(PrevAimOffsetYaw, AimOffsetYaw, DeltaTime, 100.f);
    PointOffsetYaw = FMath::FInterpConstantTo(PrevPointOffsetYaw, PointOffsetYaw, DeltaTime, 100.f);
}
Don't try to replicate rotation manually to circumvent the byte compression, its used for good reason.
Note: The reason I'm caching every getter such as bSimulatedProxy = Character->GetLocalRole() == ROLE_SimulatedProxy; is because I do this in NativeUpdateAnimation for use in NativeThreadSafeUpdateAnimation (there are BP equivalents)
The mistake you're likely making is using GetMesh()->GetComponentRotation() instead of Character->GetActorRotation()
Its neither better or worse, depends on your needs and setup
I use the ik bones that come standard with UE5 manny for my prone IK, but the pelvis and chest don't have these so I added controls

I'm pretty surprised that, when exporting an armature to FBX using armature_nodetype='ROOT' from Blender, Unreal does not detect the Armature object as a bone. Someone else tried this?
Interesting, are you using the Full body IK when setting the positions to the actual bones?
Does anyone recommend a good tutorial or documentation on where/how I can get/create a character model for my project?
Any tips on how to make this idle animation more...alive? https://i.gyazo.com/6e36be37435831ececf63b764c1f739c.gif

In control rig How would I control the the Body_ctrl up & down from the Head Ik ctrl up and down, Tried here but If I move the head vertically the body control does not move.. I want to keep the refereance pose distance between the head and body ctrl the same

Is possible to have offset/distance between parent/child bones ?
Or they need to be always attached
Yep
Make it longer, like 600 frames (you can just loop it multiple times)
Add a few subtle weight shifts later in the animation
Vary the 'breathing' or whatever he's doing throughout
Maybe drop his shoulders a little and relax the hands, he looks quite rigid
Bold assumption that its a male.

Oh they do
you can tell from their face.
really hope I learn how to animate a 2D face soon....
is this rigging technique viable for UE? https://vimeo.com/388830109

*EDIT - Breakdown and example file in description --- Due to a large amount of questions and interest, I did an isolated breakdown of just the arm as it's the…
Does anyone have a model with eye bones?
I'm exporting my model from blender and I do my best to rotate the bones into the same orientation as Manny, but I noticed Manny doesn't have eye bones. should I try to follow the neck orientation?
I'm currently trying to set this bone location from Euler angles and I'm noticing that the X and Y seem to affect each other heavily, so my guess is that because of the mismatch in orientation they are gimbal locking


no clue how to fix this. works perfectly fine in blender

mesh has weight painting too...

Does anyone know why my character animations from Blender show up like this after importing them to unreal? This is driving me insane haha


He needs to export the animation only. If it has a mesh with it it will attempt to create the assets that go with it. Once you've imported the mesh you can just assign the skeleton that was created to your animation files You're importing.
Just use sockets???
hey there im trying to edit the ALS
im adding a sword Draw & Sheathe
it done by using anim montages but the issue is the character have to stop to play them
so i tried to make the anim montages play only in the upperbuddy but its still the same


What is the difference/advantage of that over bones? 😮
Sockets can be parented to any bone and any mesh can be assigned to them.
From there some nifty stuff can be done in blueprint like having the eyes always look at a target.
can bones not look at/point at a target?
It definitely sounds handy, but now I'm left wondering why people use bones at all.... bones for things that are all part of the same mesh? Sockets for separate meshes that are attached or something?
Because bones are used for IK/FK solvers, they have their place and uses, but for small things that "attach" to a mesh sometimes a socket or virtual bone is preferable, especially if the skeleton doesn't have the bones you need.
You can easily attach a socket and place it without worrying about effecting the rest of the skeleton.

hey guys , In this video I will cover how to Add Things To The Character In Unreal Engine 5 Using Sockets .
Basic overview
Can't be bothered watching it but UE5 Manny already uses corrective bones for deformations
Sockets have no advantage over bones other than convenience. They are commonly misused by programmers who don't understand the art/animation side. It is a common theme; they create an inventory system using sockets for sheathes/holding weapons and then request an animation and realize the animator has no access to sockets in their 3D software. Trying to convert spaces to 3D package can be awfully tedious. I made a tool that converts sockets into bones instead.
Bones can do anything sockets can, the only reason sockets exist is because they can be added in the editor
@smoky shell Can i have one question?
You seem quite experienced with animation in UE and Lyra, i want to ask: how many days it would take you to implement entire Lyra animation system from scratch, from inherit classes to all the wraping technique, all the detail, assuming no asset required, only the logic system.
I want to do that myself, and i want to know how long a more experienced person would take to do that, so i can set my goals. Thank you!
I don't really understand the question, because if you just want Lyra's you can use it as-is.
Are you:
- Porting to C++
- Changing to Fast Path only
- Fixing any features that aren't implemented adequately
- Implementing other features
I want to have Lyra animation system but i want to do it myself for the learning purpose.
For the future developing purpose as well, feel like it's better to have a system that you understand, so you can easily upgrade it.
That's a good idea. I will forego answering your question though, it doesn't seem to have a point 😄
I am a solo dev for a while now, and most of time time it feel like going through a dark dungeon, losing the concept of time, of day and night, of week and month. Every single plan that i made is based of a very vague assuming of how long could i do it, and a 7-days plan could cost as much as 30 days, sometimes for reasonable reason, but most of the time is because i don't put enough pressure on myself. That is why i want to know what is the timeline of more experienced devs, so i can tell myself if i am doing it right, or wrong.
Admittedly my main desire to avoid sockets is because I had all this working fine purely based on a bone animation system in unity, and I'd like to port it at least as close as possible to as is before I start overhauling anything or doing anything "crazy"
I don't think using an experienced dev as a benchmark is reasonable towards yourself. But if its something to strive to, I can rebuild Lyra from scratch in C++ with fast-path only in 3x 8 hour days.
No need to use sockets, they are a convenience, not a necessity
idk... this sounds kind of weird to me no offense...
A big thing that a lot of developers struggle with myself included and it sounds like you as well, is estimation...
i.e. How much time/effort will it take to do X thing.
I think on one level you can definitely strive to improve and become better at just doing work faster but that's also how a lot of people burn out super quickly at least in industry...
I think it's more reasonable to approach problems you don't understand or have never done before with a "you don't know what you don't know" attitude, and then as you become more familiar with the work, you will be able to accurately assess and size things better...
and then you will also become faster at it because you are more familiar with it and have naturally improved.
I don't really know if there's any way to just force yourself to magically learn more or do more work faster.
If you were an artist (and in a sense you are) creating a one of a kind work for the first time, you can't just magically make yourself do art faster anymore than you can just magically build a building faster imo.
Things take time and a lot of that time is learning more about that thing the less you are familiar with it.
It depends.. on each individual. I understand myself, and i feel like i do have a way to magically learn faster, i just need a goal

thank you bro
Its probably just ADHD
we also have normal ADHD and Michael Scofield ADHD
That still sounds like a trap long term...
I get the whole like
Nothing forces you to make something work better than when you can't afford to fail
but long term that strategy will still probably wear you out. It's better to plan and pace yourself long term imo
just my unwarranted advice q.q
I think its fine. You do what works for you personally. Everyone is different
I had so much long term motivation that now i seek short term ones
fair enough
hey guys
I can't find right category about chaos cloth,,, is there somebody can help me,,?!
guys why is animation class telling me this ? I selected bone

deleted other 2 and still, rotator is set

Probably #chaos-physics but its not a common topic there :/
Double check that warning
The "components" its saying you haven't selected are translation/rotation/scale, the dropdowns will be set to ignore, you need to set at least one to do something otherwise the node is pointless
i had to set ignore 2 left but thx
Thank you so much!
this is updated every tick? do we know?

Hello Everyboy, I`m working on a big school project, its a big mechanical sky city. When i finished the model and rig and imported it with a test animation in Unreal Engine 5, the chains of the 4 propellors where screwed up.
Im not sure where the problem is. I think its the rig in Maya, but ik can also have something to do with the export settings in Maya or something with the import setting in Unreal. Any idea????
How it looks in Maya (How it should look)

How it looks in Unreal Engine 5

maybe it's the axis when exporting in Blender i know you have to set Z axis up and X axis as Forward
heya, is it possible to get the enhanced input in the animation blueprint, so i dont have to add an extra variable for the name of the ability?
I am trying to retarget some animations. I select to retarget manny and then I create a animation blueprint but I can only use the animations if I create a anim blueprint for quinn
fr tho that model is IMPRESSIVE
how long did it take u to make?
How did you rig the chains, are they just animated bones
I wonder if the compression is dropping some frames, or LODing is removing some bones
Set force min lod to 0 and see
I have a blendspace that has idle, walk, jog, run. When moving from idle to walk the feet are a little wonky. And then when going from a run to sprint it is like an instant change and noticeable and not natural. Does anyone know what I should be looking into so that I can smooth this out?
does anyone have experience authoring custom character rigs for use with the Physics Control component? I could use some help / advice. Things work somewhat but there are some aspects that I am fairly confused about
hi! anyone here familiar with Character creator 4? wondering if its possible to make the clothing and accessories customizable within the game in UE5 once i export the FBX there?
When I walk with my character I the way he blends to the walking animation isnt consistant, the way he takes his first step is random. how do i fix this
https://youtu.be/0bwpFksQJec?si=8HbKpNQqEJtU5XJl
Does anyone know why the legs aren't translating as they should be in the video? The ue5 mannequin can't have the same wide stance in the animations when I use montages


Anyone know what I need to put in here to make sure this video loops ? It seems like having "loop" checkbox enabled in media player is not enoug h
how do I fix imported bone transform is different from original error?
or like
what are the common causes/solutions for it
👋🏽 I'm trying to add some animations for my character turning on a bike, The tutorial says : GetActorRotation, but in my case it doesnt work, how can i get the rotation from Try Get Pawn Owner? or how should i approach this?

Hey guys does anyone know the best way to modify a certain animation procedurally and only in certain parts as well?
I'm trying to make a reload system for an FPS game project and I'm trying to modify the reload animation that I have with code so that the left haend finds the clip and follows it procedurally, rather than creating new animations for each different gun type e.g. rifle,
I was suggested before to look into a state tree and I was able to set it up to play the reload animation in it's own state but now I'm struggling with how to approach getting the left hand to go to the ClipSocket on the gun while taking the clip out and putting it back in during the reload animation and was hoping for maybe some suggestions?
here's the task that handles playing the reload animation

if I don't update LHSocket Location back to ForegripSocket before I finish the task the left hand will stay on the clip so the update of LHSocket Location to ClipSocket before the animation is registered but the animation itself completely ignores it
Does retargeting animations from one skeleton to another always involve creating a new asset?
nvm maybe I should learn to google: https://docs.unrealengine.com/5.2/en-US/runtime-ik-retargeting-in-unreal-engine/

Use Retarget Pose From Mesh to enable dynamic runtime retargeting on your characters.
I vaguely recall there was some Epic demo project or something with a character that had animations for holding a gun and stuff like that - anyone recall where that was or if it even existed?
Just need some placeholders for my test project
Oh- maybe it's the animation starter pack... but of course they haven't updated it so it would let me install that for my 5.3 project 🤔
Nevermind, you actually can bypass that limit, the UI is just super confusing for it
Why Lyra uses this shit? Instead of access to the property Velocity on CMC? It returns the same value but without 4x nodes in the graph


Hey, this is why Scrum and sprints have worked so well for companies, nothing wrong with that. As a solo developer, you are responsible for planning your long term strategy but also breaking it up into a roadmap of milestones and then breaking those up into sprint goals, if it helps you plan and motivate yourself.
i am not sure if you can apply company techniques into solo dev case though. It's very different
You get to pick and choose what works for you, I think in this case having short, medium, and long term goals fits both types of development very well. As you said, you're looking for nearer-term milestones to set as intermediate targets for yourself. I think it's a good plan.
Anyone? xDD
Does anyone know what I can do to stop this animation from moving inside of the capsule?
thanks! Ive been working on it for 4 weeks now
did u fix the rotations?
@dusk tendon , Coudnt get it working, so to save a lot of headaches, I removed the chains an made a other mechanical system
Wait - you can?
I thought I remember being able to, but never really delved further
At least on the animation pack - 1. click on add to project, 2. check "show all projects" 3. click on the incompatible project 4. on the very bottom in the select version box choose a version the asset supports
it's a weird set of steps you have to do but it seems to work :P
Its completely useless for anything other than blending dying animations with ragdoll, because it only simulates in world space and cannot simulate relative to the root bone / component
Because accessing game thread props in worker threads isn't good
The update method is for retrieving props in game thread, then you do your computations in worker threads (thread safe update)
Lyra is a bit of a mess in some regards, it doesn't even fast path, but that part is correct
How you would suggest making this simple walk animation smoother?
Is there some tool to stretch to add frames to it and bake new keyframes?
Does anyone know why this happens and what I can do to fix it? Theres like a dip in the model when blending between this animation pack's idle state to the running state.
Does any know a tutorial where or how I can add first person viewmodels to my game like csgo/tf2 where there is seperate first person viewmodel to the models that others see
I have a character with a bunch of tendrils / tentacles that I want to have animated but also react to the environment. That's what I'm using it for and that part is working nicely.
The confusion was around an animation that moved the root of the skeleton - that only worked when including the root bone but that in turn broke my other animation. I have fixed it by setting the spine to be kinematic and only the tentacles and the head be simulated.
to your point about it only working in WS: you can also have it simulate in Parent Space, wouldn't that be what you mean by relative to component?
to your point about it only working in WS: you can also have it simulate in Parent Space, wouldn't that be what you mean by relative to component?
With a character, typically their movement is based on their capsule. If its simulating in world space, then the character will lag behind the capsule. You would think that setting it to parent space would make it simulate in component space, but it doesn't. Maybe I just set it up wrong - I didn't spend tons of time on it. Even if I did something similar to you, setting only the arms to simulate perhaps, the arms would still be lagging behind the capsule which might look good for tentacles but not arms.
Oh alright I misunderstood what you meant by component space then. I thought you meant that as "joint space" but if I understand correctly now you were referring to the character capsule as the origin of component space
interestingly that's also the issue I ran into. Either my entire character was lagging behind the capsule which looked and played very badly or animations would break. I have it set up in a way now where that doesn't happen but it also means I can't simulate the whole character. But the effect with the tentacles is really nice so I'm willing to live with that small tradeoff
I have spent a bit of time trying to get it to work but I'm not very experienced with animations and rigs. would be interested in hearing if anyone has gotten this to work nicely as I might very well be doing something wrong
Its not the first time Epic have failed to foresee this use-case, I made a (now very outdated) plugin when they did that previously
https://github.com/Vaei/SpringBone
I didn't spend enough time to see if I could do it with this one.
That's because they took the old forums away
I basically added component space simulation to their Spring Controller anim graph node
So it could be used with characters
Its a bit mind boggling to see them have the exact same oversight with this component since it seems to target characters, I'm not sure what they were focusing on - sequencer?
hello!
Is there an easy way to delay my character animation from mixamo
i don't want it to start right when i play my scene
I want it to delay like 10 seconds
I have recently endeavoured into creating animations in blender, to then import them into ue5.3. The main problem I am running into is that as soon as I apply the animation to the character bp the SK mesh is in, the SK mesh becomes really really tiny. I have triple checked that everything looks good in blender, so I am currently a little lost.
The tiny green dot in the image is the SK mesh in the pawn bp.

Ah, the solution was to rename the "armature" object in blender to something else. Now the SK mesh gets imported at the correct scale 🥳
why does my mesh act like bones too when i importet from blender?

You don't want them to be in the same hierarchy as the bones. Unparent them and bind them to the bones instead.
how do I bind them?
Thank you for all the info you've posted regarding inertialization issues. Couldn't figure out what was going on but your info is ✨ gold ✨
It looks like I was running into both the issues you described and until now I only knew of Epic saying something along the lines of 'too many calls for inertialization in a short time frame can lead to snapping'
Your specific use cases/causes make this a lot less vague (and provide possible solutions 👀 🫶 ).
Was curious if you had a link to anywhere (forums/udn/social media?) where Epic said they'd expose the properties for IgnoreDeficits and Max Pose Snapshots in UE5.4?
the tutorial I learned riggig from told me to parent the mesh to the spesific bones that control that part of the mesh. i click on the mesh then the armature then go in pose mode and select the bone I want to parent the mesh to clcik ctrl p and bone. is that not correct?
Not if you want it to work in Unreal. ;)
Hi
Um im having a problem with the aim offset to look down and up
the animation is like snapping and not being smooth
with using the idle animation
This only happens when I create this aim offset, generally not
The animation is like snapping in 1 sec earlier
Ah ok 👍🏻
Anyone know what can be wrong here?
Trying to make an IK rig work
Rigged in UE5
Does anyone know the solution to make my character's rotation to follow the animation that is being played? with root motion or without
Is there a way to Extract the rotation information from the animation and update the character's rotation accordingly?
I talked to the epic dev responsible for the inertialization node privately, we went through the issues and that was the conclusion. I'm not 100% on it being 5.4, but am 100% on the changes
Hello everyone! I am doing virtual production with a metahuman. And I encountered an issue I hope you guys can guide me through since I am not an expert with Unreal. I want to be able to switch the head of my metahuman with an event(on overlap). So far I created another face using mesh morpher. But I realized that the deformation takes place in the animation blue print. Is it possible to bake that to the skeletal mesh? Cuz I can't use 2 animation blueprints since each time I try there is an error inside the metahuman arkit function that states that the animation BP is not valid. I am using an overlap event inside the metahuman to set the skeletal mesh or the animation blue print. But we'll since the transformation is not in the skeletal mesh I can't use that method because it always returns the same basic mesh and l can use only one face_animBP so that doesn't work either. The other way I could achieve it is blending directly inside the animation graph between the morphed head and the regular head for it to work properly. Here is where my knowledge hits the wall. Since I need a way to bring the event information inside the animation graph of the face_anim BP. But the animation graph doesn't support events in that context. So I wonder if someone can point me in the right direction about how to get a variable that feeds on the data generated by an event. The metahuman is not a playable character I have it inside the scene just as an default metahuman actor class that receives the mocap data . So is not a character BP. I wonder if anyone would know how to tackle this issue or find a better way to solve it. May there is a way to bake the deformed head as a skeletal mesh. Or bringing event data inside an animation BP . Cheers!
Is blendspace editing just completely broken in 5.2? I can drop exactly 1 animation into a blend space and no more. I can't even do that much in lyra. Lyra gets unrelated warnings in the log. Nothing in my project
Why Lyra don't use Blendspaces? for basic locomotion
Because distance matching doesn't support blend spaces
And distance matching multiple animations and then blending together the result is computationally expensive
And orientation warping is not computationally expensive
In some cases it handles blending even better than blendspaces
Thanks
You seem very confident with animations, do you recommend following the approach that uses Lyra?
Can anyone help why my character floats when crouched? I feel like I copied the exact bones from both IK rigs. But when they crouch it floats above the floor


So i figured out that if i unmap the pelvis in the chainmapping in the Retargeter my character no longer floats.... why is that? Wouldnt matching the pelvis put the pelvis bone where it should be? Im confused
Thought I might ask incase anyone has come across this issue before.
I created a procedural foot placement rig and it works fine with the exception of when I incorporate it into the animation blueprint it overrides the base animation. I can set the alpha to .5 to get some of that animation back, but would prefer it be additive.
Anyone have an issue with this before?
Has anybody here tried implementing orientation warping with blend spaces, I get it to semi work, but I get issues where the backwards running animation starts bugging out, slightly. I am looking to make something akin to the Paragon locomotion system, but having issues. If anybody that has worked on a similiar system is able, I would love to get some input
HelloHello!
Does anybody know if it is possible to merge or bake layers inside of a level sequence?
Like, multiple levels of animation on a control rig, but I want to simplify that down to one layer so I only have one set of keys moving forward.
Is it bad to have fully procedural animated characters in a game? I am thinking in terms of processing time/power.
What makes an animation compatible with a skeleton? I’m sorry if this is a silly question but I imported an animation (.fbx) and tried to import that for an existing skeleton in my project but it gave me an error and didn’t really specify why I can’t use that animation on that skeleton. Are animations made specifically for certain skeletons or what makes an animation incompatible with certain skeletons?
And also how would I use an animation for any skeleton in my project?
Your skeleton defines how your character's body parts are organized. This includes bones for the head, arms, legs, and so on. Animations are created to match this specific structure. If you try to put an animation designed for one skeleton onto a completely different skeleton, the body parts won't line up correctly. It's like trying to put a puzzle piece in the wrong place - it just won't fit.
Not every animation can go on every skeleton because each character may have a unique structure, joint placement, size, and proportions. Imagine your body, and the skeleton of a smol baby, now put that skeleton of that baby inside your body, even if you are both human (and lets asume same gender), the baby skeleton inside your body wont work... hope that makes some sense 😁
Depending on your UE version, this is a good one I like to follow:
https://www.youtube.com/watch?v=I84ROixEK3c
Learn how to copy animation sequences from one character to another character by making a simple IK Rig asset for a pre-animated mixamo character, then you'll use the IK Retargeter to transfer the animation to a mannequin and also a metahuman. #unrealengine #animation
If you are brand new to Unreal Engine, I recommend you watch this video fir...
That makes a lot of sense, thank you very much for explaining and providing a video I can check out!
Ah, no wonder I couldn't find anything about that 😅
Using IgnoreDeficit seemed to fix the majority of my issues btw. Unsure what performance impact increasing max pose snapshots would have so will avoid that if not crucial.
Btw, seems like there's some interesting alternative Inertialization node called Dead Blending available as well. Might be of interest to you https://x.com/anorangeduck/status/1711758390710378838
Yes, its the modern standard
But it has requirements and can take time. All animations that aren't idles need to have root motion to extract data from. And processing these animations for this data via anim modifiers can be time consuming. I was able to automate all of it in my own locomotion system but that's a ton of work itself. So it depends what your goal is.
The dev was surprised that increasing max snapshots did anything  But it does
He actually recommended Dead Blending as a drop-in replacement for Inertialization, its meant to simply be better, but I'm developing my system in 5.1 for maximum compatibility so can't upgrade just yet
Is it possible to feed an animation into control rig and then modify it from there?
I am trying to do the equivalent of a blendspace for aiming a rifle, but I don't have poses for aiming up/down/left/right, and I need it to aim in the exact desired direction so that the gun can hit the desired targets
If I had the blendspace working for aiming up/down/left/right, I don't know the math to have it aim in the right direction - whereas in control rig I already have that figured out
I can set crouched height but I cant set crouched width. how can I set it?
Is there a way to save the current state of a skeletal mesh in animbp to a pose asset? I am trying to create a blendspace and I am trying to leverage the IK from animbp

That's literally what the 'control rig' anim graph node does, it passes the pose into the control rig for the control rig to modify it, then outputs the modified pose
You can use the 'record' feature to get an animation, then if you want a pose you can take it from the resulting animation

This is what I mean

https://www.youtube.com/watch?v=qoljP3MAuLs Not to bad, just starting with animations

Unreal engine 5.3 zombie horror scary realistic cinematic animations trailer game
heyo
How can i play a skeletal mesh animation on button press and when pressing again reverse it? It's for a skeletal mesh component in a pawn blueprint
right now i am doing this

Try using a different node to play it and setting play rate to -1, I haven't tested this tho, so I don't know if its supported
If it doesn't work try setting play rate before telling it to play, if possible, you might be able to do that with your existing node
the play rate is set inside the animation sequence
Did you even try? 😄

well i did and like the first time I tried it didn't animate

it prints the string at the end after the animation time, yes. But it doesn't animate actually
like visually
OK, so what if you set the play rate like I did there
And what if you duplicate the animation and set play rate to -1 in the editor
the second option you mentioned is what i did before which didn't work
and about the first one i don't know really how you planned on connecting the rate of the set play rate node with the play montae play rate
the problem here is not only that it's not reversing. It's not animating at all
Doesn't this provide the solution? https://forums.unrealengine.com/t/play-animation-in-reverse/397235/2
This one, basically
And what if you duplicate the animation and set play rate to -1 in the editor

Epic Developer Community Forums
Is it an imported bone animation, paper2d animation, etc? Animation can mean just about anything that is animated. you set the playtrate in the animation bp, (state window).
This too
https://www.reddit.com/r/unrealengine/comments/aeptf5/reversing_an_fbx_animation/?rdt=63980
Reddit
Explore this post and more from the unrealengine community
With this, you will probably need to set the 'starting position' to the end of the animation
You can Get Play Length from the montage
look at this ss i sent. Here the top animation is a duplicated version of the bottom one just with play rate set to -1 in editor
but it's not even playing first to reverse it afterwards
like with the montage node it's not playing at all
If its starting at 0 then its starting at the end of the animation if you're reversing
the first press opens the roof
after it is opened i can press again and then only it plays the reversed animation
...which closes the roof again
Well, you have at least 2 solutions that are said to work, I think you're misunderstanding them or implementing incorrectly
these are from 2017 first of all
Yes
second of all it might be that I am implementing them incorrectly, that's why i am providing screenshots because I don't understand why it's not working xD
I haven't seen a screenshot of this
You also need to remove most of your logic and isolate it down to the bare minimum for testing purposes
but we shouldn't focus on the reverse animation if the actual one which opens the roof is not playing in the first place. How is it supposed to close the roof if it's already closed
Its an animation, it will play either way
yea ik, but the reverse one is more complex so we should fix the actual one first or get back to the "play animation" node
i can promise you that it won't play the reverse one even then if we didn't fix the fundemental problem beforehand

maybe it's different here because it's a pawn bp i am working on and not a character one?
Nope.
did you set anything up in animation bp
Its skeletal mesh, not character
Nothing other than the slot it plays the montage on

You need to add the slot its playing the montage on
well then that's the problem apparently xD
LET'S GO okay
now we made a good step, it's animating
now just some fine tuning
give me 2 min i will let you know
One thing you will possibly want to do is handle changing while its already animating
So it can change direction before completion
ok so now i have it like that

but it behaves kinda... weird
i will show you
Here is the logic if you want to reverse it in-place

Make sure to set blending to inertialization and not standard blend
what do you mean by in place?
Look what happens if you "interact" with your roof twice, before it finishes animating
rn it's closing instantly right after opening. It's always returning to it's default pose
Yeah, that's what the logic I just posted solves 😄
oh okay perfect!
look
One moment, this will need to be handled in anim graph
no problem, thanks for your help man, I really appreciate it
@somber light I haven't tested this, its psuedo code more or less, because I don't have a setup to test it with
- Take the anim graph its using and connect a state machine to the slot node you added for the montage to work
- Set it's
Max Transitions Per Frameto 1, this shouldn't matter much but I don't understand why it isn't the default (not shown via screenshots) - Add
Open&Closedstates - Add
Sequence Evaluatorto your open and closed states, set explicit time to 0.0 forOpen - Make a property
MontagePlayLengthand assign it to the explicit time forClosed - Add transitions between
OpenandClosedthen make a propertyIsOpenand use it to drive the state change - Set transition time to 0.0 because the montage should be masking this regardless
Now what you have remaining to do is set the MontagePlayLength and IsOpen properties. The "correct" way is to have your anim graph grab it from your Pawn. You could grab the anim instance from your mesh and cast it then set it directly if you really want (not recommended)
I've provided an example for this in the final screenshot. None of this has been tested, and I anticipate a couple of issues, you'll need to show videos if/when they arise.


alright i will try this out asap
straight away a question. How shall i connect the state machine if i still have the other nodes?


yea it did alright
what shall the explicit time for closed be?
Its in one of the screenshots

both sequence evaluators are showing errors
oh lol my bad
forgot to put in the animation
did you give an example for a not recommended way in your final screenshot lol?
hmm well
I could send you this vid again basically
nothing changed about the behaviour really
Nope
Post what you did there

Read the comments I put
You need to get the montage from your vehicle, get its play length, and also its open/close state
Also you should do better than the print node I used for error checking 😄
thats all just in the pawn bp?
Yes, your pawn BP should be tracking whether its open/closed and it should have a property to assign the montage that gets played to
The montage you have here, make it a variable instead
And then you already have "Opened Roof" which you can use to set "Is Open"

same problem still
btw it's spamming ups all the time
so i guess something is going wrong with the validation xD
maybe i need to make the casting differently than you because yours is a character bp and mine is a pawn bp
You need to disconnect it from update and see if its occurring on initialize
OK so when the anim bp initializes the pawn isn't valid
no wait i will try it out again, the editor is really buggy rn

what is hot reloading
You'll have to google that
no i usually stop the simulation
oh no the initialization works fine apparently
but it went through it like 5 times

so it printed the upper string like 5 times
to be prescise 7 times
Don't worry about that. It'll trigger in the editor as well as PIE world
Ty so much 🙂
Oh heck yes, this is in the "Forward Looking" roadmap so not on the timeline yet, but I've been expecting this
Soon we wont even need 3D software...
There's a whole suite of animation authoring tools planned it seems

When doing an animation do you use a camera rail or do you pilot the camera and set key frames? With the first one it's easier to have a constant speed, while I find the second option easier to set up (piloting the camera with wasd, setting the orientation, and adding a key to the transform track)
why is it that my transform (modify) bone node that is setting a fixed rotation stops being applied when I set the skeletal mesh's Collision Enabled property to enabled?
Animation graph of a person that doesnt want to pay $170 dolar on procedural tentacles plugin lol (its not working properly)

cw tw: spaghet
So, I know with UE5 we can author animations in engine now. Is there a simpler way of authoring walk cycles tho? There doesnt seem to be an easy way of doing it other than manually, which wont loop as well.
👋🏽 Anyone know a method on how to create Vibration on meshes inside Sequencer?
The same as you would use CameraShake for instance, but for non-camera objects. Can't find much on the net about it, maybe someone has a good idea would love to hear it 🙂
Btw it still didn't change. It still goes back to default
Hey, so, I working with metahuman characters on the mannequin skeleton, and the retargeting works pretty ok, except that the weapons are held too high as they follow the animation (and I assume they would have to, to mkae sure they fit the weapons). So, are there tutorials somewhere which describe ways of modifiying the ik bones. Specifically I want to lower them, so it looks more natural on characters with other dimensions.
Hi folk! I want to know how I can crossfade between two animations in a montage. They say that I have to use it in a blendspace, but is it a must?
Hey guys, I'm trying to make a control rig for a gun, but I'm having an issue setting the transform of controls. I use the set transform bone node and just connect the control's transform to it, however the bone and control's locations get desync and glitchy when I move it too far away from the initial position, as shown in the video. Does anyone know a fix for this? Thanks in advance!
How do I rename nodes in Control Rig?

F2

hey there im trying to blend the upper and the lower buddy
but its not blending and when the anim montage play the lower part isn't doing the movement and just plays the anim montage for all the buddy


Do you have an anim blueprint assigned with the corresponding montage slot setup?
this?

im in "UE5 general" trying to find help with some other people but i still have my problem
Your video is so blurry I can't even see the nodes, but it looks like double transforms, a common novice rigging issue, in the case of control rig it typically means that you are modifying something not based on the input and based on the current instead so you're getting i=i+y instead of i=x+y
Yes, is the montage set to DefaultSlot
Oh, I must be blind, you haven't connected a skeletal mesh component

to where ?
I just immediately jumped to the most common cause of this issue 😄
i replace it with " Play montage anim " instead
You just need to tell it which skeletal mesh to play the anim on 😛
Also check your output log to see if there is a warning, it might be giving one about the skeleton being incompatible
the animation is specialy made for this skeleton
Yes, but nonetheless, check the output log if its still not playing after you assign a mesh
Just opened a project I haven't touched in a couple months, and getting some crashes. Does anyone have any insight on why I repeatedly get this error when trying to double click an Animation Sequence in the Content Browser?
Does Control Rig's backward solve not run in real time? does it only run when you bake an animation to a control rig?
I am trying to run an animation in real time and modify some aspects procedurally with control rig
omg nvm it works,. I just had alpha set to 0 on my ctrl rig node lmao
actually the bones being set in the forward solve all appear to be in their initial non-moving state, but all bones not being affected in the forward solve are following the animation
hmm makes me wonder, in backwards solve I am setting the control transforms to the bone transforms....is that not being set in real time?
ah looks like I need to take the logic I have in forward solve and place it in the beginning of backwards solve
You won't be able to find the answer to that with that information
You need more
Which means at minimum editor symbols/source and crash reporter to get a full stack trace
Either way the animation is probably corrupt and won't be saved
But it might be something the animation references instead, can't tell without the trace
happens on a brand new project as well so I'm beginning to think it's larger issue. I'm going to try a full reinstall
Oh, then yeah
If while im doing the " Layered Blend Per Bone " But the tutorial show i have to set the bone to the Spine so only the upper body part is moving, but my skeleton doenst have spine, what should i do? thanks
Assign the bone where you want the blending to start from, for example if a skeleton has:
- Pelvis
- Spine_01
- Spine_02
- Spine_03
And you assign Spine_01 with a Blend Depth of 2, then it will blend partially into each bone below and including Spine_01, which means Pelvis gets nothing and nothing below Pelvis that isn't below Spine_01 gets anything either, thus blending away the legs and pelvis entirely. Normally Pelvis is not included because you can't control the blend direction - legs or spine (so it goes both up and down), thus the spine is used instead of pelvis.
The purpose of this is to create a falloff for nicer results. The formula Epic use is 1.f/((float)BranchFilter.BlendDepth) which can be simplified to 1/BlendDepth, so if you have depth of 2 then you get 0.5 and they add together (depth + 1) * 0.5. Therefore Spine_01 gets blended in with a 0.5 weight, and Spine_02 gets blended in with a weight of 1.
I used 2 as a simpler example, but 3 is a pretty reasonable blend depth for most cases to provide slightly more falloff.
Knowing this, you should be able to determine which is the appropriate bone to start your blending from.
If you're still unsure, post a screenshot of your character's skeleton
This isn't important to you at all, but their formula kind of sucks, you can get nicer falloff doing it other ways 😄
The thing is i dont have spine at all, it means there is hierarchy between legs/arms/or head
I'll need to see the skeleton
Im not on my computer anymore but its the one i sent you my project
I can't help you if you're not at your computer anyway, so feel free to ping me with a screenshot when you're back
Sure it was about if you get curious lol
2am here i gonnz sleep
Thanks à lot again for your help and see you later
oh yeah sorry idk why the video got so blurry when I uploaded it to discord, it is just a set transform node that is getting the transform of the control
here's a beter quality version hopefully
ok, so I think I understand what you are saying the issue is, but how can I fix it? I don't really know how to get the "x" value
is control rig just absolutely buggy for anyone else on 5.2?
Hey I have a quick question. Im having a difficult time trying to figure out how to import animations properly. Is retargeting animations generally difficult?
Looking for some feedback. Feel free to critique
The animation above was entirely done with control rig and sequencer in 5.2
Damn that is pretty good
No. Where are your animations coming from? If it's mixamo to UE5 you need to convert the anim. Also here's a retargetting vid I used for other stuff. https://youtu.be/DnHxgXTi0aw?si=b_IVCt37jfXx6bWB

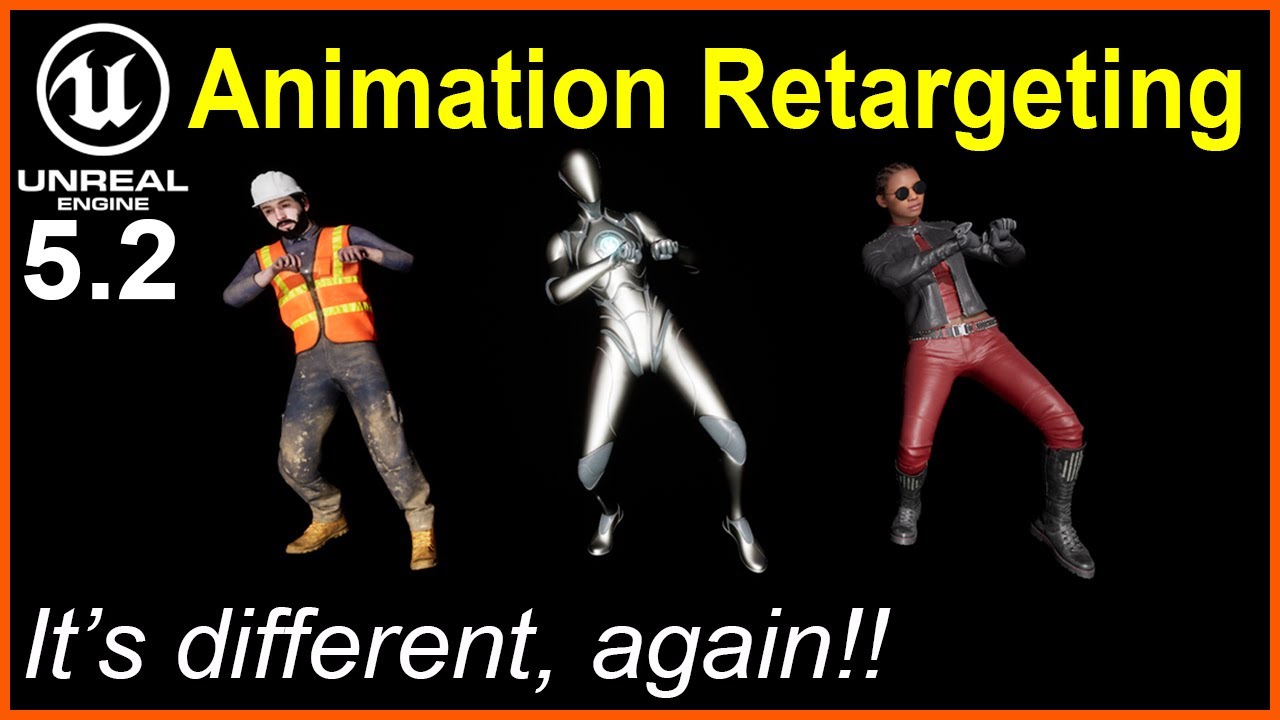
Hey guys, in today's video I'm going to be showing you how to use the new animation retargeting system in Unreal Engine 5.1.
Mixamo To UE5: https://youtu.be/0L0rH9nyVlU
Creating An Animation Blueprint In UE5: https://youtu.be/TE-SsP3pigs
#UE5 #UnrealEngine5 #UE5Tutorial
__________________________________________________________________________...
What can be causing the animation to play differently than how it shows in the retargeter?
very nice 🙂
Hello! What is the best automated way to animate face in Unreal for the game that have a lot of dialogue lines? Im not looking for perfect solution but at least decent with not much work. It must be handle by 1 or 2 animators that dont have a lot of experience with Unreal. Im able to rigg and animate stuff, create blendshapes but I have no idea about entire workflow-system around dialogue system-automatic face animation for smaller project (not AA/AAA). Realistic / semi-stylized graphic. I would be happy to achive close-similar result to Starfield game where characters have not that great face anims but it still do the job.
What's the correct way to turn off animations for a skeletal mesh? I'm basically ragdolling a character, but its animation BP keeps playing which seems to cause it to twitch certain bones, so looking to turn that off but I don't see any obvious way of going about it
Hi, is there a way to get get the axis/axes of bones in control rig?
Is there a way to add IK hints to FABRIK? Or do I need to use a different IK or something like control rig for this? I noticed the arms here are looking quite robotic.
I'd like to be able to add a suggestion/target location that pulls the elbows down.


Is there a way to get the controllers of a control rig to show through the mesh of the characters, much like how Allright Rig handles it. Right now, you must use an oversized shape so it can be outside the mesh of the character.

Is there anyone working professionnaly as a rigger for games ou here? I have some question about mesh prepping for games rigging
@outer gardenin your level viewport go to animation tab ( shift + 8 in 5.3) and tick "Show Controls as Overlay"
Awesome, thanks!
I guess to answer my own question I think the answer is no
My guess is that because FABRIK can be used for a chain of potentially multiple joints there's no way to provide a hint for all of them, but the two bone IK has a joint target location which seems to be functioning how I want
Does control rig crash less in 5.3? I am at my wits end in 5.2. It crashes when I use aim math. When I click on anything in the details panel for a node (such as debug), it deselects the node. When I select multiple nodes and try to move them, it only moves the last node I selected.
It only crashes when I compile & when I have an instance in a PIE session being previewed

so im creating a layered animation system using linked anim layers, I have a base anim blueprint which handles the main locomotion states, and separate anim blueprints with linked anim layers to handle overlay states for weapons, animation states, etc.
Is there a way to transition or blend linked anim layers when they are linked or unlinked? its really jerky at the moment when I swap between layers
Is there a way to bulk create and name notify tracks in an animation? I have to create and name hundreads of them and it's long and painful
instead of creating and naming each one, you can create a new blueprint class under AnimNotify and name it to your liking, it will then show up in the add notify menu!
then you wont have to name them by hand each time
Anyone know what happened to 'Search & Replace' in RIG graph?

Oh I was not talking about the notify itself, but the track, I already have named notifies that I can add, luckily!
oh in that case im not sure, I believe you may be able to make custom scripts for doing that kind of thing if its something that can be automated, but ive personally not done it before
Okay, thank you!
Our programmers are way too busy for that rn, and I never scripted in unreal so I guess I'll continue doing it by hand :p
for IK bones, do people usually just make a bunch of bones hanging out off their armature in their modelling software?
I think I'll need FK and IK bones which I can control the location of from my blueprint so that I can position my character's hands and wrists properly... I'm just not sure how to go about this I guess...
In some cases like the Two Bone IK node I can use a vector and it will move parts of my arm to it, but I notice that the ability to directly drive the rotation the end bone should trying to achieve seems somewhat lost. More specifically I'm noticing weird twisting purely at the wrist of my character instead of a more natural twist up the forearm of my character/centered at the elbow.
I'm hoping FK can help with something like this, but I noticed I need bones for it, not just vectors.
Just look at UE5 Manny and do the same
That's not bad advice. 😮
I notice in the case of Manny however he only has IK bones... so what about FK bones? or is the actual end bone itself usually what drives the FK in something like the IK Retargeting node?
I often mask the layer change with a montage that uses inertialization to blend
His skeleton itself are the FK bones
I see... I think that makes sense
so does this end up looking something like this? Where I have to set the FK bone position from a blueprint.... Retarget my IK bones to the FK bones...
and then Two bone IK? my Shoulder - Elbow - Wrist chain to the target location?
Does hand IK retargetting actually set the rotation in this case, or what exactly does it do?

Question for rigging experts - When- why would you use a Backward Solve?
for the life of me I can not figure out how to add an execution context pin on the return node of a control rig function

also there is no way to delete a variable?!?!

seriously wtf am I crazy
is there a way to contain the equip and unequip anim montages within the linked layer? ive been trying to find the best way to contain related animations within the linked anim layer blueprint instead of cross contaminating them.
like what would be the best way to trigger those montages?
Don't quite know what that means. If you have an unarmed layer and a holding rifle layer you would play equip rifle montage using inertialization for blending (because the initial pose will be lost standard blending can't work) and set the anim layer
I'm trying to retarget a sliding animation from mixamo, I already used blender to add a root bone to the mixamo character and am trying to IK retarget. The chains map fine except for the arms, for some reason they're completely out of whack. I tried creating smaller retarget chains to see if any specific bone was the issue but it's just all the arm bones. What could be going on here and how do I fix it?
I would recommend just converting the mixamo anim using the tool instead of adding the bone in blender. Something about the roots being all wacky. You can YouTube "convert mixamo anims to UE5"
What can be causing the animation to play differently than how it shows in the retargeter?
Is root motion in Unreal dependent on framerate? I have a vertical root motion animation that doesn't go as high if the frame rate is half.
Is there a setting in Maya when exporting animations to make them framerate independent or is it just how unreal processes them?
Hello everyone, i'm back with my problem
I have an animation " punch" and my animation " walk "
but you know.. when i punch it stop my walk animation
So i should do the " Layerd blend per Bone " thing
BUT
My problem is, my character has no SPINE, so there is no hierarchy between legs/arms blabla
so it doesnt work..
any idea how can i solve this? thanks !
hey there i need some help with setting up my animations
im making a combo system and its working fine but i get a glitch in the anim montages
which is i have anim notify for resetting the state of my attacks and others for saving them so now if i play one anim montage but something interrupts it like doing left hand attack or maybe change the to other movement state it wont reset so how can i check if im in attack state but no animations playing for like 5s and then it should reset the state


Has anyone gotten UE2Rigify to work with two characters in a blender scene?
How can I blend two animations together where every bone under X is playing animation 1 fully, and every bone under Y is playing animation 2 fully? Layered blend per bone cant play both sequences to their full alpha
If you want help again, post a screenshot showing the skeleton hierarchy, need to see this whole thing

How do i play a anim montage in the actual bp for the character but make it ignor this bone blend thingy bc it plays the arm for anim i want only 1 animation to not have that lock

I need to play the kick animation you can imagine why it dont work considering the lock for anims in the anim bp is for arm only and kicking is ya know for your leg...

Need help, I'm trying to import a single frame fbx animation which is basically just a pose, with morph targets for facial expressions and fixing joint deformations, but I couldn't import the morph.
It seems to only import the morph as curves if there are actual change in values. It worked fine in other animations that actually moves
Hello, sorry it was late for me im in Europe haha
thanks for your answer, i since found solution, its not perfect but it does the job for my learning
this is my skeleton

and i did this

So i set it on each top leg and it works, i dont understand exactly HOW but it does lol
Can someone please tell me what magic setting or IK setup I have to use to stop my wrists from doing this?
I set the wrist bone position and location, and have then tried the two bone IK, because I'd really like an elbow hint,
But I've also tried FABRIK, and even tried the full body IK in control rig. They all seem to suffer from this problem to varying degrees.
I'd prefer to somehow distribute this twist through the IK chain, or more ideally adjust how much of the twist goes where, and probably put more of it into the elbow joint as I think that would make this look more natural


There's even an "allow twist" option which I have tried enabling and disabling but it looks like it affects literally nothing
Does your modelling program have a weight painting mode you can look at?
Normally you can look through the bones and see like a heatmap, and you can judge the painting from there


I'm not sure how good the tools inside unreal itself are tbh....
If it's anything like the cloth paint thing I tried earlier it probably leaves something less than to be desired
tis possible...
That's why I like the heatmap view blender offers, because it lets you see how much of what movement belongs to which nearby bone...
Blender also has a mode where you can select individual vertices and set the weights directly... so you could try to manually apply a gradient across those bones. I'm not sure what unreal offers internal tbh, as I've never used it for this
So in the screenshot I showed the red parts are the parts which are 100% owned by each respective bone, the blue is the part completely unaffected by the bone, and the green to yellow is the part with partial ownership between both bones...
So there's slight overlap between the bones and it's not just 100% one or the other
Not sure if that helps x.x
I think it might help more if you showed what kind of artifacts you are getting, or showed what your painted heatmap looks like
hey guys! Hi all! Need help with Modular character. Connecting an asset. Who can help? Add me as a friend, I will show you through the viewport what the problem is.
is it possible to have a montage play on different slots depending on a variable? I'm working on a dialogue system where you can specify a montage to play during the dialogue. I have have a system where NPC's can sit down. Ideally, I would like the montage to play full body when stood up and play on upper body if sat down. Is this something that can be done or would it need to be two montages?

Happy Halloween come join the haunted trails; only the brave survive.
I rigged a model of a sawn off shotgun following this: https://www.youtube.com/watch?v=58Ci8UjvTsQ&t=569s
tutorial. It works in blender but when I try to import it to unreal engine 5.2 I have 2 problems.
1st. I always tries to import as a static mesh vs a skeletal mesh.
2nd. If it try to tick the skeletal mesh box and import the entire program dies and I have to manually restart it through task manager.
plz help (there is no place for armature so i thought animation would be seconf best opyion)

#blender #unity3d #gamedev
I have really been working on my modelling and animating skills in blender, with the intention of creating some good looking game assets.
I have been inspired of late, to share the details of my work, in the hope that someone watching it might find something useful in it which they can use to make their own awesome ...
Are vive trackers gonna be the best low-budget mocap solution?
Question for any animation experts.
How do you animate the property of just a single bone of a Skeletal Mesh in Sequencer?
I need to animate just the rotation value of the pilot_visor1 bone in the attached, but have no idea how to expose this bone in Sequencer.

For future reference, adding spine bones even if they have no weights is still good exactly for these kinds of scenarios 👍
Don't think so. But I didn't actually try either. I often have at least an upper body only and full body duplicate of most montages for this reason. Keep in mind montages don't have much data because they only reference the sequence, the top file here is the animation and the selected file is the montage, so its not a big problem.

Manny has a lot going on in his skeleton:
thigh_l,calf_l,foot_letc that make up the main structure of the limb (main bones)thigh_twist_01_letc,calf_twist_01_letc that are the twist bonesthigh_bck_l,thigh_in_letc that are corrective bones used to preserve volume during deformation that you can't get entirely from weighting alone (in fact, its quicker than good weighting and overall looks better, when time is a factor)
In the screenshot is everything under the thigh_l, there's a lot there.
Weight painting shouldn't be underestimated either, its it's own skillset and can take years to master like anything else, though thats more true for film than it is for games, games get away with a lot here. Corrective bones are a bit complex to setup too, and you'll really have to delve into Manny to understand how it works if you're going down that path.

To start with, disconnect literally everything other than the IK and see if it goes away
And if it doesn't go away, leave it disconnected to isolate the problem area, sometimes it can result from two different areas and you'll miss it if you fix it in one area and not the other
Thanks for the reply. I thought that might have been the case. I was hoping to not have to specify two montages in my dialogue system. I guess I'll have to get creative lol.
Why when I retarget animation of ALSv4 to metahuman resulting animation have root motion, what I mean is that: the character moves forward but root bone not changes it's position. In original animation character do not moves forward... How to prevent it? Please help!
Can anyone help with this??

Hey guys, for some reason when I edit the curves for the x on my control rig, it goes at an angle, does anyone know why this might be happening?
idk why the video needs to be downloaded but here's a gif that hopefully works

wtf happened to the colors lol
looks okay in full screen, discord just does some crazy compression on the previews
I cannot for the life of me figure out this root animation stuff. I've watched some videos and looked up some things, I cannot figure it out. Did I mess up when rigging the character? What am I doing wrong here?

Nevermind guys, I'm an idiot
Any idea why a character would disappear when playing an animation in the preview
The code won't even run on compile, I'm confused.
this is actually a really good point/idea....
Without any IK at all I cant move that wrist... but I've noticed that with my current IK setup... I think I'm having some issue caused by mismatched translation and rotation spaces.... I notice that if I use component space for the initial transform/modify... and then bone space for the IK I actually get reasonable looking wrist rotations and stuff, but I have to severely modify the vector for the wrist location to something I wouldn't expect... Even in component space
anything else results in nonsensical fully locked limbs... so my guess is I'm probably misunderstanding something quite a bit somewhere


My rotation even in bone space seems to happening around some external pivot... is there a way to/set just the rotation of the actual bone itself?
as if I were rotating the bone from the root?
I messed with all that crap for a long time and no combination of what I tried didn't seem to have it's own issues, so finally I just stuck to doing all rotations in component space... all translations in component space... and then just manually stealing some of the x axis rotation from the wrist and distributing it between the two bones after the IK is complete

seems like a code error - I had a blueprint error that was causing it
help- i dont understand why this happens with full body IK (the arm is supposed to bend more, and the shoulders and body are supposed to move more 'together'?


Hello, I am trying to use the snapper tool with an FK control rig to lock the head bone in place. It works in the level sequencer, the bone is locked in place but its not baked down. Is there anything I need to do to solve this?
When I tried to rotate my character with Transform Modify Bone in AnimBP at root bone, its only getting initial rotation. When I increase rotation degree in runtime it doesn't effect. Any idea?
When I first imported my character model and skeletal mesh to unreal, I used mixamo and got a walk, run, and jump going. I did not have the foresight to add a root bone before bringing them in. I decided to export the skeleton to blender to add the root bone at 00,00,00 and parent the skeleton to it. Im now making my own attack animations for it. Is there a way to add this new skeleton to my original character without completely breaking what Ive done so far, or do I need to start completely over with the new root skeleton?
Helloooooooooooo !!!
I having an issue with replication and threadsafe ABP.
I need to replicate this value.
Its easy to do an rpc but threadsafe won't allow me to cast in the character blueprint which annoy me to use the replicated variable here.
Any workarround ?

guys I need question i have propeller on my plane and i am moving with it via animations i want make it looke more like fully rotating propeller 😄 it looks very slow any ideas ? i want make it more blury maybe ,here is video how it looks and also how I made animation rotation percentage is from 0 to 100 when engine is fully started and current speed is speed of plane

I feel like one of you guys asking your question, as complicated as they are, probably could have at least tried to help me with my question. At least have pointed me in the right direction....
https://www.youtube.com/watch?v=PxXCC3435zY&t=21s This solved my problem, if anyone else sees this has the same problem.

Hey guys, for Unreal Engine 5.1, how to add a missing root bone if your FBX 3D avatar doesn't has a root bone, but it started with hip / pelvis? For some root motion retargeting, you really need your 3D Avatar to has his/her own root bone, how to quickly add a root bone for you in 1 minute? This is my step by step tutorial on how to do this! ENJ...
Hello, I'm trying to make animations for the ALSv4 mannequin does anyone know how should I add the ik_hand_root bone to the control rig?
Hello, I'm experiencing an issue with skin weights in Unreal Engine, but they seem to function correctly in Maya 2020. Can anyone help me troubleshoot this problem?


Hello! I’m trying to replace this node in the AnimGraph and can’t find it. Any idea how to call this node?

I am basically having this same issue

Reddit
Explore this post and more from the unrealengine community
Hi, I am making a new custom character for my first Unreal Engine 5.3 game and I am using Mixamo characters and animations as my base. However every character I import to Blender, edit and then export and then import to UE has these oddities with the legs. It seems to be some kind of animation unalignment, as when I turn animations off the legs are straight. Any idea how to fix this? In game they look like the legs are a bit bent and there is a hard edge at the knee joint. It kinda looks like it is a jenga tower and someone karate-chopped the knee and pushed one brick slightly forward. If I use a character straight from Mixamo, no issues. But through Blender and the knee problem.

I need to explore various methods of applying weapon weight to swing speed. higher weight = lower speed.
Initially, whats the best place to change the animation speeds? Im looking at play rate basis and play rate.
Hi everyone! Where is the best way to execute animation monage of an enemy? I'm running it from BTT but this one limits me as I need to have different attack animation for enemies. would be nice to execute them from enemy blueprint, but in this case I dont now how to finish the task by animation notify
if store an animation montage in a variable in the Blackboard, set the variable in an enemy blueprint and play this animation from the var in the BTT ?
https://cdn.discordapp.com/attachments/832399451758657547/1163422966265163858/Unreal_Engine_2023.10.16-11.16.mp4?ex=653f8512&is=652d1012&hm=c51c5e4856d98f9997cdd367c47d2bc7caf97ffcd0903a4a8b5a2a7c7b9e28f1&
is there an fix for this backward glitchy animation
Any advice or tip for fix this? Default foot placement is working

But when the height is high this occurs
whats the difference between these two? ApplyAdditive should be local (bone space) no? Additive anim must be set to "Local Space".
ApplyMeshSpace is in skeletal mesh space, which is the root bone space? Additive anim must be set to "Mesh Space".
In practice they don't look any different, both additive appear to be applied in mesh space. in other words Local Space additive anim with Apply Additive looks exactly the same as Mesh Space Additive with Apply Mesh Space Additive. Is this the intended behaviour?


i have a problem my feet are fixed
https://cdn.discordapp.com/attachments/628638005393096745/1163440126022660156/MyProject_-_Unreal_Editor_2023-10-16_13-35-13.mp4
But in the animation montage it moove normaly
https://docs.unrealengine.com/5.0/en-US/aim-offset-in-unreal-engine/
Your use-case is probably too simple to see a difference, there is definitely one, and quite big


An Aim Offset is a type of Blend Space that uses additive poses, typically for creating aim-spaces.
I think my problem was misunderstanding between what Epic labeled "Local Space" and "Bone Space". I thought "Local Space" was the same as "Bone Space", but evidently "Local Space" is actually "Parent Bone Space"
Could be that tracing height is not high enough. Does the knee bend at all?
Have you enabled root motion?
yes si have
Without the animation montage does your animation still stay in place?
Yes
That most likely means that the root motion is not working correctly
Place it in the level

An overview Root Motion Animations in Unreal Engine.
okkay thanks
yes
I think your animation's are overlapping - that's why its snapping. What I did was to declare a notify whenever the animation ends and created a reset in the Player/AI BP
Do you have the the code bp for the reset ?
Could anyone point me to a video about creating animations for unreal engine 5 with customer character models
All the video's I have found are for the manequin model
and have pre-existing animations
What is the best/proper way to play animations on separate meshes simultaneously - for example with a weapon that has an animation when firing, I want to play a montage on both the character using the weapon, and the weapon itself. Does Unreal have some kind of native solution for this?
Trying to set up motion matching, not sure I've set up the bones properly, animation is all over the place in testing. The feet seem 90* offset from the model on my Motion Database, anyone know how to sort it?


How do you use Unreal Insights for metahuman debugging? I have much of lagging during LODs changing but do not know how to find functions or problem where it happens.... Can someone tell me how to use Unreal Insights to find most time consuming function?
Is there a known issue in 5.2 with child ABPs and aim offsets? When I try to assign a new Blend space to my child blueprint, it doesn't seem to apply. Testing with a minimal setup, the LookAt AimOffset still uses the parent asset

Extremely minimal setup:

Seems I can workaround this by making the blendspace asset a variable and overriding that in the child

Got a question so I can start learning for next part of project: if I wanted to start learning the physics engine for learning how to implement physics into character animations (for example, hold right click and flick mouse to imitate a sword swing in the direction I swung) for the sort of thing I described: should I use blueprints or c++? I’m not sure how intensive physics based programming is on the engine but naturally want it to be optimized to start off with
yes - not specifically the code but I can show you how I fixed it
I would say it doesn't matter - depends on your personal preference. But I would use blueprint for effective flow. 😉
Hey let me know if u still need help
Do you want them by using blender or within inside unreal engine?
Yes Blending animations
Can you explain more in specific?
Why is this happening to my "turn in place" animation? I think some code is conflicting somewhere maybe? I have no clue and I'm just scratching my head
Is rootmotion enabled?
This is the logic that drives it


Yep
Did you declared a notify when the animation end?
What do you mean?
I haven't had to deal with notifies yet - but this issue wasn't happening to the person who's example I'm following, which is why I think some code elsewhere may be interfering
So, inside your animations create a new track and add a notify ("TurnEnd") or something and add the notify in the end and inside the BP call that and add a reset anim node
Oh... then recheck the code.. you might have missed something
Also, had rootmotion but not force root lock, now I'm forcing the behaviour is slightly different
Not correct, but different
I am not sure what tutorial you are following but I had the same issue with my animations and adding the notify was the solution for me
He turns, but in the wrong direction - and he doesn't seem happy about it 😂
I am pissed my project is crashing... I would have show you.. ufff
I added the IK system from the third person anim blueprint to my character and it all worked fine until they start attacking. the legs are staying in place kind of like what you would expect from the ik system but that makes my sword animations completly broken. Is there a fix for this? Not sure what the next steps are this is my first time messing around with an ik system really
i guess it appears the animations im using dont have the iks animated for the melee attacks is there a way to get the ik bones to just follow the foot bones that are animated?
add keyframes for the feet accordingly inside the animations
lmao thats what i figured out but i was really hoping a way to not have to keyframe the bones for all the animations i may look for some animations that have ik foot animations but would love to figure out an efficient way to retarget these ik bones in the animation
i was able to fix it by making new virtual ik bones and changing which bones the ik solver was looking at
Er, how does blending animations work between multiple skeletal meshes, and indeed what does it even have to do with synchronizing animations between said components? Not sure that I understand..?
is there a non scripting method of making sequence play rate be based on a curve?
Or am i looking for the wrong solution?
I have an animation that i want to alter the speed of. I want to at specific places, playrate to be at a specific speed.
i also want this as a sequence agnostic solution so i prefer not to plot a curve of every animation.
the end game here is that i want my melee move set for charging, swinging, recover, etc etc to be affected by things like charge time, weapon weight and so forth. So i have states that play the corresponding movesets depending on whats equipped.
what can i do here? when setting master pose it doesnt care about overrides for location,rotation on the meshes..
I do this on each skelmesh comp before i set the leader

Hi. There is animation "play rate", but is there any way to make animation to play time in seconds. Like if I have variable=1, animation plays 1s and if variable=2 then animation plays 2s.
what is connected to new mesh and target there?
i suppose in your case the arms is leader and the rest are targets
but its complicated
i found out that i need to have one leader with the skeleton before adding more. so i do it in a sequence.
@slow wyvern


disregarding my data driven approach you should get an idea of how what is needed to compose a body from parts
i am not sure how to do it when the components already exist but im sure its straightforward
but are all your meshes working on 0,0,0? or they need attachments
for exmaple this is mine at 0,0,0 lol

my meshes are skeleton meshes attached to the skeleton at the place they are supposed to
i guess the leader pose component acts as a method for the subsequent meshes to "know" where they are supposed to be
@slow wyvern
forexample the leg looks like this

play rate is the rate relative to 100% the animation is played in.
more or less speeds it up or slows it down
What you are asking about is either to define how long an animation should play or the the fps. Which is it?
How long the animation plays
can i ask why ?
I have spell casting animation and it would be cleaner for players to understand how long casting last. If it is modified by items.
why dont you just stop playing the animation with the state machine?
after cast is done
it shouldnt be different from lets say attacking. the attack is done when the animation is ended. But i can at any point interupt the attack.
LogPoseSearch: Error: UPoseSearchFeatureChannel_Position::BuildQuery - Failed because Pose History Node is missing.
Any advice to get working motion matching?
I get this error
Failed because Pose History Node is missing.

what does the blue note say ?
Experimental node
Not following you right now, but I will dig in to it..
I was thinking something like: Make cast animation 1s, and then control with variable how many times it will loop. Can you make animation loop like 1.5 times?
im more confused about why you arent exiting the animation when the casting is done
are you not using a state machine in the anim bp ?
@hard gorge
I would solve this with the character.
If the spell say cast: 2 seconds. I would set the active state to "casting" and in the animation blueprint i would play "casting".
i mean the problem you have is solved by some proper propagation 😄
yea in my case it just disregards the attachment entirely..
im not sure whats happening. are you swapping in a new mesh?
i havent gotten that far yet but im sure down the line i need to refresh the whole chain of events.
nah im just adding the torso part of the character
My casting animation (also attack anims) comes from anim montages. Have not done them from state machine. Also I kind a nooby and I try to make some kind of game while learning. But if i make casting from stat machine i will lose versatility to have different cast anims for different spells?
on the contrary. Organisiting animations in an animation blueprint with anim state machine is the data driven approach. Also the space you usually make varied and specific behaviours
@hard gorge
This is my state machine for melee, plays on the upper body.

inside a state. The sequence is picked from the character. so i have a different animation for every type of weapon

for your example however, just trying and learning by doing is fine.
But you still want to control your animations via what the character is doing. The character is casting for 2 seconds. Thus, an animation is playing for 2 seconds. Until casting stops. Because then another animation takes over.
no need to drive states with animations
Ty. lots of new info. i will look it up. Do you recommend some youtube/other tutorial?
not really. but dont stress it. its a journey to learn all this. Just google for the concepts and watch all the tutorials. Learn what they actually do. replicate.
Any advice to fix foot sliding in a run animation?
Does anyone have the time to show me how I rig a crane arm in blender the correct way to import it in to UE5? I cant find a video on rigging a crane or shit like that om YT and then exporting to ue5 for it to get ik rigged
I can rig a crane in blender and get it to work there but Im having problems with UE5 when importing it
I've got two animations, one motion captured without root motion, and one with root motion. I want to transition between the two so after finishing the mocap anim, I move the capsule to where the skeletal mesh is to switch over to root motion
It kinda works but at the end of the mocap anim, the mesh first sweeps towards the capsule before moving, what causes this?
This is the logic that handles that transition

anyone know why this is happening?

Anyone know why when I view the wings from the front I can see them but from most other angles they disapear?


Hey thanks for the reply dude, sorry it was 2am my time when you responded. Yeah still keen to try and make it work if it can be done, but don't know if quadrapeds can be supported
I had a similar issue with a skeletal mesh that didn't have a physics asset, because Unreal appears to use them for frustum culling. So maybe look into that, or increase the asset's bound scale?
Hello, did anyone ever animated characters doing actions with guns? I need help.
How do i play this anim montage? it only plays for the right arm as i have it set like that in the anim graph but i dont want that. How do i make this anim ignor the anim blending thingy


 I'm having some blend space issues, trying to currently set up a strafing system, but there's some jitter whenever I actually rotate my camera. Is there a way to patch this? I tried googling it, but it didn't produce any helpful results, maybe I just don't know the correct terms to search for.
(Pay attention to how the legs occasionally do a skip whenever I rotate my camera)

np... is all set now?
try adjusting speed...
which speed
This is an engine bug
Tell me if this "resolves" it:
- Start moving forward + spinning camera
- Release a key that isn't bound to an input (so press it, then let go)
If the jitter goes away until you stop moving and start again, its an engine bug
Unless you have a different issue that I'm not seeing, your gif is choppy
Epic fixed this in 5.3, and I haven't been able to locate the commit that did it
Its actually the control rotation jittering
No, kept trying but no matter what I do the foot bones are not in the correct place and animations are skipping. I will stay up tonight to await your reply, if you can spare the time to see if it can be made to work! I made a forum post with some more info on my setup
https://forums.unrealengine.com/t/quadruped-support-for-motion-matching/1334623

Epic Developer Community Forums
Hey, just looking to see if anyone else has managed to get motion matching working for quadrupeds (e.g. horses)? I’ve been trying to play with the settings and this is the best result I can get, lots of animation skipping… I’ve followed a youtube video and the unreal docs > Motion Matching in Unreal Engine | Unreal Engine 5.3 Documen...
Has anyone ever used animated characters from axyzAnima in unreal engine?
Topic: Seamless transition of a metahuman character
Hi! I’d like to have my metahuman express 3 different facial expressions animated in one sequence. I want the animation to play in random order so the transition between those 3 animations have to be seamless. How would be some approaches to achieve this? any tutorial ideas? thanks!
hey guys, needed help with metahuman skeletal mesh, i am trying to add procedural walking to it but the skeletal mesh for metahumans is not the whole asset, just part of hand and feet,, how can i fix this?

Alright let me know ... where are you stuck at
Hello folks, I would like to duplicate and modify the various animations used in Lyra, specifically for the purpose of creating "melee" versions of the animations. Easy part: duplicate, then modify with animation tracks in UE.
Less easy part: I would like to export these animations so that I can modify them in Cascadeur (instead of using UE anim tracks); however, it seems like no combination of export options will work correctly with Cascadeur. Always something about the animation is totally fuc*ed up.
Thoughts:
- I would just make all of the modifications in UE; however, there doesn't seem to be a way to copy anim tracks. As such, it would be A LOT of imprecise manual duplication of the changes.
- Maybe I should try to use a different animation tool (I normally use Blender &| Cascadeur).
Anyone have thoughts / experience to share on this front?
Kind of similar issue;
I want to edit animations in sequencer that are originally made for the mannequins, but when I try to load them into sequencer, their proportions get completely messed up, despite having the correct retarget source. Any quick fix for this outside of straight up baking the animation on the other skeleton with IK retargeting?
Correct me if I'm wrong. Now that we can add bones inside UE, I can slap simple skeleton onto a mesh and then retarget mannequin to quickly have its animations working with that new skeletal mesh?
Theoretically, yes.
Does anybody have any idea why my basic locomotion isn't working?
The other two locomotion states work just fine based off the same variables on their blend tree's I cant figure out why the simplest of the 3 blend spaces refuses to work.
As seems typical of today shadow play has also decided it's done working so you will have to take my word for it that it's just stuck in the idle state and I slide around until I pick up a weapon and transition into another blend tree


Does anyone know why my character won't change it's animation? I have it set like this: Bottom is idle, middle is walk, and top is run. Then, left side is turn-left, and right side is turn-right.
Then I have this piece of code in the animation blueprint to control the two variables. Hoever, the player character doesn't change animations no matter what.


Here is my halberd blend tree for instance which works fine

Your anim event graph seems over complicated I have mine setup like this which is working fine for 2/3 of my blend spaces
look at the highlighted section
I promoted the speed and direction variables so they can be referred to in the blend tree have you also done this?

Thanks for that, it does simplify a lot. I seemed to have found why my animation never changes. When printing out the current speed/direction, the direction never really changes? It only goes up to 40 or -40, while my blendspace requires it to be 180 to start moving backwards. Any reasons for this?
I'm not sure did you mix up horizontal and vertical?
I don't think so
Have you changed the animgraph blend tree to your new one?
The new blend space I mean
well, here is my locomotion for my animgram

and this controlls the bs

My character plays the idle and walking animation, but never changes it's directional animation
Are direction and speed the same variables you promoted in your event graph?
For example these set variables here did you create them by promoting the variable?
Promoting "Vector Length XY" into a new variable and naming it Move Speed or Speed in your case.
And for the direction promoting the variable coming off of calculate direction and renaming it Direction?

hey, i'm trying to add ik feet placement on a imported skeleton, and i'm seeing these ik bones that are on the manny rig, but i'm not sure how to replicate that on my own skeleton. does anyone know?
That's not exactly how I got them, but if I manually change the direction/speed value, it does have an effect on the animation
If you don't get them from promoting the variable I don't think it updates in real-time.
So in your blend tree it doesn't really matter what you call the Horizontal and Vertical but the floats for speed and direction in the animgraph have to derive from promoting as I mentioned above. Otherwise you have just created a disconnected float that isn't reading directly from the player characters inputs.
Just delete the set variables and remake them as I described and hopefully it should update
I think IK placement is tied in with the UE5 Mannequin not custom rigs unless you set this up after the fact most skeletons and animations you bring in won't work with IK's out of the box I don't think
i am trying to add the ik to the rig i currently have, that's why im asking how this piece is set up so i can copy it
I'm not sure but I'm guessing there will be some content out there somewhere if you search something along the lines of "Setting up IK's on custom rigs in UE5"
okay, i'll try another tutorial then
nope, nothing changed. I don't think the issue was the the variables weren't updating, as I printed them to the screen and they were updating, just not enough
Yeah sorry it's something I wondered myself as it looks much nicer in game with IK's but I haven't got around to it yet
if I pressed S, instead running the walk backward animation, it would just turn around and face the camera. This is due to the direction variable never going to 180, it only goes up to like 40 or so
The character won't walk backward holding S unless you have your character set up to use the cameras rotational yaw for direction

Without this ticked the character will function like a GTA character and you won't be able to strafe or walk backwards
🥳
I'm glad I could help!
:D
I consider this a success 😂
Created skeletal mesh using Mannequin skeleton and adjusted to the mesh of the elf.
Does this look like only bone orientation issue? 🤔
I dunno what this looks like, only that I'll never sleep again...
Looks like a weight painting issue to me
looks like some verticies might not be bound as well
Weight Painting can be annoying but for most "Humanoid" models Blenders "Parent with automatic weights" when attaching the skeleton is normally good enough.
you're welcome
the ankles are due to weighting to the ik bones. but everything else I think is messed up cause I think I pressed "Orient" on the bones :V
might need to redo and see what horror I create this time. will remember to tag you @crystal rose once I post it 🙃
Did you normalize the scale of your model before export?
Apply scale essentially so the scale is 1 in the details panel on blender
How are you setting it up did you export the unreal mannequin and then parent your mesh to it in blender?
I downloaded this model and trying to rig it in UE
I've never rigged anything in unreal but if I were you I would export a UE5 mannequin and then parent your mesh to that in Blender using automatic weights then import it into unreal afterwards
ye ye, I know. I'm just stubborn and want to do everything in UE. stubborn and stupid 
It is impressive what you can do solely in unreal such as weight painting etc. but I think for rigging you would be better with specialty software like Blender or Maya etc.
This guy is really good for if you wanna get something done without any extra info tacked on
https://www.youtube.com/watch?v=etXY2udjFls&ab_channel=RoyalSkies

Here's the easy way to import Unreal 5's Mannequin Skeletal Rig to your 3D software of Choice -
If you enjoyed this video, please consider becoming a Member :)
https://www.youtube.com/@TheRoyalSkies/join
Or joining the Patreon Squad directly:
https://www.patreon.com/RoyalSkies
It makes a huge difference, and really helps ensure I'm able to make...
The process will basically be exactly the same in Blender
Thanks for that. Will go to blender if I fail at doing it in UE. Just trying to learn doing it all in one place, at least for such small scope and complexity.
Yeah if you don't know a little of Blender or Maya it can be very daunting but learning a bit of animation/modelling/coding/texture painting/material nodes etc. can go a long way.
Almost nobody is an expert on all these things and 90% of professionals just specialize in one aspect of game design for their role but having a little knowledge in all these area's has helped me understand the whole process much clearer, especially as a beginner
For example "face normals" determine which side of a flat object renders in game unless you apply a two sided texture. I learnt this when I first started modelling on Blender about 9 months ago.
But without this knowledge if I imported a model from elsewhere and one of the sides is invisible I would just be like
"Ah shit it's broke" and not have the slightest clue what to do about it
I learned I need to use proper winding order for face culling about 10 years ago when I was playing with OpenGL 😉
I have (and want) lots to learn, but Blender is not on the list right now. I am an anti-artist, so anything I learn would be wasteful. mostly dead knowledge/skills
if I can stay within known environment, I will. and right now I am exploring whether that's possible for rigging
What is an anti-artist lol?
Do you mean you don't wanna commit to learning artistic software with AI encroaching in that space?
I mean I won't do any meaningful modelling on my own
cause I can't imagine it
not that I hate artists or sth 🤣
Ah I get you haha
I'm not a natural artist myself most of my models are me using a reference to model from.
Do use mixamo?
Mixamo has a bunch of free animations and you can just drag an unrigged mesh in and set up a few points like the chin/groin etc and it rigs it for you with decent weight painting
That will then work fine with any animation you get from mixamo
https://youtu.be/0aOBefSBNqk?si=SKCEbOnkzgECCtlk&t=137
Here you can see how easy it is

Looking to take a character mesh you made or found online and pose or animate it? Well now you can. Adobe's Mixamo character rigging and animation suite is just the thing.
Using Blender we take an un-rigged character, plop it into Mixamo, and bring it back into Blender to pose and animate!
Super easy process that just works!
- psst-- it's G...
ok, this worked to get it rigged for mixamo. at least it seems so. though some time ago I was trying to do retargeting from mixamo to mannequin and that was a painful process. so I guess I'm stuck to mixamo animations unless that process was simplified
Yeah pretty much that is the major drawback of it but if you are just making a simple project it saves a ton of time
by stuck I mean that I won't be able to use anything from UE marketplace that out of the box is made for the Mannequins
but still the mixamo library is rather extensive so unless I find something I really want to use from marketplace... 😄
but first let's see first if I can download and get it easily working in engine
I would download the T-Pose of your model first this is a pose option on Mixamo.
Then use that as your skeletal mesh reference in your project for any other animations you bring in.
Then if you change your mixamo avatar to something else you can always drag that T-Pose FBX back into the mixamo character selector to import more for that one specifically
What I do is if it's a simple NPC/Mob character I might use mixamo and then I use an UE5 skeleton mesh for my main character
If you want everything to work with the UE5 mannequin your best bet is like I mentioned earlier exporting the mannequin and then parenting your mesh to it with automatic weights in another program.
I've never used unreal's rigging so maybe you can achieve something similar just using that with a bit more research
🤣

Lmao
When importing there is a box that says
"Force X to forward" or something along those lines check that
It's because in Mixamo Y is forward I thibk
think*

Haha maybe it's an issue with the models orientation then, or maybe he is just really sad haha?

I had a similar issue when using mixamo earlier in the week for one if my mobs I think the Force X as forward fixed it but play with other import settings that mention "Transform"
holy cow, it worked really well. look at those fingies!

Nice!
Now unreal just needs to add a Mixamo>Unreal 5 Mannequin retarget option and we will all be golden
exactly
there are nice new tools coming in next version
Cool!
I haven't made anything other than humanoids myself really so I haven't had to put to much effort into my weight painting but it's good to know the tools are coming, by the time they come out I might be good enough to need it for something more complicated haha
there is also automated weight painting coming
Do you use Blender or Maya? would you say unreals rigging is comparable I always use Blender for my own models and stuff
the unreal tools will be on par if not better
Cool I might start looking into it then when that newer version is out.
It can be annoying jumping between different software's
I have done vertex painting in unreal but only on a flag that I was using material nodes on to make it blow in the wind.
I am working through a dark souls combat course atm but once I have the functionality in my project I will need to do a lot more rigging/modelling stuff so I will definitely check out what unreal has to offer afterward
here is list of stuff that were added in 5.3
https://portal.productboard.com/epicgames/1-unreal-engine-public-roadmap/tabs/88-unreal-engine-5-3
im making a little survival game together with a few friends
Nice!
Is it multiplayer?
yes
Cool I haven't tried anything multiplayer yet is it a lot more work?
I know you just basically have to tell the server whenever you update something but I imagine once you understand it then you just have to go through and check all the boxes
well the main problem is that im trying to make it using only blueprint, but that makes things a lot more complicated xD
Ah I see, I would probably struggle as well then as I am not a coder at all haha
I was thinking of making a racing game as my first multiplayer attempt whenever I get around to it in my unreal learning journey. It's actually nuts how few chill racing games there are to play with friends.
MarioKart > Forza > Racing Sims ..... thats about it haha
making a racing game isnt too hard, but when making an RPG with complex stats calculations and inventory system, u kinda cant avoid using c++ xD
I saw a tutorial for a multiplayer inventory system and it was like a 30 hour series haha
I still haven't started on an inventory system for my game. I'm kinda dreading it as it looks like one of the more convoluted systems to add even more so than melee combat
are u making single or multiplayer?
well making souls like combat is kinda hard imo xD
and its pretty heavy on animations (which is something i hate xD)
i decided to just go with skyrim-like combat for my game
Did you see the new free AI animation software?
https://www.youtube.com/watch?v=JrddPZmUHvE&ab_channel=GrantAbbitt
It looks pretty cracked for speeding up the workflow
Skyrim combat is perfect for a survival tbf

#animation #ai #gamedev
This video looks at the AI animation software Cascadeur. I've been working with it for a couple of weeks and really enjoyed the experience and feel that this could well be the future of the way we animate characters for games and films. let me know what you think.
Get a discount on the pro licenses and find out more ab...
I got the ARPG combat asset pack and it has 500+ animations and 4 weapon types so most of the work is done for me for £20 an absolute bargain haha
They certainly aren't AAA anims but they are nice enough for a solo project
ok this looks crazy
it's like IK on steroids
IKR kinda blew my mind too after attempting a little bit of animation myself in Blender that seems like a gift from god haha
free to start, $360/yr after earning some bucks. seems reasonable
okay, with that, I might even try a bit more animation myself. I had video mocap in mind already, so that would enable me to add custom animations so I can design level how I feel cause then I can just make non-standard animation for problematic pieces (like custom obstacle)
i would wait for next engine update
check here character & animation section
oh, yes, the retargeting
but first I need to have animations, so I can start getting familiar with cascadeur now
indeed xD
but being able to make and change them in unreal engine will be a whole different experience 🙂
I am already using skeleton creation/editing and skin weights
i wish i had time for diving into animations, but im learning c++ now xD
the new tools look really exciting though, maybe ill look into it when i get frustrated with c++ xD
hey there
i got an issue with my jumping animations
i was trying to blend the lower and upper buddy for some of the animations and its working but whenever i jump the character legs just spins around and doesnt follow the jump start animations
even if disable the upper lower buddy blending
any clue why is or how to fix it ?


Can anyone tell me - how do I fix sprint system.
My character plays the sprint animation without going forward... I am using set max walk speed on input press method
show your code


This is the logic I'm using currently
For animation bp - I am just using bool if < or > then transition
But when on play I press shift the speed increases but no forward movement
did you try using the started pin
yup same issue
okay one sec
just a heads up - I am not using forward vector in my anim bp is that something that's causing it?
i dont think so your issue is your character isn't running
are you sure you setup the sprint speed variable
Basically.. it runs when i press (forward key + sprint) but when I only press sprint it plays the sprint animation in place
if so try doing a print string after setting the speed and check for the current speed
so i would like to see how you setup the anim bp


so your not using blendspace
okay and you dont want the character to play the run anim if you hold the sprint key without the forward key right ?
Yes correct
I mean ... I want it to play the anim but it should move forward is all.
Its playing the animation but stays in place
okay then you can check if vector length > 0 then play the sprint anims
you can do it in idle to walk
and where do i call that - from the chararacter movement component?
i mean like this get the speed then check if you have movement or not in the animation

in event update in your event graph
I can't find the speed thou..
As I am using 2 different variables walk and sprint speed..
wht should I use
this just for checking if you have any movement input and has nothing to do with the walk sprint speed variables
i can show you how to do it if you can join a vc and share you screen
Ah.. so can I just create a variable speed in the anim event graph
it would be easer
sure thing
hey guys, question about animations. specifically control rigs
I need to know if there is any way to just. Grab a bone and rotate it with a gizmo in either the control rig editor OR the animation blueprint in 5.3
Alternatively can I show all bones in the animation mode viewport?
?
Got it! I found the Debug preview
Hi, dose anyone have idea why when i set EnableRootMotion to true, the animation is still moving?
@vivid peak you need to make sure you have a root bone it can fixate to 0,0,0
in the skeleton
i have a root bone
also everyone here, ive added some custom animations to lyra but the weapon is rotated weirdly any resources i can read up on to understand why its doing this ?

Am retargeting from mixamo, and in preview its works fine. But if i export the animation its starts moving
are you using the mixamo converter ?
yep
yeah it should work when you extract root motion
when you select that root boon can you show me the viewport ?
root boon?
like this?

the character wont stay on my root for some reason

is there any simple ways of exporting a skeletal mesh socket from blender to unreal? other than manually calculating offset and copying the values?
Can you explain more - what exactly you are trying to achieve?
Does anyone have experience with retargeting CC4 rigs? I have this curious issue where my clothing and body mesh use the exact same skeleton at the same scale, yet animations pull differently on them. If I retarget clothes specifically, everything runs great but the animation breaks the body mesh. If I retarget to the body, everything runs great but breaks the clothes mesh.
It looks like the pants from CC4 add new bones to the skeleton. These bones aren't accounted for in the IK or RTG because I don't know what I'm supposed to map them to.
I'm used to using the retargeter when all the bones match. I'm not 100% sure what to do in these situations where my target has extra bones.


Am I supposed to add extra chains to the IK rig of the source UE4 mannequin?
exacly what i sayd, i want it to stay on place
did you check the EnableRootMotion?
did u create the anim in blender or imported from mixamo/somewhere?
mixamo

that one didnt have it
fixed?
nop

Then you have to manually clean it up - open that animation in blender or other software and then delete the X, Y or Z according to ur needs it should do it
try it and let me know if it still doesn't work
should be pretty straight forward
I'm having this error when I try to import FBX animations that should be targeting the same SK_Mannequin as my other animations

If I say "no", the imported animation is stretched and it imports 4 files rather than just one animation.
If I say "yes" it updates the skeleton for all my other animations and the imported animation is just T-posing.
This is the animation, if anyone wants to test it themselves
Importing a 300mb fbx containing multiple animations then exporting them individually results in a total file size of almost 3 gigs, anyone know why this could be? The sample rate seems fine as well as the other settings

ooh.. wht's the frame rate?
I'm a noob, but maybe all animations contain full mesh data, so the resulting size comes from its duplication?
This is just the fbx without animation
60
it's only the animation
If I import that FBX into unreal I'm able to see animations?
might me a glitch on my end let me retry
Trying To Build A FREE Mocap Plugin Using Control Rig, Live Link & Vive Trackers But This Keeps Happening! This Plugin is based off the MegaMocapVR Asset With Some Code Optimizations & Built In Modularity. Somehow The Tracker's Transform Is Breaking The Control Rig Control Transform! Any Ideas??

It only shows the animation if I click "no" on that 'Failed to Merge Bones' error
Did you made this animation in blender or grabbed online from somewhere?
I grabbed it from a tutorial series on YouTube
Nobody else seemed to be having issues
can you send me the tut link?
In today's episode we get the calculation logic set up for turn in place animations. This is an addon to the Enhanced Input Root Motion series. If you are not following that series you will need to do some modification to the logic to get it to work correctly.
Sorry about all the sniffles, I was waiting on my sinus medicine to start working. 🤧...
When I import it and I click "no" on the "failed to merge bones" error, I'm given these three assets (plus materials)

The animation sequence is super stretchy
And I only need the animation sequence anyway
It works for me on the same Ue4 manny but breaks for new Manny
I guess you have to retarget the anim
Is it because the lyra mannequin is different from the default third person mannequin?
I'm mostly using Lyra anims for now
No - Ue4 and Ue5 are slightly diff when it comes to custom animations I belive or that's what I have experienced..
It's just, I had a similar problem before when I tried to import the Lyra animations - they imported fine but didn't like the skeleton I was using (which was just the default SK_Mannequin from the third person template
When I migrated the animations and their skeleton over from the lyra project, they worked fine
its fixed for me
How did you fix?

Wow you retargeted that fast - I haven't delved into retargeting yet
Works ??
It does import yes!
Awesome! 🙂
Would you be okay with fixing the Left turn as well?