#animation
1 messages · Page 17 of 1
Anyone know how to solve this issue where if you constrained a part of a control rig to another objects bone and if you edit that control rig later in the control rig window and press compile, the control rig moves to another location in sequencer?
anybody have a recommended "best method" for doing footprints in snow/sand? i've found a few diff ways, and some feel 'dirtier' than others. i am mostly interested in footprints in snow and i'm not hanging around the scene long enough to worry about any sort of fadeout
i intend to have a close up on one spot so i need to have different shoe imprints
thats weird
doing those realistically would be more in the realm of materials i think
Has anybody worked with the "Aim Constrain" node? It doesn't appear to be doing anything for me 🤔
in Control Rig
So i just found out that you can rig straight in unreal
how?
like control rig you mean?

Yeah, I have to delete the constraint keys on the control rig and then compile works.
I need to figure out if there's a way to make a reverse foot lock control though
this is huge for me because I though I was going to have to export all my metahuman characters into Maya and rig them there and it was causing me anxiety because i didn't want to completely destroy them
i feel like we should get a control rig channel
i see other servers with it, and its a distinct enough process
like if vfx and niagara are different, or lumena nd lighting are different...
MetaHuman already comes in rigged. I am sure or you want to make your own rig?
Just drag your metaHuman into the sequencer window and click on it.
I normally rig and animate in Maya
I haven't quite dabbled that much with MH so i don't know the extent of it's capabilities in engine
You can animate MetaHuman in Unreal Engine. Its already rigged with control rig curves and ready for animation.

In this presentation, Cubic Motion’s Senior Technical Animator Riham Toulan takes you through animating a MetaHuman with Control Rig in Unreal Engine’s Sequencer. The techniques demonstrated can also be applied to animating any asset rigged with Control Rig.
Find out more and request Early Access at: https://www.unrealengine.com/metahuman-creat...
what about wanting to put new clothes on my MH?
won't I have to export it and reskin etc?
Ok. You have a point there. Haven't started using it yet. You can check youtube. There are tutorials covering adding custom clothes to Metahuman. Haven't checked myself.


In this tutorial you will learn how to add Custom Clothes for your Metahuman using Blender and Unreal Engine. You can use any model e.g. from Sketchfab. You can also use your assets, just export them to blender as in this video.
That's just a Beginner tutorial, I have more to share about custom metahuman clothings, please leave a comment if yo...
you are a fountain of knowledge sir/madam, thank you
I am a dude, lol 😅 . No worries. All the best, mate 👍

Can anyone recommend a good way of storing and setting lots of morph target values at once? One example would be a character creator that stores presets of values
hey when i retarget a character animations to another i have this problem with the pelvis / spine, how do i fix it? i tried alot of things, the spine isnt following


i put the retargeting bones like this

Idea 1

I made a variable for a specific actor, how do I make it so when I use it in a locomotion alias node it works like if it was a property access node

in animBP, is there a way to get my transform(modify)Bone to interp the values i send to its rotation (Rotation mode - add to existing)?
right now it just snaps to the new value
i think i figured it out...
Anyone know of a definitive tutorial/guide to taking characters with in place animations into a sequence? They already got a set of animations I'm going to blend in the sequencer and all in place, just want to know how to get them moving about in the world just for the sequencer (its for an animation not game).
Hello, could someone help me with exporting shape key animations from blender into unreal engine 5 morph targets animations?
This video was helpful, but I am still unable to do it because my shape keys were created from multiple different mesh, instead of deforming a singular mesh as shown in the video' https://www.youtube.com/watch?v=Gu9022OtEME&ab_channel=TrueYouProductions

i have a root motion where manny tanslates now what ishappening is if i change the direction in world the animation continues in the worlds x direction instead of mannys x direction
hello im working on a breakdown of a scene i made in unreal with foliage
I had this idea of trees falling down just to make it cool in that breakdown
here an example I made (other project in houdini)
so I was wondering if its possible to get this kind of animation inside unreal with foliage falling down ? I want them to fall as they go along an axis..
Maybe with niagara system ?
Probably the easiest way would be to do it within a material using World Position Offset
trying to make it so when im running and attacking, it blends from the spine down.
I am setting the upper body bool if my speed is > 0 and its working fine. the blend per bone is set to spine. however when i do my attack animation, it stops me in place, then sets upper body to false and wont blend it. how can i let it so my legs still do the running animation and move forward and the top half blends to my attacking animation?

my attacks are played as a montage inside my player bp btw
Hello. I have a problem with my animations in UE5. I rigged this bird in Maya 2024. The rig works and I made a small test animation. In Maya the animation looks just like how it suppose to look. But when I import the model in UE5, the animation is broken. Every object has like an offset when it moves. I also imported the model in Blender, and it looked just like Maya (no problems) Has anyone an idea?
This is how it looks in Maya

And this is how it looks in UE5

I've had the same issue when importing an alembic of a character rig with NLA animation layers from Blender
Literally every 3D software (3DS Max, C4D, Maya and Blender) had the object offset correct except UE5
I solved it thankfully by exporting with the BetterFBX addon for Blender
Looking at other ppls projects online I noticed that some ppls anim notifies stretch. Which seems so much better than adding an on and off notify as I do. How do I convert my notifies to be stretchable?

In the Animation Blueprint, how can i rotate a bone while it is playing an animation
i have a head look at script
and talk animation that wiggle the head a bit
i want to combine them
it wont work no matter what i try
😦
I think my question may also have to do with absolute shape keys. Can absolute shape keys/morph targets be exported to unreal?
Hello, I have an pose and animation as an two different clips. I want to use pose but animate this pose with other animation, basically just copy rotations of the one animation and blend it with pose. How can I do this
hi all. if making an organic (but not humanoid) mesh in blender with the intention to ultimately animate, is it best to try to put the bones system in blender and then pull into unreal, or pull into unreal first and then setup the bones?
It's a shot in the dark but have you tried enabling the Preserve Local Transform option on the Import Settings in UE?
I've found this resolves a bunch of weirdness when it crops up in animation, particularly when you have bones which stretch/transform non-uniformly as described here:

How are you implementing headlook? Typically headlook is implemented in an ABP with an AimOffset using Additive Animation to modify the rotation of the head. That way an animation can play and the headlook is added on top to aim the head in the desired direction. The ABP would look something like this:

@viscid willow I sort of fixed it. When I export the model with Export All its still a problem, but when I export it with Game Exporter I dont have this problem.
that doesnt look cool enough 😦
my aim offset is much more advanced then this
i cant resort to tricks like this
it has to be done properly.
Okay, it's not really a trick, it's about creating a flow for the animation to be modified before reaching the Output pose. How is your current headlook/aim offset set up?
i am using a control rig
Oh sure, in that case does your control rig not allow animation to play on top of what the controls are influencing?
ofc it does
its just that it wont allow above the head bone
for some reason...
layered blend per bone seems to be broken
I'd like to make an animated webseries and I was wondering what the best way to go about learning how to make animations in Unreal is. I'm just not really sure where to start. Is there any good online course out there?
hi i have a flashlight animation and the light is attached to my hand. How do i stop the hand or arm from moving when walking/sprinting?
do you have any screenshots to give a bit more information about how you have everything set up?
There's a few ways you could approach this.
You could use a layered blend per bone node to mask off the arm and play an animation which holds up the flashlight.
Or you could create a control rig to position the arm with IK.
You will likely have to deal with motion coming from the body and compensating for that somehow, if you imagine the arm is playing a static pose, and the body is still moving around you will want to stabilise the arm, either with an animation which is synchronised with locomotion or enabling this:

okay, it's certainly possible what you're trying to achieve and it doesn't have to be super duper complicated to get good results 😄
I'm trying to import a new modular character and running into an issue where the hands/wrists get a little warped after deleting the skeleton and replacing references with my current skeleton. How do I fix this? It should look like the mannequin pic.


hey it works, thank u so much for the help and the explanation!! i appreciate your time ty !!
i have what i think is a pretty simple question. is there a way to select/choose a state's animation based on a parameter, or would i need a new state per animation?
like the animation that goes into the output in the state depends on my character's speed, for example
Is there a way to make my retargeted animation not jiggly? I use Mixamo animation to my Metahuman and when it moves, Metahuman doesn’t look so steady
what is the best way to animate anime character face in UE? I am using texture animation in blender, can I just export it to UE or there is better way to do it natively?
You could use an enumerator to define different animation sequences and switch to them using a Blend By Enum in one animation state: https://docs.unrealengine.com/4.27/en-US/AnimatingObjects/SkeletalMeshAnimation/NodeReference/Blend/#blendposesbyenum

Animation nodes that blend multiple animations together based on a set of criteria.
you could also use an integer, but enums are a bit more human friendly
Hey guys, im trying to make a cover system and im running into an issue where my capsule component is not centered on my character when the animation is playing, any idea how to fix this?

The "set actor location and rotation" node is doing its job according to the capsule, but the animation just isn't lined up correctly

the capsule is just not centered because the animation makes the character lean, thats really my entire problem
Do I have to edit the animation itself and manually move the root bone in the original animation so its centered, or is there another way to do it?
can you shrink the depth of teh capsule a bit? probably not as granular as redoing at the anim level but it could buy you some more space
How would I shrink only one dimension of the capsule? I thought the only way was to change the radius
Can I make it more oval? Didn't think that was possible
Editing the root of the animation worked (as expected), just gonna have to redo a couple animations i guess
I was gonna mention the root position relative to the rest of your character animation. What I find helpful is to make a proxy capsule in Maya so I know where the collision is going to be, also useful for Jumps.
Yep will definitely be doing that in the future. Thanks for the advice
Having a problem, where if I set my ik_hand_gun rotation, it causes this glitching.
Any idea what would cause this?
I have set a notfier in my anim montage, and when i play montage if i drag from the notify begin pin to just print a string, its not firing. any ideas?
ahhh got it, was using the wrong type of notify
Hard to say, but at a guess it looks like you have some kind of dependency loop in the value being set, like it's flipping or spinning. Is the ik_hand_gun bone controlling both arms through IK in this case?
That's what I'm thinking is happening.
hello everyone how are you guys iam new here and learing UE5 and want to do some animations on metahuman so i can make a cinematic movie scene anyone know how to do it ?
Hey I'm trying to import a rigged mesh into Unreal Engine 5 using the Blender FBX tools and I keep getting this error.
"RiggedCharacter" needs its unreal skeleton asset path specified under the "Path" settings so it can be imported correctly!

Does anyone know about performance impact of using the Retarget Pose From Mesh in Anim BP? Just implemented this, it's awesome, but on the other hand I have doubts in terms of cost. Did not find infos on this.
Ai Generated 3d Characters from a single 2d video clip.. I can't wait to create Ai Environments and Characters and tell stories.. Cheers to you all... https://youtu.be/9L7tnJF4hlE

Wonder Studio have given access for some beta users and here is my first attempt on this. More scripted content will come soon after.
The creator of this Technology is https://wonderdynamics.com/ and they are about to change Character Animation and Mocap Forever..! Can't find enough words to praise what is available although it is called "BE...
Is there any way to import Unreal Engine's sockets into blender for animation or am i meant to do this in another way
I do want to animate on my own though
My characters are really not that complex so its not that difficult
Rigging question: Is there a way to put Sockets on bones and use control rig to animate the joints? I can put socket on bones and control the bones with Control Rig. However, I do not see the sockets when I drag the control rig into the level.
Anyone know how I can get the camera to follow the animation that is being played? I have a montage where the character changes shoes. The player can look around and see inside of the head and body when the montage is playing. How can I get the camera to force look where the players head is looking?
Are there any free animal animations for just basic movement and basic attacks that i can retarget to skeletons. I do not want to animate my own, I find it really tedious
Hello, have you tried using Aim constraints to look at the target?
The Epic marketplace has animal animations.
I have not tried that and never knew about them I will look those up
anybody ever done a scene where the effect of looking at something in the distance through binoculars? i'm not sure how to do a condensed "zoom" effect
i can get away with a low res building/facility in the background but where i zoom will have to be nicer
im aiming for the effect to be like a half mile away
hey hey im trying to use a simplified rig for unreal (im using blender) and wanted to know if simplifying the rig to like 28 bones might cause issues for me down the line
In control rig, how could I make it so a bone's world pitch & roll are always 0, but its yaw is unchanged?
I am trying to stabilize a mech's chest, where the cockpit is, using control rig
and ideally I could blend/lerp the stabilization from 0-1
every time i see the node lerp i think of 'derp' i can't unring that bell lol
hey guys
I'm having some trouble for my character to do the open door animation, can anyone help?
I have this door blueprint that opens and closes when I interact with it

and even after I setted the play montage, its not working

I dont know if this is hard thing to do but I dont know what is wrong
How can I add permanent bones to a skeleton, when i add virtual bones they dont do anything
what is the modern simple approach to making a foot align with ground in an animation blueprint?
or should I be doing it in control rig?
I'm a fan of this Foot IK tutorial from @misty dagger https://youtu.be/GTOs4XwzcME
I would say control rig is the optimal approach, personally I find it easier to visualise and more intuitive and I can rely on techniques from animation and rigging I've picked up in DCC tools
Making Legs IK with Control Rig using Two bones IK and Full Body IK!
Part 1 (basics): https://youtu.be/jfYZymr1svs
Part 3 (4 legs ik) https://youtu.be/mrXs8xLAr3k
thank you so much 🙂
I am drawing a blank with montages, I set up the upper body slot and I want to play a montage of it. What is supposed to be written in the anim BP?

Virtual bones are permanent but they arent skinned to the model. Are you wanting to add skinned bones to your model? If so that will need to be done in your modelling and rigging application. I think there are some experimental features on the horizon in ue5
Looks like another instance of MainStatesCache can also be hooked up to the UpperBody Slot. Is your layered blend set up to mask the bones you need?
yeah i selected spine01
sec
oh
wow
silly me
I wrote spin_01
instead of spine
ty
the power of an E
hello i need help,i have arms already with bones but i don't know how to change position because i want to put torch in hands i have this:

Hello, you can put a UE Control Rig on the arms. The Control Rig will allow you to pose the arms.
Then you can parent Constrain a torch in the hand
Hello, you can make a separate Control Rig control for each orientation: pitch, roll and yaw. This way the separate pitch and roll controls will not effect the pitch.
Hey any ue5 game animators interested in working on a horror game I’m making?
Thank you!
Hey there animation experts! How can I make my animations less "twitchy" when moving fast right/left/up/down?
https://gyazo.com/1223fba5b20326f6640b1fe3828da947
Don't mind the tearing in the clip

Hello all :), im trying to export a volume to mesh fire animation from Blender to gltf, i tried all kinds of things but no good result, any ideas? Would very much appreciate it :), thank you!
[13:16]
its a sequence of meshes animation
Is there a way to scale animation keys towards an anchor?
I would like to anchor a set of keys at frame 1323.
Then scale a bunch of keys among a couple actors towards frame 1323.

I tried this technique in the forum of making a selection and “Hold Ctrl” to scale the keys. This scaled and “pushed” all the selected beyond frame 1323. It did not work well
hello i need help i'm trying to add a new arms model first thing why if i put quinn animation they dont animate

and here why i cant modify bones i wnat to change the position of hands ecc

Hello, it looks like the Control Rig component is not added to in Sequencer. RMB over the Skeleton icon in Sequencer. Then choose "Assign Actor." Then Choose your "Arms" asset.
Hey guys, I posted a question about retargeting and wanted to ask if maybe someone in here could help me 😦
#ue5-general message
Hello Are you using Control Rig to retarget the animation?
yes, the the one premade by EPIC to retarget from UE4 manequinn to UE5 Manny
O there are many YouTube vids on retargeting with UE4 manequinn to UE5 Manny

UE5 TUTORIAL - FAST Animation Retargeting.
A BRAND NEW way to retarget your animations.
Recently the "Retargeting Manager" was removed from Unreal Engine 5.
This is the new way to retarget your animations on to UE5's
new mannequin.
IKRetargeting docs:-
https://docs.unrealengine.com/5.0/en-US/ik-rig-animation-retargeting-in-unreal-engine/
#Un...
Ther are other, too
The issue is, that retarget preview and even exported animations are looking correct. But when used in game mode, the legs absolutely dont work
Is there IK on the Legs?
If so, you might want to turn that off
use the FK rig after retargeting
Oh i havent tought about that
Only use the IK if you are doing ray casts to collision geo
@vestal aspen I disabled the IKTrace while in my hanging state bud it didnt help 😦
Are you calling the Control Rig in code or are you calling the Baked animation?
Try baking out the animation and playing that clip
@vestal aspen I have a hanging state stored in bool var so i just disabled IK it like this
The retargeted animation is baked already no? Or do you mean something else?

Hard to tell if you are using the baked out animation, cause we are on Discord. However, are you using individual FBXs for your animation and then using Animation States to switch animations? May I make a suggestion? You can try baking out the animation you need into its own FBX file. Then you can load the animation into its own animation state.
Yes exactly this hanging animation is separate fbx file and it has its own "hanging state" with transitions.
Can you double click on the Hanging animation to verify that it is working properly?
If the animaiton is working properly, then we can rule out the control rig part
It would then be a matter of investigating the transition
Sure, thats the issue i posted in original message, its displaying correctly in animation preview

That is good
Then it is a matter of investigating the logic of the transition and investigating triggering of the animaiton
try looking at what LYRA does
But look, i plug in the animation into the Idle state just to test it works properly without transitions and the legs are bugged anyway:

Are you using the correct bone names for the transition and retargeting?
Yes im using the rig premade by epic

Hmm? Sorry, My only idea is to open Lyra and see how they are handling the animaiton retargeting
Bones in UE4 might not be named as the UE5 bones
But if i named the bones for retarget differently, the animation preview would not look correctly
Anyway thanks, i understand it is hard to debug things through chat like this. Thanks for your help 🙂
@vestal aspen Just letting you know that removing the ik control rig node from animation blueprint fixed the problem. So basically it was the IK issue as you said sooner

Hey does anyone know how to use a boolean I created in my character controller to use in my animation blueprint?
I'm trying to sync my walking animation to be timed with a footstep simulation I'm running in C++. The footstep simulation calculates the percent of footstep progress - how can I sync the animation to this? Ideally I'd just play the corresponding keyframe of the animation that corresponds to the % completed
but I can't figure out how to play just a specific keyframe of a looping walking anim
Hello everyone. I was wondering it if it possible to switch out animations in an animation blueprint during run time. Like if I were to pick up a weapon, is it possible to change the animations in a locomotion state machine to match the weapon type, or should I just make copies of ABP's that just have different animations based on the weapon I am holding.
I set this boolean to tru in my character controller after picking up an object, and I want to use a different idle animation when I am holding it


Go into your Animation Blueprints event graph and you can cast from the owner of the component and grab its controller. Then you could set a variable you create in your ABP to the value of what is in your controller.

Should be this graph


Yes but there should be a red event in that graph that you should be connecting to. I forgot the name of it.
Think it is "update Animation"

Exactly. Except what you are currently doing is setting the value that is in the Character class to false. Create the same variable in your animation blueprint and then set that new variable to the Character variable
how do I play an animation, paused, at a specific keyframe from an animbp state machine?
How can I make it smoother?
How do I do that tho
Should look something like this


Yeah. Because the new one is the one that the ABP owns. And it will keep being updated with the variable that you are changing in your character class. It also allows you to reference it in your AnimGraph to change what Idle animation you wanna use.
Perfect


Yeah. Those are two different "objects". Same named variables but they are not the same thing. You need to constantly update the values you have in your ABP based on the variables in the Character.
gotcha!
I feel so close

how do I make it conditional?
is this the right way to do it?

I did it!
except I have to hold down lmb to swing
and idk how to fix that
ok I fixed it like this

Glad you got it working 👍🏿
hey guys! my character is not playing the animation to open the door after he interacts with it. The door opens and closes correctly but the animation is not playing

does anyone know why? or what is missing?
did you add a state in your animation blueprint?
idk
no, just created the animation montage
cant help u then, idk what that is
do I need to create a state in the animation blueprint everytime I need to play an animation?
Try calling the function on the mesh component inside the character.
why does this happen?
I swapped out the animation for a different one and now it gets stuck
jumping resets it tho
How do I set the value of a bool after an animation plays
Not sure if you meant to show that video. Couldn't see the issue.
why is the animation not running?
have any ideas why?
Hello, it appears the animation is running correctly. you have two keys on the Transform that lowers your character.
this may be a silly q, but can you 'play as game' output to sequencer? like aren't there some bp / physics behavior that work while "playing" that you want to capture cinematically? maybe i'm asking this wrong
since my goals are cinematic i'm not sure how differnt approach this is compared to those that want to develop a game
I see, if you wish to play your animation in Sequencer then you do not need to worry about running any game code. If you want to animate your character you have two choices. 1. You can animate your character in Maya, blender, or 3DS Max. Then export an FBX to UE5. And play the FBX within UE5's sequencer. 2. You can use UE5 Control Rig to animate your character within Sequencer.
I recommend Control Rig. There are many tutorials on the internet.
If you want to apply Physics to your character and see him drop, you can apply collision object and physics to the FBX skeleton.
Many tutorials on the internet to help you with that as well
When you like the physics simulation, you can "Bake" the Simulation animation keys to a new FBX. This way the simulation will look the same every time you play it.
https://www.youtube.com/watch?v=eTWnzHQJvBE
then how come this animation runs instantly?
time stamp 31:52

NOTE!!! Updates for 5.1+
- 1:25 - To load same level with the chairs, go to File-Open Level, and choose All/Content/StarterContent/Maps/Minimal_Default.
- 28:28 - You'll "rt-click, CINEMATICS, level sequence" instead of "animation, level sequence"
If you want to make a short film in UE5, but not sure where to start... then this tutorial is f...
Yes, good find
He key framed his animation
Then play'd it in sequencer
you can get Stock animation from Mixamo and apply it to your character. Mixamo will help rig your character, then you apply Mixamo animations, then you export that animation into UE5
but how do you keyframe an animation?
He did not keyframe the animation. The animation came from Mixamo
he applied the animation to the FBX in Mixamo
Follow the video very carefully
so can you animate quinn or no?
im using this standard fall animation if thats helps

Yes, Mixamo will have the animation you need. Or you can use UE5 Control Rig to animate your character in sequencer.
If you are using animation that has differnt bones from your character, then you need to learn how to retarget animation in UE5.
If you do not want to keyframe your animation, then look up how to rig a character in Mixamo
If you want to use animation from another skeleton, then you need to learn how to retarget animation
hmm so i need mixamo animation
If you want to key frame yopur own animation then you need to learn UE5 Control Rig
Mixamo is free
alright thanks
If your learn Mixamo and Control Rig, you will be able to edit the Mixamo animation in UE5.
The YouTuber also has Control Rig tutorials
Looks like it's getting stuck on the state. I think instead of CurrentTime try GetRelevantTimeRemaining, it might be that it is looking at the particular sequence, and relevant time remaining is agnostic of that IIRC
Hey can someone tell me how to make a cinematics game mode?
Oh yeah. For one off animations that you wanna use, I believe it is best to make that animation an AnimMontage. Should work that way.
Dang I don't know what those are
Will look into it
Hello. Is using curves in an animation for important gameplay data going to give me grief at lower framerates? I'm testing on a slower computer that gets me 25-30fps and i think it's occasionally missing some crucial curve data from animations (such as when an attack animation is in its Active state)
Or when a run/walk cycle is within the 5-10 frames that blends well into WalkStop, I was using curves to flip a bool that allows the state machine to begin transition to walkstop etc. but when I'm at low framerate or alt-tabbed (ultra-low framerate) the character never enters walkstop since the curve data is not being updated adequately.
i have a casting animation i want to loop, but the first and last frames arent the same, they are very close though, is there a way to make it blend? it is being played from a play montage node
Hello.
I am facing one weird issue with one animation, I imported one animation in the project and it's working fine in the editor when played as animation sequence but it's not playing on runtime. I tried to reimport the animation but still the same issue. another thing that is noticed it that when I am reimport the animation I'm getting warnings but that's not that case when I imported the animation for the first time.
Here I'm attaching the warning screenshot.
Anyone know what might be the issue here.

I've connected an aimoffset to layeredblendperbone where I've set the "Branch Filter" to only include spine joints. I expect to see the aimoffset only affecting the spine joints, but the result is that it still animates the arms too. What am I missing here?

A layered blend will mask everything after the bone you have assigned. So if you wanna blend from the spine you only need to define one spine bone and define the blend depth which will dictate how many bones the blend will be weighted over before reaching 100%. Instead of assigning all spine joints, you could set one spine joint and then set both arms and use a negative blend depth to remove the arms from the blend. I think negative blend depth works 😅
please explain the problem here and whats the solution for this

Hello ! I can't find how to use a state machine for Widget animations, is it not supported by UE5 ? I need to have some sort of states and transitions.
https://gyazo.com/3c587d55ba235414ba7314f0fd59d94a
Can someone explain to me why my legs are going crazy when switching directions and moving backwards?
Anyone find a tutorial for a Control Rig snake animating along a spline? Like drawing a spline along a floor and the snake animates along the spline.
Hi All! Need some help! I am trying to animate a wheel inside Unreal but its becoming very difficult. I am importing the mesh from 3ds max and the pivot in 3ds max is in the center of the mesh. But when I bring it in Unreal, the pivot is offset. Is there a way around this?
Hello, if the wheel has been rigged and animated in 3DsMax, you can offset the rig orientation so the wheel is upright in UE. In UE, drag the wheel into the level. Put the wheel at 0,0,0. Then create an empty actor at 0,0,0. Select the actor and rotate it so the wheel is upright. Then drag the Actor into Suqencer and apply the FBX animation. Press Play and the wheel should animate in an upright manner.
Second option: I believe you can also offset the root bone orientation when importing the FBX into UE.
Evening all! Can anyone recommend a reasonably priced unarmed combat animation pack? Just looking for jabs, crosses, uppercuts and 8 way locomotion. Thanks in advance!
Oh i should add ideally rigged to the UE5 Skeleton but that's not a dealbreaker
hi, how i can make foot ik also change angle to the surface? so it would be like a green line, not as current red one

hi, im making a cape for my character
but for some reason, the collision on the actor isnt working on the actor


can anybody tell me what im doing wrong? maybe im not activating something?
the cape is not working with the actor's collision no matter where i adjust it
ohh, maybe i should mention, the cape has rig
Anyone know how to set up a pole vector on a FitChain Spline? I would like to use a Pole Vector to pivot the tank tread on the X axis of the Root.

Do you have an image of your BlendSpace for strafing?
It seems as though the direction variable is goin a bit wild but it's hard to say without seeing the implementation.

have you done any debug to see what the blend space is doing at run time? My suspicion is say your direction value changes from -180 to 180 does the value travel like this:

as in the blend space doesnt wrap around
One approach could be to make Idle its own state and create two blend spaces in a locomotion state one for forward locomotion and one for backward locomotion and then flip between the two blend spaces. There's a good production example here and it's a method I use a lot because when you're animating locomotion the differences between running backwards and forwards don't blend well: https://youtu.be/4rnsph1eg4s
You don't necessarily need to make the blend offset on an angle like in the video, you can do a simple flip along the horizontal axis:


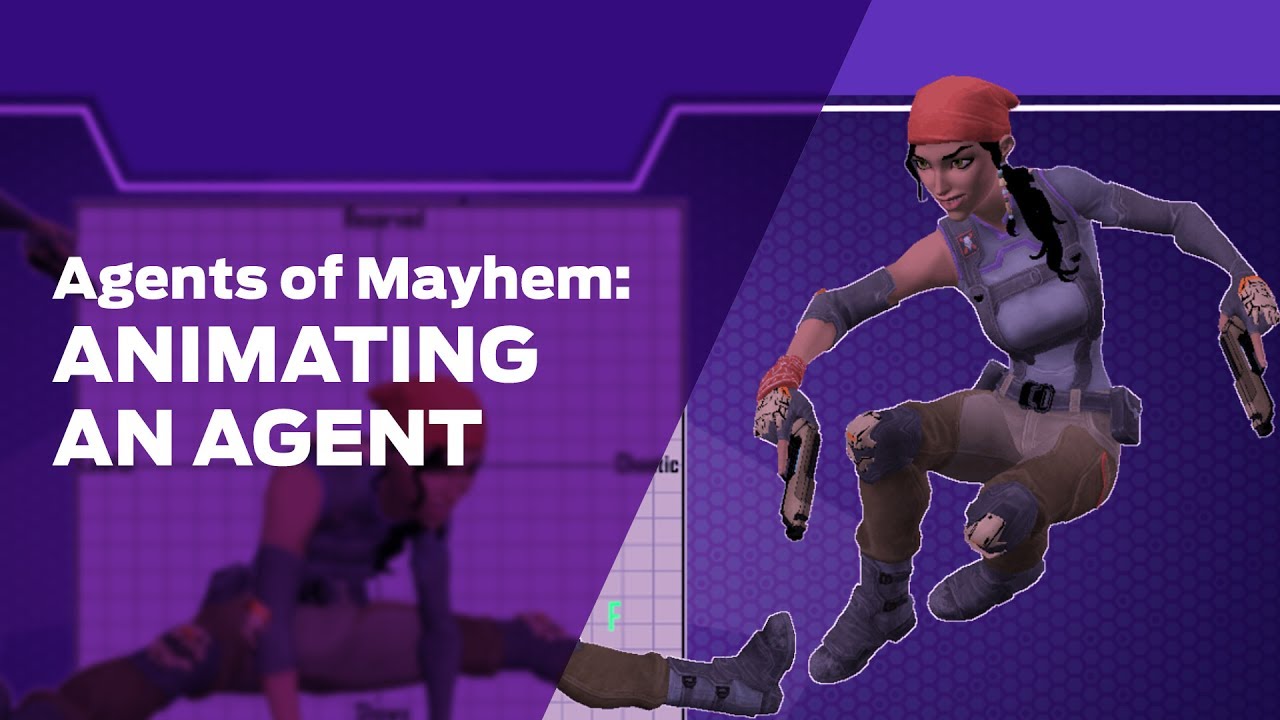
Sr Animator Mike Jungbluth, Technical Animator Evan Cox, and Sr Programmers Rob Rypka and Isaac Vanier do a deep dive into the animation systems of Agents of Mayhem, and everything that goes into animating an Agent!
Join us every Thursday @ 2pm PT/5pm ET/22:00 BST for our weekly stream!
http://twitch.tv/dsvolition
Thank you! I will check this out
You can do this by aiming the foot IK target along the normal of the surface. This tutorial from @misty dagger has a good example: https://youtu.be/GTOs4XwzcME
Making Legs IK with Control Rig using Two bones IK and Full Body IK!
Part 1 (basics): https://youtu.be/jfYZymr1svs
Part 3 (4 legs ik) https://youtu.be/mrXs8xLAr3k
this is amazing, thank you very much for the tutorial
Hey, can anyone give me a hand? For the last week I've been desperately trying to rig my character, and I've been completely unable to. I've tried weight painting the UE4 skeleton, I've tried multiple auto riggers, even had a blender professional do it for me. Every time I import the character into UE, I get the "failed to merge" message. Is anyone able to help me at all?
This last one was made using Auto Rig Pro, which everyone has said works really well
I'm in UE4.27


hi, what is the difference besides position between twist bones and regular bones? like upper arm / upp arm twist?
If I was piecing manny back together again what would I use?
Hello! I'm new but excited to be here!
I was wondering if anyone might be able to tell me how to apply the Spring Controller?
Here's a super short video of what I have so far, I have everything working in the Blueprint, it just doesn't seem to apply in game 😦
https://www.youtube.com/watch?v=Su4uLRt36xY&ab_channel=RoyalSkies

How difficult would it be to make a very realistic looting animation? I'm building a survival looter fps (similar to Tarkov), so if you have a rifle on a sling, you'd need to put it down first, remove your backpack, open the backpack, hold it and grab the loot item, put it in the backpack.. loot some more... quick draw your pistol or pick up your rifle quickly (and drop the backpack) if there's a threat.. then close the backpack, put it back on when ready, and put the rifle sling around your body again
I haven't seen this done in any game.. the closest is like in Last of Us, but the loot is picked up instantly, and there's no respect for the layers you have on (body armor, rig, backpack, sling). So another example is if you want to replace your body armor which is damaged with someone else's, then you'd need to remove your gun, backpack then rig then armor.. put on the new armor, rig, backpack and sling
Anyone know what is replacing this node? Or are they just removing stuff we would normally use from the Control Rig?

Maybe it's just me but it seems like we are losing control over simple rotation logic with each update lol
Man they have actually deprecated quite a bit, maybe in 5.2 we start seeing some of this come back?
Almost everything I used in my last control rig has been deprecated
Hello, Is Velocity for animations calculated in another pass than VelocityPass? (I mean VelocityShader.usf)

why Control Rig Sample from Epic is broken
i cant move head
and when I use other mannequins, e.g. when I want to control my hands, the fingers are strangely made, because when I move one finger, e.g. the smallest one, the others move
I was able to import the FBX you linked. Is the issue that you're trying to import this skeletal mesh onto the existing UE4 Mannequin Skeleton? If that is the case you will have a lot of issues doing so because there are significant differences between this skeleton and the UE4 skeleton.

Twist bones are added to a skeleton to fix issues with deformation and skin weighting. Because areas like the shoulders and hips have very complex movement a single joint is often not enough to get good deformation for these limbs. What the twist joint does is that it Counter Rotates on the twisting axis of the arm or leg bone to keep the shoulder or hip more stable in volume.
A couple of important notes:
-
These joints should not be in the heirarchy of the arm or leg, they should be leaf bones that are a child of the upper arm or thigh this is so as to not add extra bones to the joint chain of an arm or leg so that things like IK can still be applied.
-
These are joints which would never be animated manually, they are procedurally driven by the rotation of their parent bone.
There's a funny video on Twist Bones in Control Rig here: https://youtu.be/VU5egEEolsI

The way to set up simple twist bones in UE5 changed compared to UE4 ( referring to my previous video here: https://youtu.be/wD1odz50vQo ) - the Twist Bones node is deprecated, so now you have to do things slightly differently.
Grunt shows you how it is done.
It is actually easier now than before, but as of right now, this is not mentioned i...
thank you
Hello! Not a problem!
So a couple of things; if you want this effect to run all the time on your character, and in your example it seems like that's the case, you can assign the ABP you have made to your Skeletal Mesh as a Post Process Anim Blueprint. This option can be found in the Asset Details of your skeletal mesh, I would recommend watching this livestream (timestamped) to get a run down on the Post Process ABP: https://www.youtube.com/live/Ny3TULUfehk?feature=share&t=1268
The short answer is that once assigned the ABP will run any time the skeletal mesh is visible, even in editor, so it's useful for things like physics which you want to be consistent.
The other thing you will need to add to your New ABP is an Input Pose node before your Spring Controllers, this used to be called a SubGraph Input as you might see in the video but it's the same thing. This input pose node passes the pose from your Main ABP to your Post Process ABP so it can be modified by the nodes in the graph. Without the Input Pose node, you'll see your character in T-Pose.


Announce Post: https://forums.unrealengine.com/showthread.php?130734Lina Halper was on the stream to once again show us all the latest and greatest animation...

every animation this shoulder looks weird, i use Control Rig Template from Epic
is this normal and i'm just picking on it or can i fix it somehow in this template?

in Control Rig I don't have this
package from Epic Games with this Control Rig, everything is inaccurate
or I'm doing something wrong, I don't know anymore
What are the differences? It's literally rigged to the UE4 mannequin
here's a simple test anim I got in blender. I imported it in UE using the plugin. I also need a proper physics asset.. for some reason only 3 bones were picked for the physics collision capsule.. how do I fix this?

That's very useful info, thanks for sharing that.
Like seriously we kept having people try to fix the legs on a raccoon because when it would stand we would get bad deformation and no one could fix it....we paid like over 5 people to work on it lol
that whole time we may have been able to just add twist bones to fix the issue....
There are some extra joints in each hand which change the hierarchy. Those Metacarpal bones exist in the UE5 skeleton, but not the UE4 skeleton. I tested importing onto the UE5 skeleton but here are hierarchical differences there too, so it's incompatible.

The other thing to look into when you encounter that problem is Corrective Joints using Pose Drivers, this is more commonly seen in UE5 with the new Manny and Quinn skeletons and particularly on Metahuman characters. These are joints which move based on the rotation of another joint for the purpose of fixing deformation. Same principle as Twist correction but more advanced. https://docs.unrealengine.com/5.1/en-US/pose-driver-in-unreal-engine/


Describes how to use the Pose Driver to drive Pose Asset or Curve values based on a bone's movement.
Oooh that's what they were doing there...thanks for this info, invaluable
Fun fact - Quinn has Biceps, Manny does not 💪

Interesting, I never noticed that
This is often due to the scale of the bones in your skeleton. If they're too small they're ignored in the Physics asset generation, you can still make them manually.
ah! I see.. because I only saw 3 bones in the list, I didn,t think it would generate zones for the other bones.. I changed the tolerence and it works!
THANK YOU so much for taking the time to answer my question - My problem has been solved!
Everything works now, Hope you have a Fantastic Day!
Excellent news! Glad to help 🦇
A little hard to tell with the bone selected but it looks as if you aren't moving the root bone to create root motion. The top most bone needs to be animated to create root motion correctly in engine.
It's hard to determine from your blender scene too because the scene scale seems to be much too small for export.
So what do I do?
🙂 🙂
But how come I cant even use launch character nodes when its active it wont launch me?
That's gonna be a whole other problem for #blueprint
There are resources on how to correctly set up a character in Blender for Unreal I would recommend the videos on the UE to Rigify addon. You don't necessarily need to use the addon, but it has some good examples and explanations about the technicalities of Blender and Rigging and how to make that compatible with Unreal. I can't find a link to the full playlist but they're all on the Unreal Youtube Channel: https://youtu.be/9FjlgyuGhNo

UE to Rigify is a Blender addon that uses constraints defined by visual nodes to drive any rig and its animation with the Rigify modular rigging system. In this video, you will learn how to get up and running with the addon and how you can immediately start using it in your game development workflow!
Here is the link to the full documentation:
...
I see you've already asked in #blueprint. It could be that root motion conflicts and overrides when you try to use the launch node. Do you have a screenshot of your animation playing and skeleton hierarchy, without any bones selected. If set up correctly, your animation should have a red bone in the animation to represent the root motion.
Hey! Been wondering if it's possible to change where your weapon is located in your hand while doing a certain animation since have some animations the weapon doesn't align well with, but when i change it to match that animation the other animations get unaligned
How would I rig to the UE manniquin then
I DID IT
I used Auto Rig Pro, but it auto used the UE5 model, not UE4

Fantastic 👏

Hi, im completly new to UE5 and im strugling to trigger simple animation. I created FP project and I imported robot with animations. What i want to achieve for now is to trigger animations for that robot with key inputs and I watched like 5 tutorials and none of them worked. (note, robot isnt player model)
Could anyone give me some advice or help me please ?
Heya, probably a really simple answer... I hate the FP default camera location and how the arms and shoulders are positioned... its terrible. How do I permanently change the pose?

My root motion changing location correctly but rotation not, I tried same montage with blank ACharacter and it worked. What might cause this kind of issue?
Use keys in sequence, or just redo it in 3d software and reimport it back.
When you choose "Root Motion From Everything", the character stays at speed 0, the character does not move. how fix

someone can help with this?

can anybody please help me


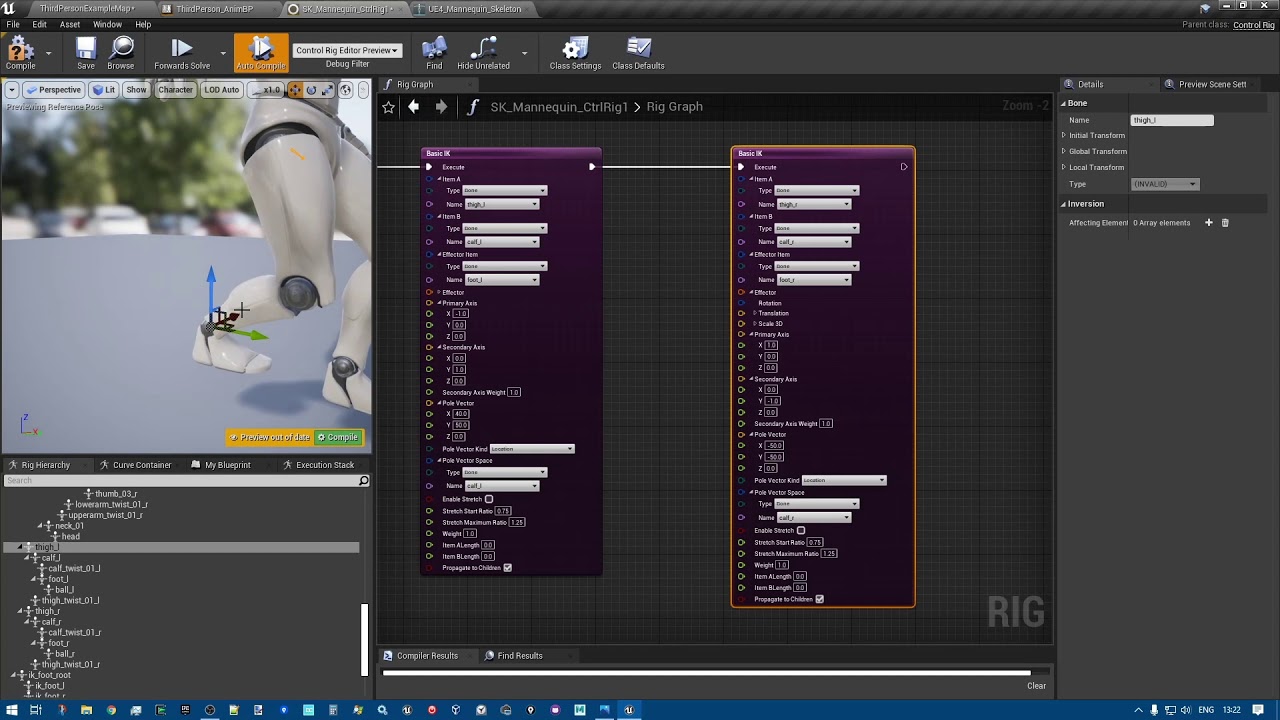
the rig for the face works correctly when icontrol the bone transform(picture 1)
but when i add the control rig for the selected bone, and hook it up in the rig graph, it seems to control other part of the face, in this case the upper middle lips(picture 2)
i use a simple fk chain with item arrays
can anybody explain why this happens?
Welcome to "being an animator", we hope you enjoy your stay. Jokes aside the best way is to create a new pose to apply as your animation, this can be done in a DCC package like Maya or Blender. Alternatively you can do a lot with Control Rig right in the engine, and arguably the engine side control rig can be relatively simple if you're only concerned with viewmodel arms instead of a whole character. I'm sure there are also FP animation asset packs around too.
Are you trying to create a root motion character controller? Setting this option to "Root Motion From Everything" should be responsible for the issues your experiencing.
Why don't my morph targets seem to play when the actor is moving? and how can i fix that?
Does anyone here have Maya?
I need a simple file conversion to FBX!
Please if you do DM me, it'll be fast and easy I promise 🙂
Which sample pack exactly? I'm having a hard time finding it on the Samples page.
My guess would be your array is assigning incorrectly. Have you tried mapping the control to the bone 1:1 to ensure it is behaving as expected?

ah i see it now, I'll grab it sometime tonight and take a looksee on the UE5 characters
You need to ensure you have no other nodes above your root in you 3D application.
Can I create a skeleton/rig a mesh in engine?
This exists™️ ... not sure how user friendly/stable it is, I would be dubious 😅 and I'm not sure you can build a skeleton from scratch https://twitter.com/games_inu/status/1644444689352003587?s=20

Skeleton editor appeared in #UE5-main. You will be able to add, move, delete, rename and mirror bones. Also has a BP API.
Likes
219
how would i do that?
i tried copy the bone and ctrl+shift+v on the control bone, doesnt work
can you guide me thru it?
ohh nvm
i got it working
i have to add each item manually on the array -,-
quite a hassle, but it works
also, i have a question about node runlimit
is it bad for me to increase it? does it effect performances?


Fantastic 👏 yeah not fun to do it manually, but doing it to ensure the connections are correct helps. So I guess you could automate it if the array is consistently correct.
This is all I could find on the node run limit, it seems to be for debugging: https://docs.unrealengine.com/5.0/en-US/API/Plugins/ControlRigDeveloper/FRigGraphDisplaySettings/NodeRunLimit/
So increasing it will remove any warnings but is hiding the fact that you might have a lot of instructions.

A upper limit for counts for nodes used for debugging.
why does retargeting the ABP cause this to happen? in the IK retargeter, the animations turn out fine (see the actual animations here), but the idle pose has legs stretching out to infinity

i've got this error for most of the bones, not sure why this is causing an issue even though the preview for the animations is fine

Why wont my bone move with my character? I dont understand but then some animations work but I know its not the inamations fault also it tps me back to the starting position when the animation is complete idk can someone help plz I would prefer do vc if possible would be very greatful thank you!! 🙂

Hoping this is the right place because it has to do with sockets, sorry if it isn't. Is it possible to open an object connected to a socket to physics? I am using hand tracking and I have an object attached to the players hand that I want to be able to spin when it is hit by the players other hand, but it doesnt seem to do it
Well, actually, it is attached to a sphere that is attached to a socket on the hand because if I attach it to the socket it just doesn't appear for some reason
Anyone can help me?
Does anyone have any good animation tutorials for ue4?
how the hell are you supposed to make animation without control and ik rigs?
it seems like all tutorials do everything to not teach you how to make animation from scratch
i agree
i have been looking for how to render a 5 sec video render for a hour
just a still camera rendering 5 sec
cant do it
there's so little documentation on it
It's "doable" but pretty painful to animate from scratch in UE4, you're better exporting the animation from DCC such as maya, blender, or grabbing mocap animations and making slight tweaks to those if you must...
You are right as hell i just found it out a couple minutes ago
Can I ask a question here about rigging?
I am trying to understand the difference between blender and unreal when it comes to bones.
It seems that in unreal the joint of a bone like between the hand and arm is the actual "hand bone".
Now my issue is if I want to connect my finger bones to the hand bones it would thus create 5 bones on top of each other in unreal. Would this be an issue?
https://media.discordapp.net/attachments/1013143929480290307/1102705428627980398/image.png

The circles that are at the start of the the bones in blender seem to be how the bones are in unreal but as you can see it would result in 5 bones stacked on each other.
Question gentlemen: i making animations in UE editor, and if my root bone is animated, UE5 doesn't make it as root motion (by enabling root motion in animation viewer) . Issue is capsule doesn't follow animation root :/
This is always a tricky one to visualise, what you would want is your finger bones to be independent of the hand and the best way to approach this is to Disconnect the finger bones from the hand. They're still parented to the hand, they're just disconnected so they can freely translate without affecting the joint orientation of the hand or requiring a bunch of connected hand bones.
Blender's visualisation is not very helpful for bones, but the thing that Unreal cares about is the position and orientation of the head of the bone, the Octahedral bit in the middle is only really there to show the joint orientation.


The result in unreal would look something like this (excuse my messy mouse drawing):

So disconnecting bones preserves hierarchy but renoves this need for additional "connecting" bones. Thanks, this really made things easier for me!
Exactly right! Happy to help 🦇
any one know why my skeletal alembec's normals keep coming in broken?

So i've retargetted my rig and used the quinn blueprint. All animations are working properly and previewed 100% correctly, but when you apply them for the blueprint and the character to use and test the simulation in game, the legs aren't bending and they are just straightened as seen in the 1st pic. both are idle animations, any1 know the fix ?


That's likely the Leg IK control rig at work during Play. It's probably not proportioned correctly to your character.
if the animation plays correctly how come it's not correct for the blueprint ?
how can i fix it
I am using FABRIK node and I want to use output pin of the fabric in additive animation, how can I achieve this?
Oh actually, are you using the UE5 third person template?
yes
i've fixed it btw
but now another issue

the legs arent going on the edge

it's supposed to do this
Oof, was the issue IK or something else?

That looks like the nodes for the IK Control Rig. So now it looks like you are setting the IK target to the foot position, which might mean that the Feet are never able to adjust if they're being forced to the animated position, rather than being offset by IK.
Is this the control rig which comes with the third person template that you changed?
I'm afk at the moment. But I can take a look when I'm back. I remember not being a fan of the default control rig implementation, it doesn't orient the feet accurately.
what do you use ?
UE4 rig ?
i don't like using the mannyquinn either but i dont understand how to transfer all the codes to my own rig so i don't have to worry about retargetting from quinn
I've linked this a few times but I like the way foot IK is implemented in this tutorial: https://youtu.be/GTOs4XwzcME
It's built on the UE4 mannequin but there's no reason it can't be used in UE5.
Making Legs IK with Control Rig using Two bones IK and Full Body IK!
Part 1 (basics): https://youtu.be/jfYZymr1svs
Part 3 (4 legs ik) https://youtu.be/mrXs8xLAr3k
well... idk.. My first issue after retargetting was the legs weren't moving so my character was sliding on the ground with only the foot working and the legs were frozen.. so i did something to these nodes to start them moving but then after i fixed it, 2 new issues came out. the one was legs not bending and the collision IK tracing wasn't working
Hey gang, so I'm using UE5.1 and I'm having trouble with the locomotion for my TPC.
I got a basic locomotion set up, and the idle is playing, but none of the walking/running will. I even set up a input to turn it on/off (pressing X once to walk, and press it twice to run) and it still doesn't work. The skeleton and skeleton mesh seem compatible as I assigned the animations to the skeleton I made, and they respond as they should in the editor.
made a new blendspace and still no response.
As far as I know the speed is working, but honestly not sure how to check that.
Is Replace skeleton enough for assigning animations to a skeleton? Some of the animations are from UE4 and don't come with a IK retargeter or anything. Seems when I did the duplicate and retarget once before, then animation came out terrible. (this question may not be related but figure I'd throw it out there).
@viscid willow

😮
was able to fix it by importing the default template and retargetting again, but same issue again, legs are straight as sticks


supposed to look like this
:/
dunno how to move up the bones up so the feet isnt sinking in the ground
yeah I see, I think the issue is that the Control RIg is using the IK bones to drive the Foot IK, which is fine until you have a differently proportioned skeleton. Can you send a screenshot of the character Idle animation showing the bones?
I reckon the issue is that the IK bones are too low, so it's hyper extending the legs trying to reach

Yep, this offset is screwing up the legs.


IMO the default set up is a bad approach because it relies on baked animation data to be exactly correct.
To be correct the bones should be aligned at the foot:


question, why then I try to do FKChain it snaps spine_01 bone to root? even my controls are set in correct positions? did i messed up my rig in blender?


yeah it's definitely not the bone
just something ihave to change in the nodes
deformation i can fix it, but then i lose the IK tracing
or keep the deformation and keep IK tracing
no idea what to change in the nodes to fix that tho..
I honestly think the Inu Games setup is a better IK Solution, and it's not difficult to follow
it will work for UE5 rig too right
Oh wait nah, what I suggested before does work
lemme repost
It needs to be accurate for every animation. I'm not sure if you can "rebake" the bone to follow where you need it to. What you could try is create a Virtual bone which goes from the FootRoot to each foot bone and use that as the IK target in the control rig. Just make sure you refresh the skeleton to get the Virtual bone in the heirarchy, and assign the Virtual bone to the modify transforms node:


does that make sense @worn aurora ?
Why would i do that tho
The animations and rig itself are correct the nodes and the code is what’s messing up the character’s feet and sinking it in im pretty sure
You would do so if you want Foot IK to work correctly and not extend the legs, if you remove the control rig all together that will work too, but foot IK would no longer be functional. The issue is that th IK bones in your character are proportionally in the wrong place for your character, they're proportionate to the mannequin skeleton, and the likely reason is because your character has a thicker foot base.
it's not really that the nodes/code is incorrect, it's that the animations are incorrect, they're incorrect in the sense that the IK Foot Bone and the Foot Bone no longer align after retargeting
ya
Cuz im really new to ue5
The images I linked show the steps
Oh just 2 bones
yep
alright gonna try tmrw time to sleep now lol, spent hole day today trying to figure this retargetting stuff
Thanks for the help 
Np, hit me up if you have any questions. It's certainly not an easy subject, and yet most people will tackle it because of course everyone wants their custom character. There's just a lot of gotcha's
for sure
err, you can manually set bone positions at runtime, right? how?
You could use a Modify Bone node in the Anim Graph and feed it a vector and rotation. Alternatively there are Set Transform nodes in Control Rig for the same purpose.
How to reduce interpolation/animation framerate in UE?
How come my root motion works in the anim but not in the game?
I think we've looked at this before and your character is not moving their root bone, they're moving a child of the root bone in the animation. Even if the bone is called "root" a true root bone needs to be the first bone in the skeleton hierarchy


?
Ninja skeleton is a bone which is going to come in above your root bone in the hierarchy, and Blender will export the SasukeUERigV1 node as a bone in Unreal too


Remove the Ninja_Skeleton bone. Oh cool looks like Unreal ignores the SasukeUERigV1 node for you
I named it armature so I think thats why that works

and the ninja skeleton bone is being used to animate some of my animations
Would it be possible to show you in a screen share?
Ah yep. If you require that bone, then that should be used for your root motion, for cleanliness I would consider renaming it root, and removing the other root bone in that case.
I mean you could swap the names but whatever you want to do, root motion must be performed on this top bone:

okay thank you
np
Hi, I have 2 different skeletal meshes with anim blueprints in my player character and want to cast to both blueprints but for the second skeletal mesh (not the root one) when I do the "cast to anim blueprint, object anim instance, reference skeletal mesh 2" it always fails?

Trying to change a variable in the anim blueprint
so i've made the VB bones but they're not showing up in the control rig
Do a print string of the anim instance to check if it's the one you're looking for
Make sure you go to the rig hierarchy and refresh the skeleton like i mentioned

where is the refresh button lol
right click on the root bone in the rig hierarchy
okay i put the virtual bones in
and the same issue again, it fixed the deforming and now IK trace doesn't work again

will do
hello, can anybody help me with this collision issue? its still not working correctly


Did you replace the bones in the modify transforms and Fullbody IK nodes with the virtual bones?


yep
the cape clothing simulation keep clipping through the actor model, no matter how much i adjust the capsule
is there some sort of setting that i missed?
and where are your Virtual bones parented to/targeted in the rig?
to the foot_l,r
from which bone?
coz you select a bone to add the virtual bone to, and then pick a target.
yes
yea still doesnt work..
Oh my bad there's one more place to change to virtual bones:


ok i fixed it
i was doing the root wrong
tysm
how can i delete the other virtual bones i made ? if i delete it messes up the legs
How could I cast to the player character from an animation blueprint?
phew, glad it's working
you should just be able to delete any Virtual bones no problem, so long as they dont influence anything else


cast is failing when it try that for some reason
this isn't the root skeletal mesh, this is a second one I've added to the player character btw
anyone knows? is this the right place to post this ?
😬 I would suggest not casting on update
So Player_KartTaxi_1 is your character, what class does it inherit from?

if i delete the VB bones this happens
ok nvm it's just the preview glitching, compiling fixes it.
Player_KartTaxi is the pawn of PlayerController
if that's what you're asking
I wanted to know if it's a Character Blueprint or not. But yeah i'm not sure sorry
gotcha thank you!
I assume its because its not the main skeletal mesh of the character blueprint
sorry that seems really annoying, i found someone mention they used tapered capsules, and it worked, rather than default capsule primitives: https://gamedev.stackexchange.com/questions/178666/clothing-and-physics-asset-collisions-not-working

Game Development Stack Exchange
I"m making a character in Blender where there's a character mesh and a simple skirt.
The skirt has a different material slot, which allows me to use the Unreal Clothing tool. I created the clo...
the #chaos-physics channel might also be a place to ask
ohhh, okay, theres the group for that, ill check it out in a while
thanks for replying 😄
sorry if this is the wrong section to post this
is there any nicer solution to check if a quaternion is close to zero?

i really feel like control rig is missing a bunch of useful nodes (also comparing two quaternions with tolerance would be neat)
which comes down to the same math..
How do I get the Ik trace and use it for footsteps?

Ok, does a Pose Asset actually contain a Mesh correction? Like, when arms are straight up, the shoulders deform. So, if i make a pose asset and of course call it correctly in the animBP, does the pose asset i made actually utilize corrections? (I made the pose in blender, and sculpted corrections) but i am unsure if this is valid, or if CGPT is hallucinating again
is there any way to find which animations have anim curves? or you're supposed to just remember by memory?
Hi Can anyone guide me here,
Is it possible to import object with a fk rig that has animation into unreal engine 5.1?
I am trying to import that rig with mesh from maya into ue5.1 ,I cant figure out this one.
Sorry if this is the wrong place to ask or stupid question, but anyone know why my item sockets to completely different place then in the socket editor and runtime?


is your weapon's mesh transform offset at all?
check the details panel of the mesh component to see if it's at 0,0,0
Its 0,0,0
This is how i have it spawning in runtime. Very new to this, trying to get the concepts down

did you import the corrective shape as morph?
and does it have the same curve name as the pose in the pose asset?
why is the socket's name sword? don't you want to spawn it on ik_hand_rsocket?
Not yet. I was hoping to get confirmation before i went through everything involved. (Tired of CGPT leading me wrong) 🙂
i haven't done it, but i guess it works that way
to me it looks like it's looking for a socket named Sword on your mesh but can't find it so it's spawning on the root
doh. I renamed it sword, didn't work, deleted then it renamed. But I updated now and instead of his legs its spawns on his shoulder
Pretty sure you responded to the wrong person
yes, i barely use discord sorry it looked like i clicked the right one lol
no worries
It was transform in the Blueprint. Thank you.
no problem
Ultra newbie question here. How can i create a simple animation to just move a component? Its a button, i'd like it to go up and down within its baseplate when pressed/released. Small single axis movement shouldn't be hard?
that will have all the information you need
this is an hour long video about blueprints 👀
the table of contents on the right doesnt contain "animation"
The information is there. your choice to spend time learning or not.
perhaps someone could just point me at the right place to get started on this specific task, or give a one sentance overview of how to do it, and i'll figure out the rest by googling
Can anyone help me? I’m following the alsv4 tutorial by legend on YouTube but the hand ik isn’t working. The line trace hits the wall but the animation doesn’t play, does anyone know what could be wrong, thanks
just the animation part, you can use a Timeline. The communication trigger is a different matter
@viscid willow hey. so i can only have 1 character per blueprint ? because if i add another skeleton to that same blueprint they will have the same deforming issue. and vbones seem to not help anymore for them.. so the only fix would be having a seperate blueprint for one rig or i can fix it somehow ?
Hi guys, i need to make an animation longer , how can i "slow down" it? or i should add frames?
It's my first time doing this
I'm in the animation editor of UE
not sure if i should ask this here or in the niagara thread. I have a custom notify that i dont want to play on the dedicated server. But it still seems to play even when I uncheck the "Trigger on Dedicated Server" box. What gives?
there's a float value in anim sequence assets called Rate Scale that will slow down the whole animation.
Oh wait, actually my problem is that my jump animation is played when my character jump and ok, but when the animation end the character get stuck in run animation while falling xD
its like freezed when falling when the animation end
Hi people, im trying to work out how to have multiple walking animations. I currently have a walking and running in a blend space and they work fine. I have added a pick up feature for the player to hold a torch. i have a separate walking animation i am wanting to use that it looks perfect for holding the torch. im not sure on how to setup multiple walking animations if anyone knows a youtube video or has done this i would appreciate a screen shot or any help. Thanks 👍
lol ever have a youtube on 1.5x speed and forgot you had it set? i thought i was having a stroke
you trying to do this in a game or cinematic sequence?
I can't, for the life of me, get root motion working on my character's animations. Meanwhile, another character in my game has root motion applied perfectly.
I've tried two different animations from two different artists, both applied root motion, and I can see that there is root motion in the animation.
The animation blueprint is set to root motion from montages.
Enable Root Motion: checked
Root Motion Root Lock: Ref Pose
Force Root Lock: checked, unchecked, no observable difference
Use Normalized Root Motion: Checked
It's a custom character, custom animation (not retargeted or anything). The root motion is being derived from an animation montage. Before the animation montage, the character is put into "flying mode" via the character movement component.
I cannot figure this out and I've been trying to solve it for weeks. Any ideas?
actually it's better to have an additive pose/animation for the upper body which holds the torch
then you blend that over the actual running animation, and in theory most of your "normal" animations would also work while holding the torch
Does anyone know of a resource for how to implement parkour locomotion anim blueprint?
anyone here familiar with this method of getting the mannequin into Blender? I tried it but get issues on export, IK bones that should not be moving like the feet move along the z axis and I cant figure out why.
https://youtu.be/AhpOrqyGf0o

Create Manny, Quinn and other mannequin rigs in Blender with Rigify and Uefy 2 for Unreal Engine 5. Use metarig presets to instantly create compatible rigs for all mannequins in UE5.
blog: https://www.rakiz.com/uefy
Next Video: How to Import Mannequin to UE5
https://youtu.be/GdObGfhRPGA
Chapters:
00:00 UE5 Mannequins
01:35 Manny89 Export
02:1...
Alternatively, does anyone have a UE5 mannequin rig that works in Blender, similar to Mr Mannequin's? Jim Kroovy seems to have disappeared, the github for that hasnt been updated in over a year and its not compatible w/ current Blender versions
Still have his old UE4 mannequin rig for current work, but retargeting isn't something I'd like to keep doing given how clients are increasingly asking me for Metahuman-compatible skeletons.....
Simple hoodie made in marvelous designer animation done in blender, rendered in ue5
Not exactly what your looking for but if you can get the ue5 mannequin model into blender I would just use auto rig pro to re rig it, and auto rig has its own fbx export settings for unreal
how can i make a very simple component animation? I want to smoothly move a static mesh component up and down within an actor, and save it as an animation i can reuse at will later
its a button, i want to animate the button being pushed. its made of two static meshes
Hi, I have a question or two, maybe someone can help me out?
I've created two separate animation sequences on a metahuman model and so far I've been able to blend the two in animation blueprint using layered blend per bone. Other than using the record button within animation blueprint, is it possible to create a joined animation sequence? Previously I have created those two sequences in level sequence while utilizing metahuman body control rig. Is it possible to blend those two animations within sequencer?
I've tried overlapping but that's not really what I'm looking for. One of the animation sequences is about head rotation, and the other one is about body rotation, so in layered blend per bone node I selected everything bellow head to be animated with the second animation.
Everything looks good in animation blueprint but, as I said, other than using record button to capture the animation and export it as animation sequence, I don't see any other way to do so, possibly more properly.
Thank you for your time!
It's been a long time since I've done any animation stuff (been working in other areas of the engine, and on non-Unreal projects) but now need to get back into it. Could anyone recommend a tutorial series (free or moderately priced) which will take me through the basics such as Blend Spaces, Animation Blueprints as a reminder for myself and move up to things such as Control Rig, Sequencer, and maybe even Procedural Animation which I've not done before?
I know I could Google this but honestly would prefer to have some recommendations from folks who know the field as to what they'd personally vouch for, tends to mean that quality wins out more over marketing and SEO.
(I doubt it matters but my 3d pipeline is an unholy combination of things such as Houdini, ZBrush, and Cascadeur. I do keep meaning to add Blender to my skills and for this I'd rather focus on Unreal itself rather than a hybrid course but if there's a very strong one I'd be tempted).
anyone have an idea?
https://www.udemy.com/course/procedural-animation/
Give this udemy course a look at. I've purchased it but haven't been able to look at it, but it looks like it might be up your alley

Udemy
Create a dynamic and flexible animation system which can be adapted to any style of character movement
Anynone have any ideas about this? Bueller? Bueller?
Thanks, I'll get that while they have one of their many sales on.
Reviews look good too
I’m having this same problem, I want to make a parkour system but don’t know how to make the hit traces and I want to to look at the point and choose between a foot climb or hand climb
Im doing this one it’s good but also confusing but really good
Hello everybody,
I have a weird problem with importing a model in UE5. I modeld and rigged this model in Maya 2024. When I made a short test animation and importeded it to UE5, I saw that only the lowest part of both feet (L,R) are not imported. Even when I select the whole model and bake the animation in Maya. The lowest parts are still missing. The are attached to a bone in the feet so they are a part of the bone hierarchie and when I combine the Top part of the feet, the springs and the lower part of the feet, the whole feet is missing in UE5. Does this problem sound familiar?
How it looks in Maya

How it looks in UE5

I'm trying to export a very simple skeletal mesh with some animations from blender, to unreal. It has just one bone in its armature
https://i.imgur.com/2AI2NaA.png
I export as FBX
https://i.imgur.com/IPGSVlD.png
But when I import to unreal, the skeleton doesnt come with it, its just a mesh
https://i.imgur.com/oMQHfCm.png
What could be wrong here?

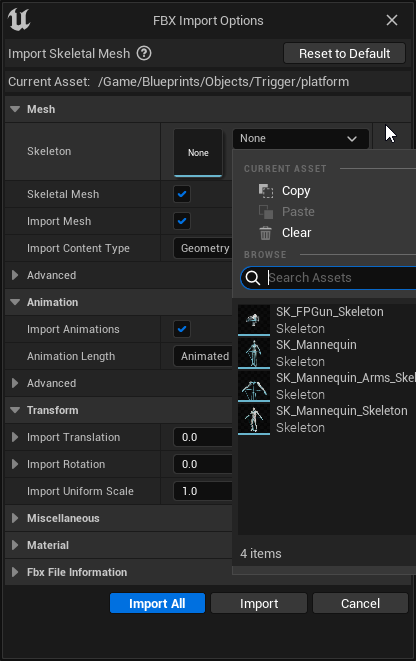
Keep the skeleton setting in the import settings empty. When you import it, UE creates a skeletal mesh for the model
I just updated to 5.2 and when I import animations now it sets the target frame rate to 60000fps. Prior to 5.2 I didn't have a problem importing 30fps. Has anyone seen this yet?
I'm importing from Blender 3.2. Haven't made any changes to blender files after updating UE
ohhhh, so that field is just for using a substitute, i seee
thank you! boter
Glad it worked
Following up on this, found a way to do it:
Open the Anim curves window
In the Anim curves window, add an asset filter called Uses curve (inverted triangle button).
Right click the new added filter, then select any of your Anim curves! Only the Animation sequences that contain the selected Anim curve will show!
Does anyone know how to solve object attachment problems with retargeted animations?
I followed this tutorial to apply ALS v4 to a MetaHuman:
https://dev.epicgames.com/community/learning/tutorials/zoYm/unreal-engine-advanced-locomotion-community-to-metahuman
So I have a character derived from ALS_BaseCharacter_BP whose component hierarchy looks like picture 1 and whose ConstructionScript looks like picture 2. The ABP for Mesh (the default ALS mesh, which is hidden in game) is ALS_AnimBP_C while the ABP for Body (the MetaHuman mesh hierarchy, which is visible in game) is one whose EventGraph is on picture 3 and whose AnimGraph is on picture 4. The problem I have is that when picture 5 is applied, the object is in the invisible ALS mesh's hand, not in the MetaHuman's hand. I tried attaching it to the MH Body instead in the appropriate socket but it seems to be attached before the animation retargeting is run, or something of the sort — in any case it isn't strapped to the hand but moves about around it in a strange way.


any one know how to fix this
my character is floating a tiny bit because of the basic IK feet from ue5. I tried putting a manual offset but it's also kinda rotating the foot in a way that the toes are below the feet like in the 2nd pic and that means the offset basically puts them below the floor


in the ik retargeter it looks good tho and in the animation sequence too

When i first imported an fbx it gave me a popup with various options, notably one to include animations
But now that i'm reimporting the same fbx (after some tweaks in blender) it no longer gives me the popup, just magically reimports and overwrites files instantly. This seems really cool and convenient
but its not importing the animations anymore, and i cant seem to get that popup to tick the anim box.
how get popup again?
first ever sprite anims from our art department at ELSQUAD.INC. 1-5 stars?


is that supposed to be a running animation?
walking, the one on the right is a practice/first animation of our sprite makers
ah i see, yea i like the style but it looks a bit like he is making jumping jacks without moving his arms
i agree😅 , but i have faith that they will be a great animator with some more practice
Has anyone else have this weird animation problem when exporting a animated model from Maya to UE5? In Maya the animation looks fine, but when i import it to UE5, all the objects move offcenter. I'm having this problem for 4 weeks now, and I still don't know how to fix it. It's really giving me headaches because I literary cant finish my projects, and I need them for my portfolio for my internship wich I need in 2 months.

I also tried it on my laptop (exporteng from Maya to Ue5) but i get the exact same result.
just an question, how do import the model, do you just drag the fbx file into the content browser, or do you go up to, file > import into level > the select your file. It could be the pivot points reset in UE,
I finished my locomotion system using a blend space, and im reasonably happy with it overall. However i've started noticing there is a bit of jankyness happening when the player moves Left to right quickly (Pressing A+D). I've tried to find the cause, but im scratching my head at this point. Does anyone have an idea what could potentially be causing this?: https://streamable.com/tiom6w

Were you able to solve the problem with not being able to import the lower part of the feet? Seems the feet are here now at least, what did you do?
I was about to say, I had similar problems with disappearing parts when importing to Unreal, but I use Blender and the send to Unreal plugin. I realized that if the thing is meant to behave as one mesh, it should be one mesh and not just parented components, that was what solved my problem.
What's your process for bringing this piece into Unreal? Do the animations work fine when testing in another software?
Figured out how to duct tape Advanced Locomotion System onto Lyra. Here is my fork that does this.
https://github.com/ZacharyDK/ALS-Community/tree/LyraIntegrationBegin

GitHub
Replicated and optimized community version of Advanced Locomotion System V4 for Unreal Engine 4.27 with additional bug fixes. - GitHub - ZacharyDK/ALS-Community at LyraIntegrationBegin
if i want to set an animation of a metahuman walking/running and want a rather abrupt stop, does it actually stop as is, or is there animation of the momentum across the joints (more realistic). if not, how would you go about this?
i would expect a heaving forward a bit at the waist with feet planted
i haven't messed much with tne prefab animations and wasn't sure how realistic they were lol
Hello there, I'm going to create my 3D first character and I'm wondering which squeletton should I use.
In a first time I would like to use Unreal Lyra controller with its animation until I get enough time to make my own animations.
For a Lyra controller/ animation retargeting, should I go for an epic skeleton and then remake a new rig when I will make my own animation?
Or I can go to my personal custom RIG right away and be able to make an easy retarget with Unreal Lyra character
Has anyone had the issue with animation montage chaning the animation state the animBP is in?
it does not happen if i spam it fast, but if i wait a bit betwen shoots it breaks.
When i first imported an fbx it gave me a popup with various options, notably one to include animations
But now that i'm reimporting the same fbx (after some tweaks in blender) it no longer gives me the popup, just magically reimports and overwrites files instantly. This seems really cool and convenient
but its not importing the animations anymore, and i cant seem to get that popup to tick the anim box.
how get popup again?
anyone have idea why my metahuman is looking like this in animation iam useing actor core animation it would be really help full

Are you using the send to unreal addon? Under the advanced dialogue options, under Import, you'll find the check for "Launch FBX import UI"
Edit: This is in Blender, of course. Also wanted to add, the settings you need should all be here under the various tabs so you don't really have to fiddle with the FBX import UI.

@amber sequoia Im still not realy sure why it happend. But I think it was because I had a rigged moddel where objects are parented and skinned (Weightpainted) to the bones. So I skinned the objects to the rig instead of parenting. That fixed it
Im trying to get this attached to a rig or a character so I can animate it
Would control rig be best and how the hell do I do that? 

i am not yet using that, ive tried poking at it this morning and cant get it working for now 😦
in any case theres a bigger problem, blender doesnt seem to be exporting animations at all. Ive started from scratch and remade the scene in case i messed something up. Made an armature, parented mesh to it, went into the action editor, created a new action called Depress, and set two keyframes
https://i.imgur.com/gjHmYpV.png
When i export it and bring it into unreal, no animations come with it, the checkbox to import animations isnt even in the dialog anymore. This did not happen the first time
i'm not sure what i did different, my first time i screwed up a lot of stuff, messed with pose libraries, bone groups, and the timeline. now its just rigged via a single vertex group
Clearly one of the things I did before was important for unreal to understand animations, but i'm not sure which
Export dialog
https://i.imgur.com/9QGFpIk.png
So i have an animation working fine within blender, but it doesnt seem to make it to unreal. any idea what could be wrong? Is an "action" actually what unreal treats as an animation asset? or is it something else?
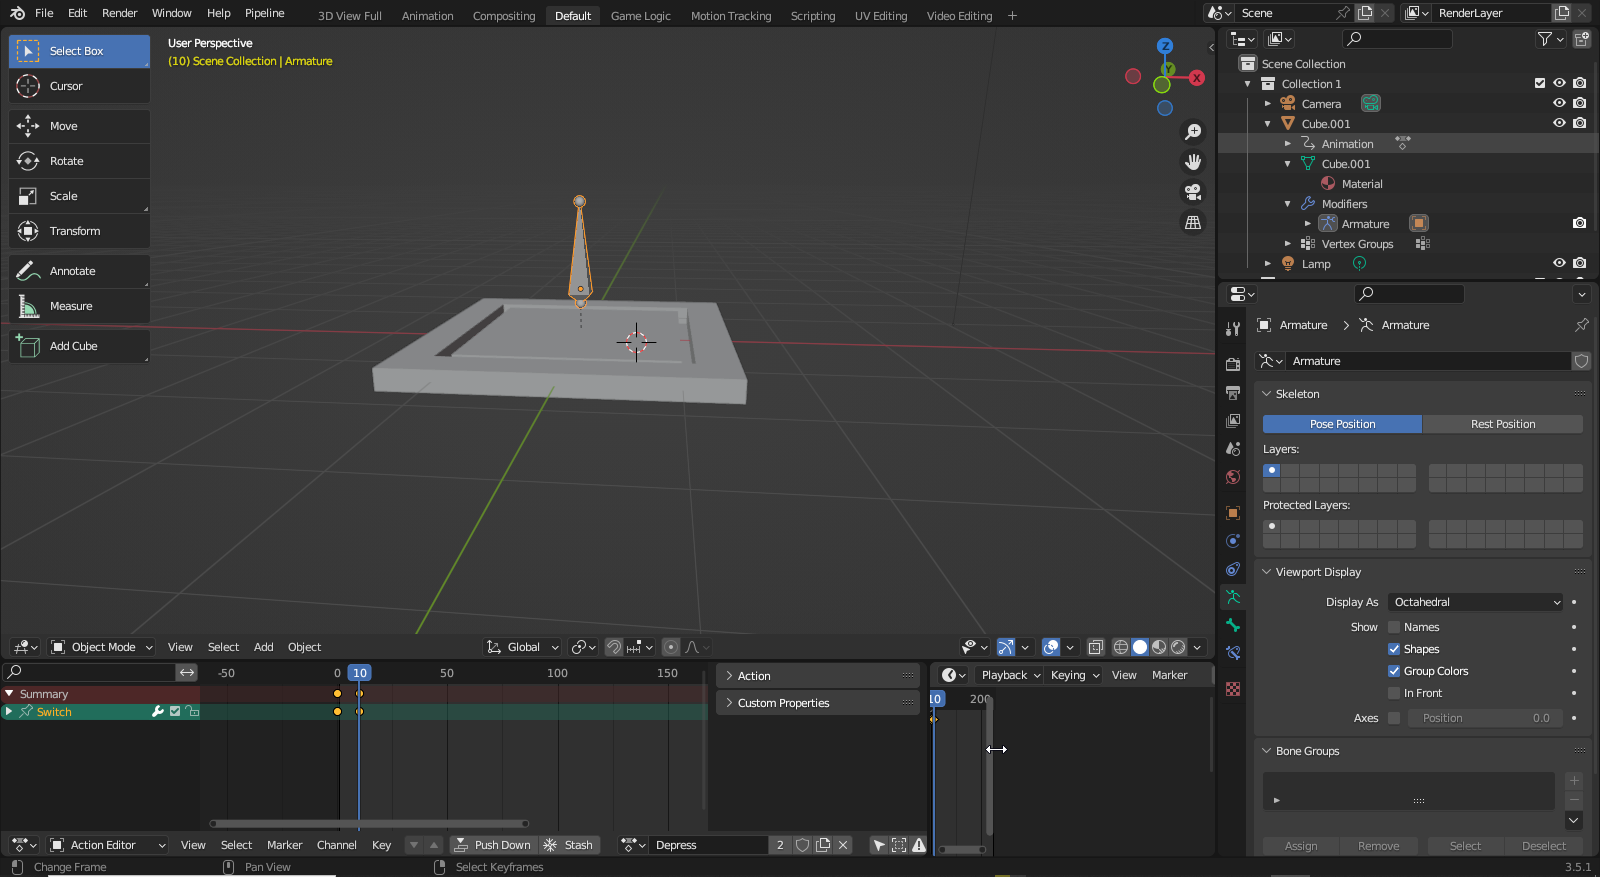
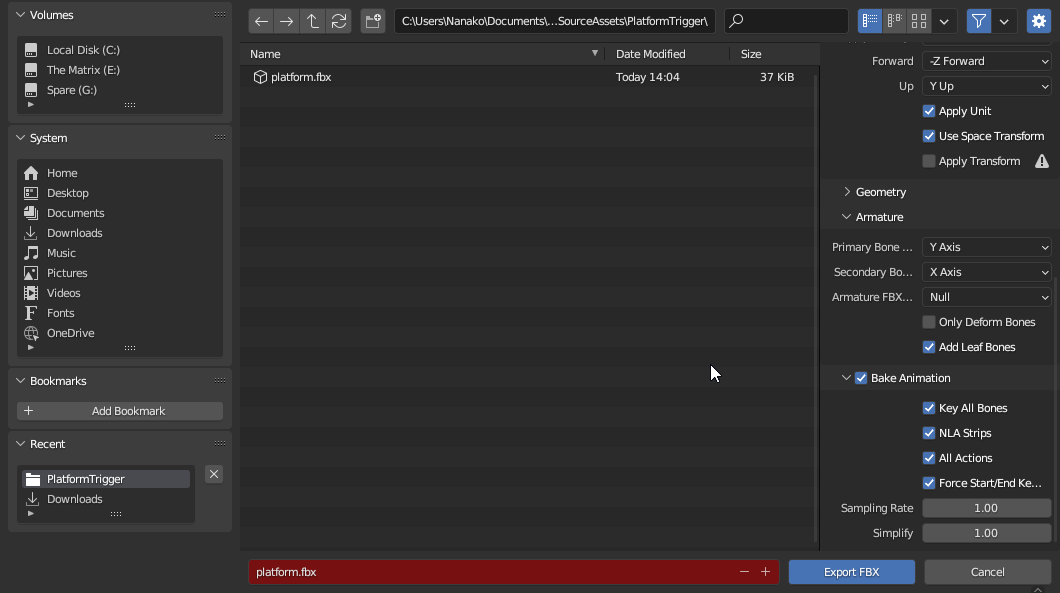
Hello guys so I am trying this tutorial to create a moving character but after having created my animation bp I get this instead of what the tutorial is showing, I also try and find and add the node the tutoial shows but simply can't find it. Does anyone know what my rookie mistake is?

(ofcourse now when I click the animgraph in the tab on the left it does work, fixed it!)
Hmm.... it's been working fine for me, but it did get me a while to get a hang of it. This is what I do:
-
First I place the rig and the mesh (which is parented and weight painted to the rig) in the export folder, I click on send to unreal advanced dialog, I set the path to whatever folders I want this in, I UNCHECK import animations, make sure nothing is there in the path for skeleton asset (since this is the first import pass that will send the asset) [see pics]. I send this to unreal, where I can see my skeleton, skeletal mesh and physics asset.
-
Back in blender I move the mesh (only the mesh) outside the export folder (it's still parented to the rig), the only thing in the export folder is the rig. I I copy the reference to the skeleton from unreal and paste the path in the skeleton asset field. Now I CHECK import animations. Fiddle around with options to pick whether you want to send all animations or just selected ones on the NLA, then hit send.


whats all this about export folders? I thought this would be sending stuff straight from blender to unreal. How exactly do you "place the rig and the mesh in the export folder" ? Are you exporting them as some kind of special format? Are you putting the .blend file there?
After installing the addon in Blender, it automatically creates some folders in Blender’s outline view or whatever it’s called, I forgot. The addon sends to Unreal only the assets you’ve placed inside the export folder you see in Blender.
thank you for your patience, still struggling with this a little, i'm trying to determine what to write in here
https://i.imgur.com/COkHNzl.png
I don't know what context this stuff is in, or how to tell it which project to send to. I'd like my assets to be imported to unreal at.... C:\Users\Nanako\Documents\Unreal Projects\Nobility\Content\Blueprints\Objects\Trigger
The format is, take the part that comes after \Content\ in your file path and put that after /Game/ in the addon folder path fields. You may wanna skim the documentation for the addon as well.
blender crashes instantly when i put a path in ;-;
https://i.imgur.com/4Kn90o5.png
just hangs as soon as the text entry box loses focus and never recovers, i didnt even attempt to push or confirm anything. It hangs even if i don't change the text from the defaults! have you had any crashing issues? Running 3.5, downloaded today
Using Material Anim curves resets the value to 0 after its animation sequence has ended, anyone knows if that is by design? UE 5.1
Put a / at the end of that path, after “/Trigger”
I.e. should be “…/Trigger/“
alright blender doesnt crash anymore, now unreal crashes instead ;-; There is a very big log on both ends about it though
Fatal error: [File:D:\build\++UE5\Sync\Engine\Source\Runtime\CoreUObject\Private\Misc\PackageName.cpp] [Line: 799] LongPackageNameToFilename failed to convert '/Content/Blueprints/Objects/Trigger/Cube_001'. Path does not map to any roots.
does an armature need more than one bone?
i am having no luck getting the blender pipeline plugin working, i have created an issue detailing my problems and error messages, i hope that someone can assist
https://github.com/EpicGames/BlenderTools/issues/607
Has anyone ever run into a problem where the morph target value is locked ?

nevermind. I was using the preview from the skeletal mesh instead of from the skeleton file.
I have a small request, for anyone using blender.
Could you possibly send me a .blend file of yours that works for unreal? I will only use it for learning, i just want to compare with my own setup and see what i might be doing wrong. Doesnt really matter what it is, as long as its got a rigged mesh, an armature, an animation or two, and it imports into unreal
Does anyone here have Maya?
I need a simple file conversion to FBX!
Please if you do DM me, it'll be fast and easy I promise 🙂
Anyone with Blender and Rigify experience here? Google's being all but useless so this is my last resort
Apparently the rigify skeletons lose their IK on export, has zero movement in Blender but when I import it into UE5 this happens. No idea what's causing it and I've been troubleshooting for hours 
https://medal.tv/games/unreal-engine/clips/17QfTx0sbG-dz4/wM9ThAq9reoR

Watch Untitled and millions of other Unreal Engine videos on Medal, the largest Game Clip Platform.
how can i fix this crash guys?

I have two questions about UE4 retargeting from Paragon characters.
1: Supposedly the Orion rig prevents deformations when retargeting from Paragon characters to Mannequin. However, I have had no such luck. Is this true, or not?
2: I can't be the only one who's retargeting from Paragon characters to Mannequin. Is there a place online where people have the retargeted animations already ready to go for the Mannequin?
Also, I feel like I might be asking the wrong questions. Do people normally experience deformations of Paragon animations when retargeting? It takes me hours to fix up the fingers and such and in the end some things still don’t retarget right, like thigh position. Is there something I’m missing?
Once your animation leaves Blender and is imported into Unreal it is all Local Forward Kinematic bone animation. Inverse Kinematics is a constraint you can apply. I believe what you're seeing there is FK Animation Compression, if you disable compression settings I wonder if it will solve this.
Are you baking the animation on export?
I am not baking but I'll try that
Double click anim graph
Trying to go for the RetargetPoseFromMesh to use Dynamic IK Retargeting, I plan to have one base Skeletal Mesh and different Retarget meshes that can be selected by the player. I ask myself, which Mesh is the best choice for the Base one: the UE4 Mannequin (has most of the animations readily available) or better go for the Manny or Quinn? The retargeters for UE4 to Manny and vice versa are contained in the 3rd person template, so that should?? actually not be a big deal to go for Manny or Quinn, apart from adding more retarget chains in the process, potentially adding up small errors. I did some tests with AccuRig, this looks like a really cool tool, so another option could be to use some AccuRig character as a base one. This could even allow for using the same skeleton (or using Compatible Skeletons) and only do a RetargetPoseFromMesh for others like metahumans. Maybe that isis the best option to go for if most of the selectable characters are made using AccuRig. Are there any recommendations and best practices? Or is my plan not a good one at all?
You’re are right about all this, one note on the new ue5 rig is that it’s not 💯 the same as the old one. I like yo stick to the old one because all has always worked for it. All companies base off of the original one. I’m actually doing the exact same thing as you and test out some things.
Thanks so much for your answer. Yes, the UE5 version differs, I checked them. The old one seems to be some proven one. I'll follow your advice and go for this one for now - not being on a wrong path if doing it like all companies do makes me feel a lot better. Again, thanks for this.
Yeah I’ve worked with reallusion assets, mocap and marketplace never had a problem with the original
I created a control rig in order to animate my character but I'd like to know if it's possible to start the sequence with a pose from another animation that wasn't made with a control rig instead of using the A-Pose as base.
Go to the animation and bake it to the control rig
May I ask you how do I do that? I can't find how.
Go to animation asset
Go to top of screen
There is some button about baking or something like that.
Click on that and then bake to control rig
Can't see anything.


Thank you!
@tranquil lark or anyone else, do you happen to know if its possible to animate sockets using control rig? I have a simple character wielding a sword via a socket attachment but not sure where/how to learn about animating for weapon use
Sockets are attached to skeletons, you animate the skeleton and the socket follows
You can animate via Blender, Maya, Control Rig, etc..
when you add an anim blueprint do you guys know if there's a way to check how far into the animation we are?
Like return a % or at least a float value of the place in the time line we are on?
There are these nodes used for transitions, not sure if that's accessible anywhere other than the transition rule though https://docs.unrealengine.com/4.26/en-US/AnimatingObjects/SkeletalMeshAnimation/StateMachines/TransitionRules/


Guide to rules that govern State Machine Transitions
When you have told them dozens of time that scale matters and they continuously blow you off until it's so obvious they can't possibly ignore the fact anymore......

When they keep asking you why the animations look so off on their characters and you tell them and they ignore it like you don't know what your talking about until it becomes a serious issue they can't ignore....
oof
We had that issue a lot but our issue was ... "we're just gonna scale the character in game"

can confirm that baking did absolutely nothing 😩
Thank you so much! these nodes, where do they live?
I was only finding them in the transition rules.
I wanted to catch how far (fraction) we traveled in the animation.
Then use that and start another animations state with that 'start position'
So I was trying to figure out how to catch it.
Any more info always welcome thank you battz.
if you're able would you be able to send through the fbx?
I've been poking around different tutorials and one that I fall back to often is the following linked video. At the time linked, you should see transform bone nodes being inserted into the main states... thing... Would this be something a blend space could do or is there possibly a cleaner way rather than just yeeting these nodes in middle of this animgraph?
https://youtu.be/ZP05zJ0WsgY?t=559

In this tutorial, I will take you through how to make a first person camera using IK and mouse input.
0:00 Intro
1:26 Setup
5:42 Leaning Forward IK
11:40 Leaning Forward Blueprint Communication
13:58 Leaning Sideways Setup
16:07 Leaning Sideways IK
Please consider supporting this channel through Patreon: https://www.patreon.com/SpyderWebStudios
What's your use case?
The things which come to mind in this situation are evaluating an animation curve or using sync markers to tell an animation to synchronise in a way that's non-standard.
This fbx doesnt contain a skinned mesh, it can't be imported
whoops sorry wrong files
this is the right one
I'm gonna do a test of my own but one thing I notice is your scene scale appears to be incorrect in Blender and your root bone is scaled down to 0.01 to compensate
This could be causing errors in bone rotation calculation 🤷
I honestly don't understand that, I've always had Blender's scale at Metric 1. Only causes issues if I set it to .01, like the skeleton importing, but its miniscule
I would approach this by exporting the default cube or the mannequin from Unreal and importing to Blender and comparing the dimensions between the two software. The default cube for example should be a 1m cube and the mannequin should be 180cm tall.
I just did an export of the manny skel mesh to confirm:

Oh my bad, there's one massive gotcha with this, the top node locator/empty of manny in when imported to blender is 0.01 scale:

I know this is a total noob question but I downloaded this model file and when I import the materials donot have texture applied to them. What can I do?

instead of doing this, is there a way to cache an input param?


Unreal Engine
Unreal Fellowship: Animation applications are now open. Sign up and continue on your path to real-time animation success.
Yeah, you can do that but it's really not a good idea in my opinion. Especially not regular geometry. I don't believe deforming geo is effected the same way, but regular geo like couches and walls and cars generate Distance Fields based on geometry of the structure and if it's small then Unreal will create a simplified version of it likely with holes in it where there shouldn't be....and if you scale this up it doesn't fix the issue....the issues with the Distance field just scales up with it. So importing things tiny and scaling them up is normally a bad idea. I'm sure other things besides Distance Fields are effected by the actual scale of things as well.
It's a performance side effect though, Unreal assumes you are importing them at the actual scale you want them....and so for performance the Distance Field of small objects like toy cars and such, will have more simplistic Distance Fields since Unreal assumes you normally don't get close to those objects for you to actually need the extra complexity in the Distance Field
Lumen actually uses these Distance Fields....which is why importing tiny objects and scaling them up, will often lead to Lighting artifacts.
I'm pretty sure Distance Fields aren't generated for Deformable objects like characters though
Anyone know what needs to be done for motion warping to work correctly in UE5, I have an animation made in blender that had some movment on root and root motion enabled on the animation asset with a montage created but following everything online I can't get Motion warping to work and starting to think it's my animation

how can i fix the animation bones (yellow) to be in place as the (blue) one ?
it's a retargetted animation from my character which is a smaller skeleton to this one
That's going to be in your retargeting settings, you can try globally scaled

it might help
it can cause issues though with the fingers
in some cases...idk if they fixed that
I think they did
Set Blend to Source to 1
this enables it
if you have Full Body IK Setup for it then it will place your hands in the same location
Retargeting won't change the anatomy of your character
it places the hands and legs, but what about the neck
IK requires a chain of 3 bones
I wouldn't recommend trying to setup IK on the Spine and Neck
It always causes funny issues


so it should be off ?
it's still incorrect.. the hands are straight and foot is floating not fully stepping and touching the ground
That's because you have Global Scaling enabled, you normally don't want to use that especially on the neck. It's pretty helpful for Root Bone and Pelvis though
If I have a Giant Character and I want to translate that to a Rat and it's root motion....I will obviously get foot sliding if the root moves 5 miles with each footstep
so I would use Global Scaling and it would help make that root motion more appropriate given the rats scale
Turning FK off turns off Animation Translation
in other words your neck won't move at all in the final animation
FK works off Rotation translation....IK works off Location and uses a Solver to rotate the bones so that the end reaches it's target
so i have to set globally scaled for some bones ?
because setting globally scalled for the root does nothing..
If someone has a 5 foot arm and can touch the opposite arm, IK will try to make the arm of a normal person reach that target....obviously though the person won't have a 5 foot arm....so just using IK won't solve all problems.....if the difference in length is significant the arms will lock on your character and will never reach the target
If you have no Root Bone then it won't
I mean...
If the animation isn't a root motion animation it will do nothing
Root motion is something used to move the capsule the player controls in the game
if you play a root motion animation the user loses all control because the animation takes over
There are ways to allow both
im sure my animation doesnt have root motion
then it's not important
its a simple walk animation
I'm not sure what your trying to do
im trying to retarget a walk animation from my own character to ue5 quinn skeleton
and what's the problem?
Did you setup the bone chains with the same naming conventions?
You may need to set Pelvis to Globally Scaled, sometimes you have to play with the settings and experiment to see what works
You should probably enable blend to source for the feet and setup goals for them if there aren't any. This will make the feet follow each other. I would leave it off for the hands....I don't see why you would need everything to be in the same exact location....outside of preventing foot sliding, the default settings should work fine
@worn aurora
yeah i've tried everything. everythings named the same
You still haven't explained what it's not doing that you expect it to do
i need the animation to play the same as the other character
It would be like telling someone you have a problem but refusing to tell them what the problem is while at the same time expecting them to help you with it.
What do you mean though?
What is it doing that isn't right?
i sent a video ?
So what's the problem? I haven't seen the original animation so I have no reference, for all I know that's how it's supposed to look
one sec
One is a Skeleton with no Metacarpal bones and no twist bones....so you have to go through and set those to None

The names on the Left should match the names on the Right
if they don't they are wrong
if they are wrong they will cause problems
Also your Assigning your Neck to the Head
normally the Head is a Chain of bones from the Neck to the Head
Neck_01, Neck_02, Head
only messed up the animations
Look
I can't stress this enough
A is not equal to B
If I guide the thigh bone using animation data from the arm bone....it's going to look funny
If I guide the UE5 Metacarpal bones using the First Finger Bones I end up with twisted fingers
The ones on the right are telling the ones on the Left how to Rotate
They often leave important information out

I always try to find multiple videos on the same subject
You left the MetaCarpal bones
you can't do that
Literally everybody ever does this
I wish Unreal would fix that so people would stop overlooking it
yea i didnt chain the metacarpals
Set those to None

because they weren't rigged
The Metacarpal bones are for the UE5 manny
your telling the UE5 Manny right now to treat both the LeftIndexMetacarpal bone and the LeftIndex as the Left Index
the Metacarpal bones are inside the hand....they aren't actually finger bones

You need to setup a Chain from the First Neck bone to the head on your characters IK Rig
call it Head
inside the Retargeter you can set Head to Head
don't use Global Scaling for the head
it will stretch the neck

You good now?
Try setting it to Reversed Interpolation
one to one reversed ?
I think so

Try setting it back and mess with the Pole Vector
I'm not sure why it would be doing that
I've never had it do that
its supposed to step fully down
Enable Blend to Source
You can use the IK goals on the other feet as targets
and use the IK settings to make it follow the others feet exactly
blend to source is already 1.0
Well I can't see your settings so I don't know what you have set
It's why I told you to try setting the Pelvis to Globally Scaled
if the pelvis height prevents the feet from touching the ground then your feet won't touch the ground

also the Pelvis is set as the Root for both, in some cases this can actually cause issues, sometimes it's better to have the Root as the Root
or i need to make a chain just for pelvis
I would suggest looking through more videos on the IK Retargeter
to become more familiar with it, I would be here all day walking you through this otherwise
i mean all of them are terrible
The new Retargeting system is more flexible but it has a learning curve

It's all about setting Bone Chains, Goals, and Settings
Create a chain with only the Pelvis in it
I would suggest doing so for the root as well
set the root to absolute
the pelvis to Globally Scaled
I've had to experiment myself, depending on the issue, the setup will be different
Also they both have to have their Roots match
the mannequin doesn't have pelvis chain tho
If the root of one is set to the Pelvis and the root of the other to the Root bone....then it will treat the Pelvis as the root bone and it will be on the floor where the others Root bone is
It has a Pelvis
right click it and create a chain
I'm assuming you know how to do that
yes lol
If you don't then I would suggest the Unreal Documentation
what did you set the Pelvis too?

it's on none
btw all of your chains reset because you used the Auto button
yea i saw that
i fixed it
globally scalled sinks the whole character into the ground
yea absolute looks a bit better
but the foot is moving so weird
and like spazzing out or somethig
Your overthinking it....the feet don't actually need to touch the ground for them to be on the ground
once he steps on the ground his foot is stuttering
if your just trying to lower the feet, set it back like it was....go to the foot IK and add a Negative Z Offset
while the other one is smoothly moving
no look at the animation of it
it's not smooth
it's jittering
If your characters feet don't touch the ground you shouldn't expect the Mannequins too
that is only a test area....in-game when your using Foot IK in your Anim BP it will correct foot height offsets
That's about all I have for you. Don't over-analyze it. Things aren't always what they seem.....just because the feet don't literally touch the floor in the Preview doesn't mean they won't in the level
I think the feet are meant to float just off the ground in that preview
I don't believe that represents the true height of them....what dictates that will be their offset from the Root
If they meet the level of the root then they are on the ground
the root is the ground, not the grey plane
it looks like it's skipping frames
because the pelvis is too high and there is no slack in the legs
the knees are locking
slack ?
that's what your seeing
Slack meaning I can't reach something on the roof without grabbing a ladder
IK doesn't stretch
It will make the limb reach as far as it can without stretching and it will just stay there even if you continue moving the goal further and further away
You could move the goal to the opposite side of the galaxy but it still won't close that 2 inch gap
You have to bring the pelvis closer
in UE ?
you have to lower the pelvis