#HELP! 3d printer settings and errors, and Cura printing settings
1 messages · Page 1 of 1 (latest)
 bitter veldtBOT
AI Help
It sounds like you are experiencing several common issues with 3D printing. Here are some troubleshooting tips for each problem you described:
- Support Issues:
- Ensure that your model has proper support structures generated in your slicer software (Cura Ultimaker).
- Check the support adhesion settings in Cura to make sure the supports are touching the build plate.
- Adjust the support density and pattern to provide better stability for your prints.
- Consider using soluble supports for complex models that are difficult to remove manually.
- Print Adhesion Issues:
- Make sure your print bed is level and properly calibrated.
- Clean the print bed surface with isopropyl alcohol to ensure good adhesion.
- Use a suitable bed adhesion method such as a brim or raft to help your prints stick.
- Adjust the initial layer height and print speed to improve bed adhesion.
- Print Quality Issues:
- Check your filament diameter settings in Cura to ensure accurate extrusion.
- Adjust the ...
WARNING: This response is AI generated and may contain errors.
 hazy wing
HELP! 3d printer settings and errors, and Cura printing settings
im assuming its relating to infil patterns and density, the heatbed being uneven, or it being too cold or something
im just actually losing braincells tryna figure this out
 weak gazelle
hazy wing
im assuming its relating to infil patterns and density, the heatbed being uneven...
What printer?
bitter veldtBOT
Tips for better first layer success
The first layer is quite literally the foundation of a successful print. These are some of the things to keep in mind:
- Wash your print surface with dish soap and water, refer to
?bedcleaning. - Ensure your printing temperatures are appropriate. For PLA, the ideal bed temperature is 55°C-60°C. If the lines appear to come out "gummy" and forms clumps, raising the nozzle temperature may help. Calibrate your nozzle temperature by printing a temperature tower. Refer also to
?platemps. - Relevel your bed and ensure your nozzle distance is equally spaced at each corner, refer to
?paperlevel. If your printer is equipped with a bed meshing probe such as a BLTouch or CRTouch, make sure your Z-offset positions the nozzle close enough to the bed, refer to?z-offsetfor additional information. If your printer has automatic Z-offset calibration, make sure the nozzle is clean while the calibration runs. - You can confirm that your leveling and Z-offset is correct by observing your first layer extrusion by printing a full layer test: Printables, Thingiverse Refer to
?levelingfor help with the interpretation of the results. - Ensure the nozzle is not colliding with the print. This usually presents itself as loud noises and layer shifting. Some causes may include overextrusion, insufficient cooling, mechanical Z axis issues, or insufficient Z hop
- For warp-prone materials such as ABS, Nylon, Polypropylene and others an enclosure is recommended, ensure ambient temperatures are high enough (40°C+) and stable. Consider using a specialized bed adhesive.
?firstlayer requested by: m.von.d#0

GitHub
This is the wiki for the 3D Printers Discord . Contribute to 3D-Printing-Discord/wiki development by creating an account on GitHub.
hazy wing
weak gazelle
What printer?
elegoo neptune 4
i retpyed the message to be a bit clearer
im gonna edit it and fix it rq
hopw that helps a bit,
weak gazelle
Make sure your z offset is correct and your flow/extrusion multiplier is set correctly
bitter veldtBOT
Ellis' Print tuning guide
Follow this guide for easy print tuning
Guide
?tuning requested by: m.von.d#0
weak gazelle
Photos of failed prints help too
hazy wing
theyre really jsut supports being detached from the nozzel knicking it
weak gazelle
hazy wing
theyre really jsut supports being detached from the nozzel knicking it
So? If I can see that your first layer is wrong I can help you much better than bombarding you with all the stuff you may try
hazy wing
yeah no im still uploading the image lol
no worries i just said that while my phone starts up
battrey died
forgot to charge it last night
you know how it is lol
weak gazelle
No worries
hazy wing
weak gazelle
No worries
phone died while i was uploading the pictures, my charger is hot garbage so give me 3 min
i appologise lol
weak gazelle
bitter veldtBOT
Troubleshooting
A number of troubleshooting guides exist online:
• Simplify 3D Print Quality Troubleshooting
• Rigid Ink Print Quality Guide
• Institute of 3D Printing Cheat Sheet
?troubleshooting requested by: m.von.d#0
weak gazelle
Something to read in the meanwhile
hazy wing
heres the spaghetti and wiry print


heres where it got ripped up

and i had a power outage and this happened it was really bad
really really bad
💀
if u want i can record what it looks like for a second too
when it prints

Spaghetti and wiry under let
Leg*
@weak gazelle hope these help
thanks for the help again man
weak gazelle
Make sure the first layer goes down without gaps or ripples, tune the extrusion multiplier. Additionally you want to tune your aupports
bitter veldtBOT
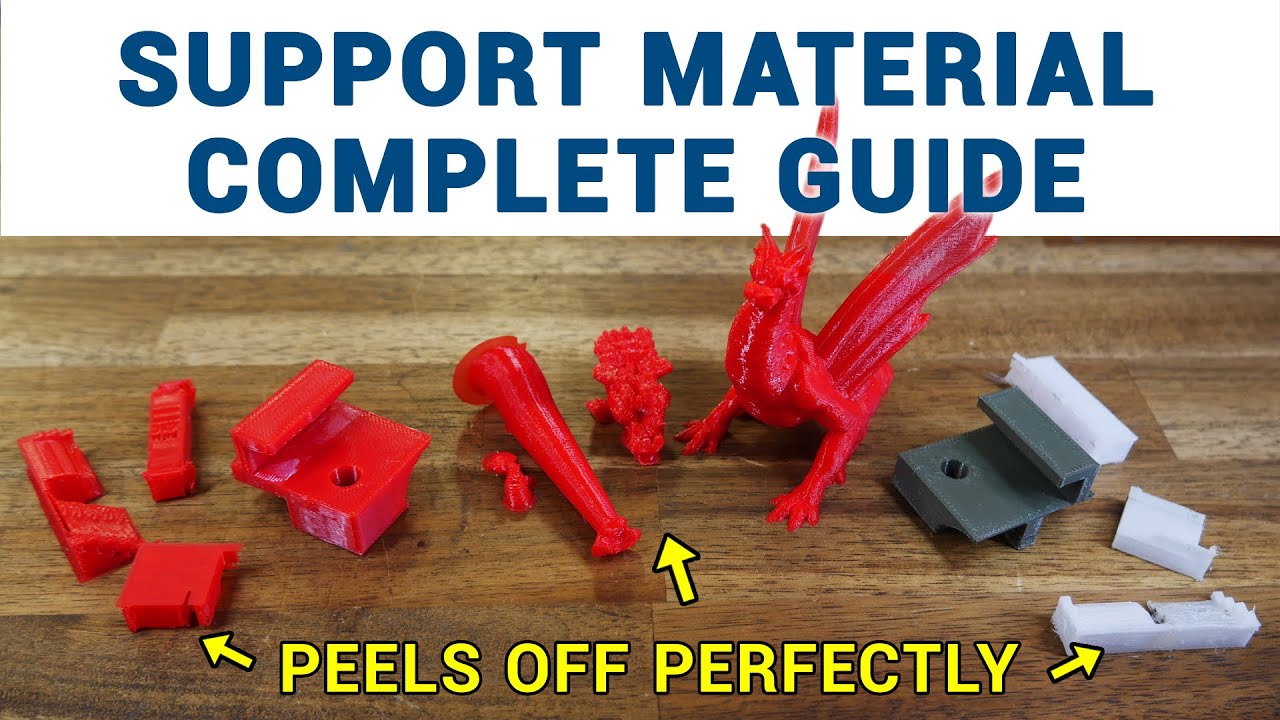
Support material in 3D printing lets us defy gravity, but it does eat up additional filament and add time to the print. My patrons requested a guide on tuning support material settings in the slicer, so this video covers the most important parameters across a range of slicers, as well as ways to apply support more efficiently.
0:00 Introduction...

In this 3D Printing 101 I'll show you how to generate the strongest, most reliable support structures around! But be warned! These supports are only for models that need it... because they're incredibly tough.
The Ultimate Book of 3D Printing Tips and Tricks (FDM/FFF) - https://www.makersmuse.com/3dprintingtips
Example project files available...
hazy wing
weak gazelle
Make sure the first layer goes down without gaps or ripples, tune the extrusion ...
ok cool ty
i just recalibrated it
im gonna give it a test run rq
and thanks for the videos imn going to check them out
thanks so much!
@weak gazelle here’s a video for example
Should I have the print speed, filament flow and fan speed on low first
yeah its tearing it up in some spots
is that a cura error or an actual printor error
It’s like peeling back
It did it last ime
Lasttime*
im having a hard time really leveling it
i cant get it right idk
ive even done the paper test thng
bitter veldtBOT
hazy wing
ive even done the paper test thng
Leveling Your Printer
Here is a handy infographic that will help with levelling your printer.
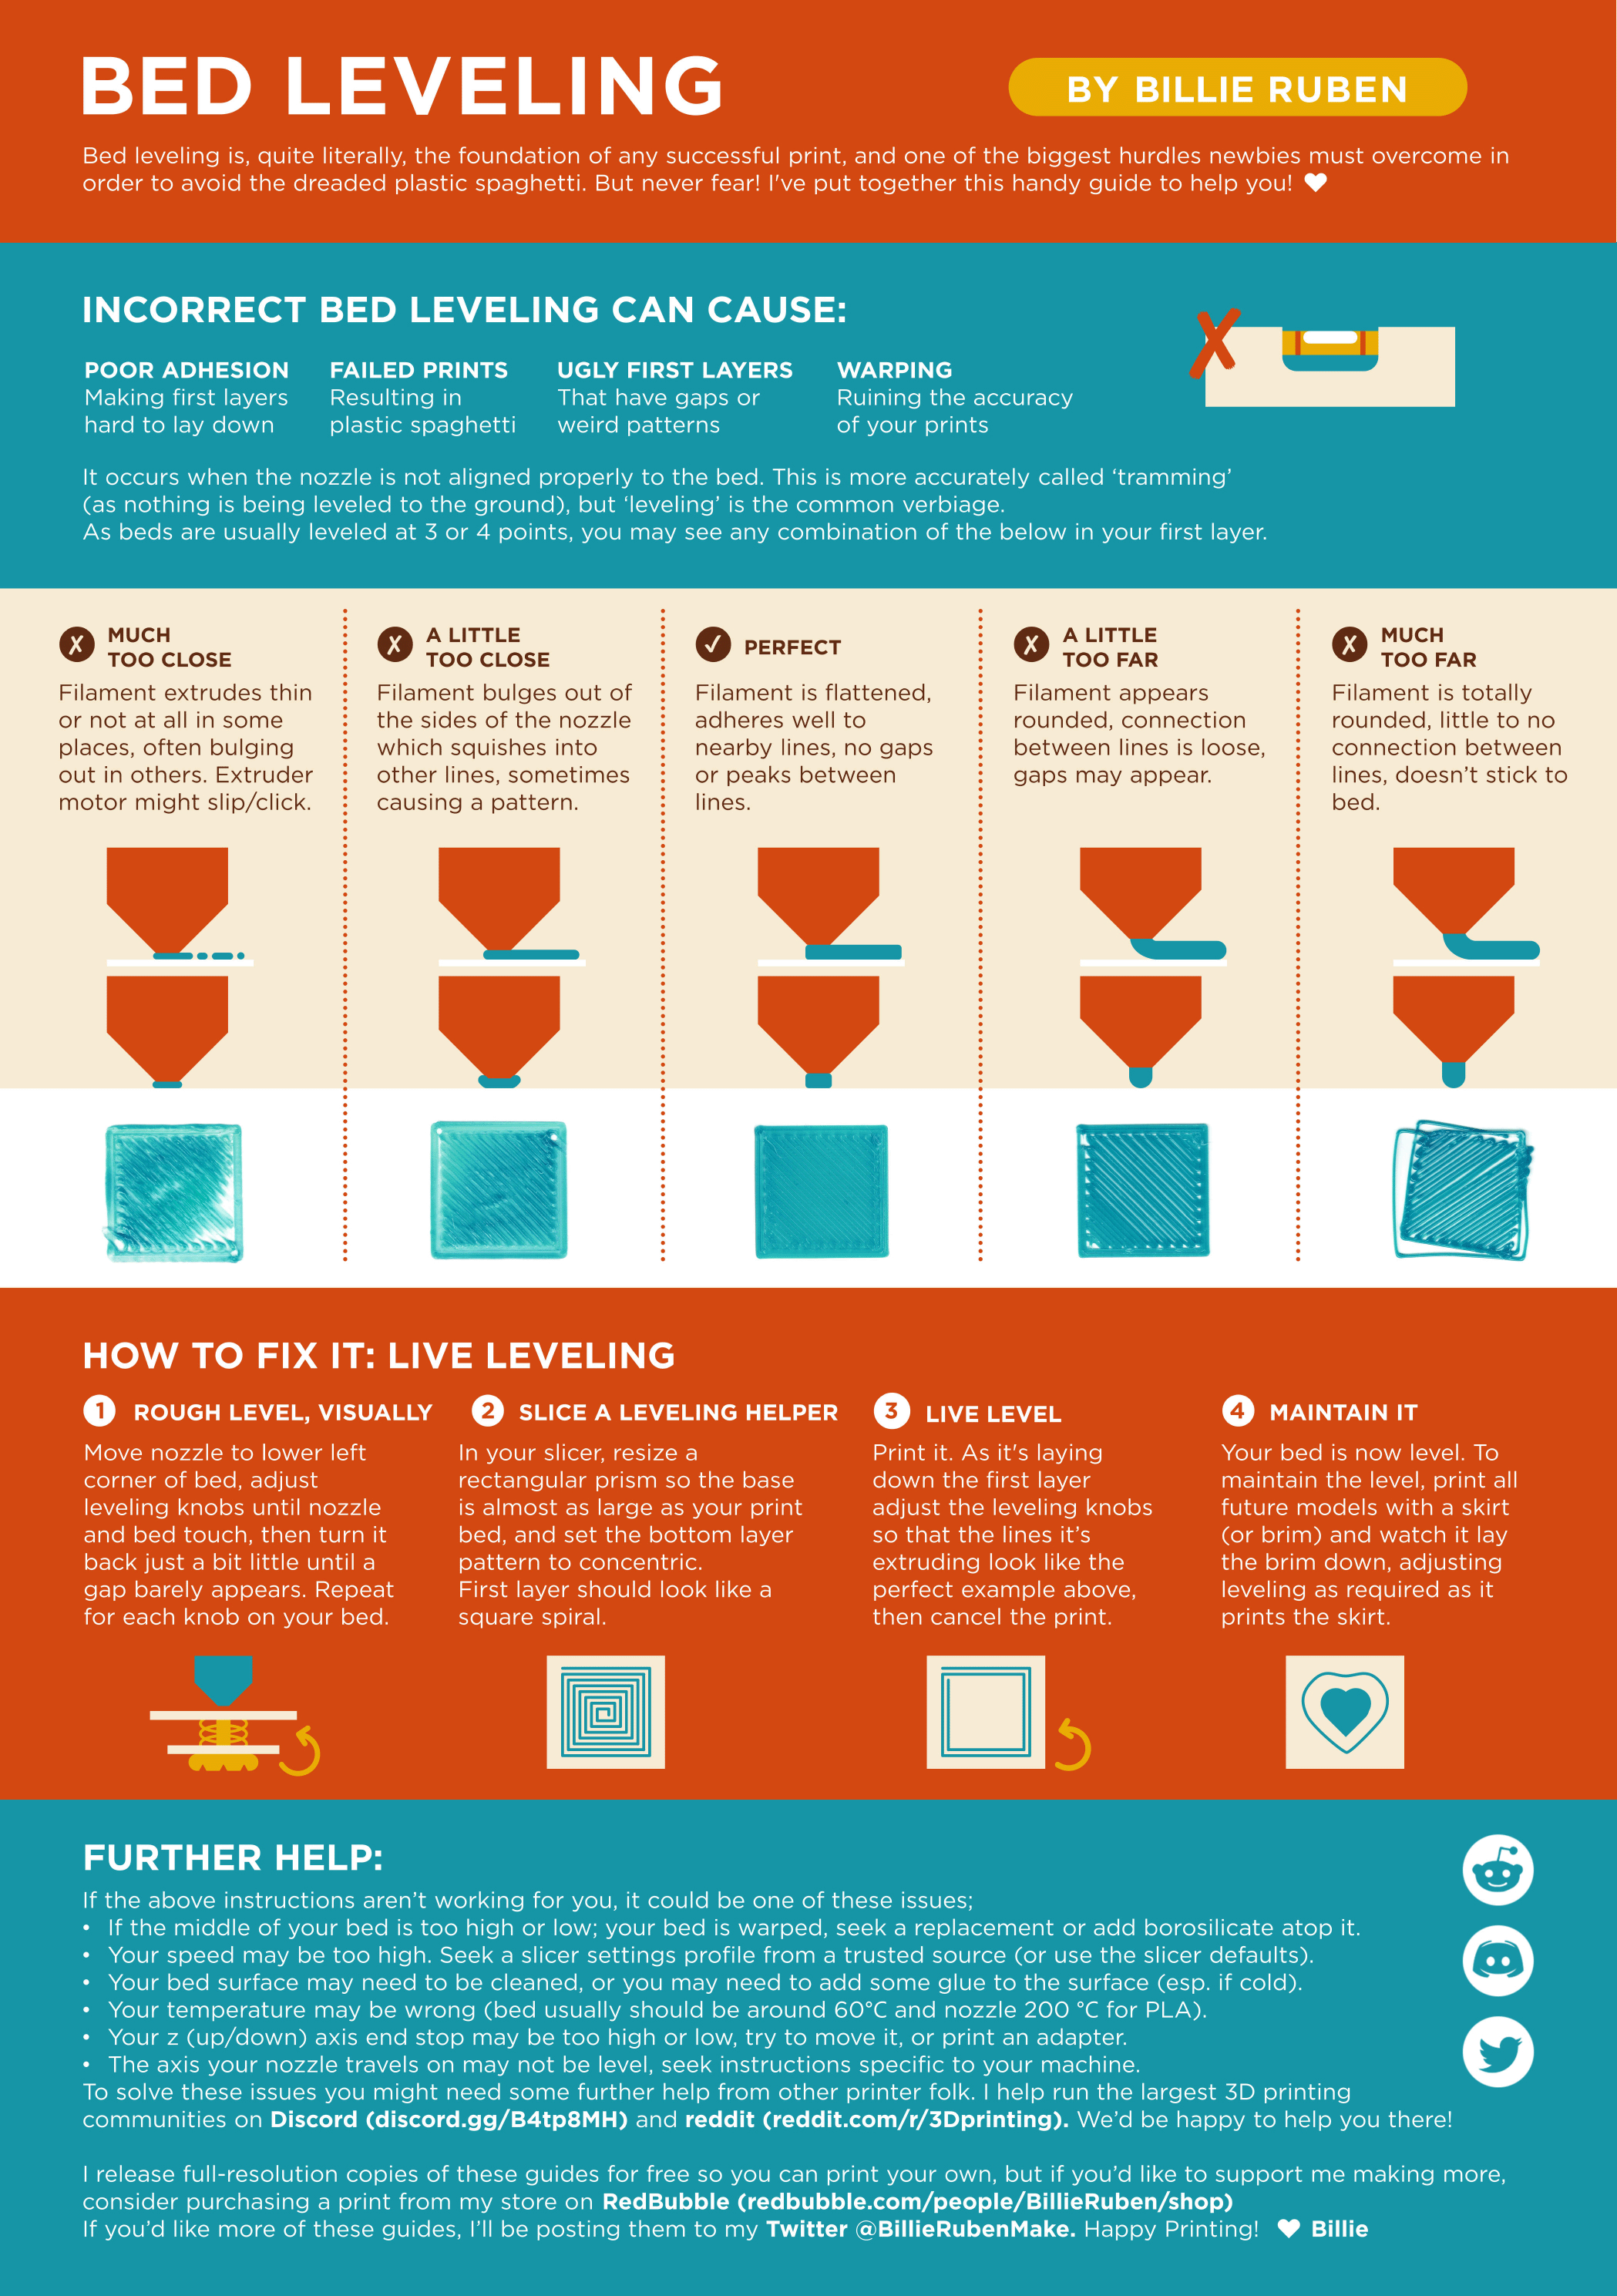
?leveling requested by: m.von.d#0
Leveling your printer with paper
While often recommended, paper "leveling" also often causes issues for people. The reason is simple - it is a very inaccurate way of levelling your bed. Theres no defined units, you are working off feel alone and that is highly subjective. It's not easy to explain through words - "just scraping the paper" can mean something to one person and something completely different to another.
What paper levelling is useful for, is getting the bed at the same height away from the nozzle in all four corners of the bed. As long as you can consistently make sure you have the same "feeling" for each corner, your bed should have minimal tilt in relation to your gantry.
It may be higher than it should be, it may be lower than it should be. But you can easily correct that - print something, look at the first layer and just adjust the levelling knobs accordingly. Since your bed should not be tilted anymore, you can easily turn each knob, in the exact same increments to raise and lower it, or adjust Z offset on your machine or slicer (refer to ?zoffset).
This of course, assumes your bed is not warped.
?paperlevel requested by: m.von.d#0
weak gazelle
Paper only gets you so far
Looks fine from the video though. Have you cleaned the bed?
 white jungle
(side note: we were checking belt tension earlier)
For ref.
#✅|help-quick-questions message