
#3d printer failing to print my model!
1 messages · Page 1 of 1 (latest)
 green wasp
 daring dragonBOT
green wasp
I tested the printer on a different model and it worked well! However on this mo...
AI Help
I'm glad to hear that the printer worked well with a different model. Based on your description, it seems like the issue may be specific to the model causing the print to fail. Without seeing the images provided, it's a bit difficult to troubleshoot the specific issue with the print. However, common reasons for failed prints include incorrect settings, bed leveling issues, slicer settings, or model design errors. I recommend checking these factors and ensuring they are set correctly for the problem model. Feel free to share the images for further assistance.
WARNING: This response is AI generated and may contain errors.

 green wasp
 hollow crow
i think ur z offset is extremely low
it prints with other models just fine(that were quite smaller) or printed in the center of the plate
so I recallebriated each of the corners
just enough so I felt a small bit of friction in the paper
hopefully that with yield better results
green wasp
also see its printing off the bed a bit on the side
which is for the supports
im hoping the print doesnt fail because of that
hollow crow
im more concerned about all the bubbles.
3 buibbles there

whole lot of bubbles here

tells me the z offset is bad or the build plate is dirty
could be massive overextrusion too but then it would have stayed onthe bed and not come apart that way
green wasp
hollow crow
could be massive overextrusion too but then it would have stayed onthe bed and n...
yeah i have no idea why the smaller print works so flawlessly
maybe it was just cause I didnt calibarte the corner things
hopefully that fixes it
hollow crow
smaller print worked better probably cuz it has a lot less potential to fail
green wasp
hollow crow
smaller print worked better probably cuz it has a lot less potential to fail
Yeah don’t think it worked

Idk maybe the problem is my design
hollow crow
whats going on here
 green wasp
Where is that
 green wasp
No idea
Maybe it’s way to close?
If it was way too close I feel like the little print would fail too
I think ima slow it down a lot
Maybe 0.28 extreme fast is too much size in between each layer
going to
0.2
200mm per second
hopefully that helps
hollow crow
my bet is still on z offset being too low until i see otherwise
green wasp
hollow crow
my bet is still on z offset being too low until i see otherwise
shouldnt it have some friction with the paper?
hollow crow
no thats just to get it started
green wasp
less then that
hollow crow
z offset is when u eyeball it from first layer
green wasp
can i send a photo
hollow crow
uve sent 4 already why ask to send a 5th?
green wasp
hollow crow
uve sent 4 already why ask to send a 5th?
I eyeballed it
and it looks like its almost touching the plate
is that were its meant to be?
green wasp
hollow crow
my bet is still on z offset being too low until i see otherwise
Your defo right, Looking at this video I have the same exact problem
https://www.youtube.com/watch?v=4WmS4Z9VopQ
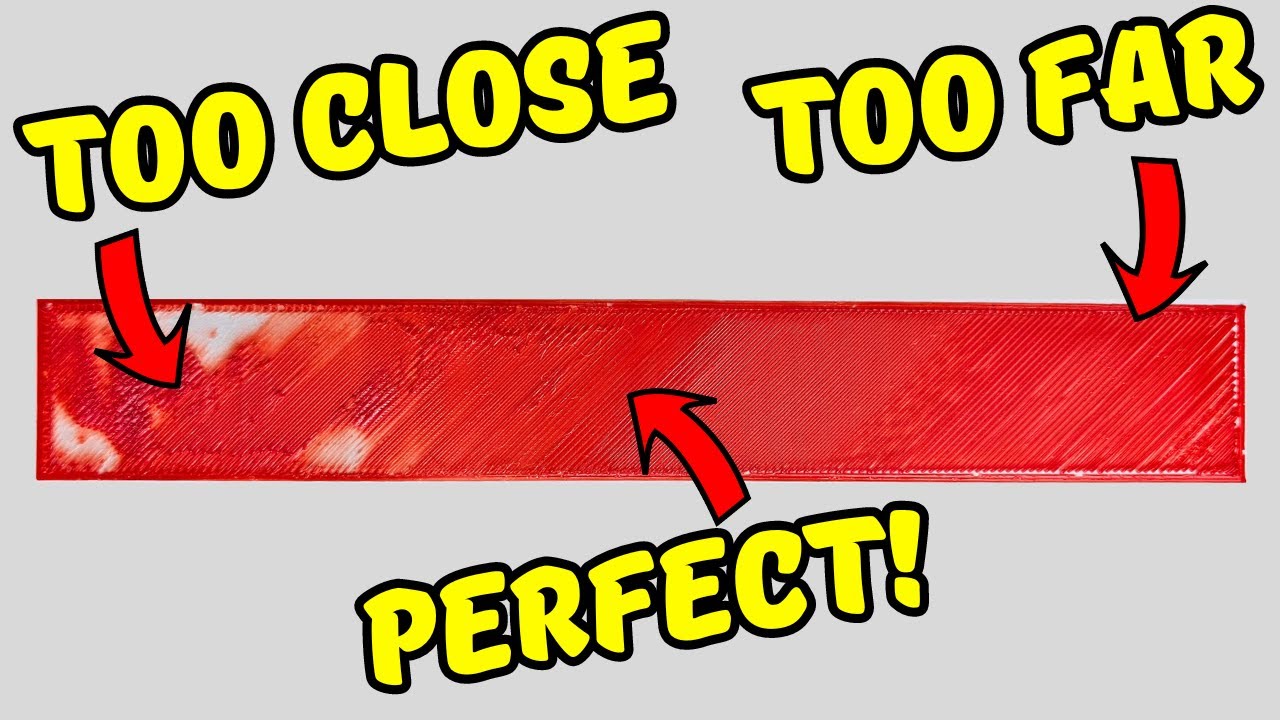
So you know you need to tune your Z offset for great first layers but how do you know when it's right?
In this video I'll quickly show you what your looking for when trying to dial in your Z offset with examples of what you might be seeing on your 3d printer so you'll know what you need to do to improve things.
**10% Discount on your first F3D...
hollow crow
mmmmmhhhhhmmmmmmmmmmmmmmmmmmmmmmmmmmmmmmm
daring dragonBOT
This post has been closed due to inactivity.
This post has been inactive for over 1 hour and so has been closed. To reopen this post simply send another message.
green wasp
🤔
 mild lodge
green wasp
I eyeballed it
did you eyeball it from a first layer test? or just set z to 0 and see how far the nozzle is from the bed
green wasp
mild lodge
did you eyeball it from a first layer test? or just set z to 0 and see how far t...
I grabbed a piece of paper
Lowered it till I felt a bit of friction
mild lodge
do what the video tells you to do #1283973180825927770 message
 proper bronze
?paperlevel
daring dragonBOT
While often recommended paper "leveling" also often causes issues for people. The reason is simple - it is a very inaccurate way of levelling your bed. Theres no defined units, you're working off feel alone, and that is highly subjective. It's not easy to explain through words - "just scraping the paper" can mean something to one person z and something completely different to another.
What paper levelling is useful for, is getting the bed at the same height away from the nozzle in all four corners of the bed. As long as you can consistently make sure you have the same amount feel for each corner, your bed should have minimal tilt in relation to your gantry.
It may be higher than it should be, it may be lower than it should be. But you can easily correct that - print something, look at the first layer, and just adjust the levelling knobs accordingly. Since your bed should not be tilted anymore, you can easily turn each knob, in the exact same increments to raise and lower it, or adjust Z offset on your machine or slicer. This of course, assumes your bed is not warped.
daring dragonBOT
This post has been closed due to inactivity.
This post has been inactive for over 1 hour and so has been closed. To reopen this post simply send another message.
green wasp
guys
like im still having the problem
i reset all the settings
redid all the leveling and setup
and its still not printing well

Like I’ve been trying for jours
Just to get this printer working
green wasp
Sob 😭
green wasp
I’ve been messing with the z offset for so long
 noble birch
yeah check the elegoo discord/reddit. they all had z offset issues lmao. amazon actually has the 4 series flagged in their system with that known issue. they let me return mine outside the return period lol
green wasp
I can return mine
noble birch
you can eventually get it to work tho. if you havent already, upgrade to the latest firmware. you have to update the MCU and the touchscreen separately. make sure you read the instructions very carefully bc if you do it wrong, or in the wrong order, it will brick your printer and you'll have to reach out to elegoo for them to ship you an emmc to reflash everything
green wasp
noble birch
you can eventually get it to work tho. if you havent already, upgrade to the lat...
It’s already on latest
Whatis mcu
green wasp
noble birch
i think you update mcu with USB and the touchscreen with SD
I believe everything is updated
noble birch
which model do you have? do you have the leveling wheels to tram the bed?
noble birch
did you do Screw_tilt_calculate?
noble birch
lmao the paper doesnt do anything that's just a starting point
noble birch
right im telling you that that does not work
green wasp
I think the overall z axis is the issue
Or the nozzle or something
My nozzle is blue now
green wasp
 noble birch
you need to actually tram your bed. easiest way to do that is screw_tilt_calculate. the elegoo discord has the code that you can put in to be able to do that. this will tell you exactly how many turns to turn each leveling wheel so that they are flat.
then you need to do the live-z offset workflow
you print this slowly. and live adjust your z offset until you see the correct results. you do this while it is printing
green wasp
Thank you so much
green wasp
noble birch
you print this slowly. and live adjust your z offset until you see the correct r...
Can you slice it for me
I’m printing petg
noble birch
and ofc if it gives you too much trouble, return it and snag an sv06 or a1 mini instead, if possible lmaoooo
green wasp
Okay 👍
green wasp
green wasp
Can you slice it for me
? @noble birch
I want to minimize the things I can do wrong
noble birch
haha im not by a pc or i would
green wasp
noble birch
haha im not by a pc or i would
Okay I’ll go on default 0.2 settinggs
How do I slow it down
noble birch
just print it at like 50mm/s
green wasp
okay im about to print
noble birch
ok cool. when you change the z-offset while it's printing, make sure you make very tiny changes. like +/-0.05mm if possible
this is how to interpret the results
 green wasp
Idk what’s going on
Ima restart the print
Yeah…
Look at this

Like what is going on
I think something is mechanically bad

A
 noble pine
Hmmm
Judging from all the z offset you've been doing, it's probs not that
What uhh z thing do yoy have
Linear rails, 2 or 1 screw e.t.c
green wasp
I have
 frosty patio
green wasp
CLean your bed
green wasp
Elegoo 4
frosty patio
Wash with dish soap and water
green wasp
frosty patio
Wash with dish soap and water
It’s perfectly clean
noble pine
frosty patio
Wash with dish soap and water
He has Elegoo 4
frosty patio
no
noble pine
:O
frosty patio
the thing is not sticking anymore, it usually means its dirty
and you can't use isopropyl alcohol to clean that thing off. That thing doesn't remove oils
green wasp
I’ll clean it cus I have tried everything else
frosty patio
you need an emulsifier to have the oil rinse off which is what dish soap is
green wasp
The nozzle is like picking up the filament
frosty patio
then figure it out tomorrow
green wasp
50mm
frosty patio
hmm, that seems odd
green wasp
This printer is advertised at 500
frosty patio
try lowering it even further for the first layer
frosty patio
green wasp
This printer is advertised at 500
that's just the peak velocity
and sometimes it usually causes the stepper motors to skip even before getting there
noble birch
they mean the speed
frosty patio
try lowering it further for the first layer
frosty patio
nah
you can print really slowly at the first layer then go ram at the second and next ones
green wasp
I can only change it in the digester
frosty patio
if you look at benchy world records, they also print the first layers REALLY REALLY SLOWLY
frosty patio
lower it for the first layer
your slicer should have a first layer speed setting
something like this

 thorny sedge
do you have the correct temps?
frosty patio
250 should print petg okay
not great but it should do it
try bumping it up though
green wasp
frosty patio
something like this
I have cura softeare
frosty patio
green wasp
I have cura softeare
afaik even cura has this
thorny sedge
and is it just this print or every and other filaments
frosty patio
just search around their settings
noble birch
rn they're literally just trying to print a single layer rectangle lmao
green wasp
Ima stop this rectangle
noble birch
yeah once it fails, p much start over lmao. mine failed at the borders multiple times
 noble birch
too low
green wasp
Okay
noble birch
noble birch
this is how to interpret the results
.
next time, just raise the z-offset while it is printing
thorny sedge
looks like too low Z and idk how well should PETG stick to the bed
green wasp
Bruh I raised it up a bit and seems like it’s looking a lot better
thorny sedge
👍
 thorny sedge
ye
thorny sedge
I think that the gaps are just from the filament not sticking
green wasp
When I took it off it turned into string :I
green wasp
thorny sedge
I think that the gaps are just from the filament not sticking
I’ll increase bed temp
thorny sedge
should be arounf 80°C or more
green wasp
Alr I’m running 85c
Let’s see how it goes
85c higher nozel.
Time to test on a actual print
stills lots of space
in between each lin
thorny sedge
well its super out of focus
but the top should be completely flat and with no spaces between the lines
green wasp
thorny sedge
but the top should be completely flat and with no spaces between the lines
theres lot of space
when i took it off
it just turned into string
time to print what ive been trying to print
dropped down speed to 24m per second on first layer
then 300mm afterwards
hopefully that works
hollow crow
Refund. Get bambu
green wasp
hollow crow
Refund. Get bambu
does anyone know how i would repair it
cus
something is wrong
prob something small
hollow crow
what is it we are repairing again?
i thought it was ur z offset initially what changed?
@green wasp
mild lodge
What are you on about? 😂
hollow crow
he said his printer wont work
green wasp
hollow crow
he said his printer wont work
like
it doesnt work
without making a massive plastic mess in my room
from all the stringing
green wasp
its just overall trash
green wasp
hollow crow
how about different filament
i jsut bough random chinese filament
im hoping thats not a problem
i shouuld prob try pla
im printing really slow rn
maybe it needs to warm upo
hollow crow
what brand
 woeful inlet
green wasp
it just dont work
Thats a contradiction. #1283973180825927770 message Thats still the state of things currently?
green wasp
i slowed it down a lot
and just let it print
even though i saw stringing and stuff
somehow its working
maybe after a few prints the printer will get better
woeful inlet
green wasp
maybe after a few prints the printer will get better
thats not how it works unfortunately
green wasp
woeful inlet
thats not how it works unfortunately
its gonna take 12hours to print cus how slow i made it
hopefully it works lol
woeful inlet
good luck
green wasp
woeful inlet
thats not how it works unfortunately
hopefully it starts working i think the issue is i didnt wait and wherever i saw stringing i cancled it
woeful inlet
green wasp
hopefully it starts working i think the issue is i didnt wait and wherever i saw...
Faith will not magically make it work
daring dragonBOT
Troubleshooting
A number of troubleshooting guides exist online:
• Simplify 3D Print Quality Troubleshooting
• Rigid Ink Print Quality Guide
• Institute of 3D Printing Cheat Sheet
?troubleshooting requested by: m.von.d#0
Calibration
Calibration and tuning can help with all aspects of print quality.
Extruder calibration should be done only once, and then again if you change any hardware on your extruder setup (new tube, gear drive, different motor, etc).
Flow calculation should be done for every filament, even different colours from the same brand.
A number of calibration and tuning guides exist online:
?calibration requested by: m.von.d#0
green wasp
SCROLL UP
woeful inlet
green wasp
SCROLL UP
where to?
green wasp
green wasp
a
green wasp
green wasp
hewfg
i bet i can bump it up to 200mm a second now
it would prob run fine
woeful inlet
I read the thread....did you actually do anything people have told you? Z offset calibration, bedcleaning etc?
green wasp
yes
If u look at all the images i got the z offset really good
i believe the issue is petg, just isnt the easiest material to print
I should of just bought some pla+ and called it a day
Update: I beliveve the problem is stringing to a extreme! Thats why it worked when i slowed down the speed to 50mm a second
im gonna do reserach and preventing that
hollow crow
did u set PETG as a profile?
did u dry the PETG?
again what brand of PETG?
did u set the max flow rate and all that for the PETG?
hollow crow
it has to be printed slow. like 8 - 12 max vol flow
green wasp
thank you so much for the help
green wasp
hollow crow
it has to be printed slow. like 8 - 12 max vol flow
oh
i prob should of went with pla+ if it has to be printed slow
green wasp
hollow crow
did u set PETG as a profile?
did u dry the PETG?
again what brand of PETG?
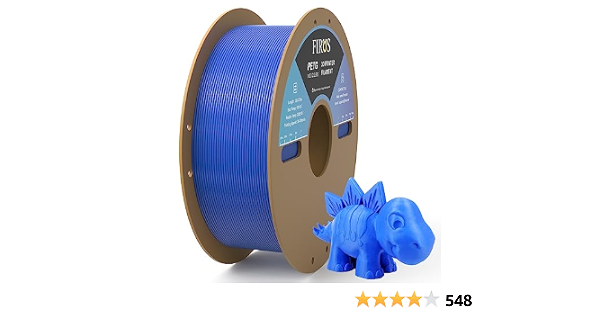
FIROS PETG 3D Printer Filament, 1kg(2.2lbs) Spool PETG Filament 3D Printing Filament, 1.75mm Dimensional 3D Printer Filament, Fit Most FDM Printer, 1 Pack PETG Blue

im watching videos on this hopefully by my next print ill be able to go atleast 150mm

80mm looks like a good speed
thats prob why my prints were falling
I was running like 350mm
im now doing 50mm and getting quite a lot of it
so i guess i have to do more improvements
hollow crow
green wasp
https://www.amazon.com/FIROS-Printer-Filament-Printing-Dimensional/dp/B0BV2J3VDG...
i got mine back when it was $16 and it was on sale for $12. i had zero problems with it
 green wasp
ye
green wasp
hollow crow
i got mine back when it was $16 and it was on sale for $12. i had zero problems ...
what speed u printing at?
hollow crow
petg will string if wet. and its just overall hard to print wiht good quality.
300
but its about vol max flow
not really speed too much as a factor.
green wasp
hollow crow
petg will string if wet. and its just overall hard to print wiht good quality.
how do i maek it dry
i didnt spill water
hollow crow
see how slow im printing, but the spool is feeding quite quickly
cuz im maxing out vol flow rate. its hitting 18 nearly the whole time
PETG absorbs water over time. like all filaments. except it absorbs it descently fast. unlike PLA, which in my experience. take months. and even using a year old spool most of the time u cant tell its even wet.
if u have a dehydrator u can use that. or use ur print bed. theres a guide on it
?beddrying
daring dragonBOT

What if i told you that you already have everything you need to assemble one of the best filament dryers available? Don't believe me? In this video i'll show you how, with a combination of very simple principles, we can all dry filament without an oven for free.
....................................................................................
hollow crow
poke a hole at the top. for airflow to escape. u want to create an oven with airflow.
green wasp
daring dragon
https://www.youtube.com/watch?v=WC3jvuq-uq8
do i need that lol
green wasp
hollow crow
poke a hole at the top. for airflow to escape. u want to create an oven with air...
can i use the microwave 🤔
woeful inlet
Hell no😅
green wasp
hollow crow
petg is more for heat resistance.
I also have another question
in the future im gonna be using tpu
for a go kart bumper
u think i can do that? with this printer
hollow crow
100% u will need to dry TPU if u dont print longer than a few days
kart byumper yeahhhhhhhhhhhhhhhhhhhhhhhhh as long as its not going to bake in the sun
green wasp
plastic cant do that lol?
 green wasp
ima buy pla
hollow crow
so. baking sun heat. will deform pla 100%. buuuuuuuuuuuuut 45c is the glass transition temp.

which is 113.
u ever see what happens when u leave a pla print in the car during summer?
although it does depend on the thickness.
ASA can bake in the sun all year long no problem
green wasp
is asa bendable
hollow crow
fuck no
green wasp
even with low infill\
hollow crow
its a hard plastic
just like the others
@green waspapparently TPU is actually a moderate amount of heat resistance. not as much as PETG. but not as low as PLA
daring dragonBOT
This post has been closed due to inactivity.
This post has been inactive for over 1 hour and so has been closed. To reopen this post simply send another message.
green wasp
Alr guys

I printed it
It worked 🎉
But lots of stringing
And buttom is ruined
 daring dragonBOT
This post has been closed due to inactivity.
This post has been inactive for over 1 hour and so has been closed. To reopen this post simply send another message.
green wasp
Any help?


 jaunty quiver
green wasp
for one lower your z offset some more, the lines shouldnt be that visable/at all visable, and curved bottoms dont look good when that close the bed and that agressive
 green wasp
jaunty quiver
for one lower your z offset some more, the lines shouldnt be that visable/at all...
Okay
green wasp
 west apex
Brand new to printing what am I doing wrong
I had similar issues
What printer are you using
west apex
green wasp
I had similar issues
Neptune 4
green wasp
west apex
Neptune 4
Same
U have to tune z offset
Clean the nozzle
Slow down the speed a lot
That’s what worked for me(kinda)
west apex
green wasp
Same
I tuned the z offset so their is a little bit of tension on the paper
I will fix the nozzle
Would a different printer be better ?
green wasp
west apex
Would a different printer be better ?
I don’t really know that much cus this is the only printer I have
green wasp
west apex
I tuned the z offset so their is a little bit of tension on the paper
I did that and it wasn’t correct
It was too low when I did that
Bring it up a little bit
You have to find tune it
west apex
green wasp
I did that and it wasn’t correct
Ok it has to be perfect
west apex
green wasp
I did that and it wasn’t correct
Just took the apart the nozzle
Majors clog
😭
Pain
daring dragonBOT
This post has been closed due to inactivity.
This post has been inactive for over 1 hour and so has been closed. To reopen this post simply send another message.
green wasp
west apex
Ok it has to be perfect
Close to perfect lol
green wasp
west apex
Just took the apart the nozzle
Yeah mine prob has a clog or needs replacing but I’m too lazy lol
west apex
green wasp
Yeah mine prob has a clog or needs replacing but I’m too lazy lol
I broke it lol
Back to Amazon
The clog was way in their
green wasp
west apex
I broke it lol
You just broke the nozel right? The other stuff is harder to fix
Also it’s prob good ur replacing it cus you’ll get better printing performance
west apex
green wasp
Also it’s prob good ur replacing it cus you’ll get better printing performance
The nozzle was mega clogged
Like bad so I couldn’t get it off
Tried heating it still wouldn’t come off
So I used my drill still wouldn’t come off
green wasp
west apex
The nozzle was mega clogged
Did u buy a used printer
west apex
green wasp
Did u buy a used printer
No
west apex
green wasp
Did u buy a used printer
So then I used my bigger drill for concrete
And I wasn’t strong enough to hold the thing in place with pliers
And I broke tf out of the machine
So I’m retuning to Amazon
green wasp
Oh lol
green wasp
How much did you pay
west apex
For the new one ?
green wasp
Yea
west apex
I got a flash forge 5m for $520
green wasp
Nice
You can get the elegoo Neptune 4s for like 100 bucks lol
That’s why I got mine
west apex
green wasp
You can get the elegoo Neptune 4s for like 100 bucks lol
Yeah it costed me eternal pain and frustration
So I said fuk it I’ll get a better one
green wasp
west apex
Yeah it costed me eternal pain and frustration
I got lucky and mine kinda worked
west apex
green wasp
I got lucky and mine kinda worked
That’s how mine was at first
Then it kept getting worse
green wasp
Oh lol
west apex
So I said I’ll buy a nice one I really like this hobby
green wasp
What do you print
west apex
Ima comp sci major I need one anyways
green wasp
I need more things to print
green wasp
west apex
Ima comp sci major I need one anyways
Comp sci? That’s mainly coding. 3d printing is more general engineering
west apex
green wasp
I need more things to print
I was printing a hello kitty to give it to my girl but not no more
green wasp
lol
west apex
green wasp
Comp sci? That’s mainly coding. 3d printing is more general engineering
I know I took the class because I wanted to
I also printed a trash can for my car while it worked
green wasp
Oh wow
daring dragonBOT
This post has been closed due to inactivity.
This post has been inactive for over 1 hour and so has been closed. To reopen this post simply send another message.
west apex
green wasp
Oh wow
I got rid of that printer
Got a new one way better
Actually enjoy printing now
green wasp
west apex
I got rid of that printer
mine is working for now