#A baby using a machine
1 messages · Page 1 of 1 (latest)
 spiral fogBOT
AI Help
To check the pins on your Sovol Sv06 Plus, you will need to carefully inspect each pin for any damage, bending, or misalignment. Make sure the pins are securely connected to their respective ports on the printer. If you notice any issues, such as loose connections or damage, you may need to gently adjust or replace the pins. Be sure to power off the printer before making any adjustments to avoid electrical shorts or damage. If you are unsure or uncomfortable with this process, it is recommended to seek assistance from a professional technician or the manufacturer for further help.
WARNING: This response is AI generated and may contain errors.
 sharp geyser
Hello
Issues:
- The fan in power supply is not aligned properly, so I can’t put screws in
- Filament sensor doesn’t work
- The nozzle seems to be clogged
- Lines on the build plate (can’t really fix that though)
Little summary:
I’m a beginner and this is my first 3d printer, people suggested me the sovol and I’ve been having issues, so I refunded the first unit to get another, and I got another, was working fine until more problems occurred, and I gave up. It’s been sitting in my room for almost a year and I got into trying to fix it all of a sudden. I can’t return it anymore.
I contacted Sovol and they’re sending me a new hotend and build plate, but they told me to check the filament sensor, my dumbass took out two screws from the power supply and that’s how the fan ended up unaligned. I moved it with my screwdriver, so I gotta fix that. My screwdriver won’t take the other screws out and some of the screws are chipped and my screwdriver is chipped as well.
So my electric screwdriver is coming tomorrow.
 frigid patrol
sharp geyser
So my electric screwdriver is coming tomorrow.
It has the heads to remove the other screws?
frigid patrol
It'll prob work for it then
sharp geyser
Ill send a link
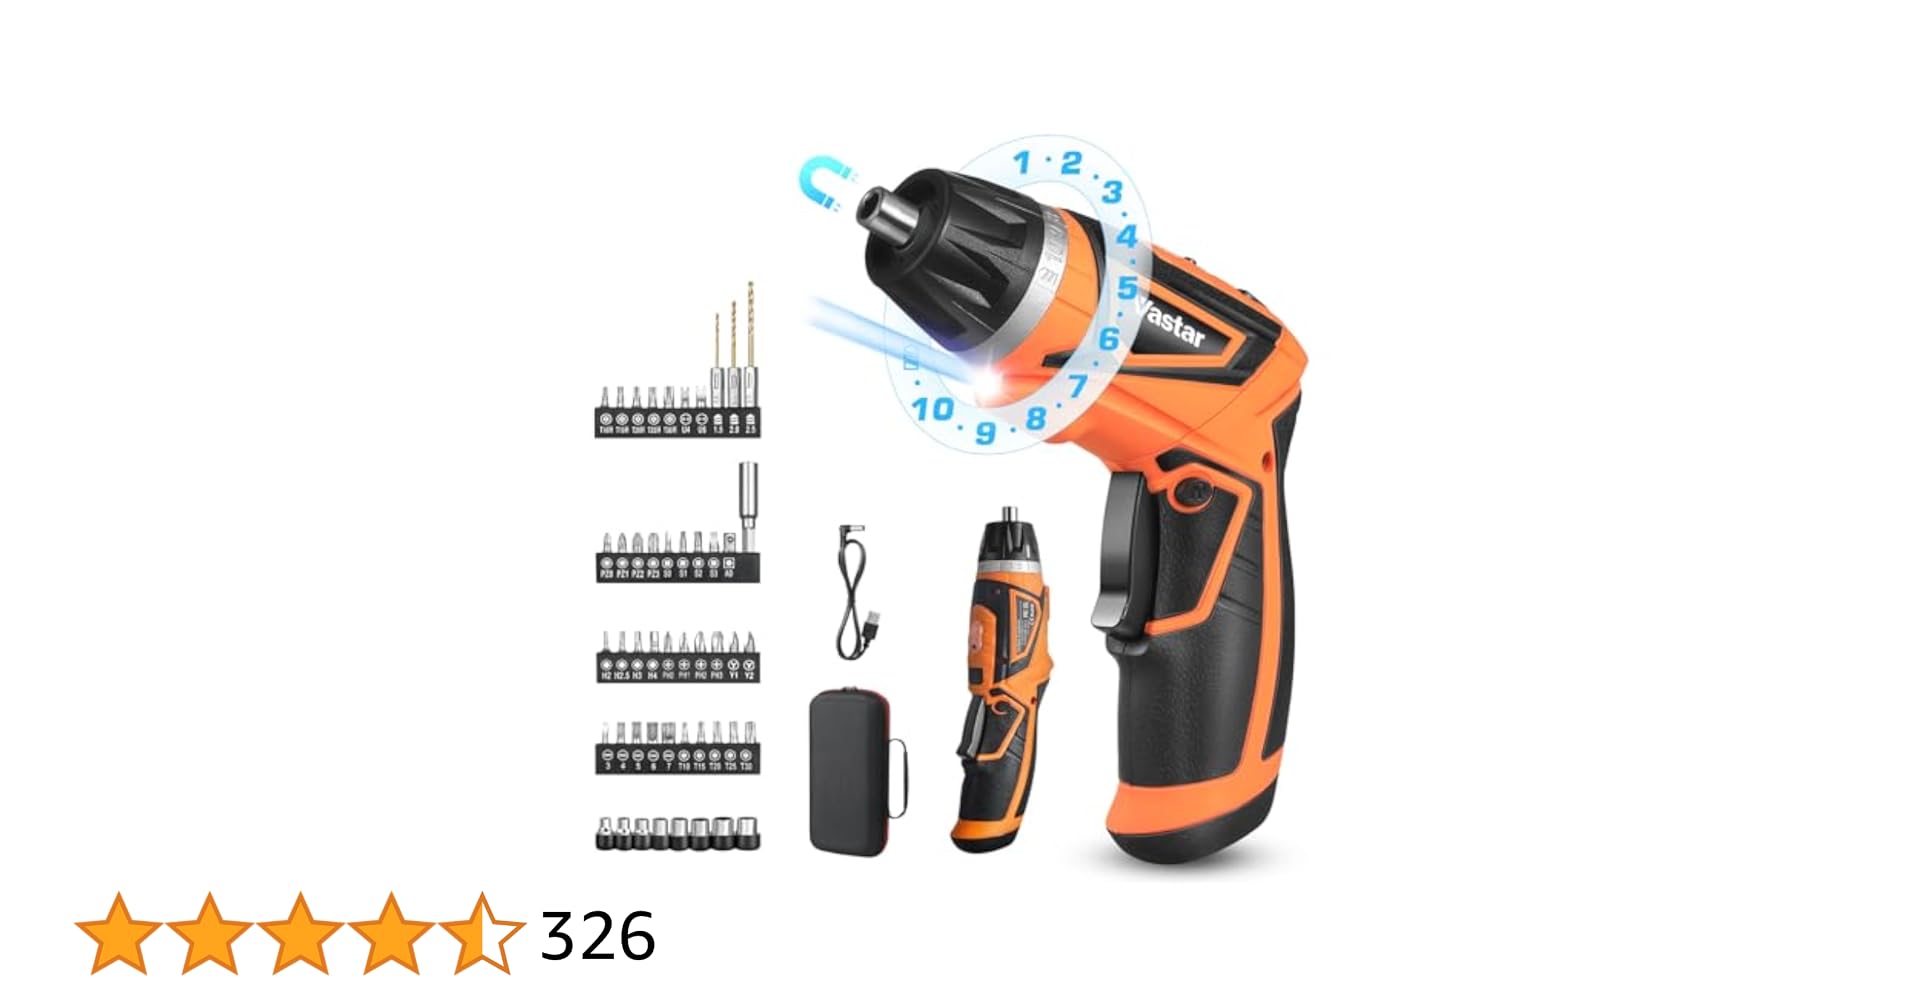
Vastar Cordless Electric Screwdriver Set, 52Pcs 4.2V Rechargeable Screwdriver Kit in Carrying Case, with 10+1 Torque Settings, Dual Position Handle, Battery Indicator, LED Light
One of these heads should work?
frigid patrol
Didnt the printer originally come with a bunch of l wrenches though?
There should be one for each screw size i think
 frigid patrol
Oh in that case yeah the one you ordered prob has it instead
sharp geyser
I’m assuming the first step is to fix the fan in power supply?
frigid patrol
Did it function even with it misaligned?
sharp geyser
Idk
frigid patrol
Did you knock it loose after using it or while you were using it?
frigid patrol
Is it resting against any other parts of the power supply?
sharp geyser
Idk, that’s why I neeed to open the power supply completely
But I can’t
Until tomorrow
frigid patrol
I see, probably safe to wait till you can then
Compared to that, the other parts are stupidly easy
sharp geyser
Also on this thing, there is a hole
 frigid patrol
(Other than filament runout sensor)
sharp geyser
If you look very close
frigid patrol
That's just the sock, you dont gotta worry about that
frigid patrol
You should take the sock off for a better look
You're gonna need it off when cleaning the filament off anyways
sharp geyser
Alright, I’ll send a better pic tomorrow. Will you be available for guidance ?
frigid patrol
Yeah, dw I'll be checking
sharp geyser
Ok
I don’t have to wait for the new hotend or build plate to start printing again?
I think I’ll have to reset up my bed and z offset
frigid patrol
Yeah, plate is just fine i have had worse, and the hotend i also had a worse looking filament clog
Everyone has clogs at some point you just gotta clean it off and it works
frigid patrol
You shouldnt need to
sharp geyser
Are you using a slicer profile?
frigid patrol
Never updated mine, honestly am worried i'd mess up my already good tuning doing it
Yes, in prusaslicer
frigid patrol
Yeah, any of the popular slicers should be just fine
Its just a matter of preference
sharp geyser
How do you know what profiles to use?
frigid patrol
Usually there are presets for known printers
sharp geyser
Do you use a profile if you are printing first prints?
Like the cube, tower, benchy, or bed squares?
frigid patrol
Yeah i used the sv06 preset on prusa and then tweaked from there as i kept doing more prints
You use it as a base and then customize it accordingly
frigid patrol
i fortunately did it in my first like four or five prints
my biggest issue was bed adhesion, so i failed and ended up clogging on a flexible dragon print
sharp geyser
It doesn’t take months or years to get good or perfect settings does it?
frigid patrol
not at all, no, i had that stuff printing fine in the next week after
sharp geyser
What do you do after you tune your settings(
frigid patrol
also, clean your plate with dish soap and water before you go to use it, it makes a huge difference in adhesion
sharp geyser
Do you change settings on the actual printer?
frigid patrol
well the one setting you mainly wanna change on your printer, after going through the bed leveling and homing steps in the manual, is z-offset
which the best way to do is get a flat 1 layer template print, the one i used was circles on each corner and the center, and watch it print those
as its printing, if you notice it's too far or too close when printing the circles, you can tune the z-offset
sharp geyser
Do you have to level the bed everyday or change the z offset everyday?
frigid patrol
no, i havent done mine in months
you shouldn't need to unless you jostled your printer around a lot or something
i did end up moving my printer and its offset did change slightly, but its still pretty much the same quality of print
sharp geyser
I’d love to set up klipper and octoprint on a raspberry pi maybe after a couple of months to a year.
frigid patrol
i set up octoprint in my first month or two i think
i can help with that, and again as i recommended, more powerful than a pi zero 2w at least, like the pi 3b+
sharp geyser
Yeah, that’s probably too quick for me
frigid patrol
mine cant handle any long prints cause of it
sharp geyser
There is so many slicer settings to learn
frigid patrol
also you can actually use an old android to set up octoprint (probably klipper too but idk)
sharp geyser
frigid patrol
mine cant handle any long prints cause of it
You can’t print helmets or swords?
frigid patrol
i did print a helmet, but i had to use the printer's sd card and print manually and not through the pi
the pi craps out if its too long printing cause its low power
sharp geyser
Oh
frigid patrol
not all pi's mind you, just the one i got, i got the cheapest, least powerful option
its why im replacing it with a tablet i dont use, should be way more capable
sharp geyser
First I gotta set up my printer properly and learn slicer stuff and basic knowledge before I get into that advanced stuff
frigid patrol
honestly, you should be able to get most of it within a week of use, the hardest part is getting started, especially if you messed up anything initially
sharp geyser
I really want to make a collapsible sword
frigid patrol
you can definitely do that with your printer
you might have to tune for tolerances, make sure it is fine enough to enable moving parts in a print, but for something as big as a sword it probably won't have to be too fine
 wanton copper
?beginner
spiral fogBOT

GitHub
This is the wiki for the 3D Printers Discord . Contribute to 3D-Printing-Discord/wiki development by creating an account on GitHub.
Troubleshooting
A number of troubleshooting guides exist online:
• Simplify 3D Print Quality Troubleshooting
• Rigid Ink Print Quality Guide
• Institute of 3D Printing Cheat Sheet
?troubleshooting requested by: m.von.d#0
Calibration
Calibration and tuning can help with all aspects of print quality.
Extruder calibration should be done only once, and then again if you change any hardware on your extruder setup (new tube, gear drive, different motor, etc).
Flow calculation should be done for every filament, even different colours from the same brand.
A number of calibration and tuning guides exist online:
?calibration requested by: m.von.d#0
 storm steppe
sharp geyser
Is there third party heads and nozzles you can buy?
heads are annoying, you can get volcano nozzles if you print a different fan shroud in at least PETG and a new probe mount, and any filament sensor should work fine, just gotta enable it with M412 S1, but sounds like you are still setting up the basics
spiral fogBOT
This post has been closed due to inactivity.
This post has been inactive for over 1 hour and so has been closed. To reopen this post simply send another message.
sharp geyser
storm steppe
heads are annoying, you can get volcano nozzles if you print a different fan shr...
Yeah I don’t know what all of that is.What is PETG?
 queen mason
PETG is a type of material
queen mason
yes
sharp geyser
What properties does it have?
storm steppe
sharp geyser
What properties does it have?
for this case higher temp resistance, but others it has slight bending, chemical and UV light resistance
sharp geyser
Oh interesting
Is there any filament that can print soft? Like could I print a ball?
spiral fogBOT
 storm steppe
kinda thuds then doesnt move
storm steppe
limits are pretty much 300C and enclosure, but i dont have too much experience with pushing other materials, just book knowledge
sharp geyser
Gotcha. Btw I’m sure you modded your printer, can I see what it looks like?
storm steppe
 storm steppe
its a extruder indicator, the old one just pops off
sharp geyser
Did you buy a new one?
storm steppe
all printed
sharp geyser
Oh, you made one
storm steppe
for that color of blue
sharp geyser
That’s sick
How do you know which ones work with the sv06 plus)

This one looks cool
storm steppe
if your printer is tuned in most any NEMA motor one should work
sharp geyser
Oh sick
Hopefully I’ll be able to start printing once I get my electric screwdriver
I just gotta do all of this
Issues:
- The fan in power supply is not aligned properly, so I can’t put screws in
- Filament sensor doesn’t work
- The nozzle seems to be clogged
- Lines on the build plate (can’t really fix that though)
And on top of that, I need to level my bed, do the z offset thing
storm steppe
1 power supply or control board? control board shouldnt really matter its position, power supply could kill you
2 whats the wiring? there is 2 positions for the sensor, and it needs the gcode to enable it
3 how sure are you its the nozzle? could be higher if you cant extrude
4 the white lines? they kinda fade over time
 storm steppe
any sort of return window? truly unfortunate
spiral fogBOT
PSU Modding: DO NOT ATTEMPT
Modifying the PSU is highly discouraged because there is an immense risk of lethal electrical shock.
The capacitors in there hold enough power to easily kill you if you touch the wrong part.
It is not worth opening a PSU. DO NOT ATTEMPT
?psu-modding requested by: jack3939#0
sharp geyser
storm steppe
any sort of return window? truly unfortunate
No, it’s been sitting in my room for months
I need to fix the fan tho
So, what do I do?
storm steppe
could leave it if its not too bad, I wouldnt mess with the insides, you touch a screwdriver to the wrong part and you get to sleep forever
else could replace the entire thing https://sv06.blakadder.com/Upgrades/power-supply/

Power supply upgrades and modifications for the SV06 3D printer
sovol isnt known for their QC
sharp geyser
I’m not sure if the fan is leaning against anything important
storm steppe
that side of the unit should be fairly empty, im not too worried abou that as long as some air is getting in there(possible fire hazzard, not too sure on that)
sharp geyser
It should be fine if the printer is off tho?
storm steppe
yeah, only problem area is it possible overheating something during active use
sharp geyser
No I’m saying me accessing the power supply when the printer is turned off
storm steppe
hard no, the capacitors in there will hold charge for weeks
storm steppe
I would still not open it, and if so have someone nearby to help if needed, but big and round, between a AA and D battery
like this has caused deaths before level
sharp geyser
Is there risk with me moving my screwdriver to realign the fan?
storm steppe
smaller chance, but still there IMO
i dont think the PSU needs much cooling if you want to print the replacment
sharp geyser
Well I’ll send an email to Sovol, they have to do something about that, no?
storm steppe
yes, but no, could take a while for them to respond and then they are in china so takes 2 weeks to get anything from them if the do want to help
 storm steppe
wait their support told you to open a PSU?
 storm steppe
asked in the main chat, 2 your fin bros, a 2 dont touch that with a 10 foot stick
id replace the while thing myself
sharp geyser
They should be able to send me a new printer under these circumstances ?
sharp geyser
Thank god you warned me
I was going to use the Eletric screwdriver and open everything up
Maybe, I should take it directly to Amazon?
storm steppe
seedy china company goes brrr again
sharp geyser
If they didn’t warn me about any danger, and they specifically told me to open it up, I should have a right to get a new printer?
Even if it’s past Warranty?
storm steppe
you can try for it, not sure the success rate on a whole new printer
sharp geyser
Wow, you basically saved my life. Thank you again.
storm steppe
they try to avoid sending out anything when they can since you are one of very many and one bad review is nothing in the scale of it
sharp geyser
So what should I do in the mean time?
storm steppe
sharp geyser
Wow, you basically saved my life. Thank you again.
why communitys exist, there whas a whole fad about using microwaves to do lightning lithographs, cause i think it was 20+ deaths from youtube alone
should be usable for now, maby slight fire hazard when printing but should still print
storm steppe
which ones? but probably
storm steppe
the fan ones?
 storm steppe
the side ones sure, not sure how you would line up the fan to get them in there
sharp geyser
@storm steppe
I’m going to leave the power supply alone, is there any risks with the motherboard?
storm steppe
not to my knowledge, but im not too much into the electronics
sharp geyser
I need to find a switch for the filament sensor
storm steppe
??
sharp geyser
My filament sensor doesn’t work as you know
And they told me to check motherboard
But as you know, I opened the power supply
They directed me on the power supply, but it ain’t safe.
storm steppe
what all have you done for the sensor? should be sperate from the PSU
wiring and slicer start gcode come to mind

 sharp geyser
Both
Well
I get a message on the touch screeen
And the light doesn’t turn on.
Additionally, I used to hear a clicking sound when I put the filament through the sensor, now I don’t hear it
storm steppe
you following the arrow for the direction to insert?
sharp geyser
I know someone who is an electrician, so he will take care of power supply when he comes back to Florida
In the mean time, I should probably get everything else sorted
Save up for enclosure, buy tools that I might need, read stuff
storm steppe
so no click means switch is problematic, I wouldnt worry too much about the sensor in the first place myself, you get an idea of how far the spool will go, but annyoing that they sent a non functional switch
you can always maky your own
sharp geyser
Can I buy a different branded born?
storm steppe
any should work as long as it has the 3 pin layout
sharp geyser
storm steppe
you can always maky your own
Hell no, I mixed up a power supply for a motherboard.
Any tools you recommend I should save up for?
I got an electric screwdriver on the way
I’m sure that will be handy
storm steppe
what the insides of the switch look like

why its one way
and for other things not much comes to mind other than 5015 fans

 storm steppe
the PSU fan is probably one of the "safer" things to mess with ,since its probably just the PSU shroud, but thats on you
for the sensor folow the wire and make sure its pluged in at the board, cant remember if that was plugged in by default
there is another option for wiring the sensor to the hotend
sharp geyser
@storm steppe
Moving the fan back to its original spot shouldn’t be a too big of a risk right?
As long as I don’t use metal?
queen mason
i really recomend you not opening up a PSU if you dont know what youre doing, ask support first if they can send in a replacement
storm steppe
sharp geyser
Moving the fan back to its original spot shouldn’t be a too big of a risk right?
opening it in the first place is a risk, this is just the least risky of a risky thing to do, I would still not do it myself
sharp geyser
Ask support for a new power supply?
queen mason
yes, or if you know someone whos experienced with mains voltage, you can ask them for help
sharp geyser
I know an electrician
It’s just he won’t be in Florida for a long time
It would be nice if Sovol sent me a new one free of no charge
queen mason
sharp geyser
It’s just he won’t be in Florida for a long time
how long r we talking?
sharp geyser
A couple of months maybe a year?
My plan was to figure out 3d printing and eventually save up for a Bambu p1s or x1c
But this is going to set me a bit off track
queen mason
p1s is just a x1c but cheaper, the difference are a couple of things that you can buy while still cheaper than a x1c
queen mason
so does p1s
queen mason
carbon fiber filled filaments? it can depending on the filament
queen mason
lets get back on the main topic, the power supply should run fine, but from this image #1279228809714995250 message it looks like if you can find a non conductive stick or something, you can poke through the hole just enough to grab the fan and align it and screw it in if you still have the screws, i can't advise you to do this though
sharp geyser
How about a plastic straw?
queen mason
maybe, not sure if its strong enough though, but please wait for other peoples opinions before doing this, as im not a qualified electrician by any means
spiral fogBOT
This post has been closed due to inactivity.
This post has been inactive for over 1 hour and so has been closed. To reopen this post simply send another message.
sharp geyser
Once I get my power supply, I should be good to go?
Should I throw the old one out?
spiral fogBOT
This post has been closed due to inactivity.
This post has been inactive for over 1 hour and so has been closed. To reopen this post simply send another message.
sharp geyser
@queen mason
Sorry to ping
I did it
I risked my life
Can you check to see if it’s correct
 frigid patrol
sharp geyser
Can you check to see if it’s correct
Comparing to mine it looks exactly as it should

Though try not to open psu again it is really dangerous, didnt recognize that till i read what the others had to say
sharp geyser
We are on track to success?
frigid patrol
sharp geyser
We are on track to success?
yeah, honestly i think at this point with your fan on properly and presumably no issues being caused with the psu, you can move on to cleaning the extruder mess
sharp geyser
Alright.
The fan seems to be working, I can feel the cooling
I didn’t hear sparks
frigid patrol
did you reassemble the printer entirely?
sharp geyser
No the big head
frigid patrol
oh so like the entire extruder block is taken off?
sharp geyser
Yes
frigid patrol
ok just reassemble all the pieces as you would've initially setting it up
frigid patrol
connect everything, make sure its fully set up cause to clean it off you need it assembled
yeah sock can be off, but you shouldn't need to take off the nozzle as it is now, at least not until you clean it off to see if there is any actual damage
 frigid patrol
that actually is much better than i expected
sharp geyser
Alr
I can’t
But it’s under the bed
Feel your printer
Anyway
The nozzle is back on
frigid patrol
Everything plugged in?
sharp geyser
I’m pressing the z - button on my printer to move the head down but it won’t
Move
Yes
Everything is connected
frigid patrol
ok dont tune the z-nozzle yet it wont move, might even damage it to try to force it through the plastic
sharp geyser
Should I press home?
frigid patrol
where is the print head right now?
sharp geyser
 frigid patrol
can you comfortably reach it there
sharp geyser
Cleaning the nozzle?
frigid patrol
cause you wanna just keep it still when you are cleaning it yeah
sharp geyser
I can
Also the needles have filament on it
How can I remove it
And what do I preheat the printer to
For the nozzle?
frigid patrol
preheat pla in the prepare option i think
frigid patrol
you dont wanna touch any of what was under the sock with your bare hands while its heated
yeah that's good
 frigid patrol
no idea i dont have one, but it does tell you how to in the manual right?
sharp geyser
I believe so
Will the pre existing filament on my needle melt from putting it inside?
frigid patrol
putting what inside?
frigid patrol
why you putting a needle in? im a little confused

 frigid patrol
ok dont use the needle at all just yet, i dont think its meant to be used when the extruder's heated
sharp geyser
What do I do?
frigid patrol
at this point, just focus on like getting a small pair of pliers to pull the bigger chunks of filament off the extruder
sharp geyser
Ok
frigid patrol
they should easily peel away with it being heated
sharp geyser
Oh so the silver part?
frigid patrol
pull the filament off the silver part yeah
sharp geyser
Nothing is oozing out to my knowledge
frigid patrol
i also used the tweezers that the printer came with to scrape off some of the smaller bits that were stuck
frigid patrol
send me a pic of how it looks
sharp geyser
Put my phone under nozzle?
frigid patrol
sure if you're certain you wont get hot filament on it
 frigid patrol
I see it, just try pulling that off with small pliers or even the tweezers
sharp geyser
Can I use a paper towel?
sharp geyser
Idk if I’ll be able to get it all of by doing that
frigid patrol
if it's like too liquidy and hard to get off in one piece, it may help to preheat to a custom temp that is lower, like 150 or 140 to where it won't liquify as much
sharp geyser
Are you sure I’m doing this the correct way?
frigid patrol
i pretty much did it like that, all you do is just pull/scrape anything off on the outside
looking up a guide its the same words with lowering the temp a bit to peel off bits that are too liquid and using pliers to get the big chunks, but they also recommended a brass brush to get the tiny bits of molten plastic
frigid patrol
i think turn off the preheat
and then do it again at a lower temp like 110-150 C to try to peel whatever is left more easily
unless you're saying like there's almost nothing to get anymore
i had little traces left on mine and i just ended up putting the sock on and leaving it, as long as it doesn't look like it'll be enough to clog or anything
sharp geyser
Do you think I’ll be able to print a benchy today?
frigid patrol
yeah, probably
i was printing in the same day and look at how bad it was, just found a pic
sharp geyser
I’m scared about those lines on the build plate
frigid patrol
 frigid patrol
im still using the same nozzle and everything after like half a year of consistent printing
frigid patrol
and the build plate scratches you have wont affect much
frigid patrol
sharp geyser
Am I safe with a paper towel
do you have any like old cloths you dont care about?
sharp geyser
Yeah I’ll use that
frigid patrol
slightly damp it and wipe while its still hot
just mainly the bottom nozzle area, i dont think you should bring that near any of the wires
try to fold it over a couple times or make sure its thick enough so you dont burn your hand in the process
frigid patrol
at this point it should be okay
see if you can move the nozzle using z-offset, try to move it up a little cause it scratched last time
 frigid patrol
ok so if you moved it up high enough to where you think it won't scratch, i'd just redo the homing and leveling process you're given on the instructions, considering you disassembled and reassembled there might be a bit of an offset compared to how you had it last
and then you finish it out by just tuning the z-offset during a level test print
before you get to all that though, might wanna double check if it actually extrudes properly first, you can test it with a filament change
frigid patrol
Gotta further tune it, give me a sec ill send you the print
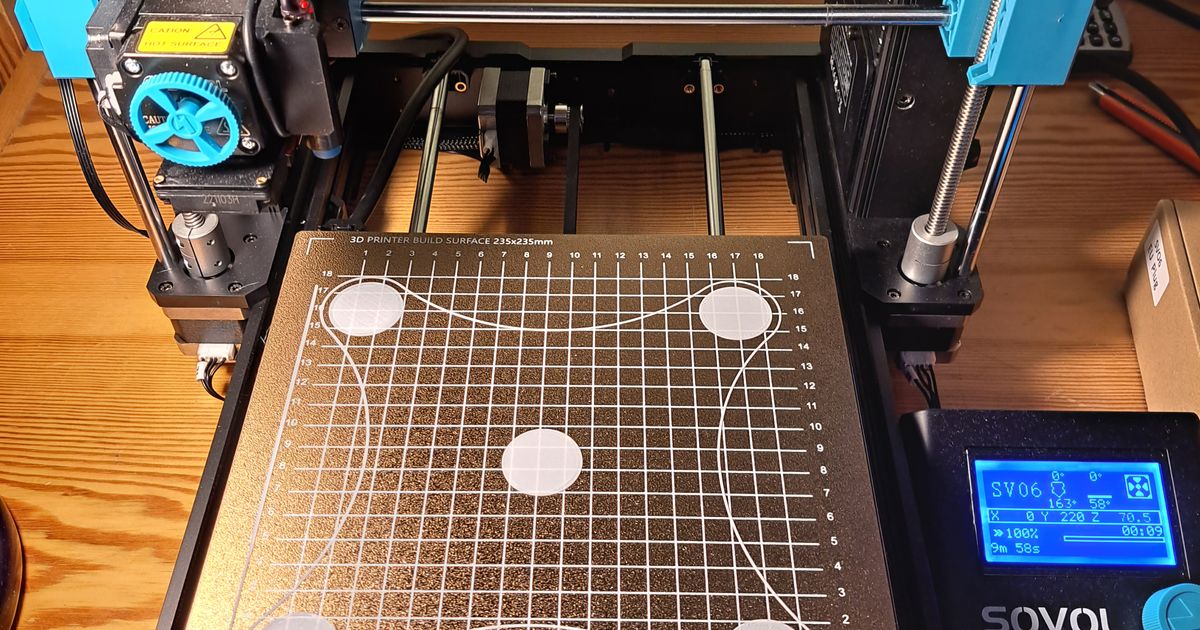
Printables.com
Small bed leveling test for the SV06, draws next to purge line. | Download free 3D printable STL models
you'll want to scale it out for x and y directions to cover the same relative space with the increased bed size
here, one of the people from the comments used it for their plus they scaled it like so:

and then while you print this, just adjust z-offset if it looks like it's too close and squishing the filament down or too far and not laying it down precise enough
be sure to save whatever adjustments you make to the z-offset while its printing
sharp geyser
I’m currently doing a benchy

It came out like this
I don’t think those weird patterns are supposed to be there
Here is the link to the stl


 frigid patrol
wait
how old is the filament you used?
if it's been left a couple months and it's the one they sent in with the printer, could just be bad filament
sharp geyser
A couple of months
frigid patrol
was it in a sealed bag or anything
sharp geyser
Do I use my bed as a heater?
frigid patrol
or just in the open
frigid patrol
oh, yeah definitely can blame the filament for most of that
sharp geyser
Put filament on the bed?
frigid patrol
i dont think directly
im pretty sure you're supposed to use a cardboard box (like the filament box) poke holes in it and heat it from there
sharp geyser
Oh
queen mason
?beddrying
spiral fogBOT

What if i told you that you already have everything you need to assemble one of the best filament dryers available? Don't believe me? In this video i'll show you how, with a combination of very simple principles, we can all dry filament without an oven for free.
....................................................................................
sharp geyser
Is that the issue?
frigid patrol
no esun should work ive heard its decent
queen mason
just dry the filament
sharp geyser
The filament temp range is 205-225 and I changed the slicer temp to 205
 frigid patrol
yeah you should dry it before trying it again
sharp geyser
Could be that too?
frigid patrol
what temp did it print at before?
frigid patrol
if its within the range on the spool it shouldnt be causing issues like you saw on the benchy, its cause you need to dry it
sharp geyser
Easy to peel off

 sharp geyser
frigid patrol
if its within the range on the spool it shouldnt be causing issues like you saw ...
Gotcha
How long do you dry it for,
spiral fogBOT
Filament Drying Temps
3dxtech recommends the following maximum temps for drying and recomended durations. When getting information about what temperature to dry filament keep in mind where that information is coming from. For instance print dry's units max out at 70C which may not be sufficient for some materials.

?dryingtemps requested by: adib07#0
frigid patrol
spiral fog
here, with a cardboard box to cover the spool
if you still have the one it came in just use that
gotta trap the heat in with it
sharp geyser
I got to cut the bottom of the box it came in?
frigid patrol
i dont think you have to, i think just using the box as is will work
frigid patrol
poke holes in the top though im reading up now, gotta do that to let moisture escape
sharp geyser
Using a pencil?
queen mason
anything
sharp geyser
Ok
frigid patrol
2-3 small holes, dont need too much
sharp geyser
My bed should be fine tho right?
frigid patrol
to use for drying??
sharp geyser
No like is the nozzle fine?
frigid patrol
probably, cant tell for sure if that's causing print issues until you dry that filament
sharp geyser
Can the sv06 plus bed go past 60 degrees?
queen mason
yes
it can go up to 100 iirc, but i wouldnt do that to dry filament as the spool will likely melt
queen mason
yea, flip halfway through
queen mason
no, just when the filament gets wet
spiral fogBOT
This post has been closed due to inactivity.
This post has been inactive for over 1 hour and so has been closed. To reopen this post simply send another message.