#Auto leveling vs manual leveling
1 messages · Page 1 of 1 (latest)
 true token
 sweet moonBOT
true token
on an ender 5 plus, can i only auto bed level, or do i have to manually bed leve...
AI Help
On the Ender 5 Plus, you can choose to either use the auto bed leveling feature or manually level the bed. When manually leveling the bed, it is recommended to turn off the auto bed leveling feature to prevent interference. It's important to follow the specific guidelines provided by the manufacturer for your printer model to ensure successful bed leveling.
WARNING: This response is AI generated and may contain errors.
 potent egret
Do you measure with a ruler or tape. Both do the same thing. Level the best you can manually then let the auto bed level do it's thing
true token
potent egret
Do you measure with a ruler or tape. Both do the same thing. Level the best you...
paper in between the bed and nozzle?
potent egret
Yeah. I don't have an auto bed level but I think the sensor can give you the measurements as well so you can adjust it manually
 sharp scroll
true token
paper in between the bed and nozzle?
manual leveling and auto bed "leveling" (ABL) are seperate. Manual leveling is called tramming and means adjusting the print surface to be parallel to the plane of the nozzle (being "level" with it). ABL measures inconsistencies in the bed and adjusts for those with the moves the printer does.
sweet moonBOT
Leveling Your Printer
Here is a handy infographic that will help with levelling your printer.
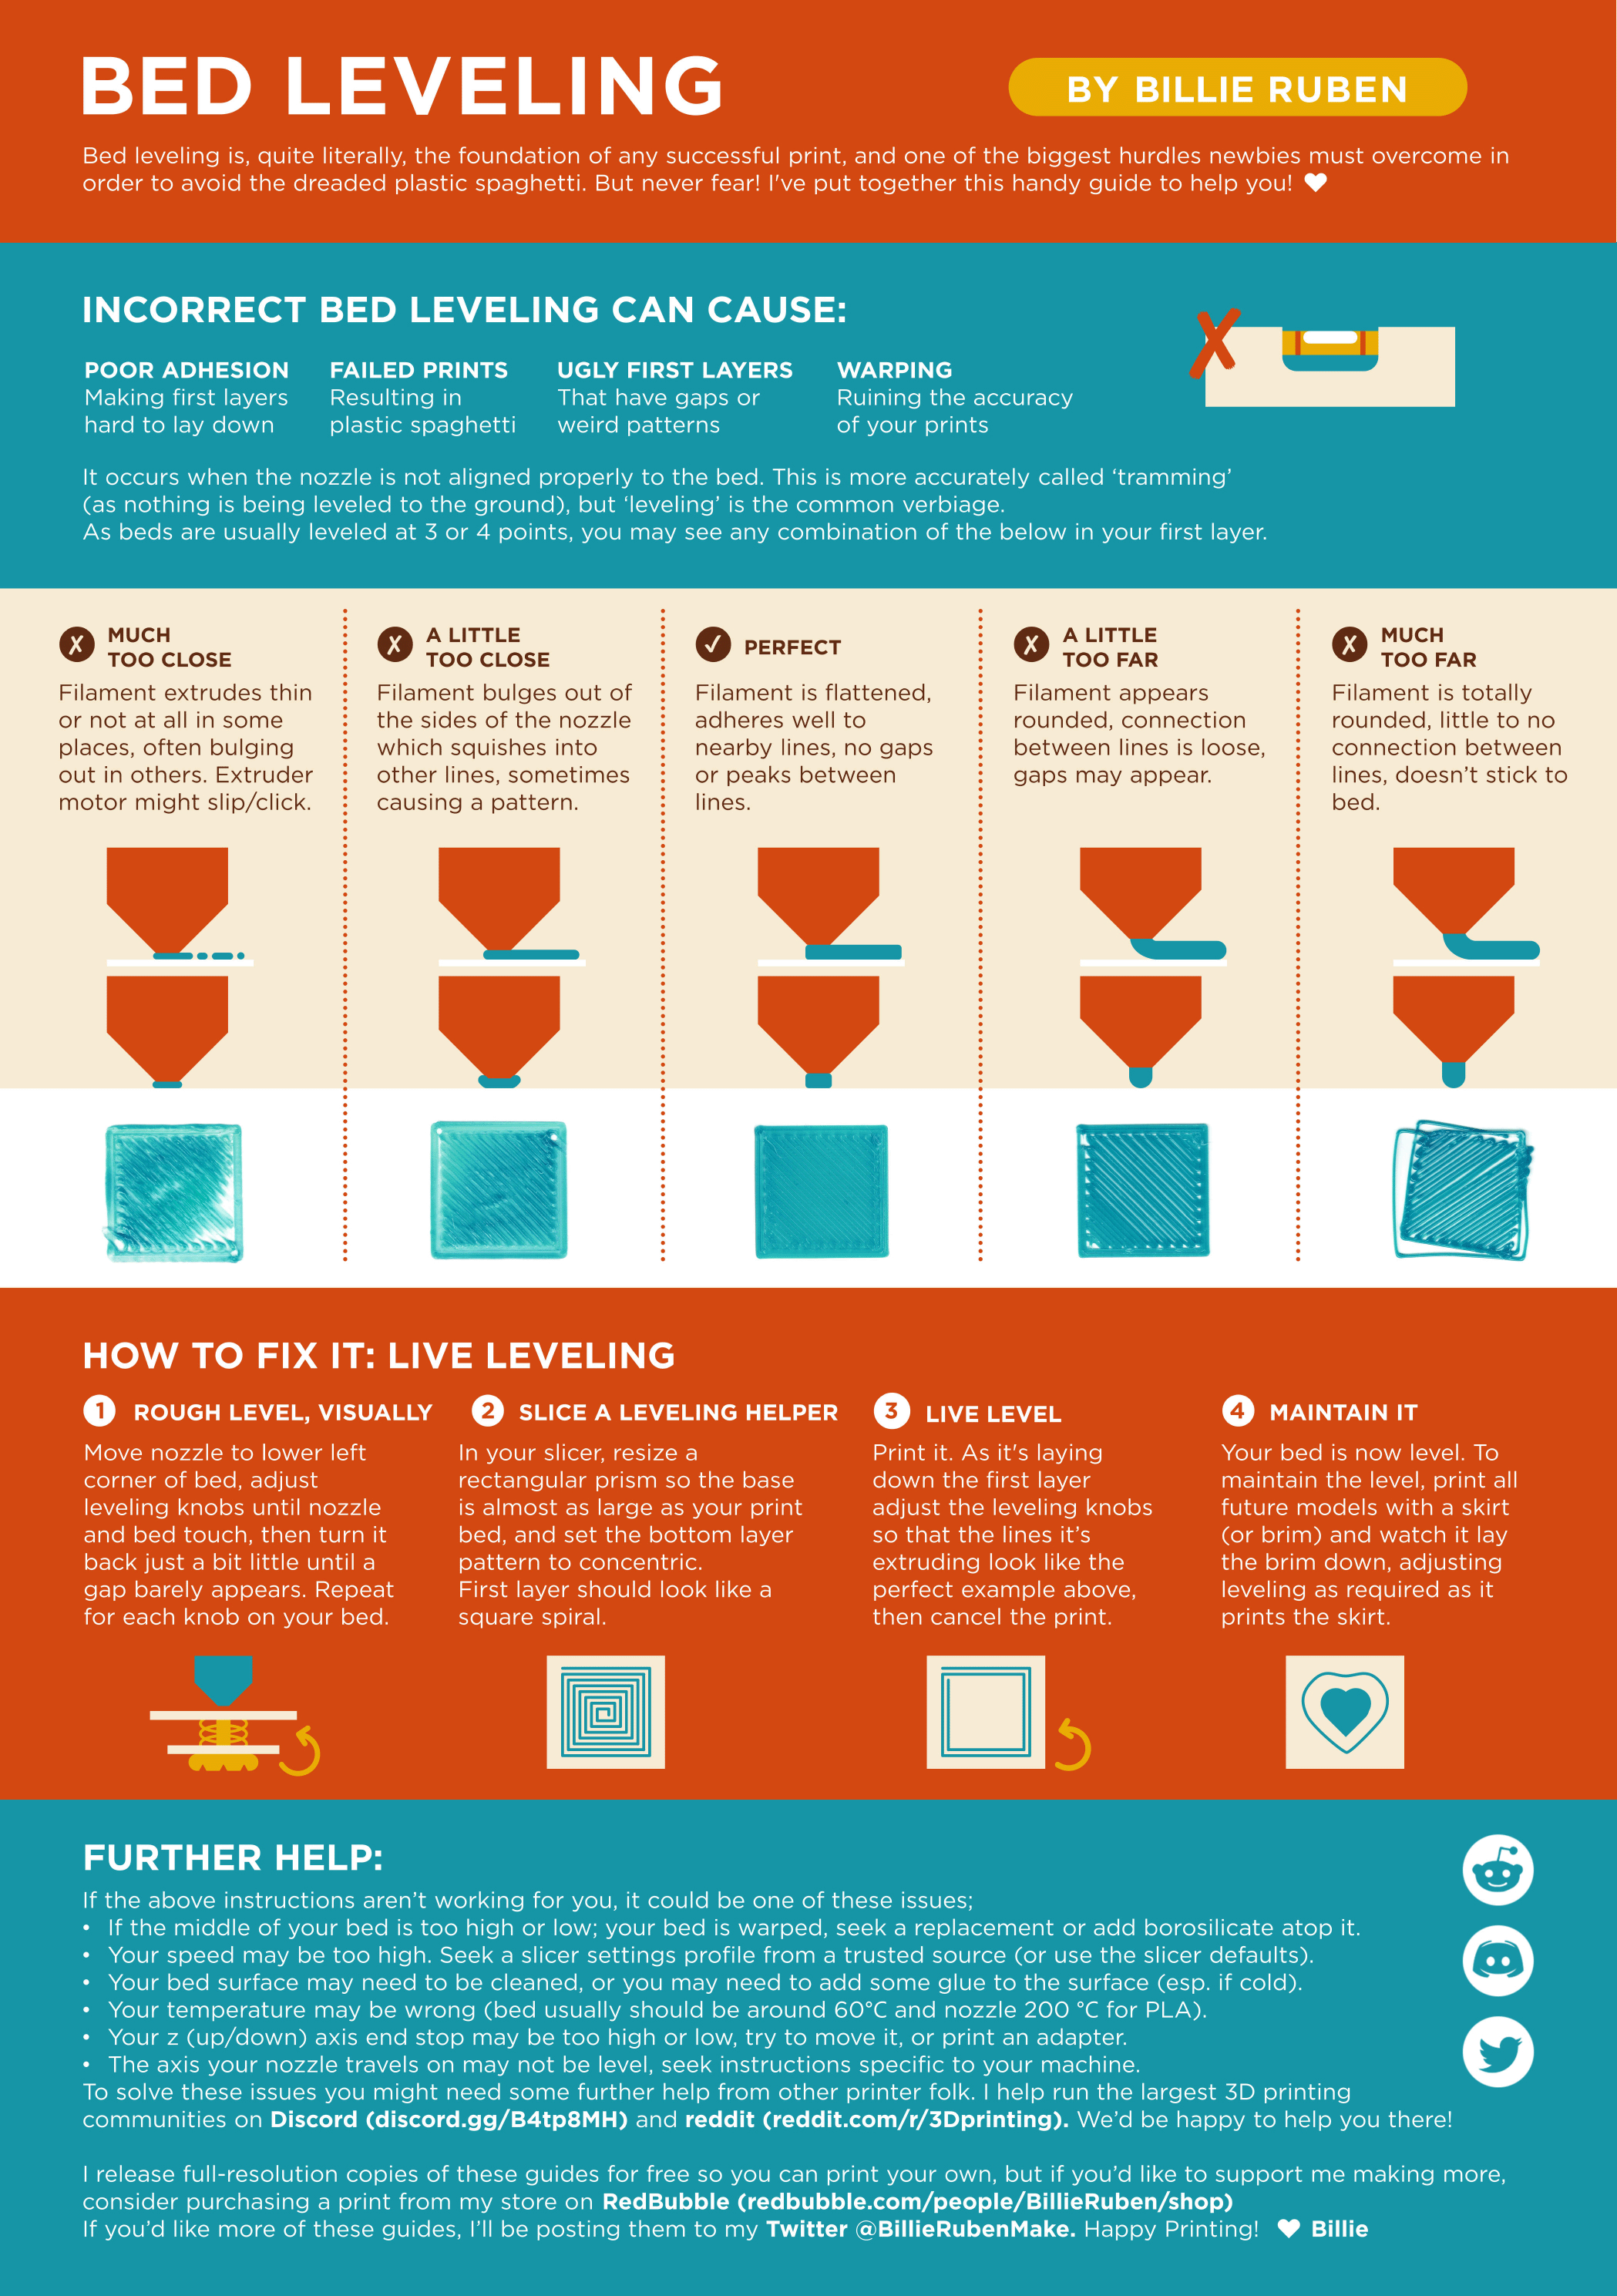
?leveling requested by: m.von.d#0
sharp scroll
?paperlevel
sweet moonBOT
While often recommended paper "leveling" also often causes issues for people. The reason is simple - it is a very inaccurate way of levelling your bed. Theres no defined units, you're working off feel alone, and that is highly subjective. It's not easy to explain through words - "just scraping the paper" can mean something to one person z and something completely different to another.
What paper levelling is useful for, is getting the bed at the same height away from the nozzle in all four corners of the bed. As long as you can consistently make sure you have the same amount feel for each corner, your bed should have minimal tilt in relation to your gantry.
It may be higher than it should be, it may be lower than it should be. But you can easily correct that - print something, look at the first layer, and just adjust the levelling knobs accordingly. Since your bed should not be tilted anymore, you can easily turn each knob, in the exact same increments to raise and lower it, or adjust Z offset on your machine or slicer. This of course, assumes your bed is not warped.
ABL (Auto Bed Leveling) uses a probe to measure the bed surface and compensate for deviations in flatness. It is not meant to replace manual bed leveling, but to compensate for imperfections.
Upgrading to ABL requires firmware modifications, so ensure your machine is compatible or you are comfortable with the modification process. Additionally start gcode in the slicer must be updated to enable and load or reprobe for mesh compensation.
Probe Z offset, the distance between the nozzle tip and the probe trigger point, must be set accurately for best results. You can adjust this through Configuration>Advanced Configuration>Probe Offsets or during the first layer of a print using live leveling.

?abl requested by: m.von.d#0
https://www.wevolver.com/article/z-offset-what-it-is-and-how-to-adjust-it
TLDR:
Setting your z-offset correctly ensures a good first layer squish and proper adhesion to the build plate (assuming its clean, see
?bedcleaning for more information). See
?leveling for a good representation of how the first layer should look like.
If in doubt: Refer to you your specific machines documentation.
For the Qidi X series printers: Adjusting the z offset from the Fluidd webinterface breaks it. Always set the z offset from the printers screen.
?z-offset requested by: m.von.d#0
sharp scroll
This should give you an overview