#Bed tramming probe measurements disagree with manual level/test print

1 messages · Page 1 of 1 (latest)

analog crystal
#

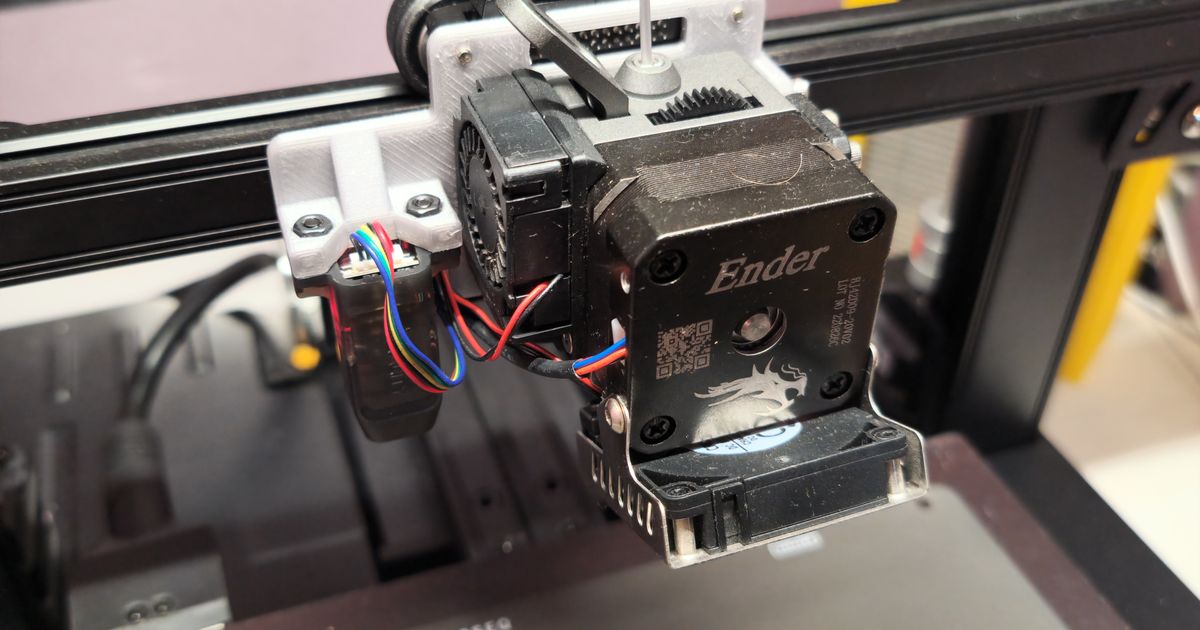
Ender 3 S1 with professional firmware. When I run my bed tramming, get everything within 0.01mm then run my ABL mesh - my prints come out with the nozzle too far in the back left, too close front right and the other two corners are fairly consistent. Pic below of bed tramming which results in a perfect 1st layer

To try fix this I've tightened my eccentric nuts all over. Adjusted my x-rail is trammed with respect to the frame of the printer. Ensured all belts are nice and tight. Calibrated the probe to confirm its reading consistently. After all this the results are the same regarding first layer.

I just can't figure out why neither touch bed tramming isn't working and the bed mesh isn't enough to compensate clearly

dapper oracleBOT
#
AI Help

It sounds like you may be experiencing issues with bed leveling and ABL mesh compensation on your Ender 3 Pro. Here are a few suggestions to troubleshoot the issue:

  1. Check the bed leveling process: Make sure that the initial bed tramming process is done accurately and that the nozzle is consistently at the correct distance from the bed at all points.

  2. Calibrate your ABL sensor: Double-check the settings and calibration of your Automatic Bed Leveling (ABL) sensor to ensure that it is accurately detecting the bed surface.

  3. Adjust the Z-offset: If the first layer is still not adhering properly, try adjusting the Z-offset in your slicer software to fine-tune the nozzle height during the print.

  4. Check for mechanical issues: Inspect for any loose connections, worn belts, or misaligned axis that could be causing the uneven nozzle height across the bed.

It may take some trial and error to find the root cause of the issue, so be patient and methodical in your troubleshooting pro...

analog crystal
#

I'm at a loss why my manual tramming and probe tramming don't align, and its a huge margin at 0.4mm across the diagonal

analog crystal
#

bump

#

After manually tramming and running the mesh, you can see the printer for some reason thinks it's not level

#

And printing like that yields the same results

analog crystal
#

.

wanton orchid
#

odly enough i wonder if my s1 pro is doing something slightly similar

#

i have noticed that each time i print and then go to set z offset

#

i can lower downa bit more as the paper is loose again

analog crystal
#

My z-offset stays consistent, just the probe can't seem to read properly. Checked it with callipers and its definitely not .4mm out across the bed

wanton orchid
#

the s1 comes with the same cr touch as the pro right?

analog crystal
#

Yeah sprite extruder

wanton orchid
#

i am half tempted to install the older bltouch to see if it may be a problem with the cr touch's

analog crystal
#

Do they use the same mounts?

wanton orchid
#

same mounts

#

the wiring might be slightly different

#

i know on my ender 3 v2 i had to reverse 2 of the wires so id idn't fry the mainboard

#

i had another benchy print perfectly but then when i tried to print a statue the supports failed and ripped off the bed

analog crystal
#

I get good prints when I get the level and z-offset spot on but I swap between beds every now and then and I've never got my probe mesh to work, its only ever been used as a z-stop succesfully

wanton orchid
#

ya i am not exactly sure what creality did differently to make the cr touch versus the bltouch i know it has a different case and a metal probe versus a plastic one. but i am not sure if they changed alot of the internals

analog crystal
#

Ive tested the consistency of the probe and doesnt seem like its an issue with the probe

wanton orchid
#

so somethign with the firmware

analog crystal
#

Im sure it gave me the same issue with stock firmware and I've upgraded to the professional firmware

wanton orchid
#

do you have it set to run a probe of the bed before a print

#

i was always curious if running this probe would interfere with any previous bed meshs saved from level testing

analog crystal
#

No I get it to load the mesh and I've tried the M420 S1 and the G29 codes and both seem to work as I can feel the z-motors moving slightly on the first layer

wanton orchid
#

out of curiosity on a different note. does the s1 come with the dual lead z screw

analog crystal
#

At the minute I cant use the bed mesh. Yeah comes with dual lead screw and I've adjusted those so the x-axis is level with the printers frame

wanton orchid
#

did you have aprevious ender 3 of any kind

analog crystal
#

Nah this is my first printer, had it a couple of years and just managed without the meshing, hoped the upgraded firmware might help

#

And I've confirmed with calipers that the probe is reading the bed level wrong on the corners

#

the high/low ones

wanton orchid
#

how are you measuring it with a caliper?

analog crystal
#

Placing the caliper on the top of the x-rail and letting the depth probe go behind it while keeping it parallel

#

When I manually level it's pretty much spot on, when I run the tramming wizard and adjust that way, I can see the back left corner is low and front right corner is high

wanton orchid
#

do you run the wizard while the bed is heated

analog crystal
#

Yeah heated or cold its about the same

wanton orchid
#

it's hard for me to run any comparison as well cause the s1 pro has a different screen it looks alot different

analog crystal
#

Do you get a decent first layer after running your tramming wizard then bed mesh?

#

entirely probe basd

wanton orchid
#

i don't think i ever used the tramming wizard

#

i just run the auto level for bed mesh

analog crystal
#

Fair enough, even if I skip the tramming wizard and just run the bed mesh, it prints with the same issue

#

Because it thinks those two corners are out

#

by skipping tramming wizard I mean doing it manually

wanton orchid
#

odd my test print is almost done i will check my z offset again

#

and can you send a pic of how you set the caliper up and i'll check mine after another bed level to see if mine is doing anything similar

#

ok mine just finished

analog crystal
wanton orchid
#

ah ok

analog crystal
#

Like this around the bed, making sure the calipers are flat and vertical

wanton orchid
#

i am just running a bed mesh now

#

the z offset stayed the smae this time

#

it feels tighter then i would normally set it

#

as it takes me 2 hands to slide the piece of paper but this is the only way i can get a good stick on the first layer

analog crystal
#

Yeah, in an ideal world I'd like to have the probe run and tell me how to adjust the bed levelling knobs, mesh it and the just print a few 1 layer bed level prints to dial in the z-offset

#

I use a feeler gauge when manually tramming then just adjust over a couple bed level prints

#

But its a pain in the ass to do it manually when swapping between this bed and my magnetic one

#

You can also do the same thing with the calipers (much easier as well) to confirm the x-axis is level with the bottom frame which I've adjusted and checked since

wanton orchid
#

ya

analog crystal
#

and it being dual z-screw that shouldnt change any time soon. All my belts and wheels have been tightened

wanton orchid
#

i bought the ezlevller hoping that would help me out a bit

#

but th offset number is different then what they reported

analog crystal
#

Im wondering if going away from marlin might be worth a shot, I've seen videos of people using old android phones to run klipper or octoprint. Upgrading the firmware was pushing the boat out for me already though

wanton orchid
#

i tried klipper recently

#

but i ran into a problem early on that no one was able to help me solve

analog crystal
#

Yeah yours seems to be out of level according to the mesh but if it compensates for it correctly then no worries

#

I wonder if the result would change if you used the BLtouch instead

wanton orchid
#

i was trying to find one of those levelling prints where it just prints like a sheet of plastic but i havent found one yet

analog crystal
#

Just put a cube into your slicer and set it to 0.2mm thick or whatever you have

#

Or like filament change script

wanton orchid
#

and to be fair i havent run flow tests yet on my machine

analog crystal
#

Do your e-steps and that should be close enough, anything from there is just adjusting flow per filament

wanton orchid
#

ya i wanted to see about upgrading my stepper motors as this printer sounds alot louder then my ender 3 v2 did

analog crystal
#

Only mod I've done is upgrading to the S1 Pro all metal hotend

wanton orchid
#

ah i swapped my s1 pro's hotend for the all metal variant but i got the wrong one as i wanted the 60w high speed hotend

analog crystal
#

Didn't know there was one. Although I've not played with speeds until this past week or so after upgrading the firmware

analog crystal
#

Yeah I'm at the point now where I might flip this bed over to the clean side, get it trammed and never touch it again lol.

#

May do the old phone running clipper or octoprint and see if that helps - assuming it's easy to revert back

dapper oracleBOT
#
This post has been closed due to inactivity.

This post has been inactive for over 1 hour and so has been closed. To reopen this post simply send another message.

analog crystal
#

Worth another shot to see if anyone has any ideas on how to resolve

wanton orchid
#

I have been digging into this some more since last night and it seems this was a know. Issue from a while back. Still looking to see if anything was resolved but apparently it may have had something to due with a possible bent y axis mount.

#

I’ll see if I can find any more info

analog crystal
#

@frosty grail pic of the process above sorry for ping I fell asleep and didn't reply

analog crystal
analog crystal
#

I'm also hesitant to rip it apart since it does print well, just the probing issue

wanton orchid
#

Ya I am still seeing if anything came of this issue. Seems people have been talking about this problem from 2 years ago

frosty grail

#

with the calliper end stop thing. I have always just used two equal length blocks as shims to rest the gantry onto and turn off motors and twist the couplers while holding the adjacent coupler by hand until both sides of gantry have the same ish feel when jiggling the shims

#

Then I do a Home and they fall over/remove them

wanton orchid
#

@analog crystal just curious but have you seen the few recommendations about loosening some of the wheels. I have seen more then a few people that had an auto bed levelling issue say they fixed it by loosening up some of there gantry wheels I guess from the factory they are too tight and are warping something

#

I did notice that my hot bed actually had a warp in it from me cranking down the bed screws a bit too tight

analog crystal
#

And everything's nice and square

analog crystal
#

All fixed and nothing changed when it comes to print quality

frosty grail
#

I am having the same problem atm bud

analog crystal
#

At work so slow replies

frosty grail
#

Whenever I probe my bed it does shit like this

#

But it has to be a joke

#
PROBE
10:34:07 pm
probe at 157.000,217.000 is z=0.720000
10:34:08 pm
probe at 157.000,217.000 is z=0.720000
10:34:08 pm
Result is z=0.720000```

10:35:16 pm
probe at 157.000,17.000 is z=0.582500
10:35:18 pm
probe at 157.000,17.000 is z=0.582500
10:35:18 pm
Result is z=0.582500

analog crystal
#

There's no way your bed is actually like that. Are you running the sprite extruder and CR touch?

frosty grail
#

Btt micro probe also running it on the other printer this one in particular not long had a Biqu H2 V2s installed

#

Could it be a bad config for klipper I dunno I didn't write this ones config but I have messed with the meshing not any different than the other printer that I can spot

#

It does this on small mesh and dense meshes

#

That's why I'm so confused 😕

#

As u know probe hits 14mm within the bed plenty of buffer

analog crystal
#

Oooh changing size of the mesh is a good shout see if its the same issue

frosty grail
analog crystal
#

I was meaning changing the max x and y so it probes more centrally

frosty grail
#

I have it atm set

[probe]
pin: ^!microprobe_sensor_pin # V2 ^# v1 Invert the pin ^!#
x_offset: -41.0
y_offset: 0.0
#z_offset: 2.6
speed: 5.0
samples: 2
deactivate_on_each_sample: False # Please make sure adequate clearence is taken into consideration.
#sample_retract_dist: 2.0
samples_tolerance: 0.06
samples_tolerance_retries: 3
activate_gcode:
    Probe_Deploy
    G4 P500 # allow time for the probe to deploy before homing Z
deactivate_gcode:
    Probe_Stow

[bed_mesh]
speed: 180
horizontal_move_z: 6
move_check_distance: 5
mesh_min: 10, 10
mesh_max: 190, 220
probe_count: 16, 16
mesh_pps: 4, 4
algorithm: bicubic
bicubic_tension: 0.2
split_delta_z: .025
fade_start: 4    # The Z height in which to start phasing out adjustment. It is a good idea to get a few layers down before starting the fade process.
fade_end: 6      # A significantly warped surface should fade out over a longer distance. A near-flat surface may be able to reduce this value to phase out more quickly. 
fade_target: 0    # Additional Z offset applied to the entire bed after fade completes. (not generally set above 0)```
#

Y
position_endstop: -7 position_min: -7 position_max: 230
X
position_endstop: 0 position_min: 0 position_max: 235

analog crystal
#

Changing the max x-y or probe points didnt really do anything, even multiple probings didn't

wanton orchid
#

finally got the batteries for my caliper, i'll start checking my bed tonight

wanton orchid
#

so when i checked the 2 back sides of my bed. compared to the last bed mesh. they are different

#

the bed mesh says there is a .07 difference between the 2 sides, but my caliper says there is a .24mm difference between the 2 sides

analog crystal
#

What about the front?

dapper oracleBOT
#
This post has been closed due to inactivity.

This post has been inactive for over 1 hour and so has been closed. To reopen this post simply send another message.

wanton orchid
#

@analog crystalhavent checked the front side yet. as i wanted to do a full level with the caliper first before re-running the bed mesh abl to see if the whole thing could be off

dapper oracleBOT
#
This post has been closed due to inactivity.

This post has been inactive for over 1 hour and so has been closed. To reopen this post simply send another message.

analog crystal
#

Unless you guys are the ones commenting for similar help 😆

analog crystal
#

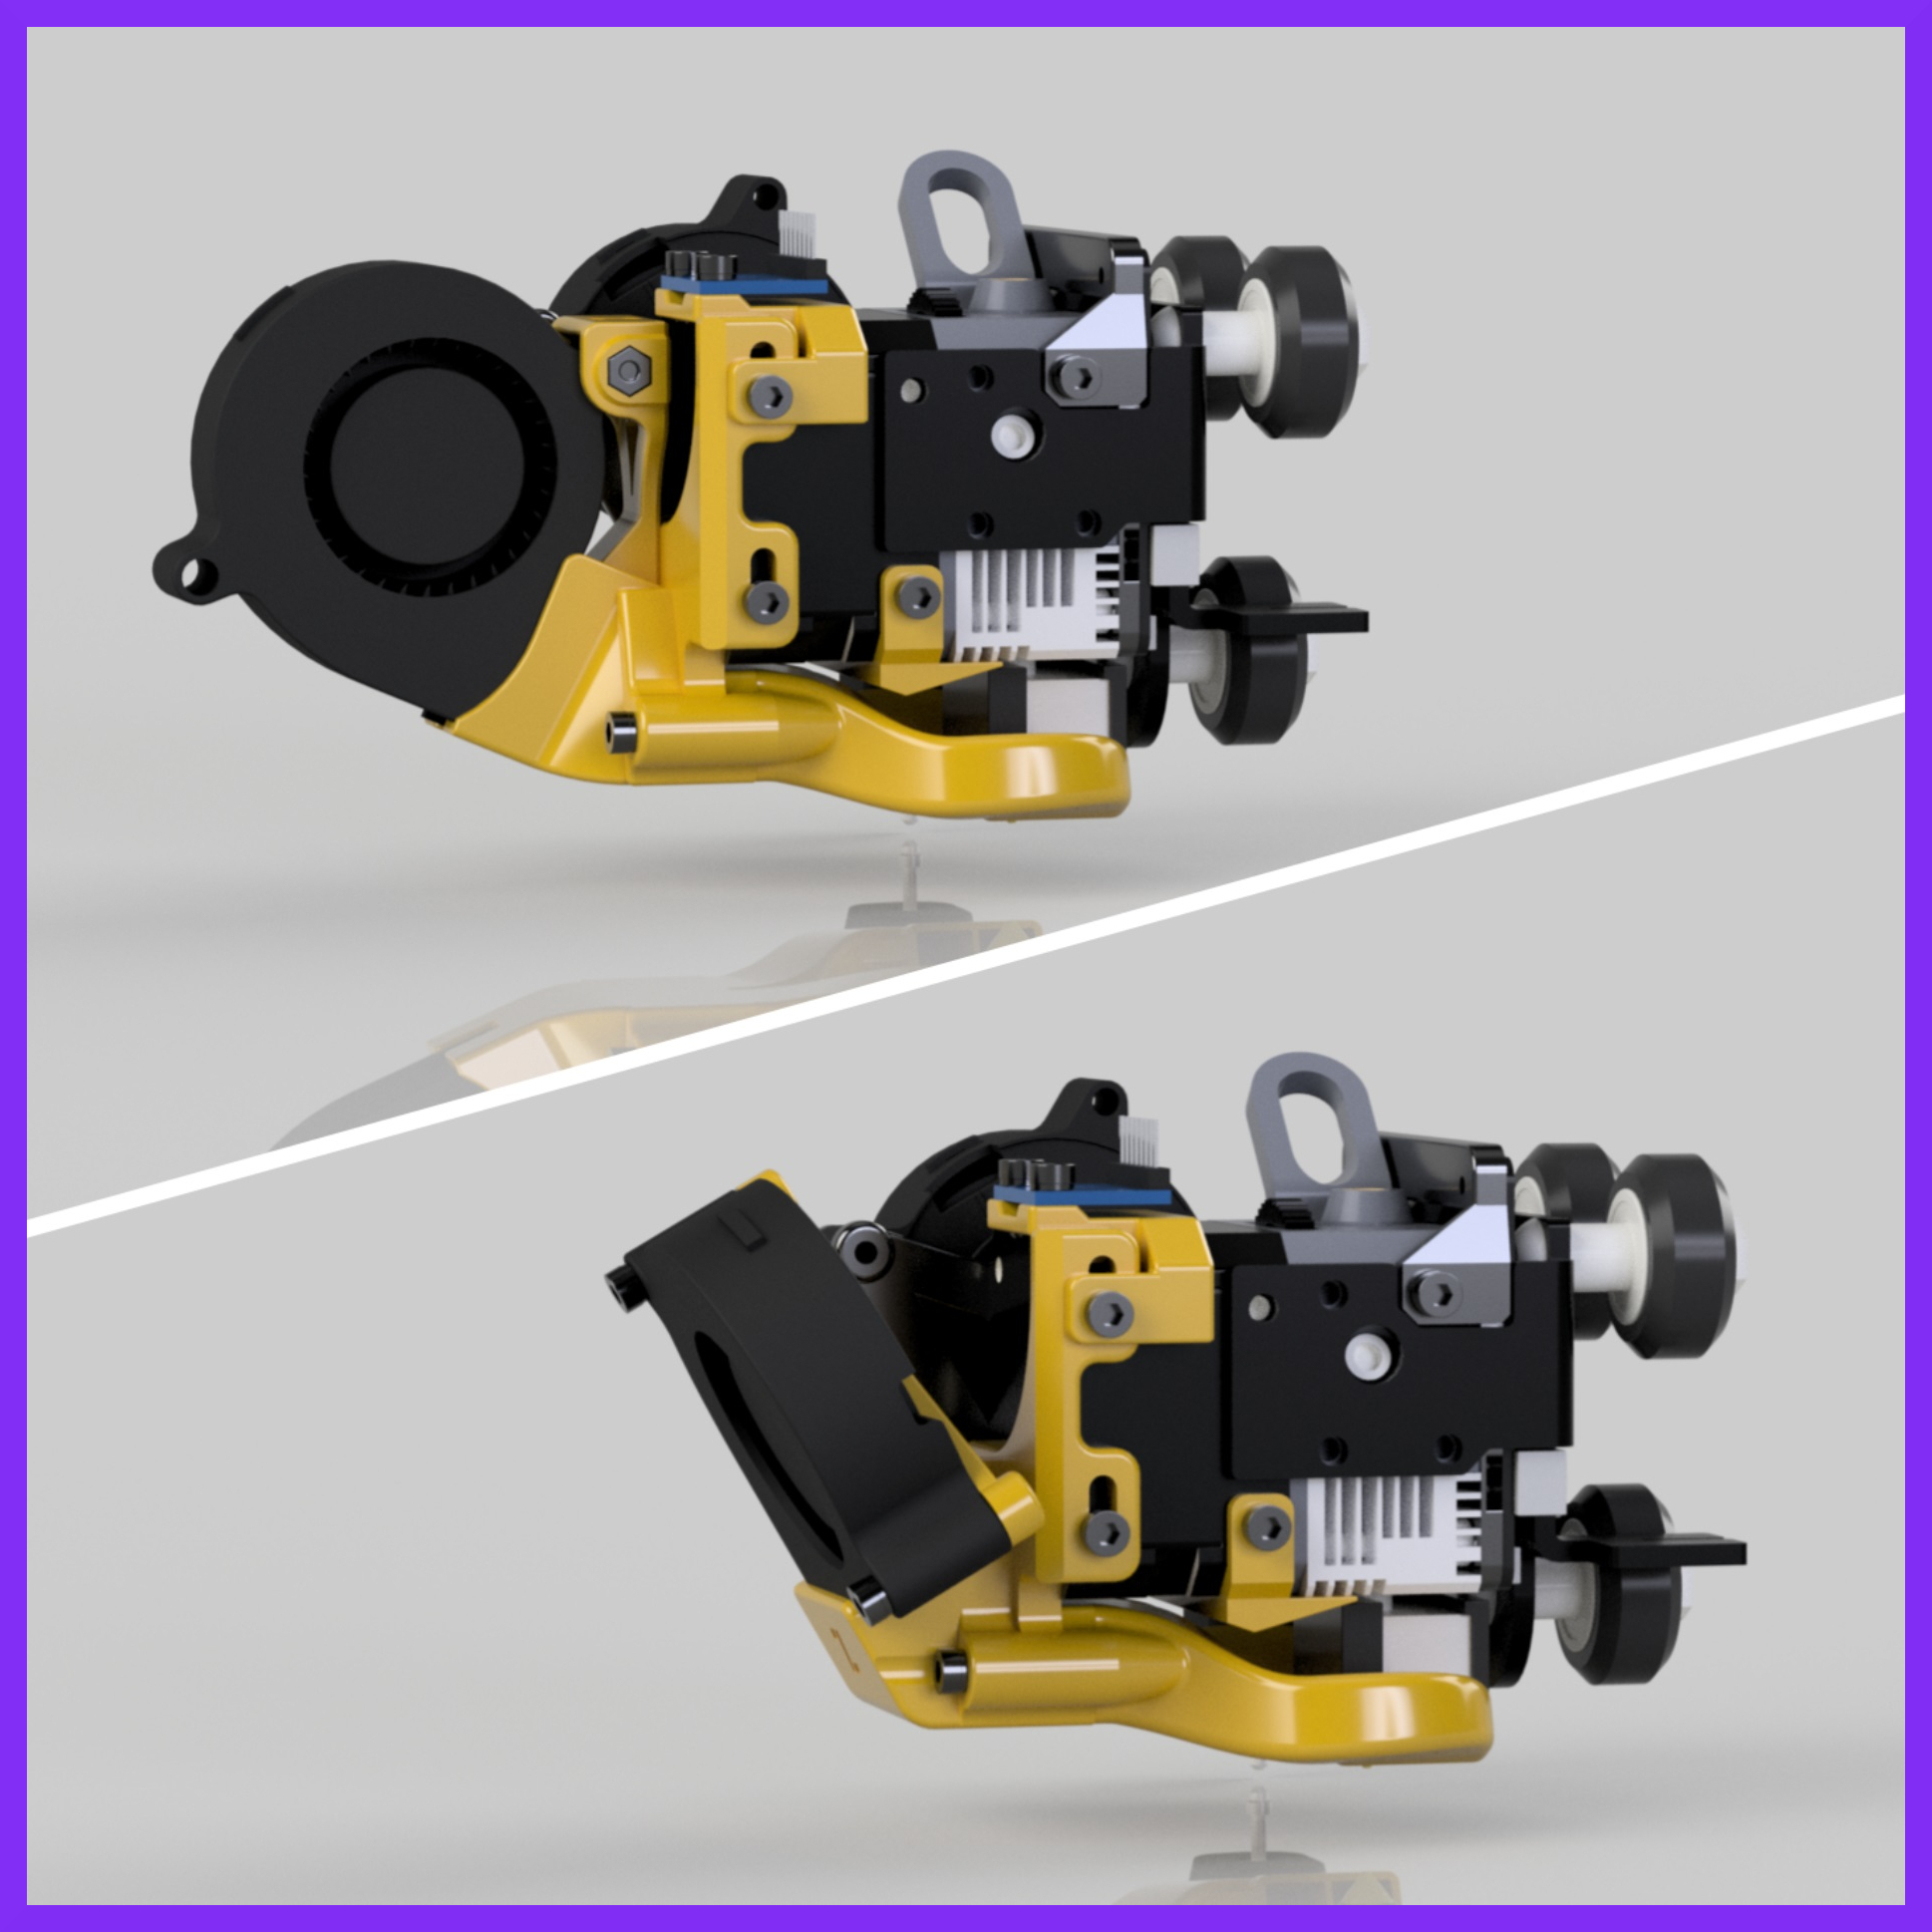
Someone commented saying they printed a new probe mount with a different position, I think I might give that a go and see what happens from there

#

I did read some stuff last night that apparently if the probe isnt perpendicular to the bed, it might not trigger the same and thats a bit trickier to check

#

For the sake of some filament I'm happy to give it a go

#

Rather that than starting to dismantle the printer again for no reason lol

wanton orchid
#

i have been meaning to try some of the custom extruder ducting prints form online and alot of them have new mounting points for the probe, i wonder if they might fix this issue. i'll give it a go in a bit

analog crystal
#

I'm currently checking my bed level with PETG and about to send it

wanton orchid
#

i am getting so sick and tired of the magnetic bed that comes with the s1 pro. half way through the print. The print decided to completely pop off.

wanton orchid
#

ok so after multiple trips around the bed plate i am out .04 mm according to my caliper

#

so now i'll run the bed mesh and see what the probe is saying

#

ok so ya the probe is definetly giving me the same issue you are having

#

I re-tested the bed with the caliper from the top of the gantry and got the 4 corners to a difference of .02 mm

#

But then I run the auto level test and this is the results.

#

@analog crystali just realised my gcode doesn't have the m420 s1 command. so does that mena my printer never used the bed mesh after i ran the auto level test.

analog crystal
#

There are G29 commands that use the bed mesh instead. I've also heard the s1 pro automatically reenables it

wanton orchid
#

so just tried printing a bracket off to mount the resonance sensor. and the skirting failed even before the print started. and the bottom layers speaking for themselves

#

the z-offset is still really tight to te bed so it should be getting good adhesion, but the print is still lifting on all sides and doesn't stick at all

analog crystal
#

Give it a clean with alcohol or whatever you use maybe

wanton orchid
#

ya i was thinking that

#

i'll give it a shot

analog crystal
#

The plate on the standard S1 is quite good, I wrecked one with PETG printed far too close to the bed so now only print PETG on my G10 bed lol

#

But PLA I've never had issues with really, maybe slight corner lift at most but the tab plugin for corners is quite good from the couple of prints I've tried

wanton orchid
#

Also on a side note noticing a lot of these random blotches like the printer isn’t retracting properly if I stop a print. But that’s a whole different issue

analog crystal
#

Yeah mine leaves a little stuck blob if I stop it wherever it spent a moment starting the stop procedure

analog crystal
#

I probably shouldn't have swapped materials for testing

#

But this first bed level print is looking promising

#

Please excuse the (likely) soggy ass PETG and very quickly/roughly set z-offset, but zoom in and these first layer tests look pretty damn consistent.

Next steps are:

  • Again with PLA (this bed doesnt stick PLA too well unless your z-offset is spot on).
  • Then I'm going to dial back the z-offset so its just too far so I can see how consistent the layer line gaps are.
  • Swap bed to my textured one and repeat the tramming and meshing procedure.

note to self: -1.72

wanton orchid
#

so these are the results with that new bracket you posted

analog crystal
#

Yeah that was with PETG, the z-offset was too close as well (confirmed with PLA). I've dialled the z-offset back so its just giving me gaps between lines of bottom infill

#

Just printing a full print at that slightly reduced z-offset to see if its consistent across the bed

#

Assuming it all lays down at that offset

#

So far so good though, 10 mins and I'll report back on that, and get the bed swapped

#

the bed swap and retram+mesh is the real test

#

Going off the skirt this looks very promising tho

#

If this works I genuinely don't understand why though

wanton orchid
#

so i just swapped back to my glass bed and gave it a hose down with alcohal i am trying to see if i can get a strining test to stick and if i can i will print one of those brackets to try out as well

#

unfortunately i only have pla at the moment

analog crystal
#

Id recommend doing it in PETG when you can but be worth a test in PLA

wanton orchid
#

i have never tried to print with petg before

#

i'll see about ordering a roll in

analog crystal
#

Honestly having just felt the heat sink you'll probably be fine with PLA

#

PETG is nice, sticks far too well to some materials though

#

On the stock S1 textured bed, I'd recommend raising your z-offset by like 0.05-0.1mm so it doesnt rip the bed apart coming off

wanton orchid
#

i am using the comgrow glass bed for now

analog crystal
#

I printed a filter basket for my reef fish tank with like a honeycomb empty grid pattern on the bottom for water to flow through. Fucked the bed coming off

#

And Im certain it rips glass apart (just coat in gluestick or hairspray as a barrier)

#

Its a great material though, bit stringy and kinda need to keep it dry

wanton orchid
#

i think this is going to work

#

the alcohal woke up the material thats on the top of the glass bed and even the test line seemed to sticka a bit better

#

also i am going ot be putting klipper back on this machine sometime tomorrow so i'll see if this problem carry's over

analog crystal
#

I have a 1L spray bottle and cloth and love the stuff, only thing it can't do is melt material but I guess acetone or something might do that

wanton orchid
#

ya acetone works

#

i used a bunch of it from my airbrush and it takes all of the pla off

#

also trying out the ironing setting for the first time as well

analog crystal
#

I was tempted if I couldnt resolve this to use my phone and run some form of other firmware (honestly dont know much about them and never looked into it much). But that would be last ditch and a bit of a project

#

I've got some really good settings for ironing

wanton orchid
#

i just used the base settings for now as it's the first test print

#

but i'd be open to suggestions

analog crystal
#

Most of that is stock except speed flow and line spacing

#

I found it on some reddit page when trying to dial in ironing settings and its honestly one of the best I've found and Im happy with it atm. still to be tested further

wanton orchid
#

also just as a quick side questionj have you found any good settings for supports you like so far. my supports are really hard to remove from the figures after i print them

analog crystal
#

I used to but my profile has changed so much since that it doesnt quite work or I've not dialled them in

#

I could give you mine to try but the grid part the print lays on often sticks pretty hard

#

I really wish you could actually adjust the z-gap by different values than the layer gap

#

Because a printer is capable

#

Like it could drop down and extrude a thicker or thinner layer on the interface material at the end of that layer and it wont interfere with the rest of the print, and dropping the nozzle down like .05mm wont kill anything

#

PLA with too high offset results are in. Very consistent but the bottom right corner was a little off and just failed (I had to catch the infill material as it came out). But the rest of the bed is pretty consistent just almost joining the lines

#

Now to swap my bed

#

🙃

wanton orchid
#

what print is this

analog crystal
#

that was PLA where I raised z-offset so its not quite close enough to make it leave gaps between lines

#

Cam quality isnt the best but zoom in

wanton orchid
#

o no i meant what print file

#

i ahve seen people use it but i could never find the link to it

analog crystal
#

If you use cura, theres a plugin called Calibration shapes

#

Has tonnes of stuff but I really like this one

#

About a 10 min print on this bed cause I have to go slow af first layer

#

Swapped beds and the tramming is quite far off so this should be a conclusive test

#

As in Im messing with the bed level knobs

wanton orchid
#

nice so close

analog crystal
#

Only thing I want to figure out at some point, is whether the m420 or g29 command to recall the mesh can specify which profile

#

Although I might as well just run a mesh every time I change beds since it doesnt take long

#

Also I think the fact it failed on that bottom right corner is because the printer can't actually probe it that far to the right, so maybe its extrapolation is a bit shit

#

So print shit on the left 3/4 of the bed for best results maybe if thats the case lol

wanton orchid
#

maybe

analog crystal
#

At the very least theres definitely a bigger gap between the probe and bed as it prints

#

I reckon my bed clip on the front might actually survive but going to take a grinder to it tomorrow or something

#

Fan will still hit it but thats a bit closer to the nozzle than the probe tip was

#

Well my z-offset before was like -3.86, and I'd say it should be about -1.65 or so to be spot on. So maybe almost 2mm gain

#

This actually looks like its working, and the z-offset doesnt really need to change between beds either

#

Prints still going

#

Same print, swapped bed, same line gap, very consistent over the entire bed

#

Line gap was deliberate so it would show any fuckups in the mesh

#

Im over the moon

#

Time to swap the bed back and triple check lol

#

and maybe do a shit job of tramming and see if the mesh can handle it

wanton orchid
#

well damn

#

Bed adhesion was perfect

#

Ironing needs a bit of tweaking

#

But to before I haven’t set the steps on my motors yet

analog crystal
#

Turn on monotonic ironing order

#

that'll get rid of the diagonal lines next to the posts

#

There's also the same setting for top and bottom layers which Id also recommend switching on

wanton orchid
#

i also havent set my cura properly

#

caus ei don't have all the options that your shows

#

i don't think i'm using it in advanced mode yet

analog crystal
#

Ahh you have to enable them or something like that

#

Ive made quite a decent fast profile, I was previously printing at like stock speeds and painfully slow compared to what it can do

wanton orchid
#

ya i am still runnning sotck speeds

#

but once i put klipper back on i'll be increasing the speeds

#

i am also doing the 5015 fan upgrade and v4 cooling duct install

#

once i can print the parts

analog crystal
#

I need to look into how complicated fan and cooling duct installs are

#

Would be really nice for PETG stuff

#

Swapped the bed back, havent touched the tramming and just meshed it. Sending the bed level test to see what it can do

wanton orchid
#

this is the one i went with

analog crystal
#

I think I saw one that had the right side open instead of far side which I'd like because thats the convenient size to pull the nozzle boogers off

#

Thats a bigboy fan tho

#

Pray for my bed

#

I also set the z-offset correctly(ish)

#

So if this one works I'll be damned

#

Overdid the z-offset slightly but its pretty consistent considering its almost 1mm out of level corner to corner

#

I think the bottom right needs cleaned probably

#

That has 100% solved it, I now never really have to level my bed lol

analog crystal
#

This has bugged the shit out of me for a week

analog crystal
#

Wait shit sorry I think thats the wrong dude, sorry sprite! I meant to ping @frosty grail

wanton orchid
#

so the final verdict is a warping in the y axis so by using a zero y axis offset probe mount the issue is fixed

analog crystal
#

I'd have thought if it was the y-axis the warp would show on both corners at front and rear

wanton orchid
#

but the new bracket fixed your problem?

#

o what slicer did you use the brackets file formats arn't ones i normally see

analog crystal
#

Just cura, should be a .step file if youre using fusion or similar to edit it, or there's an STL

#

I just got the STL and printed, nuts were a but snug but probably due to wet filament giving me a pretty rough print

#

But works a treat

#

Bed mesh works exactly as it should

#

I also turned the mesh so it maximises the area of the bed it covers, probes nice and close to the edges

wanton orchid
#

did you update the firmware with the new y offset

analog crystal
#

Yeah updated both x and y

#

and z

#

Do that before you home it or do anything

#

Put your z to like 0 initially as you'll have to redo it all. My x was -47mm and y 0

#

my z offset is -1.63 but you'll definitely have to tune it for your setup but thats probably the rough ballpark

wanton orchid
#

ya i've seena few notes that it may interfere with the left side fan shroud and some people said it even hit there x axis stepper motor cover before it hit the x end stop so they had to remove the x axis cover

analog crystal
#

Mine is fine, have to route the wire so it doesn't rub on the cover but other than that no issues. There's no cover on the fan shroud is the only downside. And I'd like to have had threaded inserts as an option for the top screws that hold the ribbon cable but it's not under much load

#

My 13 hour print is about an hour and a half through and I'm happy to go to bed for now.

#

I may increase the number of points on the mesh in future as there was one spot maybe half an inch in diameter where I could see through the lines just, but I've dropped the z offset another smidge and should be perfect from here on out hopefully

dapper oracleBOT
#
This post has been closed due to inactivity.

This post has been inactive for over 1 hour and so has been closed. To reopen this post simply send another message.

frosty grail
analog crystal
#

Ahh I got mine working properly so the mesh can compensate for really bad levelling