


1 messages · Page 1 of 1 (latest)
 dusky badge
I would like to show you my 100% printable frame.
I have invested a lot of time and testing and am looking forward to putting it online soon🤩
I still have a few ideas and upgrades that I plan for the future
 brisk surge
this looks really good
 stray silo
i like this concept for making tiny custom dryboxes/ how much filament does that drybox of yours take? and how much was panel cost?
also would like to know how modular this is, you could probably make the bottom part printable for dryboxes and integrated silica holders and a sensor
really cool project anyways!
dusky badge
Thanks.
I haven't weighed it now, but the box should have about 600-700g. But you can certainly use fewer walls and infill with such small boxes. (my box are only remnants of my test prints 😛 )
I'm still working on an Excel list that calculates the required parts including weight on the desired lengths entered
The panel didn't cost me anything because it's the pane of a broken Ikea picture frame 😄
I have a 4mm plexiglas for the main frame. I think it cost about €35 per square meter
the corners of the frame are 5cm and the struts are available in 5/10/15/20cm versions. So the smallest cube would be 10x10x10
drying boxes are definitely a good idea! I'll think about it when I'm done with the basic structure 🙂
dusky badge
stray silo
yeah this is awesome
what are you printing this out of, i can imagine you want abs because youre making an enclosure
dusky badge
at the moment it is a mixture of PLA and PETG.
The funny thing is, I just wanted to quickly build a cardboard enclosure to be able to print something out of ABS/ASA...then I designed this frame here. It's a real rabbit hole.
So this is a chicken or egg situation.
I'm curious about the tolerances on parts printed from ABS - because of the shrinkage
but I think ABS/ASA is not absolutely necessary. PETG should be fine
stray silo
if youre getting higher chamber temps you for sure want abs
 charred trellis
that looks really nice!
dusky badge
stray silo
if youre getting higher chamber temps you for sure want abs
for everything over 70° or 80° of course
brisk surge
what is the max chamber temp you got with this? also how sturdy is the top if you placed multiple dryboxes will it hold?
dusky badge
I haven't measured before.
but now as a test, only with the print bed heating switched on at 100° I reached +10° ambient temperature after ~20-25 minutes
I would like to print ASA soon, so I have to see how I will heat the chamber
the stability also depends heavily on the panels used.
I have a wooden panel at the top with almost 8mm. This way the load is evenly distributed.
2x cardboard and 2x 4mm plexi on the side. That's extremely stable
You can easily load it with 40-50kg for a short time
I think in the long run 10 kg shouldn't be a problem?
brisk surge
dusky badge
I haven't measured before.
but now as a test, only with the print bed heating sw...
that's reasonable for 3 or 4 dryboxes
since you have e3 s1 how big is the enclosure? i have s1 pro and i want to check the length and depth if it will fit on the table
dusky badge
I made it 60x60. So the bed and cables have enough space.
Maybe 50x50 would work too.
I made 50 at the height
dusky badge
brisk surge
that's reasonable for 3 or 4 dryboxes
That should be no problem
brisk surge
dusky badge
I made it 60x60. So the bed and cables have enough space.
Maybe 50x50 would work...
nice 👌
i will be waiting for the release 👍
dusky badge
 wet shadow
looks absolutely brilliant. wish my ender 3 max fit in it lol
love the joint design thats some wonderful woodworking inspiration
dusky badge
TheFrame is now online 🙈
https://cults3d.com/de/modell-3d/werkzeuge/theframe-100-printable-frame-for-enclosures-etc
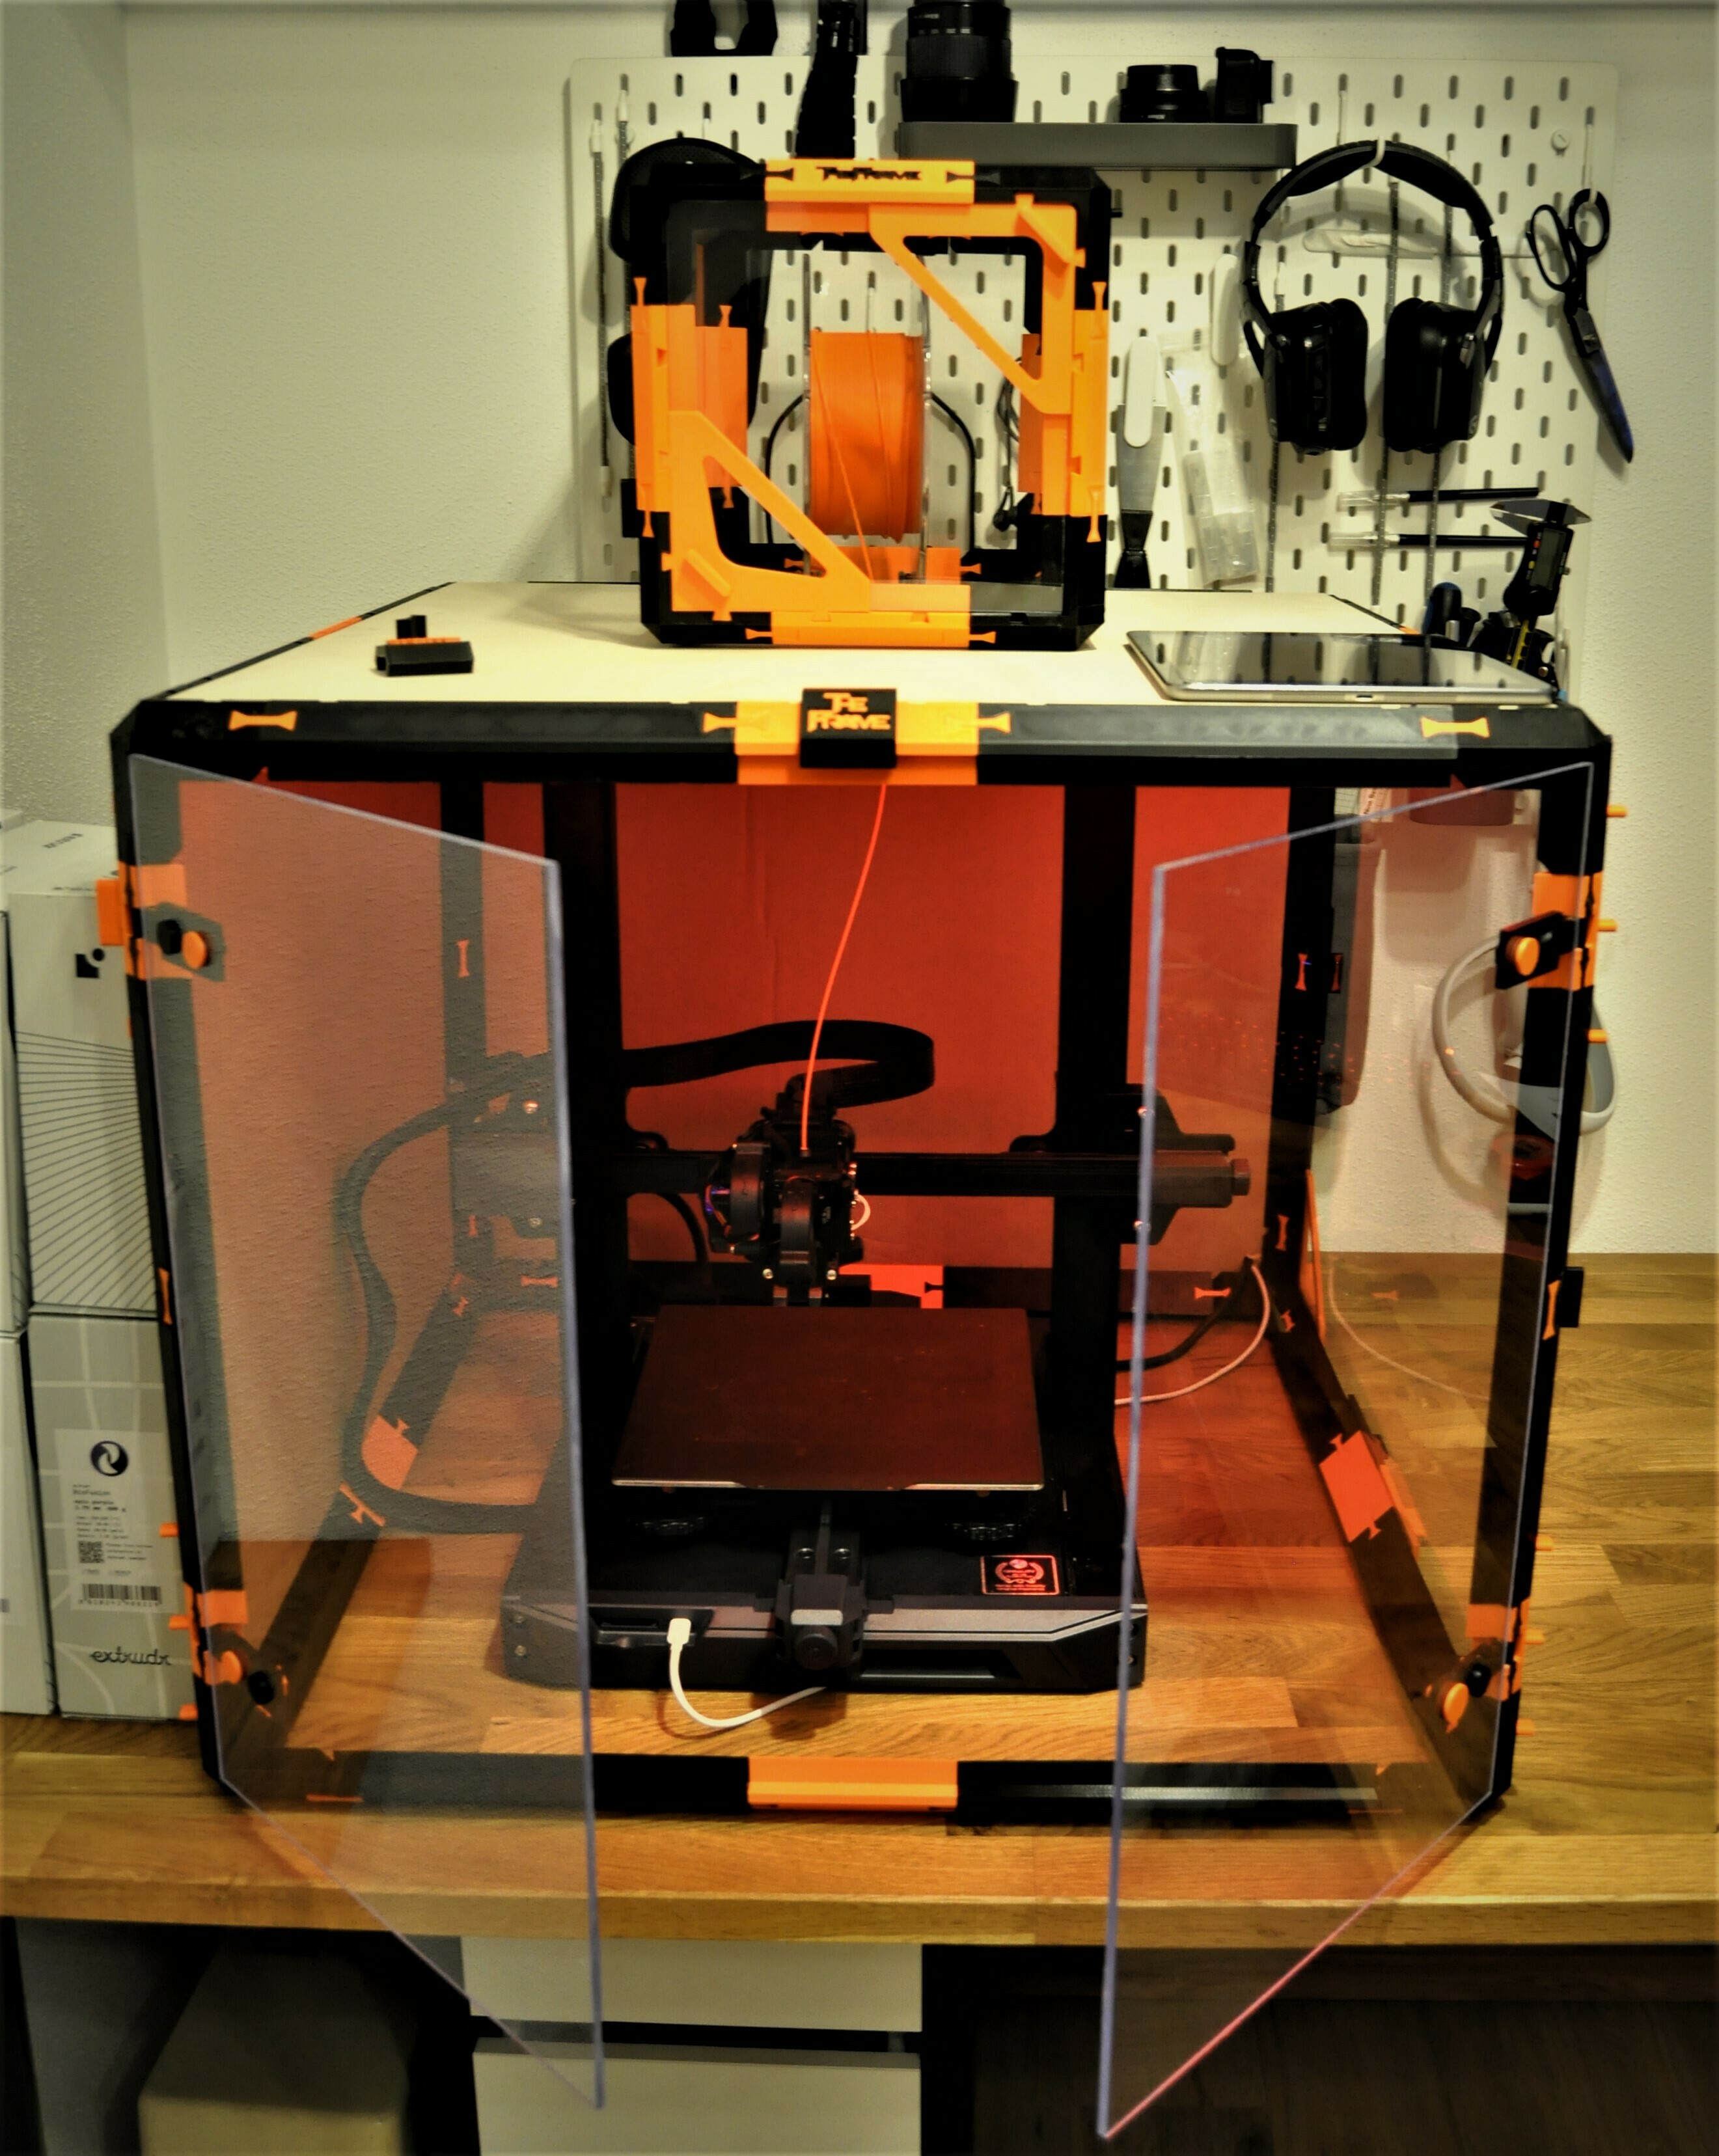
Dieser Rahmen ist die Basis für ein Druckergehäuse, oder wofür auch immer Sie einen Rahmen benötigen :-)
Er ist zu 100% bedruckbar und es werden keine Schrauben etc. benötigt.
Trotzdem ist es erstaunlich stabil - erreicht aber natürlich nicht die Steifigkeit eines Aluminiumrahmens.
Ich habe versucht, die Teile so modular wie möglich zu ...
dusky badge
wet shadow
looks absolutely brilliant. wish my ender 3 max fit in it lol
You can build TheFrame as big, as you want 🤓
dusky badge
wet shadow
love the joint design thats some wonderful woodworking inspiration
funnily enough, i was inspired by the woodworking to the joint design😅
wet shadow
yeah thats what i meant lol
wet shadow
dusky badge
You can build TheFrame as big, as you want 🤓
oooooh
i might just do that then
dusky badge
❤️
wet shadow
Impressive on the first two pics. I'd center them for the last test tho cus spread out like that it's not that heavy
 kind condor
dusky badge
TheFrame is now online 🙈
https://cults3d.com/de/modell-3d/werkzeuge/theframe-10...
Could you post it on myminifactory? :) As cults steals money from designers
brisk surge
dusky badge
oh shit 😂 that's more than a couple of dryboxes
dusky badge
kind condor
Could you post it on myminifactory? :) As cults steals money from designers
I didn't know the site until now...as far as I can see, I have to pay €25 a month here to be able to put paid models online. And then an additional 8% will still be deducted from the sale 😵 💸
dusky badge
brisk surge
oh shit 😂 that's more than a couple of dryboxes
😅
dusky badge
wet shadow
Impressive on the first two pics. I'd center them for the last test tho cus spre...
I don't think that changes the loading on the frame itself. Rather, the wooden board is even more stressed
 kind condor
dusky badge
I didn't know the site until now...as far as I can see, I have to pay €25 a mont...
hot damn
wet shadow
dusky badge
I don't think that changes the loading on the frame itself. Rather, the wooden b...
The bending force of the wood pushes to the side more than down in the original. Looking strong as fuck tho nice work
dusky badge
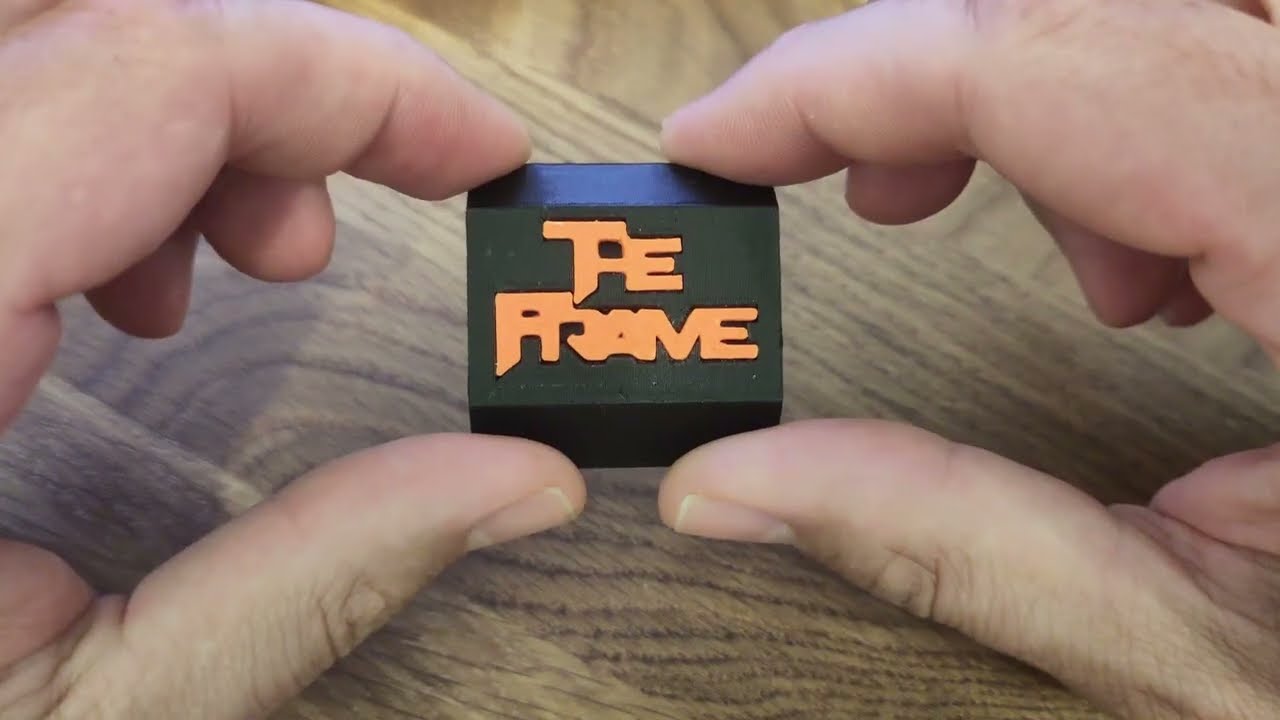
This frame is the basis for a printer enclosure, or whatever you may need a frame for. :-)
It is 100% printable and no screws etc are needed.
dusky badge
Thanks! it's the small details like this locking mechanism or the hinge that took a lot of time because i wanted a simple and good solution
there are models of the struts from 5-20cm in 5cm increments.
so the frame should be printable with pretty much any printer.
if someone has a larger print area, i can create even longer struts 😄
stray silo
damn
i wanna buy the files just to support you
i feel like this project is really clever and a good idea
 spring wind
What material are the walls?
dusky badge
stray silo
i feel like this project is really clever and a good idea
Thanks! ❤️
I see so many stopgap solutions for a chamber, i honestly thought there would be more demand.
but it doesn't matter, i learned a lot and had a lot of fun doing it
dusky badge
spring wind
What material are the walls?
wood, cardboard and plexiglass
charred trellis
I think I will buy it when my new PETG arrives
dusky badge
Glad to hear that!
consider that such a frame weighs between 1 and 2kg!
 small crest
whoah. that design is a steal for $5.46 USD
approximately how myny rolls/kg of filament would this take for a 300x300 SV06+ ? 2-3 rolls? looks like maybe 1 or 2
dusky badge
small crest
approximately how myny rolls/kg of filament would this take for a 300x300 SV06+ ...
Please determine the required dimensions yourself. note that the print bed must be able to move completely back and forth. the cables also need some space.
You can use the Excel file to make a rough calculation with the dimensions you want. The best possible combination of parts is calculated here and you are also shown which parts you need.
But I'm pretty sure you'll need about 2kg of filament
Since you have a 300mm print bed, I could also create 25cm struts for you (I guess 300mm wouldn't make sense?)
macros must be activated for the calculation to work
 scenic kelp
Looks great, love the LED lights.
 static basin
I'll probably get this and find some way to attach it to the frame of my bed slingers to save space - basically make the frame part of the printer
There's some adapters to attach the Mobius 4 to the anycubic mega - I can probs mod them to be anchor points for the frame
Along with some Z bracing 🤔
dusky badge
static basin
I'll probably get this and find some way to attach it to the frame of my bed sli...
sounds interesting. if you know exactly what you want/need let me know and give me the dimensions, then I can see if we can find a solution 🙂
static basin
@dusky badge is there a version of the frame that can take acoustic foam instead of a sheet of whatever (glass, metal, etc) 🤔
Maybe with inbuilt or attachable living spring clips
dusky badge
hmm, do you mean something like this?
https://www.amazon.com/-/de/dp/B08R1JFZCF/ref=sr_1_5?keywords=acoustic%2Bfoam&qid=1688323303&sr=8-5&th=1
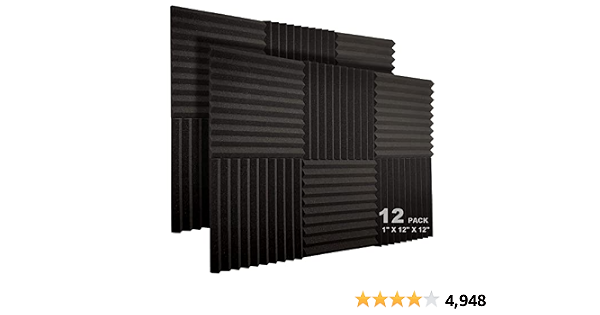
JBER 12 Pack Acoustic Foam Panels, 1" X 12" X 12" Studio Soundproofing Wedges Fire Resistant Sound Proof Padding Acoustic Treatment Foam (Black)
dusky badge

something like that?
I'm only concerned about the stability if no side walls are installed at all
brisk surge
static basin
I'll probably get this and find some way to attach it to the frame of my bed sli...
that's actually a good idea, smaller space = faster to heat up and less material to use
static basin
dusky badge
hmm, do you mean something like this?
https://www.amazon.com/-/de/dp/B08R1JFZCF/...
Yep!
brisk surge
like a tent type dimensions
static basin
dusky badge
I'm only concerned about the stability if no side walls are installed at all
Good point , they would add a lot of necessary rigidity
May be best to simply.glue the foam to the panels
static basin
brisk surge
that's actually a good idea, smaller space = faster to heat up and less material...
And no worries of overhearing PSU and main board since you're not enclosing the entire printer
Just the print area
dusky badge
static basin
May be best to simply.glue the foam to the panels
That's what I was about to say 🙂 just use cardboard etc
brisk surge
static basin
Just the print area
ohh i get what you mean now the bottom frame of the printer would be open and up will be enclosed
static basin
dusky badge
That's what I was about to say 🙂 just use cardboard etc
Well cardboard may not be rigid enough. Probs best to use some standard sheet there for the structure
static basin
brisk surge
ohh i get what you mean now the bottom frame of the printer would be open and up...
Yep basically the bottom of the frame is the top of the printer chassis
brisk surge
i can see a possibility on the e3 s1, there is screws on the corners and the vertical z extrusions to bolt the part on them
brisk surge
static basin
Well cardboard may not be rigid enough. Probs best to use some standard sheet th...
you don't need that much structure for small enclosure i think it will hold fine
static basin
brisk surge
you don't need that much structure for small enclosure i think it will hold fine
For the mega sure - since will use the Z structure and Z braces for rigidity anyway
But trust me induced vibrations can be a pain
brisk surge
static basin
yeah this would be ideal
static basin
So.youd still want something to stabilize it
Maybe like this

With adjustable feet being able to hold the frame.in place too
To the ground
brisk surge
static basin
So.youd still want something to stabilize it
add more vertical parts or X shape parts to hold each corners
static basin
Still saves space
When I have more time I'll download the model and try to CAD something up
brisk surge
 static basin
Yep and add a sick flame decal to the side
dusky badge
I thought about that too at first. but don't forget, the print bed needs a lot of space to move! the cable also has to go in there somehow 🙂
static basin
Yep yep I've come up with an approx size and set up in my head. Having the Mobius makes.it easier since the extruder mounts to the top of the Z structure there
So I just need the tube running in
The mega uses those Z braces to channel the other cable loom in
Since heat rises, even having small openings near the bottom should cause too many issues
If I'm not mistaken the mega is designed so the front of the hull is approx as long as the bed sticks.out.
It sticks out more towards the rear so I'd need to account for that and it's cabling
brisk surge
dusky badge
I thought about that too at first. but don't forget, the print bed needs a lot o...
do you have the cad file posted on cults?
static basin
The kp3s is a diff story. Very small hull, lots of bed stick-out
But I'd be mainly focused on turning my mega into an ABS machine anyway
dusky badge
brisk surge
do you have the cad file posted on cults?
only the stl files
dusky badge
static basin
So I just need the tube running in
ah ok that sounds good!
the ender 3 s1 also needs a lot of space for the cable
brisk surge
Hello, have you done any testing on chamber temperature?
 lavish lance
prob doing one of these to print some abs, does it fit in a lack table?
 unique sun
What kind of print time are we looking at here roughly, I can't tell (because I'm new to 3DP and want an enclosure for my SV06+)
stray silo
unique sun
What kind of print time are we looking at here roughly, I can't tell (because I'...
That'll depend on your configured print settings and acceleration and how big your frame will be, doubt the OP can give a good estimate
unique sun
What filament type (that doesn't already essentially require an enclosure to print) can be up to the task for this project
dusky badge
brisk surge
Hello, have you done any testing on chamber temperature?
I haven't tested it yet, but I'll probably print ASA in the next few days. Then I will measure the temperatures.
But I think without heating you will not reach more than 40°. it also depends on which walls you use
dusky badge
lavish lance
prob doing one of these to print some abs, does it fit in a lack table?
If you use the lack table, the frame isn't necessary, is it? Or do you need something so that you can attach the side walls well to the table? But there are already a lot of models for that?
dusky badge
unique sun
What kind of print time are we looking at here roughly, I can't tell (because I'...
That depends on how fast your printer can 😅
but be prepared for a long long print time. Calculate with 1-2kg filament. I recommend PETG (or ASA if you want high temps in the chamber. But as a beginner, Asa printing without a chamber will be difficult 🙈 )
I printed from PETG and PLA (because I tried a lot). In the future I will reprint everything from PETG or ASA - I don't know exactly what yet.
I'll slice a few parts to give you an idea of how long it takes to print
For example the corners. You need 8 of them in total


these are the struts, depending on the size of the frame you will probably need between 16 and 20 of them


a few of the keepers


And there are other parts that I don't want to look for all of them now 🙈
printed with an ender 3 S1 and klipper.
I have optimized the settings for fast printing. For nicer results I would (for my printer) print about 20-30% slower
unique sun
yeah that last part of what you said makes sense. There's no point in all this effort and time for it to only turn out decent/usable rather than actually-nice results
stray silo
dusky badge
For example the corners. You need 8 of them in total
wait 130grams takes u 8h?
or is your filament not configured properly
dusky badge
unique sun
yeah that last part of what you said makes sense. There's no point in all this e...
yes i had to print quickly as i printed a lot of prototypes which i ended up using anyway
dusky badge
stray silo
wait 130grams takes u 8h?
👀 uff, something in the slicer doesn't seem to fit...according to my list, one corner weighs about 140g 😵
stray silo
dusky badge
👀 uff, something in the slicer doesn't seem to fit...according to my list, one ...
i do not speak german ;_;
oh
dusky badge
😂 sorry
stray silo
all good
dusky badge
i forgot 😛
stray silo
im dutch and have been taught some german, that wasnt easy to decipher in 1 second though befor eyou changed haha
makes sense then anyways
dusky badge
stray silo
im dutch and have been taught some german, that wasnt easy to decipher in 1 seco...
😅 haha

close to the limit of my ender 3 S1 i would say
the cht nozzle does its job well
hm, the information about the required filament really doesn't fit at all... no idea what's going on with the PrusaSlicer
lavish lance
dusky badge
If you use the lack table, the frame isn't necessary, is it? Or do you need some...
my printer doesnt fit in a lack table, due to height, thats why im looking into other enclosure options
dusky badge
ah ok, i see. Yes, you can adjust my frame freely as you need it.
here is the excel file to calculate the parts. above you can enter your desired size
lavish lance
great, thanks
spring wind
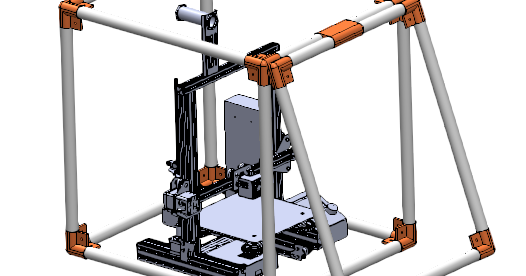
Elevate your 3D printing game with our innovative open-source 3D Printer Enclosure designed for fit all sizes | Download free 3D printable STL models
Is this a good idea
lavish lance
spring wind
https://www.printables.com/model/547349-3d-printer-encloser
i meant to use the printable frame lol
it seeme better than that one
spring wind
What
lavish lance
spring wind
What
#1119010153006645258 message
lavish lance
spring wind
Well no i am asking if its a good idea
you want an enclosure?
spring wind
No
lavish lance
spring wind
No
then why would you do that?
spring wind
Because it looks like a unique idea
lavish lance
spring wind
Because it looks like a unique idea
for an enclosure
spring wind
Yes
lavish lance
spring wind
Yes
and you dont want an enclosure
spring wind
No
lavish lance
spring wind
No
so why do it?
spring wind
Because it looks like a cool idea
lavish lance
oh god
spring wind
spring wind
Well no i am asking if its a good idea
Im not even wanting to do it as i said
I was just asking what could be the problems with it
 rocky coral
dusky badge
TheFrame is now online 🙈
https://cults3d.com/de/modell-3d/werkzeuge/theframe-10...
Hey, sorry to necropost, but I've been trying to decipher this calculator for like... 30 minutes lol.
I'm trying to print a 70cmx70cmx70cm enclosure, and I'm not sure what that is relative to the inserts? Unless I'm missing a field here
 dusky badge
rocky coral
Hey, sorry to necropost, but I've been trying to decipher this calculator for li...
hey,
no problem! If you have any questions, bring them on 😁
For "Desired length X/Y/Z" you have to enter 70 each.
here you will be suggested 3x20cm per edge length (do not forget, the corner parts each have an additional 5cm -> (2x5cm)+(3x20cm) =70cm)
but please check everything again to see whether the calculations with the remaining parts can fit so far. The Excel spreadsheet is very complex and got on my nerves...🙈 😅 I can't guarantee 100% that there wasn't an error somewhere.

 real viper
Awesome work
dusky badge
spring wind
https://www.printables.com/model/547349-3d-printer-encloser
The idea is good. However, I can imagine that the parts are very difficult to print. And you need the pipes. 🙂
I like the idea of the door. But I can imagine that it's not all that stable.
I've seen a few models of DIY "printable frames". But I'm always skeptical when even the designer doesn't have any photos of the printed parts 😛
rocky coral
Ahhh, okay, gotcha. I was under the impression the green highlights were the measurements for the acrylic/cardboard or something lol
Thank you very much!!
spring wind
dusky badge
The idea is good. However, I can imagine that the parts are very difficult to pr...
the designer doesn't own a 3d printer himself, but I just thought the idea is pretty cool and unique
dusky badge
rocky coral
Ahhh, okay, gotcha. I was under the impression the green highlights were the mea...
no problem I like to help. Unfortunately, I forgot to delete the entered values from the uploaded Excel sheet. I'll do the upload again soon to avoid confusion 🙂
dusky badge
spring wind
the designer doesn't own a 3d printer himself, but I just thought the idea is pr...
ah OK🙈
dusky badge
spring wind
the designer doesn't own a 3d printer himself, but I just thought the idea is pr...
yes the idea is not bad! When I get a chance I'll try to print out a part. but as I said, it looks very difficult to print to me.
i thought long and hard about how to design the parts so that they would be easy to print
dusky badge
Yes please. it's always interesting to see other ideas
dusky badge
oh OK. thank you 🙂
rocky coral
My only issue with fulfilling this project is the sheer amount of print time

p much talking 5+ days of just back to back printing
dusky badge
rocky coral
My only issue with fulfilling this project is the sheer amount of print time
uh, 5 days is really tough! 😵
what speeds and infill do you work with?
try to print as many of the small parts as possible at the same time. then you have fewer problems with the minimal layer times.(make sure you don't have any stringing)
and with the struts you can also use quite high speeds for the inner walls
but yeah, it's a big project 🙈
i also mixed the infill on the struts so that there is only a lot of infill in the heavily used areas.

I saved on the top layers...so you can see the infill on my struts🙈 😅
rocky coral
dusky badge
uh, 5 days is really tough! 😵
what speeds and infill do you work with?
try to ...
1% infill, 100mm/s print speeds (roughly)
I use Cura, so I don't think I can do custom infill unfortunately
rocky coral
Do you have any advice on mounting one of your frames to a Lack table?
Just like, a one inch overhang
dusky badge
not until now. 😅
Just to get it right... do you want to screw the frame to the top of the table? or between the legs with an overhang so that the frame/Lack table becomes wider?
rocky coral
Good question
Basically, I ordered two Lacks, and they were just barely too small to fit my Anycubic Mega X, only in terms of height and width (bed extends past clearance when fully extended)
I only need about 1-3 extra inches around the table
I have 0 experience with CAD, but I have experience modeling functional prints in blender
dusky badge
OK I think I understand what you need. how much are you missing in height?
give me some time, after 1 or 2 beers i might have an idea 😅
dusky badge
ok that's enough for me as a clue. the exact heights are then adjusted quickly 🙂
rocky coral
Thank you!!!!
dusky badge


does that make any sense to you?
I couldn't think of anything simpler. Unfortunately, this is again quite complex and you need some additional parts🙈 😵
@rocky coral
dusky badge
I didn't write to him.
I would have been interested in the discord. But I don't know what the point of communicating directly with him is. Since I'm not going to build a complete frame, I can't contribute very much 🙂
he should just set up a frame himself and then he can see where the weak points are.
I printed one of his corner pieces.. that seems pretty stable.
and i think the frame needs a kind of seal so that the warm air between the tube and the plexiglass cannot escape
spring wind
dusky badge
I didn't write to him.
I would have been interested in the discord. But I don't ...
Ah OK i understand
Yeah theres totally room for improvement
I like the doors too pretty creative
dusky badge
i just think that there is a lot of stress on the middle part of the frame. And since there are no screw connections in the Plexigas (or whatever walls are used), the frame will become unstable here. It would make more sense to move the hinge to the left and right edges
In addition, this door needs a lot of space to open.
I see he's just starting to print the parts in small. When you then hold the parts in your hand, you really notice where there are problems.
 junior edge
this is awesome i would print this
 bronze siren
Interested in this. Are you planning on releasing longer struts? I personally would love to see 25-30-35cm as well.
dusky badge
bronze siren
Interested in this. Are you planning on releasing longer struts? I personally wo...
Thanks! I've already made some. I just haven't uploaded it yet because then I would have to update the scripts in the Excel file... and I really don't have the nerve for that at the moment! 😛 but I can then send them via PM. I can also make other lengths upon request, it's done really quickly 🙂
bronze siren
Good to know, Cults3d still the best place to buy it?
Another thing, I see that you are able to use a thickness up to 7mm. Do you think it would be possible to use 2mm acrylic, 2mm spacer and 2 mm acrylic again?

Like this basically, will improve the heat retention by a good amount
dusky badge
Cults3d is the only place to buy 😅 🙈
I see no problem with 6mm panels. But i think, you would have to use "spacer" in the middle of the panels.
you could also try something like that?

If you want, I can send you the file for a strut and a holder, then you can test whether that would work for you with 6mm?
bronze siren
Haha, sweet. Thanks for checking that out, I'll just buy it off Cults right now
bronze siren
Just bought, I love to have those longer struts 😉
dusky badge
up to 35cm?
bronze siren
Yeah, but if you have only 25-30cm made that's fine as well
dusky badge
no problem, it's done in 2 minutes 🙂
dusky badge
I've been printing a lot of ASA parts for my Voron lately and can give a few updates on the temperatures.
I didn't get the chamber temperature above 45 - 50 degrees C°, no matter what I tried (even with an additional blanket over the enclosure). Even after 15-20 hours of printing, the temperature wasn't any higher.
I haven't installed any extra heating. The print bed alone heats (110 C°)
Room temperature approx. 22 C°
The question is whether a standard printer can even tolerate higher temperatures. My Ender 3 S1 prints surprisingly reliably at these temperatures, even if I sometimes feel sorry for it 🙈
And I have also noticed that the tolerances on the PLA parts become slightly larger over time. The connecting pieces are now coming loose on their own.
So I recommend at least using PETG or gluing the parts together
rocky coral
Scary thought
Your enclosure just falls apart mid-print
Letting out a plume of 110C air
Full of ASA and ABS fumes
Nightmare
 summer ingot
Looks great
lavish lance
rocky coral
Letting out a plume of 110C air
you will have another problems at 110 chamber
dusky badge
rocky coral
Your enclosure just falls apart mid-print
don't worry, the frame won't fall apart. But I notice that the small connecting pieces are no longer as tight as they were at the beginning.
It's very interesting to observe how PLA reacts even to such low temperatures


